Your room is more than just a place to sleep—it is a sanctuary, a creative studio, and a direct reflection of your personality. But as we move deeper into 2026, the definition of “aesthetic” has shifted. We are moving away from the chaotic “clutter-core” of the early 2020s toward a more curated, intentional vibe. The current trends blend the cozy warmth of “Cozy Core,” the organic textures of Biophilic Design, and the playful, nostalgic futurism of Y2K.
The best part about this shift? You do not need a designer budget to achieve the look. In fact, the most viral aesthetic rooms on TikTok and Pinterest right now feature handmade elements that show off personal craftsmanship rather than store-bought perfection.
Whether you are looking to update a dorm room, a temporary rental apartment, or your childhood bedroom, we have analyzed the top search trends to bring you the ultimate guide to aesthetic room decor DIYs. These projects are categorized by vibe and function, complete with material lists and detailed step-by-step instructions.
1. Trendy Wall Art & Murals: High-Impact Visuals
Walls are the canvas of your room. If you are tired of generic posters, these textured and dimensional DIYs will add depth and sophistication to your space. In 2026, flat prints are out; texture and dimension are in.
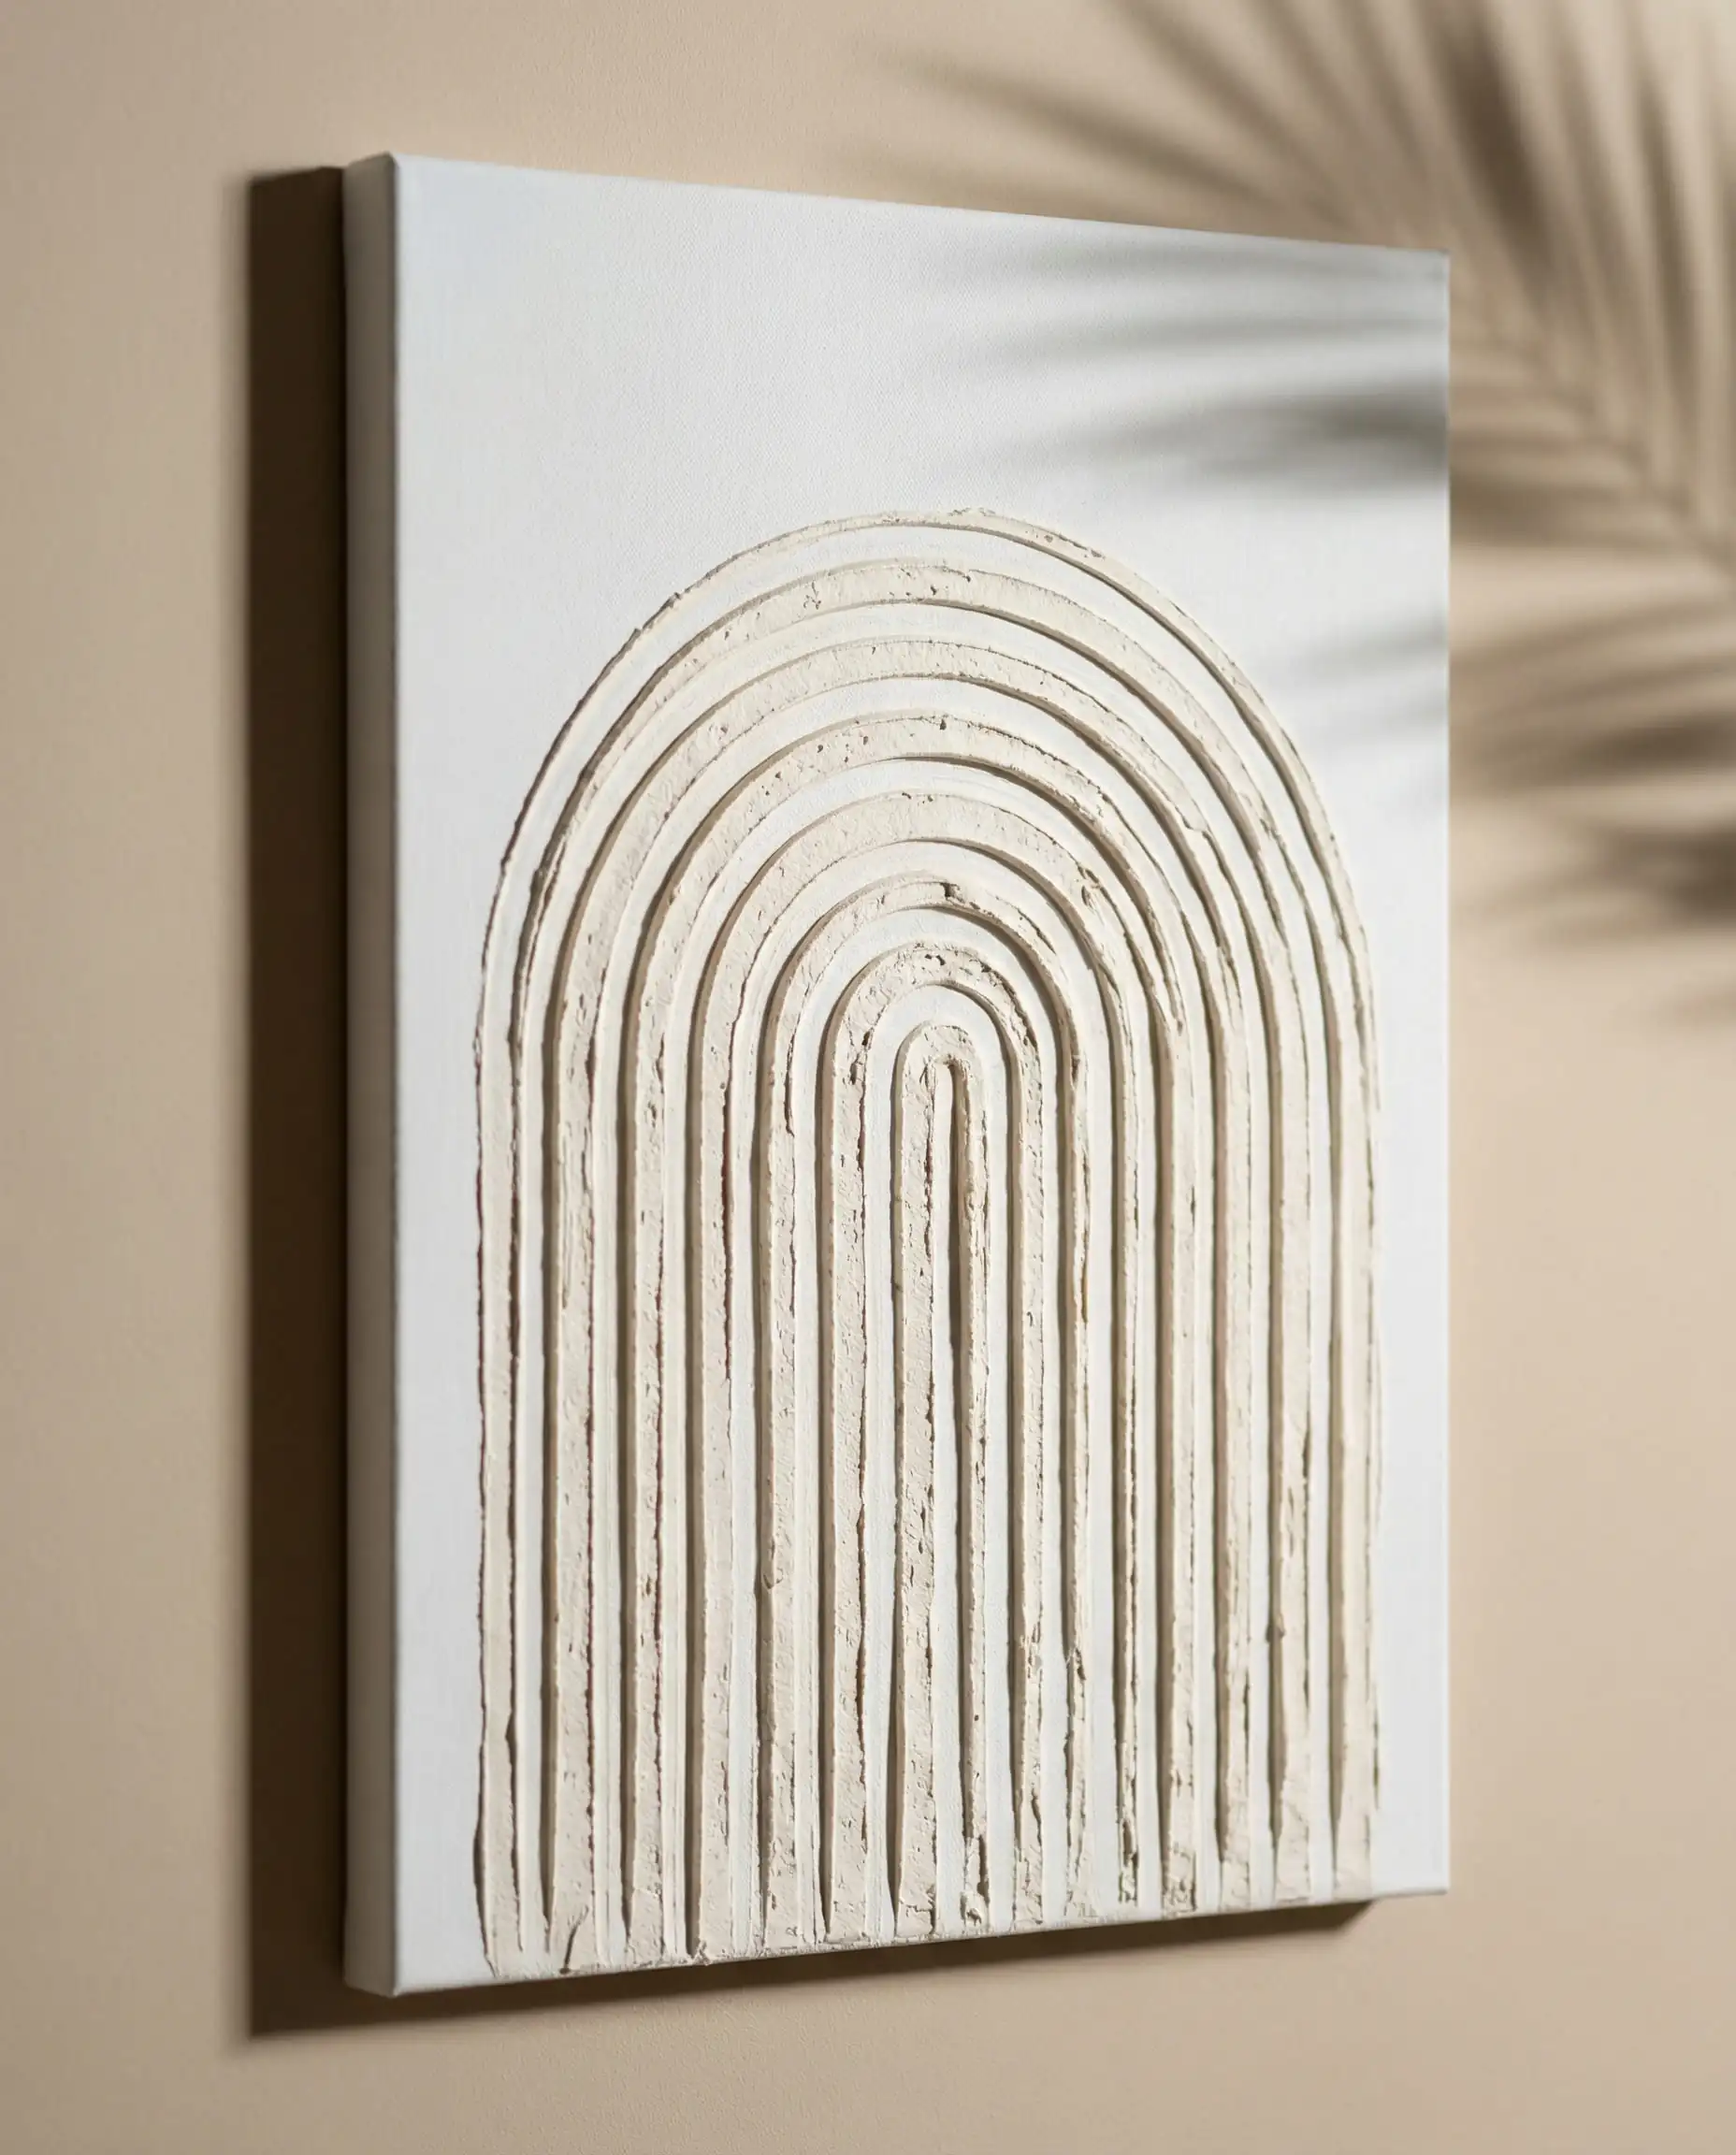
Textured Plaster Canvas Art
The “Japandi” and Minimalist trend is all about texture over color. This project mimics high-end gallery art found in luxury hotels for a fraction of the price.
Difficulty: 🟢 Easy | Time: ⏱️ 45 Mins (+ drying time) | Cost: 💲 Low
You Will Need:
Quick Steps:
- Prep the Canvas: Lay your canvas flat on a protected surface. If it’s an old painting, you don’t need to prime it; the plaster covers everything.
- Apply Plaster: Scoop a generous amount of joint compound onto the center of the canvas.
- Create Texture: Use the trowel to spread it. For a 2026 look, try creating perfect geometric arches using a notched trowel, or go for random “impasto” messy strokes for an organic feel.
- Dry: Let it dry for at least 24 hours. The plaster will lighten as it dries and harden into a matte, stone-like finish.
- Finish: Paint over it if you want a specific color to match your room, or leave it raw. Seal with a matte spray to prevent chipping.
Don’t stop at one! Make three smaller canvases with connecting patterns to create a triptych. This helps fill large walls. For more inspiration on wall trends, check our guide on DIY home decor trends.
🎨 Hackrea Styling Tip
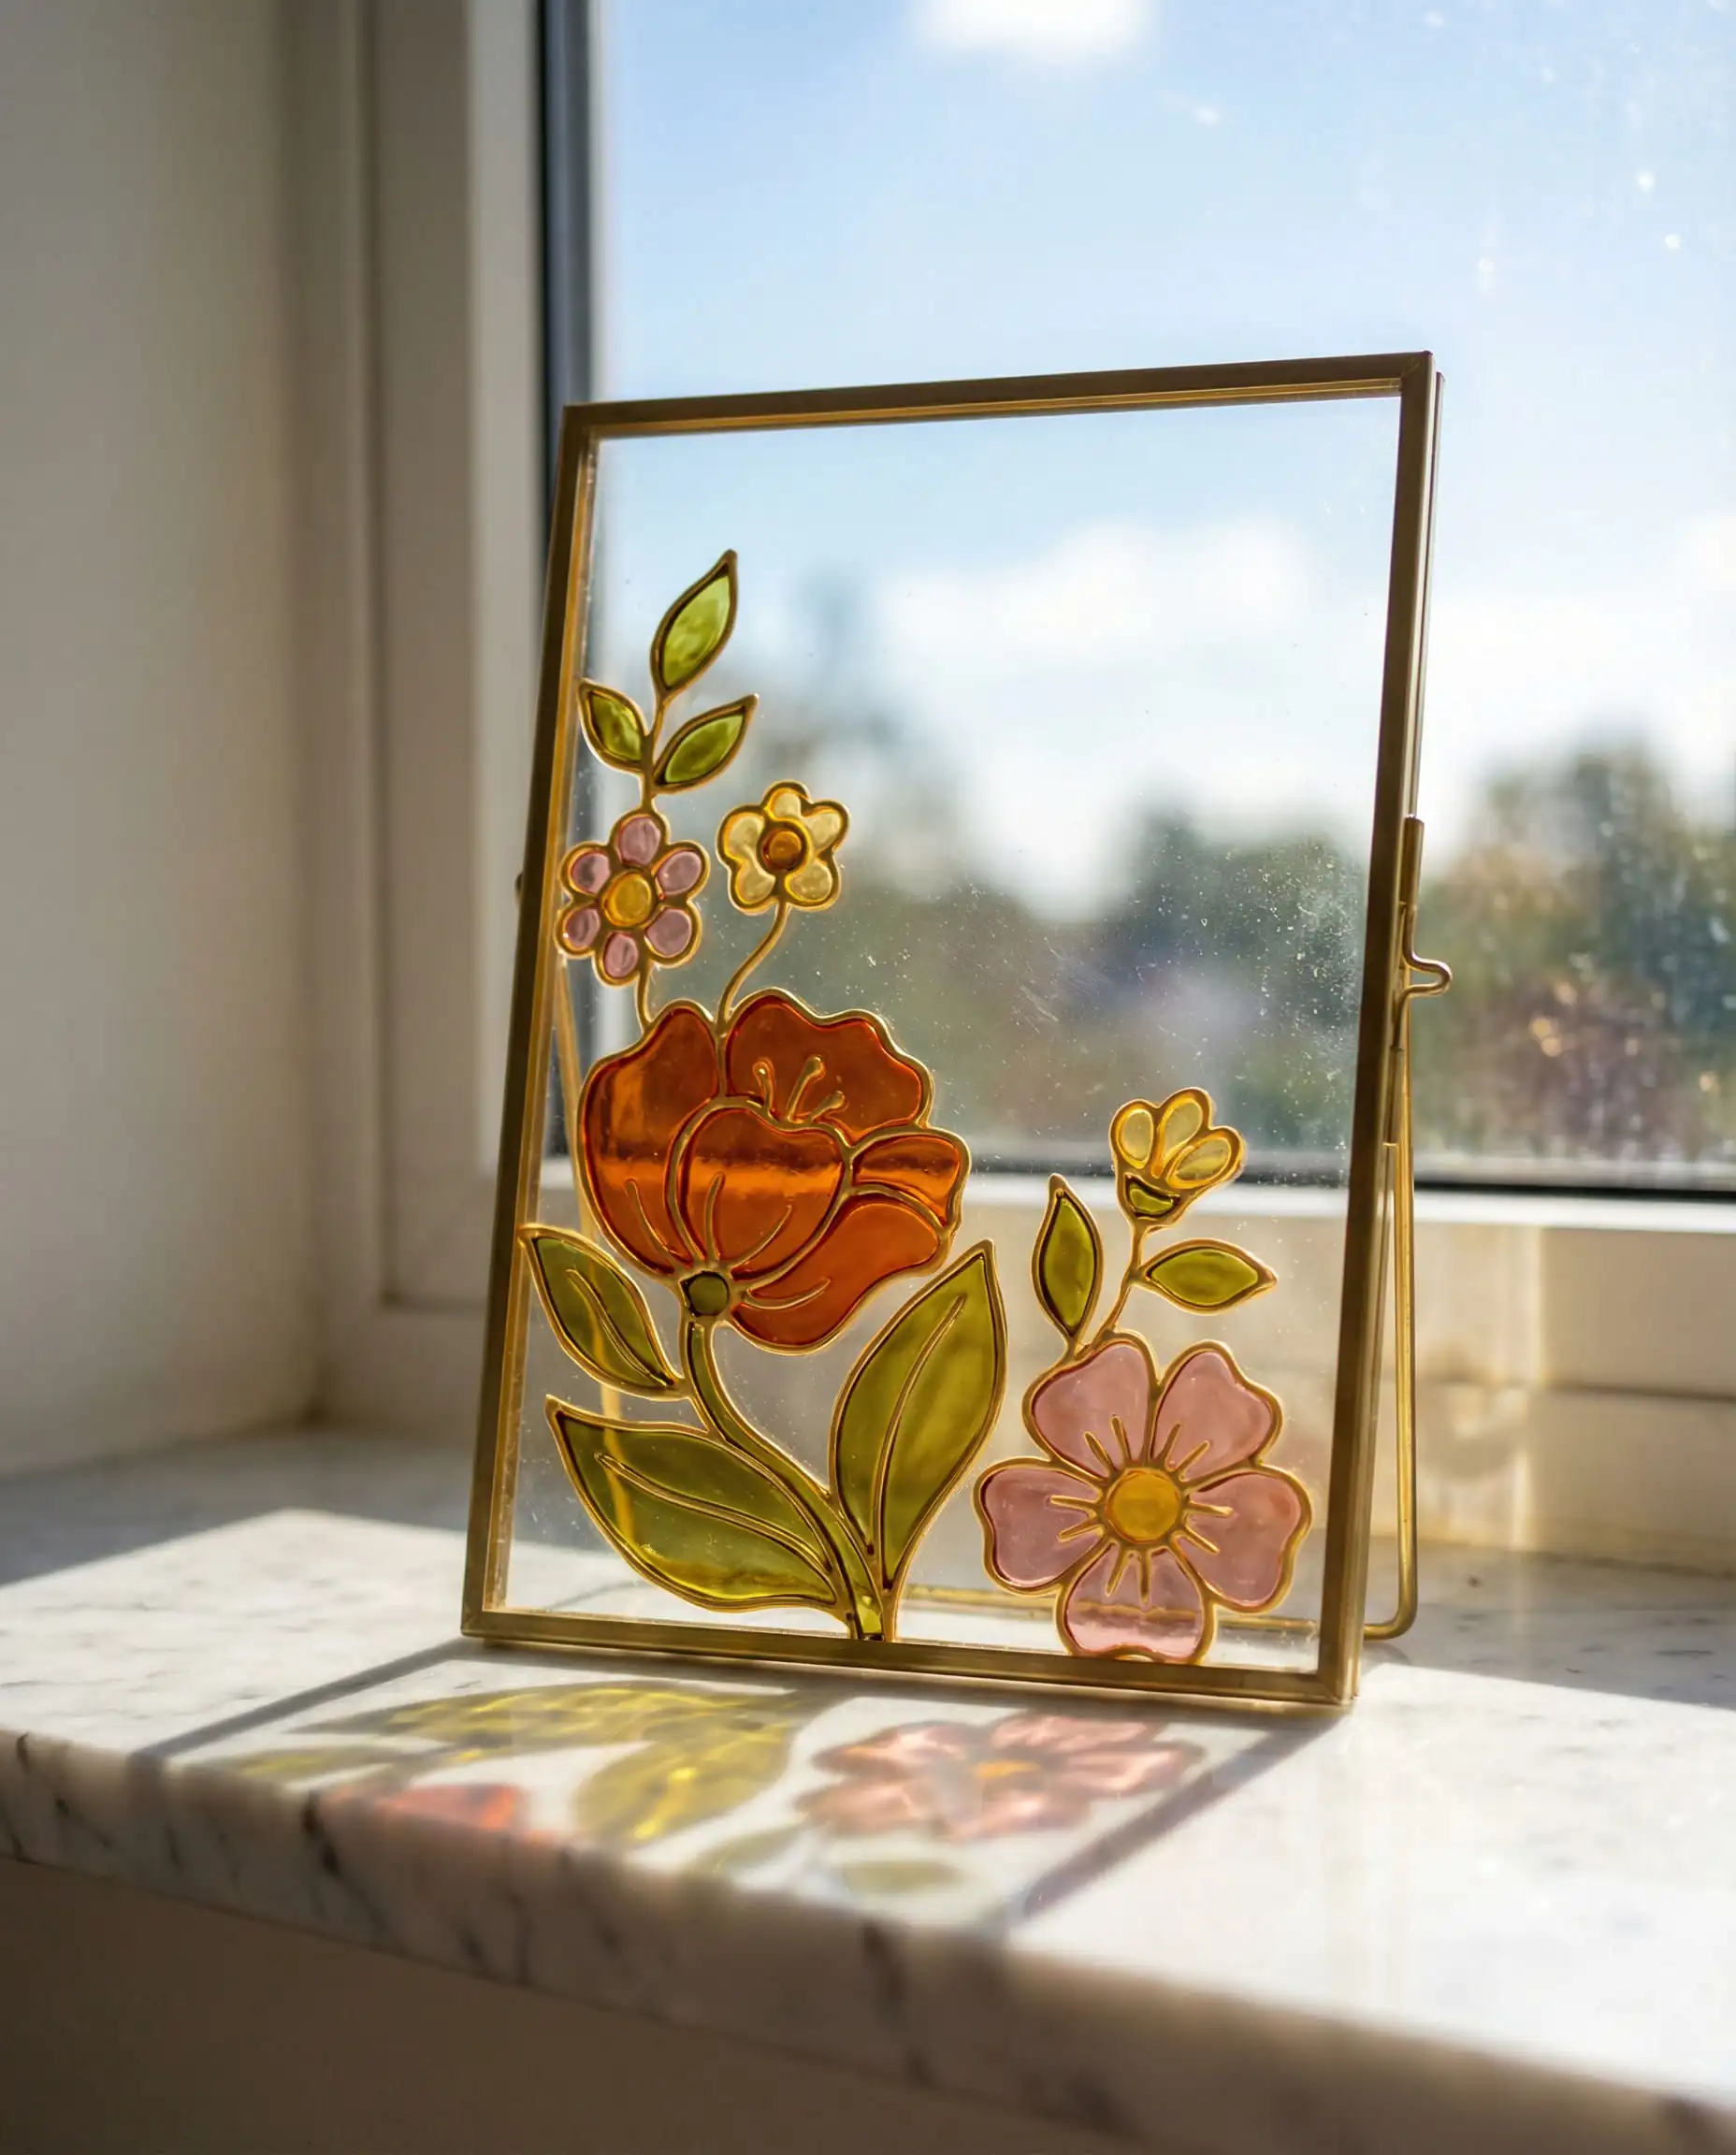
Faux Stained Glass Suncatchers
Capture the “Golden Hour” all day long. This retro-eclectic trend uses glass paint to turn boring windows or picture frames into glowing art pieces that cast colored shadows.
Difficulty: 🟡 Medium | Time: ⏱️ 2 Hours | Cost: 💲 Low
You Will Need:
Quick Steps:
- Trace: Print a pattern (Pinterest is great for “stained glass patterns”) and place it under the glass.
- Outline: Trace the lines using the liquid leading. Keep your hand steady and apply even pressure. Let this outline dry completely (usually 1-2 hours).
- Fill: Squeeze the glass paint into the sections. Use a toothpick to spread the paint to the edges of the “lead” and pop any air bubbles.
- Cure: Let it dry flat for 24 hours. The paint will go from milky to transparent.
- Display: Place the glass back in the frame or hang it in a window with a suction cup chain.
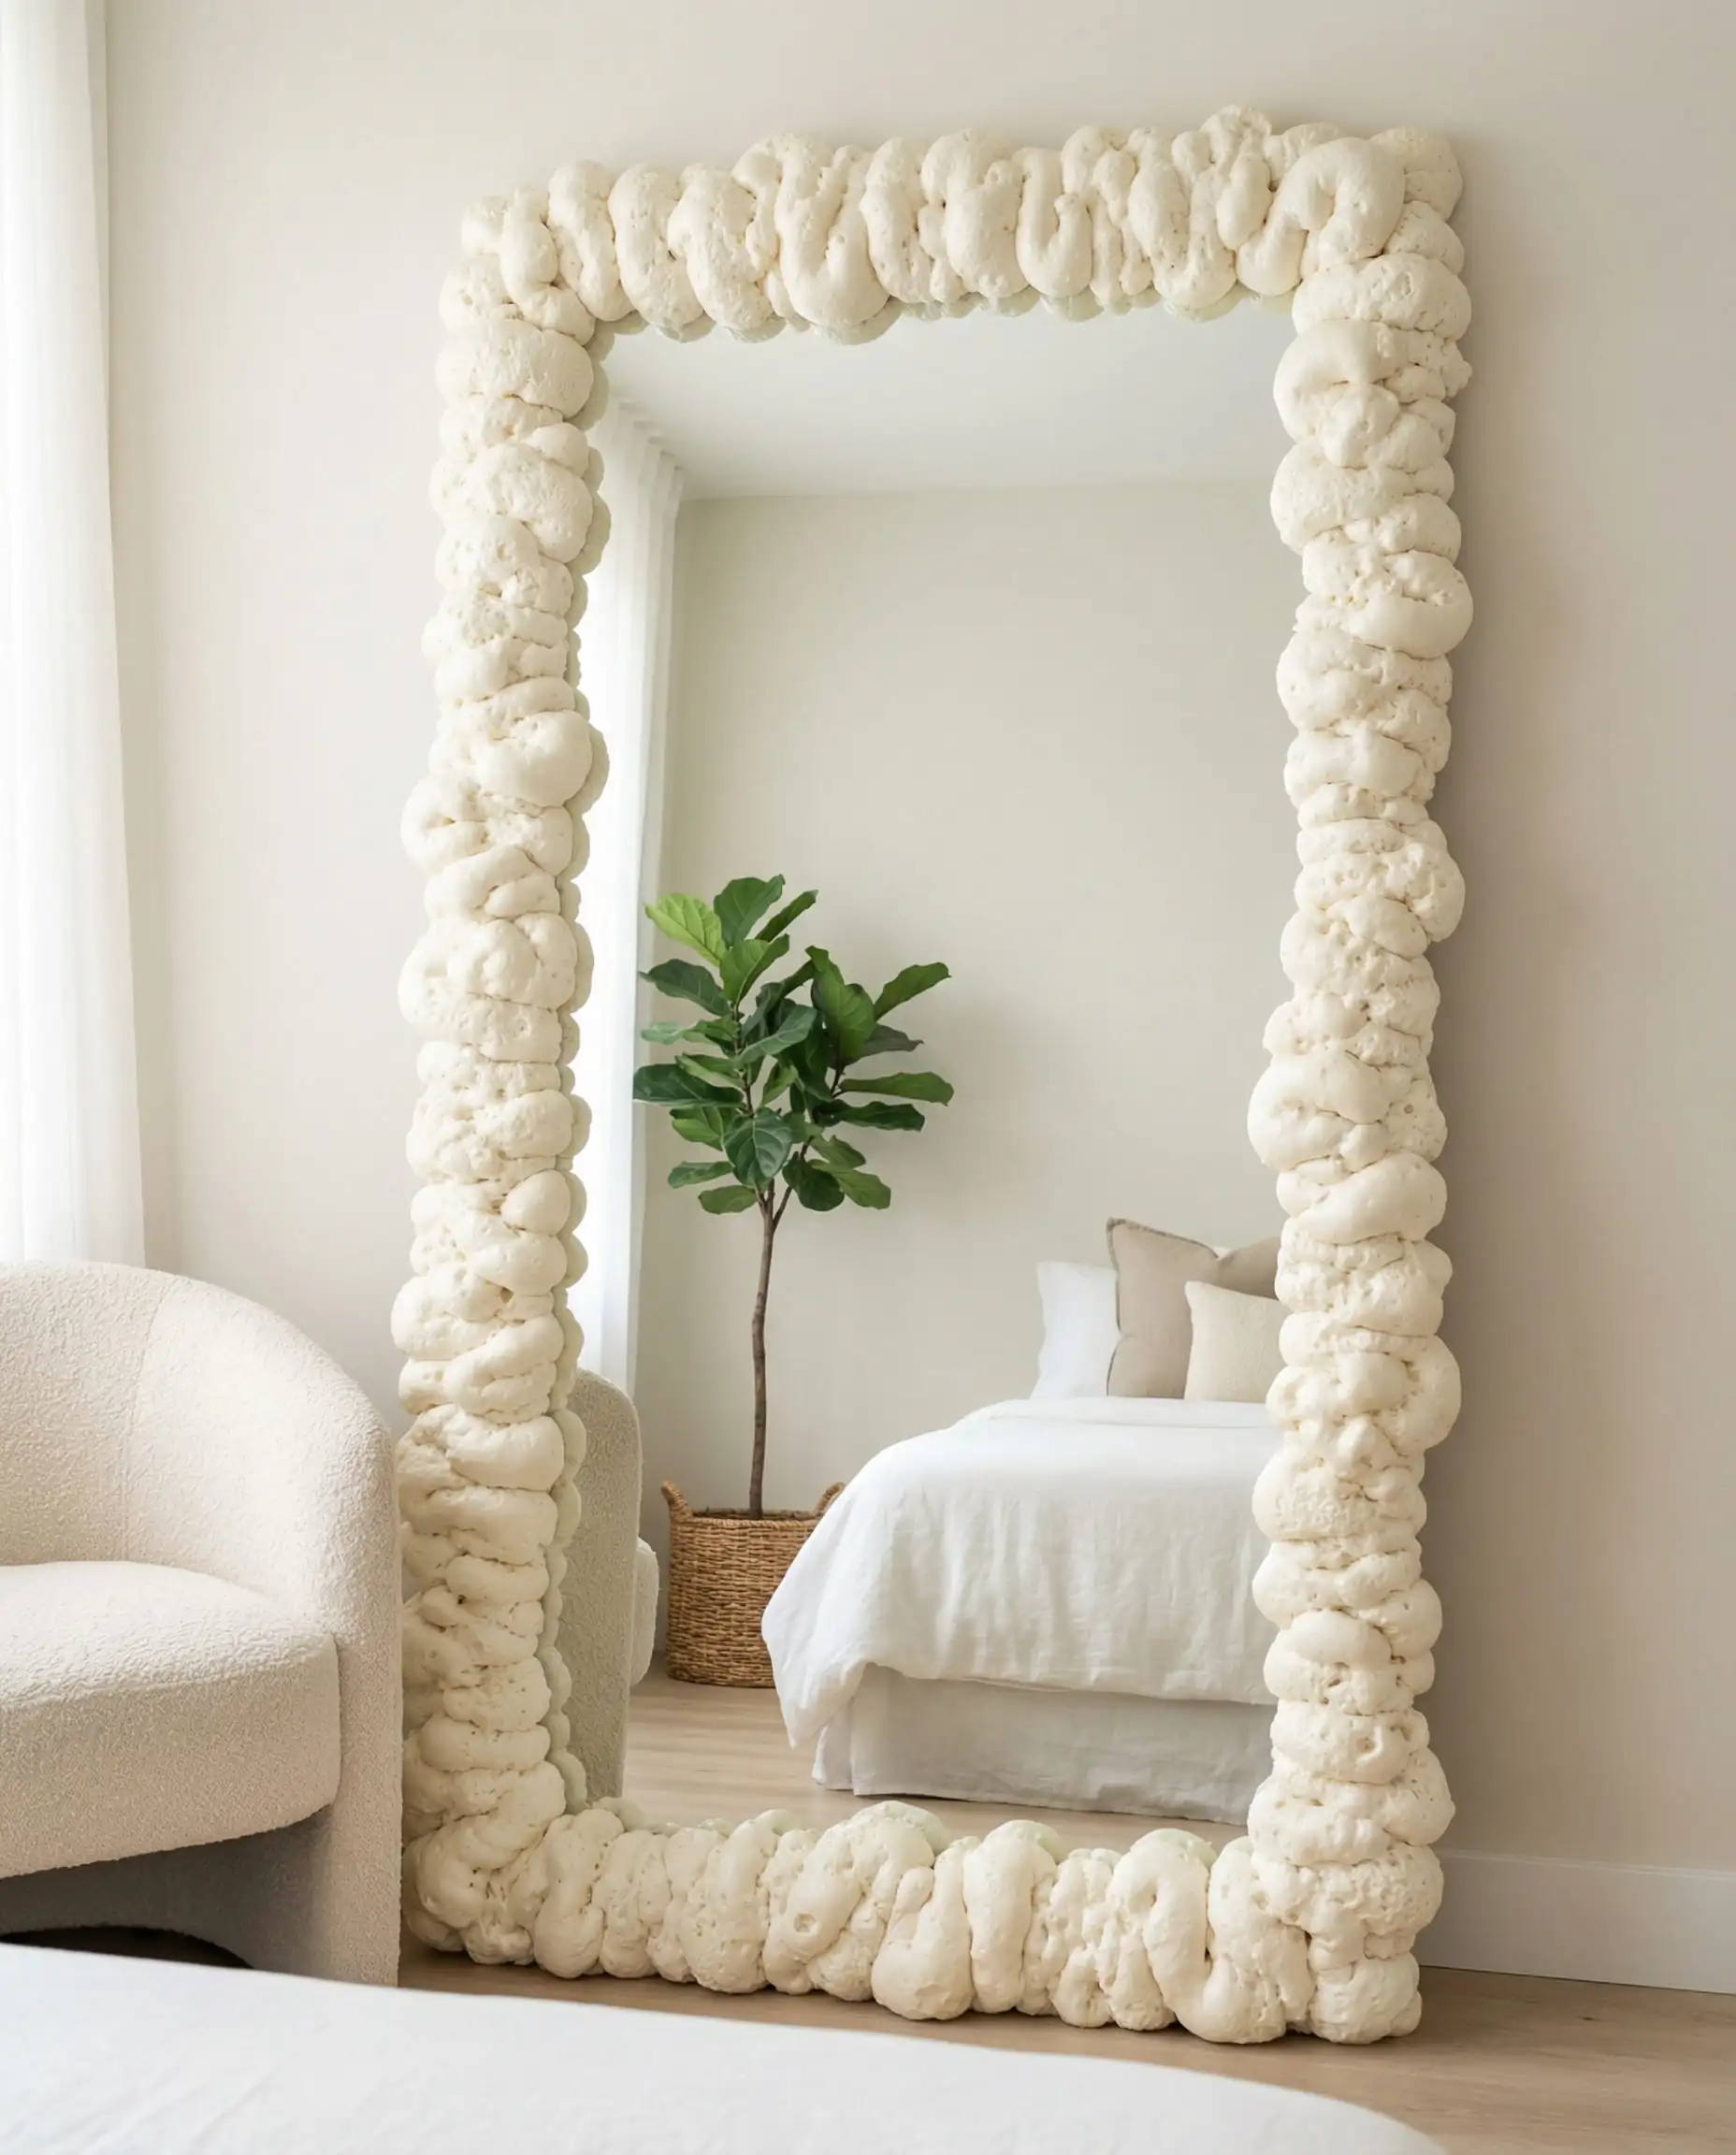
The “Cloud” Mirror (Foam Frame)
This viral trend is still going strong because it adds softness to rigid spaces. It turns a standard cheap mirror into a statement piece that looks like a fluffy cloud or a piece of popcorn.
Difficulty: 🟢 Easy | Time: ⏱️ 30 Mins (+ overnight drying) | Cost: 💲 Low
You Will Need:
Quick Steps:
- Set Up: Place the mirror on a drop cloth outside or in a well-ventilated area. This foam is incredibly sticky and hard to clean off floors.
- Shake: Shake the foam can vigorously for 60 seconds.
- Spray: Slowly spray the foam around the border of the mirror. Move the can in a zigzag motion or small circles to create the “fluff.” Don’t worry if it looks small; it expands significantly.
- Cure: Let it cure overnight. It will double in size and harden.
- Customize: If you don’t like the creamy yellow color of the foam, spray paint it lilac, sage, or soft pink to match your bedroom paint colors.
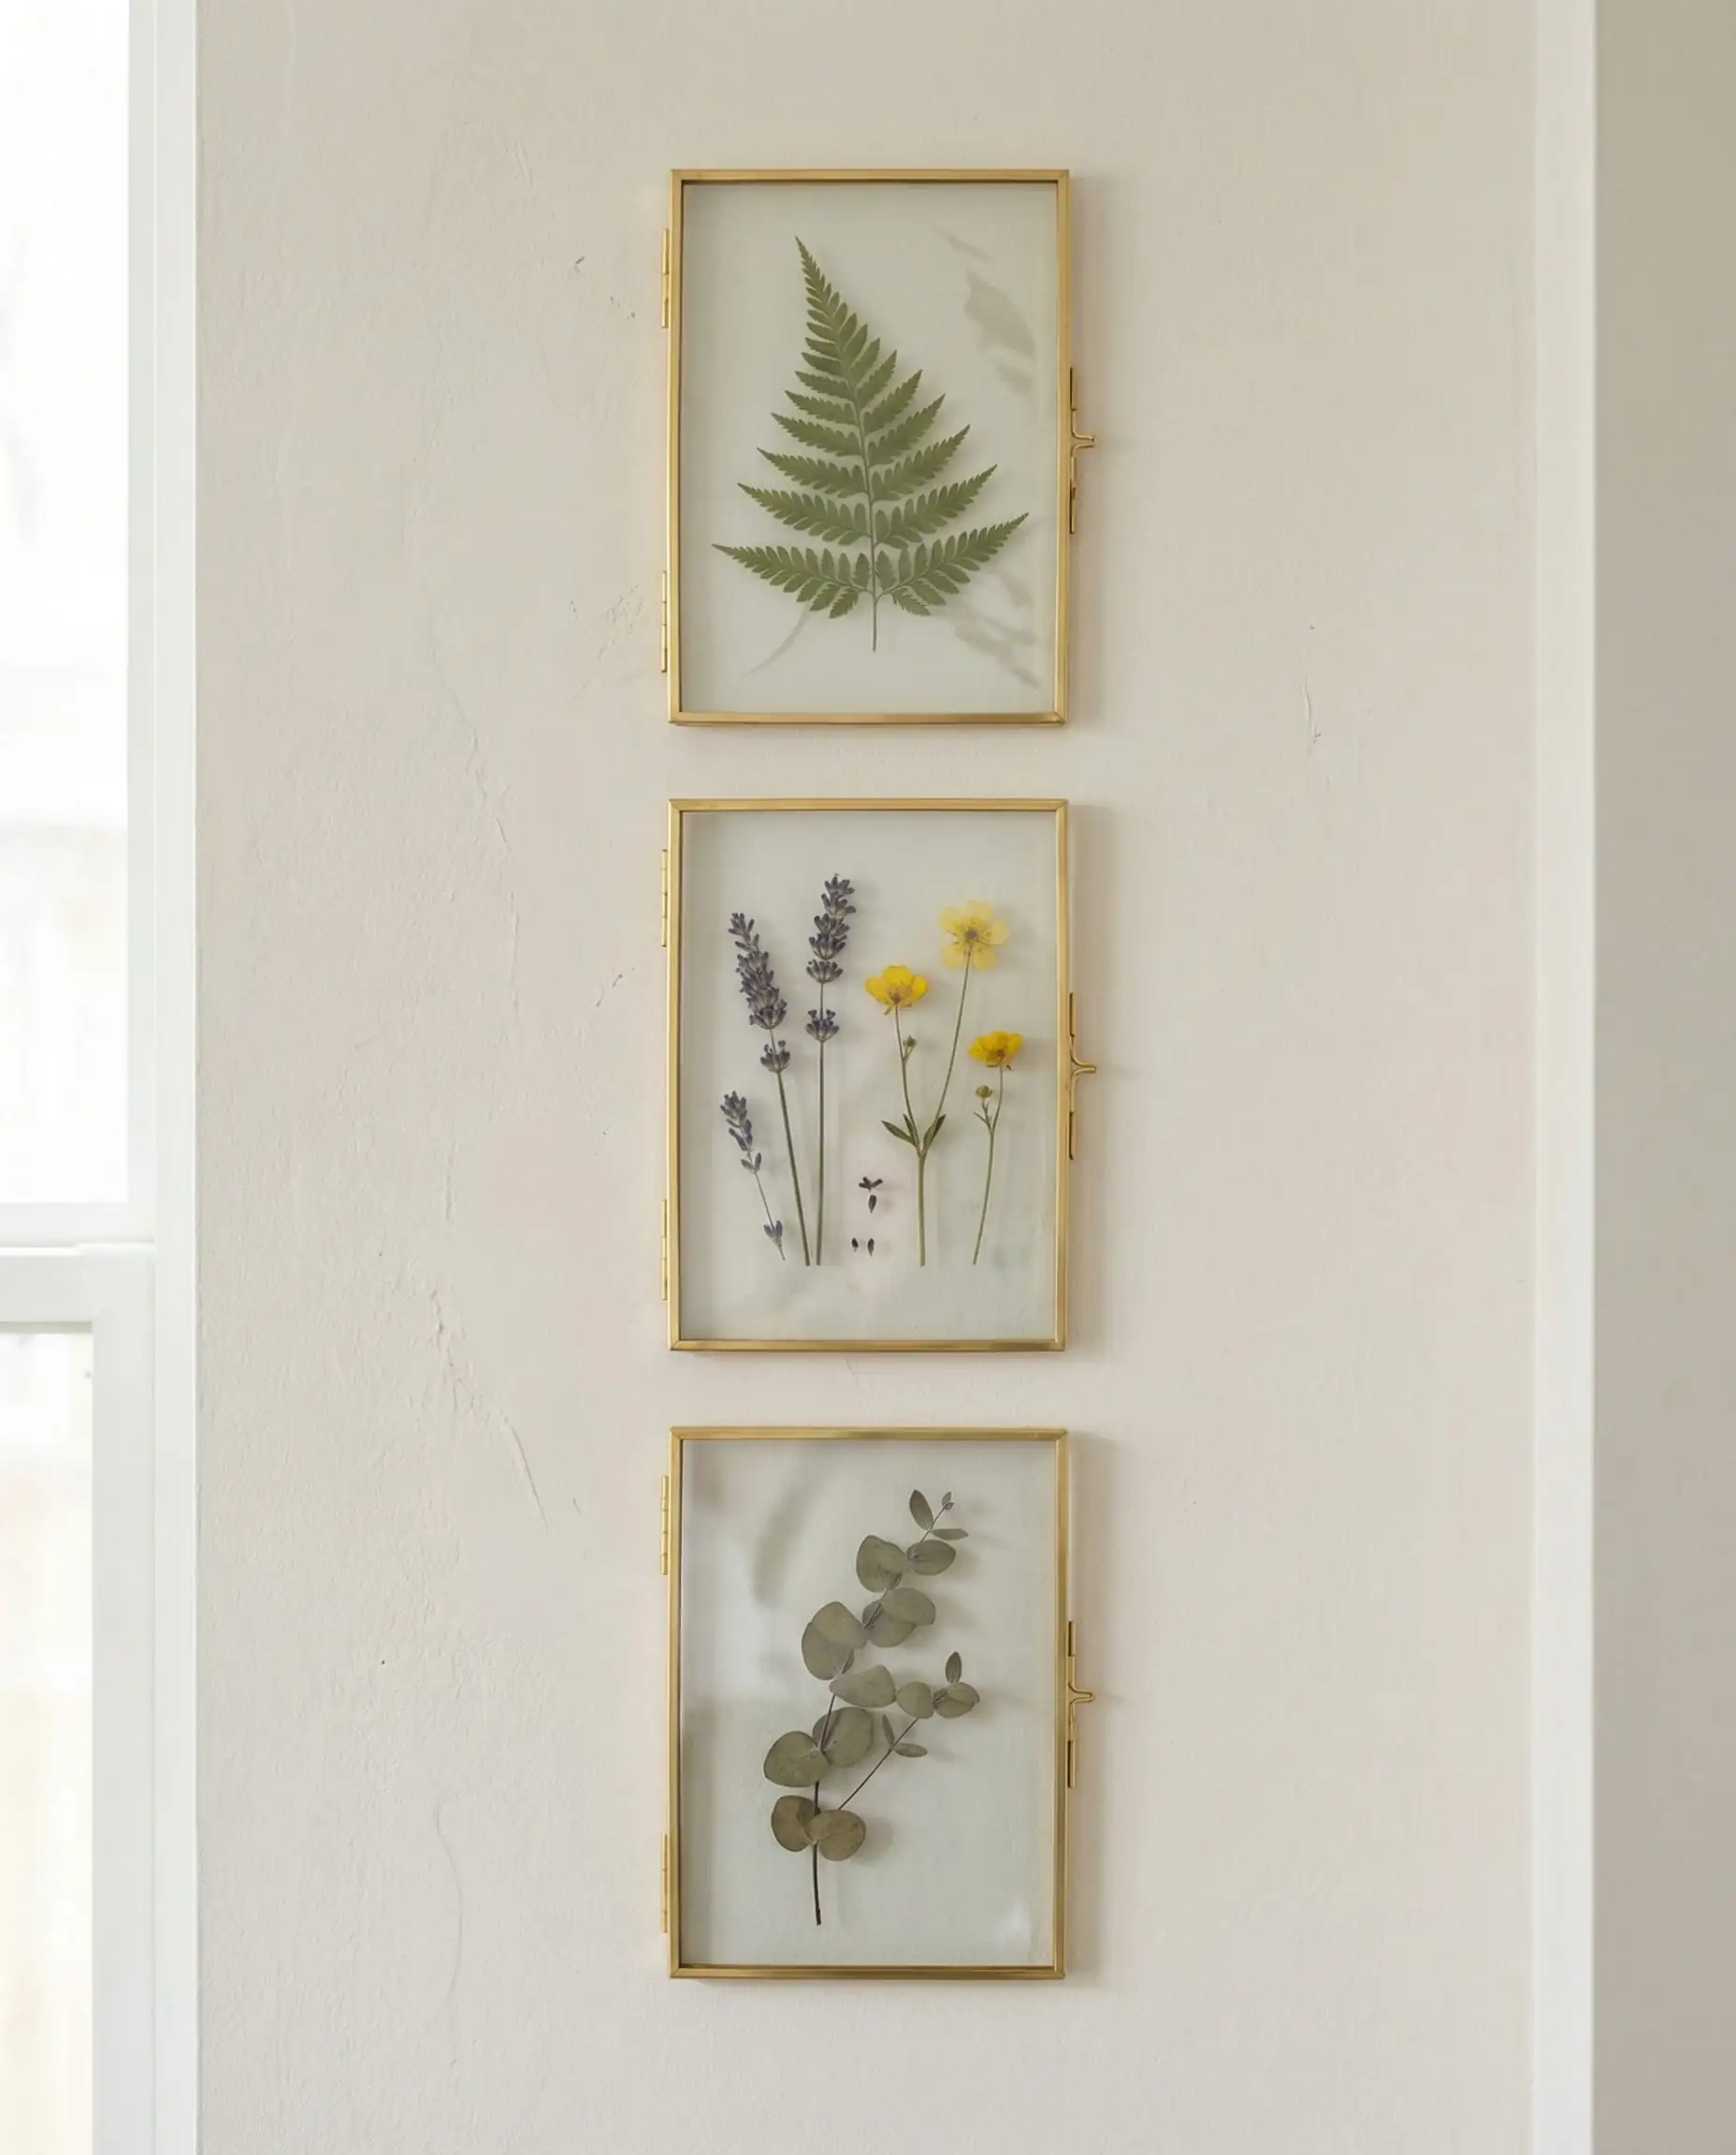
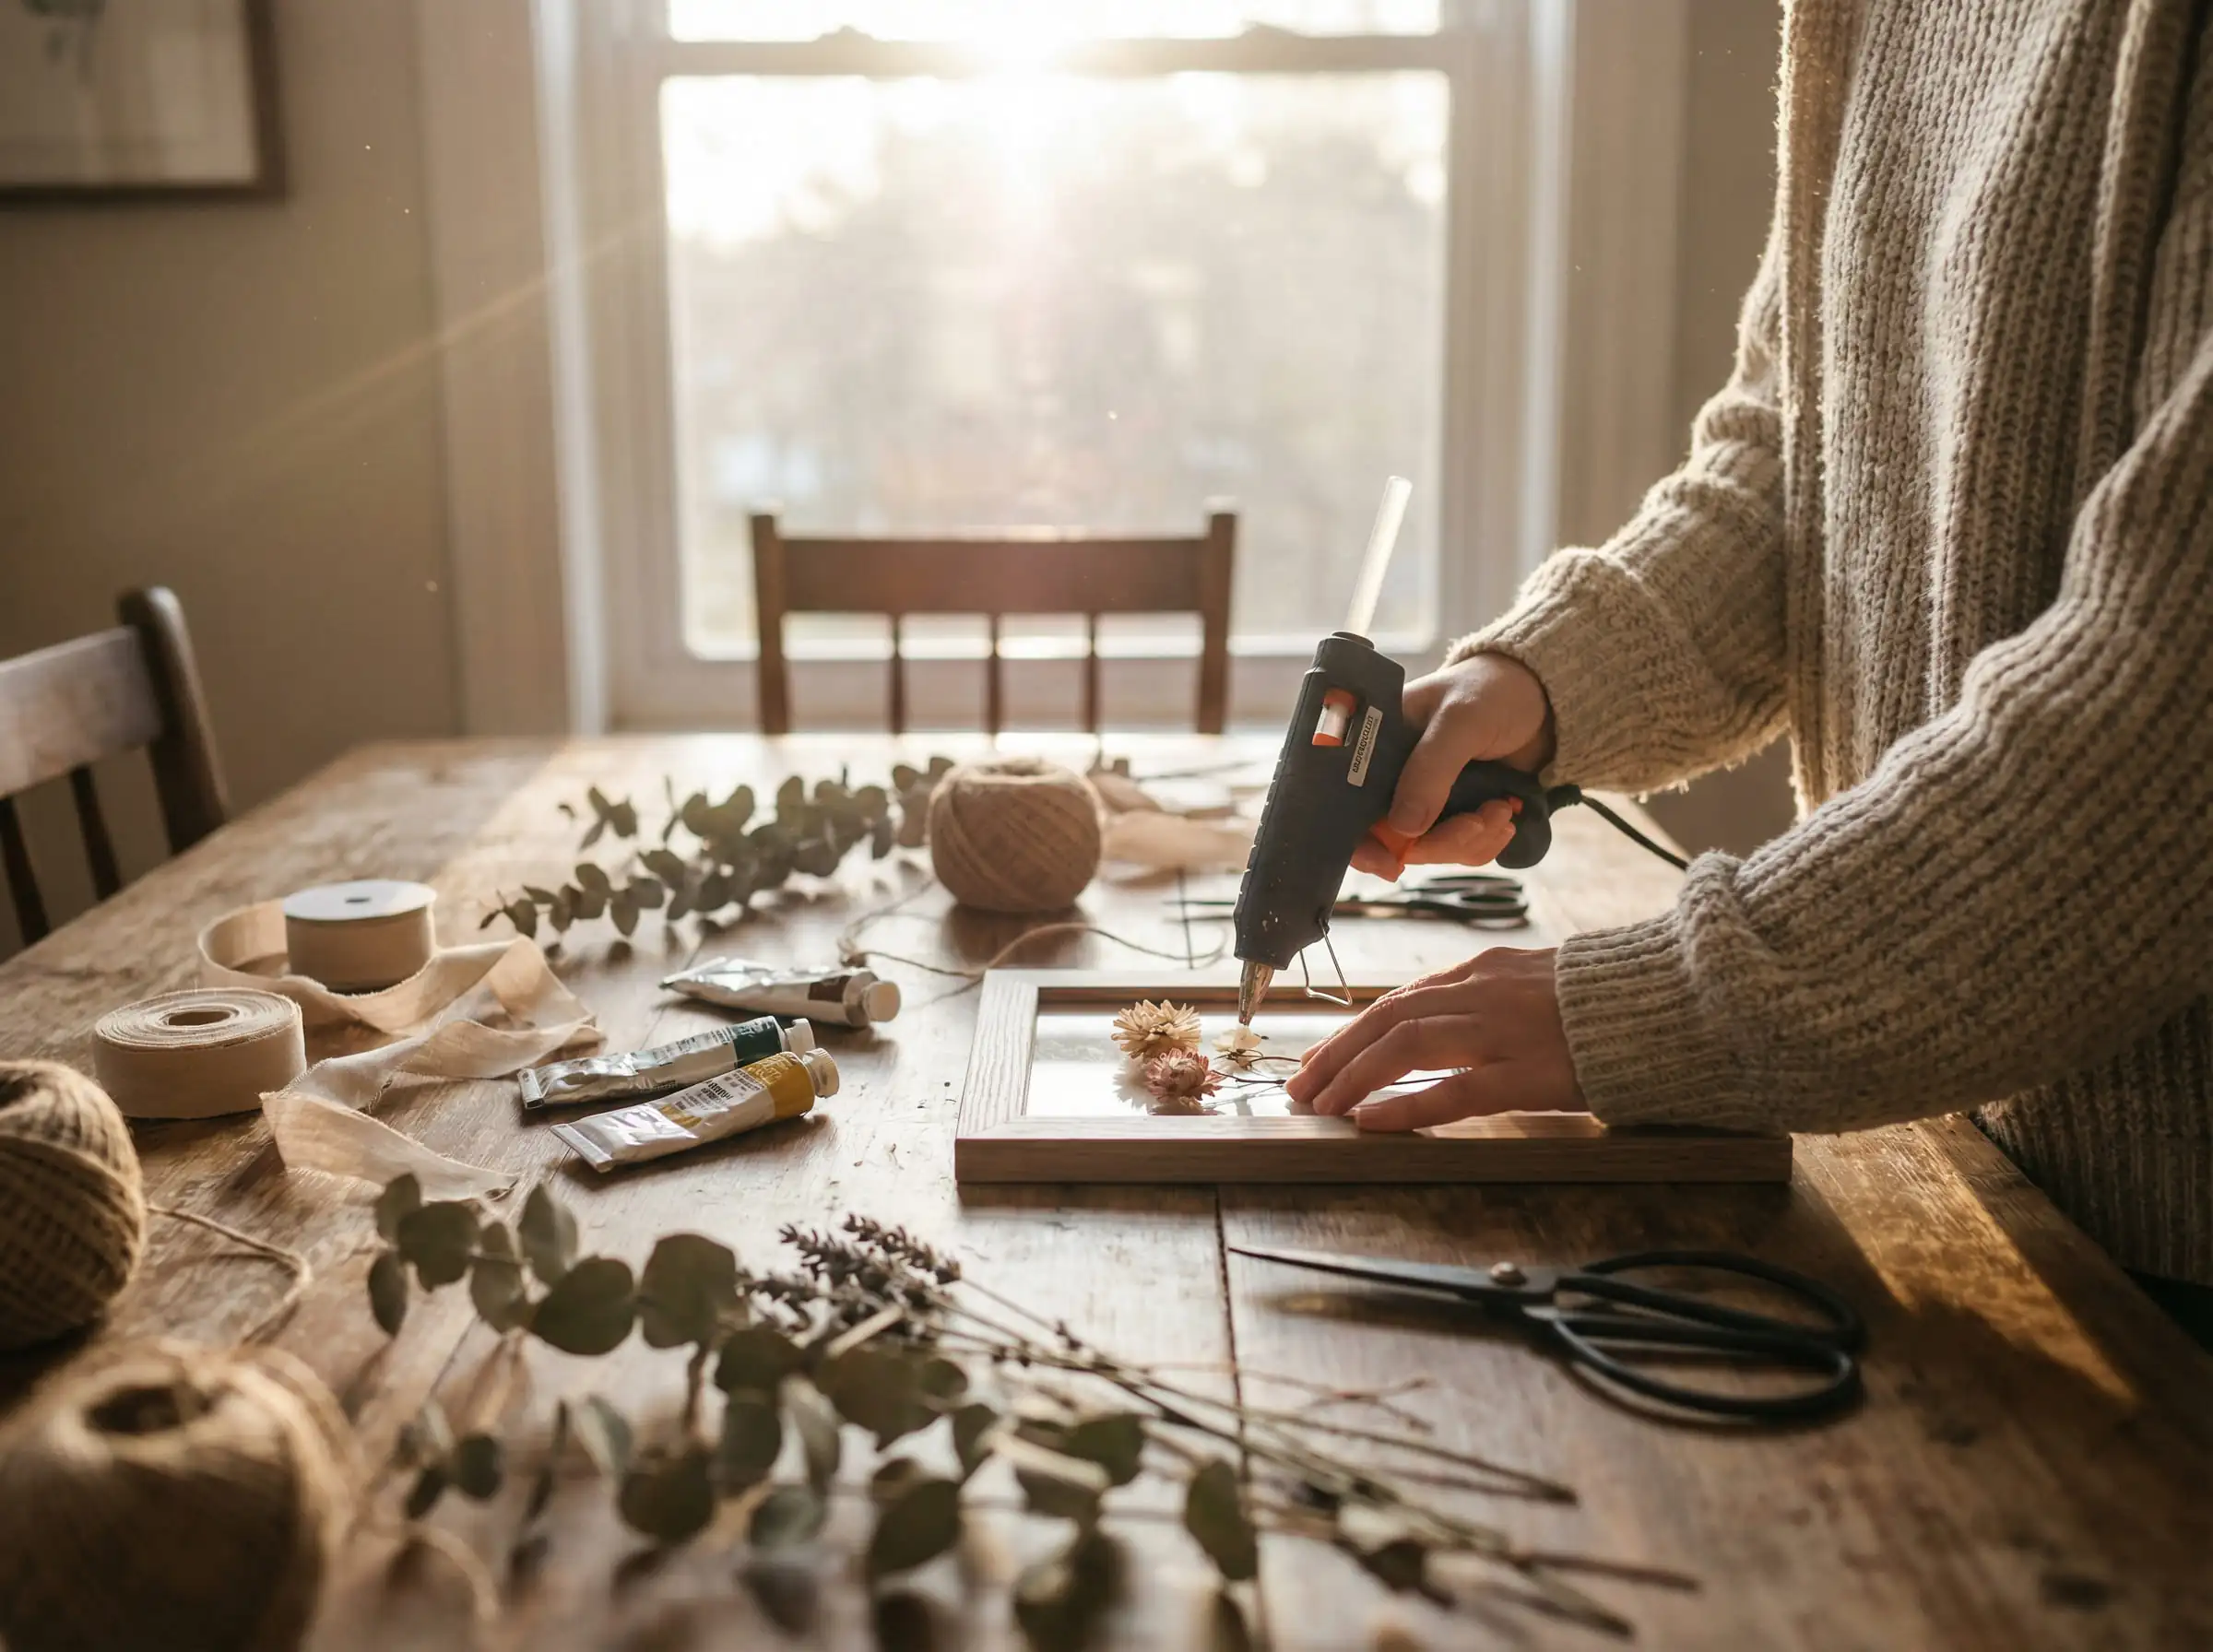
Botanical Gallery Wall (Pressed Flowers)
Updating the standard poster wall with something organic. This brings the “Cottagecore” aesthetic into a modern setting and preserves nature.
Difficulty: 🟢 Easy | Time: ⏱️ 1 Hour | Cost: 💲 Free/Low
You Will Need:
Quick Steps:
- Harvest: Pick flowers that are naturally flat-ish (pansies and ferns work better than roses).
- Press: Place them between two sheets of parchment paper inside a heavy book. Leave them for 1-2 weeks until fully dry and papery.
- Arrange: Open your floating frames. Arrange the pressed flowers in a minimalist pattern. Try not to overcrowd them; negative space is key here.
- Seal: Close the frame. The pressure of the two glass panes holds them in place without glue, meaning you can change the design next season.
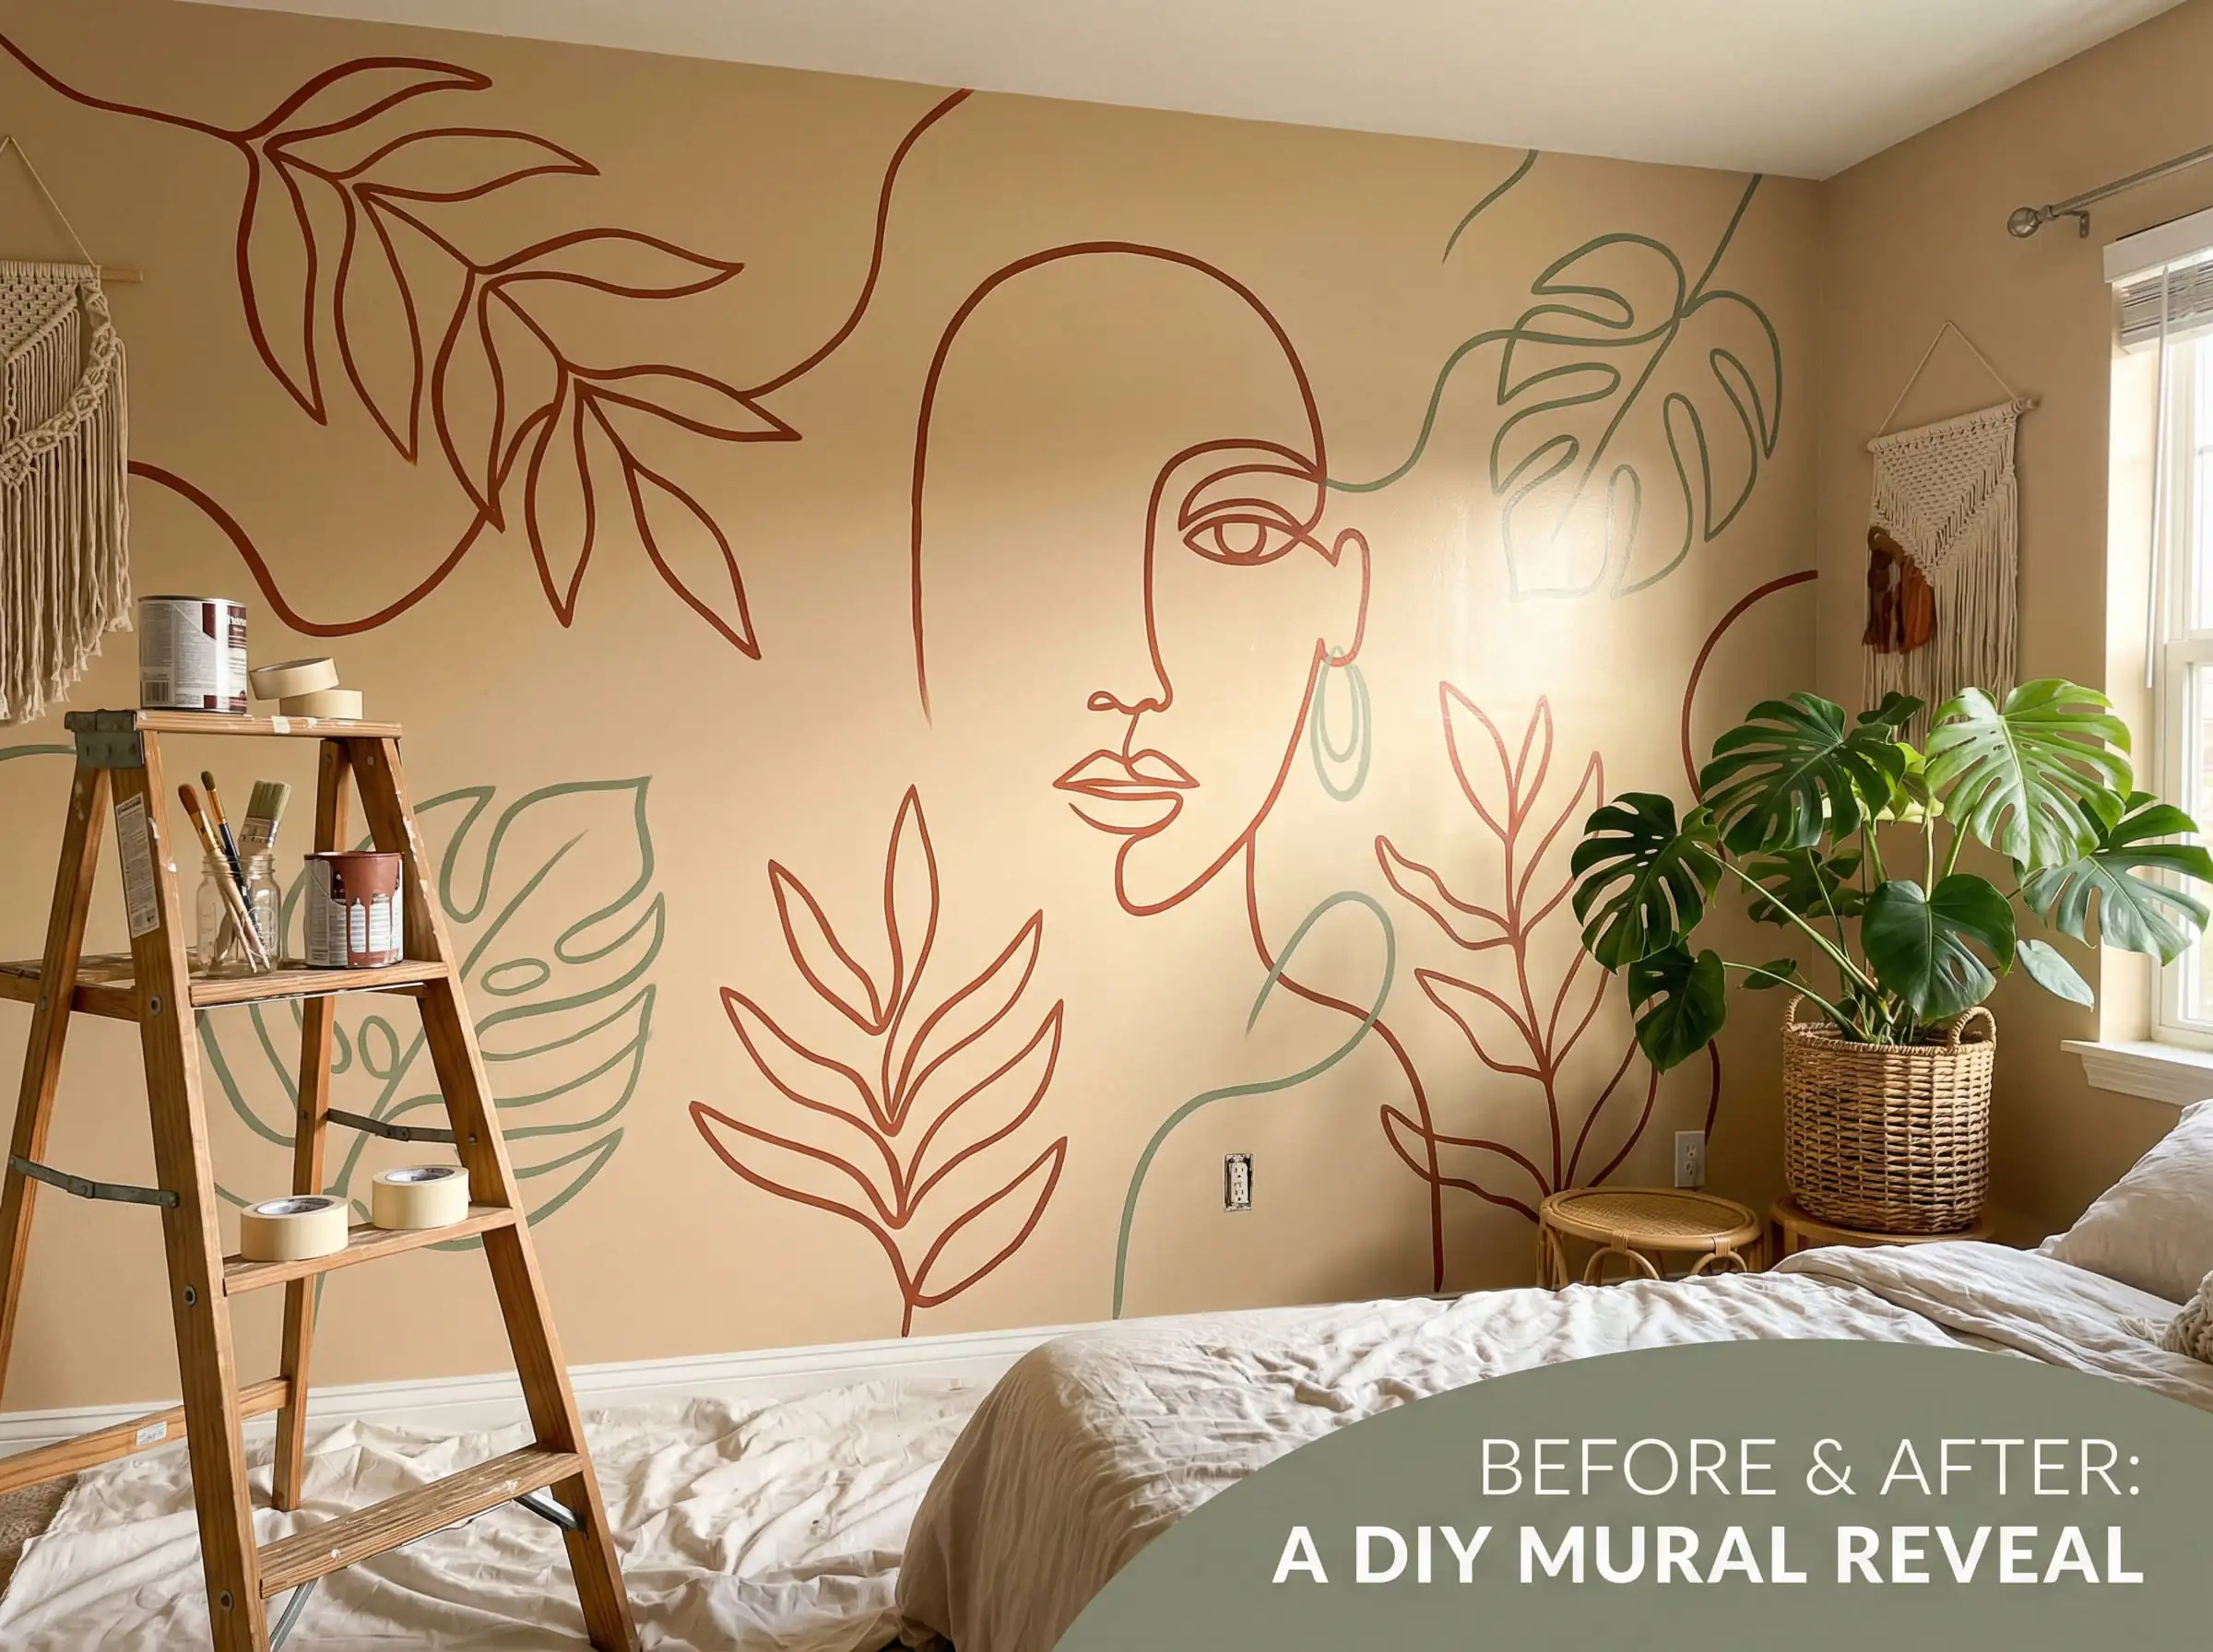
Minimalist Line Art Mural
You don’t need to be Michelangelo to paint a mural. Abstract line art is forgiving, trendy, and makes a massive statement on a budget.
Difficulty: 🟡 Medium | Time: ⏱️ 3 Hours | Cost: 💲 Low
You Will Need:
Quick Steps:
- Design: Sketch your design on paper first. Think continuous lines, faces, or abstract botanical shapes.
- Transfer: Lightly draw the design on your wall with a pencil. If you aren’t confident in freehanding, project an image onto the wall with your phone and trace the light.
- Paint: Go over your pencil lines with the round brush. Don’t worry about shaky hands; organic lines look more authentic.
- Layer: Add solid circles or blobs of color behind the lines for depth.
Check our article on wall art decor trends to see which shapes and colors are dominating this year before you start painting.
💡 Hackrea Pro Tip
You can apply wallpapers, paints, etc. on walls and see how they look in various interiors.
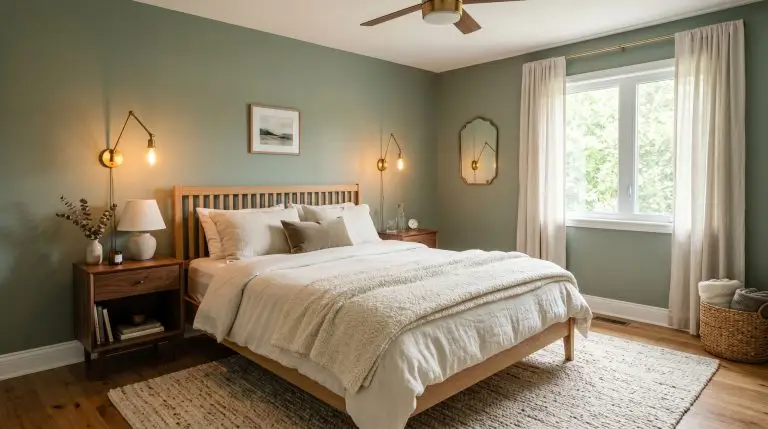
2. Aesthetic Lighting DIYs: Setting the Mood
In the world of aesthetic decor, lighting is everything. It defines the ambiance for your content creation, your study sessions, and your relaxation. Harsh overhead lighting is the enemy; ambient, layered lighting is the goal.
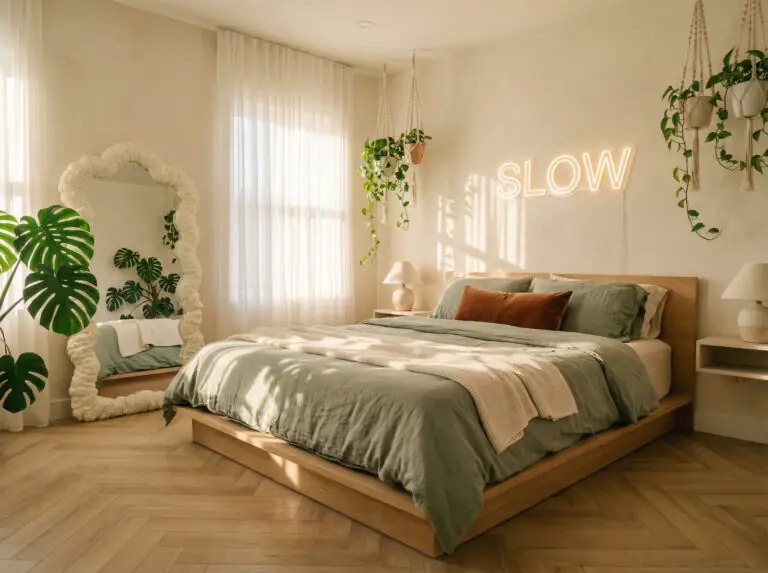
Custom LED Neon Sign
Real glass neon is fragile and expensive. “Neon rope light” allows you to “write” on your wall safely and affordably.

Difficulty: 🟡 Medium | Time: ⏱️ 2 Hours | Cost: 💲 Medium
You Will Need:
Quick Steps:
- Shape the Skeleton: Bend the strong wire into your desired word (e.g., “Dream,” “Chill”) or icon (cloud, lightning bolt).
- Attach Light: Zip-tie or glue the neon rope light along the wire frame. The wire holds the shape, the light covers the wire.
- Acrylic Method (Alternative): Lay a clear acrylic sheet over your paper template. Glue the rope light directly onto the acrylic. This looks more professional.
- Mount: Hang on the wall and plug in.
Upcycled “Mushroom” Lamp
Thrift flipping is a major part of the aesthetic lifestyle. Transform a generic glass lamp into a designer dupe that looks like ceramic.
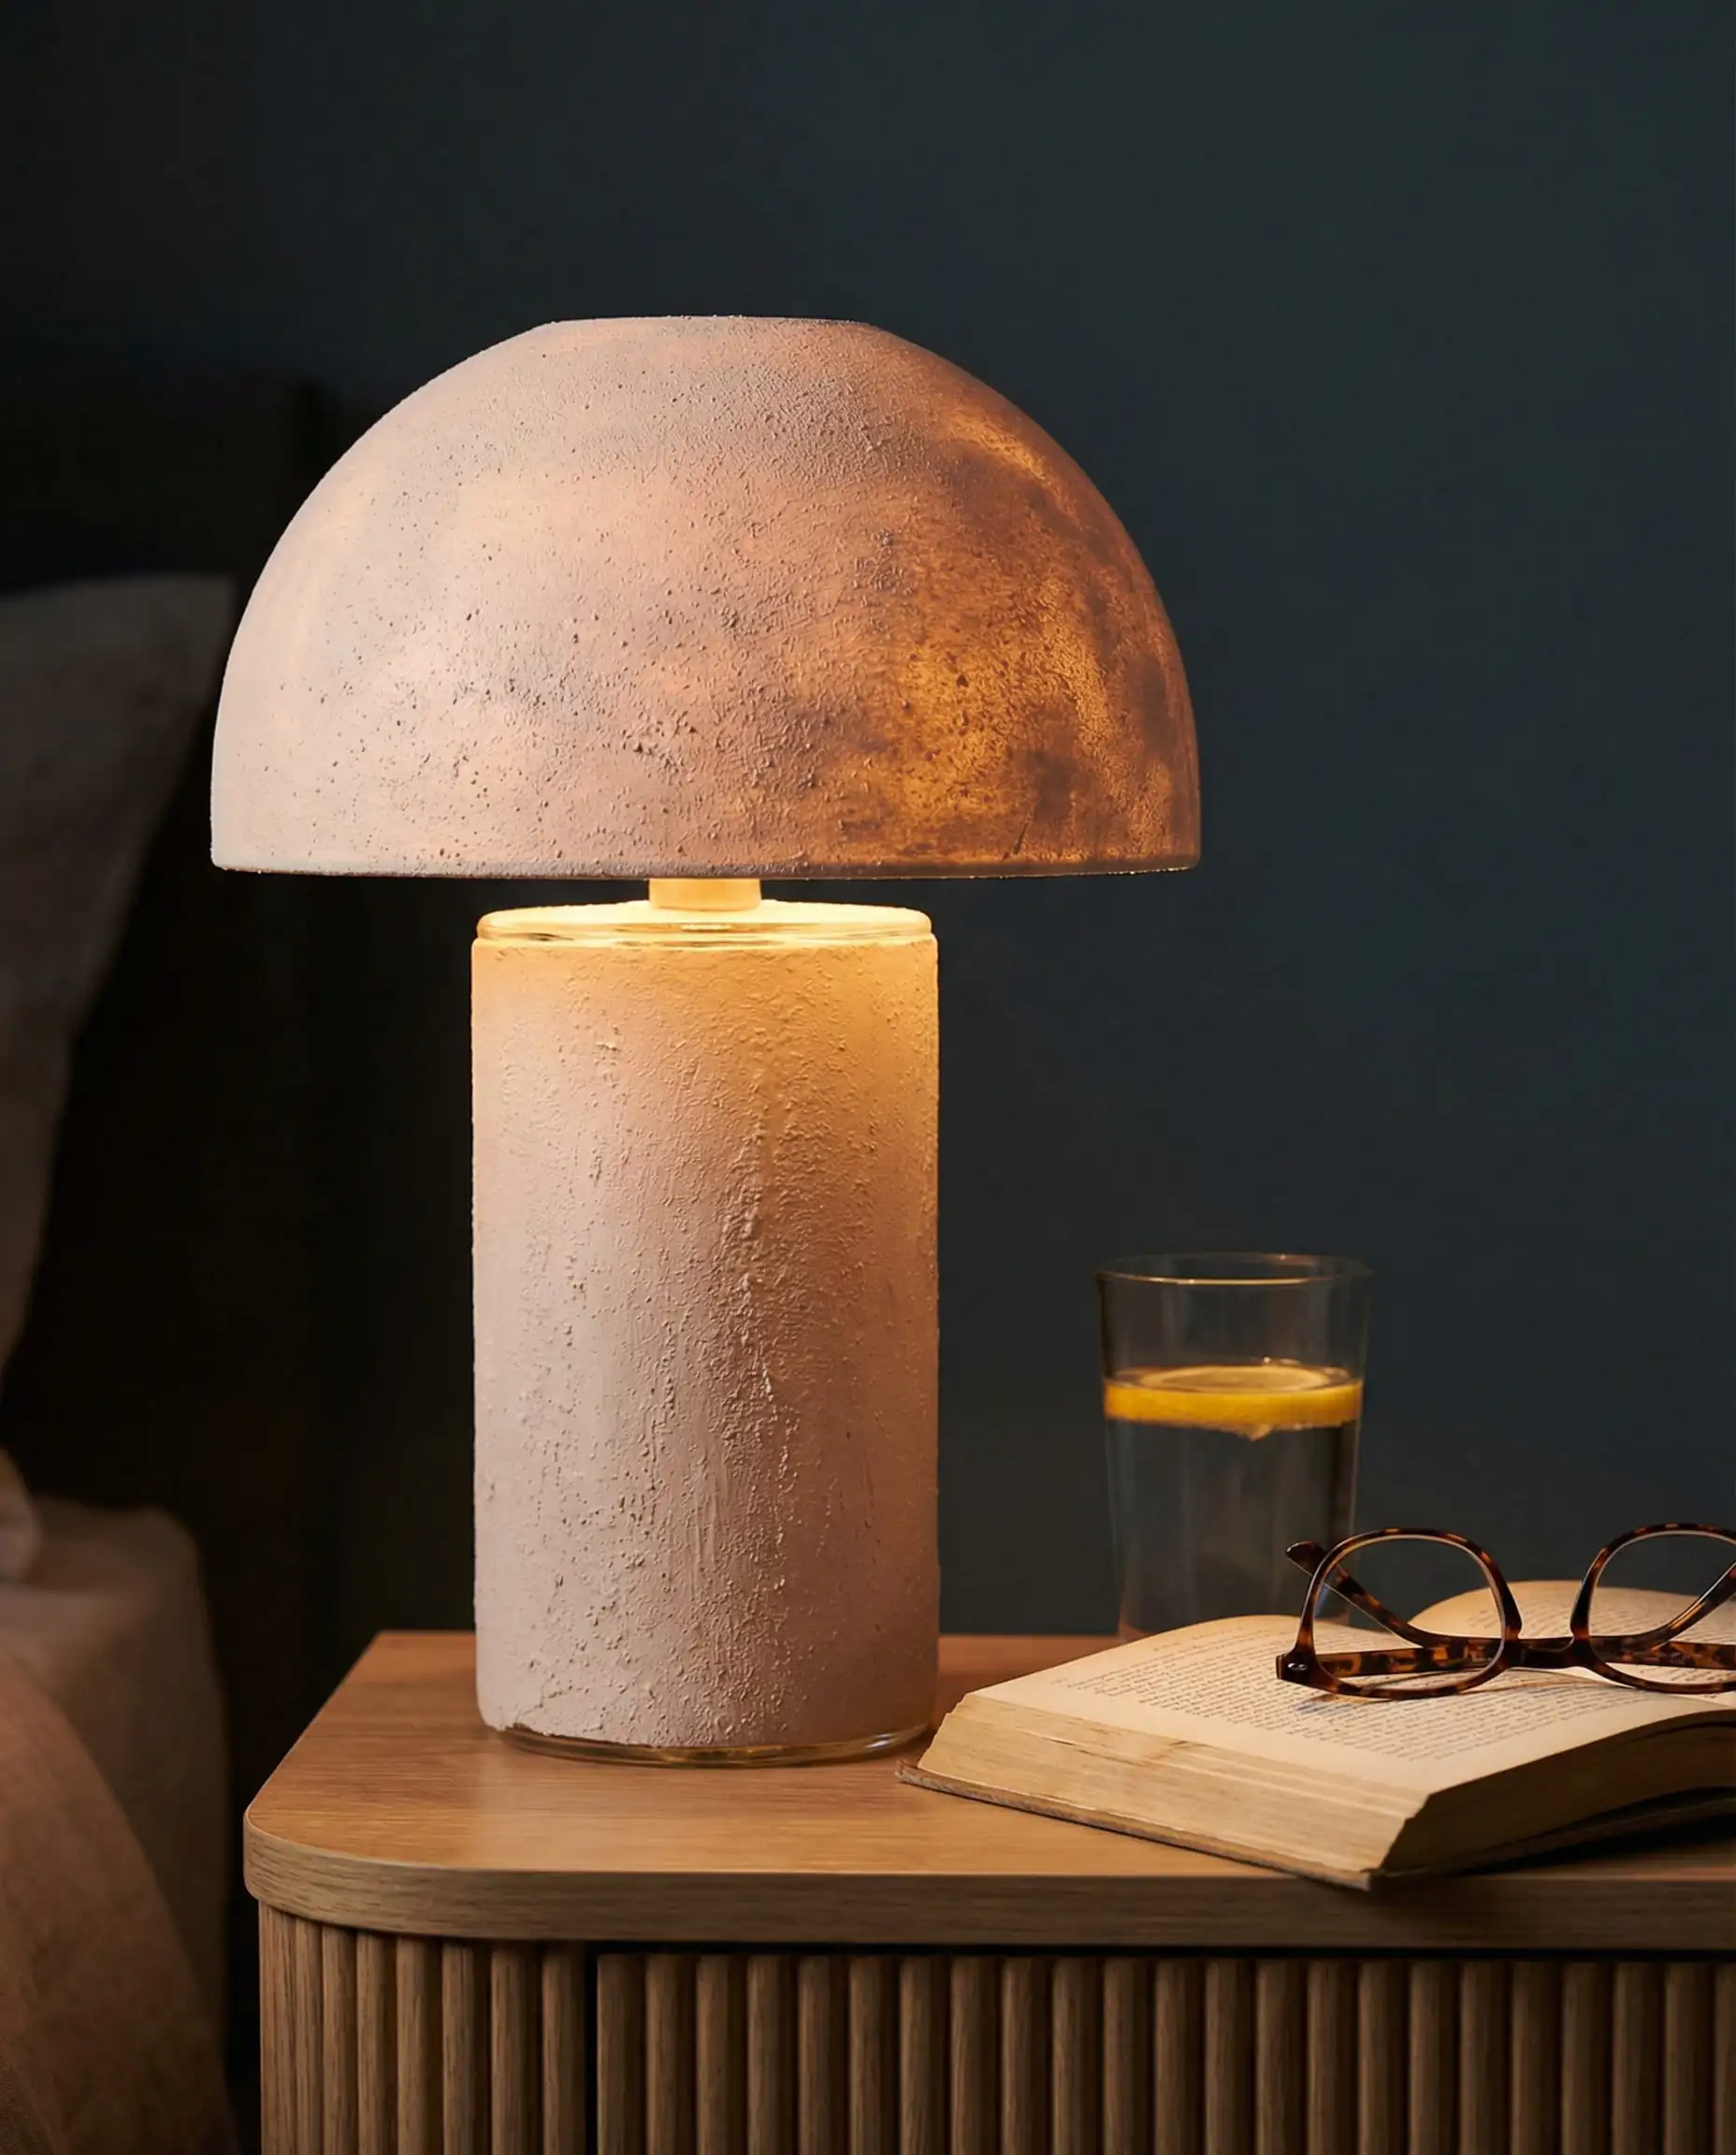
Difficulty: 🟢 Easy | Time: ⏱️ 40 Mins | Cost: 💲 Low
You Will Need:
Quick Steps:
- Clean: Clean the lamp thoroughly with alcohol to remove grease.
- Mix: Mix 1 part baking powder to 2 parts acrylic paint. It will fluff up like mousse. This creates a terracotta/ceramic texture.
- Paint: Apply to the glass base (and shade, if it’s glass). Use a sponge for a stippled, stone-like look or a brush for a handmade ceramic look.
- Coat: Do 2-3 coats for full opacity.
Fairy Light Photo Wall (The Classic)
It is a classic for a reason. It combines memory keeping with ambient light, perfect for dorms.
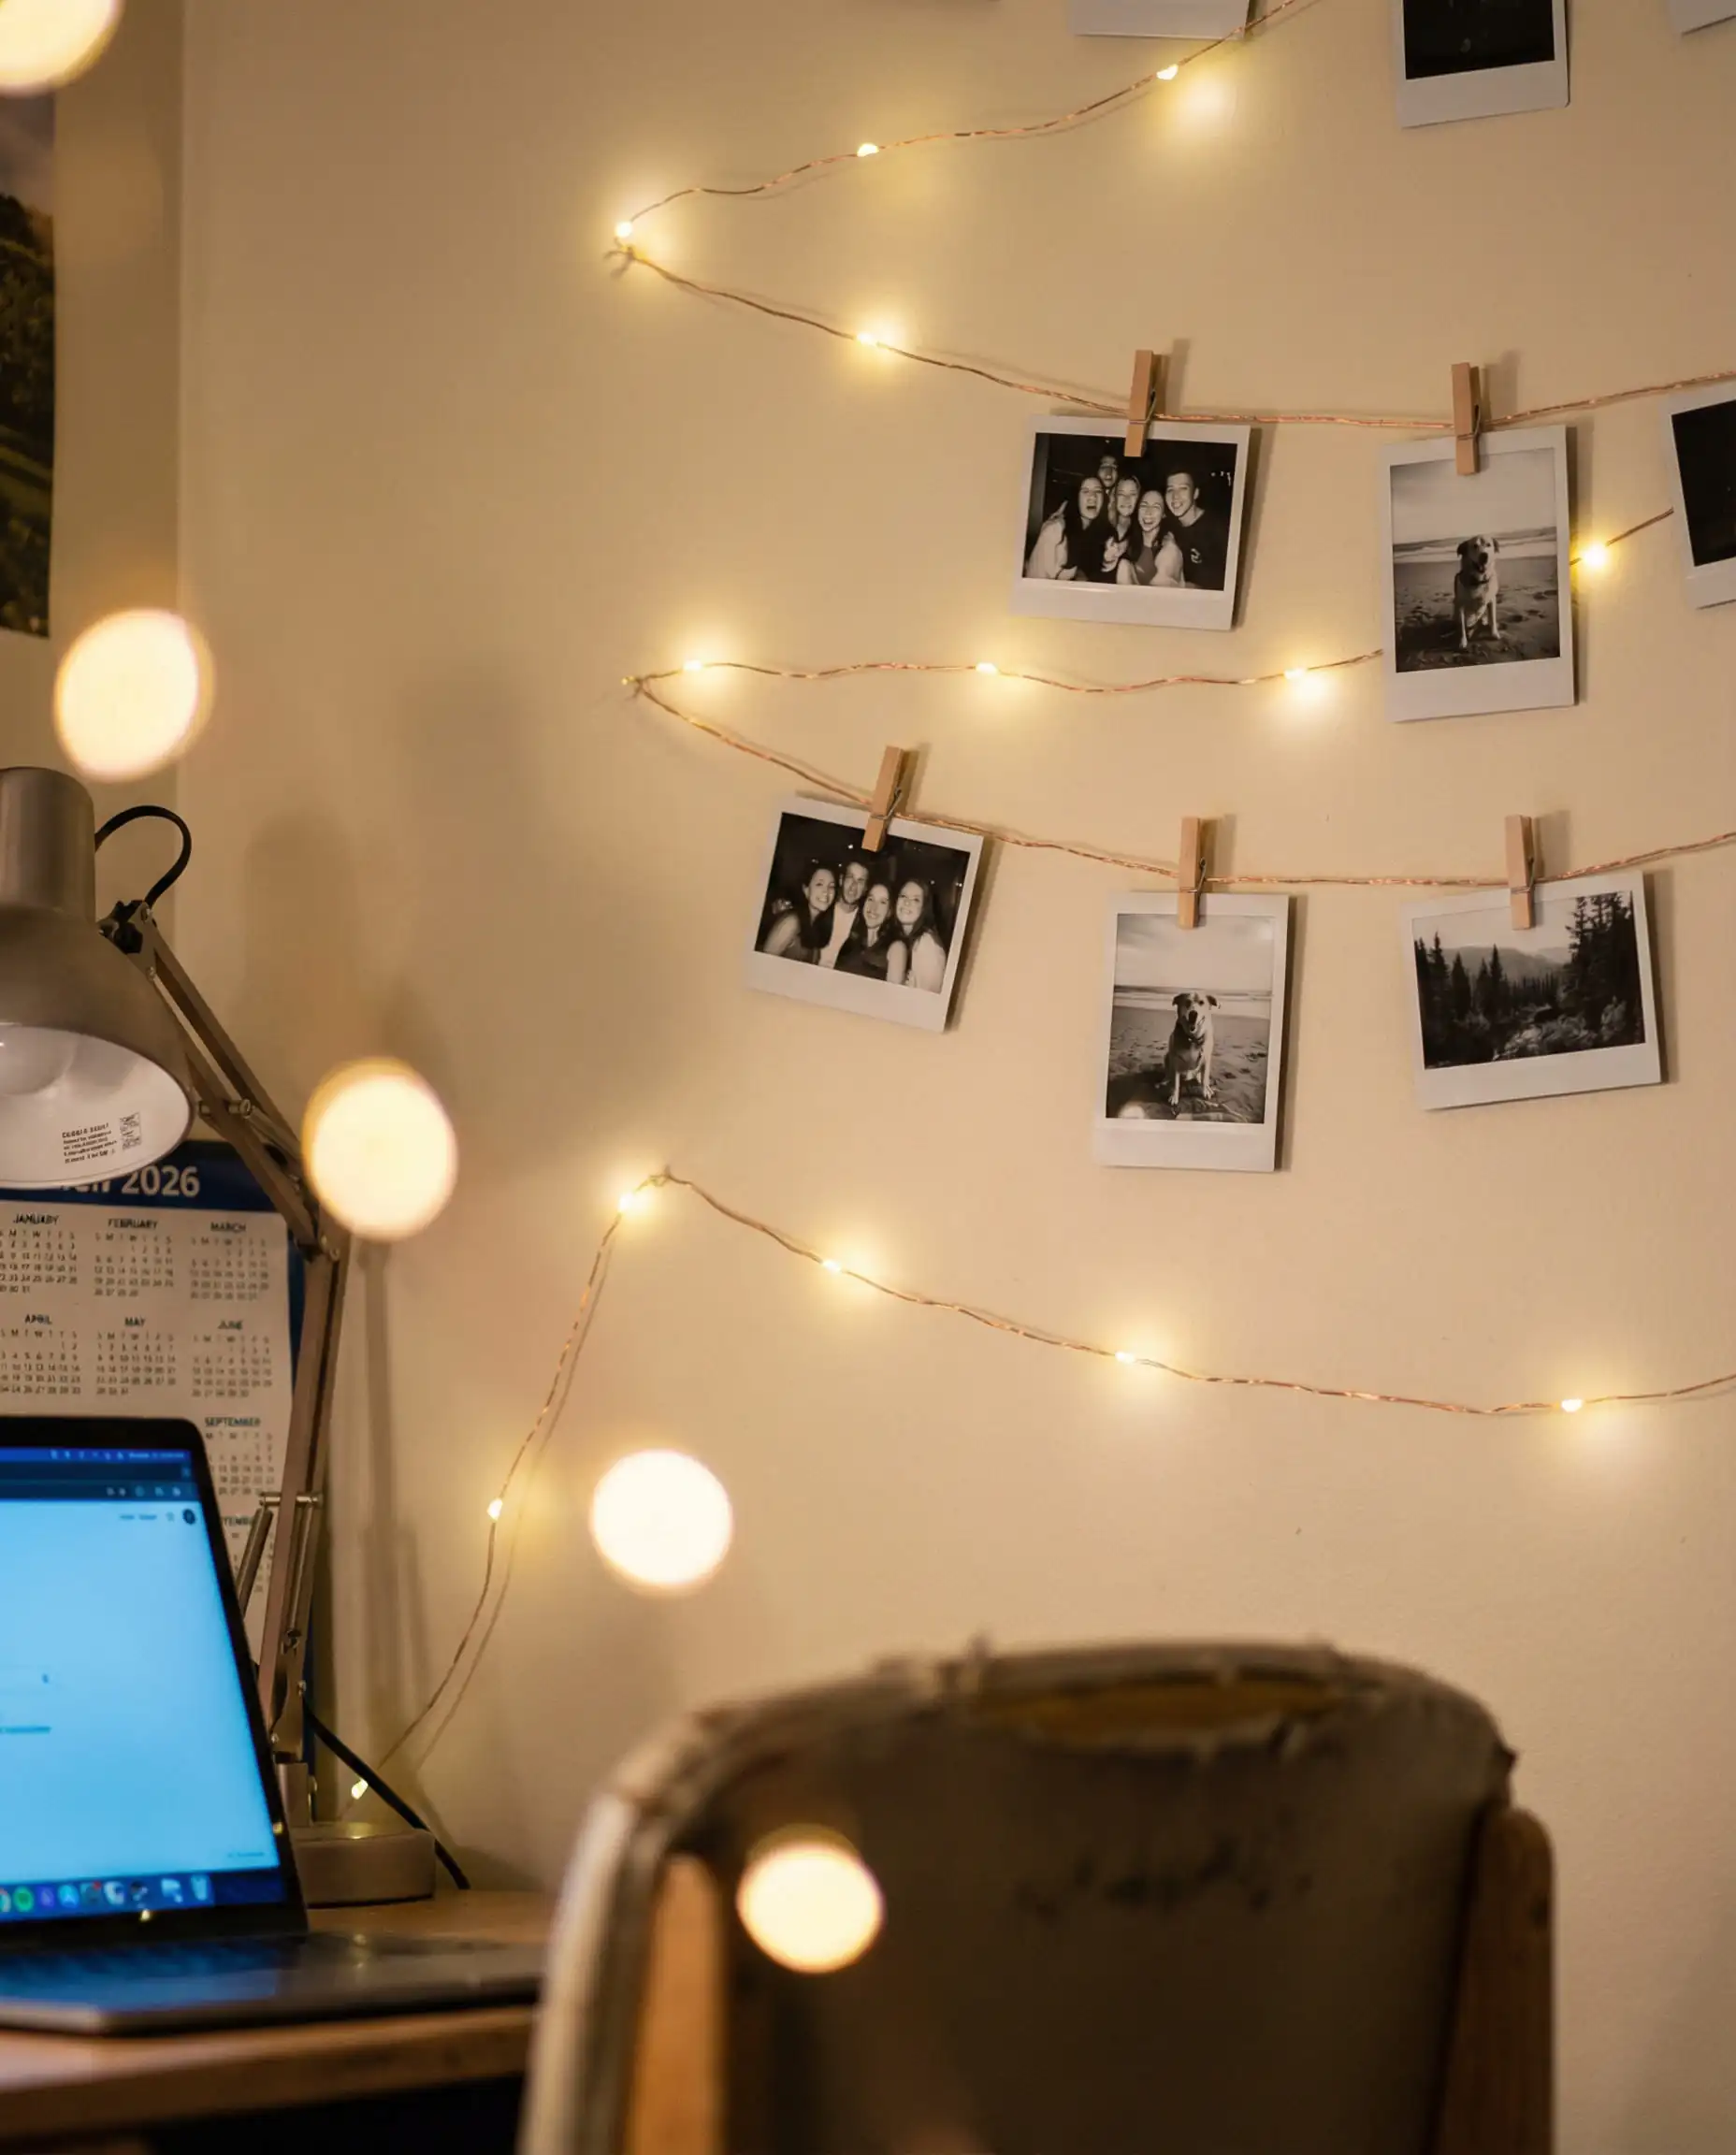
Difficulty: 🟢 Easy | Time: ⏱️ 30 Mins | Cost: 💲 Low
You Will Need:
Quick Steps:
- Drape: Hang lights in a zigzag pattern on the wall using clear command hooks.
- Print: Print your favorite photos.
- Style: Edit your photos to all have the same filter (e.g., black and white or sepia) before printing. This makes the wall look cohesive rather than messy.
- Clip: Attach photos to the wire using the clips.
If you want more advanced lighting ideas, read our dedicated post on bedroom LED light ideas.
💡 Hackrea Pro Tip
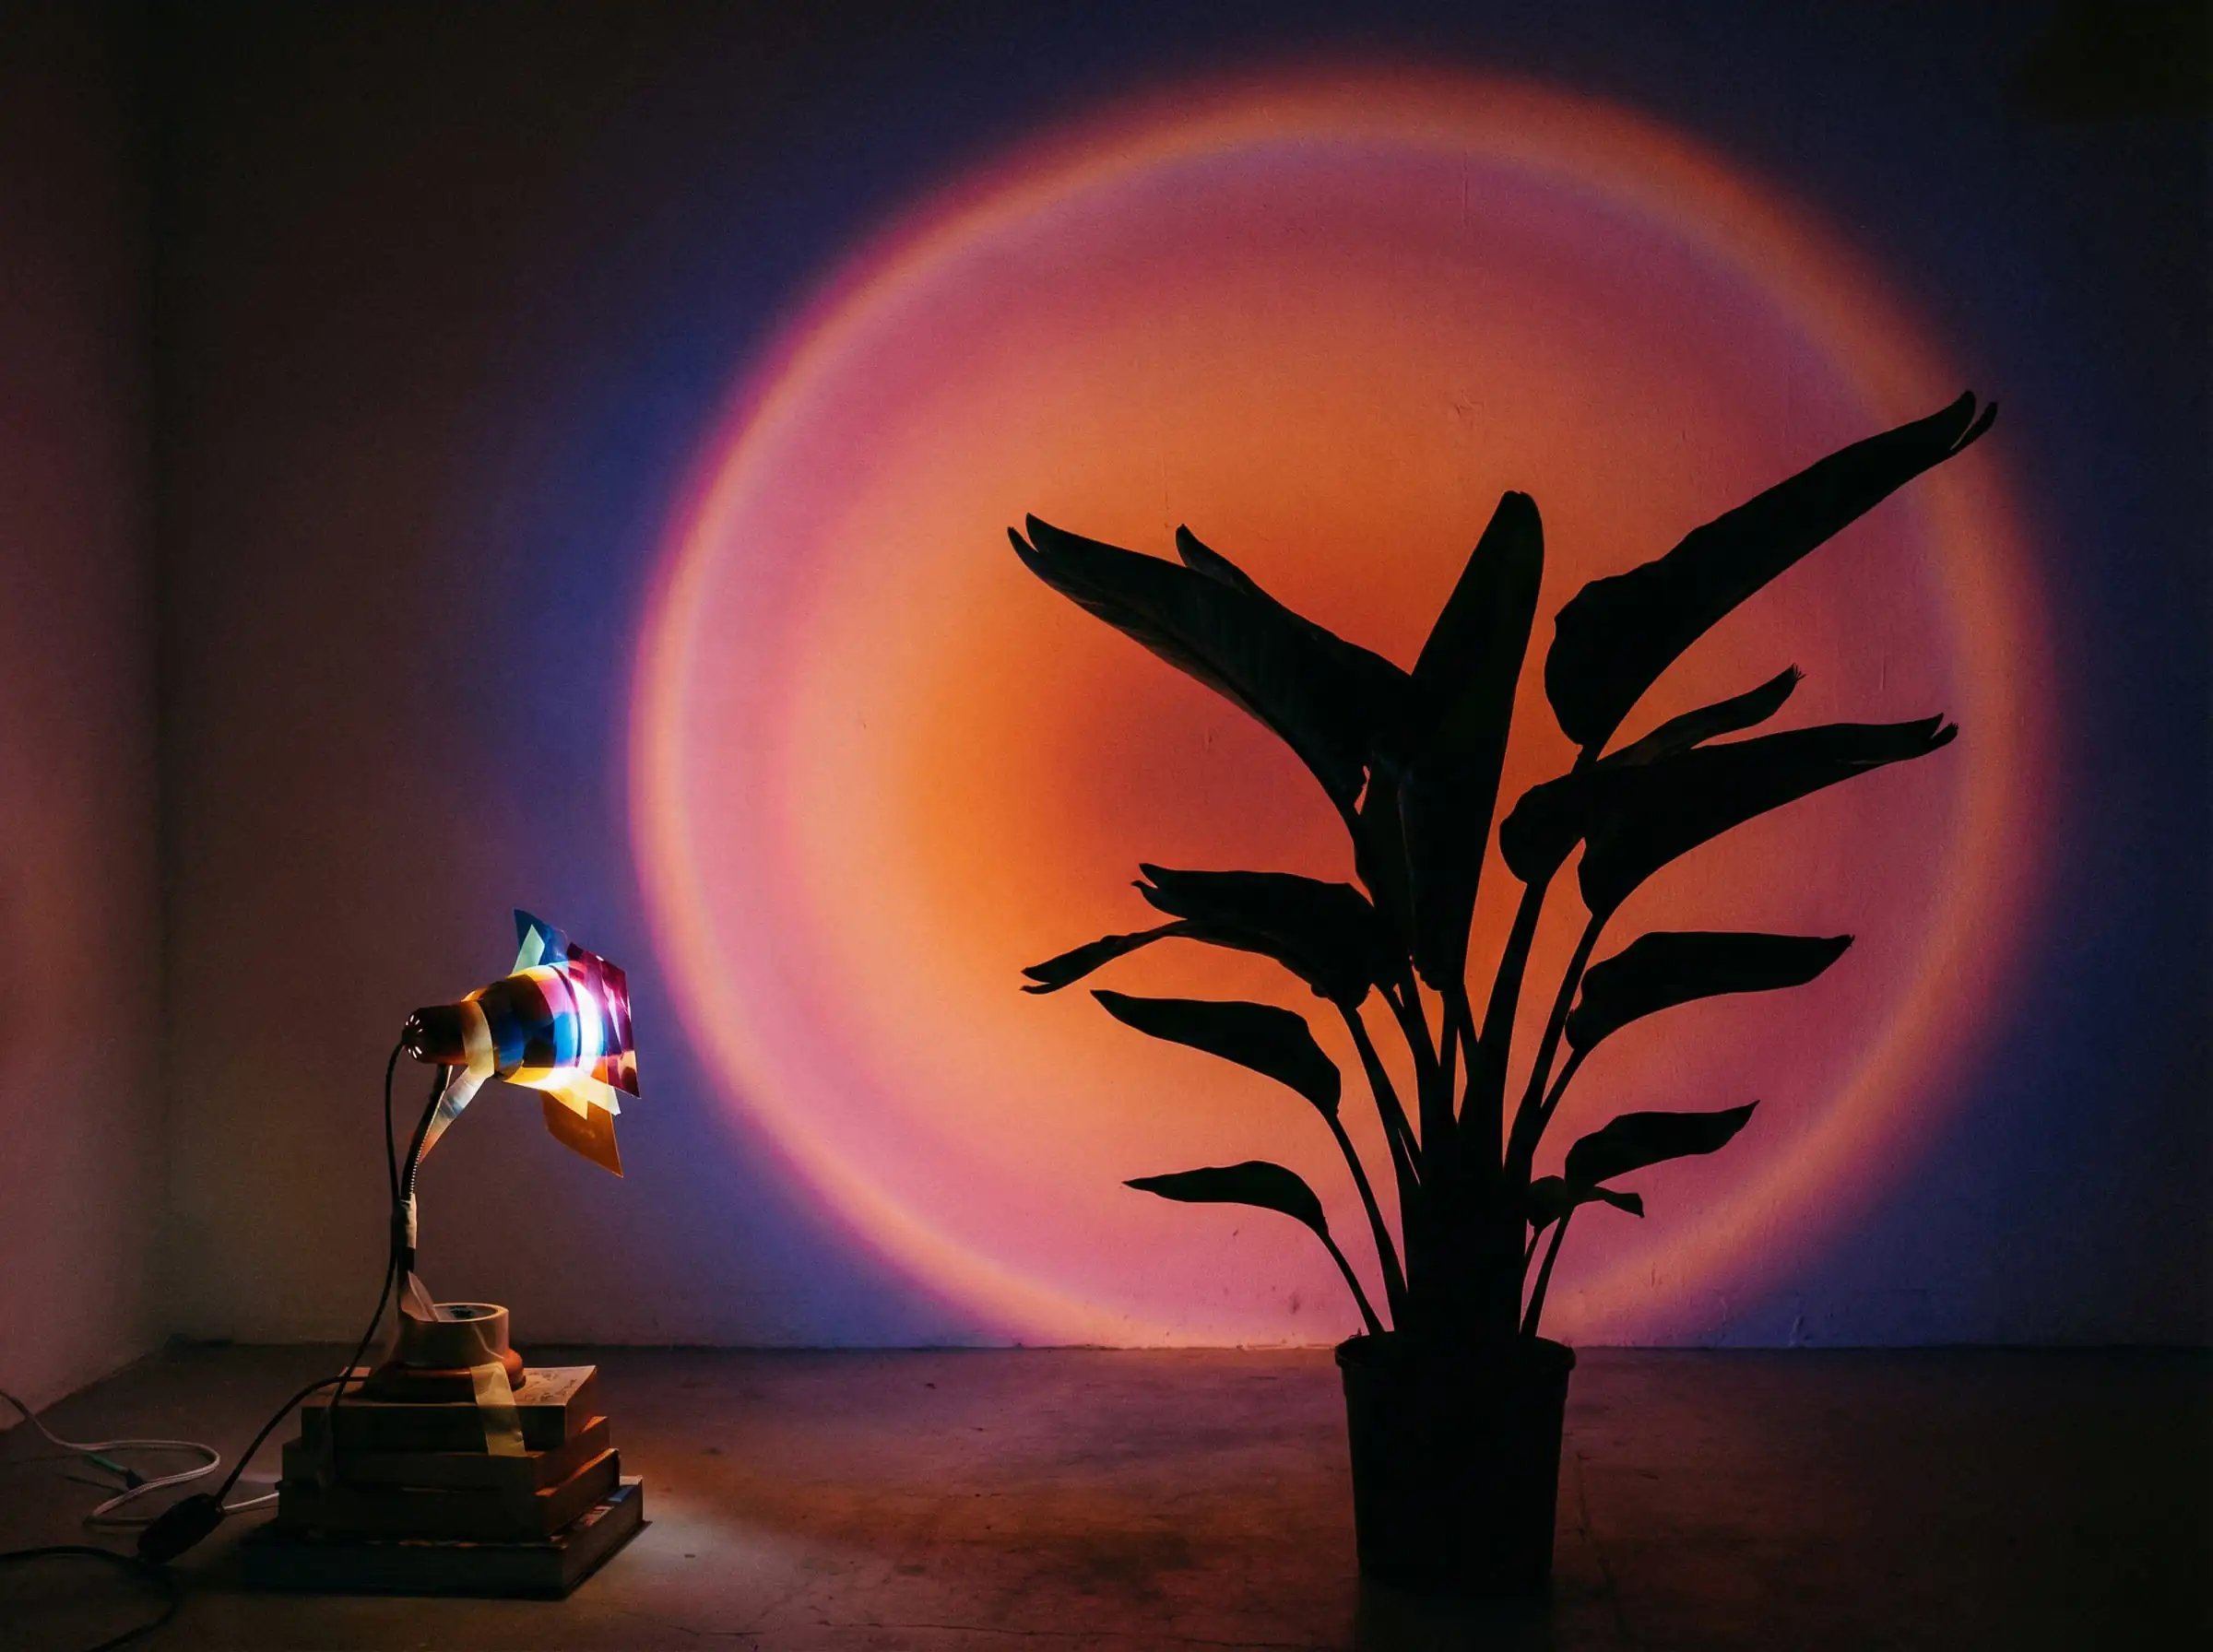
Sunset Projector Hack
Create that golden-hour glow without buying a projector lamp.
Difficulty: 🟢 Easy | Time: ⏱️ 10 Mins | Cost: 💲 Very Low
You Will Need:
Quick Steps:
- Color: Color a circle on the plastic sheet with the orange sharpie, blending it into pink and yellow at the edges.
- Cut: Cut the circle out to fit the lens of your flashlight or lamp.
- Tape: Tape the colored filter over the light source.
- Project: Aim the light at a white wall in a dark room. Adjust the distance to change the size of your “sunset.”
3. Furniture & Organization Hacks
Aesthetic rooms are often small spaces. These DIYs focus on storage that doubles as decor, ensuring your room looks tidy but stylish.
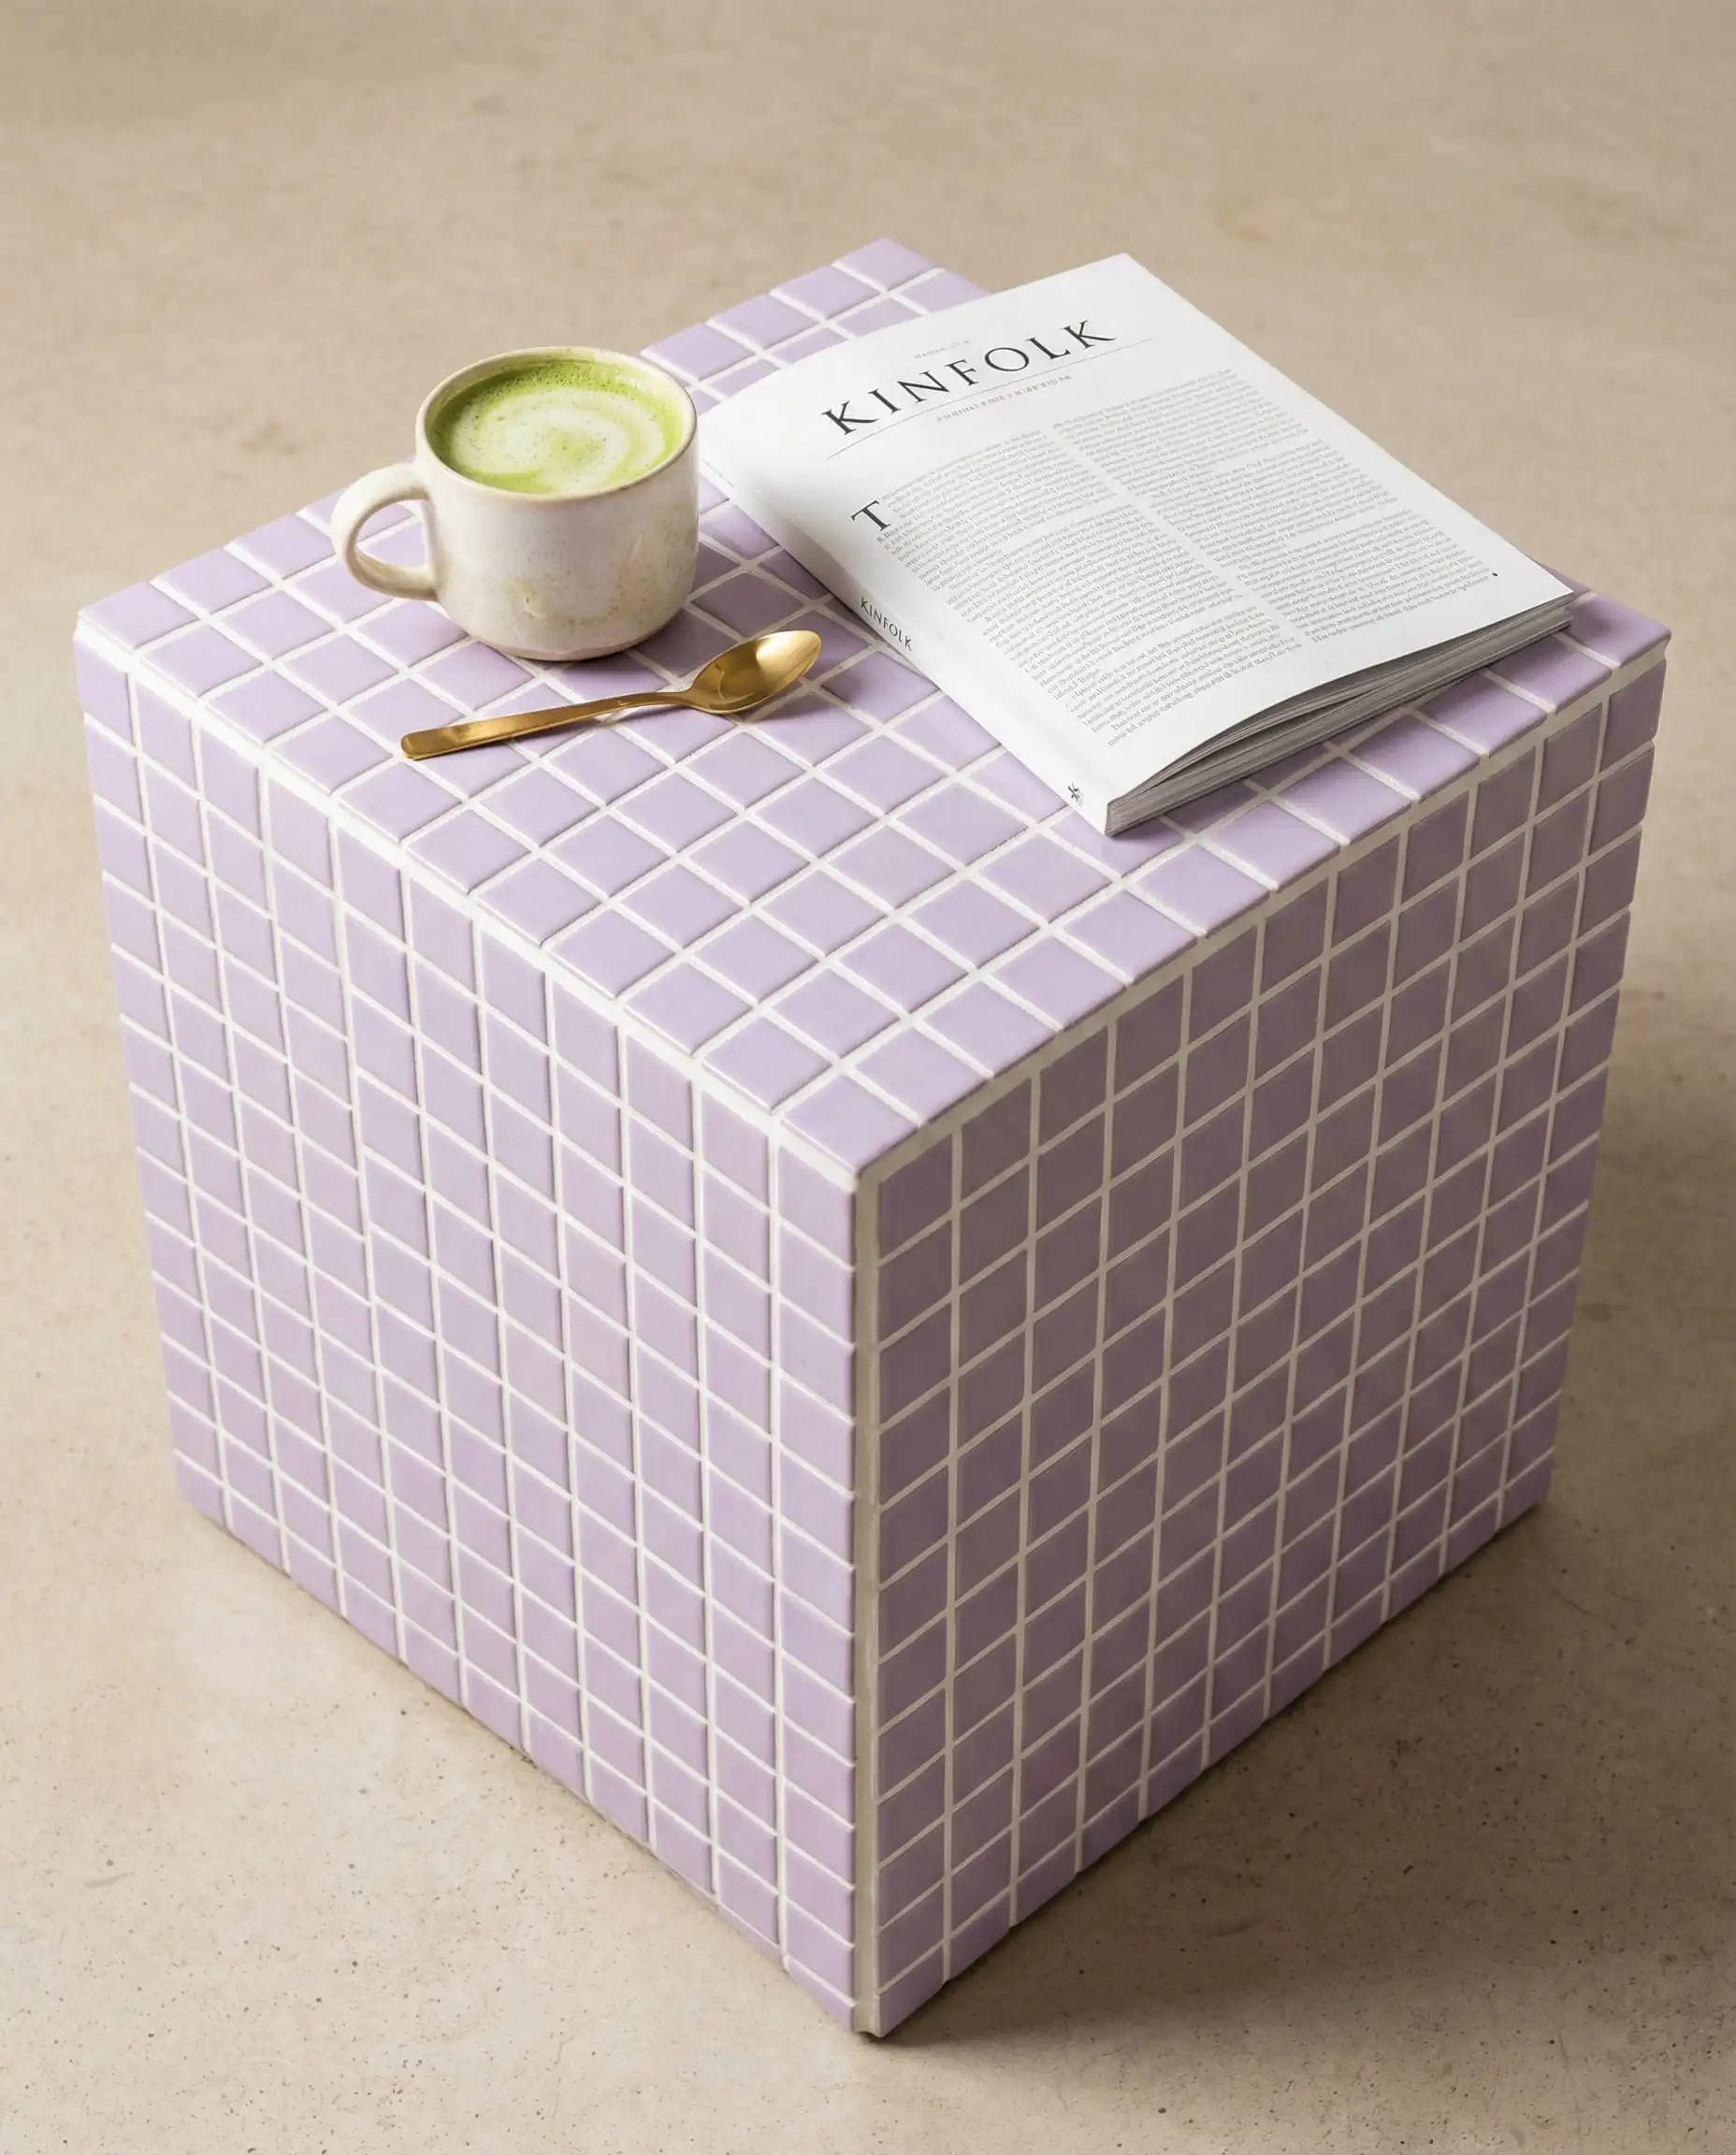
Tiled Cube Side Table
The “Grid” aesthetic is huge in 2026. This project looks incredibly expensive but is just basic tiling over a cheap base.
Difficulty: 🔴 Hard | Time: ⏱️ Weekend Project | Cost: 💲 Medium
You Will Need:
Quick Steps:
- Measure: Measure your cube and cut tile sheets to fit. It helps to pick a box size that fits full tiles so you don’t have to cut individual ceramic tiles.
- Adhere: Apply adhesive to the box with a notched trowel and press the tile sheets on. Let dry overnight.
- Grout: Spread grout over the tiles, pressing it into the gaps.
- Clean: Wait 20 minutes, then wipe away excess grout with a damp sponge until tiles are clean. Polish with a dry cloth once fully dry.
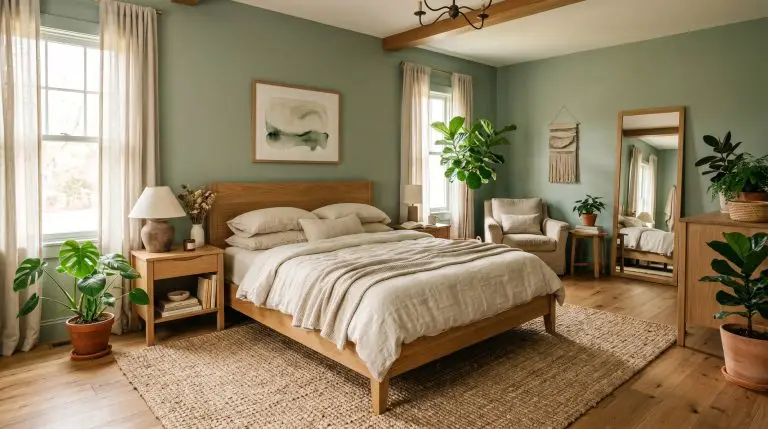
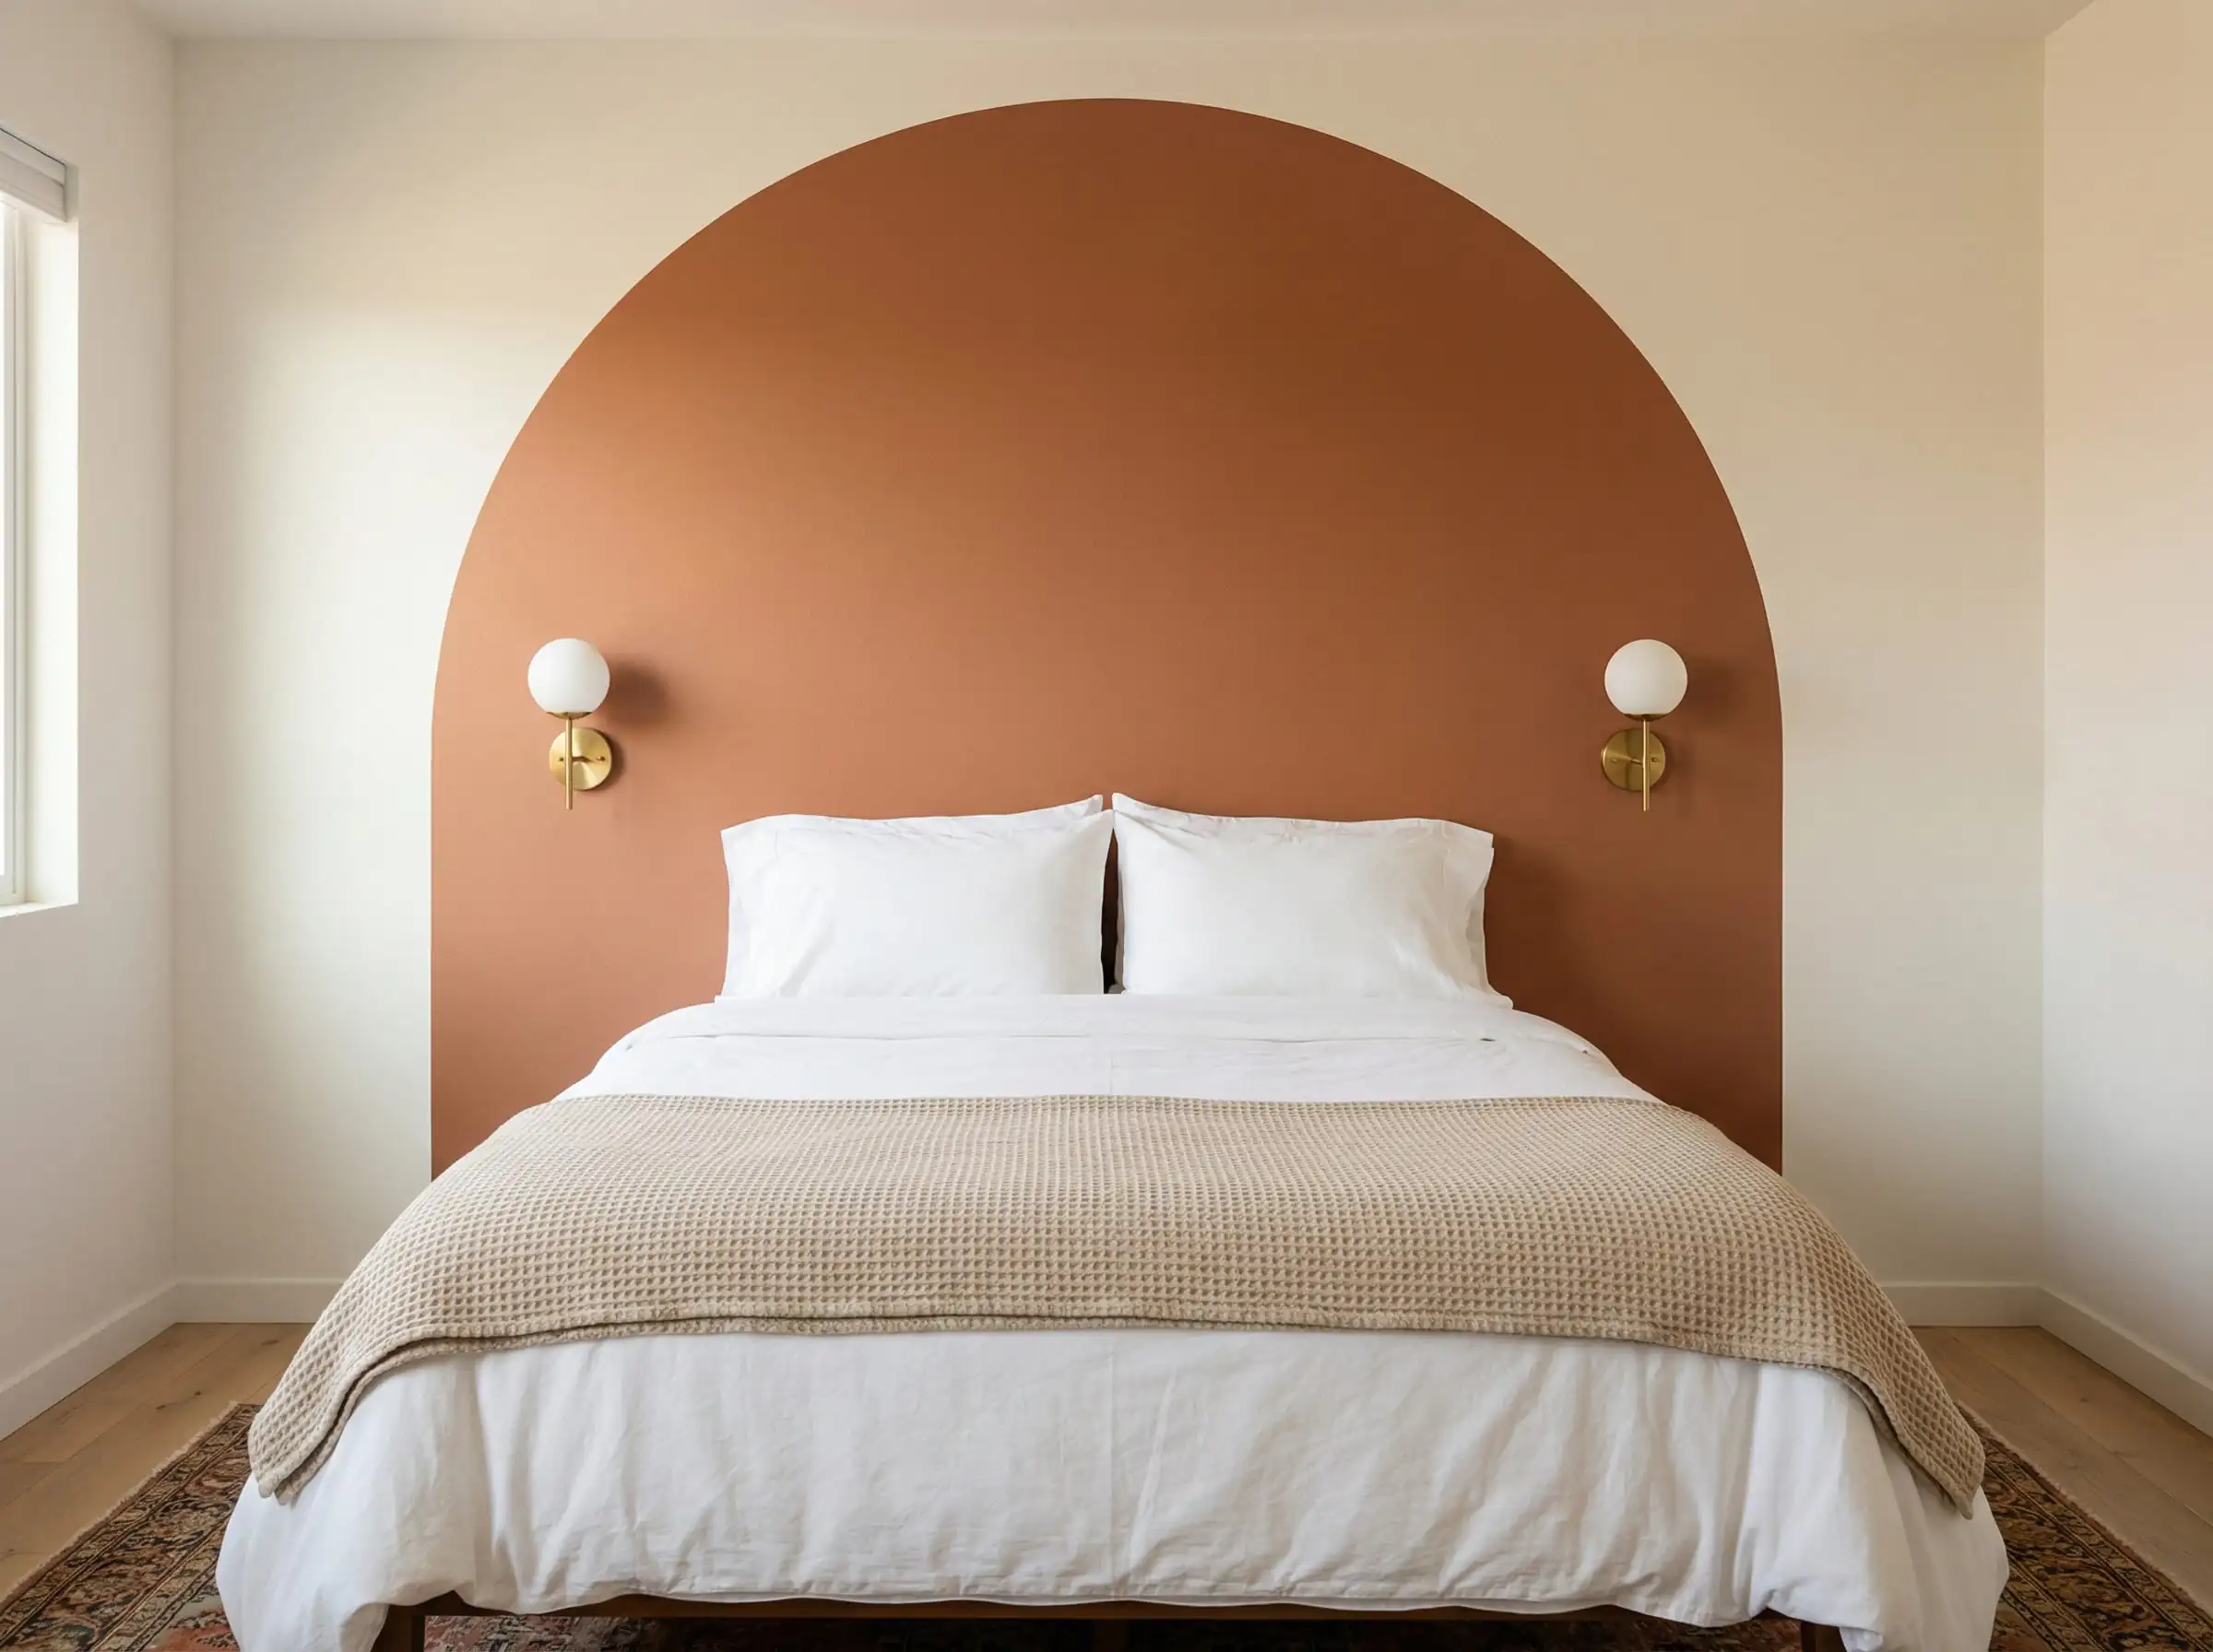
Painted Arch Headboard
No headboard? No problem. Paint one directly on the wall to zone your sleeping area. This is great for renters who can paint.
Difficulty: 🟡 Medium | Time: ⏱️ 2 Hours | Cost: 💲 Low
You Will Need:
Quick Steps:
- Measure: Measure the width of your bed. Find the center point on the wall.
- Draw: Tie a string to a pencil. Tape the other end of the string to the center point on the wall at the height you want the arch to start.
- Arc: Pull the string taut and draw a semi-circle arch.
- Tape: Use painter’s tape to mark the straight vertical lines down to the floor from the edges of your arch.
- Paint: Paint inside the lines. Peel the tape while the paint is still slightly wet for crisp lines.
Looking for the right color? See our guide on trending interior design styles to find a palette that fits your vibe.
💡 Hackrea Pro Tip
DIY Crate Shelving
Modular, renter-friendly, and very rustic-chic. You can change the shape whenever you move.

Difficulty: 🟢 Easy | Time: ⏱️ 1 Hour | Cost: 💲 Low
You Will Need:
Quick Steps:
- Prep: Sand any rough edges on the crates.
- Stain: Stain them oak or walnut for a warmer look, or white for a clean look.
- Stack: Arrange them in an asymmetric design (some vertical, some horizontal).
- Secure: Secure them together using heavy-duty binder clips (no drill needed!) or screws for stability.
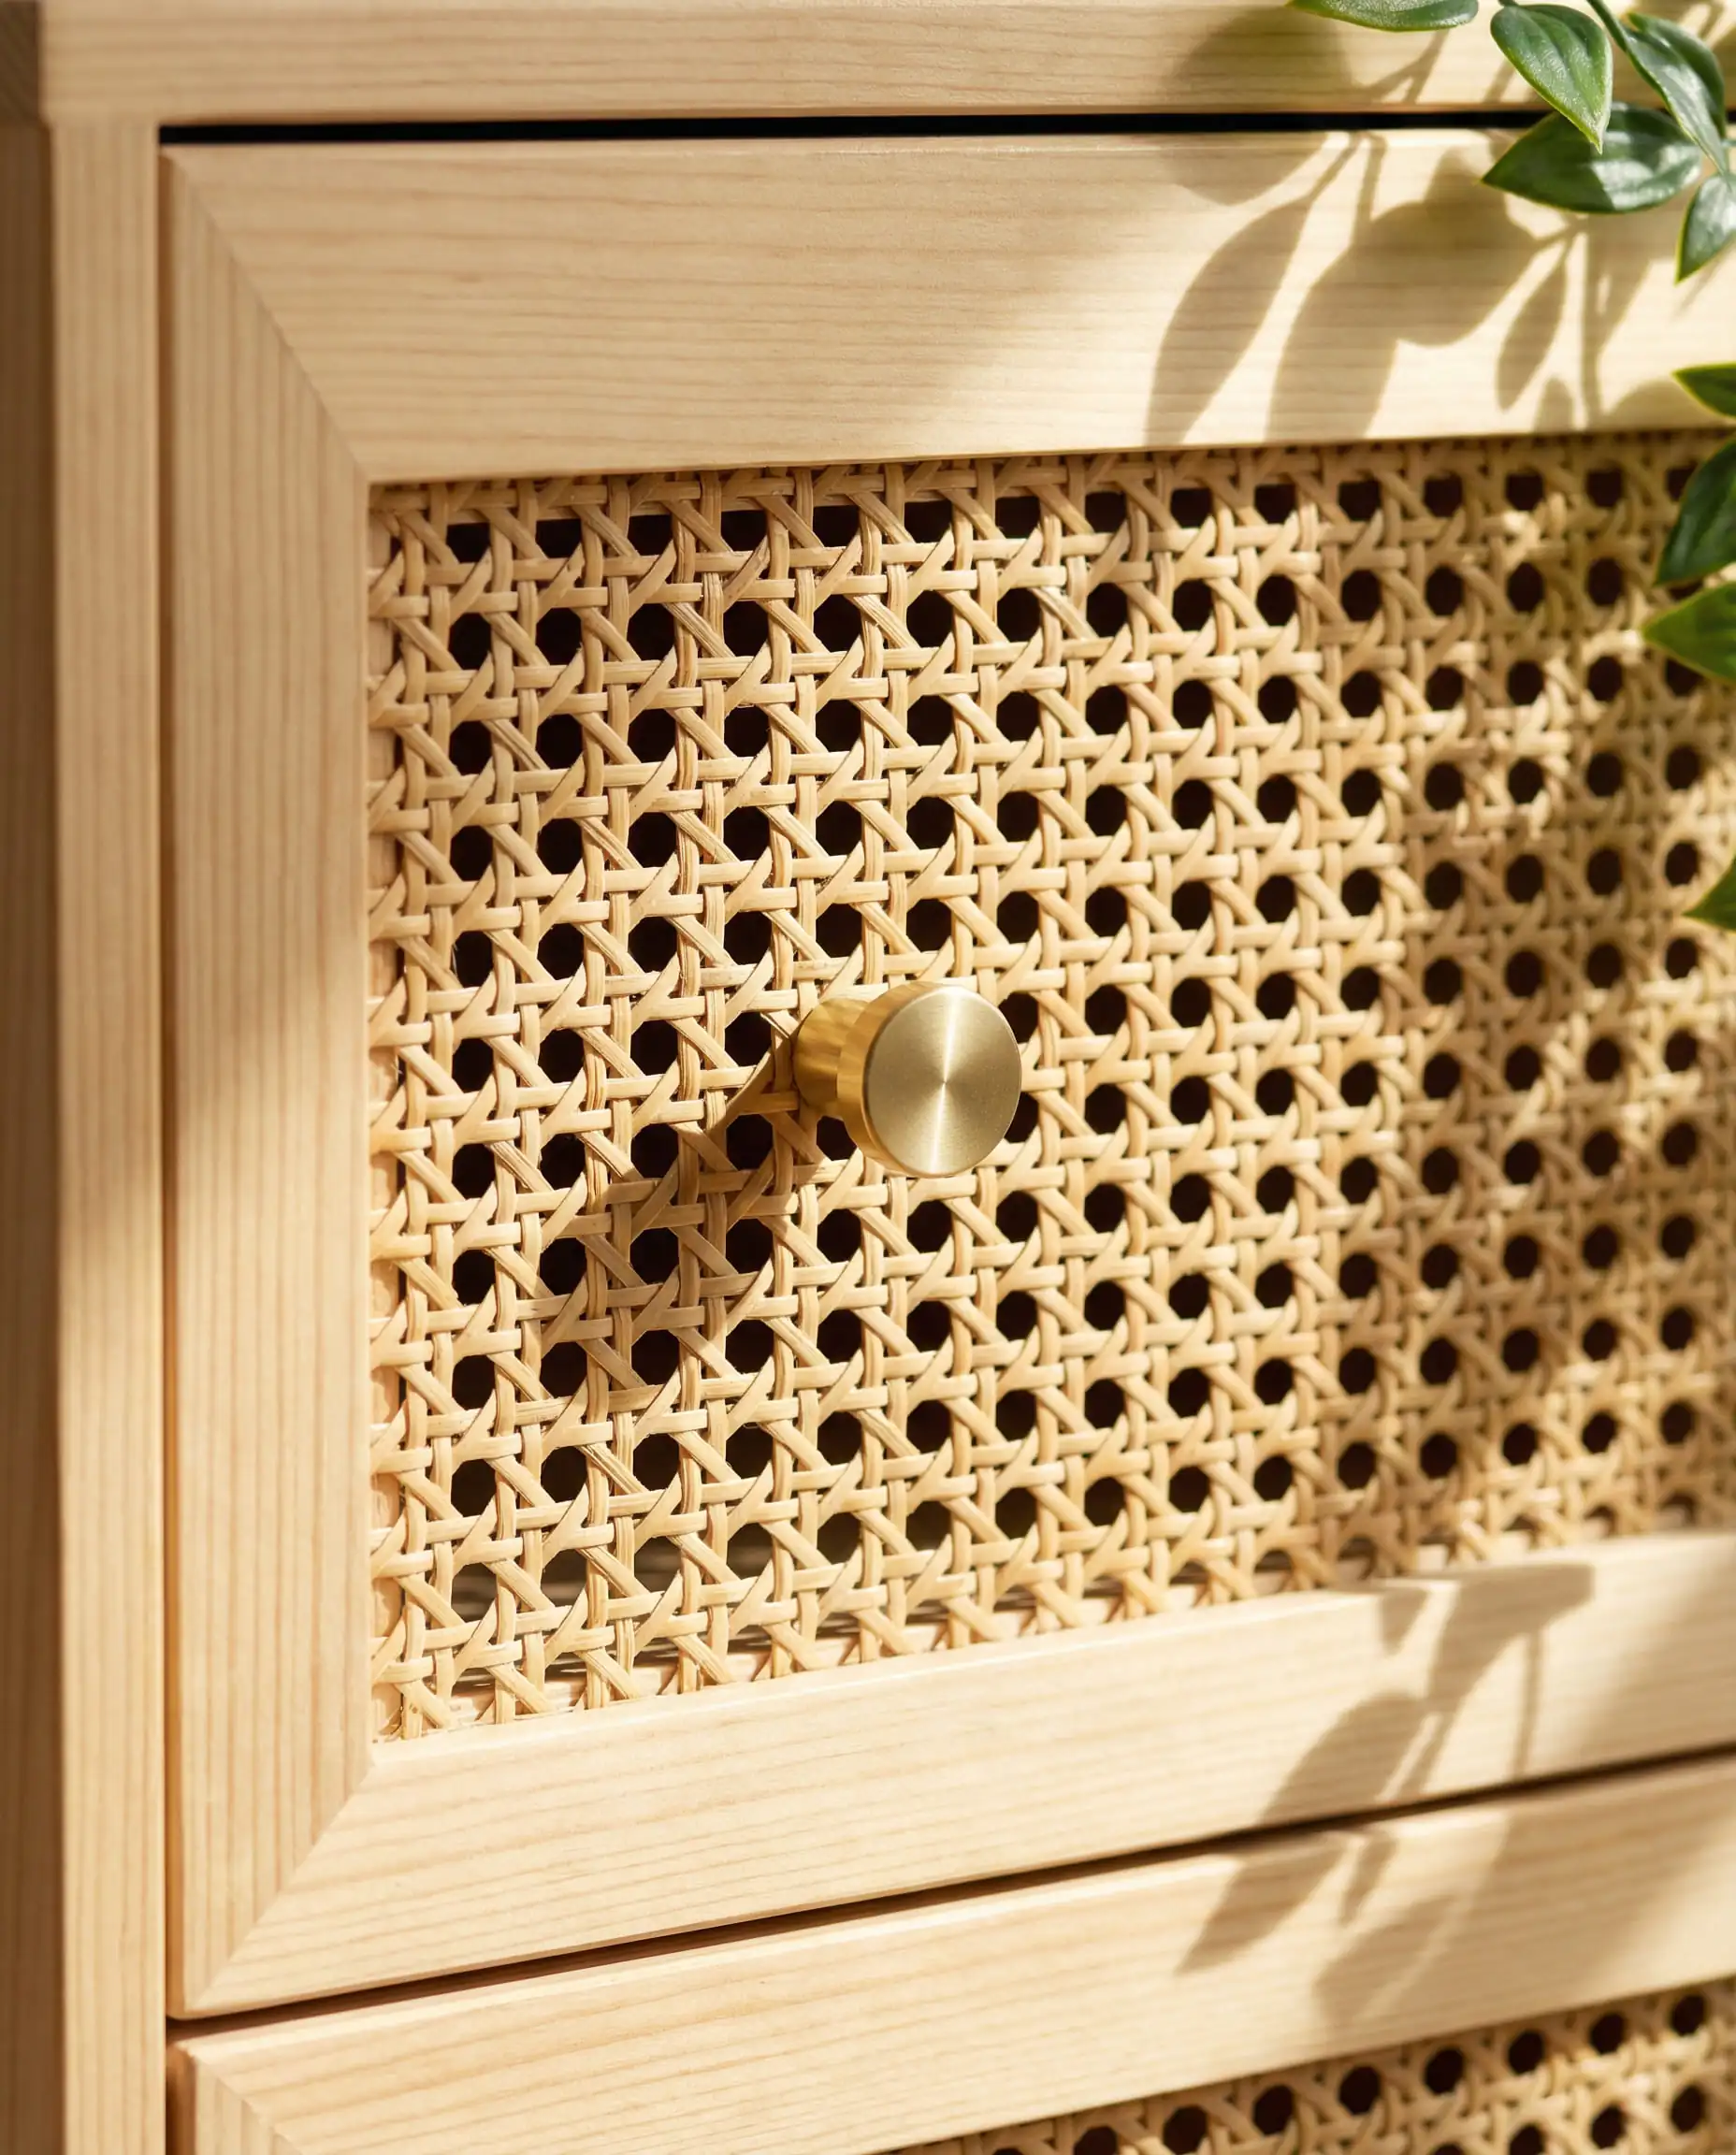
Rattan/Cane Webbing Upcycle
Give generic furniture a high-end, organic look by adding cane webbing to the doors or drawers.
Difficulty: 🟡 Medium | Time: ⏱️ 3 Hours | Cost: 💲 Medium
You Will Need:
Quick Steps:
- Soak: Soak the cane webbing in warm water for 30 minutes. This makes it flexible and it will tighten as it dries.
- Cut: Cut the webbing to size (leaving 1 inch overlap).
- Attach: Remove the center panel of your cabinet door (or cut a hole). Staple the wet webbing to the back of the door frame.
- Trim: Trim excess material. Once it dries, it will be drum-tight.
4. Biophilic & Nature Decor
Bringing the outdoors in is essential for mental well-being and the “clean girl” aesthetic. Plants are the best decor, but how you display them matters.
Macrame Plant Hangers
Textiles add softness to a room. Macrame is easier than it looks and saves precious shelf space.

Difficulty: 🟡 Medium | Time: ⏱️ 1 Hour | Cost: 💲 Low
You Will Need:
Quick Steps:
- Cut: Cut 4 lengths of cord (about 2 meters each).
- Loop: Fold them in half and loop them through the wooden ring (now you have 8 strands).
- Knot: Tie simple square knots to create a mesh net about 1 foot down from the ring.
- Hang: Place your pot inside the net and hang from a ceiling hook.
Not sure which plants to choose for your vibe? We have a complete guide on jungle interior design that lists the best species for lush interiors.
🌿 Hackrea Plant Tip
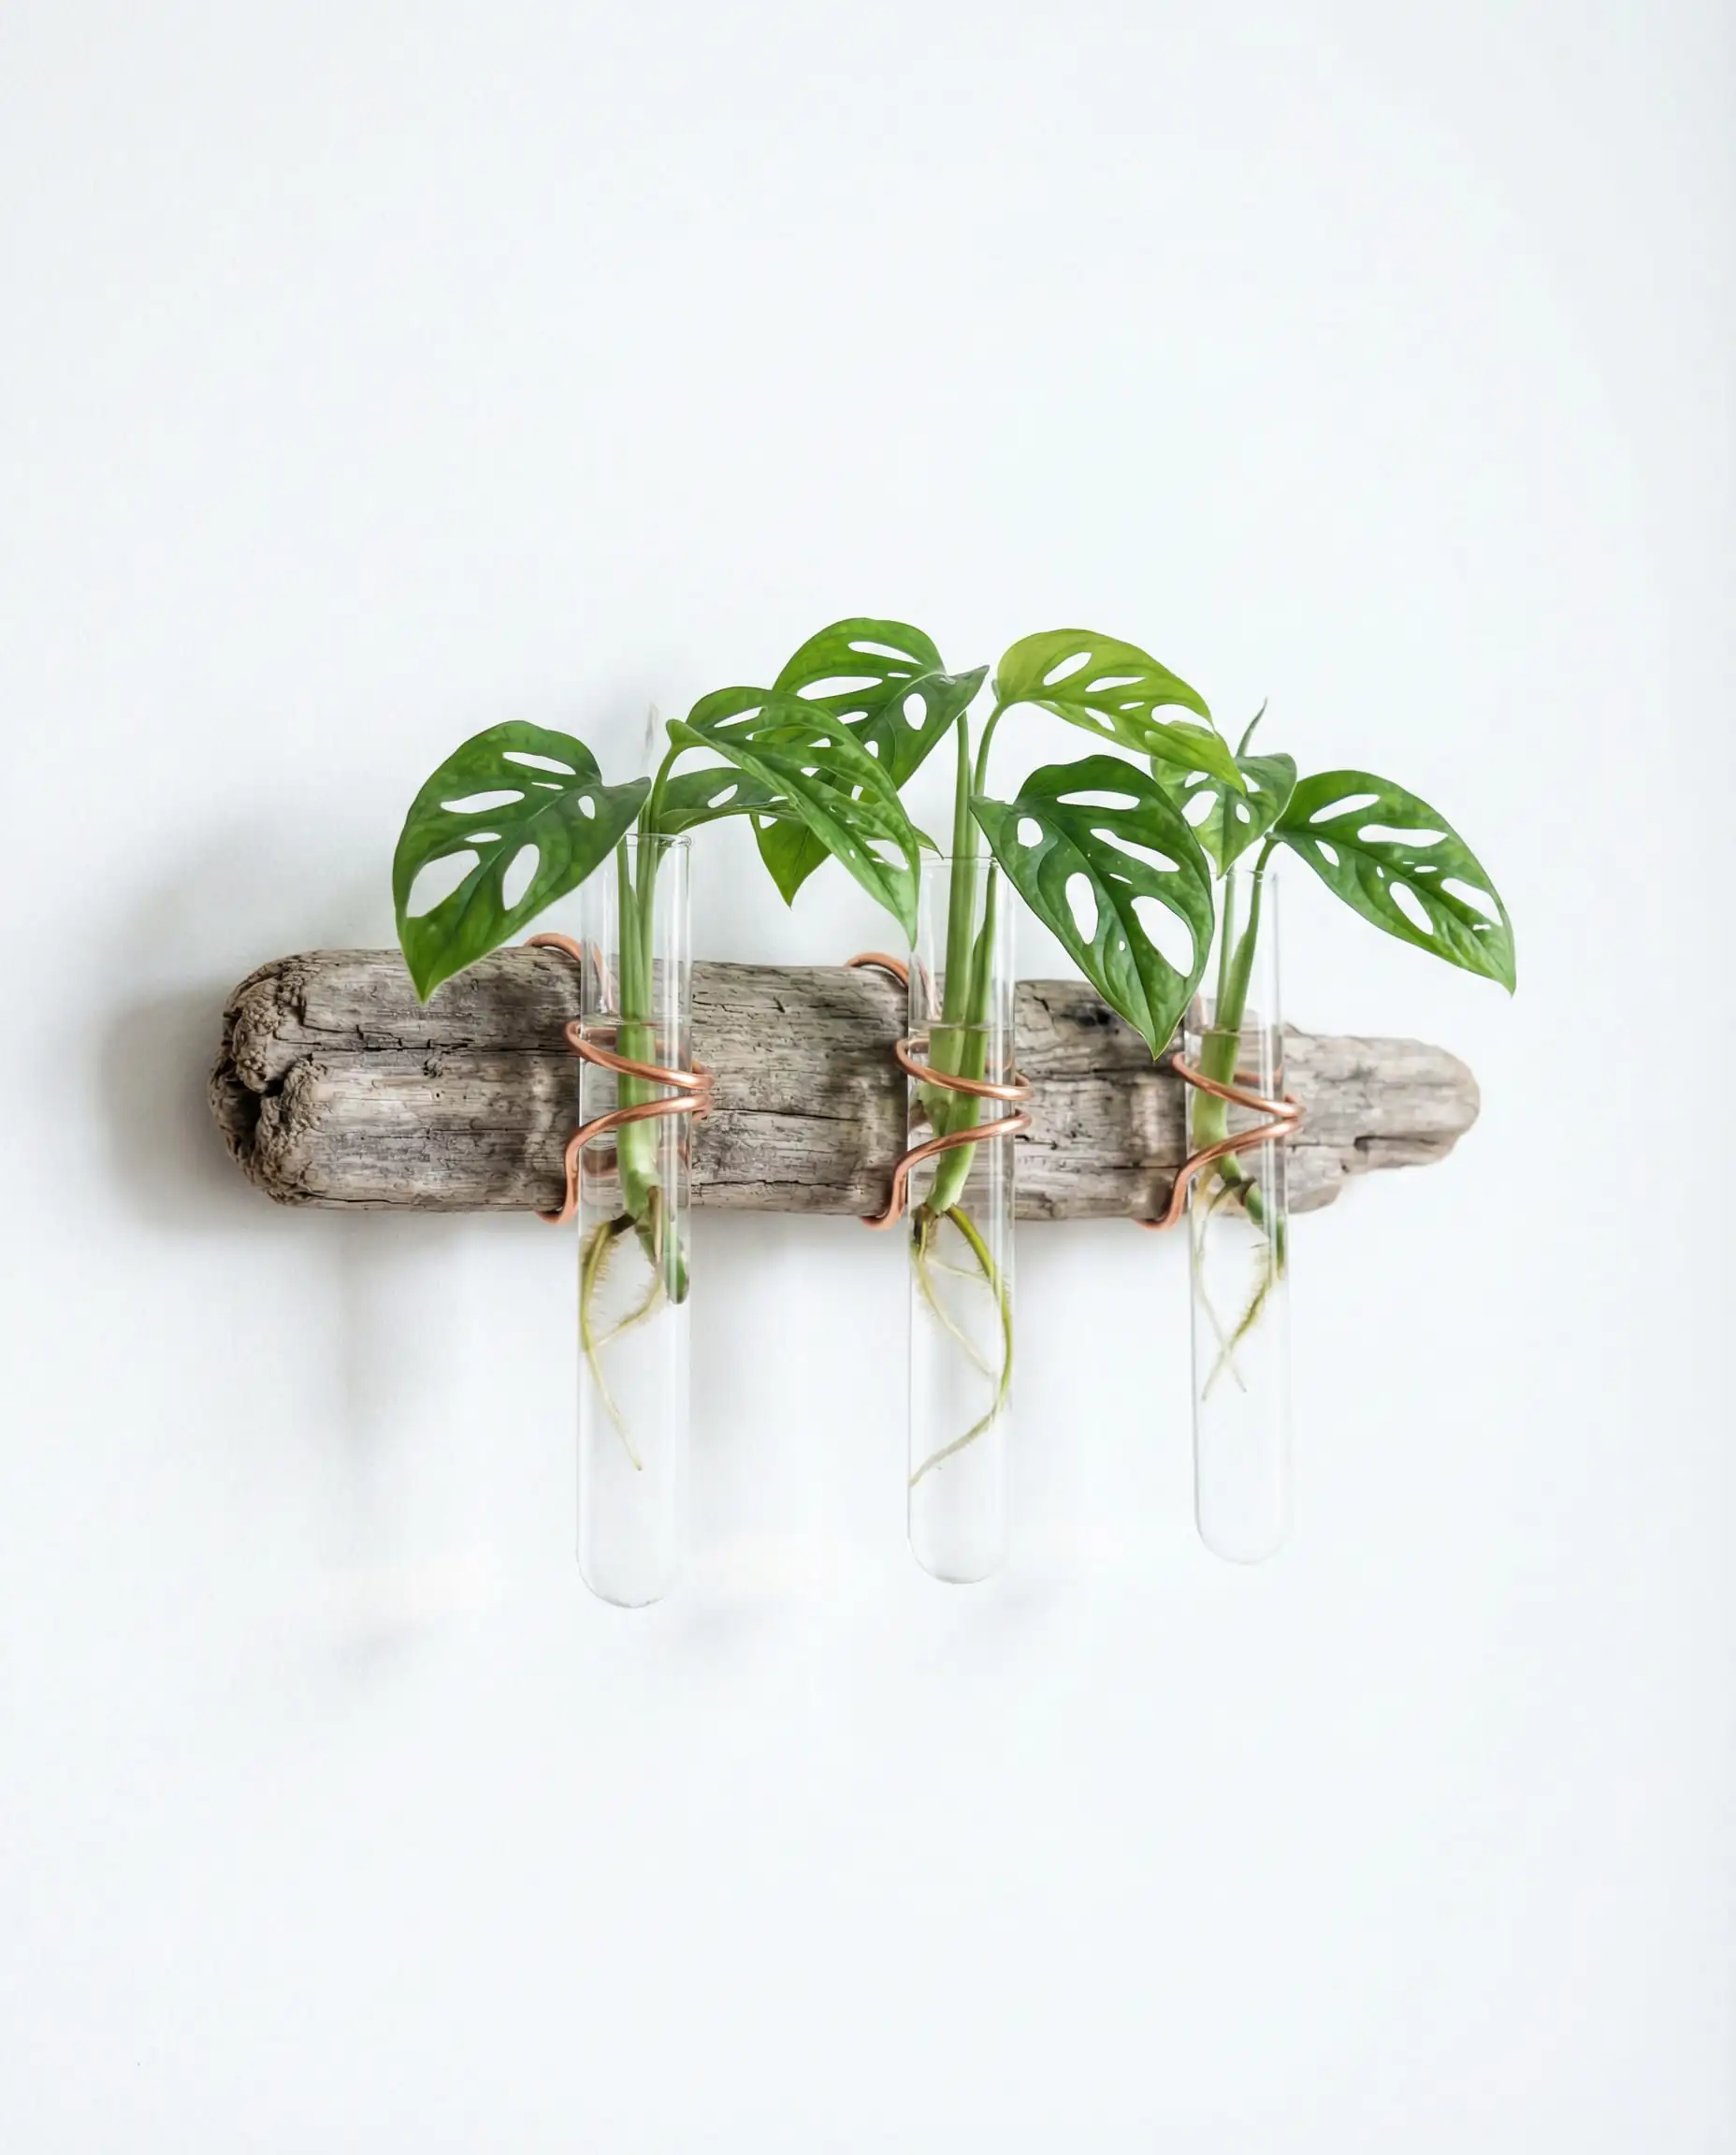
Propagation Station Wall
Turn your plant cuttings into a living science experiment and art piece.
Difficulty: 🟡 Medium | Time: ⏱️ 1 Hour | Cost: 💲 Low
You Will Need:
Quick Steps:
- Wrap: Wrap copper wire around the neck of the test tube, creating a loop/hanger.
- Mount: Attach the loop to your wood using a nail or staple.
- Repeat: Do this for 3-5 tubes at varying heights.
- Grow: Fill with water and add your plant cuttings. Watch the roots grow over weeks!
Moss Wall Art Frame
No sun? No problem. Preserved moss stays green forever with zero maintenance.
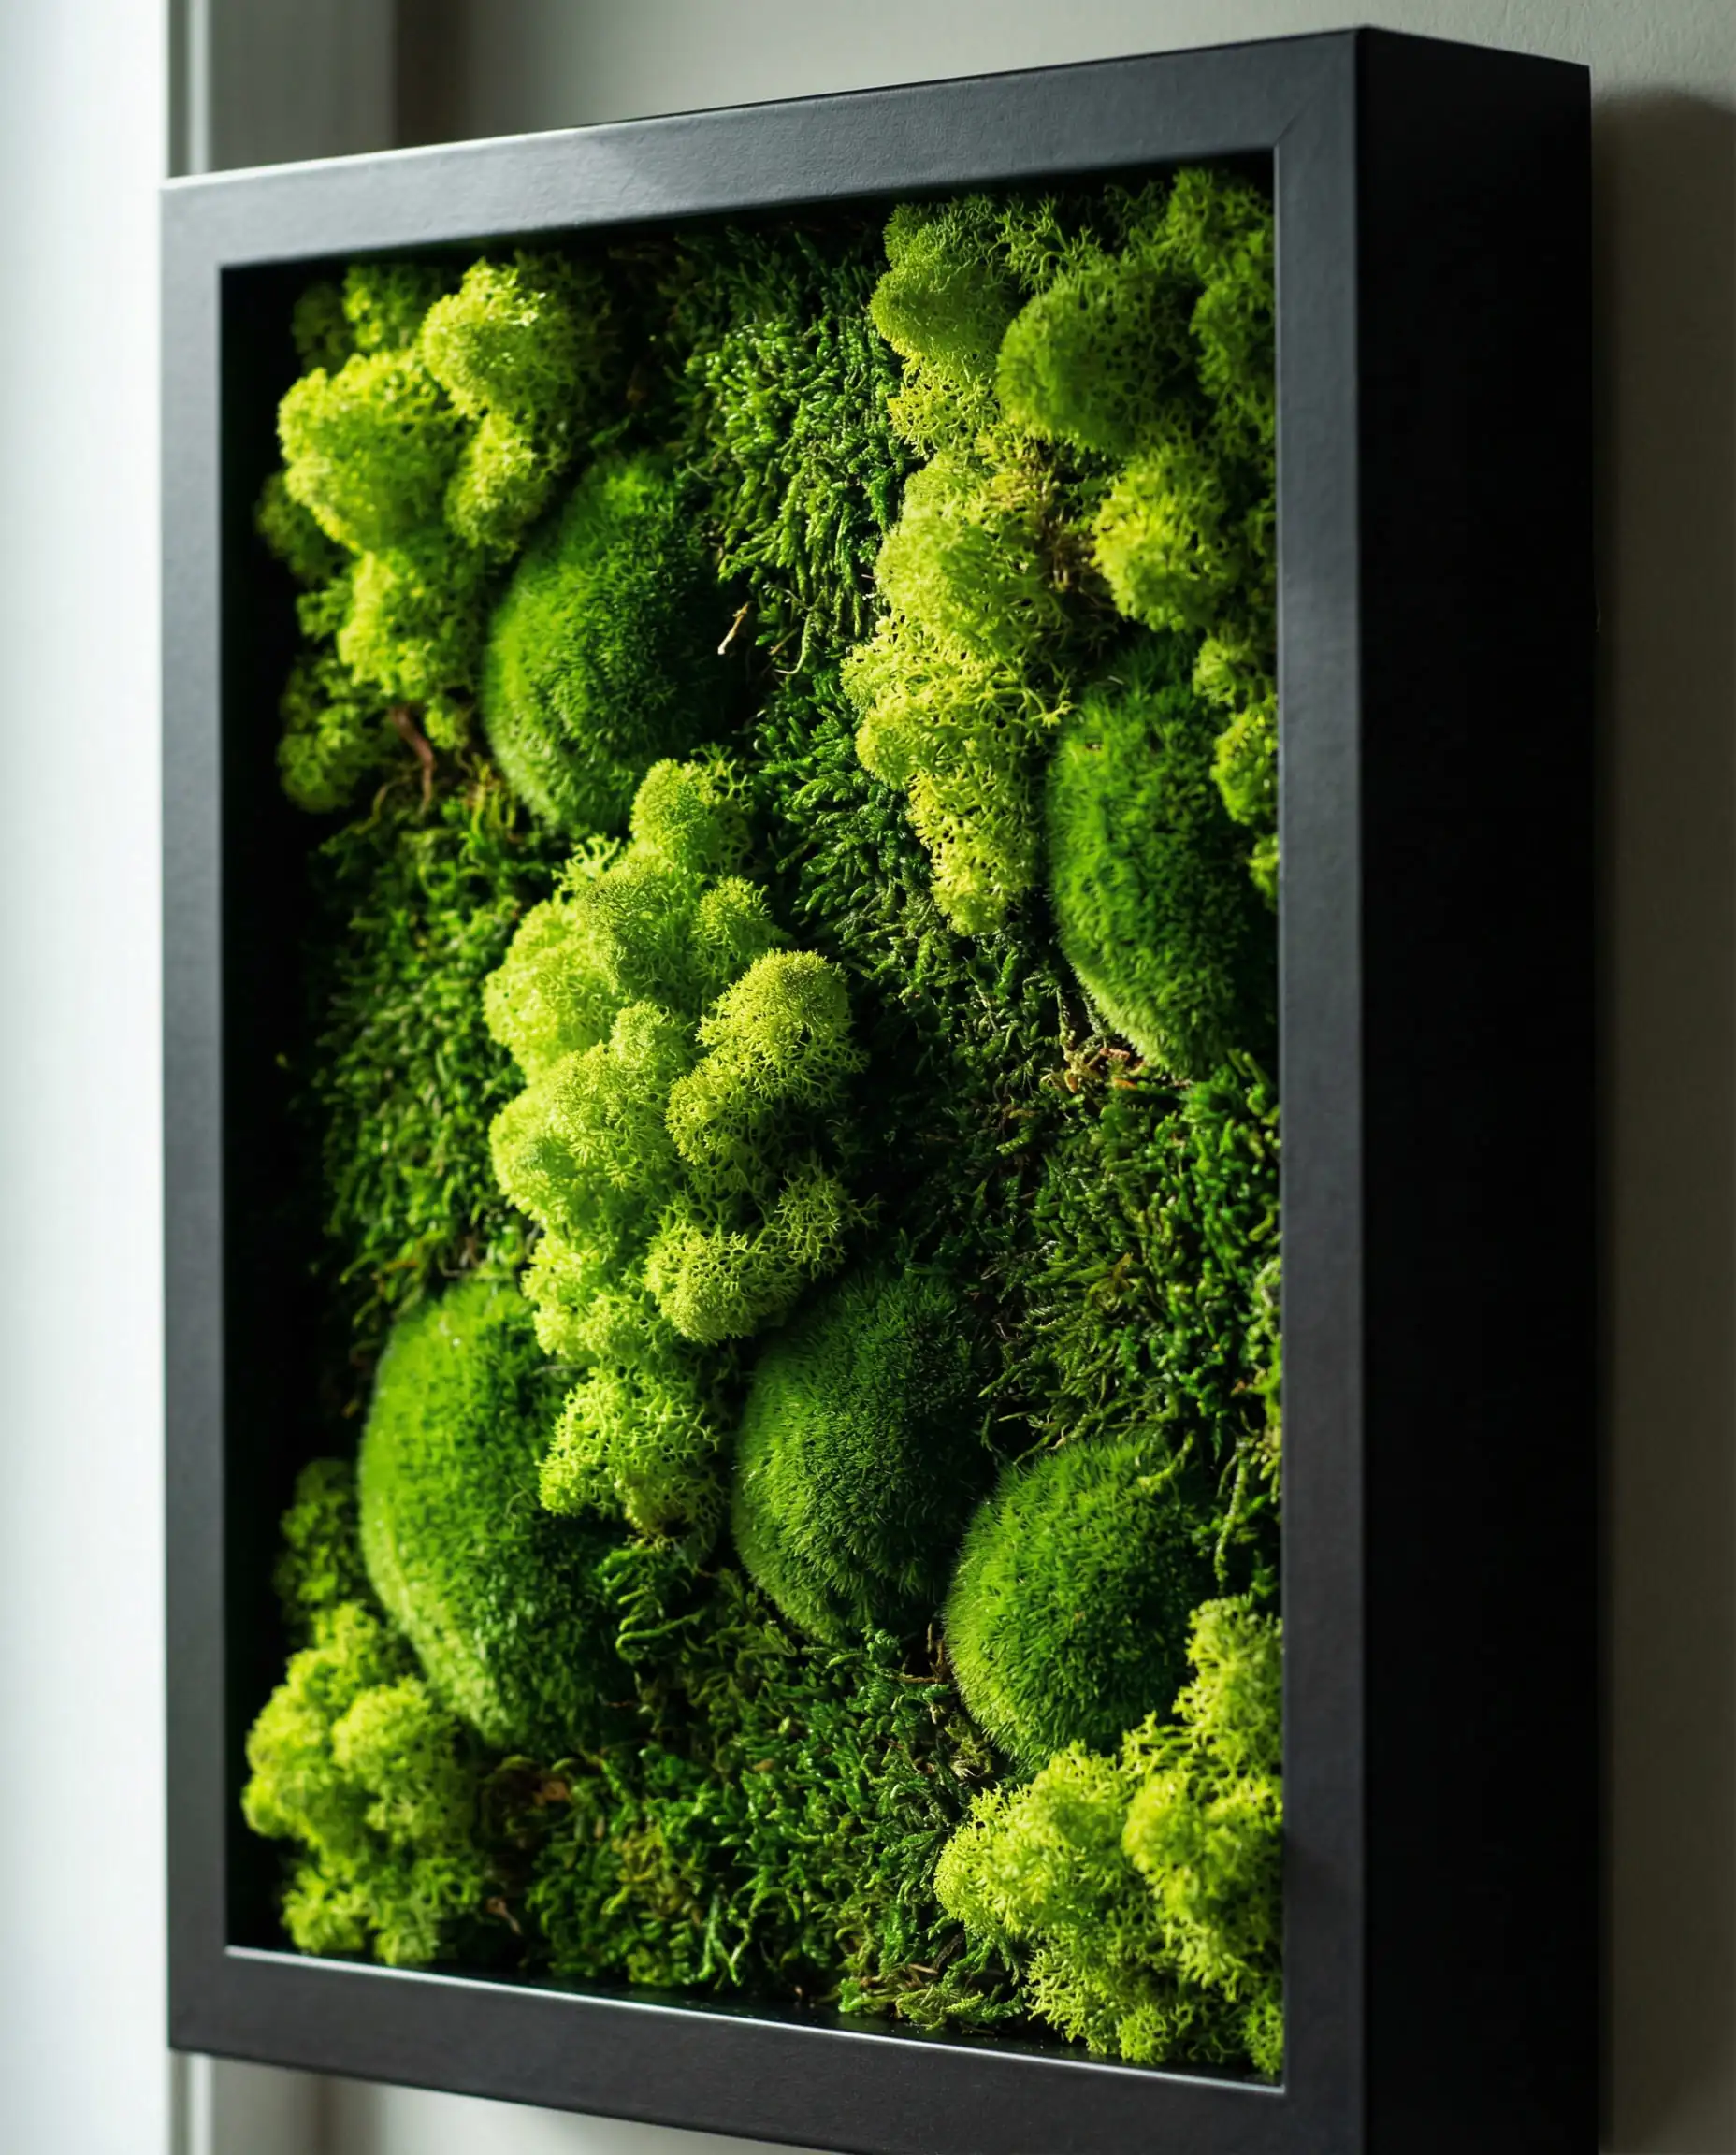
Difficulty: 🟢 Easy | Time: ⏱️ 45 Mins | Cost: 💲 Medium
You Will Need:
Quick Steps:
- Plan: Lay out your moss designs. Mixing different textures (sheet moss, mood moss, reindeer moss) creates a 3D landscape effect.
- Glue: Apply hot glue to the backing board of the frame.
- Press: Press chunks of moss into the glue. Pack them tightly so no backing board is visible.
- Hang: Display on a wall that doesn’t get direct sunlight (sun fades the dyed moss).
See more ideas for incorporating greenery in our living green wall ideas article.
5. Textile & Soft Decor (Cozy Core)
“Cozy Core” is all about soft textures that make you want to nap. These projects add physical comfort to the visual aesthetic.
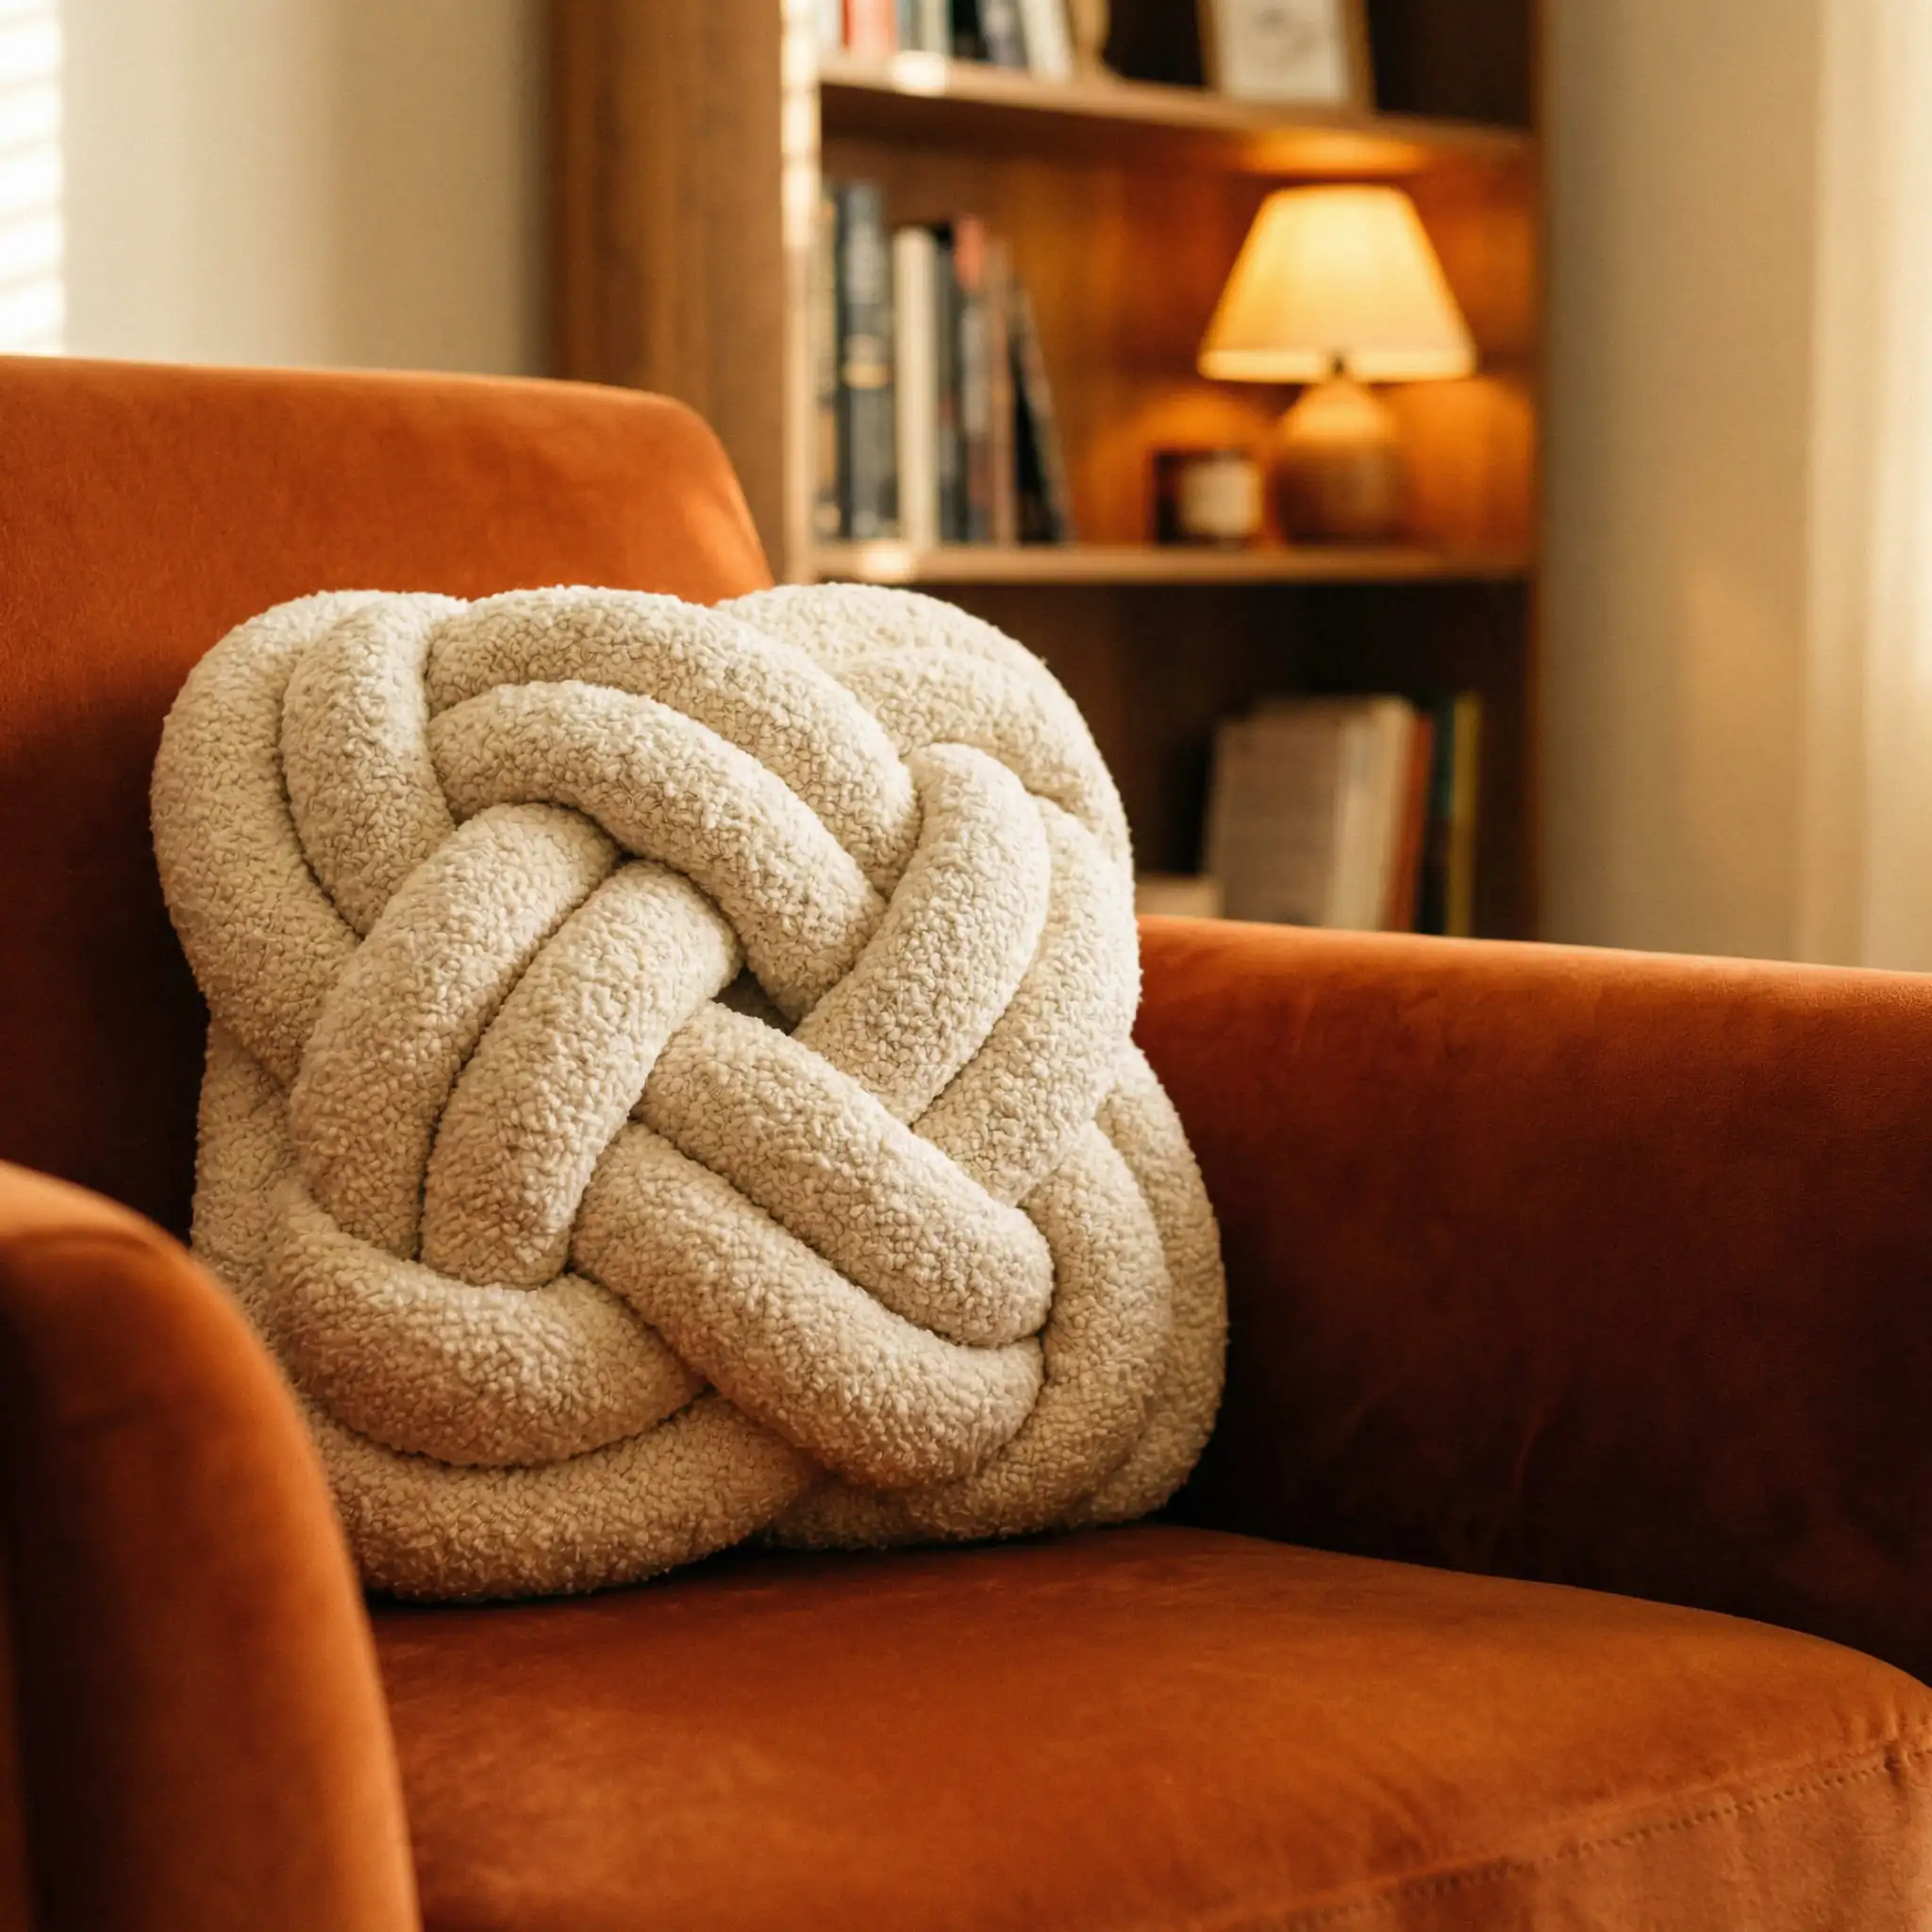
No-Sew Fleece Knotted Pillows
These fun, sculptural pillows are everywhere. You don’t need a sewing machine to make one.
Difficulty: 🟢 Easy | Time: ⏱️ 1 Hour | Cost: 💲 Low
You Will Need:
Quick Steps:
- Stuff: Sew or glue a long tube of fabric and stuff it firmly with poly-fil until you have a long “snake.”
- Knot: Tie the snake into a “Celtic Knot” or a simple ball knot. (YouTube has great tutorials for “monkey fist knots”).
- Tuck: Tuck the ends into the center of the knot and secure with a dab of hot glue or a safety pin hidden inside.
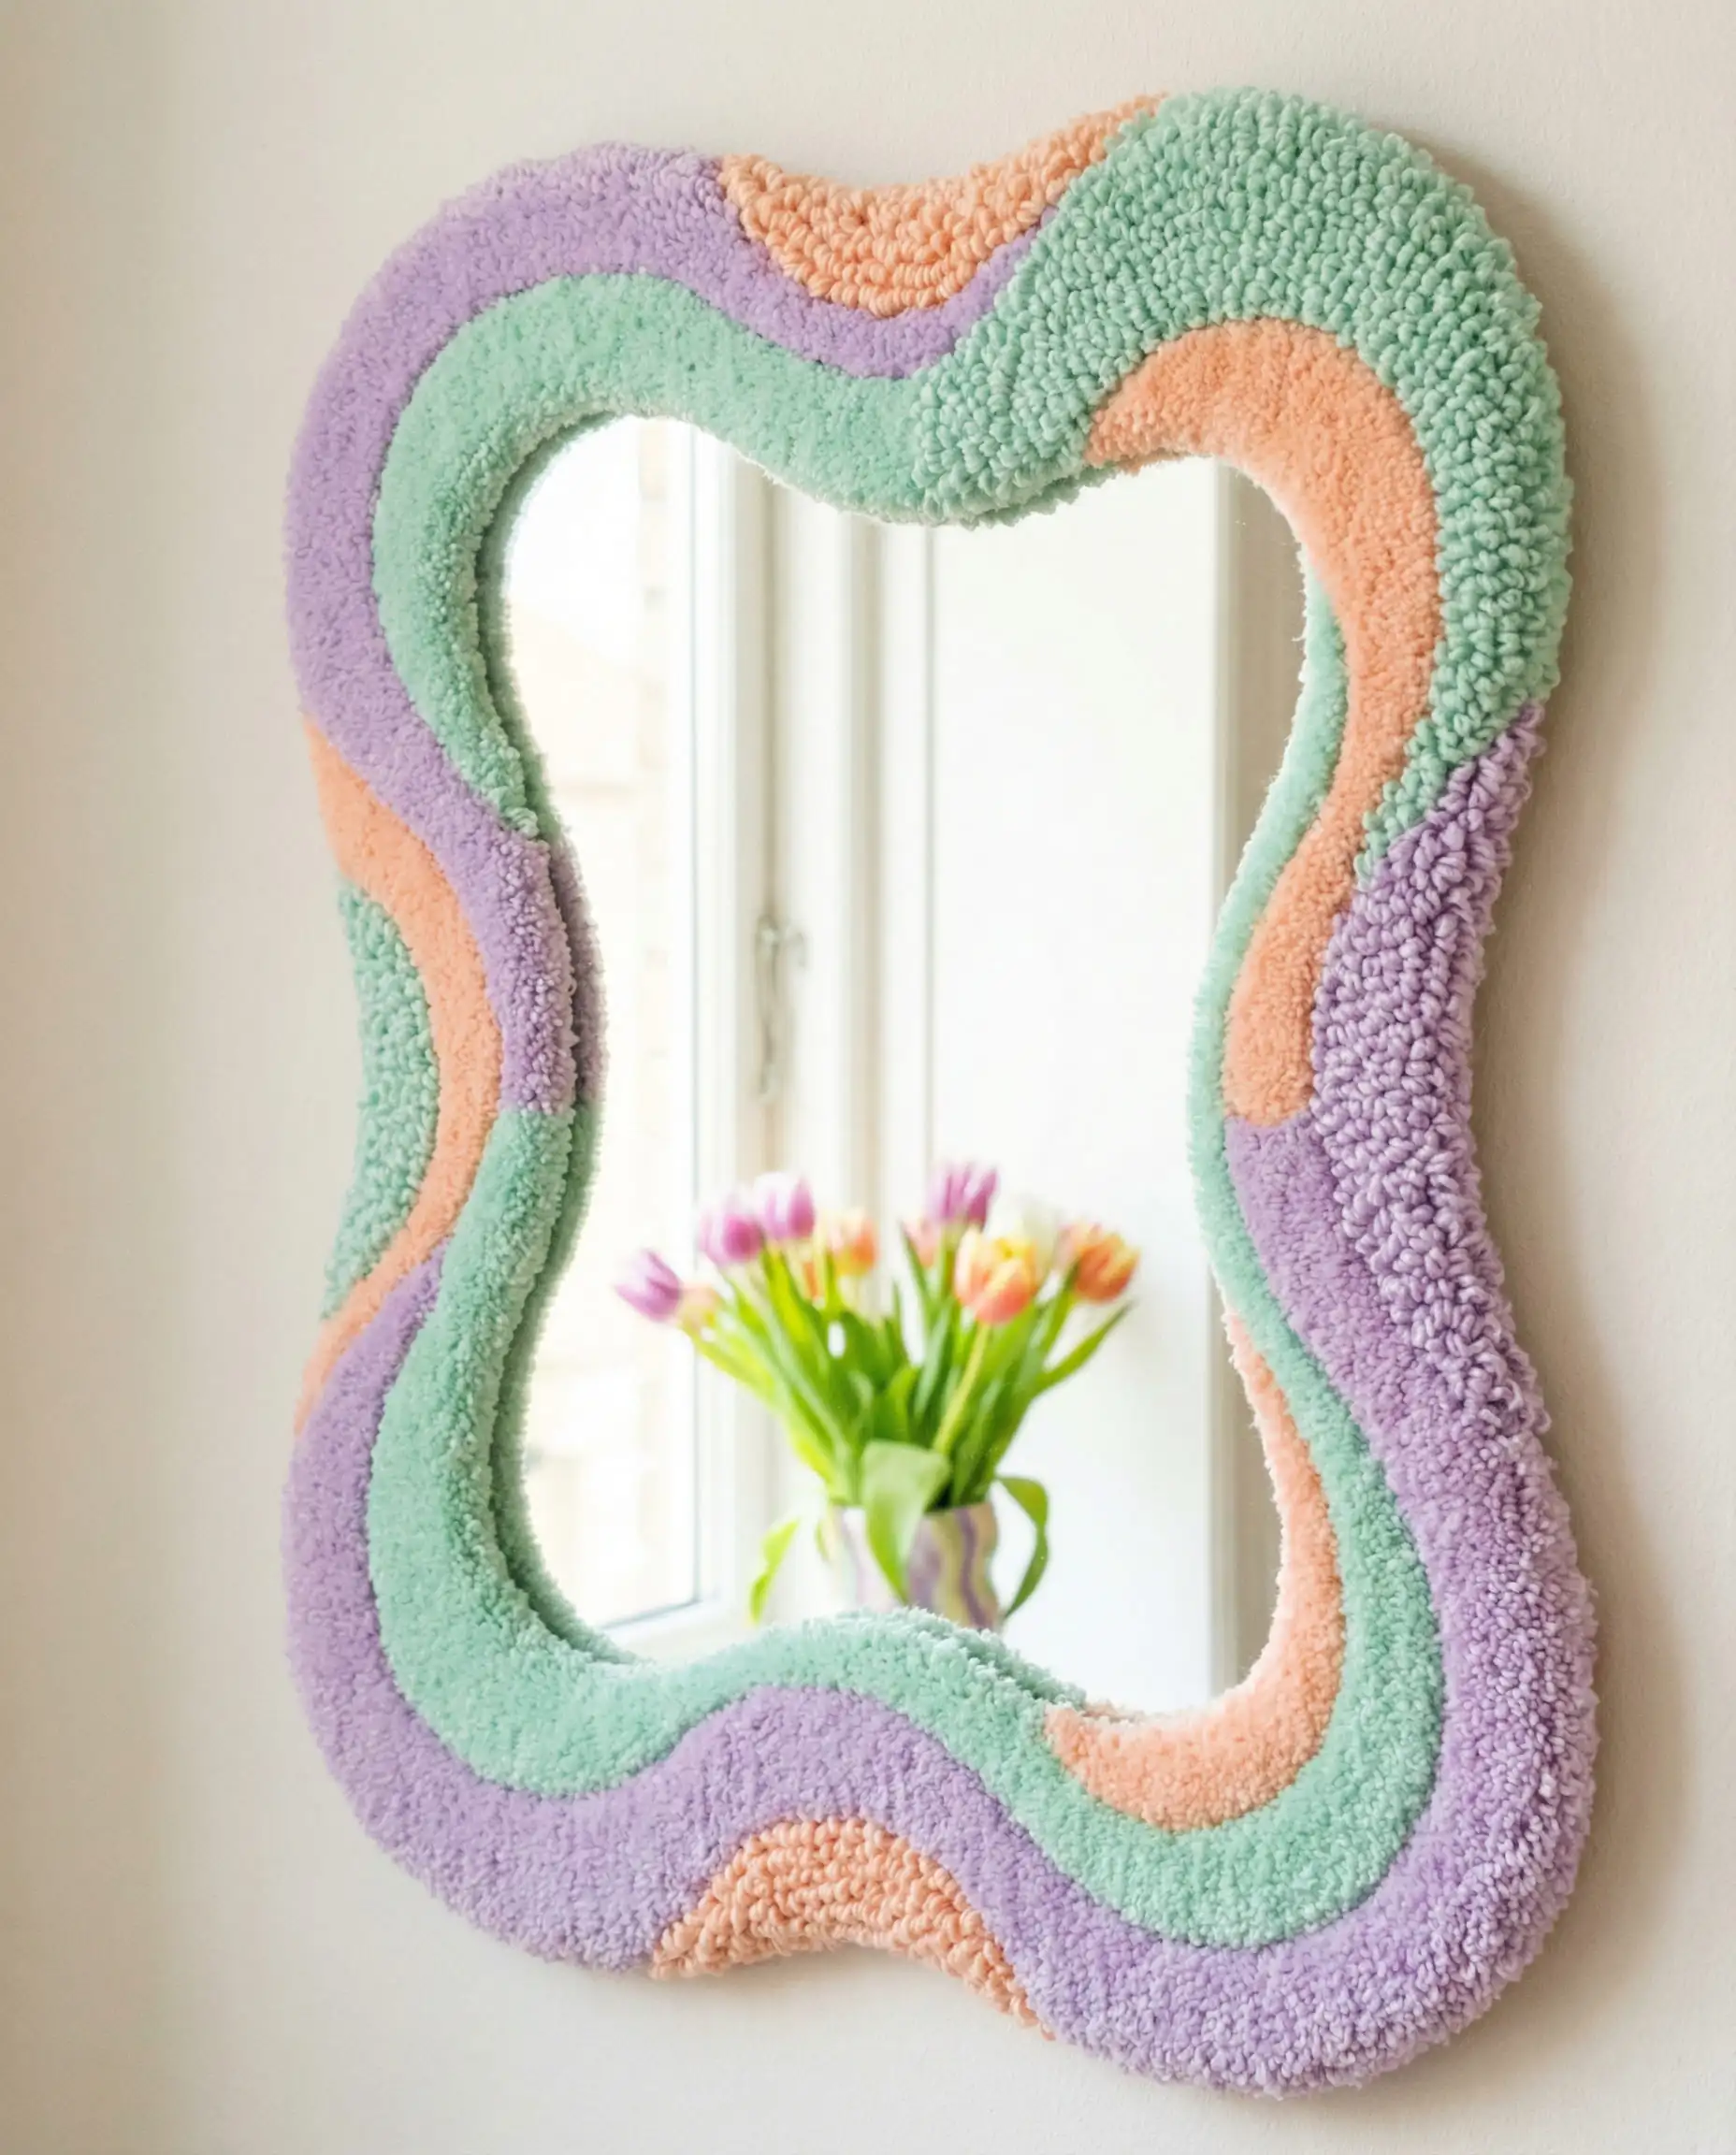
Tufted Mirror or Rug (Punch Needle)
The “rug” look is moving from the floor to the wall and mirrors. Punch needle is a beginner-friendly version of rug tufting.
Difficulty: 🟡 Medium | Time: ⏱️ 4+ Hours | Cost: 💲 Medium
You Will Need:
Quick Steps:
- Stretch: Stretch monks cloth tightly over the hoop.
- Punch: Use the tool to punch yarn through the fabric following your design.
- Glue: Once finished, glue the back to seal the loops.
- Apply: Cut out your shape and glue it to the border of a mirror or hang it as a mini wall rug.
6. The Aesthetic Desk Setup
Since many of us study or work from our rooms, the desk is a focal point.
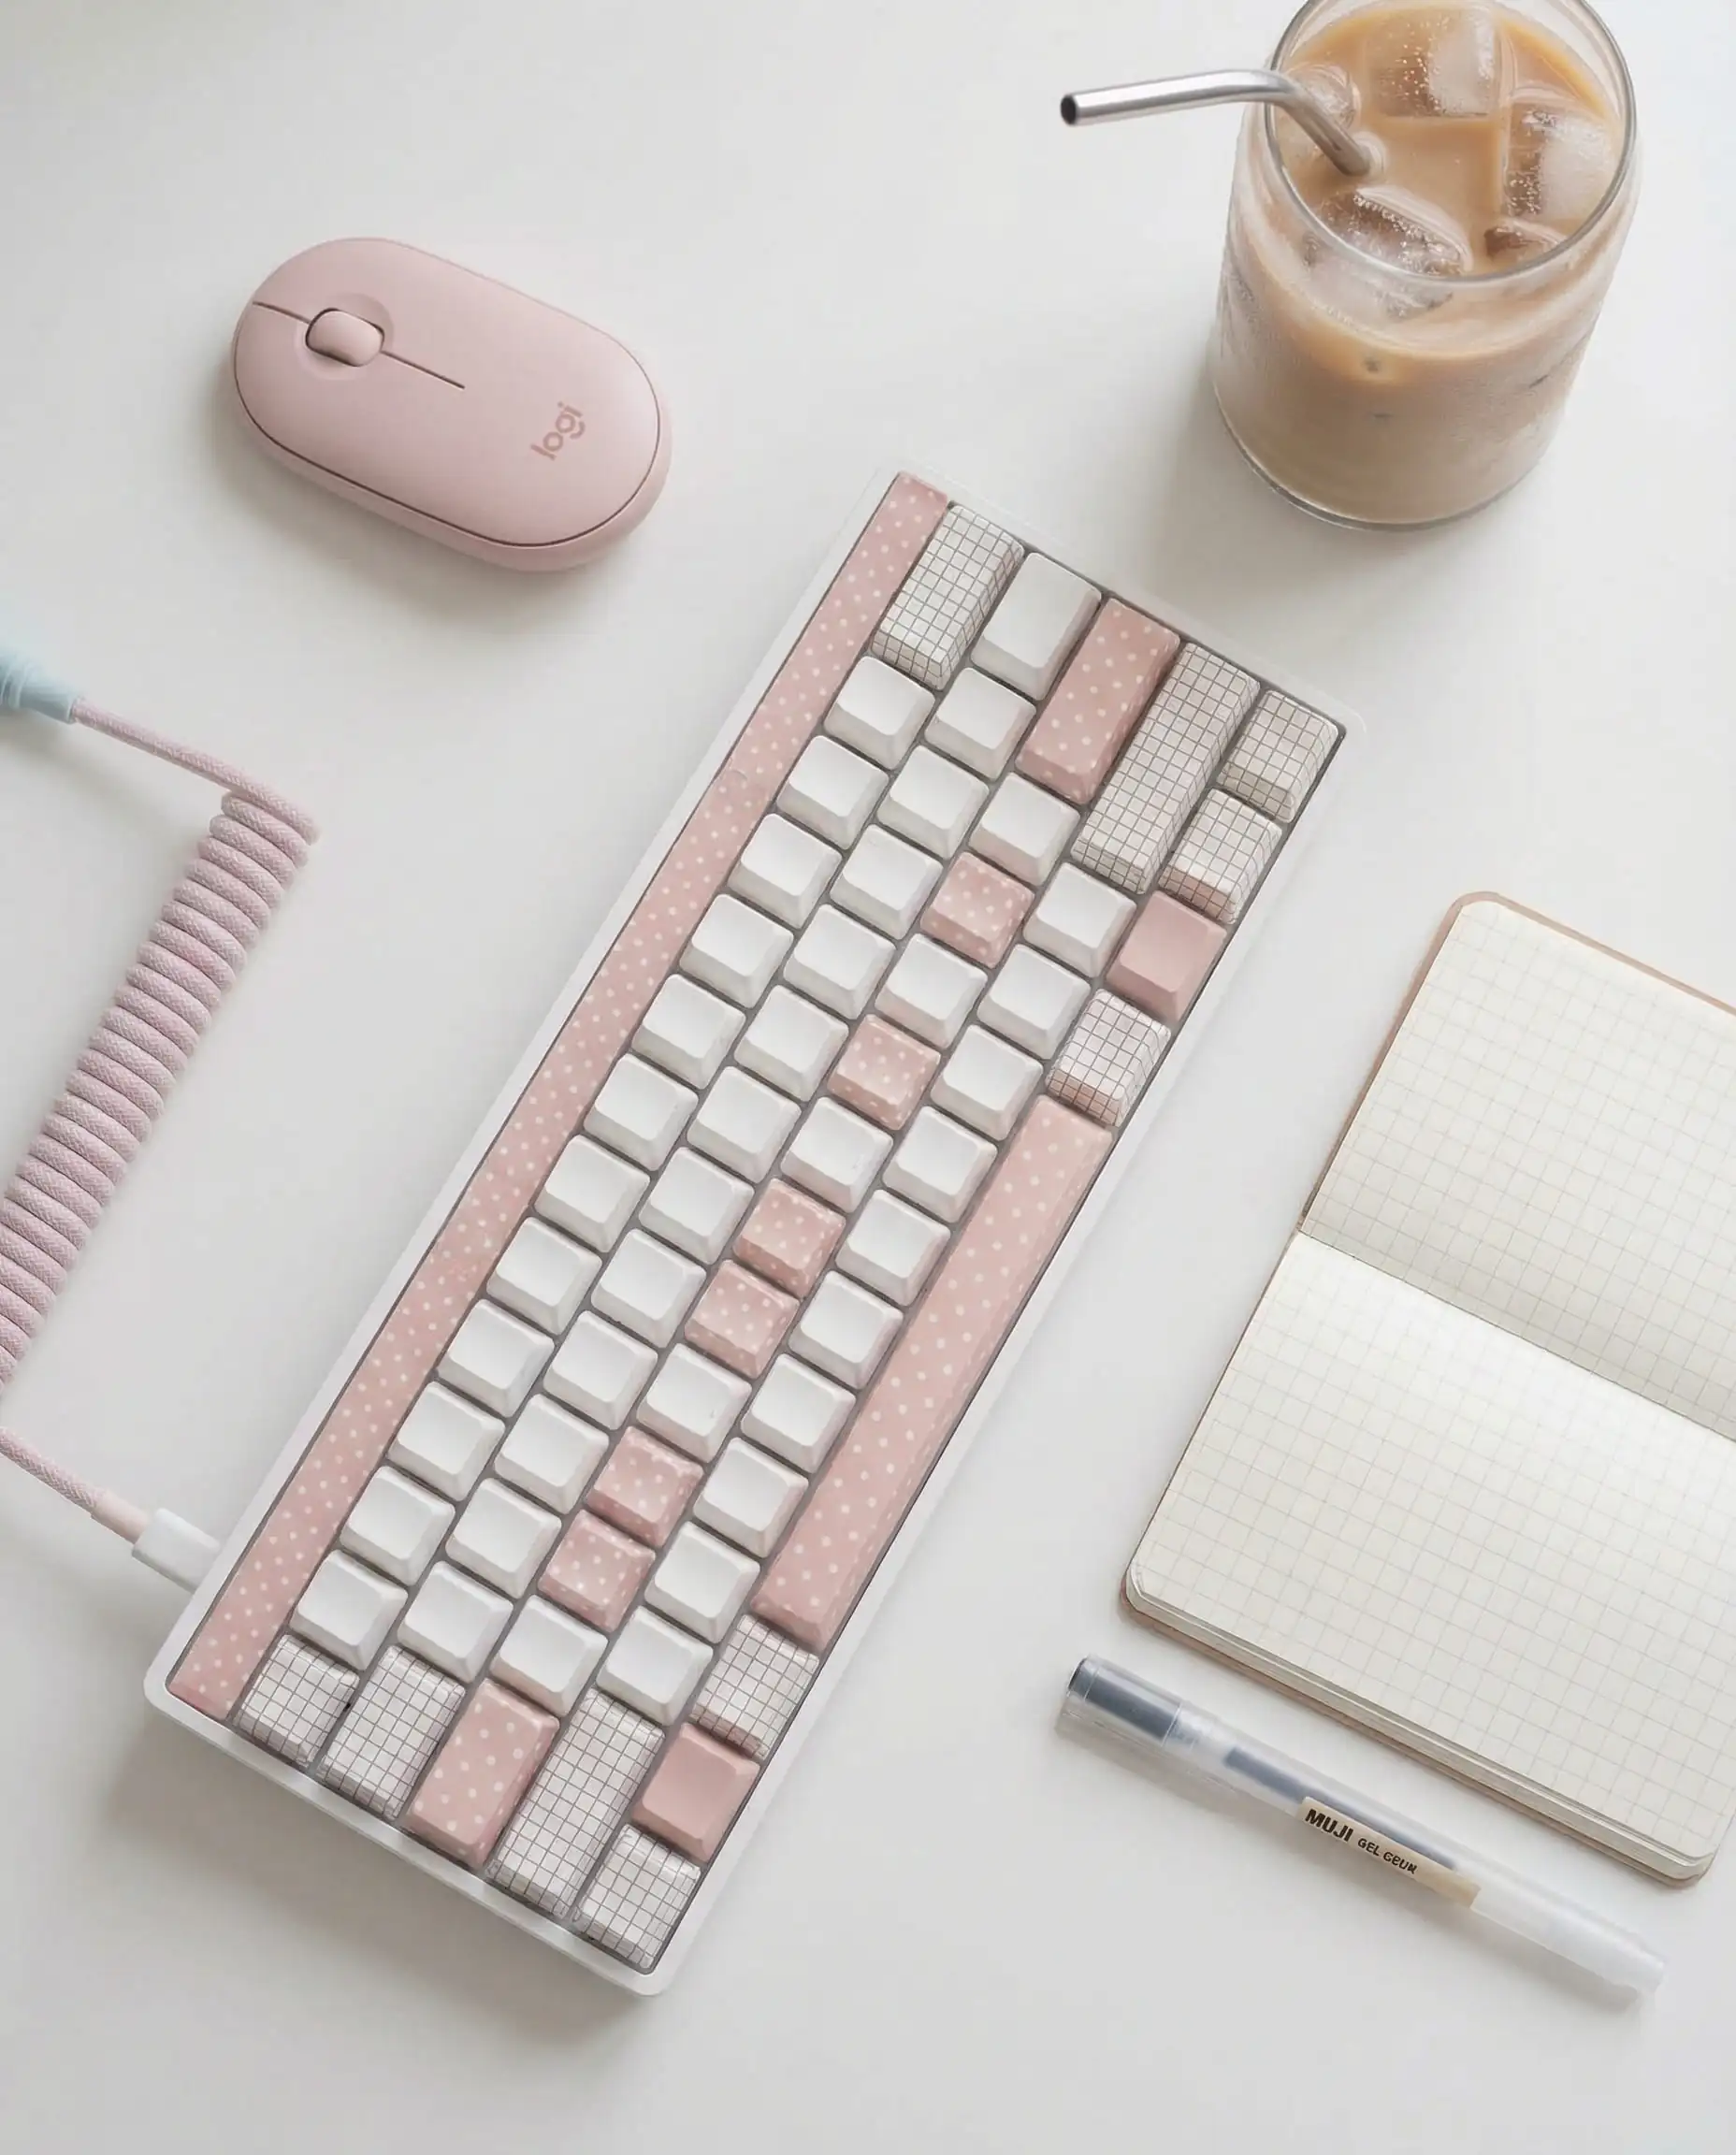
Washi Tape Keyboard
Customize your tech without permanent damage.
Difficulty: 🟢 Easy | Time: ⏱️ 1 Hour | Cost: 💲 Very Low
You Will Need:
Quick Steps:
- Clean: Clean your keys.
- Apply: Place a strip of washi tape over a key.
- Trim: Carefully cut around the edge of the key with the knife.
- Repeat: Create a gradient or pattern across your keyboard.
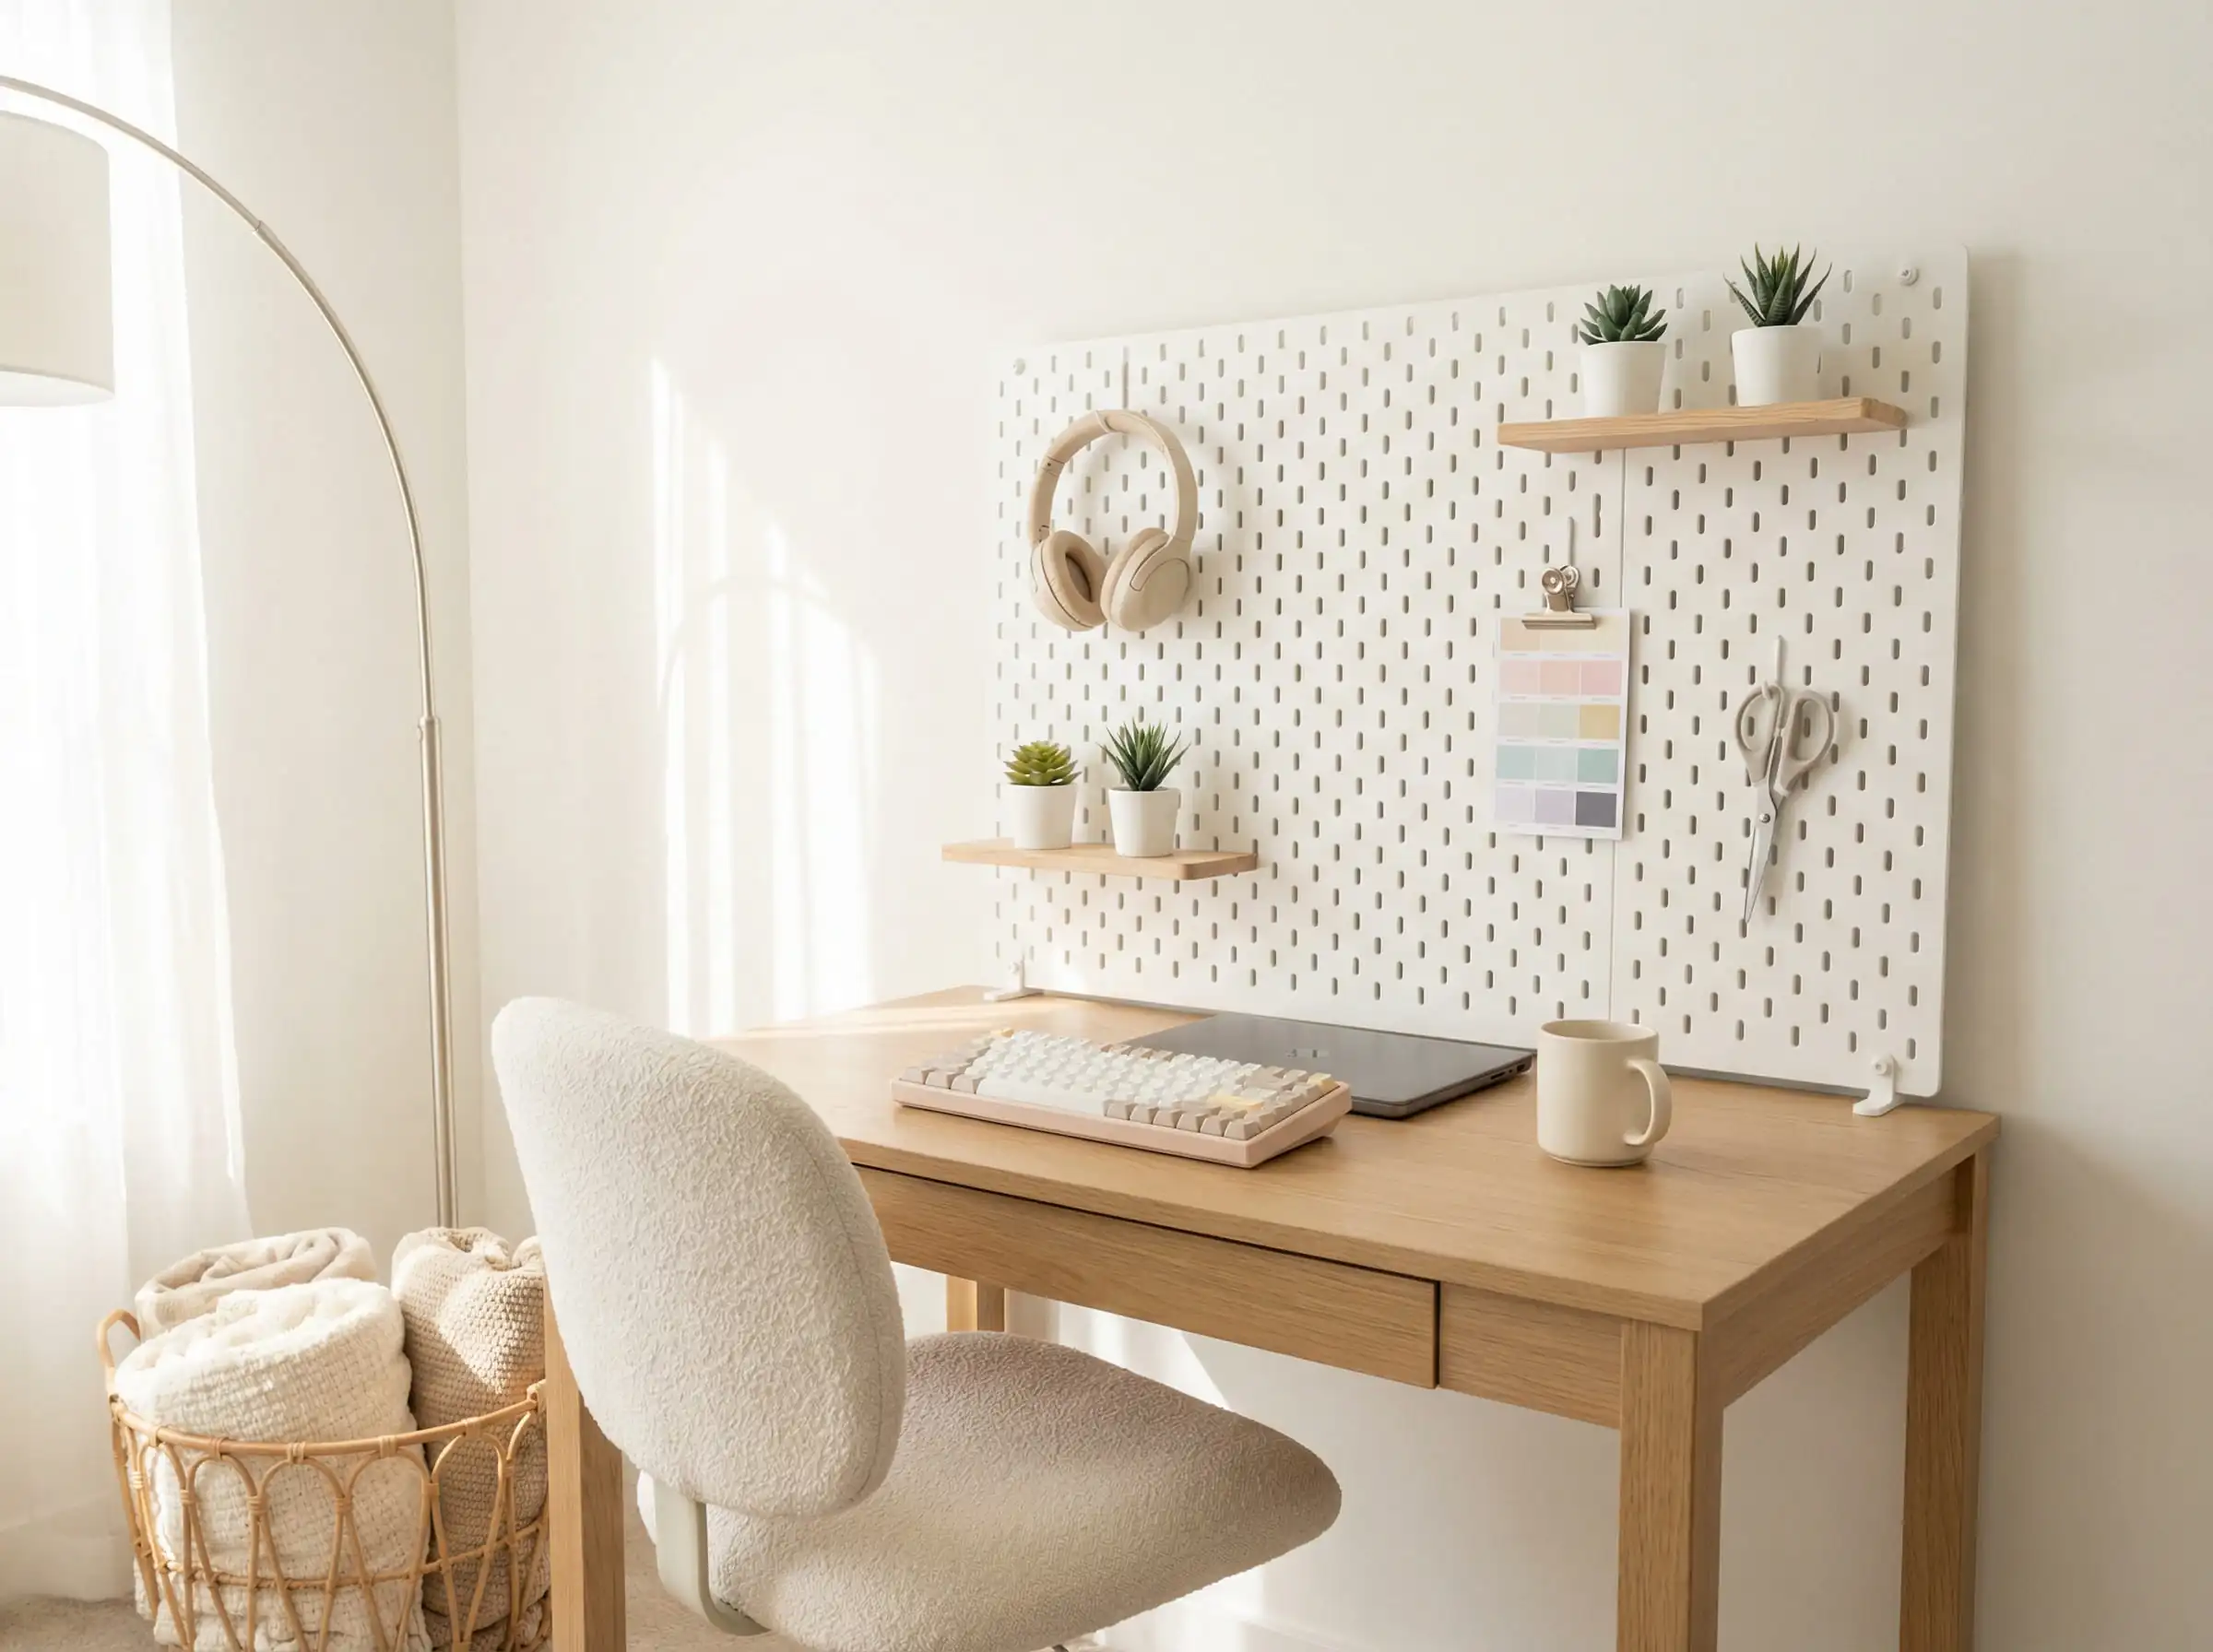
Pegboard Organizer Wall
The ultimate organizational hack that looks industrial and cool.
Difficulty: 🟡 Medium | Time: ⏱️ 1 Hour | Cost: 💲 Medium
You Will Need:
Quick Steps:
- Mount: Screw the pegboard into the wall using spacers (so there is room behind it for the hooks).
- Accessorize: Add shelves for small plants, hooks for headphones, and clips for inspiration photos.
- Style: Keep it color-coordinated to avoid it looking like a garage tool board.
The Aesthetic DIY Toolkit
Before you start your journey, make sure you have these essentials in your “crafting drawer.” These items will cover 90% of the projects listed above.
Frequently Asked Questions
Focus on decluttering and rearranging. Move your bed to a different wall, organize your bookshelf by color (rainbow order), and use what you have. You can make art using just scrap paper and coffee to stain it for a vintage look.
The top trending style is a blend of “Organic Modern” and “Eclectic Retro.” Think creamy white walls, textured art, lots of plants, mixed with colorful, funky accents like a wavy mirror or a neon sign. It’s about being cozy but curated.
Avoid nails. Use Command strips for frames, washi tape for posters (it doesn’t peel paint), and tension rods to hang curtains or plants inside window frames without drilling. Check out our small apartment decorating ideas for more rental hacks.
Most of the ideas listed here are designed to be “Weekend Projects” or even “Naptime Projects” (under 1 hour). The Tiled Table and Plaster Art require drying time, so plan those for a Saturday morning to finish on Sunday.
Ready to transform your room?
DIY decor is the best way to make a space feel truly yours. It tells a story that store-bought items simply can’t. Whether you start with a simple dried flower frame or tackle the tiled table, the result will be a space that sparks joy.
Which project will you try first? Tag us in your creations on Instagram @hackrea_en—we’d love to see your aesthetic makeovers! For more broad inspiration on updating your home, explore our articles on modern home interior design trends.