Running out of tile with one row left to lay is the worst way to end a weekend. Your dye lot is gone and the replacement box is a shade off. The floor now has a stripe in it that only you will ever notice, and that you will notice every single day.
So before you look at a single installation video, do the ordering properly. Here’s how I work it out.
1. Measure every space separately
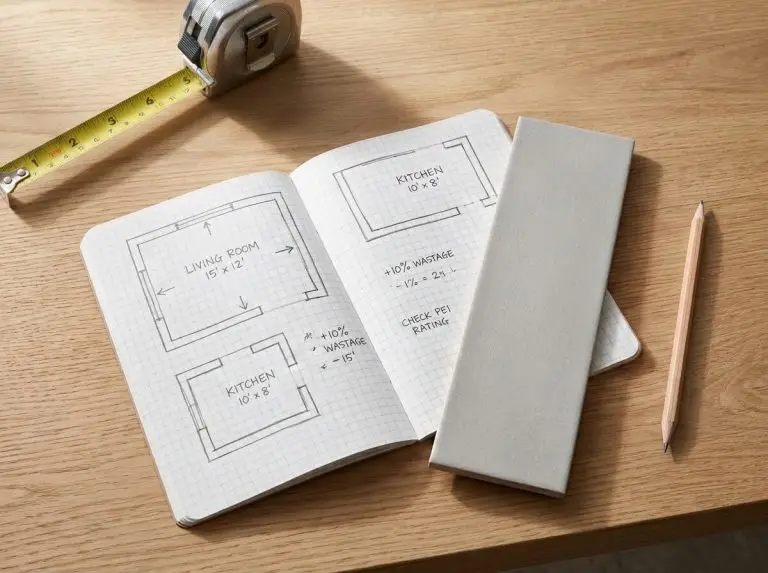
Tape measure and notebook. One line per space. Length times width at the widest points, written down with the room name next to it.
Then measure the bits people forget and add them in:
- closets and pantries, plus the landing at the top of the stairs
- the strip of floor inside every doorway
- the floor under the vanity and behind the toilet (tile continues under there)
- shower walls, floor to ceiling, each wall on its own line
- backsplash: length of counter times the height from counter to the underside of the upper cabinets
Subtract only permanent things bigger than about 10 square feet. A built-in island, a tub footprint. Leave the small stuff in your total. The two square feet of math you save isn’t worth the two square feet of tile you don’t have.
One more thing. Total by tile type rather than by house. If the guest bath gets a different tile than the hallway, those are two separate numbers and two separate orders.
2. Add wastage for the layout you’ve chosen
Ten percent is the starting point for a straight lay in a square-ish room. Everything else costs you more:
- Rooms with lots of jogs and doorways: 15%
- Diagonal at 45 degrees: 15-20%, because every perimeter tile gets cut into two triangles and you throw one away
- Herringbone or chevron: 20% and up. Every single tile that meets a wall is a cut
- Large format, 24×24 and bigger: 15%, since one bad cut wastes a lot of tile
- Directional or patterned tiles: add another 5%, because you can’t spin an offcut around to hide it
And if this is your first tiling job with a manual snap cutter, add 5% on top of whatever you landed on. You’ll break tiles while you’re learning the score-and-snap. I broke four in my first hour.
3. Check the wear and slip ratings before you fall in love
This is the part that decides whether a tile belongs on your floor or only on your wall.
PEI rating runs 1 to 5 and covers surface wear. PEI 1 and 2 are wall tiles, full stop. PEI 3 handles normal residential floors. PEI 4 and 5 are for kitchens and entryways. Use them anywhere that takes boots and dog claws. If a product listing doesn’t show a PEI number anywhere, assume it’s a wall tile or a natural stone until the spec sheet tells you otherwise.
For slip, look for the DCOF figure. The ANSI standard for interior floors that get wet is 0.42 or higher. Bathroom floors and entryways.
Water absorption tells you where a tile can survive. Under 0.5% is impervious, which is what porcelain gives you and what you need outdoors or in a shower pan. Non-vitreous tile above 7% is for dry indoor walls only, and putting it on a shower wall is a repair job waiting to happen.
Here’s the trade-off nobody mentions: the grippier the tile, the harder it is to clean. A textured shower floor with good slip numbers will hold soap scum and need a brush rather than a mop. Polished porcelain wipes clean in seconds and turns into an ice rink the moment it’s wet. Pick per room rather than per house.
4. Compare prices by area, not by box
A box price tells you nothing on its own, because a box of 600 x 600mm floor tiles and a box of subway tiles can cost the same and cover wildly different areas. Convert every option to a price per square foot (or per square metre) before you compare it against anything else, then multiply by your measured area plus your wastage allowance. Australian retailer Cheap Tiles Online is a useful reference point here, because it prices its whole range per square metre rather than per box. It sells across every tile category and runs showrooms at Herston, Underwood, Labrador and Burleigh in south-east Queensland plus a factory outlet at Woodridge, so the price you see online is attached to a tile you can go and stand on before you order a pallet of it.
Two more line items belong in that comparison. Delivery, because tile is heavy and a lot of “free shipping” ends at a curbside pallet drop that you carry in yourself. And trim, because bullnose and Schluter edging are priced per piece, and a bathroom’s worth of edging can add more than you’d guess to a cheap tile.
5. Order every room of the same tile in one shade batch
Tile is fired in batches, and the color drifts between them. The batch goes by lot number or caliber depending on who made it, and it’s printed on the end of every box.
Order all of it at once. Every room and every wall in the same purchase, so the warehouse pulls from one run.
Then check the boxes when the pallet lands. Same lot number on all of them, before you open more than one. If two lots showed up, call the retailer that day. Once you’ve opened eight boxes and cut into them, you own the problem.
While you’re checking, look at the variation rating on the box. V1 is uniform, V4 means every tile looks meaningfully different. V3 and V4 tiles need mixing from four or five open boxes as you lay them, or you’ll end up with a dark patch by the door.
6. Hold back spares, and store them properly
Keep one full box per tile type, minimum. On a big floor, keep about 5% of the area instead. That’s your repair stock for the day a cast iron pan lands corner-first.
Store them flat and somewhere dry indoors. A damp garage will collapse the box, and stacking on edge takes the corners off the tiles. Write the room and the lot number on the box in marker, because in four years you will not remember.
7. Get samples before you spend anything
Order samples two weeks before you plan to buy. Many retailers charge a small shipping fee for samples, and some credit it back against your order.
Put them on the actual floor of the actual room. Look at them in morning light and again under the lights you use at night. Splash water on one corner and step on it in bare feet, because that’s the only way to know what the slip rating actually feels like.
Then measure again, add your wastage, place one order, and go watch the installation video.