Authentic Zellige—hand-molded from Fez clay and fired in traditional olive-pit kilns—delivers an unmatched, undulating warmth to modern bathrooms. It is breathtaking, organic, and inherently flawed, making it the perfect architectural antidote to sterile, machine-made spaces.
However, bringing this artisanal material into a wet zone requires absolute structural precision, as its unrectified edges and highly porous terracotta body demand specialized waterproofing and layout strategies.
Here are 14 styling pairings and uncompromising installation truths for executing a flawless Zellige shower.
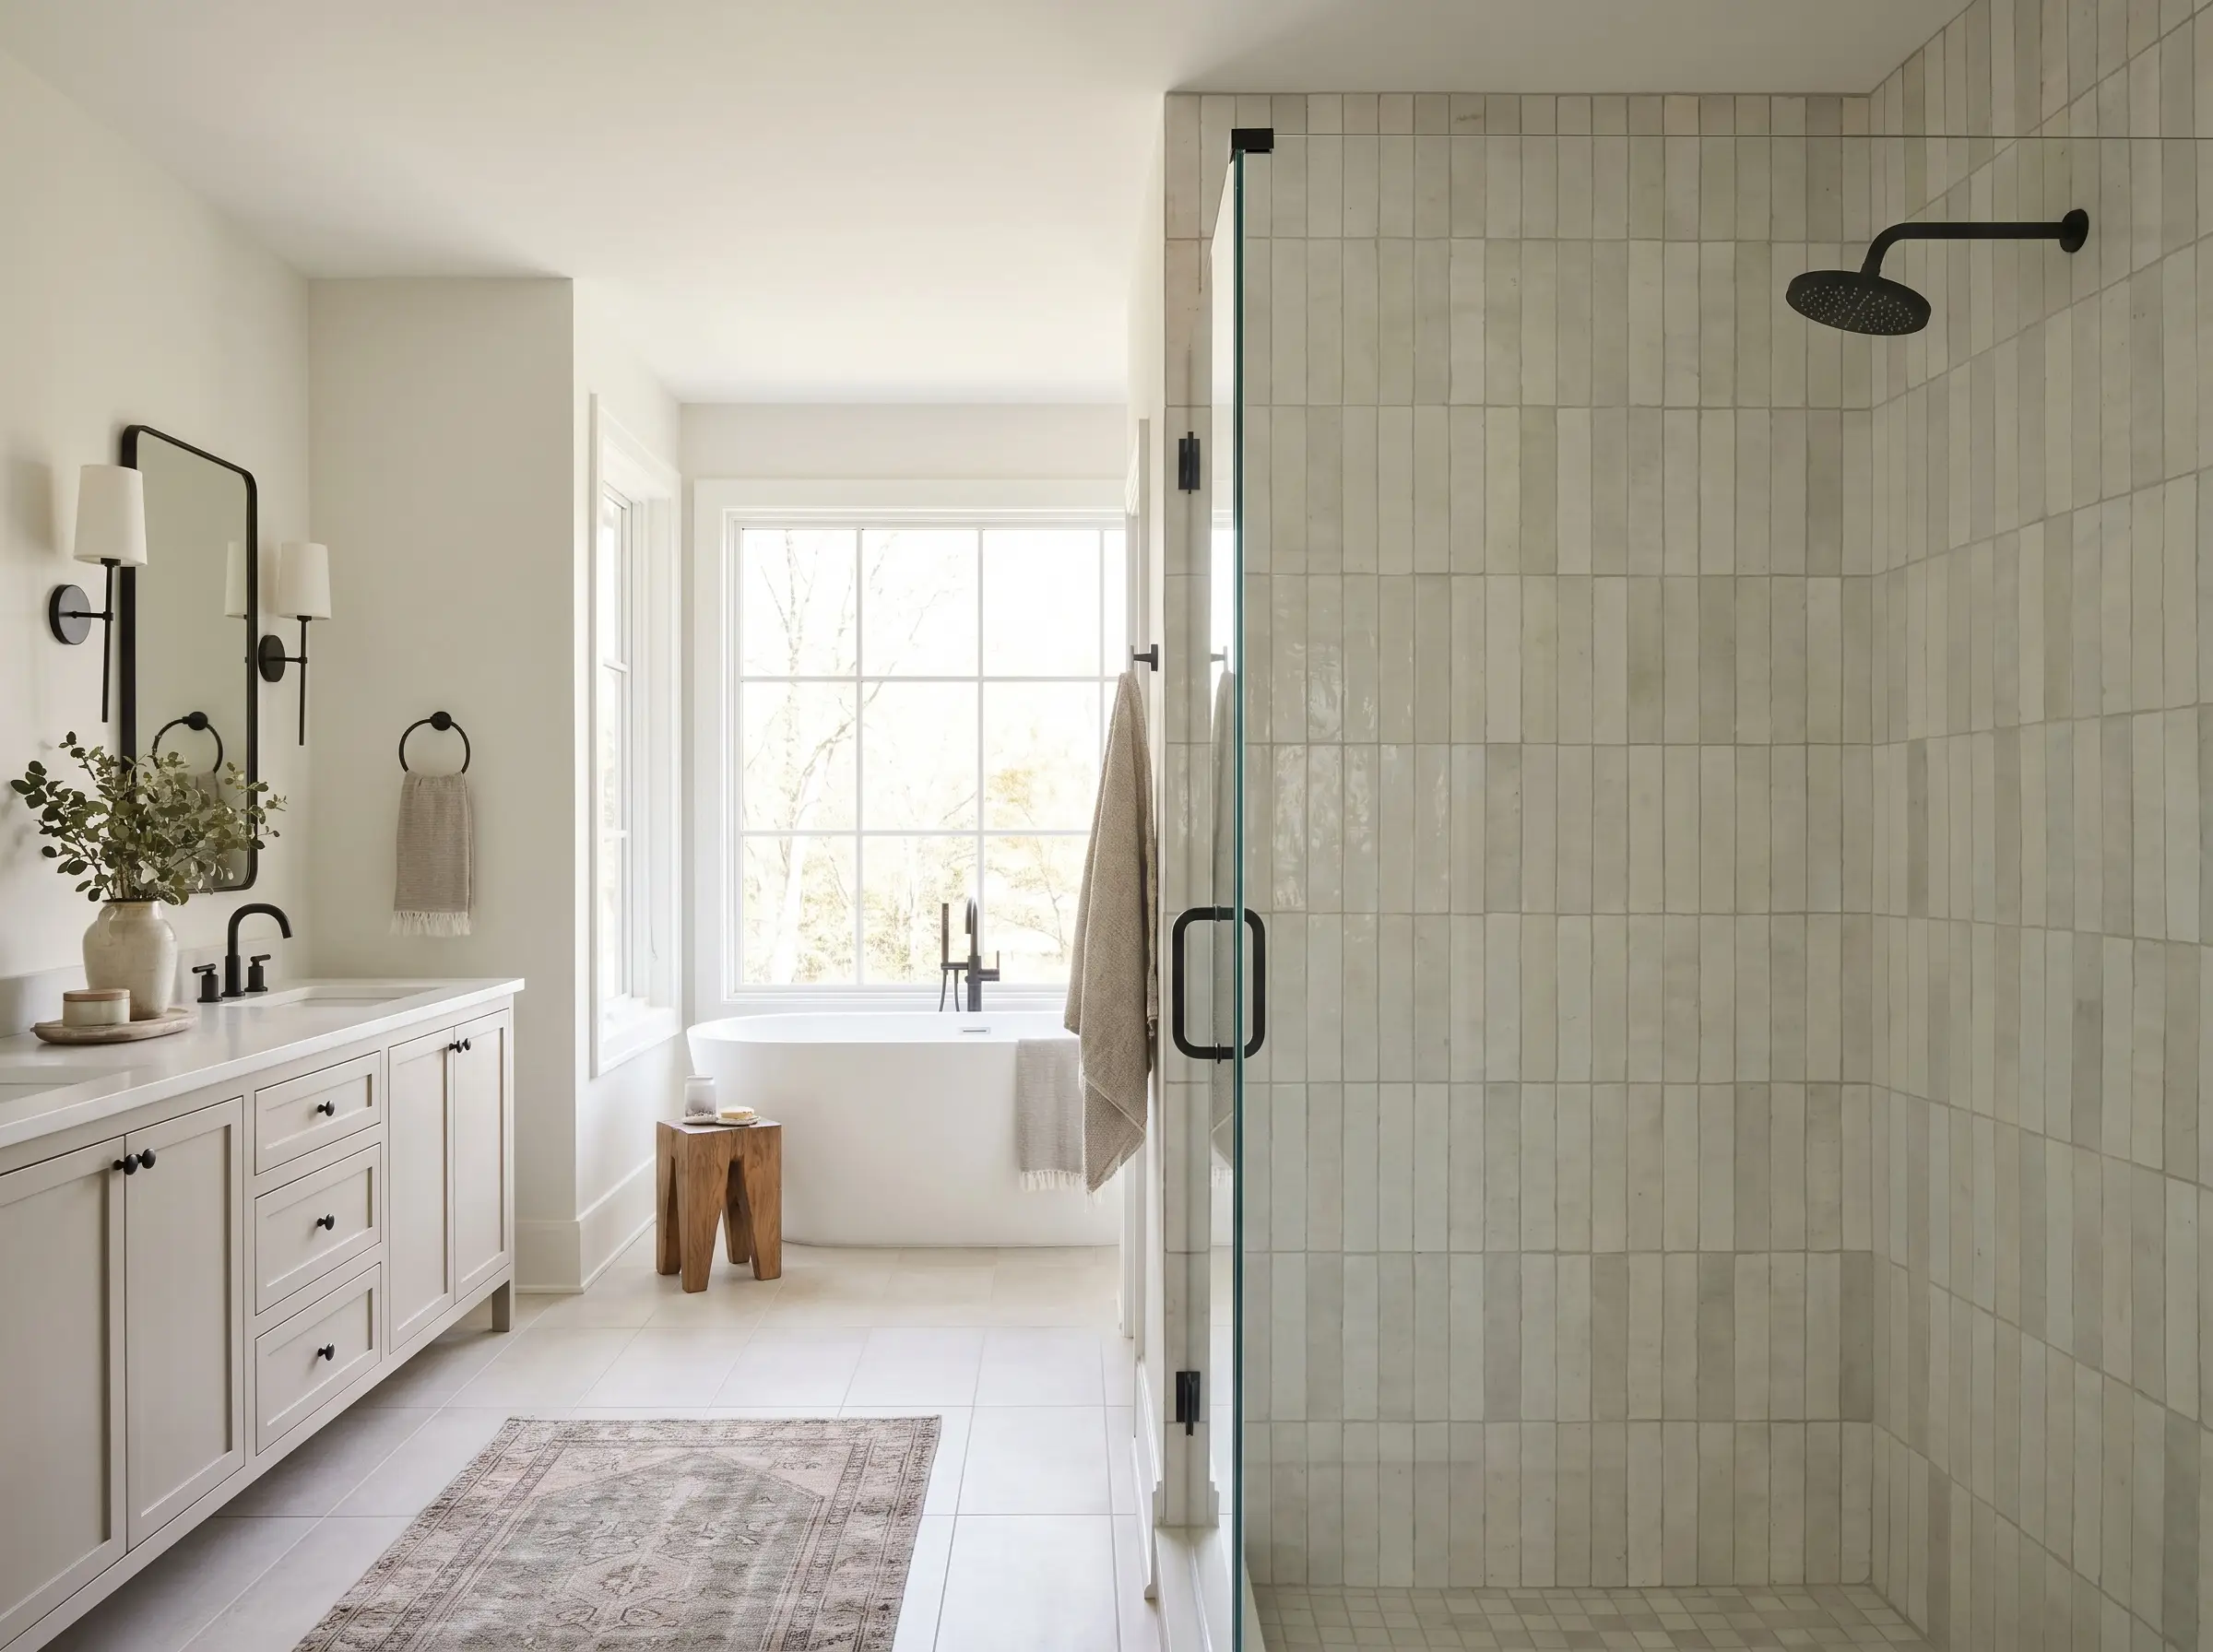
Pair Snow White Zellige with Unlacquered Brass Fixtures
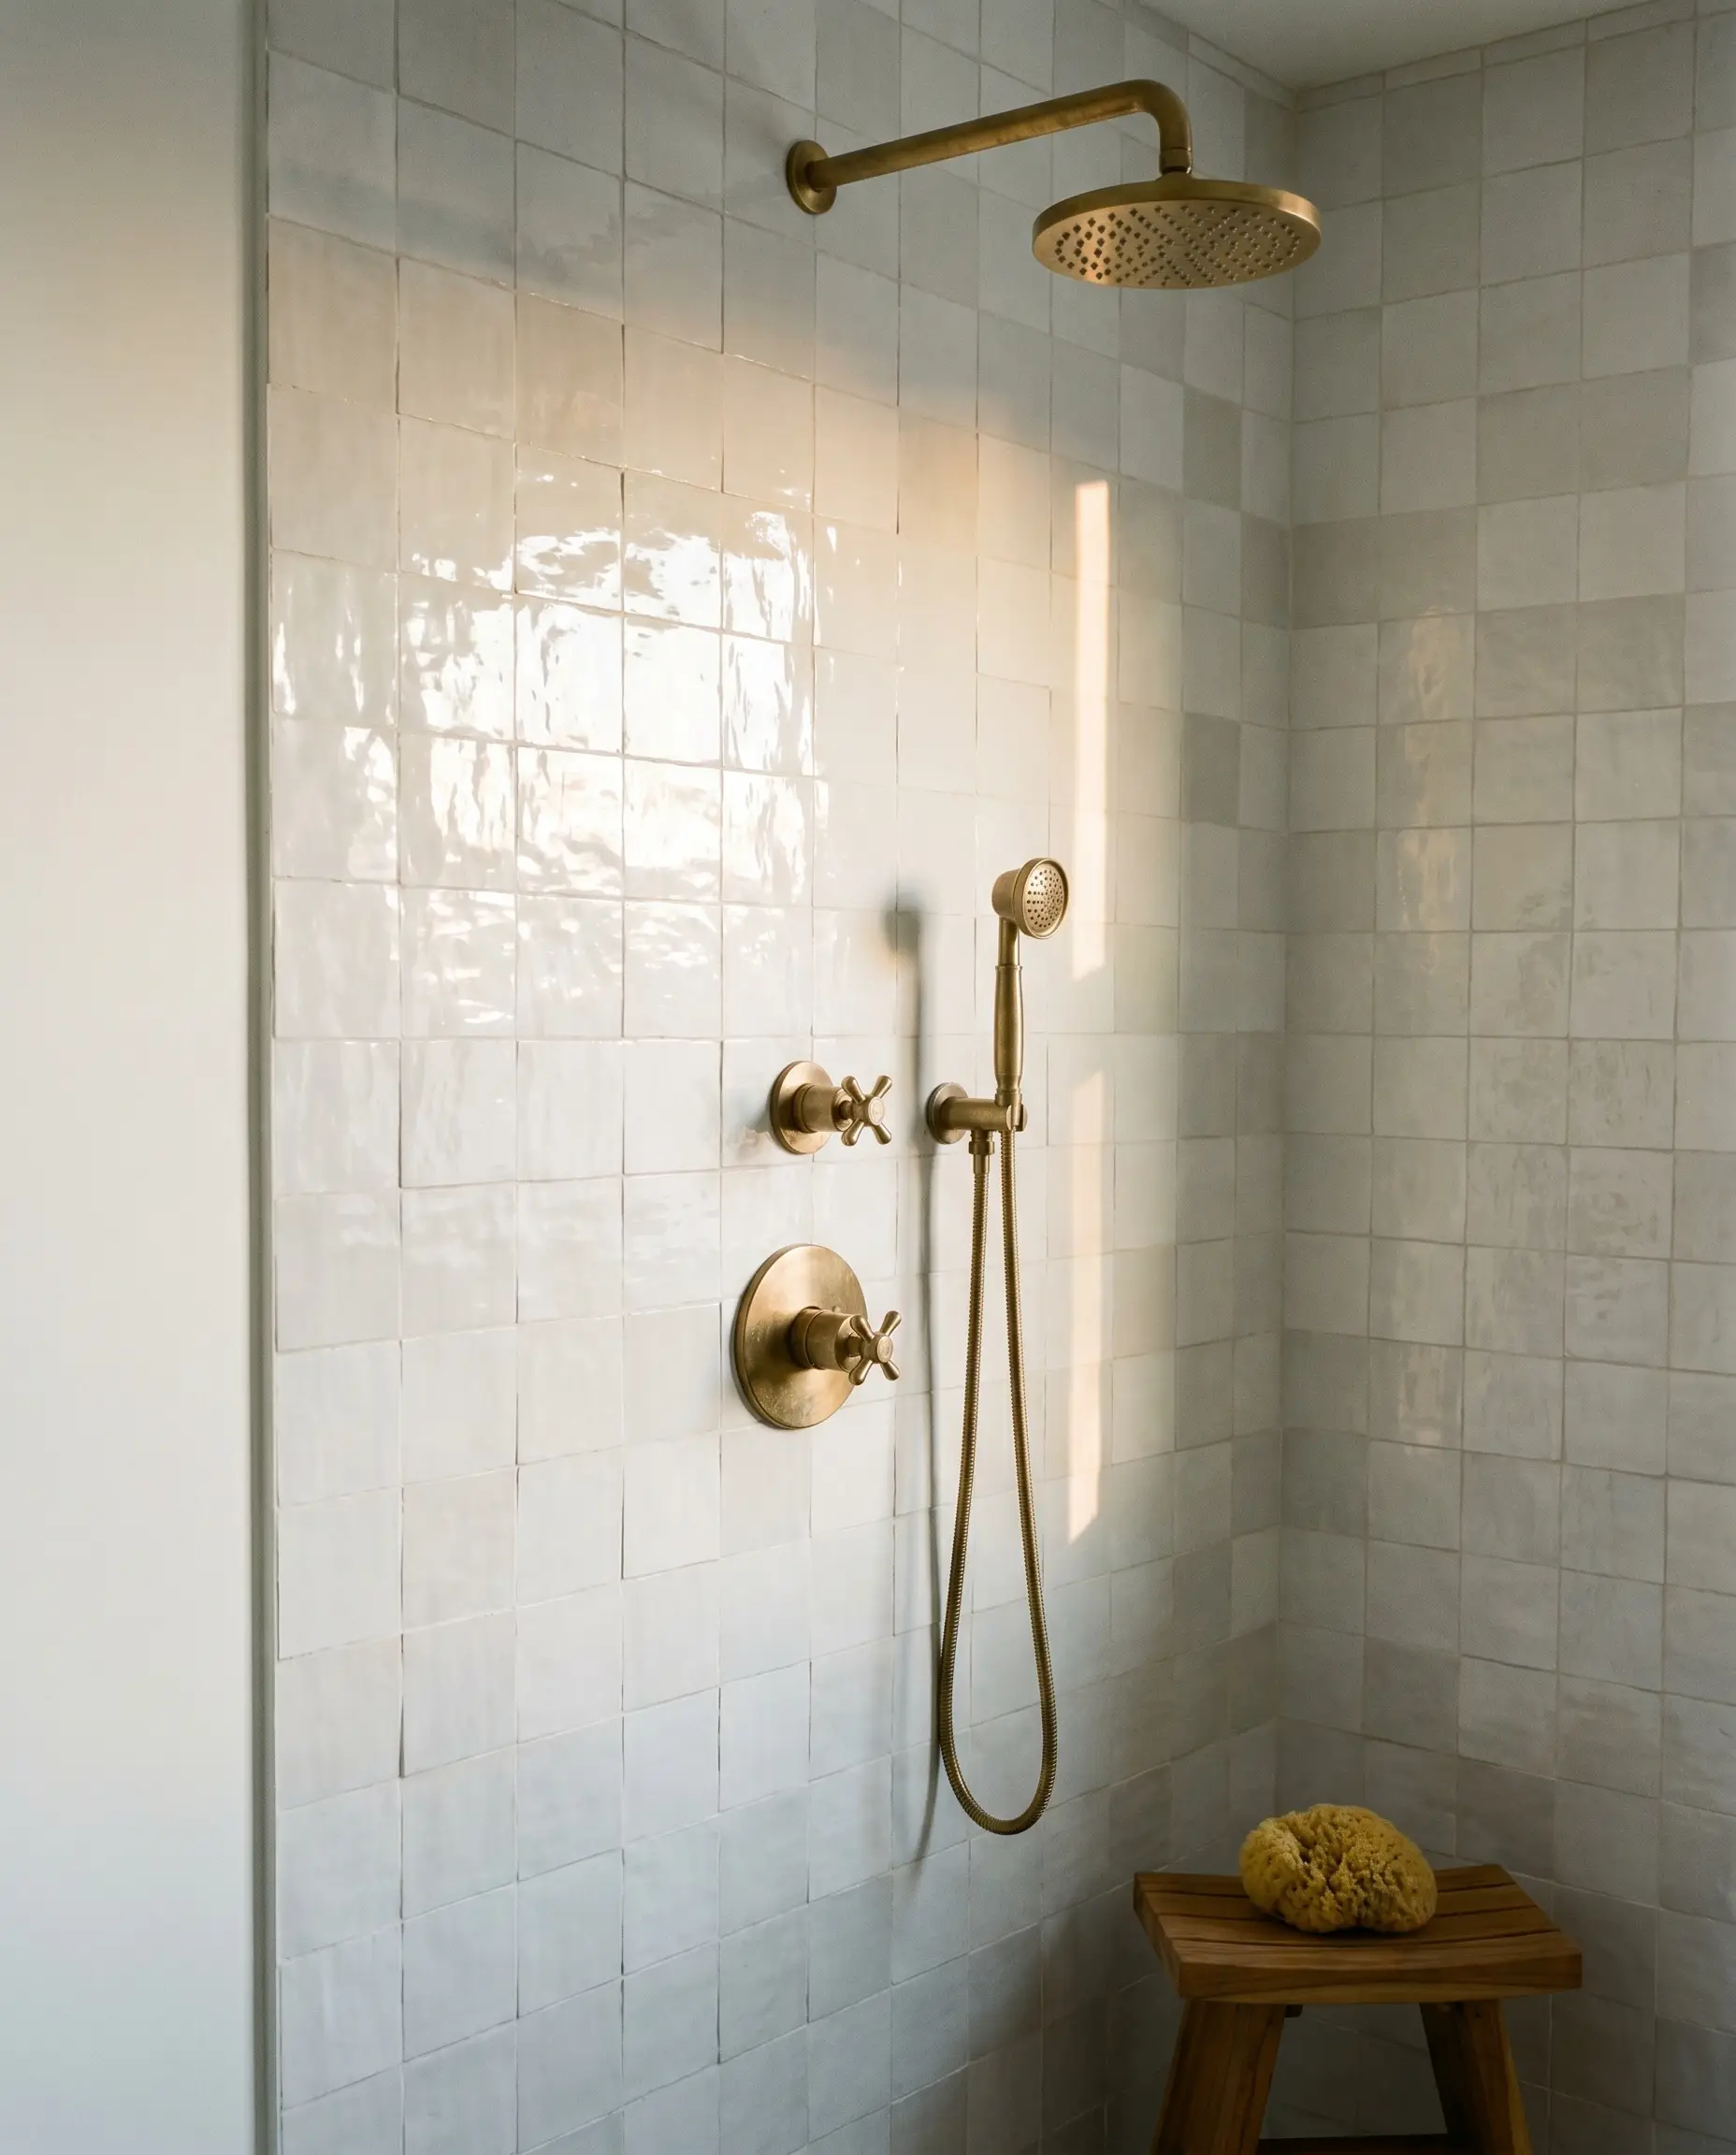
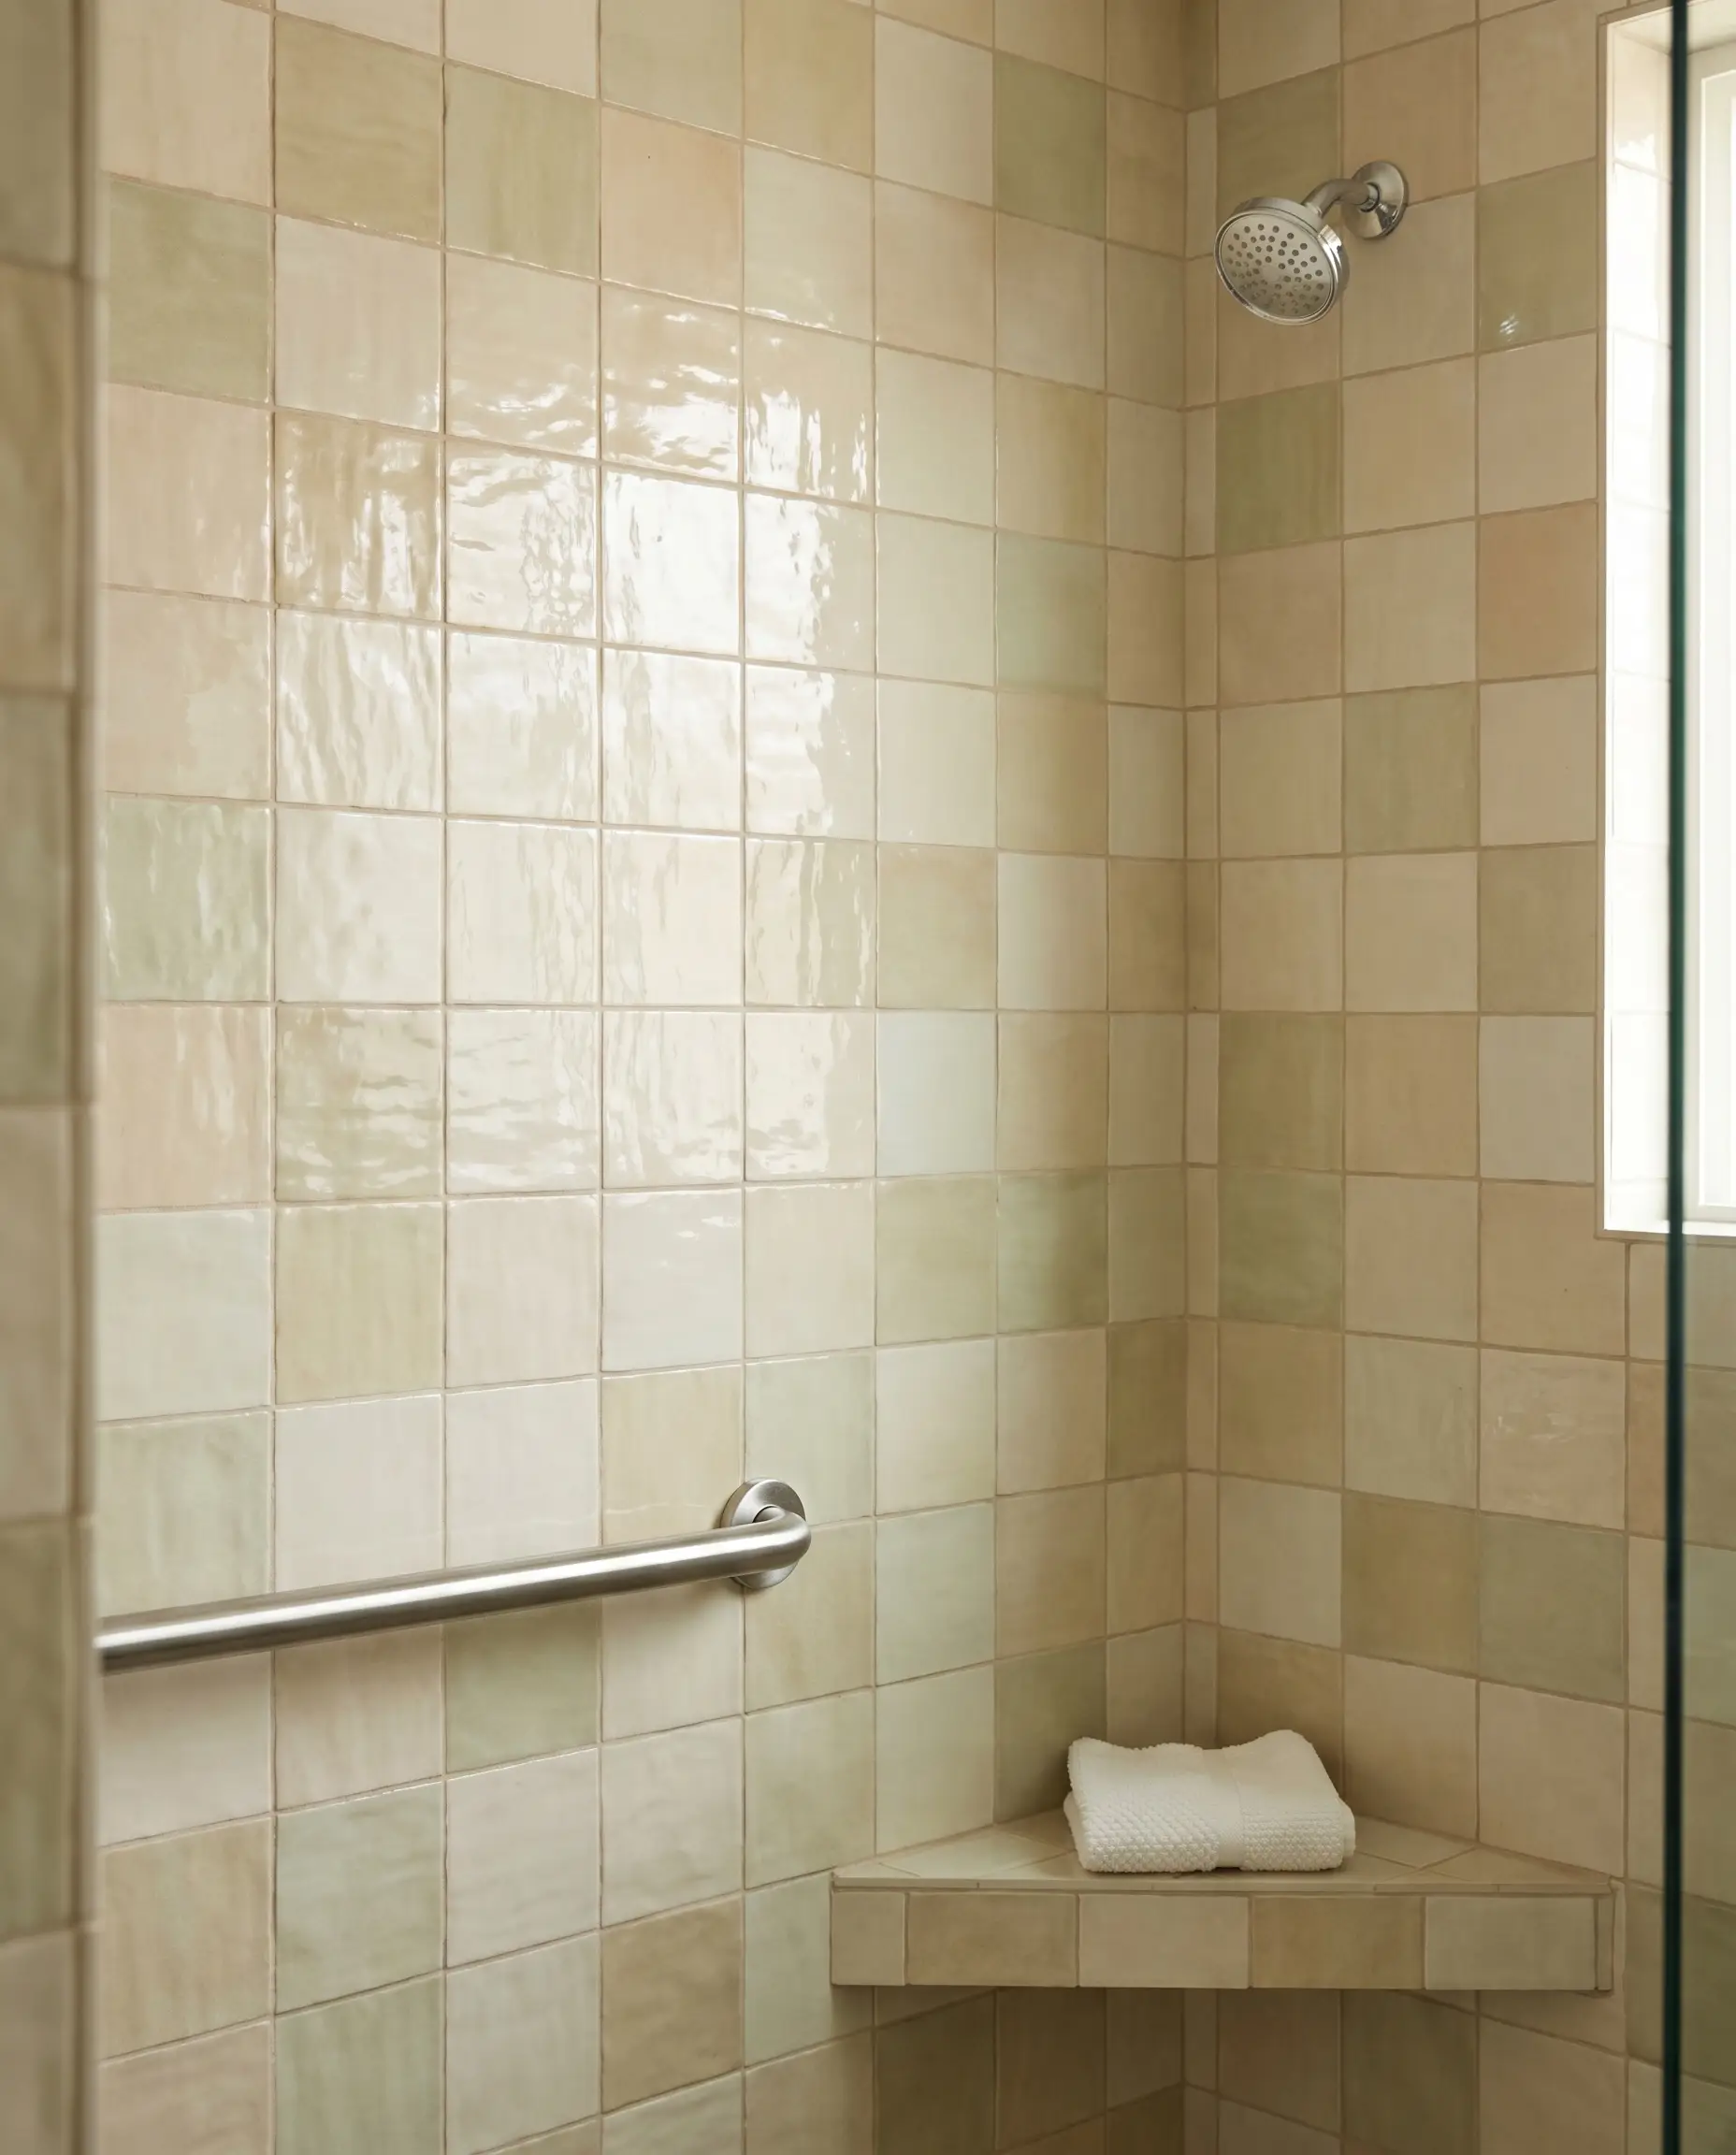
Snow white Zellige is never truly flat; the unpredictable glaze variation catches raking light to project a spectrum of warm creams and cool greys. Pairing this highly reflective surface with unlacquered brass hardware provides a stunning visual anchor, allowing the metal’s living finish to develop a natural patina that perfectly mirrors the handcrafted tile.
- Vibe: Organic Modern Luxury
- Key Materials: 4×4 Snow White Zellige, Unlacquered Brass Shower Fixtures
- Color Match: Benjamin Moore Chantilly Lace (for adjacent drywall)
- Hardware Pro-Tip: Specify a “living finish” rather than PVD brass so the metal ages dynamically with water exposure.
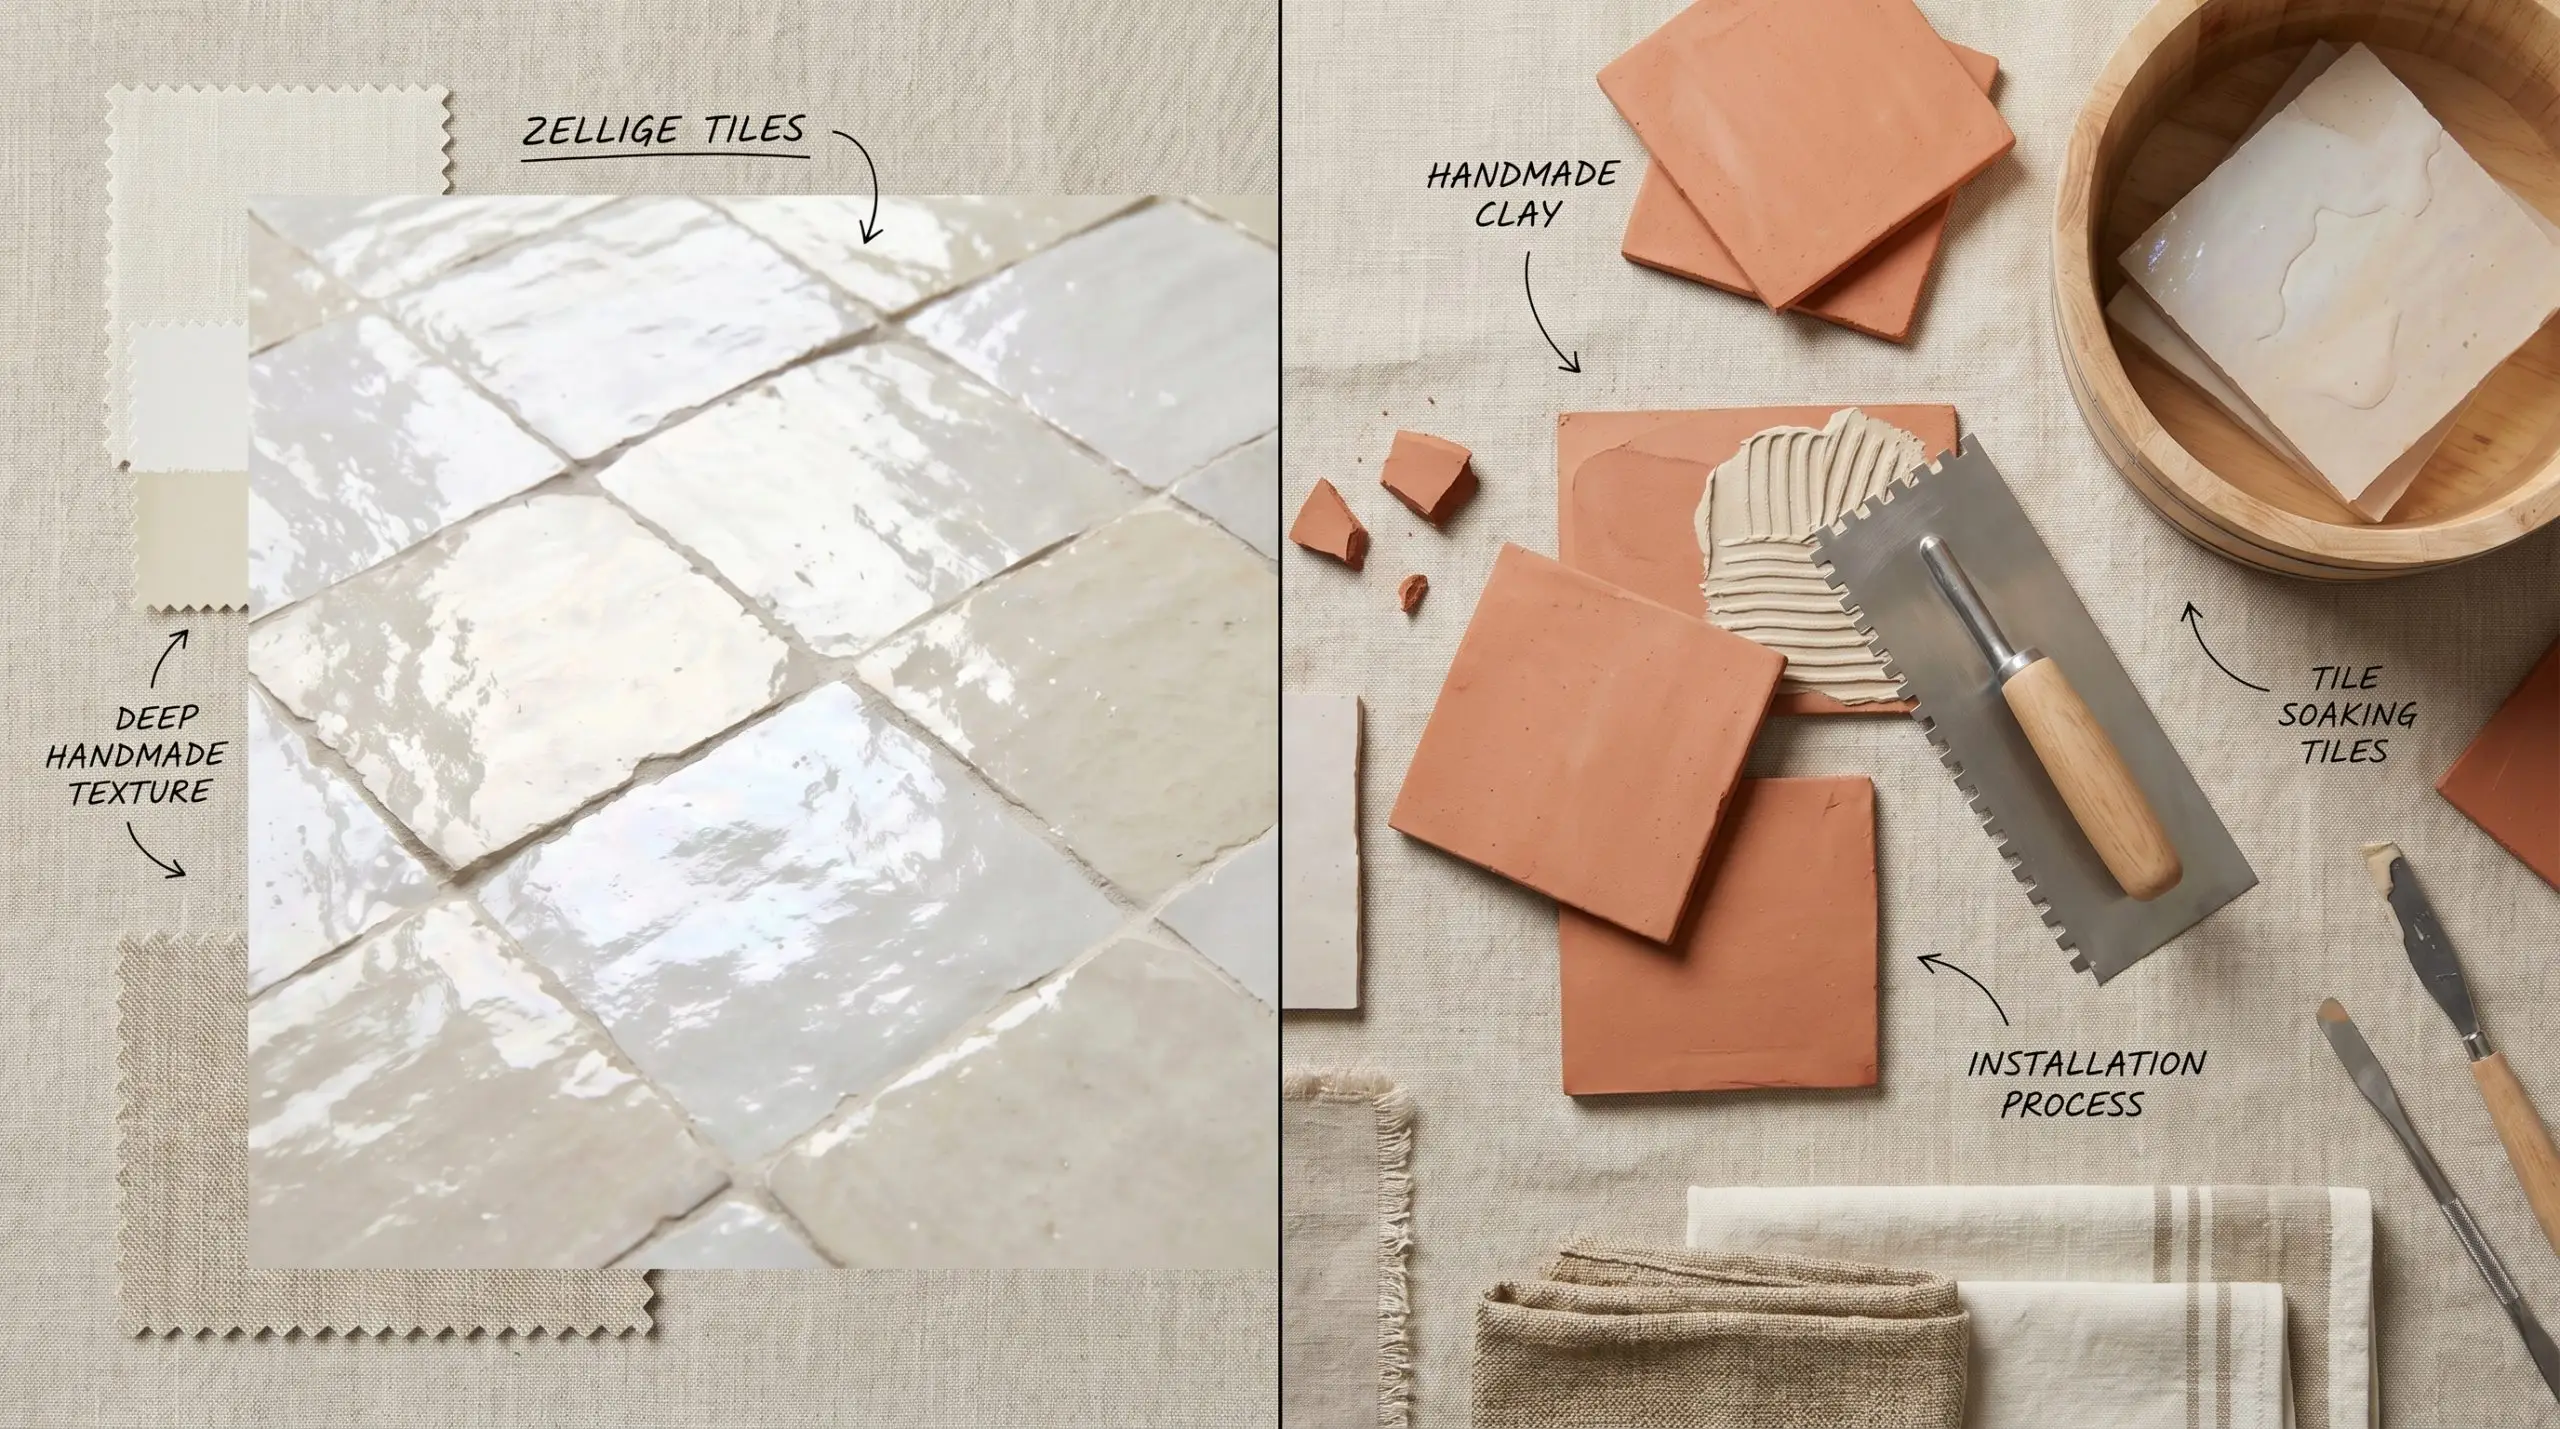
Always soak genuine Zellige in water for 1-2 minutes before applying thinset, otherwise the dry terracotta will instantly suck the moisture out of your mortar and compromise the structural bond.
The Setter’s Secret
You can apply wallpapers, paints, etc. on walls and see how they look in various interiors.
Highlight Natural Lippage with Sidelit Shower Sconces
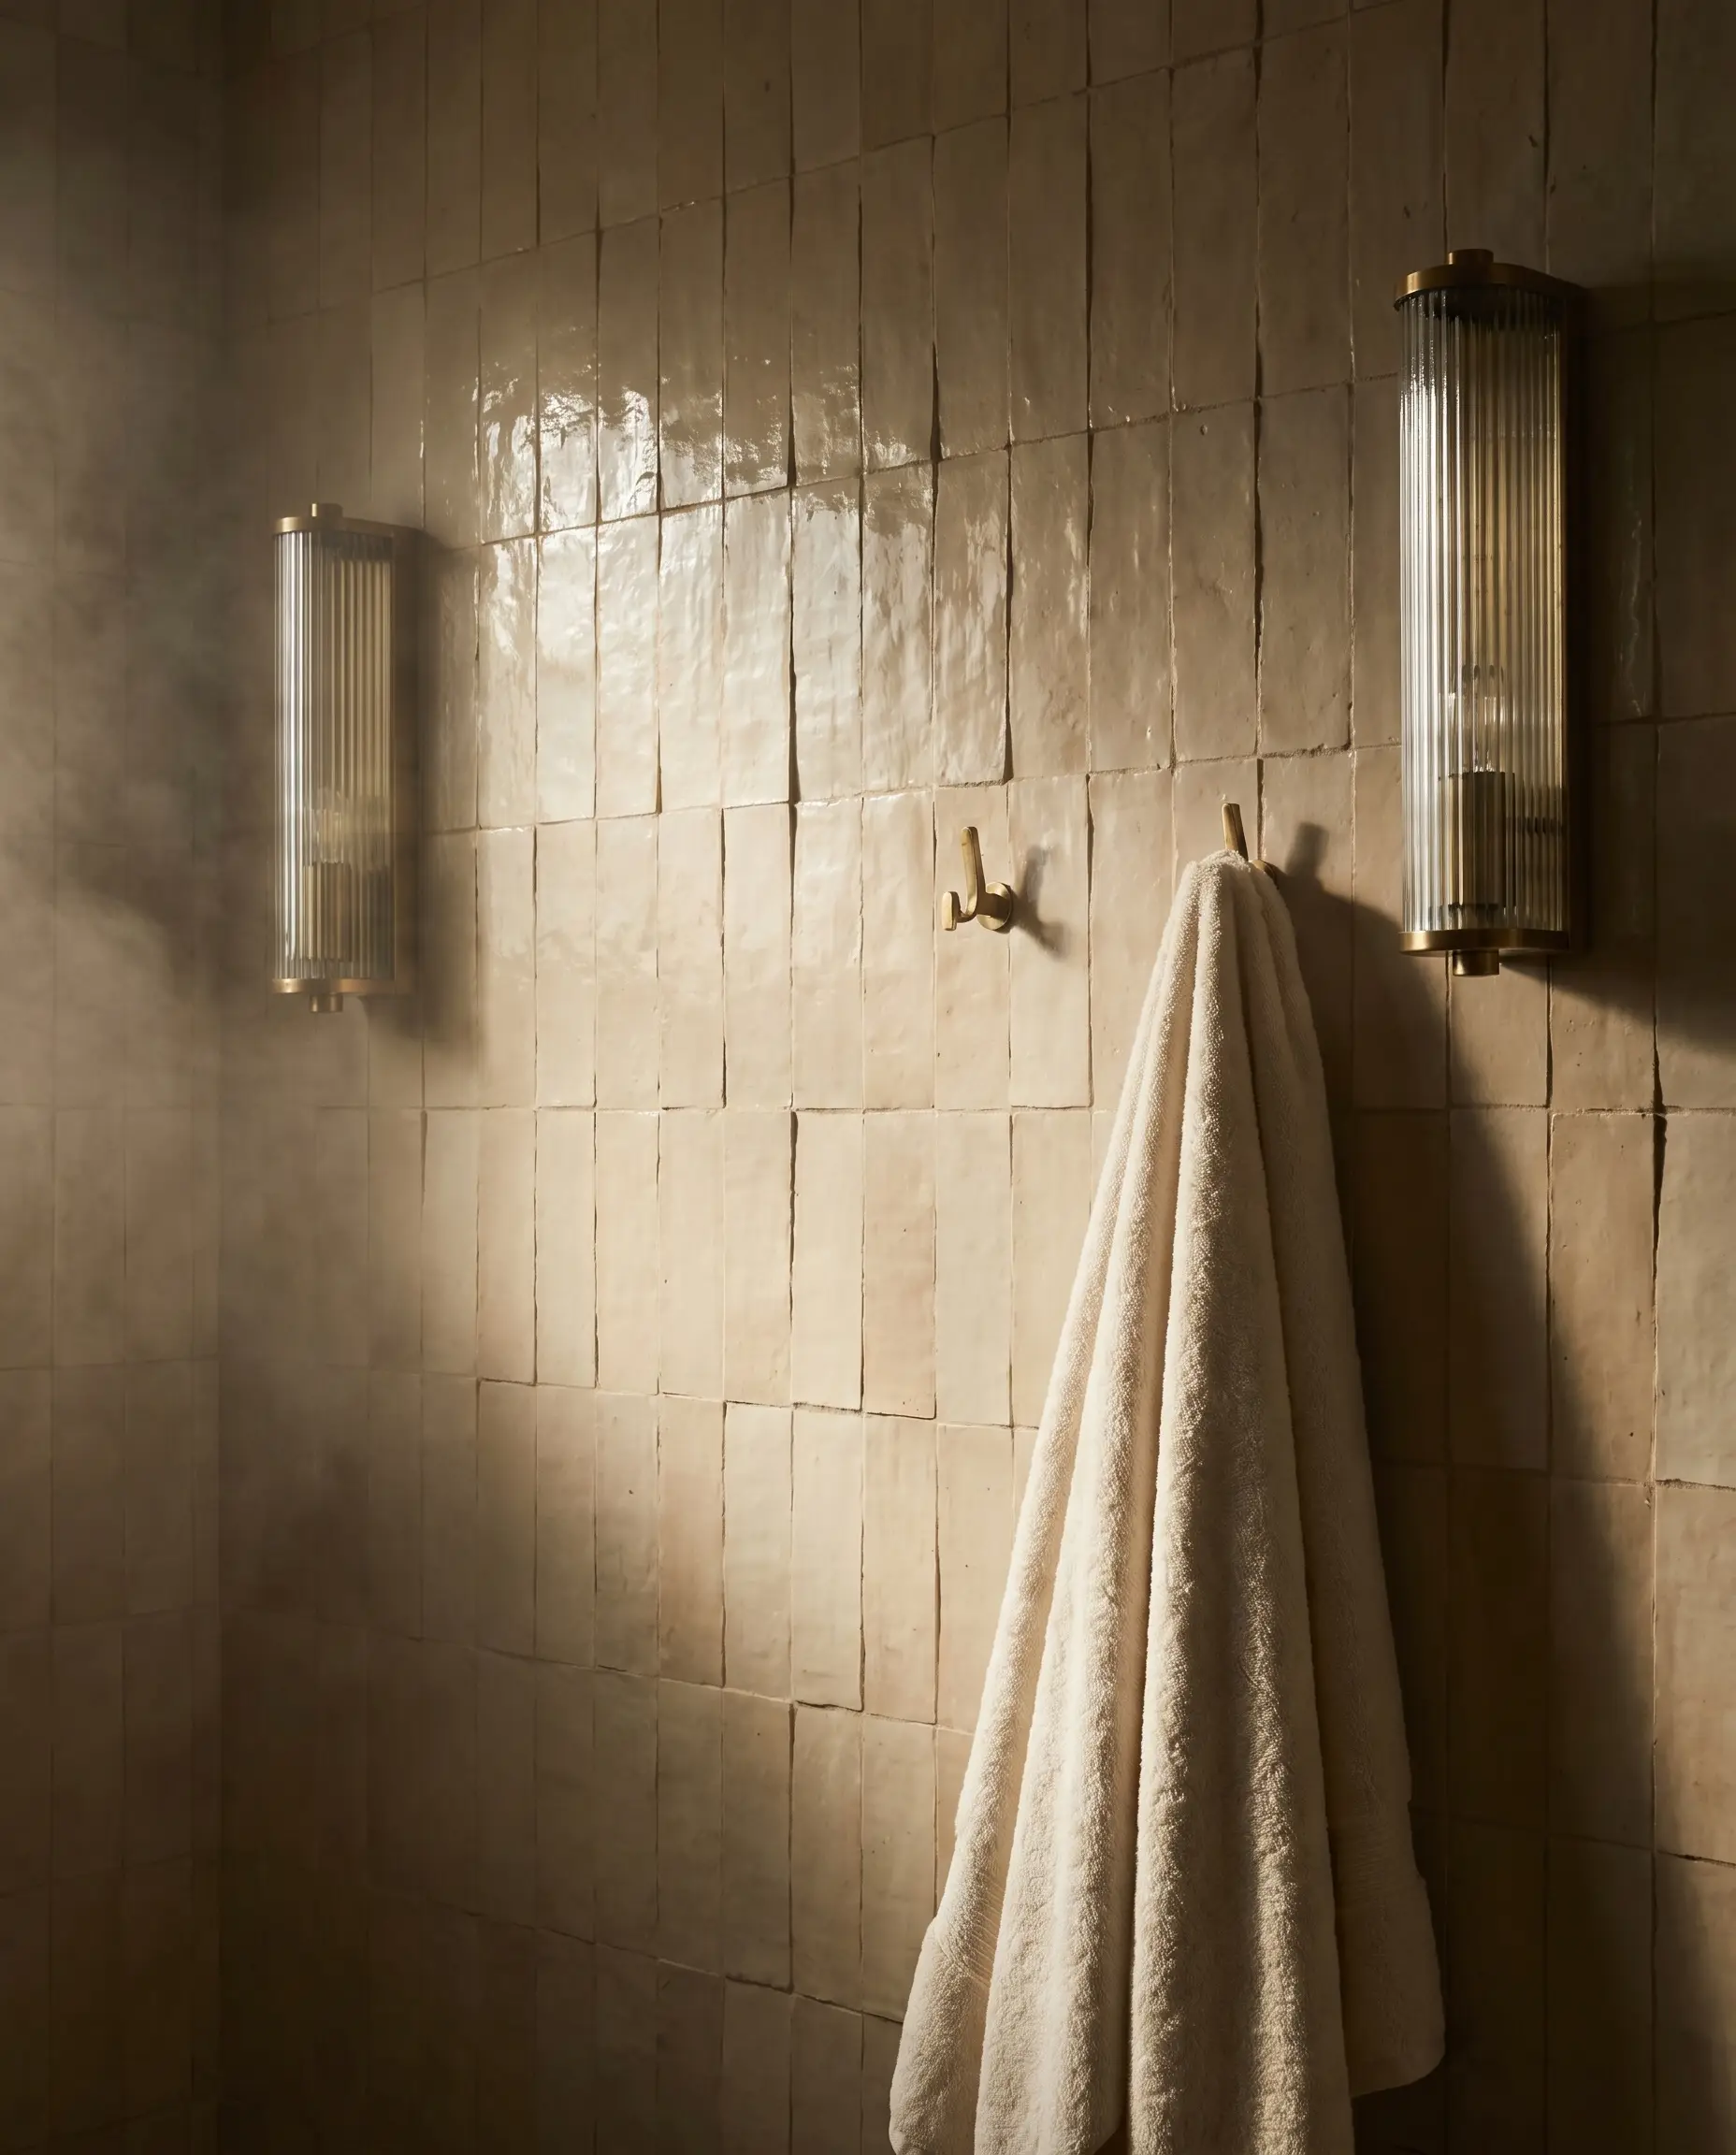
The structural unevenness between installed tiles, known as lippage, is the defining architectural feature of this material, not an installation error. Harsh overhead recessed lighting flattens this texture, so you must install wet-rated wall sconces to cast dramatic, raking light across the undulating glaze.
- Vibe: Atmospheric Spa
- Lighting Strategy: IP65 wet-rated sidelight sconces mounted at 65-70 inches vertically.
- Key Materials: Ribbed glass and brass sconces, 2×6 Zellige.
- Spatial Trick: Position the light source parallel to the tile face to maximize the shadowy depths of the unrectified edges.
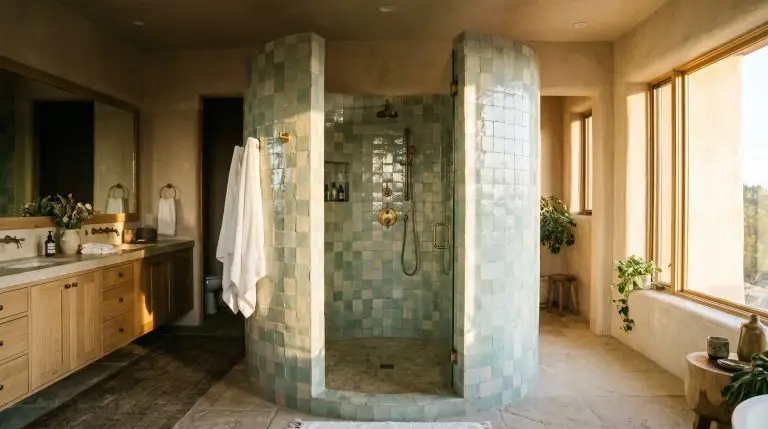
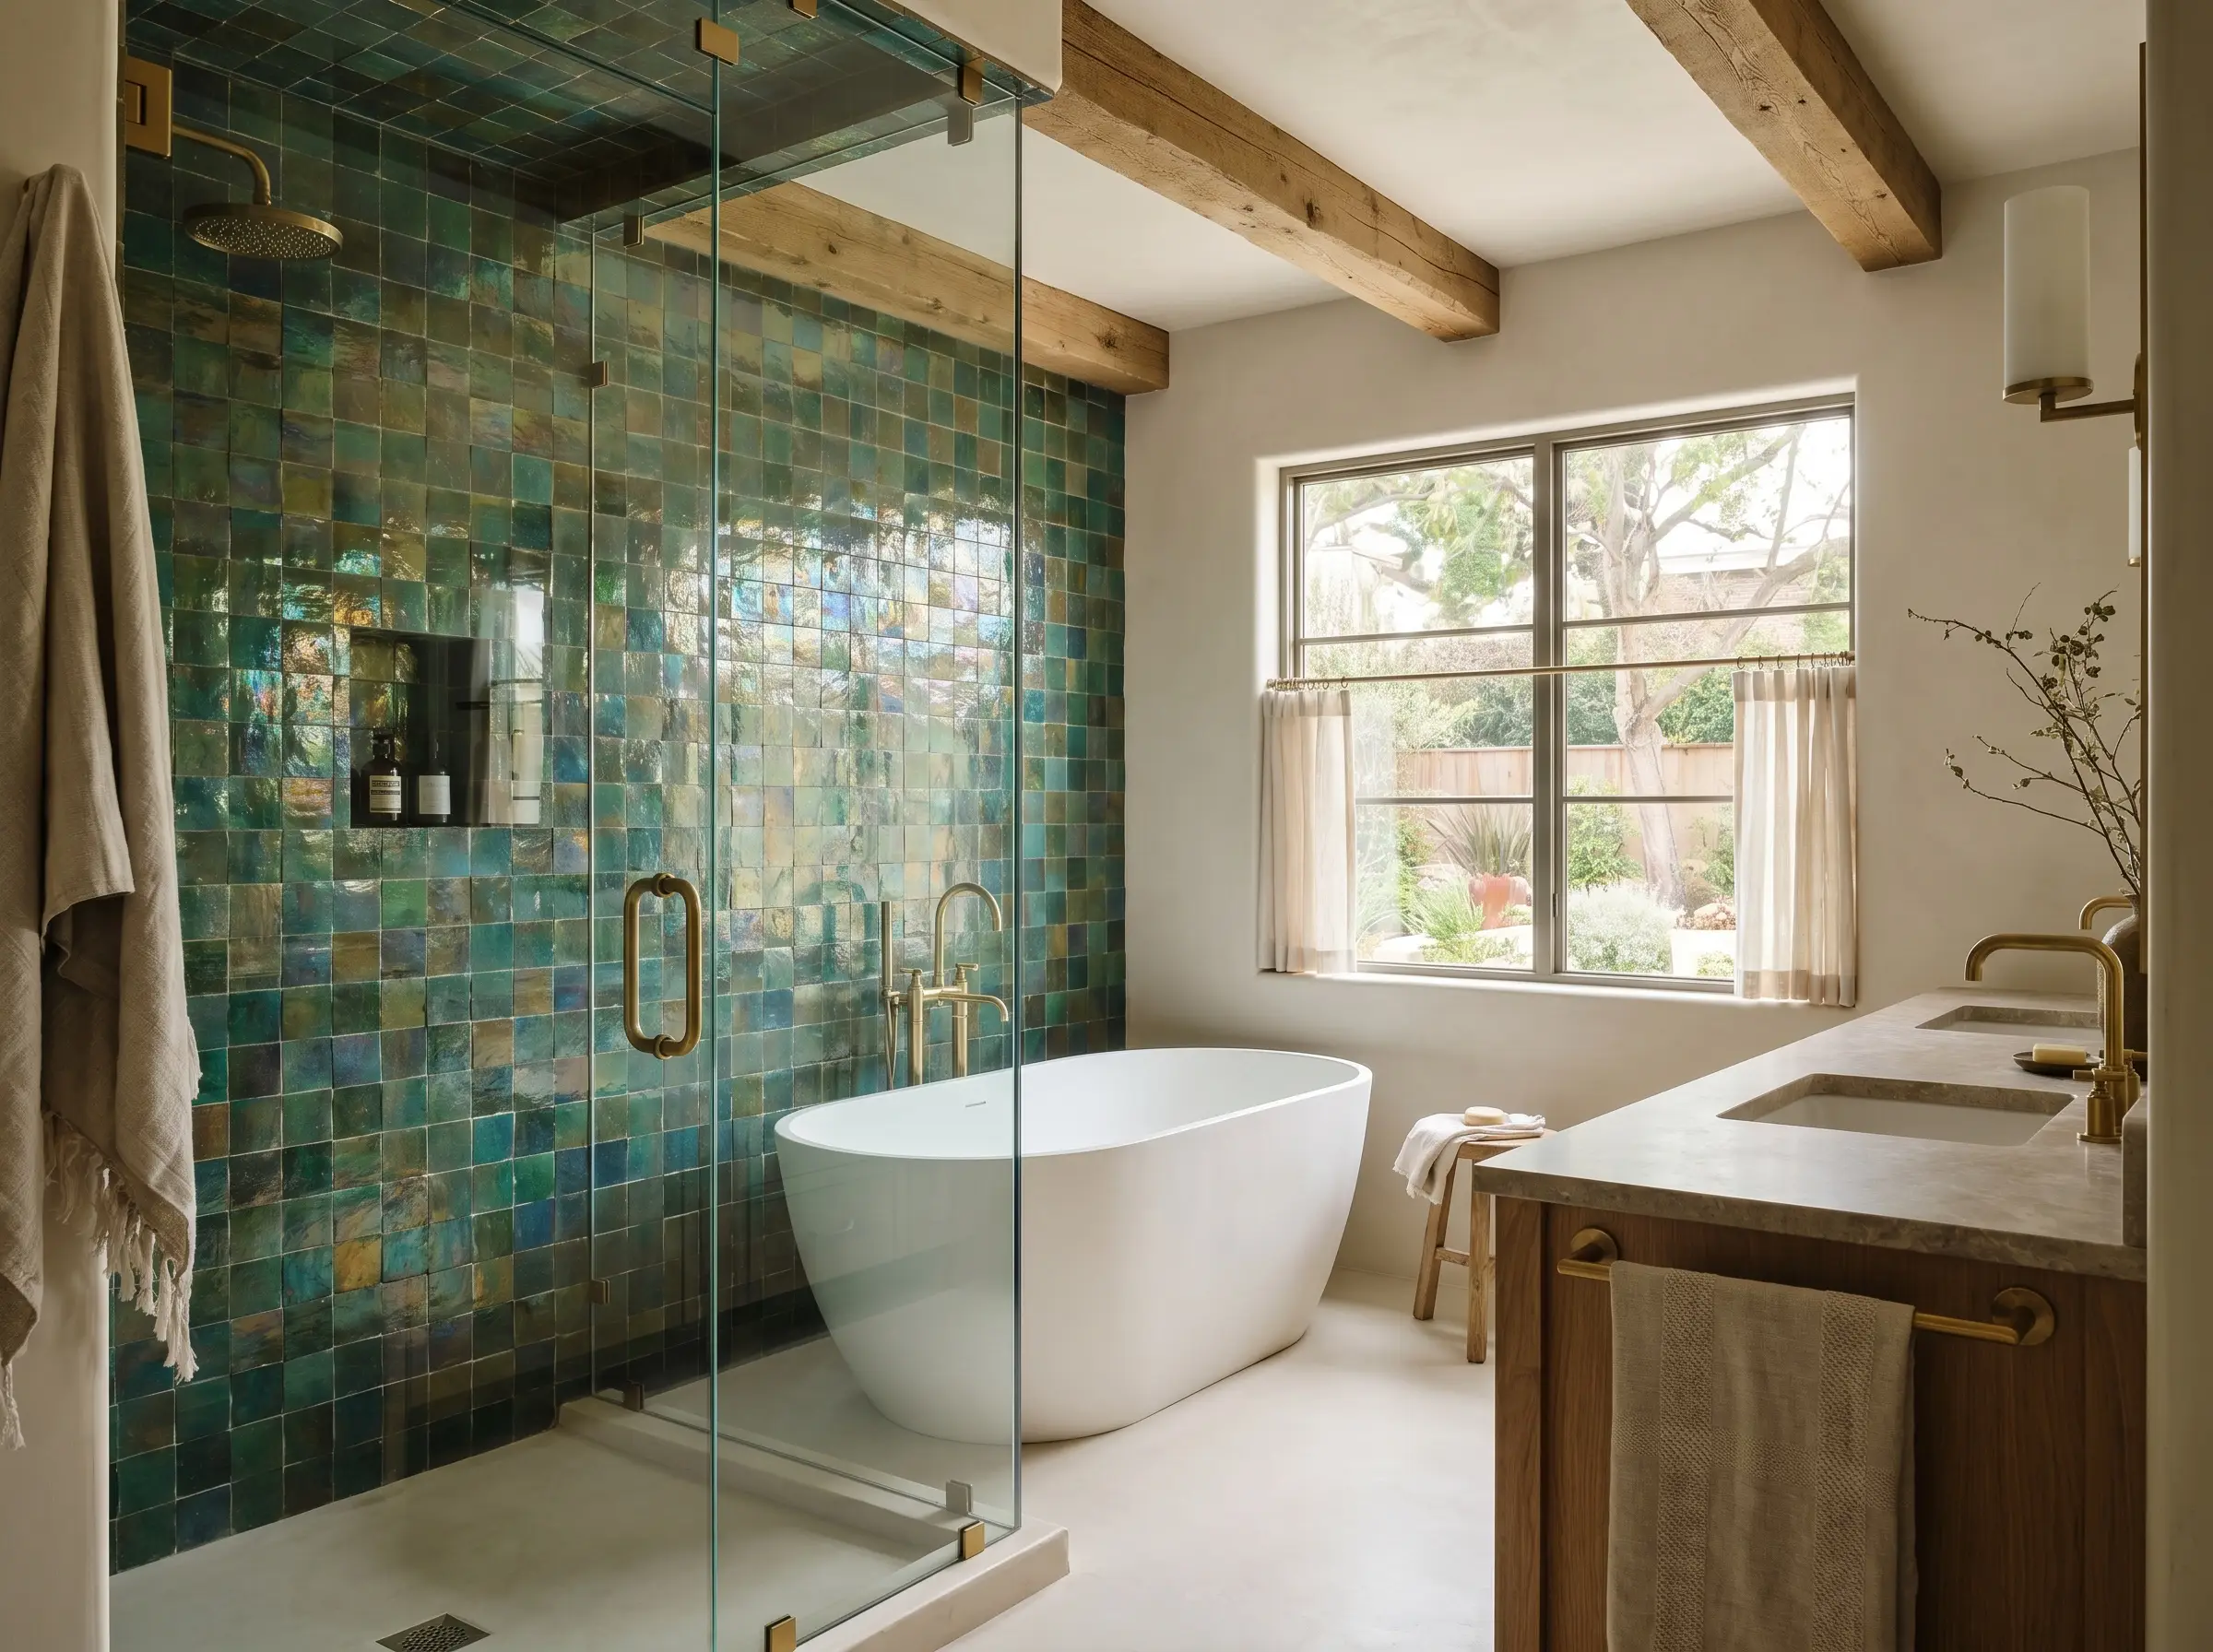
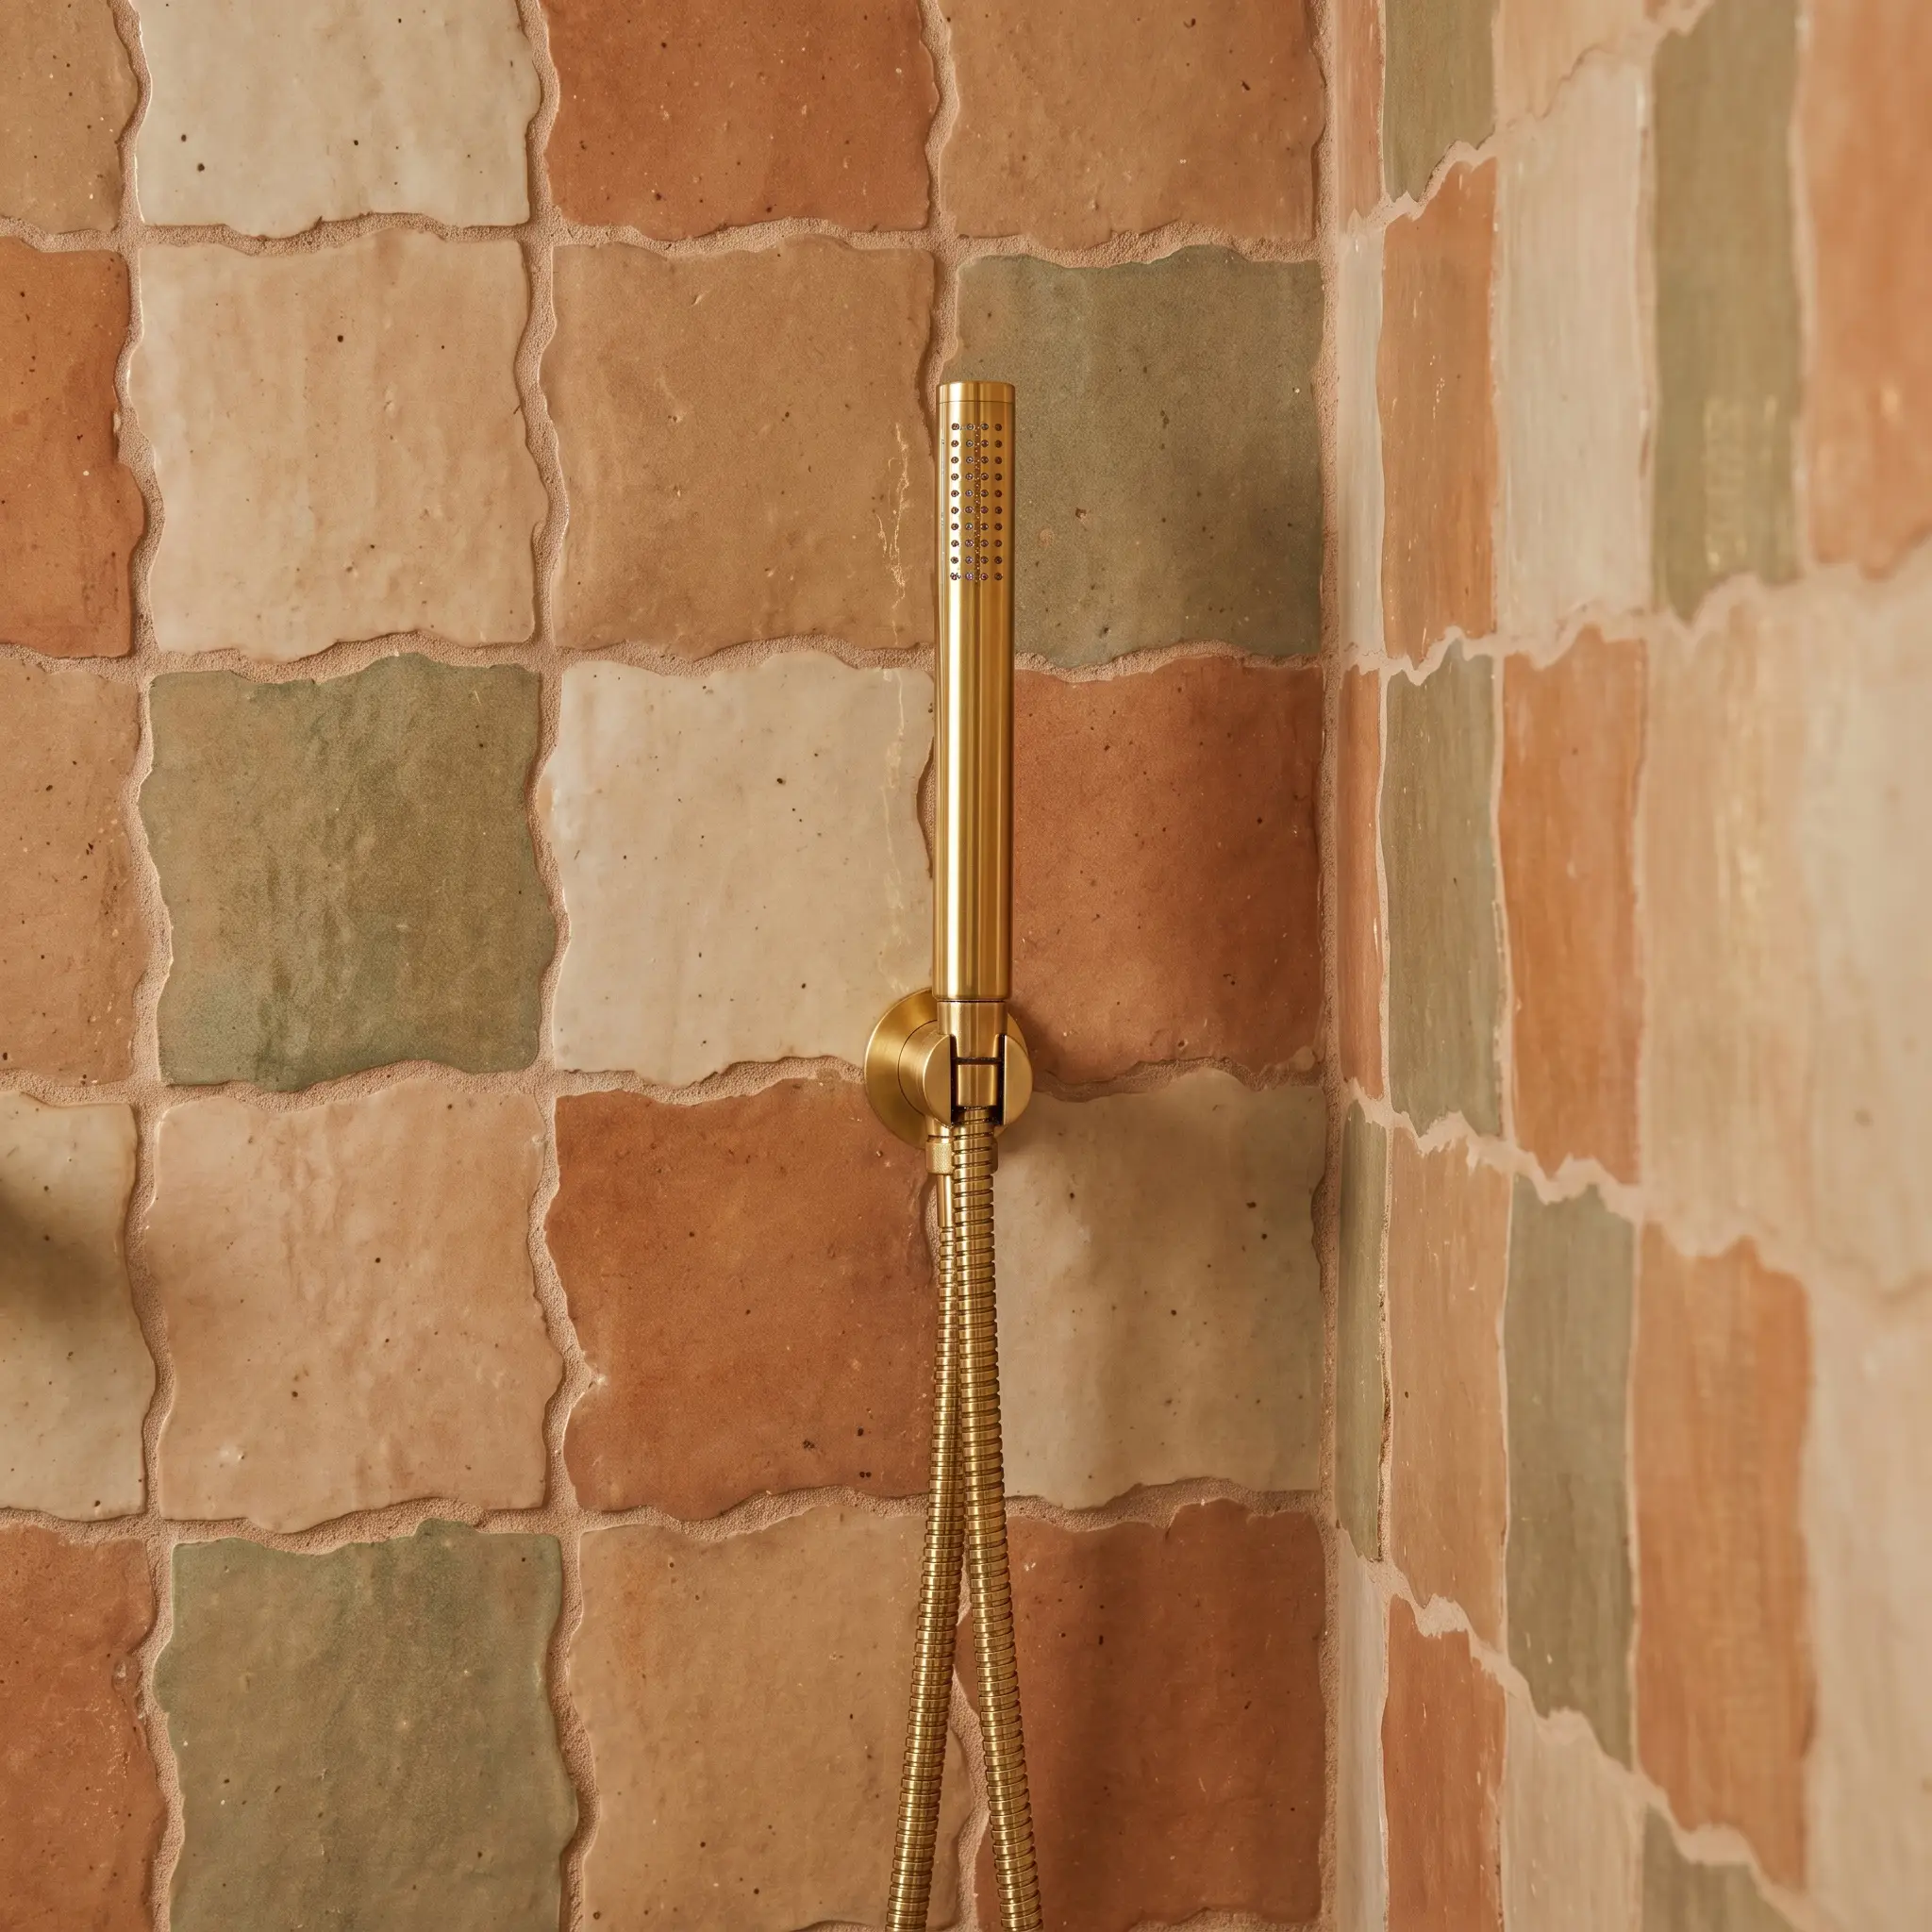
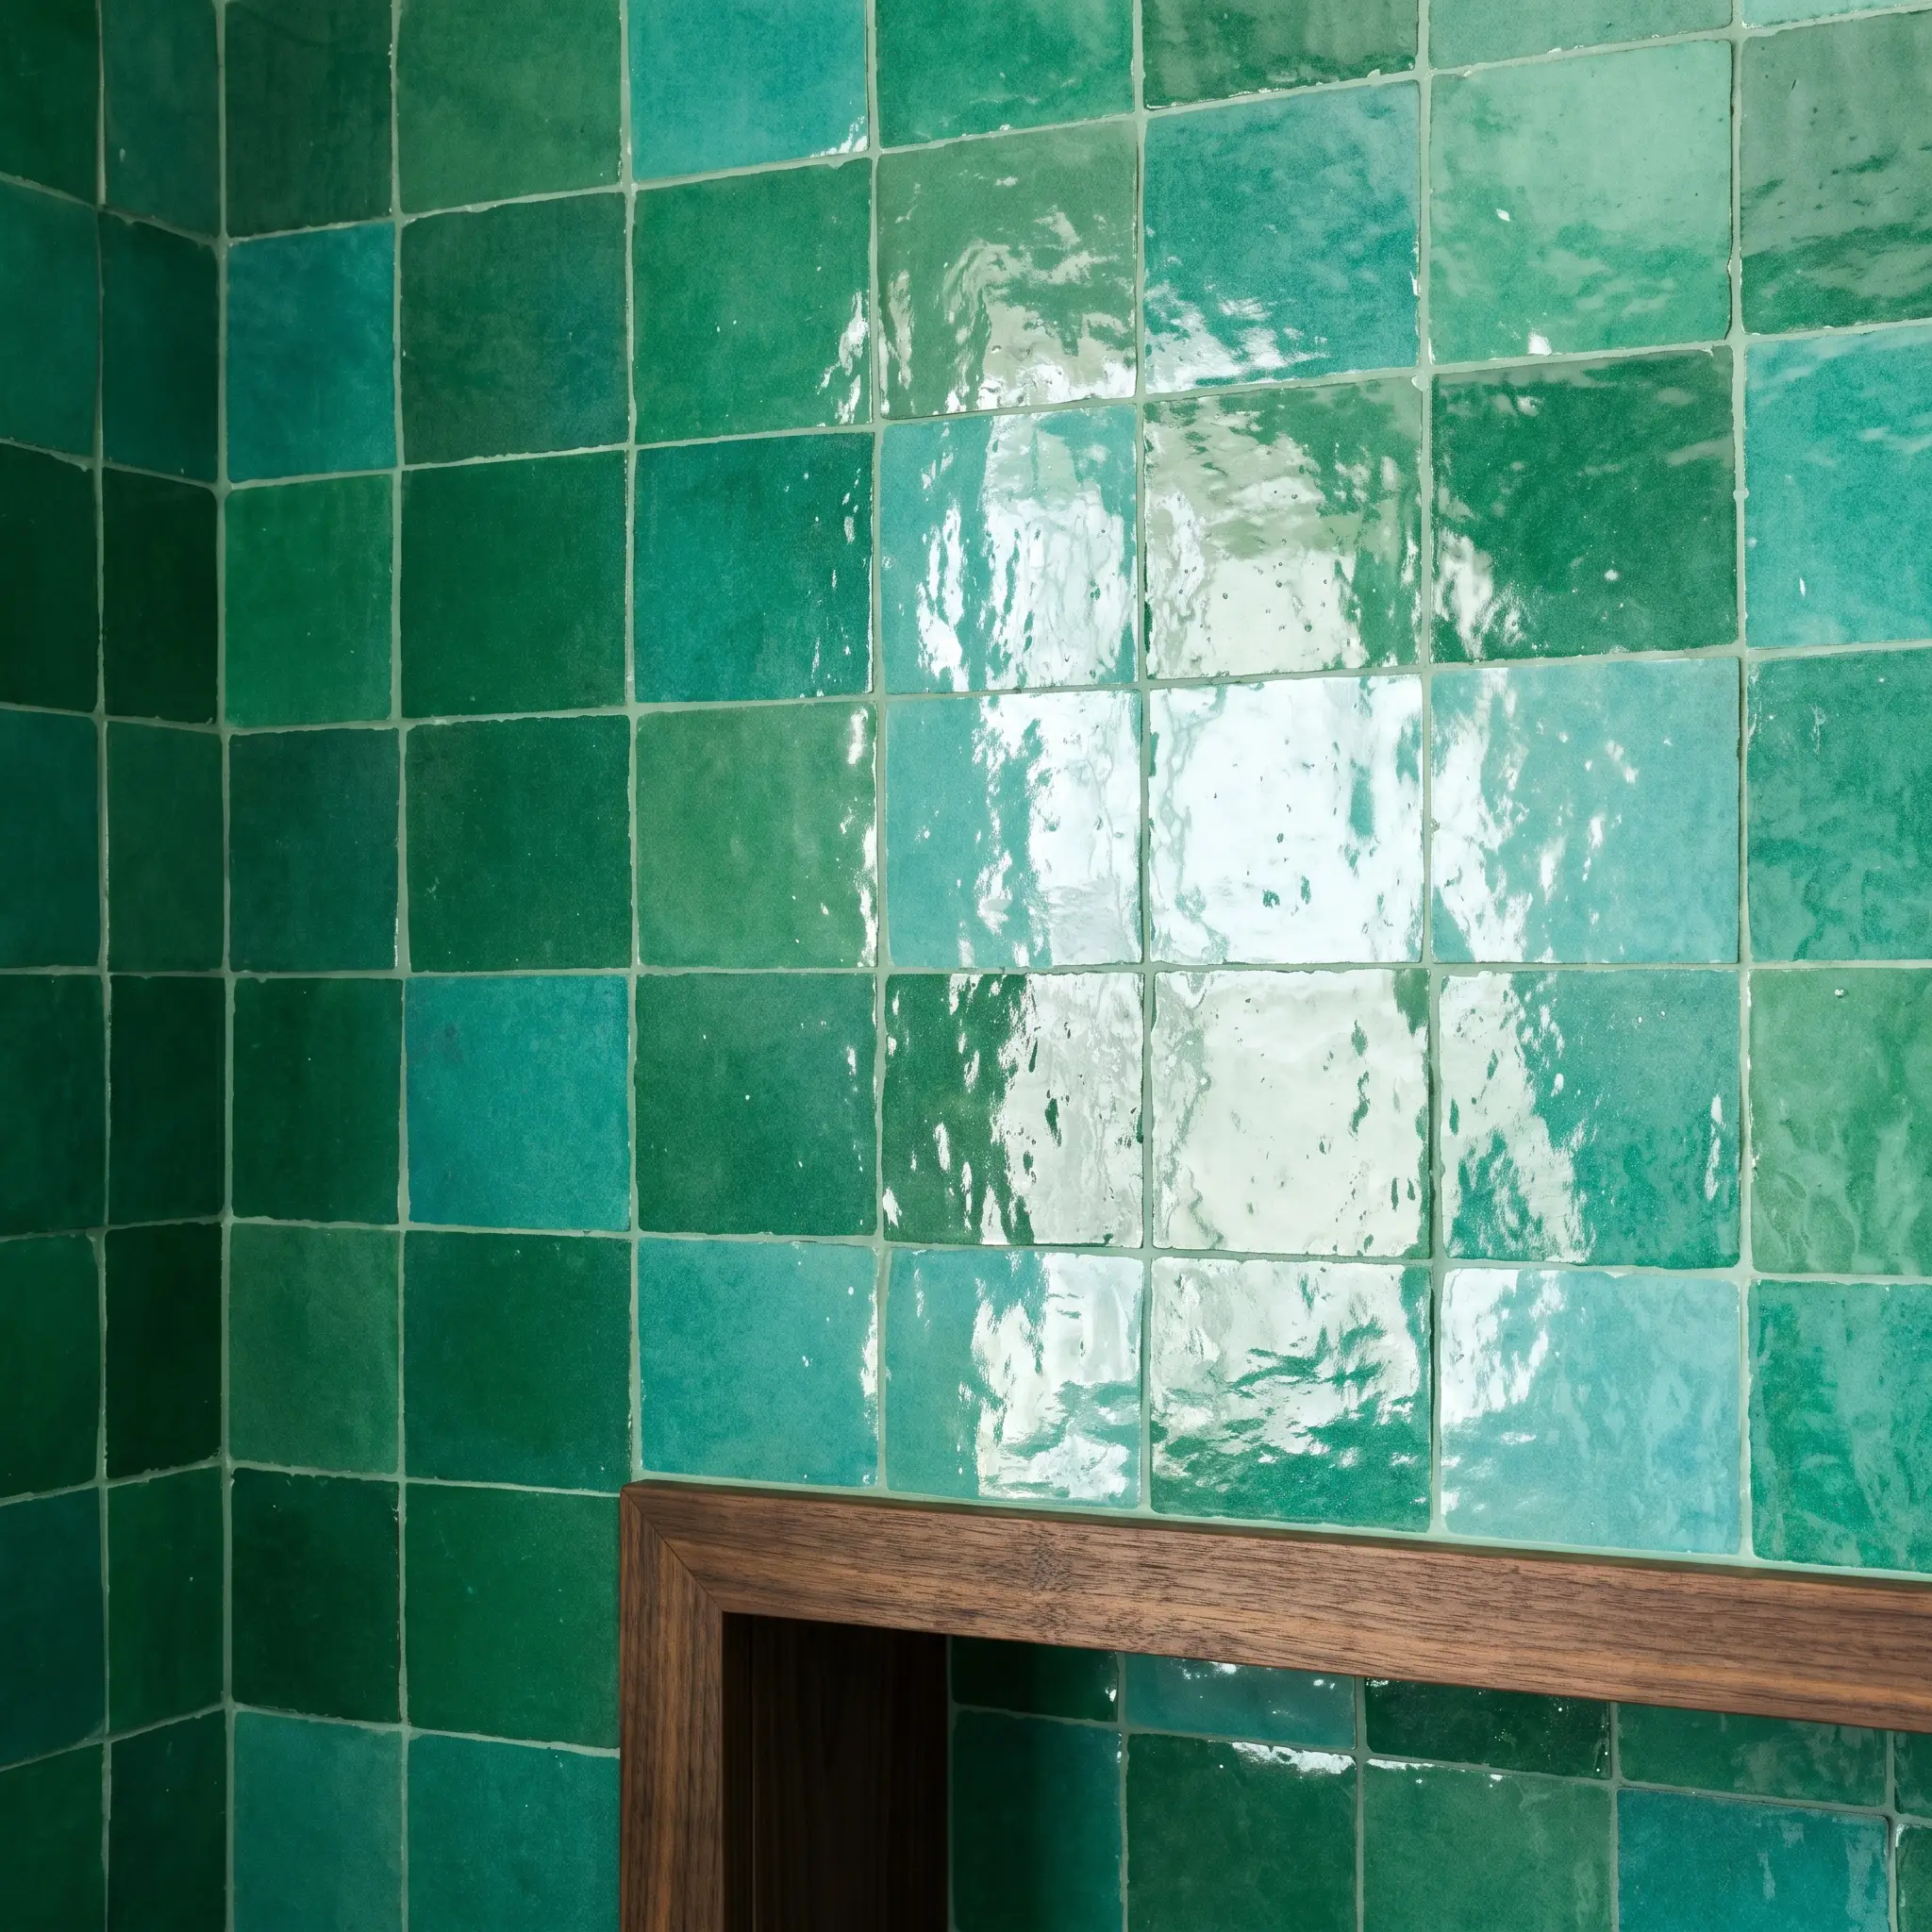
Ground Watery Green Zellige with Honed Slate Floors
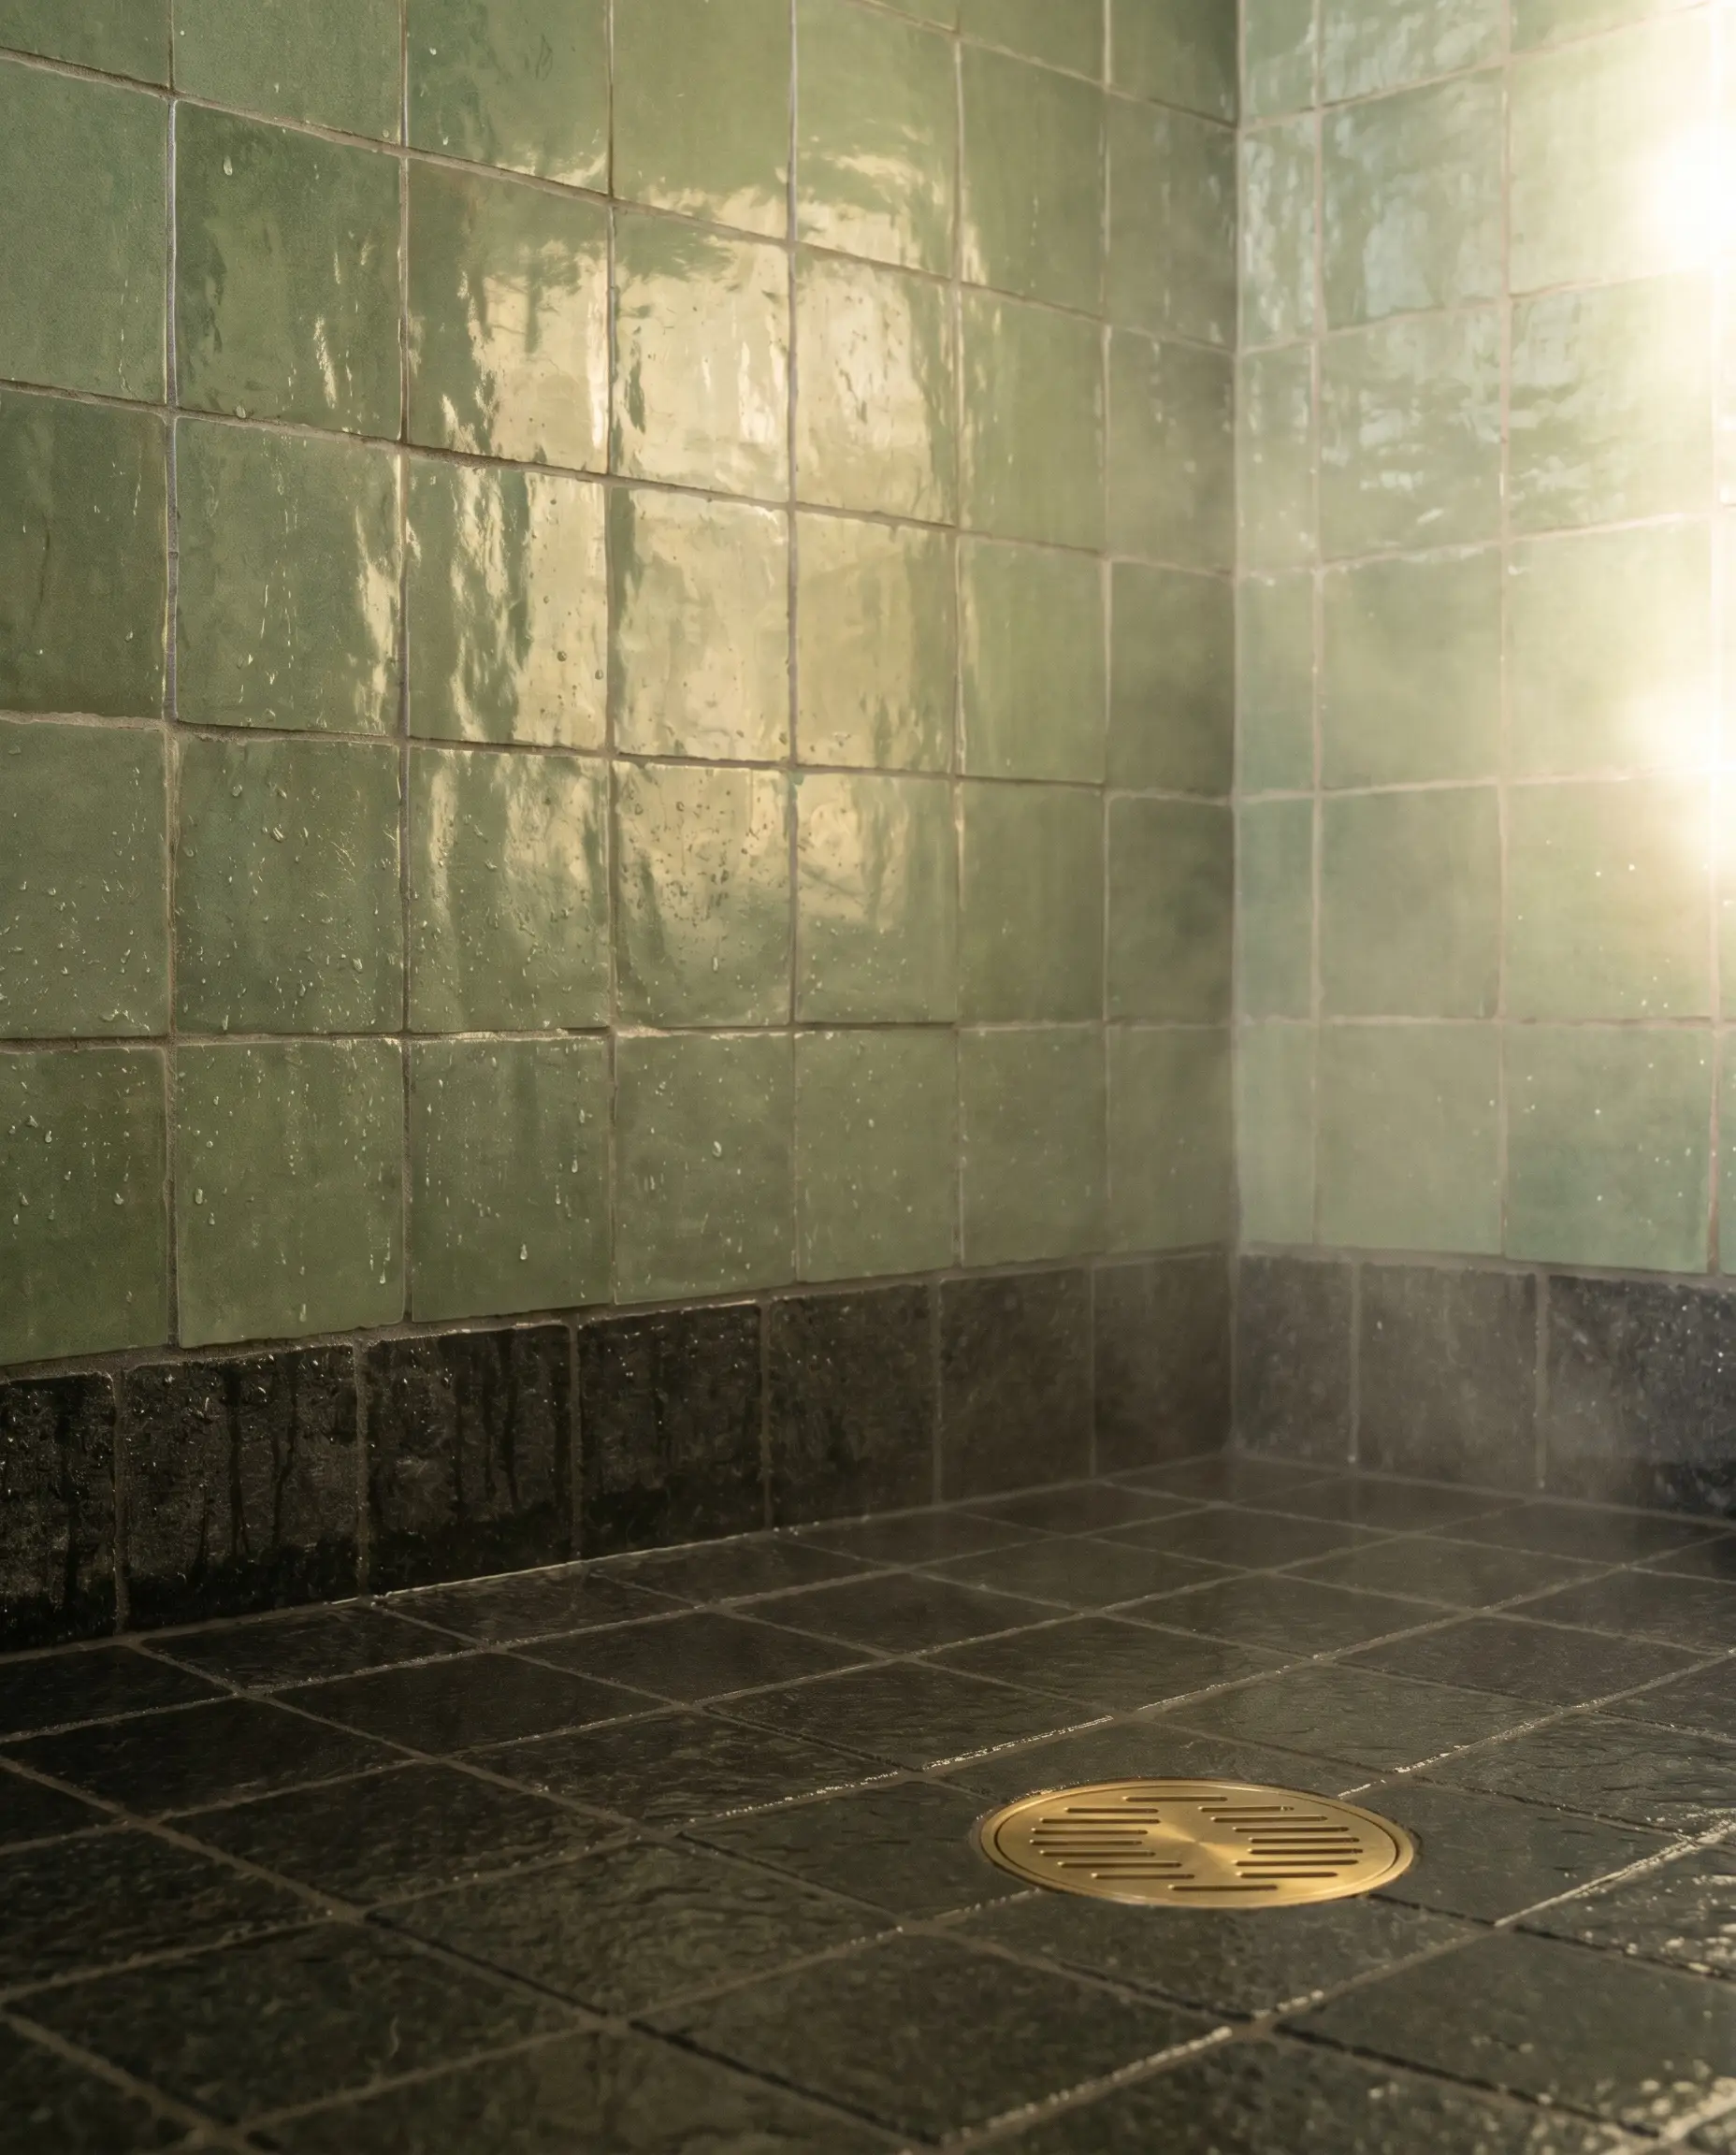
Sage or sea glass green walls create a highly reflective, fluid enclosure that requires serious visual weight at the base to prevent the space from feeling unmoored. Laying a matte, honed dark slate or charcoal basalt mosaic across the shower pan beautifully contrasts the glossy walls while offering critical slip-resistance.
- Vibe: Mediterranean Revival meets Earthy Modernism
- Wall Tile: 4×4 Sage Green Zellige
- Floor Tile: 2×2 Honed Charcoal Basalt or Dark Slate Mosaics
- Grout Match: Charcoal or soft black epoxy grout for the floor to hide hard water minerals.
Use a Vertical Stacked Bond for a Modern Edge
While traditional Moroccan applications rely on a standard square grid, setting 2×6 rectangular tiles in a vertical straight-stack instantly sharpens the wabi-sabi aesthetic into something highly architectural. This linear sightline pulls the eye upward, making standard-height shower ceilings feel significantly taller while retaining the organic texture.
- Vibe: Transitional Minimalism
- Layout Strategy: Vertical straight-stack (stacked bond)
- Spatial Trick: Run the vertical stack all the way to the ceiling drywall, leaving no painted gap above the wet zone.
- Tile Specification: 2×6 Rectangular Zellige
Contrast High-Gloss Glaze with Matte Tadelakt Walls
When your shower enclosure acts as a brilliant, light-bouncing jewel box, the surrounding dry-zone walls should absorb light to establish necessary visual contrast. Coating the exterior walls in a traditional waterproof plaster, as detailed in our guide to tadelakt plaster bathrooms, provides an organic, breathable finish that shares the tile’s regional heritage without competing for dominance.
- Vibe: High-End Bespoke Sanctuary
- Wet Zone Material: High-gloss Authentic Zellige
- Dry Zone Material: Matte Tadelakt Plaster
- Color Match: Farrow & Ball School House White (for matching plaster tint)
Create a Moody Enclosure with Carbon Black Zellige
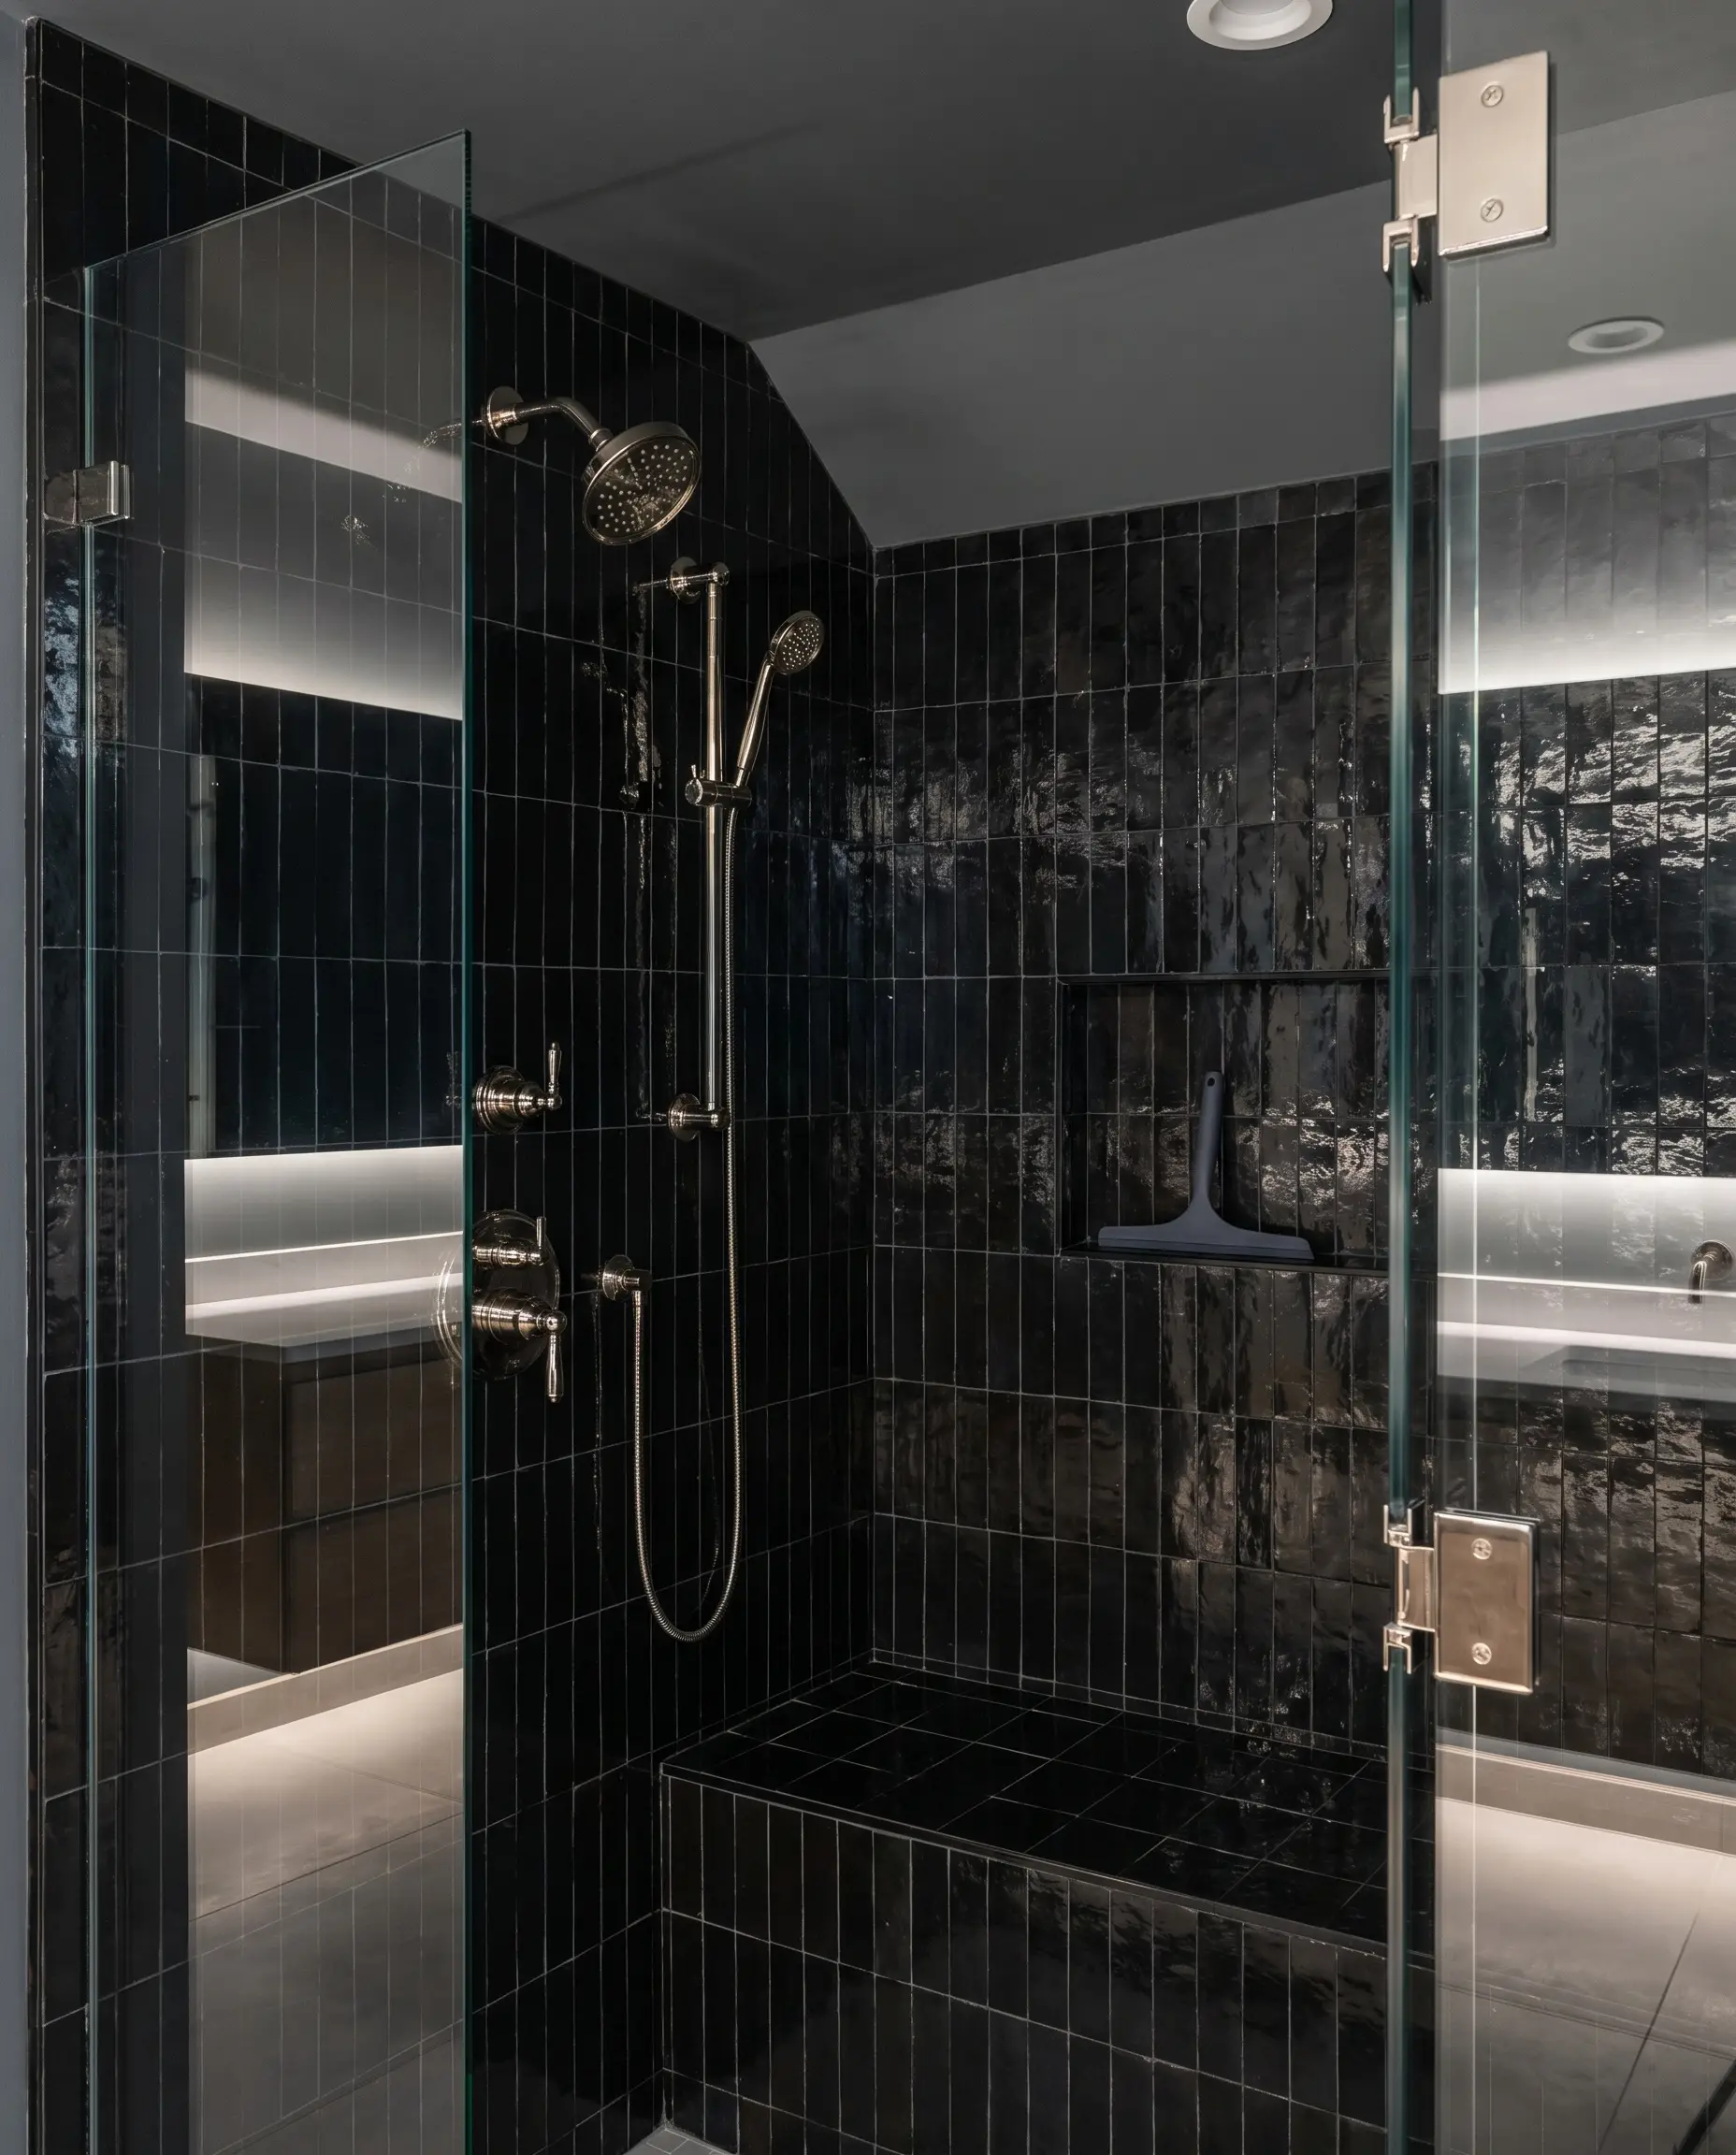
Carbon black glaze transforms the shower into a dramatic, dark mirror, reflecting ambient light while receding spatially. To execute this uncompromising, edgy look, contrast the inky walls with polished nickel hardware for classic luxury, or commit to a monolithic aesthetic with matte black fixtures.
- Vibe: Edgy Transitional Luxury
- Wall Tile: 4×4 Carbon Black Zellige
- Hardware Contrast: Polished Nickel (High Contrast) or Matte Black (Monolithic)
- Color Match: Sherwin-Williams Tricorn Black (for ceiling or trim)
Black glaze highlights hard water deposits exponentially faster than light colors; a strict squeegee routine is non-negotiable to maintain the reflective depth.
The Setter’s Secret
Soften the Shower Entry with a Bullnose Trim Archway
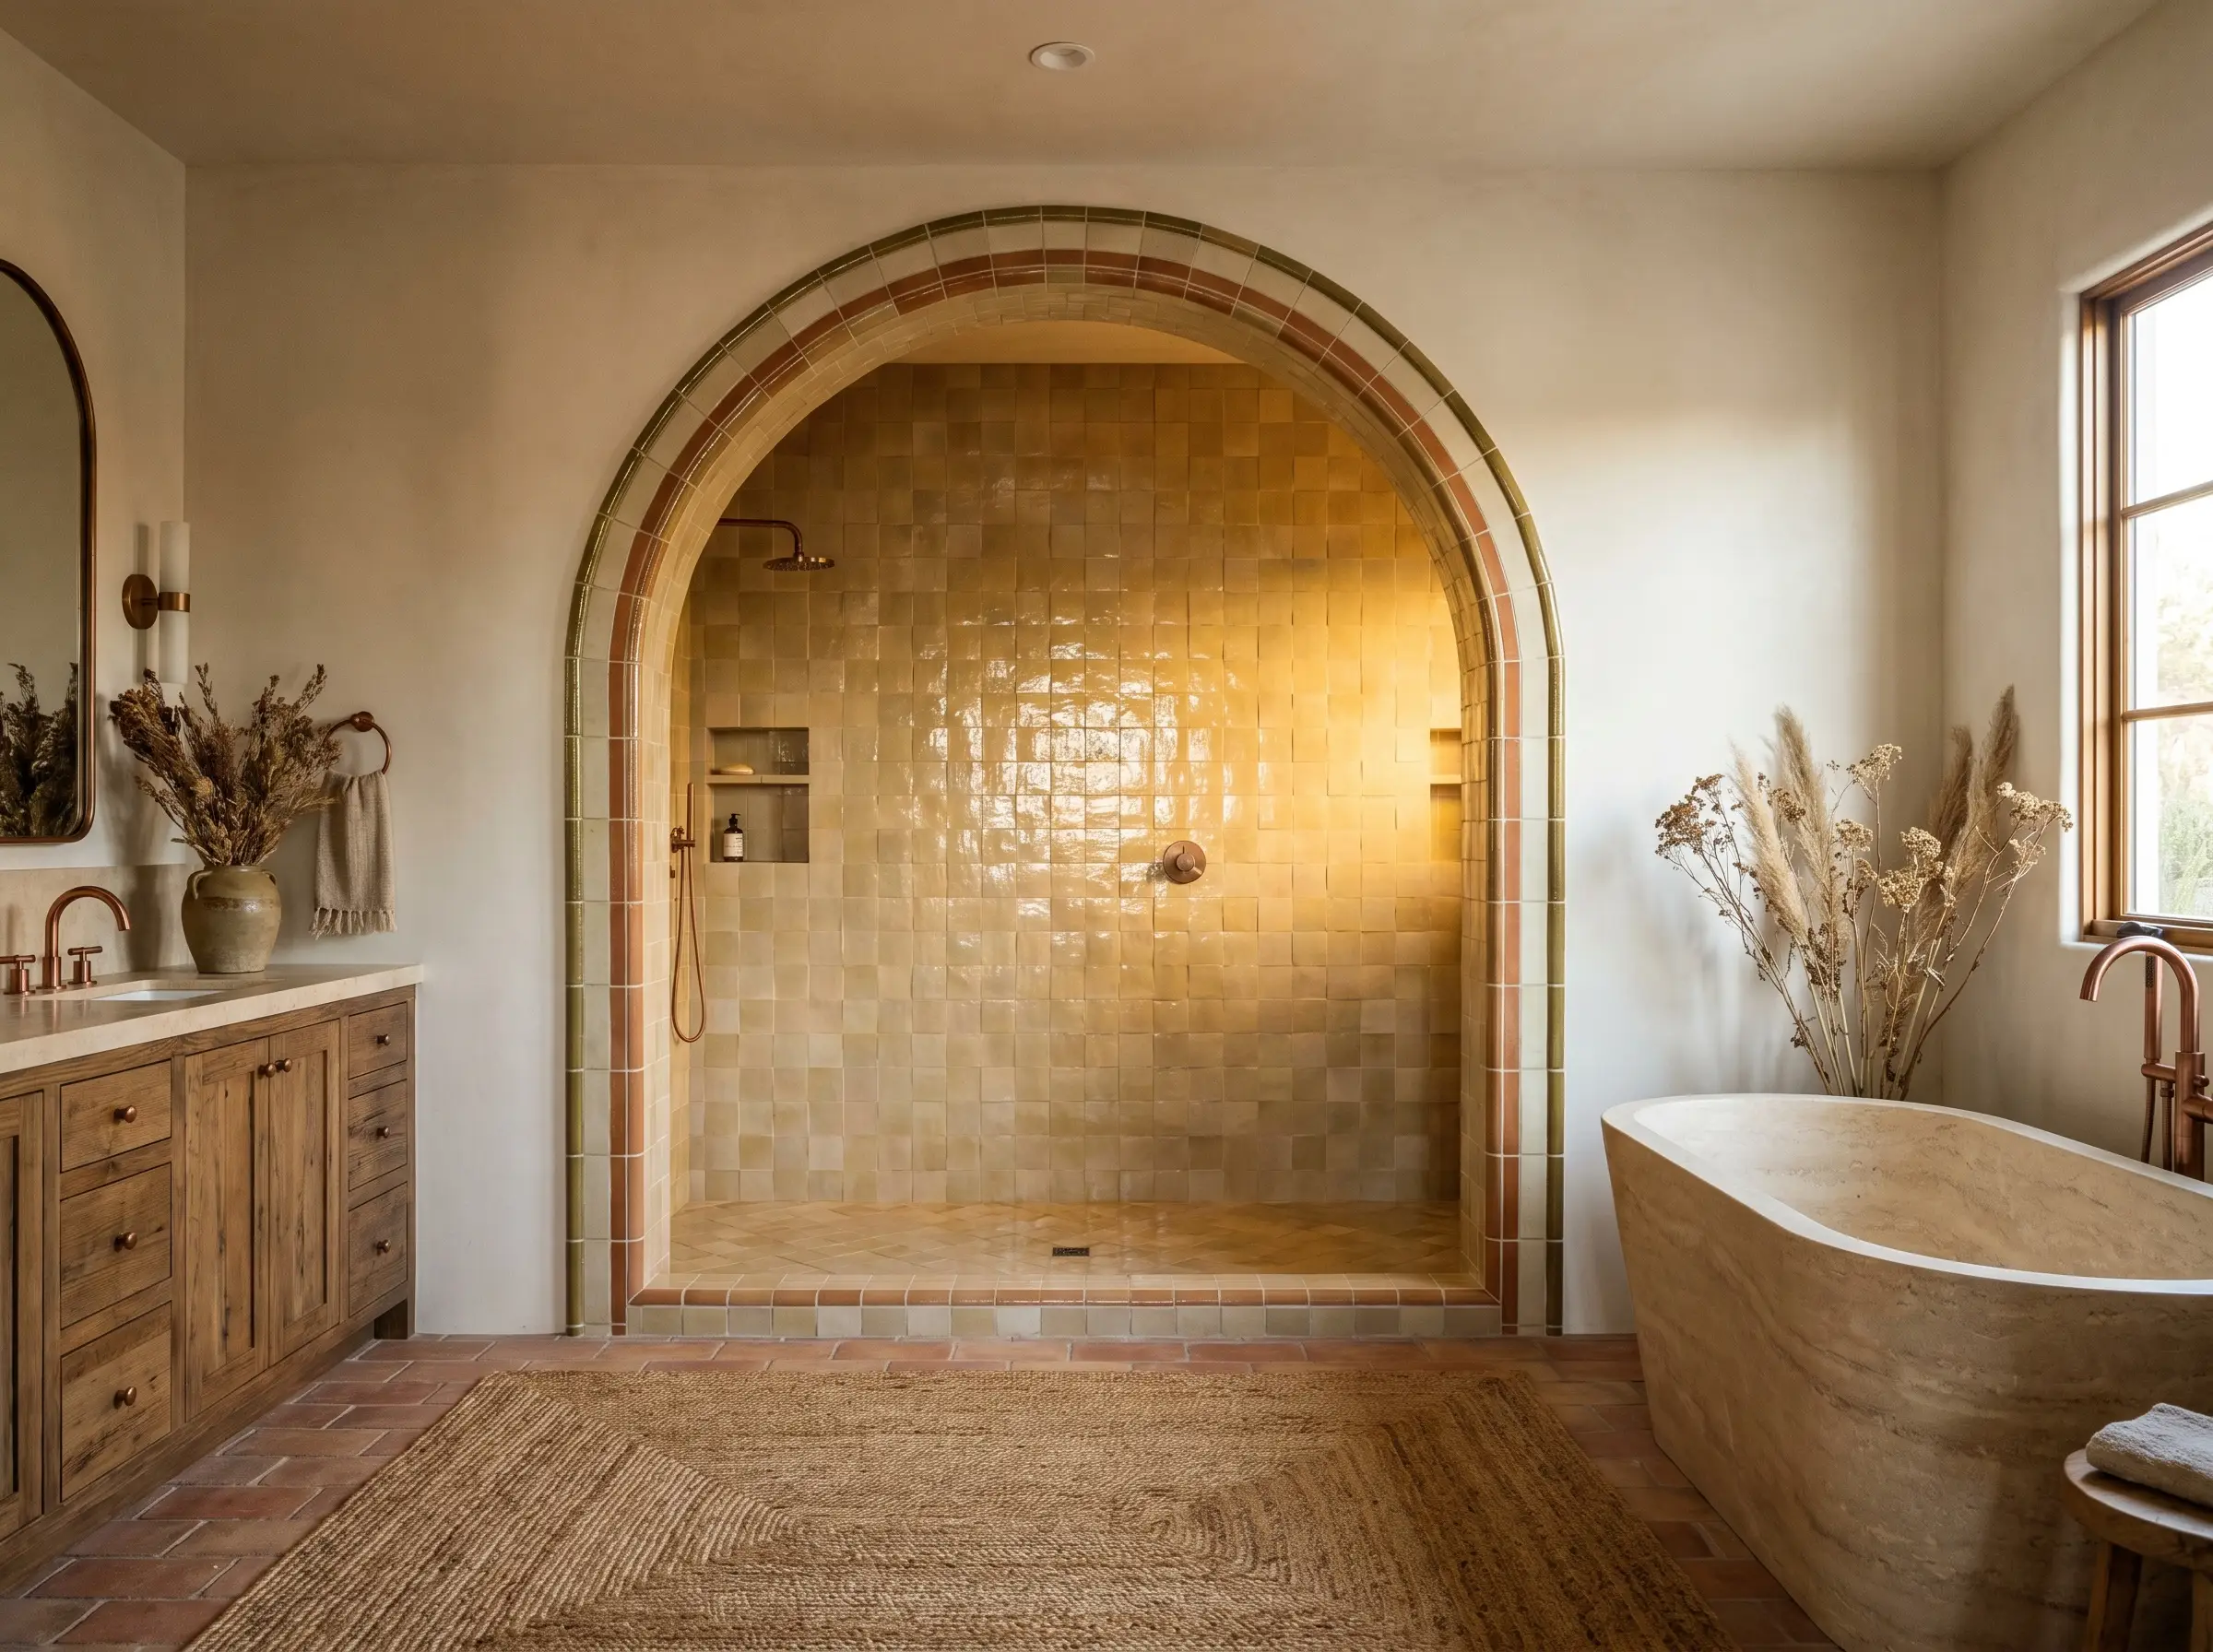
Authentic Zellige features rough, unglazed terracotta sides, making standard 90-degree outside corners a notorious finishing nightmare. Building a structurally arched shower entryway allows you to utilize specifically fired bullnose trims or meticulously custom-mitering the edges, completely hiding the raw clay body.
- Architectural Feature: Plastered or Tiled Archway Entry
- Edge Solution: Glazed Bullnose Trim or 45-degree custom miters
- Vibe: Sculptural Mediterranean
- Execution Pro-Tip: Do not use metal Schluter strips on an arch; the rigid metal clashes terribly with the artisanal tile.
Construct a Built-In Niche Using Custom Mitered Edges

Standard metal edging strips look exceptionally cheap against the thick, fired clay of a bespoke shower niche. Instruct your tile setter to painstakingly custom-miter the tile edges at a 45-degree angle for every niche corner, creating a seamless, self-returning block of glaze that conceals the porous terracotta.
- Niche Strategy: Recessed, custom-mitered shower storage
- Edge Finish: 45-Degree Miters (No metal profiles)
- Key Material: Diamond blade wet saw with variable speed
- Design Rule: Size the niche to perfectly match full tile dimensions to avoid tiny, awkward sliver cuts.
Substitute Authentic Clay with Glazed Ceramic Alternatives
Authentic, handmade clay tiles command premium pricing and demand elite installation labor, which simply does not fit every project scope. Zellige-look ceramics provide an exceptional accessible luxury alternative; these machine-made tiles feature intentionally varied glazes and wavy surfaces but boast a perfectly flat back for standard, cost-effective installation.
- Vibe: Accessible Luxury
- Budget Alternative: Glazed Ceramic “Zellige-Look” Tile
- Installation Advantage: Flat ceramic backing requires standard thinset application rather than complex back-buttering.
- Material Match: Premium porcelain or ceramic with high shade variation (V4 rating).
| Feature | Authentic Zellige | Zellige-Look Ceramic |
|---|---|---|
| Cost (Material) | $18 – $25+ / sq ft | $6 – $12 / sq ft |
| Installation Difficulty | Elite (Requires soaking & custom cuts) | Standard (Easy for general contractors) |
| Authenticity of Texture | Unmatched (Raw terracotta, heavy lippage) | Simulated (Wavy surface, flat back) |
| Maintenance | High (pH-neutral only, porous clay body) | Low (Standard ceramic care) |
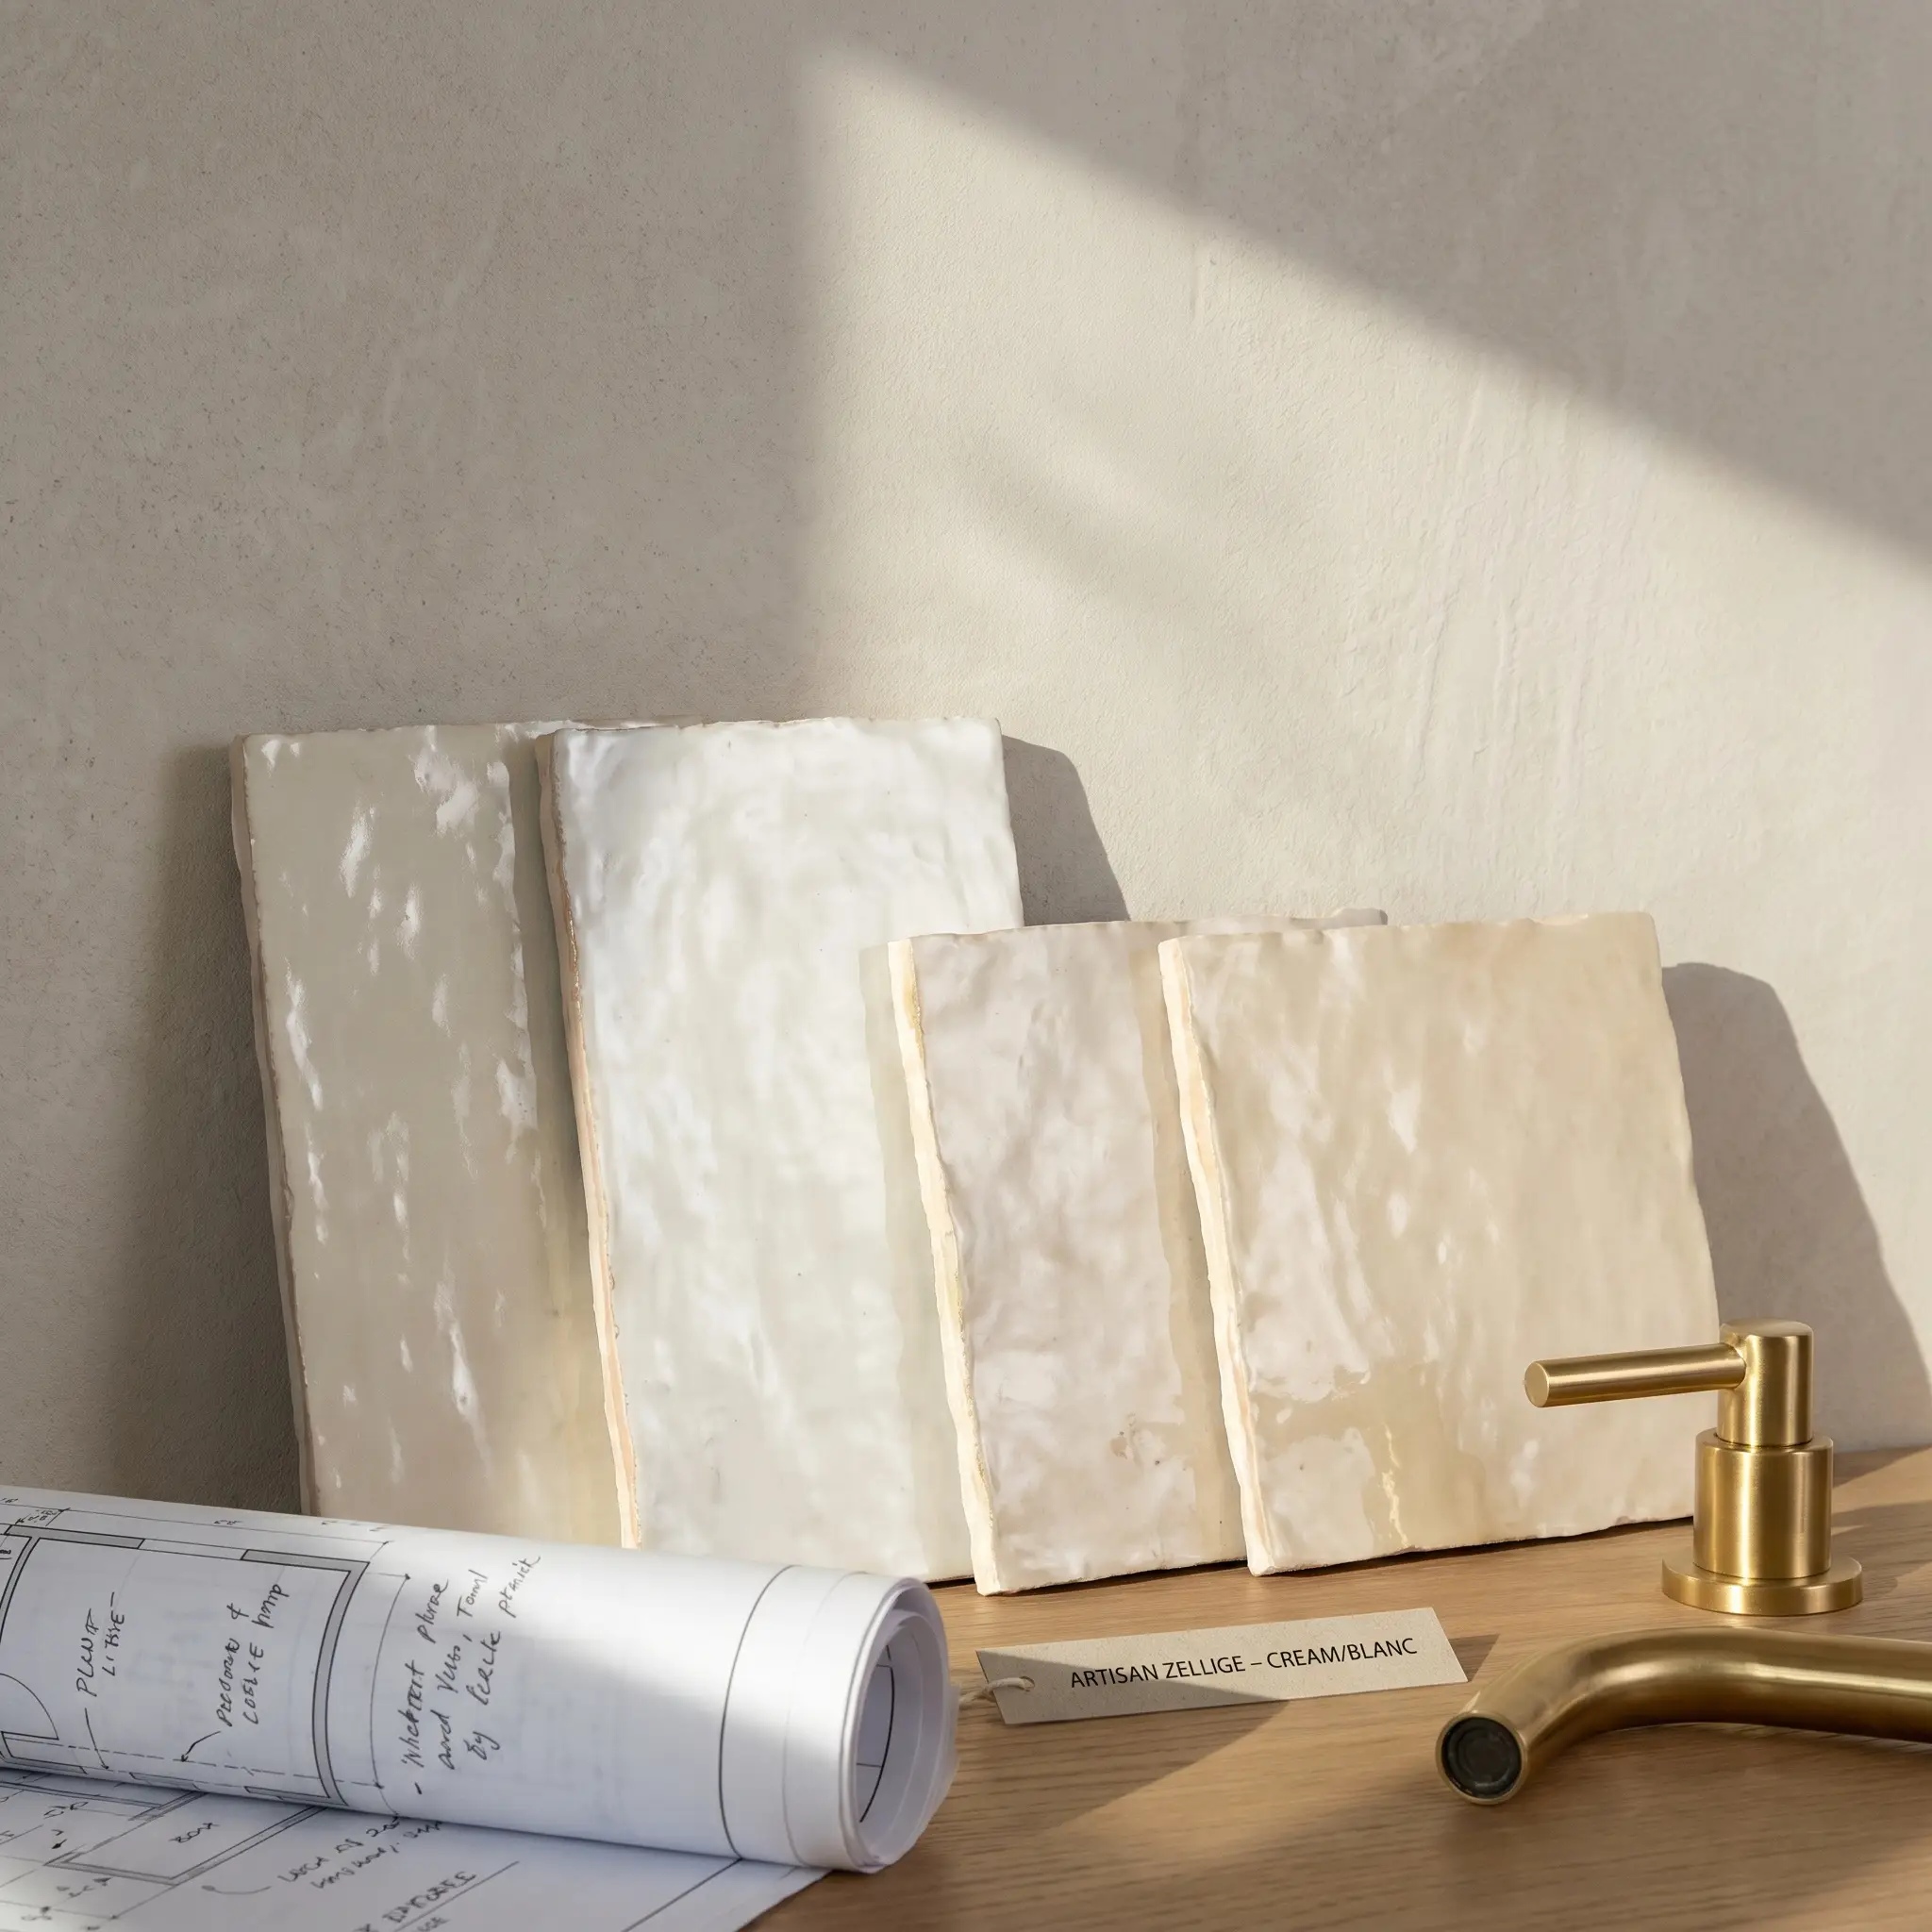
Combine Warm Neutral Tiles with Natural Oak Vanities
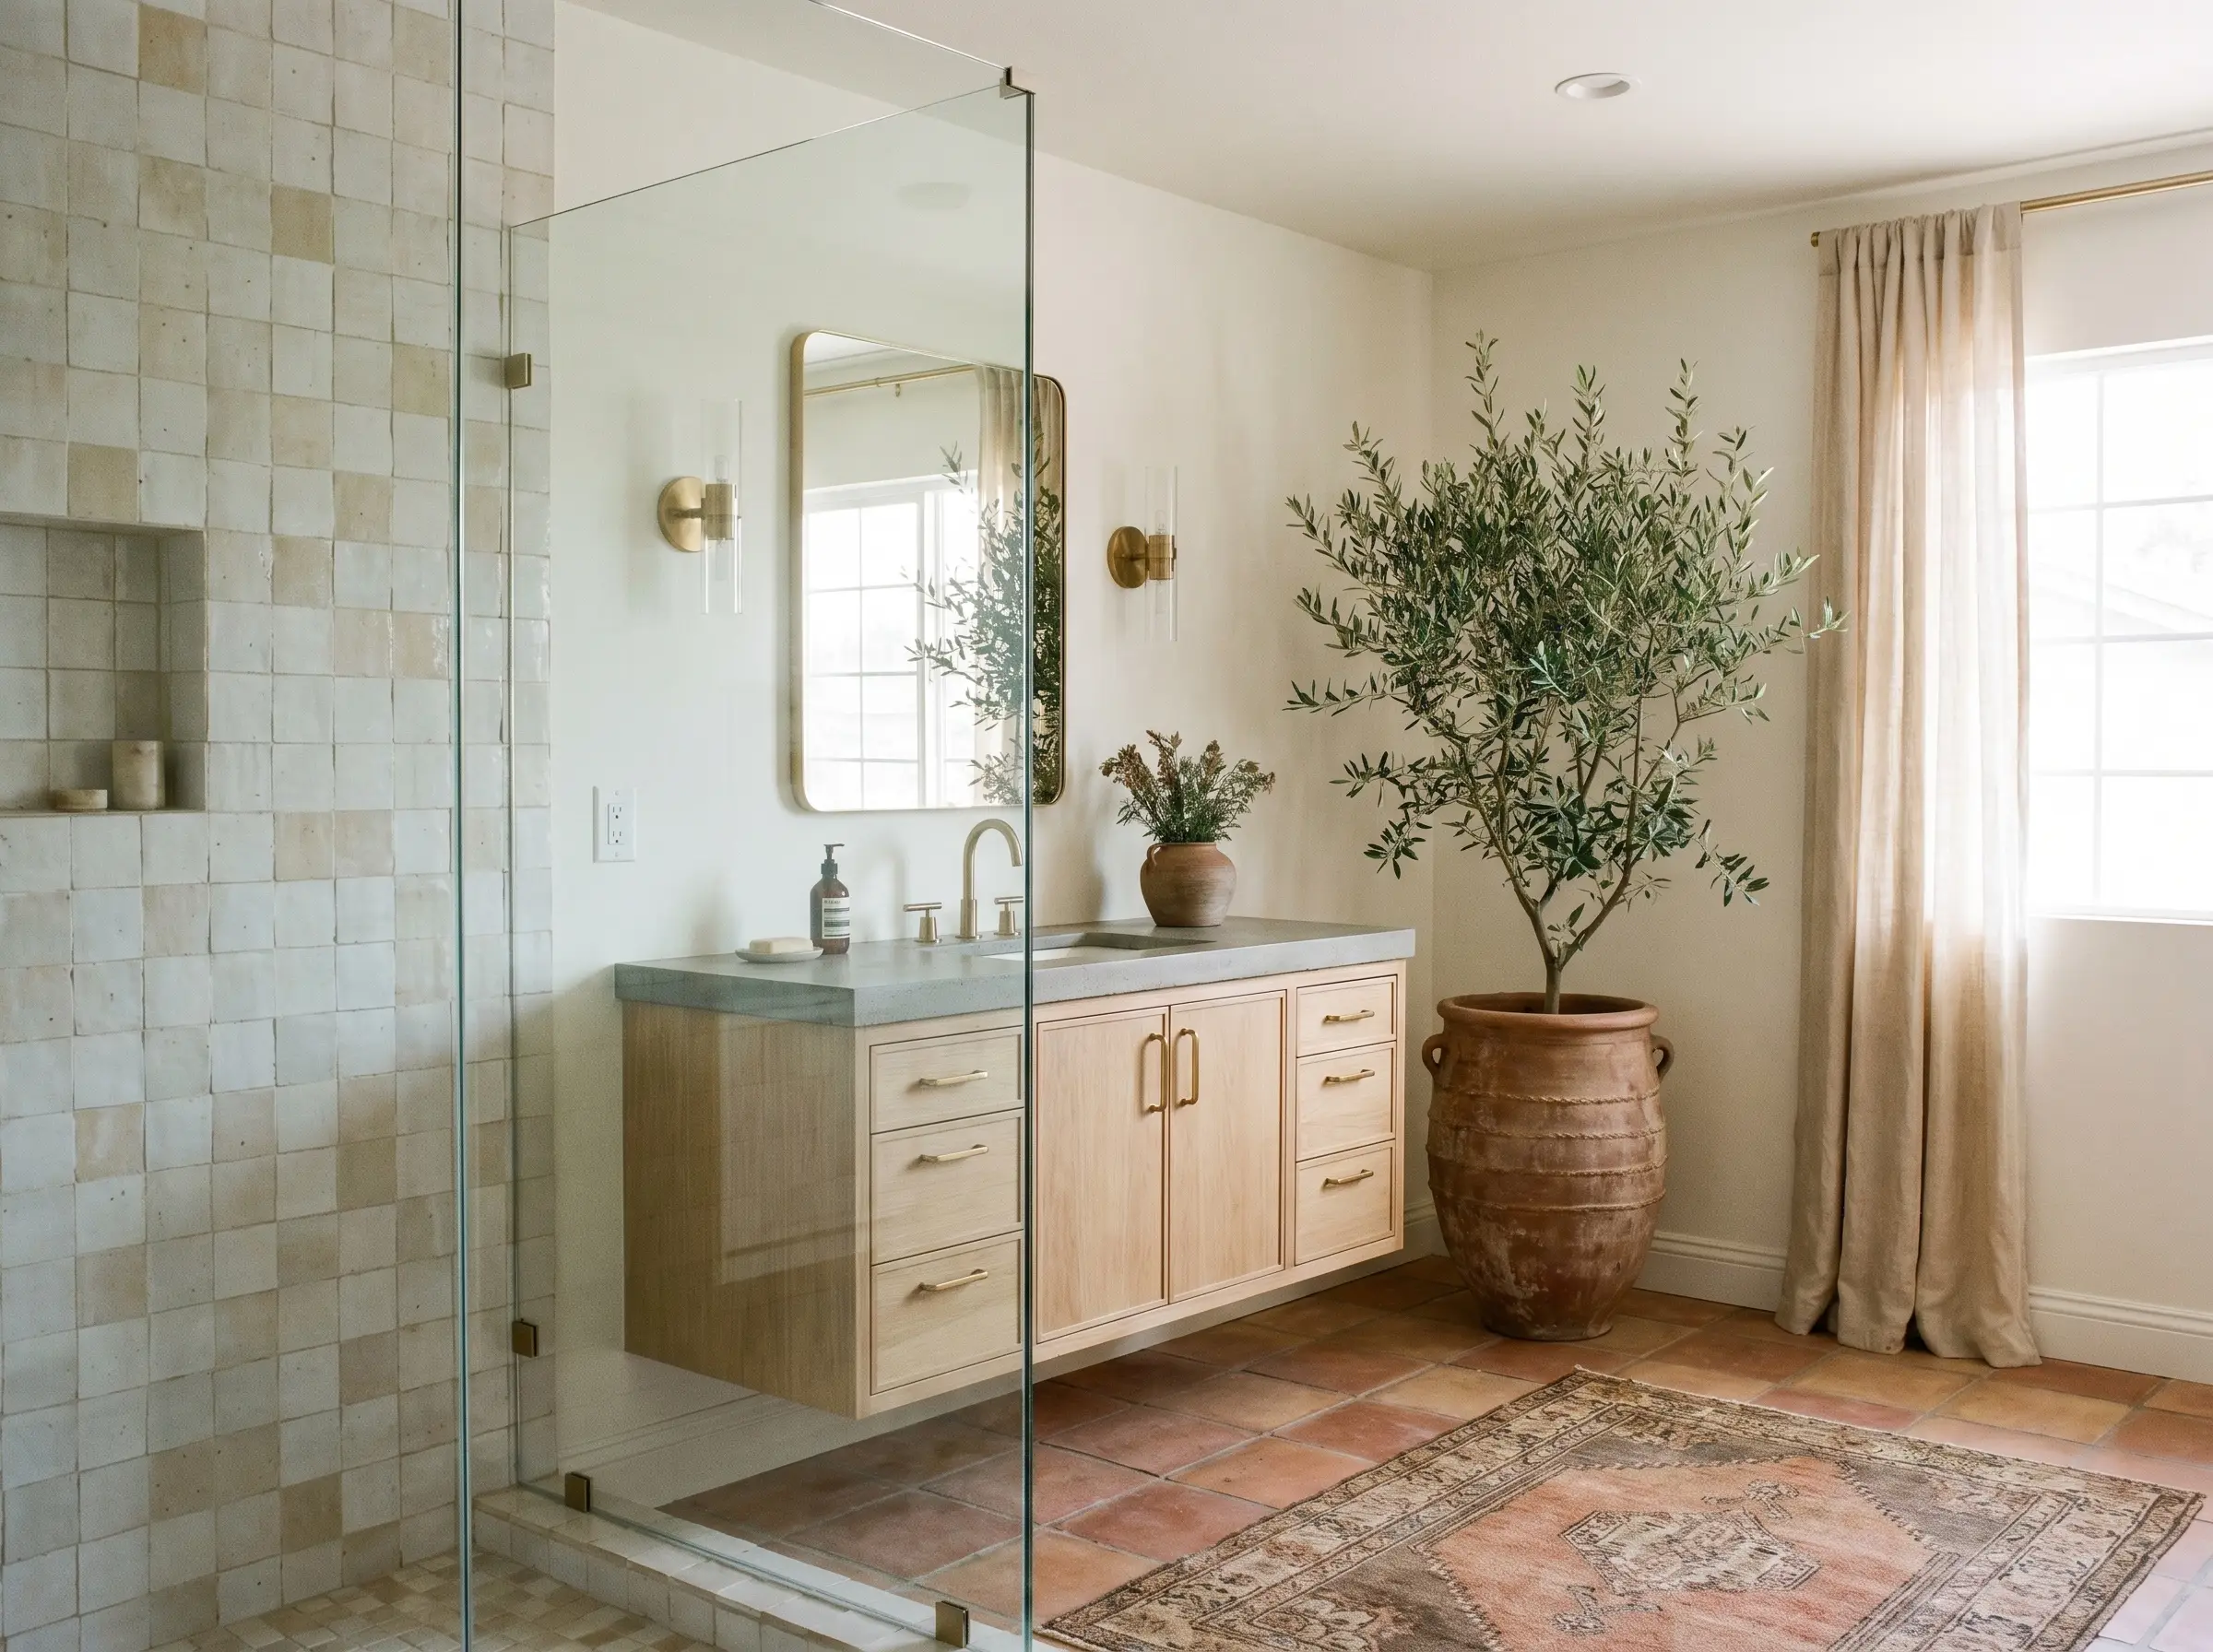
Weathered white and natural sand glazes inherently pull the visual warmth out of natural wood grains situated just outside the shower glass. This pairing is the absolute cornerstone of California Casual design, merging the fired earth of the wet zone with the organic, raw timber of a floating white oak vanity.
- Vibe: California Casual
- Wall Tile: 4×4 Weathered White or Natural Sand Zellige
- Wood Tone: Clear-sealed White Oak or Rift-sawn Oak
- Hardware Match: Burnished brass or aged bronze cabinet pulls.
Weigh the Realities: Zellige Shower Pros and Cons
Committing to this material means embracing both its breathtaking architectural presence and its demanding physical realities. Reviewing the exact structural benefits and maintenance requirements ensures you are specifying the right finish for your daily lifestyle.
- The Good: Unmatched artisanal beauty; completely unique (no two tiles are identical); the top glaze is highly durable and waterproof.
- The Demanding: Difficult, expensive installation; requires full water submersion before setting; corners can be sharp; hard water minerals easily build up in recessed lippage areas.
- The Verdict: Best suited for homeowners who view their home as a curated space and tolerate natural imperfections.
Execute the Butt-Joint Grout Technique for a Seamless Finish
Traditional tile installations rely on standard plastic spacers, but the undulating, unrectified edges of authentic Zellige require a meticulous butt-joint installation where tiles are wedged directly against one another. Because natural micro-gaps will form, your setter must spread a watery grout wash over the entire surface, working the material deep into these hairline crevices to guarantee the wet zone is structurally watertight.
- Grout Strategy: Watery grout wash (surface-slurry method)
- Joint Method: Butt-joint (no spacers)
- Material Match: Mapei Ultracolor Plus FA (or similar fine-aggregate grout)
- Installation Rule: Never leave the micro-gaps un-grouted in a shower enclosure; water will inevitably penetrate the wall assembly.
Insist on a Penetrating Sealer for the Terracotta Body
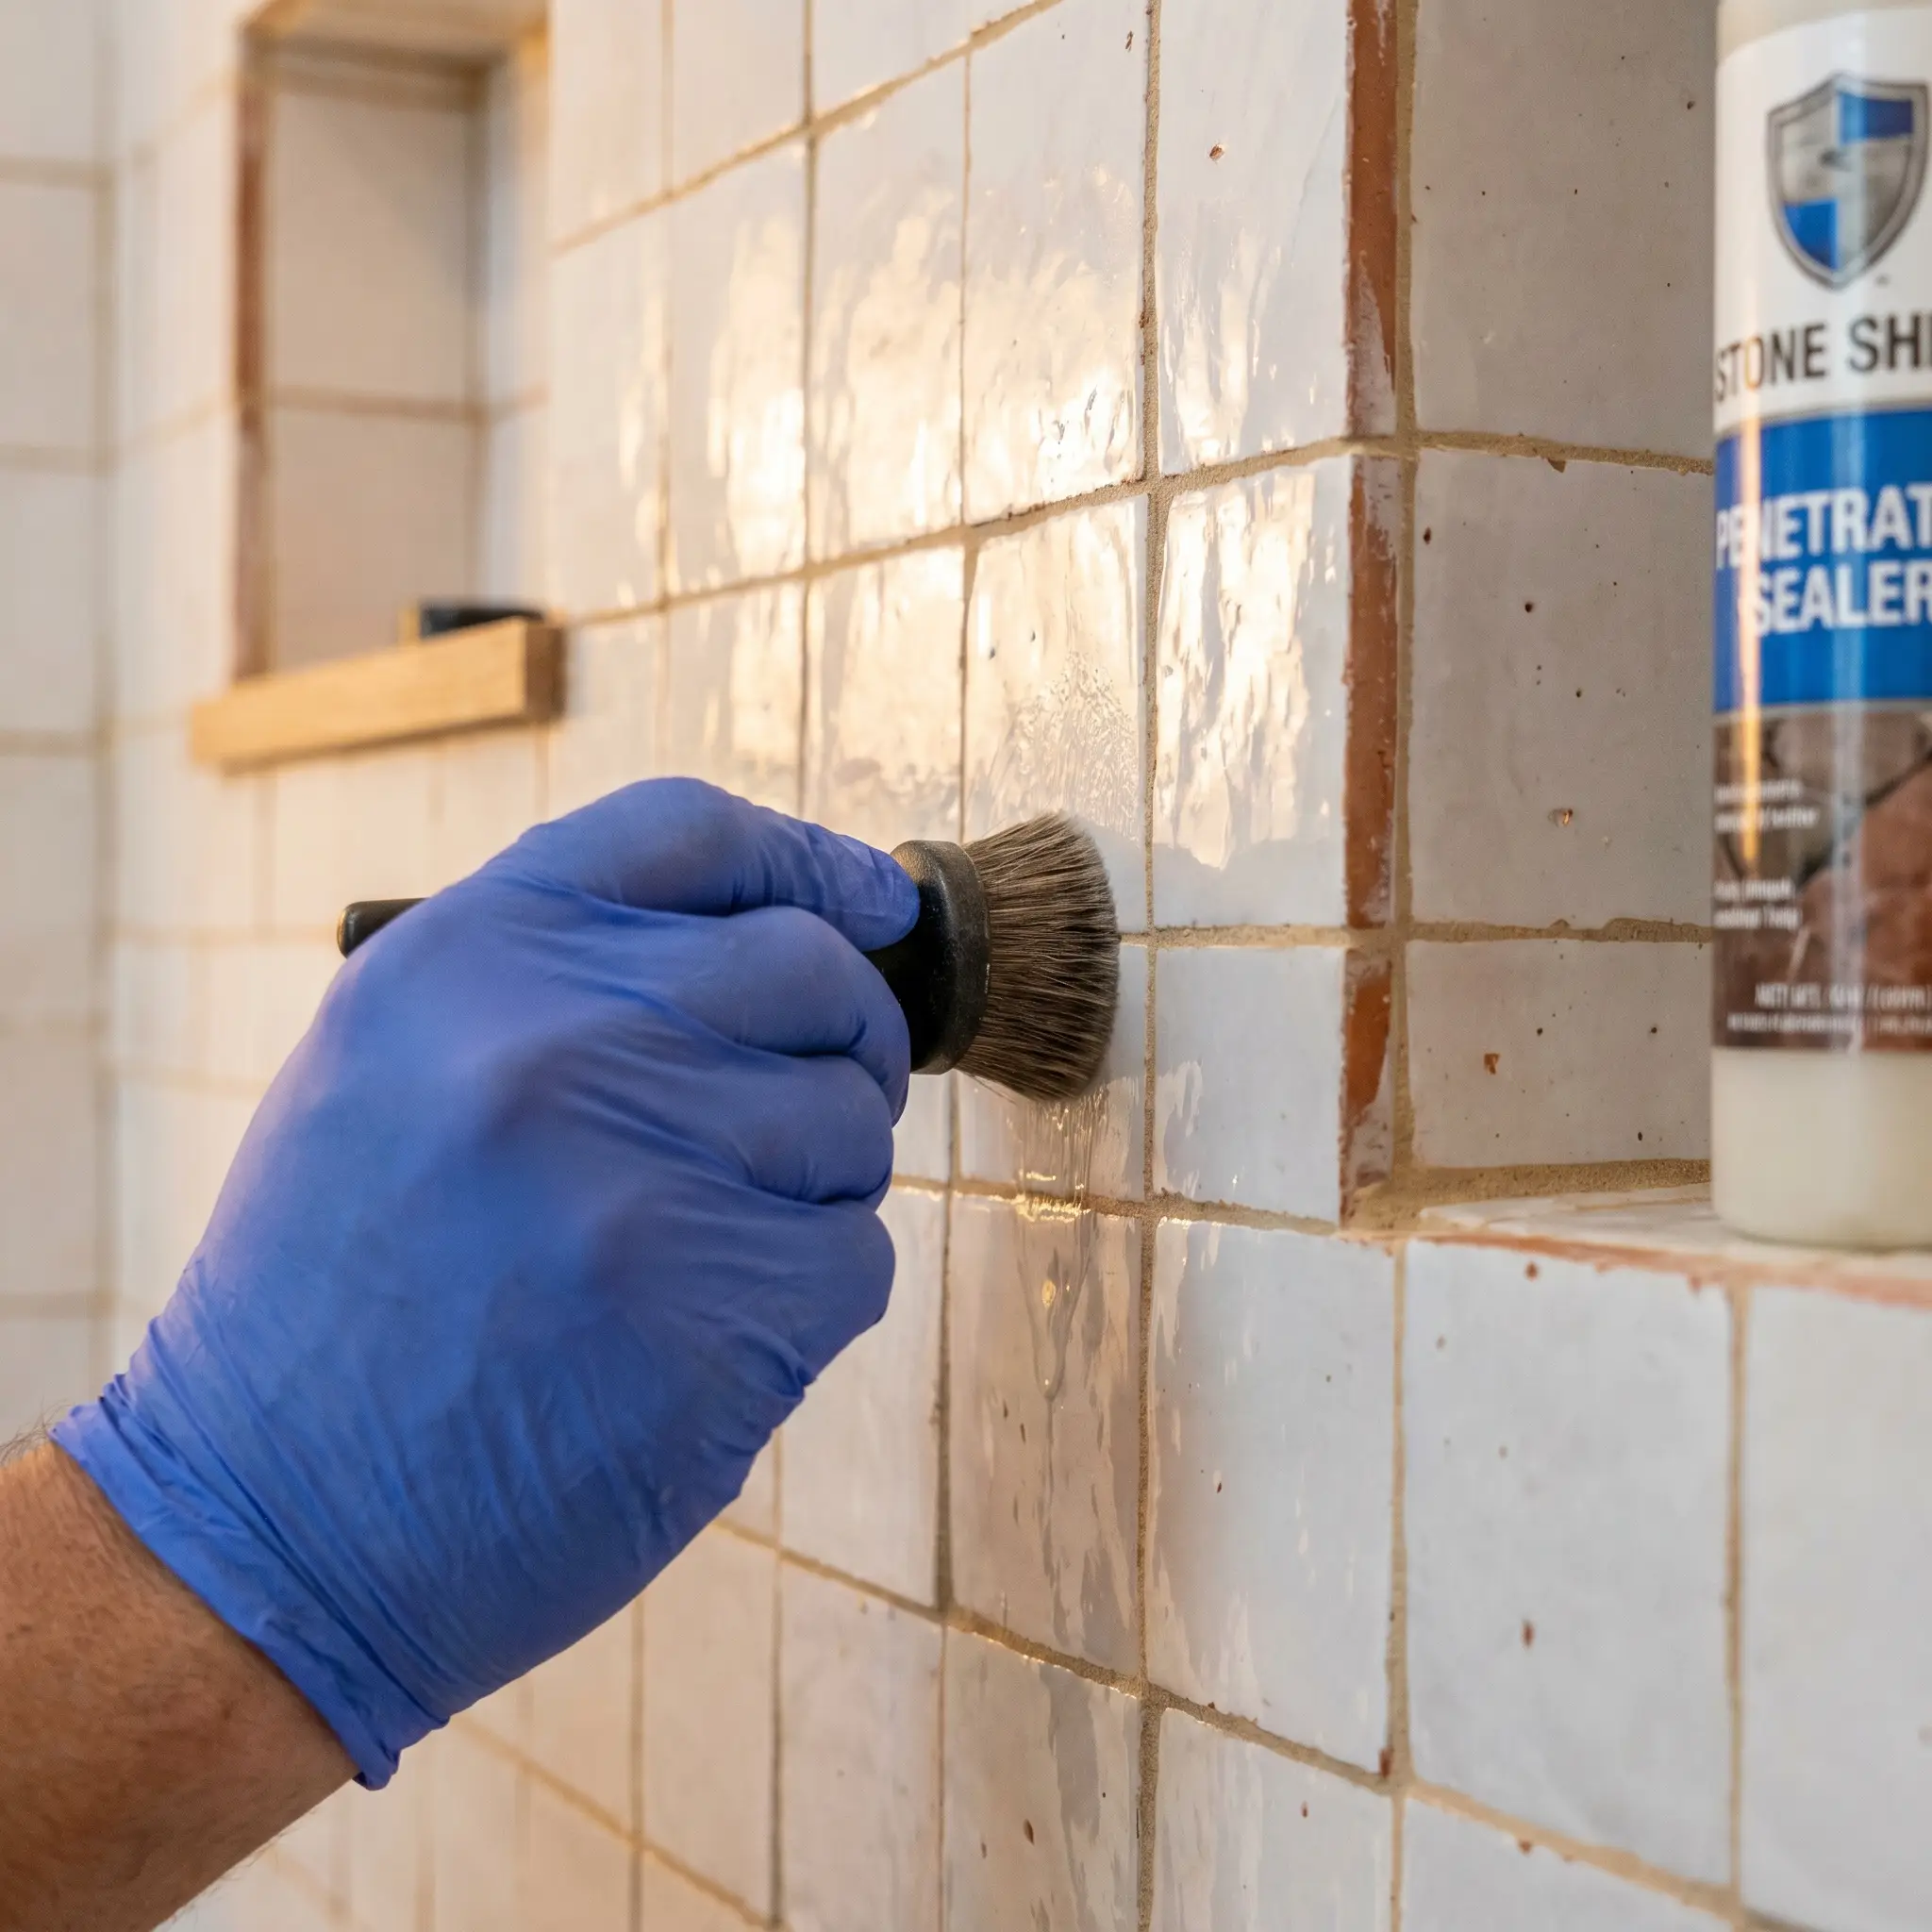
While the glassy top layer of the tile repels moisture effortlessly, the exposed terracotta body and the hairline grout joints act as highly porous sponges. You must insist that your installer applies a premium penetrating sealer over the entire wall assembly before the shower is ever used, preventing water from wicking into the clay and popping the glaze off from the inside out.
- Waterproofing Protocol: Penetrating stone and tile sealer
- Application Timing: Post-grout, pre-use (allow 48 hours to cure)
- Maintenance Cycle: Re-seal the shower walls every 12 to 18 months.
- Product Match: High-quality impregnating sealer designed for porous stone and terracotta.
Implement a pH-Neutral Maintenance Routine for Hard Water
The very lippage and texture that make these walls beautiful also create physical ledges for hard water minerals and soap scum to settle. Protecting the delicate glaze requires abandoning harsh commercial bathroom chemicals entirely and adopting a disciplined, pH-neutral maintenance routine.
- Maintenance Goal: Preserve the glaze and prevent mineral etching.
- Daily Tool: Silicone shower squeegee.
- Weekly Cleaner: Dedicated pH-neutral cleaner.
- Material Warning: The glaze is glass-like; treat it with the same care as a custom mirror.
The Zellige Shower Maintenance Protocol:
- ALWAYS: Squeegee the walls immediately after every single shower to eliminate standing water droplets.
- ALWAYS: Use a soft microfiber cloth or a non-abrasive sponge for weekly wipe-downs.
- ALWAYS: Clean with a specialized pH-neutral solution formulated for natural stone and terracotta.
- NEVER: Apply bleach, ammonia, or heavy-duty acidic cleaners, which will permanently eat the glaze.
- NEVER: Scrub the surface with abrasive scouring pads or stiff-bristled brushes.
- NEVER: Allow heavy shampoos or dyed bath products to sit on the unsealed terracotta edges.
The Final Polish: Preserving the Artisanal Wash
Specifying authentic handmade clay for your wet zone is a deliberate commitment to living with art, embracing an aesthetic that boldly rejects the sterile uniformity of commercial interiors. Before finalizing your order, secure physical tile samples, place them directly in your shower enclosure, and observe how your specific bathroom lighting plays across the undulating glaze throughout the day.
- Next Steps: Order 4-5 sample tiles of your target color.
- Lighting Test: Observe the samples under morning natural light and evening sconce light.
- Contractor Prep: Interview your tile setter specifically about their experience with butt-joint terracotta applications.
- Final Action: Embrace the imperfections—the chipped edges and color variations are the exact markers of true luxury.
The Hackrea Style Desk treats interior decoration as an exact visual science. Rather than focusing on demolition or floor plans, this desk masters the art of color theory, undertone matching, material pairings, and spatial proportion. From balancing the visual weight of mixed metals to finding the perfect bridging tone between disparate wood species, this desk provides the rigorous aesthetic rules needed to achieve high-end, editorial-quality harmony in any space.