Choosing a green zellige tile bathroom backsplash is a commitment to character, rejecting the sterile uniformity of mass-produced ceramics. Because this authentic Moroccan clay features unrectified edges and an undulating surface, it inherently connects the space to water and nature through its tactile, kiln-fired glaze. While authentic clay is a premium material, utilizing it as a localized vanity backsplash offers accessible luxury, requiring exact grout pairings, lighting strategies, and maintenance realities to execute properly.
Shade Selection: Navigating the Green Zellige Spectrum
Authentic Moroccan clay reacts uniquely to glazes during the firing process, meaning “green” is highly variable. Understanding how these specific shades interact with your bathroom’s lighting is the key to mastering this bespoke material.
1. Ground a Powder Room with Deep Forest Green
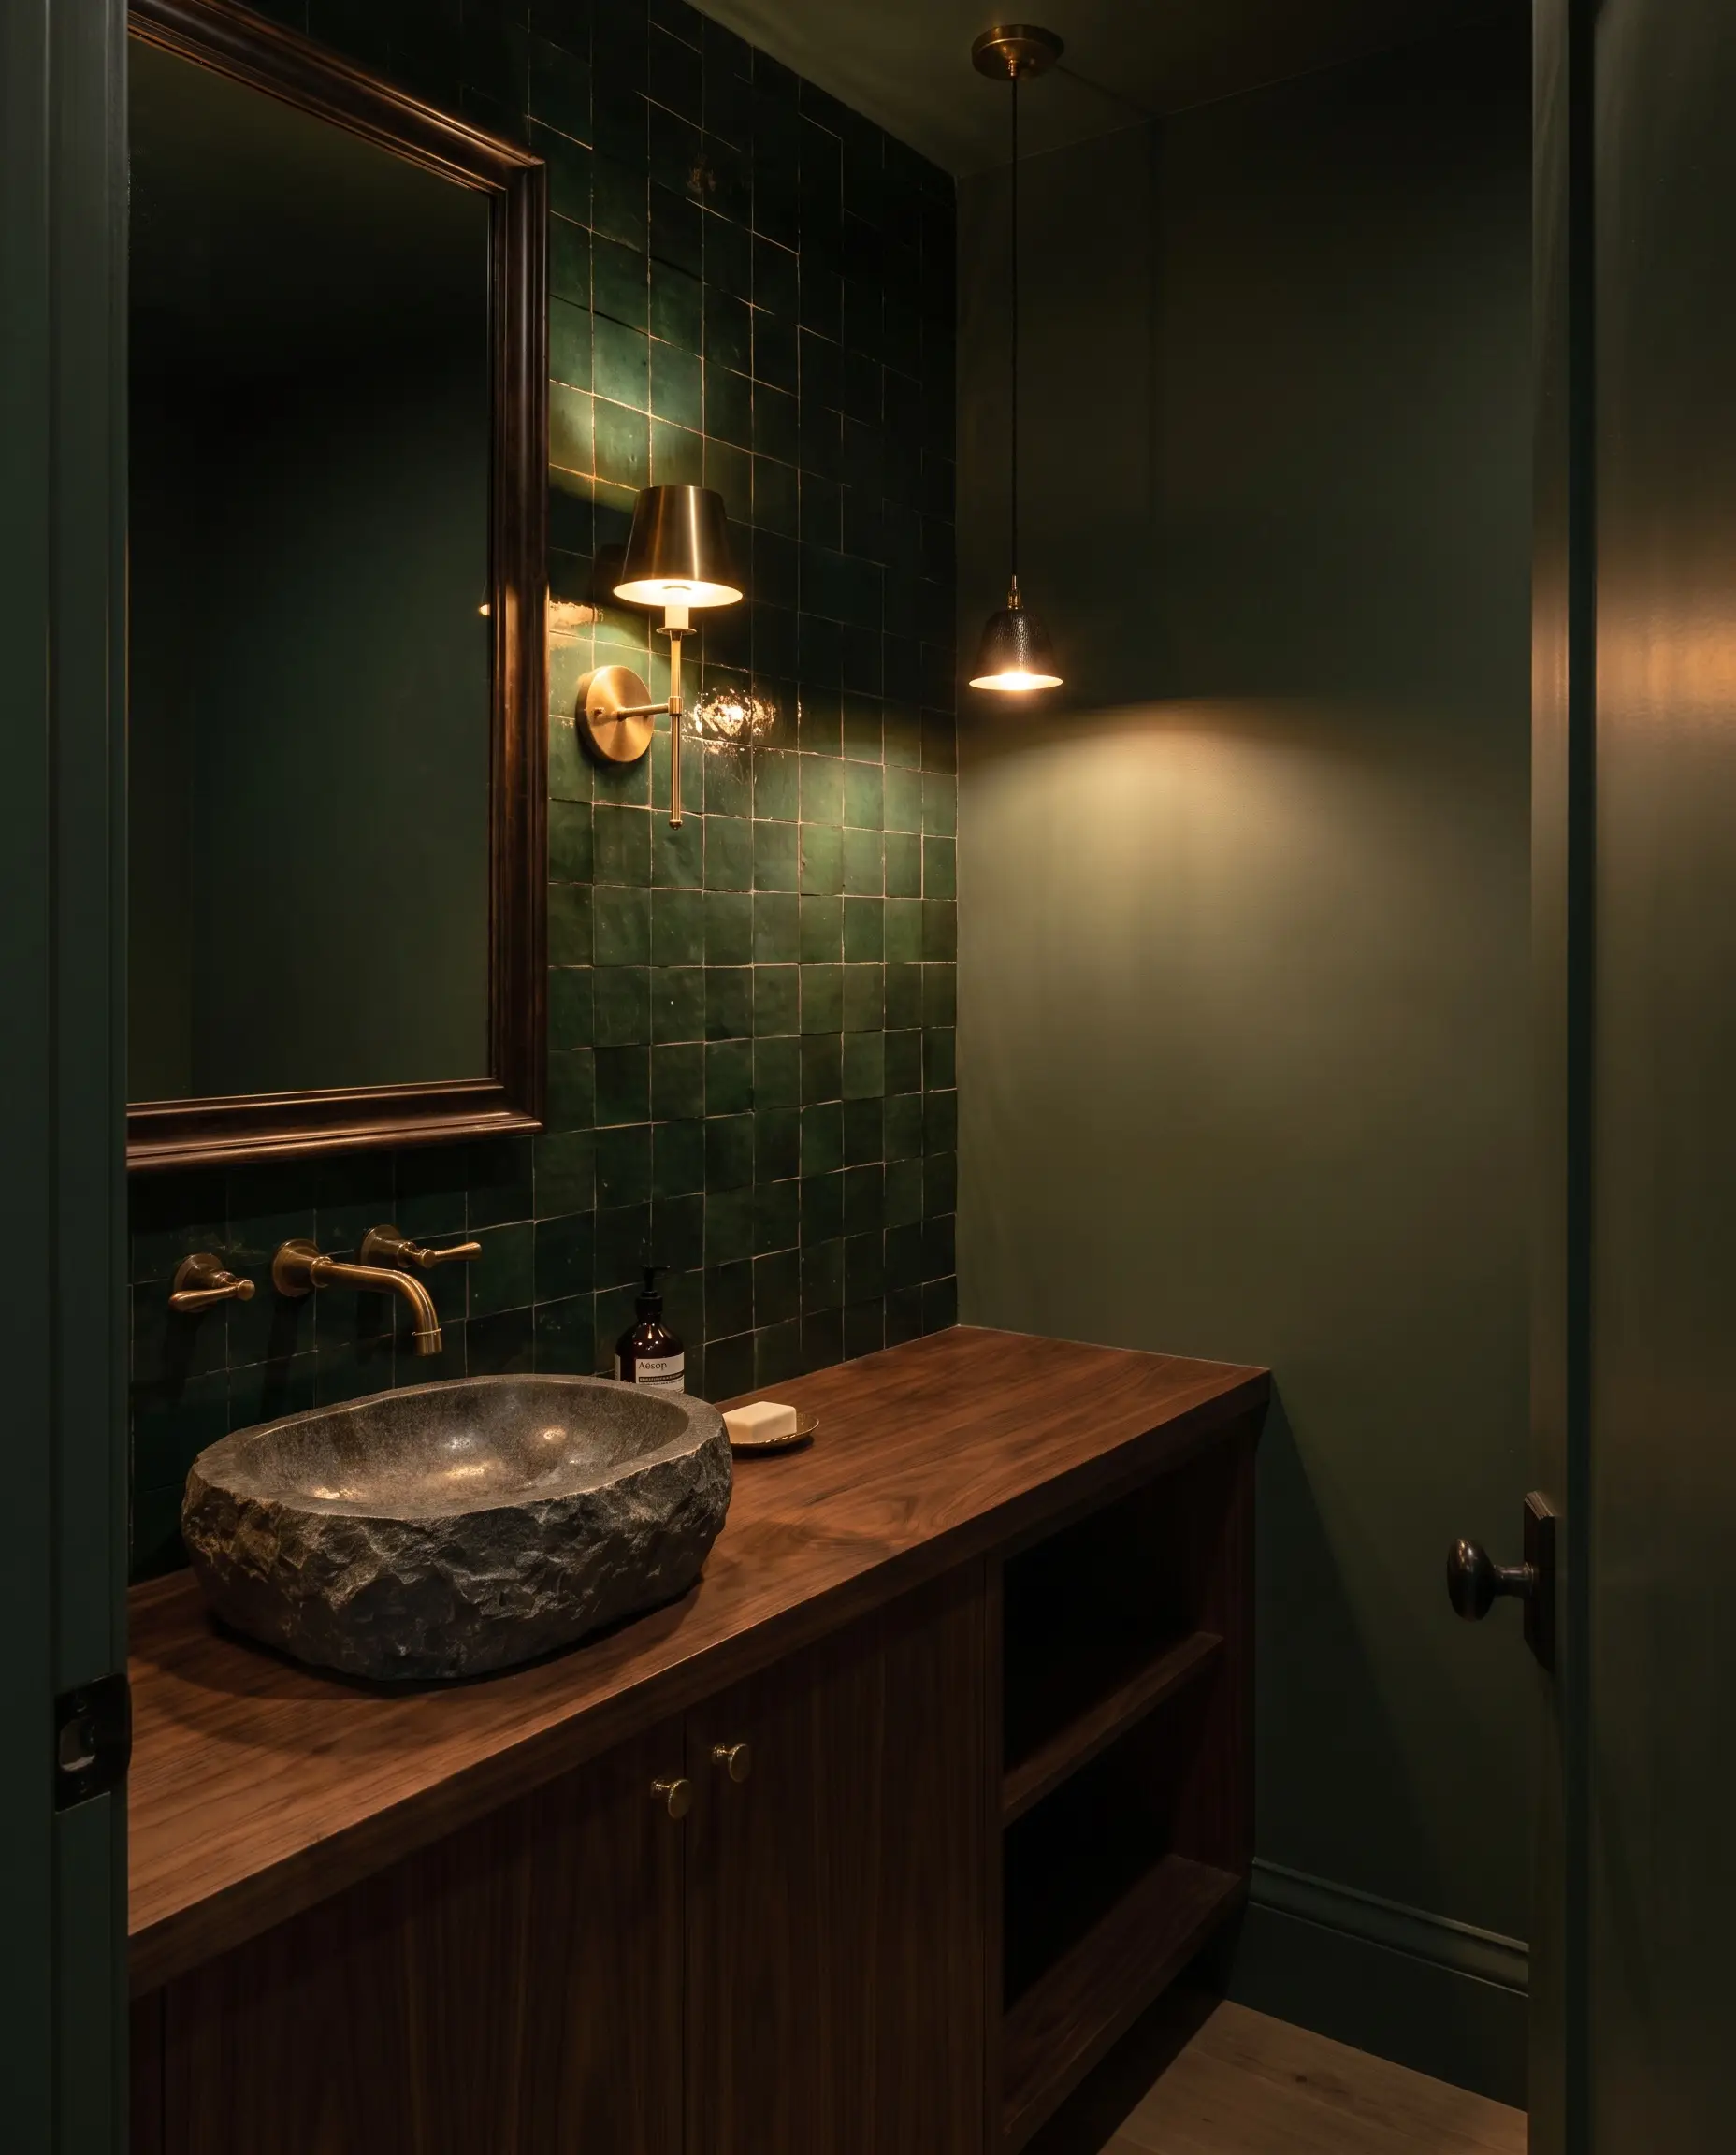
Dark, saturated forest green creates a moody, jewel-box effect when applied from the vanity counter straight to the ceiling. In small, windowless powder rooms, this deep glaze absorbs shadows and creates a deeply grounding psychological anchor.
- Vibe: Moody, grounded, architectural.
- Key Material: Dark forest green zellige (glossy finish).
- Paint Recommendation: Sherwin-Williams Pewter Green (to wrap adjacent walls).
- Color Match: Rich walnut wood tones.
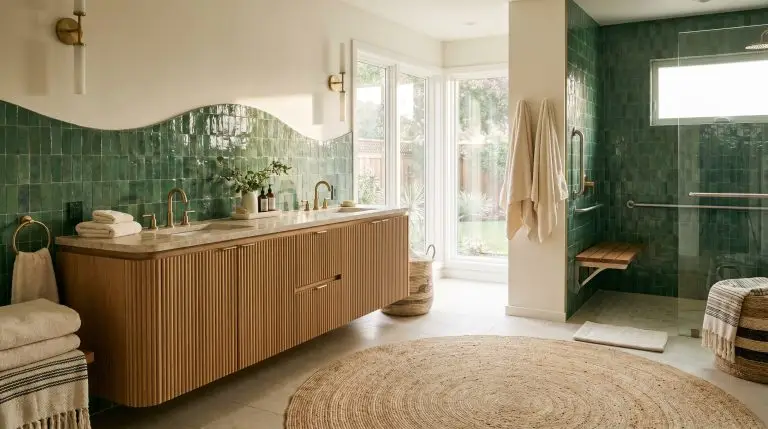
2. Cultivate Calm with Soft Celadon and Seafoam
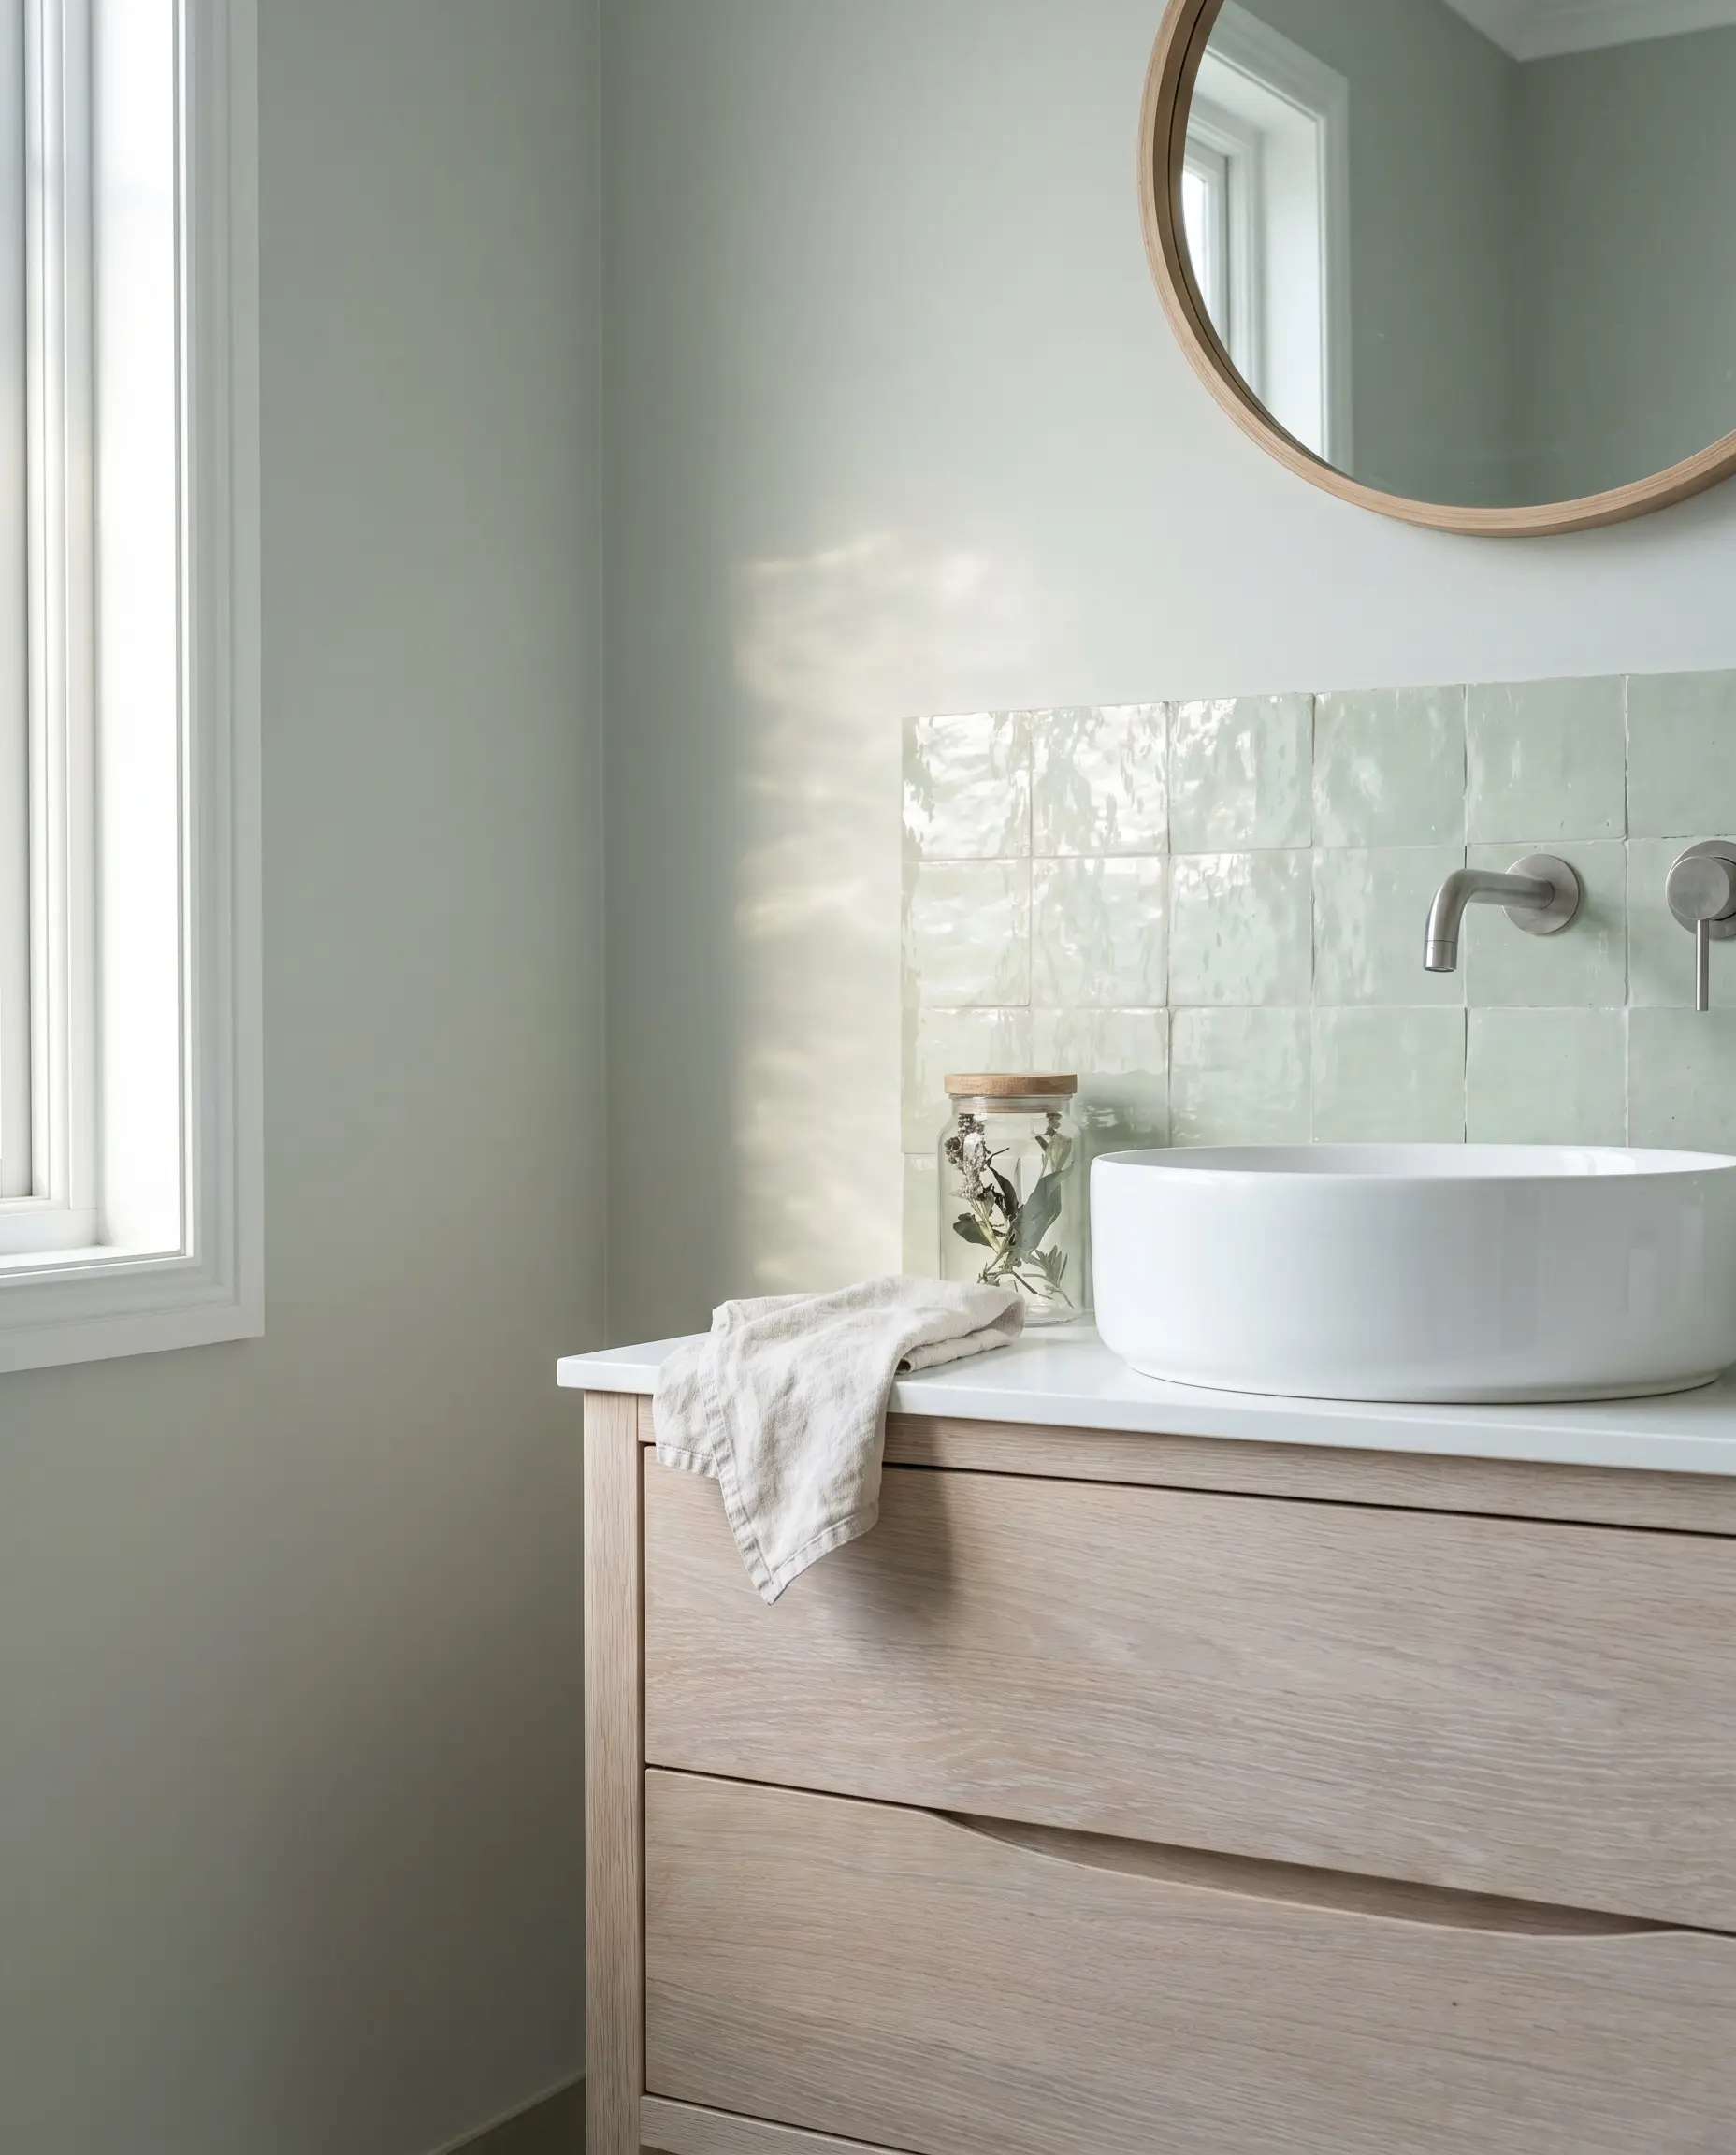
Pale mint and celadon tones interact beautifully with natural morning light, casting a soft, watery reflection across the room. This pale glaze leans directly into an Organic Modern aesthetic, offering a quiet visual temperature.
- Vibe: Calm, airy, coastal-leaning.
- Key Material: Celadon green zellige.
- Tactile Pairing: Bleached oak vanities.
- Paint Recommendation: Farrow & Ball Cromarty.
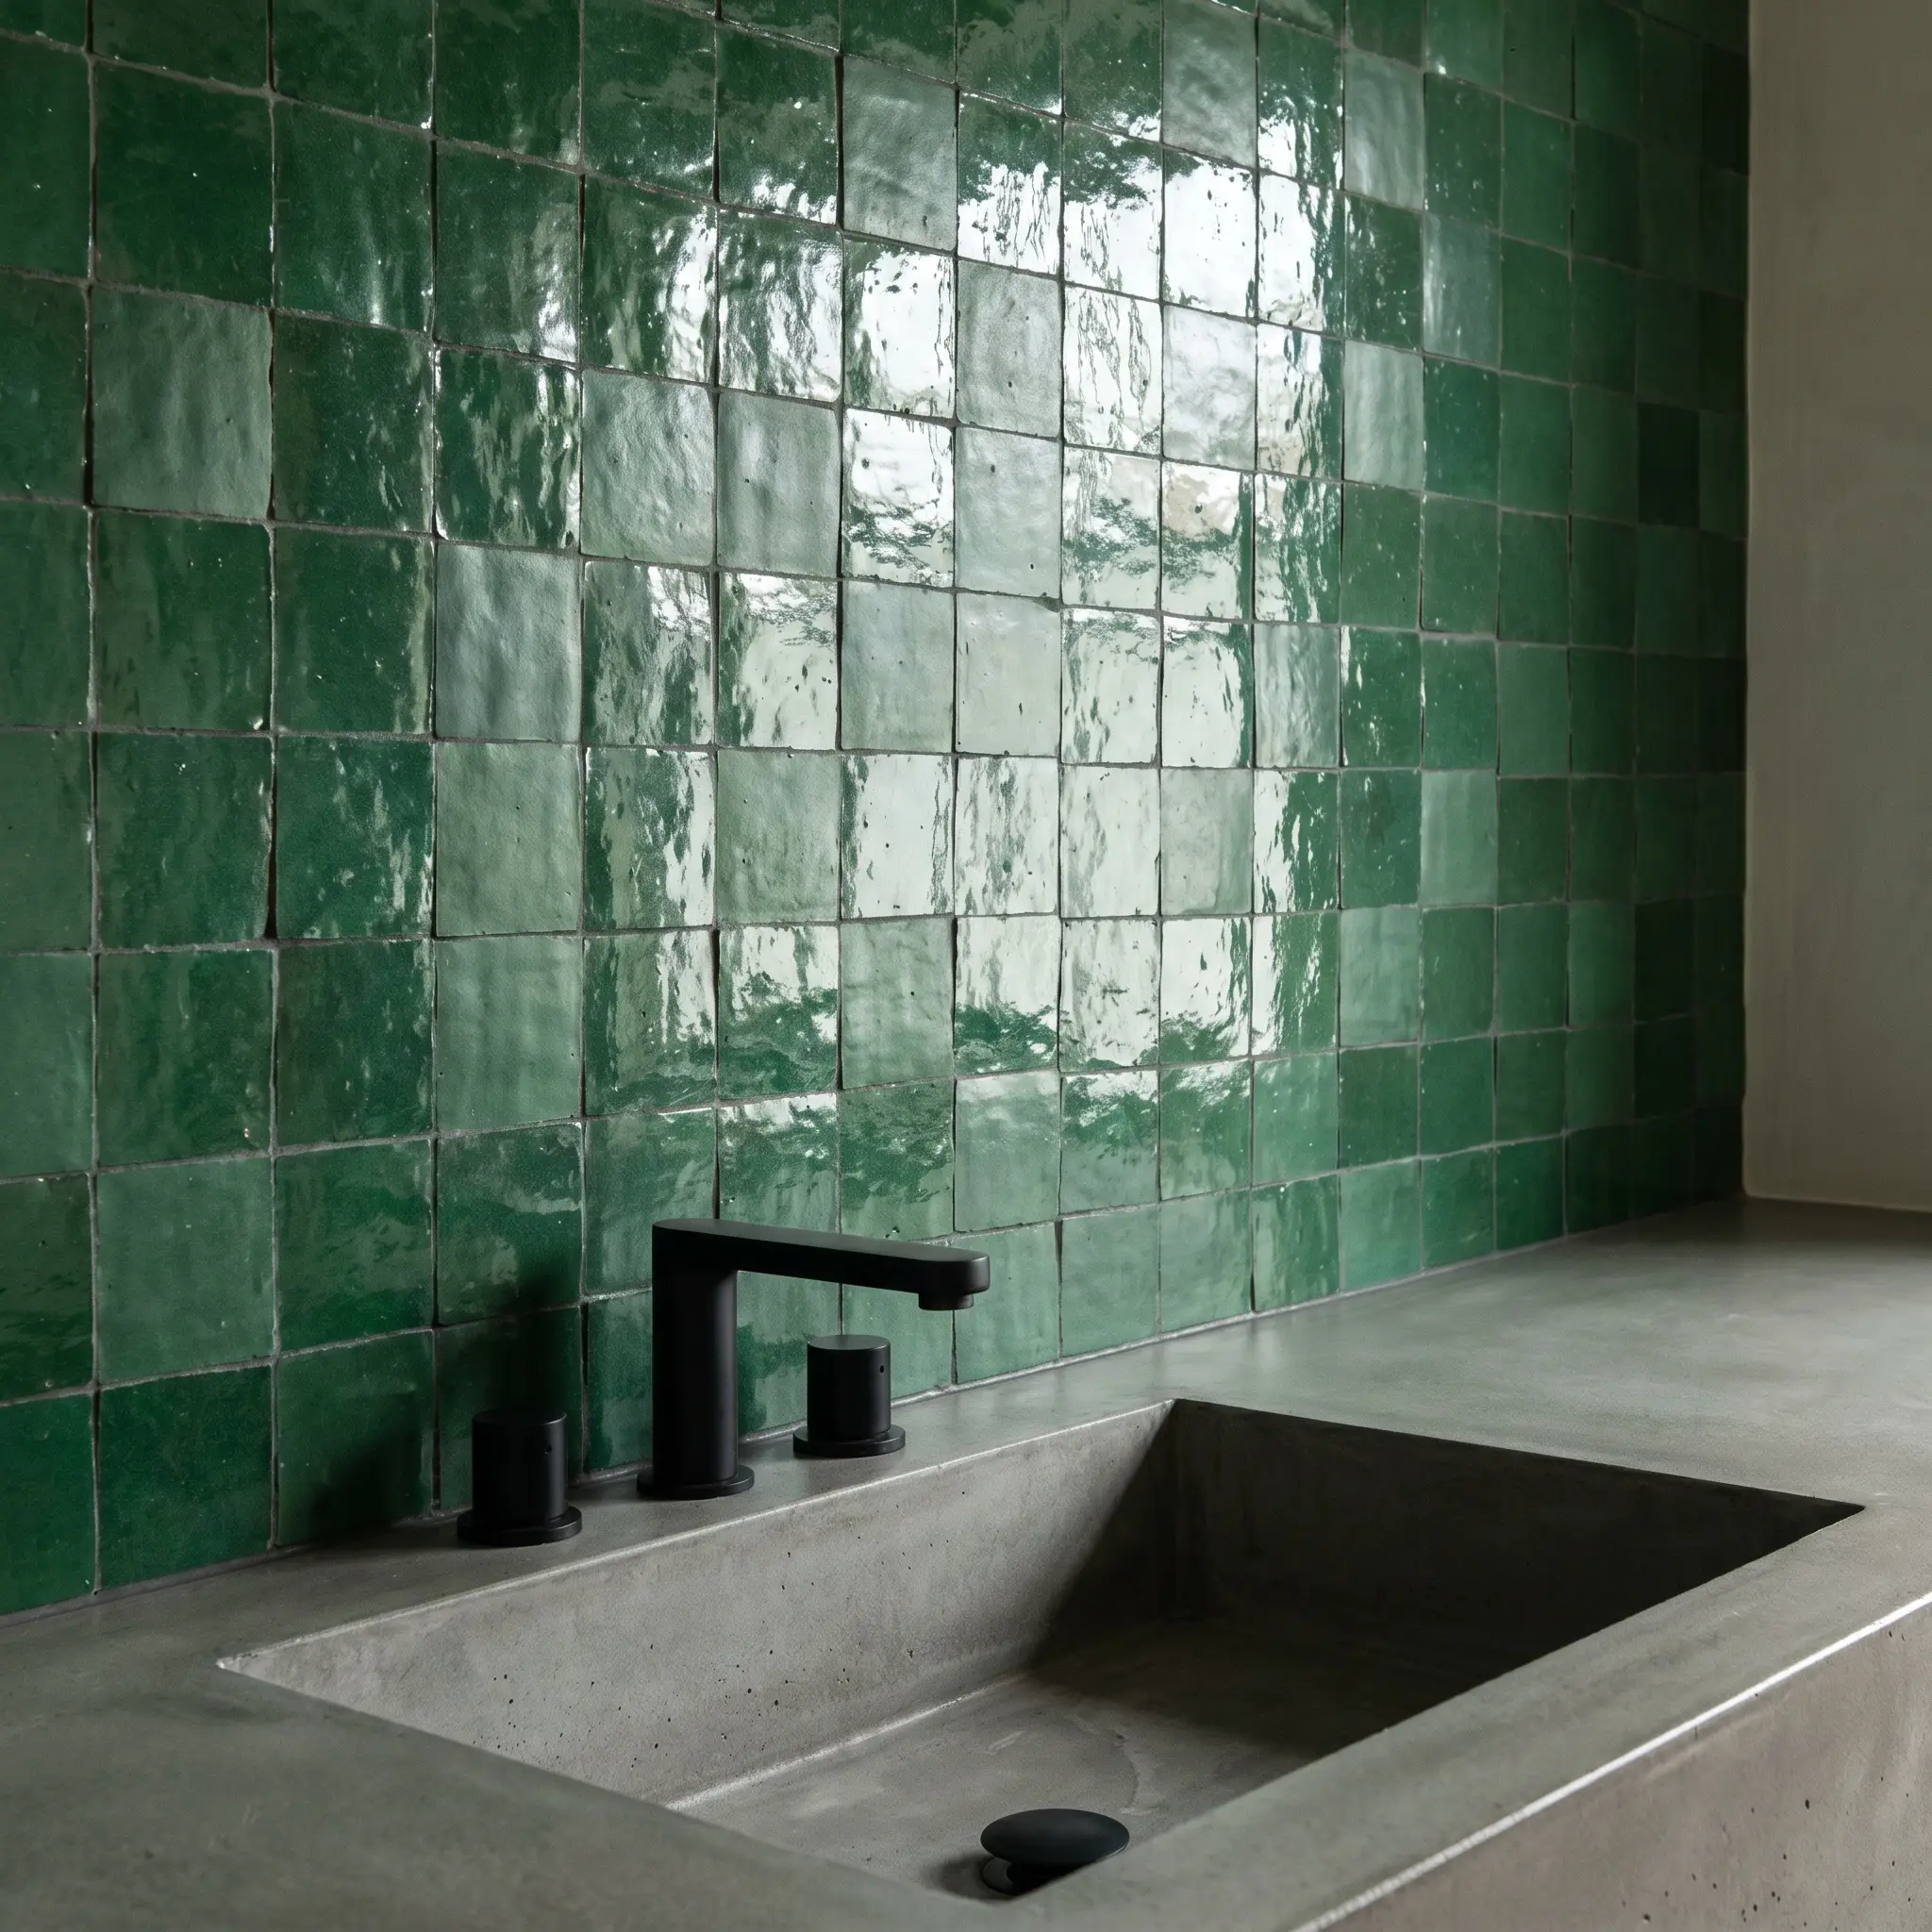
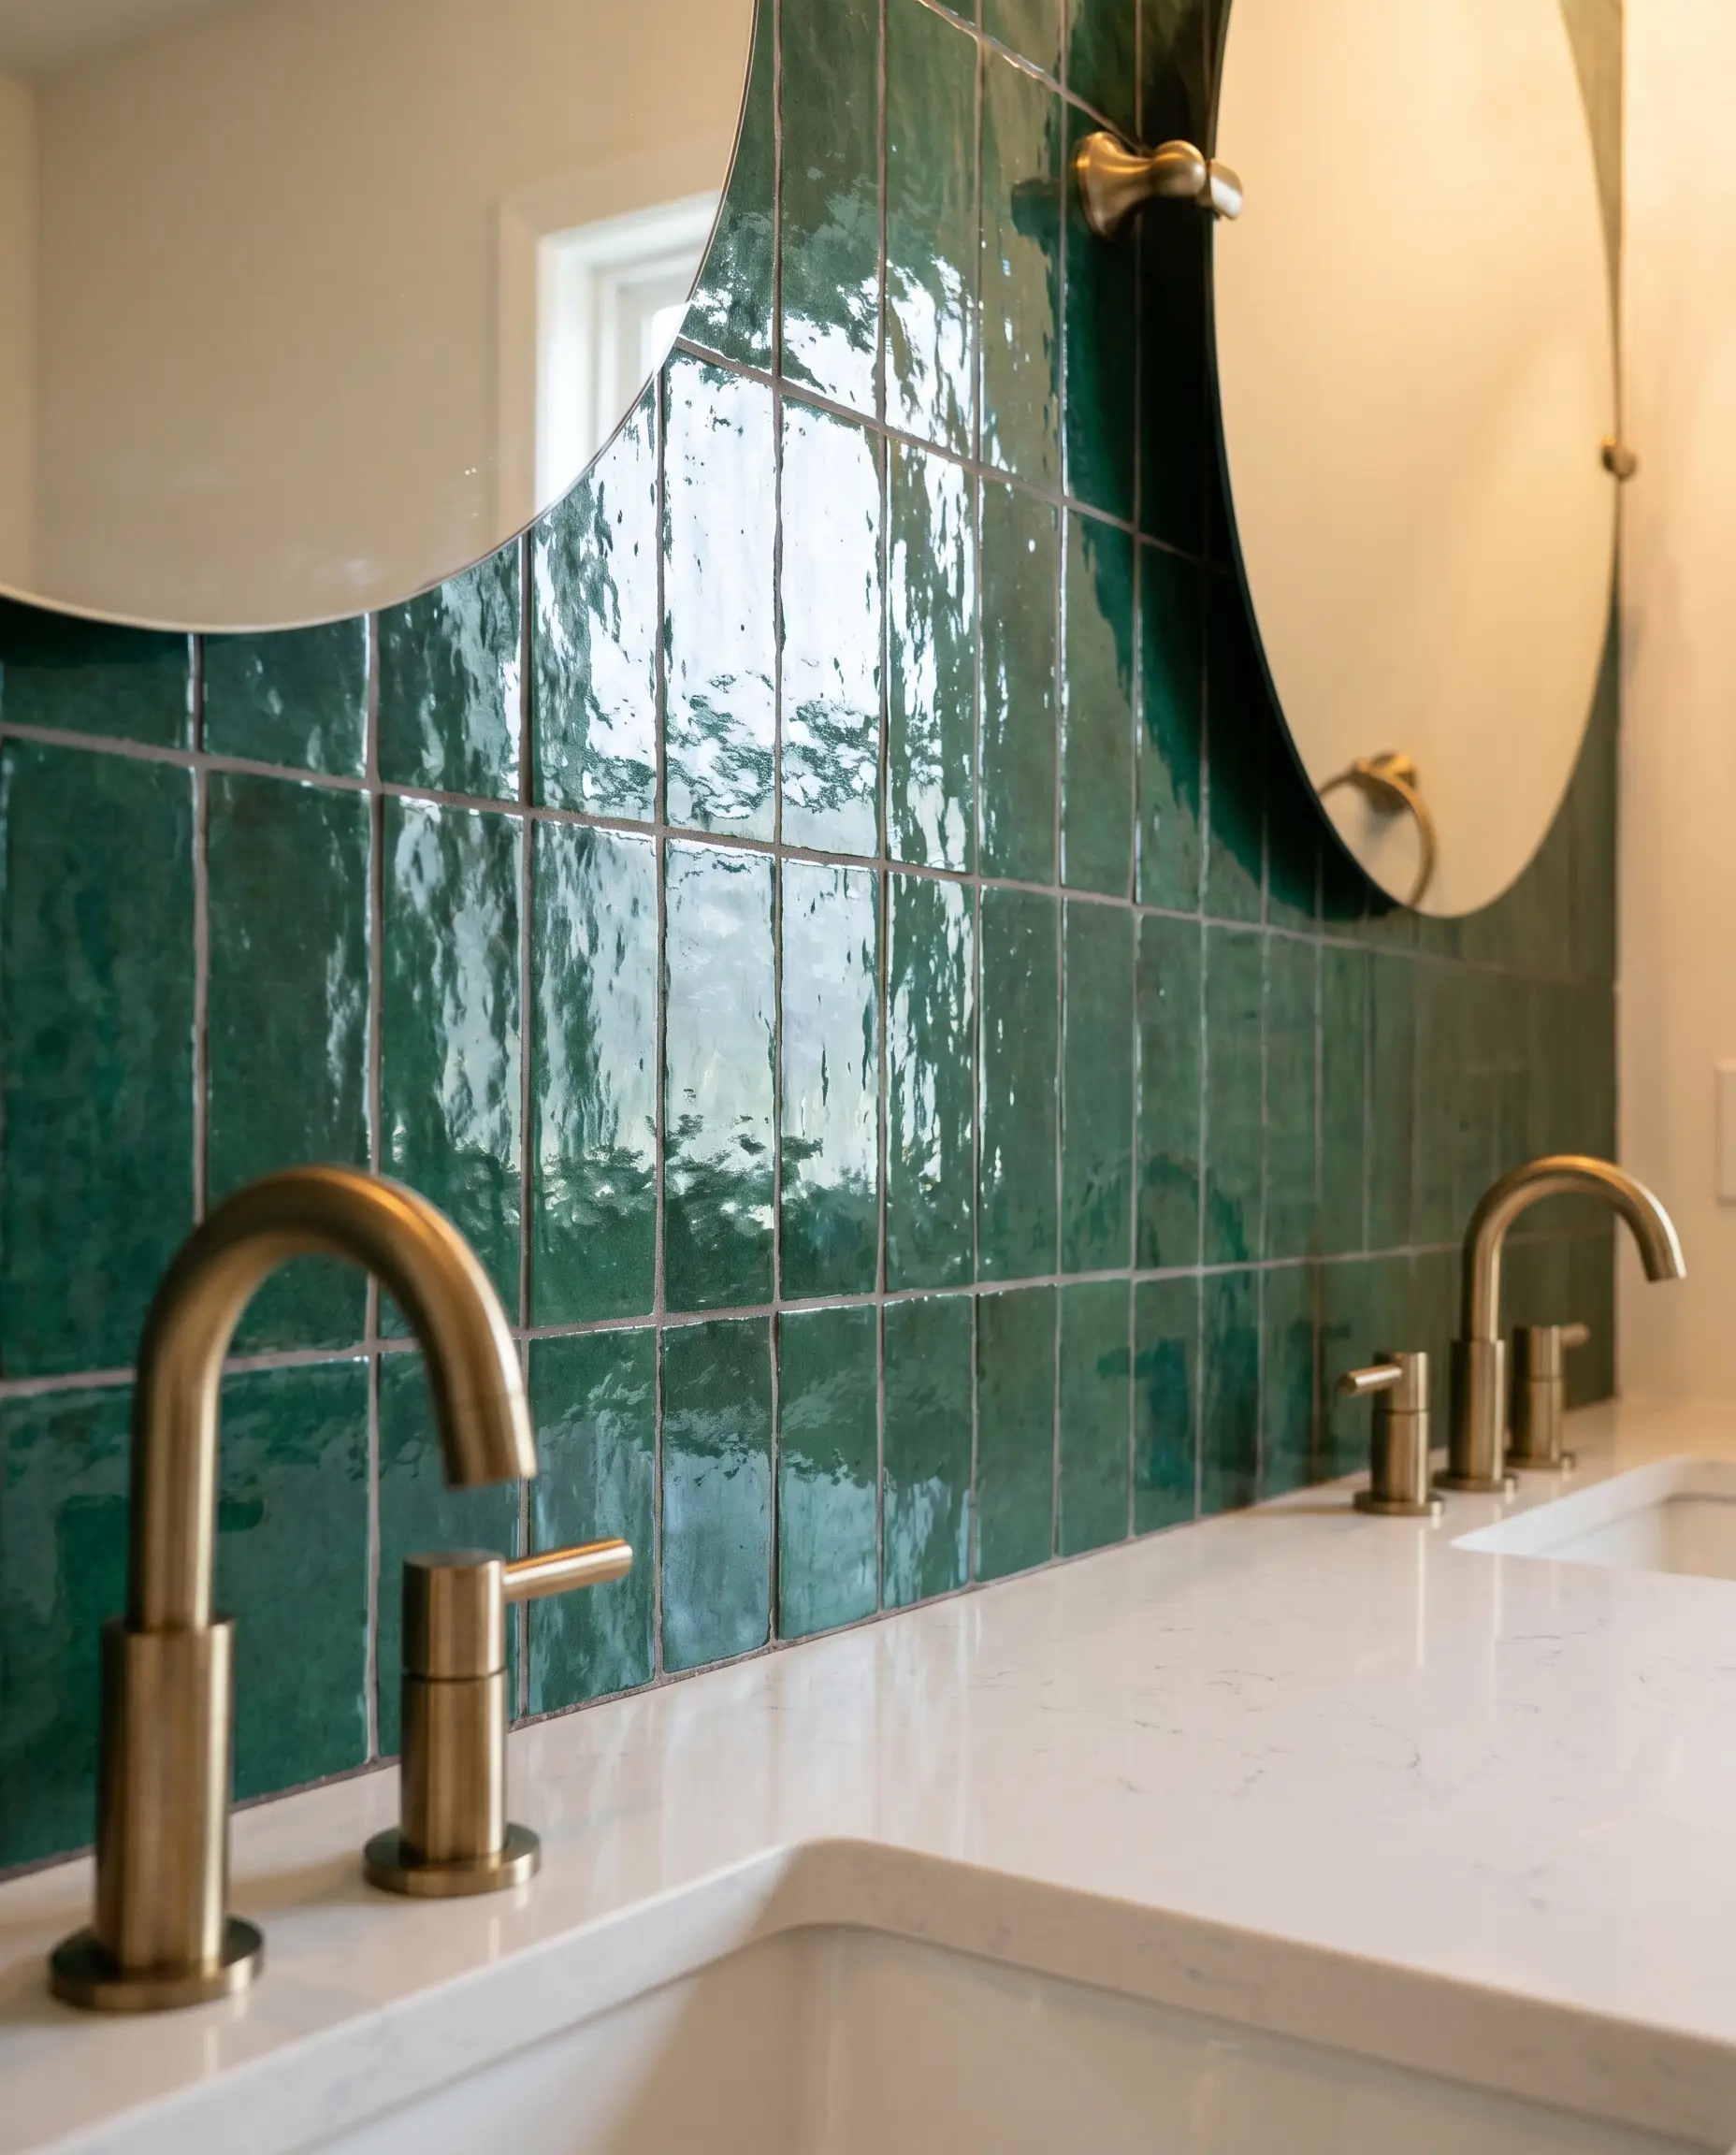
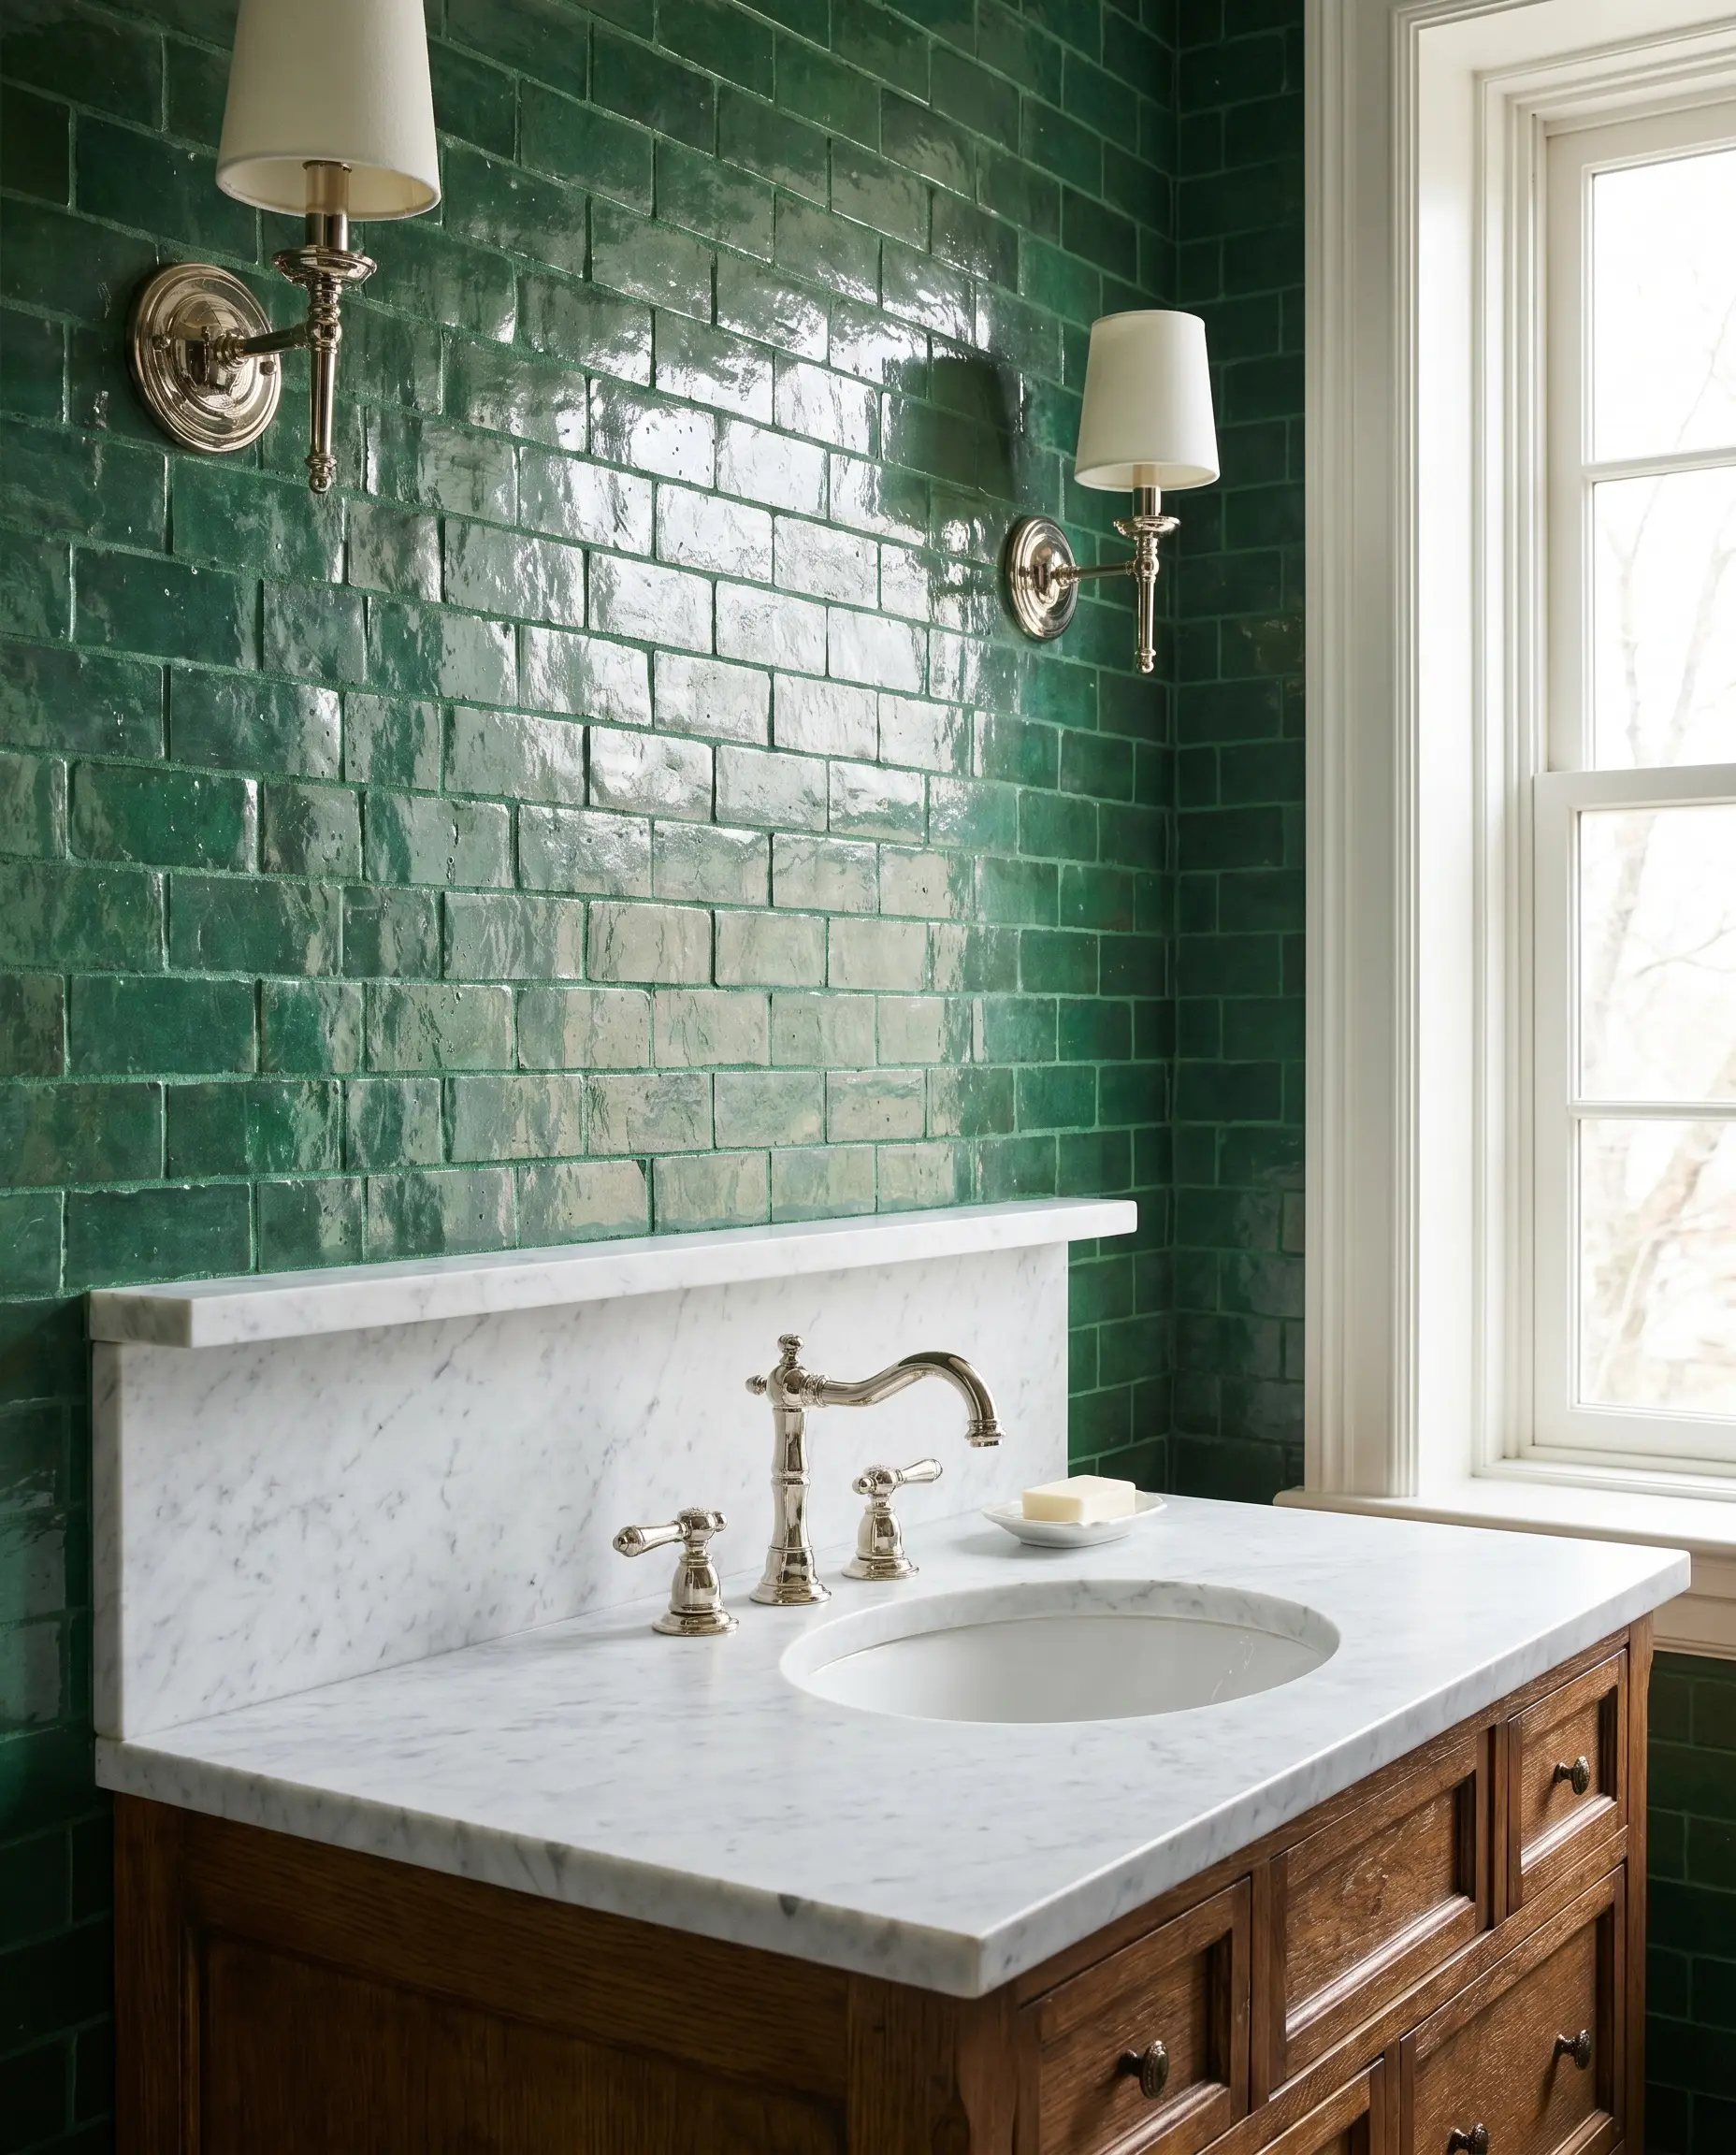
3. Create Art Deco Drama using Vibrant Emerald
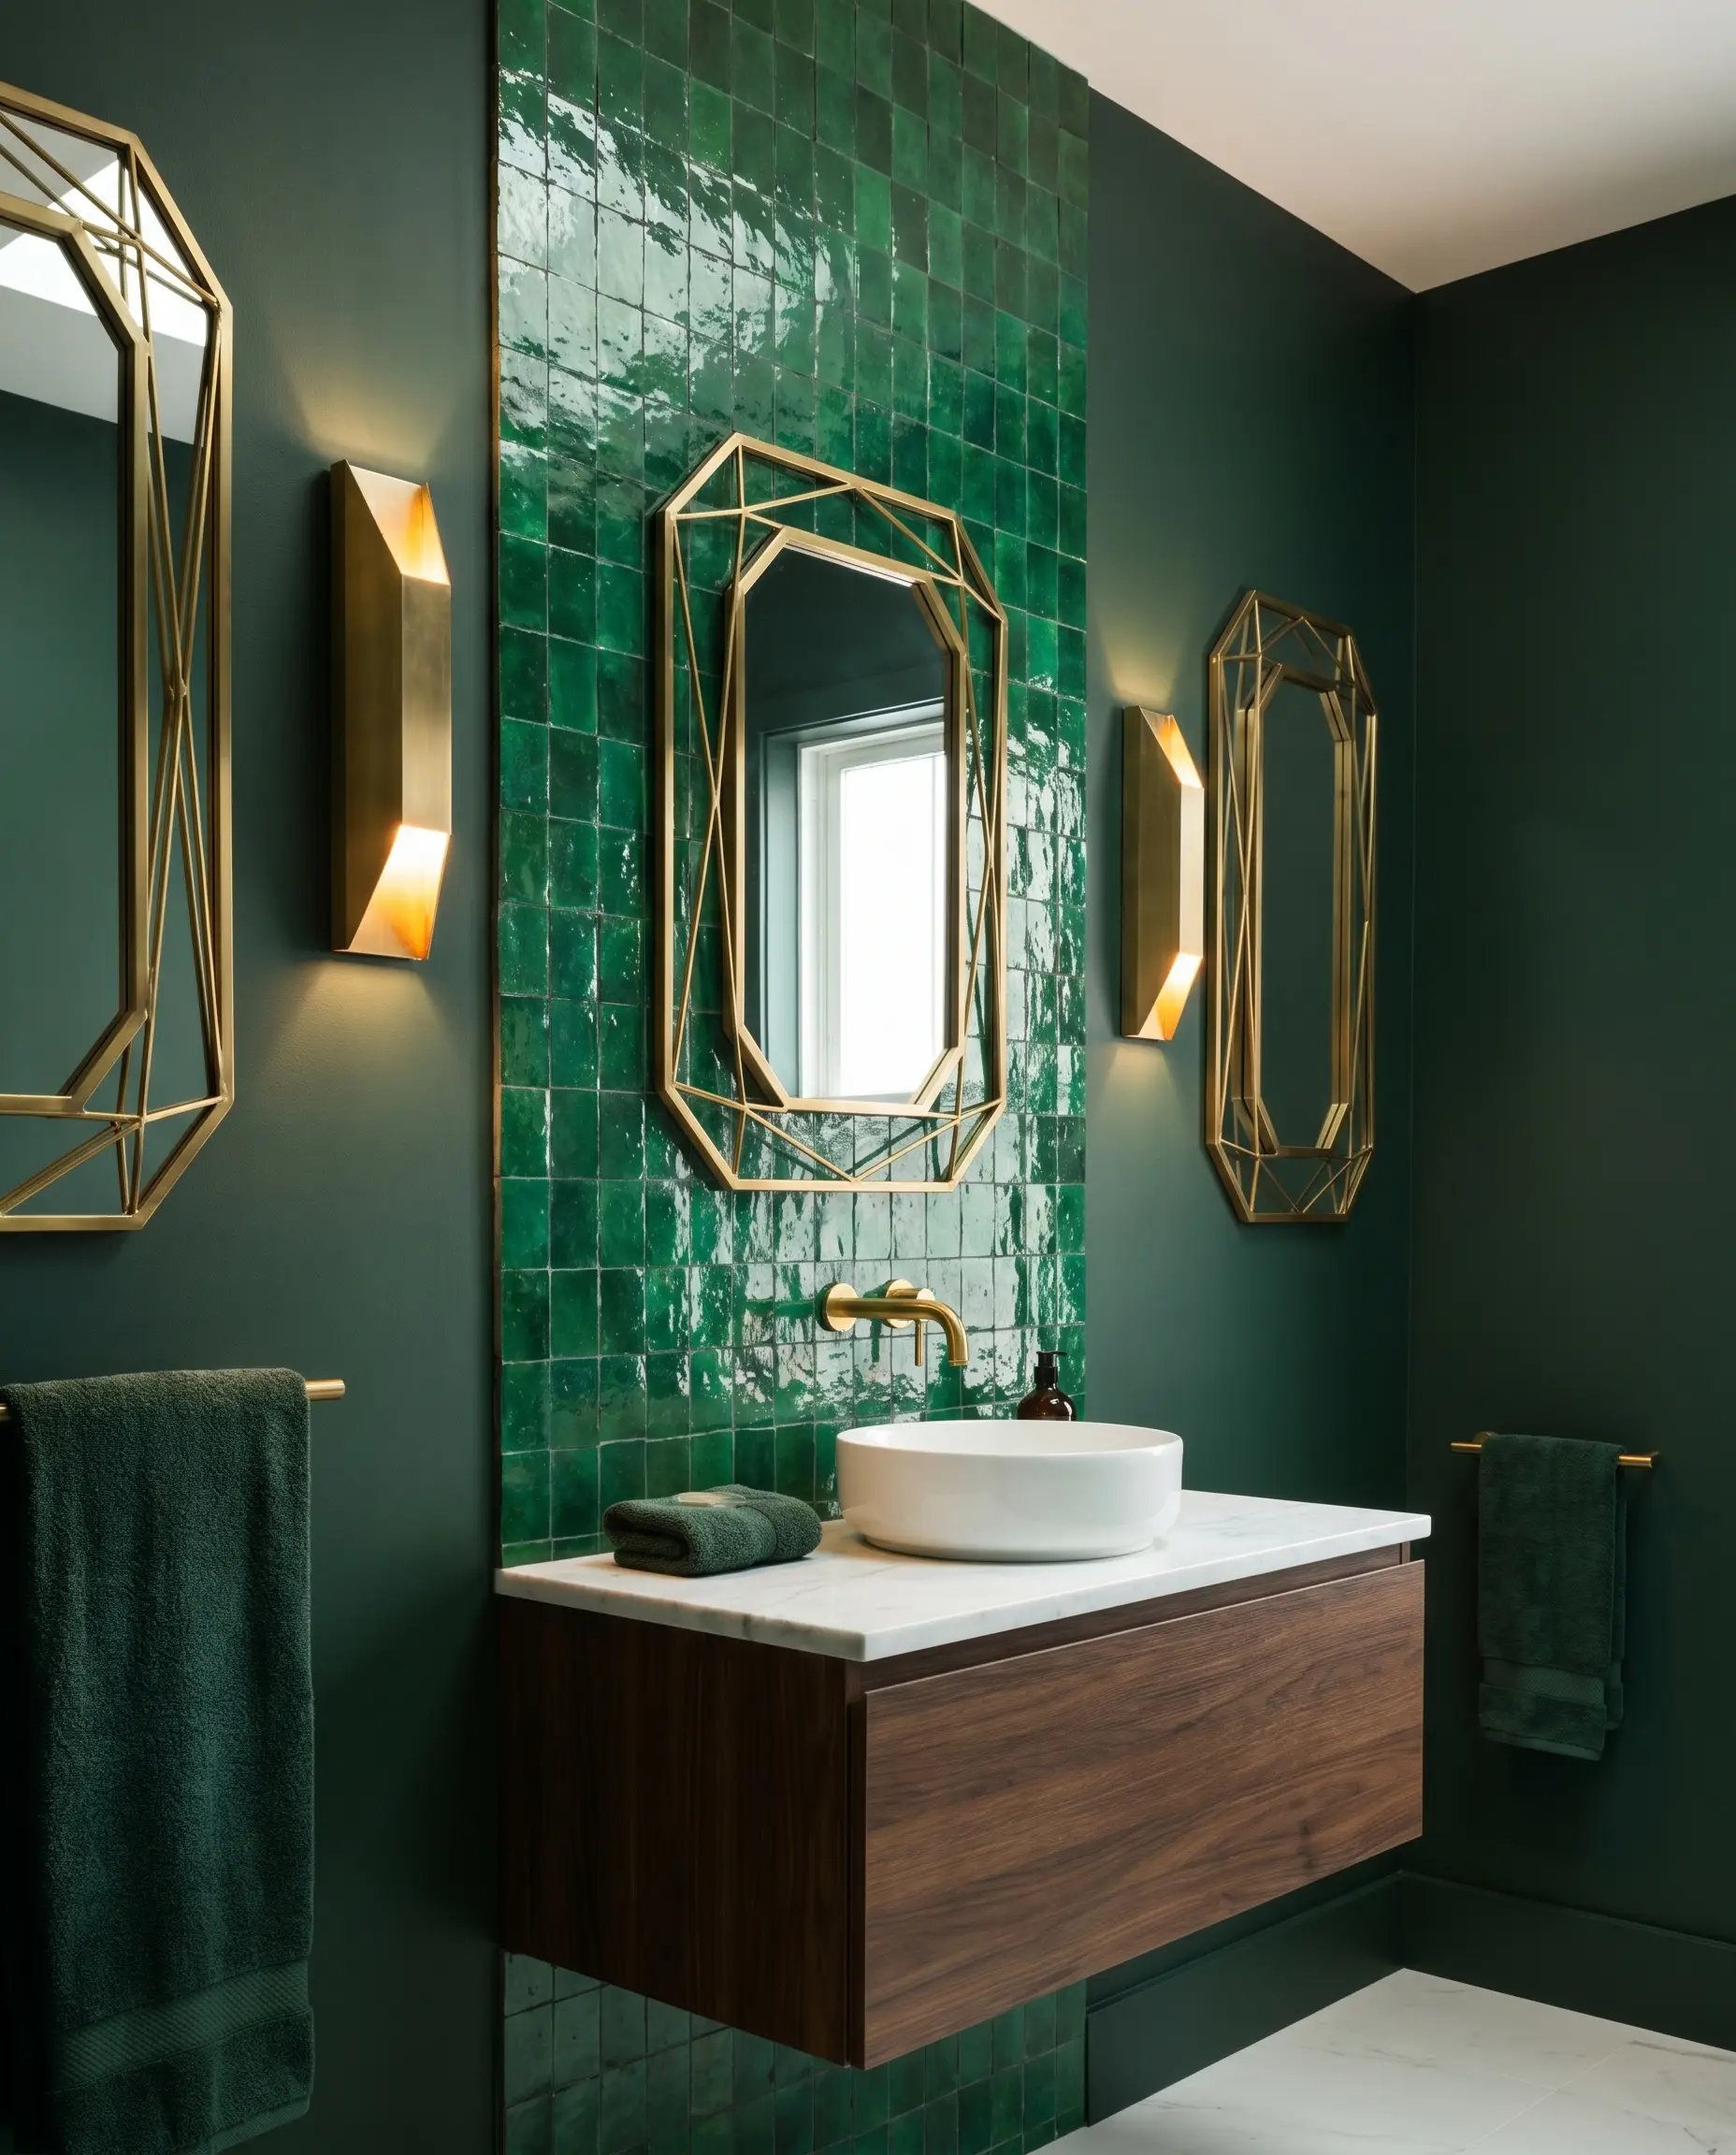
Highly-glazed, rich emerald green introduces high-contrast luxury and immediate visual weight to the vanity wall. The heavy saturation of the emerald glaze demands equally bold, geometric focal points to balance the room.
- Vibe: Bold, luxurious, Art Deco.
- Key Material: Emerald green zellige.
- Tactile Pairing: Geometric brass mirrors and brass sconces.
- Paint Recommendation: Benjamin Moore Hunter Green.
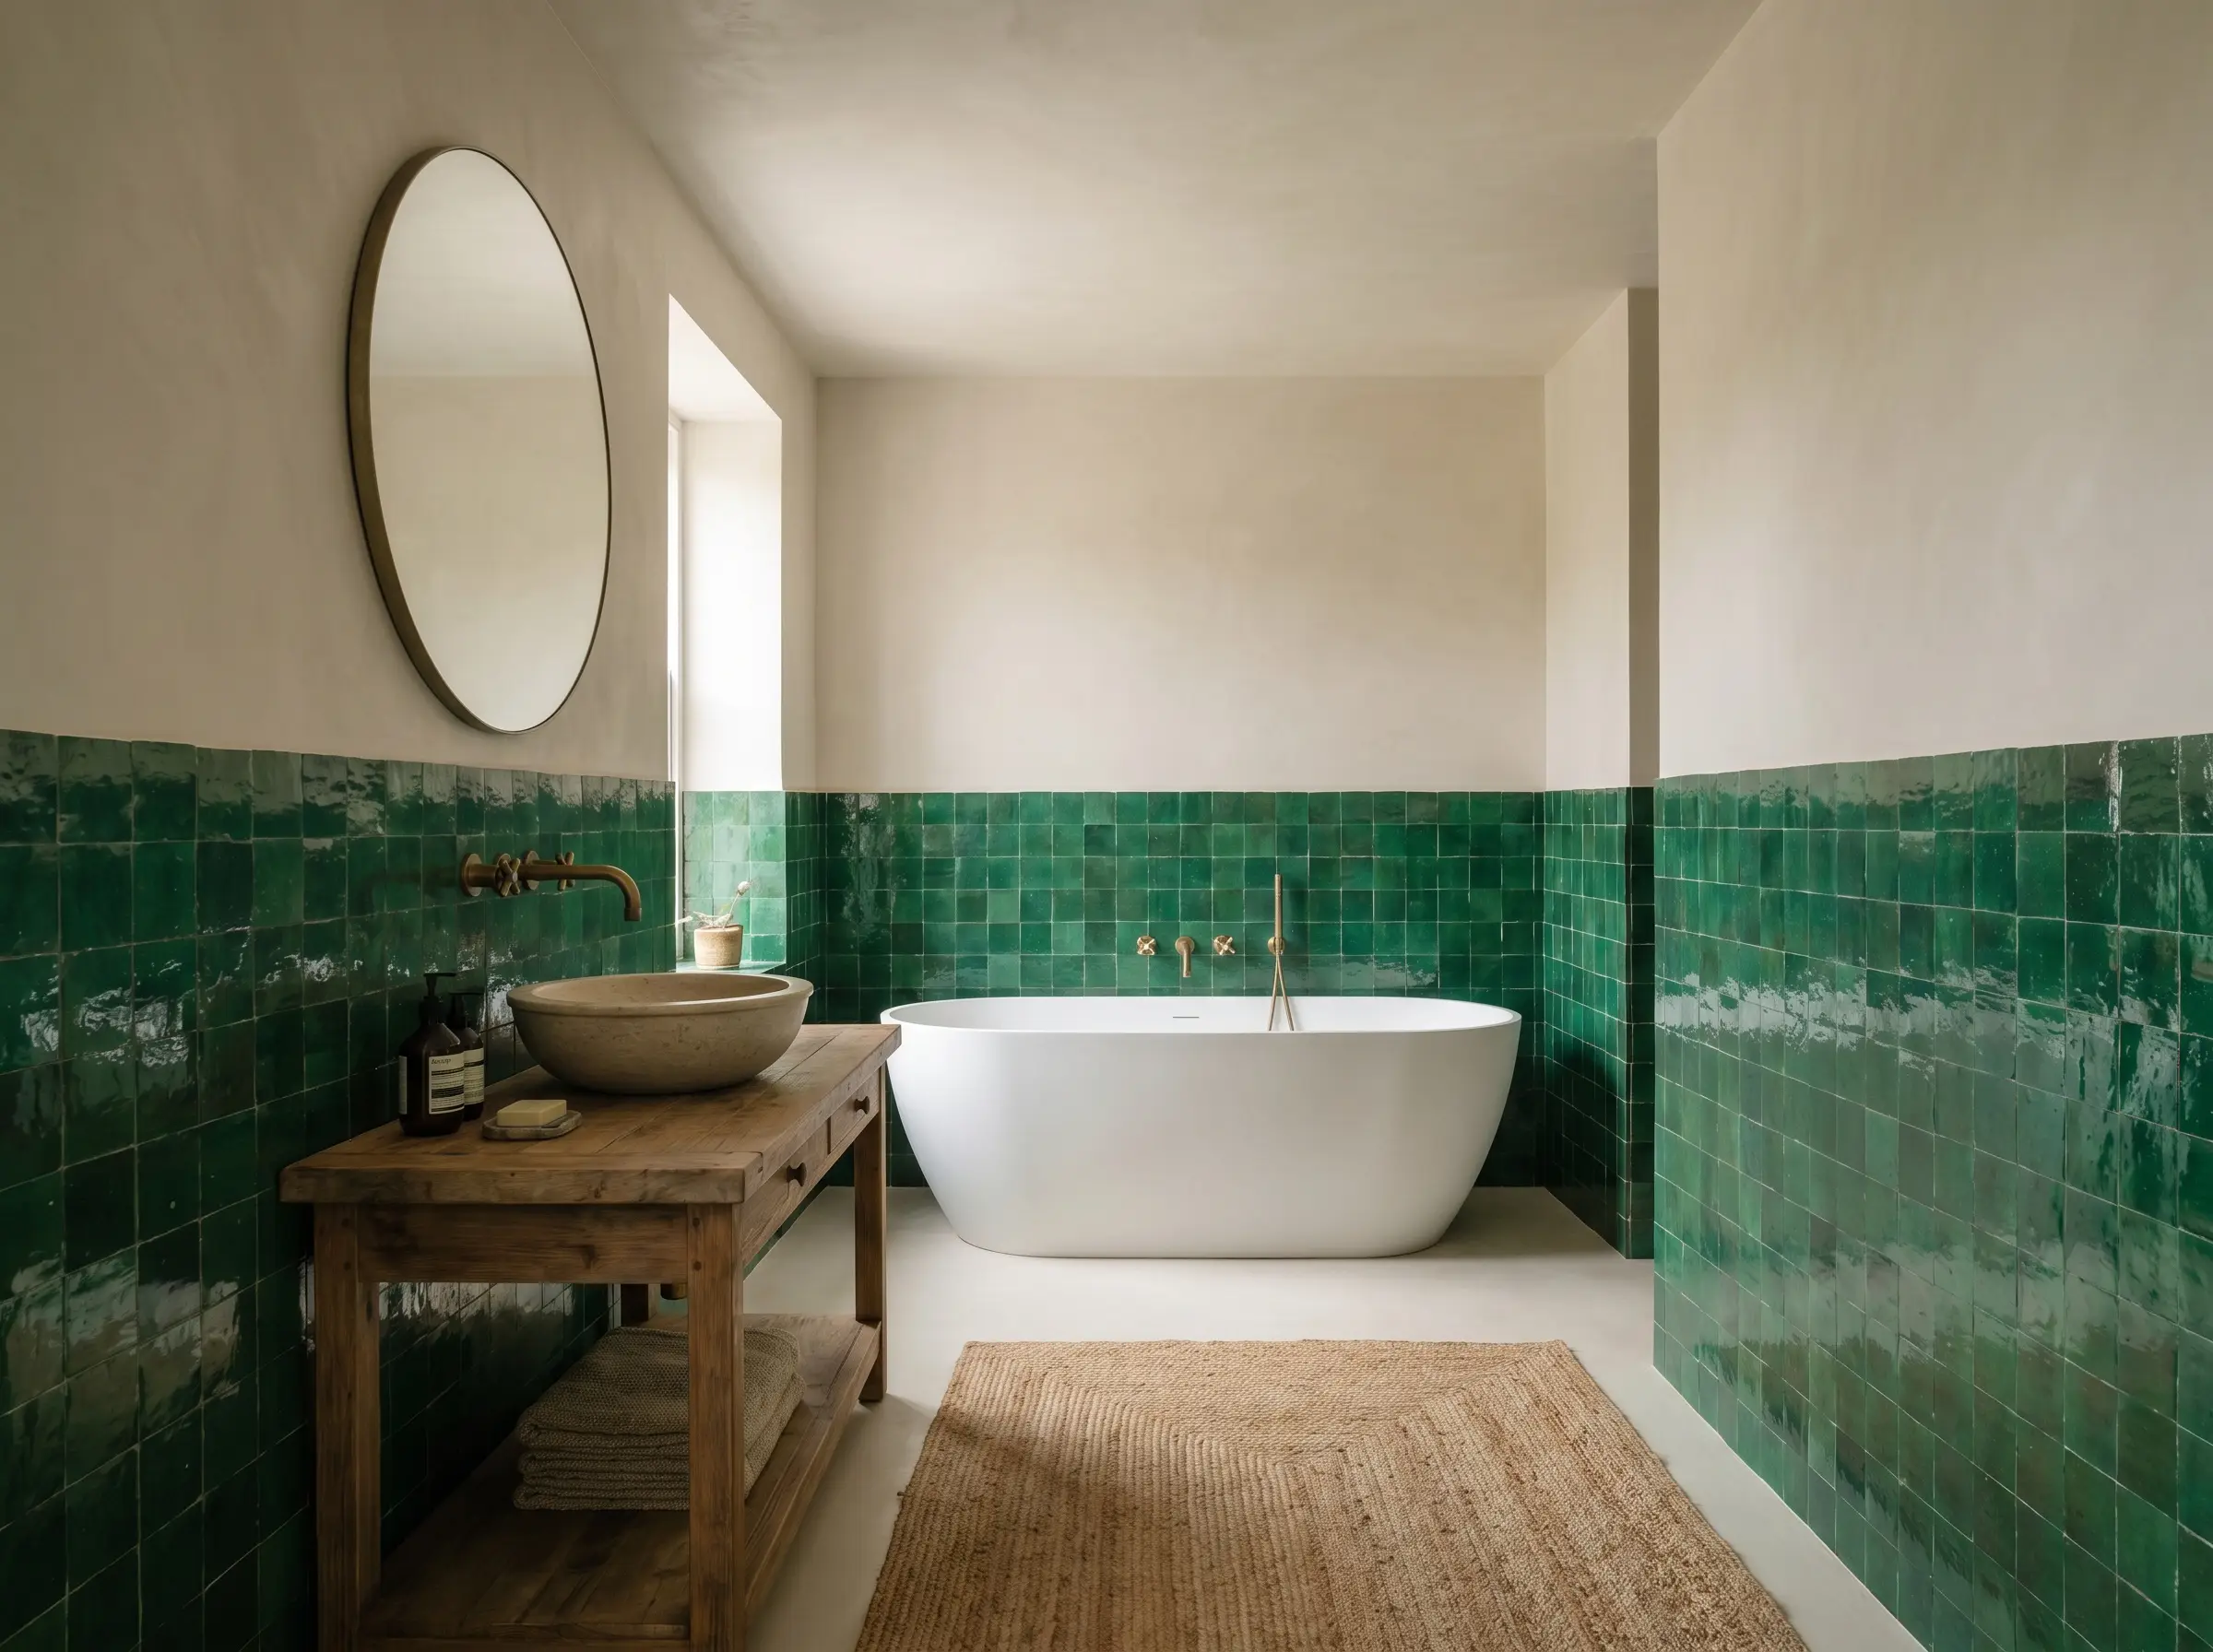
4. Embrace Earthy Tones with Olive and Sage
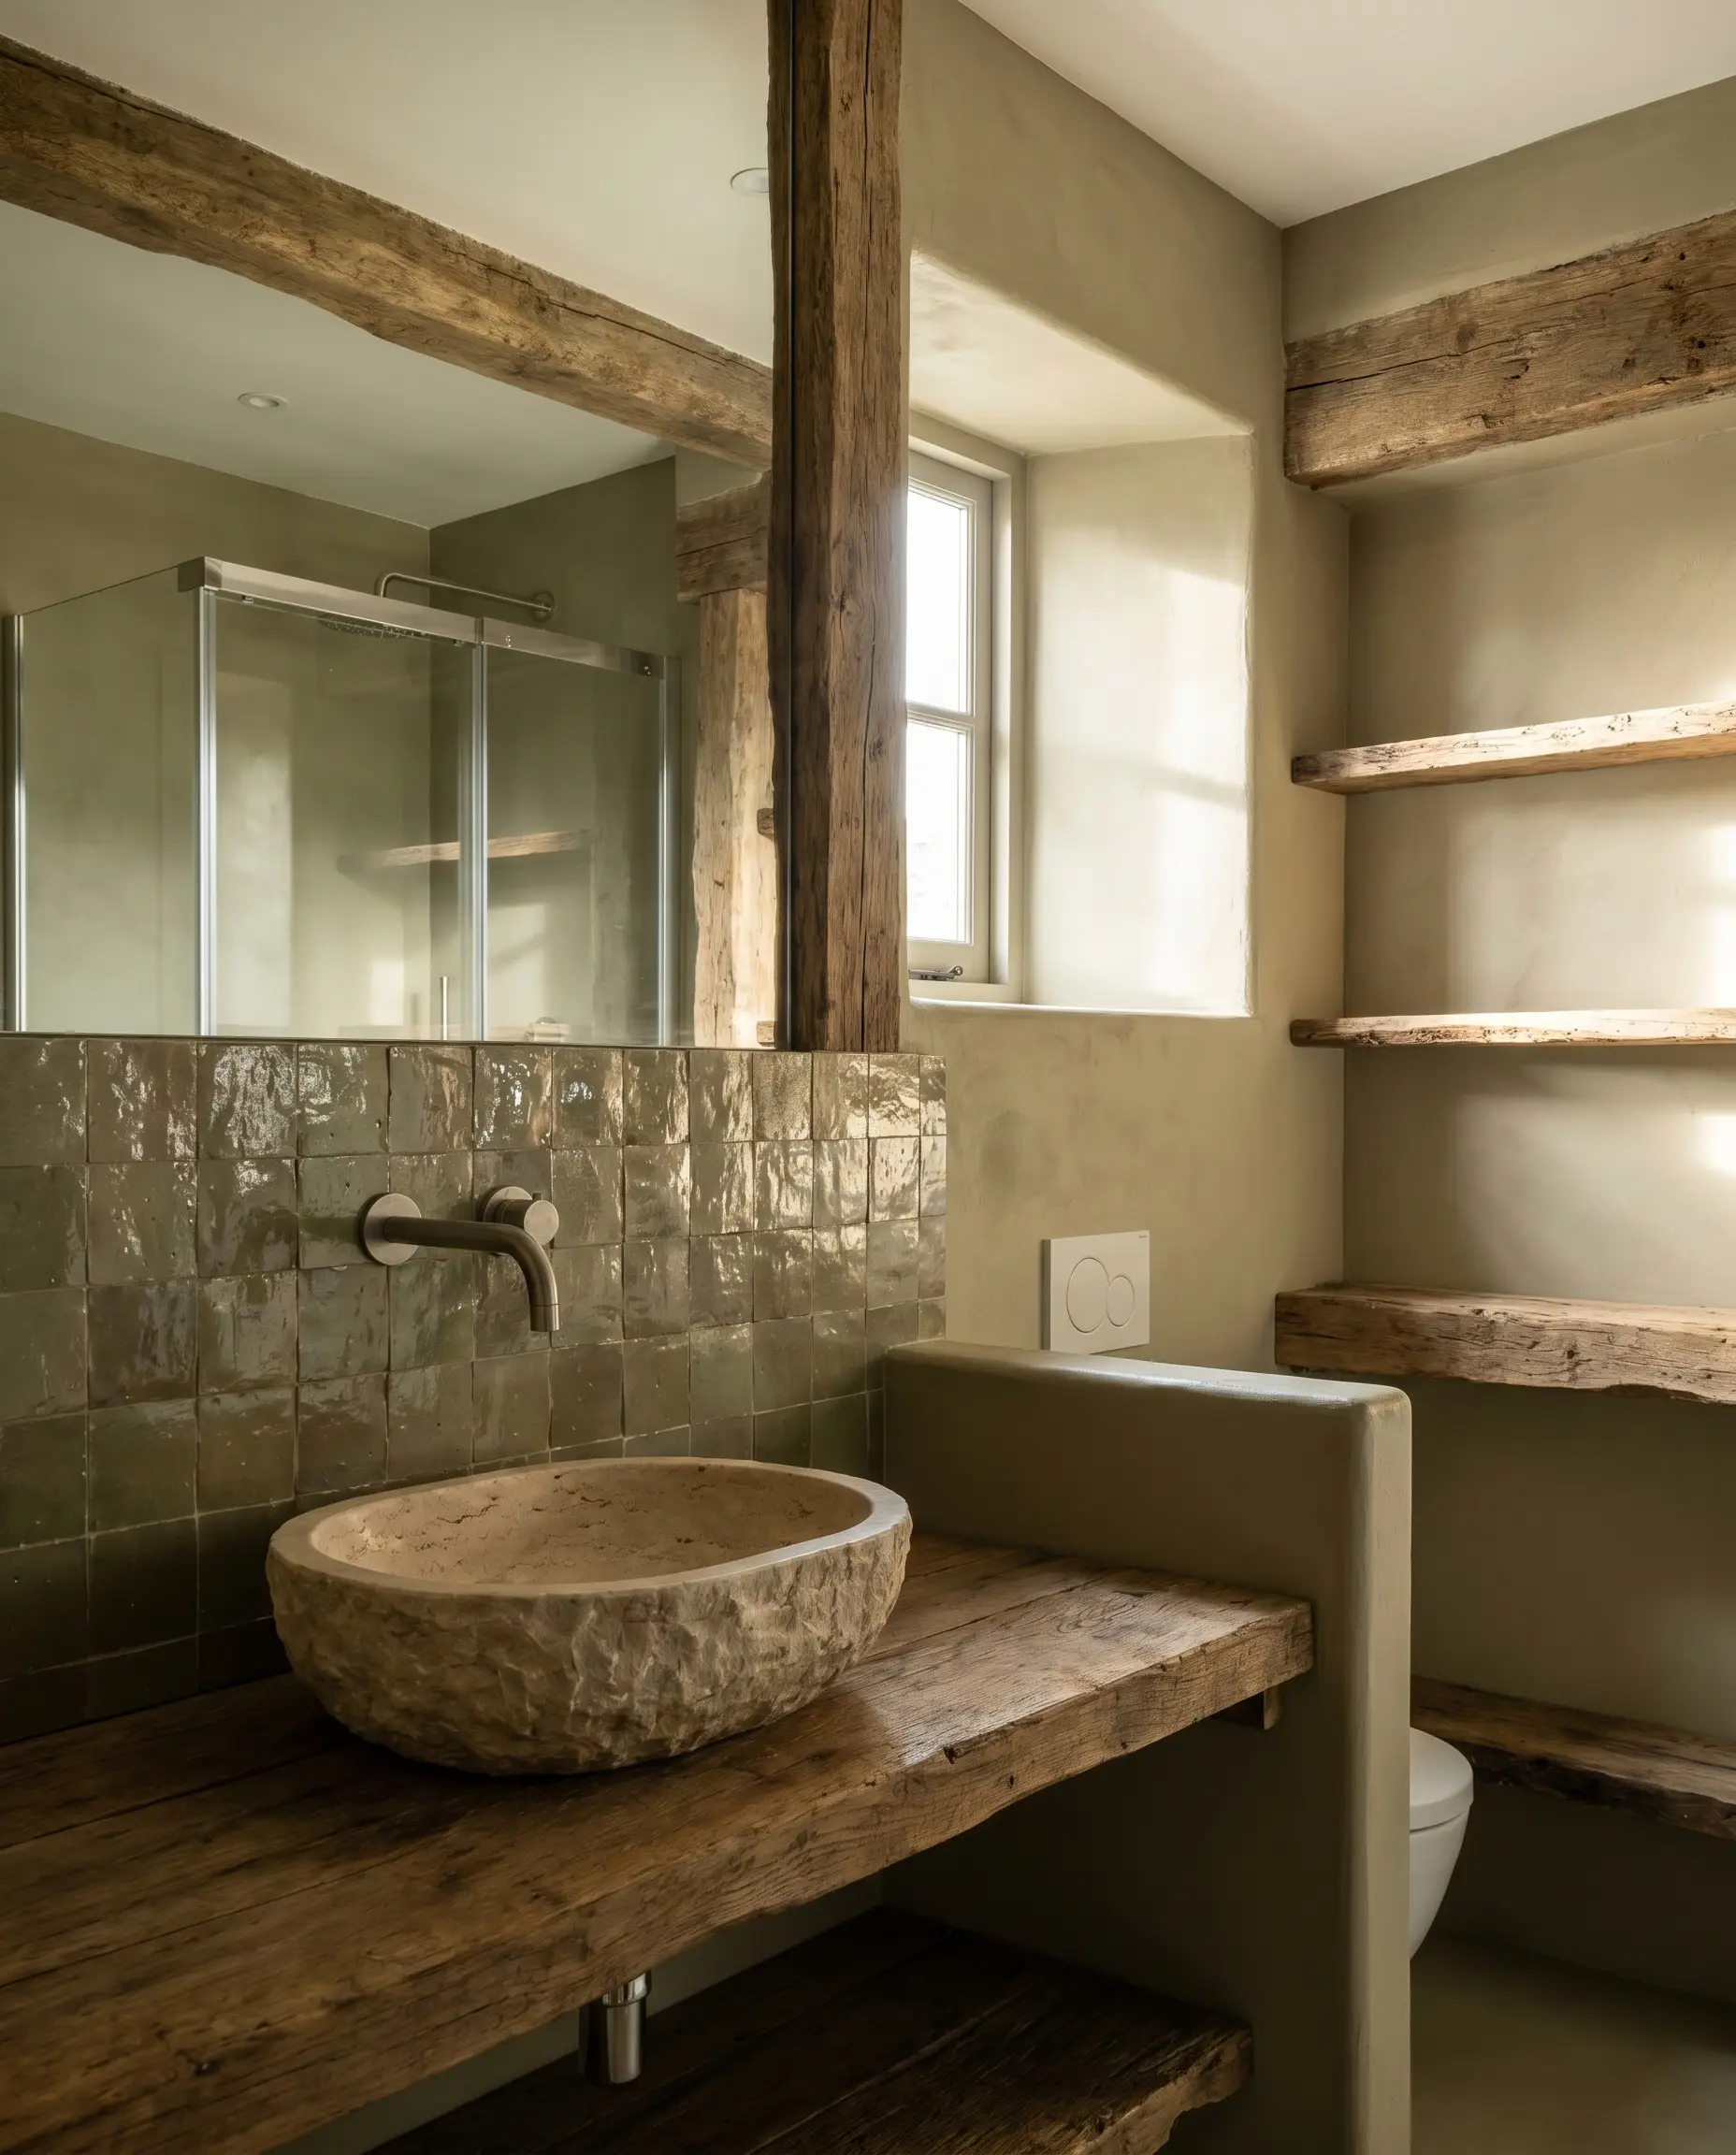
Muddy, yellow-based greens like olive and sage tie effortlessly into Wabi-Sabi or highly rustic architectural designs. These earthy tones ground the wet appearance of the tile, requiring heavy, natural textures to complete the look.
- Vibe: Earthy, rustic, Wabi-Sabi.
- Key Material: Olive or sage green zellige.
- Tactile Pairing: Chiseled travertine or natural stone vessel sinks.
- Paint Recommendation: Sherwin-Williams Svelte Sage.
5. Mix Matte and Glossy Glazes in the Same Hue
Requesting an 80/20 ratio of glossy to matte tiles in the exact same green shade yields unprecedented texture across the backsplash. This insider technique ensures the wall catches light irregularly, amplifying the artisanal craftsmanship.
- Vibe: Bespoke, highly textured, sophisticated.
- Key Technique: 80% gloss / 20% matte randomized layout.
- Styling Pro-Tip: Keep surrounding materials entirely matte so the mixed finish stands out.
6. Embrace the Natural Color Variation (The “Crazing” Effect)
Uniformity is the enemy of authentic Moroccan clay, as the kiln-fired glaze produces distinct color shifts from tile to tile. Intentionally mixing tiles from multiple boxes before installation ensures these subtle green variations are distributed evenly across the wall.
- Vibe: Authentic, perfectly imperfect.
- Key Material: Heavily variegated green zellige.
- Installation Rule: Dry-lay the entire backsplash on the floor first to balance the color distribution.
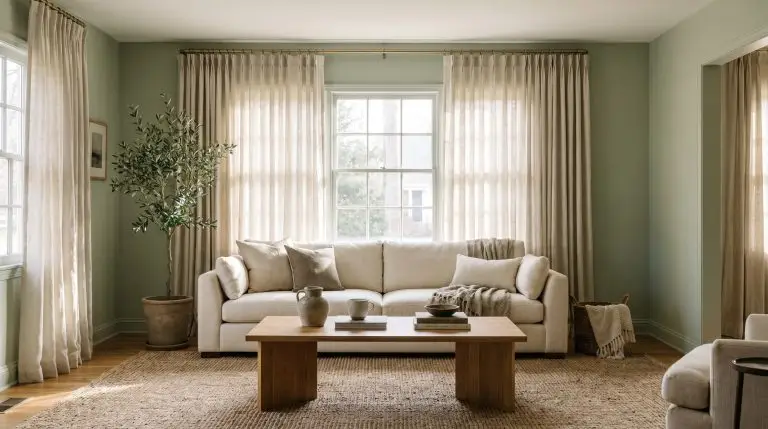
You can apply wallpapers, paints, etc. on walls and see how they look in various interiors.
The Chemistry of Contrast: Grout Pairings for Green Zellige
Because zellige tiles vary wildly in thickness and feature unrectified edges, the grout lines will inherently be irregular. The chemistry of your grout color dictates whether the backsplash looks like a historic artifact or a messy disaster.
- Custom Green Tint: Creates an invisible, monolithic surface where only the tile texture speaks.
- Mapei Warm Gray: The industry standard for an organic, historic mortar appearance.
- Mapei Rain: A soft, cool-toned gray that complements blue-leaning celadon shades.
- Soft Charcoal: A graphic, high-contrast outline that highlights every single chipped edge.
7. The Invisible Look: Matching Green Grout
Custom-tinting your grout to match the exact green of the glaze allows the undulating texture of the tiles to become the sole focal point. This creates a monolithic, highly modern application where the raw edges recede into the background.
- Vibe: Minimalist, textural, modern.
- Key Material: Custom-color-matched epoxy or high-performance grout.
- Styling Pro-Tip: Use this technique when pairing the tile with heavily veined marble to avoid visual clutter.
8. The Organic Transition: Mapei Warm Gray or Rain
Utilizing an earthy, neutral grout mimics the appearance of natural, historic mortar and respects the earthy edge of the clay. Mapei Warm Gray is a proven industry standard for green zellige, bridging the gap between the glossy face and the raw terracotta side.
- Vibe: Historic, grounded, approachable.
- Key Material: Mapei Warm Gray or Mapei Rain.
- Tactile Pairing: Aged brass plumbing fixtures.
9. The Graphic Punch: Charcoal or Soft Black Grout
Applying a dark grout against lighter sage or celadon tiles aggressively highlights the unrectified, chipped edges of each individual square. This high-contrast approach requires an elite tile setter, as it broadcasts every single installation nuance and flaw.
- Vibe: Graphic, industrial-leaning, bold.
- Key Material: Soft black or dark charcoal grout.
- Styling Pro-Tip: Carry the black accent into matte black hardware to balance the visual weight.
10. Avoid Pure White (The Bleach Effect)

Never use pure, bright white grout with authentic green zellige. The stark, clinical white severely clashes with the organic, handmade nature of the clay, instantly making the premium installation look harsh and cheap.
Designer Warning
Bright white grout outlines every tile in a sterile grid that fights the natural wiggles and chips of the clay. It strips the soul out of the material and flattens the rich green glaze.
- Vibe: To be avoided at all costs.
- Alternative: Use an off-white like Mapei Alabaster if a light grout is absolutely necessary.
- Styling Pro-Tip: Always test grout colors on a spare board before applying to the wall.
11. Mandate Non-Sanded Grout for Narrow Joints
Authentic zellige should be butt-jointed, placed as tightly together as the irregular edges allow. This incredibly tight spacing requires non-sanded grout to flow into the micro-joints without scratching the glass-like green glaze during the float.
- Vibe: Tight, cohesive, expertly installed.
- Key Material: Premium non-sanded grout.
- Installation Rule: Wedge spacers are often needed to accommodate the varying tile sizes.
12. Float the Grout Over the Glaze

The “slurry” or floating technique involves intentionally wiping grout over the irregular dips, pits, and chips of the tile face. Leaving trace amounts of grout in these recesses creates a remarkably tactile, ancient, time-worn appearance.
- Vibe: Ancient, highly rustic, reclaimed.
- Key Technique: Slurry grout application.
- Styling Pro-Tip: Use a warm, earthy grout color for this technique to simulate centuries of dust and wear.
Hardware, Stone, and Material Pairings
Green zellige cannot stand alone on a vanity wall; it relies on surrounding material weight and temperature to dictate the room’s overarching style. The metals and stones you pair with this clay will either warm up the glaze or sharpen its modern edge.
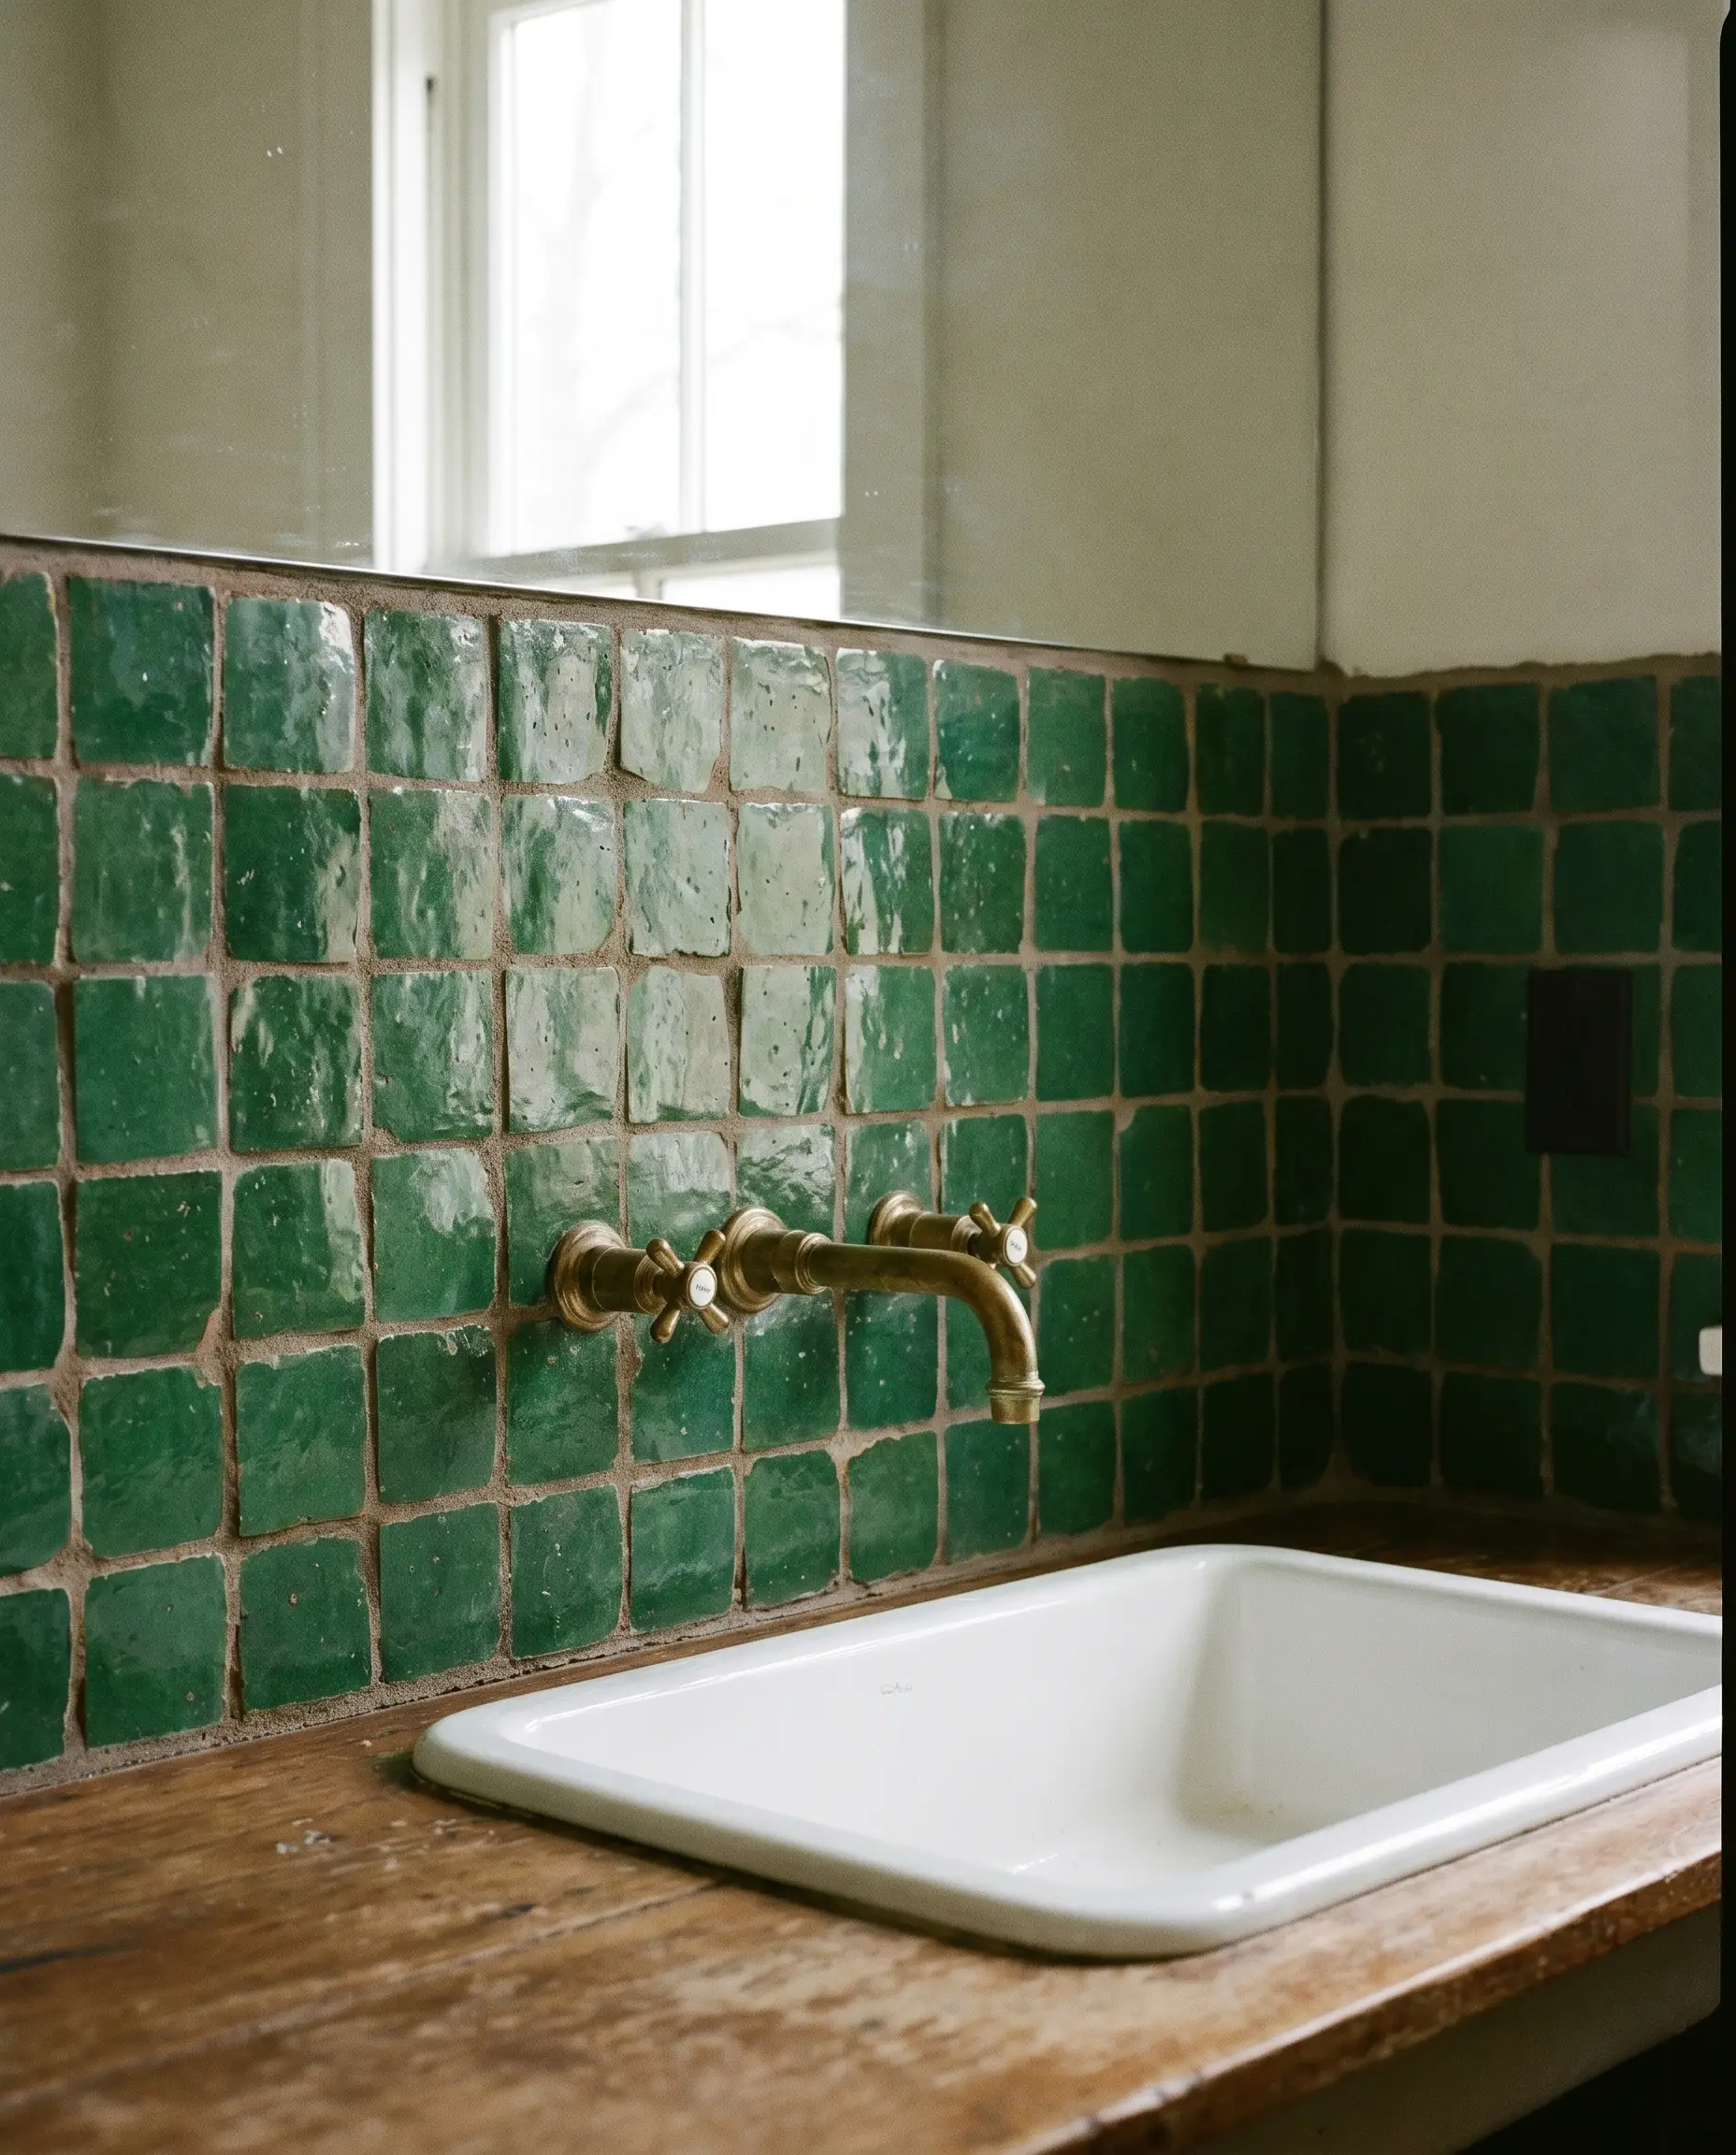
13. Contrast with Unlacquered Brass Fixtures
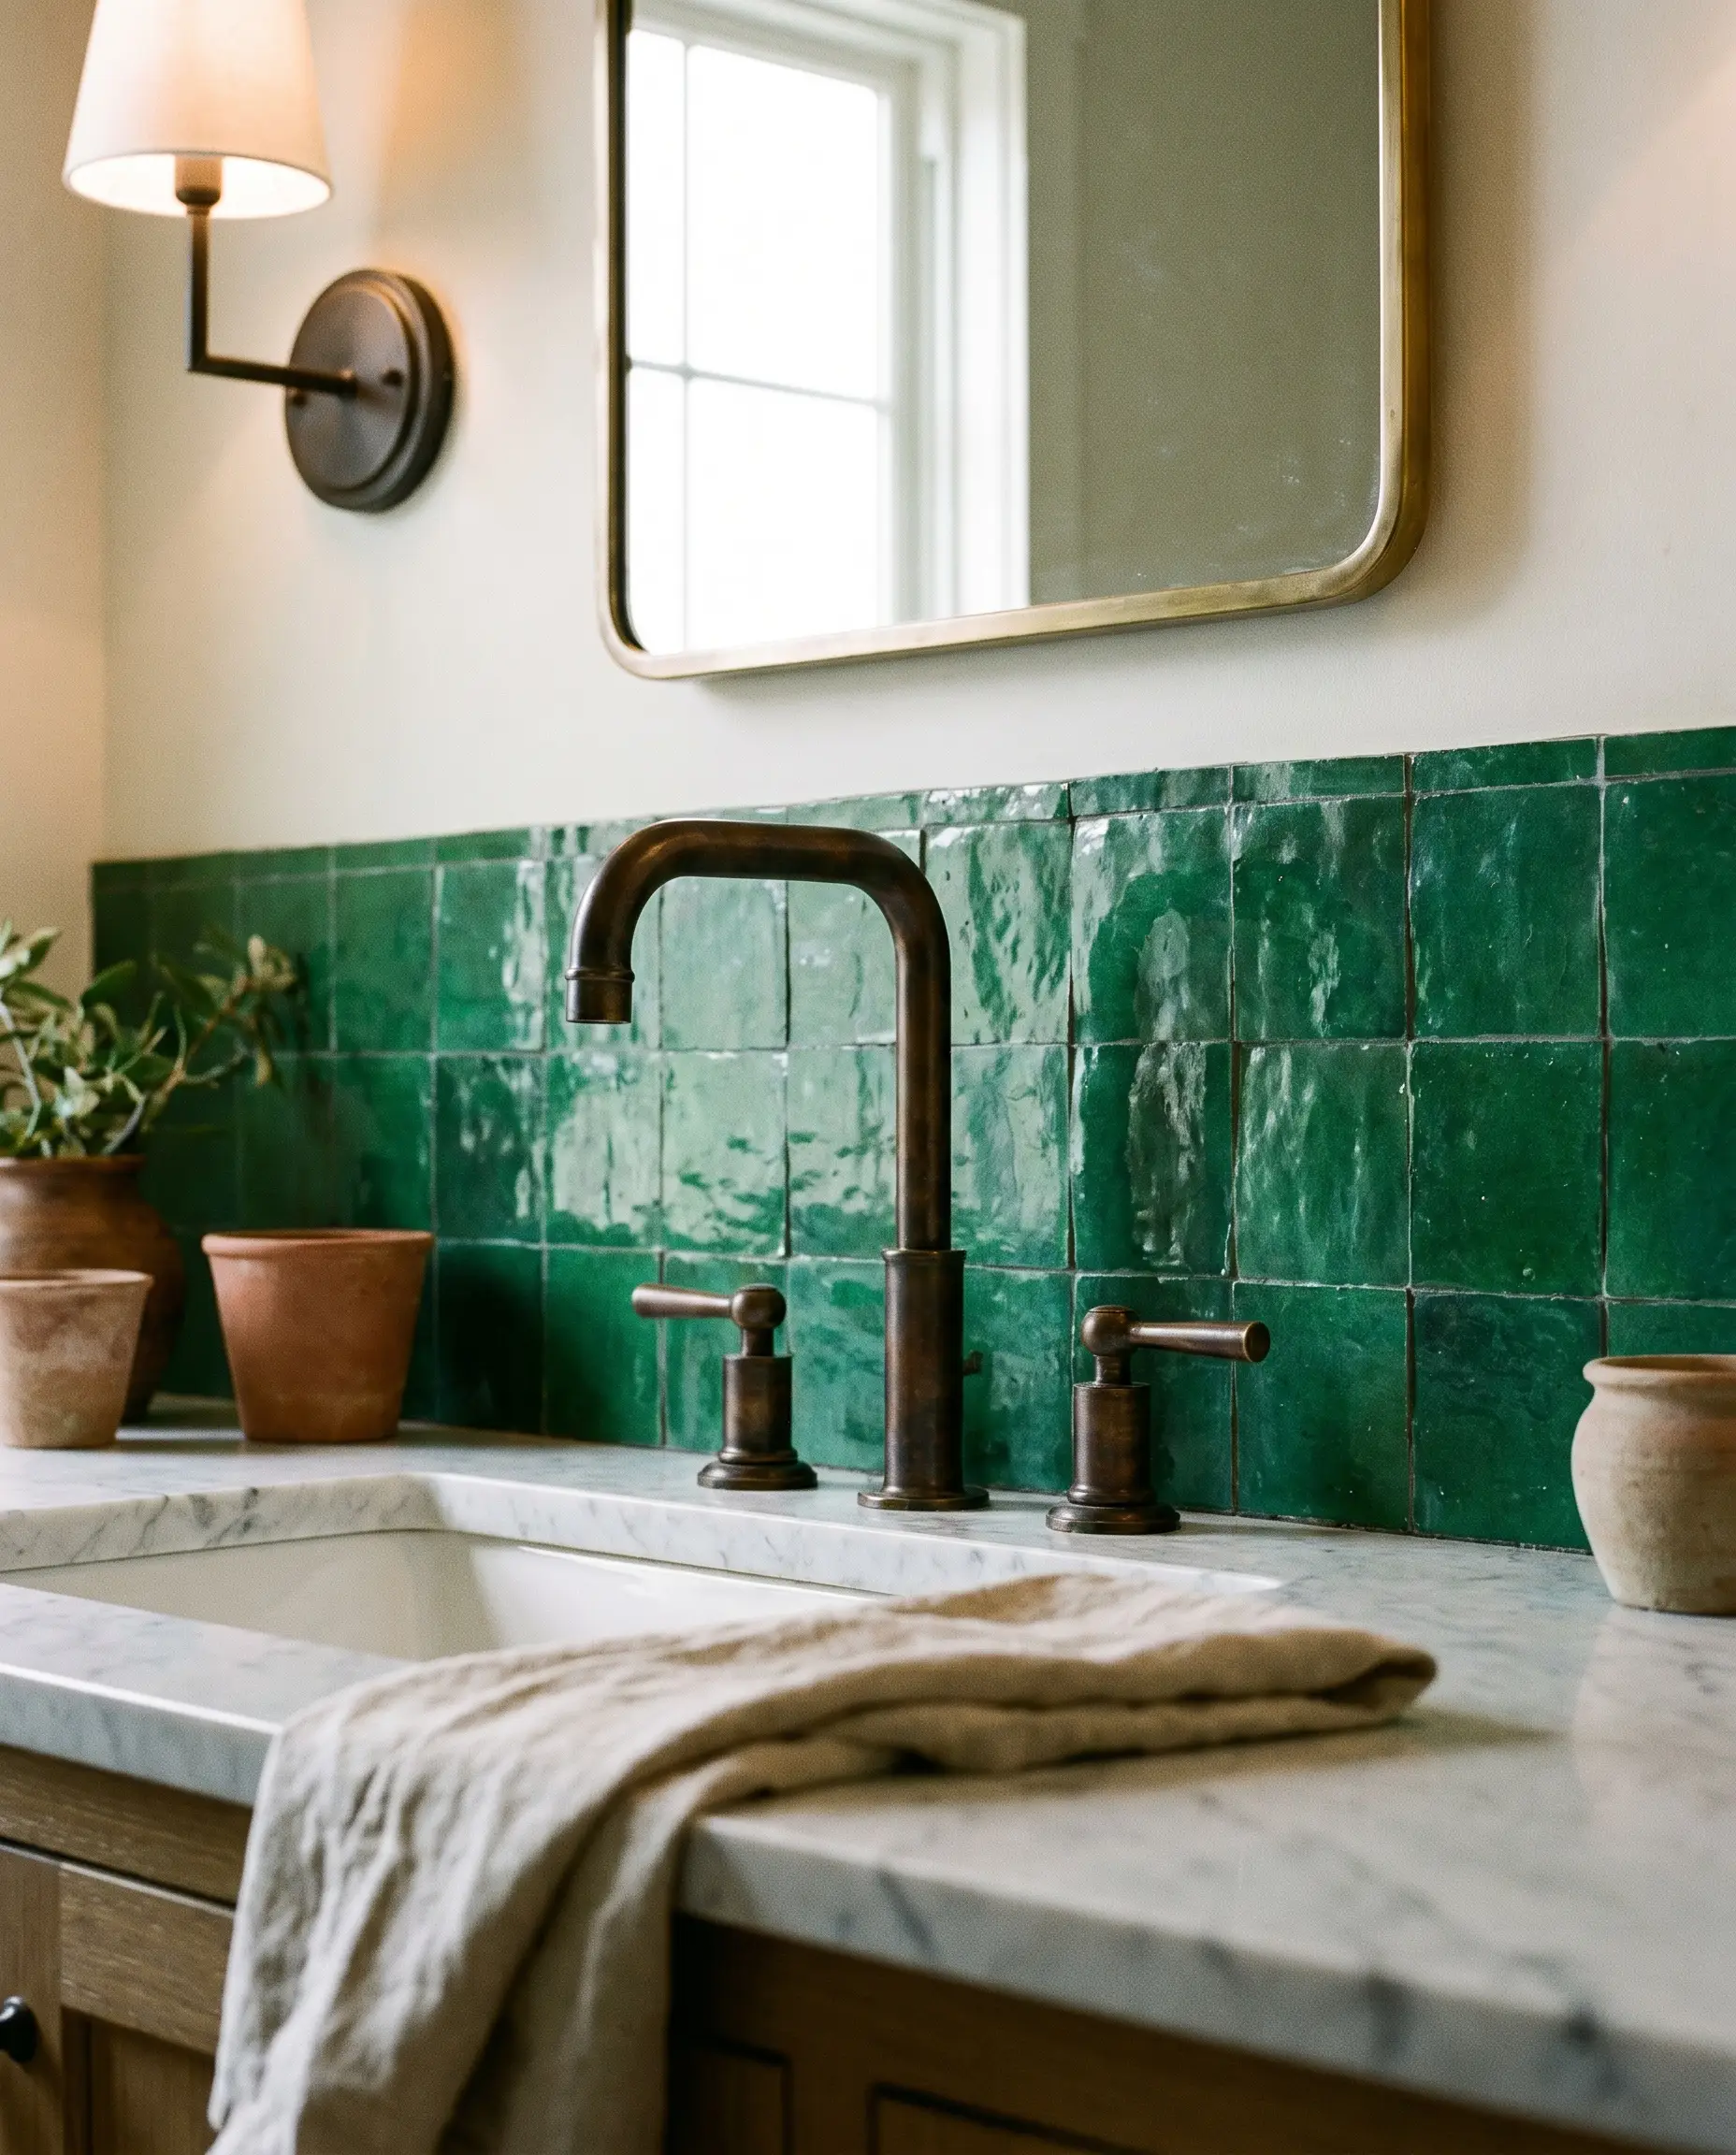
The living finish of unlacquered brass is the absolute premier pairing for emerald or forest green clay. As the brass develops a rich, dark patina over time, it speaks directly to the handmade, living nature of the tile.
- Vibe: Timeless, organic luxury.
- Tactile Pairing: Heavy, unlacquered brass widespread faucets.
- Styling Pro-Tip: Allow the brass to age naturally; do not polish it back to a bright shine.
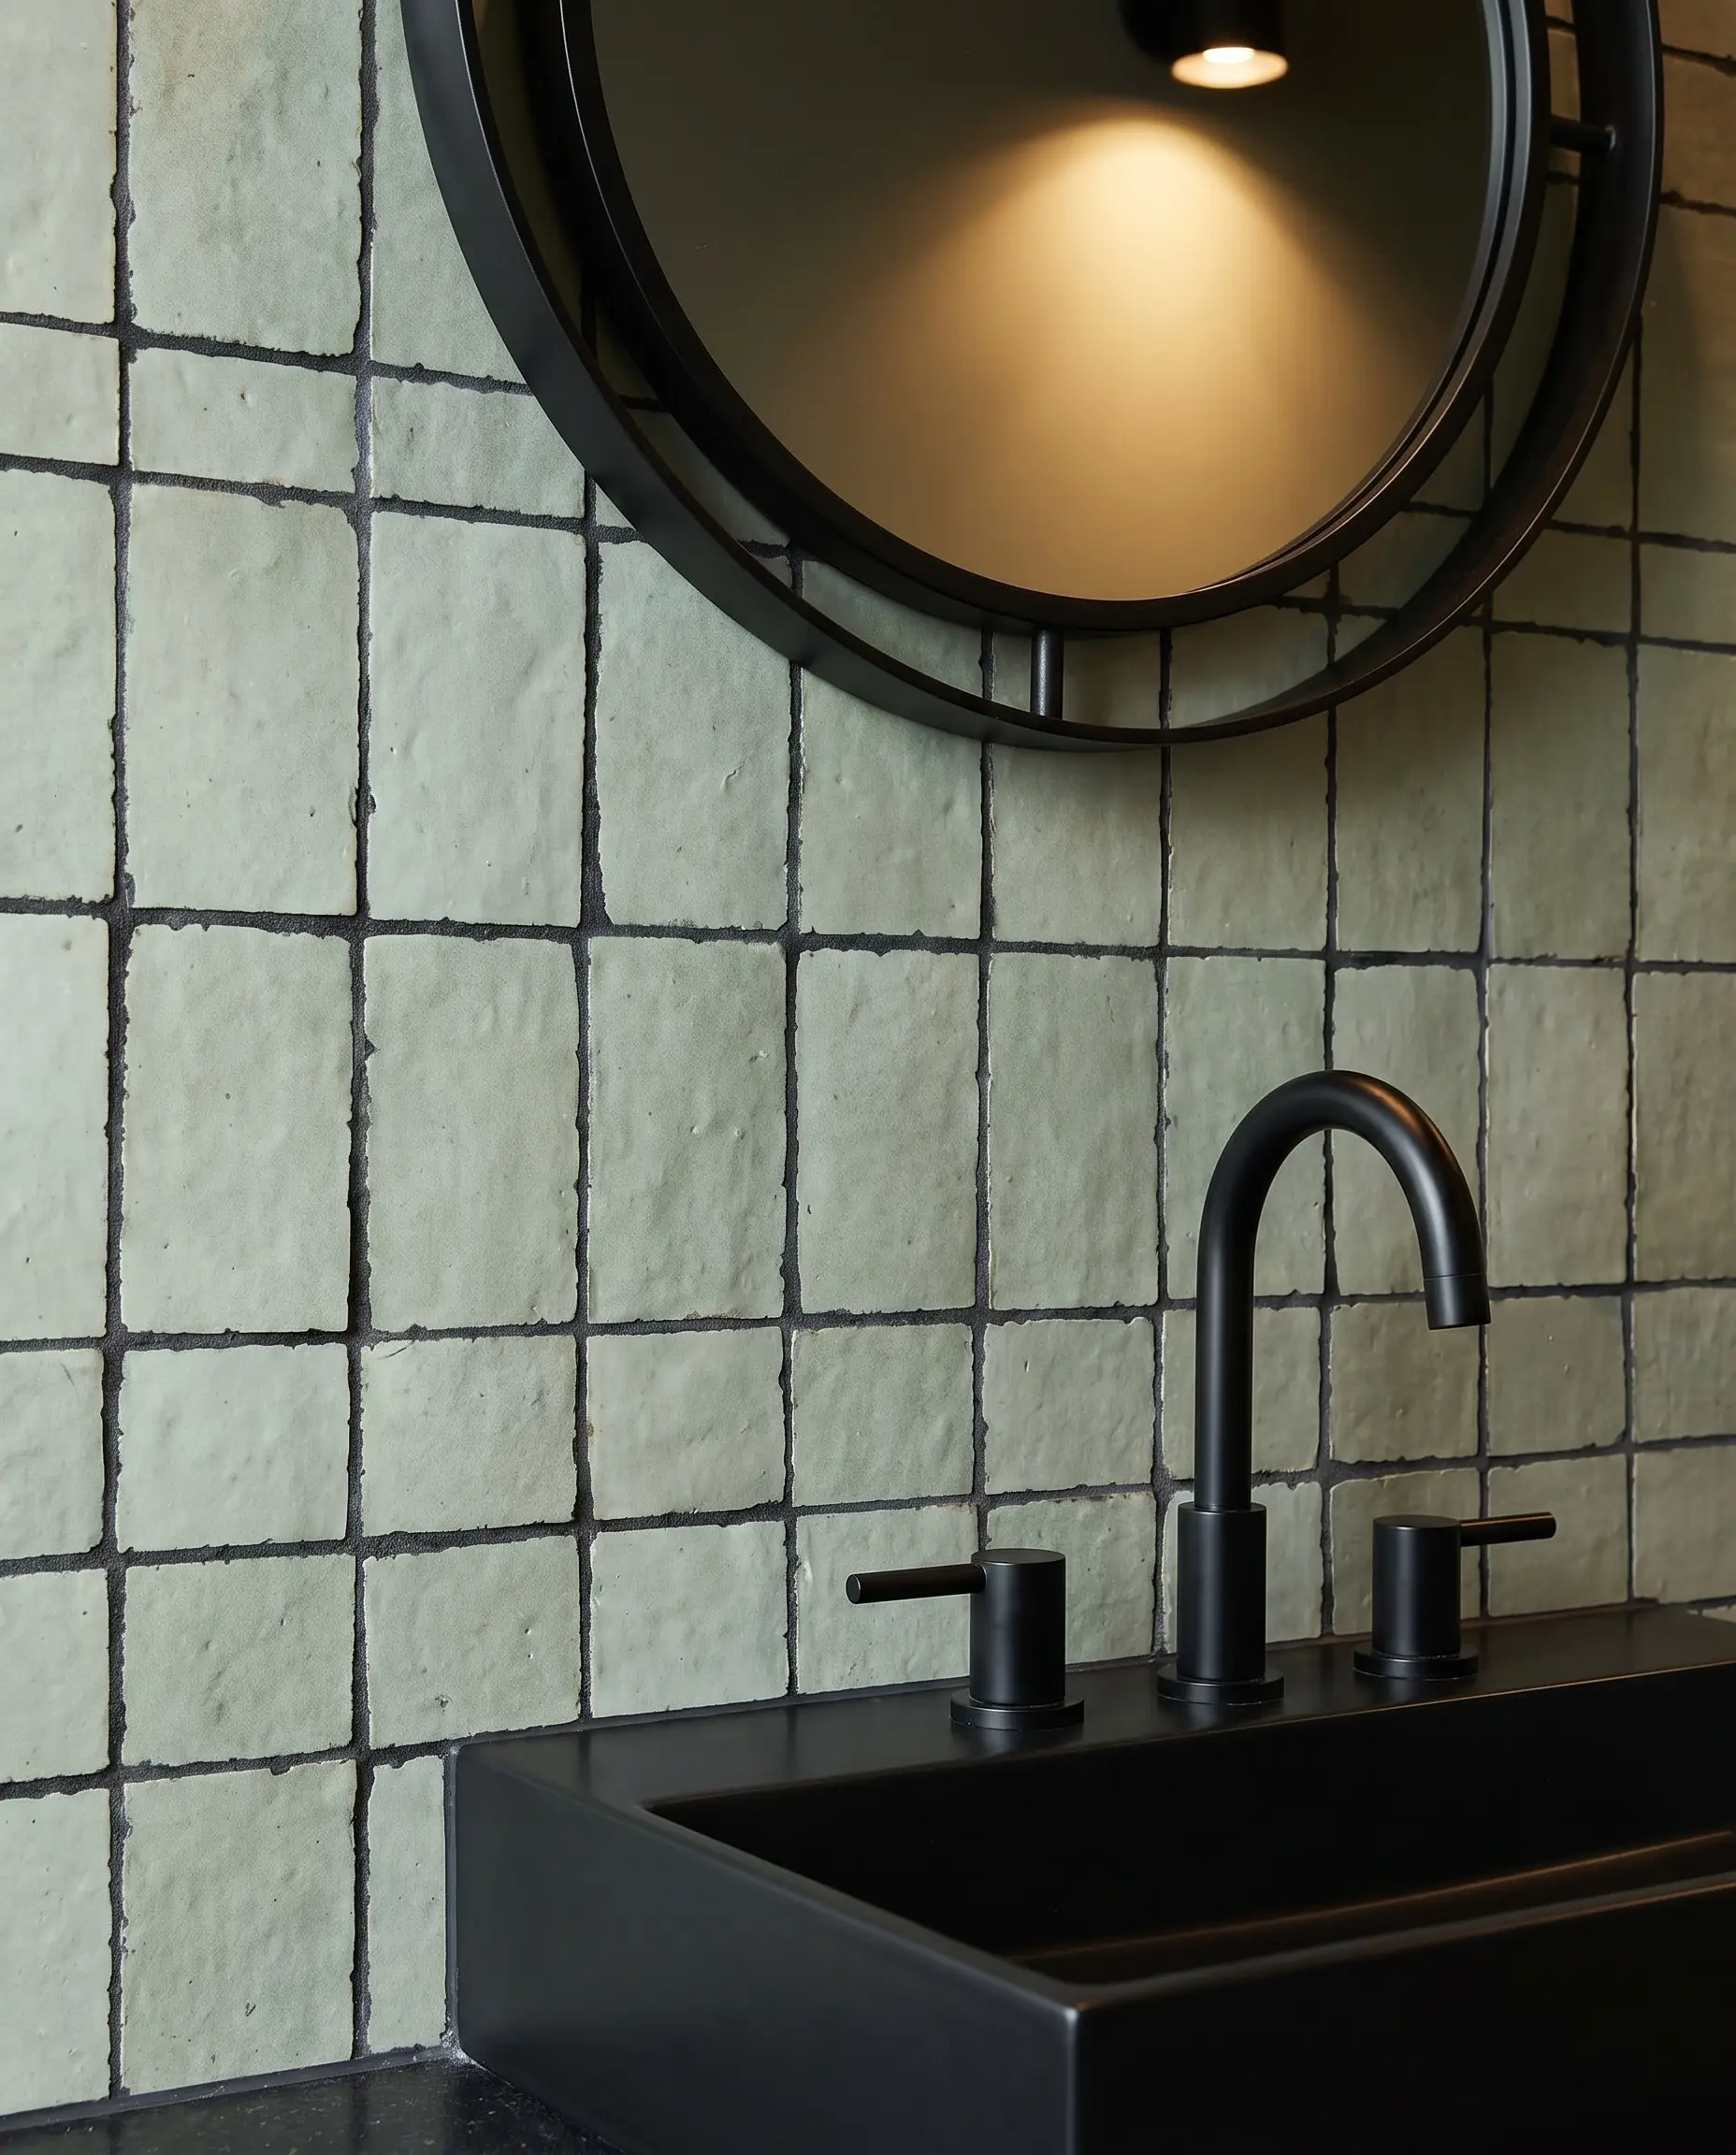
14. Modernize with Matte Black Wall-Mounted Faucets
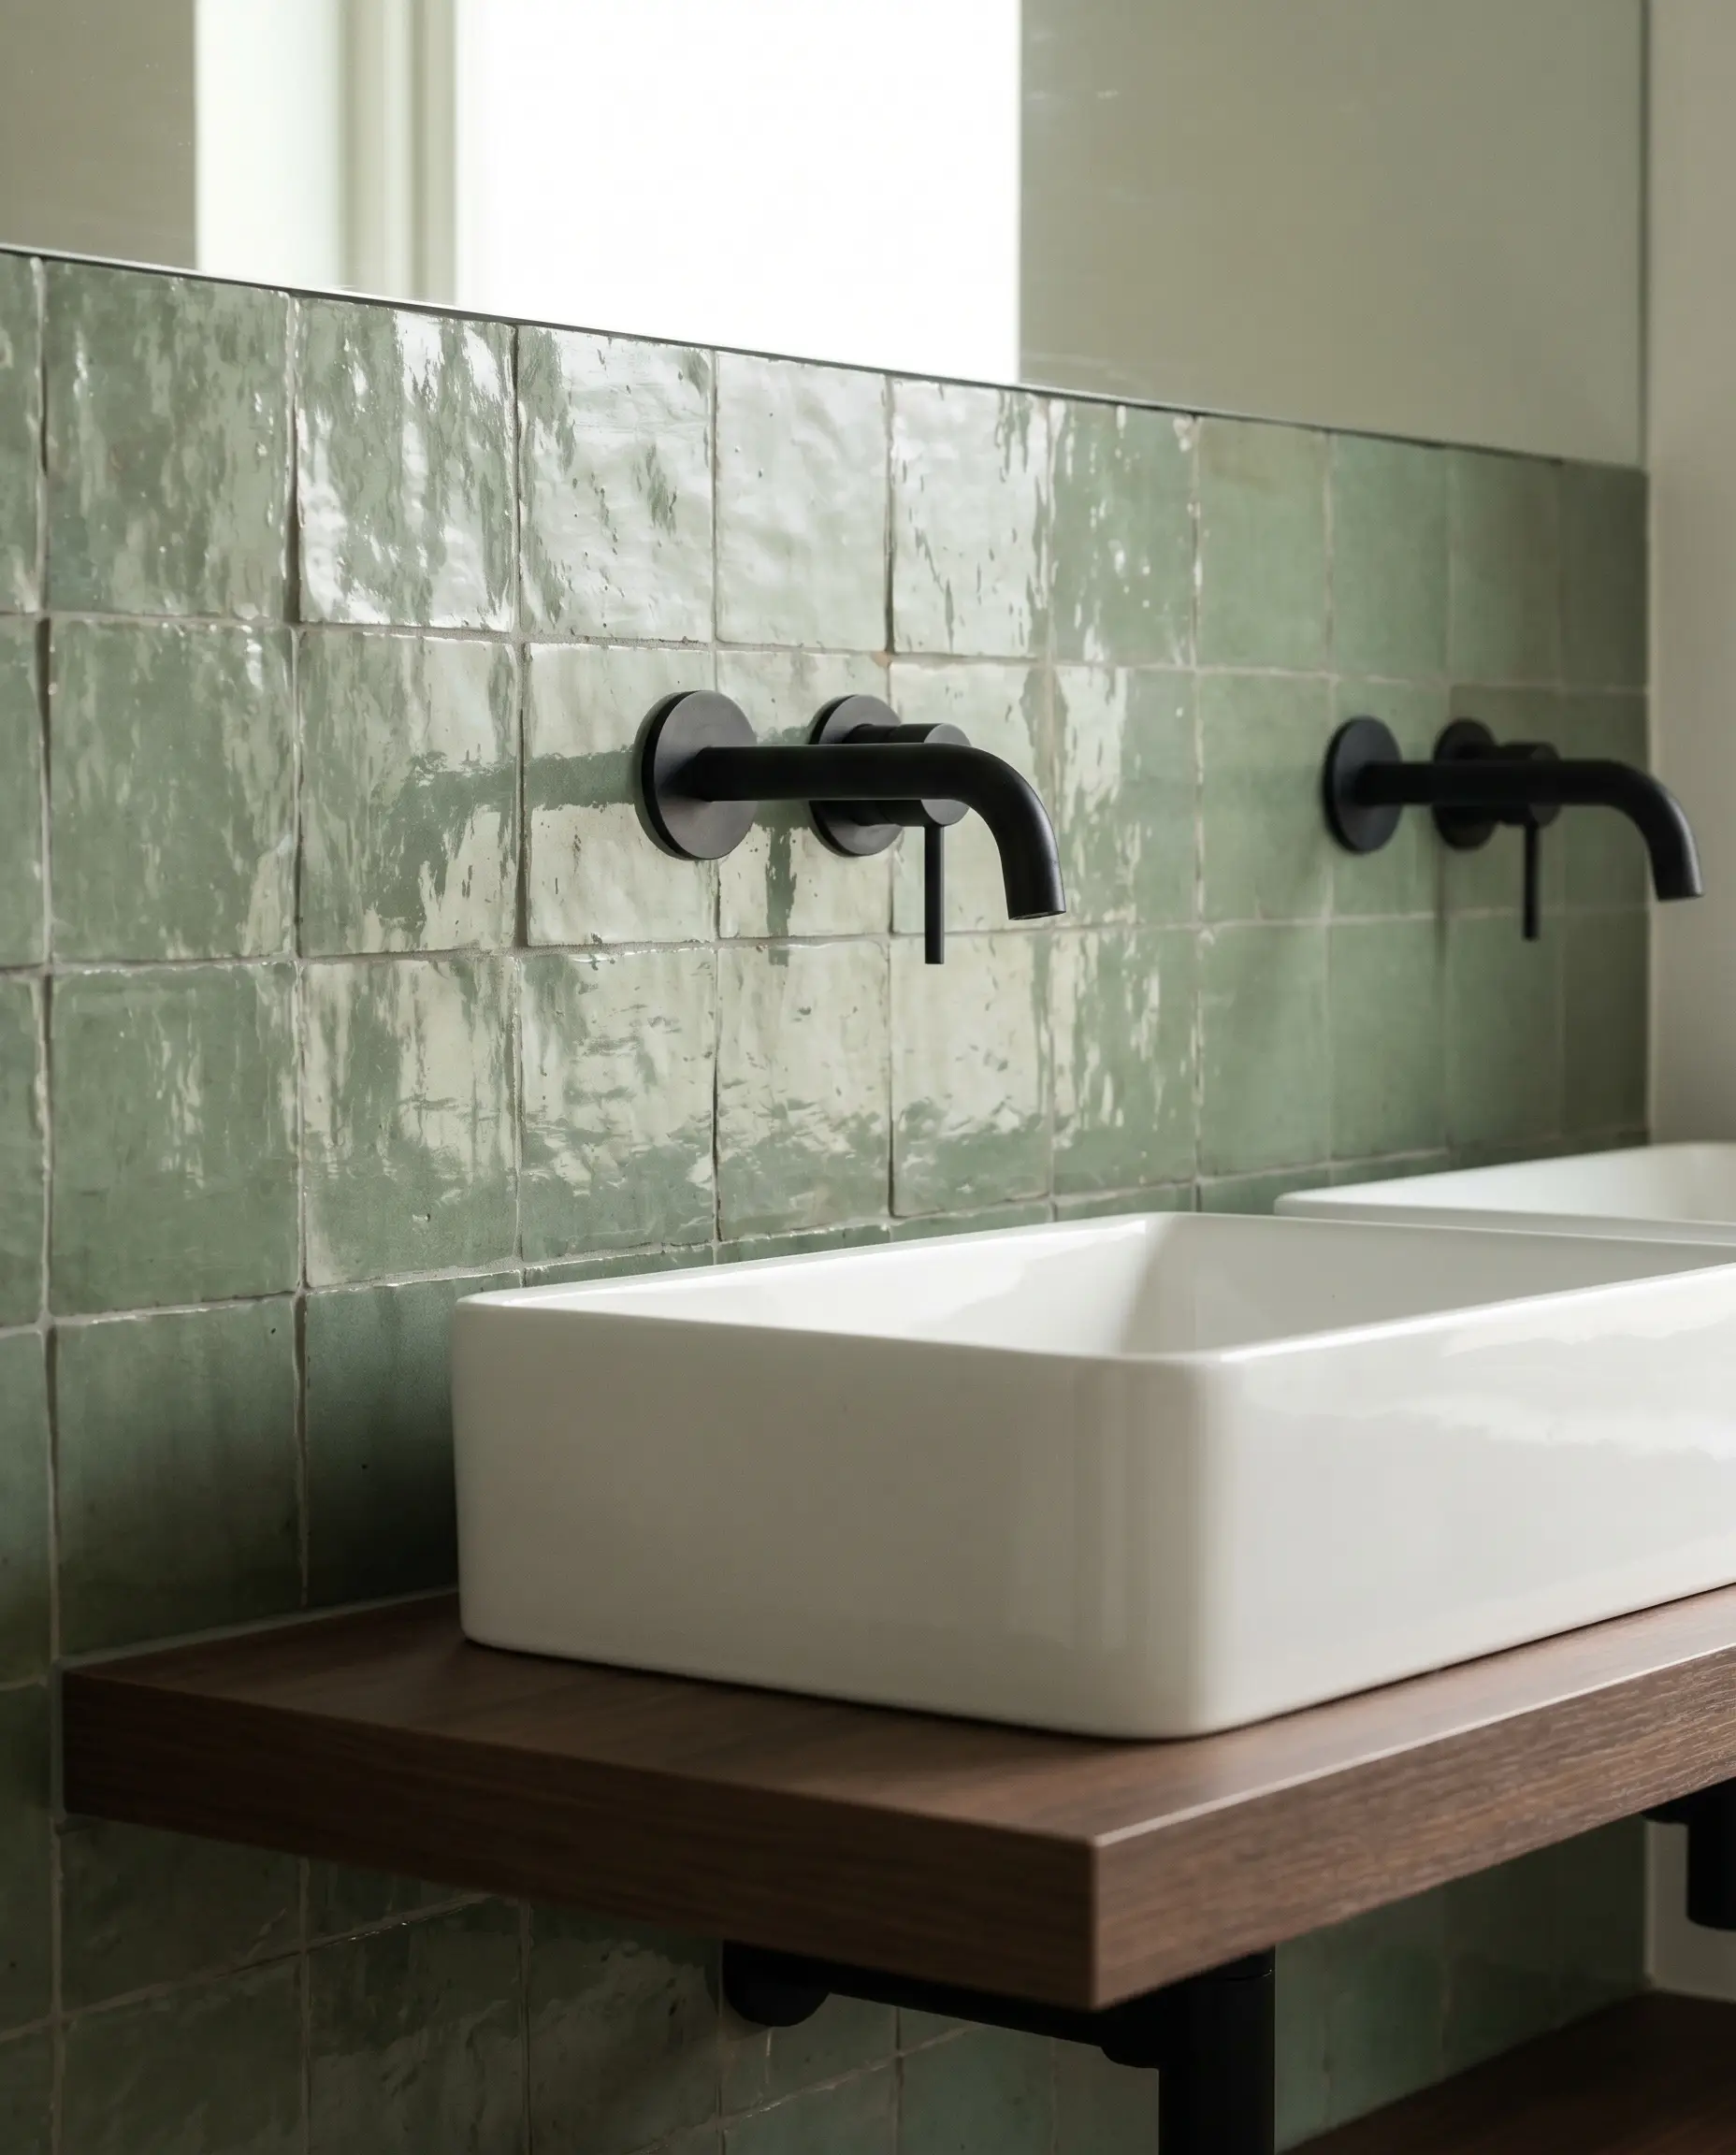
Anchoring soft sage or mint green tiles with the visual weight of matte black hardware provides a crisp, contemporary edge. Note that navigating the rough, irregular thickness of the zellige requires precise plumbing rough-ins for wall-mounted escutcheons to sit flush.
- Vibe: Crisp, modern, anchored.
- Tactile Pairing: Matte black wall-mounted sink faucets.
- Installation Rule: Ensure the plumber and tile setter coordinate closely on the valve depth.
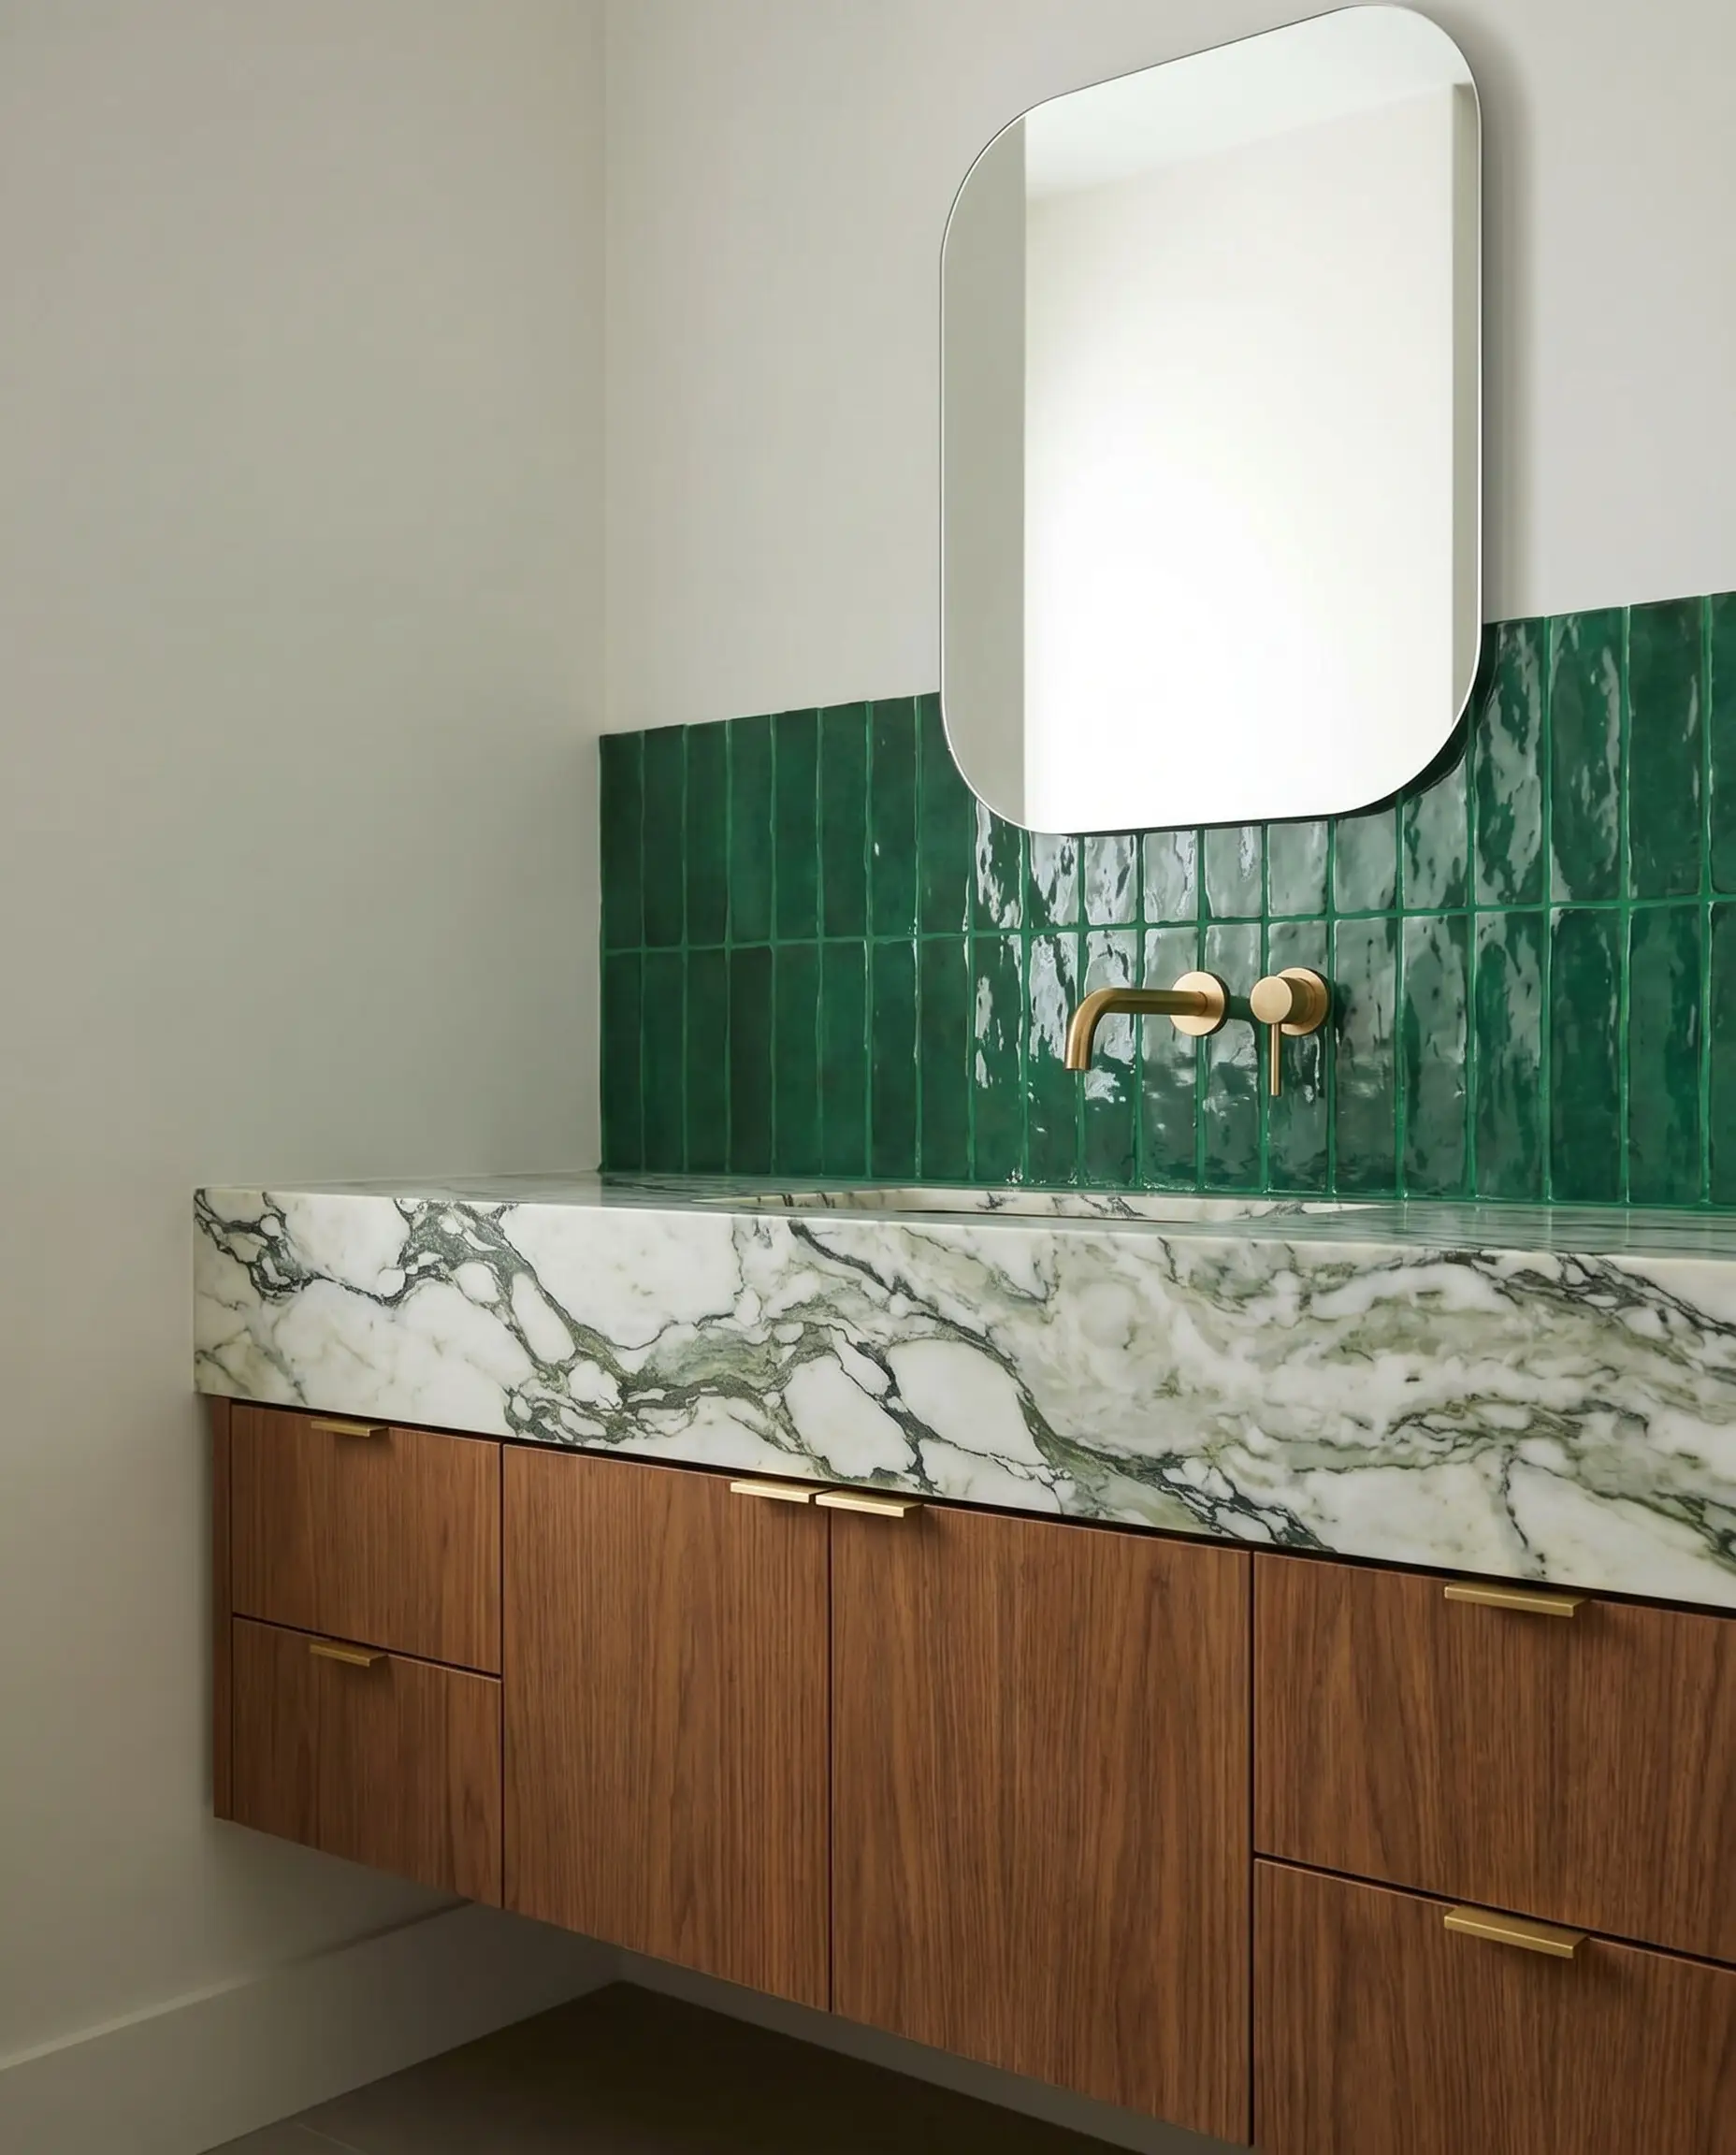
15. Pair with Heavily Veined Marble Countertops
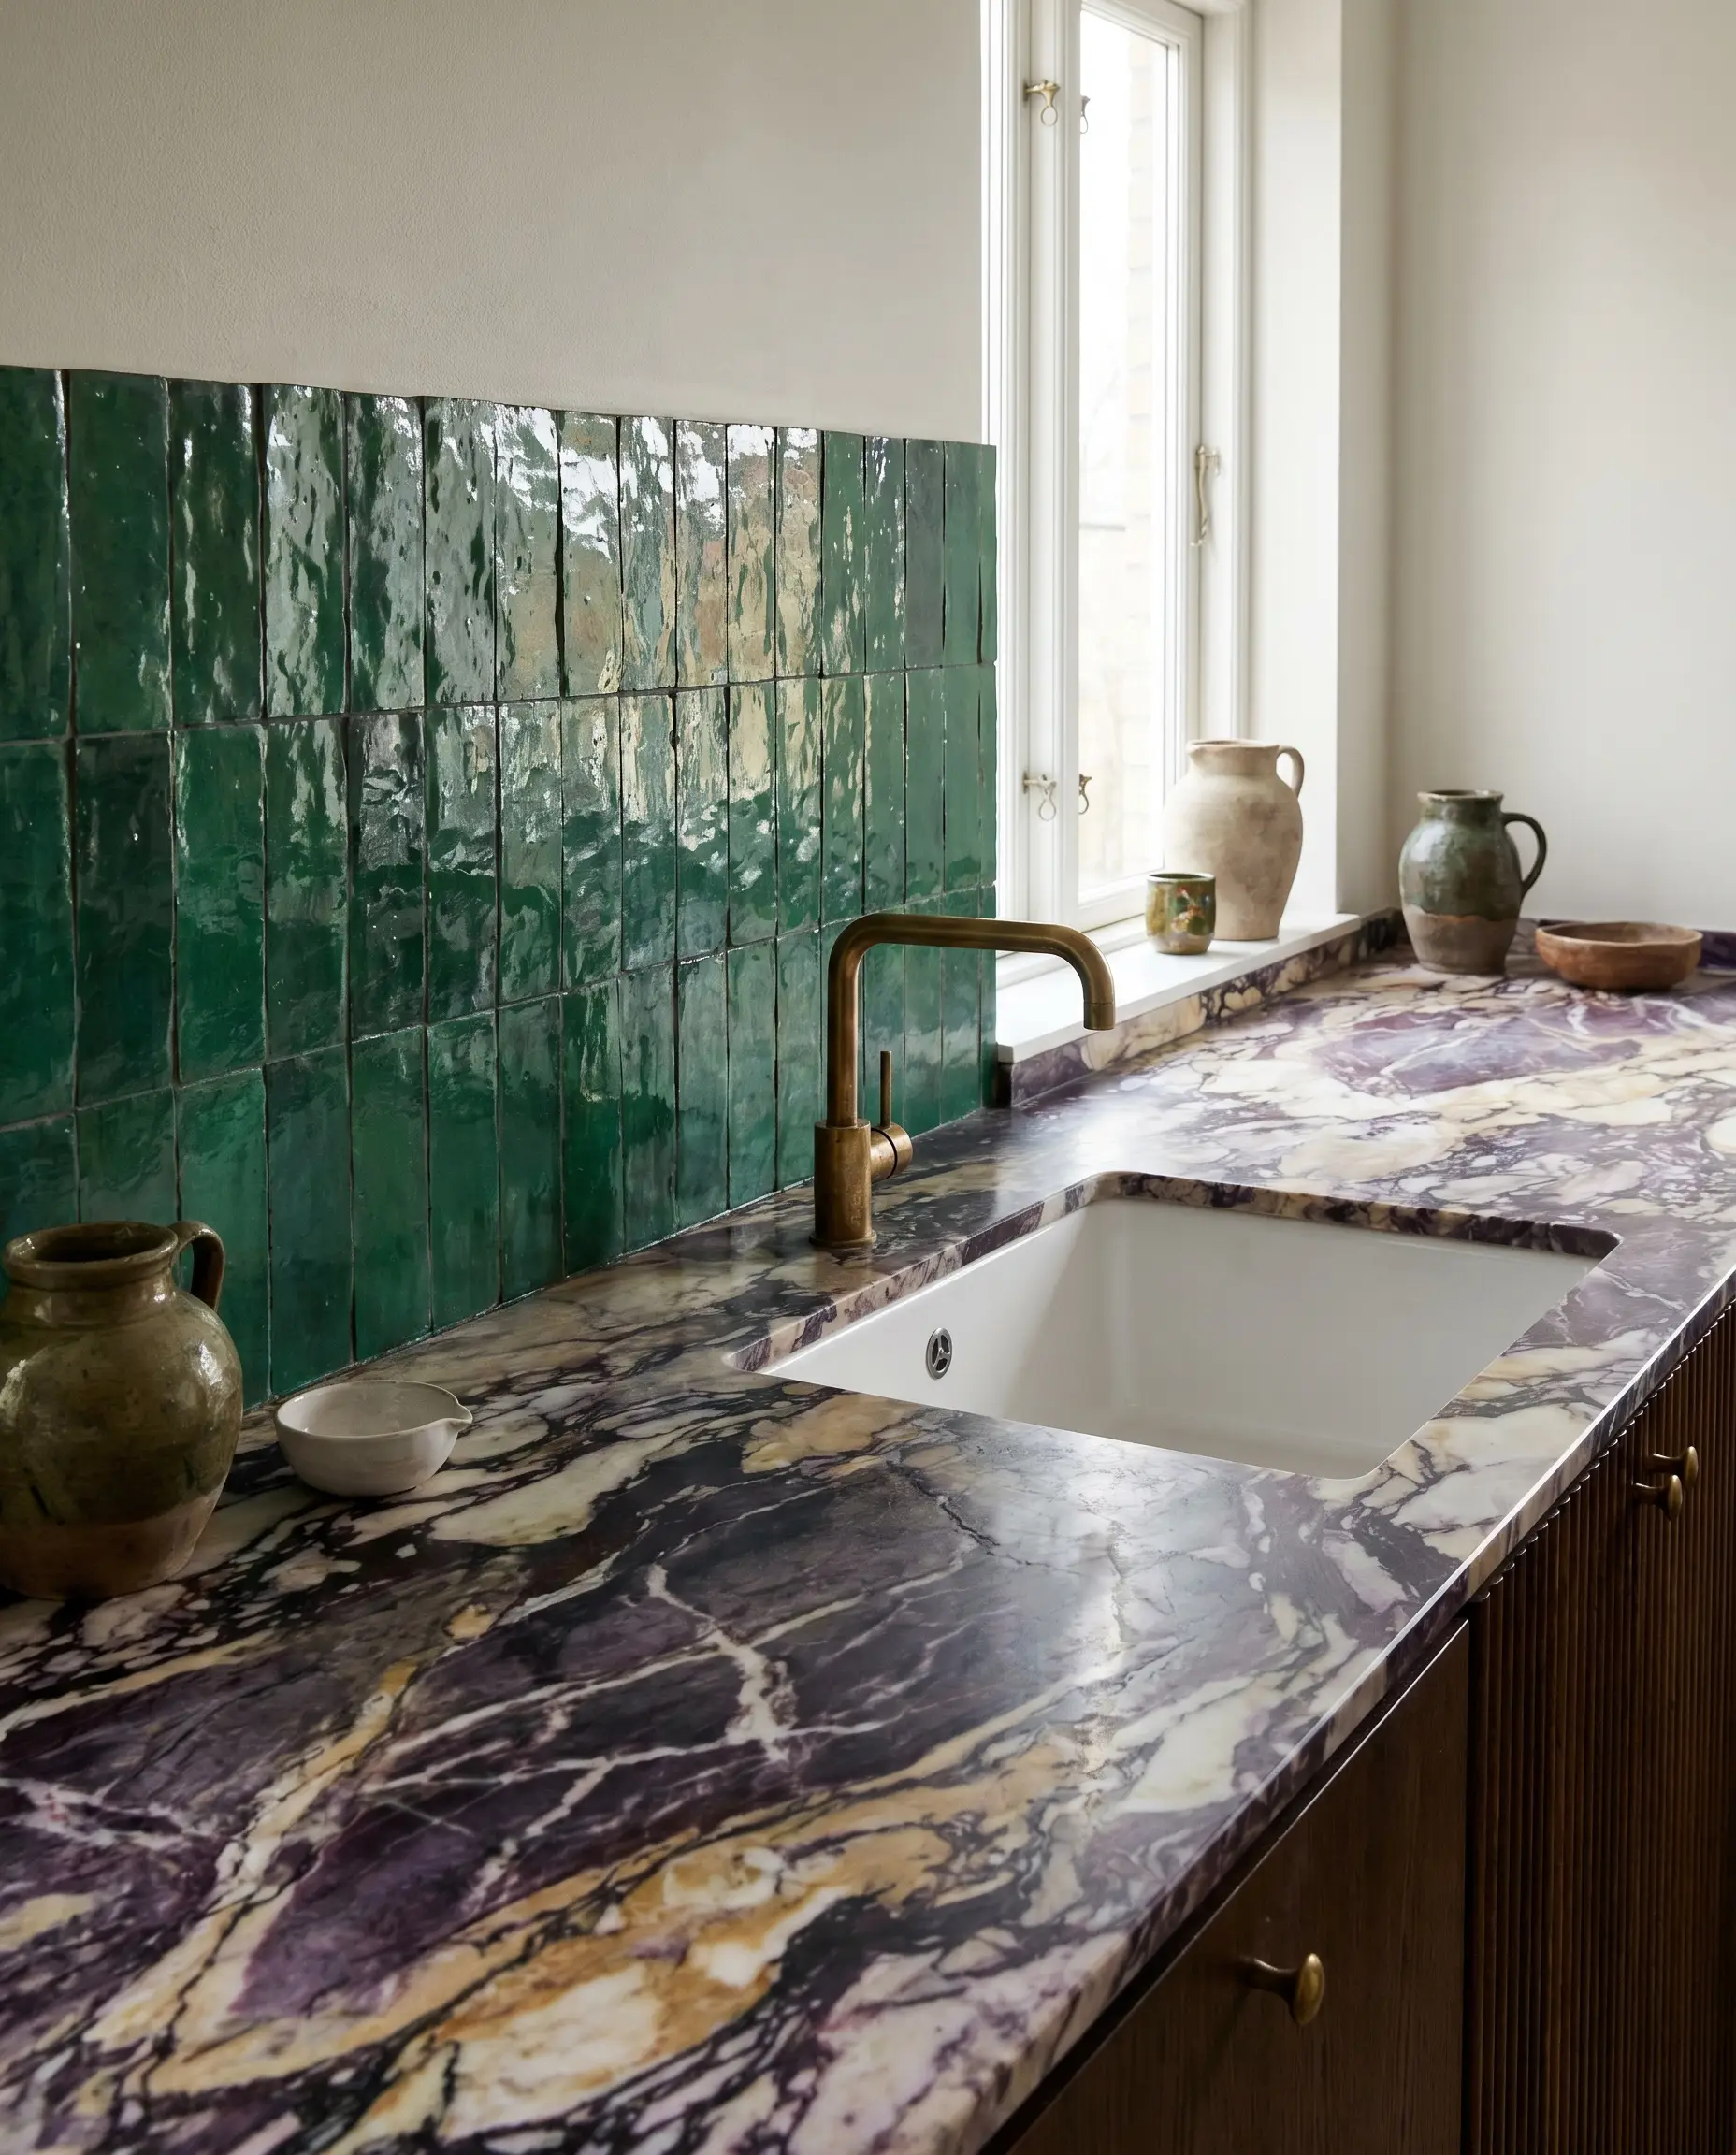
Anchoring the green backsplash with a high-movement stone like Calacatta Viola or Arabescato creates a masterful conversation between organic materials. The aggressive natural veining of the stone talks directly to the unpredictable, undulating tile glaze.
- Vibe: High-end bespoke, dramatic, layered.
- Tactile Pairing: Calacatta Viola or Arabescato marble slabs.
- Styling Pro-Tip: Keep the sink vessel simple (like an under-mount white ceramic) to prevent visual overload.
16. Soften the Look with Tadelakt Plaster
If the backsplash terminates halfway up the wall, finishing the upper half with a neutral tadelakt or limewash plaster creates incredible material harmony. The ultra-matte, velvety plaster absorbs light, beautifully contrasting the highly reflective, glossy zellige.
- Vibe: Soft, textural, highly artisanal.
- Tactile Pairing: Bone-colored tadelakt plaster.
- Styling Pro-Tip: Run the plaster onto the ceiling to envelop the room in texture.
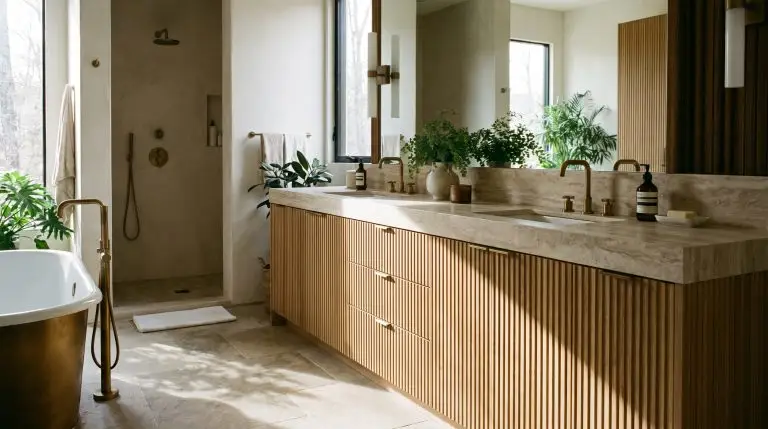
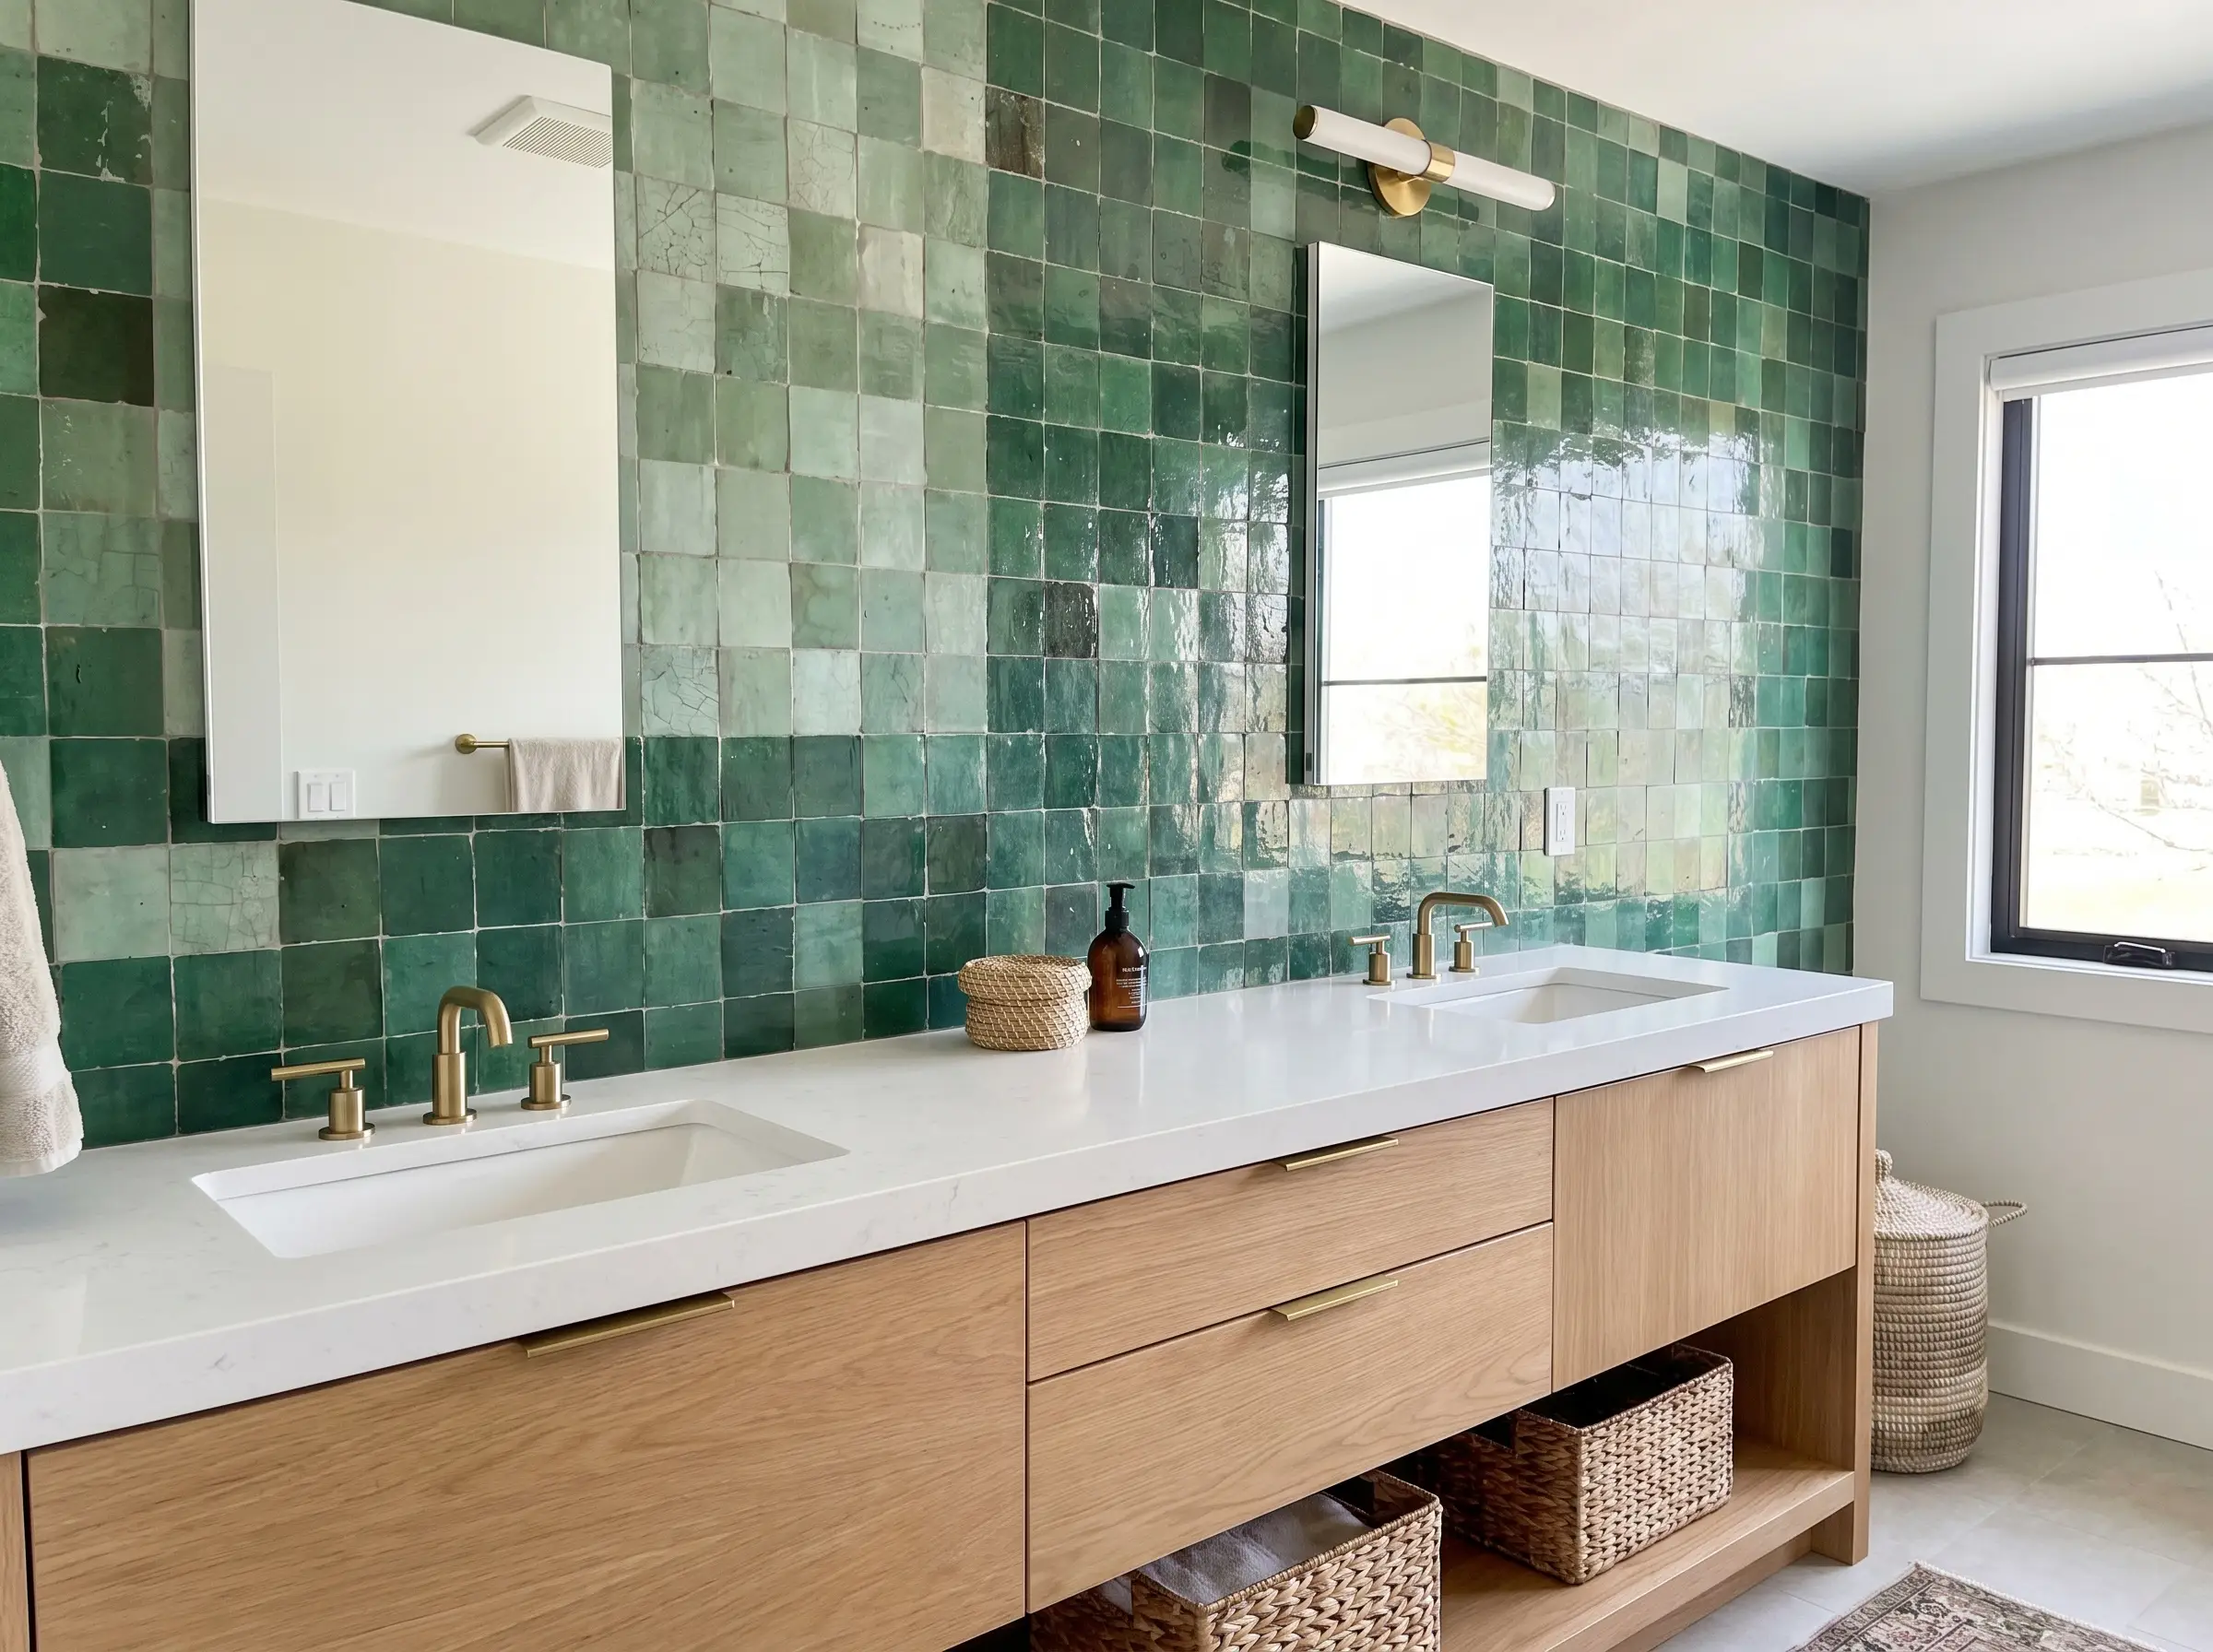
17. Frame the Vanity with Fluted White Oak
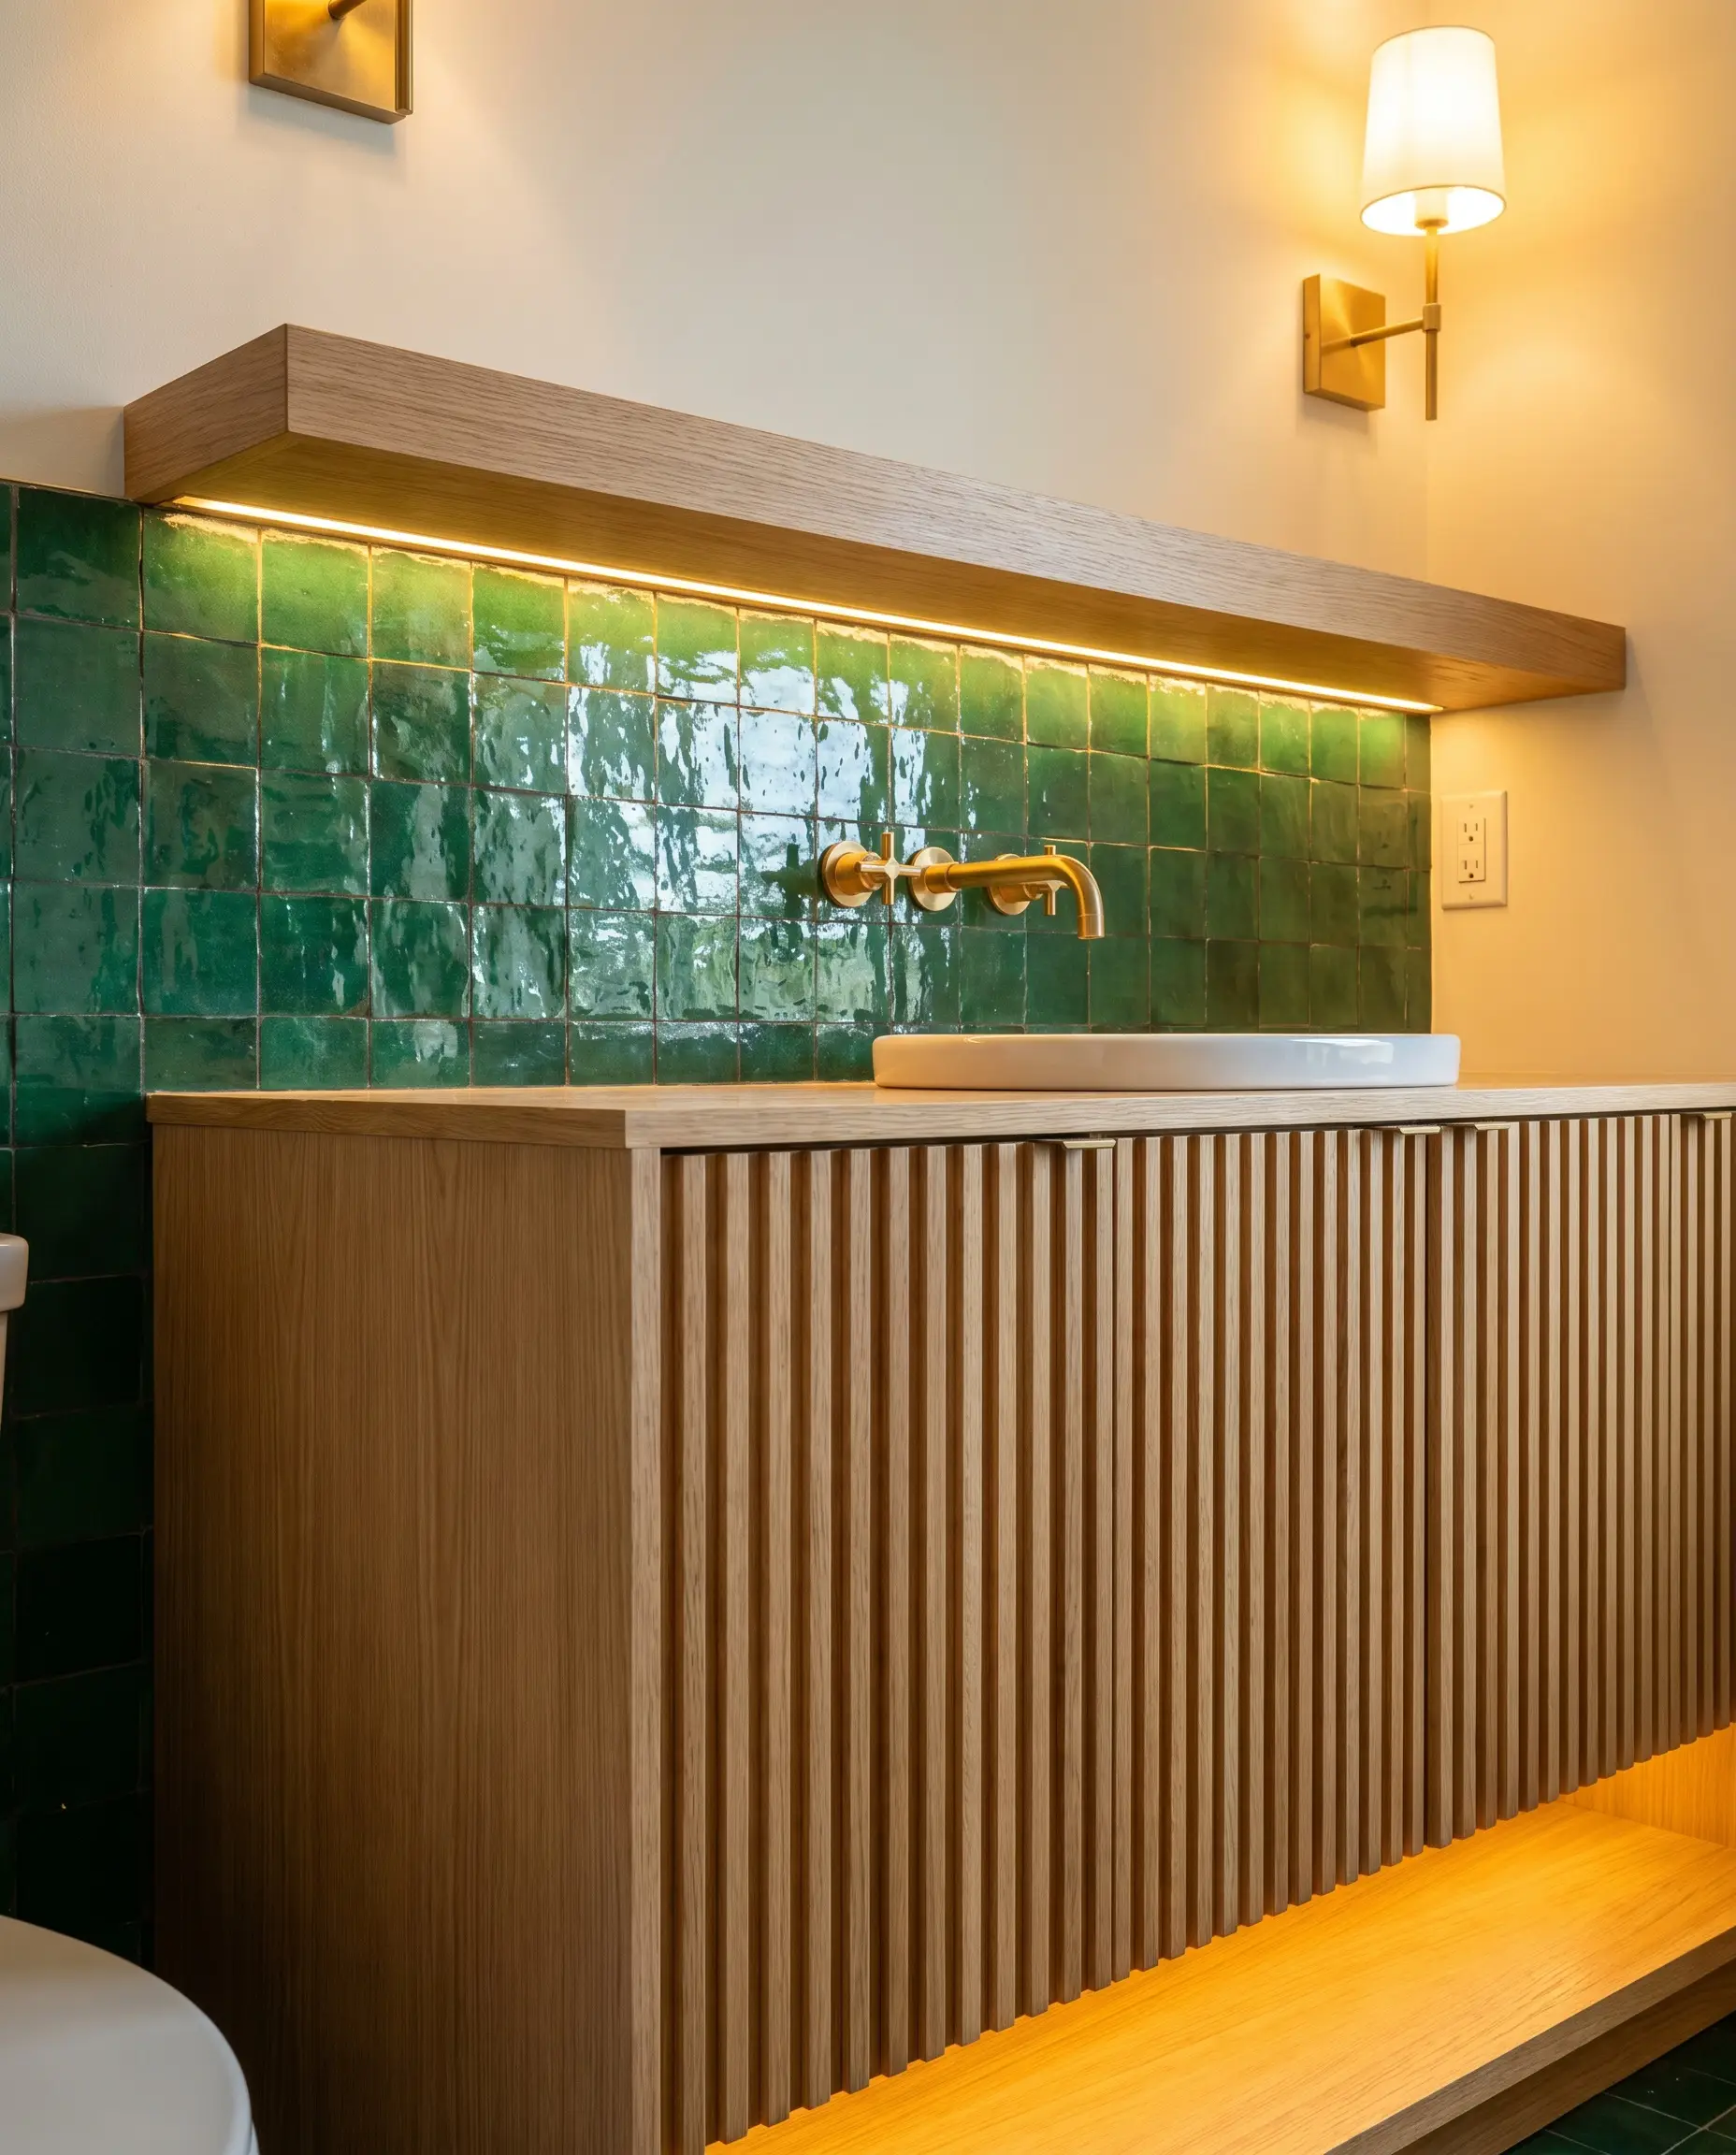
The cool, wet appearance of a green glaze needs a grounding element to prevent the bathroom from feeling sterile. The dry, tactile warmth of a rift-sawn or fluted white oak vanity provides the exact structural warmth required.
- Vibe: Warm, grounded, balanced.
- Tactile Pairing: Custom fluted white oak cabinetry.
- Color Match: Keep the wood stain in a clear, natural finish to avoid clashing with the green.
Architectural Layouts & Spatial Tricks
Moving beyond the standard horizontal layout allows you to use geometry to alter the spatial perception of the room. These physical installation patterns and framing techniques maximize both your budget and the visual impact of the clay.
18. The Half-Height Wainscoting Hack
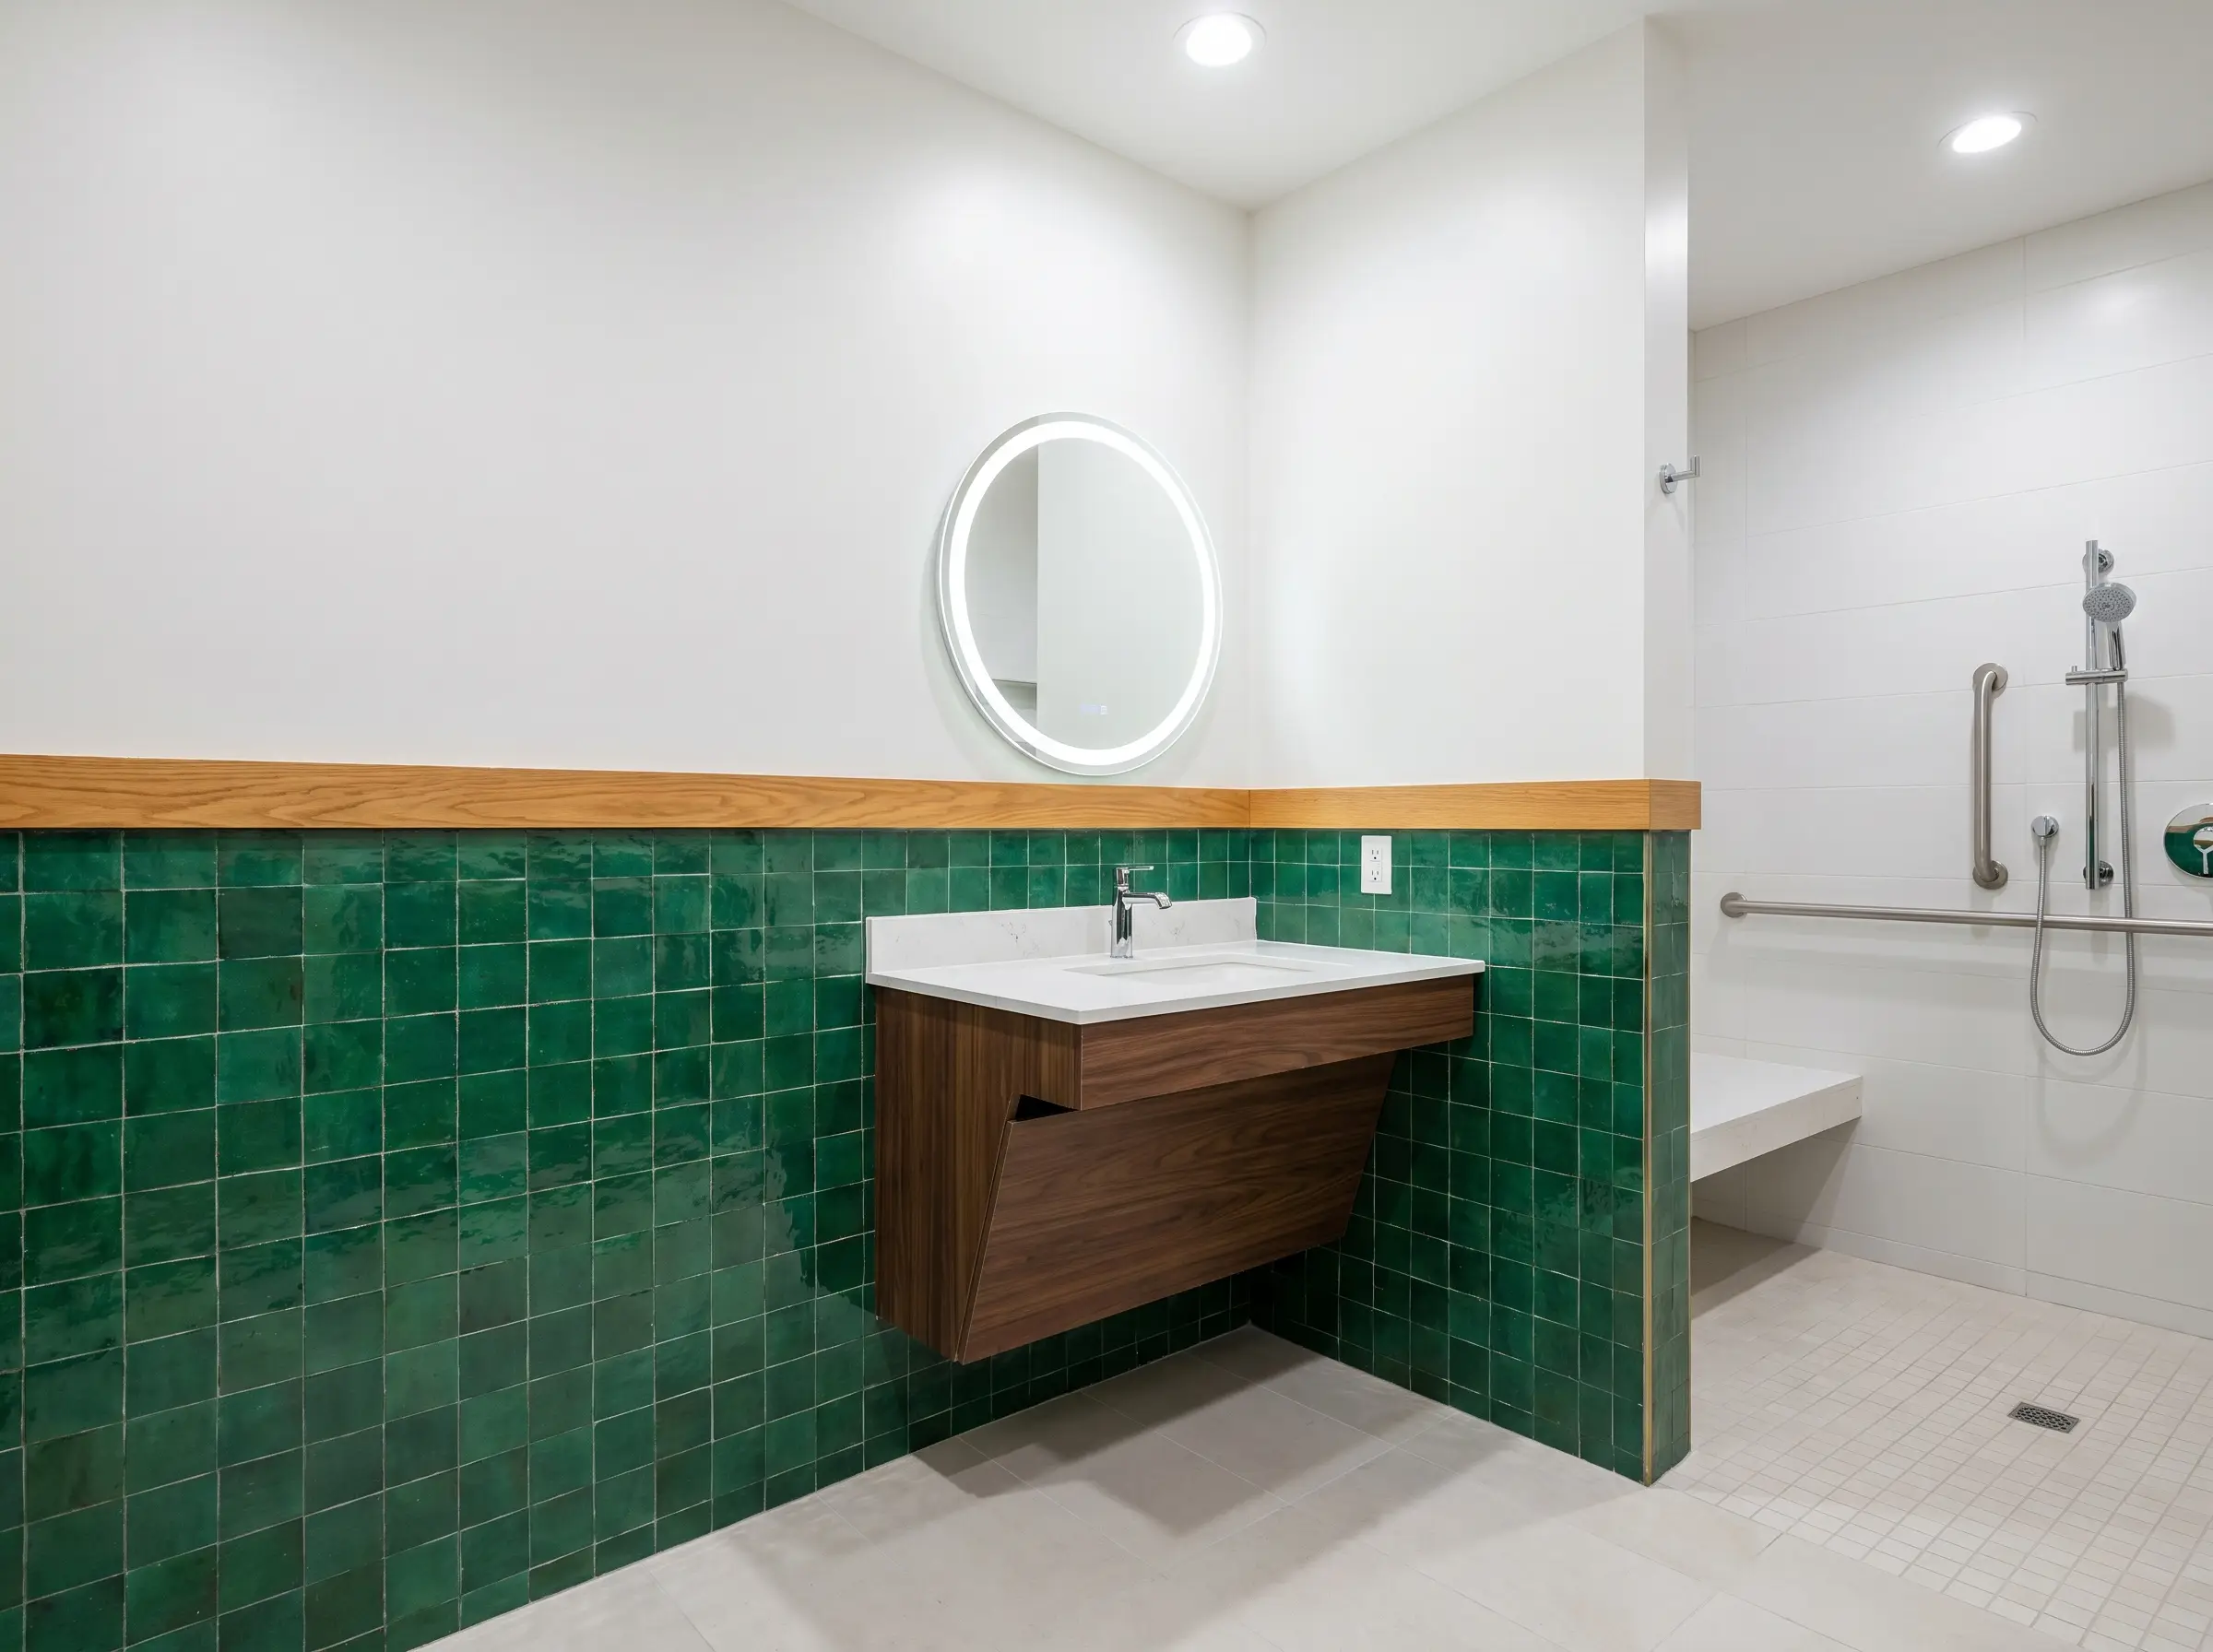
To achieve an accessible luxury look, run the green zellige only 36 to 42 inches up the wall as an extended backsplash rather than paying for a floor-to-ceiling application. This saves thousands of dollars in premium material and labor while still delivering massive visual impact.
Budget Strategy
Wrapping the lower half of the bathroom in tile grounds the space and protects the wet zones around the vanity. Capping this half-wall with a piece of stone or oak trim finishes the architectural detail flawlessly.
- Vibe: Architectural, smart, tailored.
- Key Layout: 36″ to 42″ finished height.
- Installation Rule: Ensure the height clears the top of the vanity faucet to protect the drywall.
19. The Vertical Stack for Low Ceilings
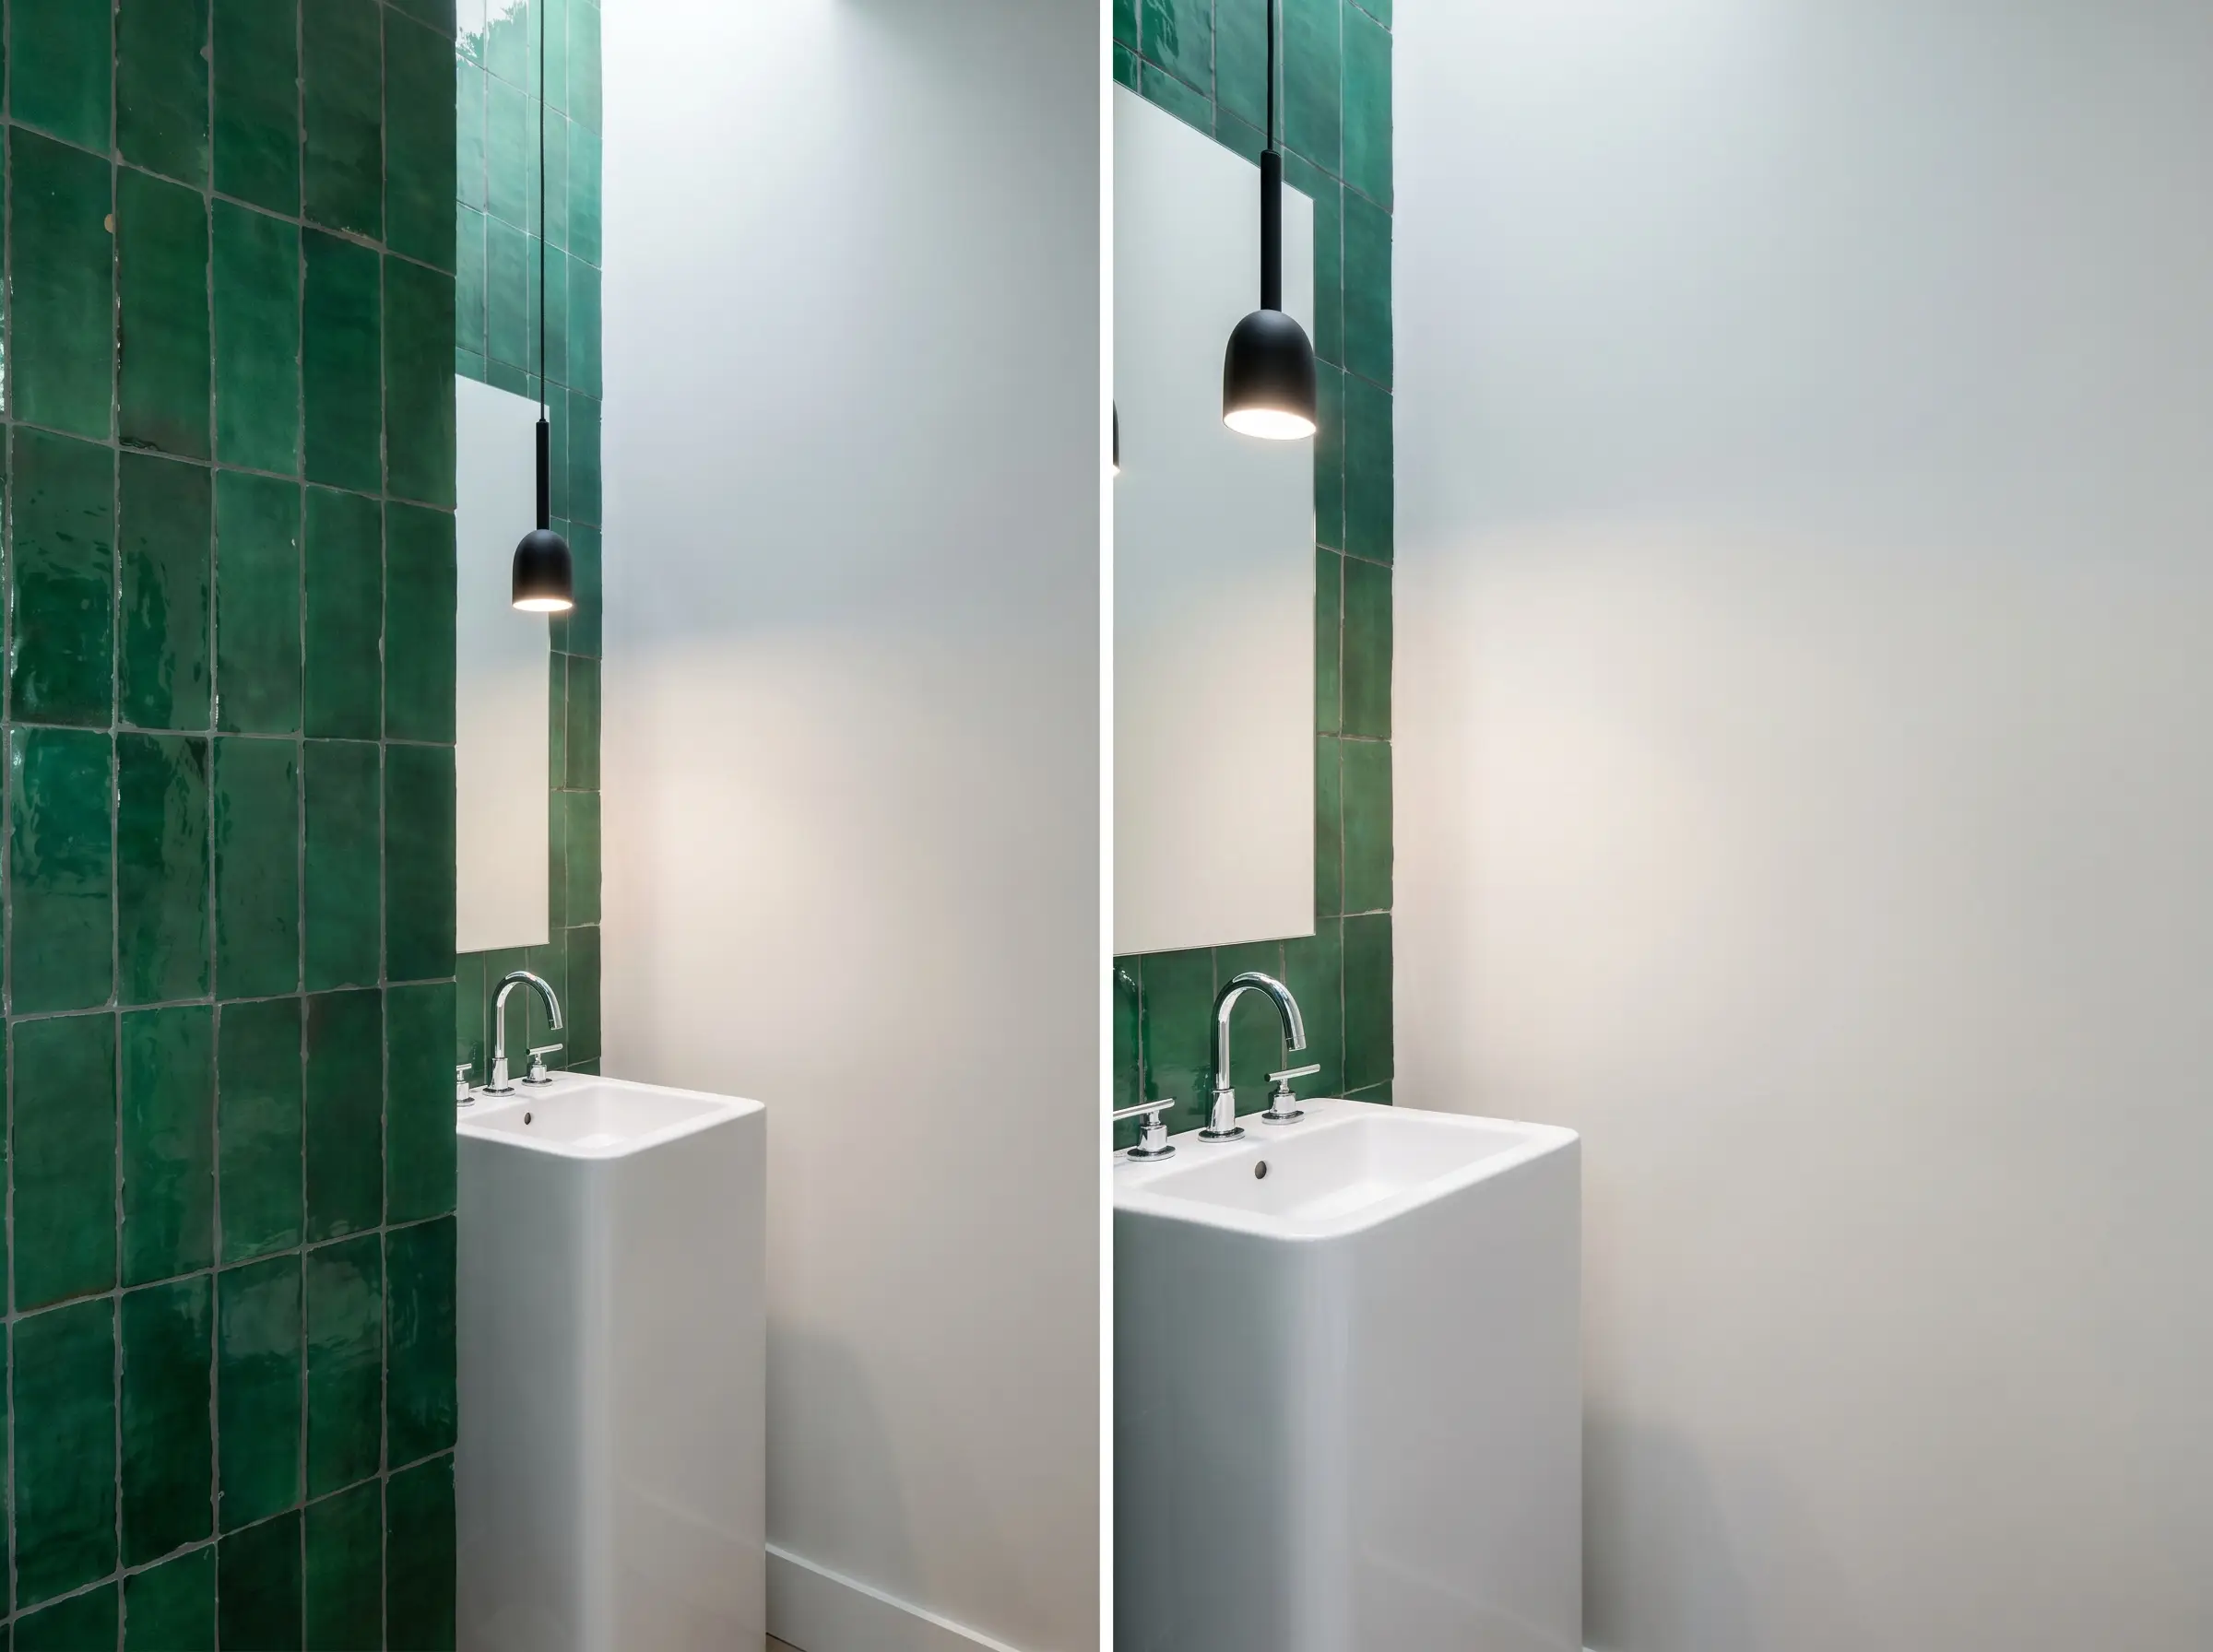
Stacking 2×6 rectangular green zellige vertically draws the eye upward, aggressively fighting the cramped feeling of low-ceilinged basements or tiny powder rooms. This layout forces a modern, rigid grid that contrasts the wobbly, unrectified edges of the clay.
- Vibe: Modern, height-enhancing, structured.
- Key Layout: Vertical straight stack.
- Styling Pro-Tip: Run the vertical stack all the way to the ceiling to maximize the optical illusion.
20. The Classic Horizontal Offset (Brick Lay)
The traditional horizontal offset is the safest application, as the staggered joints expertly hide the irregular edges and varying tile thicknesses. This layout leans heavily into historic roots, making it ideal for rustic or traditional architecture.
- Vibe: Traditional, safe, historic.
- Key Layout: 50% horizontal offset (brick pattern).
- Styling Pro-Tip: Use a matching green grout to keep this traditional layout from feeling too busy.
21. Frame the Backsplash with a Schluter or Bullnose Edge
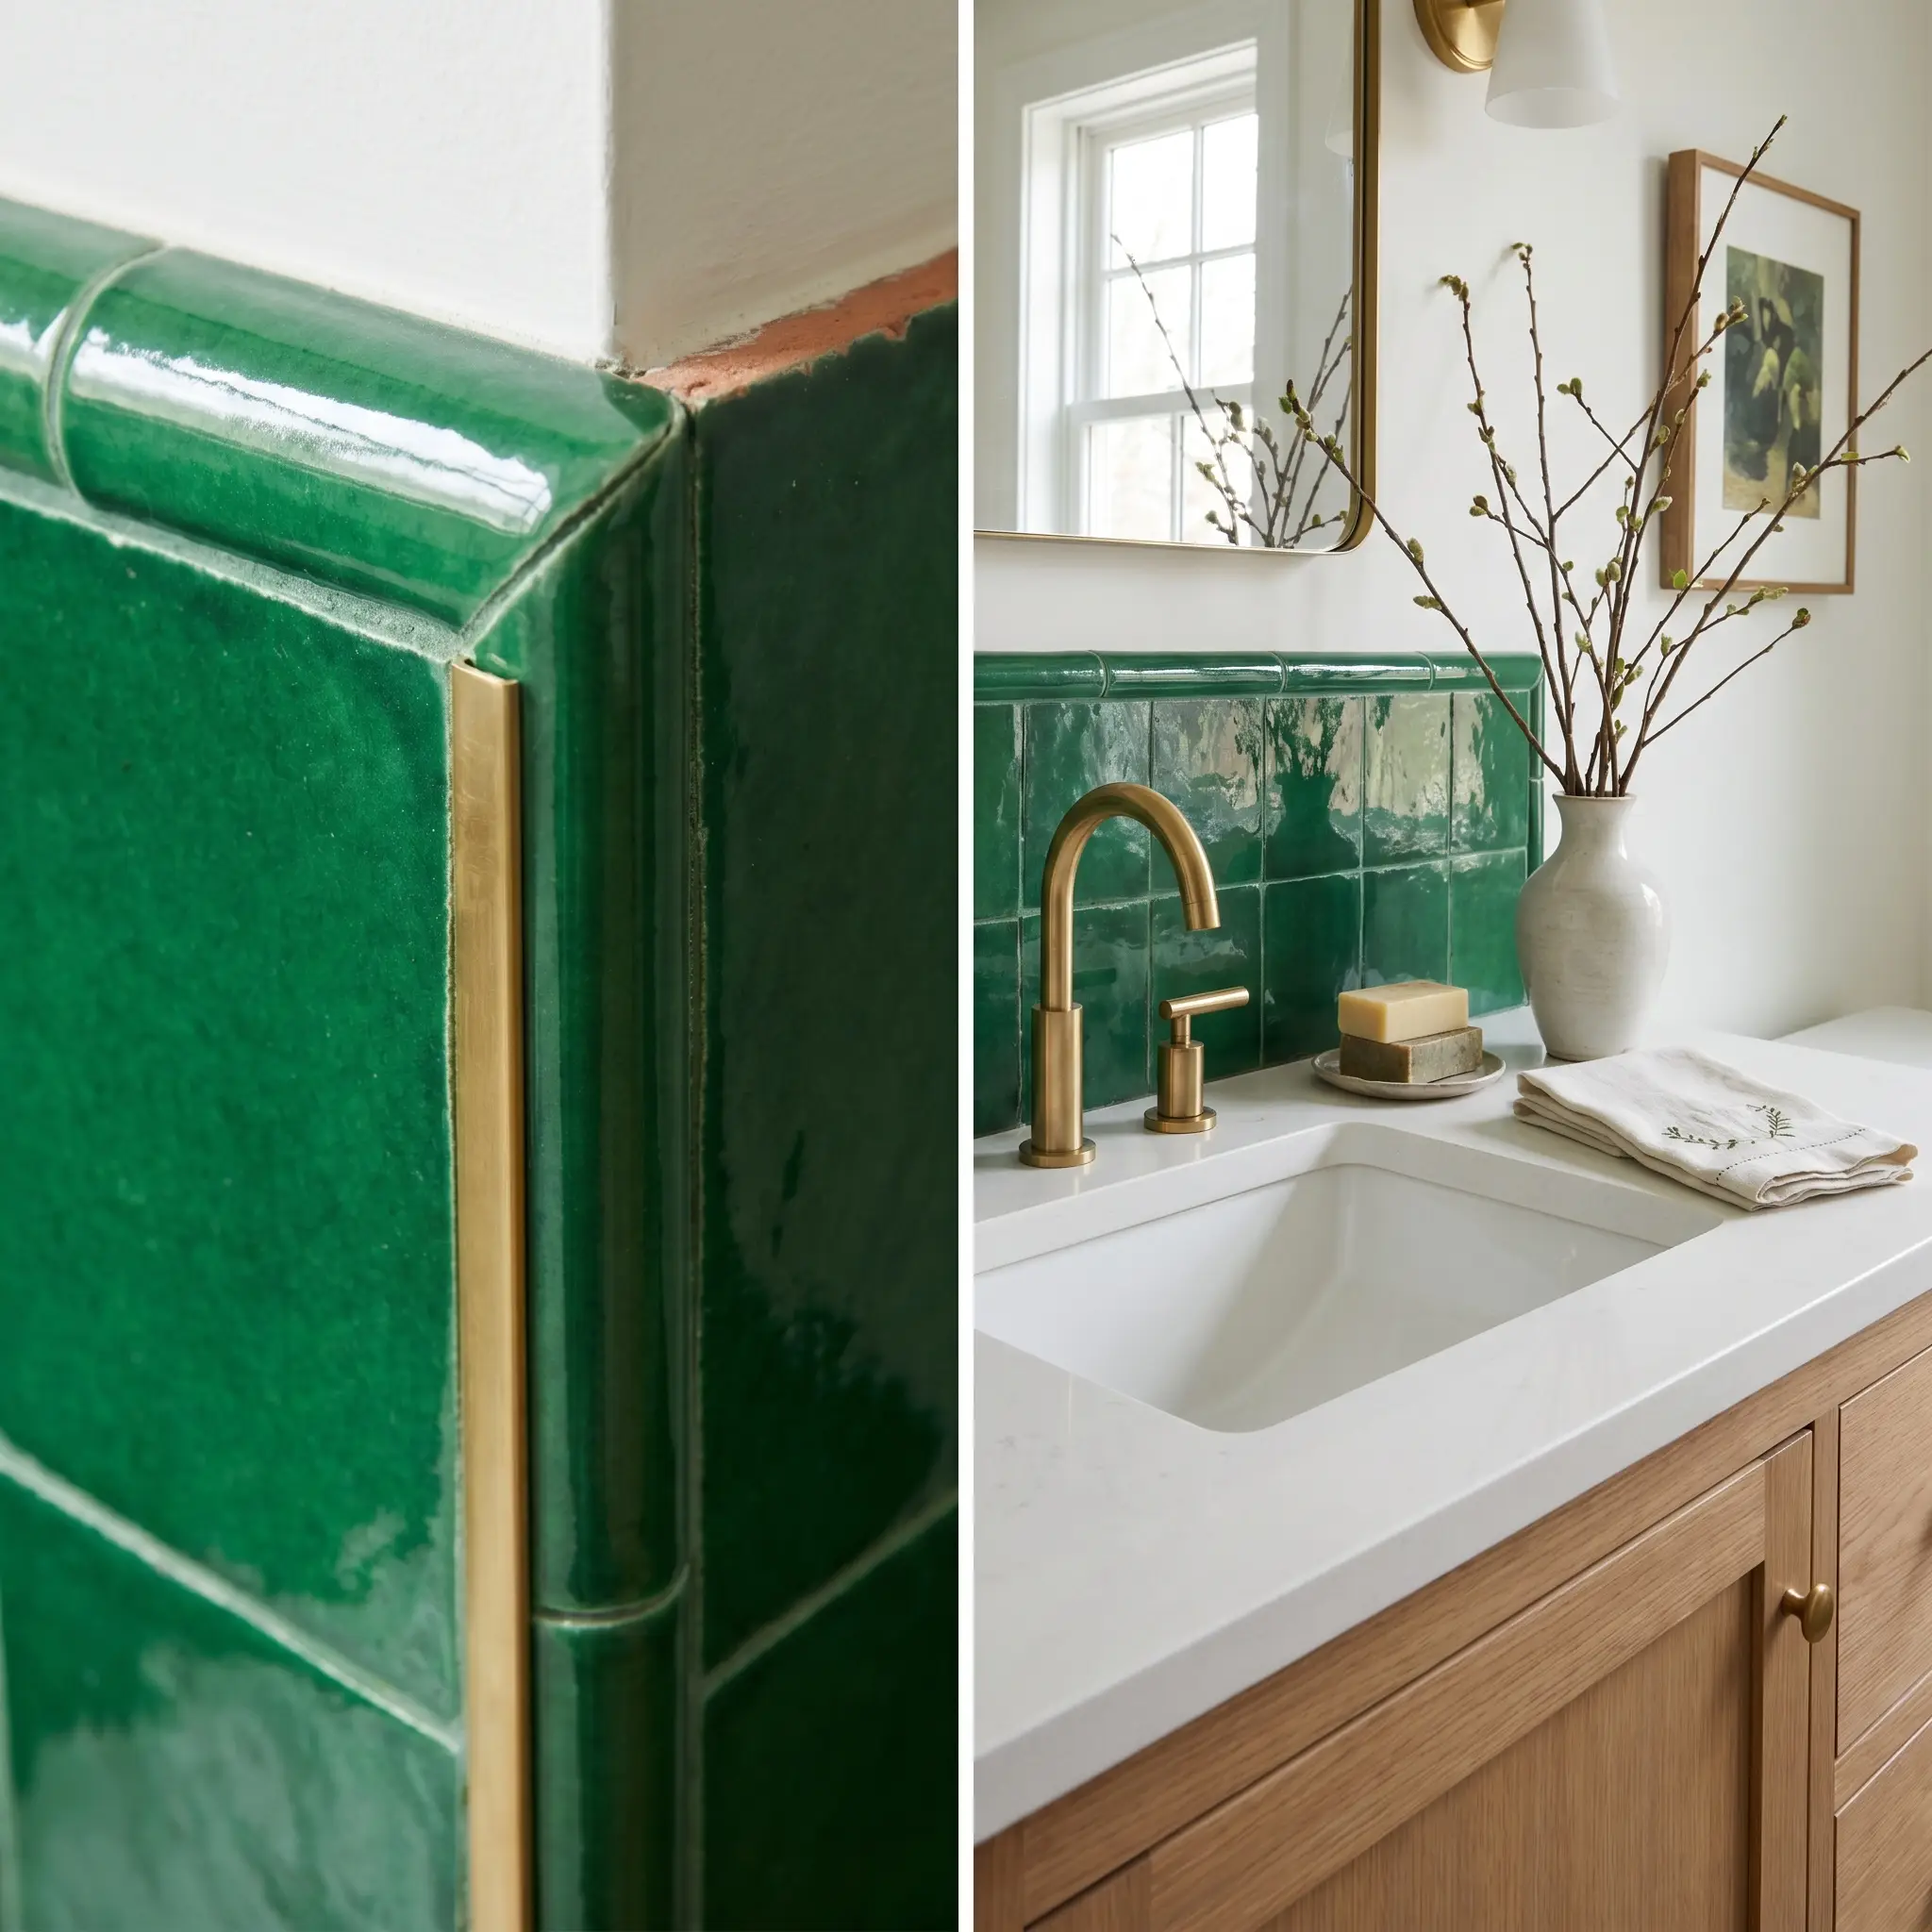
Because zellige clay edges are raw, porous, and unglazed terracotta, leaving them exposed on a backsplash profile looks unfinished and messy. You must cap the exposed run with a brass Schluter strip or a specialized, glazed bullnose trim piece.
- Vibe: Finished, professional, intentional.
- Key Material: Unlacquered brass Schluter Jolly or matching glazed bullnose.
- Installation Rule: Plan the trim details before ordering, as bullnose pieces require specialized fabrication.
22. Illuminate the Texture with Asymmetrical Sconces
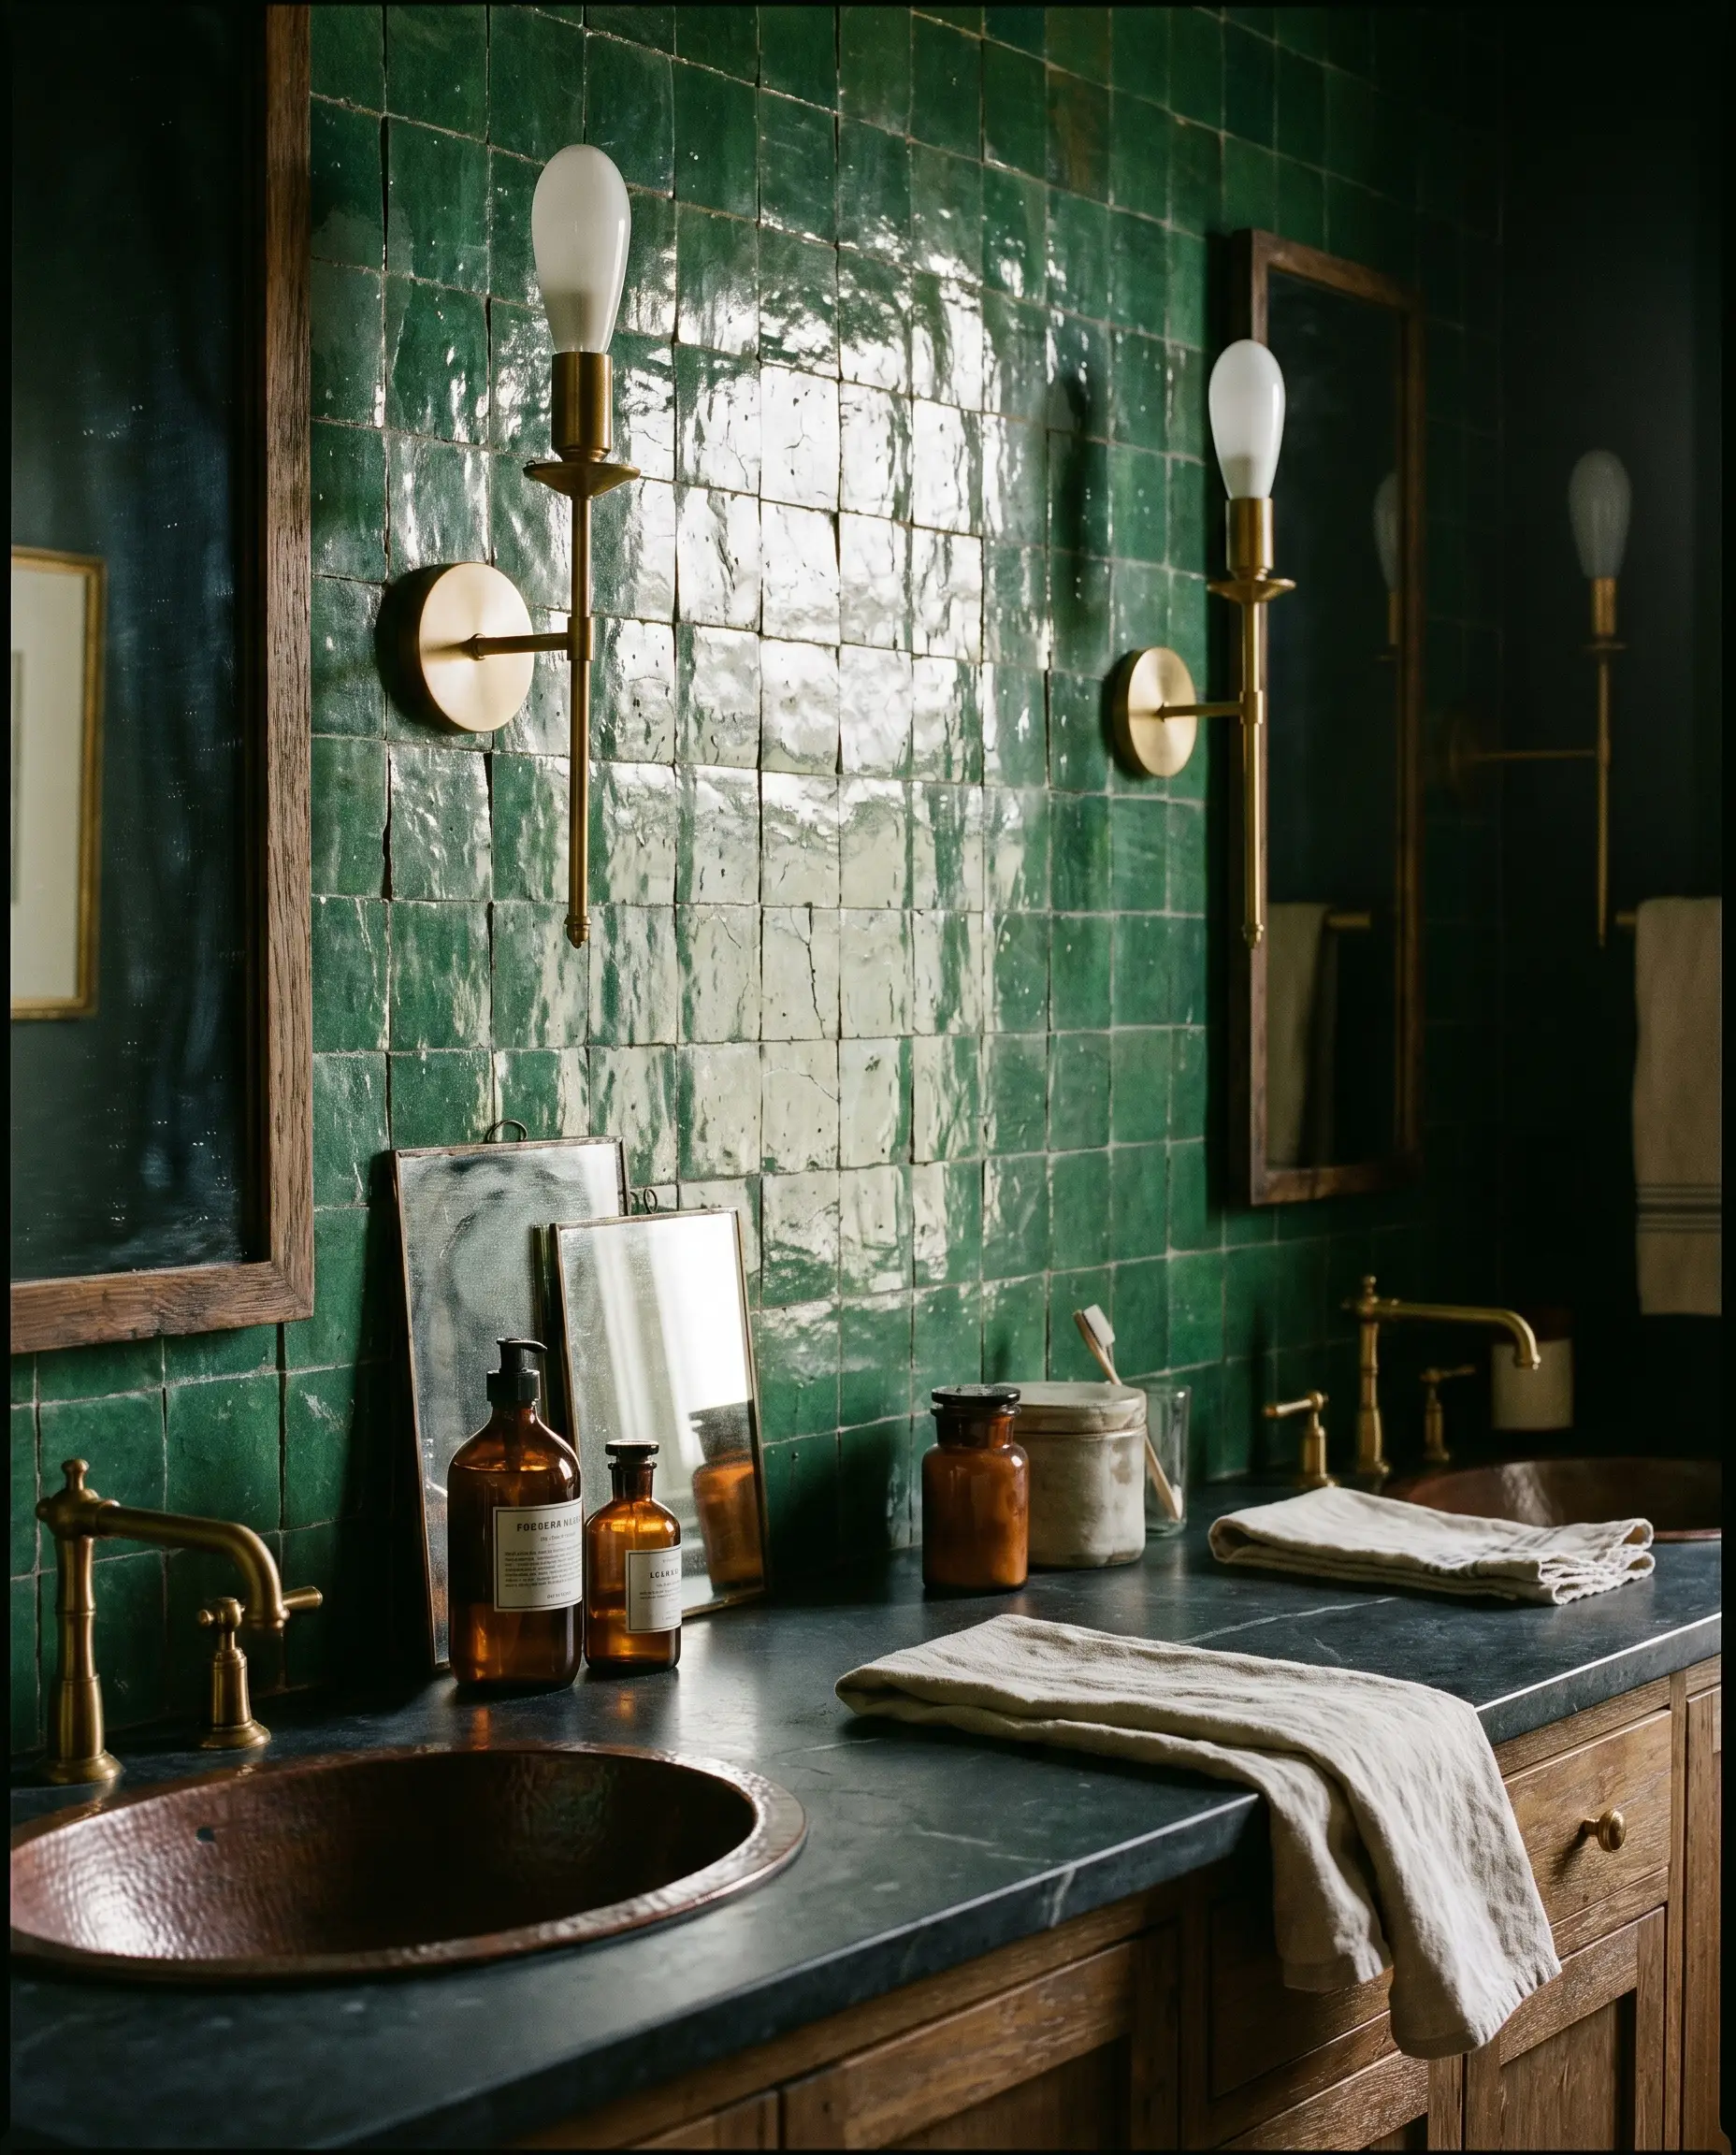
Relying solely on overhead recessed lighting flattens the expensive texture of the vanity wall. Mounting wall sconces directly onto or adjacent to the green backsplash creates directional, grazing light that washes across the undulating glaze, highlighting every beautiful imperfection.
- Vibe: Atmospheric, intentional, moody.
- Key Lighting: Brass or ceramic wall sconces.
- Styling Pro-Tip: Use frosted bulbs to cast a soft, diffused glow over the glossy tile surface.
The Reality Check: Maintaining Zellige in a Wet Area
Master tradespeople generally agree that living with authentic Moroccan clay behind a bathroom sink requires specific protocols. While the kiln-fired glaze itself is highly protective and non-porous, the raw clay backing and the surrounding grout are highly vulnerable to water and chemical damage. Protecting this investment relies entirely on a strict sealing and cleaning regimen.
| Do’s for Zellige Maintenance | Don’ts for Zellige Maintenance |
|---|---|
| Do apply a high-quality penetrating sealer to the grout and unglazed edges before and after installation. | Don’t use a topical sealer, which sits on the surface and creates a plastic-like film over the glaze. |
| Do clean the backsplash weekly with a pH-neutral stone or tile soap to maintain the finish. | Don’t use acidic cleaners like vinegar, bleach, or citrus sprays, which will permanently etch the glaze. |
| Do wipe down heavy water splashes with a soft microfiber cloth to prevent hard water buildup. | Don’t use abrasive scrubbers, steel wool, or stiff-bristled brushes that can scratch the delicate surface. |
Finalizing Your Tactile Sanctuary
Committing to a green zellige backsplash is a firm rejection of sterile, mass-produced interior design. It is a material that demands patience during installation and deep intention in its styling, but the payoff is a bathroom anchored with unmatched soul and organic character. Before finalizing your layout or grout chemistry, always order physical samples to observe how the green glaze reacts to your specific bathroom lighting throughout the day. For more on integrating artisanal materials into your home, explore our comprehensive guide on Bathroom Tile Trends 2026.
The Hackrea Style Desk treats interior decoration as an exact visual science. Rather than focusing on demolition or floor plans, this desk masters the art of color theory, undertone matching, material pairings, and spatial proportion. From balancing the visual weight of mixed metals to finding the perfect bridging tone between disparate wood species, this desk provides the rigorous aesthetic rules needed to achieve high-end, editorial-quality harmony in any space.