24 Sculptural Driftwood Wall Art Ideas That Ditch the Coastal Cliché
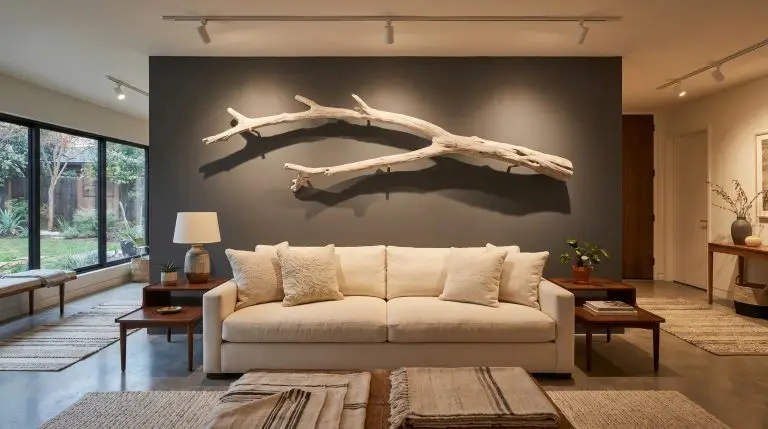
Let’s address the immediate fear: incorporating raw, foraged wood into your home often carries the terrifying risk of resembling a tacky seaside souvenir shop. Driftwood is an inherently stunning, tactile material, but it is routinely ruined by hot-glue execution and uninspired context. At Hackrea, we approach organic materials with strict architectural precision, treating raw wood not as a weekend craft supply, but as a premium gallery sculpture deserving of the same reverence as burl wood, travertine, or honed marble.
Whether you are foraging a sun-baked log from a Pacific Northwest beach or commissioning a massive, salvaged root system from an artisanal dealer, the secret to high-end driftwood wall art lies entirely in the framing, finishing, and directional lighting. You must strip away the cliché context and force the material to interact with negative space, matte metals, and moody paint tones.
If you want to achieve a highly curated, organic modern aesthetic, you must completely rethink how you select, mount, and illuminate raw wood.
1. Architectural & Sculptural Statements (The High-End Focal Point)
For expansive living rooms or massive blank walls, scattering multiple small pieces creates visual clutter. To achieve an organic modern aesthetic, your spatial layout requires a single, show-stopping piece of raw wood that commands the room’s visual weight and establishes scale.
1. Mount a Single Oversized Bleached Branch as a Sofa Focal Point
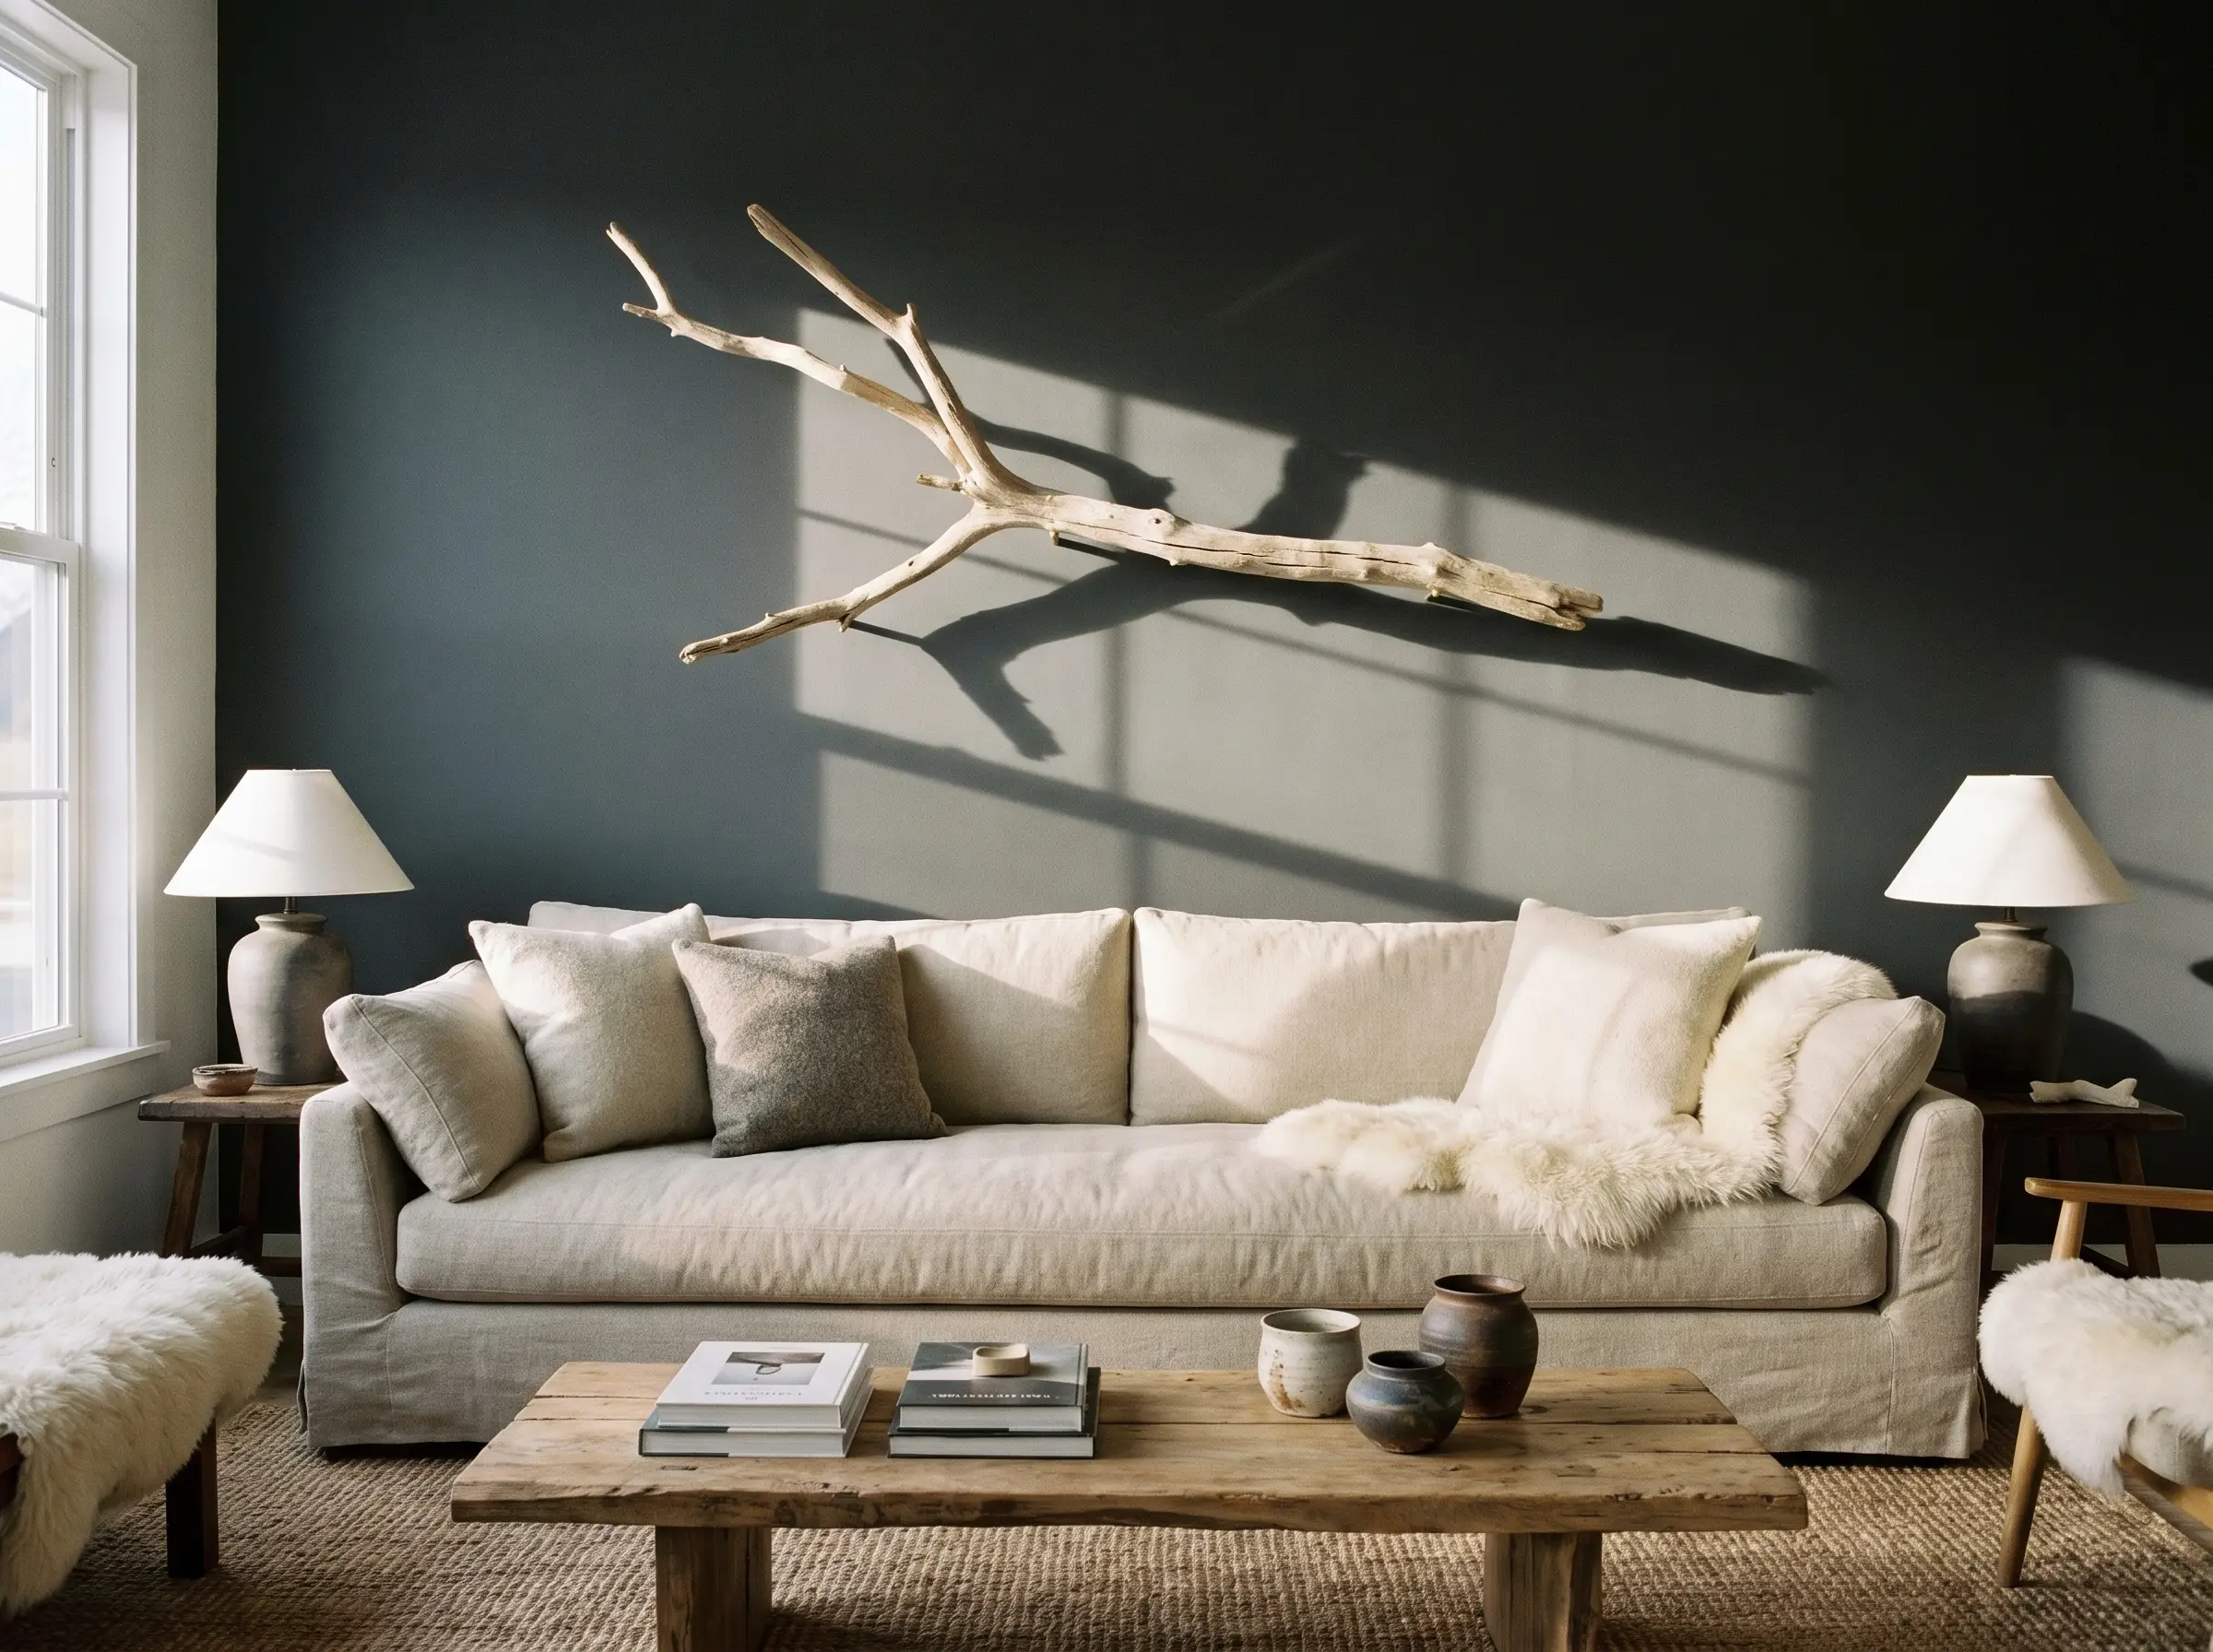
Instead of a predictable canvas painting, mount a massive 5-to-6-foot bleached driftwood branch horizontally above a deep, linen-upholstered sofa. The rough, bone-white texture of the heavily weathered wood creates a striking sensory contrast against soft living room textiles and pops brilliantly when backed by a dark, moody accent wall. Utilize dual, hidden brass standoffs to float the wood exactly two inches off the drywall, forcing dramatic, sculptural shadows.
Paint the wall behind your driftwood a deep, saturated charcoal to make the bone-white wood visually leap off the drywall, turning the negative space into part of the art.
Designer Secret
- Style Vibe: Wabi-Sabi Minimalism
- Paint Match: Benjamin Moore Cheating Heart (1617)
- Hardware: Heavy-duty hidden brass standoffs
- Spatial Rule: Allow at least 18 inches of negative space between the top of the sofa and the bottom of the branch.
2. Install Vertical Ebonized Driftwood Slabs in a Narrow Entryway
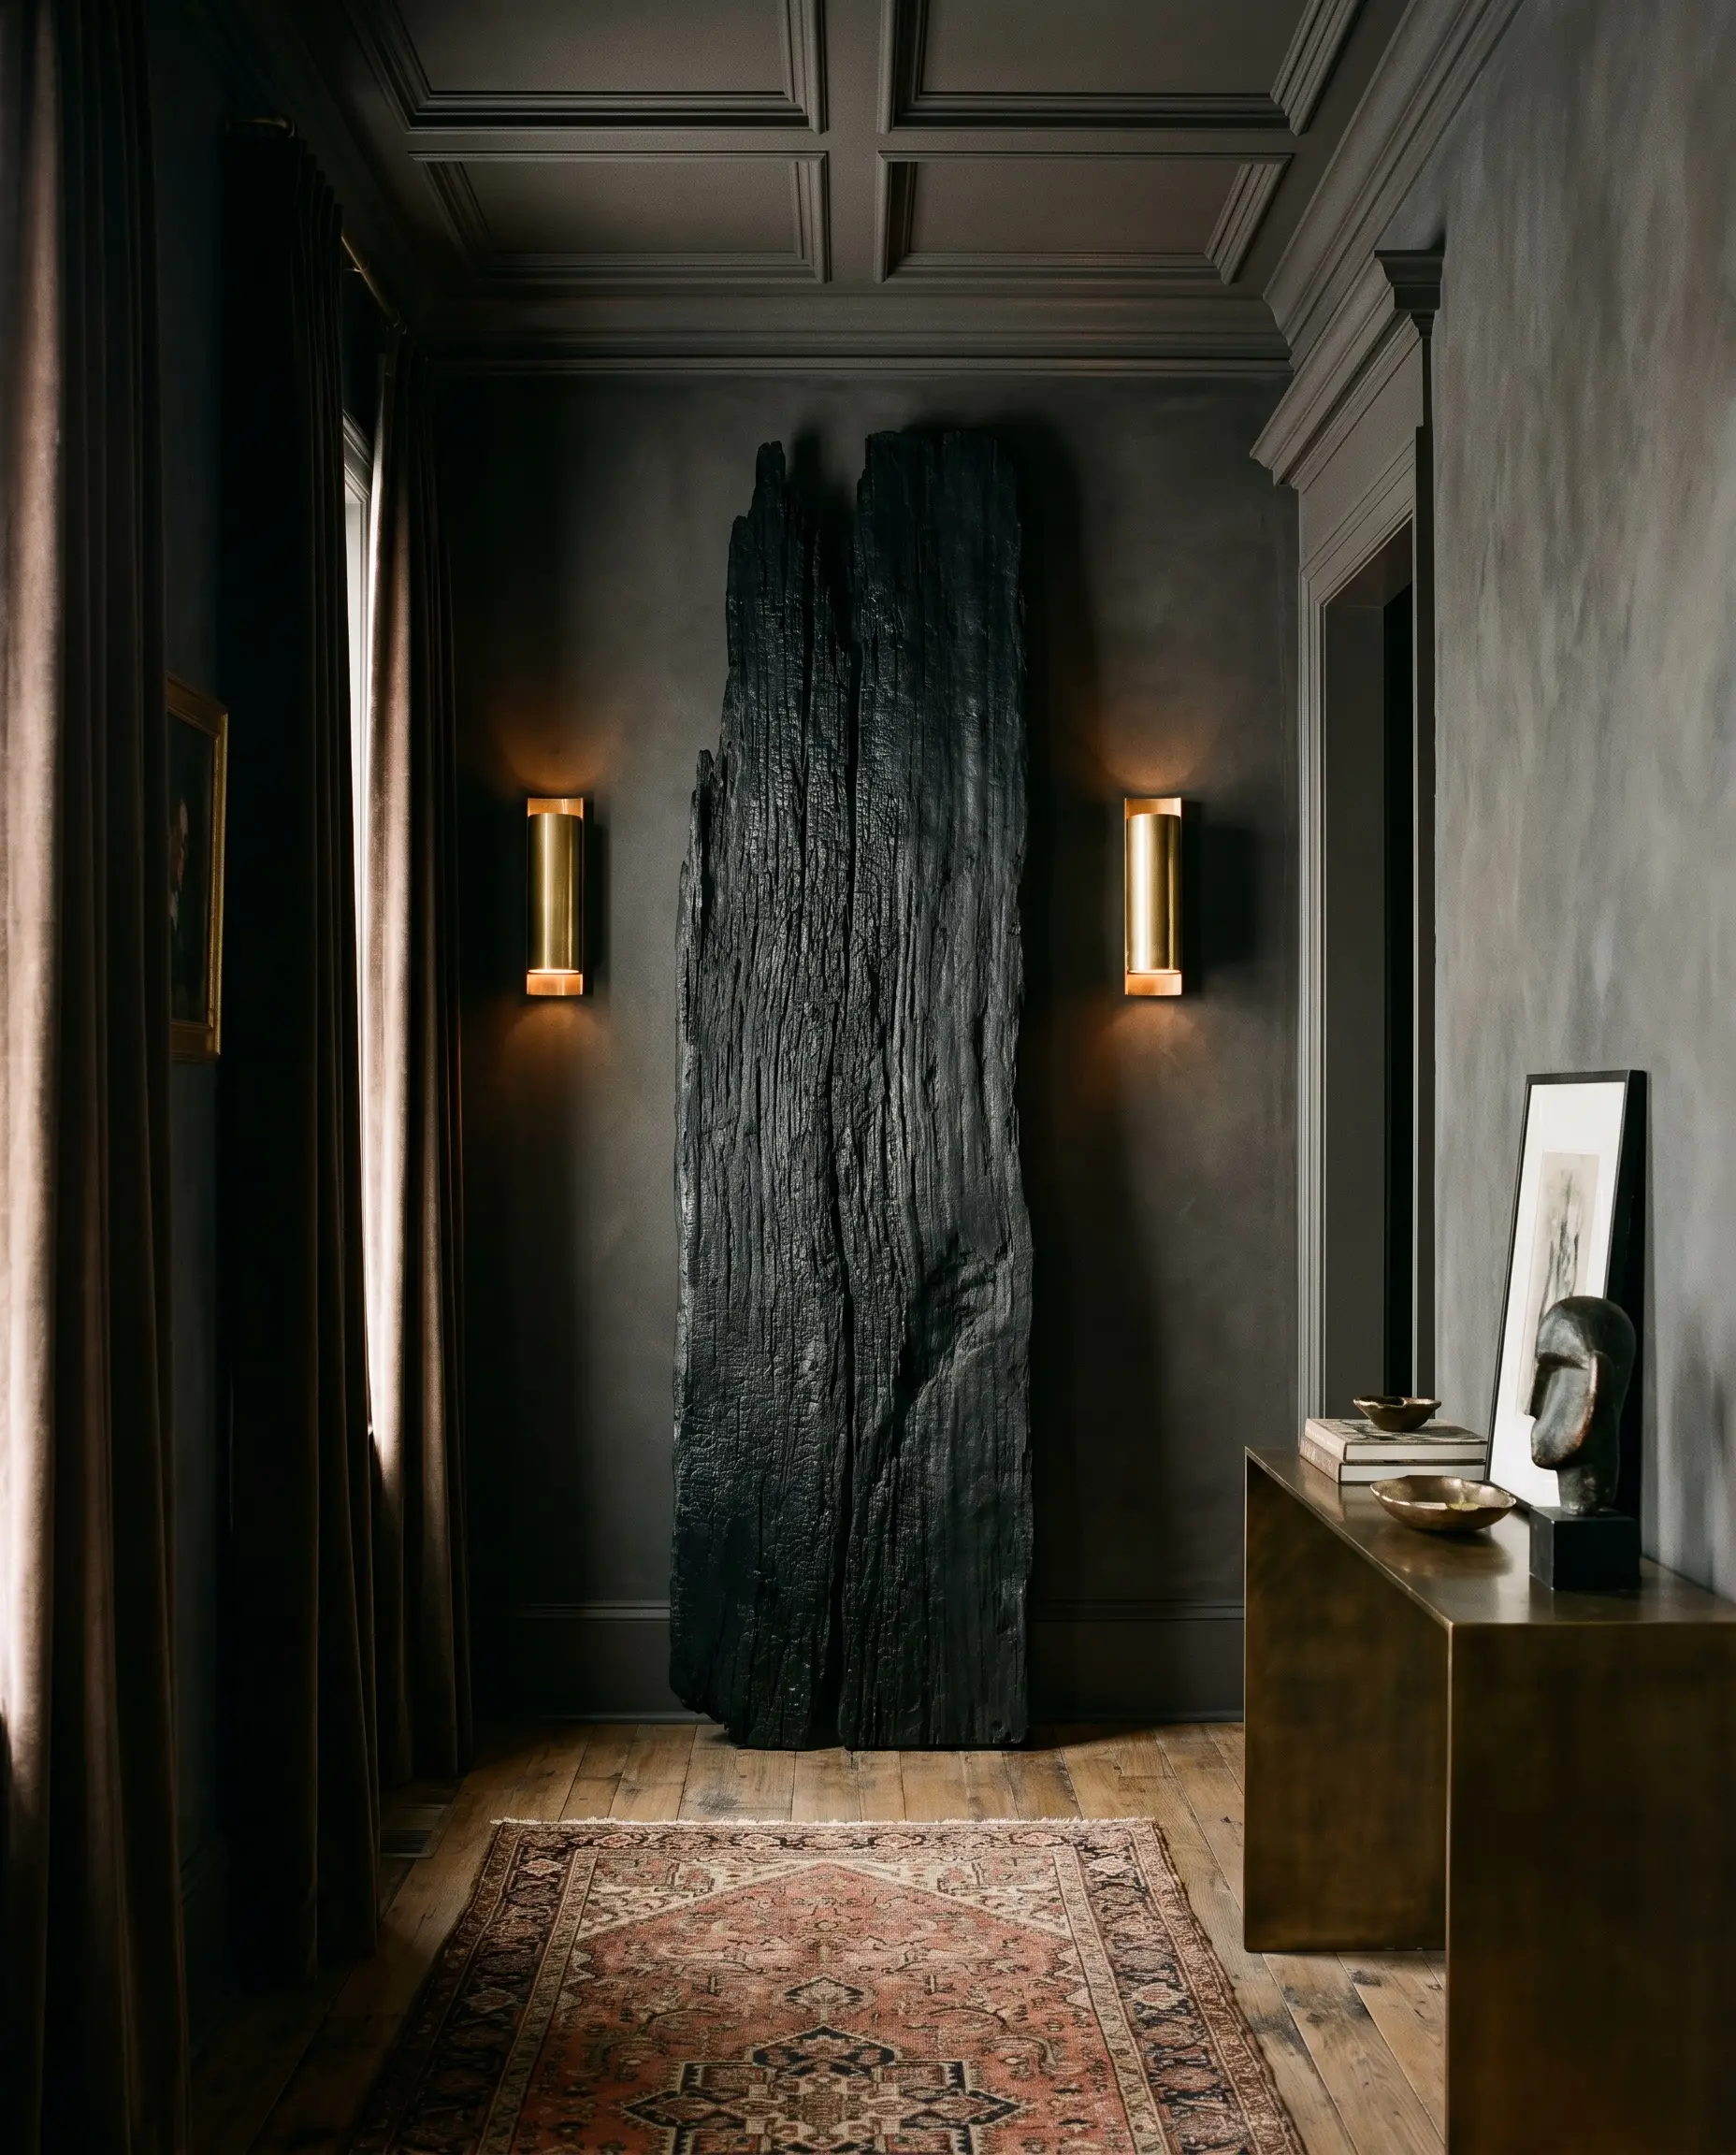
Shatter the predictable coastal mold by shifting the aesthetic forcefully into Moody Maximalism or Brutalism. Treat a tall, vertical driftwood slab with matte India ink and seal it with a flat matte topcoat to completely “ebonize” the wood into a stark black silhouette. Anchor this commanding, dark texture in a narrow entryway, flanking it precisely with polished brass sconces for a luxurious material contrast.
- Style Vibe: Moody Maximalism
- Key Material: Matte India ink and flat matte topcoat
- Lighting Match: Unlacquered brass cylinder sconces
- Scale Tip: The slab should consume at least two-thirds of the vertical wall height.
3. Display Interlocking Driftwood Root Systems for Brutalist Texture
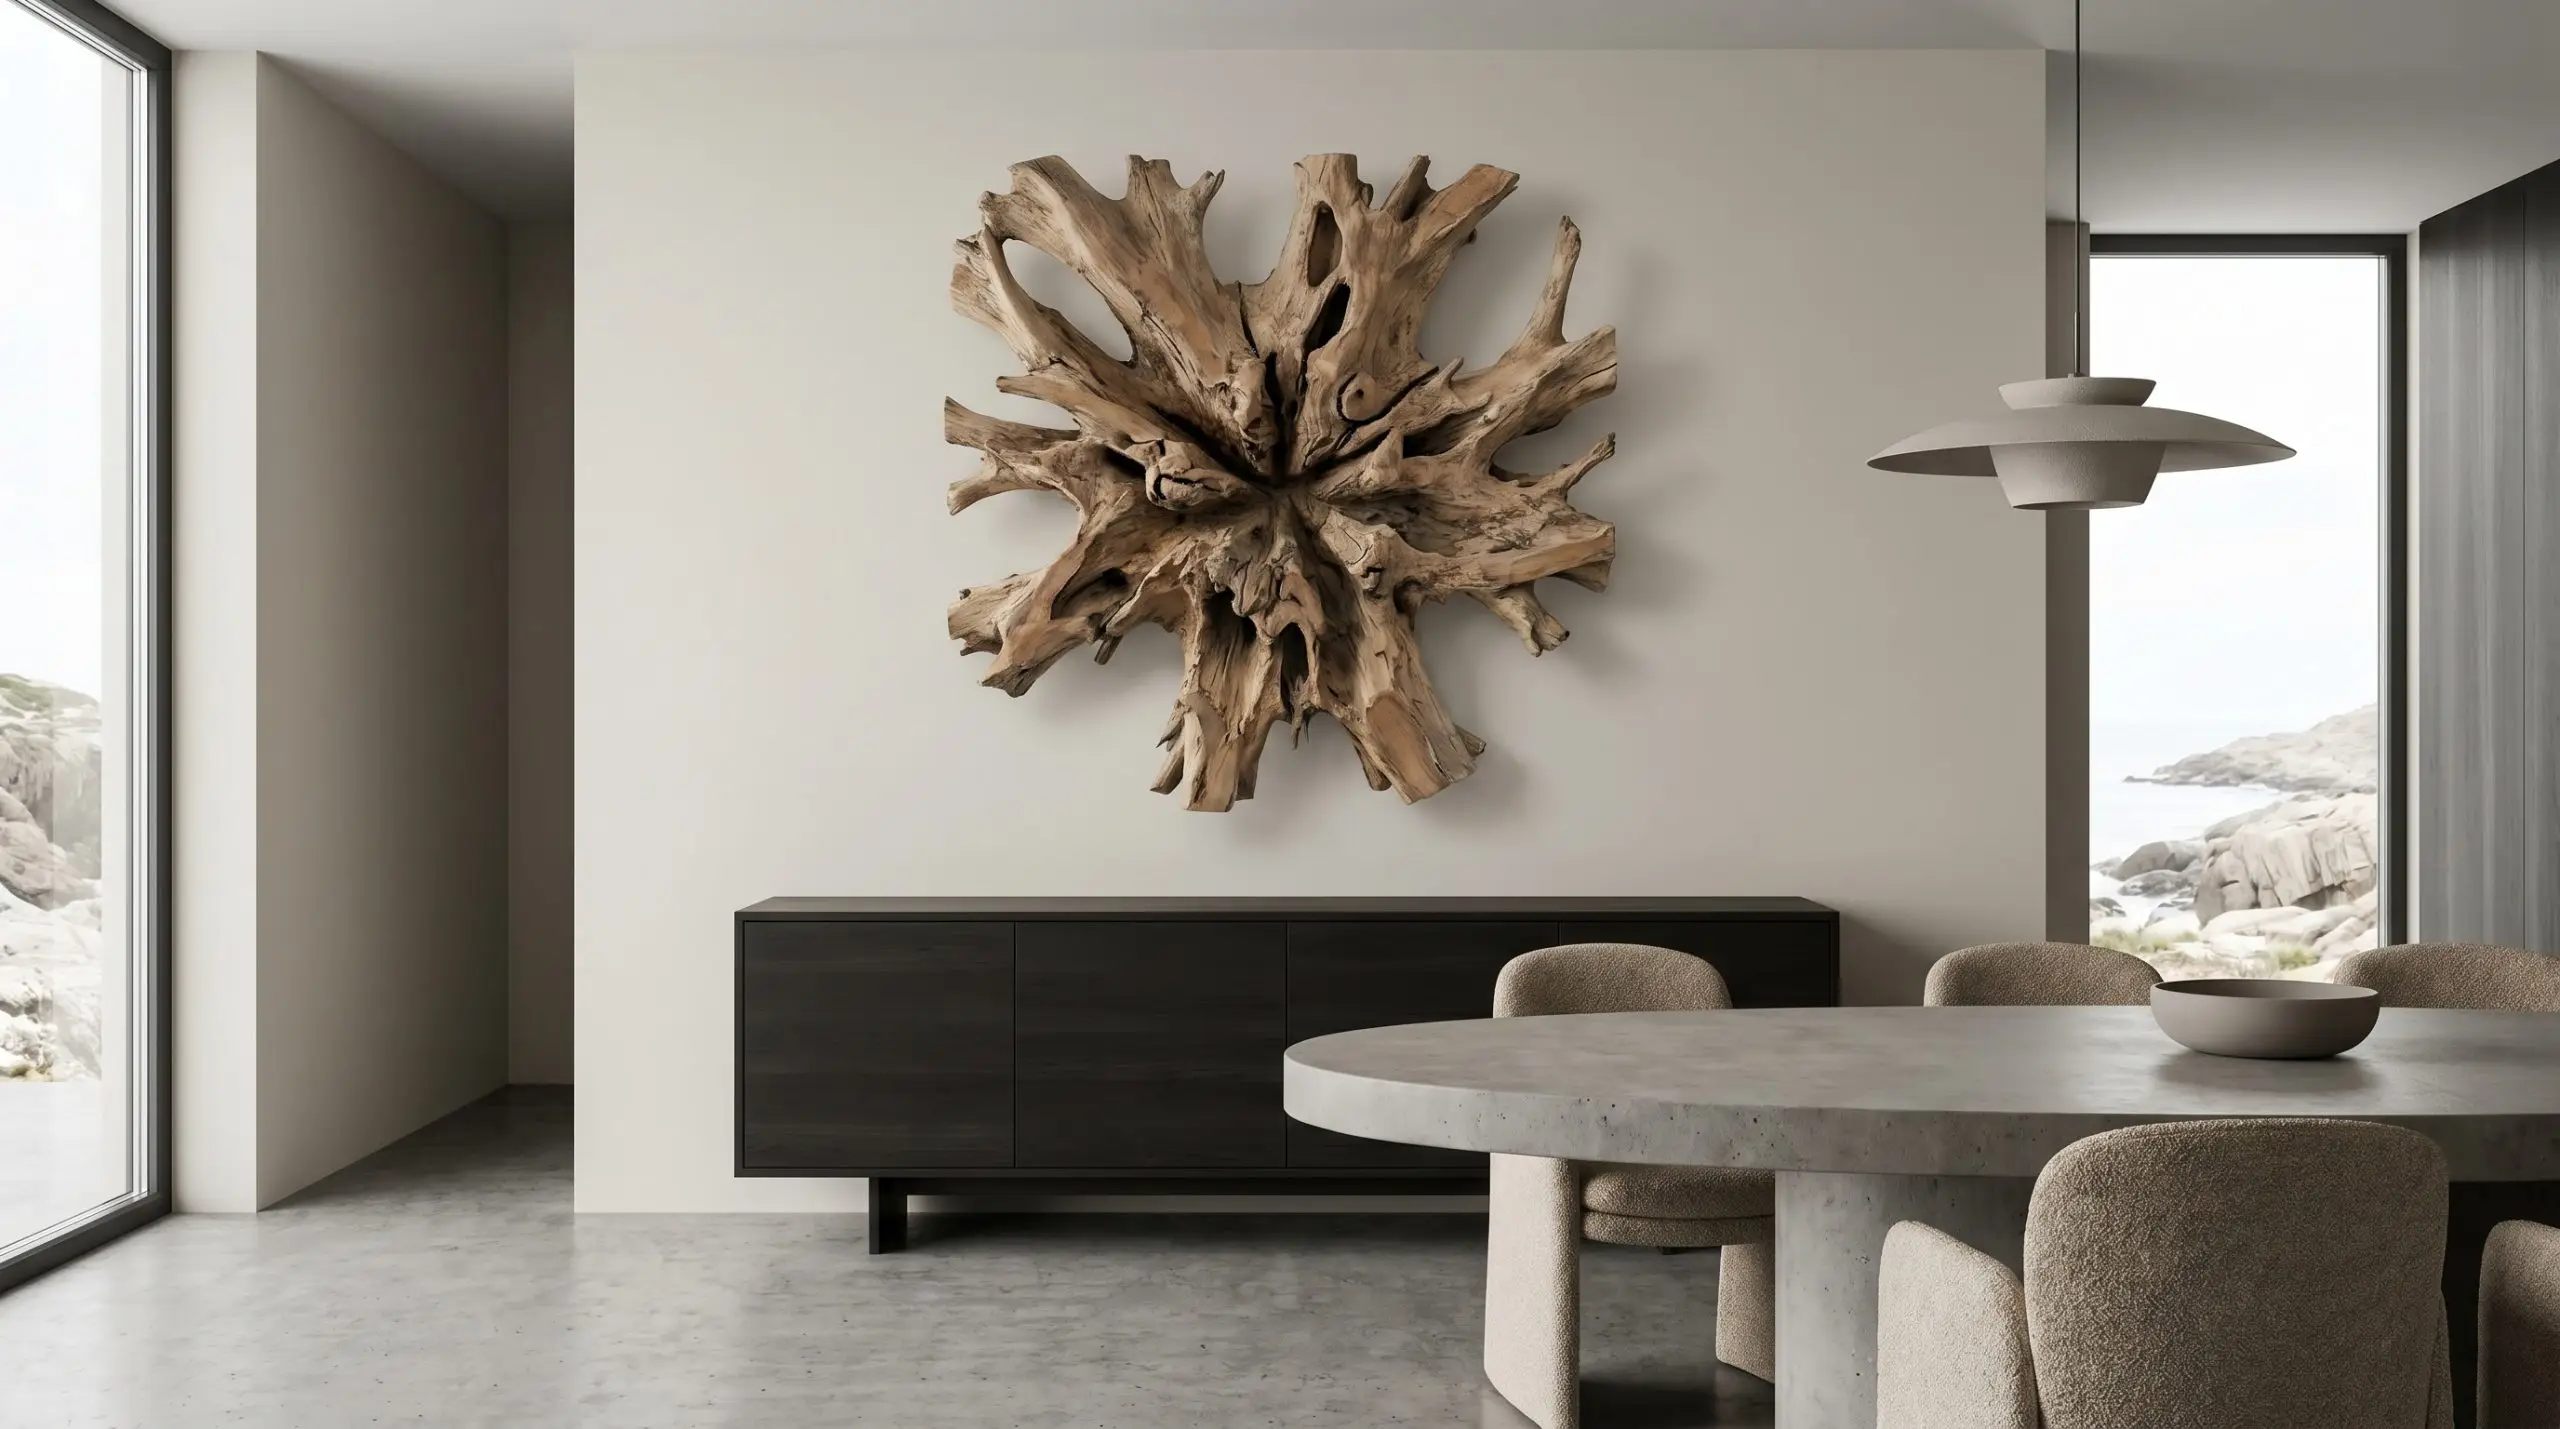
Driftwood extends far beyond smooth, linear branches; salvaged root balls offer incredible 3D depth and aggressive, architectural texture. Source a heavy, flat-sawn root system that sits perfectly flush against the wall but protrudes outward organically into the room. This aggressive focal point works perfectly in a minimalist dining room, using its chaotic knots to offset the sleek, predictable lines of flat-panel cabinetry.
- Style Vibe: Organic Brutalism
- Fabrication Note: Require your dealer to provide a precision flat-sawn back for flush mounting.
- Room Placement: Centered over a minimalist dining credenza.
- Paint Match: Sherwin-Williams Alabaster (SW 7008)
4. Flank a Fireplace with Symmetrical Driftwood Totems
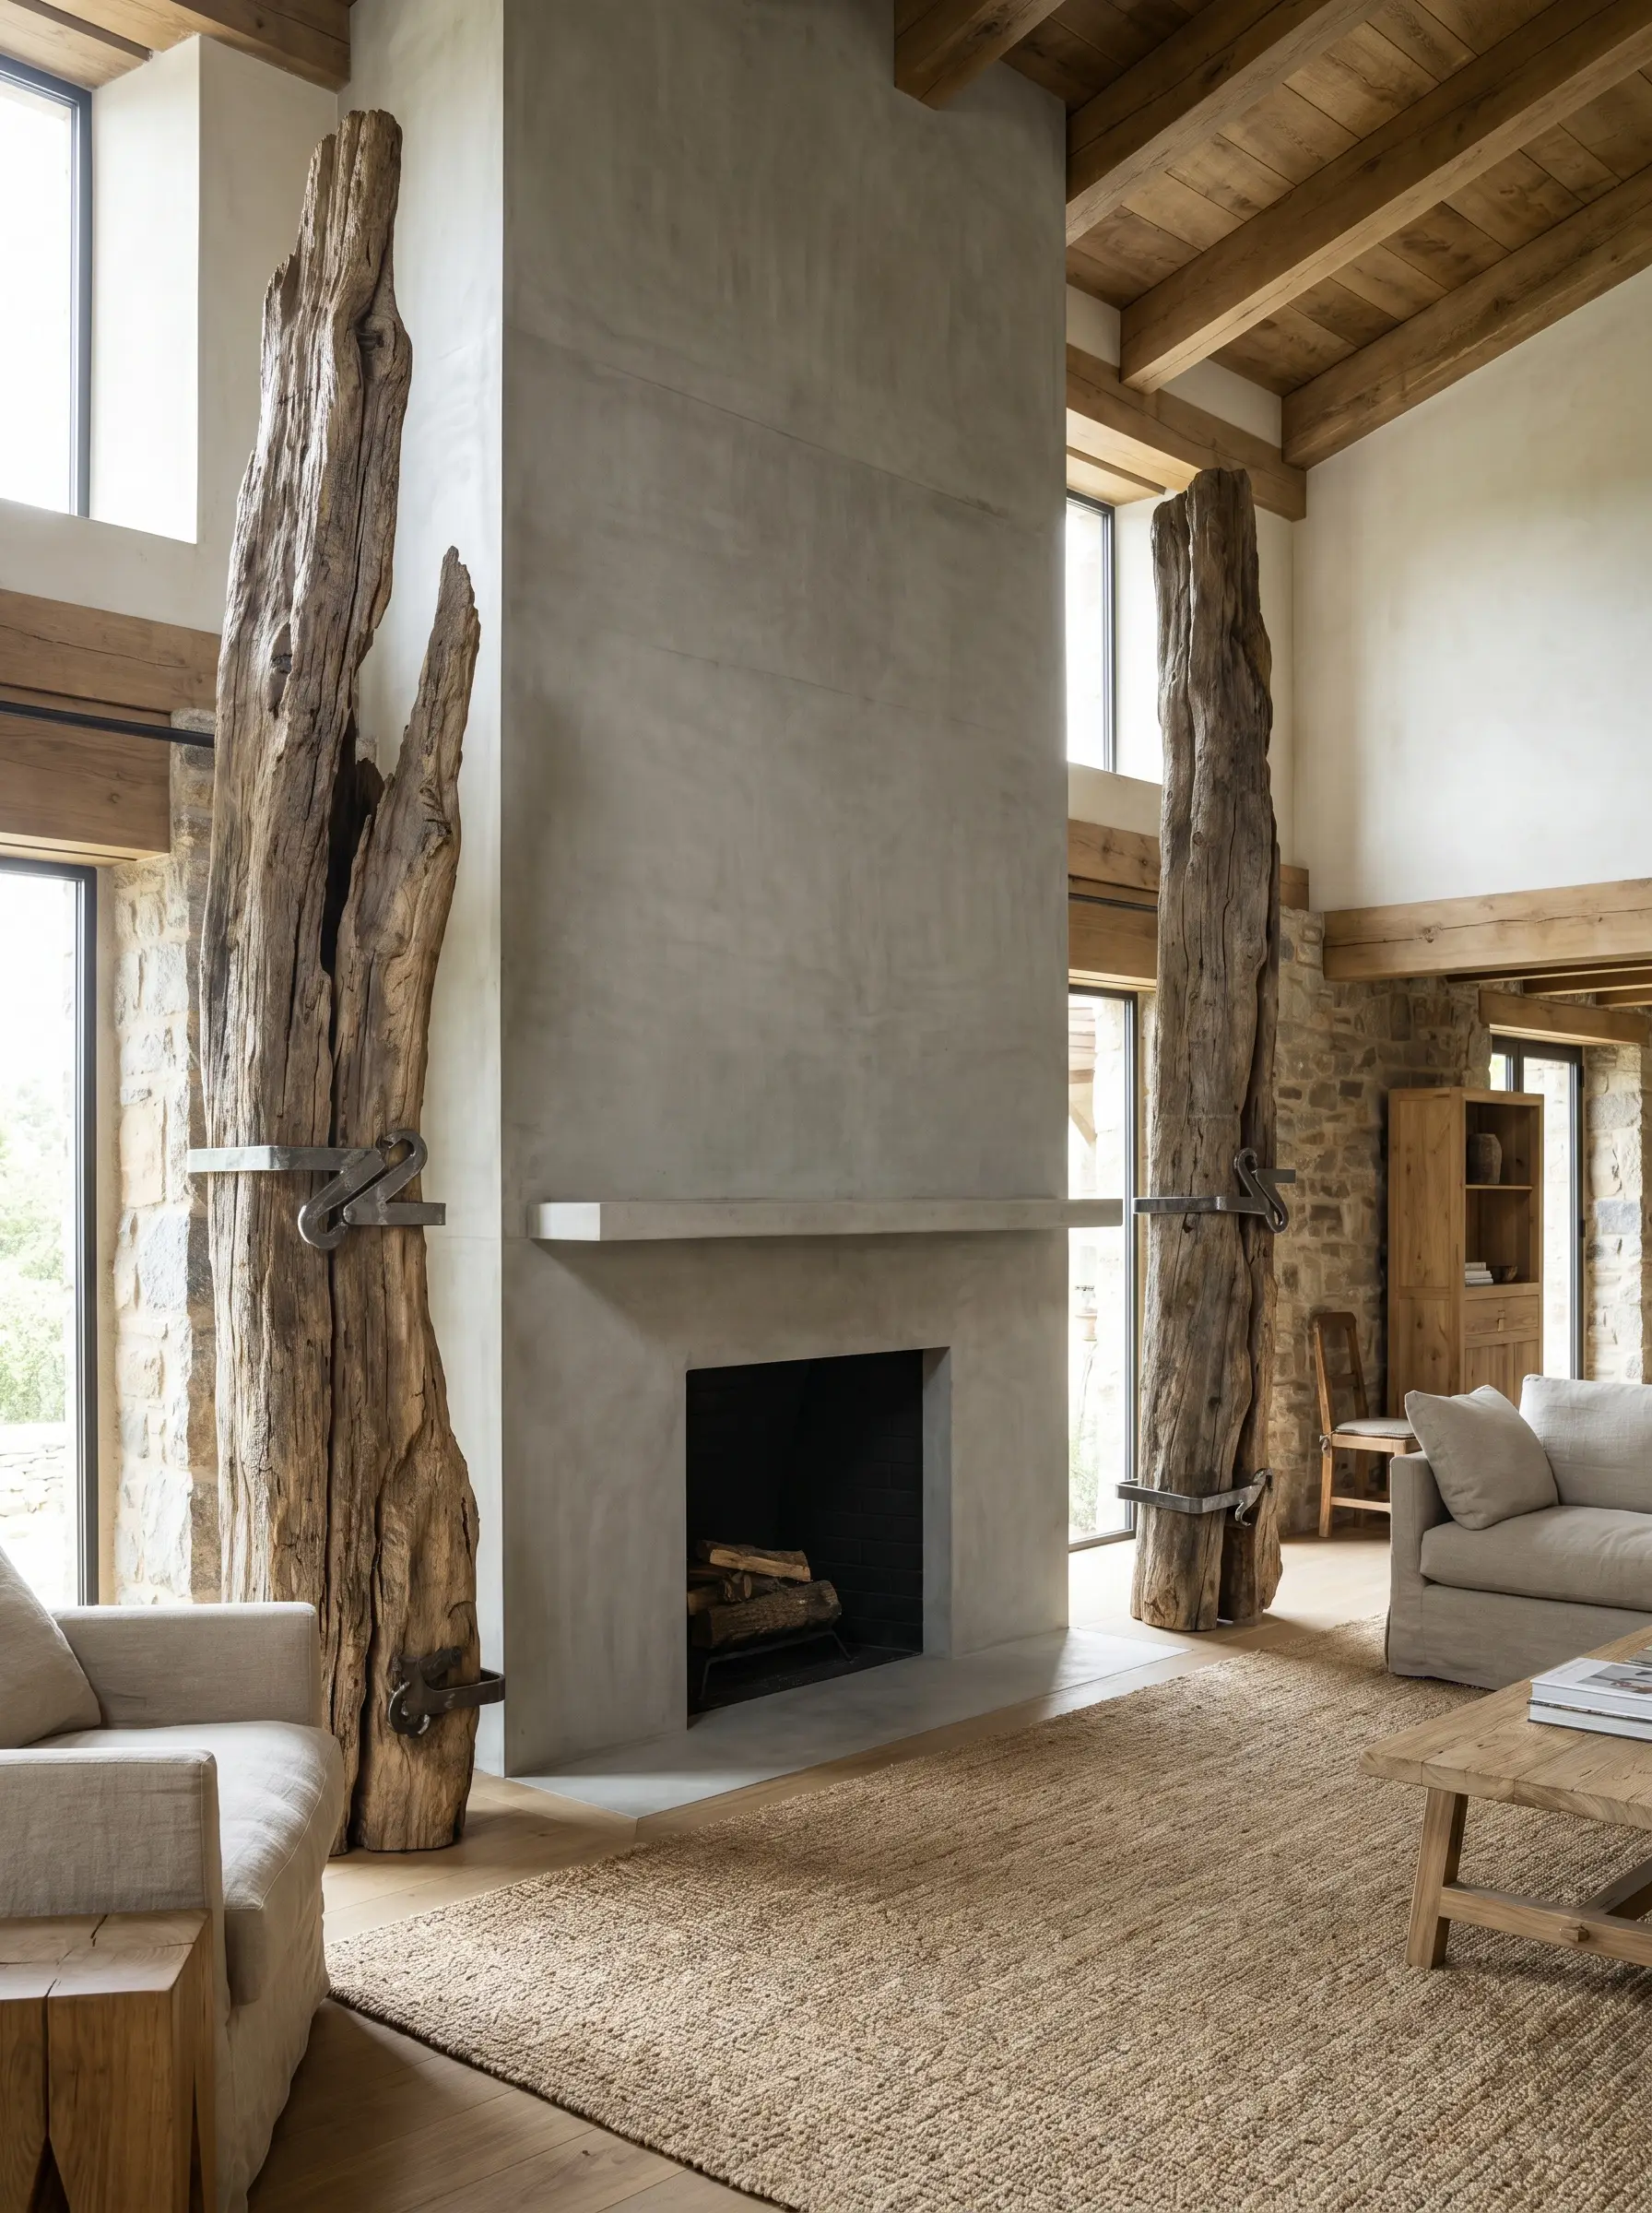
Introduce structural symmetry using a deeply asymmetrical, organic material to draw the eye upward and highlight tall ceilings. Source two massive, relatively straight driftwood logs and mount them vertically on either side of a fireplace mantle to ground the architecture with raw, tactile earthiness.
Do not crowd the mantle with small trinkets if you are utilizing massive vertical totems; the architecture of the wood demands breathing room.
Styling Rule
- Style Vibe: Earthy Architectural
- Scale Requirement: Totems must be roughly equal in height and thickness.
- Mounting Hardware: Interlocking metal Z-clips.
- Contrast Material: A smooth, honed concrete or plaster fireplace surround.
5. Suspend a Floating Driftwood Branch Above a Dining Table
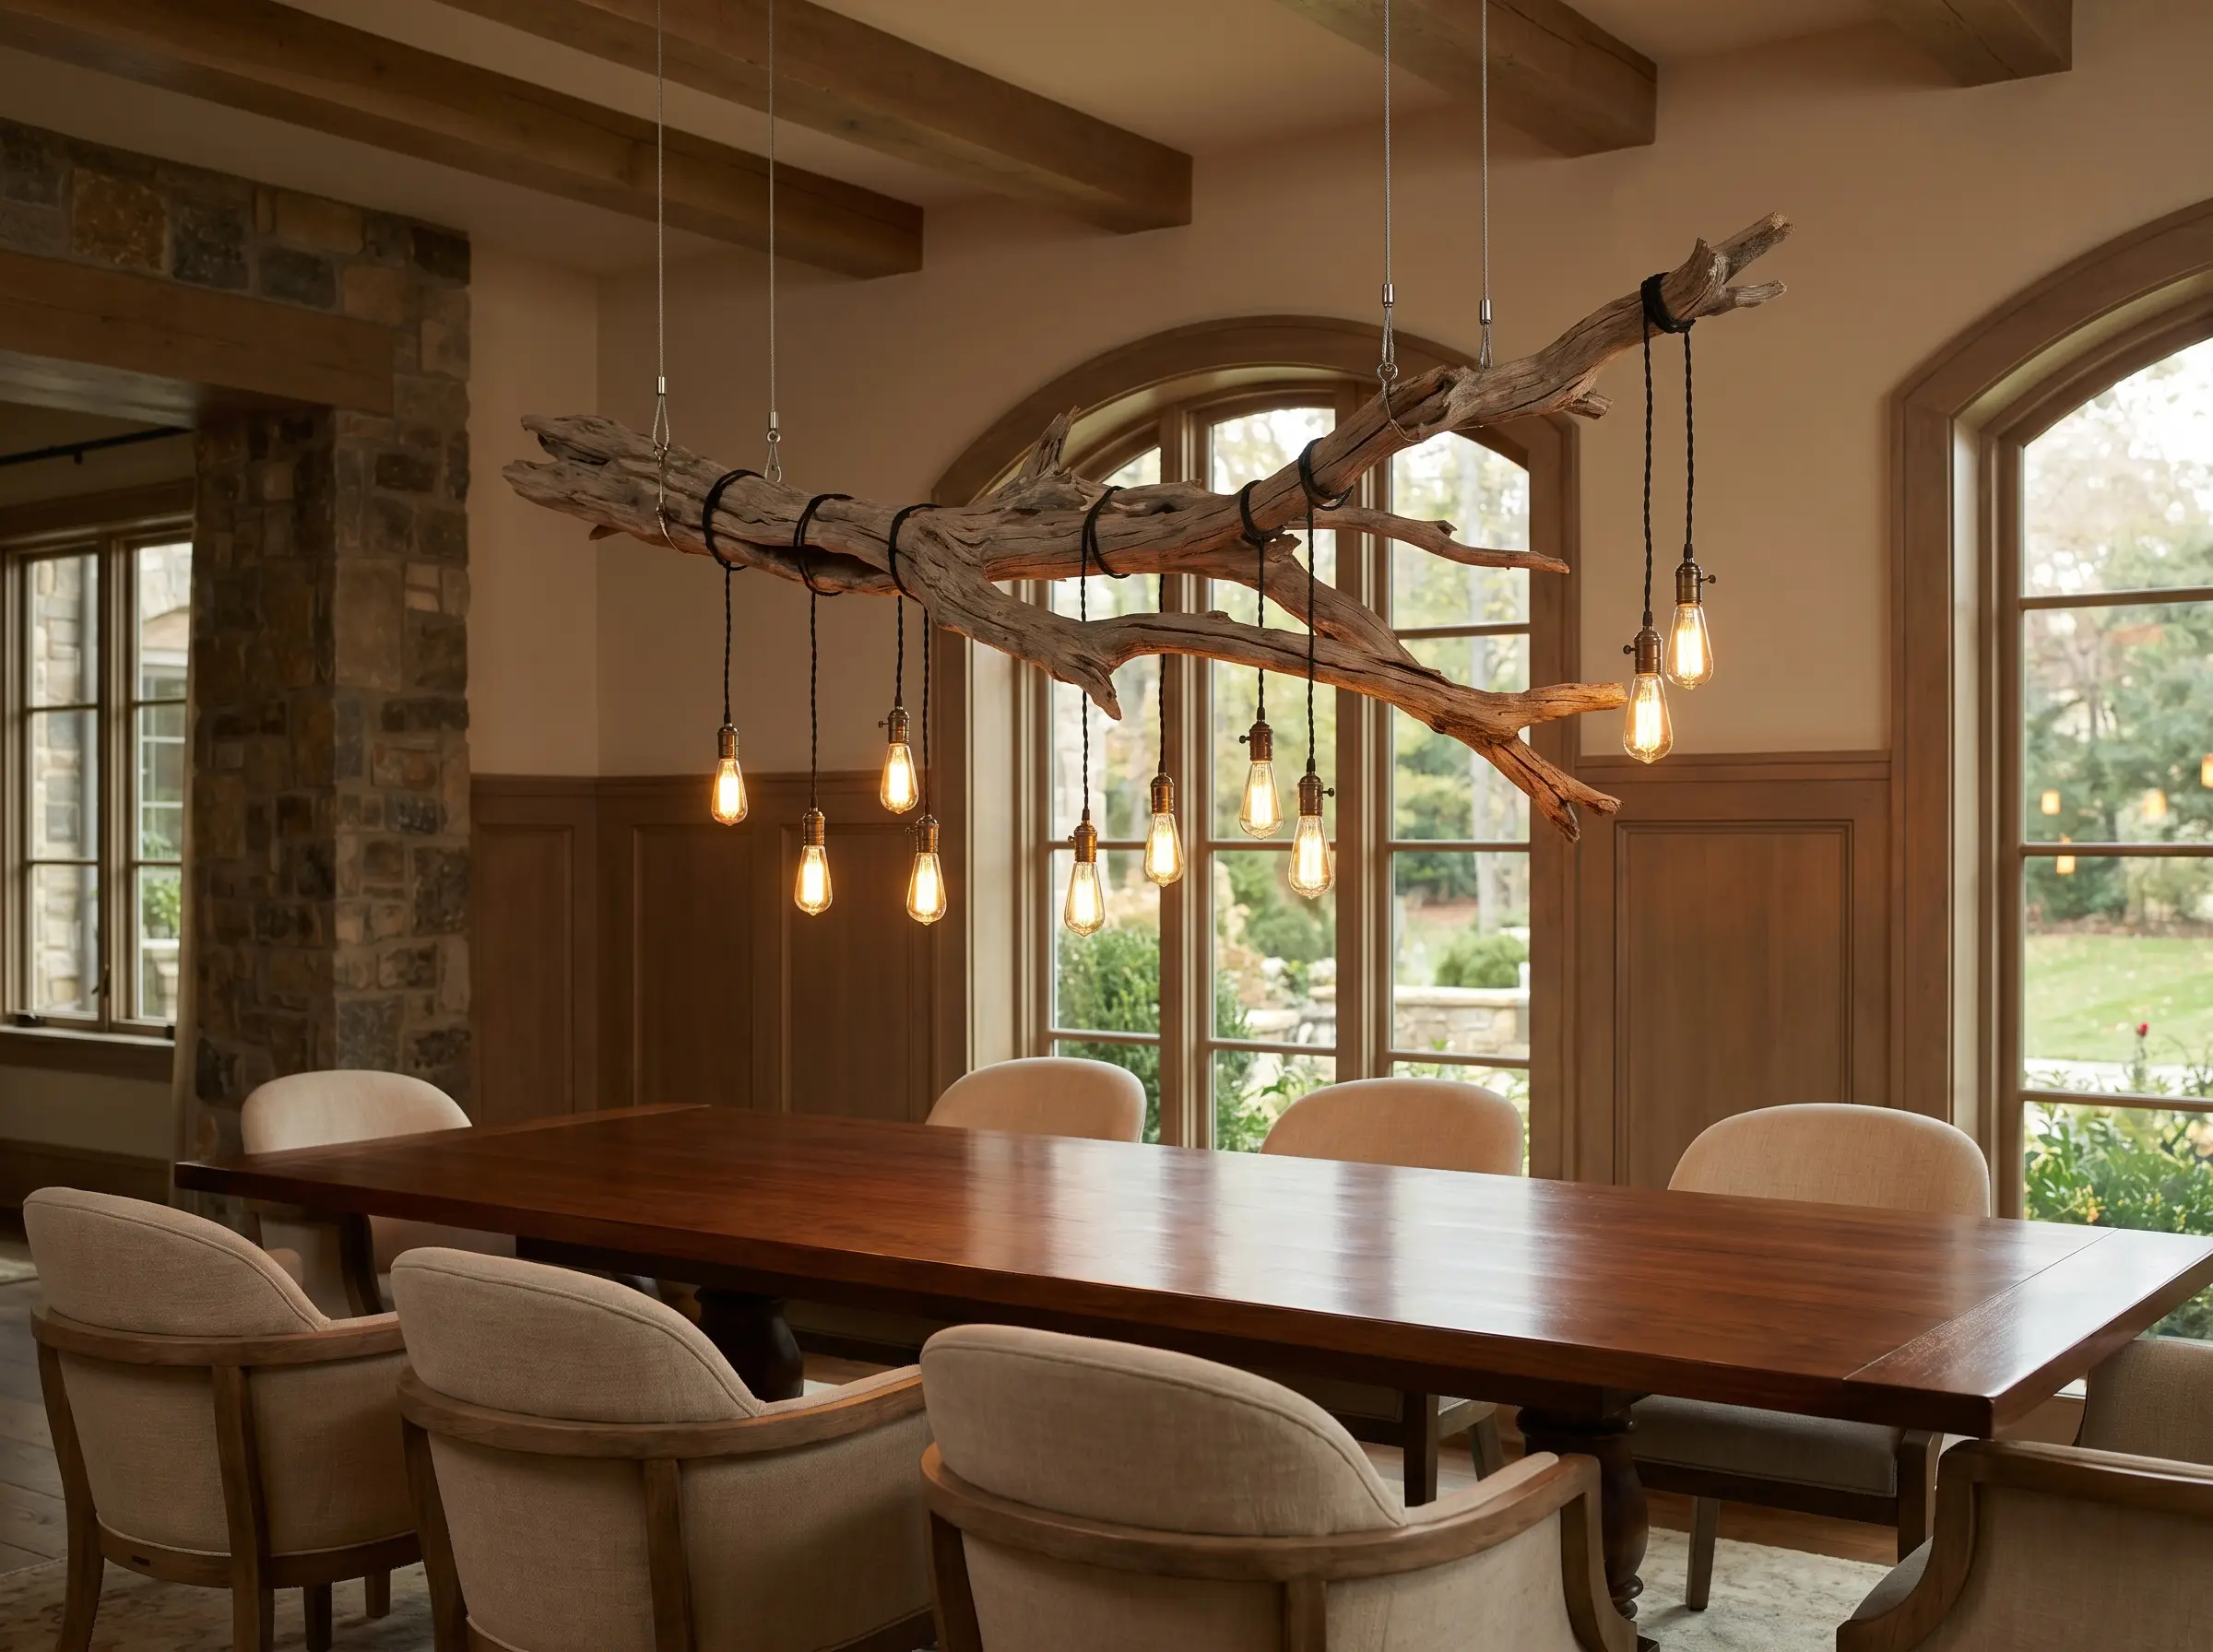
Blur the spatial boundaries between wall art and ceiling installations by hanging a massive, twisting branch adjacent to the dining room wall. Suspend the sculpture using ultra-thin aircraft cable so it appears to float effortlessly in mid-air, and weave subtle, battery-operated fairy lights or drape exposed Edison bulbs through the branches for functional, ambient illumination.
Never rely on standard drywall toggles for suspended wood; you must drill directly into the ceiling joists using heavy-duty ceiling anchors to ensure absolute structural safety.
Pro-Tip
- Style Vibe: Immersive Organic Modern
- Suspension Material: 1/16″ stainless steel aircraft cable.
- Lighting: 2700K warm Edison bulbs on black fabric cords.
- Clearance: Hang exactly 36 inches above the dining table surface.
2. Curated Installations: Framed & Structured Displays
When working with smaller pieces of driftwood, rigid structure is required to prevent the wall from looking like a disorganized collection of sticks. Framing provides the necessary intentionality, transforming foraged fragments into highly curated museum displays.
6. Frame Mini Driftwood Shards in a Linen-Backed Shadow Box
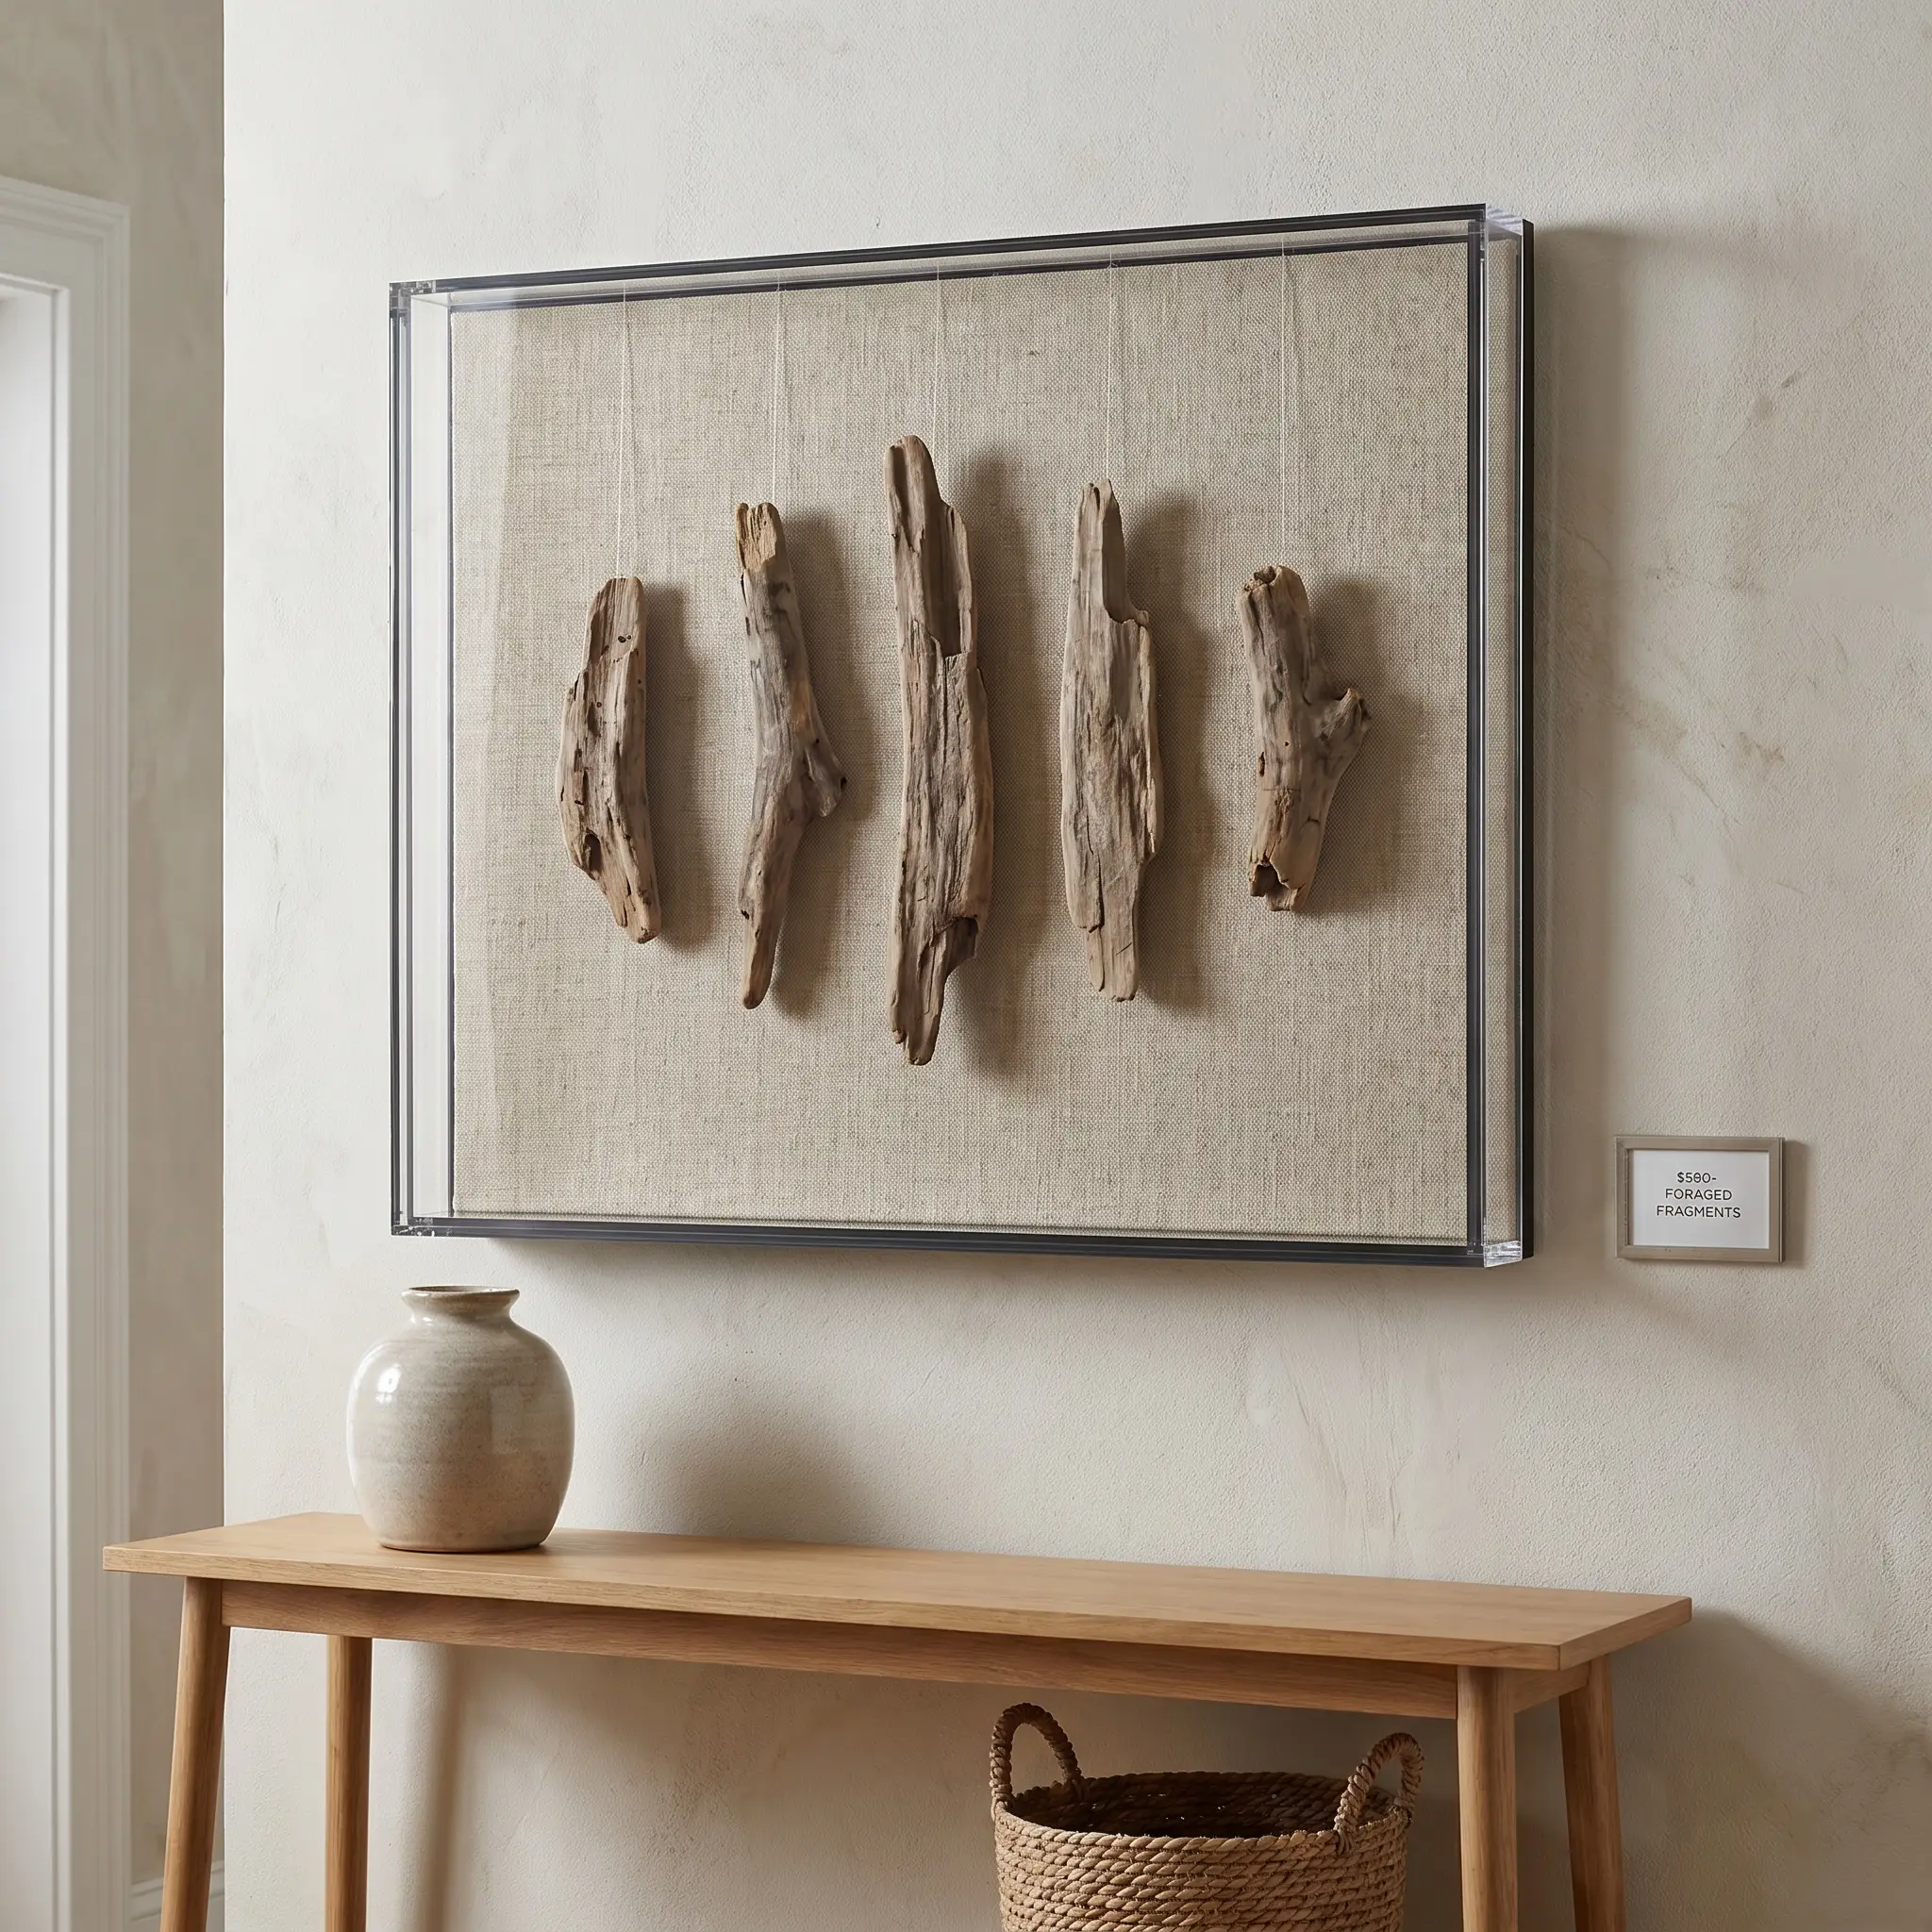
Take three to five small, heavily textured driftwood shards and mount them inside a deep, museum-quality acrylic shadow box lined with raw, natural linen. The crisp, geometric lines of the modern frame instantly contrast with the organic shapes of the wood, making a freely foraged item look like a $500 boutique gallery purchase.
Fabrication Guide: Secure the shards without visible glue using this method:
- Map the layout on the linen backing board before securing.
- Drill microscopic pilot holes through the back of the linen board.
- Thread ultra-thin transparent monofilament (fishing line) through the holes, loop over the wood, and tie off tightly behind the board.
7. Create a Geometric Driftwood Mosaic Panel
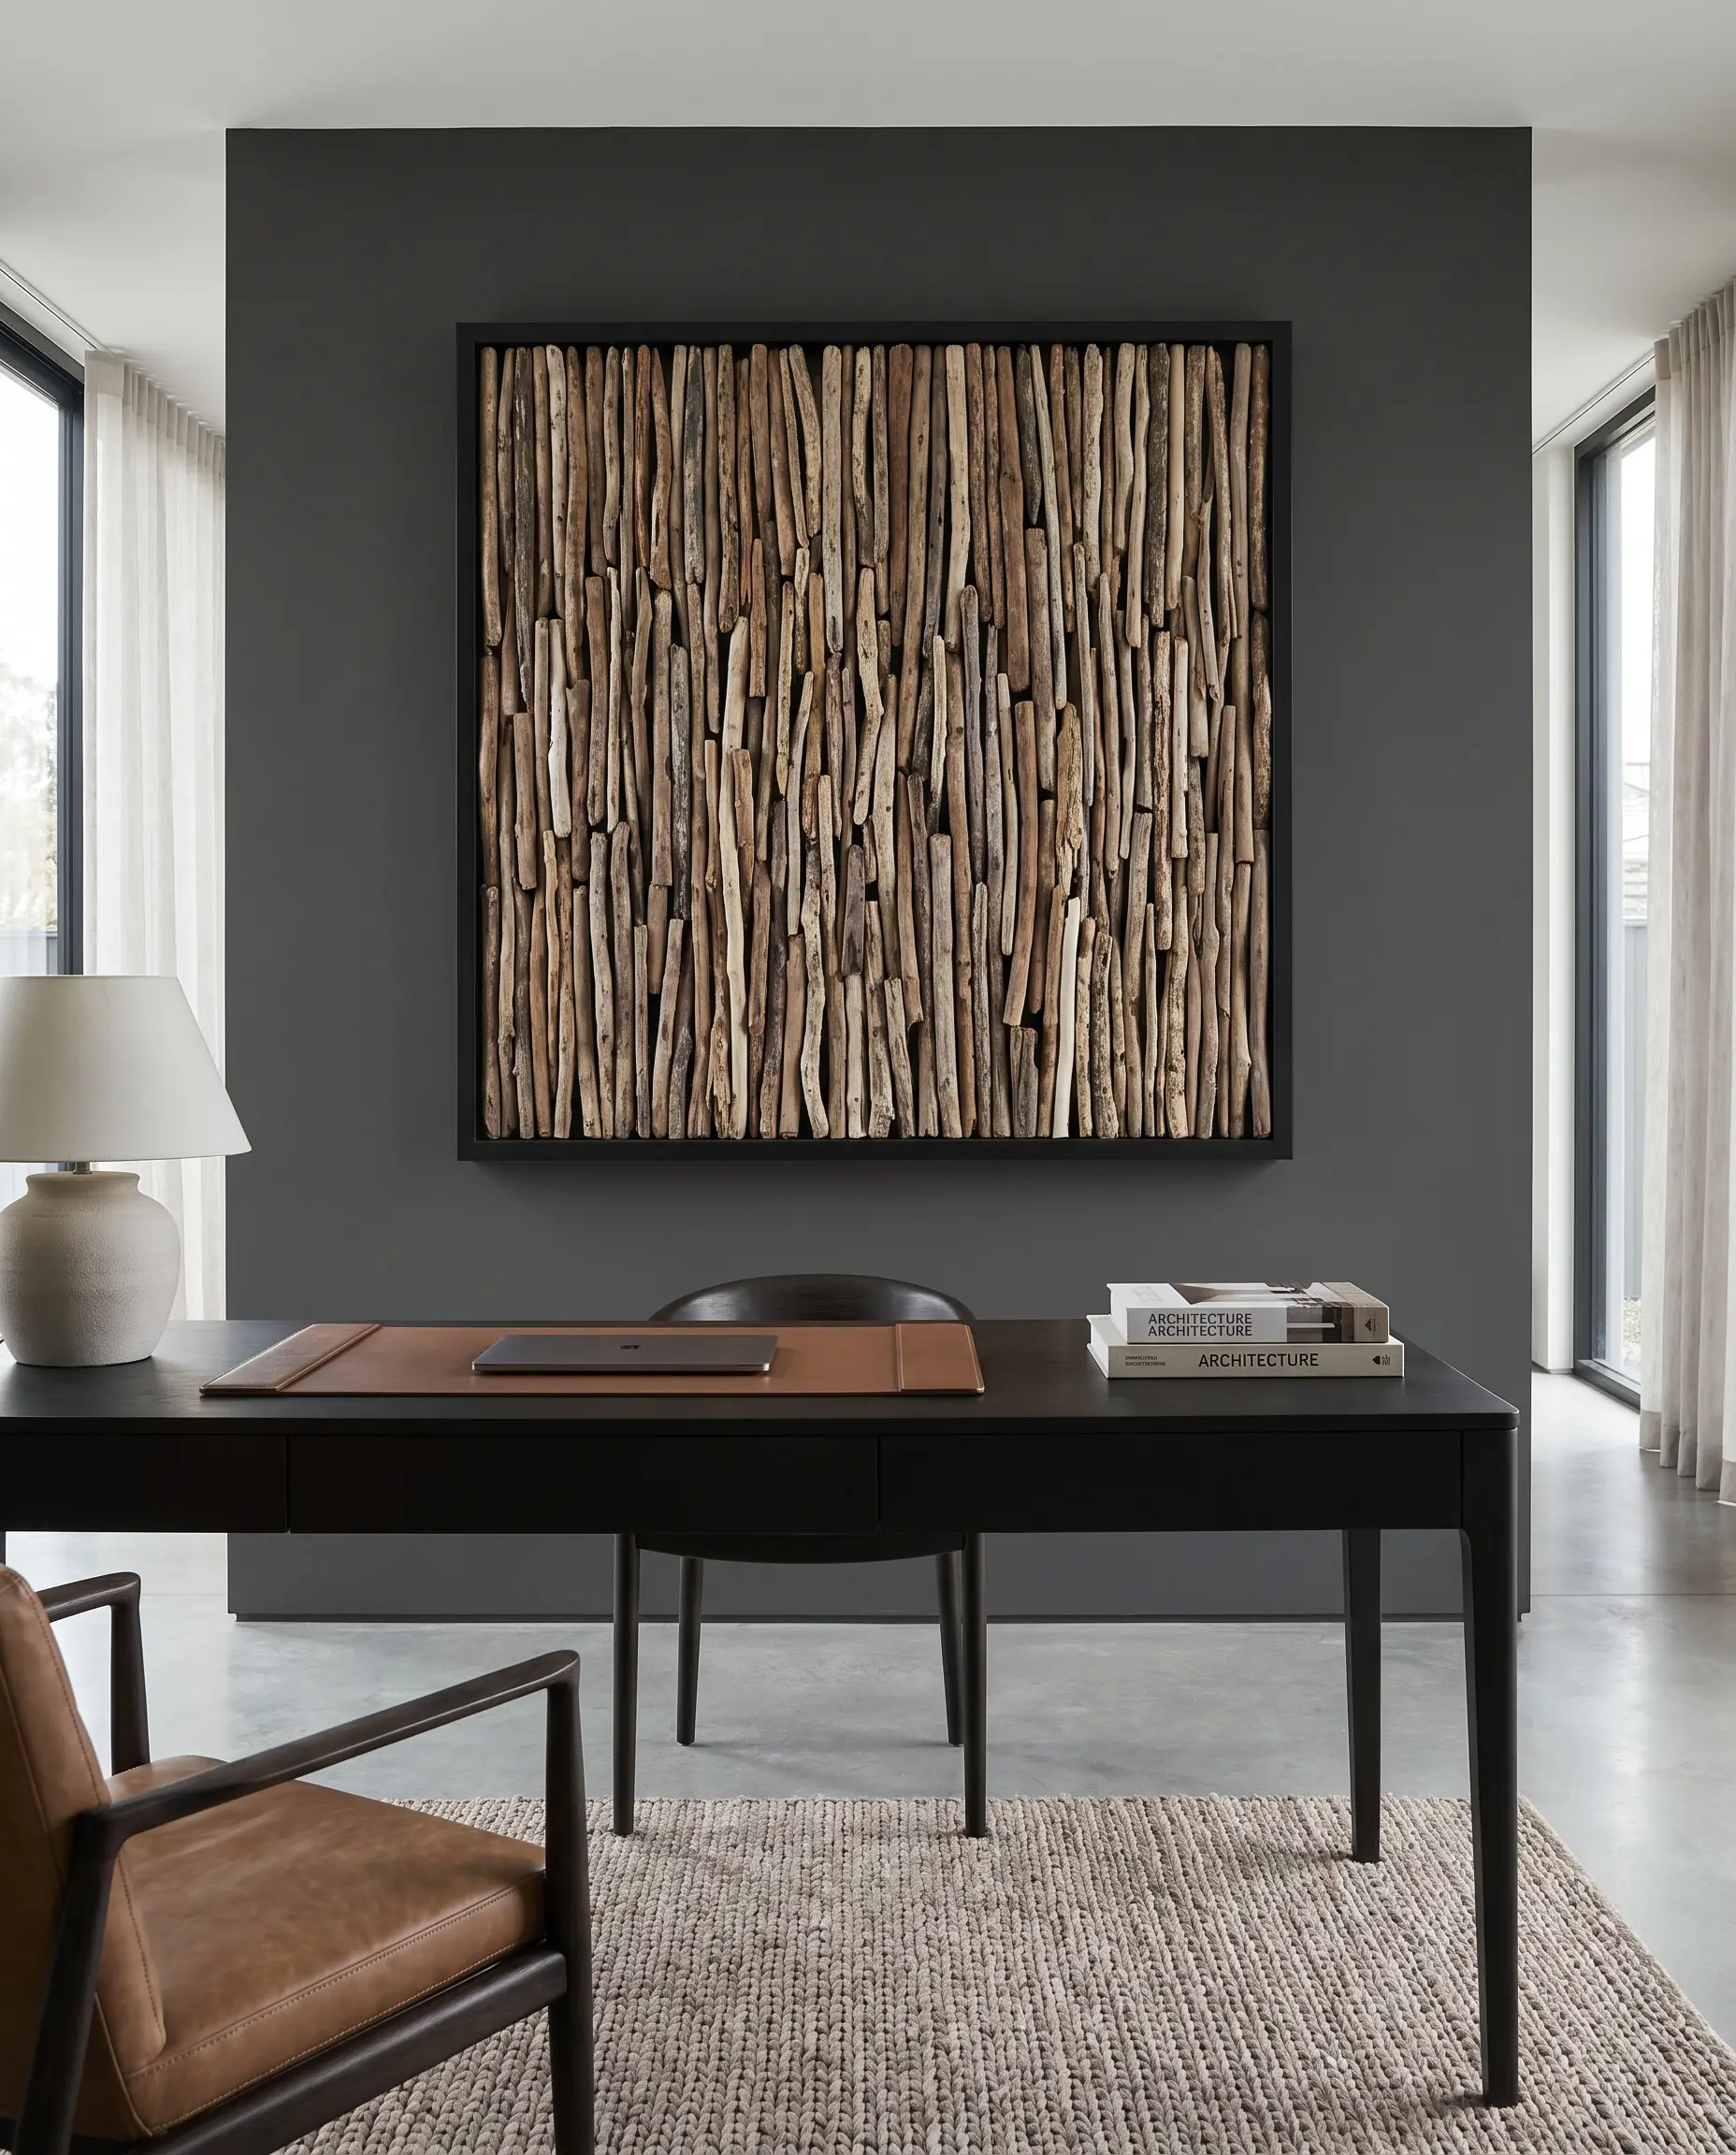
Introduce tightly packed, structured wood art to your home office by cutting driftwood branches to equal depths and mounting them vertically inside a rigid, square frame. This dense, textural mosaic acts as functional sound dampening while adding a massive punch of organic texture to a stark, modern white room.
- Style Vibe: Textural Modernism
- Construction Tools: Brad nail gun, wood glue, and a 1/2-inch plywood backing board.
- Frame Material: Matte black powder-coated steel.
- Paint Match (Wall): Farrow & Ball Off-Black (No. 57)
8. Arrange an Elevated Asymmetrical Coastal Sunburst
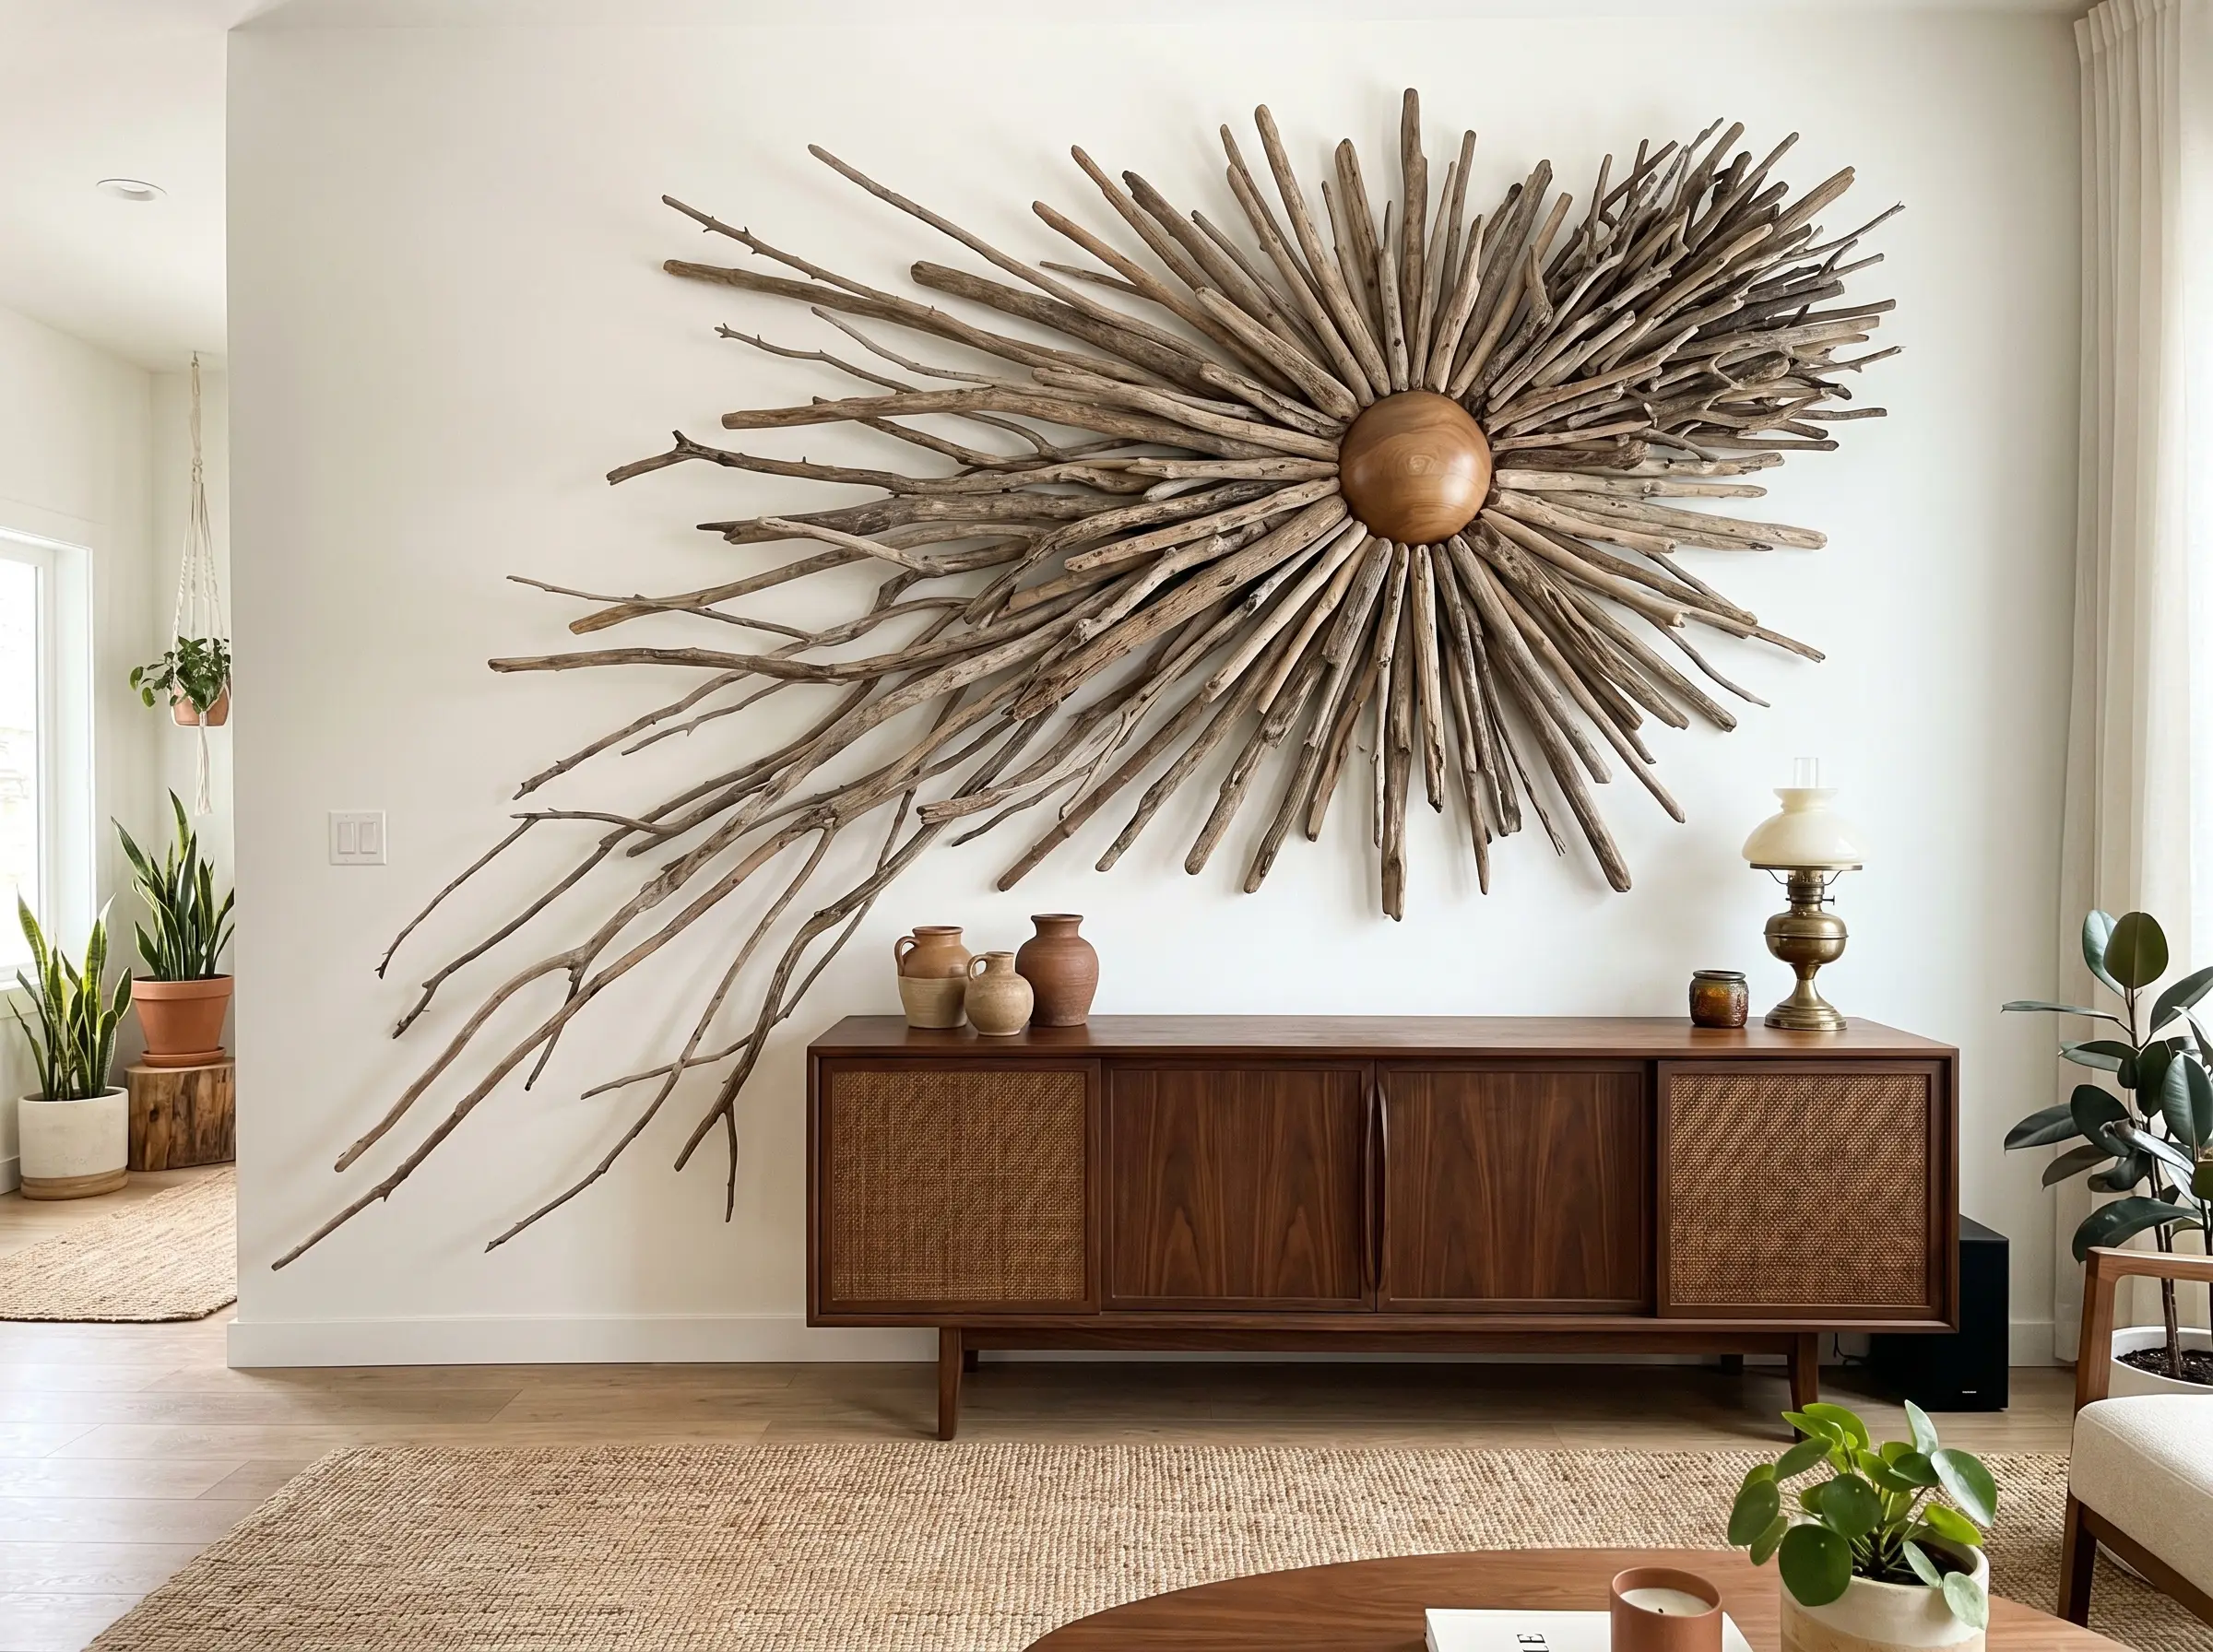
A traditional, perfectly round driftwood sunburst often feels dated and predictable. Update this silhouette by engineering an asymmetrical burst—heavy and elongated on the bottom left, short and tightly clustered on the top right. Mount this chaotic, organic installation directly over a sleek, geometric mid-century modern credenza to force a brilliant visual contrast.
- Style Vibe: Curated Mid-Century Organic
- Core Material: 40-50 straight driftwood twigs of varying lengths.
- Anchor Point: A 6-inch solid wood half-sphere backing block.
- Furniture Pairing: Rift-sawn walnut credenza.
9. Mount a Minimalist Grid of Identical Branches
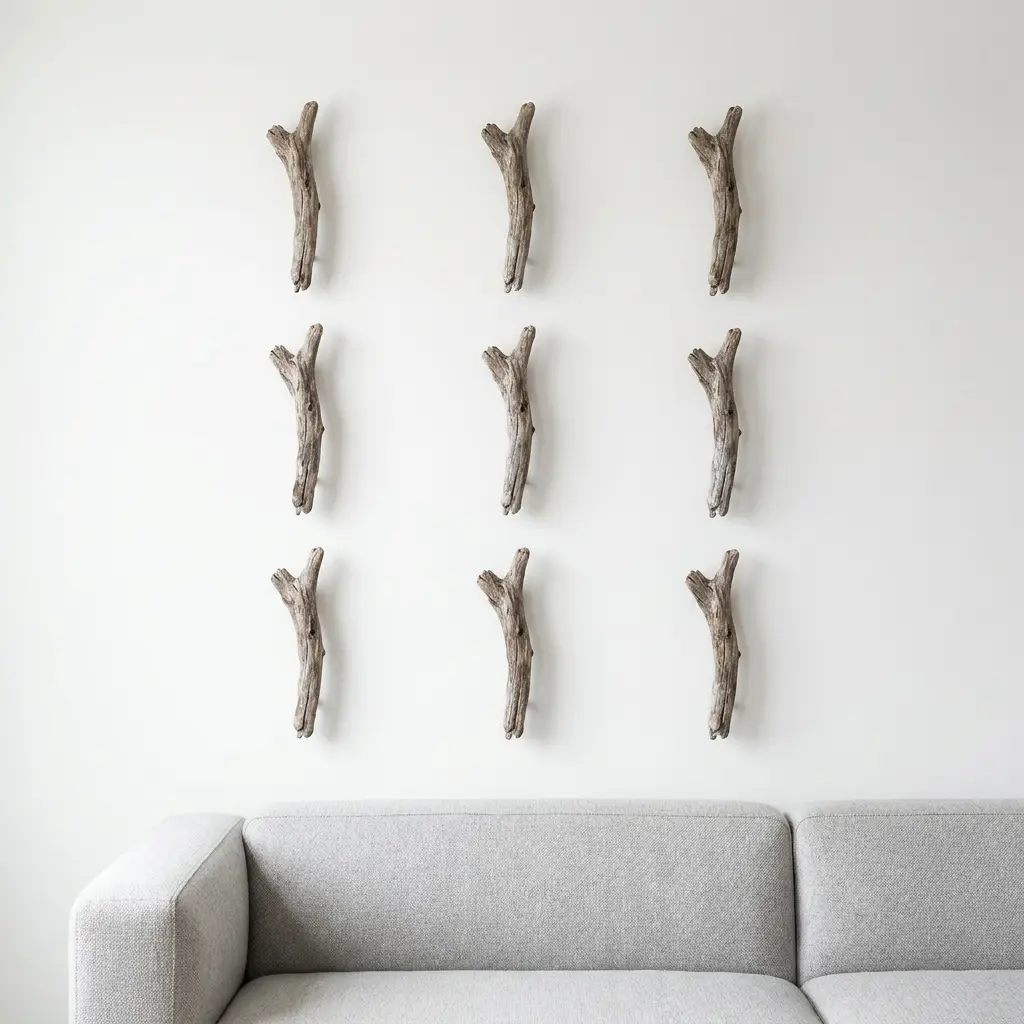
Satisfy the Type-A minimalist by finding nine roughly identical, straight driftwood sticks, or cutting longer pieces to the exact same length. Mount them in a perfect 3×3 architectural grid directly on the wall using hidden hardware, spacing them with mathematical precision exactly 4 inches apart. The visual tension between the raw, organic material and the rigid, mathematical layout is incredibly striking.
- Style Vibe: Precision Minimalism
- Layout Tool: Laser level and spacer blocks are mandatory.
- Hardware: Double-sided heavy-duty mounting tape or hidden micro-dowels.
- Wall Texture: Smooth, Level 5 drywall finish.
10. Float Driftwood Slices on Clear Acrylic Panels
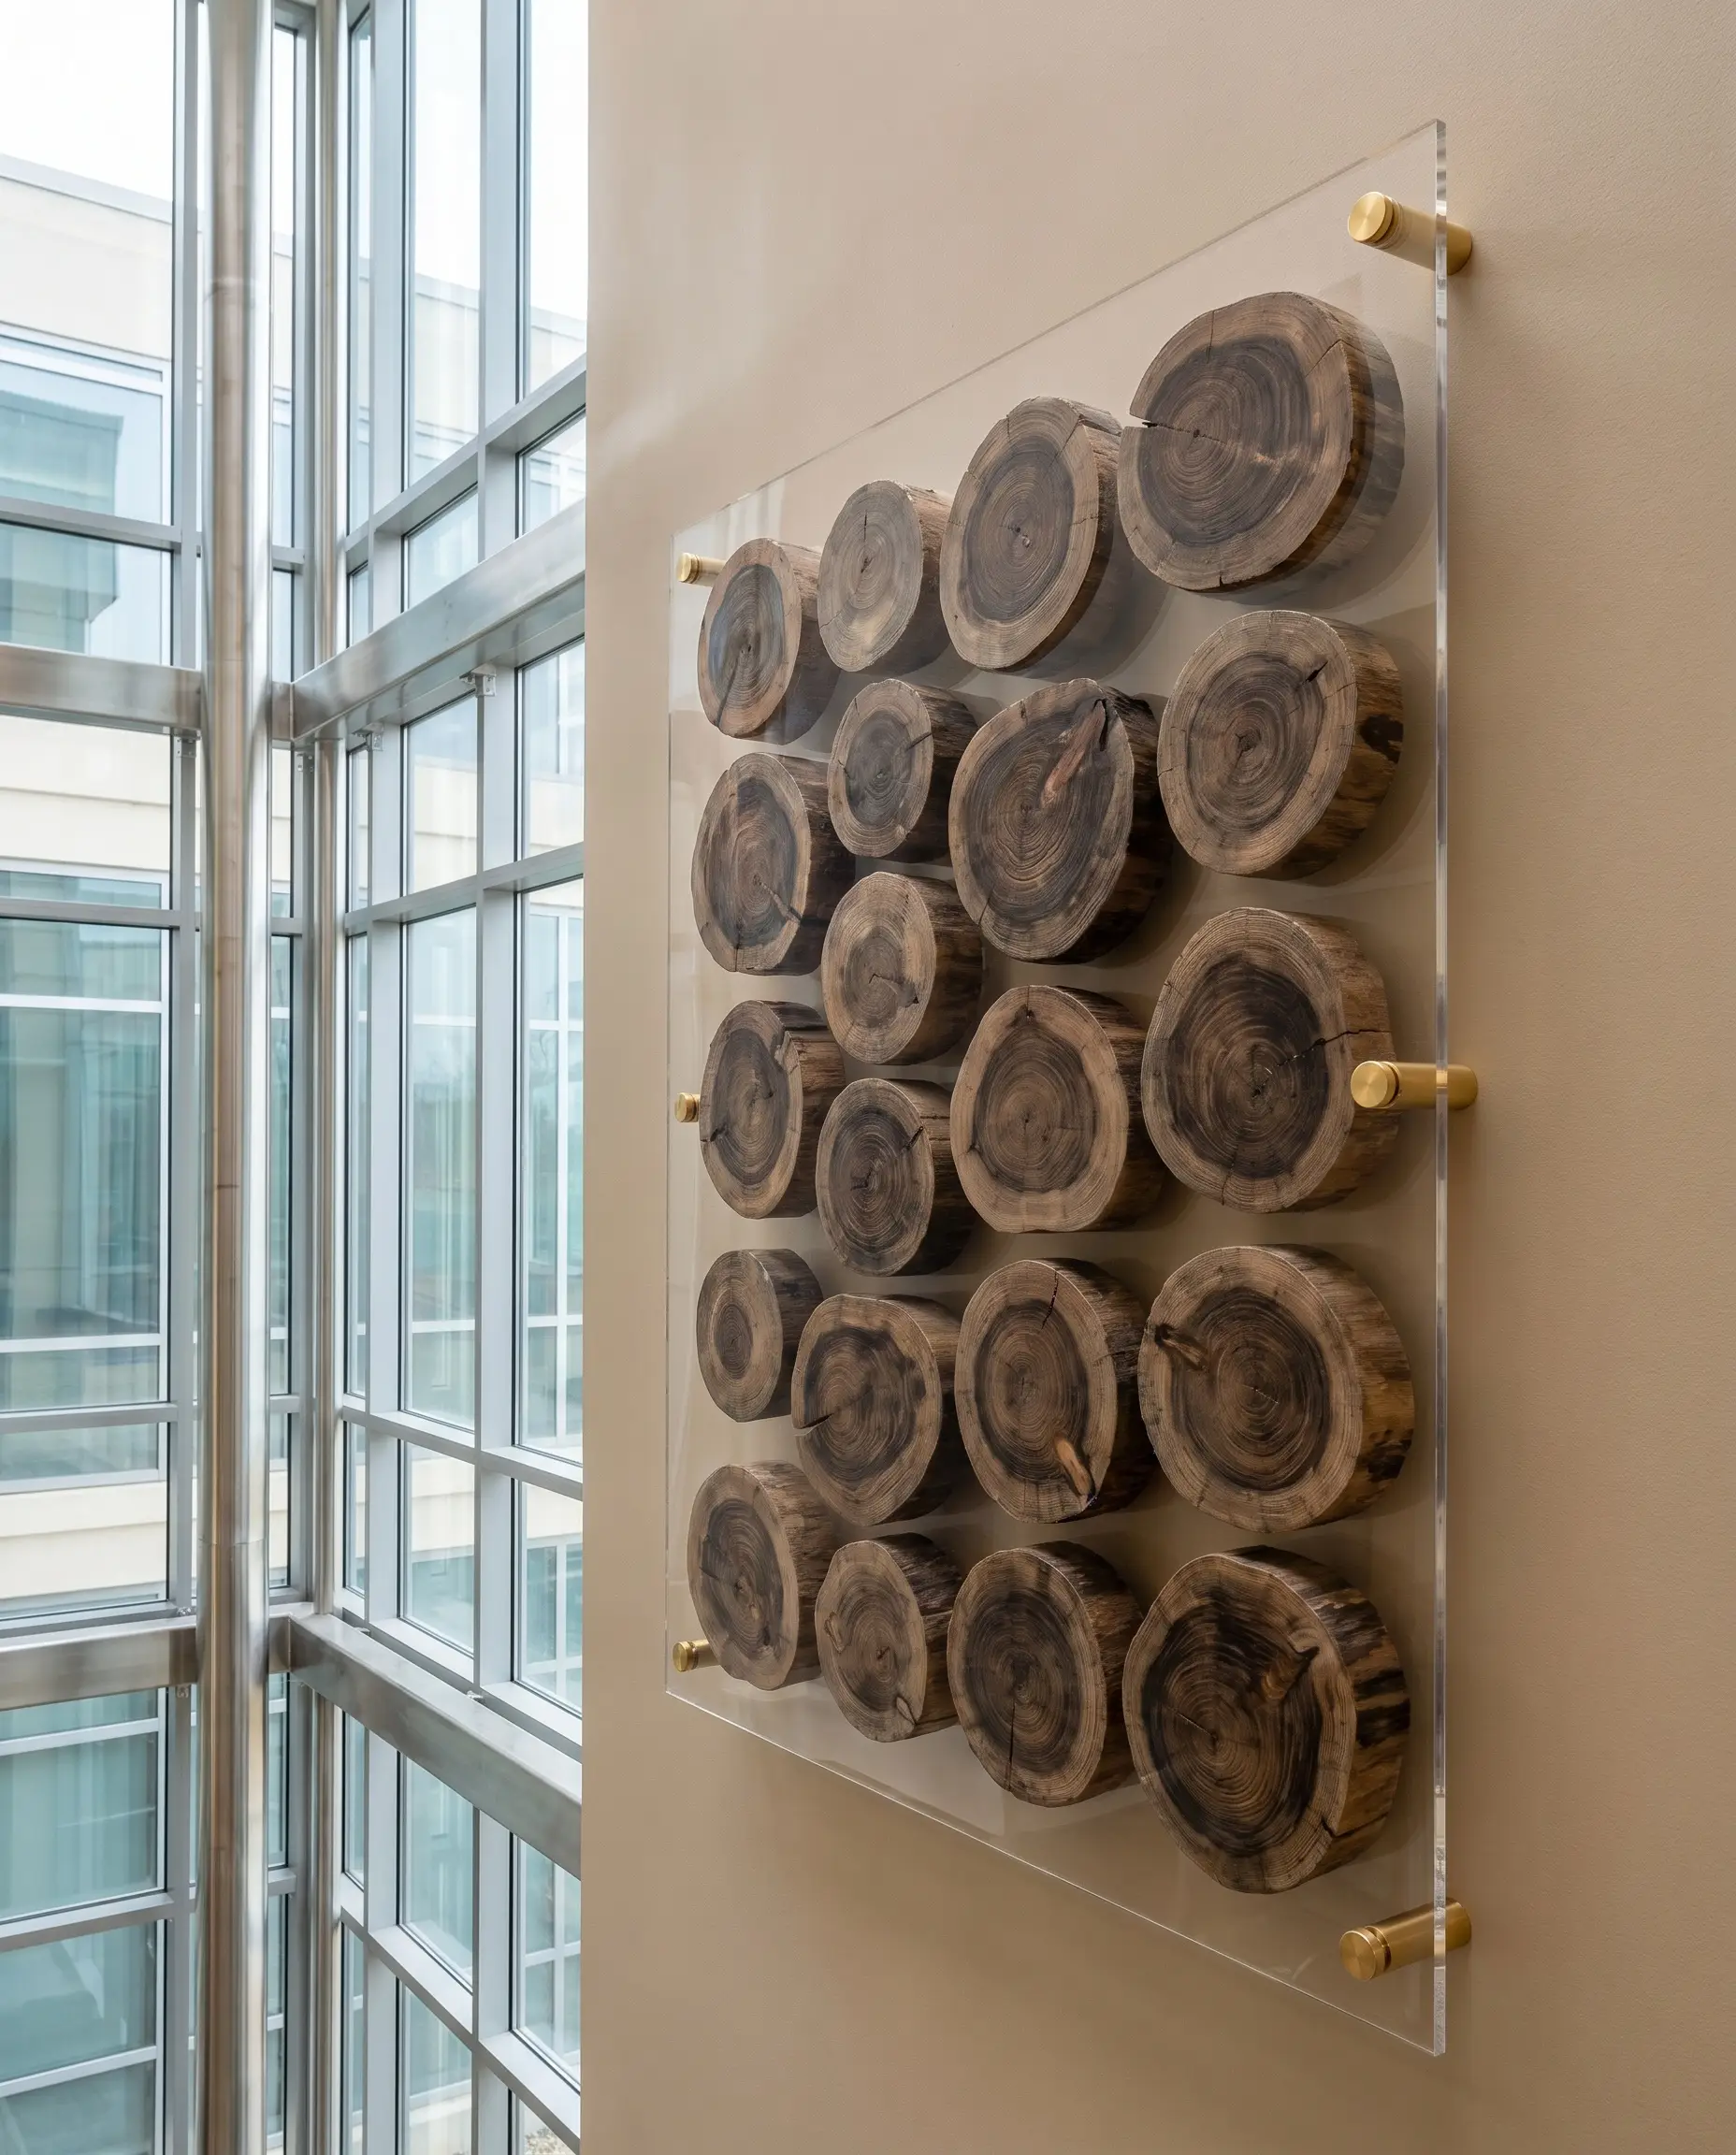
Modernize rustic elements by slicing a thick driftwood log into 2-inch cross-section discs, exposing the tight, natural wood grain. Mount these organic discs onto a large, heavy-duty clear acrylic sheet, and attach the entire panel to the wall using polished brass standoffs. The wood will appear to be floating in mid-air, allowing the wall’s paint color to act as the ultimate negative space.
This transparent mounting technique is a high-end styling secret for integrating heavily rustic textures into ultra-contemporary, glass-and-steel architecture without causing a visual clash.
Designer Secret
- Style Vibe: Contemporary Mixed-Media
- Key Material: 1/4-inch thick cast acrylic sheet.
- Hardware Match: 1-inch polished brass wall standoffs.
- Paint Match (Background): Portola Paints Roman Clay in Oatmeal
3. Mixed Media: Textural Pairings That Elevate the Wood
Driftwood should rarely stand entirely alone on a wall. Pairing it with contrasting materials—like cold metals, heavy textiles, or modern resins—forces the wood to look curated and deliberate, rather than accidentally washed ashore.
11. Pair Rough Driftwood with Polished Brass Hardware
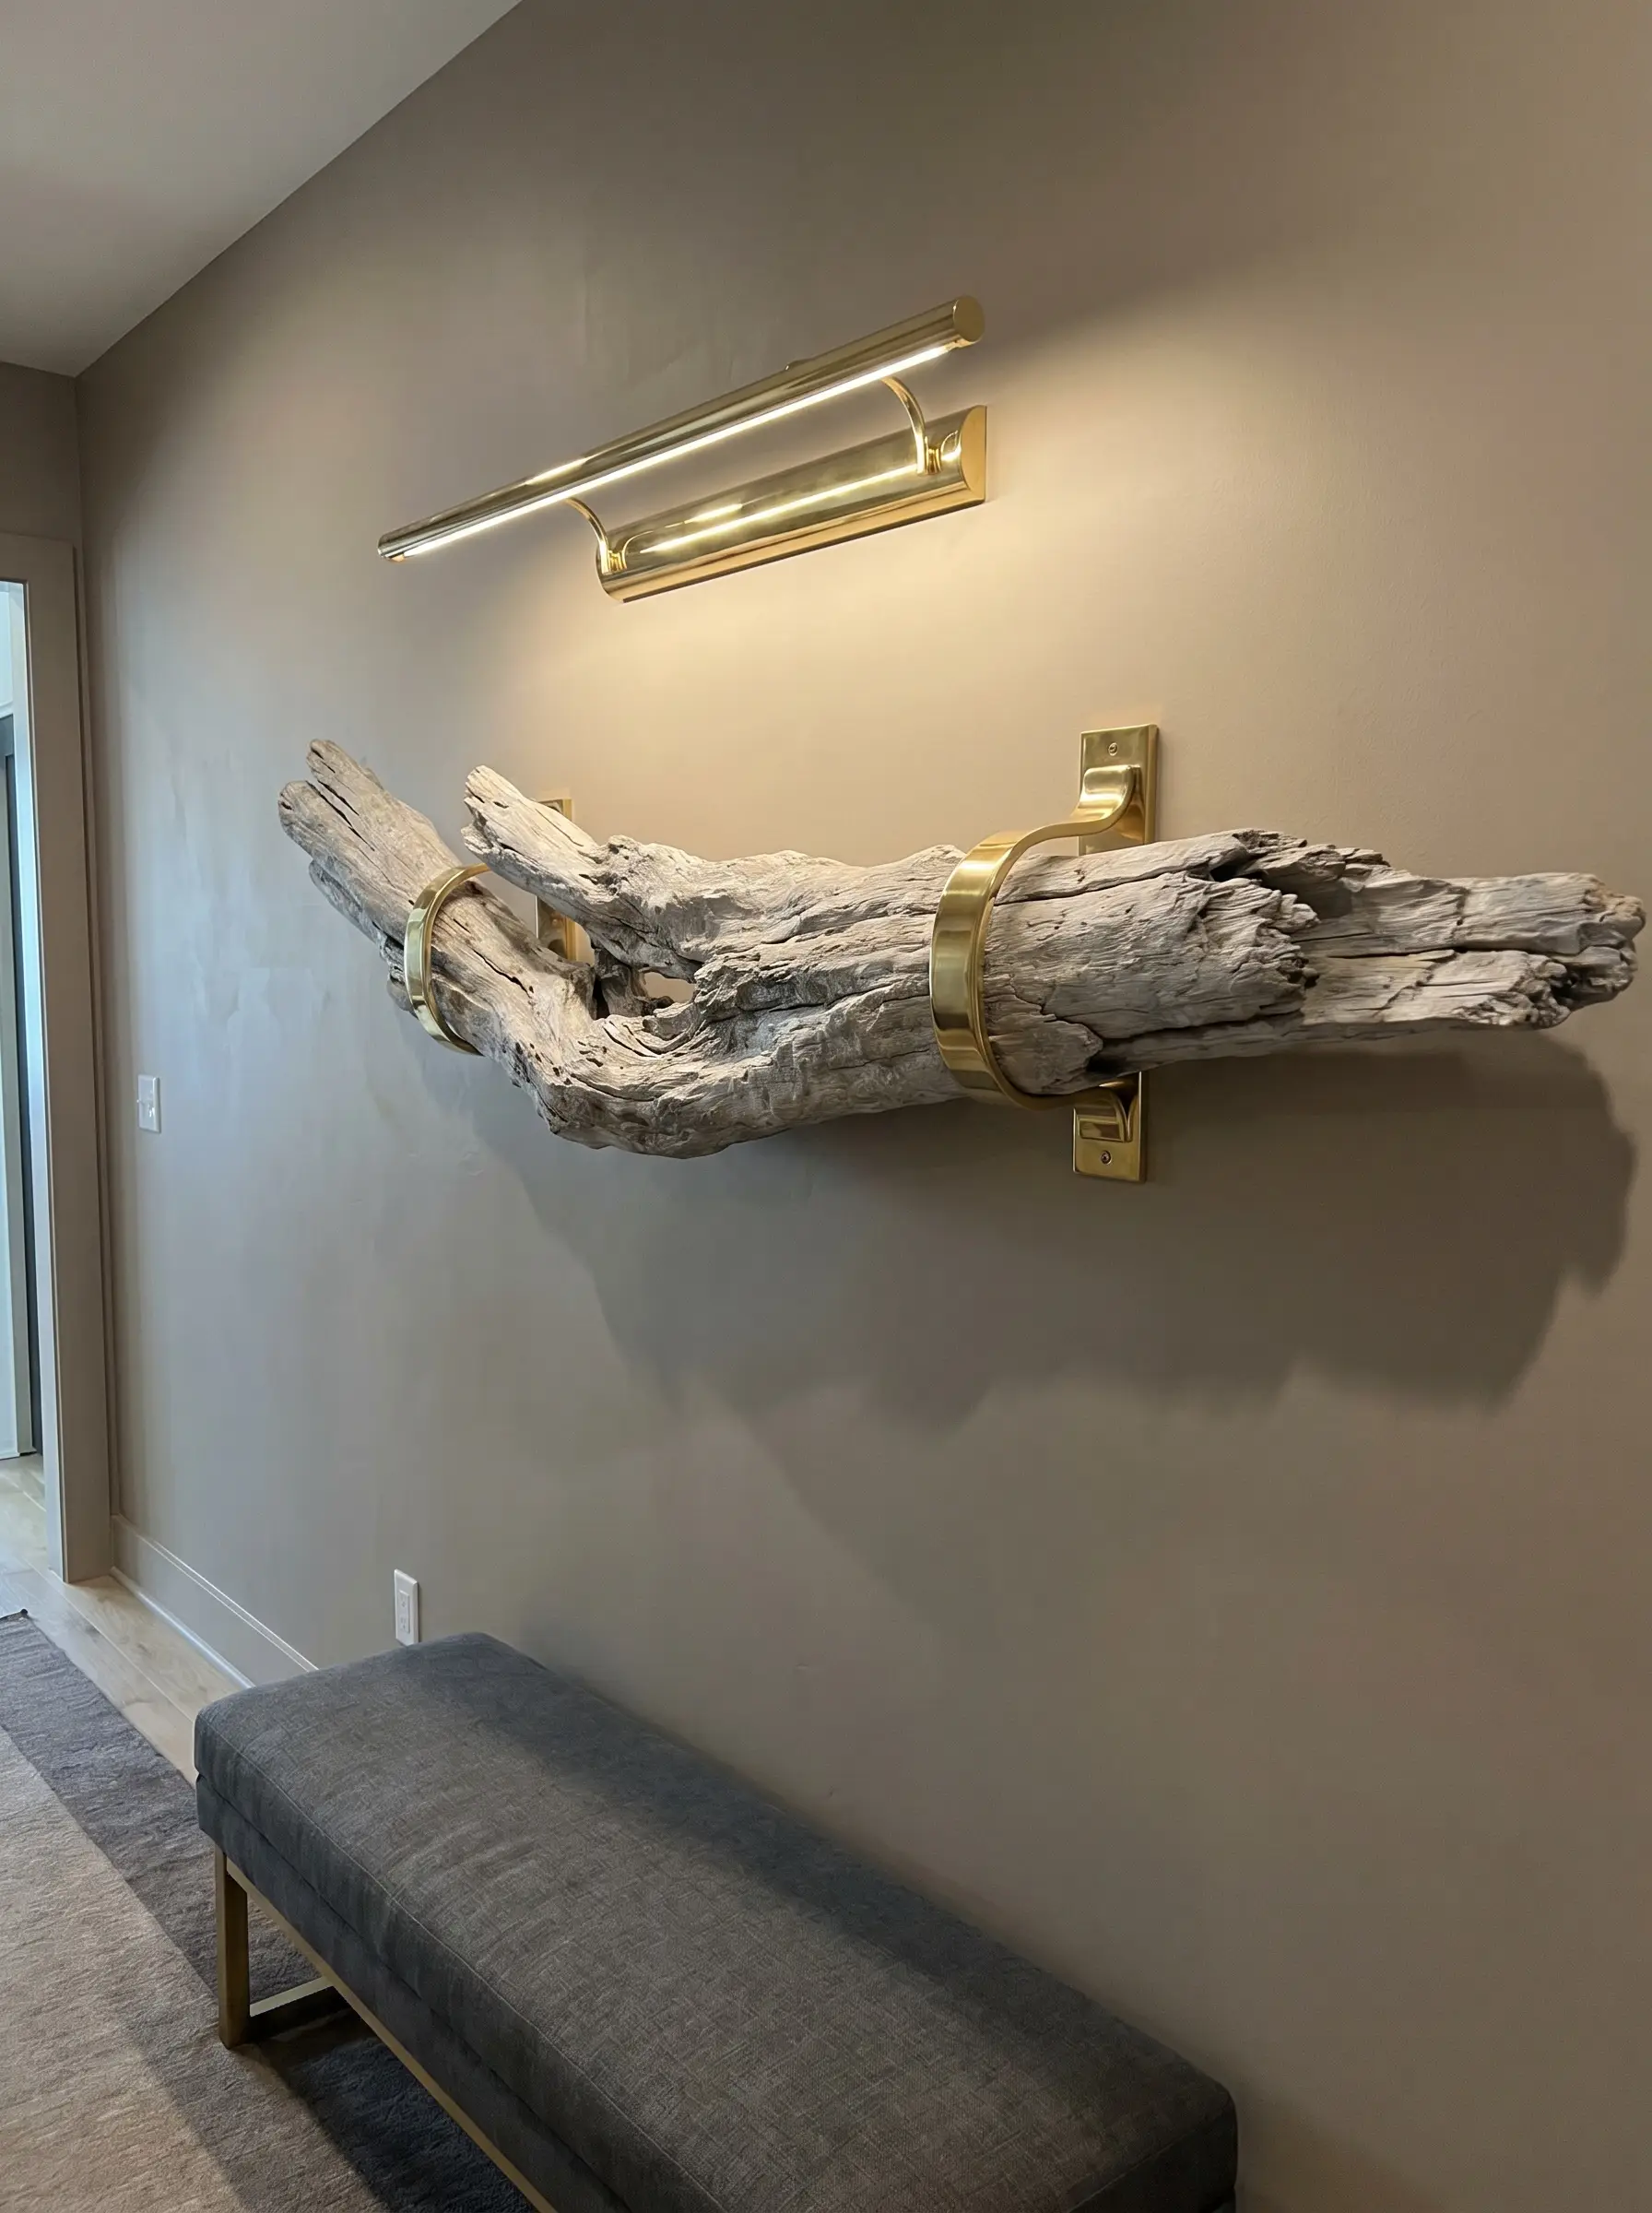
Combine raw, sun-faded gray driftwood with highly polished brass wall brackets or sleek brass picture lights for a masterclass in material tension. The warmth and sharp reflection of the brass create a luxurious, sophisticated contrast against the matte, dead texture of the porous wood.
If you are operating within an Accessible Luxury budget, upgrading your mounting hardware to solid, unlacquered brass is the single fastest way to make a piece of raw wood look wildly expensive.
Styling Rule
- Style Vibe: Accessible Luxury
- Metal Finish: Unlacquered or polished solid brass.
- Wood Tone: Pale, silvery gray (highly weathered).
- Lighting: Direct overhead brass picture light.
12. Integrate Chunky Jute and Sisal for a Tactile Tapestry
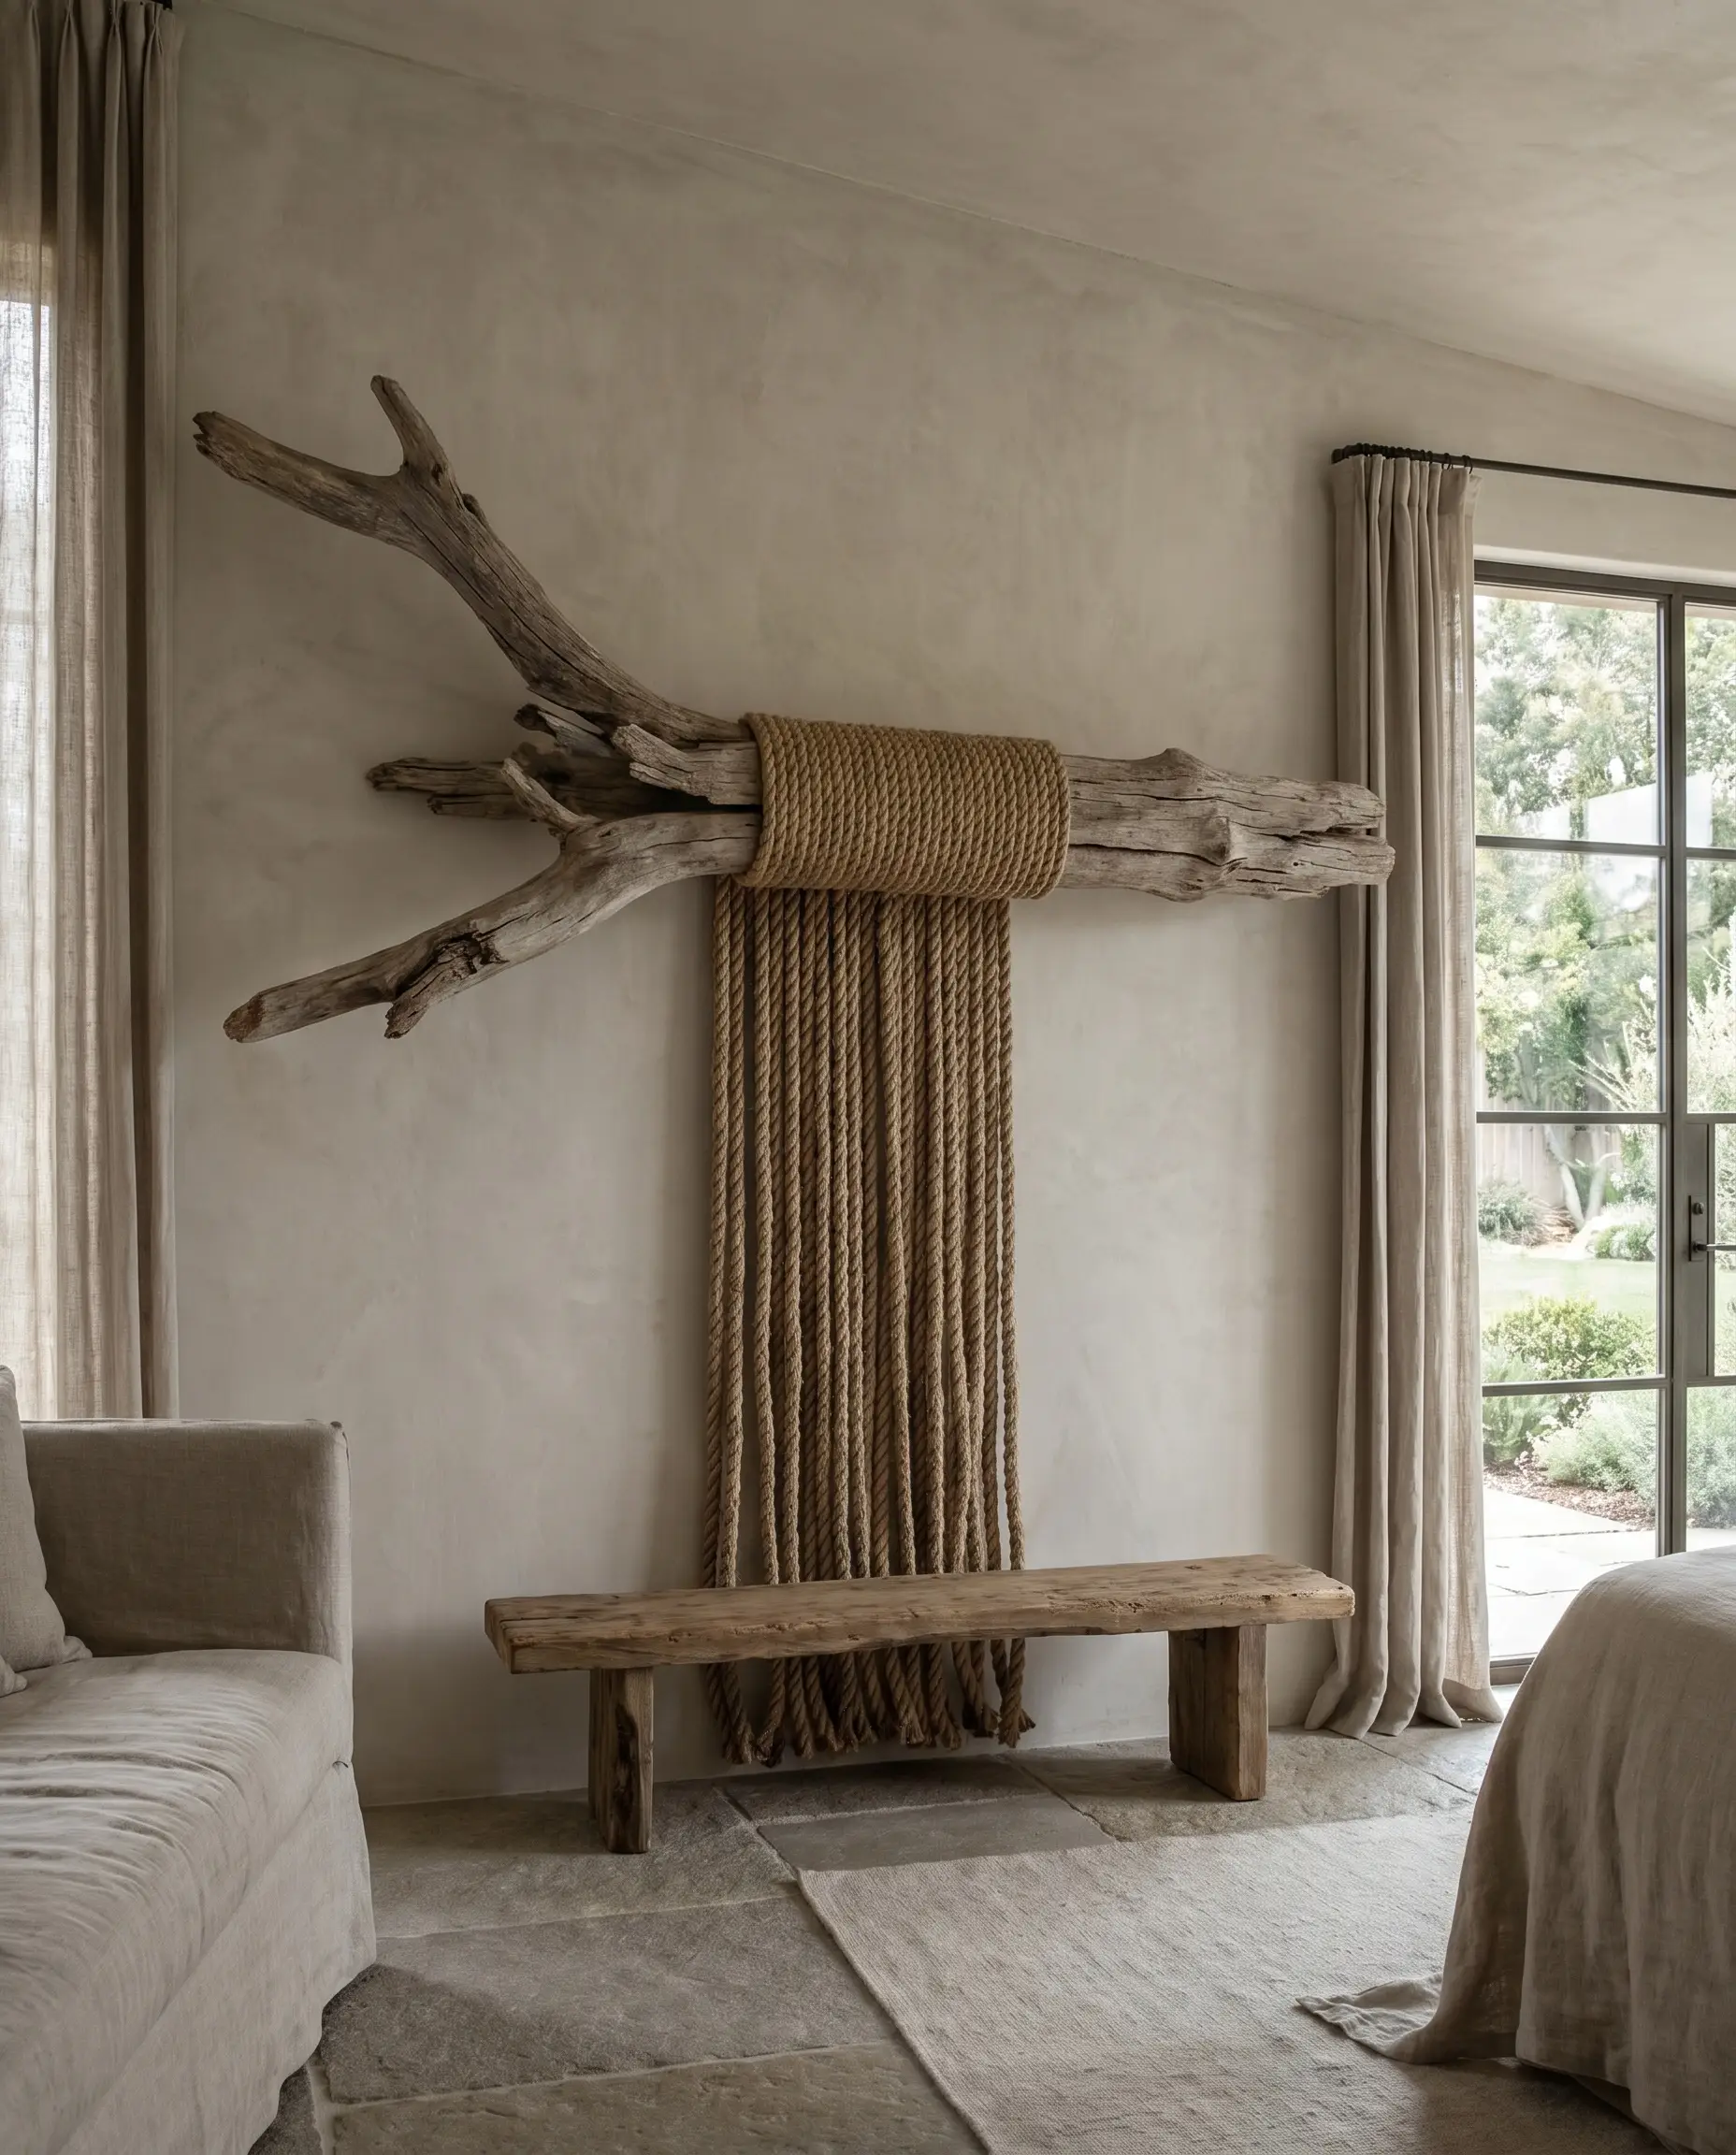
Instead of delicate, overly intricate bohemian macrame, use ultra-thick, raw jute or sisal rope tightly wrapped around the center of a massive driftwood branch. Let the heavy ropes drape cleanly and vertically down the wall, resulting in an installation that feels deeply structural, grounded, and intensely tactile.
- Style Vibe: Earthy Structuralism
- Rope Specs: 1-inch to 2-inch thick natural sisal rope.
- Technique: Wrap the rope tightly in a 6-inch solid band to create a deliberate collar.
- Avoid: Fringed edges, beads, or loose knots.
13. Combine Driftwood with Hand-Forged Matte Iron
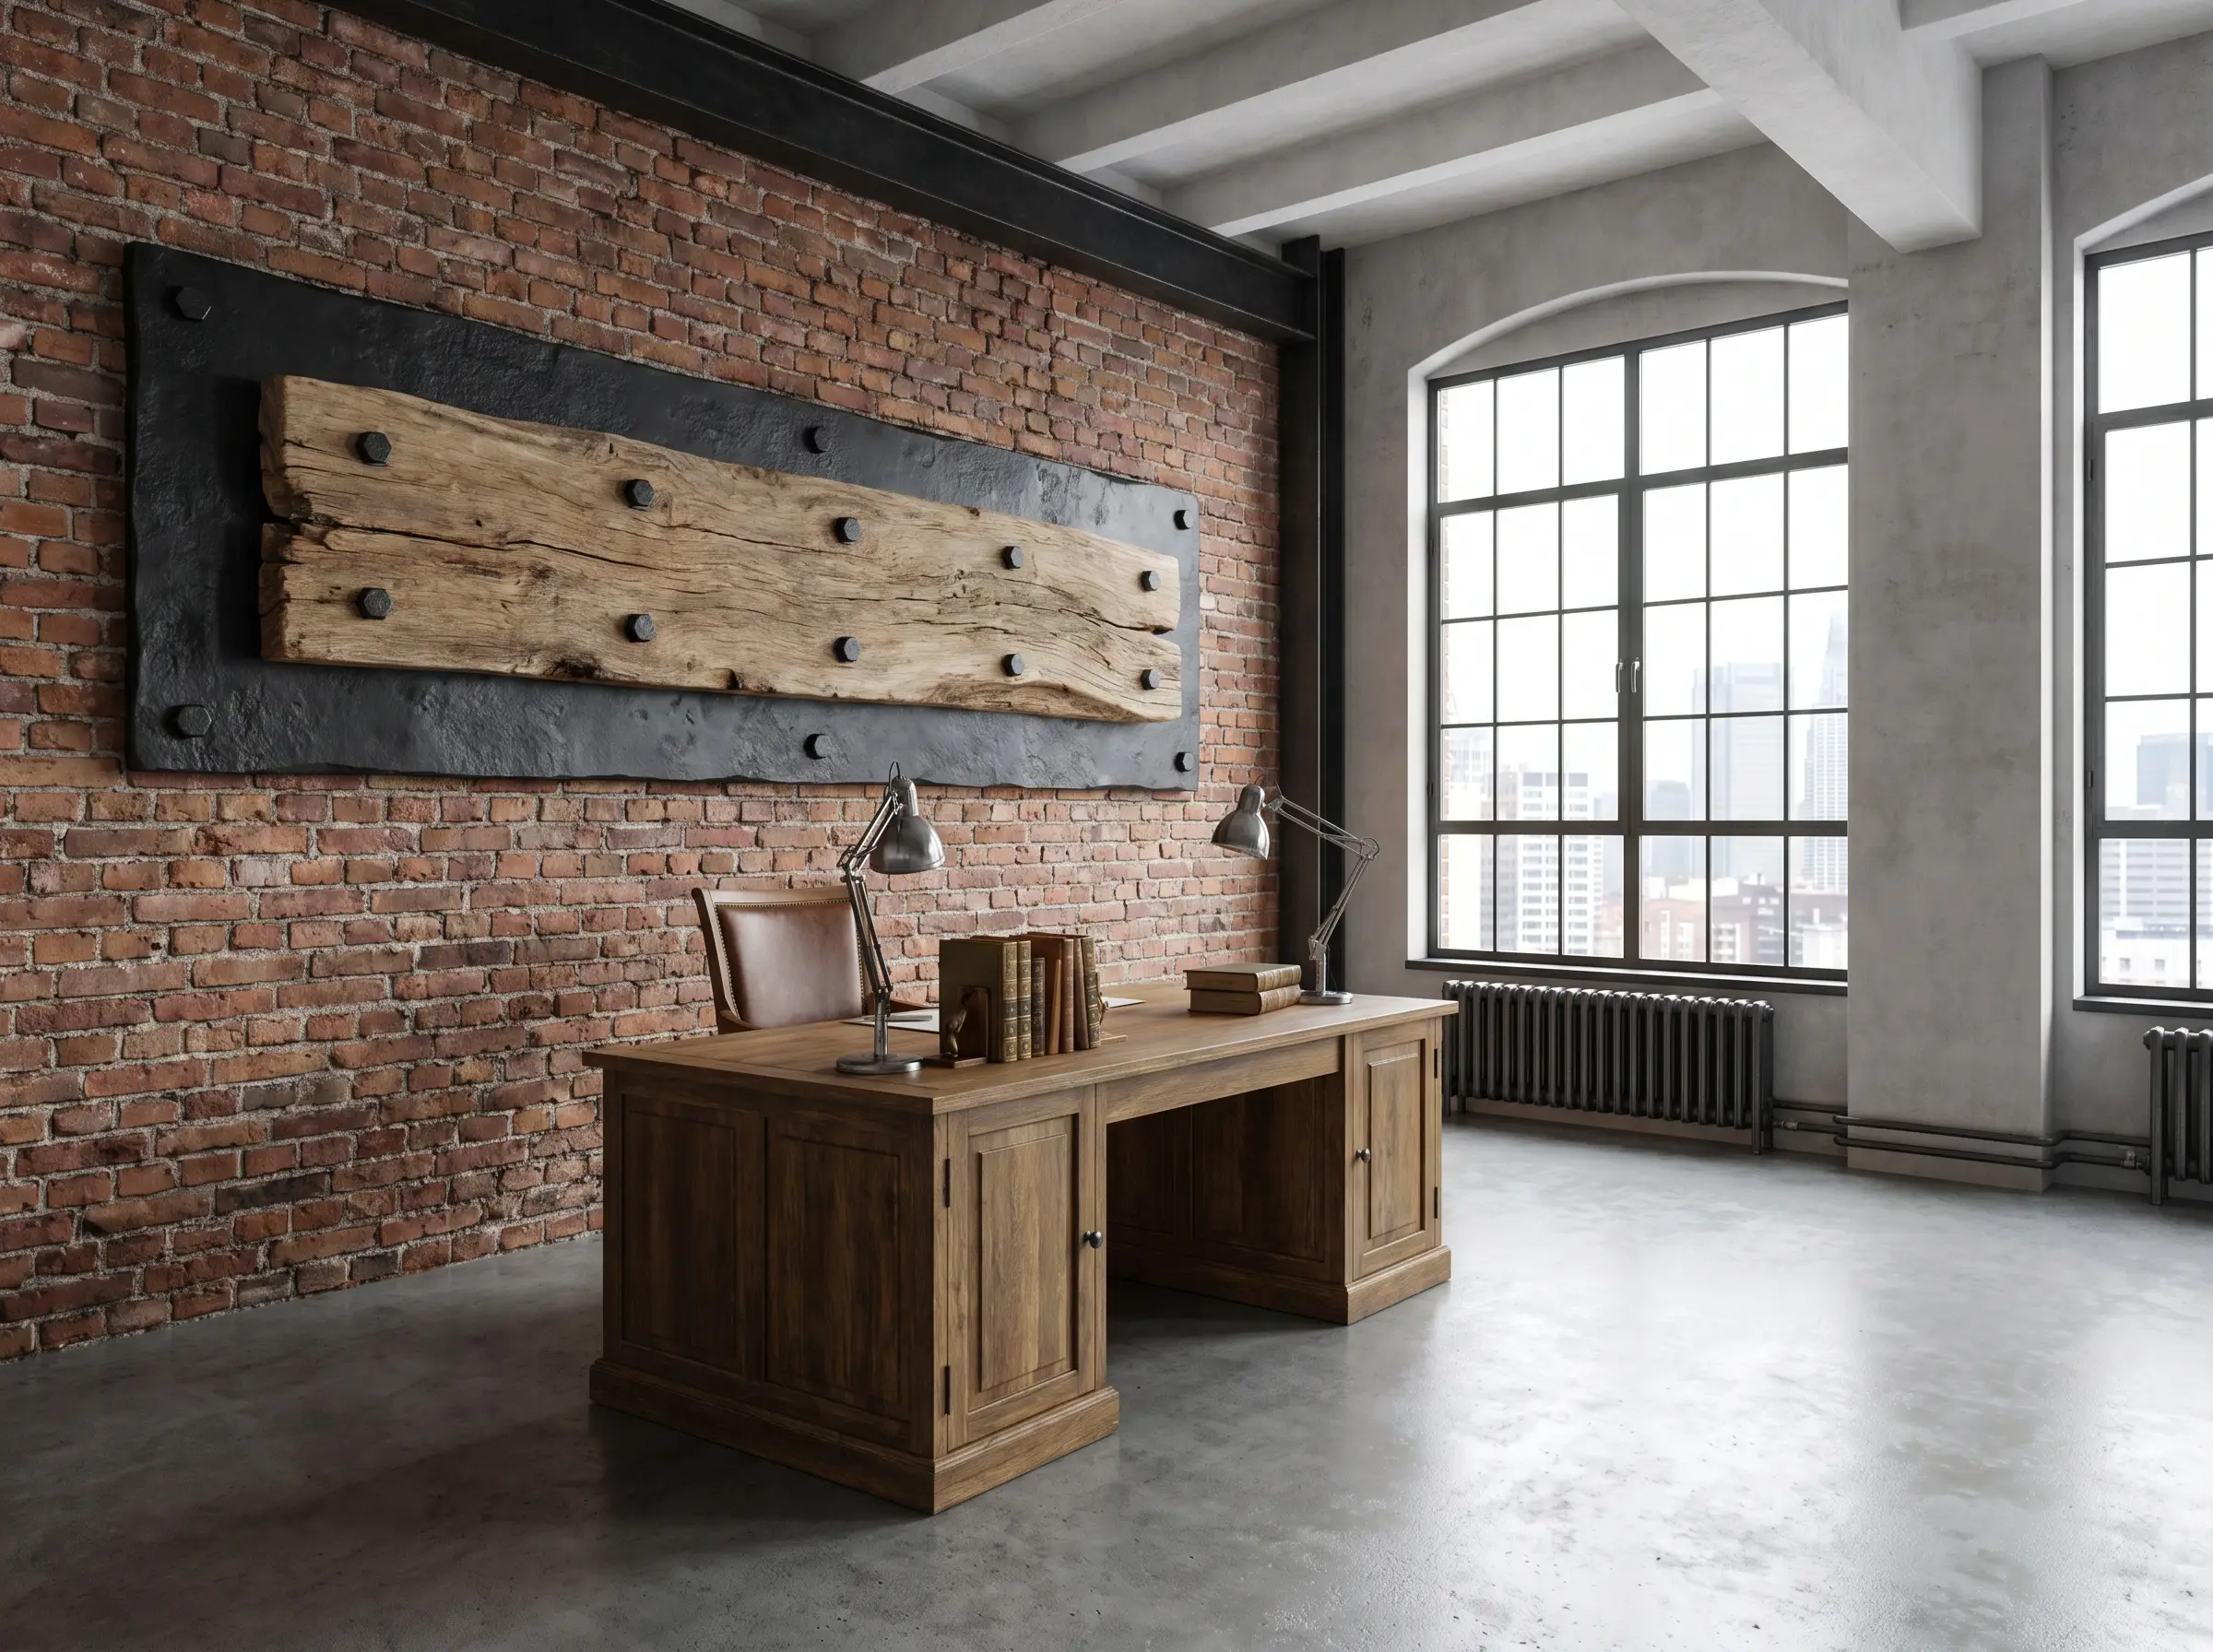
Mount heavily textured driftwood onto custom, hand-forged black iron backplates to appeal to industrial and rustic-modern architectural tastes. The heavy, unyielding industrial weight of the iron anchors the lightweight, porous wood, making this pairing perfect for a masculine home office or a concrete-clad loft space.
- Style Vibe: Industrial Organic
- Metal Specs: 1/4-inch plate steel or hand-forged iron flats.
- Mounting Method: Bolt the iron directly into the wood using blackened hex-head lags.
- Wall Pairing: Exposed brick or board-formed concrete.
14. Infuse Driftwood Divots with Matte Resin
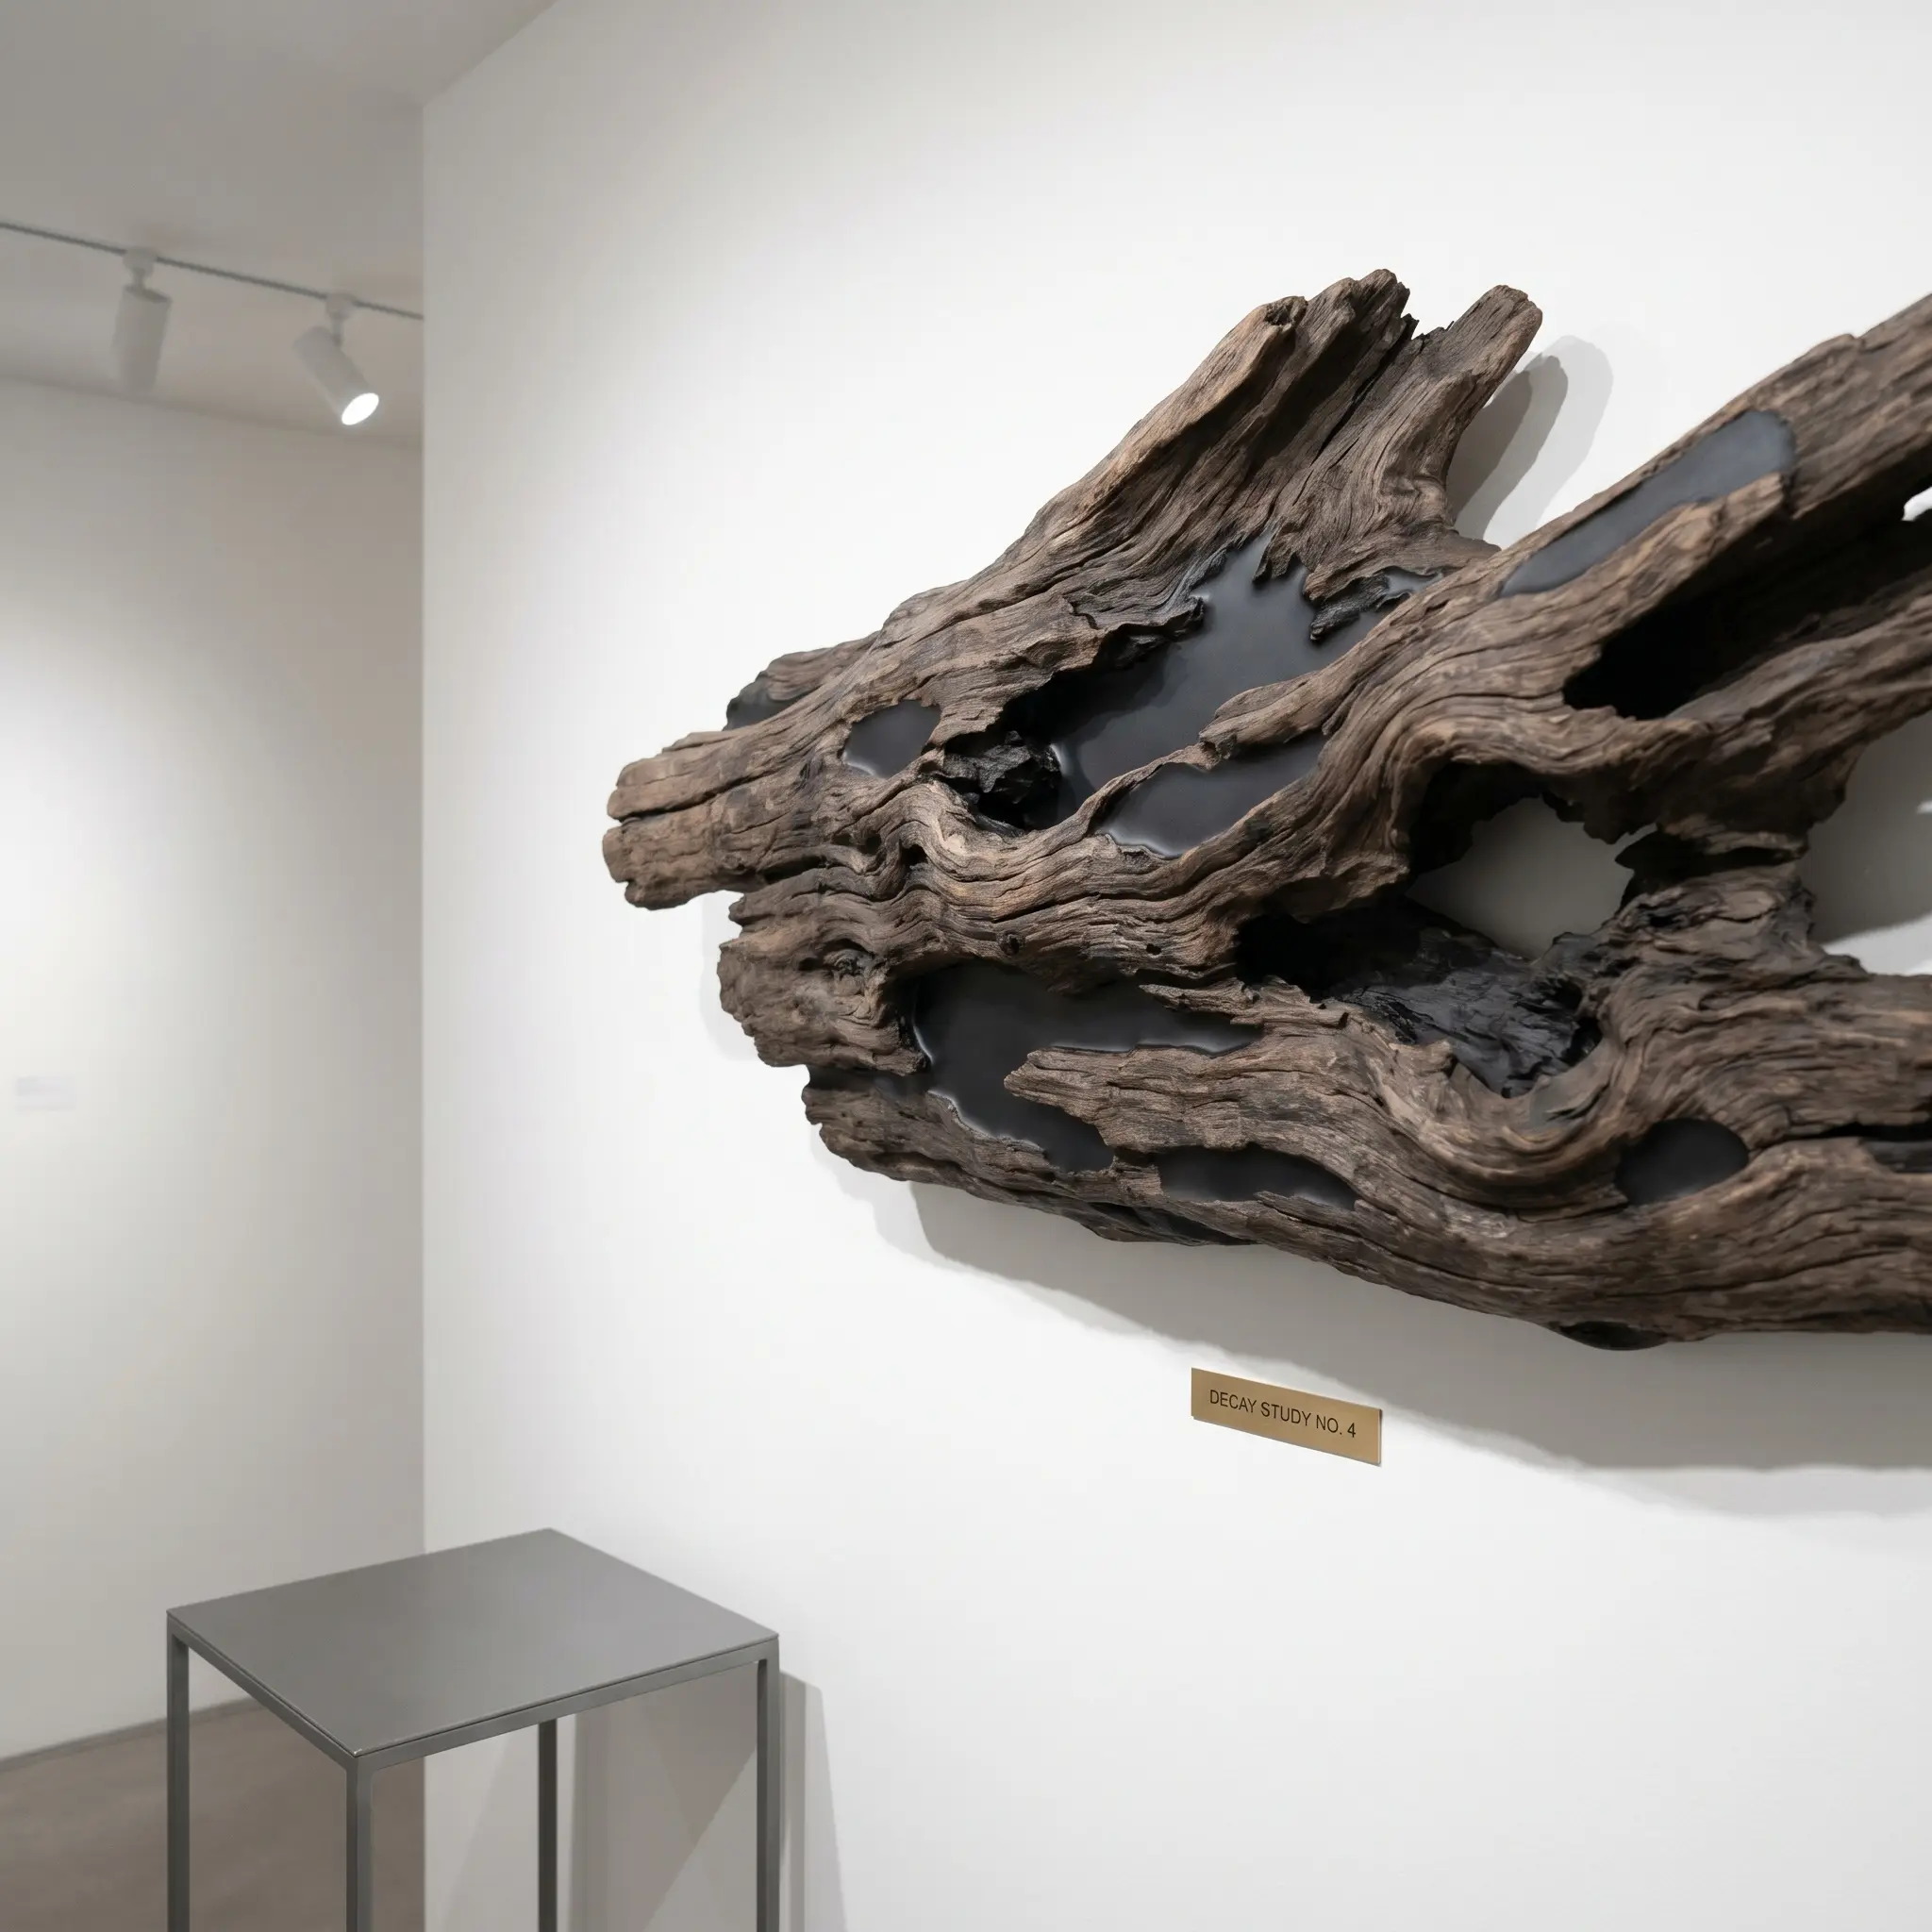
For driftwood pieces featuring deep cracks, fissures, or natural rot pockets, fill the voids with a matte, opaque resin in charcoal or bone white, then sand the entire surface perfectly flush. This creates a sleek, mixed-media art piece that highlights the natural decay while completely avoiding the dated, glossy aesthetic of bright blue “river table” resins.
- Style Vibe: Contemporary Artisan
- Resin Spec: High-viscosity epoxy tinted with opaque matte pigments.
- Finishing Tool: Random orbital sander stepping up to 400 grit.
- Design Mandate: Absolutely no translucent, bright, or glossy colored resins.
15. Apply Strict Color-Blocking with Chalk Paint
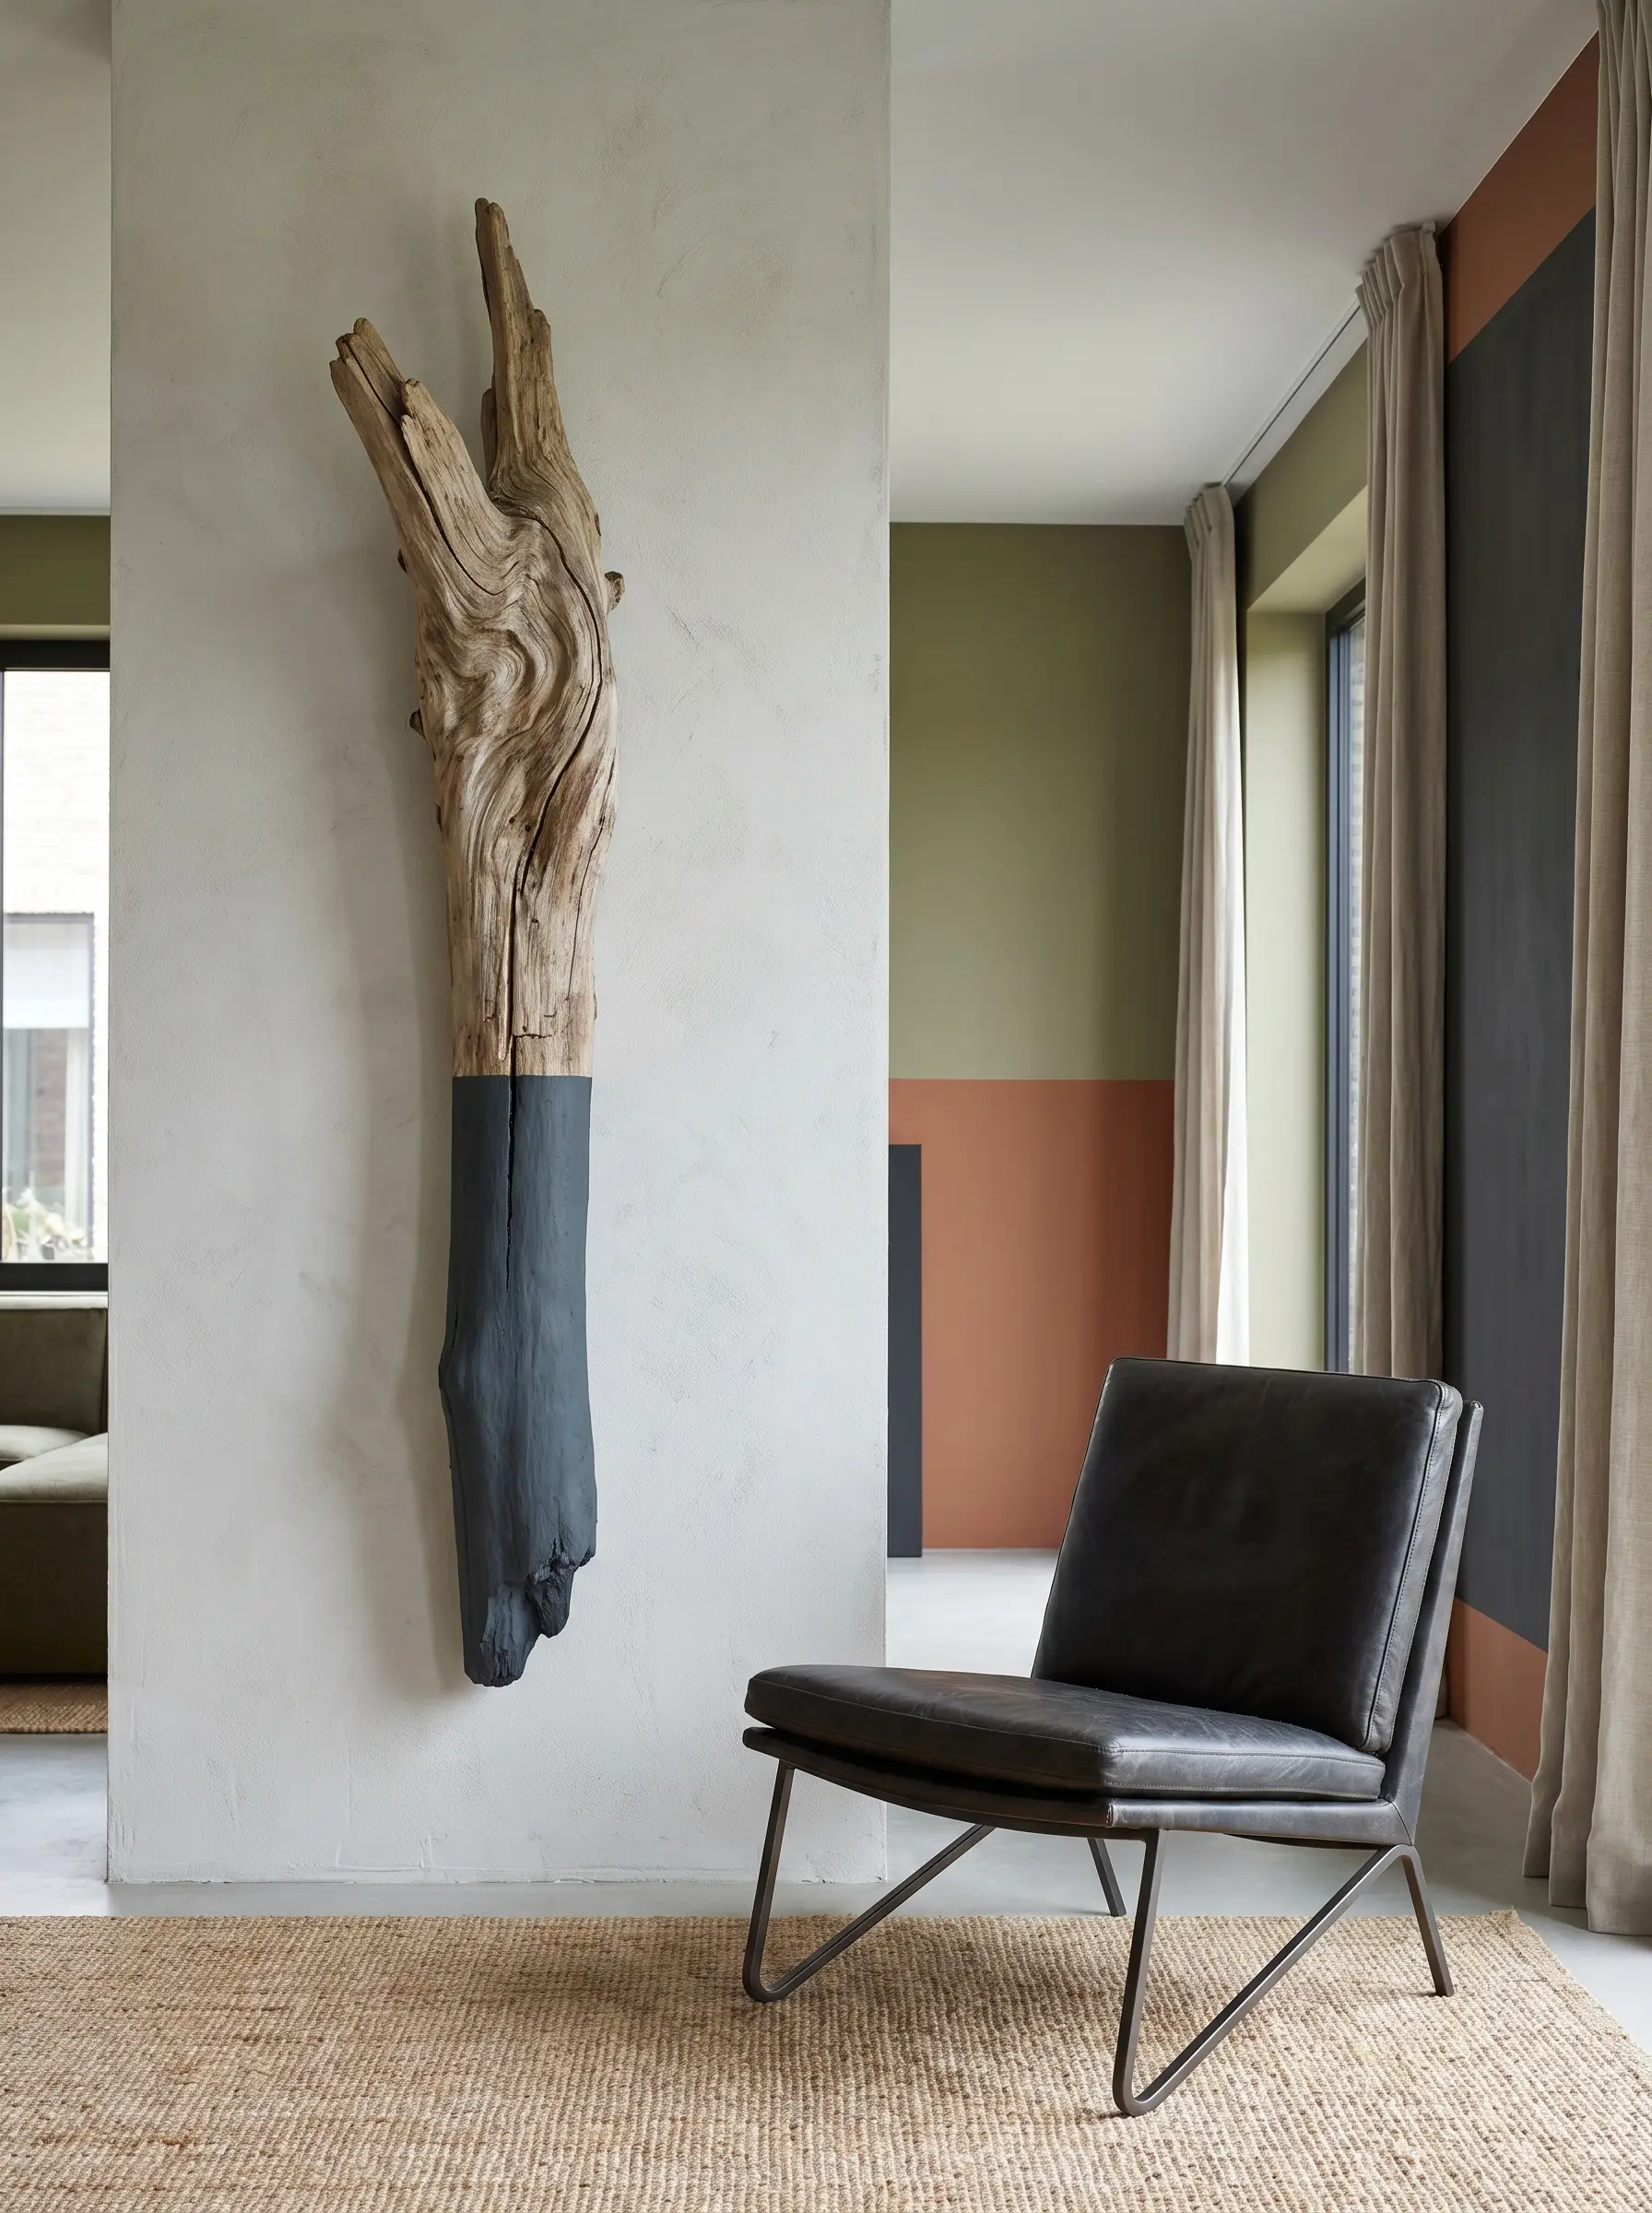
Introduce color in a modern, highly controlled manner by taping off the bottom third of a large, vertical driftwood branch and painting it with a flat, matte chalk paint. Leave the top two-thirds entirely raw; the stark, razor-sharp taped line against the chaotic, organic wood grain feels highly contemporary and intentional.
- Style Vibe: Modernist Color-Block
- Paint Spec: Ultra-matte chalk paint to maintain the earthy, non-reflective aesthetic.
- Tape Requirement: High-adhesion laser edge painter’s tape to prevent bleeding into the wood grain.
- Paint Match: Farrow & Ball Down Pipe (No. 26)
4. Functional Driftwood Wall Art (Form Meets Purpose)
Wall art does not have to be purely decorative to be beautiful. When carefully selected and rigorously engineered, driftwood can brilliantly blur the line between a curated sculpture and highly functional home hardware.
16. Install Floating Driftwood Console Shelves
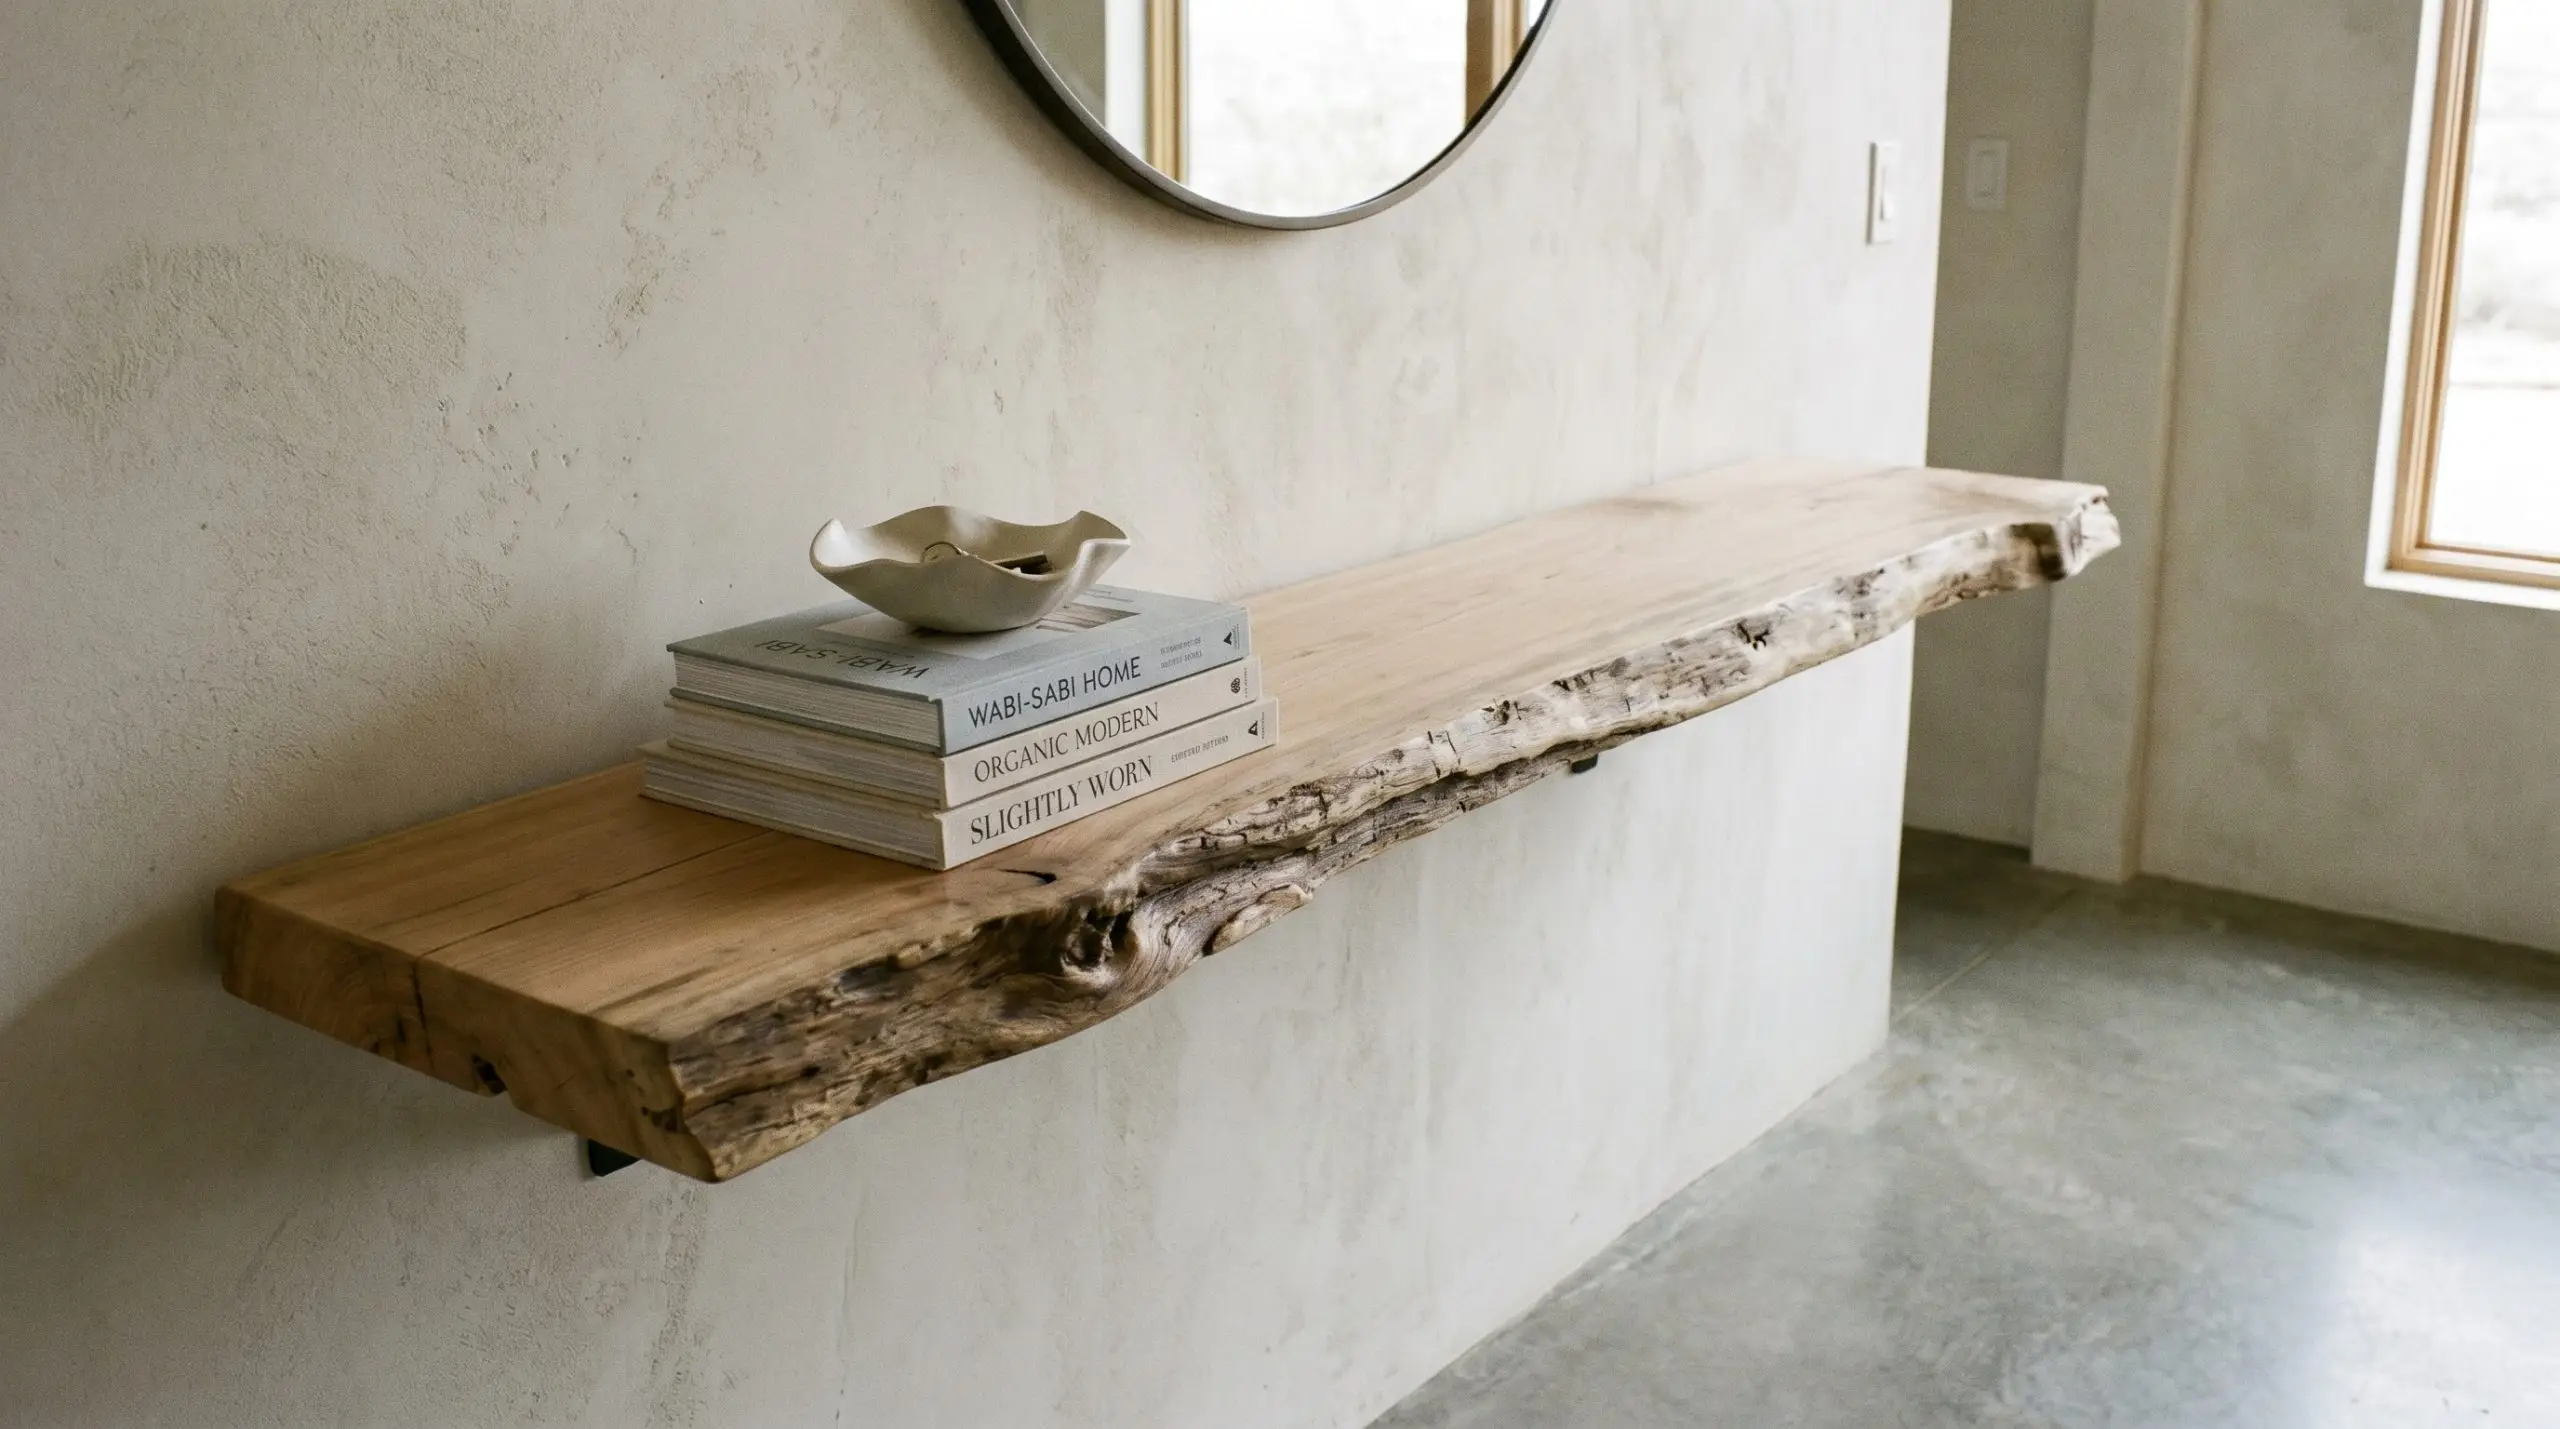
Select a naturally flat, wide piece of driftwood planking and mount it securely beneath a wall-mounted television or in a minimal entryway to act as a floating console surface. It serves as a striking piece of organic art while simultaneously holding keys, mail, or a highly curated stack of linen-bound design books.
- Style Vibe: Functional Minimalism
- Hardware Mandate: Heavy-duty concealed floating shelf brackets drilled directly into wall studs.
- Wood Prep: Sand the top plane perfectly flat while leaving the live-edge front intact.
- Weight Capacity: Ensure brackets are rated for at least 50 lbs.
17. Craft Backlit Driftwood Wall Sconces
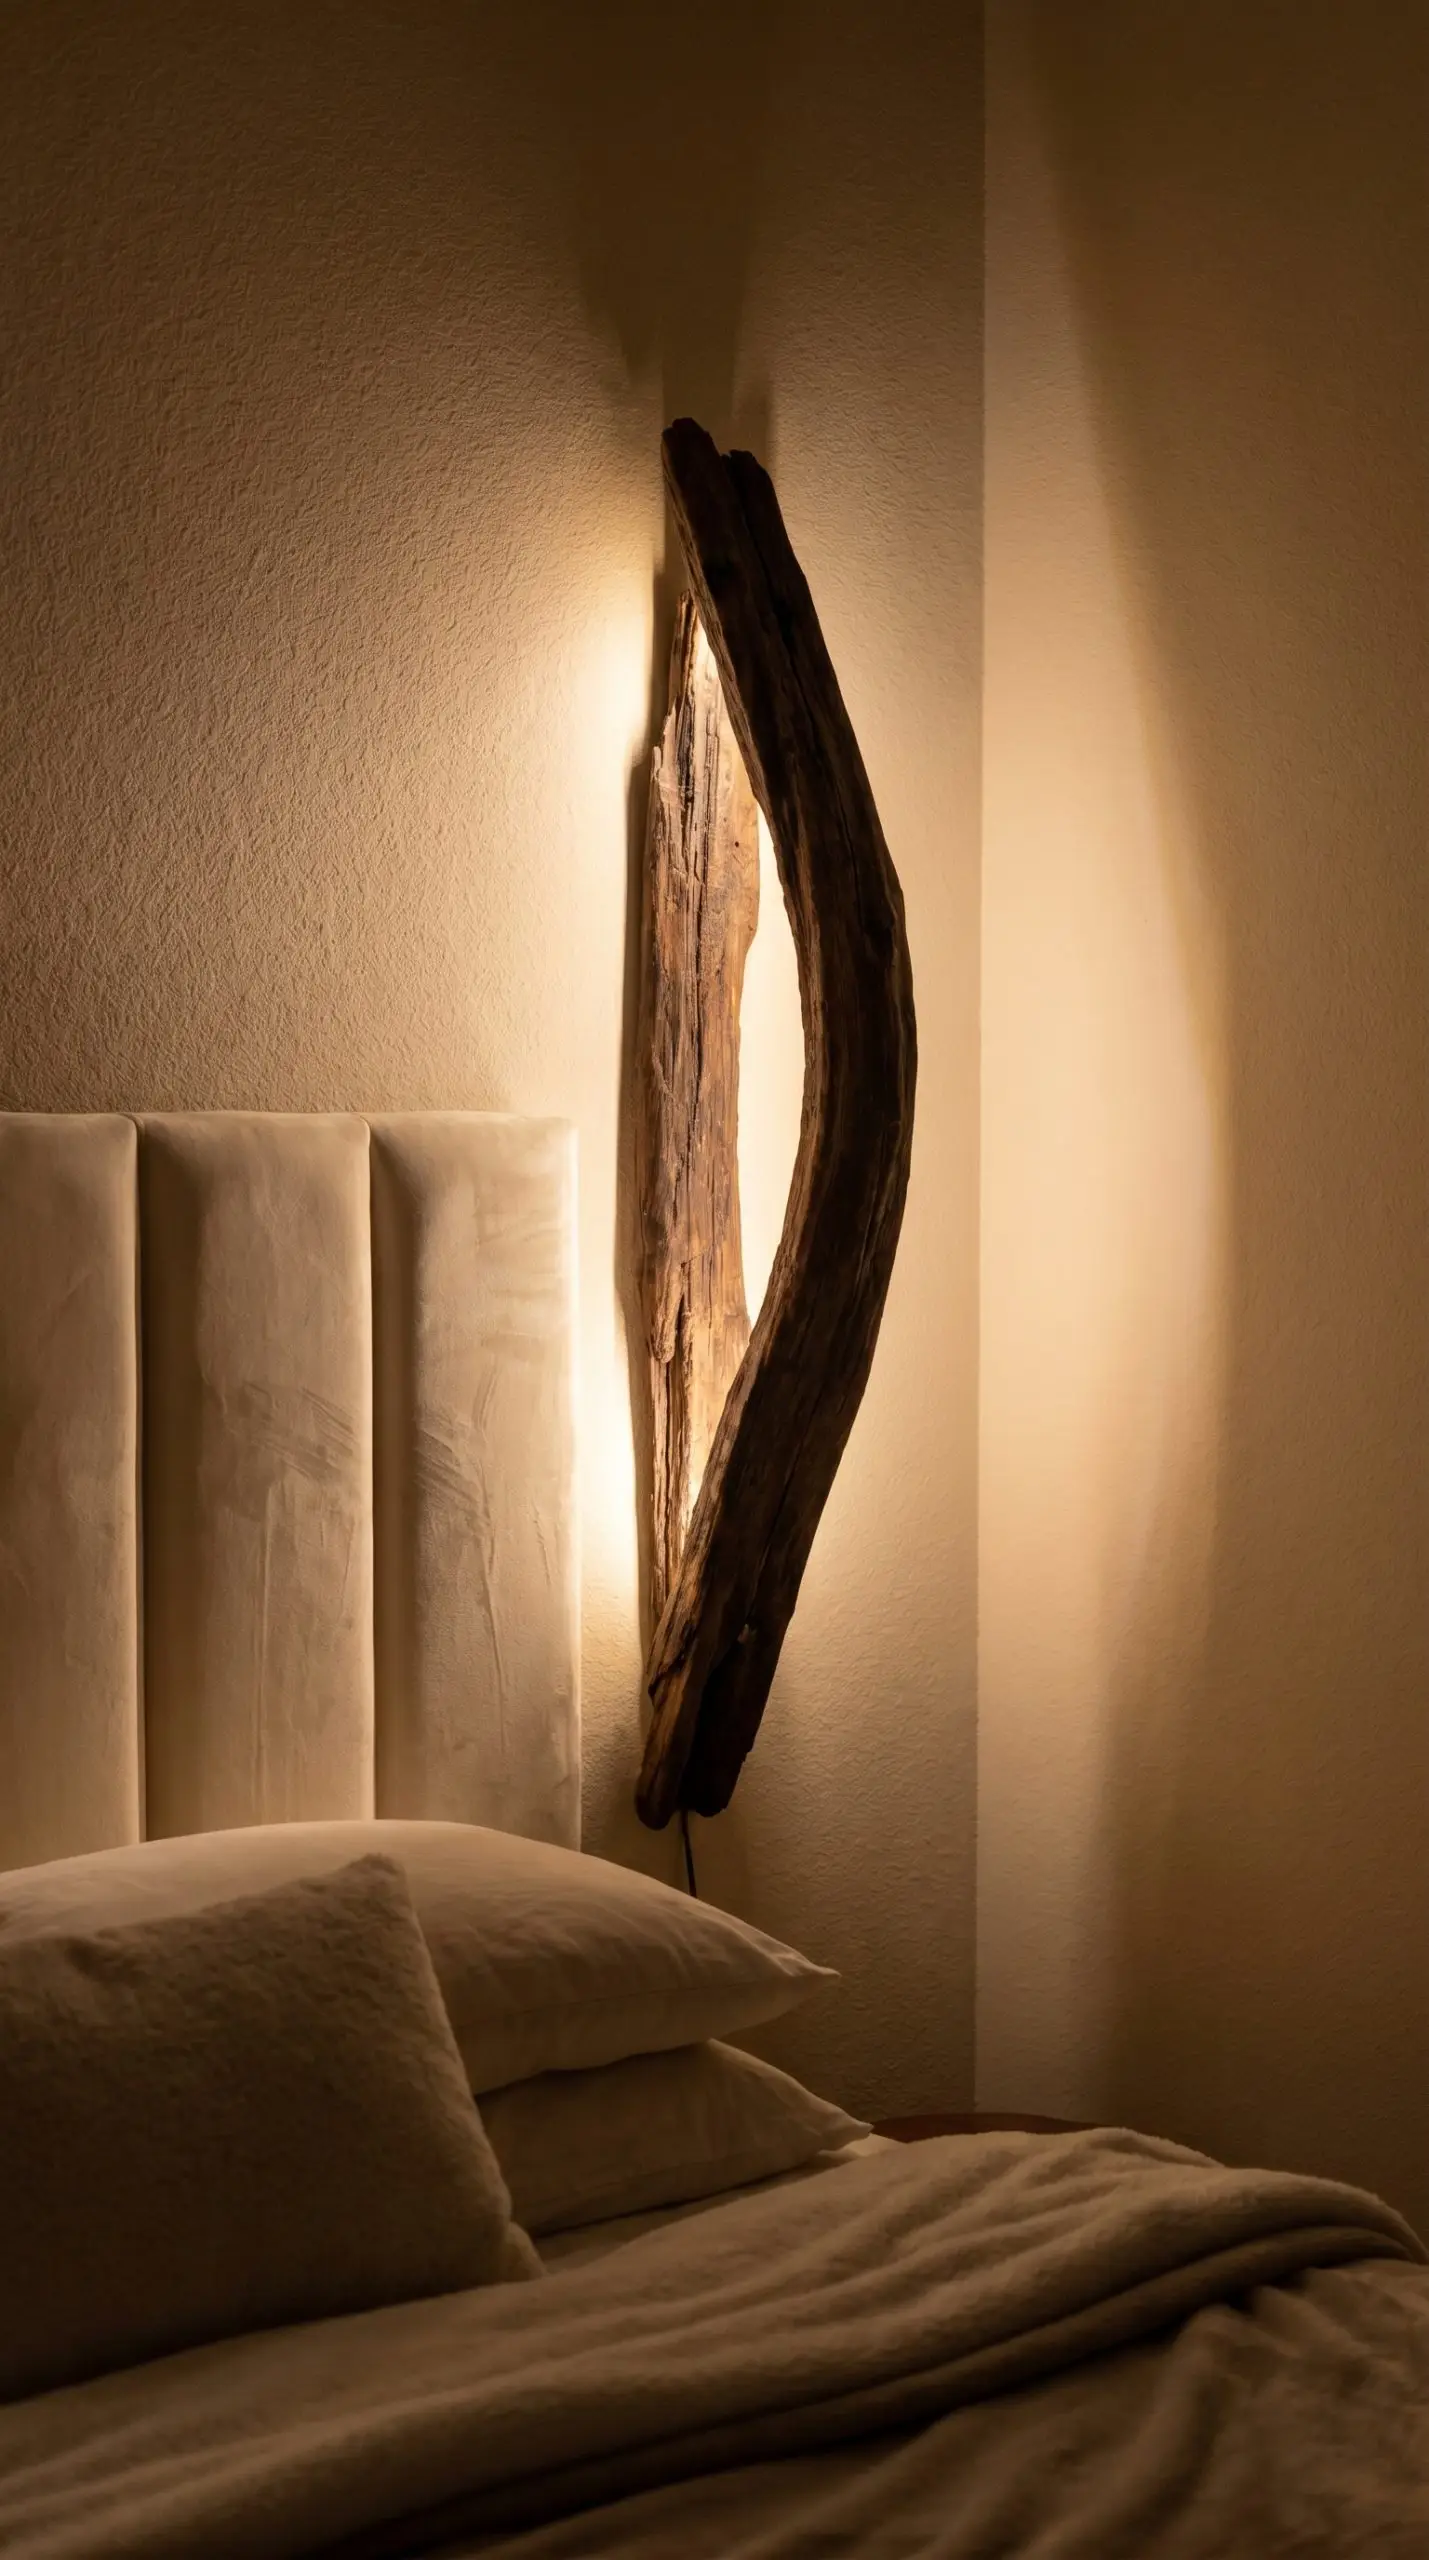
Mount a naturally curved piece of driftwood vertically on the drywall and install a hidden LED light strip directly behind the curve’s apex. When illuminated, the wood transforms into a glowing, dark silhouette, acting as a sculptural wall sconce that provides moody, sophisticated ambient lighting in a hallway or primary bedroom.
- Style Vibe: Ambient Architectural
- Lighting Spec: 2700K warm white LED strip (to ensure the light looks high-end, not clinical).
- Power Source: Hardwired into the wall or routed via a hidden, paint-matched cord channel.
- Placement: Flanking a primary bedroom headboard.
18. Lean an Oversized Driftwood Floor-to-Wall Mirror
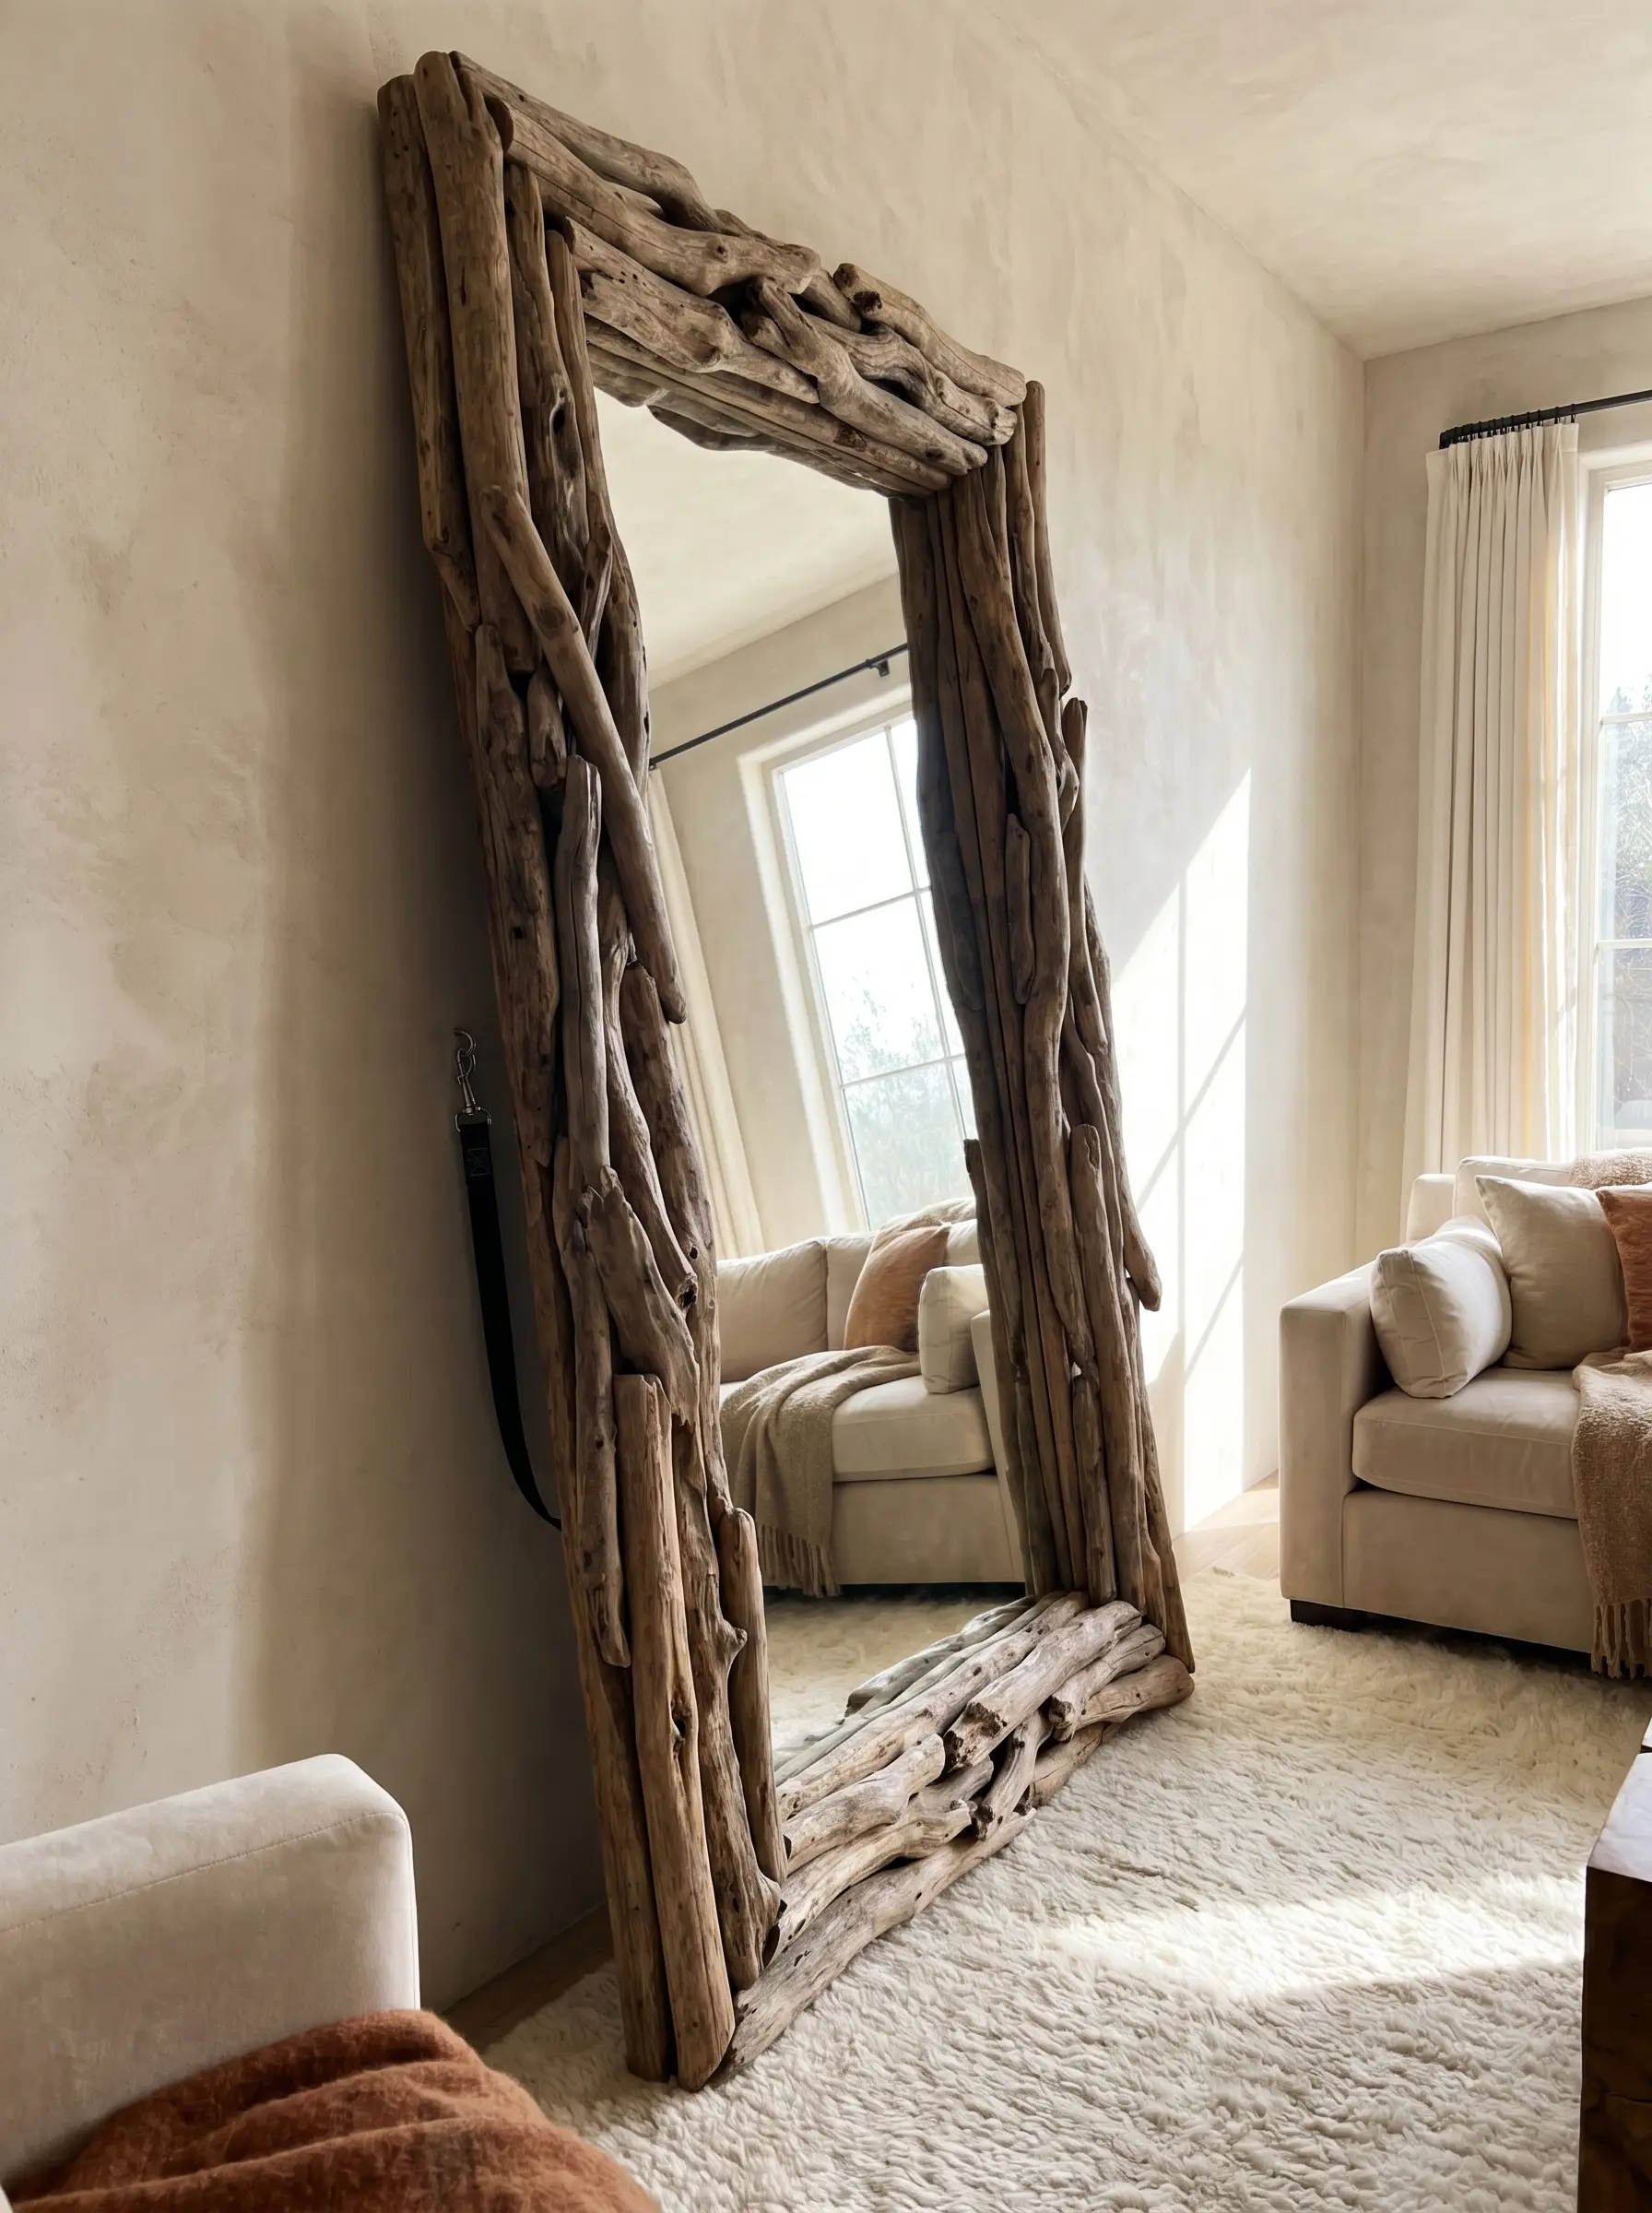
Frame a massive, 6-foot floor mirror entirely in thick, interlocking driftwood logs, and lean it aggressively against a living room or bedroom wall. The monumental scale makes it a commanding piece of art that bounces natural light around the room, serving as a High-End Bespoke alternative to the standard, ubiquitous brass floor mirror.
- Style Vibe: Bespoke Luxury
- Scale: Minimum 72 inches tall by 36 inches wide.
- Safety Protocol: Secure the top frame to the wall using a heavy-duty anti-tip anchor.
- Glass Spec: Opt for low-iron glass for pure, non-green reflection.
19. Build a Sculptural Entryway Coat Rack
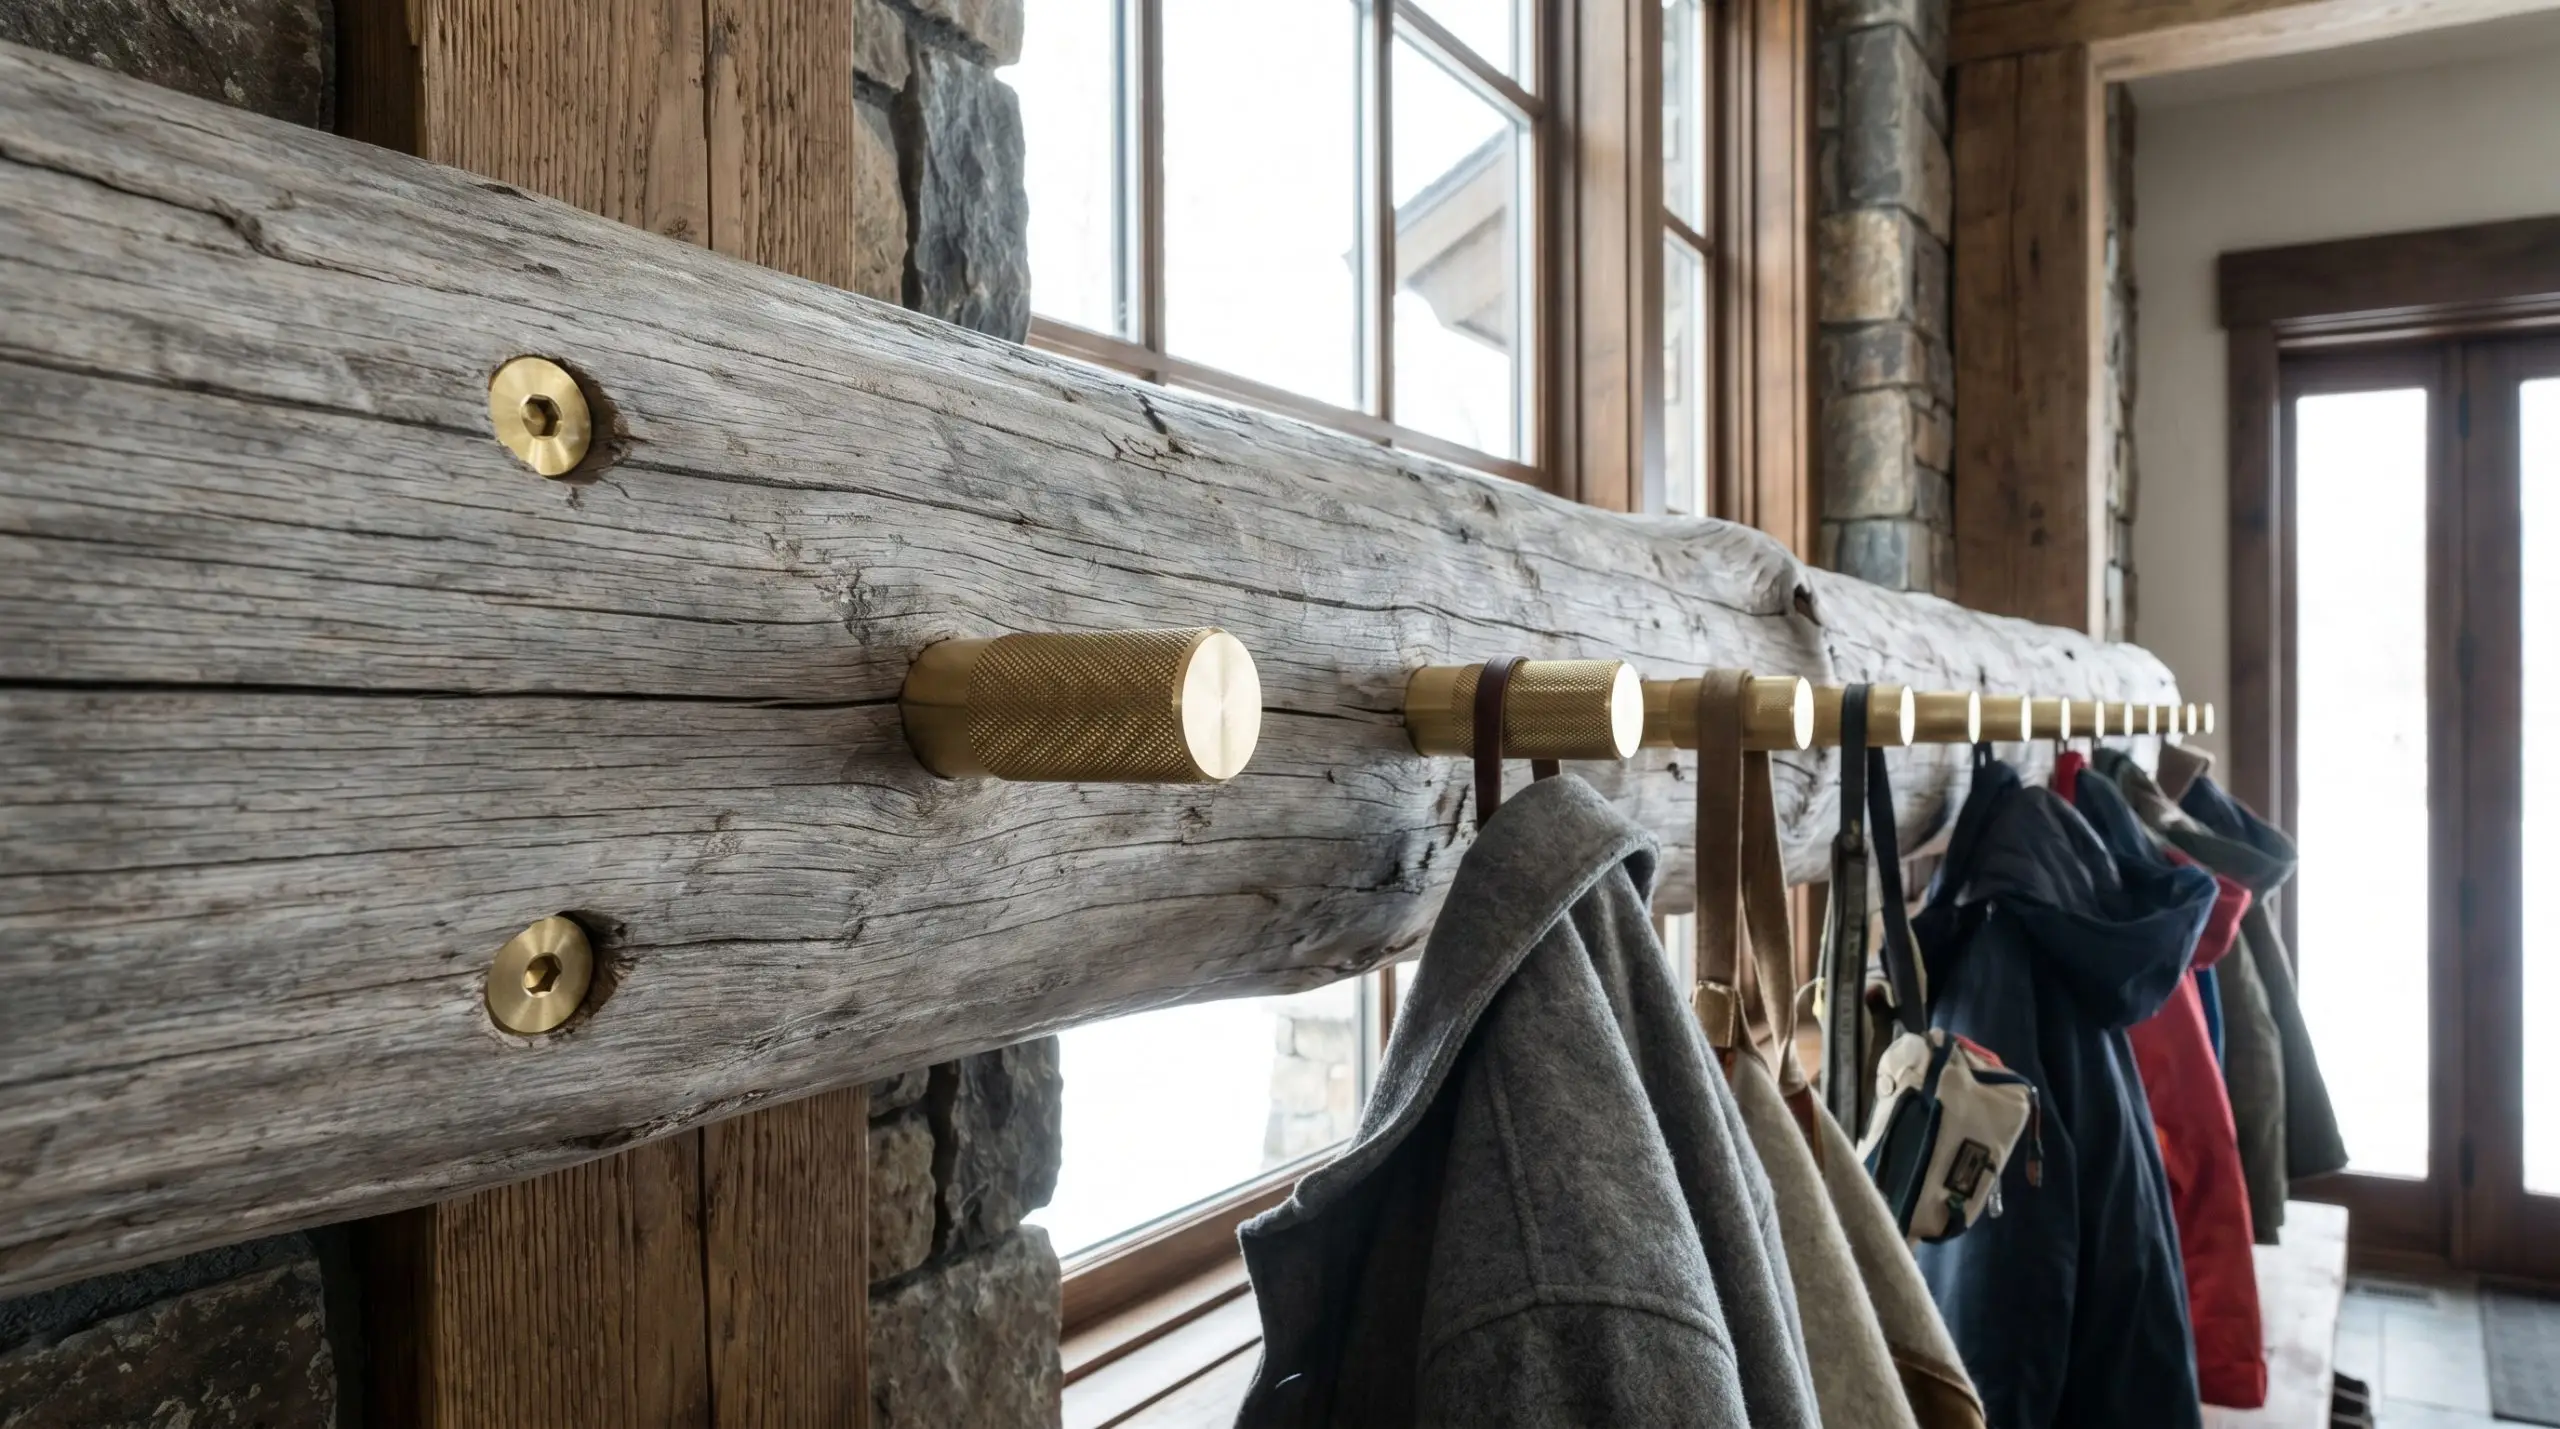
Elevate the standard, utilitarian peg rack by sourcing a thick, horizontal driftwood log and drilling in solid brass or matte black industrial hardware pegs. Mount it prominently in the mudroom; it functions as heavy-duty winter coat storage but stands alone as a beautiful, raw art piece when completely empty during the summer months.
- Style Vibe: Utilitarian Organic
- Material Contrast: The raw, gray wood grain heavily contrasts against the precision-milled metal pegs.
- Peg Spacing: Space pegs exactly 6 to 8 inches apart for optimal functionality.
- Mounting: Countersink heavy lag screws directly through the face of the wood into the studs.
20. Create a Driftwood Branch Air Plant Trellis
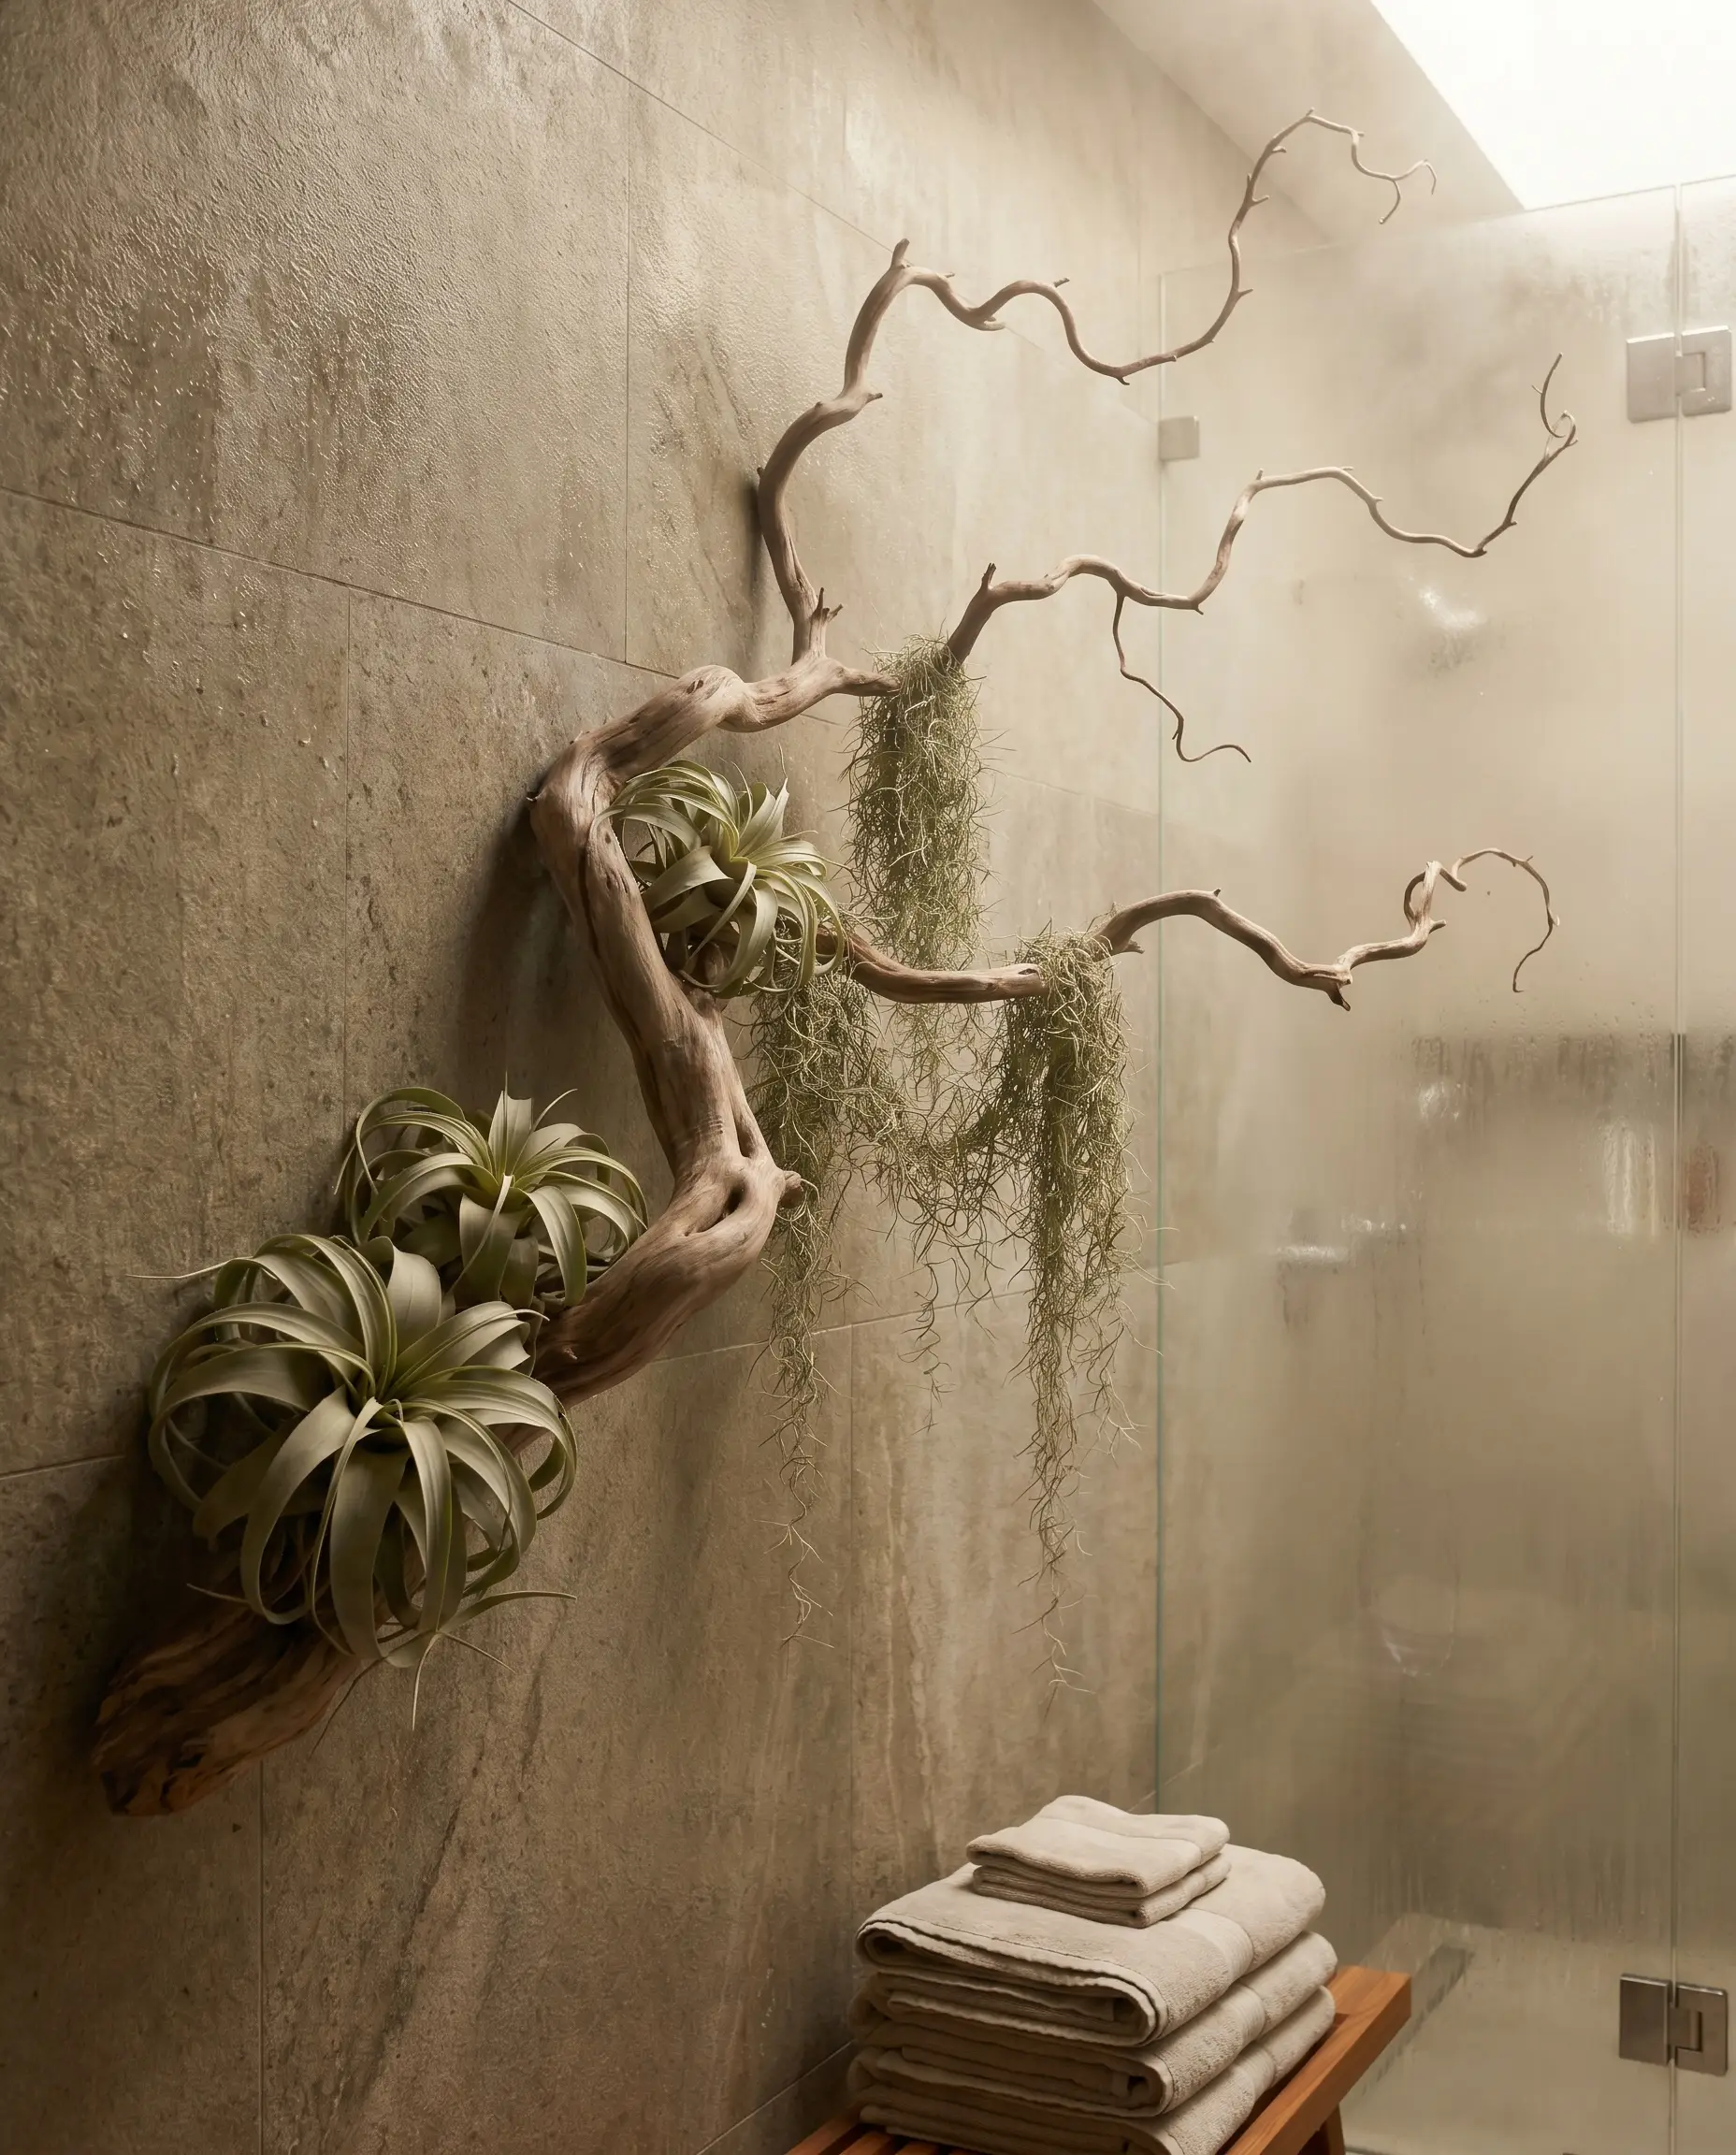
Incorporate live greenery without the mess of soil by mounting a sprawling, multi-limbed branch on a humid bathroom or sunroom wall. Strategically nestle structural air plants (Tillandsia) into the natural crooks and divots of the wood, allowing the ambient humidity to feed the plants while the wood acts as an organic, living art installation.
- Style Vibe: Living Architecture
- Plant Selection: Tillandsia Xerographica (for large rosettes) and Usneoides (Spanish moss for draping).
- Attachment Method: Tuck gently into natural fissures; do not use copper wire (it is toxic to air plants).
Visual Layout Guide:
- Place the largest, heaviest plant at the lowest structural crook to anchor the piece.
- Cluster three smaller plants tightly together midway up the branch.
- Leave the furthest, thinnest tips of the branch entirely bare to emphasize the wood’s shape.
5. The Hackrea Execution Guide: Mounting & Finishing Like a Pro
Sourcing the perfect piece of wood is only 20% of the battle. The remaining 80% is determined by how you treat the material’s surface and how securely you anchor it to your drywall.
21. Use French Cleats for Invisible, Heavy-Duty Hanging
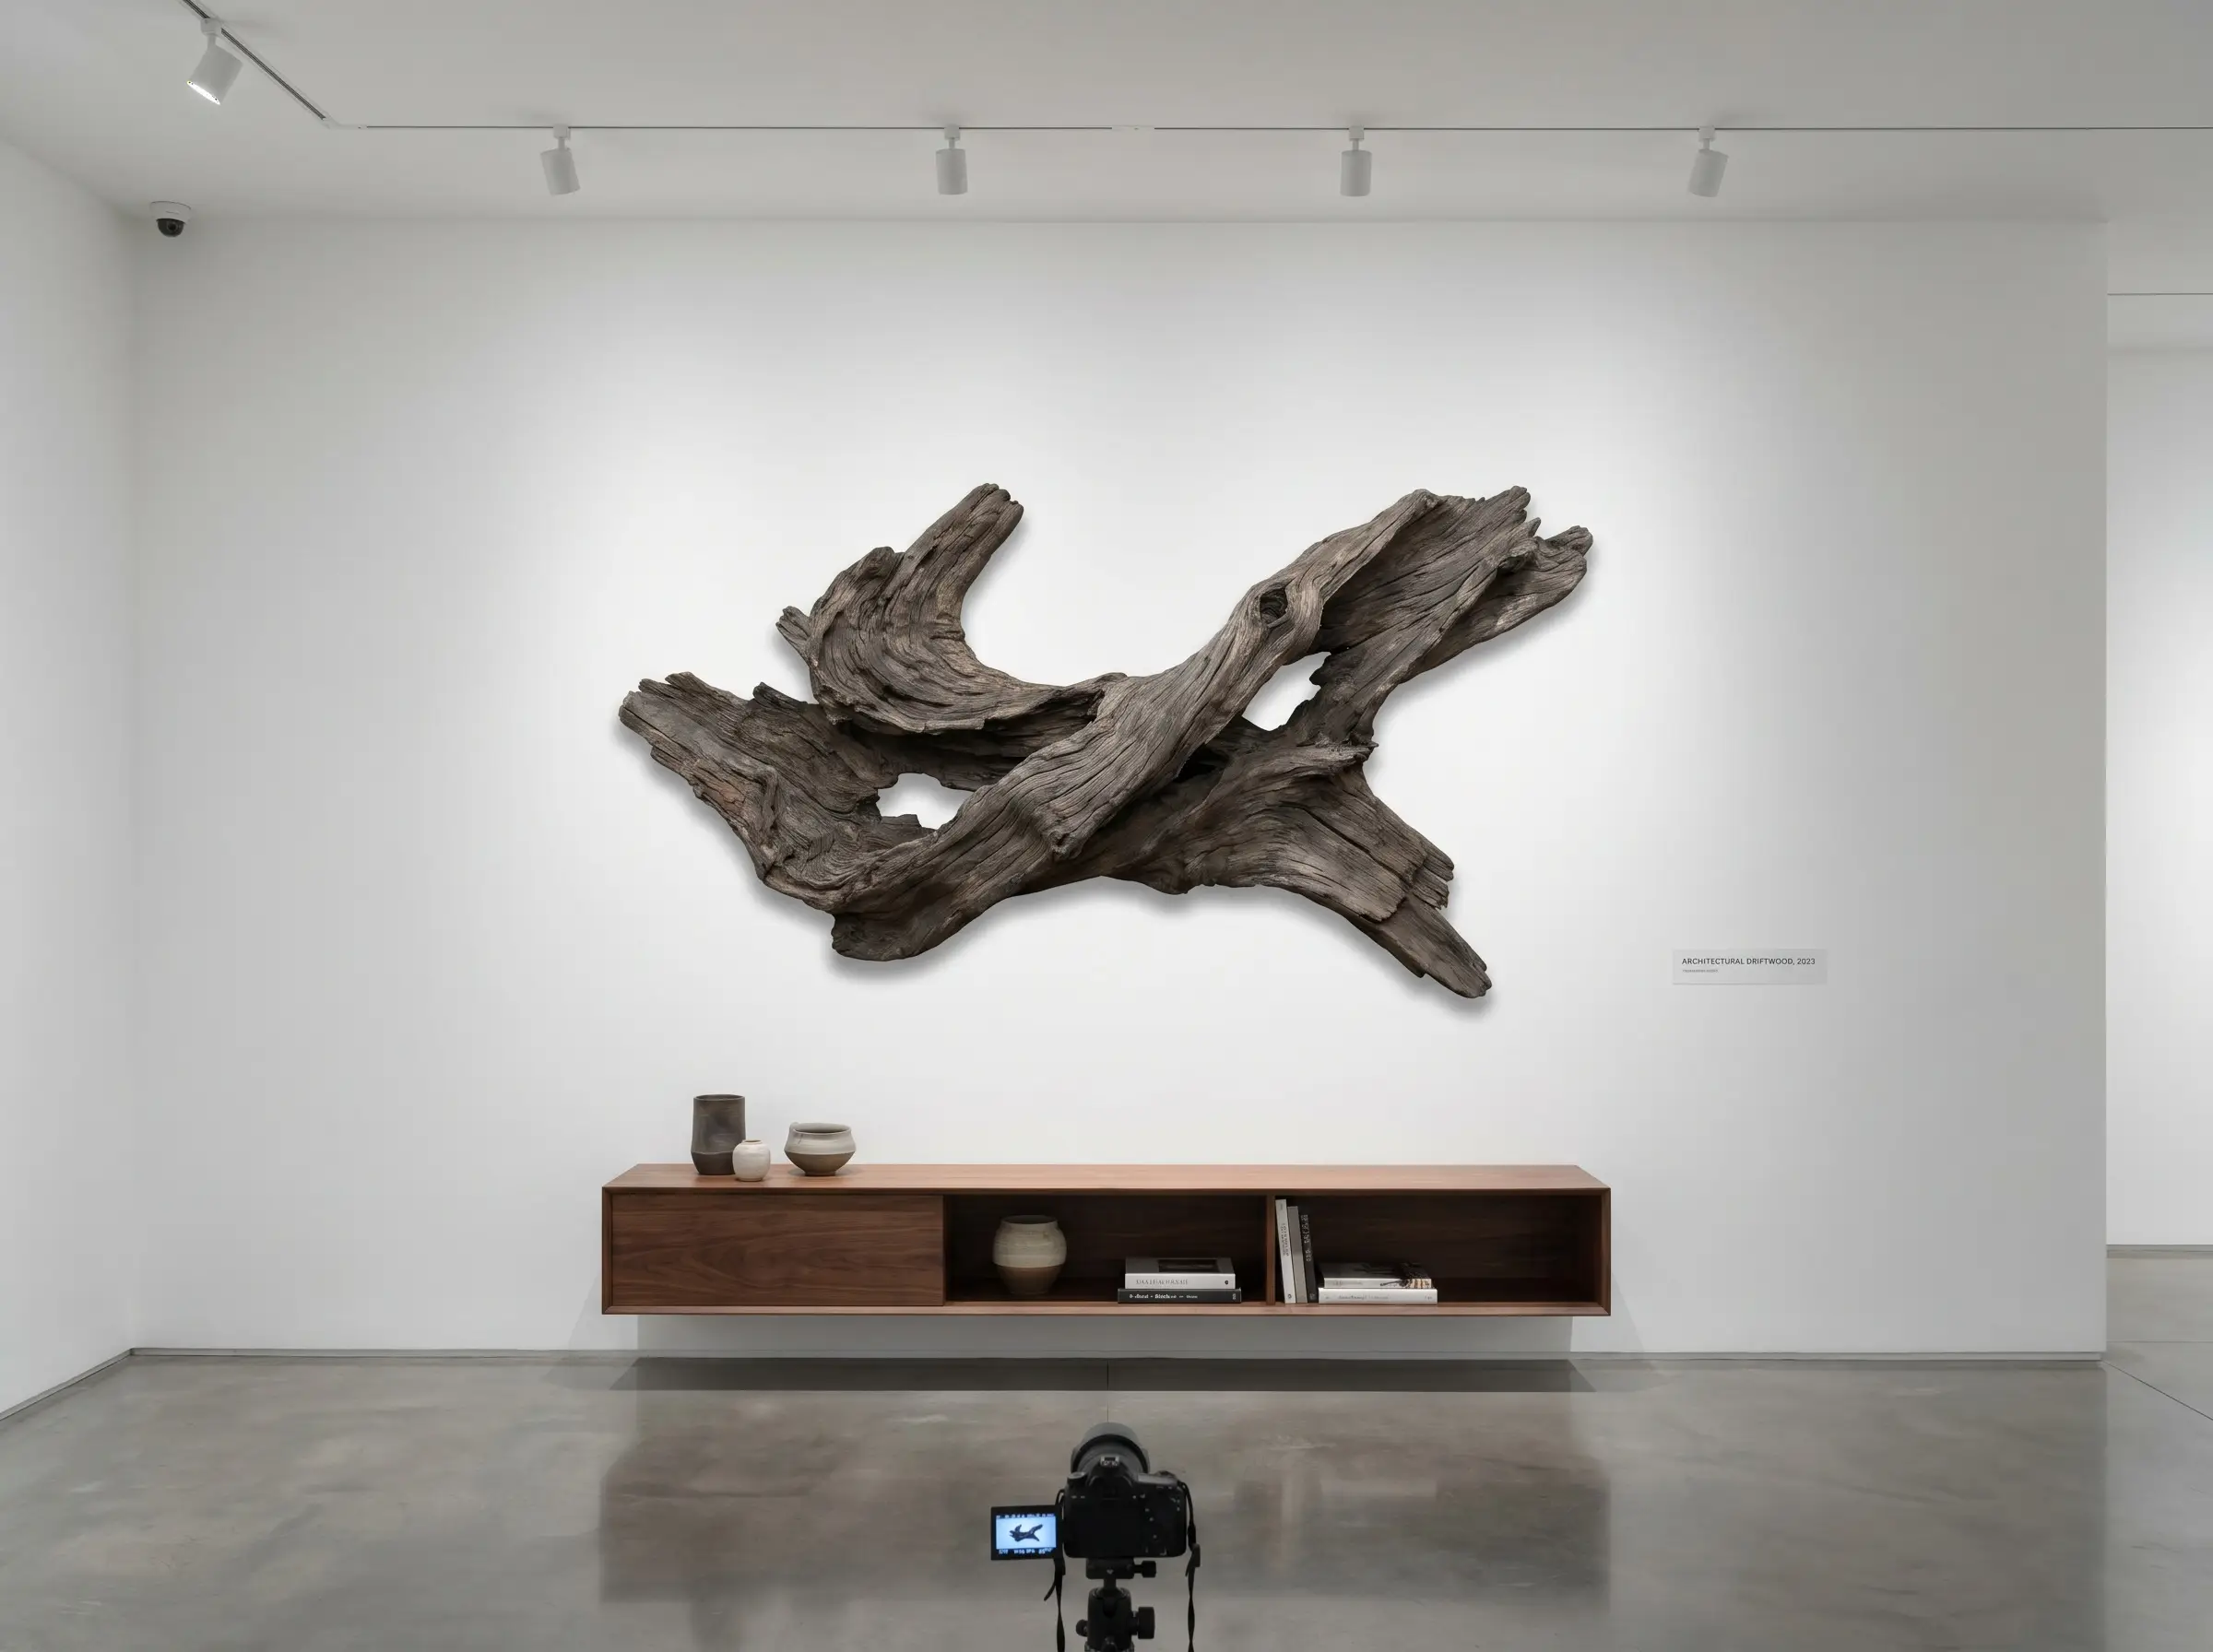
Never use standard picture wire, D-rings, or sawtooth hangers for large, architectural driftwood; they will warp under the weight and cause the wood to tilt away from the wall. A metal French cleat ensures the heavy wood sits perfectly flush, never shifts off-axis, and can safely hold up to 100 lbs of dead weight.
- Hardware Spec: Extruded aluminum Z-clip French cleat.
- Weight Rating: 100+ lbs capacity.
Installation Guide for Uneven Wood:
- Identify the absolute flattest structural plane on the back of your driftwood.
- If no flat plane exists, use a hand planer or sander to shave down a 4-inch wide mounting strip until perfectly level.
- Screw the downward-facing aluminum cleat directly into this flattened wood strip using coarse-thread wood screws.
- Secure the upward-facing interlocking cleat perfectly level into your drywall, anchoring exclusively into wooden studs.
- Slide the wood smoothly down the wall until the two metal cleats lock seamlessly together.
22. Install Directional Uplighting to Enhance Texture
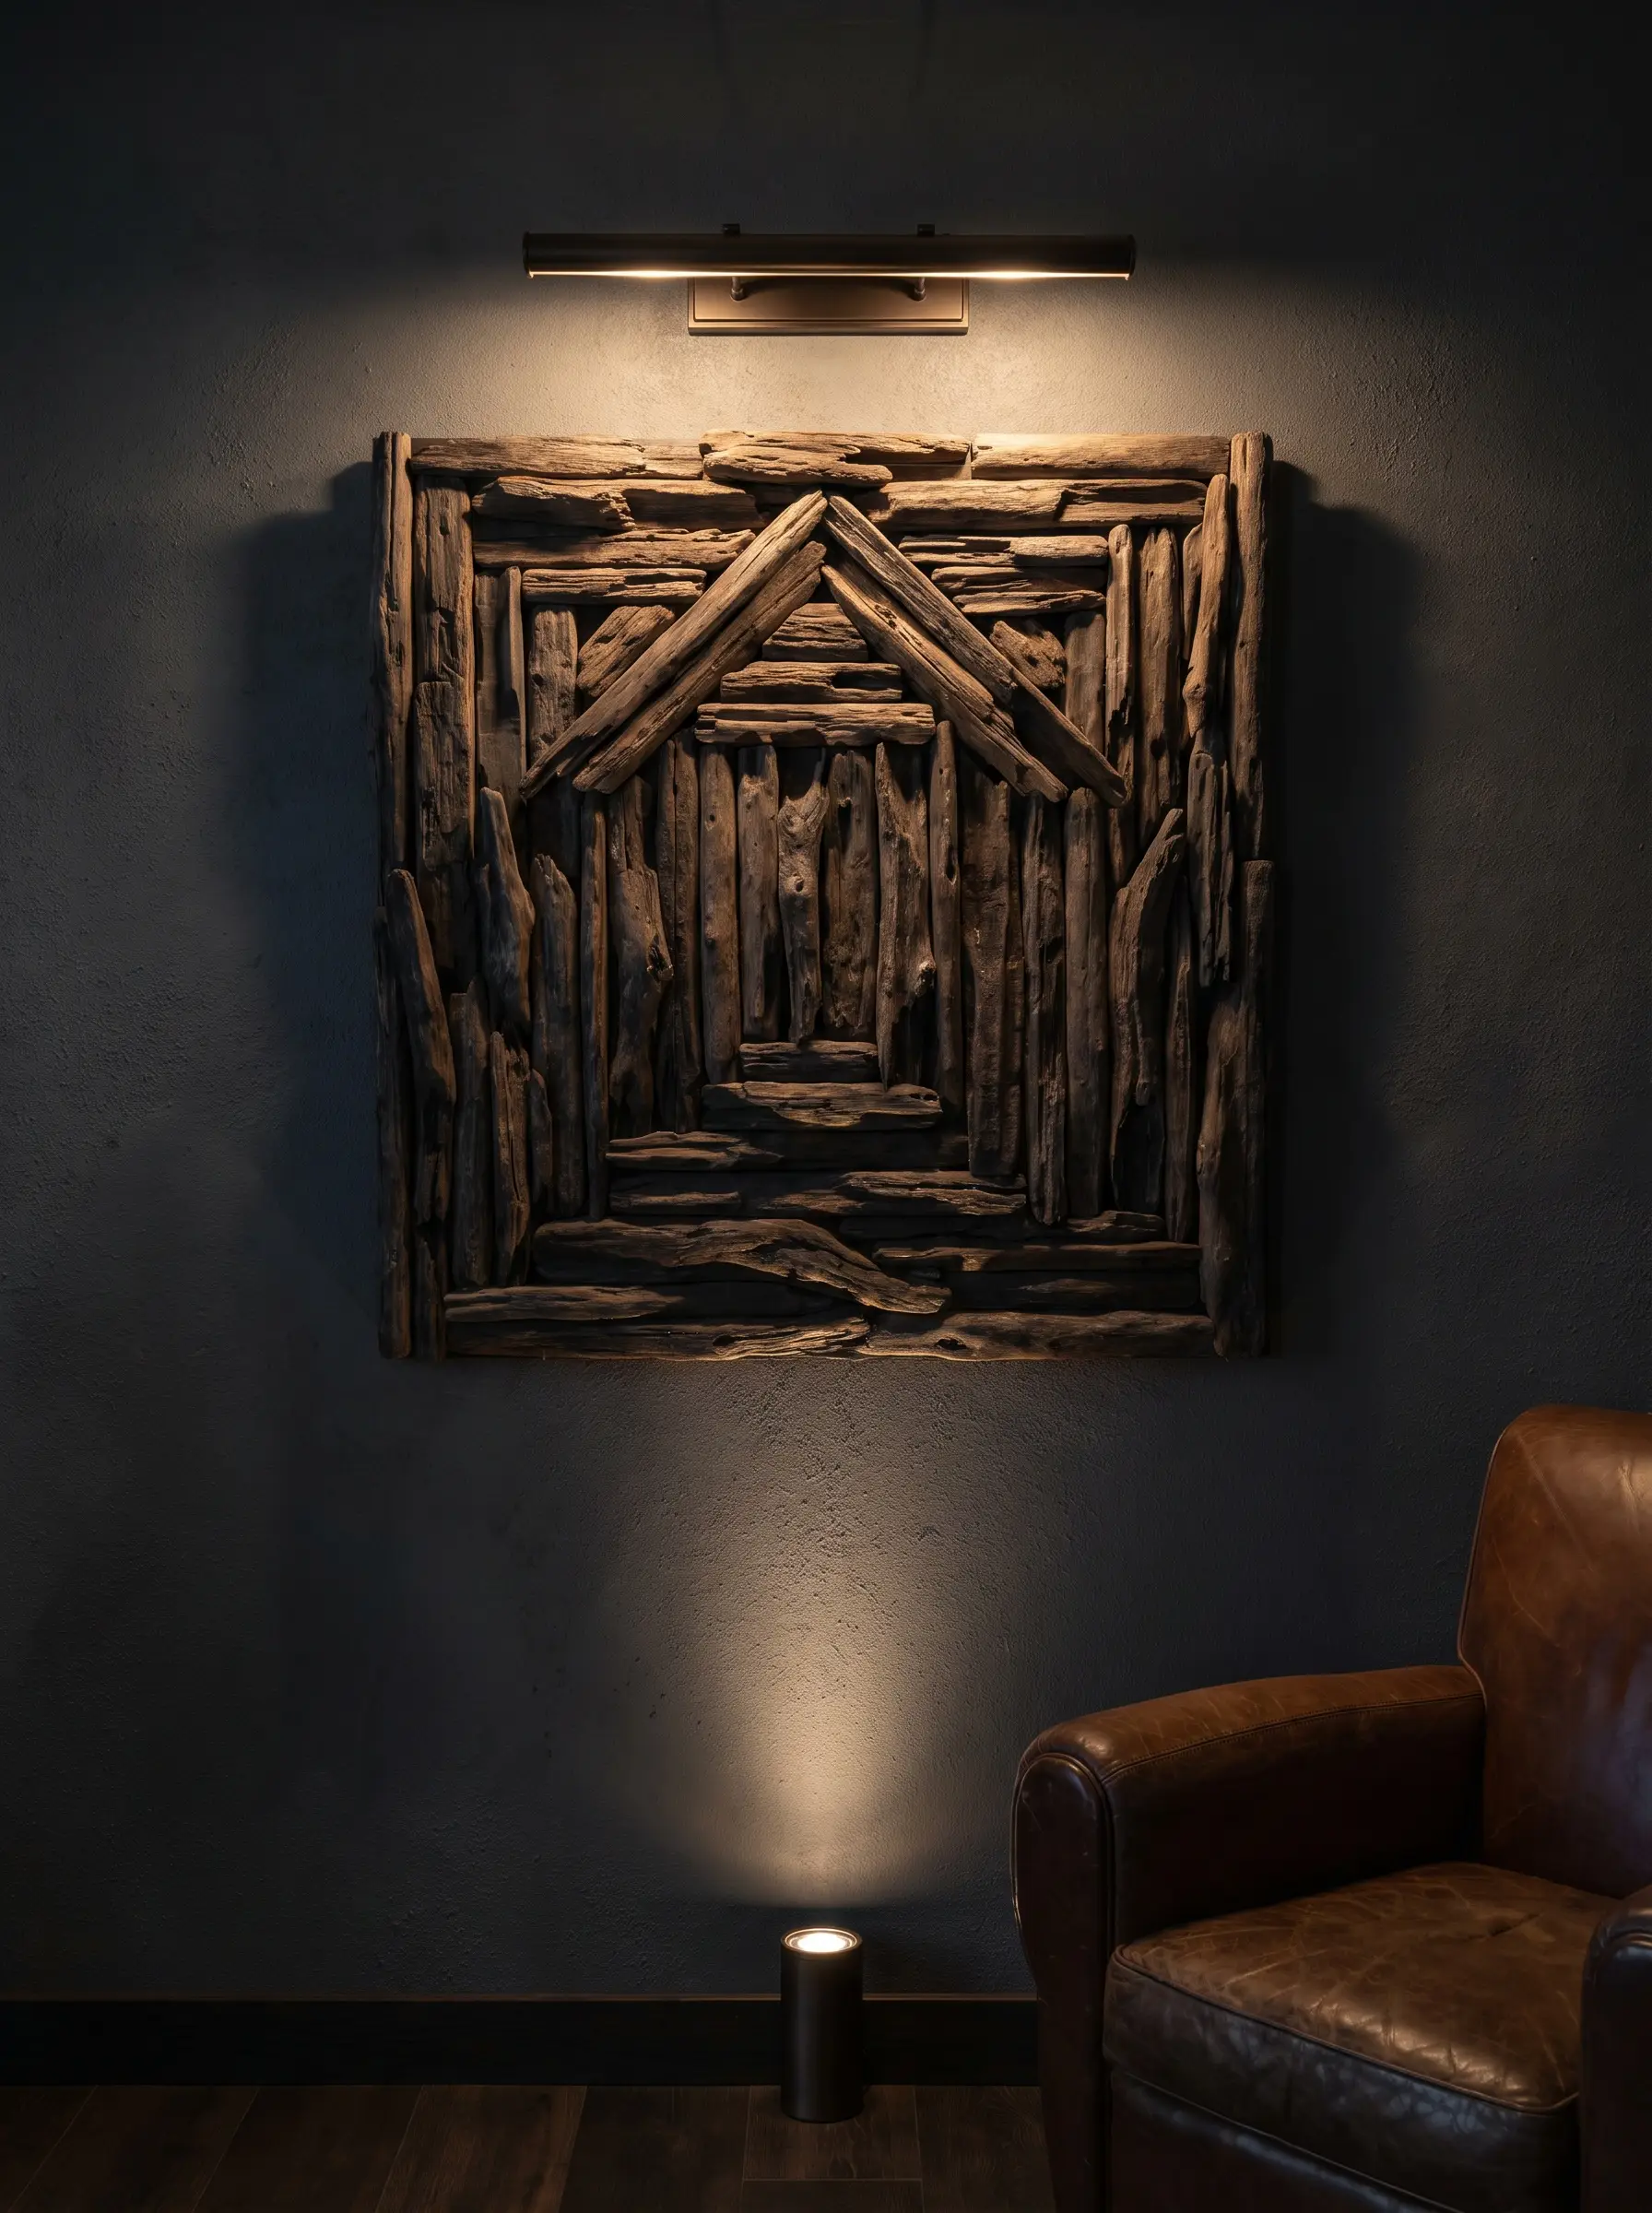
Art galleries do not simply hang art; they aggressively light it to control the viewer’s experience. Install a hardwired brass picture light above your driftwood, or place a floor-based mini uplight directly below it, to ensure the piece commands attention even at night. Explicitly, lighting the wood from a sharp angle grazes the uneven surface, casting dramatic, elongated shadows across the drywall that create massive visual depth and emphasize the natural, rugged texture.
- Lighting Spec: 15-degree narrow beam directional spotlight.
- Color Temperature: Strictly 2700K to 3000K.
- Placement: Aim the light at a steep 45-degree angle to maximize surface shadowing.
- Hardware Finish: Dark bronze or unlacquered brass.
23. The Bleaching vs. Oiling Matrix: Choosing Your Finish
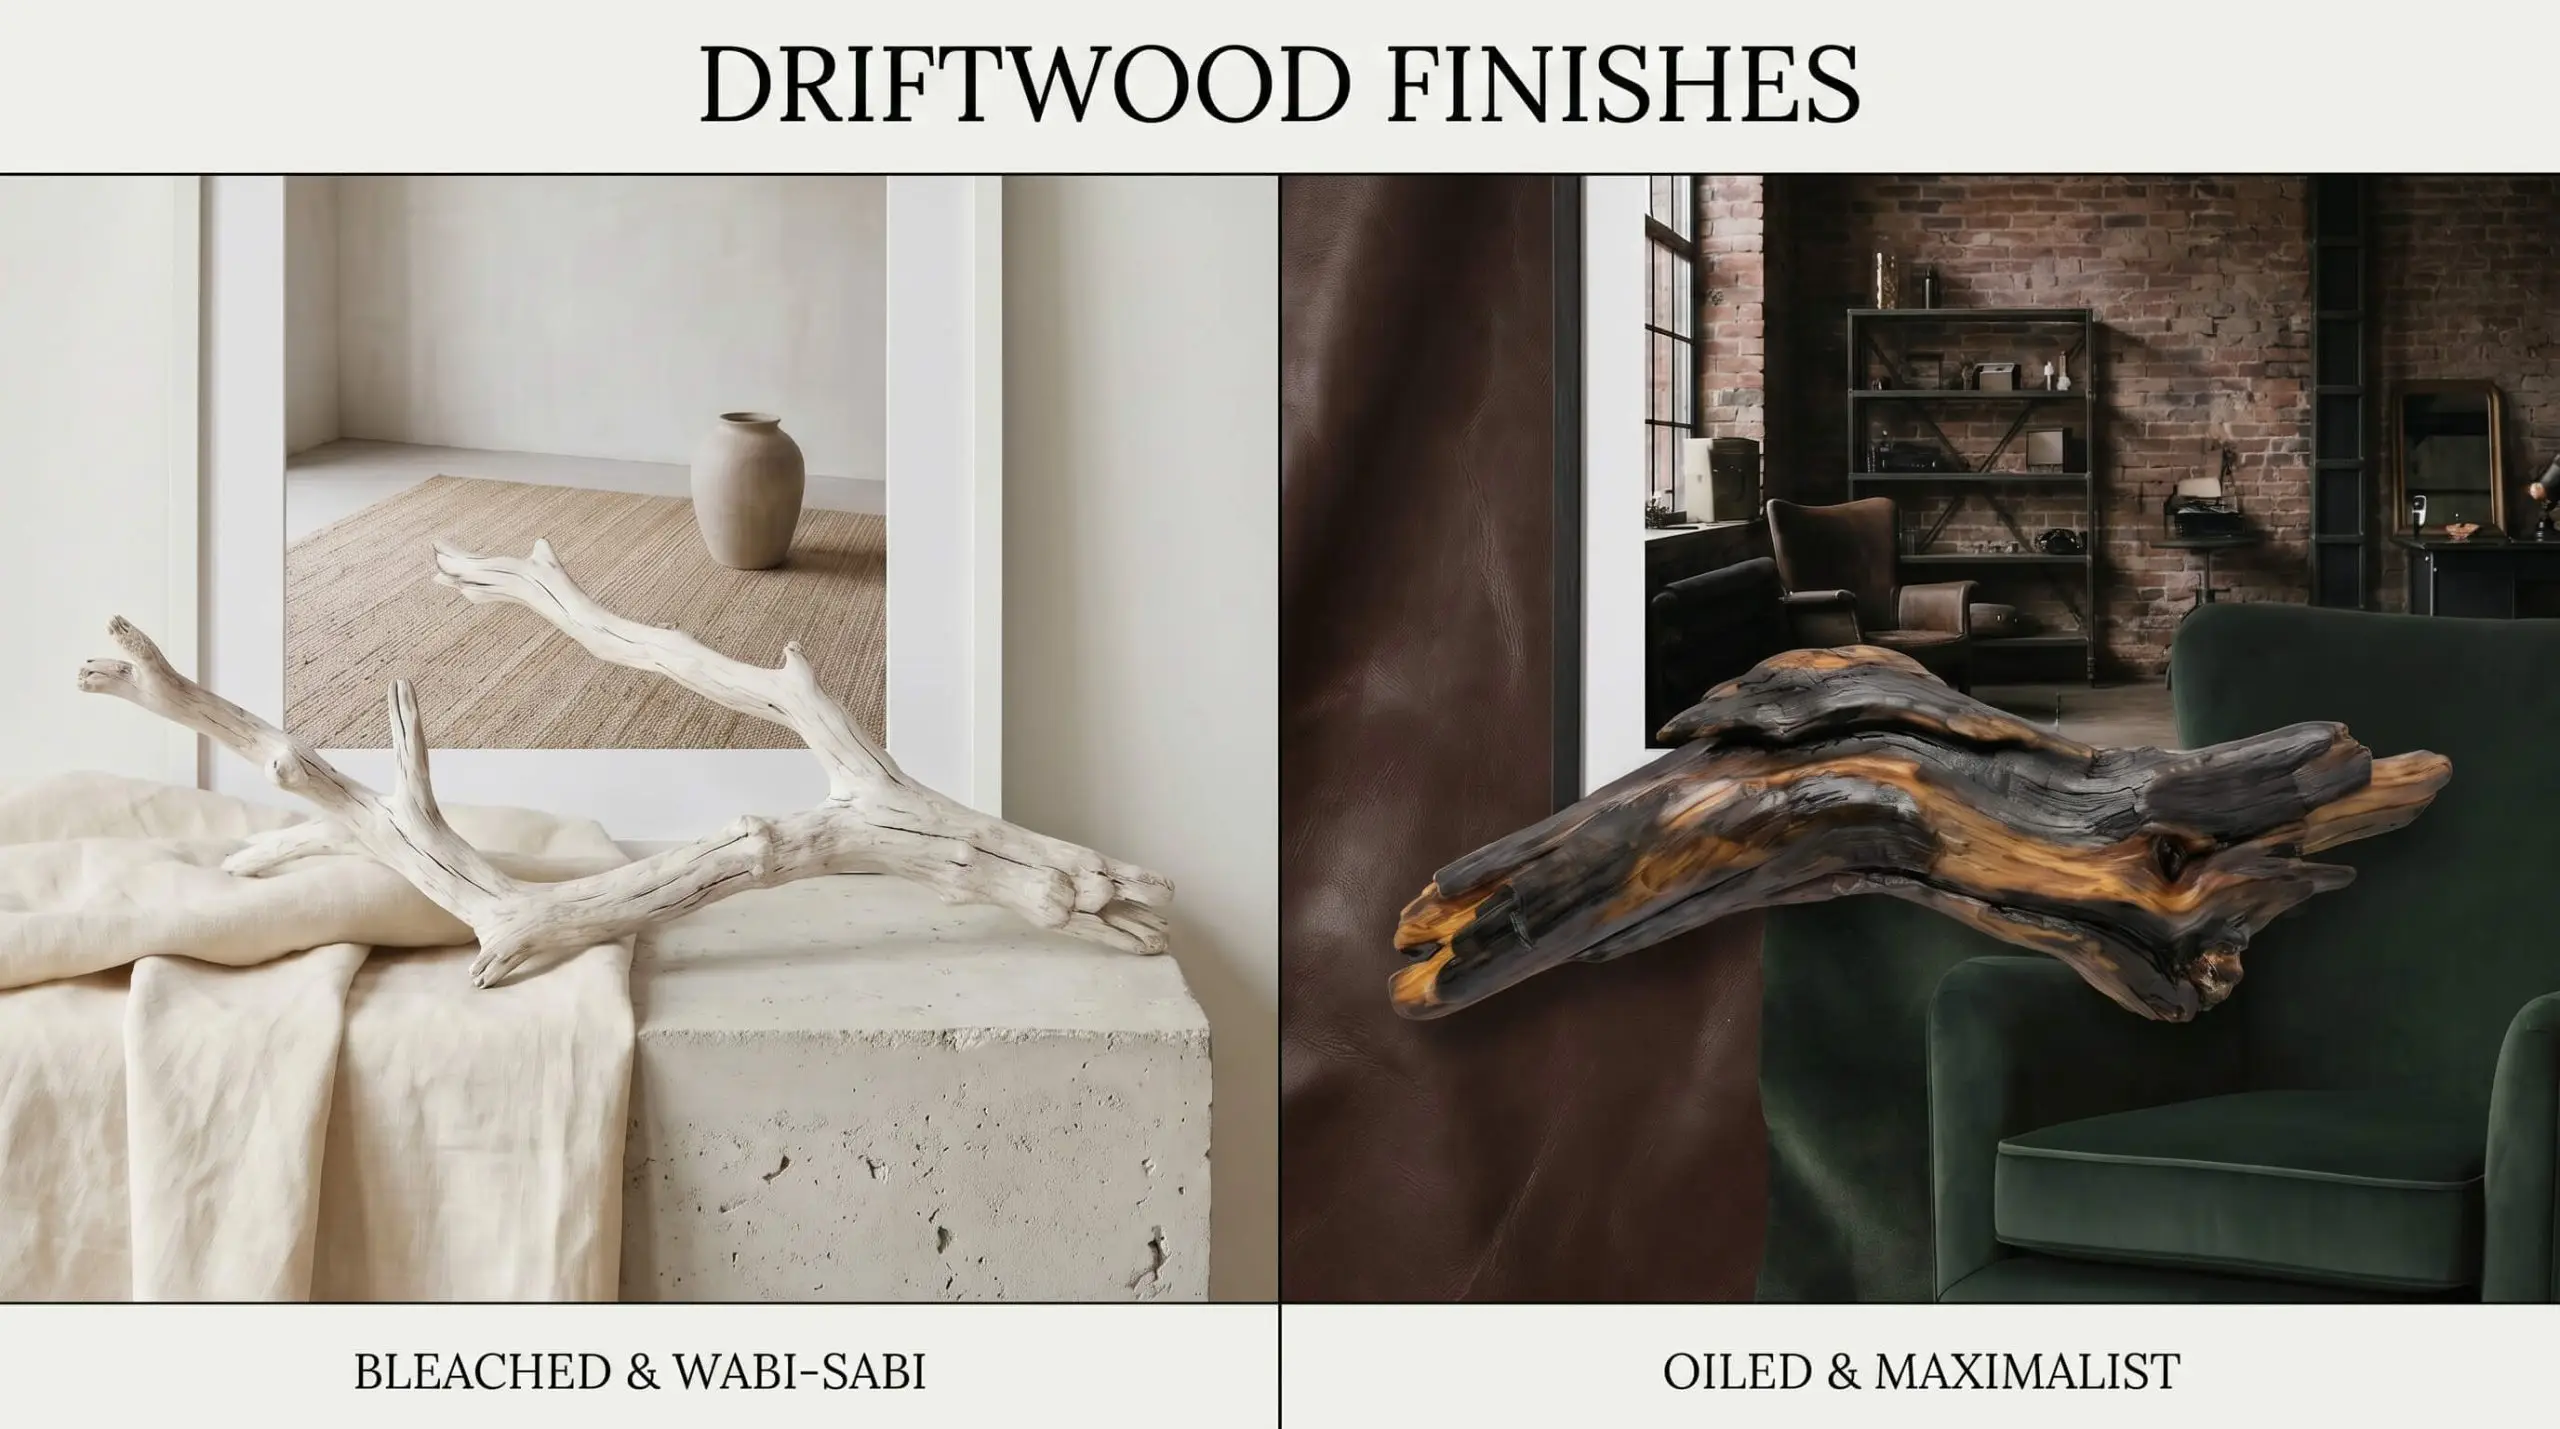
Raw, foraged driftwood can sometimes look dirty, muddy, or visually flat once brought indoors. You must actively choose a surface treatment—either stripping it bare or enriching its depth—to ensure the piece perfectly matches your room’s overarching architectural aesthetic.
| Finishing Method | Chemical Process | Resulting Aesthetic | Ideal Room Pairing |
|---|---|---|---|
| Bleaching | Soaking the wood in a 1:1 bleach/water solution strips the natural tannins. | A stark, bone-white, sun-baked finish with a chalky texture. | Wabi-Sabi, Minimalist, Light-flooded rooms with linen textiles. |
| Oiling | Rubbing the wood with raw, boiled linseed oil or tung oil penetrates the grain. | Darkens the wood significantly, pulling out rich browns, blacks, and amber tones. | Moody Maximalism, Industrial, Dark paint tones, leather furniture. |
24. Sourcing: Foraging vs. Buying Bespoke

Before executing any of the ideas above, you must determine your sourcing strategy. Your budget and willingness to deal with pest mitigation will dictate exactly where your sculptural wood comes from.
| Sourcing Method | Execution Reality | Average Cost | Target Budget Tier |
|---|---|---|---|
| Foraging | Free, but heavily labor-intensive. Requires soaking the wood in water and bleach for days to kill internal pests and remove hidden rot. | $0 (Plus cost of bleach/supplies) | Sophisticated DIY |
| Curated Artisans | Purchasing pre-treated, pest-free, curated ghost-wood or coastal pieces from specialized Etsy artisans or boutique dealers. | $150 – $450 | Accessible Luxury |
| Architectural Salvage | Commissioning specialty dealers to excavate, treat, and ship massive, 8-foot root systems or petrified slabs. | $1,000 – $5,000+ | Bespoke High-End |
Curating Your Organic Wall Space
Executing driftwood wall art correctly is an exercise in profound restraint. The goal is never to plaster your walls with an endless array of sticks, but to select one or two highly curated, sculptural pieces and display them with absolute spatial precision. Treat your blank walls not as empty space needing to be filled, but as a pristine gallery waiting for a deliberate, organic focal point. Before you purchase a single piece of hardware, decide definitively on your finish—bleached bone-white or ebonized matte black—and then source a piece of wood that commands the room.

The Hackrea Style Desk treats interior decoration as an exact visual science. Rather than focusing on demolition or floor plans, this desk masters the art of color theory, undertone matching, material pairings, and spatial proportion. From balancing the visual weight of mixed metals to finding the perfect bridging tone between disparate wood species, this desk provides the rigorous aesthetic rules needed to achieve high-end, editorial-quality harmony in any space.