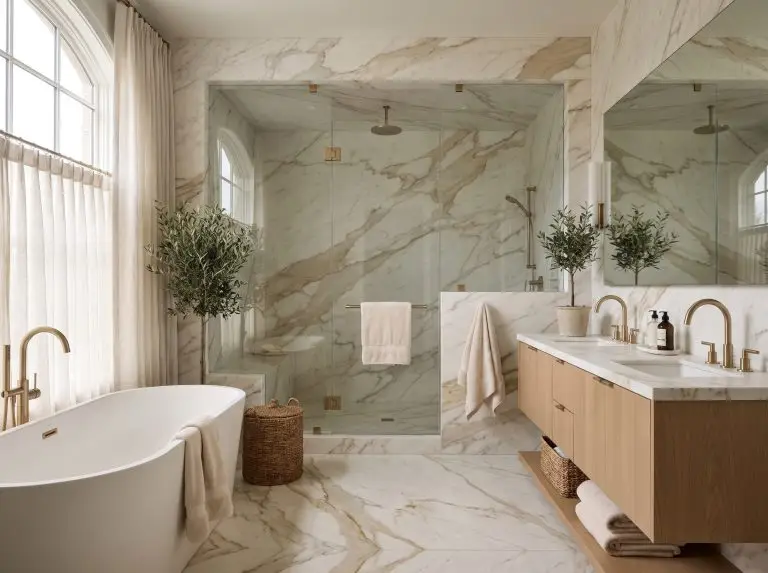
Marble is the undisputed king of bathroom materials, possessing a tactile, cool-to-the-touch richness that manufactured surfaces constantly try to imitate. However, executing a flawless marble bathroom design requires rigorous intention; without strategic application, a stone-clad room quickly devolves into a cold, sterile mausoleum. Our methodology relies on intelligent contrast: warming up expansive stone with organic textures, specifying the exact right finish for safety, and knowing precisely when to deploy modern porcelain alternatives. This is your curatorial guide to blending high-end bespoke craftsmanship with accessible luxury, ensuring your space feels both architecturally profound and deeply inviting.
High-Impact Marble Shower & Wet Room Ideas
The shower is the primary visual anchor of your bathroom, dictating the structural energy of the entire space. Specifying large-format applications in this wet zone instantly establishes a five-star, architectural presence that grounds the room.
Install a Bookmatched Calacatta Slab Wall
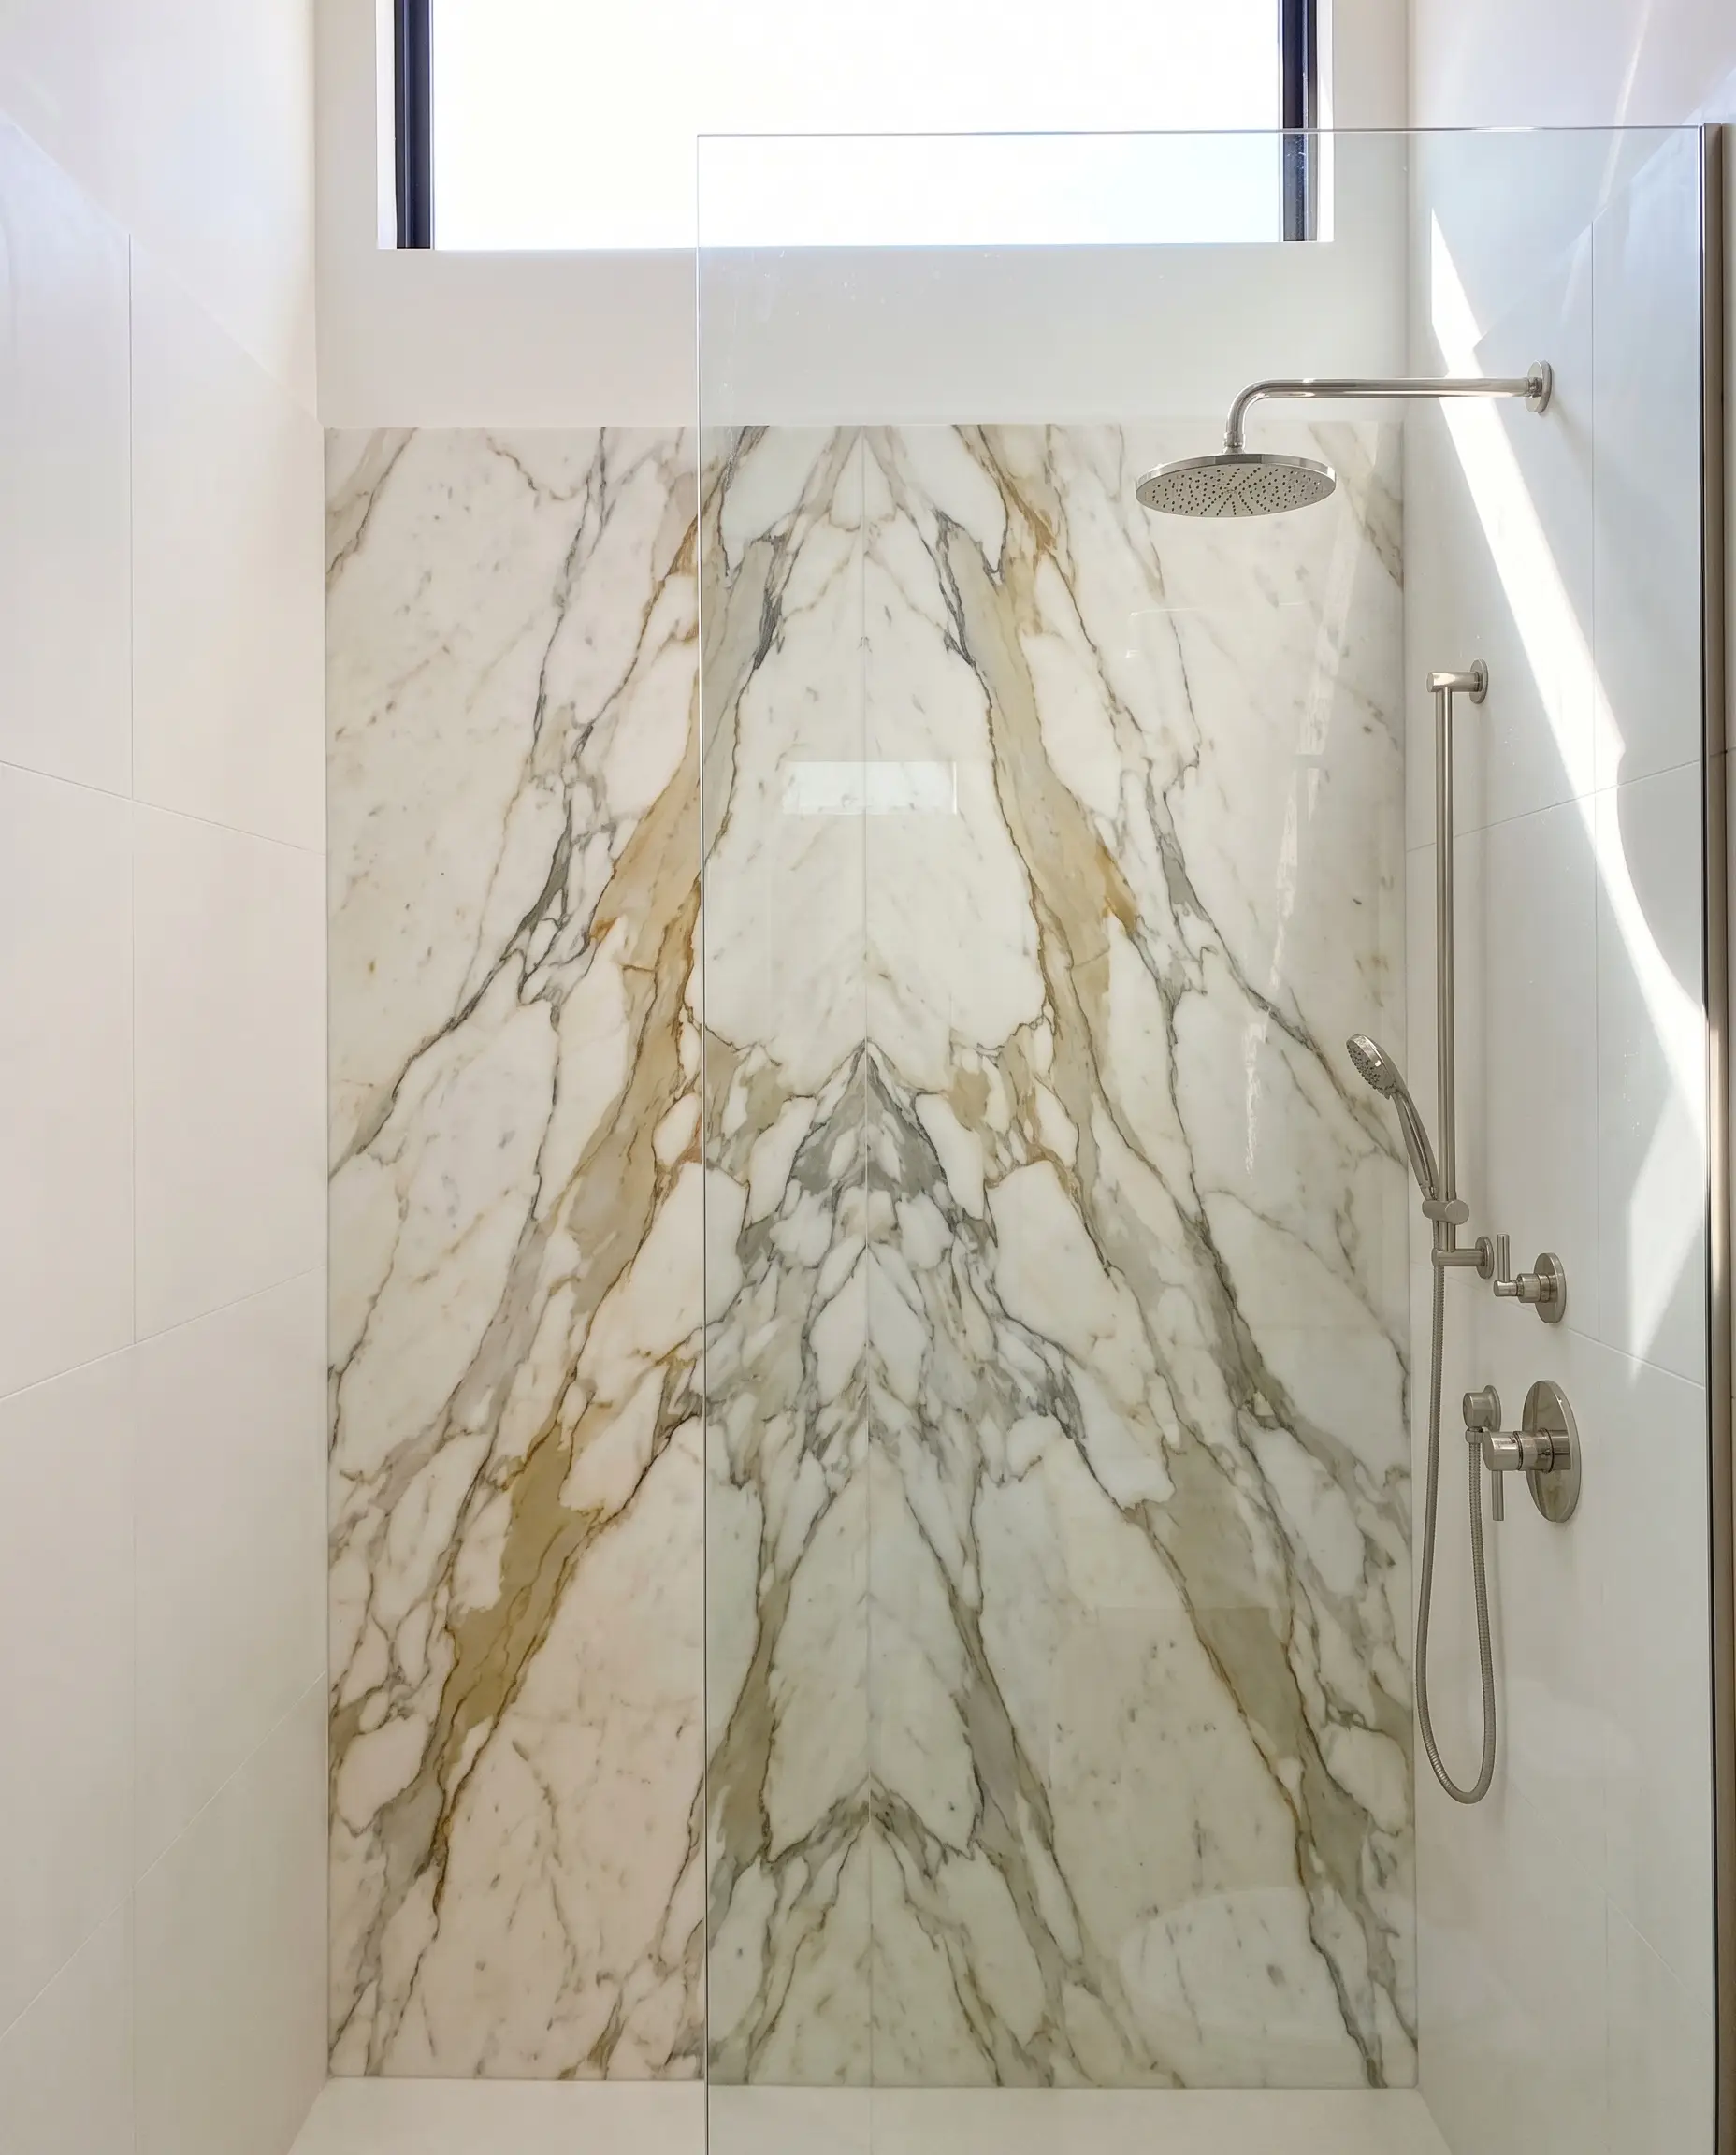
Bookmatching slabs—where two adjoining cuts of stone mirror each other—creates a breathtaking, continuous art piece right inside your shower. This bespoke technique transforms heavy veining into a deliberate, symmetrical focal point that demands attention.
- Vibe: High-End Architectural
- Key Material: Calacatta Gold or Calacatta Borghini Marble Slabs
- Styling Pro-Tip: Keep the surrounding walls minimal and solid-colored to let the bookmatched joint act as the solitary hero.
Wrap the Wet Zone in Fluted Carrara Tile
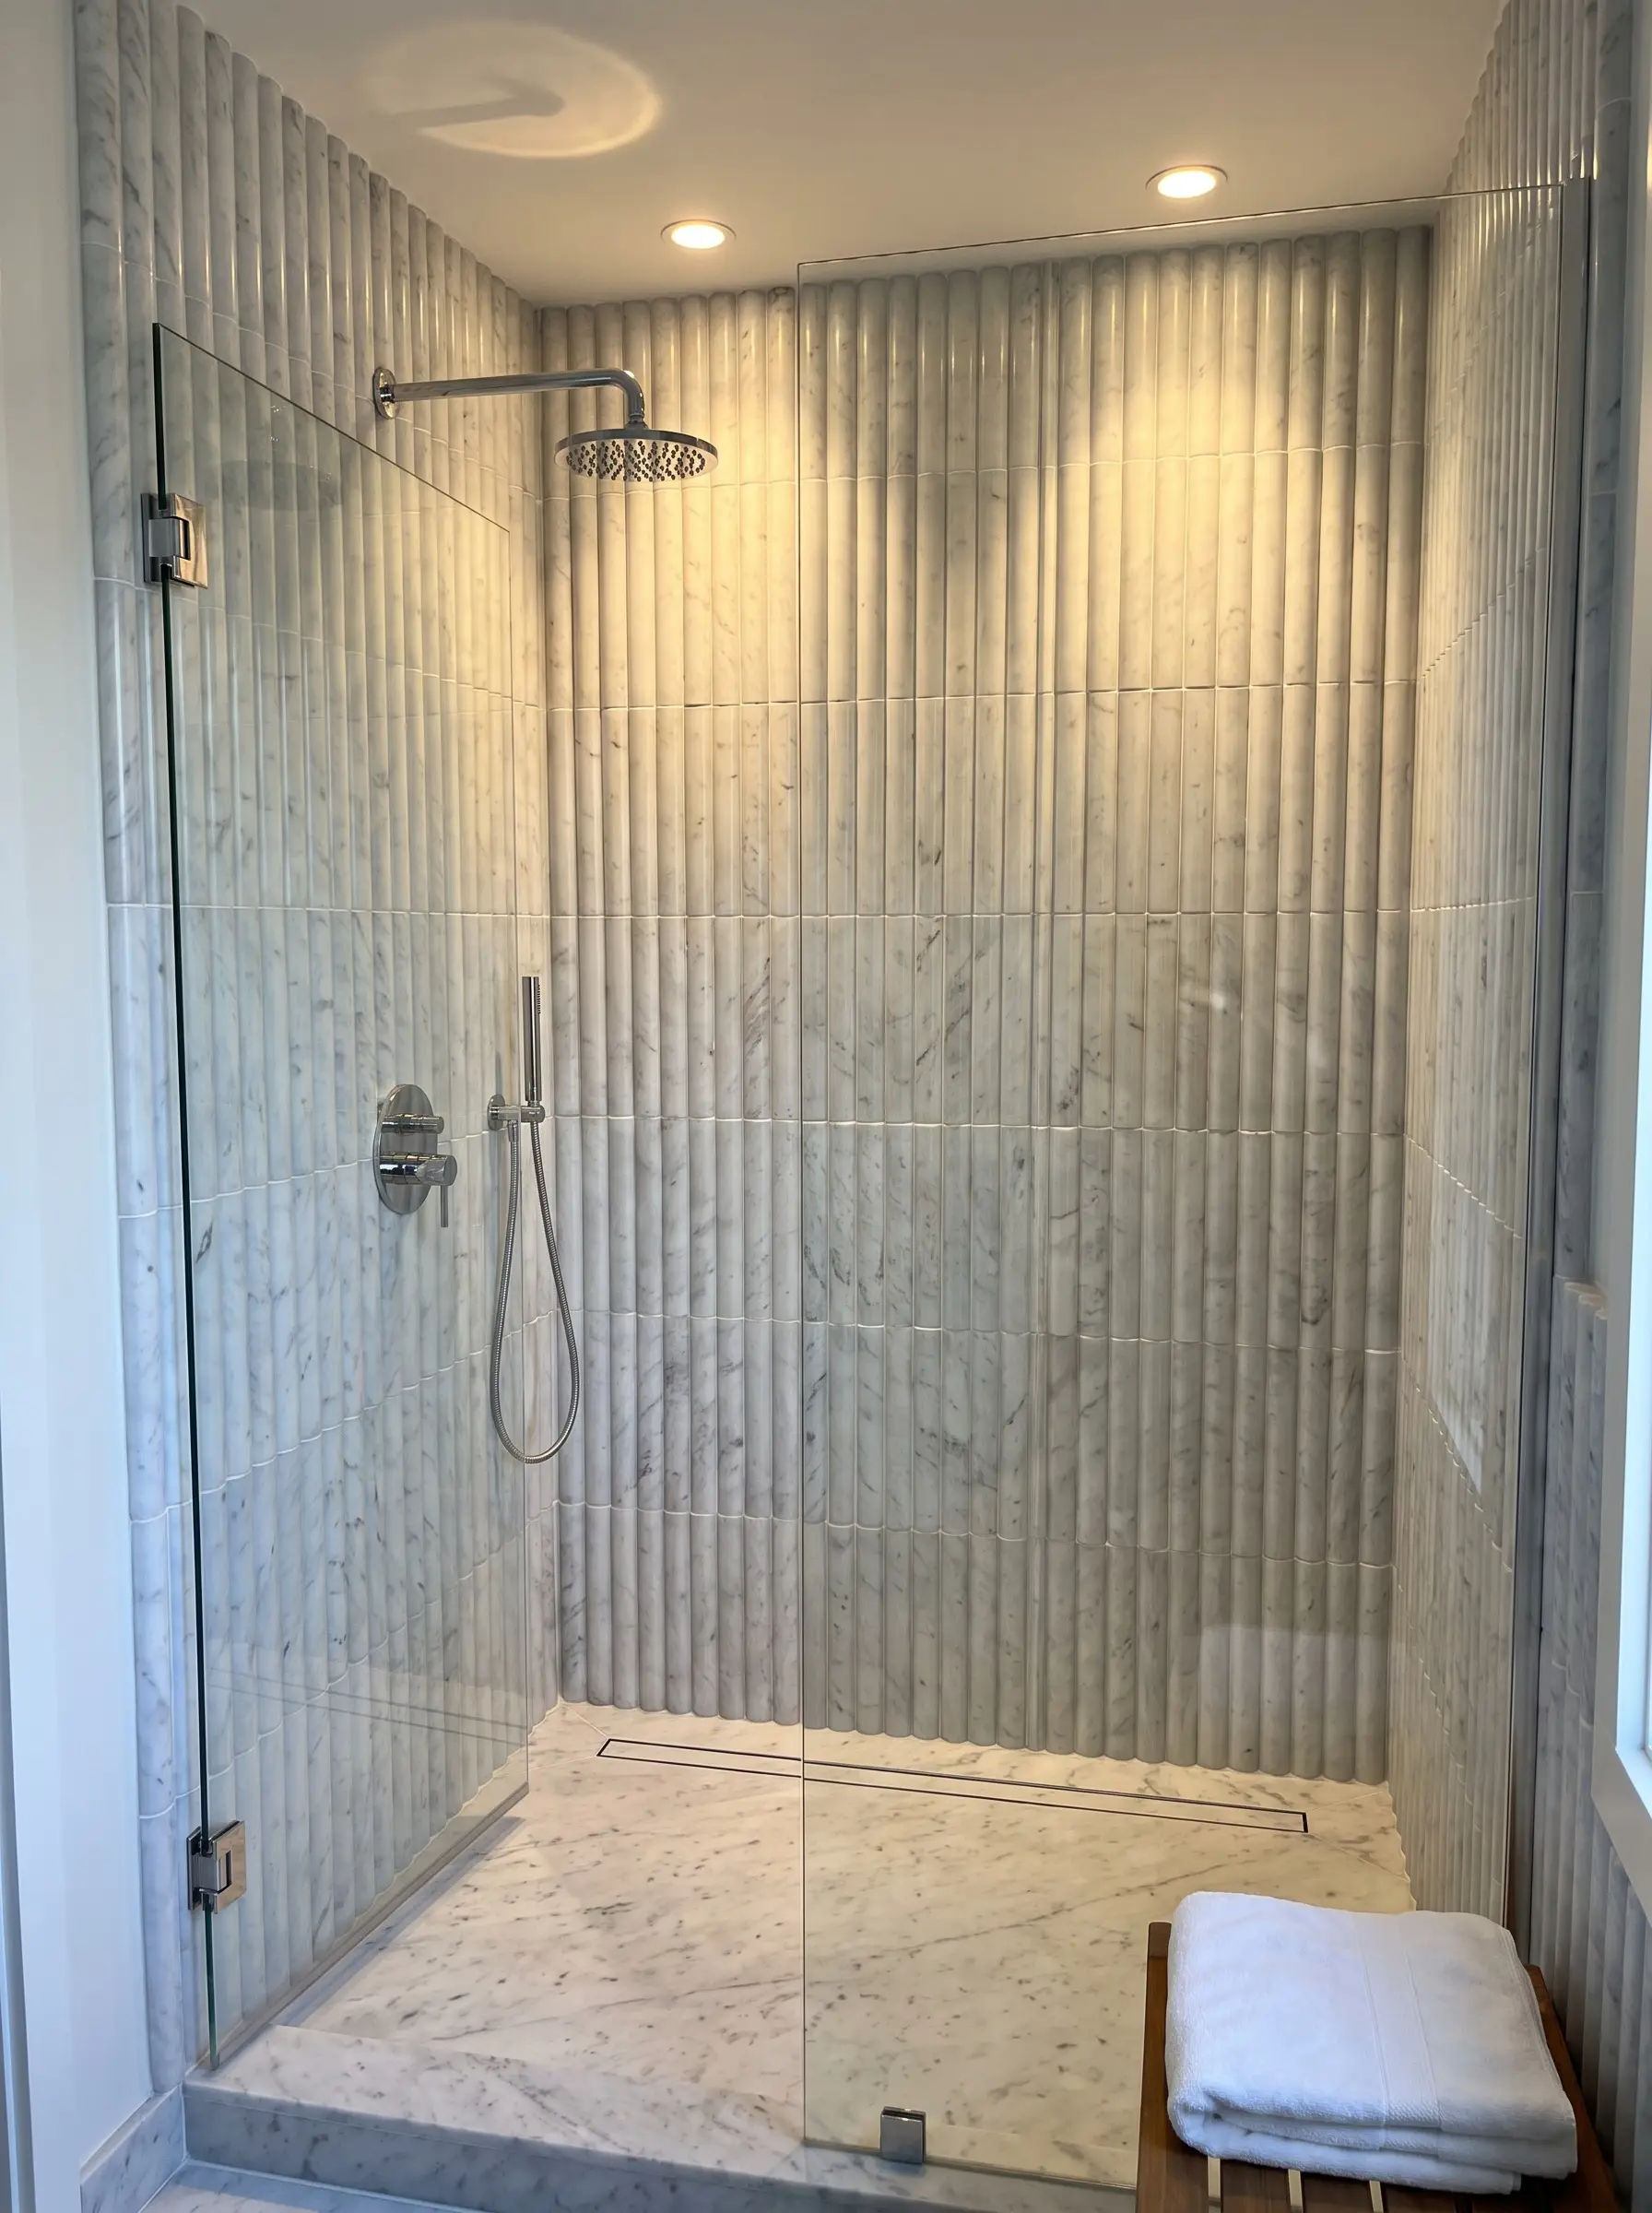
Fluted stone introduces vertical rhythm and a highly tactile surface to the shower enclosure. The three-dimensional ridges catch the light, adding incredible depth and softening the inherent visual weight of solid Carrara.
- Vibe: Modern Classic
- Key Material: 3D Fluted Carrara Marble Tiles
- Grout Match: Specify a bright white, mold-resistant epoxy grout to maintain a seamless, monolithic appearance.
Frame a Built-In Shower Niche with Eased-Edge Stone
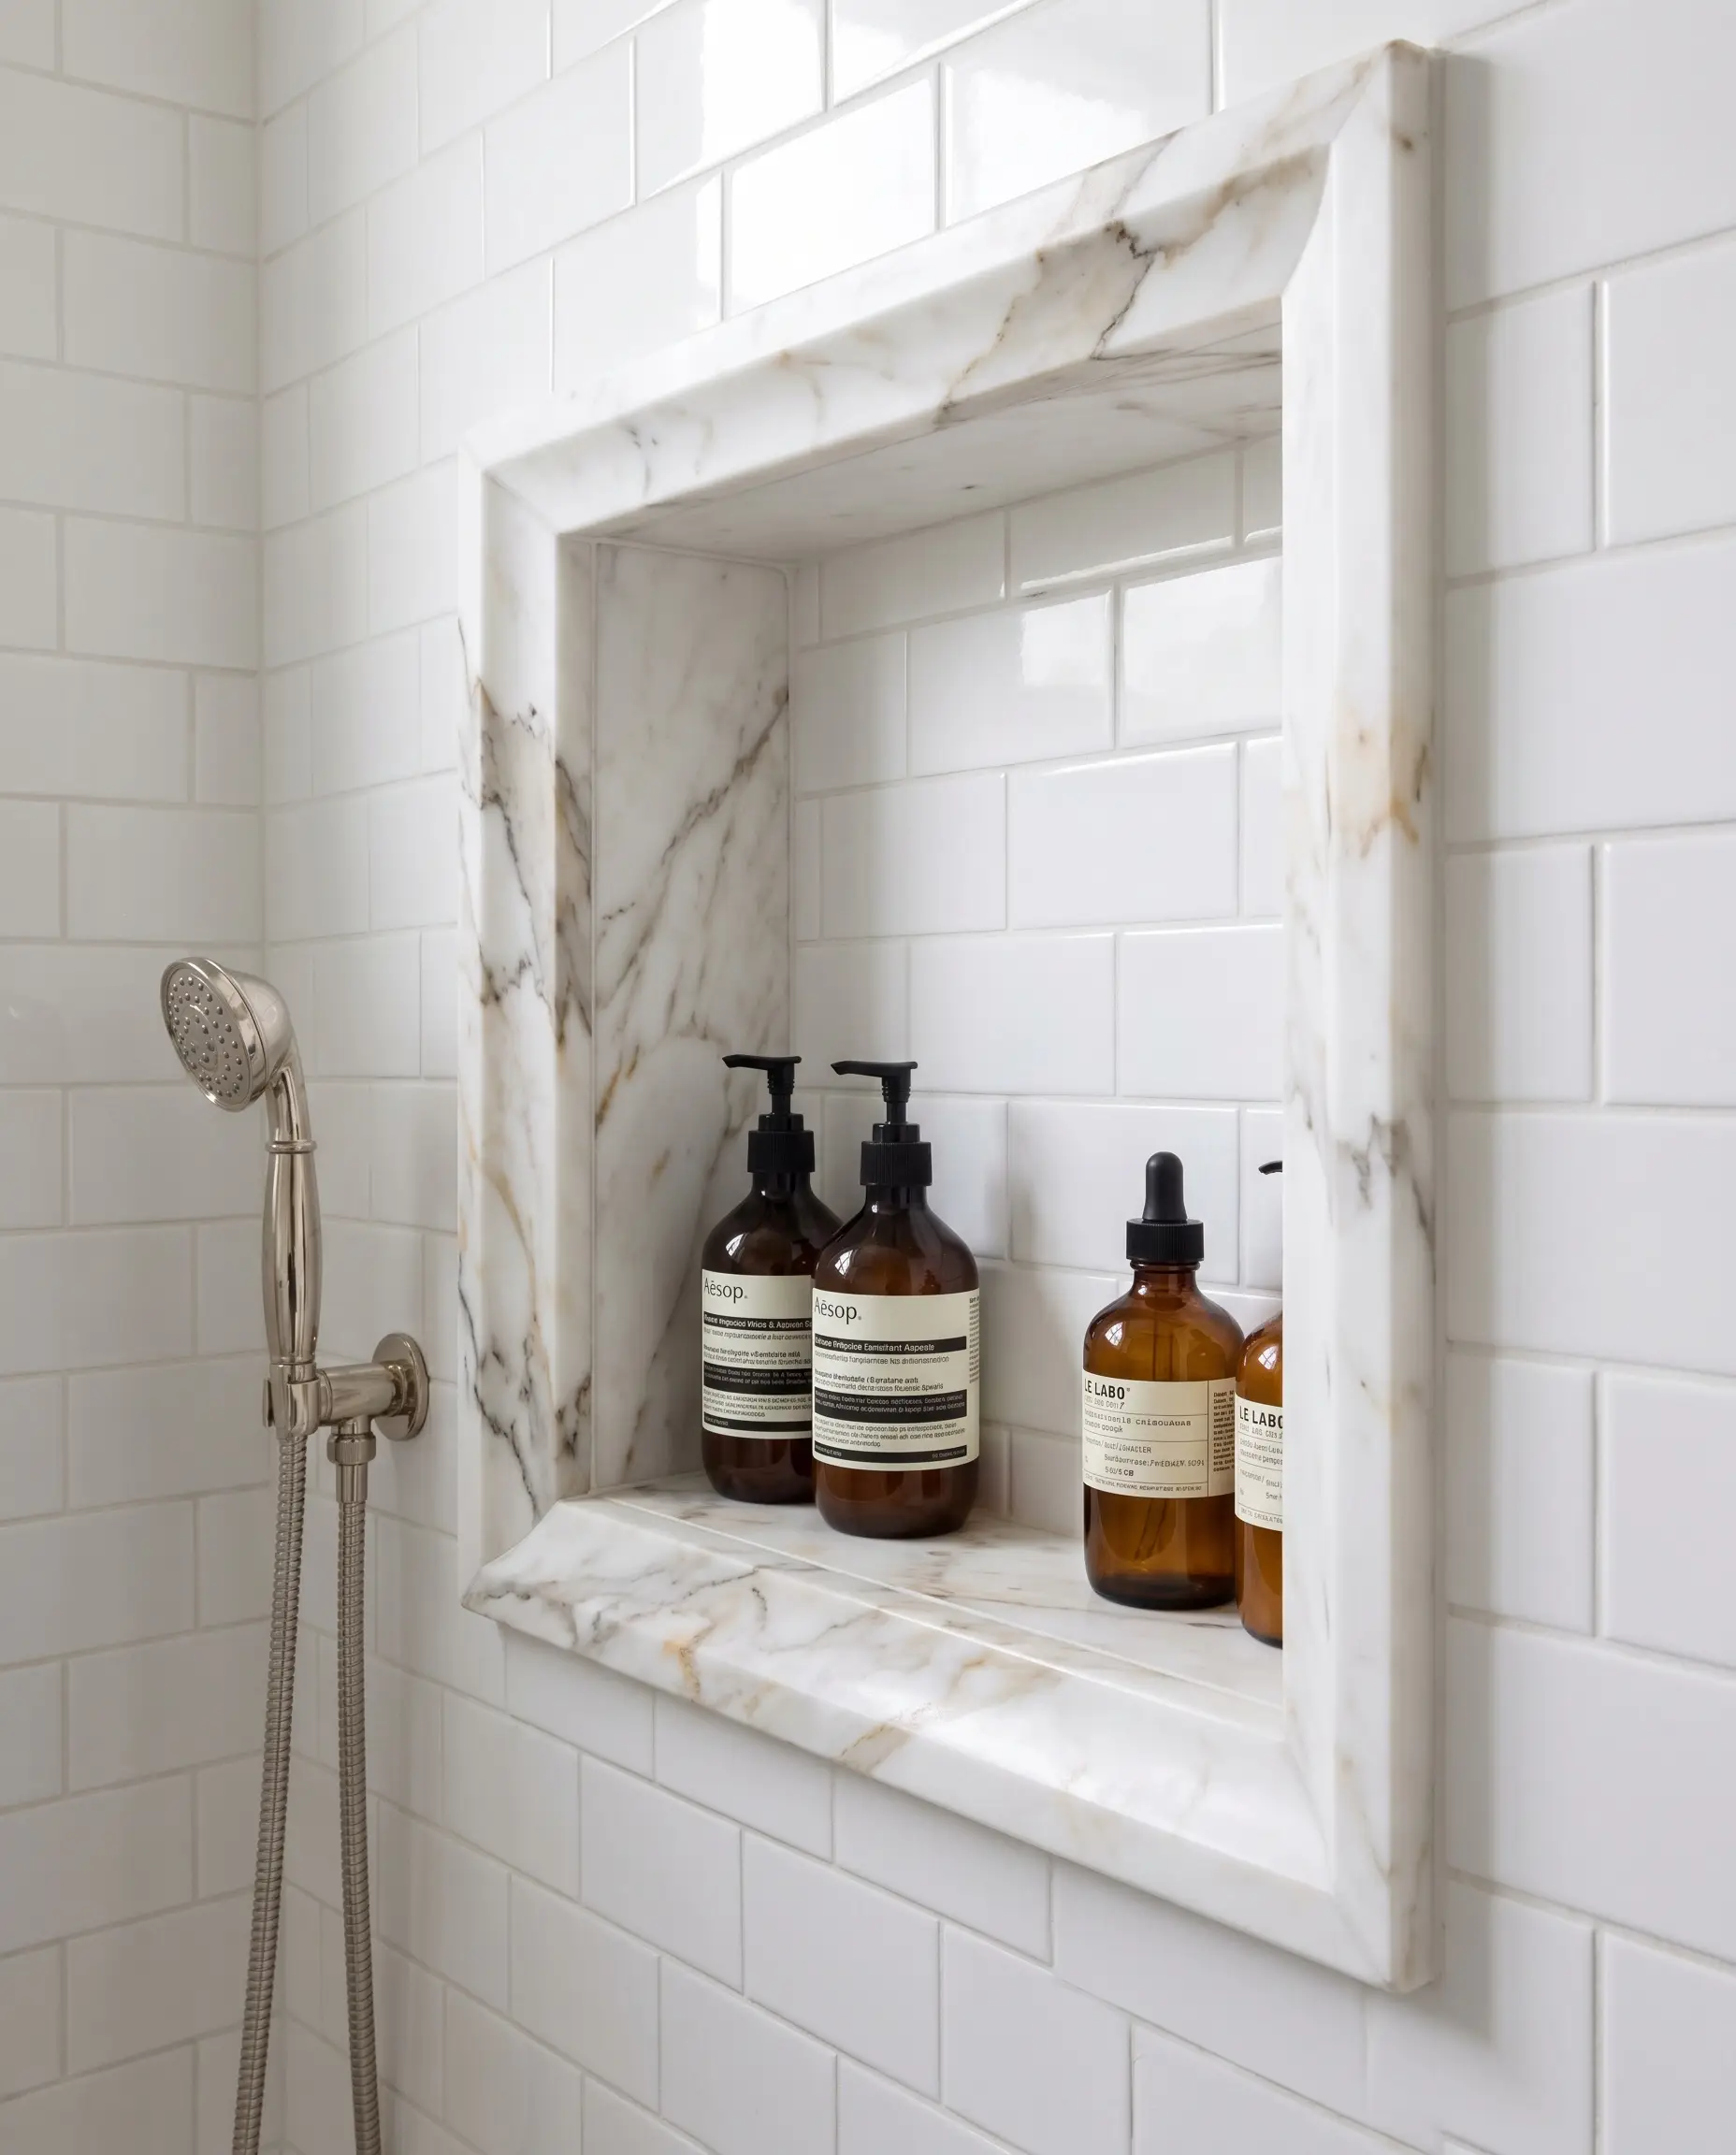
A shower niche should be a deliberate architectural feature, not an afterthought cut into the wall. Framing the opening with thick, eased-edge marble trim provides a substantial, custom-fabricated look that instantly upgrades standard field tile.
- Vibe: Tailored & Refined
- Key Material: 2cm Marble Remnants (perfect for budget-conscious luxury)
- Detail Focus: Ensure the bottom sill features a slight outward pitch to prevent standing water.
Contrast a White Shower with a Nero Marquina Bench
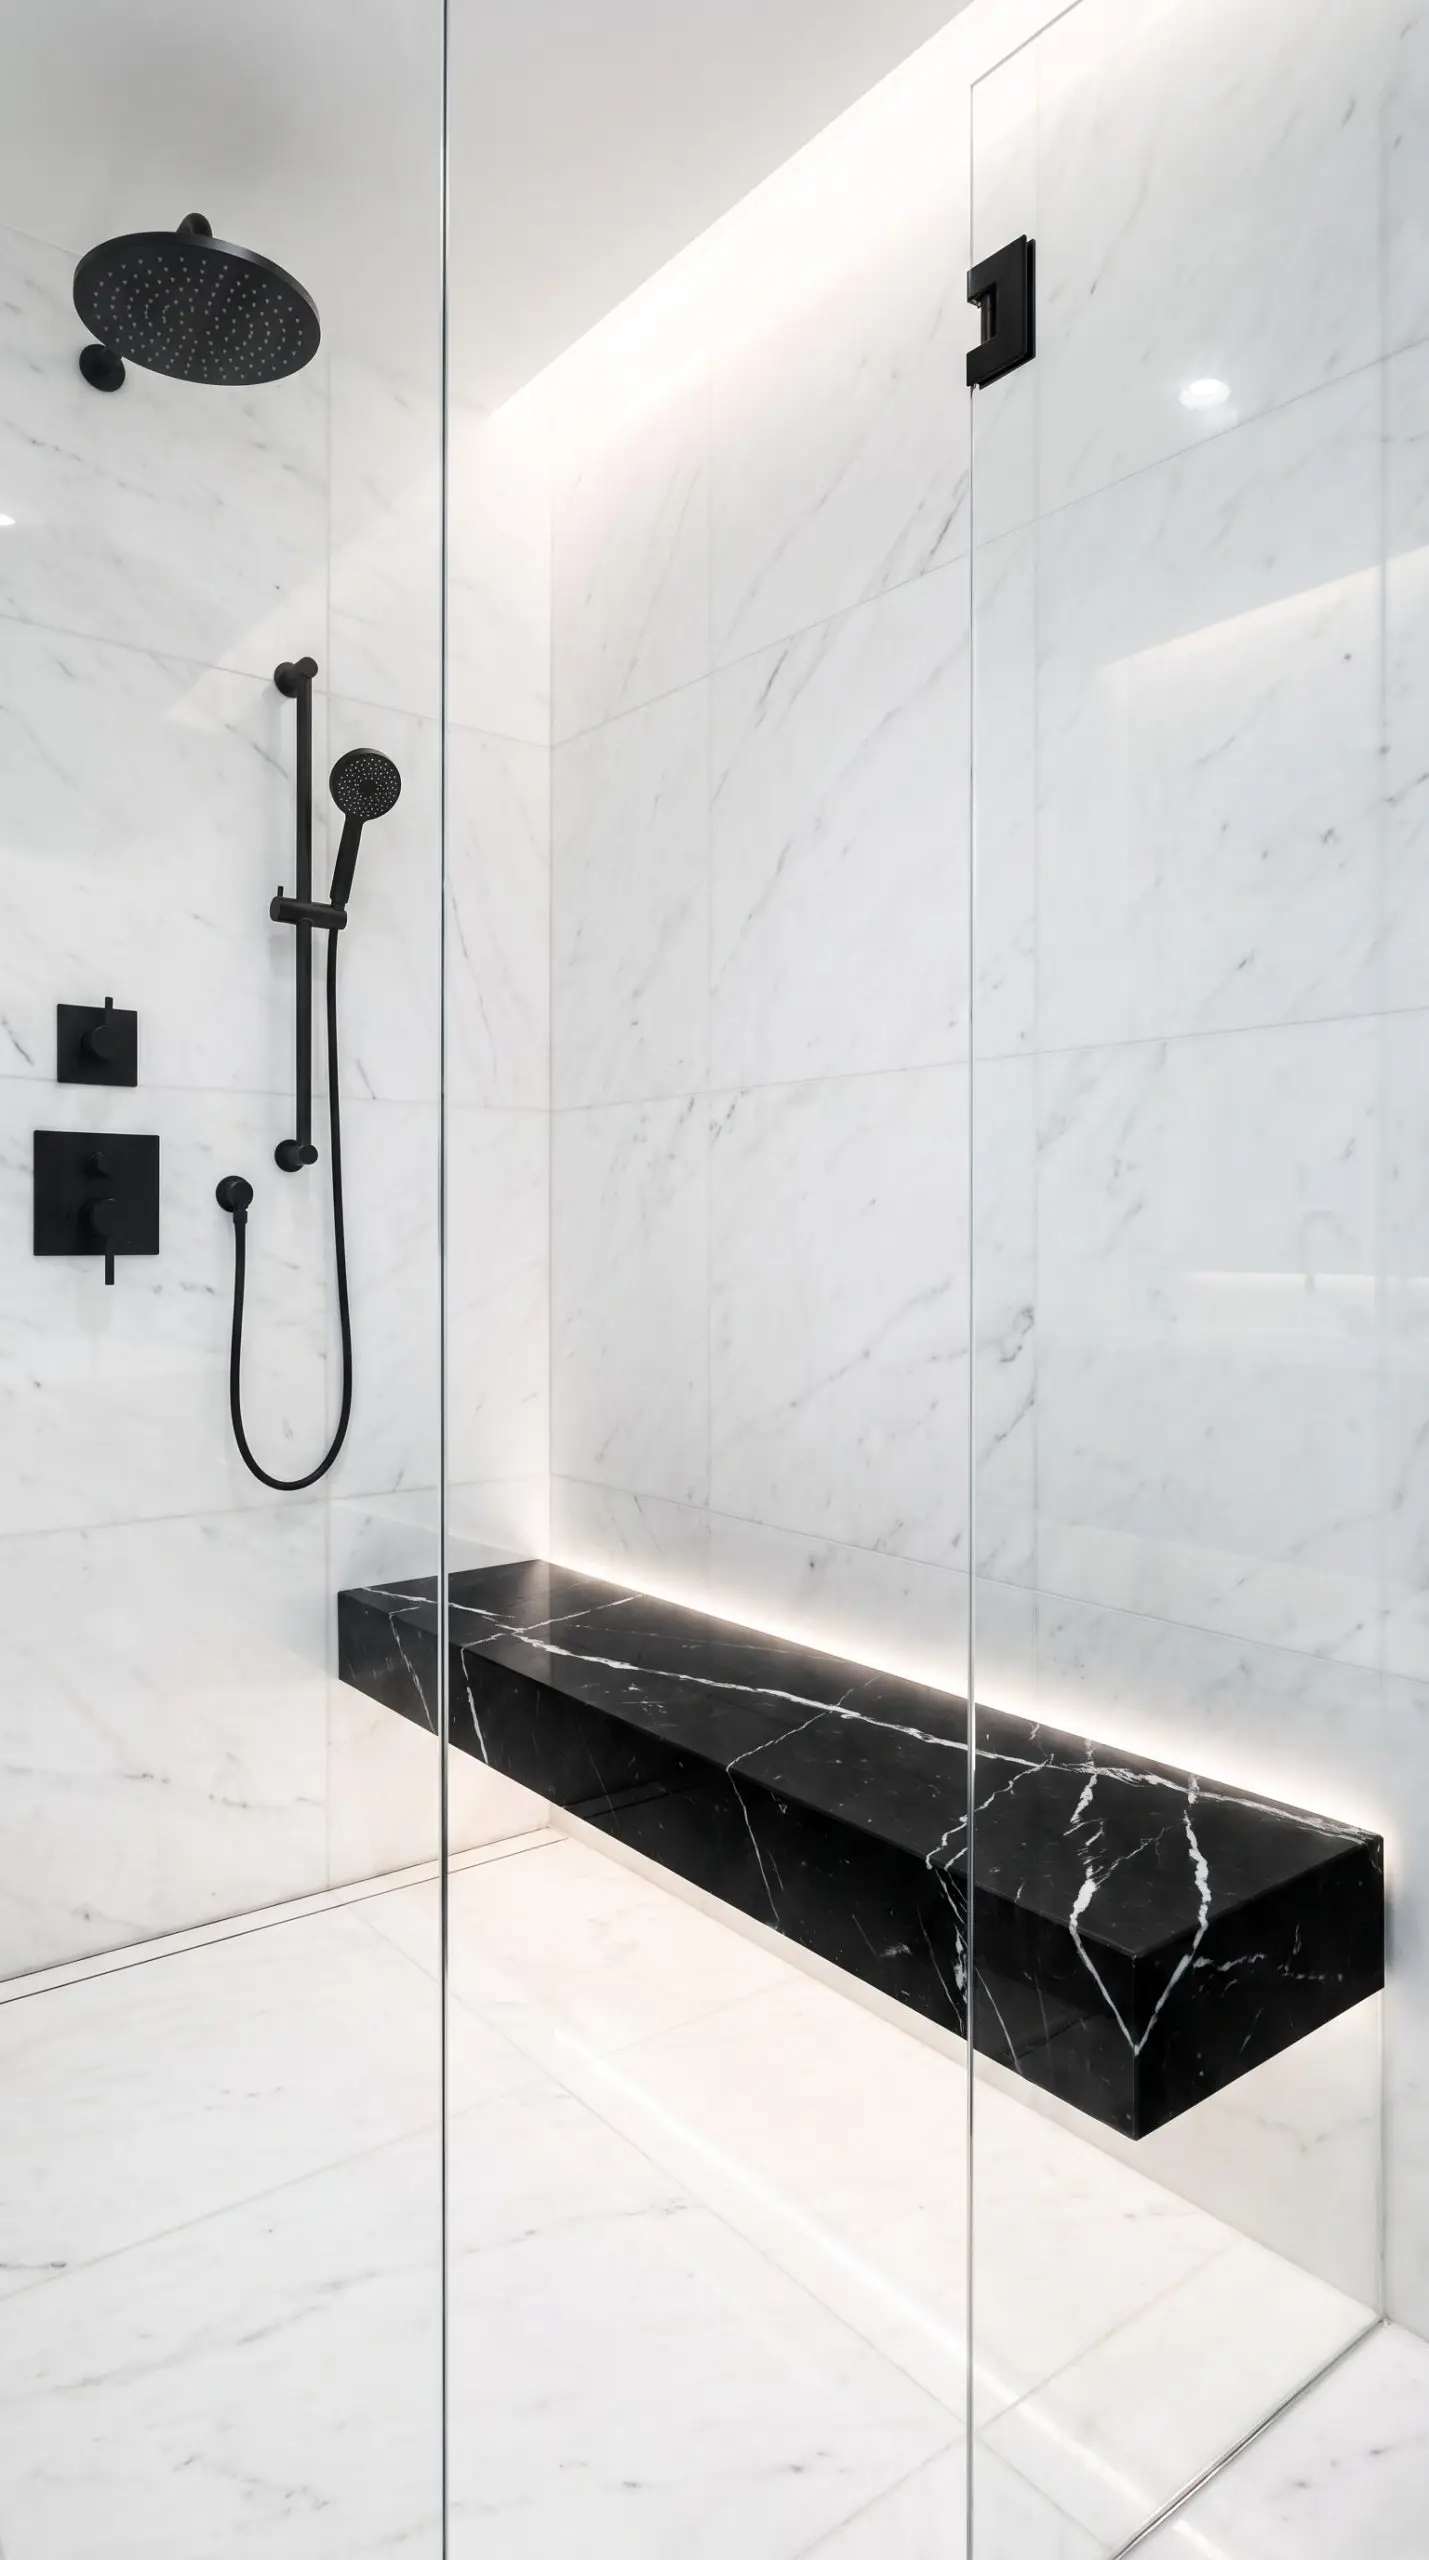
Break up an expansive white shower enclosure by installing a stark, black marble floating bench. The high-contrast Nero Marquina grounds the airy space and provides an incredibly sophisticated, functional resting point.
- Vibe: Bold Art Deco
- Key Material: Nero Marquina Polished Slab
- Styling Pro-Tip: Echo this dark accent elsewhere in the room via black hardware or a dark vanity base.
Use Large-Format Porcelain Panels for a Seamless Look
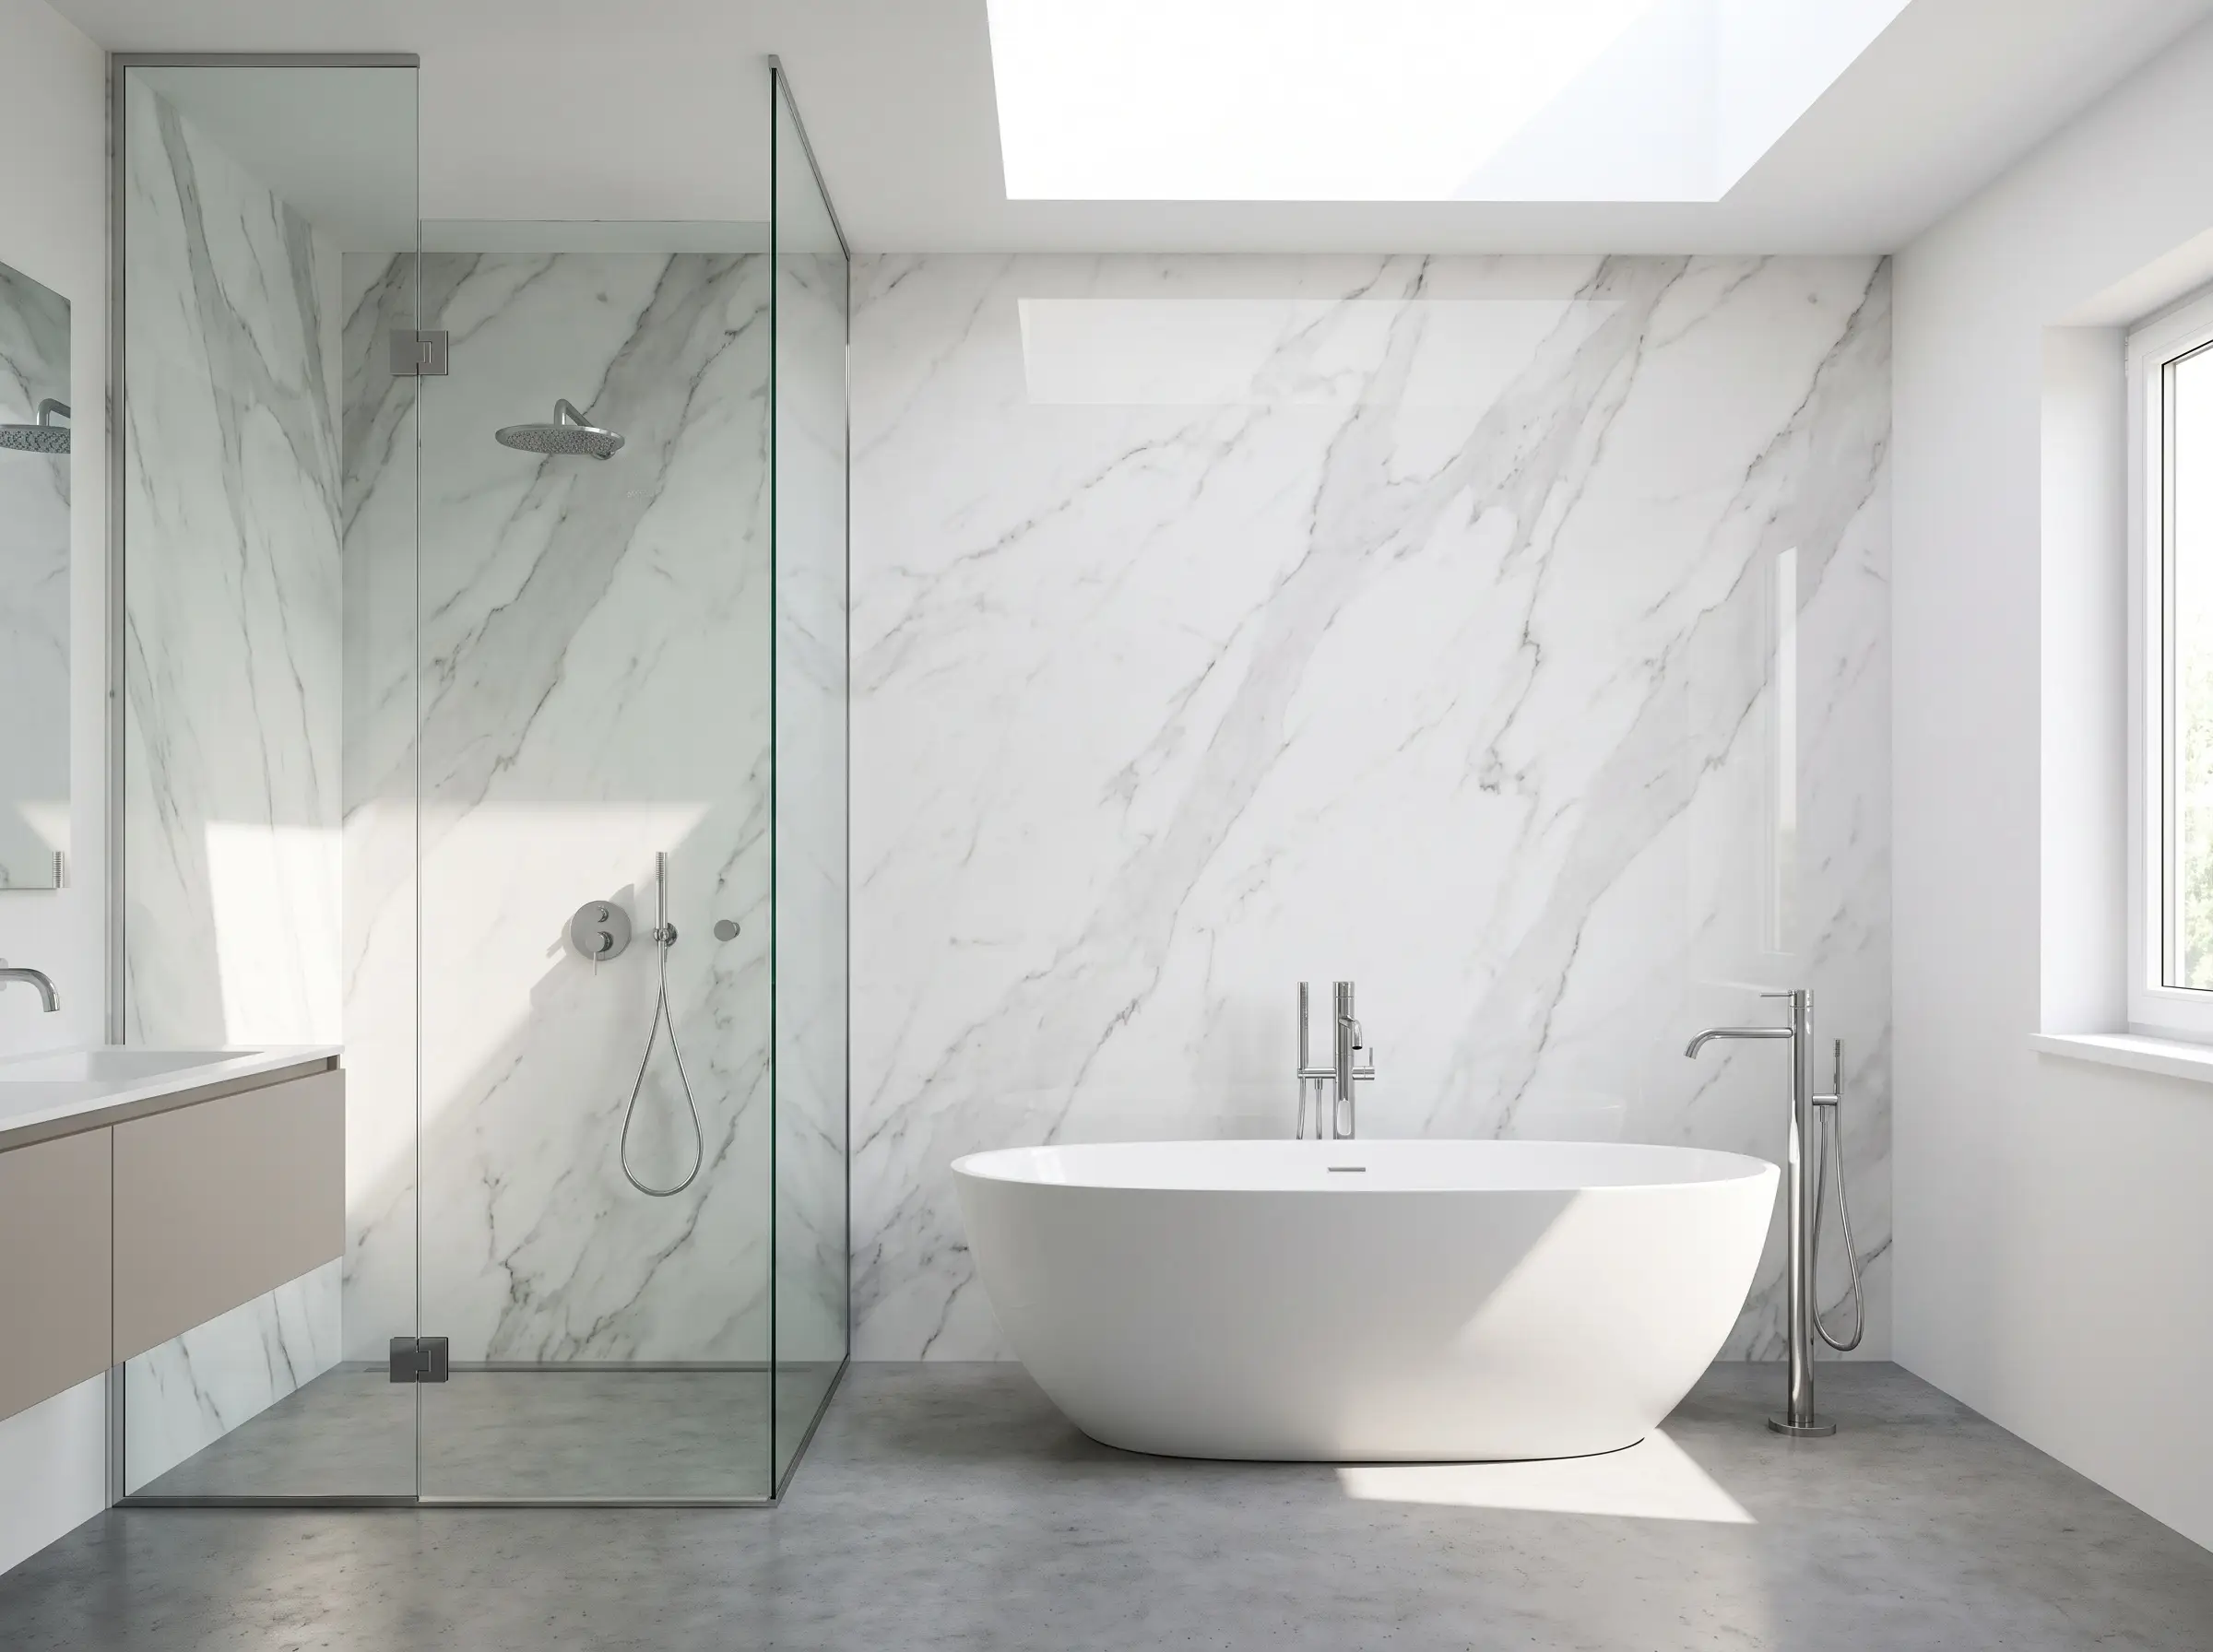
For an accessible luxury approach, high-fidelity large-format porcelain panels mimic the dramatic veining of natural stone without the heavy maintenance. These massive slabs eliminate unsightly grout lines, creating a pristine, continuous surface that is entirely impervious to water and soap scum.
- Vibe: Pristine & Contemporary
- Key Material: 120x278cm Porcelain Slabs (Calacatta or Statuario look)
- Installation Requirement: Professional installers require polymer-modified thin-set mortar designed specifically for large-format, heavy tiles.
Lay a Herringbone Mosaic on the Shower Floor for Grip
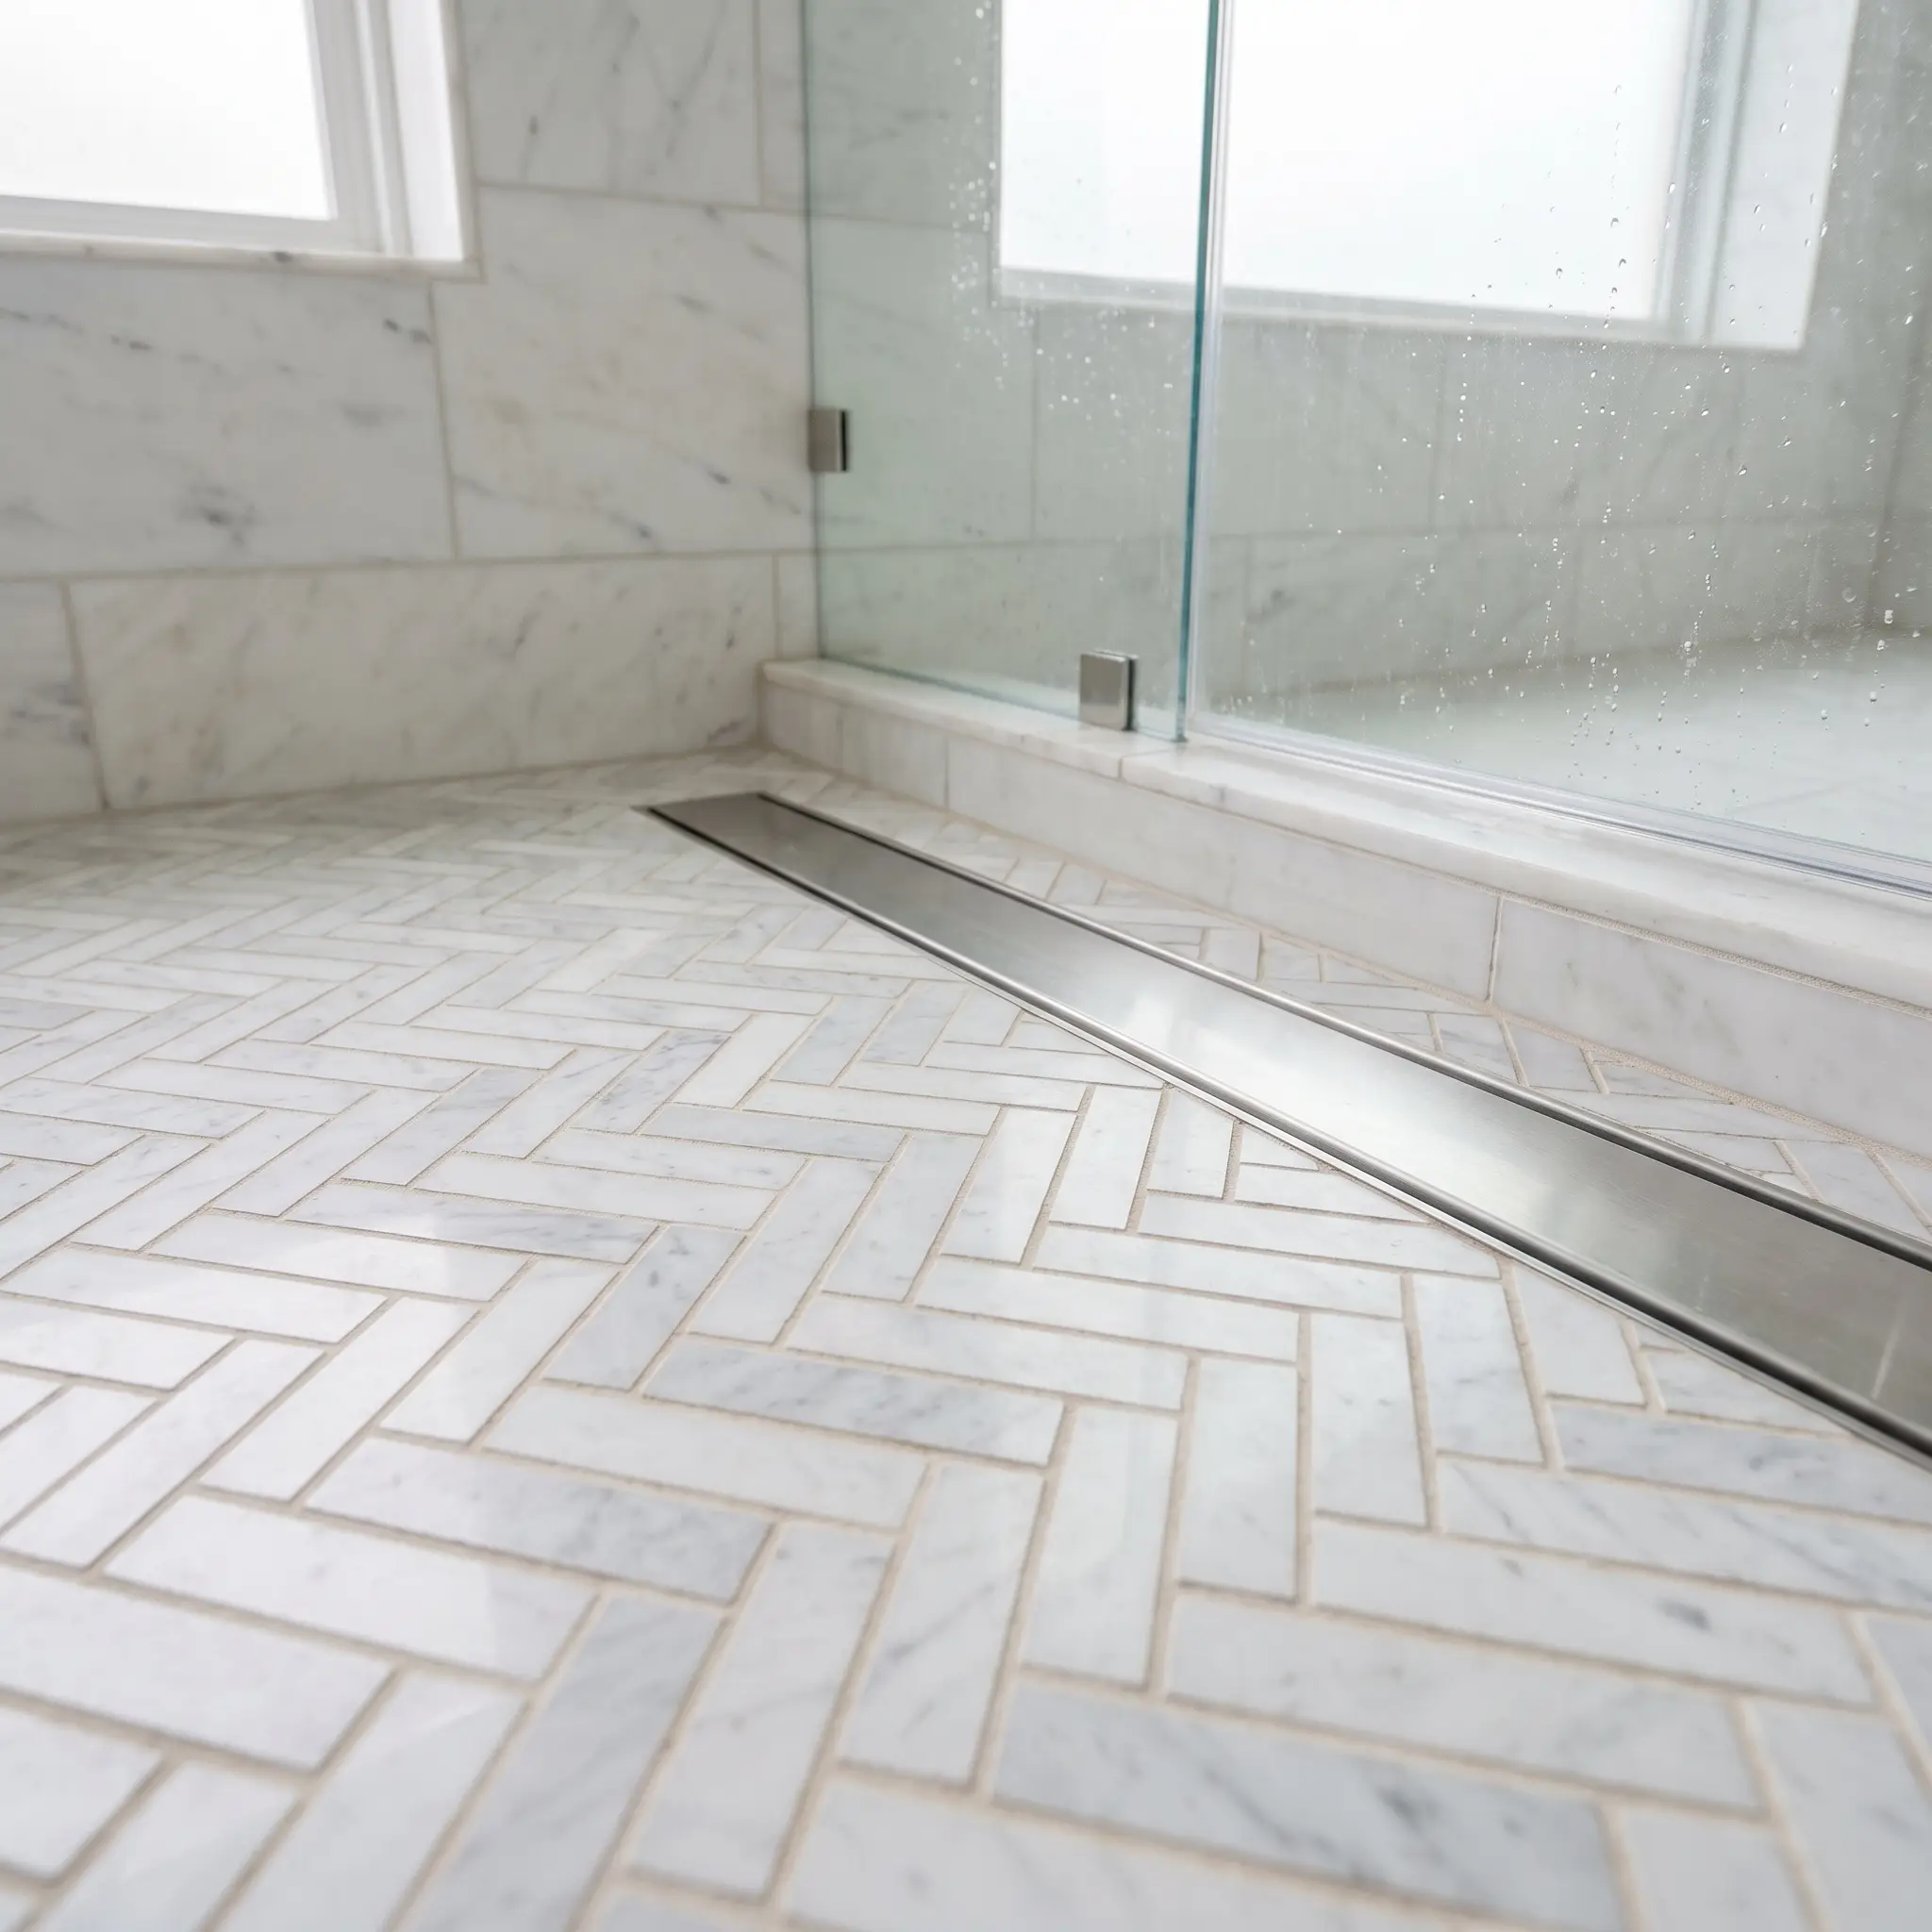
Shower floors demand friction, and a marble herringbone mosaic provides the perfect ratio of grout lines to stone surface area. The intricate geometric layout adds immediate visual interest while naturally shedding water toward the drain.
- Vibe: Timeless & Functional
- Key Material: Honed Carrara or Thassos Marble Mosaics
- Grout Recommendation: Use a sanded grout for additional traction underfoot.
Industry building codes and basic physics dictate that you must never install polished marble slabs or large polished tiles on a shower floor. The lack of friction creates an immediate, severe slip hazard when wet. Always specify a honed finish or a small-scale mosaic for wet-zone flooring.
Safety Note
Vanity & Sink Applications
If a full-room stone application stretches the budget, the vanity is the absolute best place to concentrate your investment. This is the primary tactile touchpoint of the bathroom, demanding high-quality materials and precise millwork.
Mount a Floating Calacatta Viola Plinth Sink
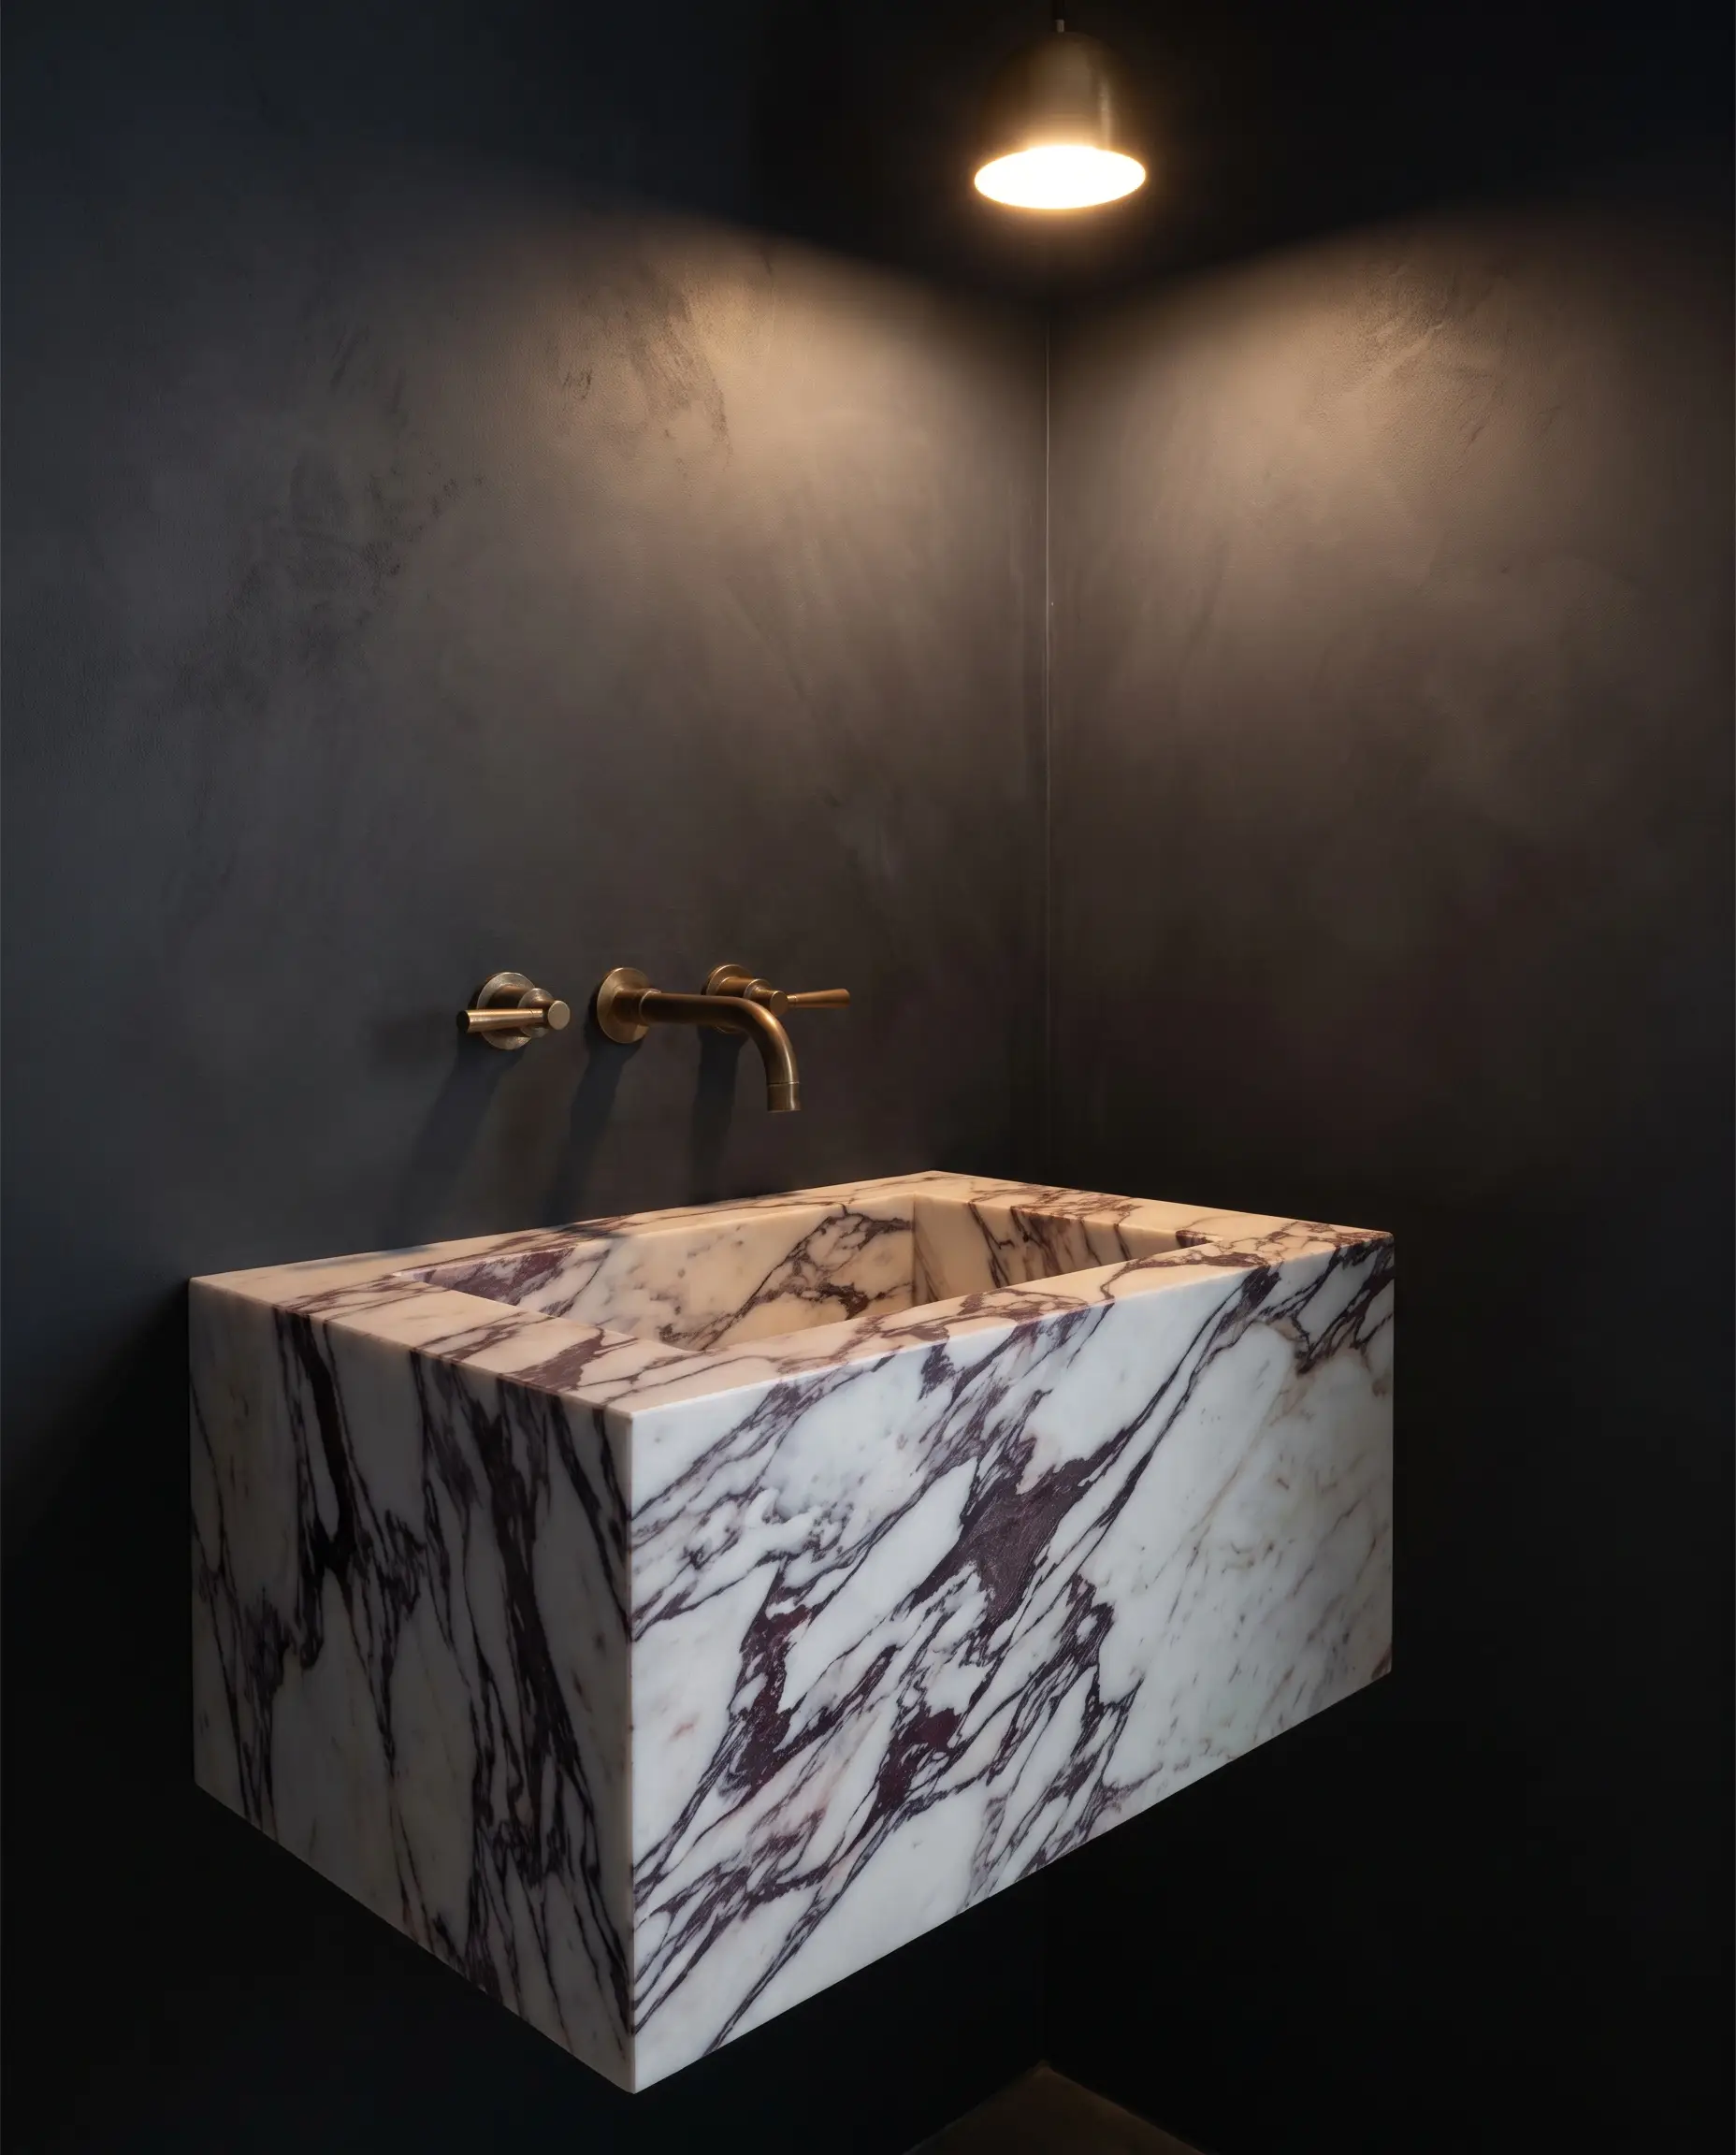
Calacatta Viola features aggressive, heavy burgundy veining that makes a massive statement in a powder room or primary bath. Mounting it as a floating, block-style plinth sink creates a bespoke, sculptural moment that feels heavily rooted in postmodern design.
- Vibe: Postmodern Bespoke
- Key Material: Calacatta Viola Marble
- Hardware Match: Unlacquered brass wall-mounted faucets.
Specify a Deep Mitered Drop-Edge on the Countertop
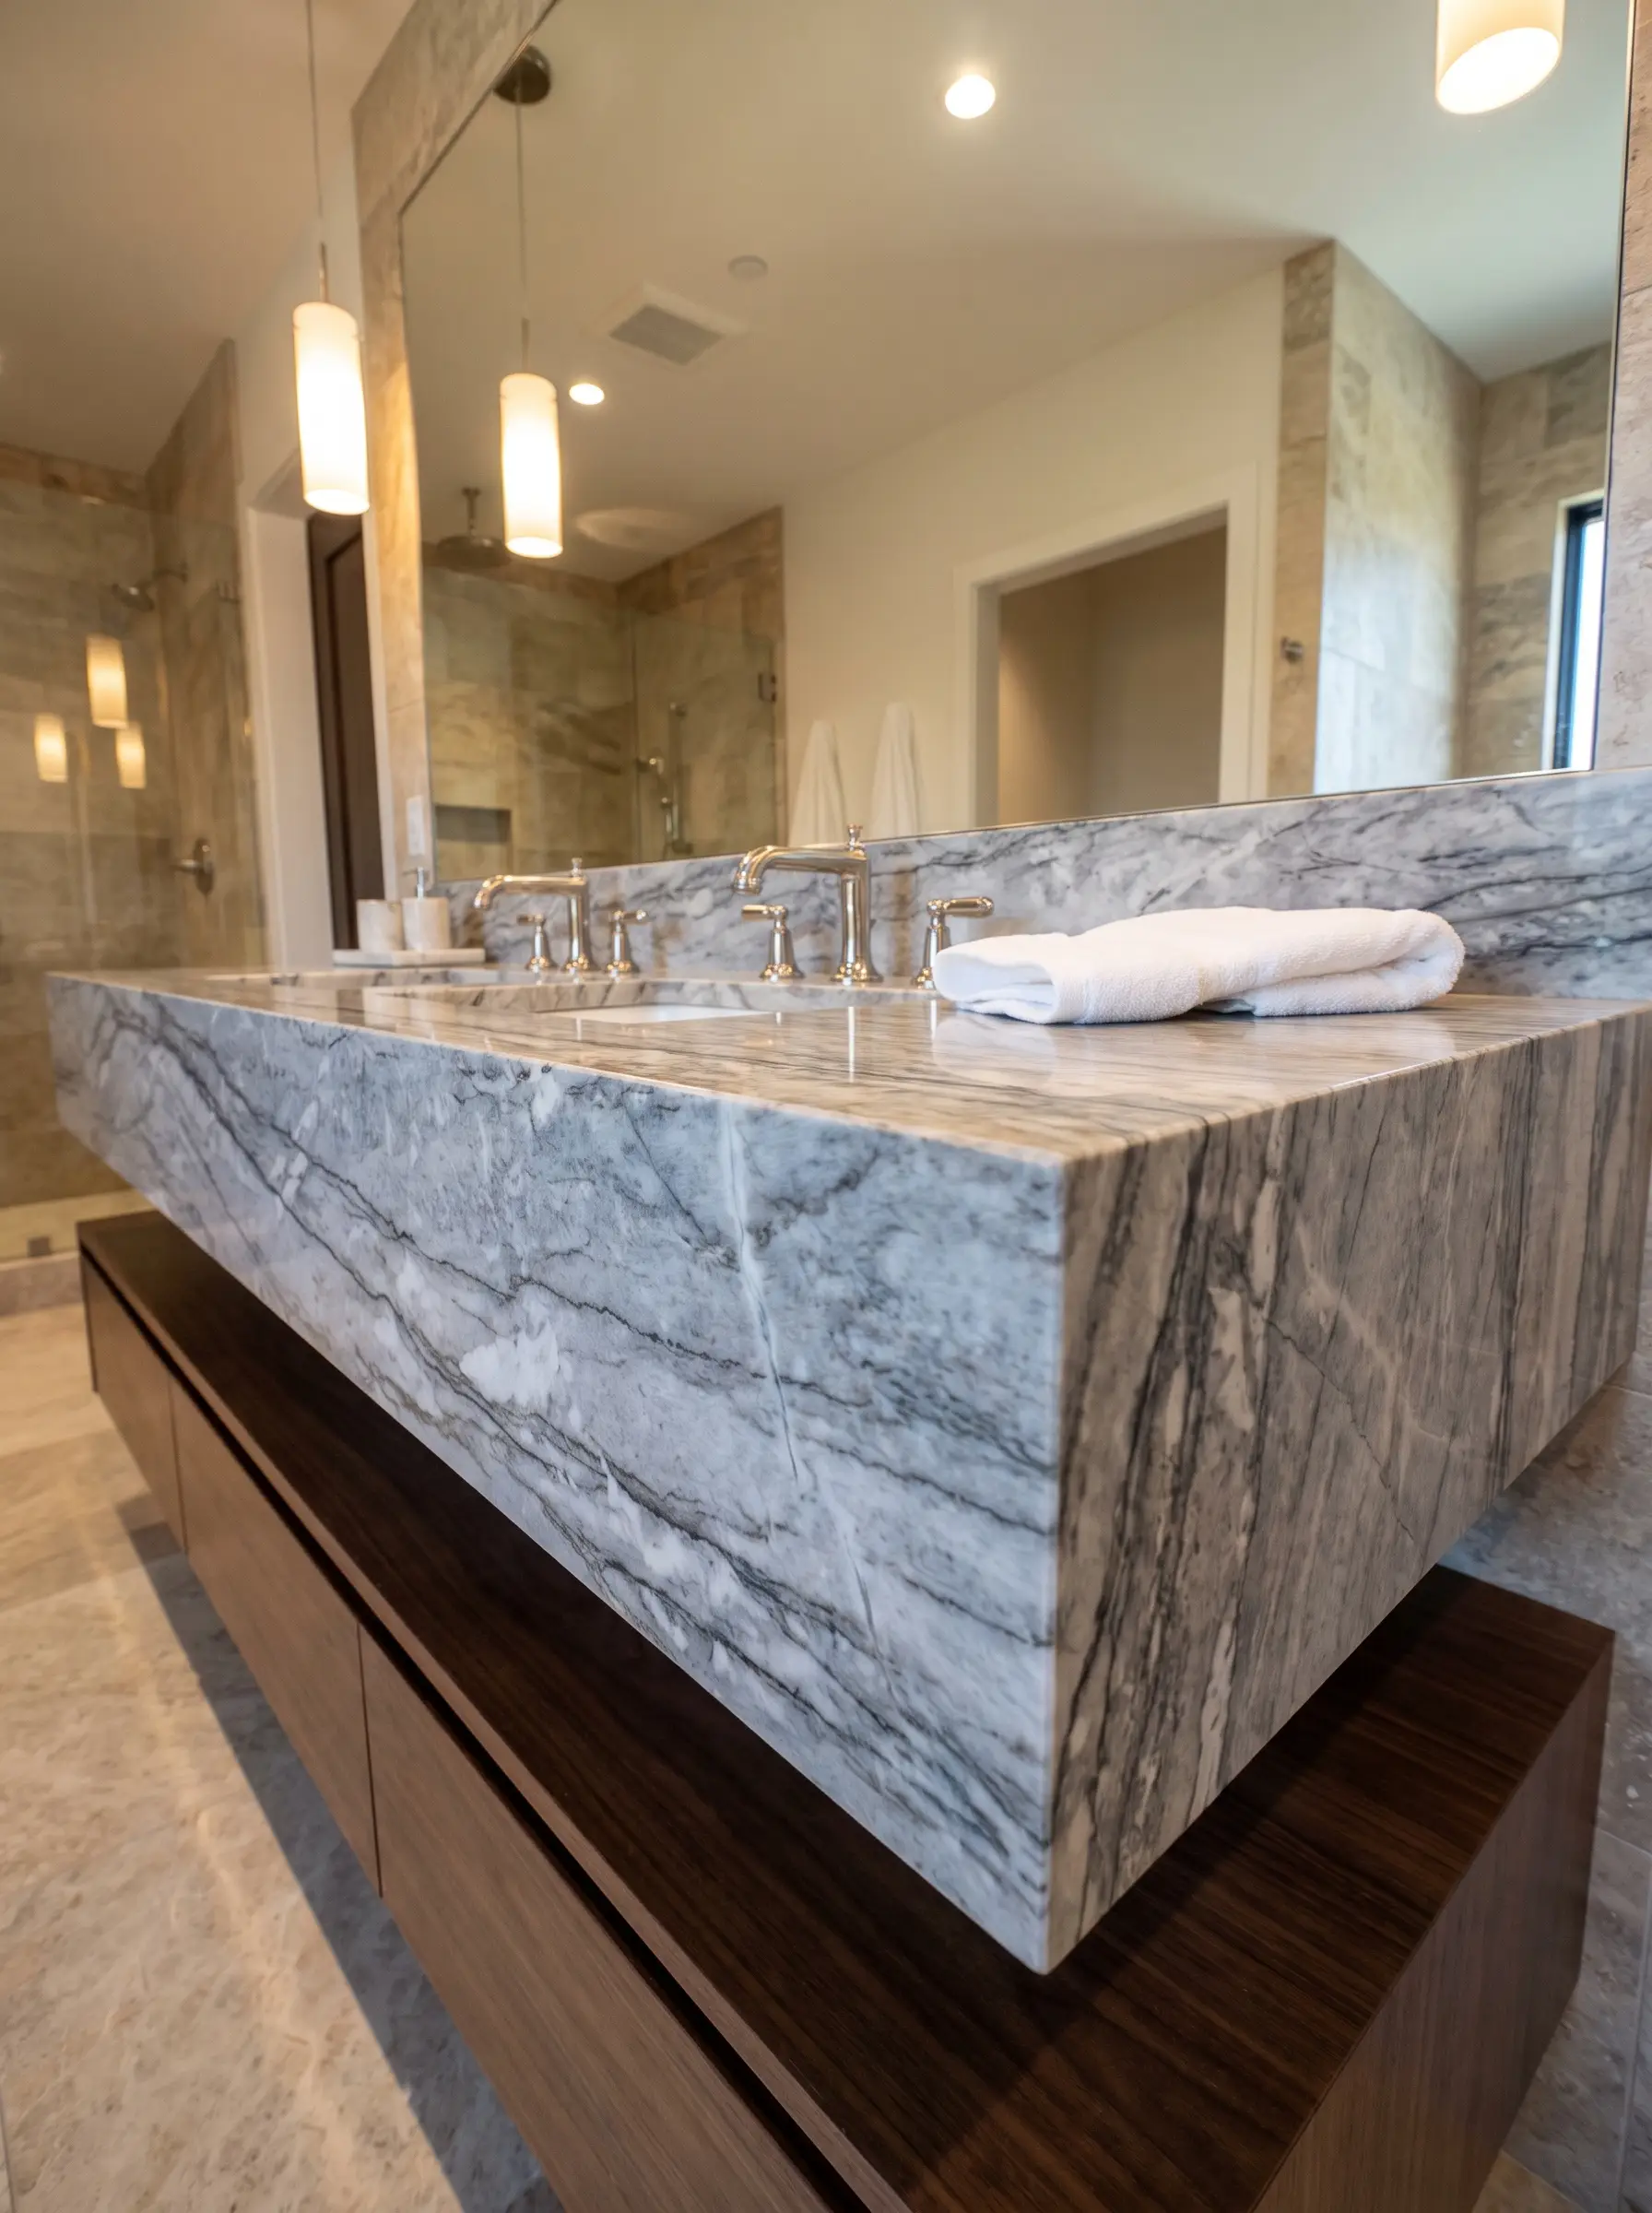
A standard 2cm countertop can look thin and uninspired. Specifying a deep mitered drop-edge gives the illusion of a massive, solid block of stone, instantly increasing the perceived value and visual weight of the vanity.
- Vibe: Substantial & Luxurious
- Key Material: Any heavily veined marble
- Fabrication Detail: The vein must perfectly waterfall over the edge to maintain the illusion of a solid block.
A mitered edge involves cutting the top slab and the edge piece at 45-degree angles and joining them seamlessly. This allows you to purchase a less expensive, thinner slab while achieving the luxurious look of a 3-inch or 4-inch thick piece of solid stone.
Designer Secret
Pair a Carrara Top with a Fluted White Oak Vanity
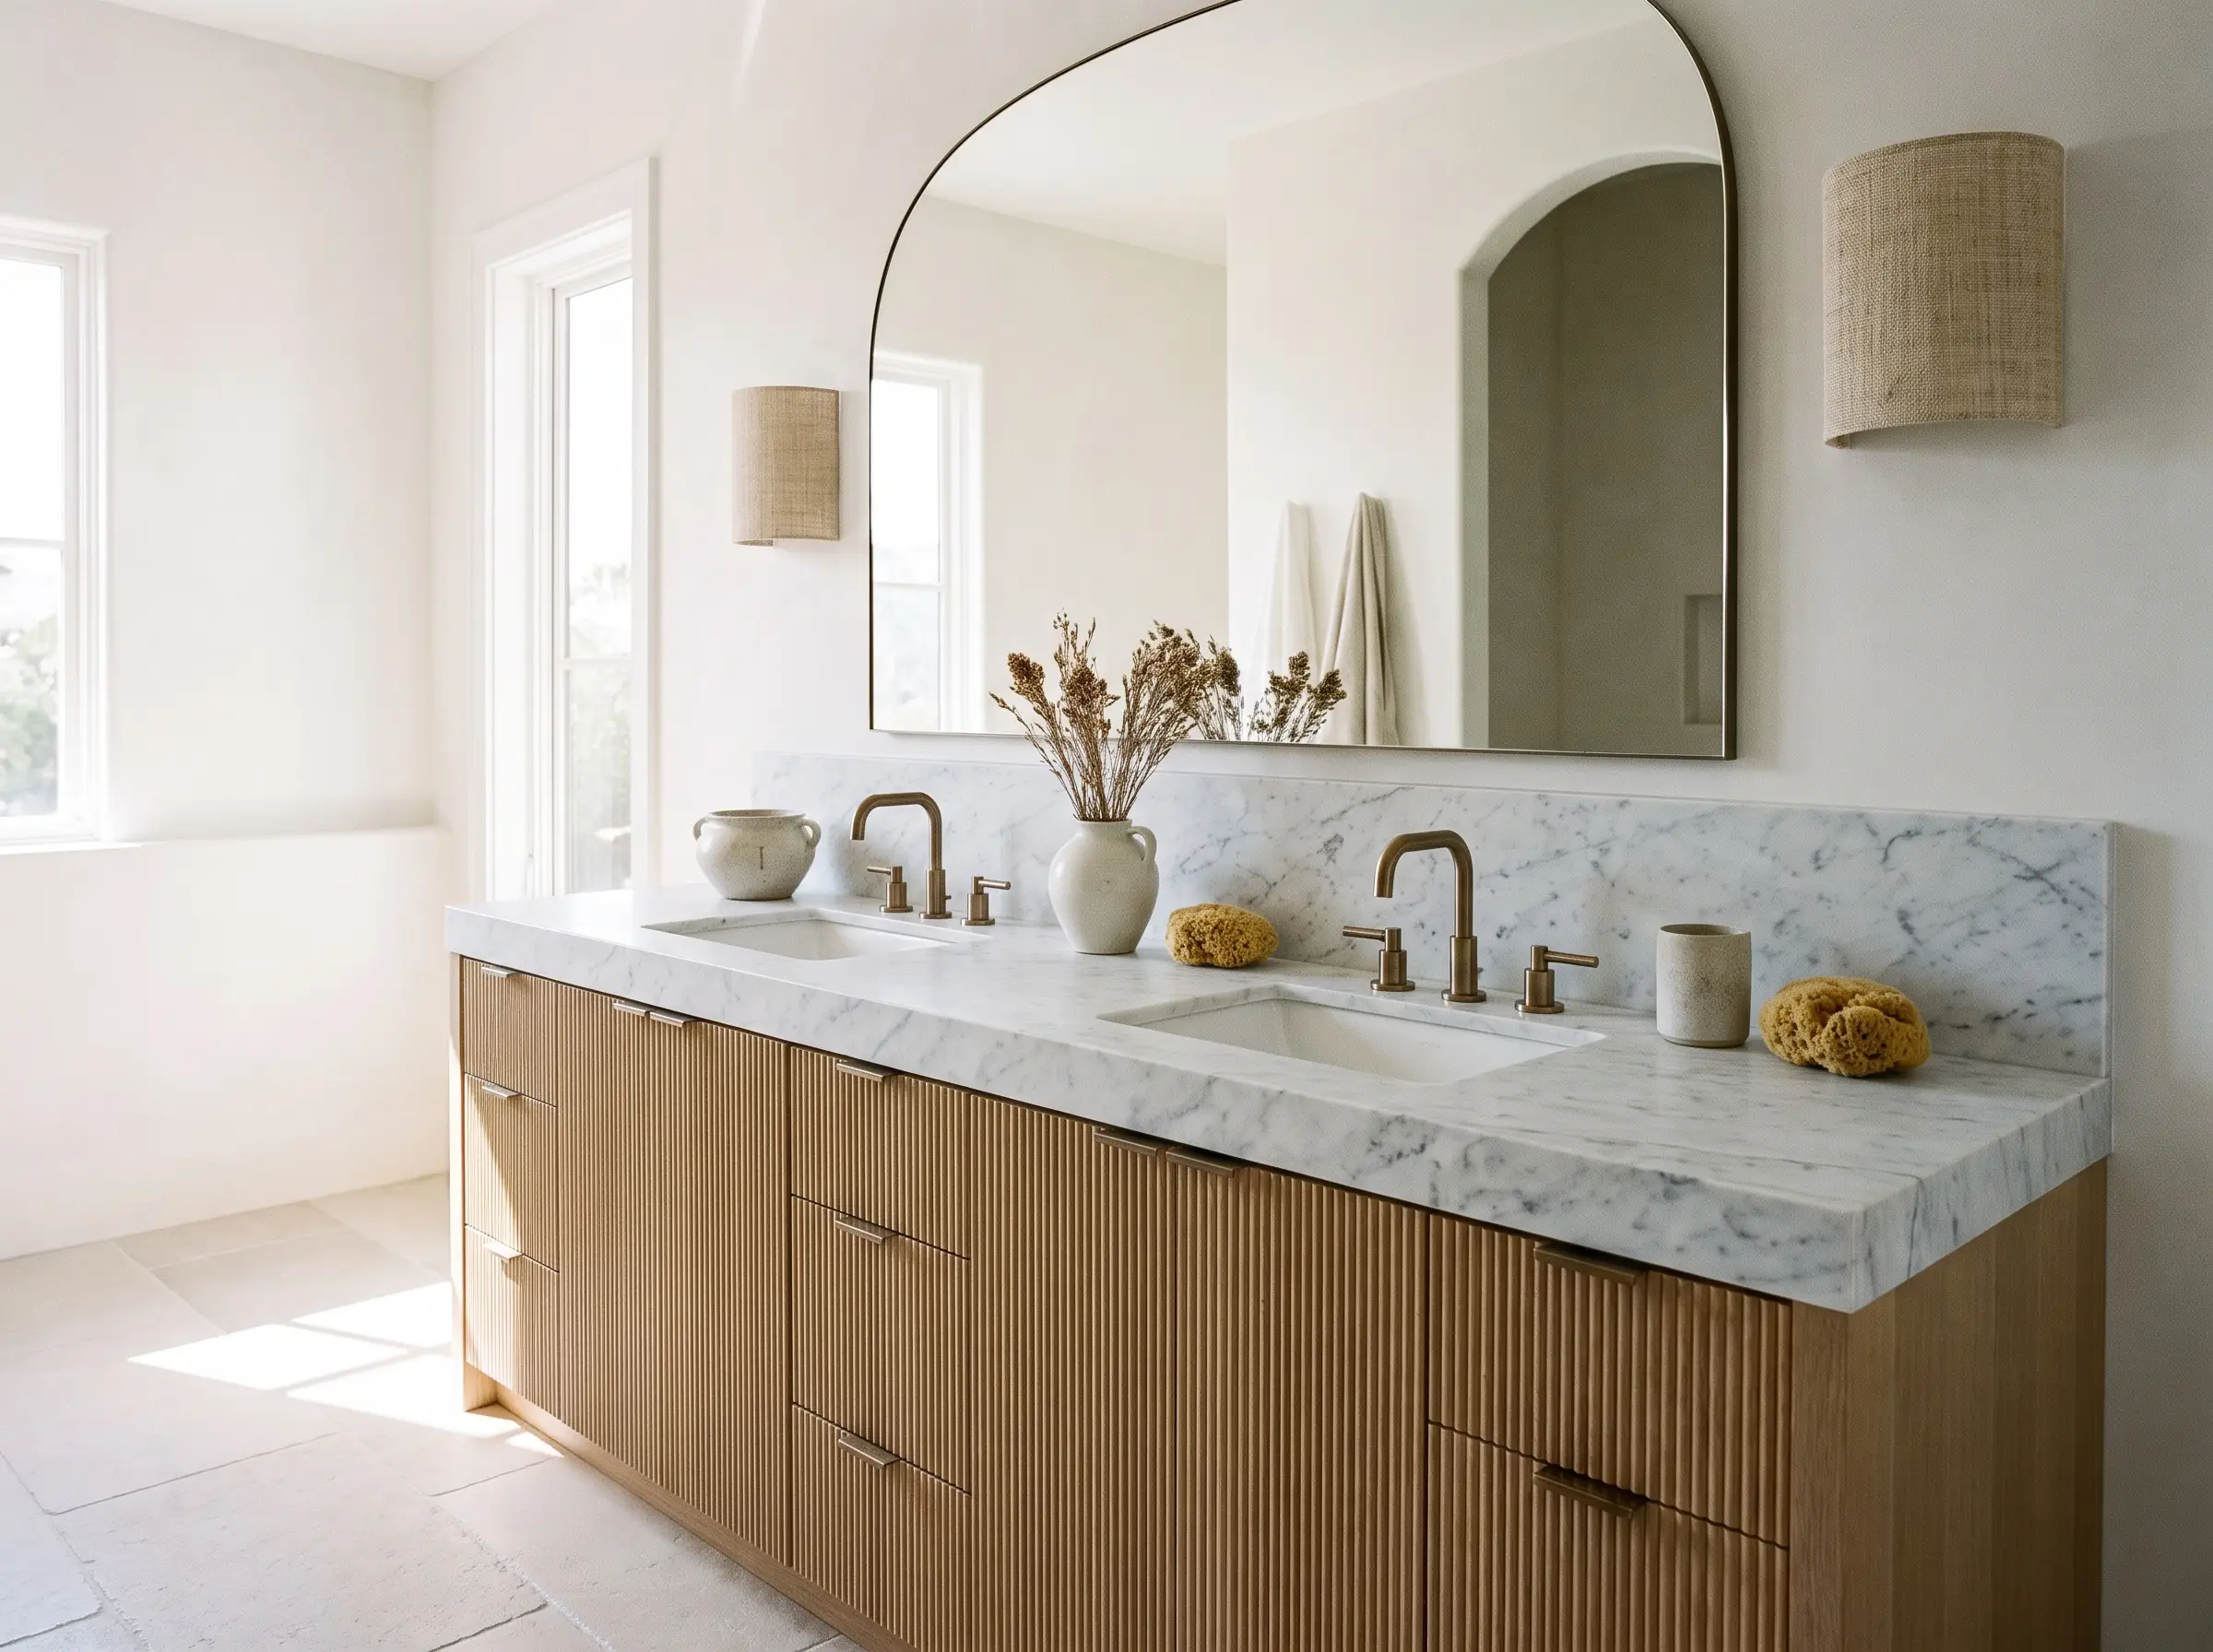
Cool-toned stones require organic warmth to prevent the space from feeling clinical. Pairing a crisp Carrara marble top with a custom fluted wood vanity strikes the perfect organic modern balance.
- Vibe: Organic Modern
- Key Material: Honed Carrara Marble
Wood Species Pairings:
- Rift-Sawn White Oak (Light, airy, coastal)
- Natural Walnut (Rich, mid-century warmth)
- Teak (Highly moisture-resistant, spa-like)
Install an Integrated Stone Trough Sink for a Bespoke Vibe
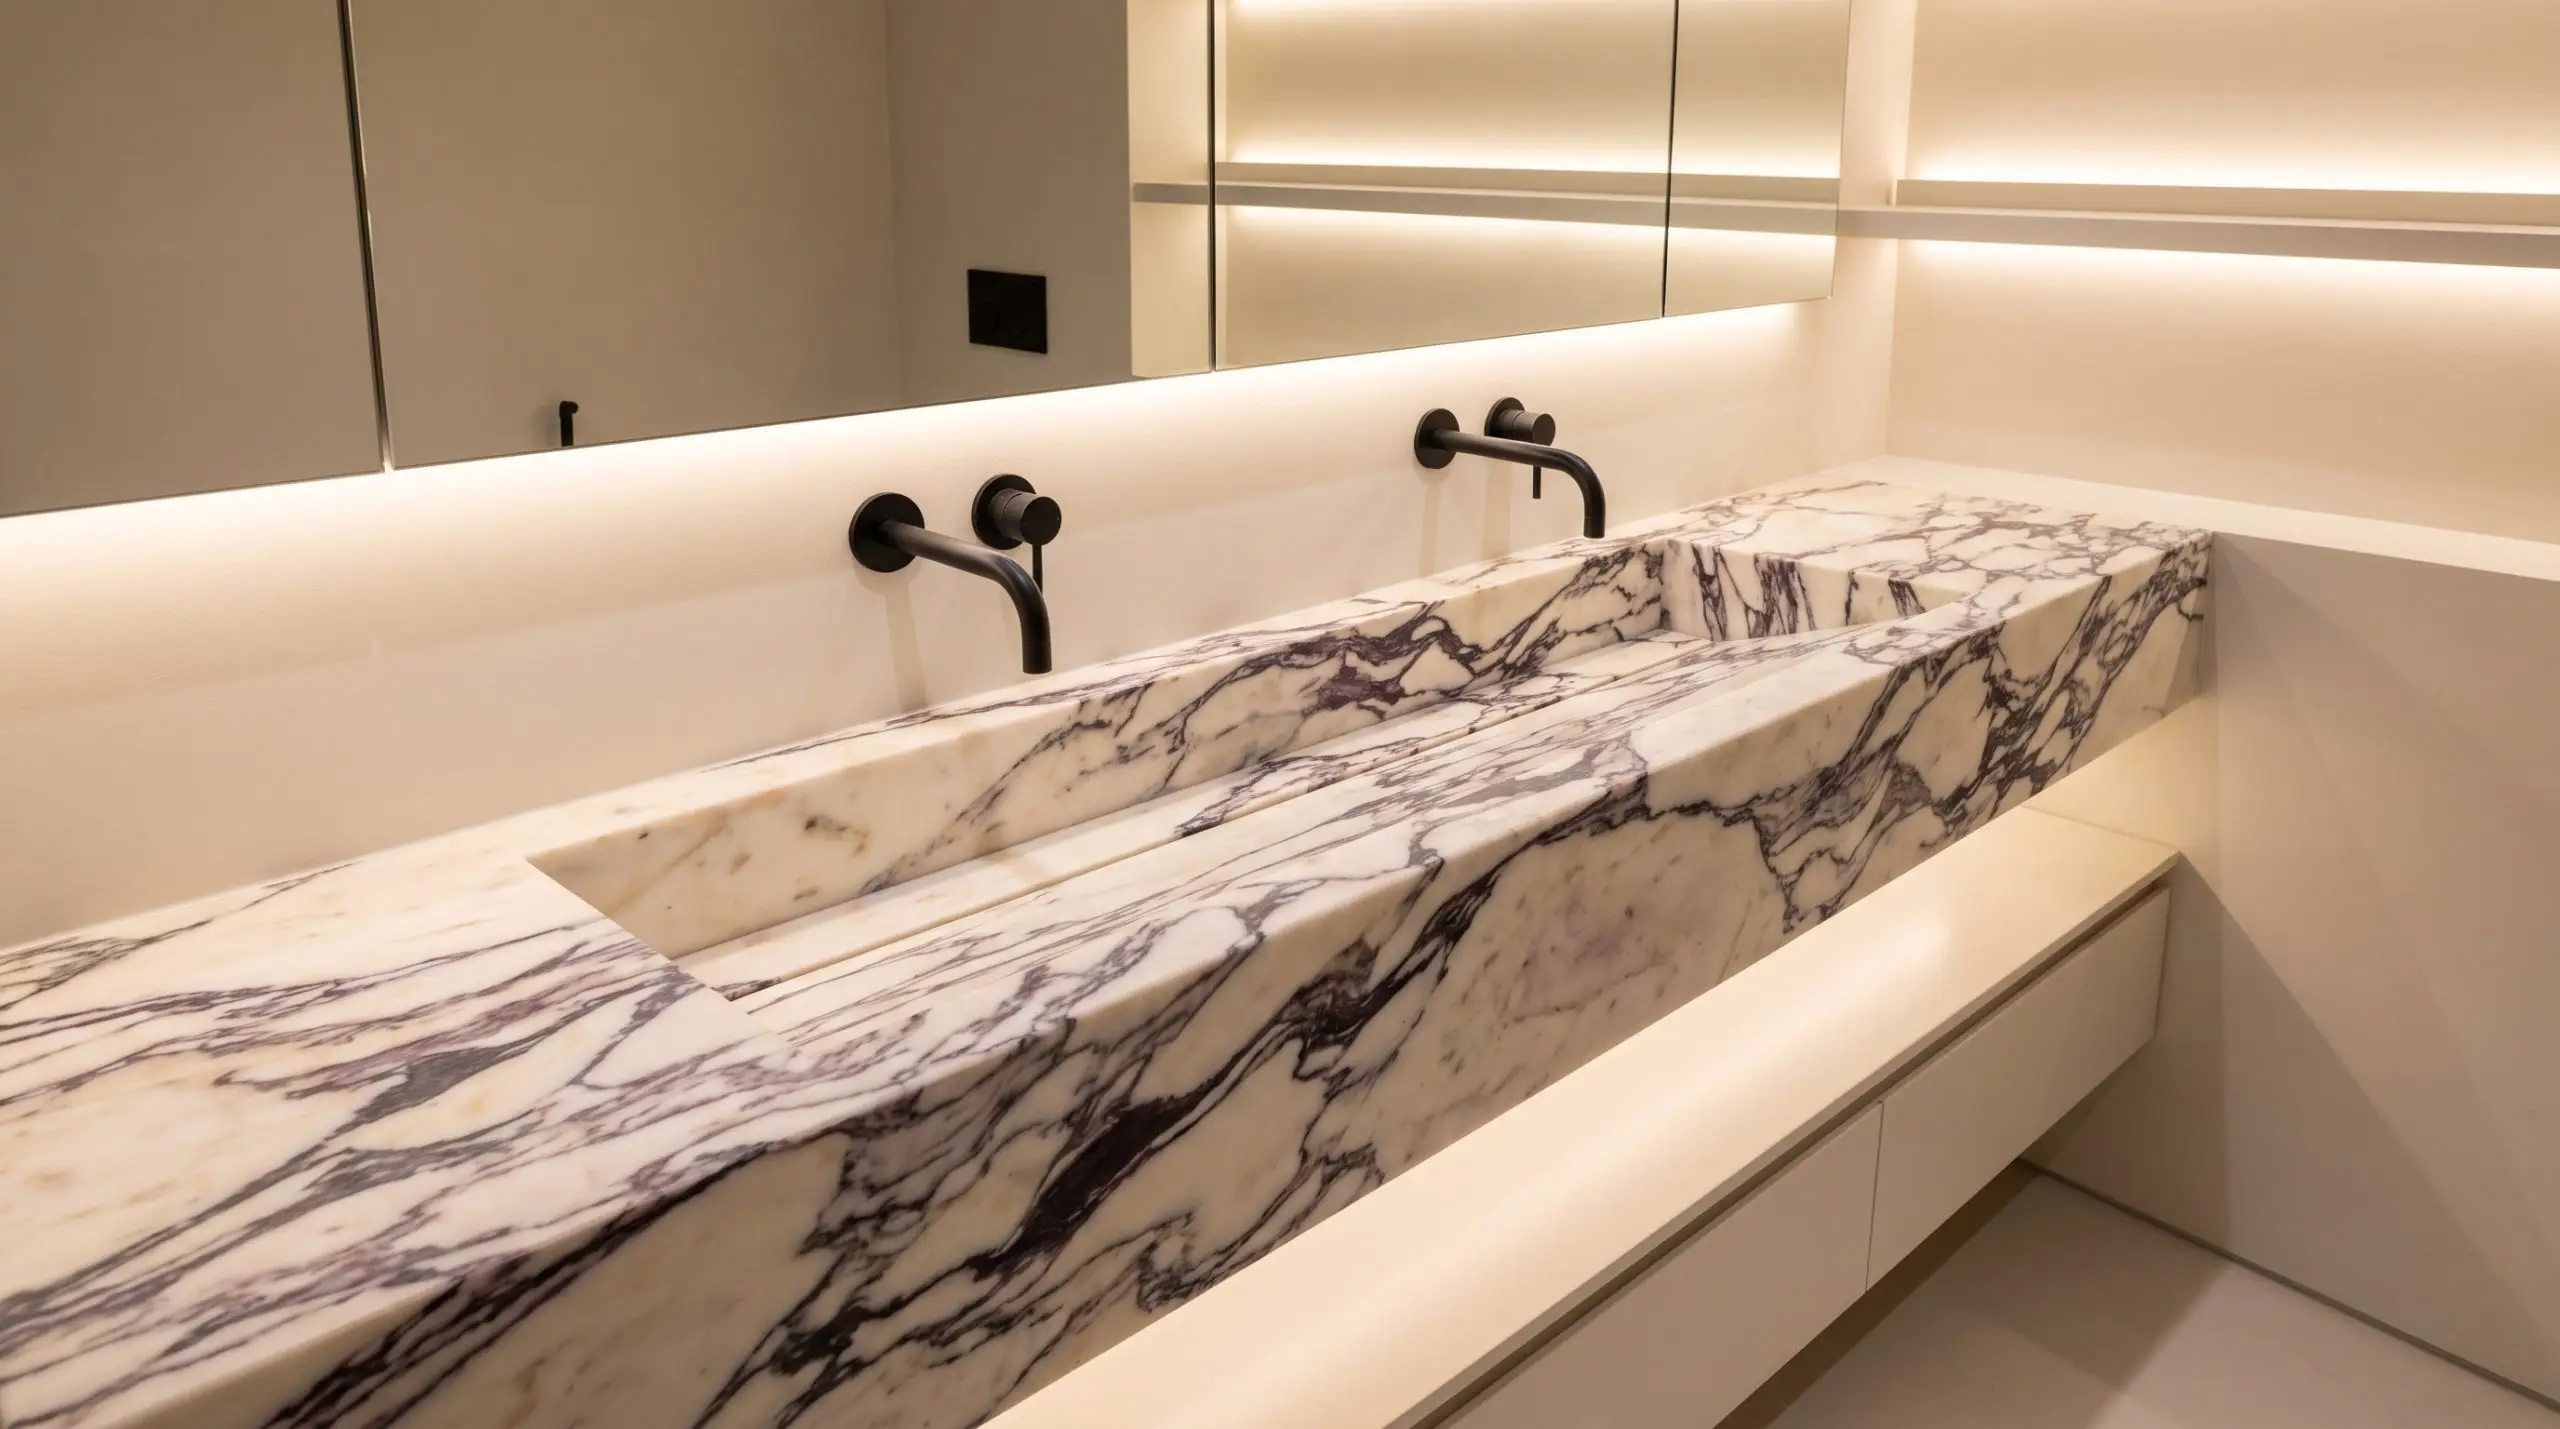
Forego the standard porcelain drop-in basin and have your fabricator build an integrated sloping trough sink directly out of the countertop material. This requires elite craftsmanship and results in a stunning, uninterrupted flow of stone.
- Vibe: Minimalist Luxury
- Key Material: Arabescato Corchia or Travertine
- Drain Detail: Opt for a hidden slot drain to maintain the sleek, unbroken surface.
Design a High-Splashback with a Scalloped Edge
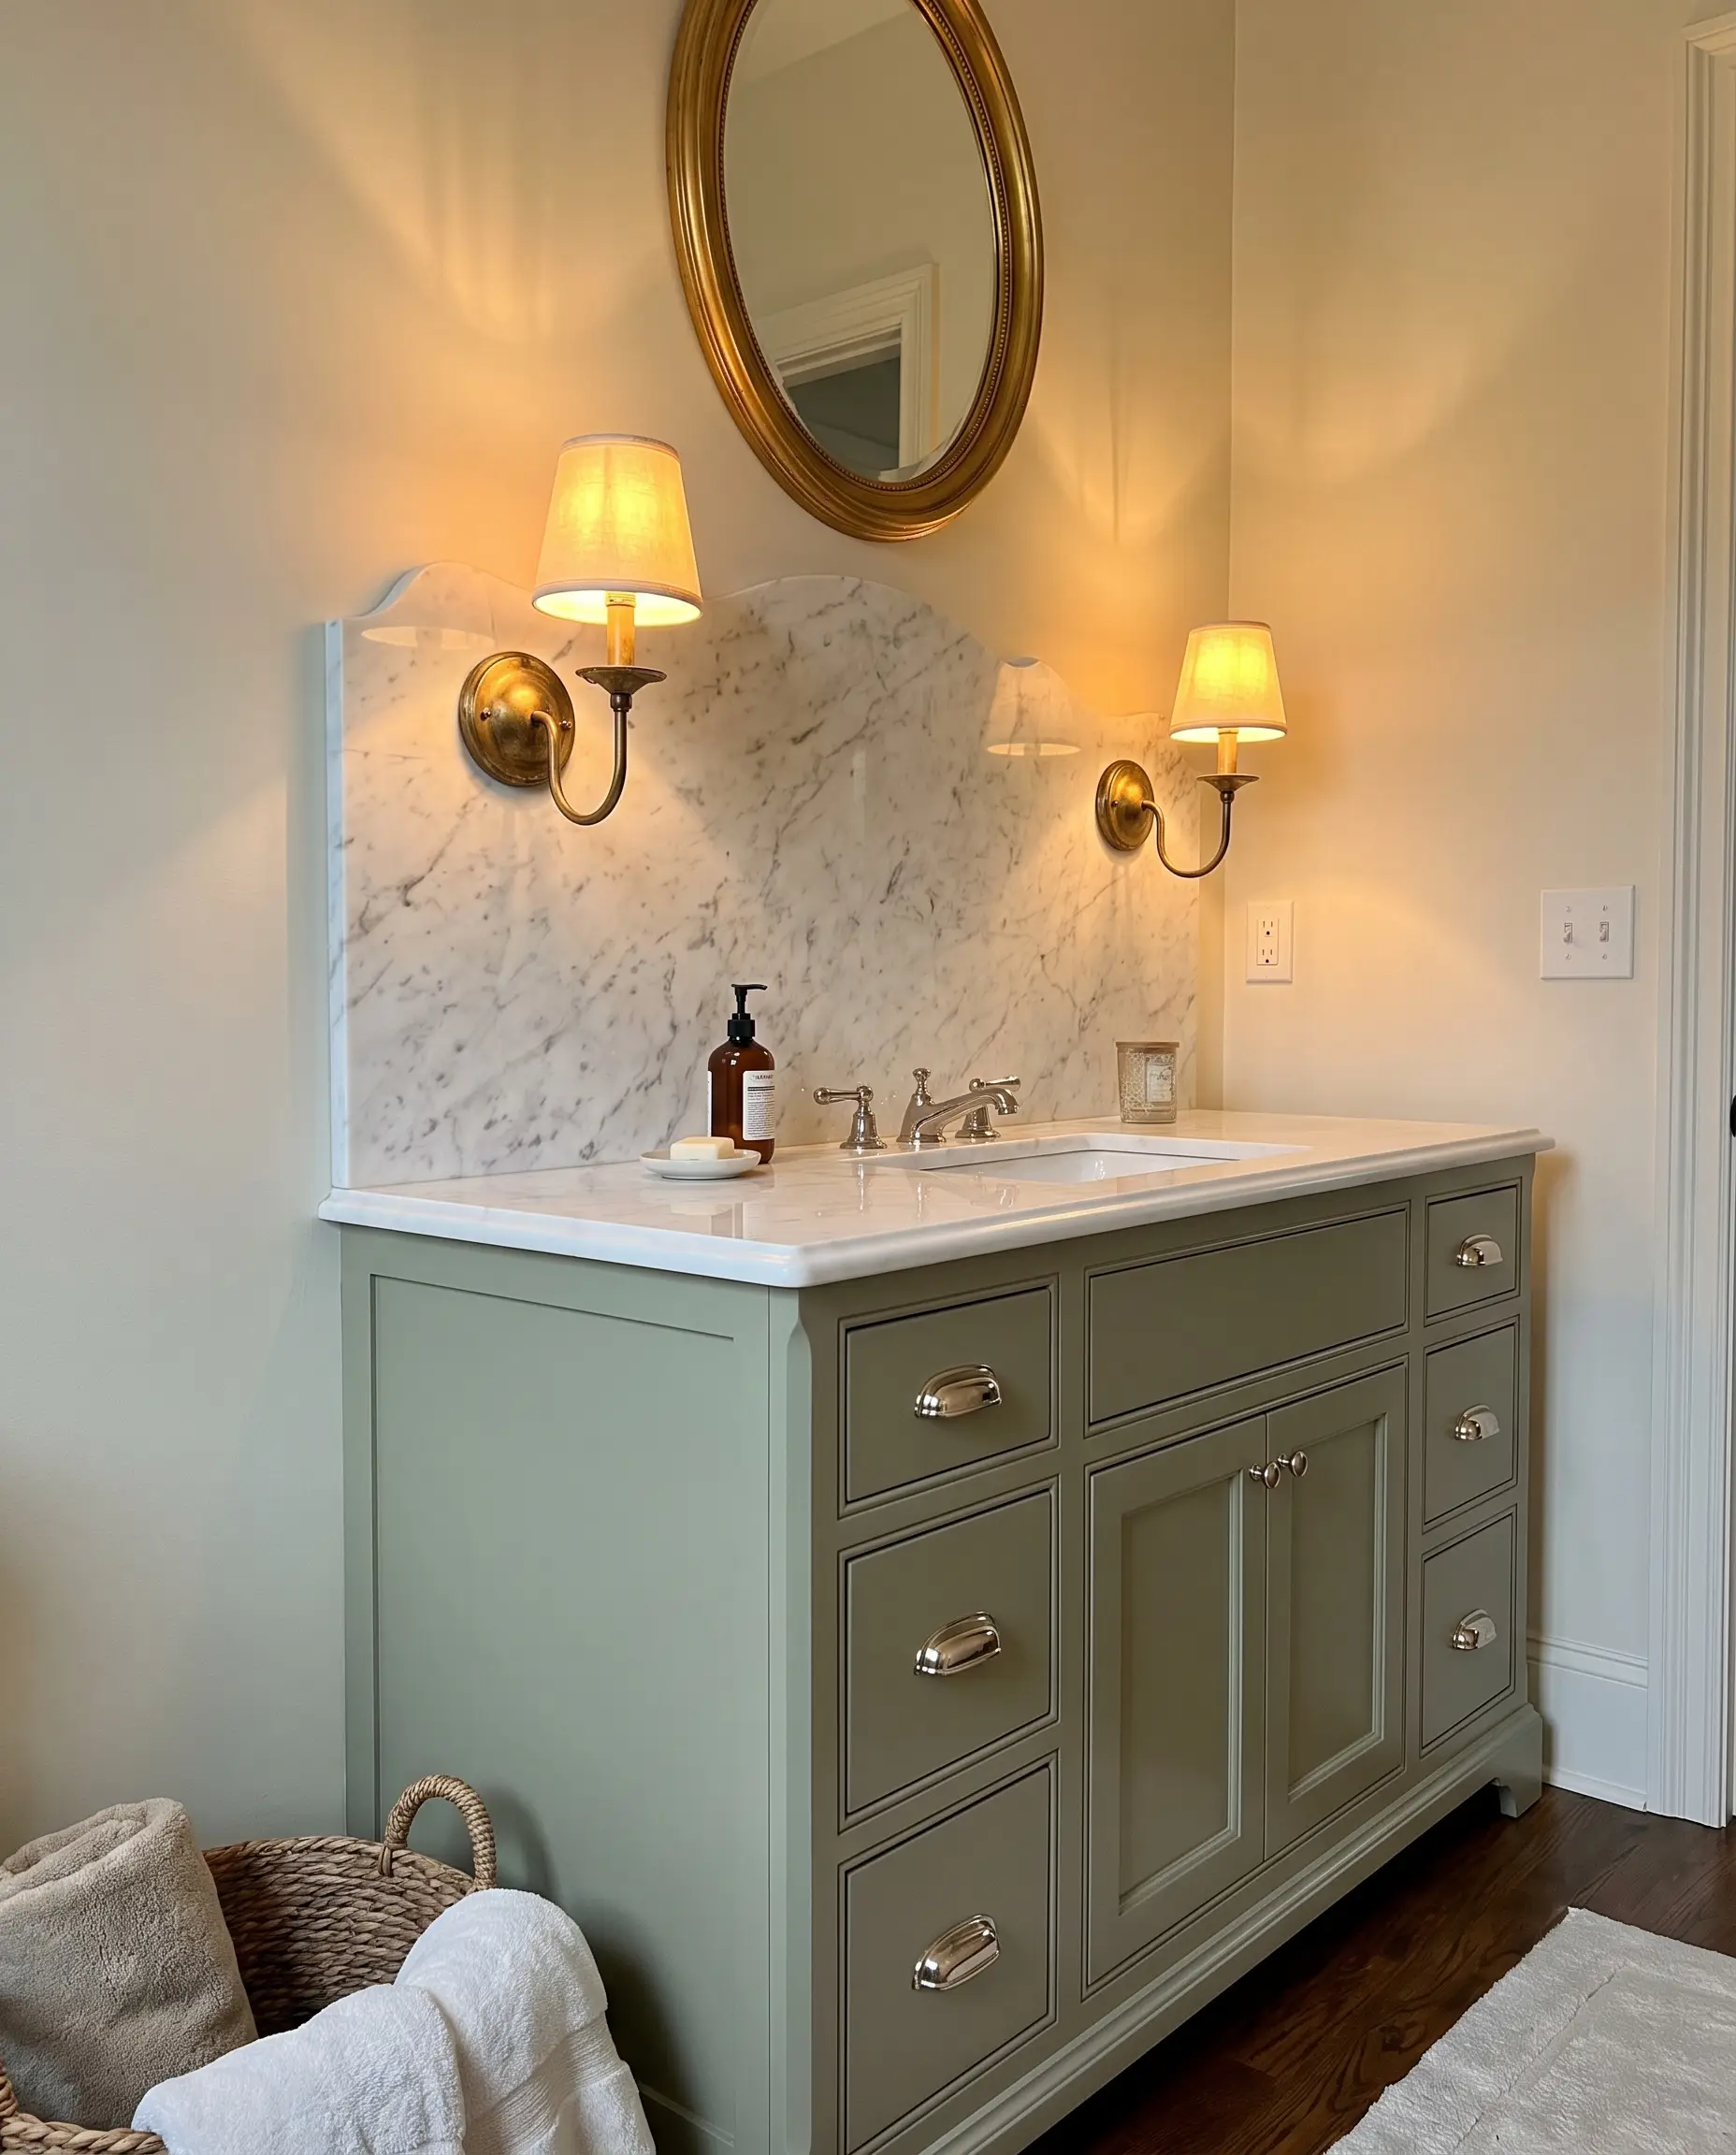
Standard 4-inch backsplashes lack imagination. Extend your marble backsplash up to 12 or 18 inches, and have the fabricator cut a soft, scalloped profile into the top edge to introduce a romantic, custom architectural detail.
- Vibe: Romantic Traditional
- Key Material: Statuario Marble
- Styling Pro-Tip: Mount your sconces directly onto the high marble backsplash for a layered, high-end look.
Top a Vintage Dresser with Honed Arabescato
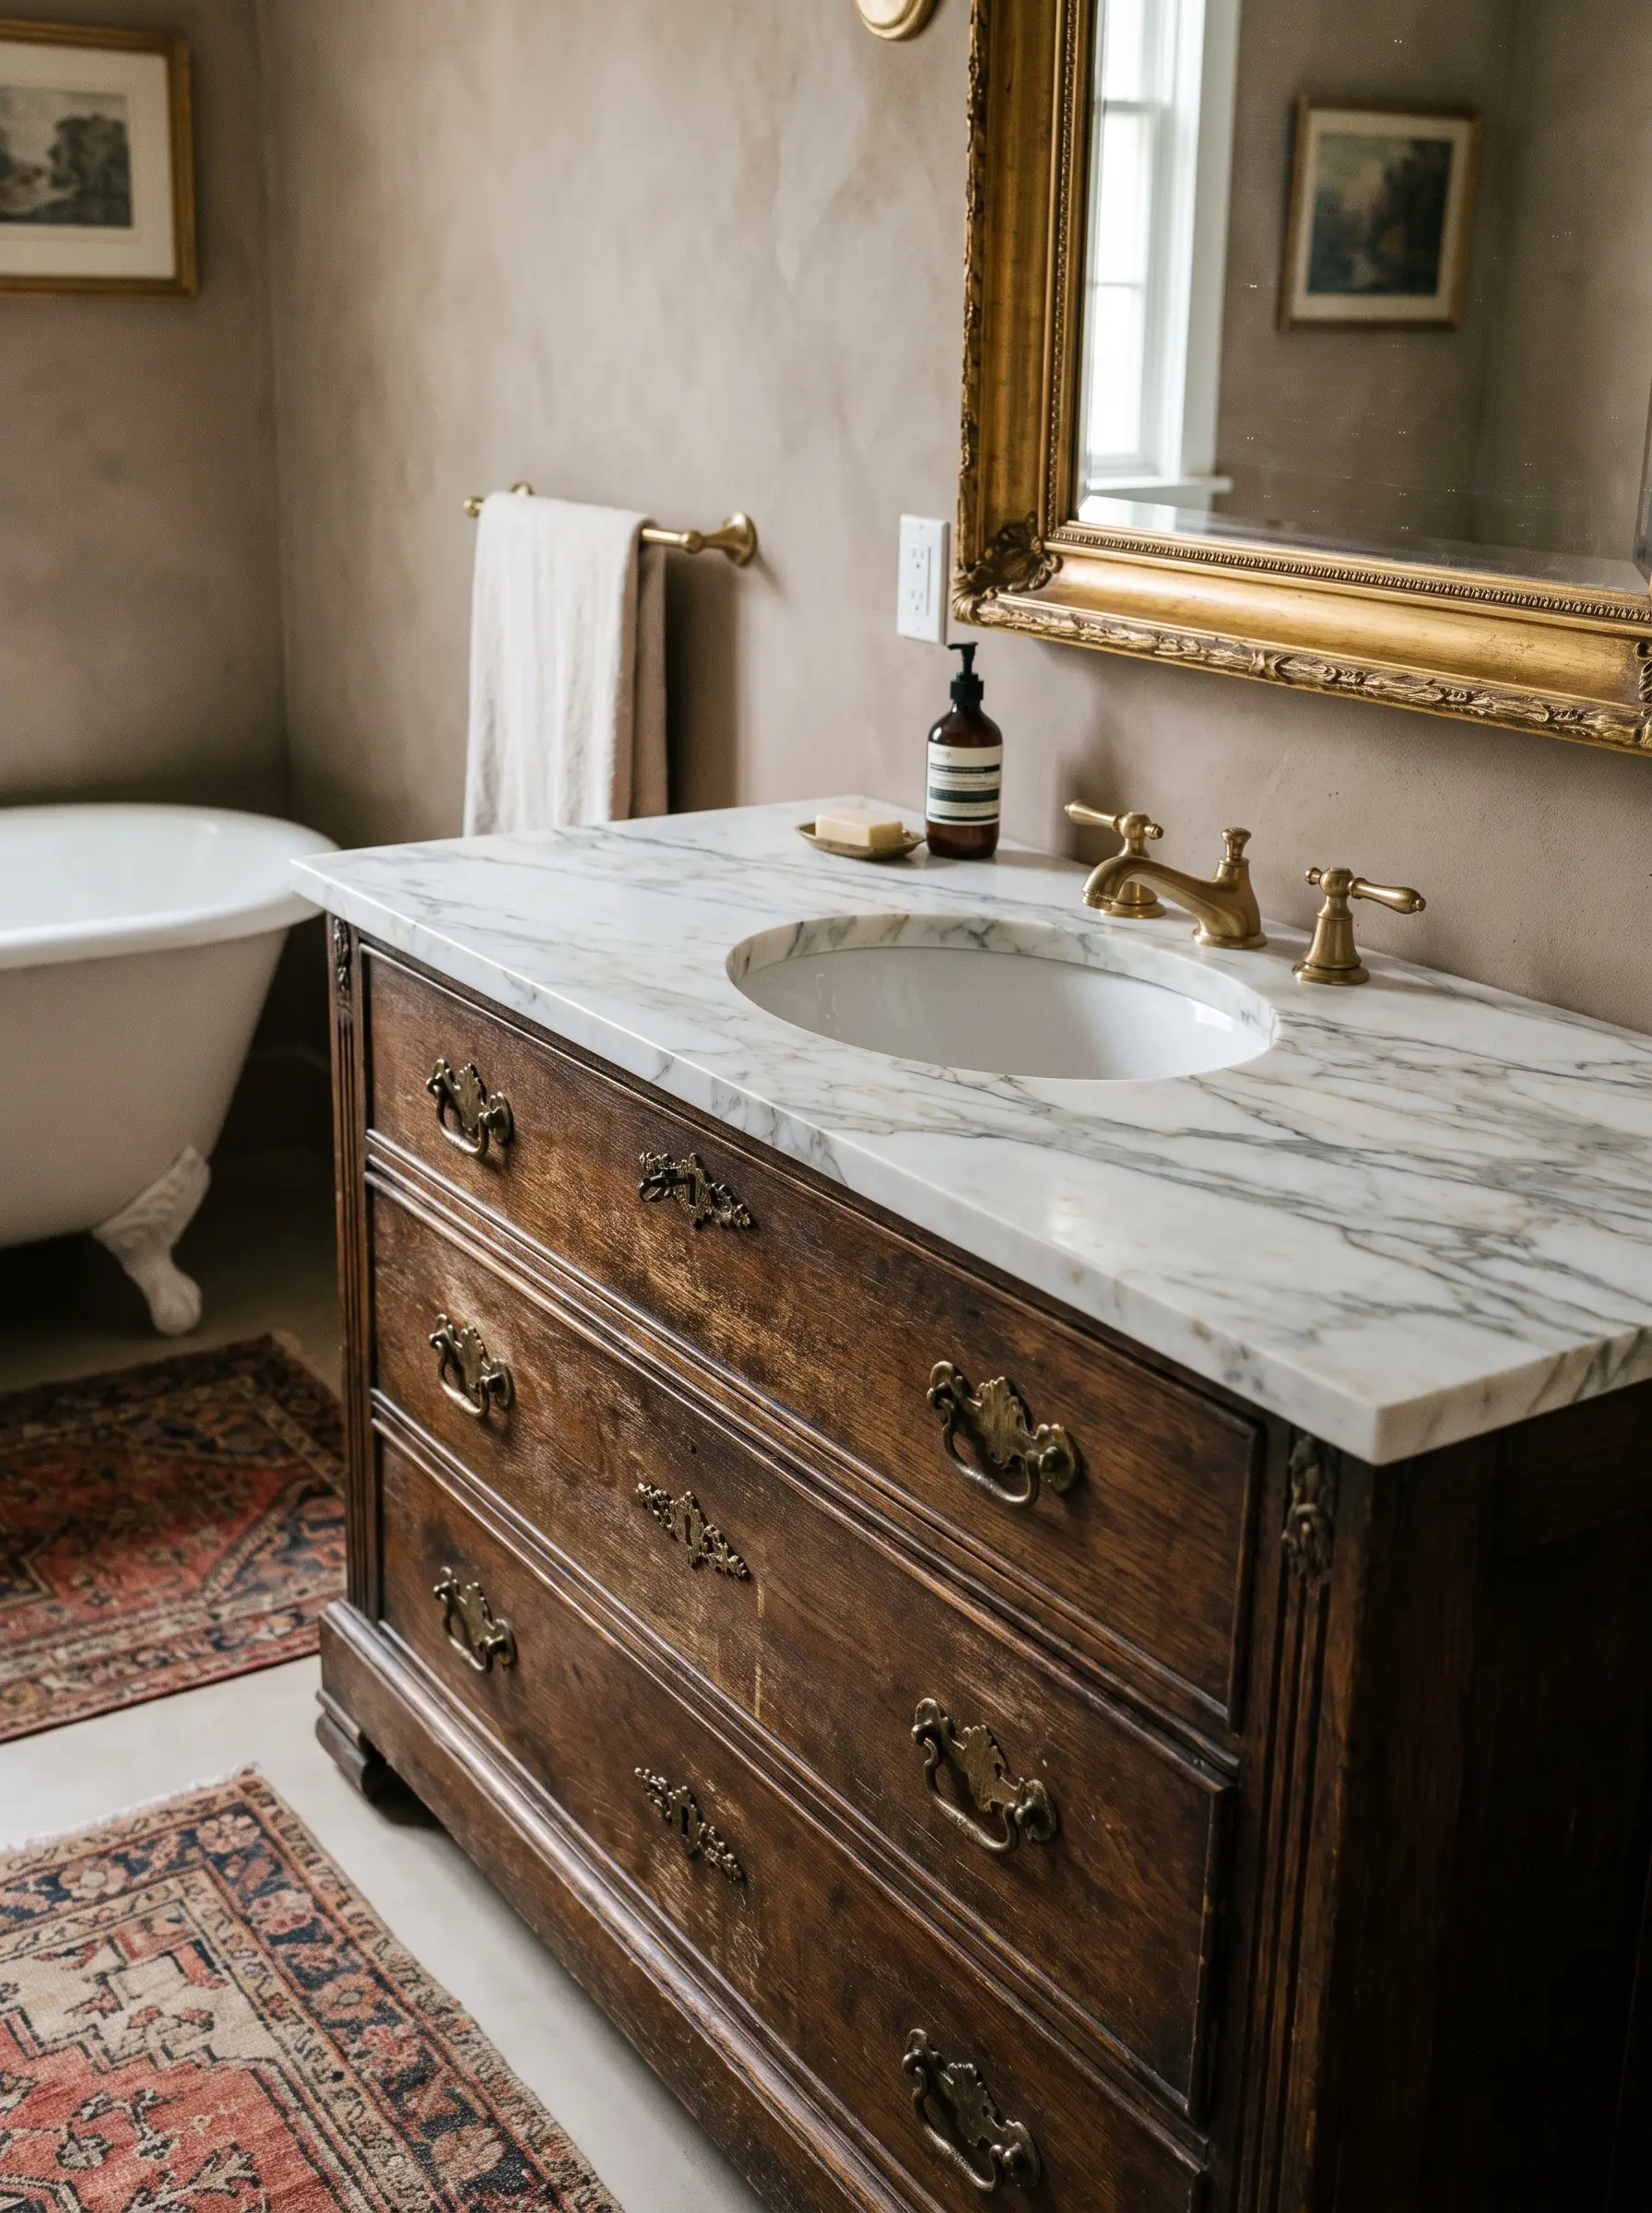
Repurposing a heavy, antique wooden dresser into a vanity anchors the bathroom with incredible character. Topping it with a honed slab of Arabescato marble bridges the gap between historical warmth and clean, modern utility.
- Vibe: Curated Heritage
- Key Material: Honed Arabescato Marble
- Hardware Match: Keep the original vintage brass or iron dresser pulls to maintain authenticity.
Floor Treatments & Dynamic Layouts
Marble floors dictate the spatial perception and foundational energy of the room. The geometric layout you specify will either expand a cramped footprint or intentionally ground a massive, echoing space.
Lay a Classic Nero Marquina and Carrara Checkerboard
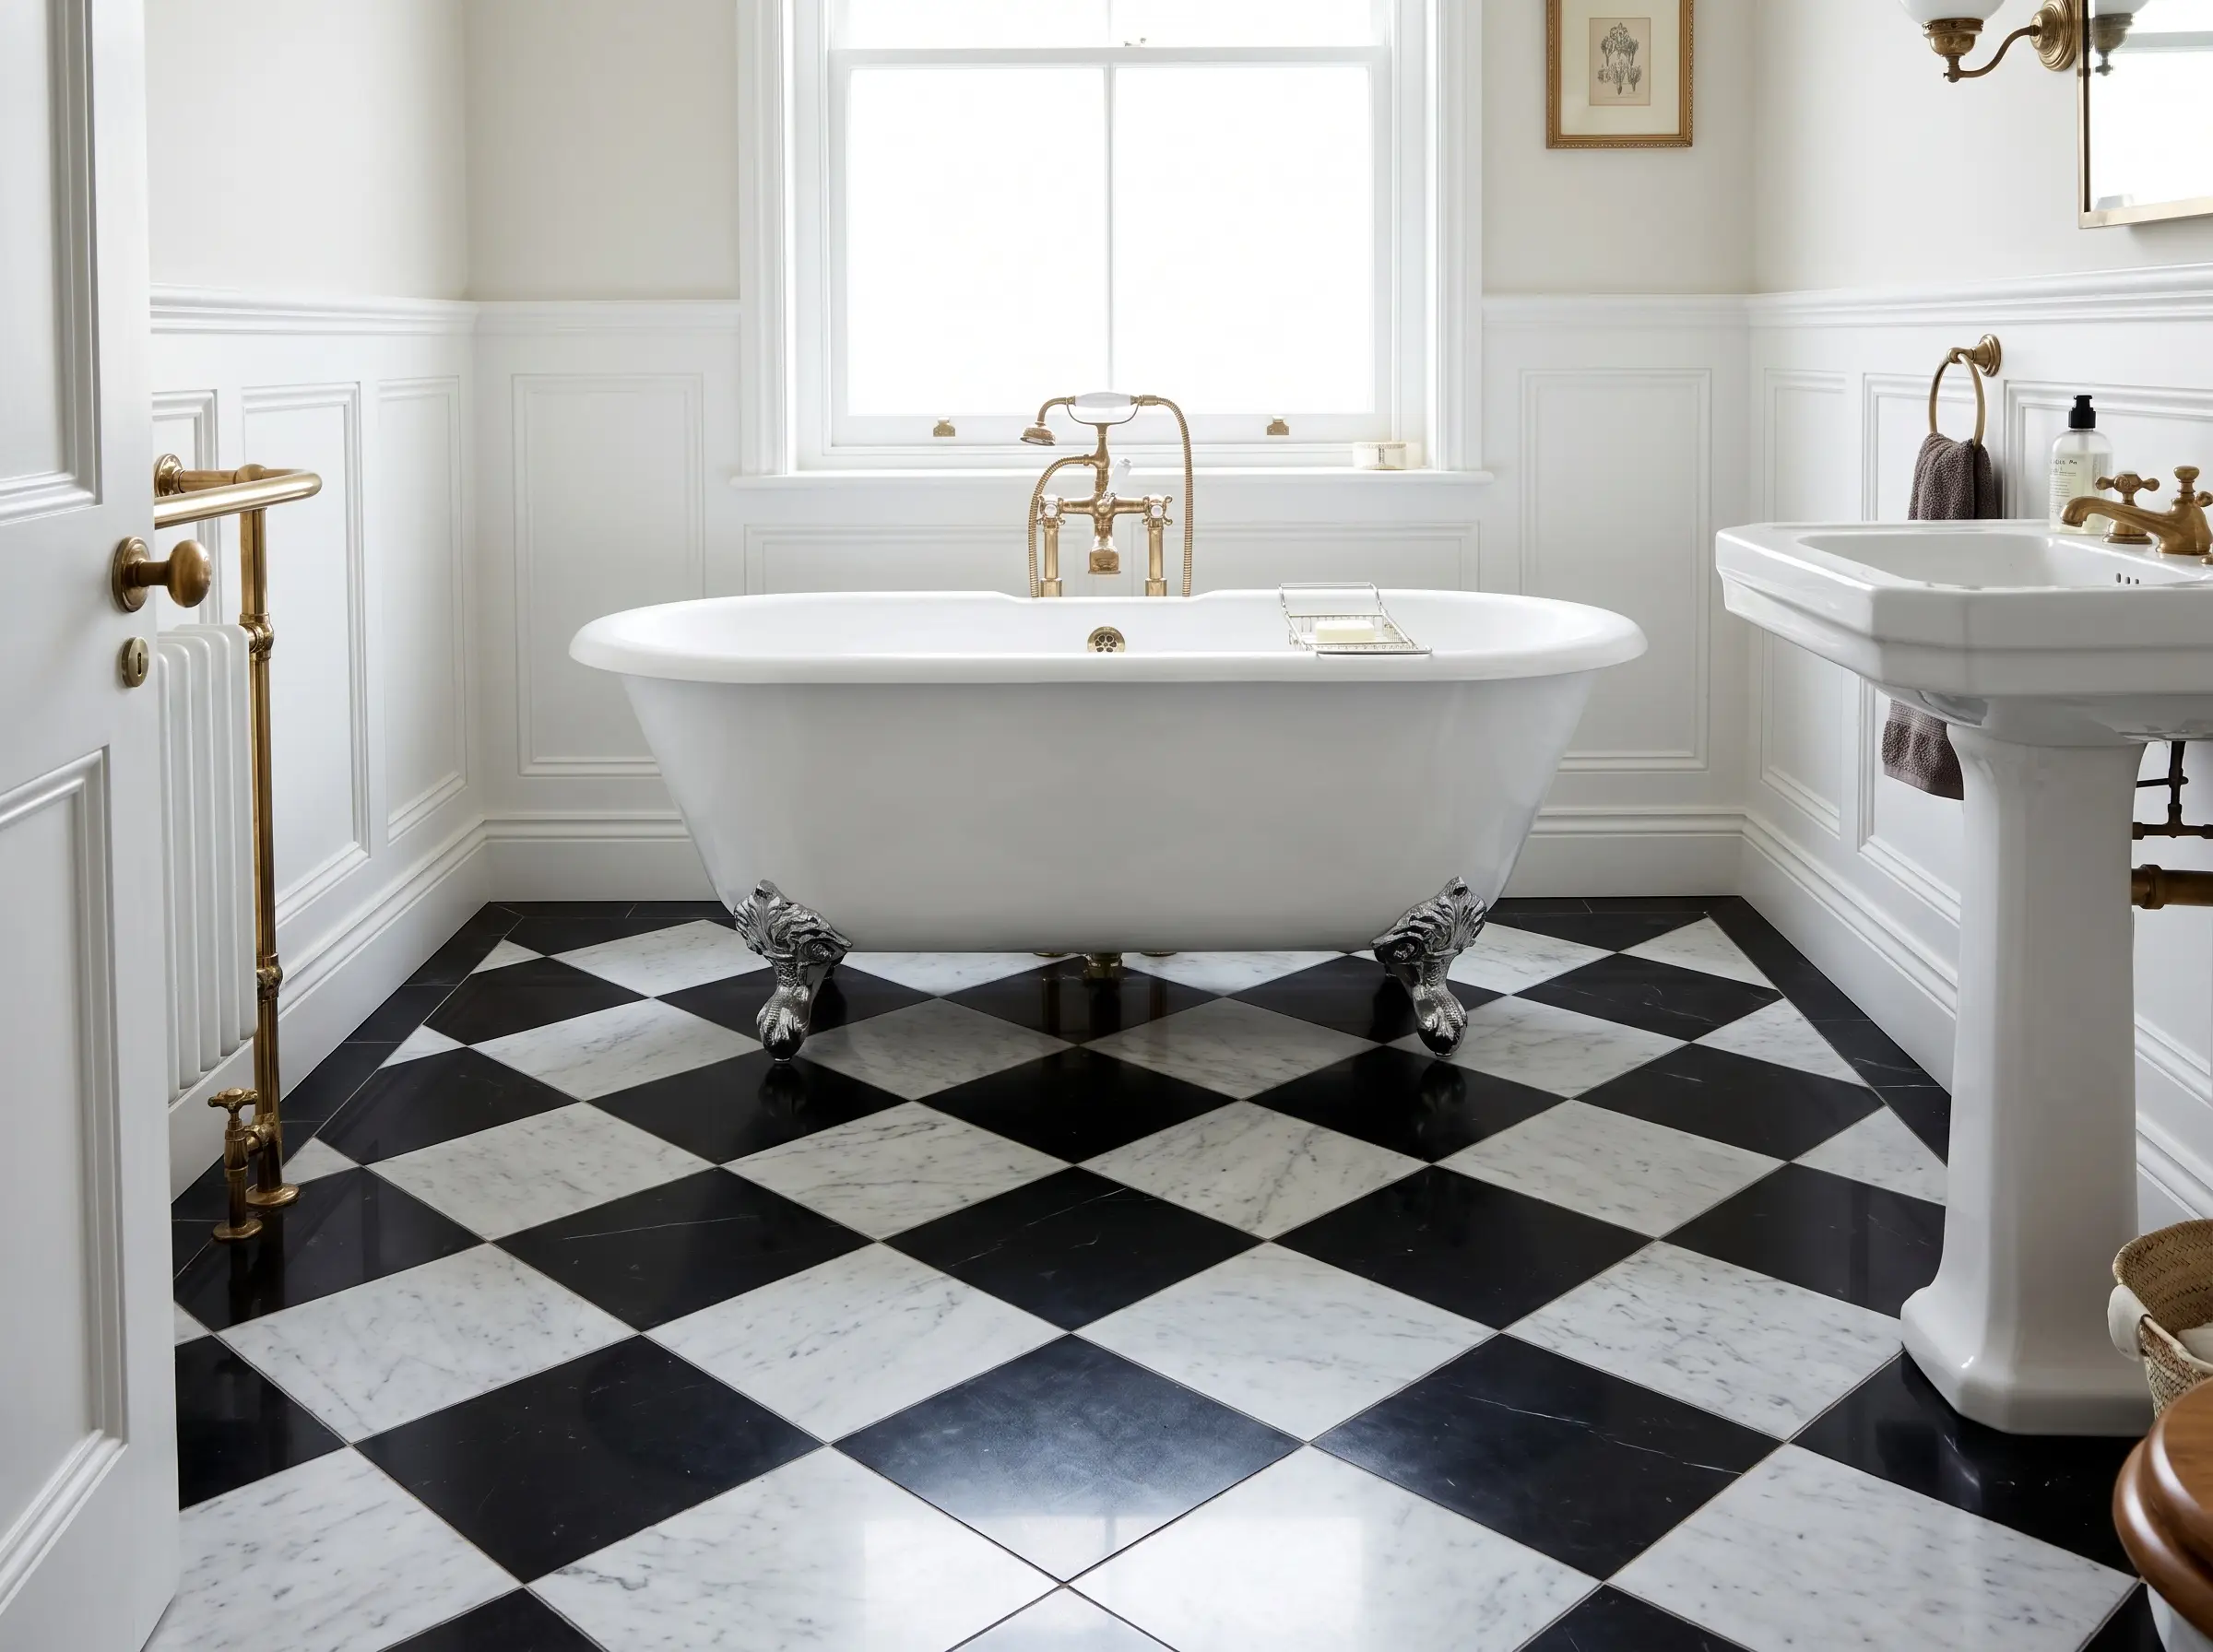
The checkerboard floor is a centuries-old design staple that remains fiercely relevant. The stark contrast between Nero Marquina and white Carrara creates a dynamic, architectural foundation that pairs beautifully with both traditional and contemporary fixtures.
- Vibe: Classic Traditional
- Key Material: Nero Marquina and Carrara Marble Tiles
- Installation Detail: Lay the tiles on a diagonal diamond pattern to visually widen a narrow room.
Scale is everything. We strongly recommend specifying 12×12 or 18×18 tiles. Anything smaller creates a dizzying, chaotic effect in standard-sized baths, while oversized tiles lose the intended checkerboard rhythm.
Hackrea Styling Tip
Opt for Honed Chevron Tiles to Maximize Traction
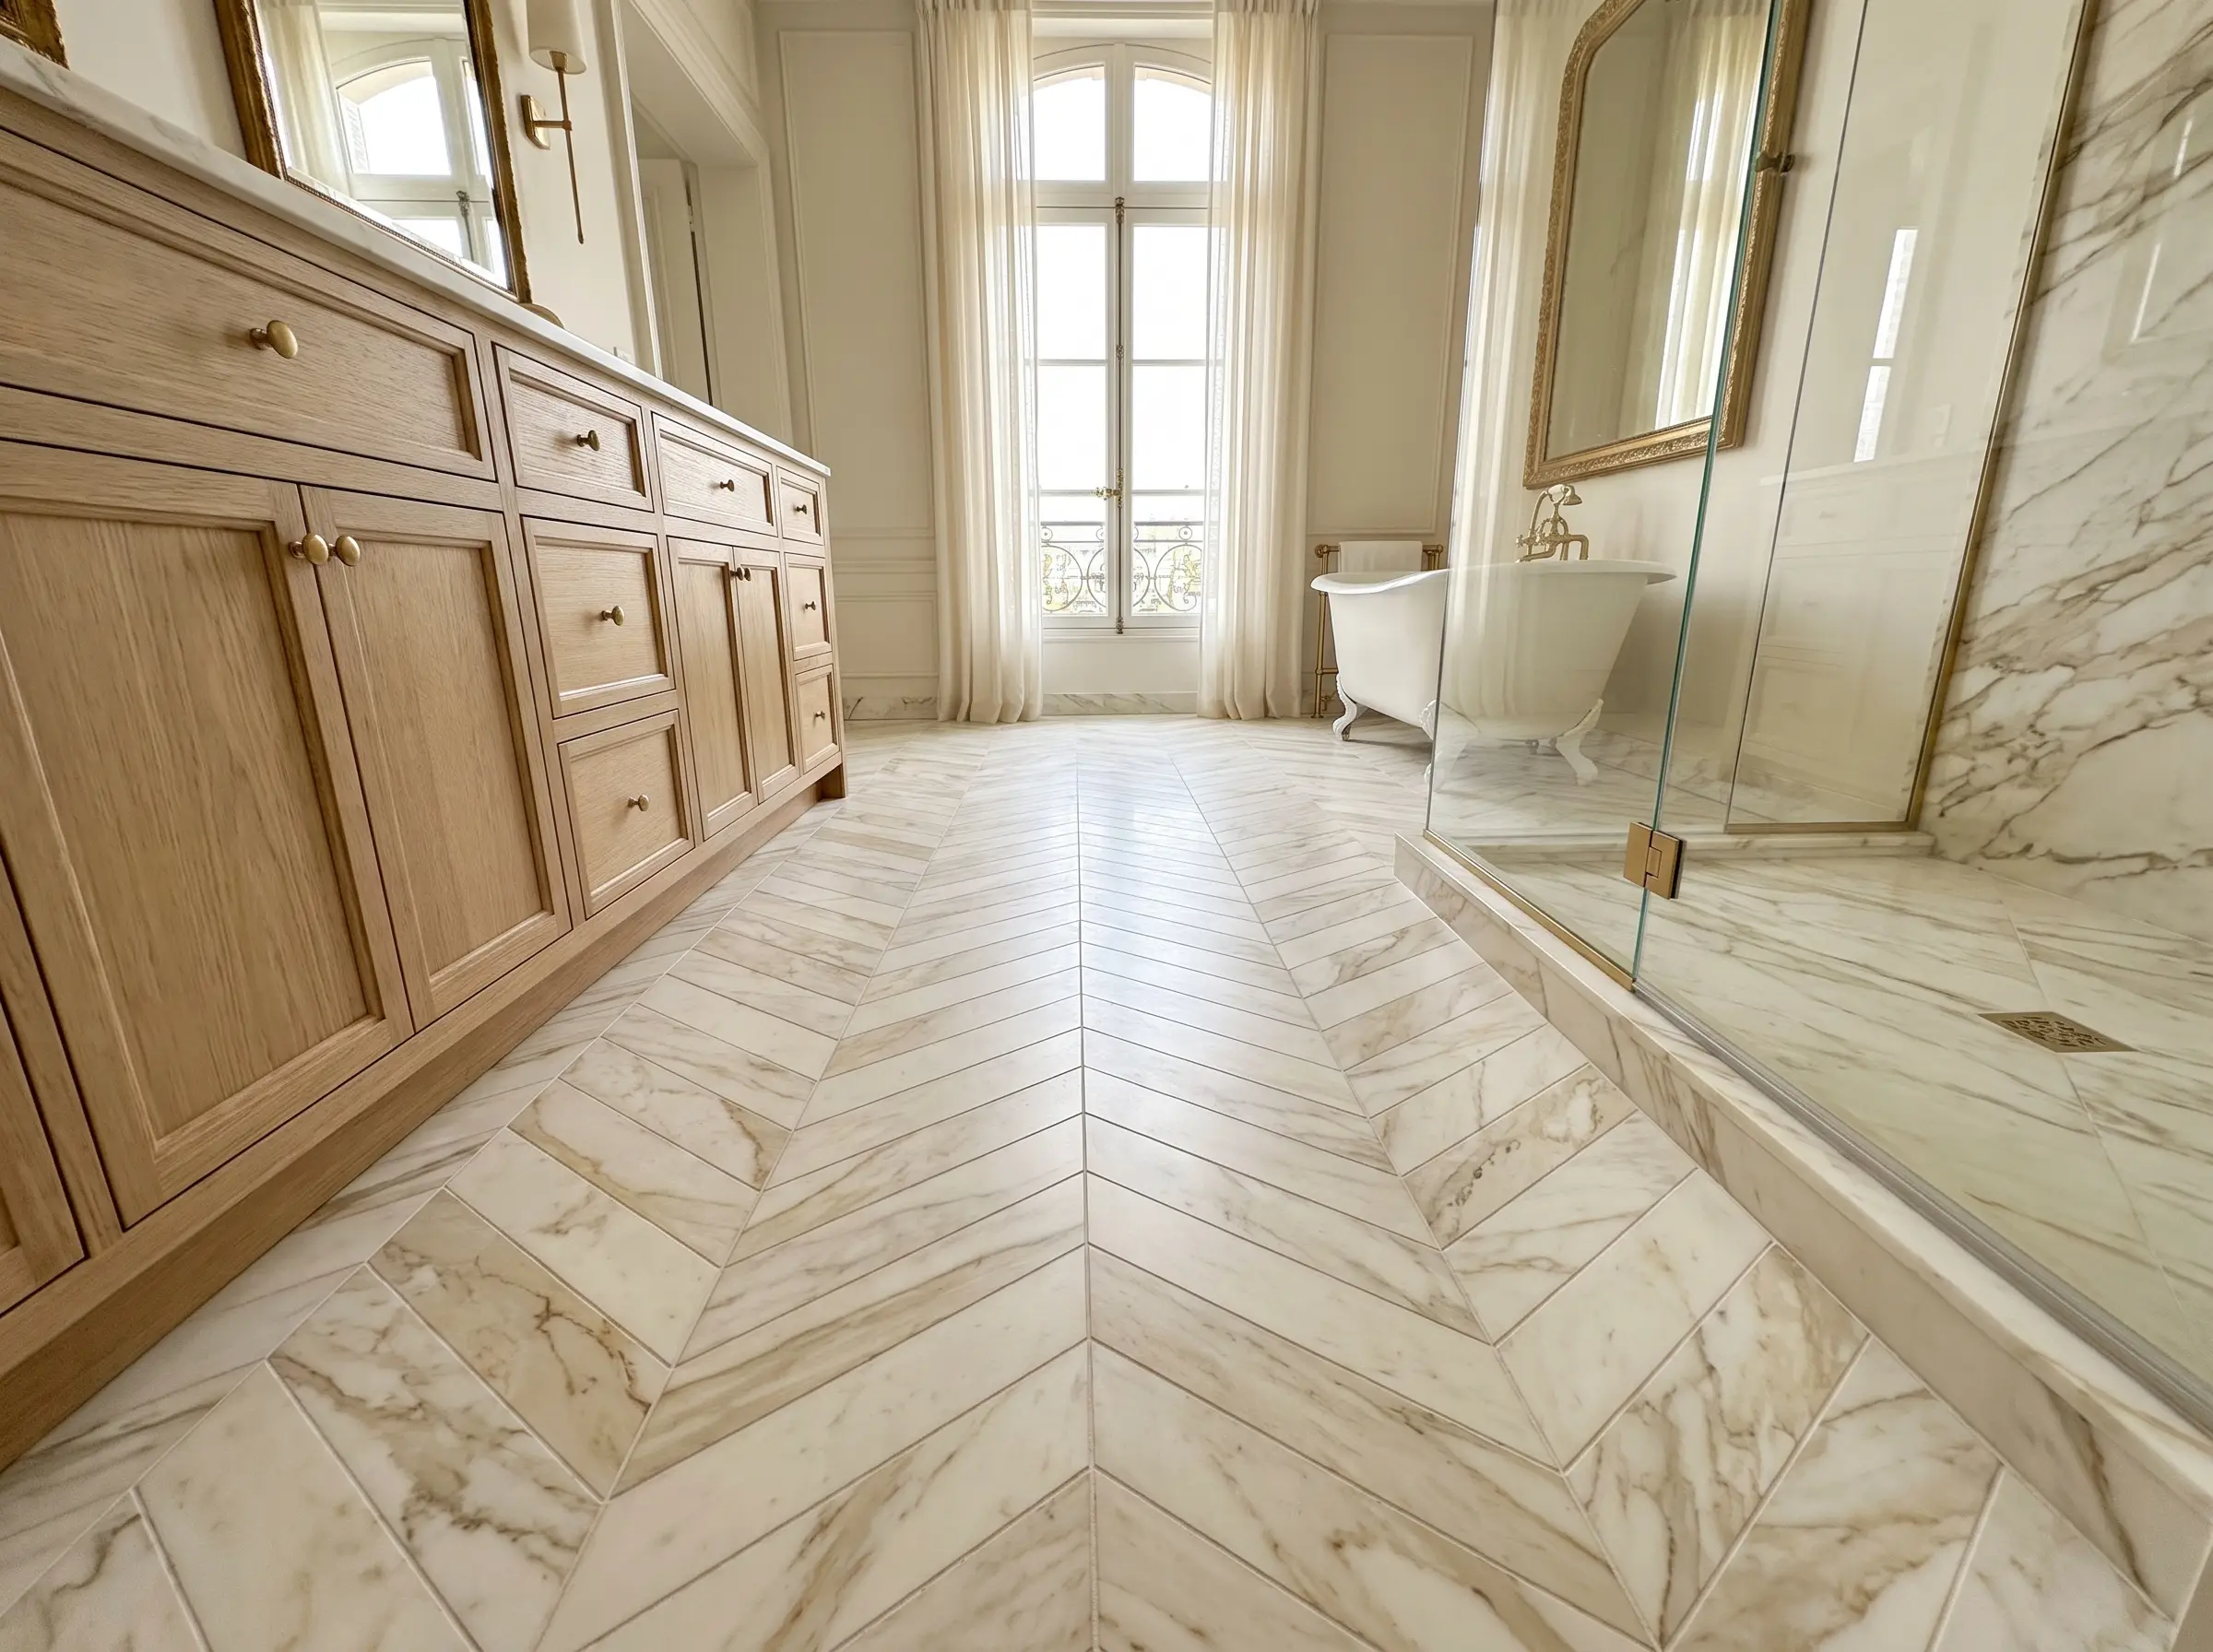
Chevron layouts force the eye to follow a continuous zig-zag, injecting movement into static spaces. Specifying a honed finish ensures the floor remains matte, significantly reducing water marks and providing essential grip.
- Vibe: Parisian Chic
- Key Material: Honed Calacatta Gold Chevron
- Grout Match: Match the grout perfectly to the lightest tone in the stone to let the pattern speak for itself.
Border a Hexagon Field Tile with Solid Stone Baseboards
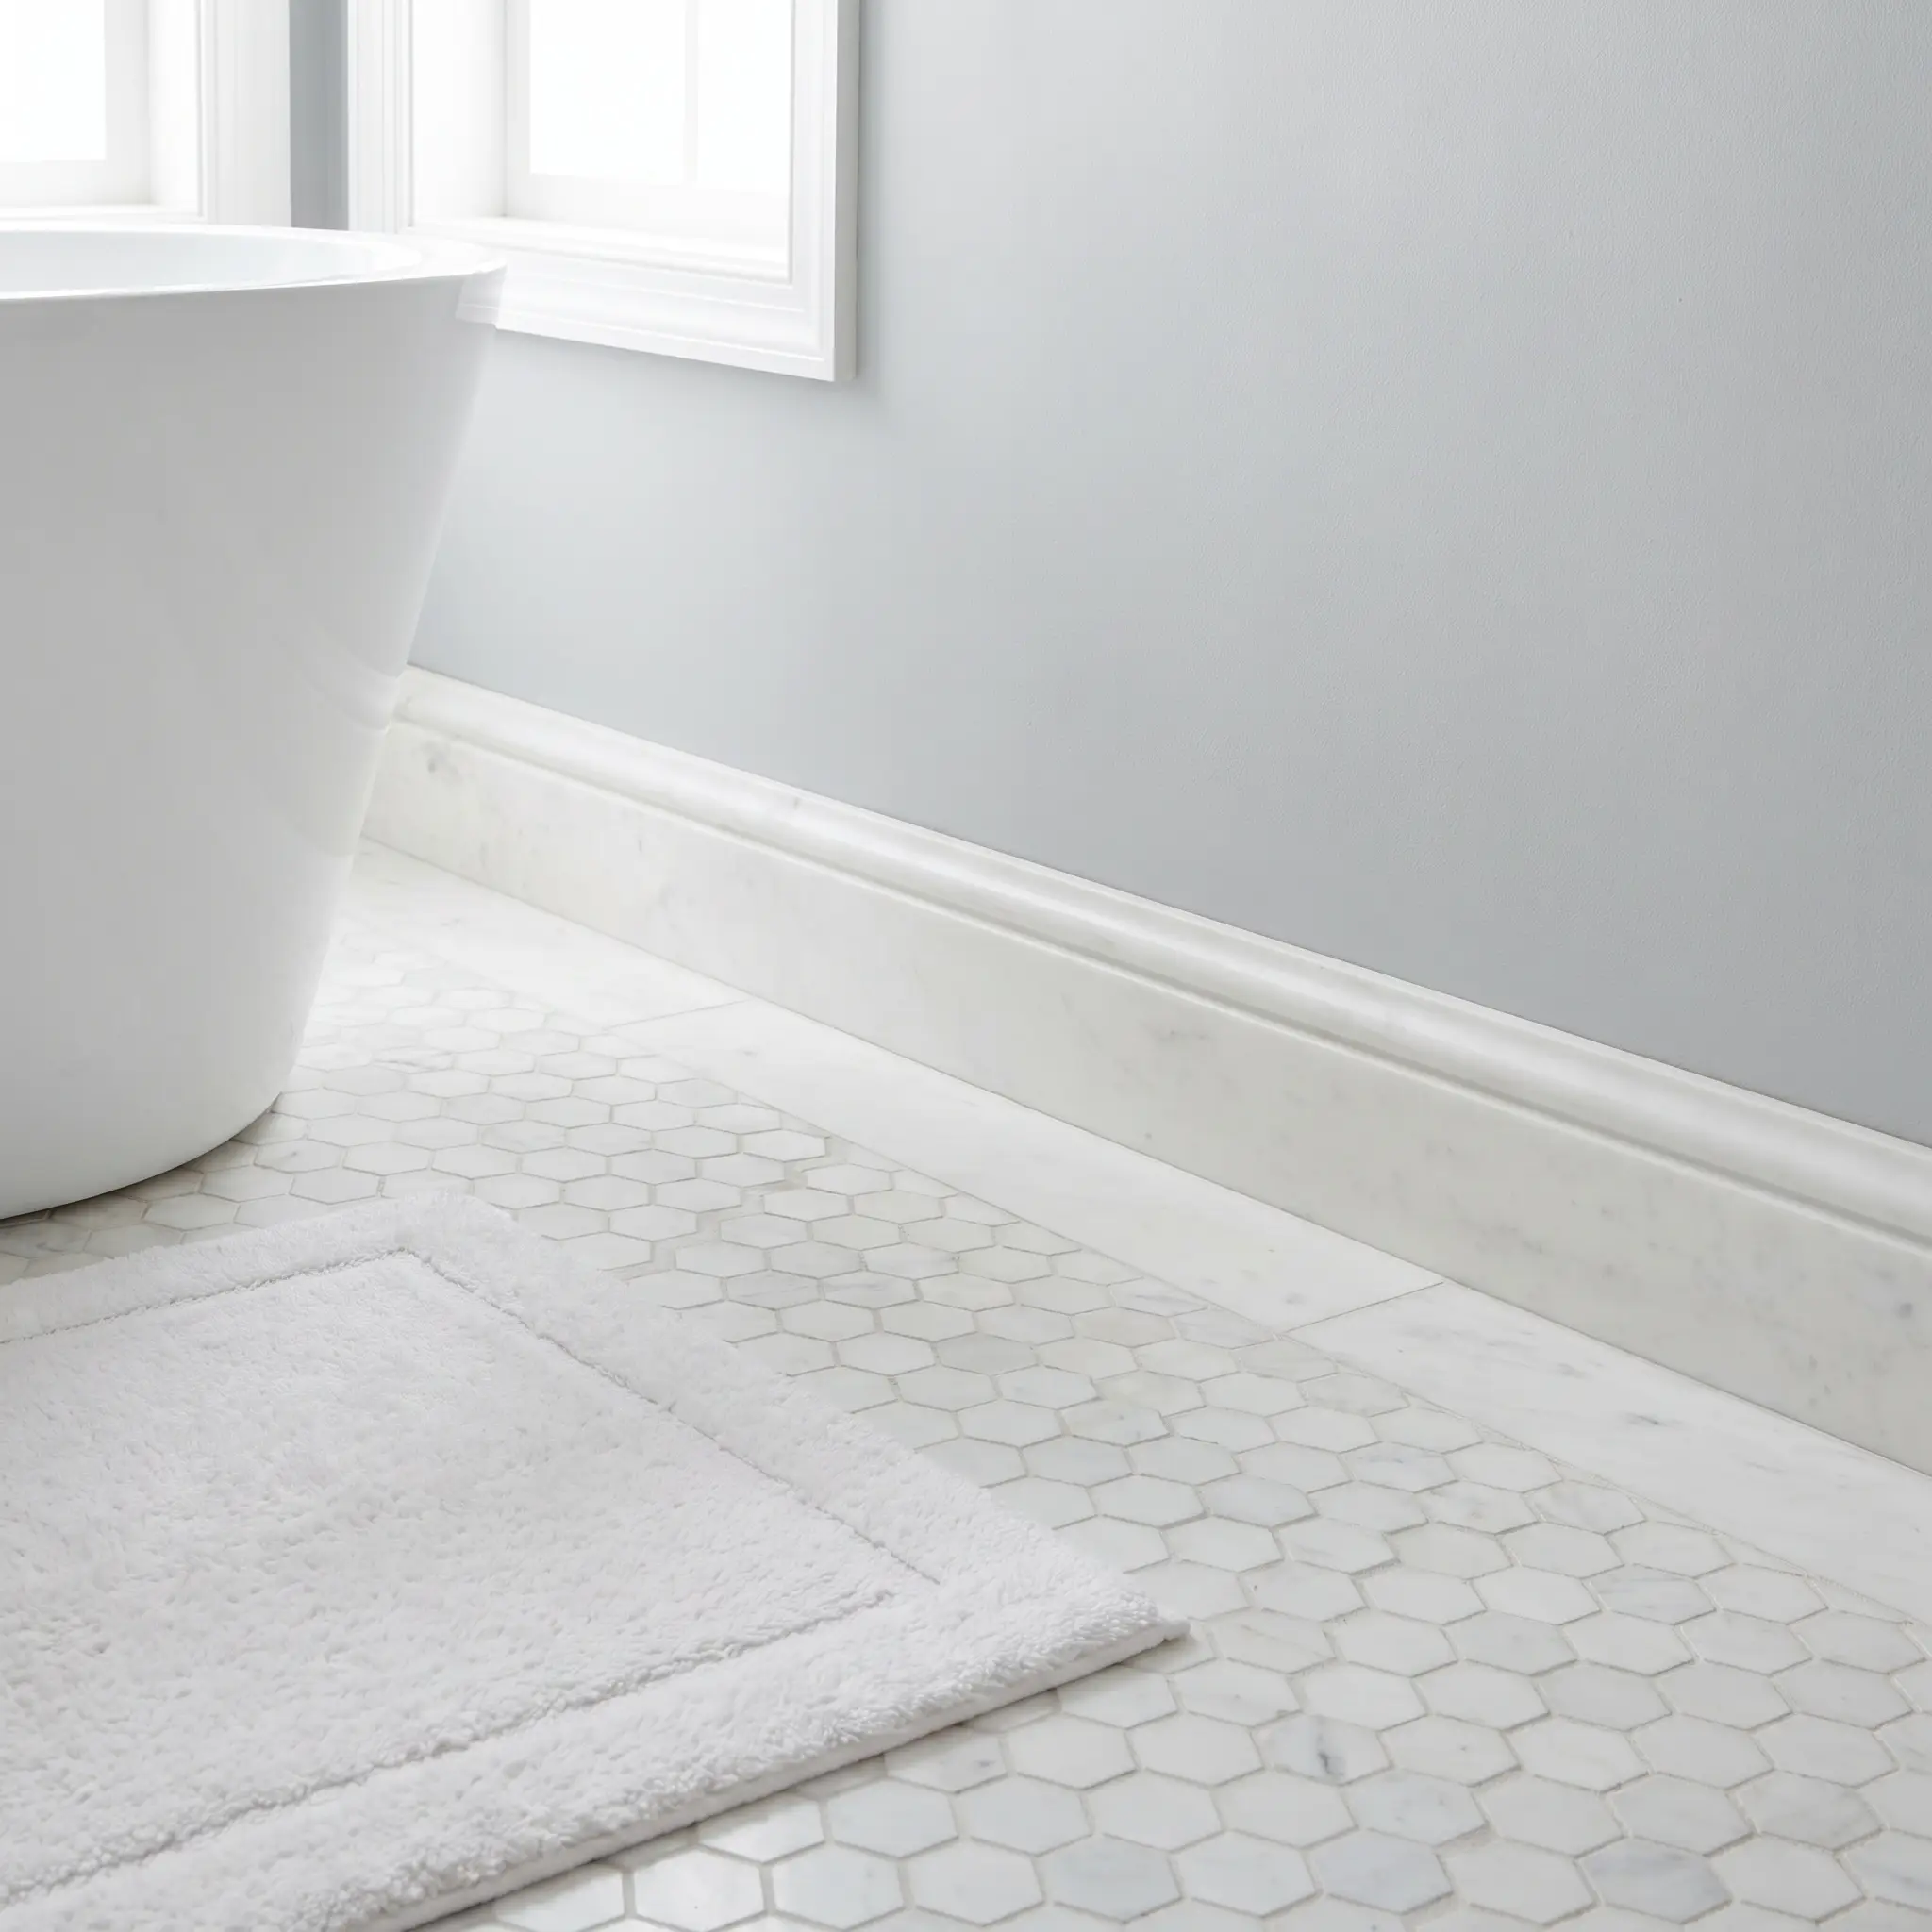
Field tile needs containment to look finished and intentional. Bordering a delicate hexagon mosaic with a solid, 6-inch high marble baseboard grounds the walls and provides a crisp, tailored transition from floor to ceiling.
- Vibe: Tailored Elegance
- Key Material: Marble Hexagon Mosaics, Solid Marble Base trim
- Detail Focus: Ensure the baseboard features a clean, eased-edge profile rather than a fussy ogee edge.
Run Veining Horizontally to Widen a Narrow Bathroom
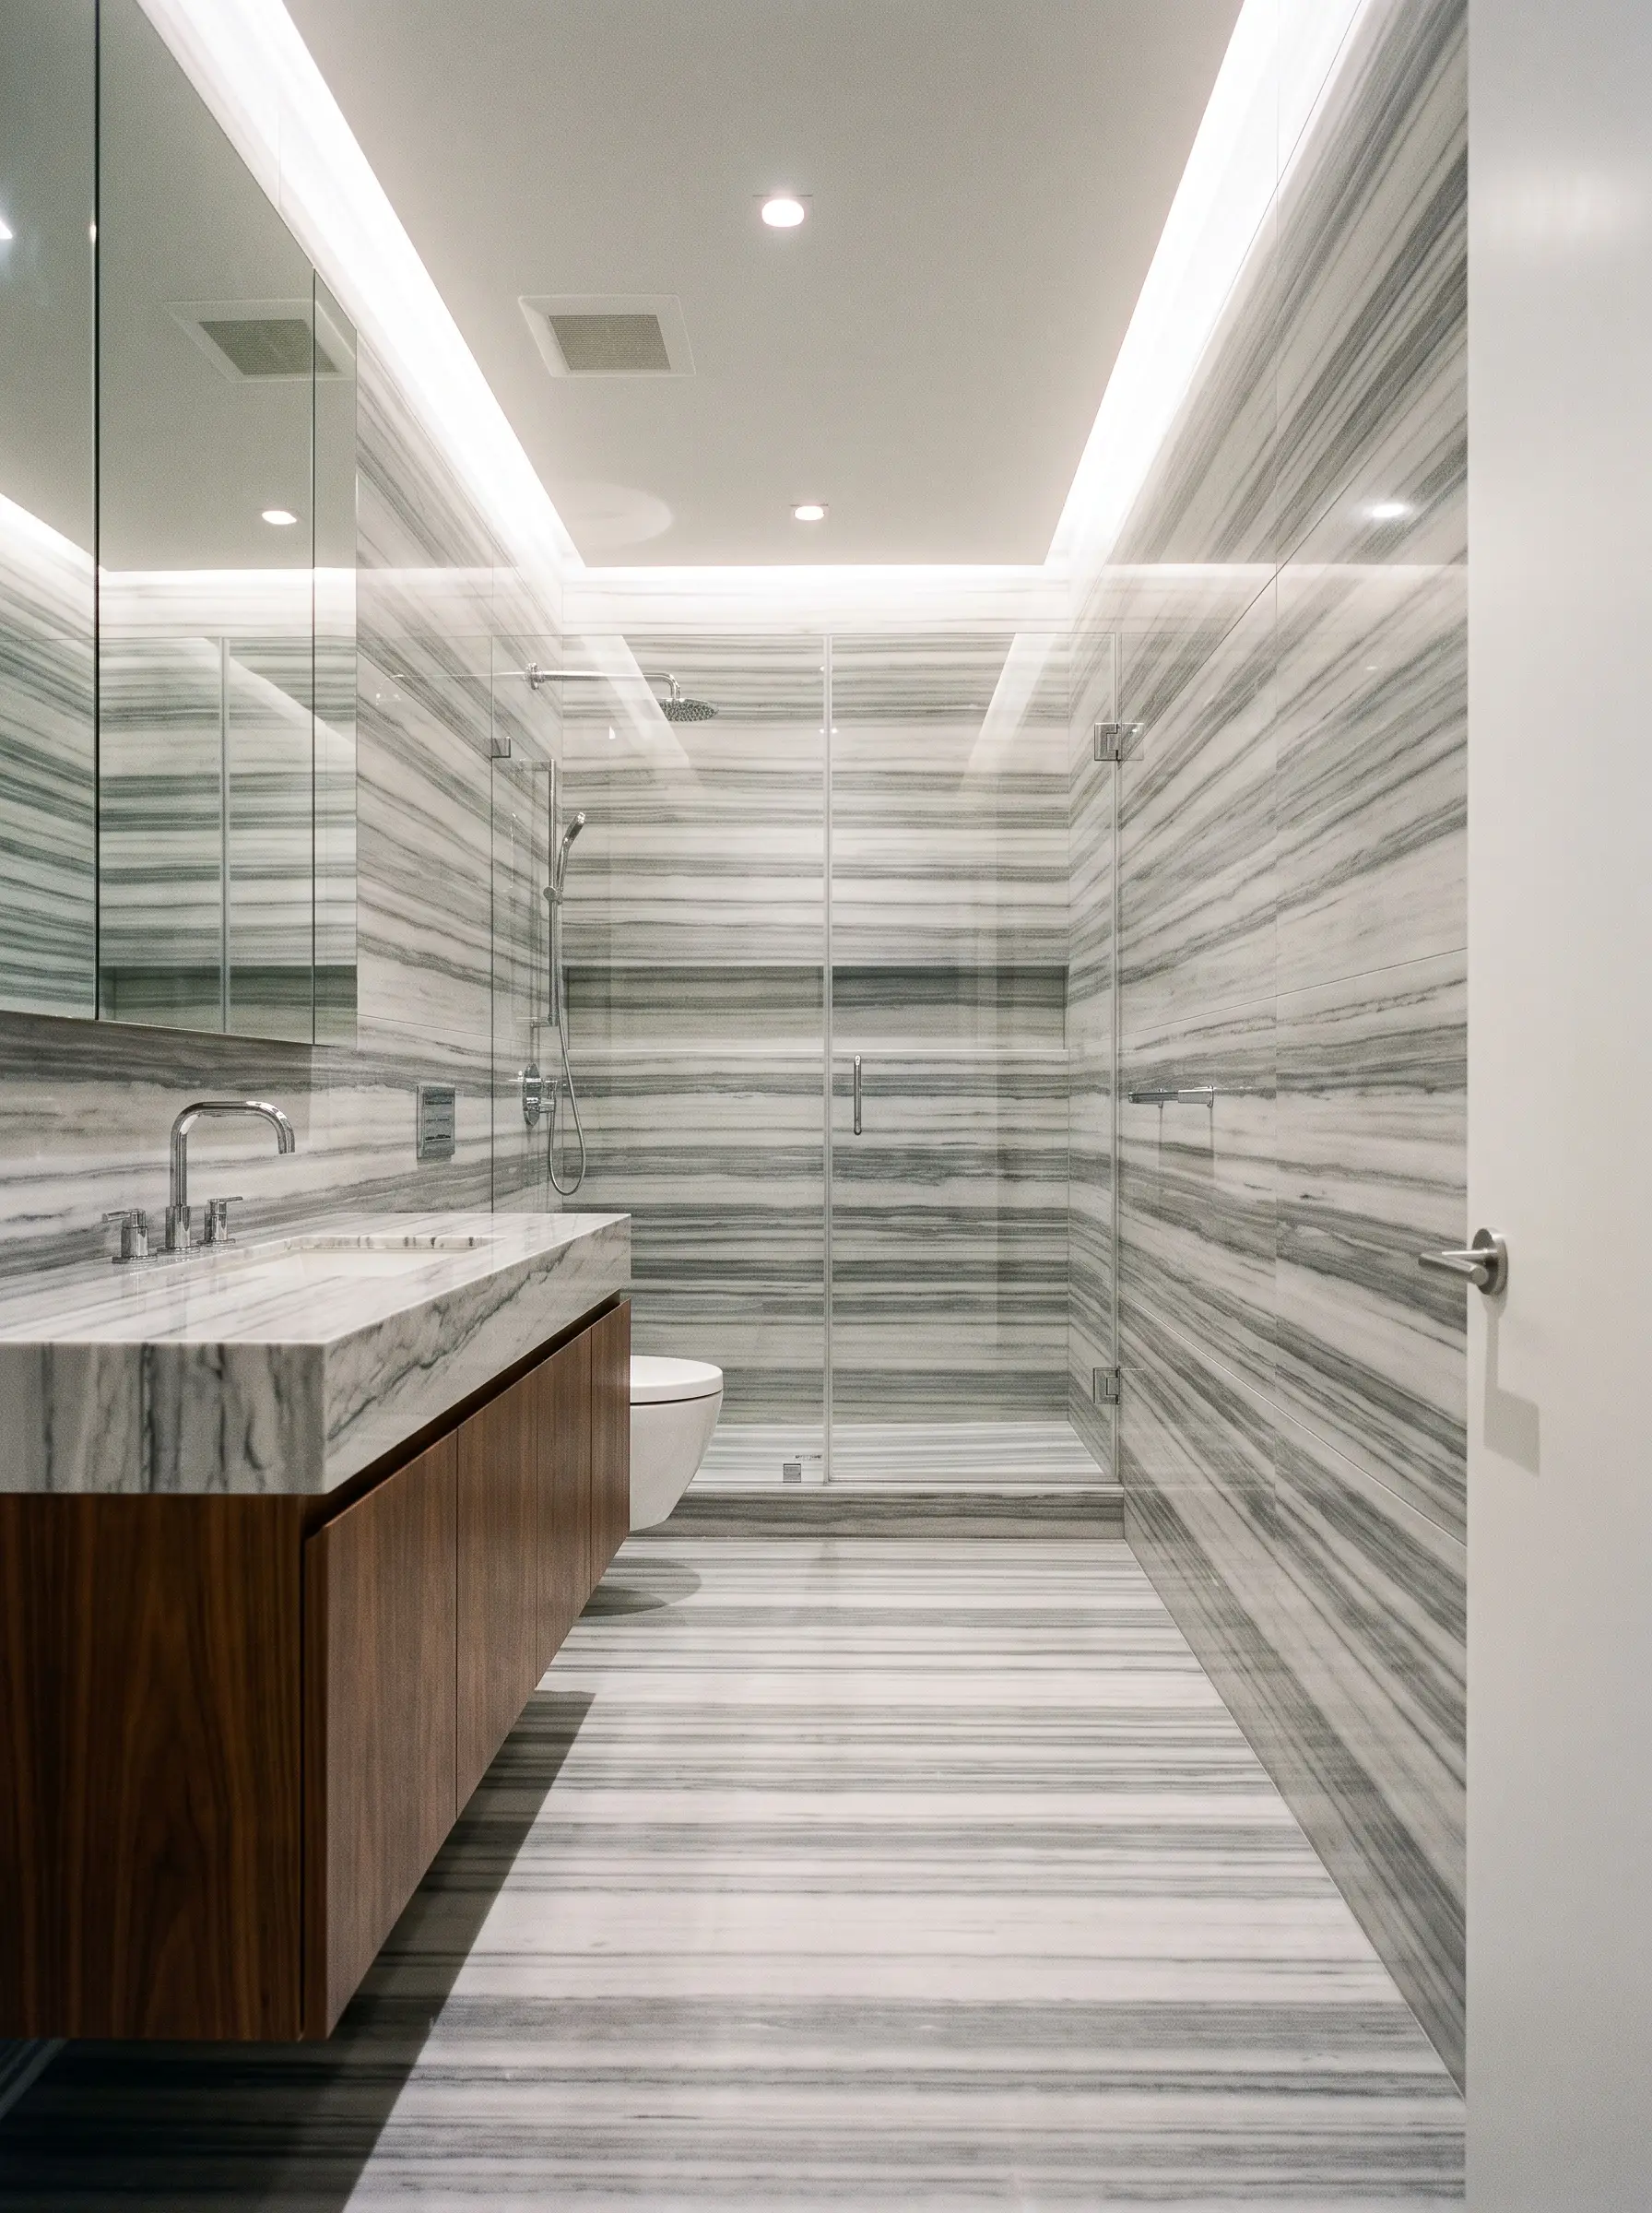
Natural stone is a powerful optical tool. When installing large slabs or rectangular tiles on the floor, running the dominant veining horizontally across the shortest width of the room visually pushes the walls outward.
- Vibe: Spatial Illusion
- Key Material: 12×24 Striato Olimpico or heavily directional marble
- Styling Pro-Tip: Work closely with your tile setter during the dry-lay process to ensure the veining flows logically from piece to piece.
Use Basketweave Mosaics for a Vintage Traditional Feel
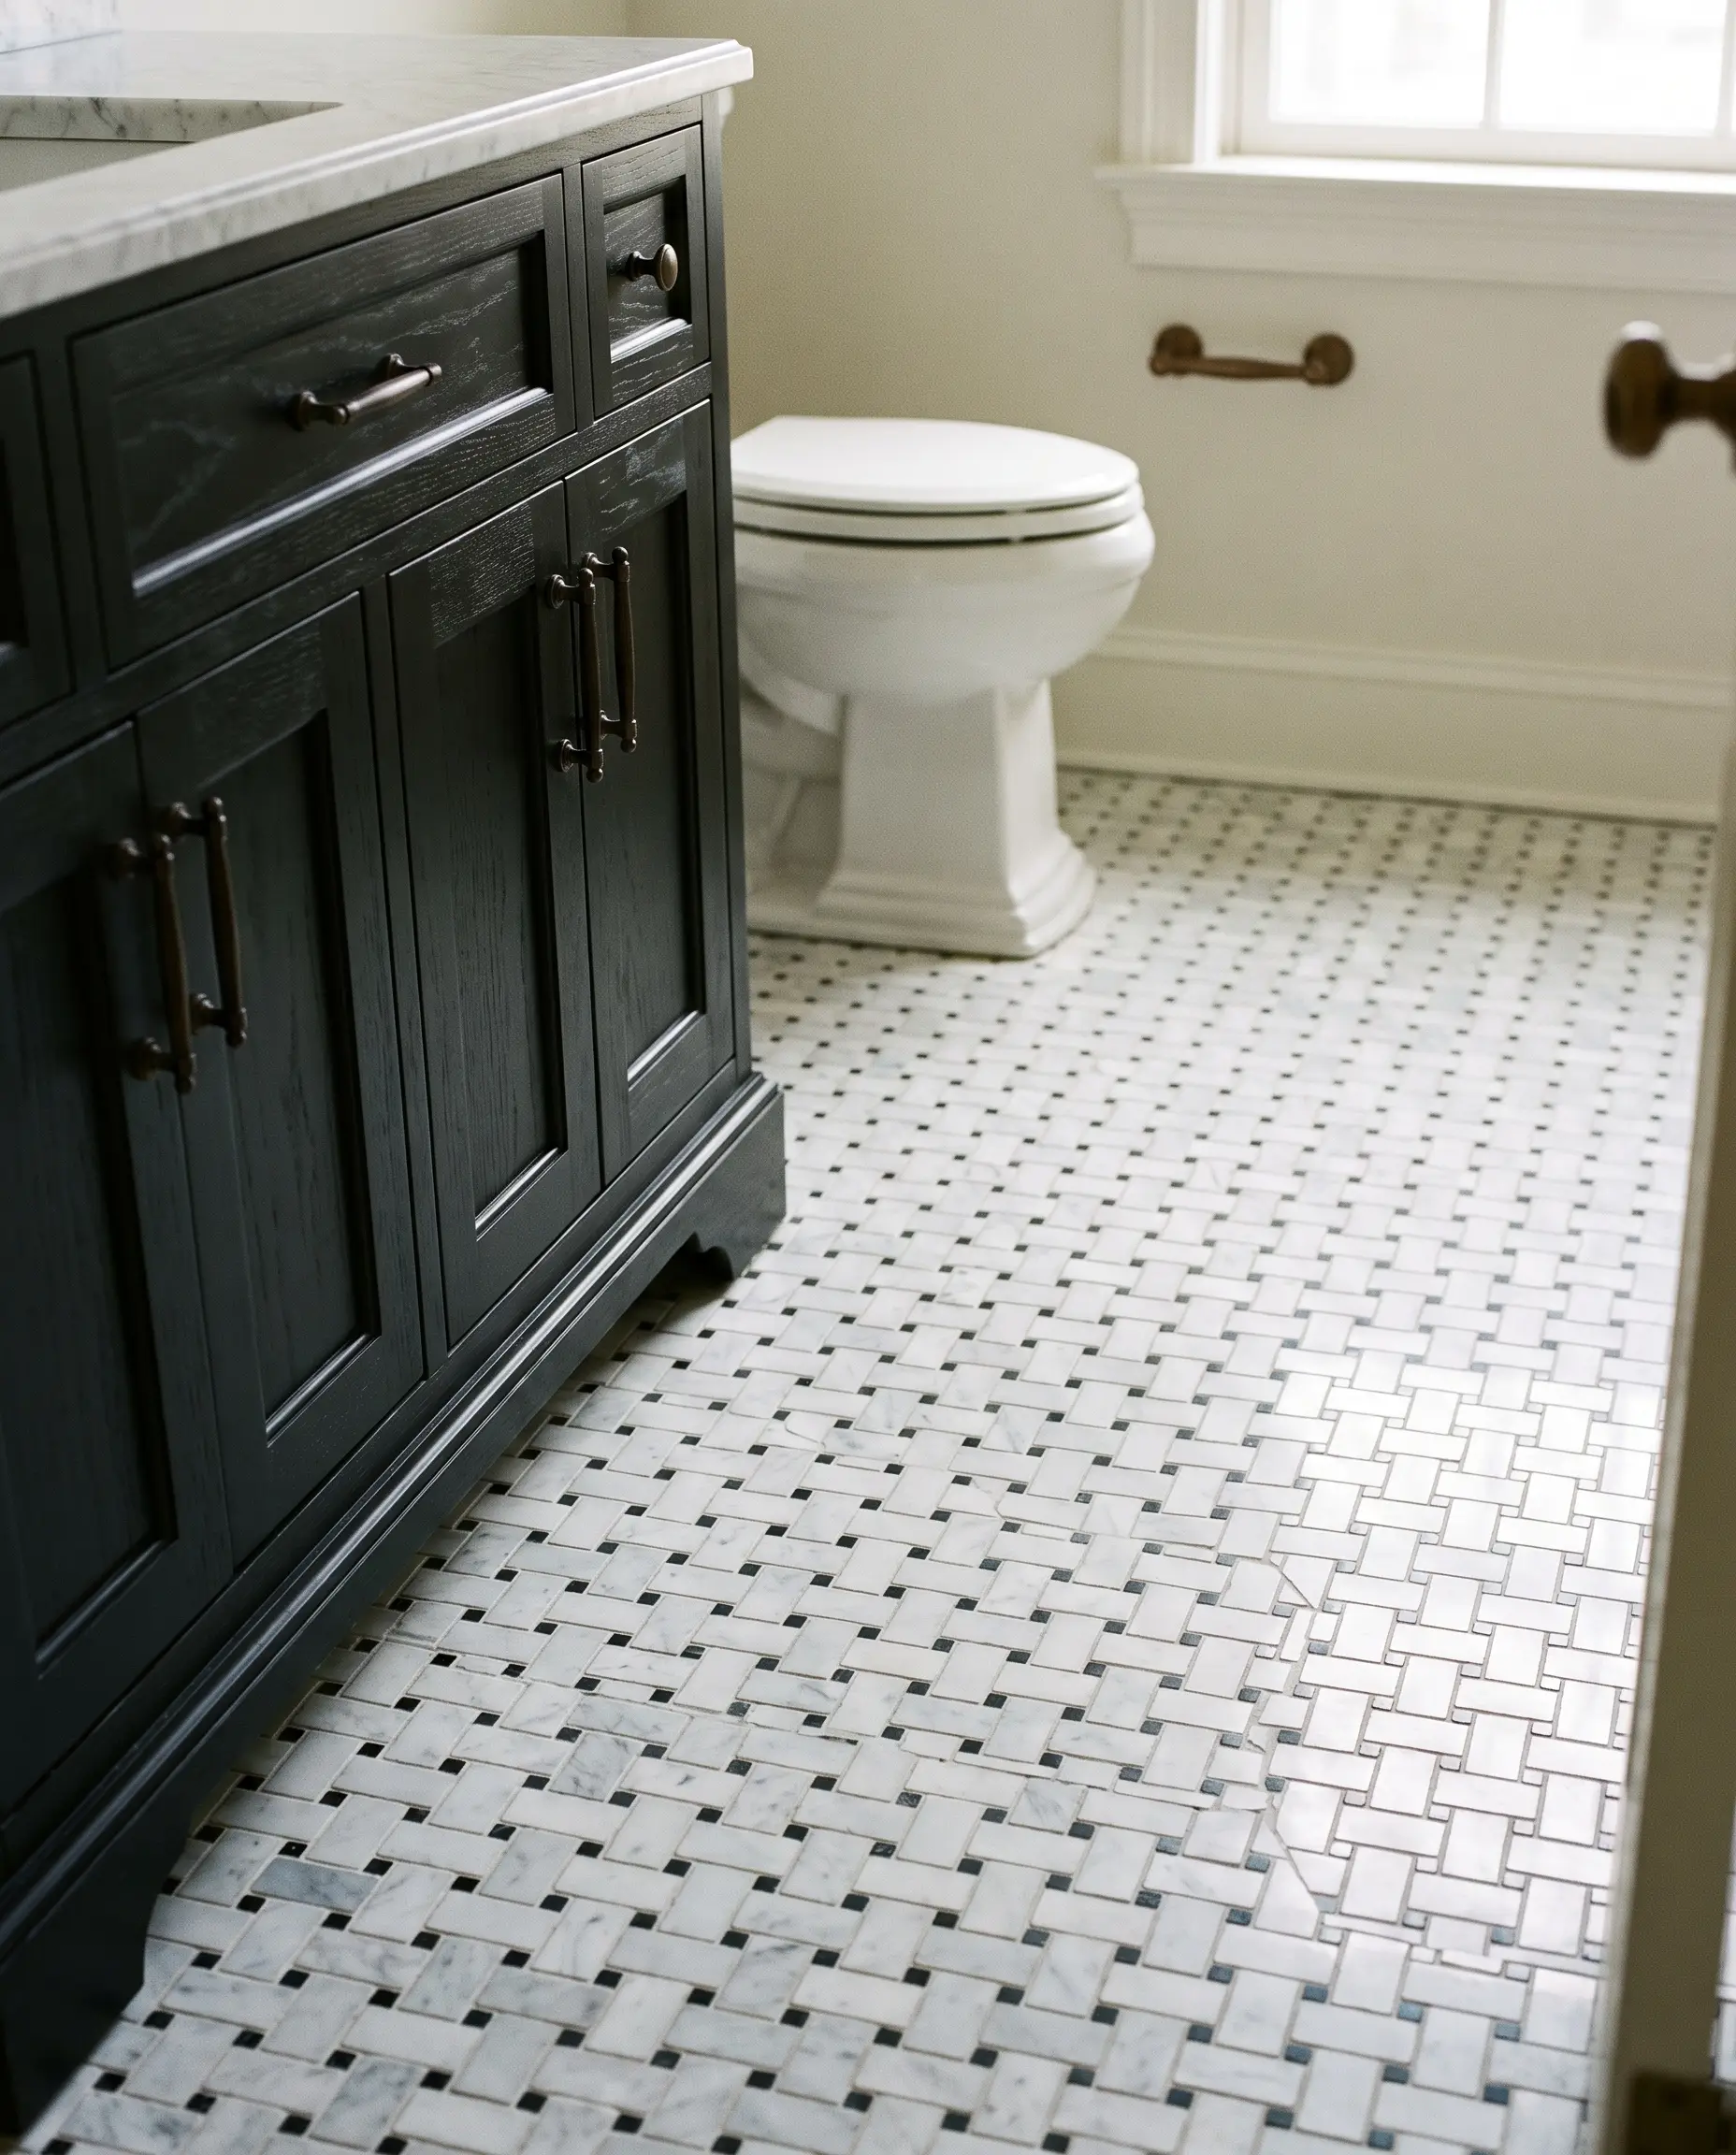
Basketweave mosaics introduce a dense, woven texture that feels incredibly authentic in historical or heritage-inspired renovations. The small black dot inserts provide the perfect opportunity to tie in dark vanity hardware or ebony woodwork.
- Vibe: Heritage & Historical
- Key Material: Carrara and Nero Marquina Basketweave Mosaic
- Maintenance Note: The high ratio of grout requires a premium, penetrating sealer applied immediately after installation.
Unexpected Pairings: Warming Up the Stone
The most common failure in marble bathroom design is creating a space that feels like a morgue. You must actively introduce tactile pairings, contrasting the cool, rigid nature of the stone with warm, organic, and deeply textured materials.
| Vein Undertone Focus | Marble Example | Ideal Metal Finish Pairing |
|---|---|---|
| Cool Gray / Blue | Carrara, Statuario | Polished Nickel, Chrome |
| Warm Brown / Gold | Calacatta Gold, Crema Marfil | Brushed Bronze, Antique Brass |
| Purple / Burgundy | Calacatta Viola, Arabescato | Unlacquered Brass, Matte Black |
Soften the Walls with Warm Limewash Plaster
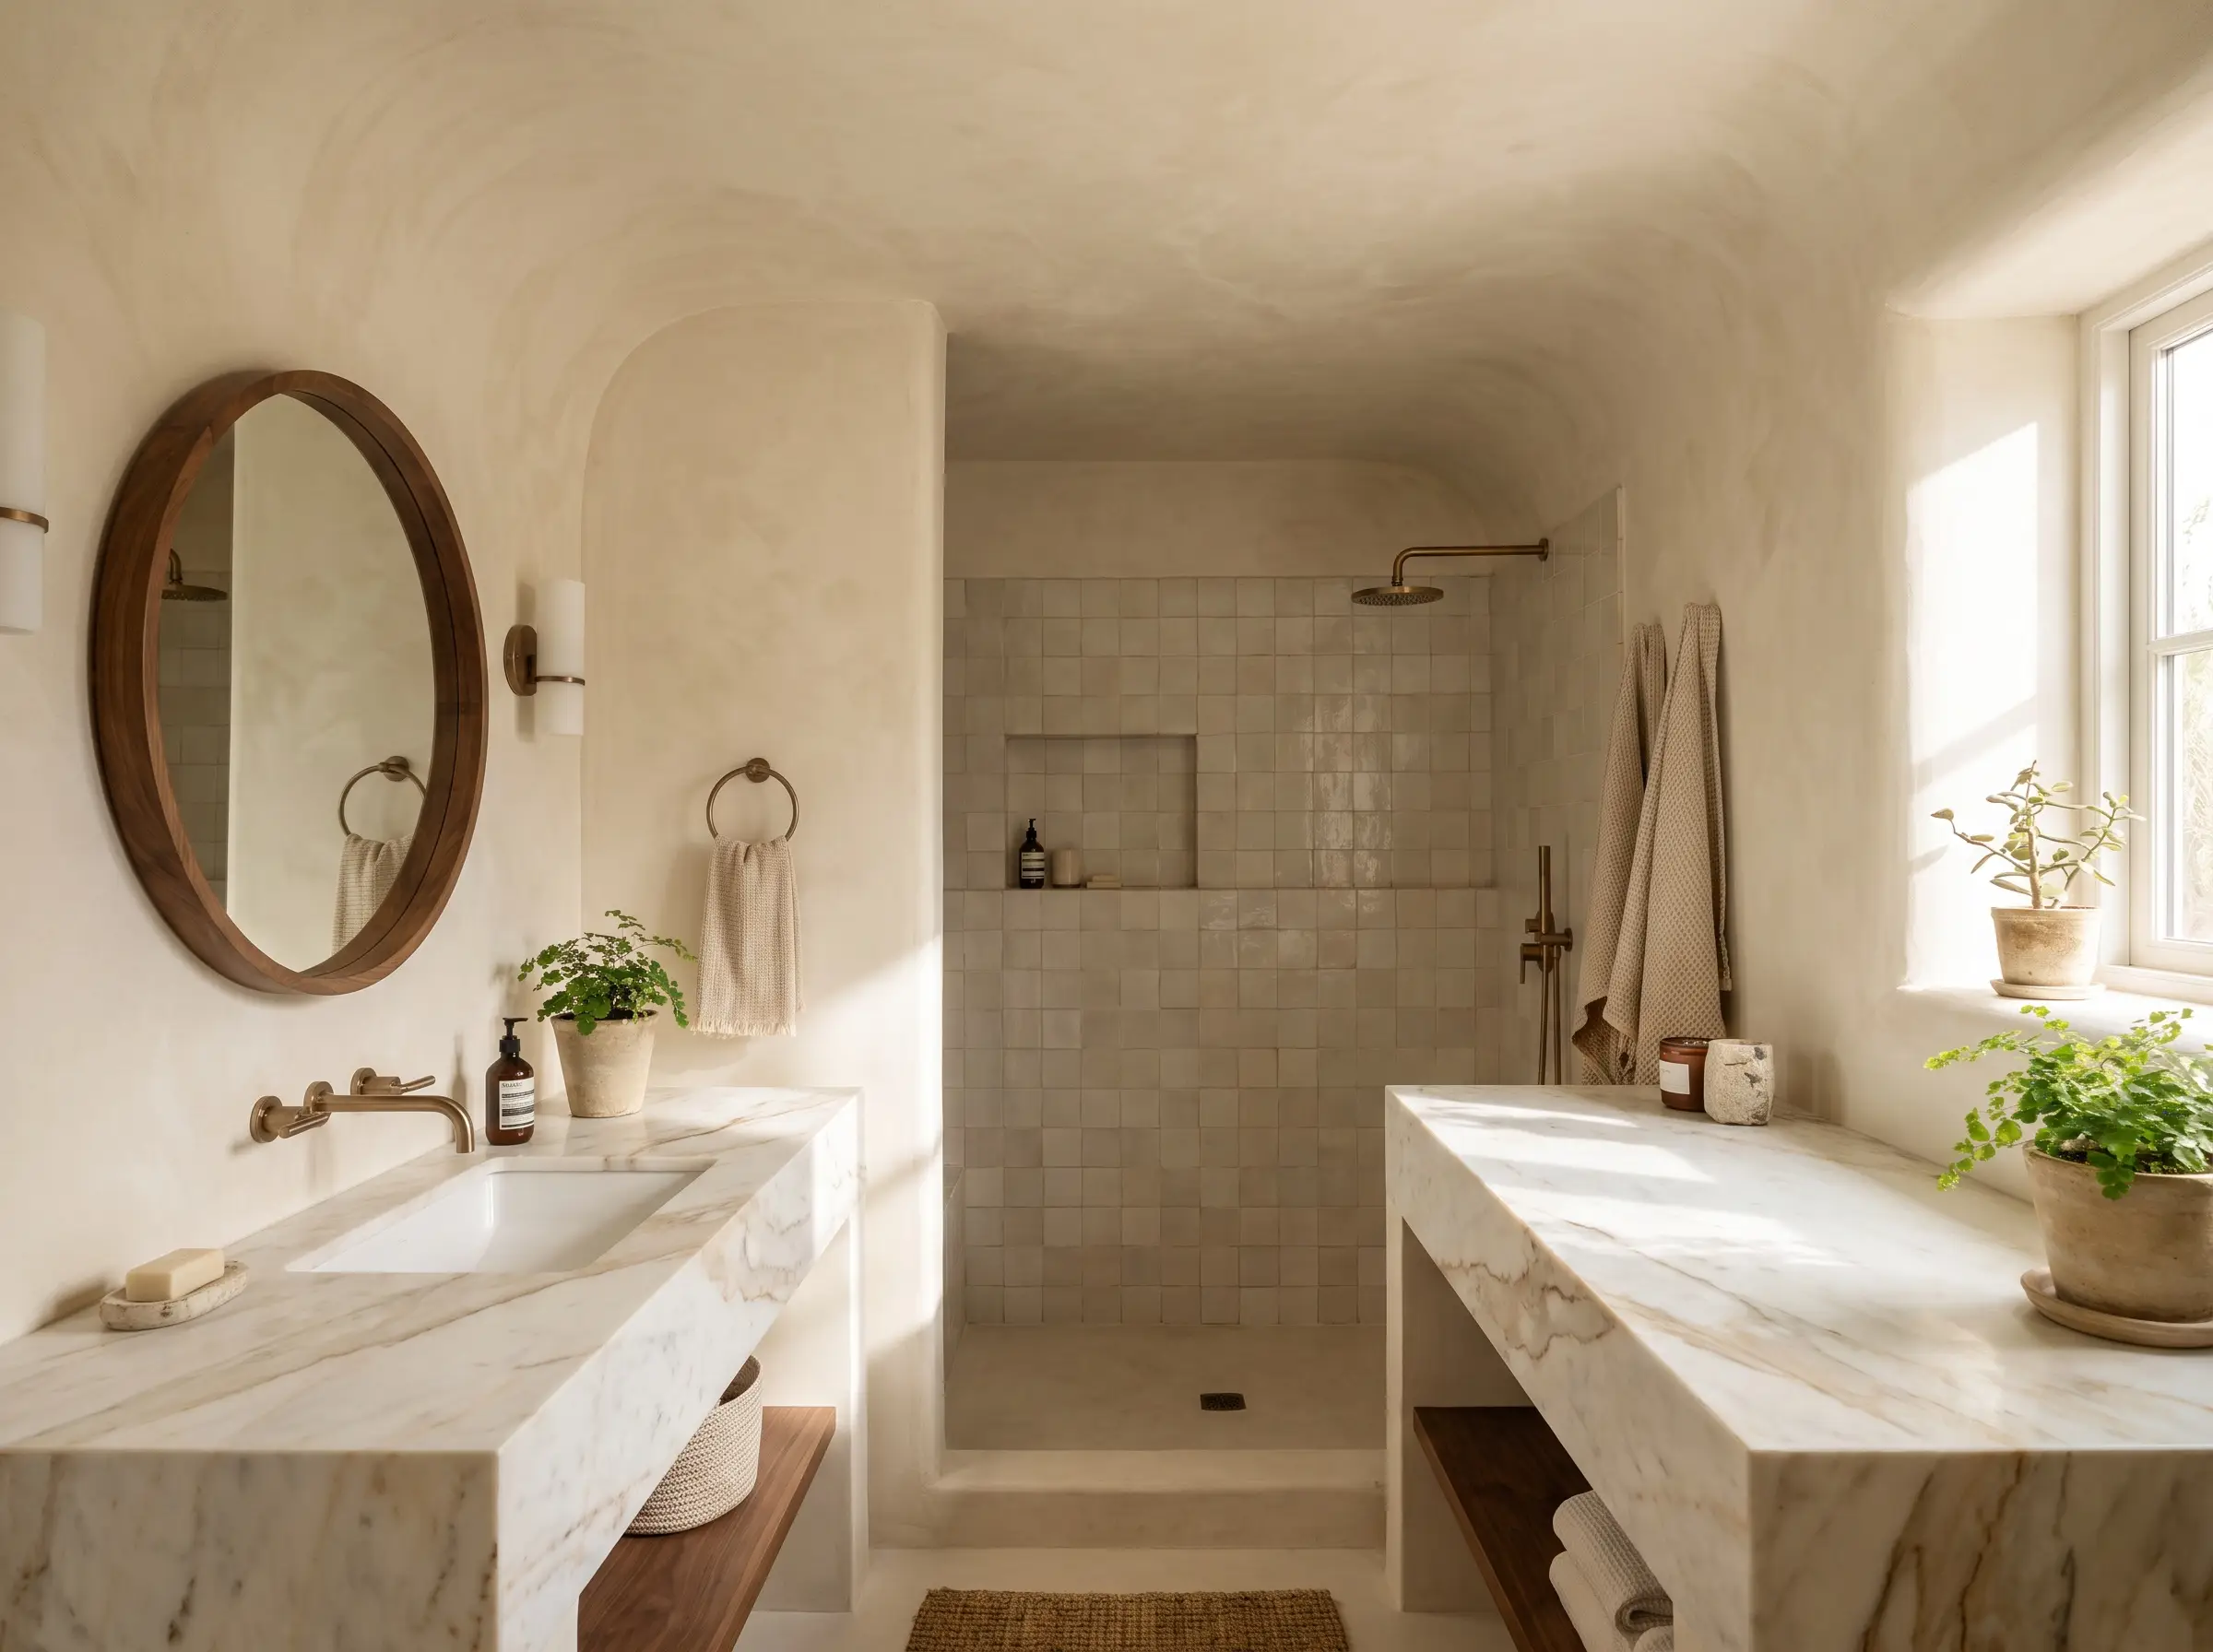
Replacing standard drywall with a textured limewash plaster completely alters the acoustics and visual temperature of the room. The subtle, cloudy movement of the plaster softens the hard, polished edges of the stone vanity.
- Vibe: Earthy & Grounded
- Key Material: Mineral-based Limewash
- Paint Recommendation: Benjamin Moore Swiss Coffee (applied as a wash or paired with a matched plaster)
- Styling Pro-Tip: Carry the limewash onto the ceiling for a fully enveloping, cave-like warmth.
Contrast Polished Stone with Matte Zellige Tiles
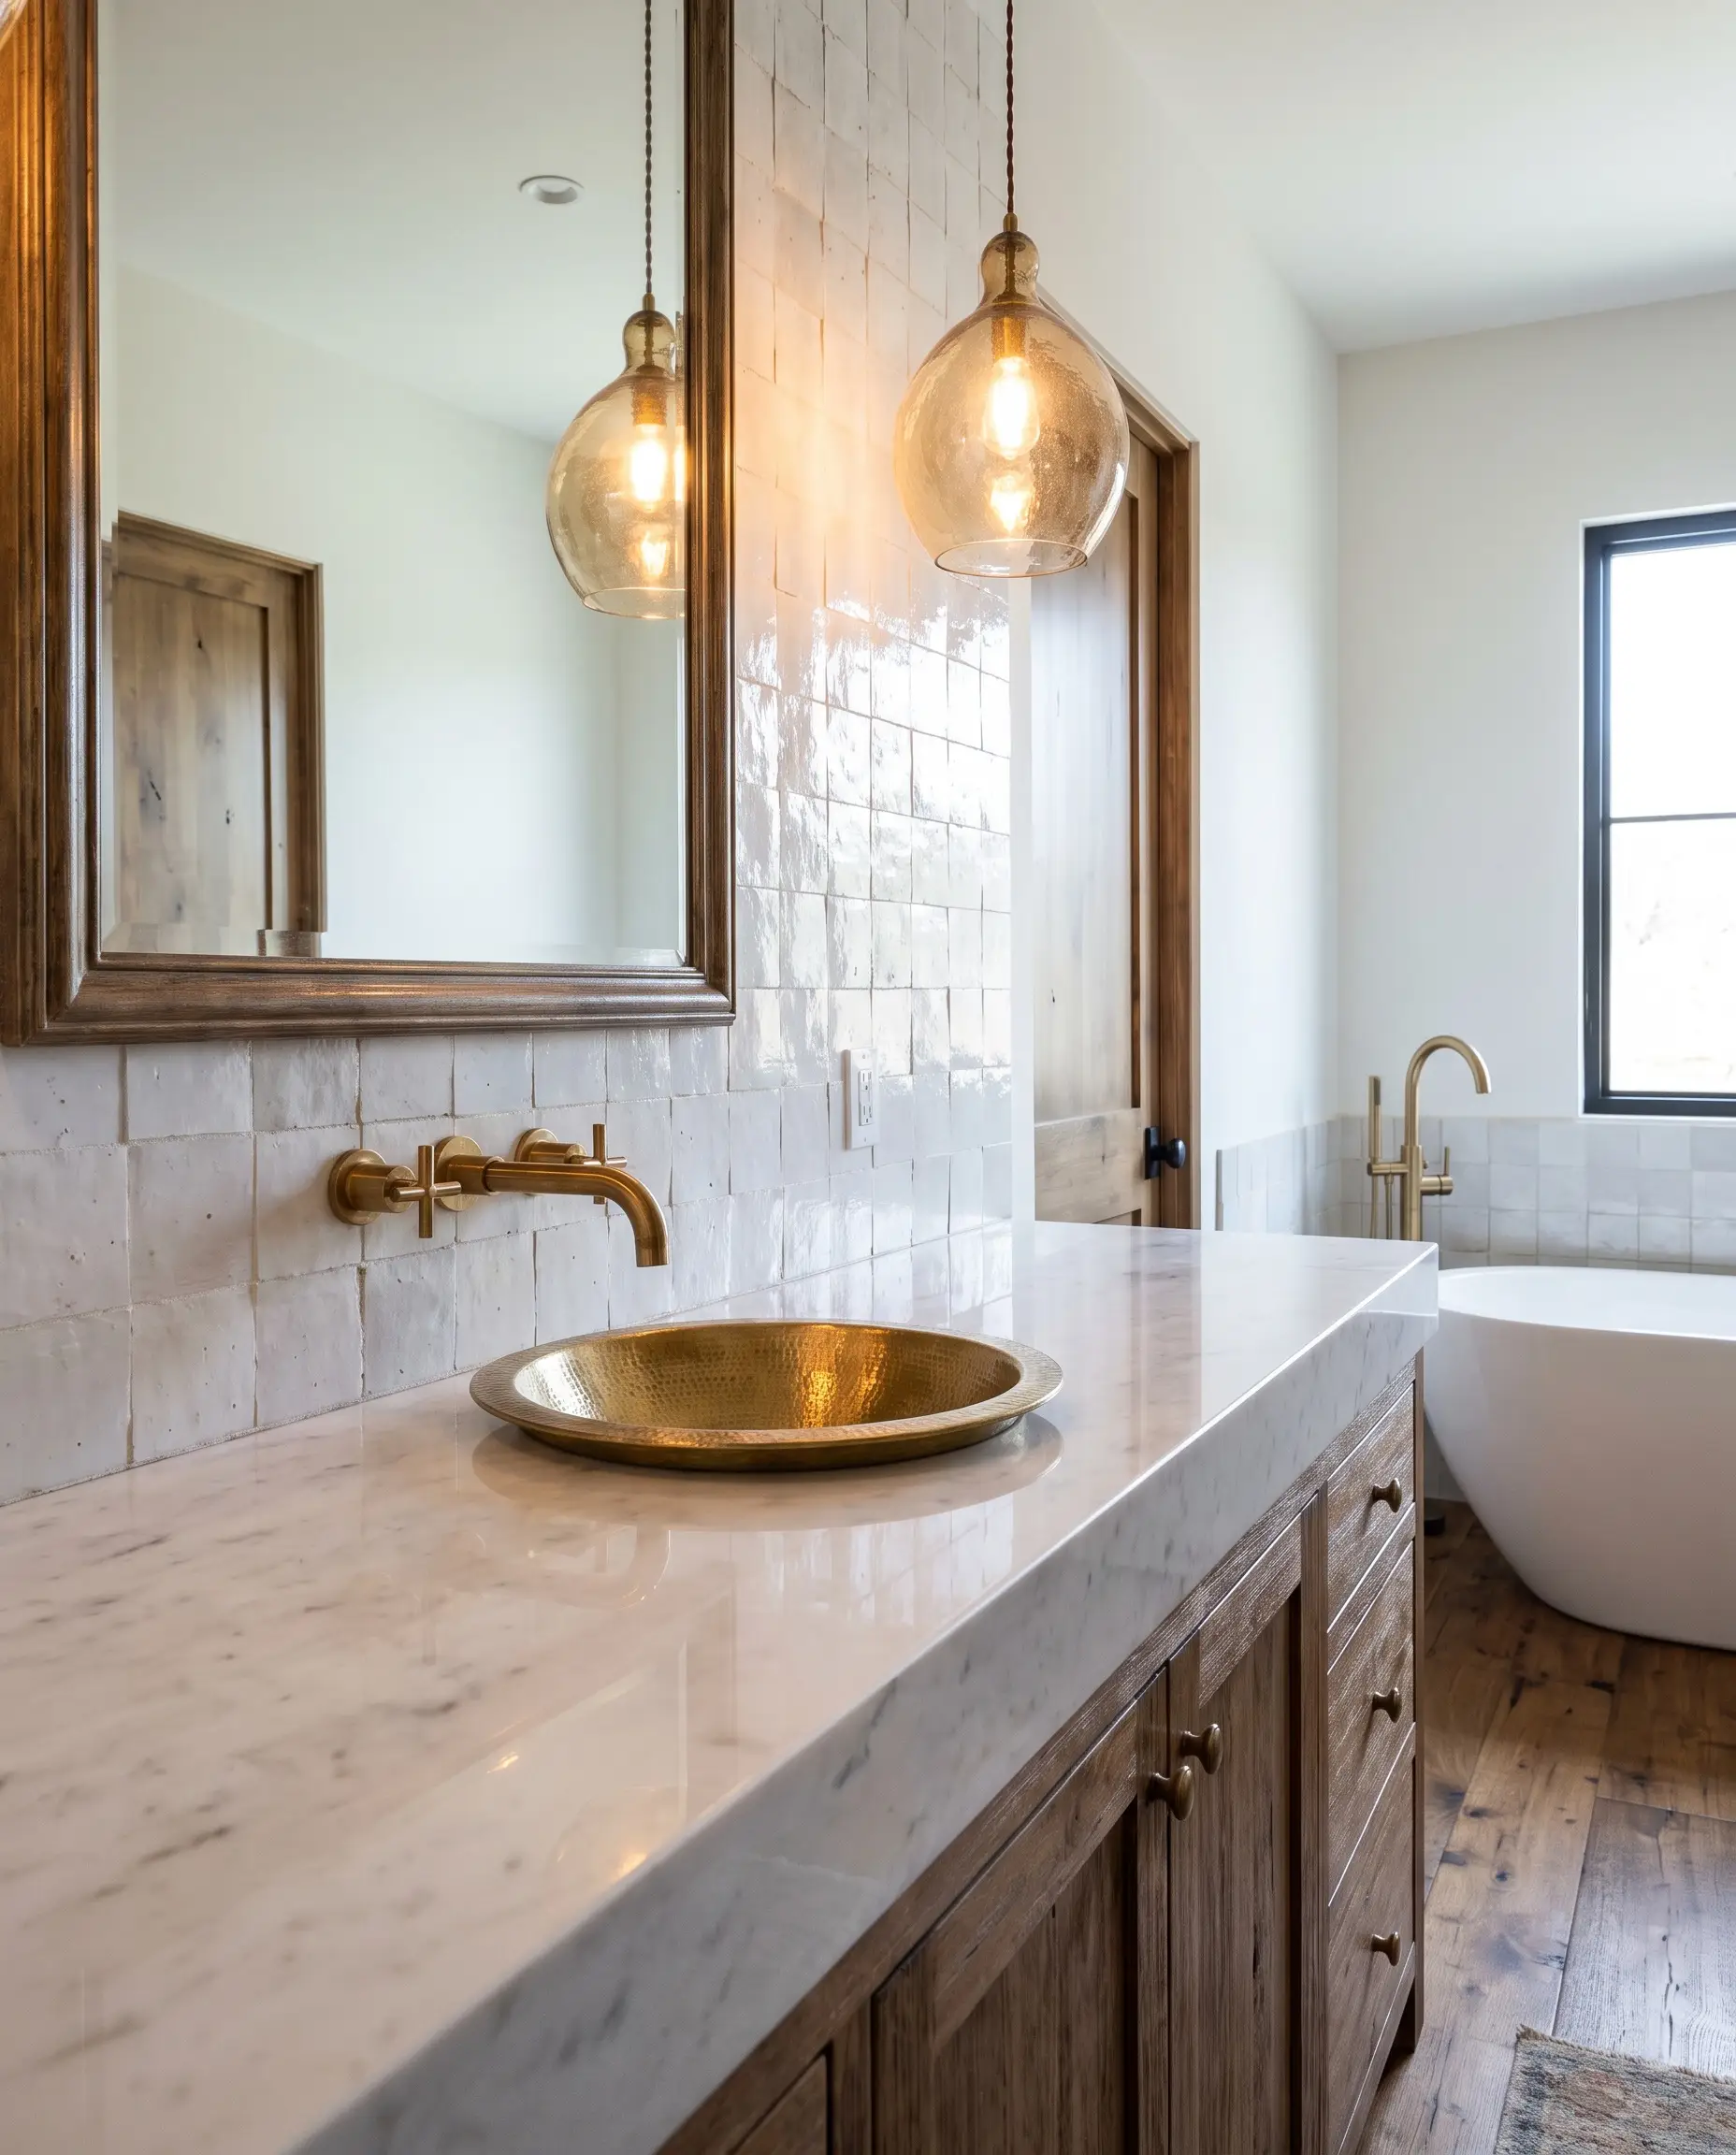
Pairing a highly polished marble vanity top with a backsplash of rough, handmade Zellige tiles creates a brilliant friction between perfection and imperfection. The undulating surface of the clay tiles reflects light in a beautifully chaotic way, breaking up the severity of the stone.
- Vibe: Artisan Modern
- Key Material: Moroccan Zellige Tiles
- Installation Detail: Zellige should be installed edge-to-edge with no grout spacers for a truly authentic, rustic appearance.
Frame the Mirrors with Unlacquered Brass
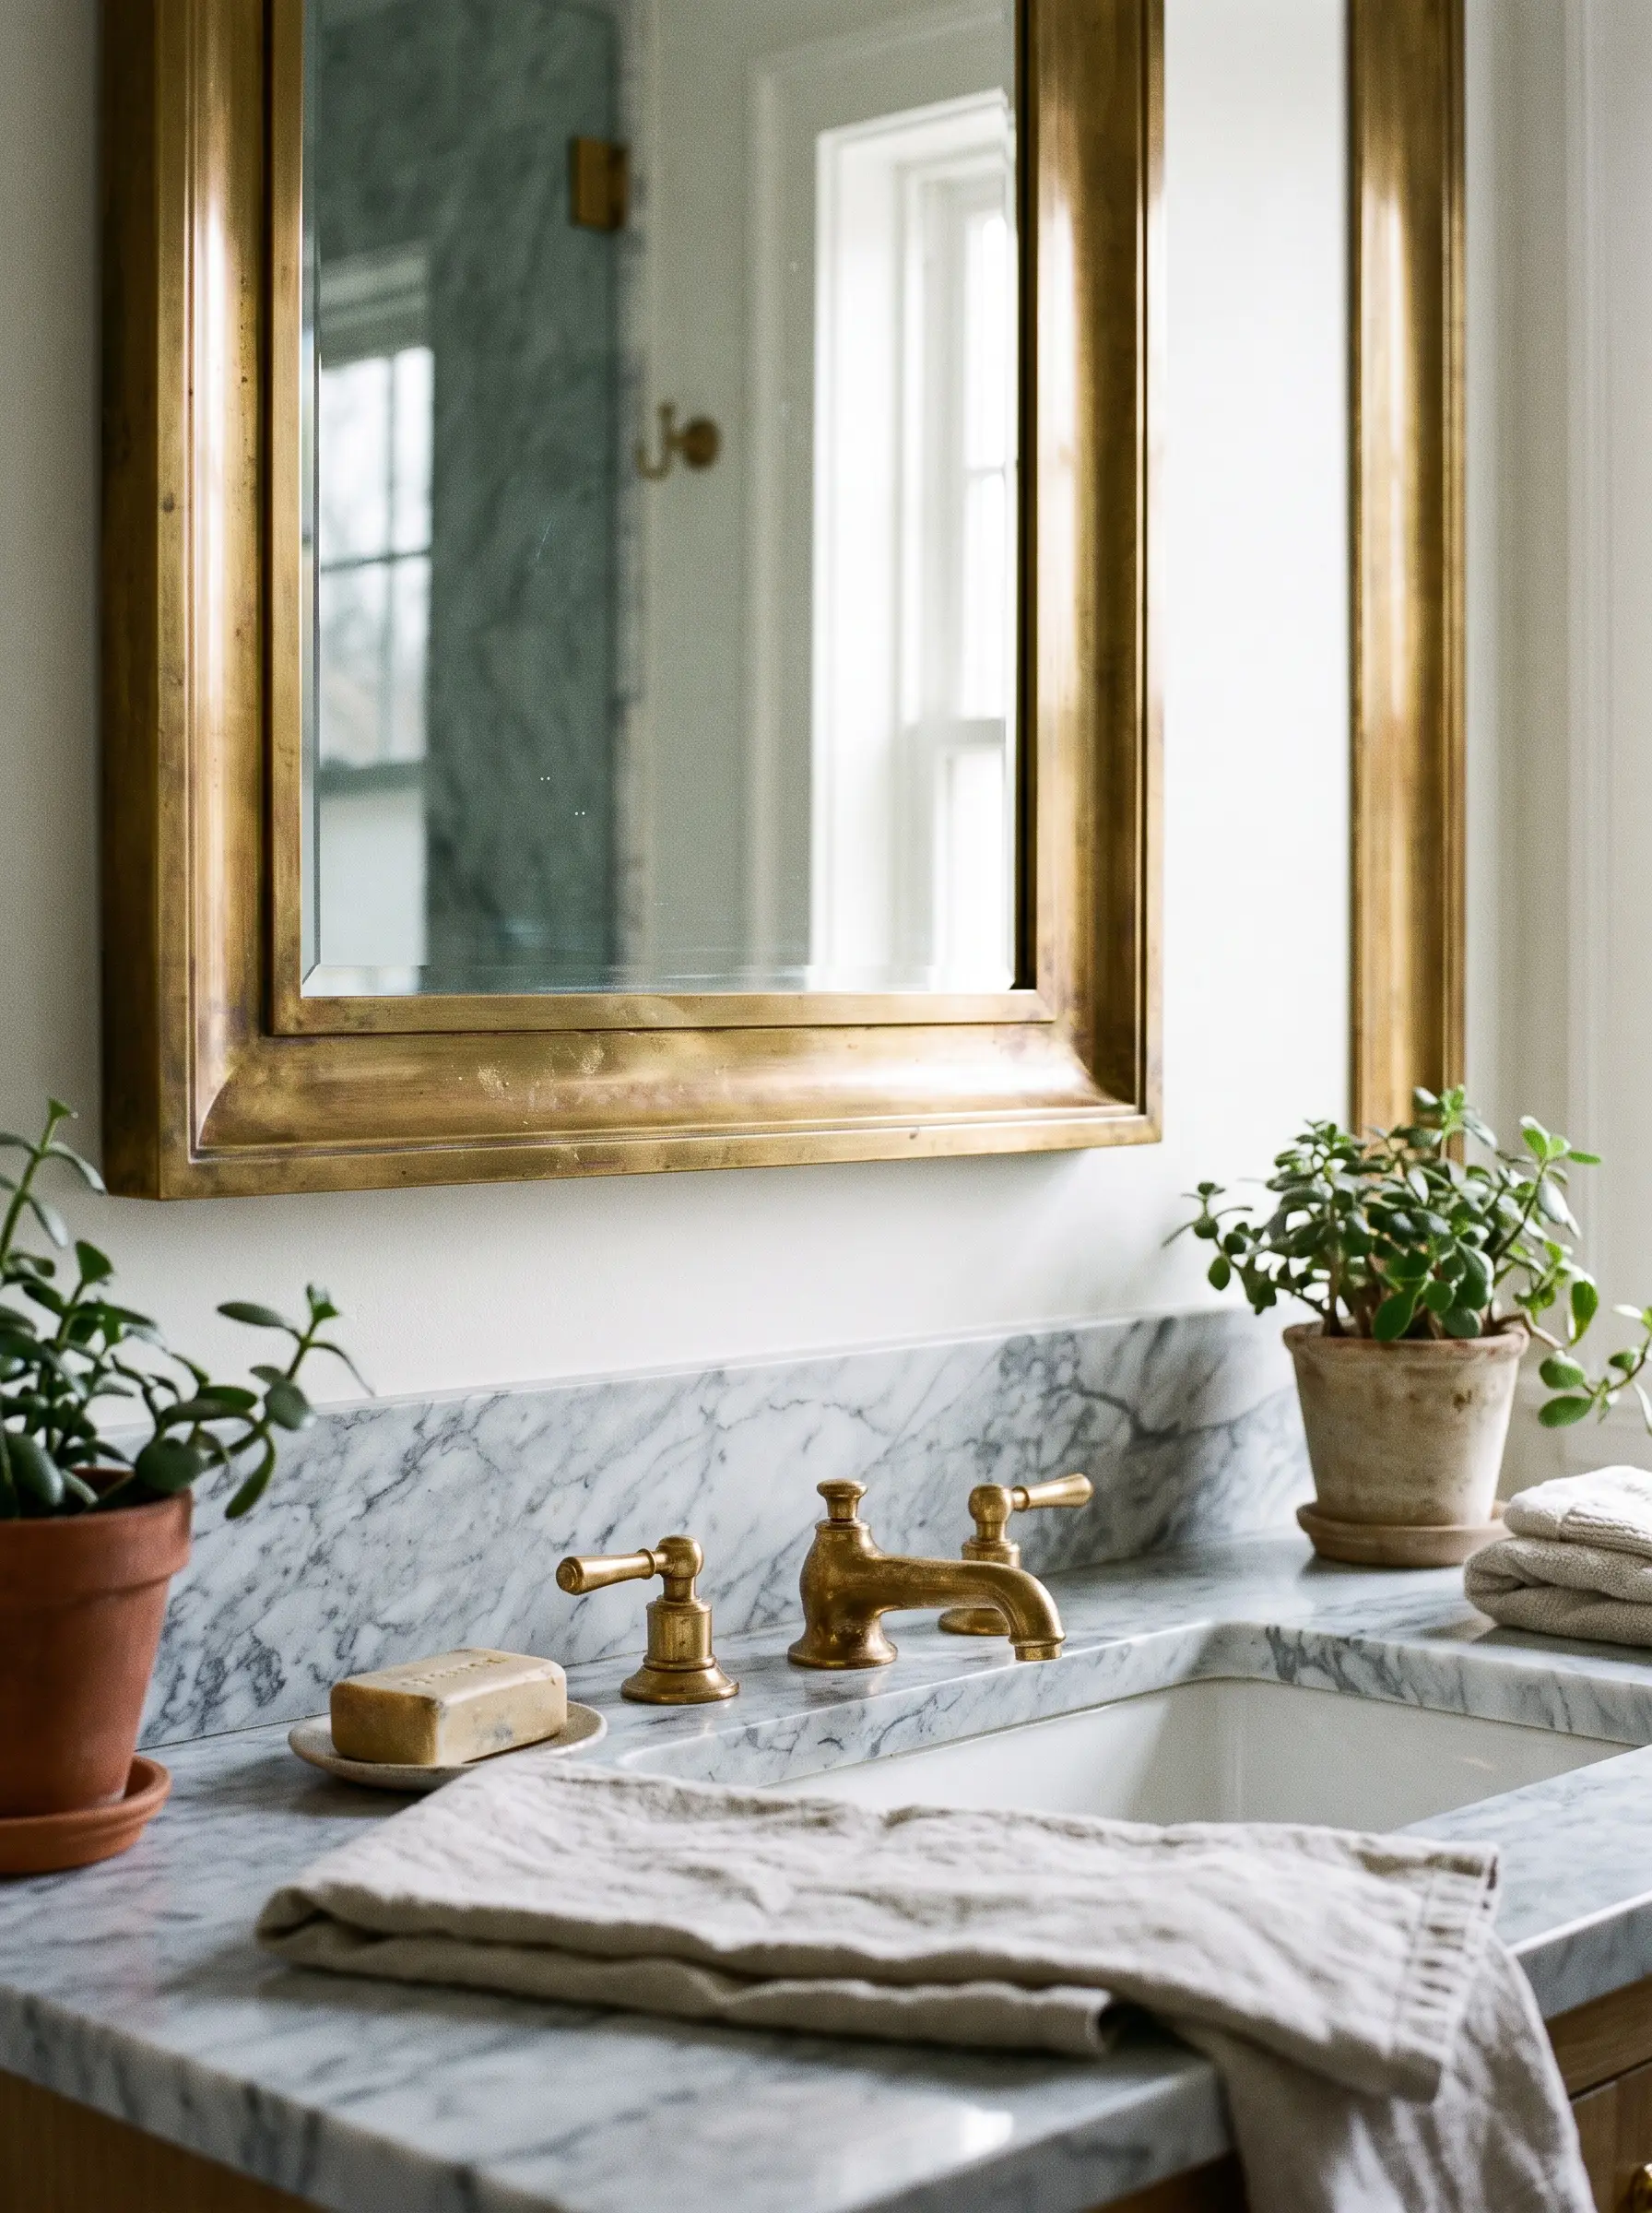
Unlacquered brass is a living finish that patinas, darkens, and ages over time, perfectly mirroring the organic, changing nature of natural stone. A heavy brass mirror frame introduces a crucial layer of metallic warmth against cool-toned slabs.
- Vibe: Lived-in Luxury
- Key Material: Solid Unlacquered Brass
- Design Note: Embrace the tarnish; if you prefer a pristine, unchanging finish, specify brushed bronze instead.
Suspend Woven Pendant Lights for Organic Texture
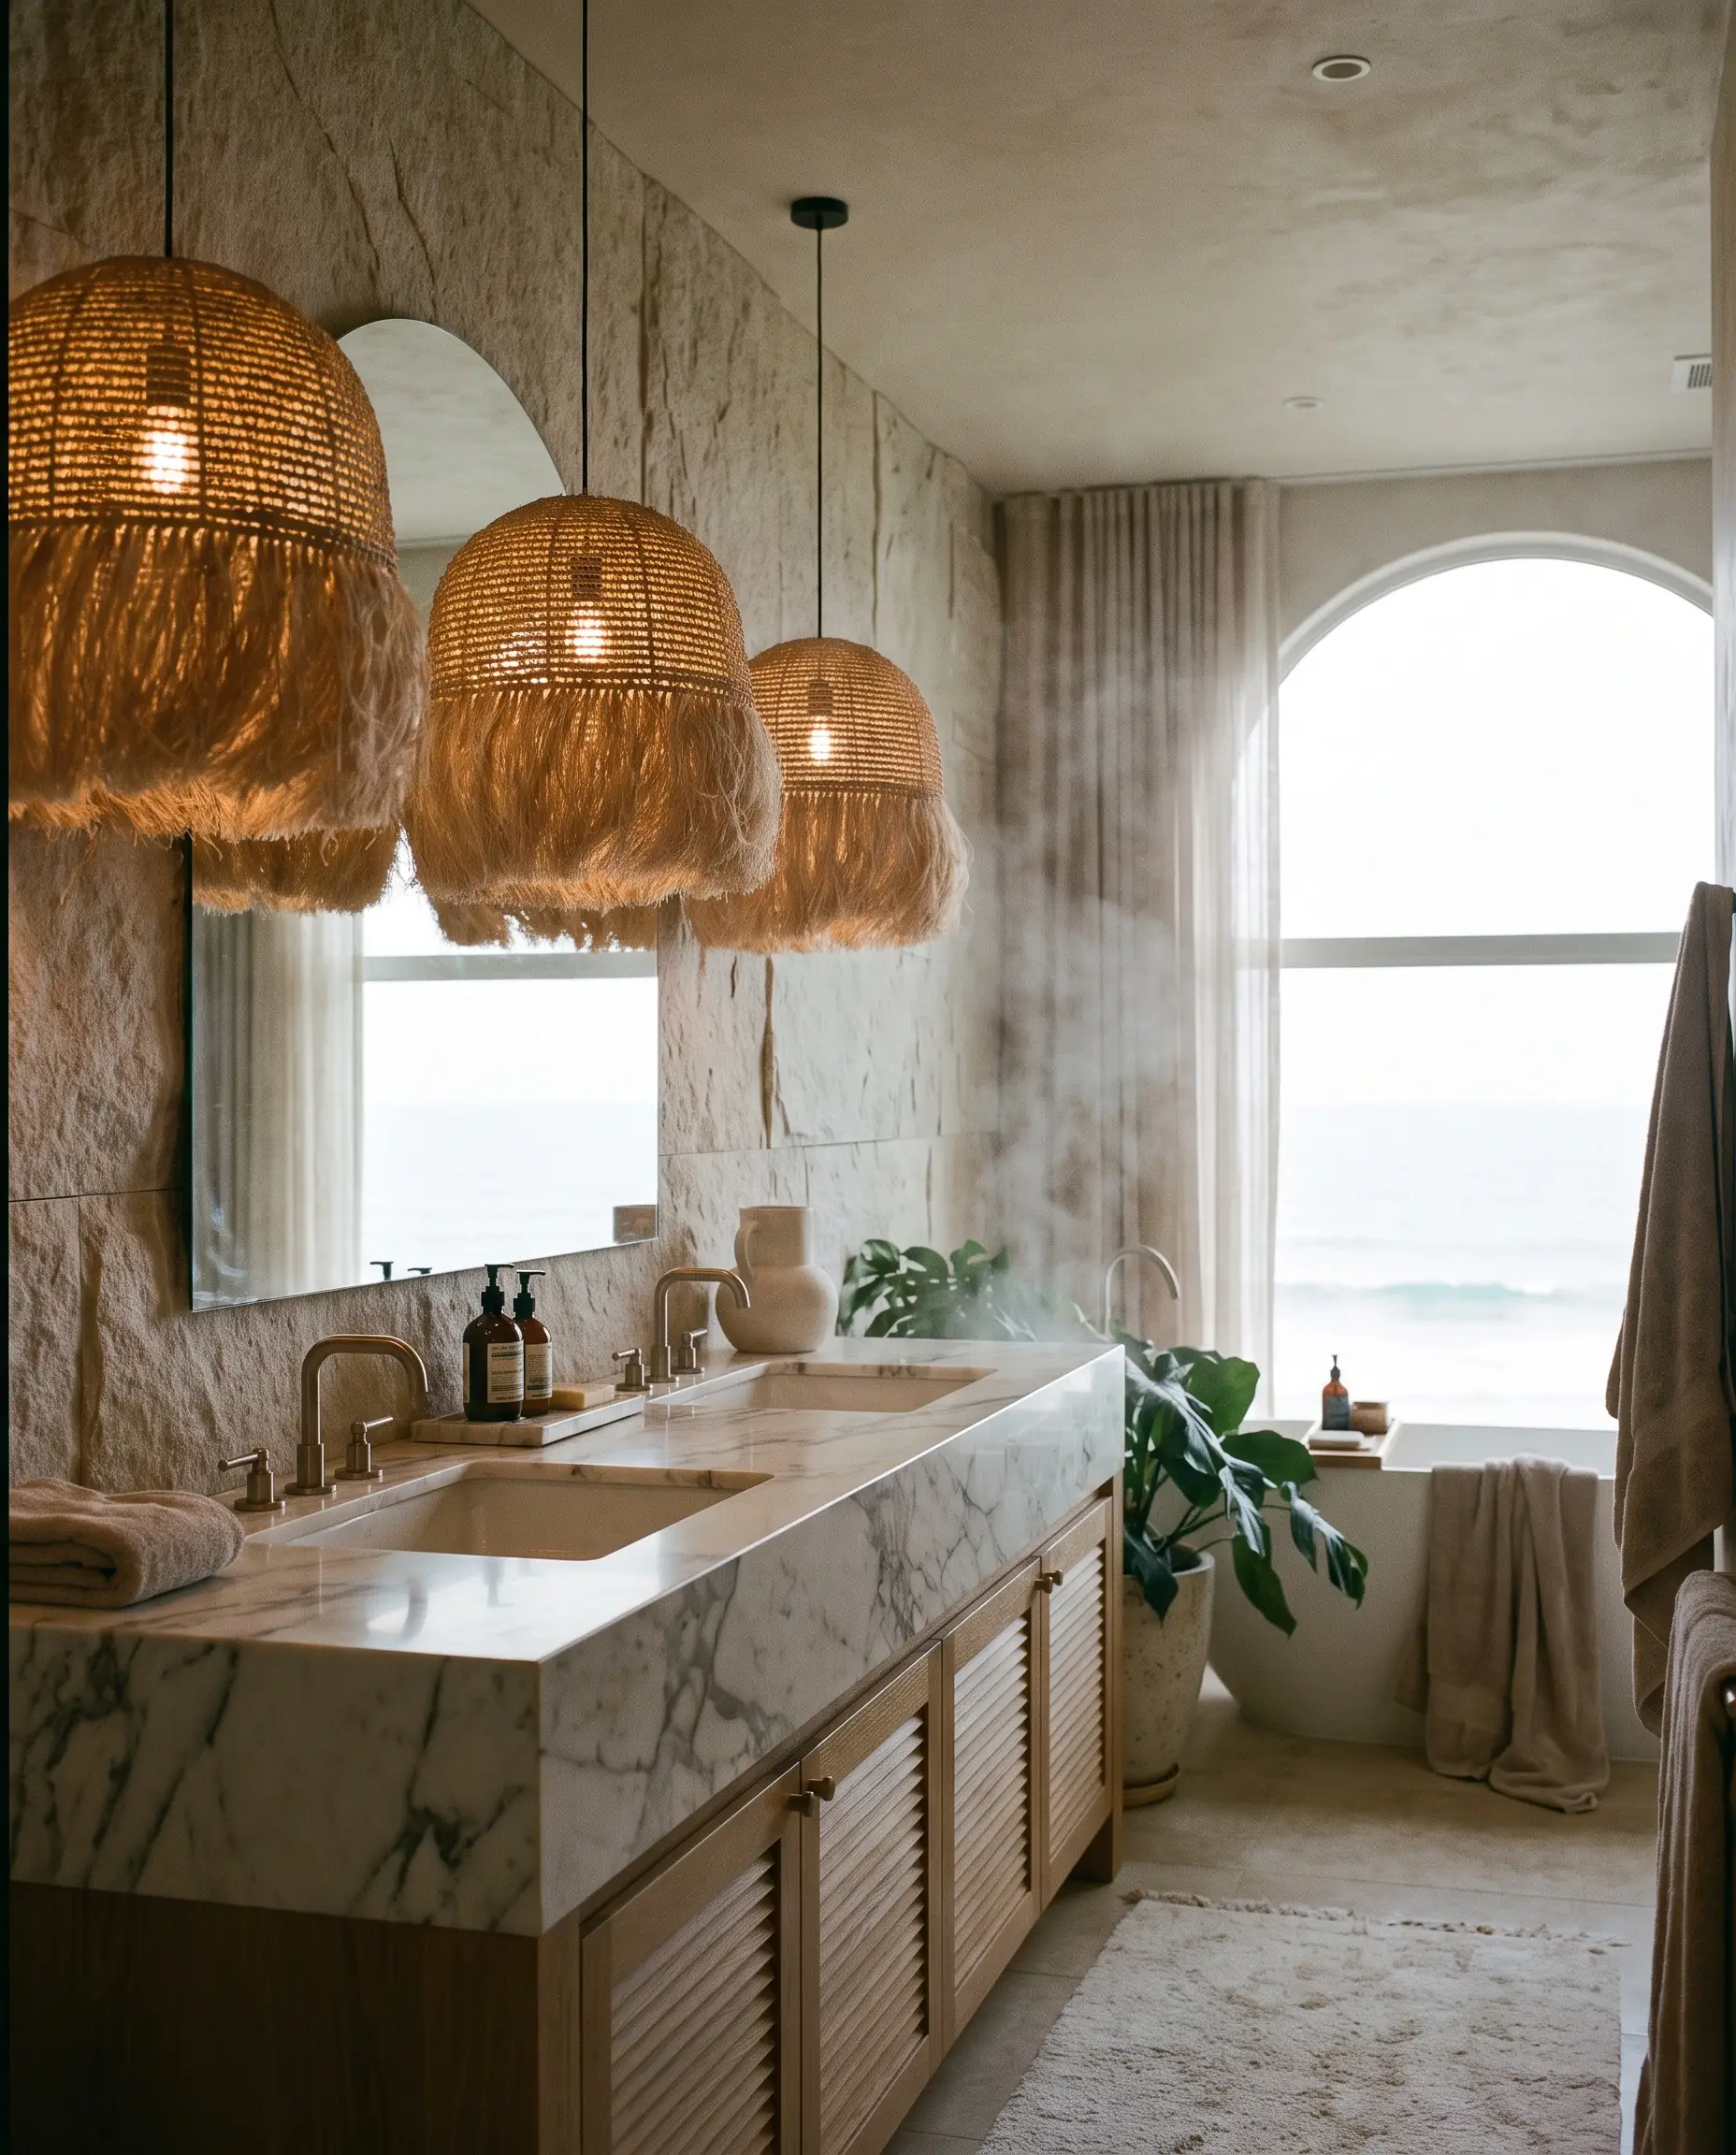
Hard surfaces bounce light and sound aggressively. Dropping woven rattan or linen pendant lights down to eye level over the vanity introduces a soft, fibrous texture that instantly warms the visual plane.
- Vibe: Coastal Spa
- Key Material: Rattan, Linen, or Woven Bamboo
- Lighting Requirement: Always specify damp-rated fixtures when hanging pendants in a bathroom environment.
Install Matte Black Fixtures to Ground the Space
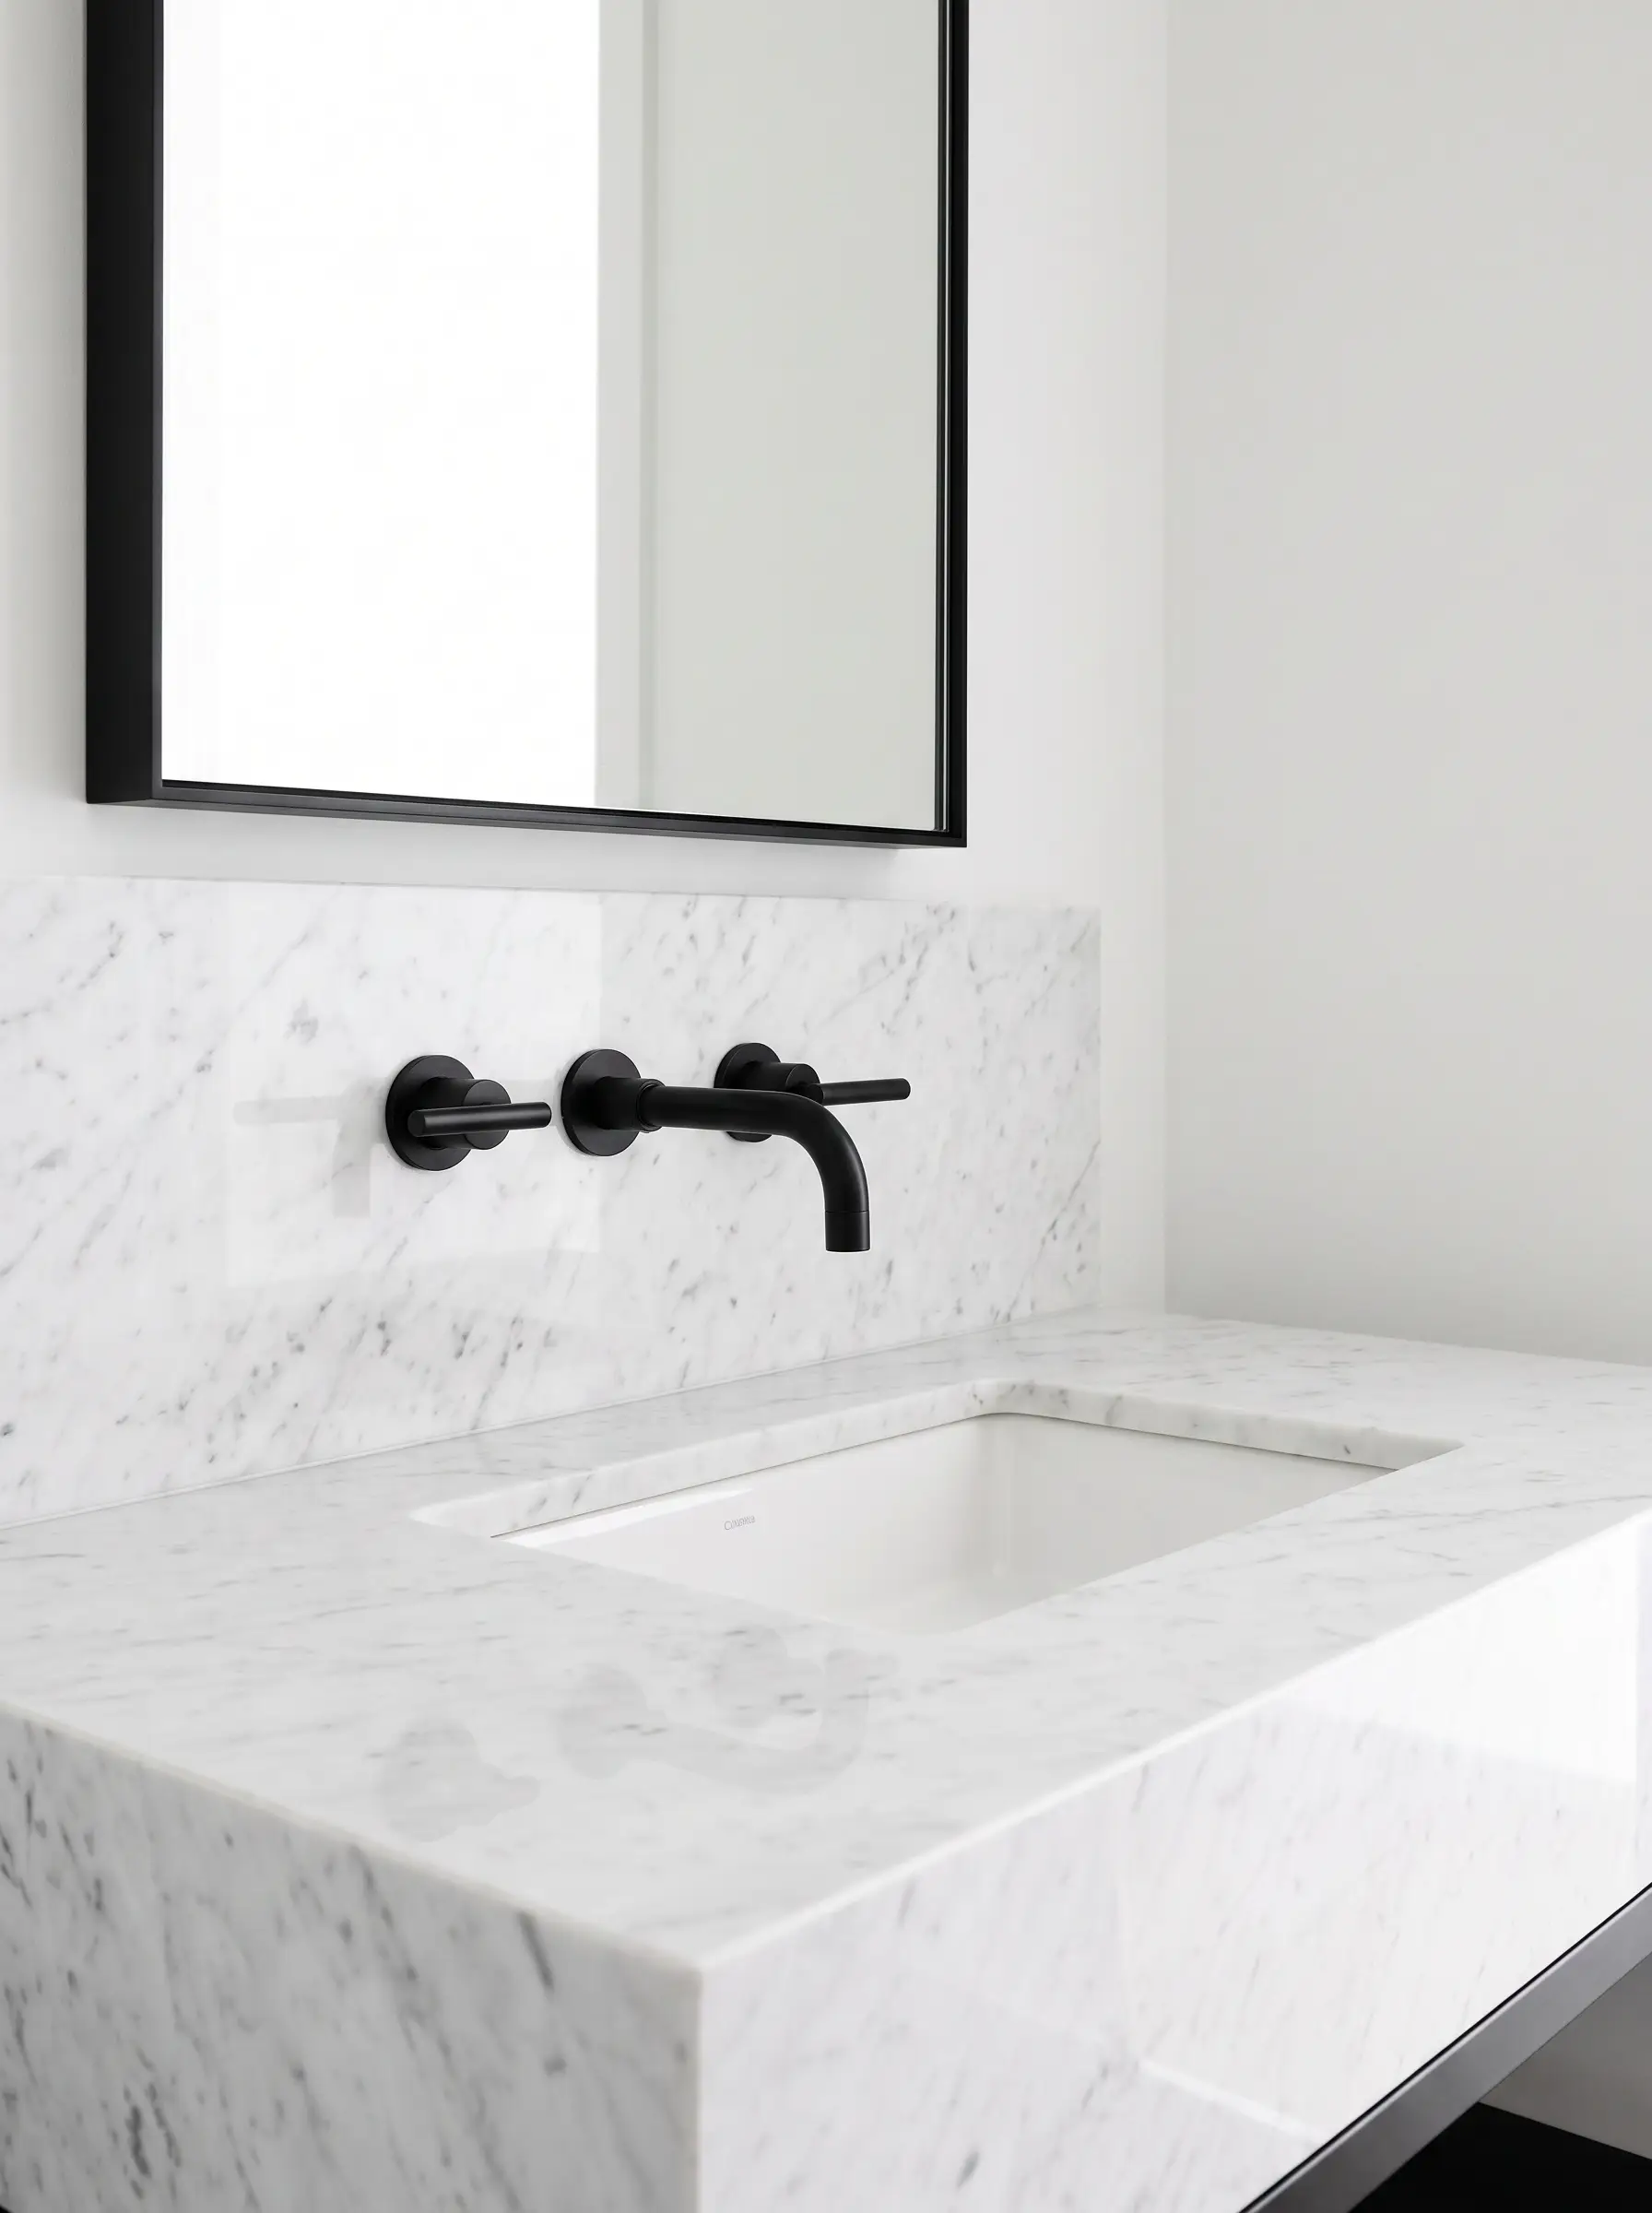
When dealing with overly bright, all-white marble rooms, matte black plumbing fixtures act as necessary visual anchors. The stark, light-absorbing finish cuts through the gloss of the stone, providing a sharp, contemporary edge.
- Vibe: Sharp & Contemporary
- Key Material: Matte Black PVD Fixtures
- Maintenance Note: Clean matte black fixtures only with mild soap and water; harsh chemicals will strip the finish.
The Reality Check: Maintenance, Finishes, & Alternatives
We must transition from pure inspiration to the hard realities of stone ownership. Natural marble is a porous, calcium-based rock; it demands respect, specific cleaning protocols, and an honest assessment of how you live before you invest.
Real Marble vs. Porcelain/Quartz Lookalikes
- Real Marble Pros: Unmatched depth, authentic tactile feel, inherently bespoke, increases property value.
- Real Marble Cons: Highly porous, prone to acid etching, requires regular sealing, expensive fabrication.
- Lookalike Pros: Zero porosity, immune to etching from cosmetics, highly durable, cost-effective installation.
- Lookalike Cons: Pattern repeats become obvious in large rooms, lacks the cool-to-the-touch feel, printed edges can look artificial.
Understand the Difference Between Honed and Polished
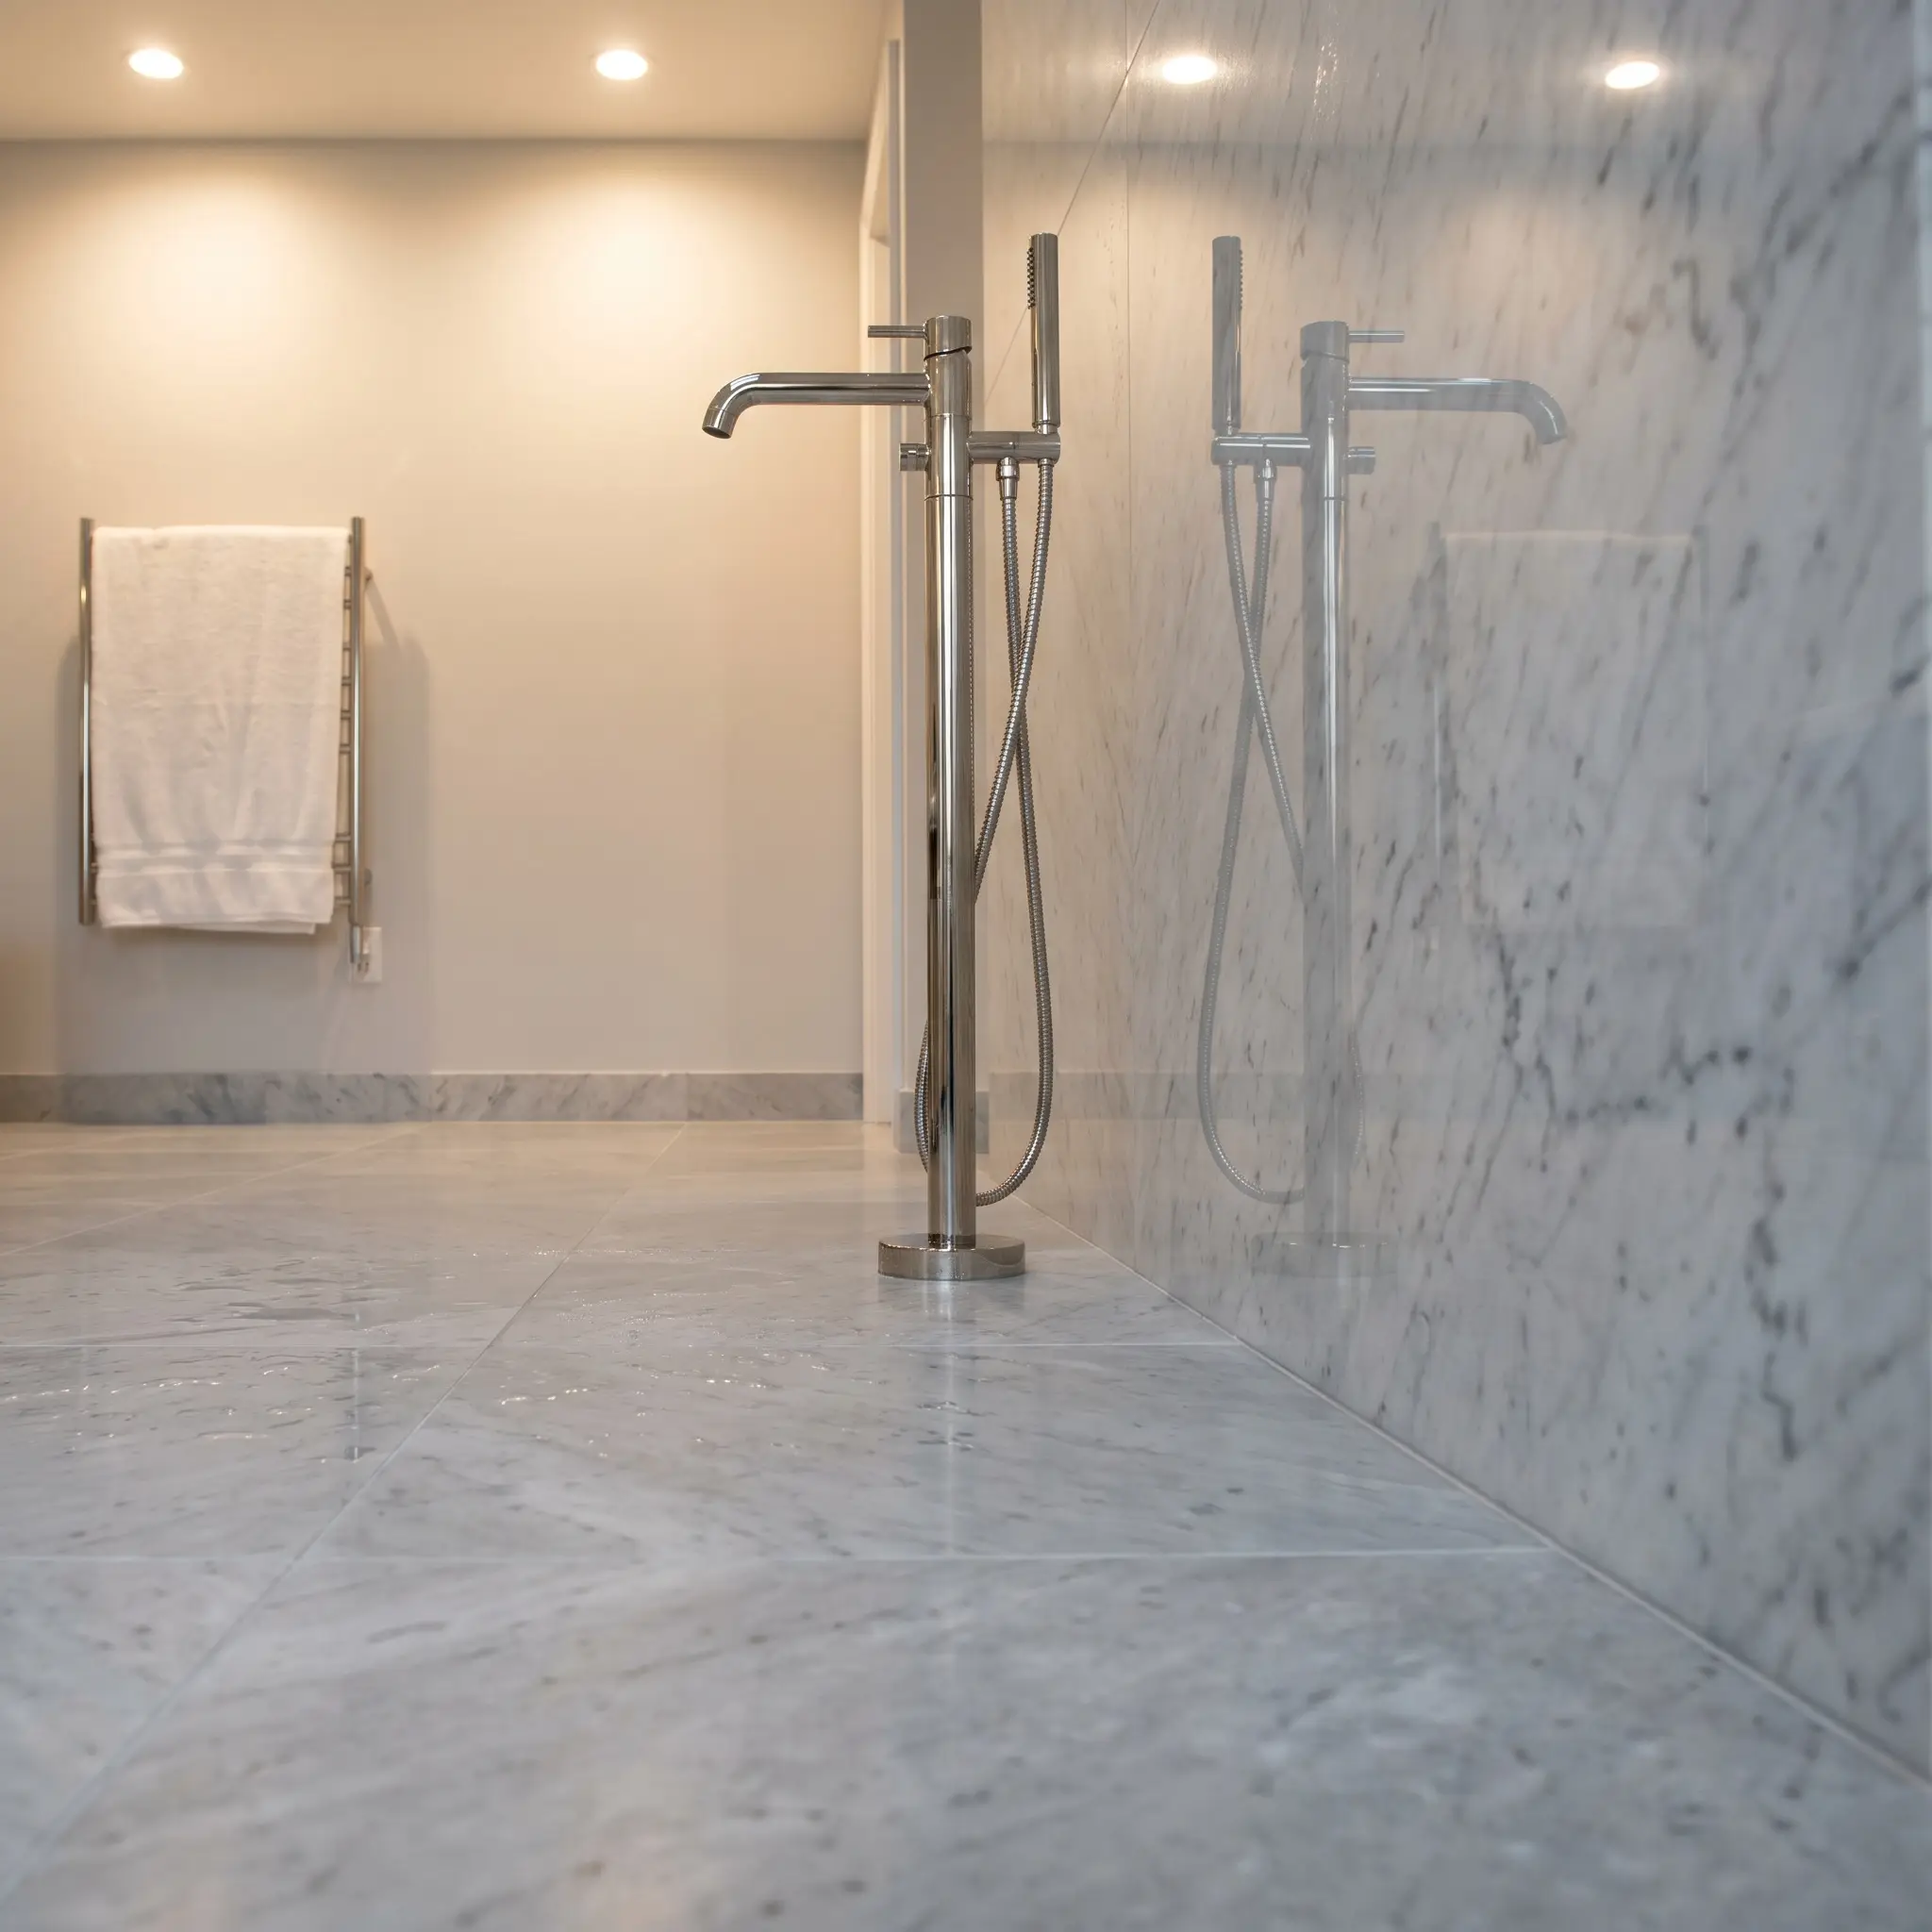
A polished finish acts like a mirror, highlighting the stone’s depth but also showcasing every single scratch and etch mark. A honed finish is matte and velvety, effectively hiding minor surface damage while providing crucial slip resistance in wet zones.
- Vibe: Practical & Informed
- Key Concept: Surface Finish Chemistry
- Application Rule: Always specify honed floors; reserve polished finishes for vertical walls or low-traffic powder room vanities.
Acidic products—including hair dye, vitamin C serums, and certain toilet bowl cleaners—will instantly etch soft marbles, leaving dull, rough spots on a polished surface. If you are highly particular about pristine countertops, real marble in a primary bath will cause you immense stress.
Pro-Tip
Commit to a Penetrating Sealer Schedule
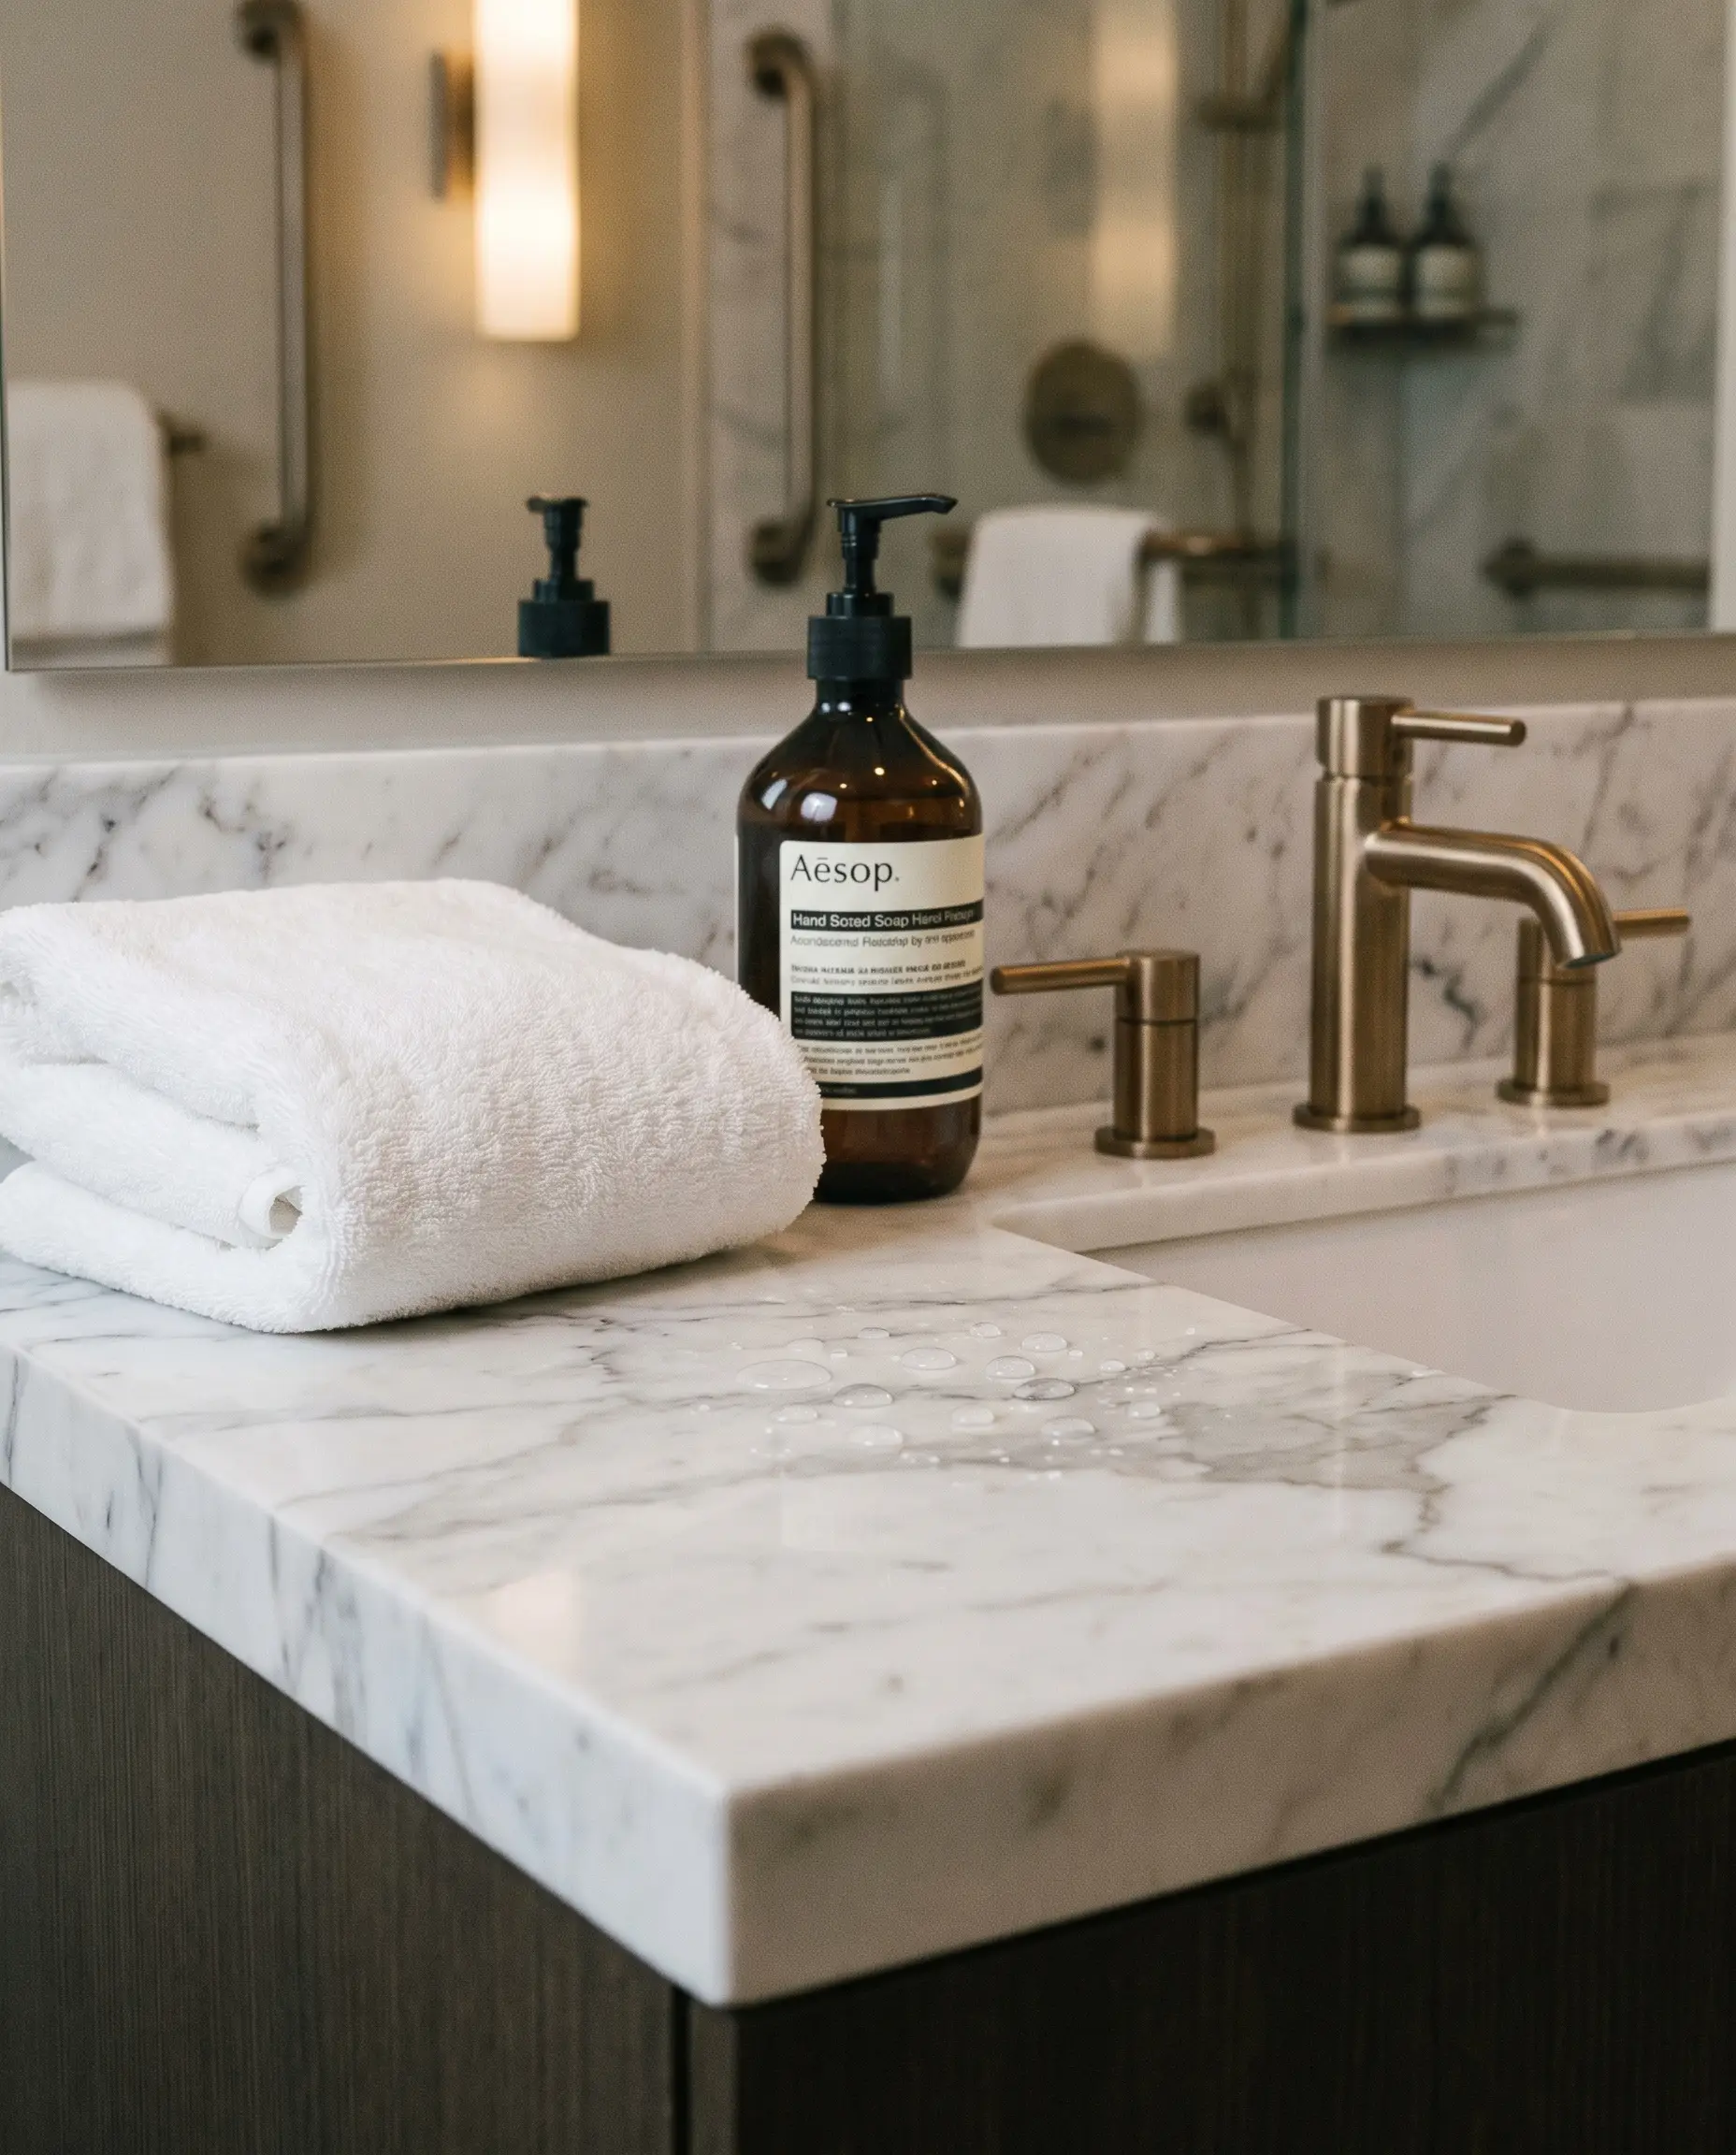
Unsealed marble acts as a sponge for water, oils, and pigmented soaps. You must protect your investment by committing to a rigorous application of a high-quality, impregnating stone sealer.
- Vibe: Diligent & Protective
- Key Material: Fluoropolymer-based Penetrating Sealer
- Maintenance Timeline: Re-seal shower floors every 6 months, and vanity tops annually.
Swap Real Stone for High-Fidelity Quartz on High-Traffic Vanities
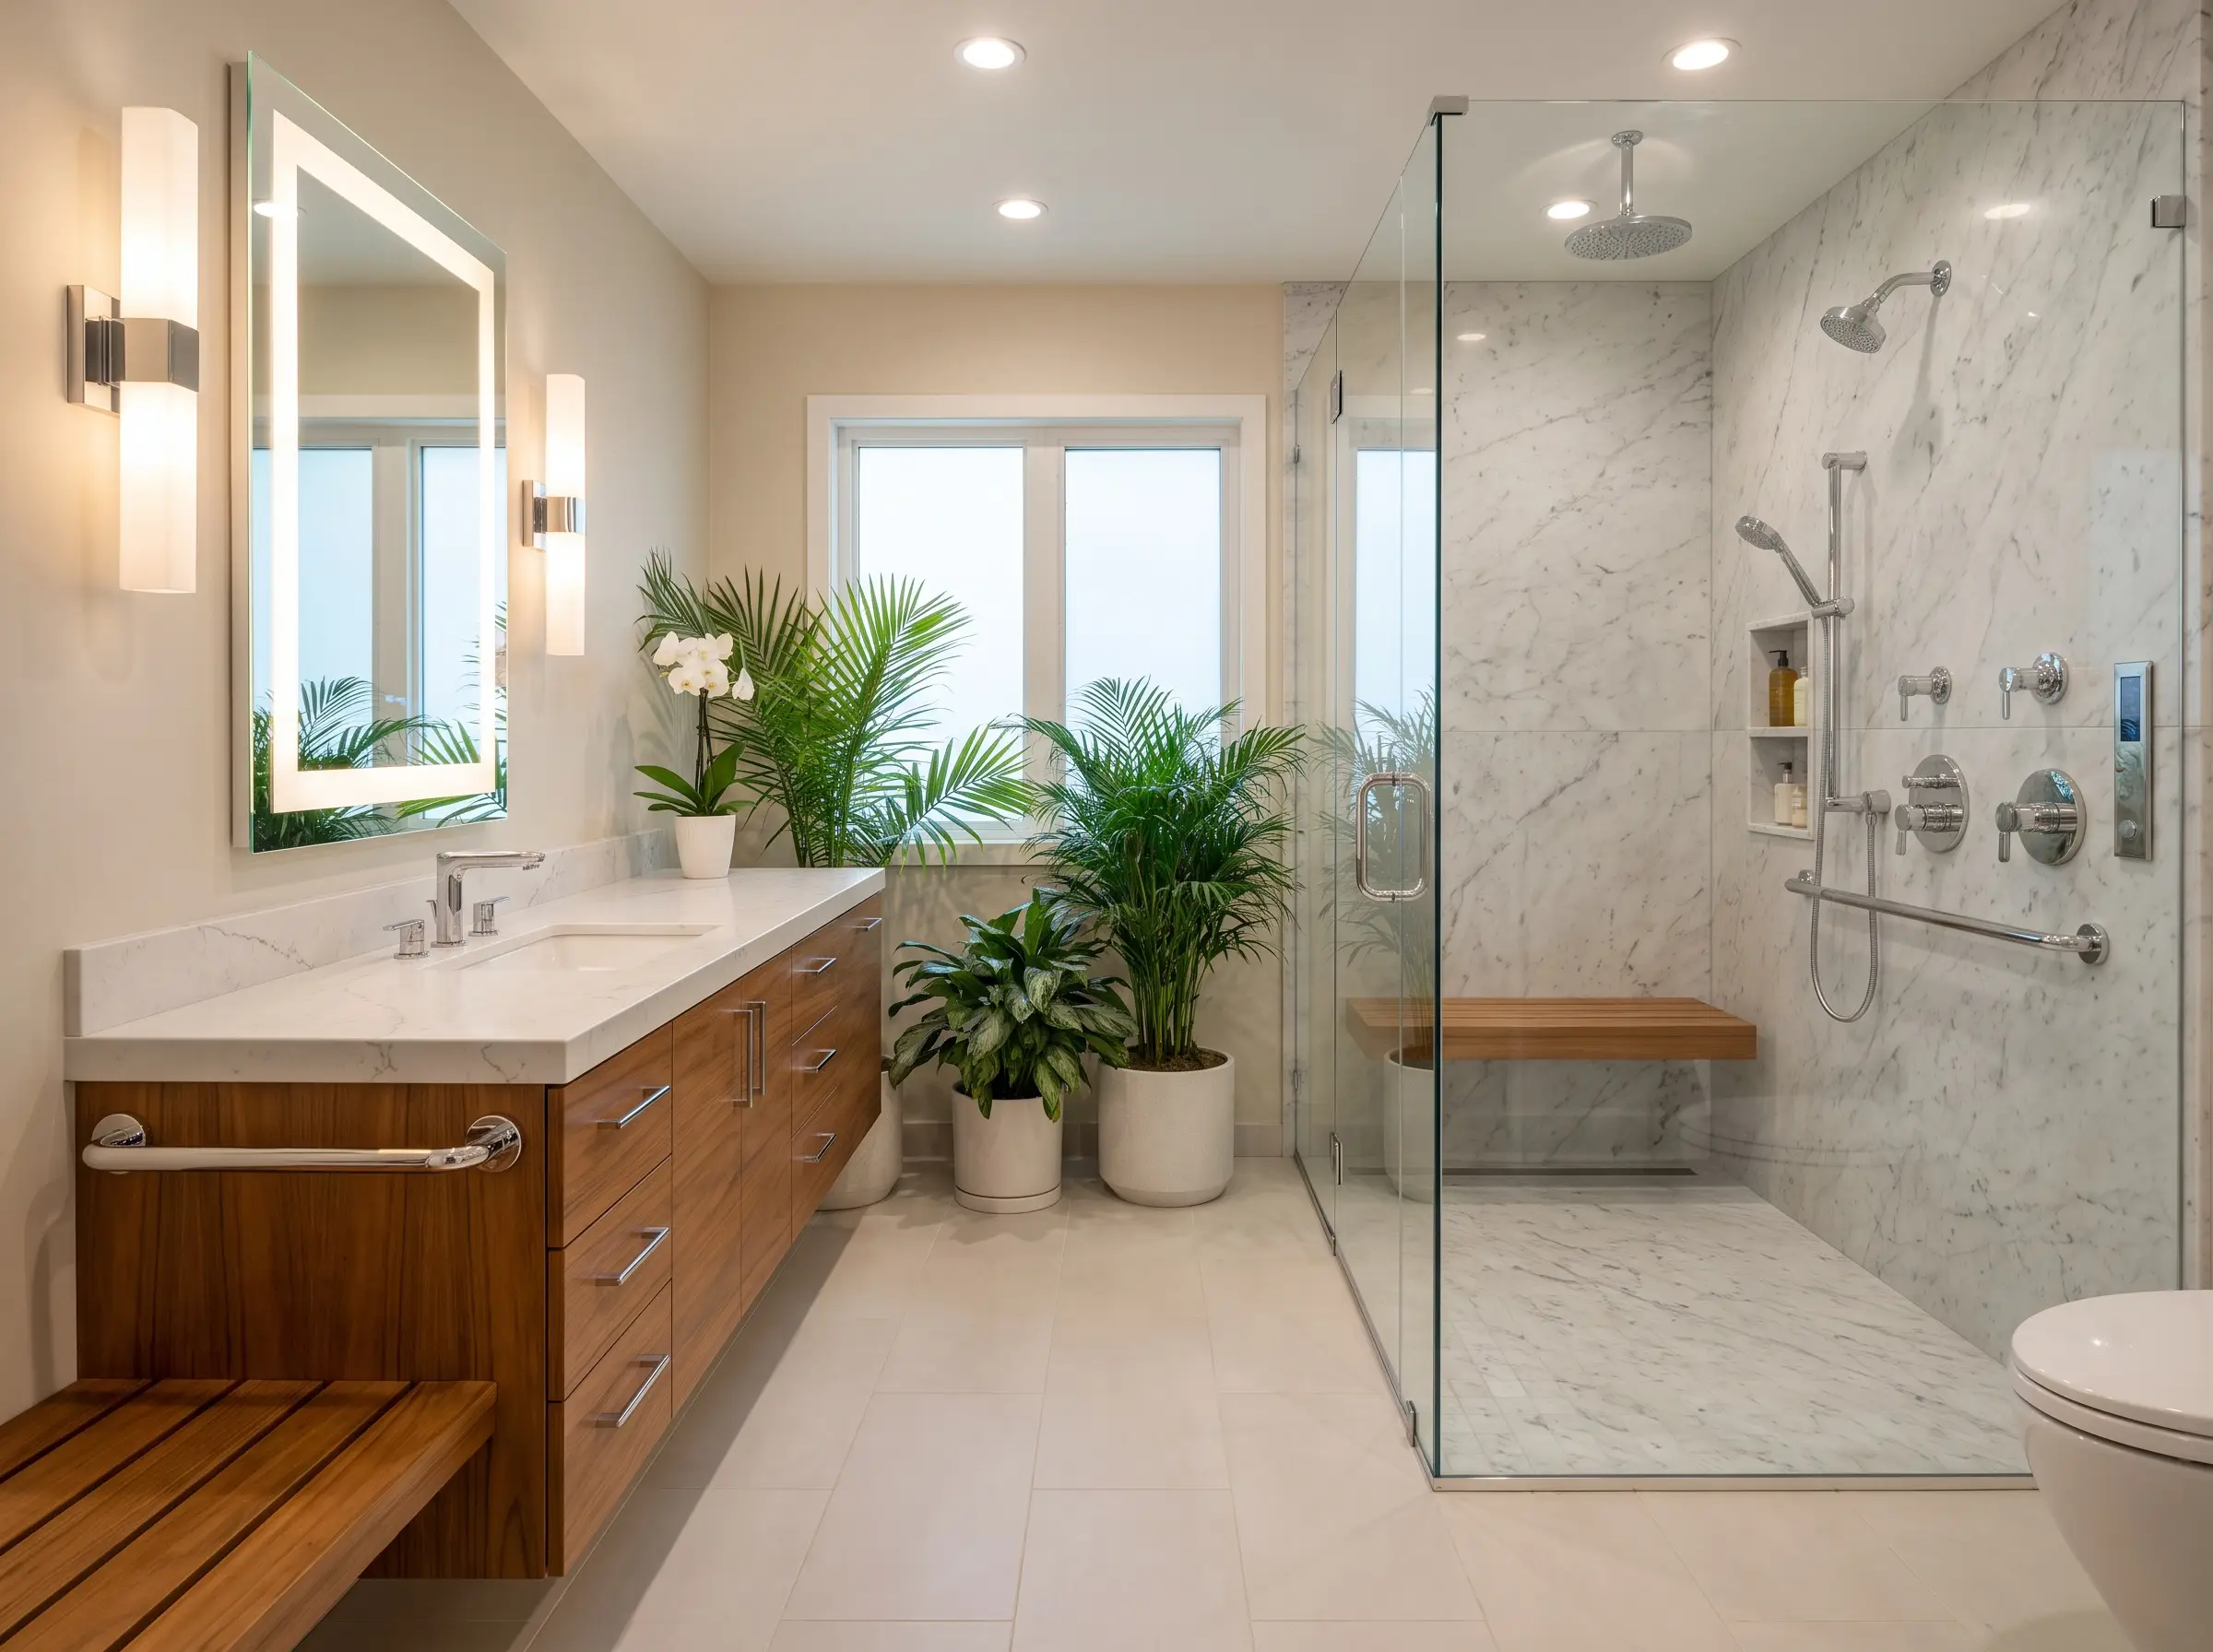
If the reality of etching and sealing conflicts with your busy lifestyle, strategically swap the vanity top for a premium quartz or porcelain lookalike. You can still use real marble on the walls where spills are less likely, blending practicality with authentic luxury.
- Vibe: Smart & Accessible
- Key Material: High-Fidelity Engineered Quartz
- Design Secret: Choose a quartz with subtle, soft veining rather than aggressive, high-contrast printed veins, which often look artificial up close.
The Strategist’s Blueprint for Your Bath
A successful marble bathroom relies entirely on balance, appropriate finishes, and intentional placement. It is not about covering every square inch in expensive rock; it is about highlighting the stone’s inherent beauty by contrasting it with warm woods, tactile plasters, and living metals. Whether you are investing in a bespoke bookmatched Calacatta slab or strategically integrating large-format porcelain alternatives, treat the material with architectural respect. Ground your choices in reality, plan your wet zones for safety, and build a space that feels as enduring as the stone itself.
To finalize your material palette, dive into our comprehensive guide on selecting the perfect bathroom hardware finishes to complement your new stonework.

The Hackrea Style Desk treats interior decoration as an exact visual science. Rather than focusing on demolition or floor plans, this desk masters the art of color theory, undertone matching, material pairings, and spatial proportion. From balancing the visual weight of mixed metals to finding the perfect bridging tone between disparate wood species, this desk provides the rigorous aesthetic rules needed to achieve high-end, editorial-quality harmony in any space.