22 Tactile 3D Wall Panel Executions for Every Room
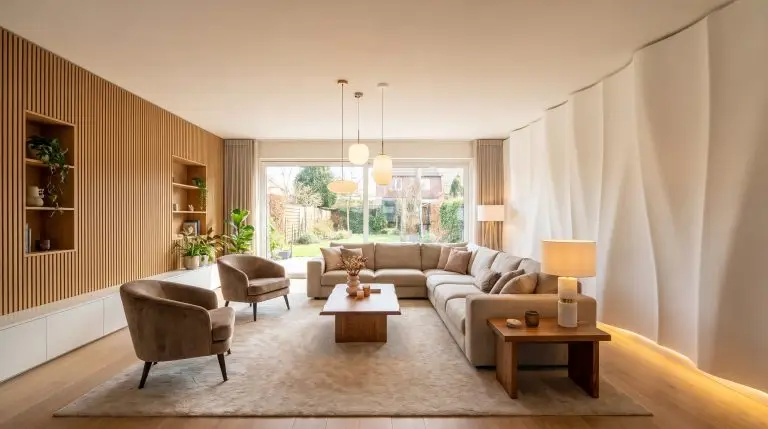
In 2026 and 2027, architectural texture is the driving force of interior design, rendering flat, sterile drywall entirely obsolete. We are stepping away from basic paint jobs and introducing 3D wall panels as the definitive structural cheat code. The current market offers a massive spectrum of materials, ranging from highly accessible renter-friendly plant-fiber bagasse to commercial-grade glass-reinforced gypsum.
But here is the critical Hackrea perspective: these panels only look bespoke and expensive if the material perfectly matches its environmental demands and your lighting actively highlights the relief. Whether you are aiming for a seamless monolithic look or a warm acoustic slat wood focal point, execution is everything.
Review our material breakdown below before selecting the foundation for your next architectural upgrade.
Pre-Inspiration Tool: The Material & Budget Breakdown
Before committing to a specific aesthetic, you must understand the material science behind 3D paneling. Selecting the wrong substrate for a humid environment or a high-traffic zone will immediately compromise the installation, so use this breakdown to align your budget with the correct structural application.
| Material | Pros | Cons | Cost Tier |
|---|---|---|---|
| Plant-Fiber (Bagasse) | Eco-friendly, highly paintable, lightweight, renter-friendly | Zero moisture resistance, easily crushed upon hard impact | $ (Budget) |
| PVC (Polyvinyl Chloride) | Highly durable, washable, moisture-resistant | Can look synthetic if unpainted, rigid cuts required | $$ (Mid-Range) |
| WPC & Acoustic MDF | Excellent sound dampening, authentic wood warmth, premium feel | Heavy, requires robust mounting, sensitive to standing water | $$$ (Premium) |
| GRG (Glass Reinforced Gypsum) | Seamless monolithic look, fire-rated, true architectural depth | Requires professional drywall mudding/sanding, heavy | $$$$ (Luxury) |
Living Room & Media Wall Focal Points
The living room serves as the optimal testing ground for high-impact 3D textures, primarily because it requires a counterbalance to the massive visual weight of flat-screen televisions. By introducing tactile ridges and deep grooves, you pull focus back to the room’s architecture rather than the electronics.
1. Contrast a Flat TV Screen with WPC Acoustic Wood Slats
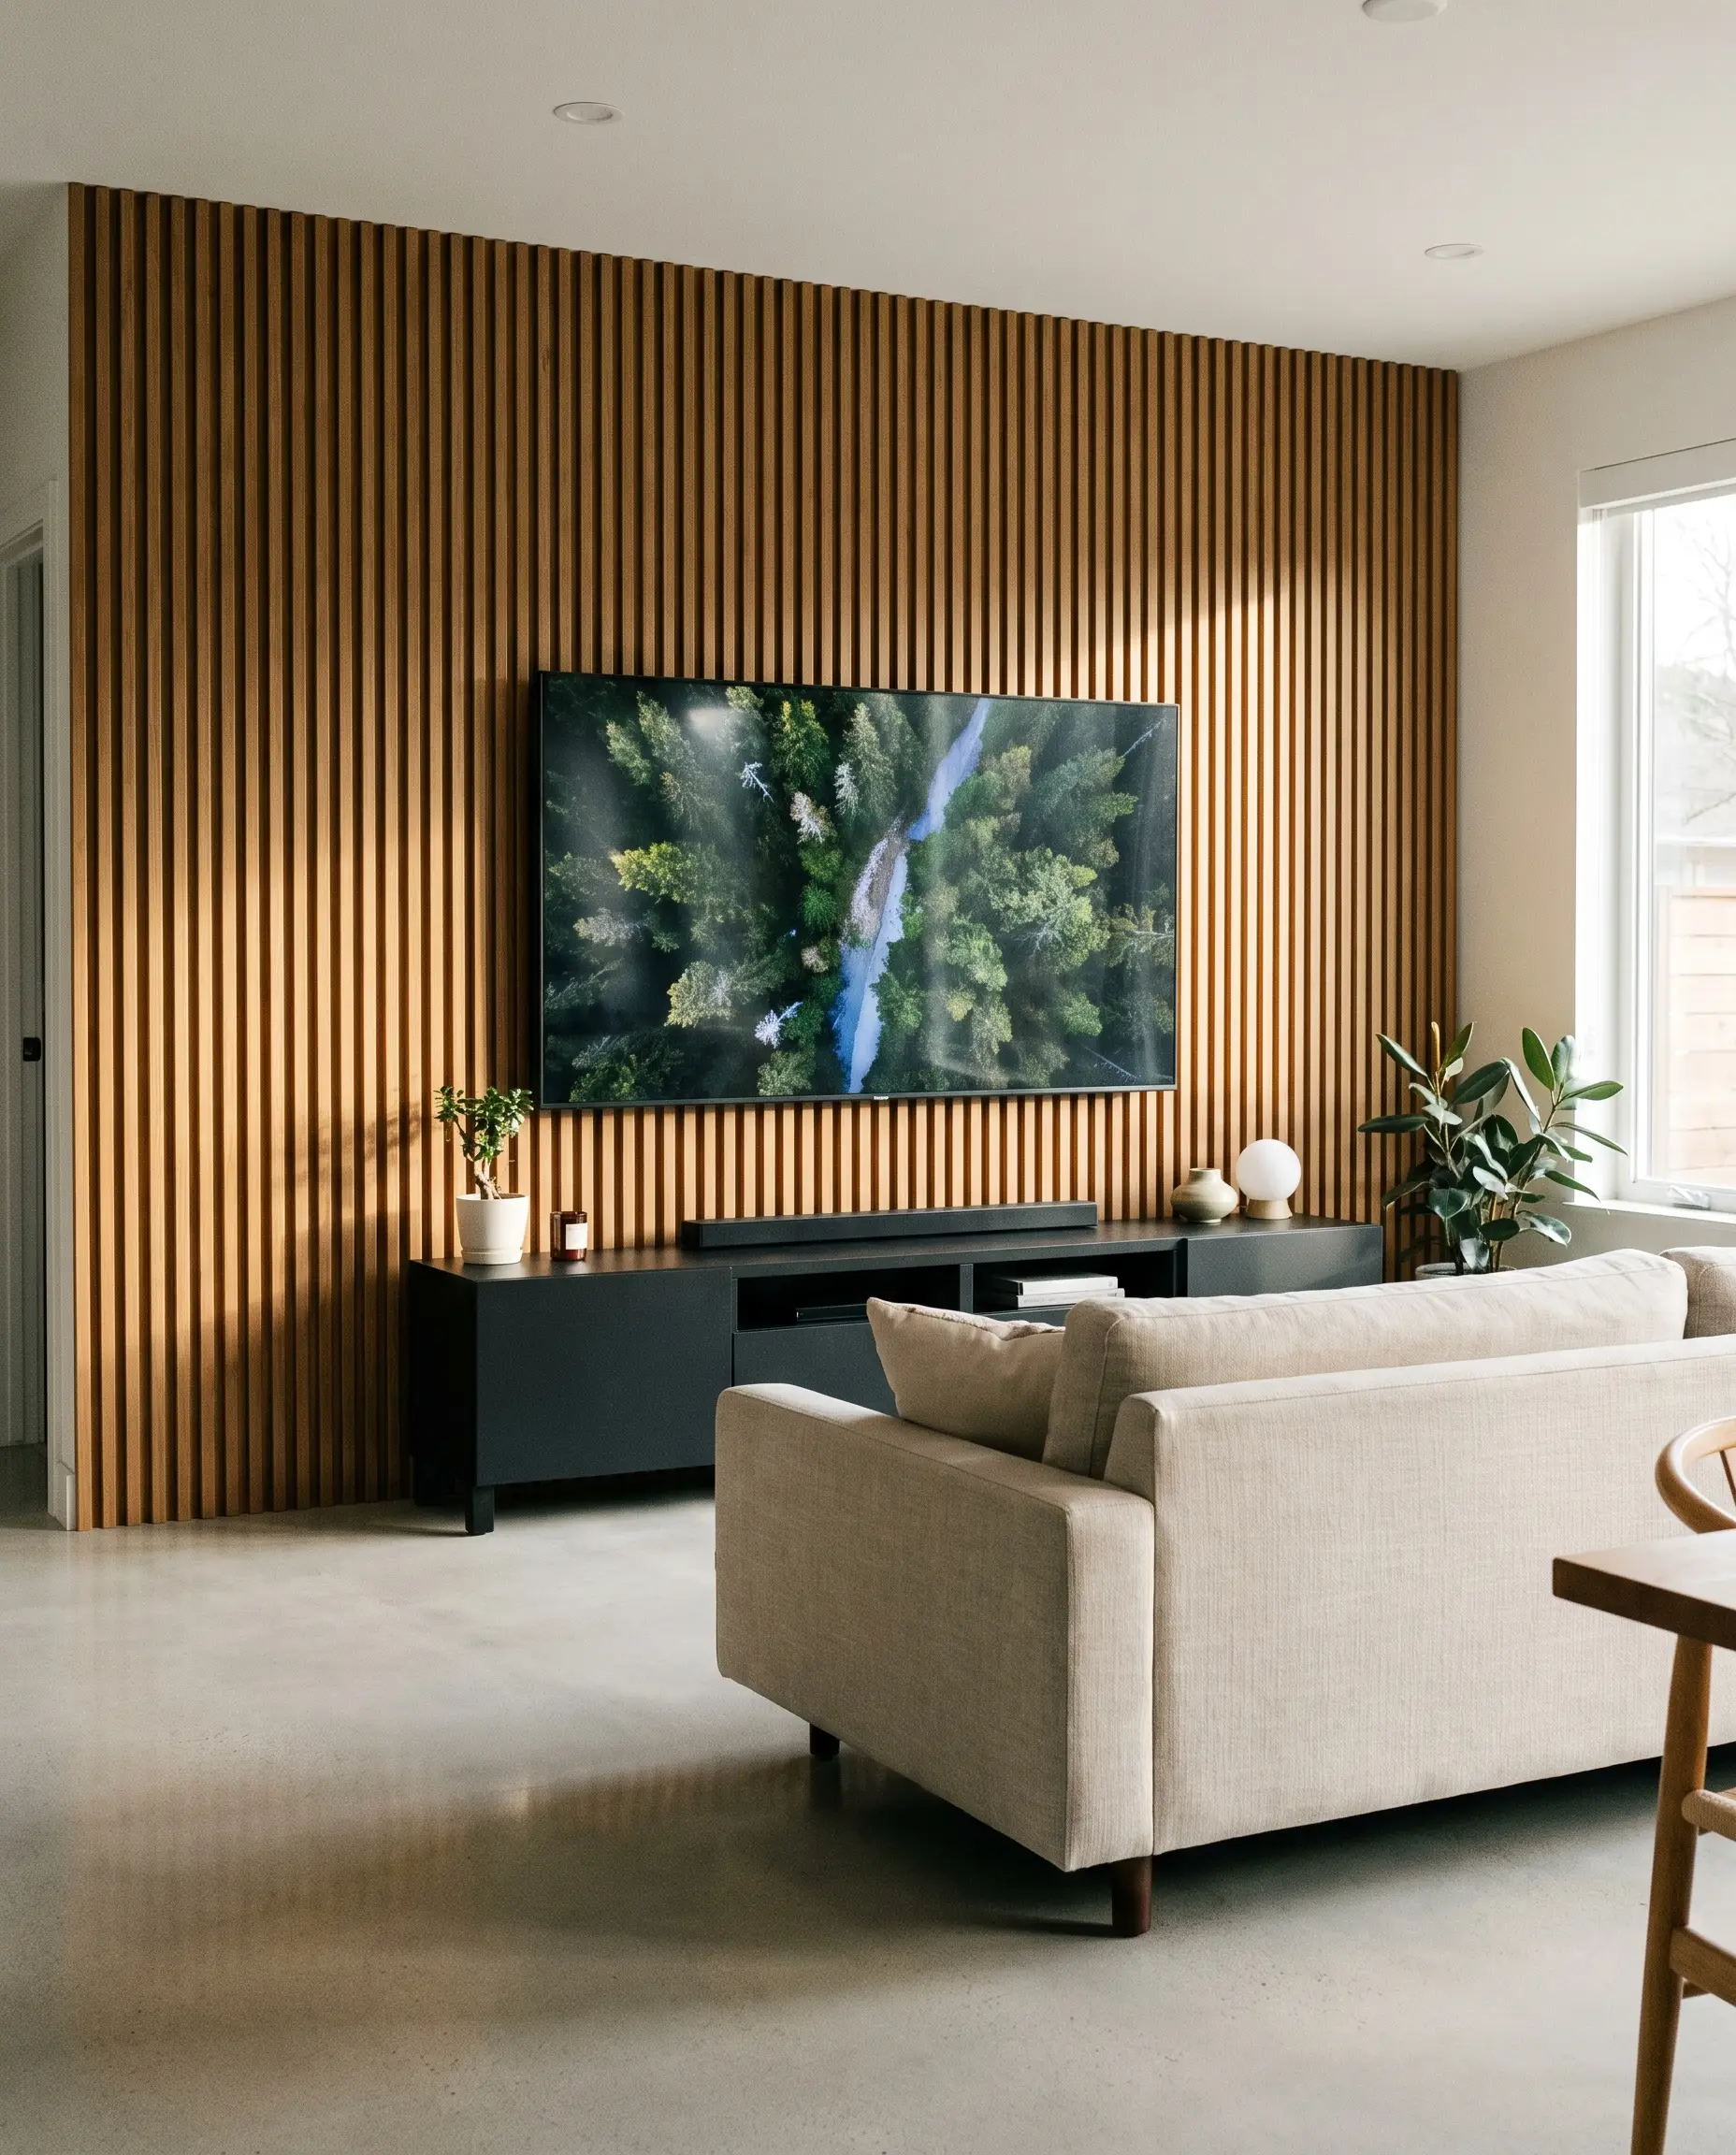
Vertical WPC (Wood Plastic Composite) slats instantly break up the cold, reflective surface of a large media screen, grounding the room in organic warmth. Beyond the visual upgrade, the acoustic felt backing significantly reduces echo in media rooms, absorbing excess sound waves from your soundbar.
- Vibe: Japandi / Mid-Century Modern
- Key Material: Acoustic WPC Slat Wood
- Acoustic Benefit: High sound dampening (NRC rating typically 0.7+)
Always contrast the wood tone of your wall panels with your flooring. Matching the tones too closely will flatten the spatial depth and make the room feel heavily claustrophobic.
Hackrea Styling Rule
2. Graze Matte Gypsum Wave Panels with Recessed LED Strips
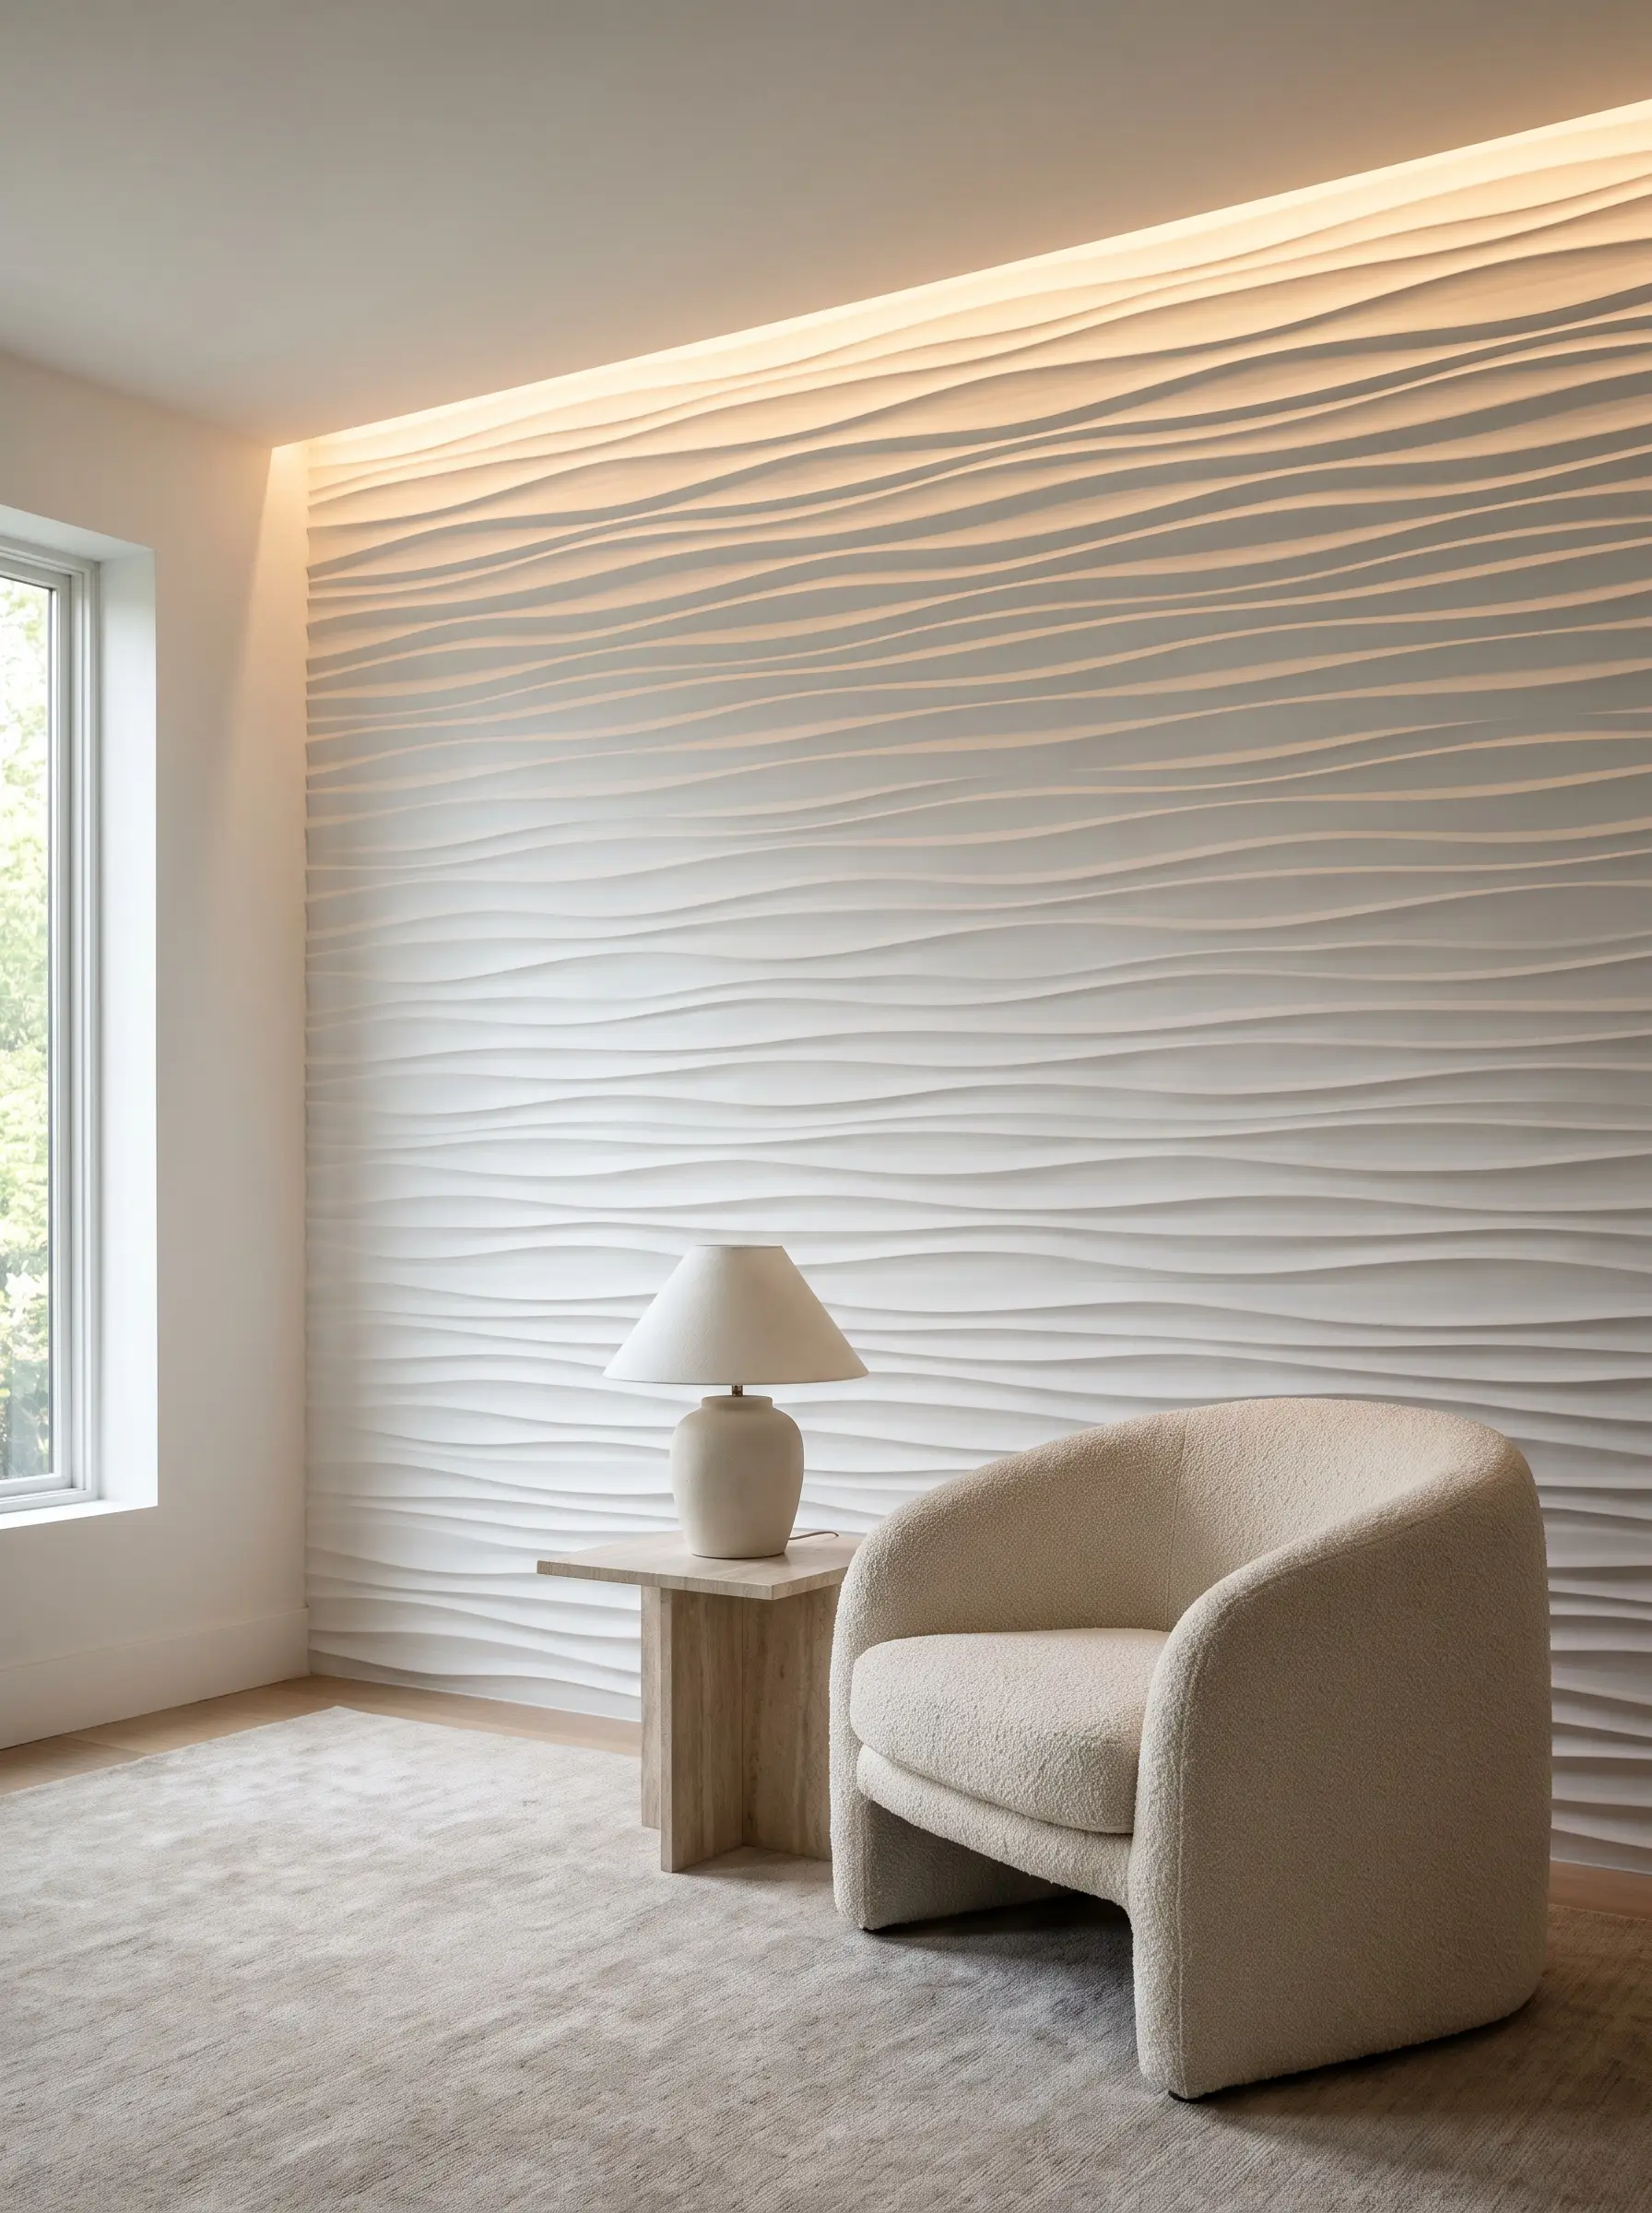
True architectural depth relies entirely on how light interacts with 3D relief. By installing seamless GRG wall panels and routing an LED aluminum channel directly into the ceiling edge, you create a grazing light effect that casts dramatic, high-end shadows down the ridges.
- Vibe: Contemporary / Organic Modern
- Key Material: GRG (Glass Reinforced Gypsum) Wave Panels
- Lighting Spec: 3000K LED channel grazing in a frosted recessed track
- Finish: Flat matte white primer and paint
3. Frame a Fireplace Insert with Fire-Rated Faux Stone PU Panels
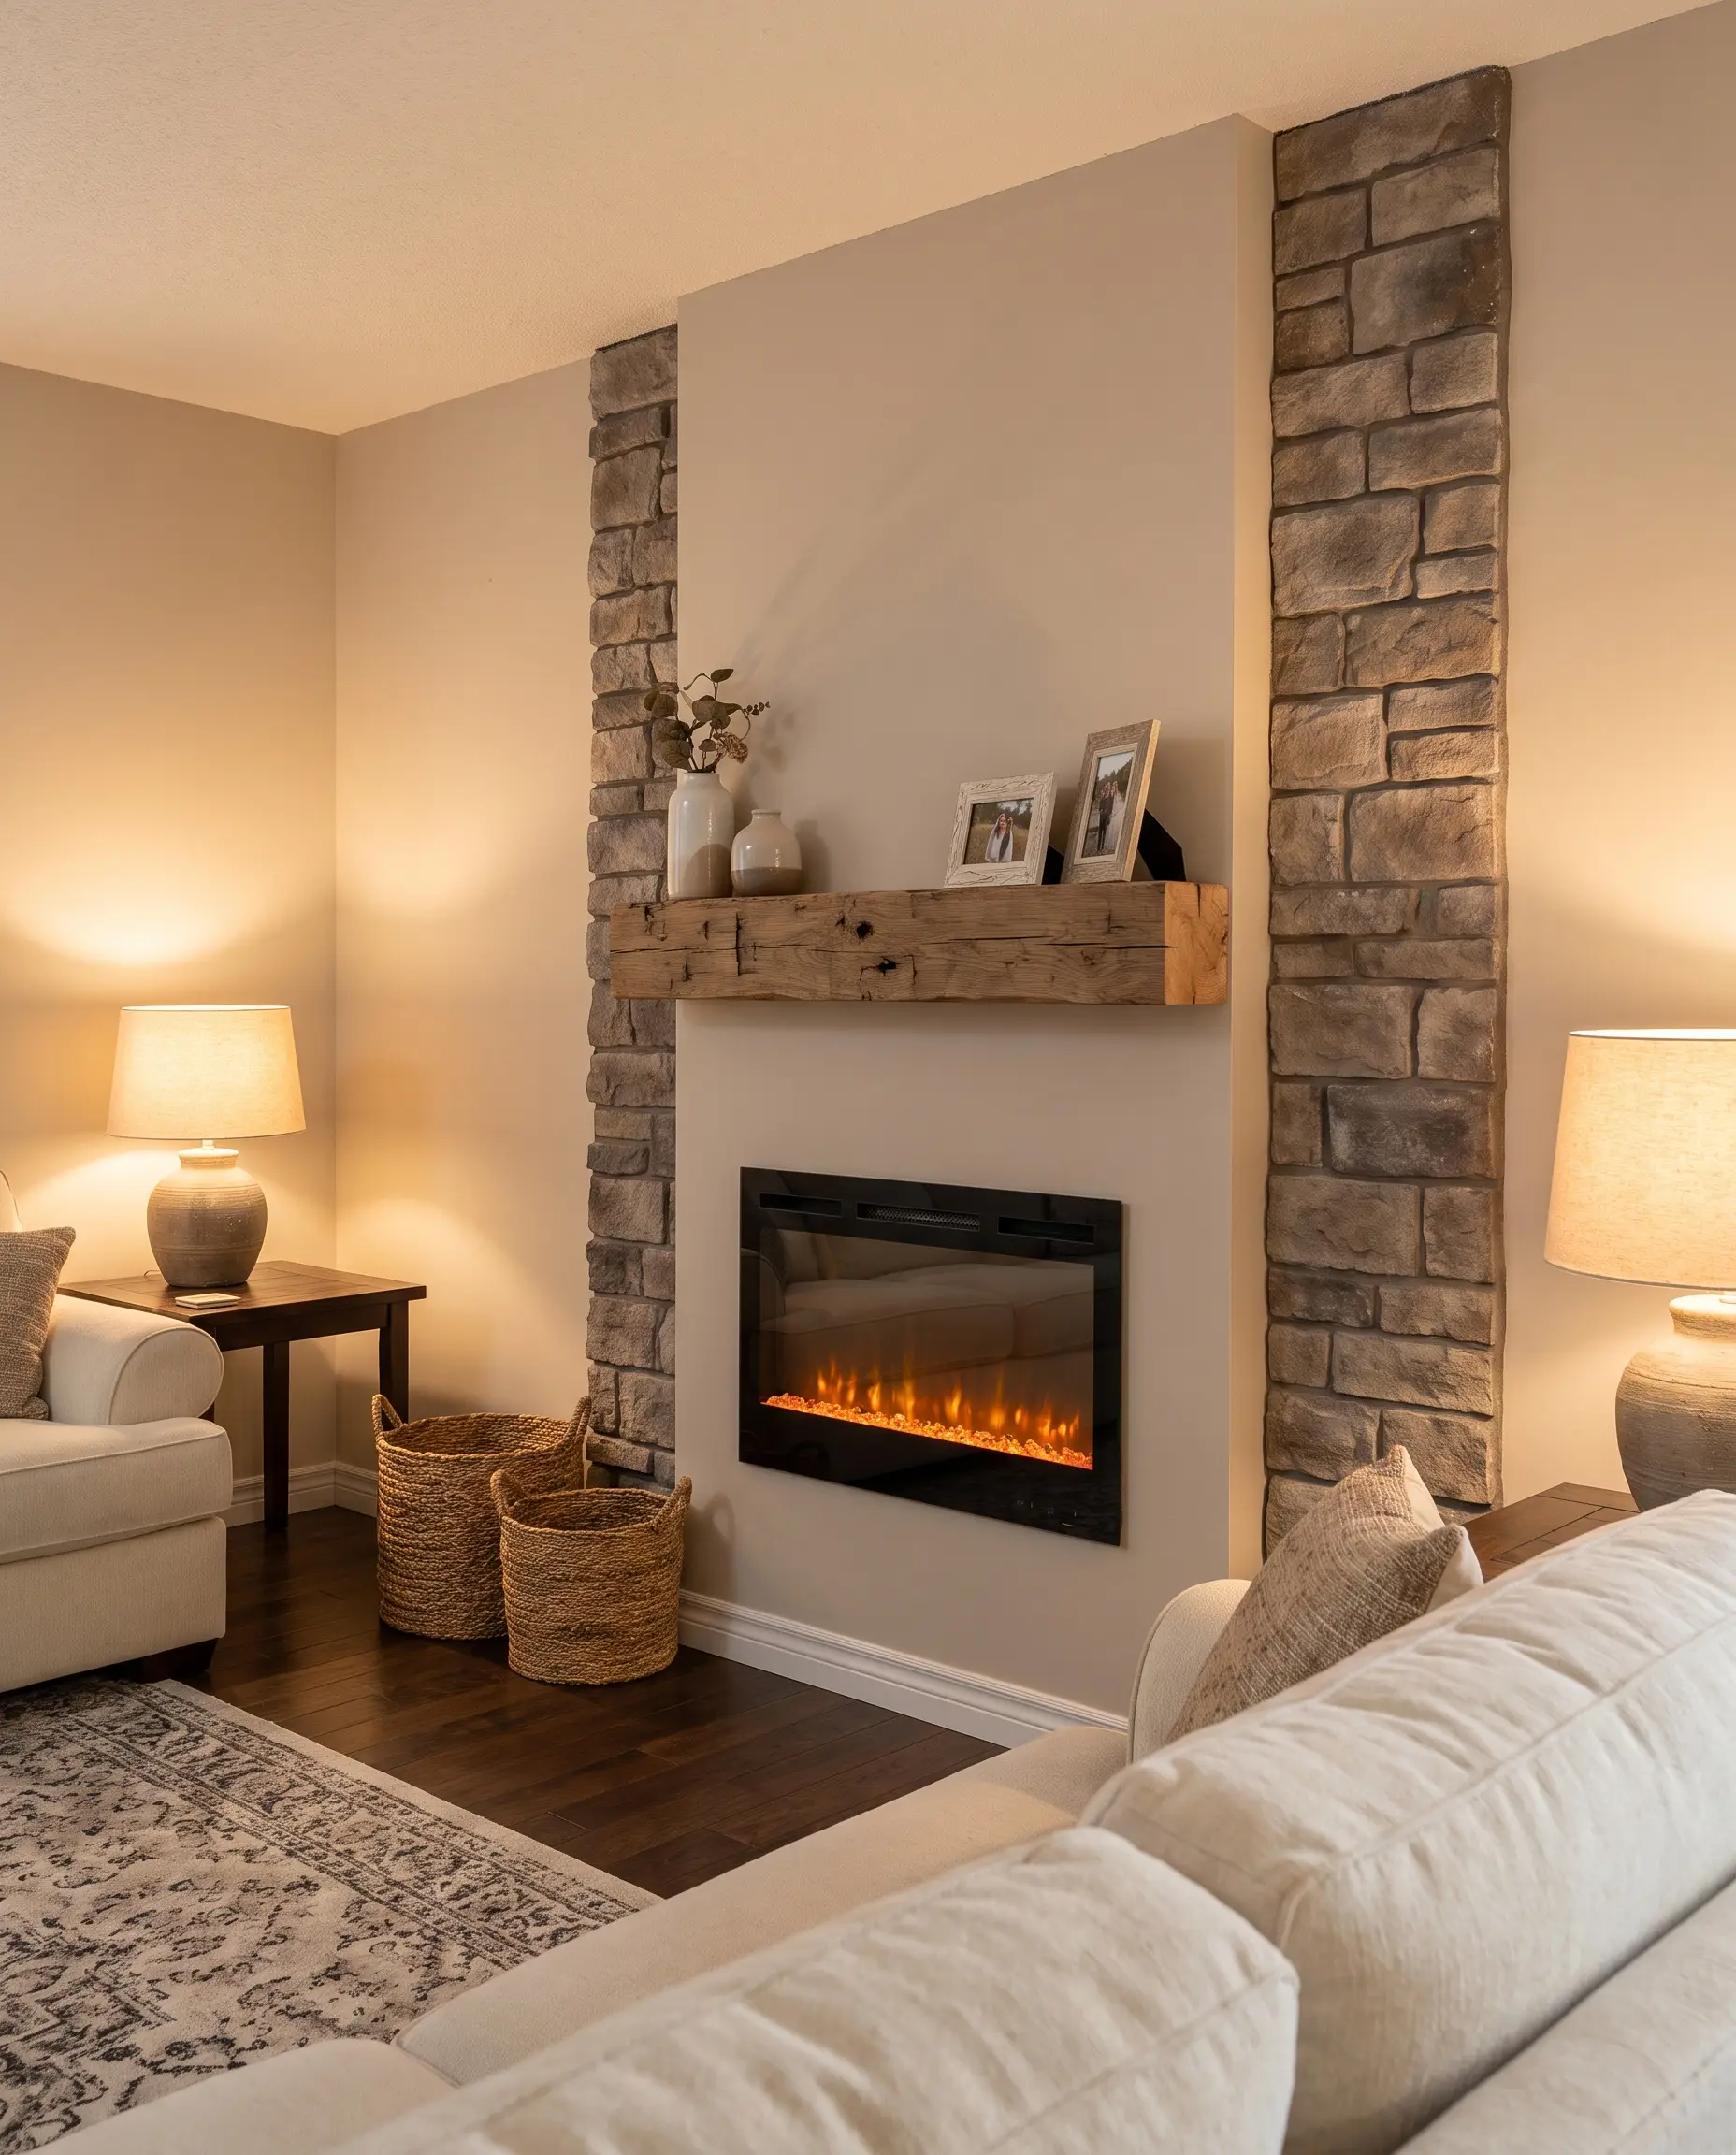
High-density Polyurethane (PU) stone panels offer a remarkably realistic, lightweight alternative to heavy masonry when framing an electric or gas fireplace insert. This application delivers the tactile realism of natural stone but can be fabricated and cut using standard woodworking tools, drastically accelerating installation speed.
- Vibe: Modern Rustic / Transitional
- Key Material: Fire-rated PU Faux Stone Panels
- Installation Tool: Standard miter saw and VOC-free construction adhesive
- Safety Note: Always verify the specific clearance requirements of your fireplace insert model.
4. Install Asymmetrical PVC Geometrics for an Art Deco Vibe
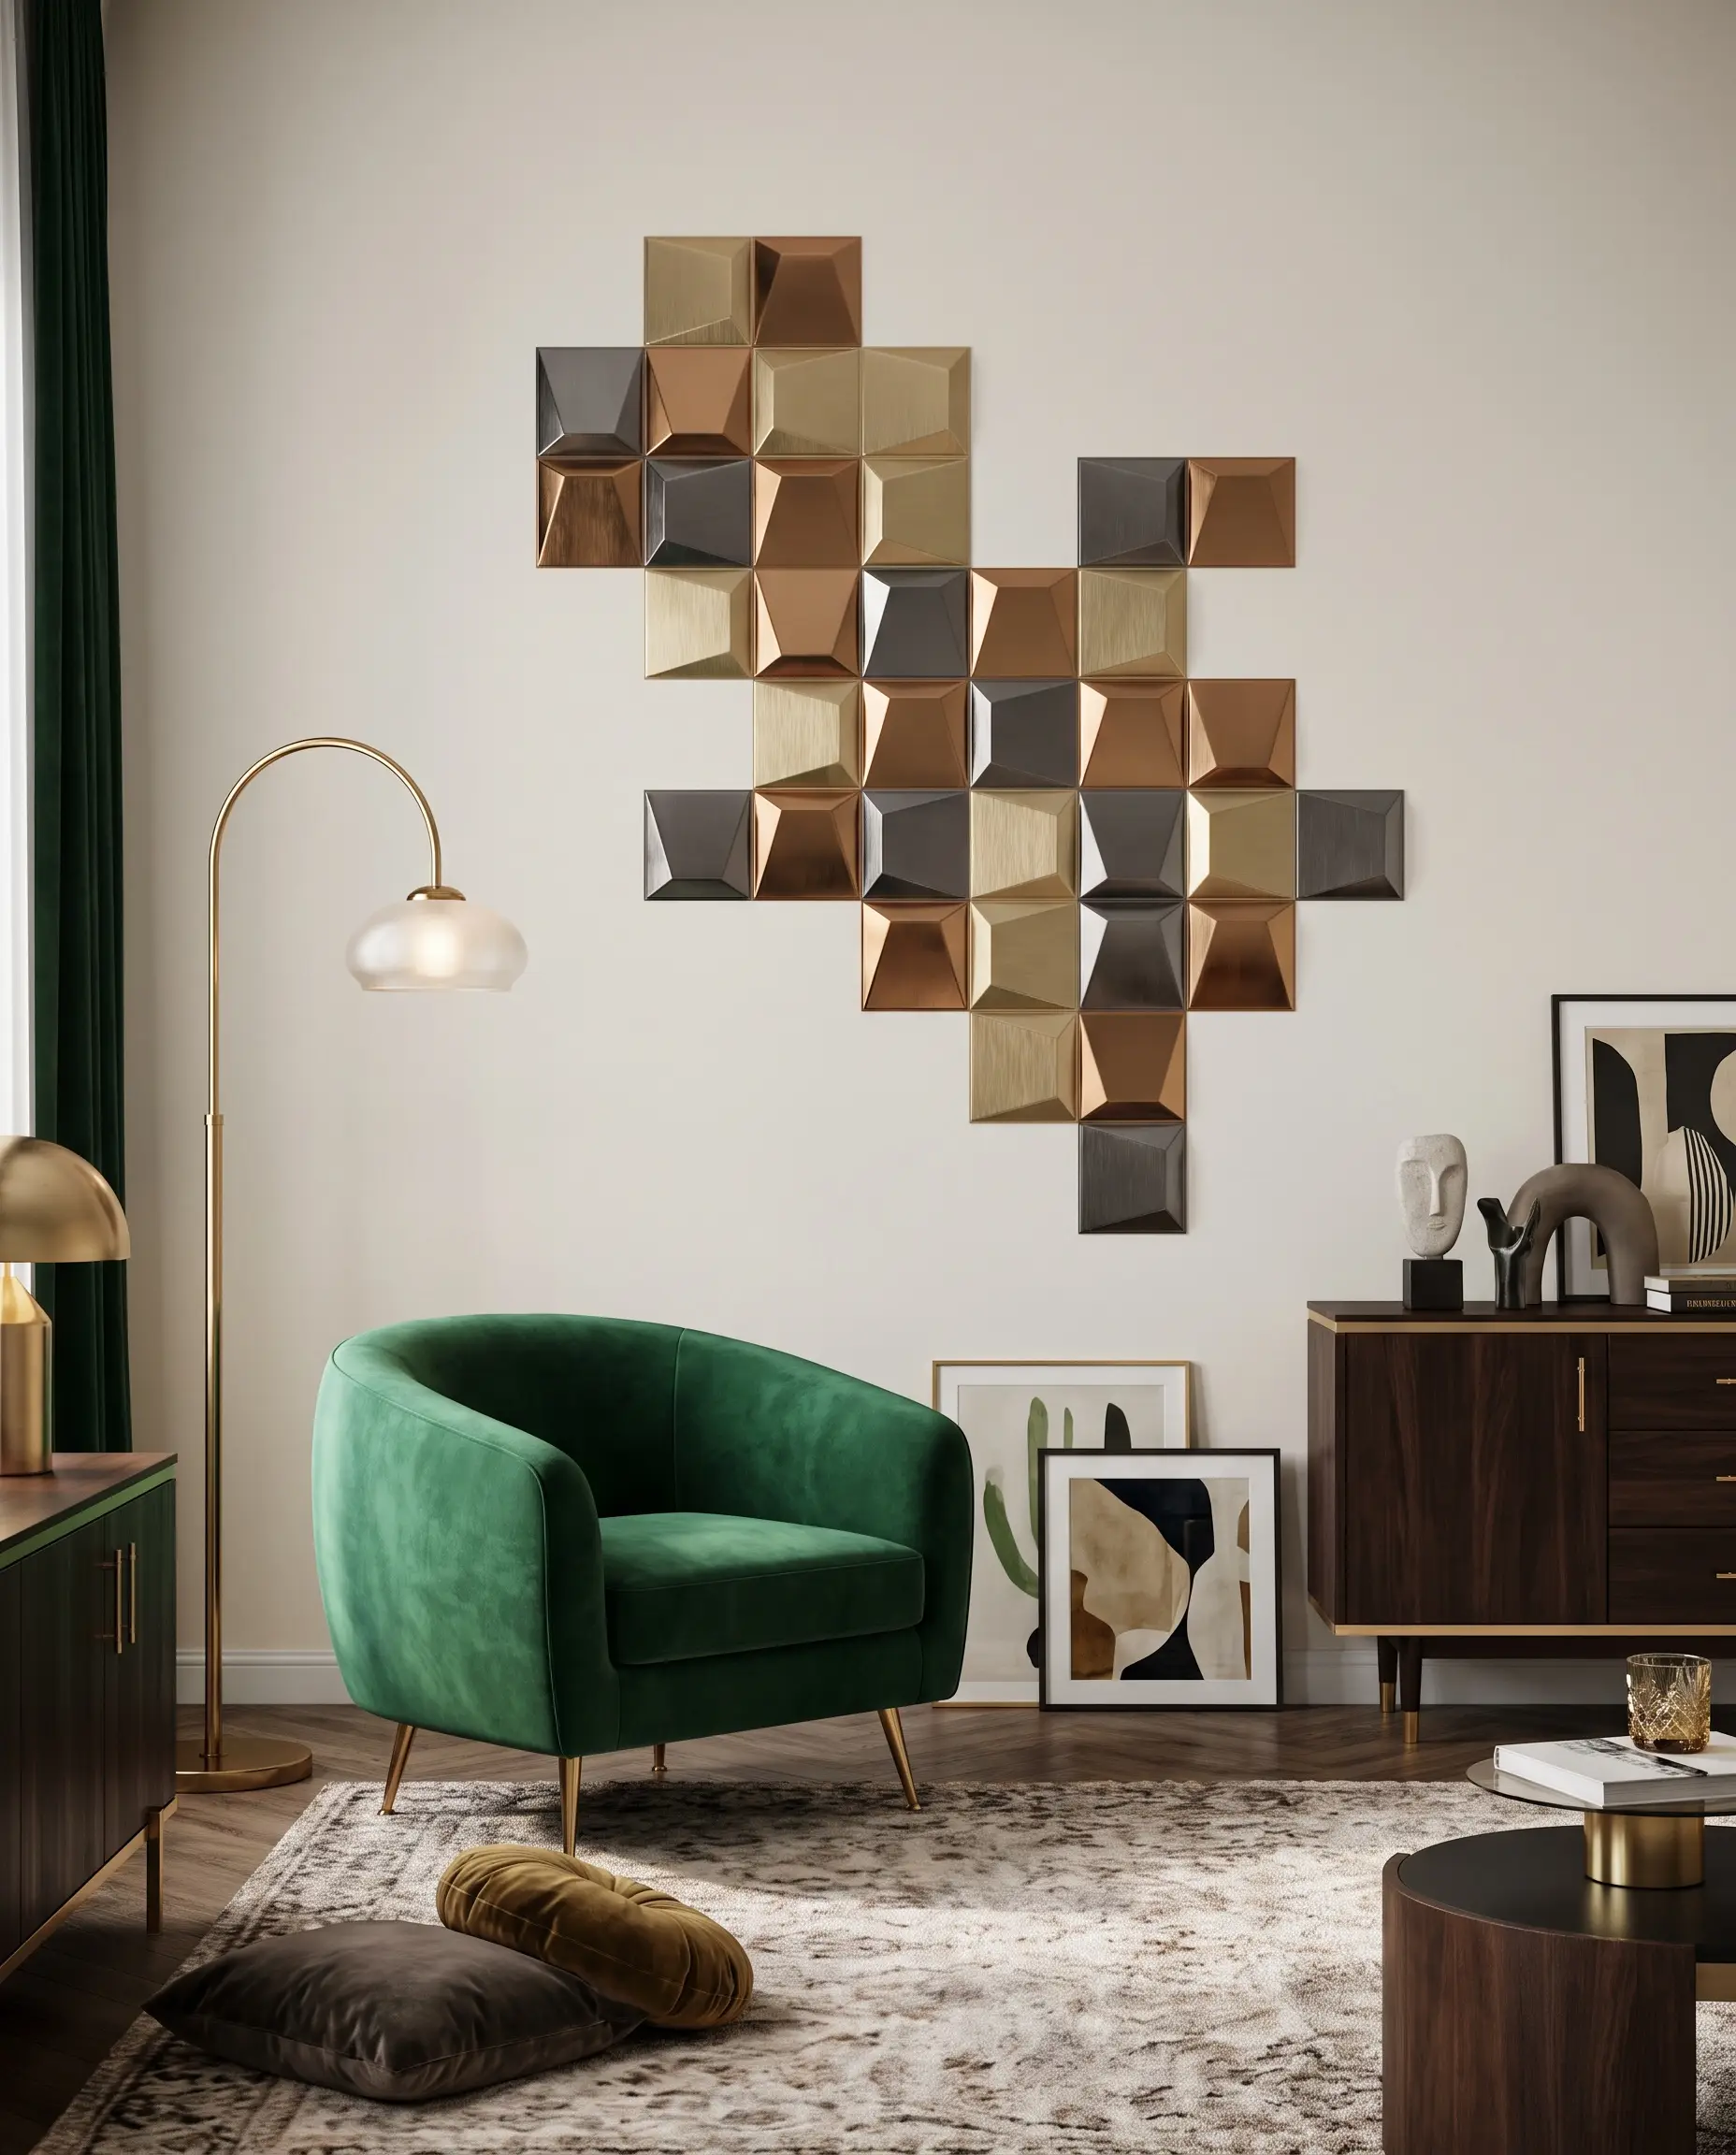
Rather than executing a predictable edge-to-edge wall covering, treat metallic or matte-black geometric PVC tiles as a bespoke gallery installation. Clustering them in an off-center, asymmetrical layout against a stark white wall creates a sophisticated, large-scale sculptural focal point.
- Vibe: Upscale Art Deco / Maximalism
- Key Material: Geometric Metallic PVC Tiles
- Application: Floating asymmetrical cluster
- Base Wall Color: Sherwin-Williams Pure White (SW 7005)
5. Ground the Room with a Fluted MDF Half-Wall Wainscoting
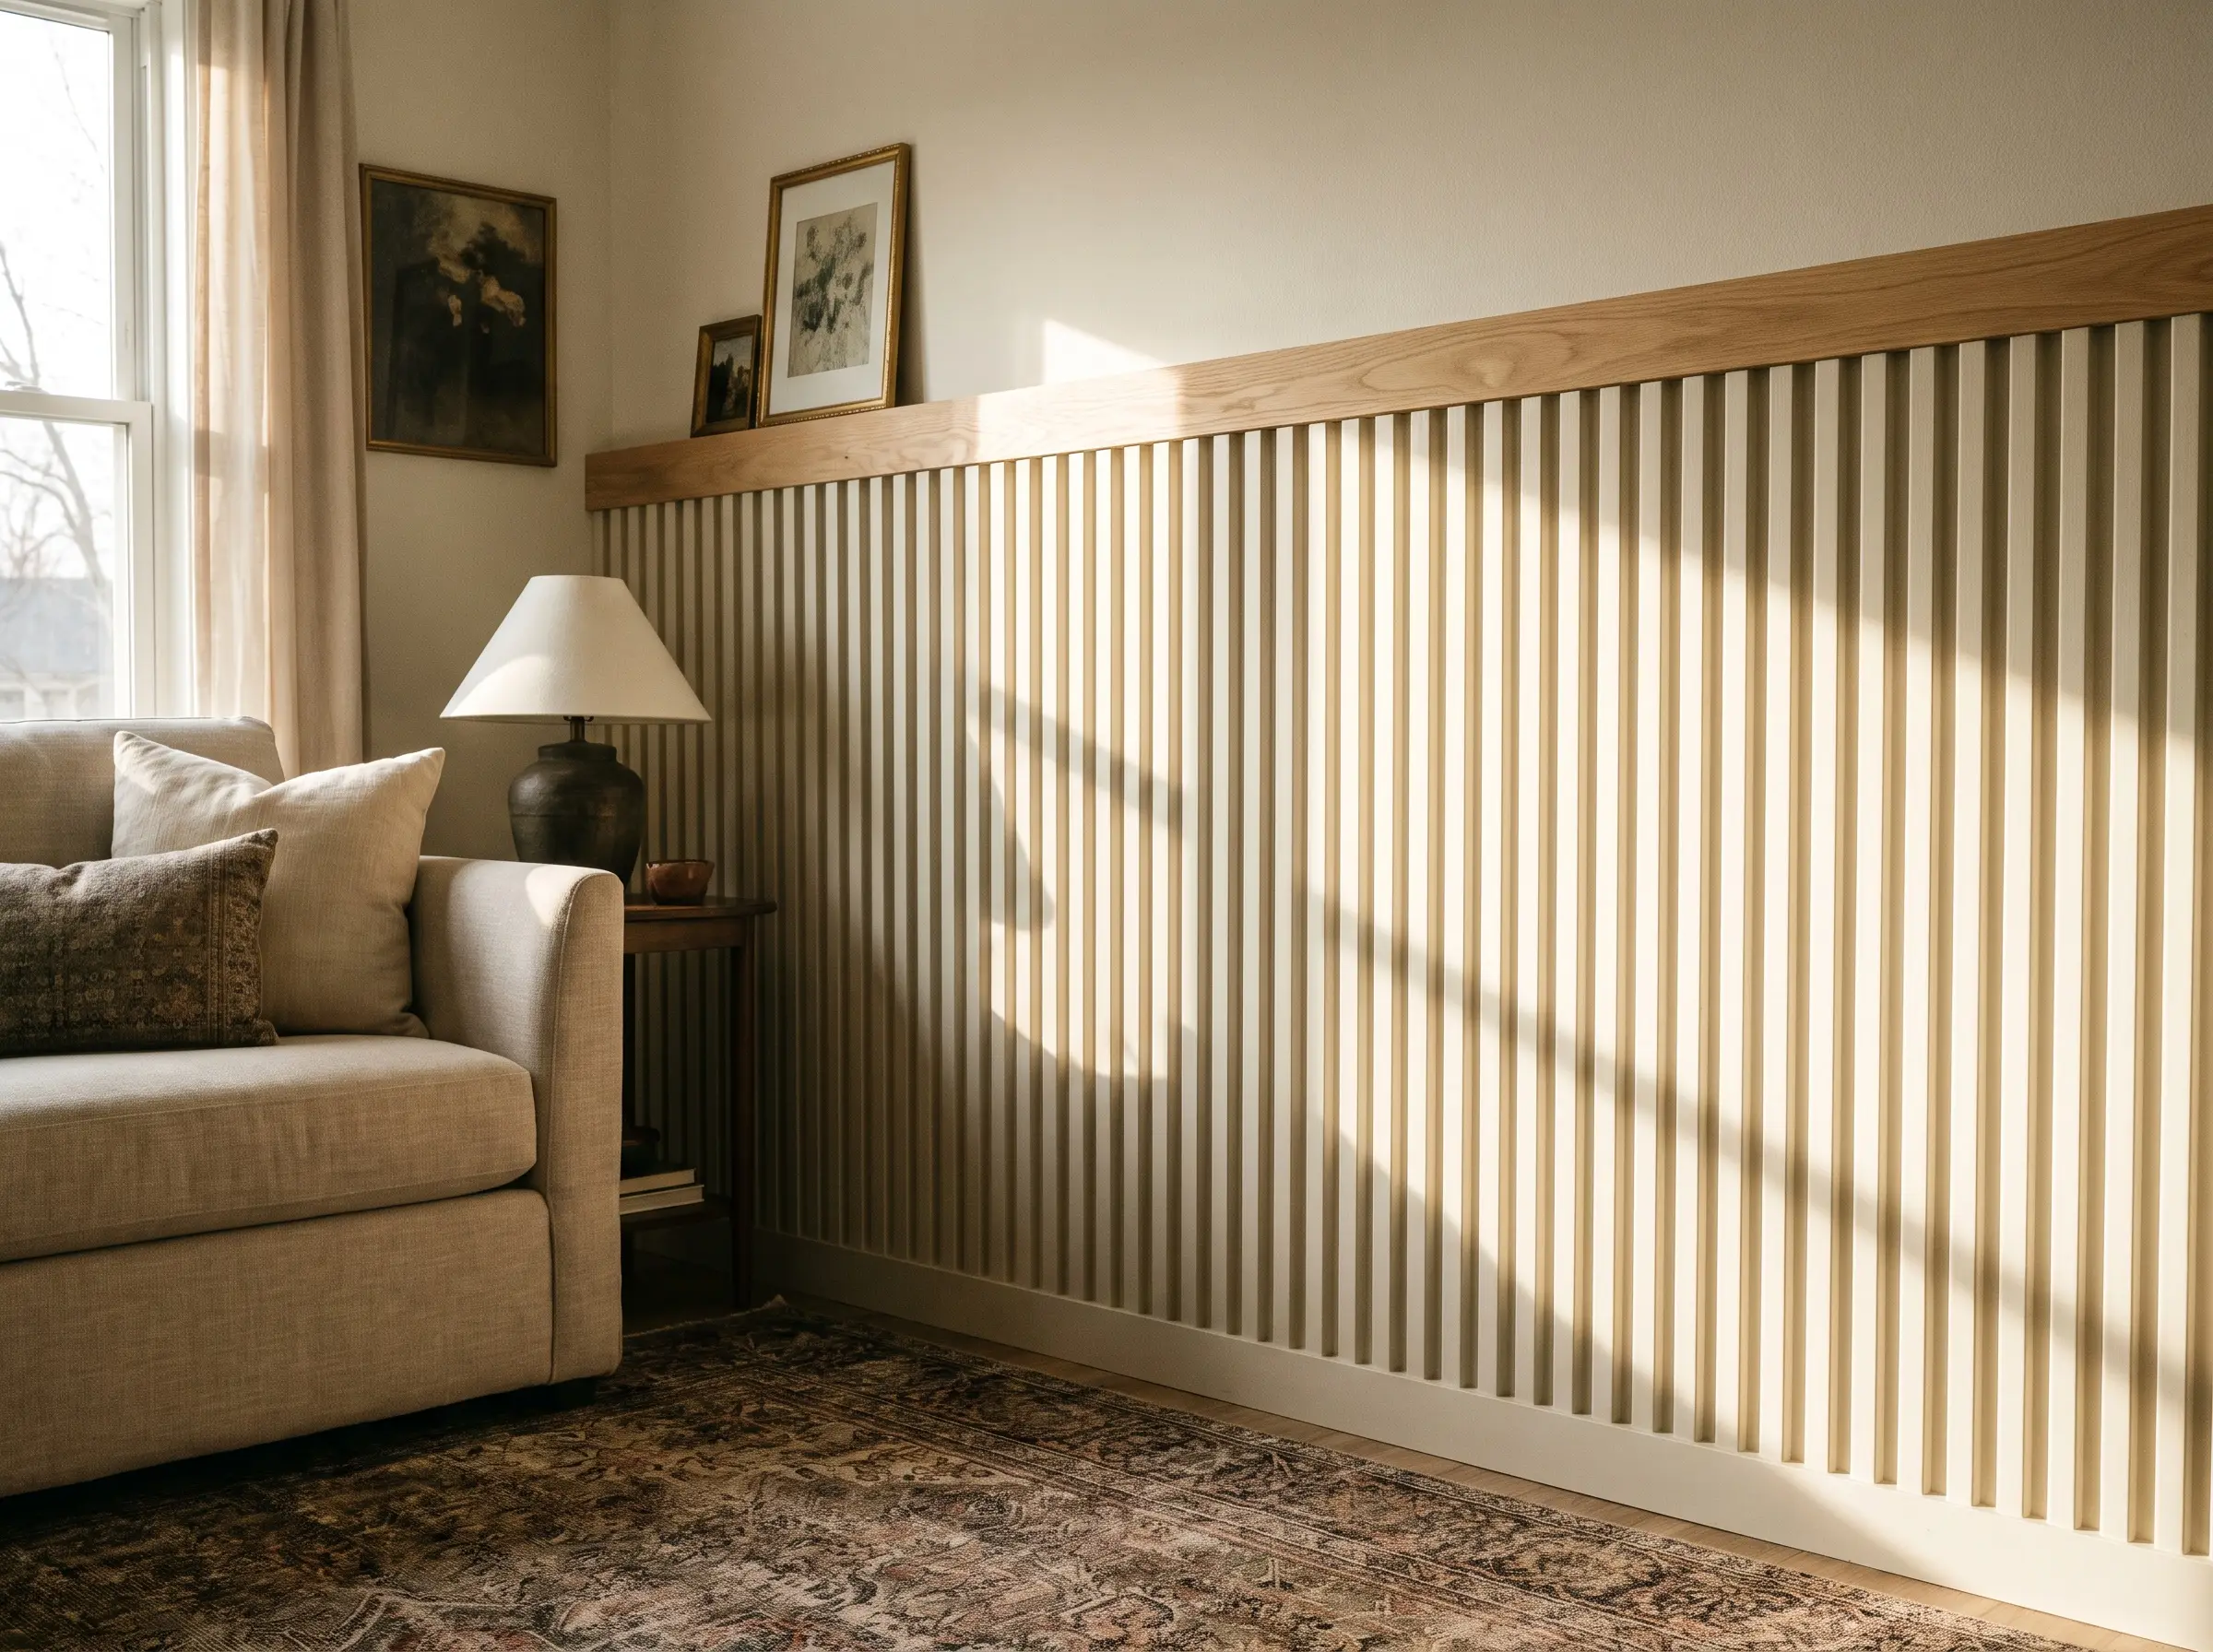
Update the traditional concept of wainscoting by applying vertically fluted MDF panels to the bottom third of your living room walls. Capping this textured base with a sharp, squared-off piece of white oak trim creates a crisp architectural division that grounds the entire space.
- Vibe: Refined Transitional
- Key Materials: Fluted MDF panels, white oak squared trim
- Proportion: 36 to 42 inches off the floor
- Adhesion: Brad nails and liquid nails
Bedroom & Headboard Installations
Sleep spaces demand a psychological sense of warmth and spatial depth that flat drywall simply cannot provide. By replacing traditional fabric headboards with expansive 3D wall panels, you instantly transform a standard bedroom into a tactile, boutique hotel atmosphere.
6. Build an Oversized, Wall-to-Wall Slatted Headboard
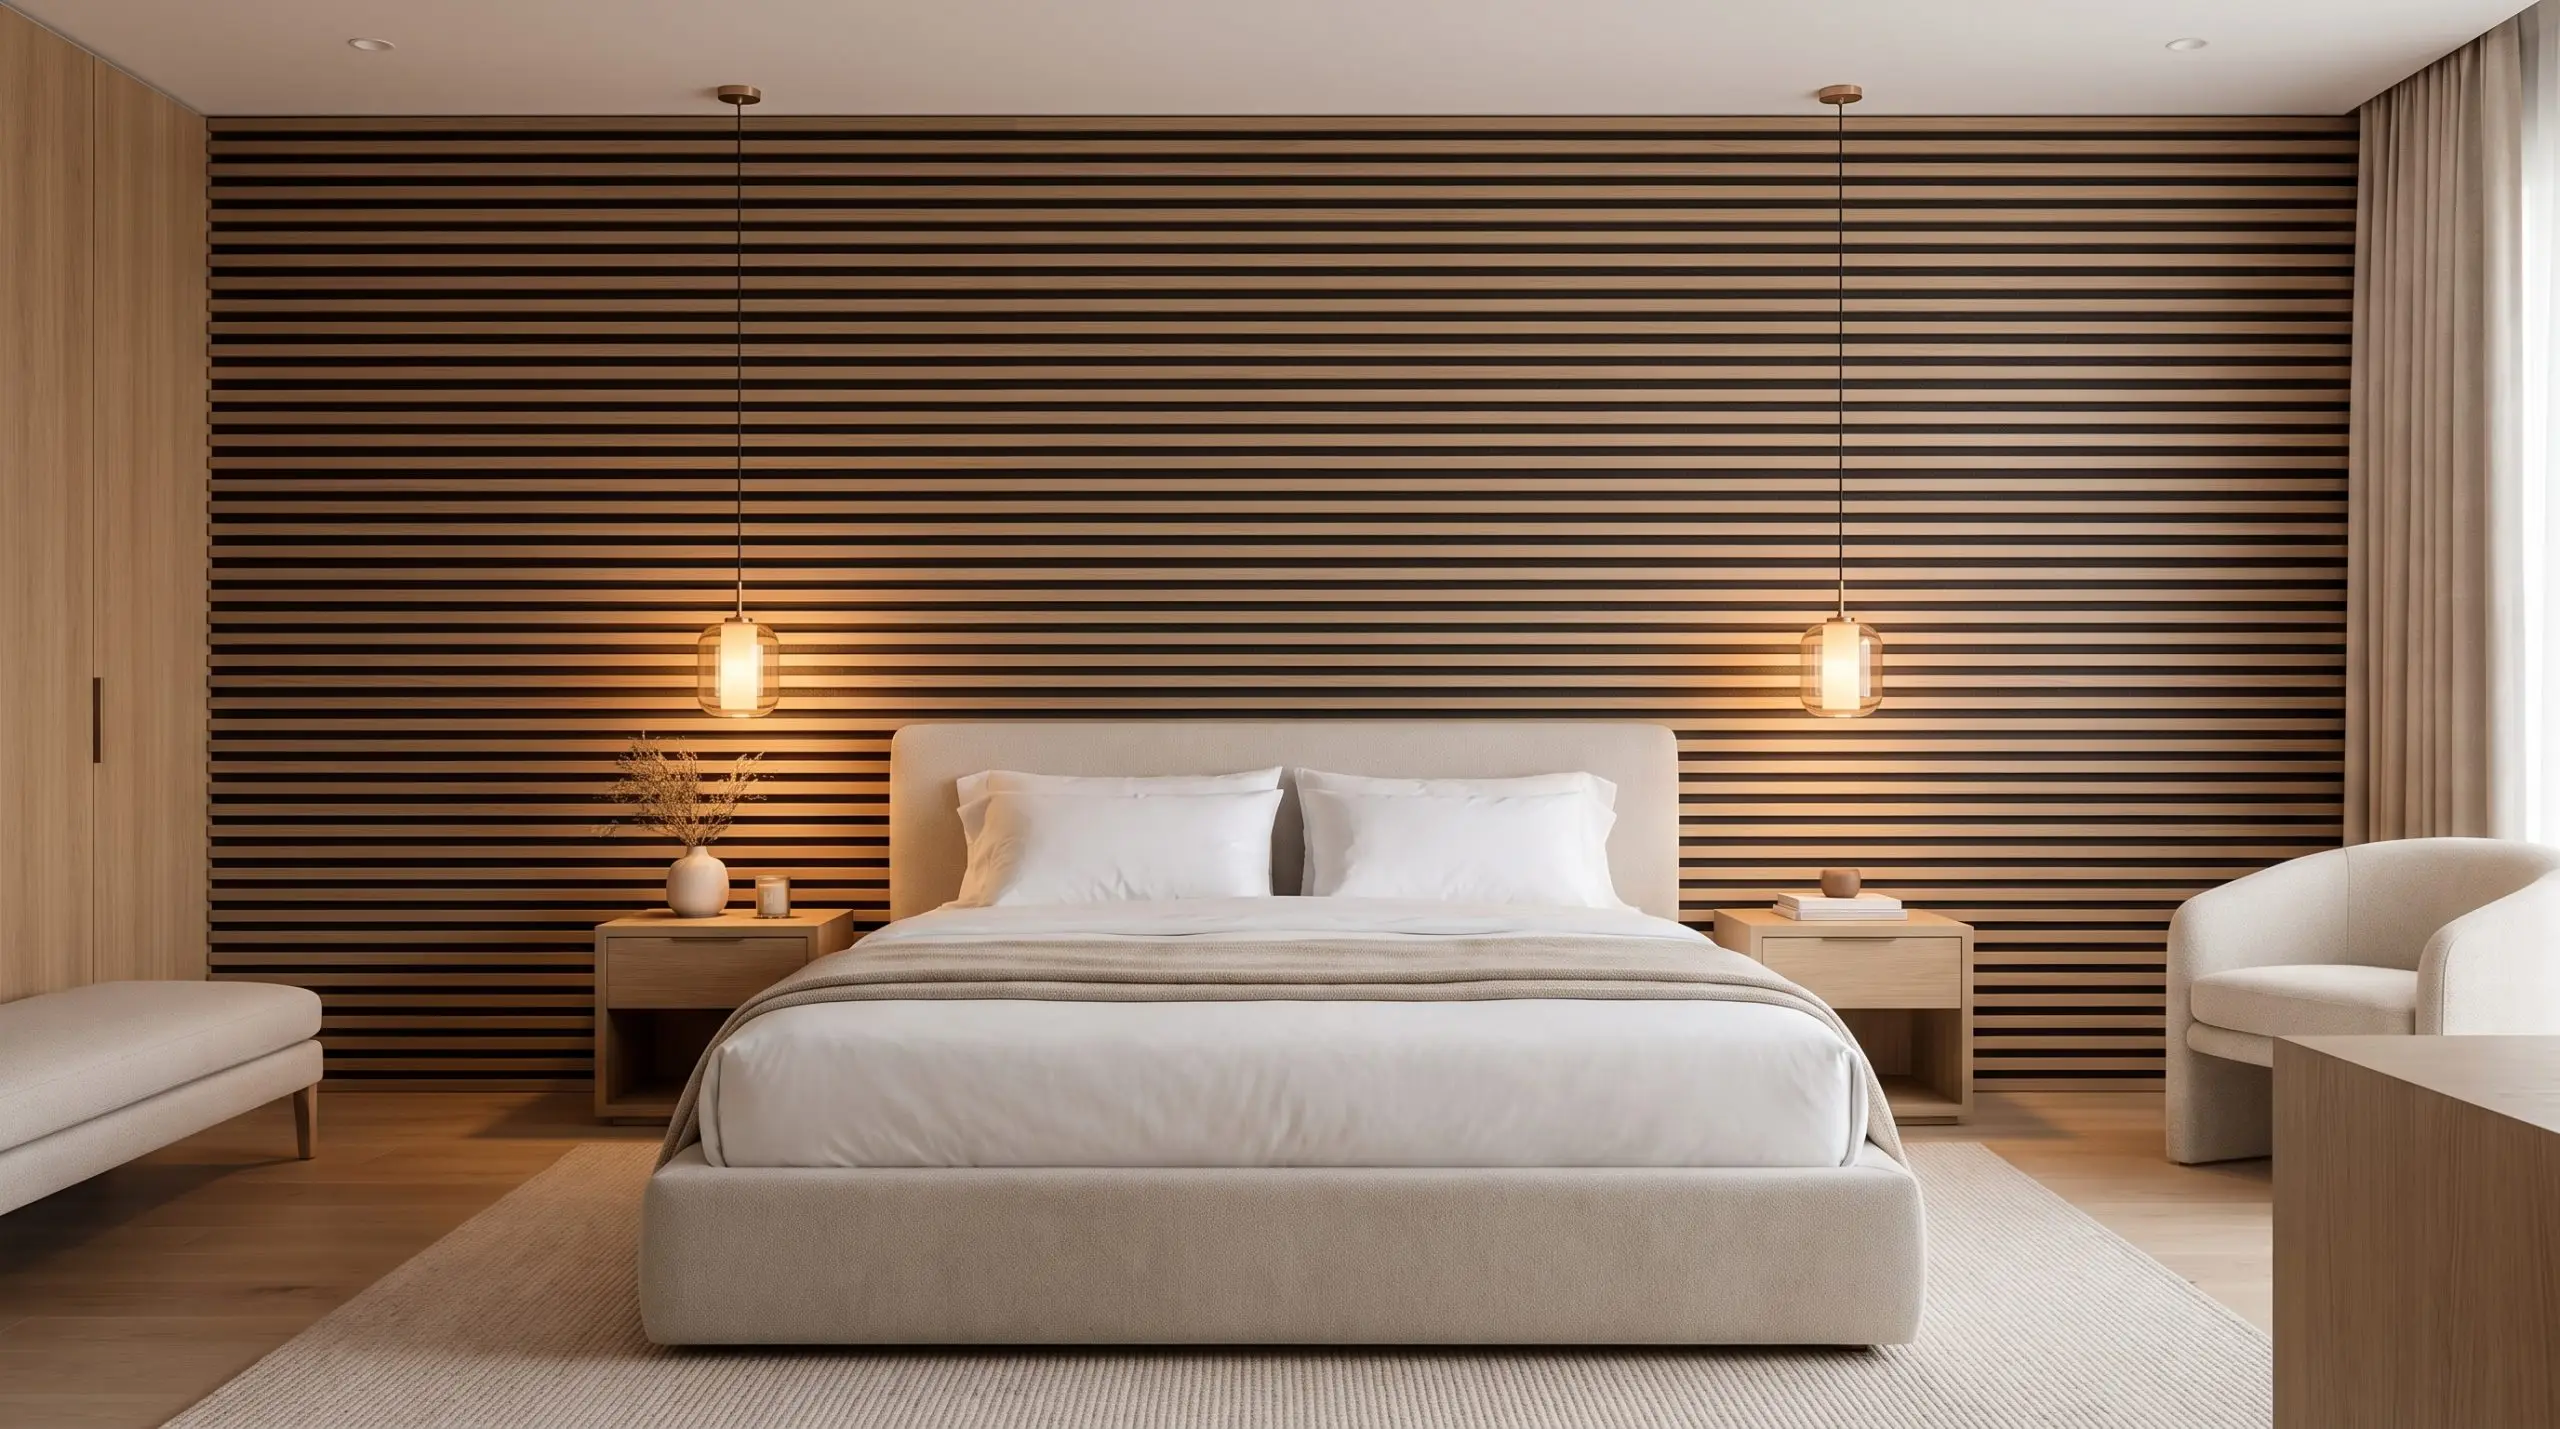
Ditch the restrictive standard bedframe headboard and run acoustic felt-backed wood slats horizontally or vertically across the entire length of the wall behind the bed. This expansive application visually widens the room while providing crucial sound-dampening benefits for shared apartment walls.
- Vibe: Minimalist Luxury
- Key Material: Acoustic Felt-Backed Slat Wood
- Orientation: Horizontal for widening, Vertical for heightening
- Aesthetic Impact: Creates a continuous architectural anchor
7. Paint Plant-Fiber Bagasse Panels in Dark Moody Tones
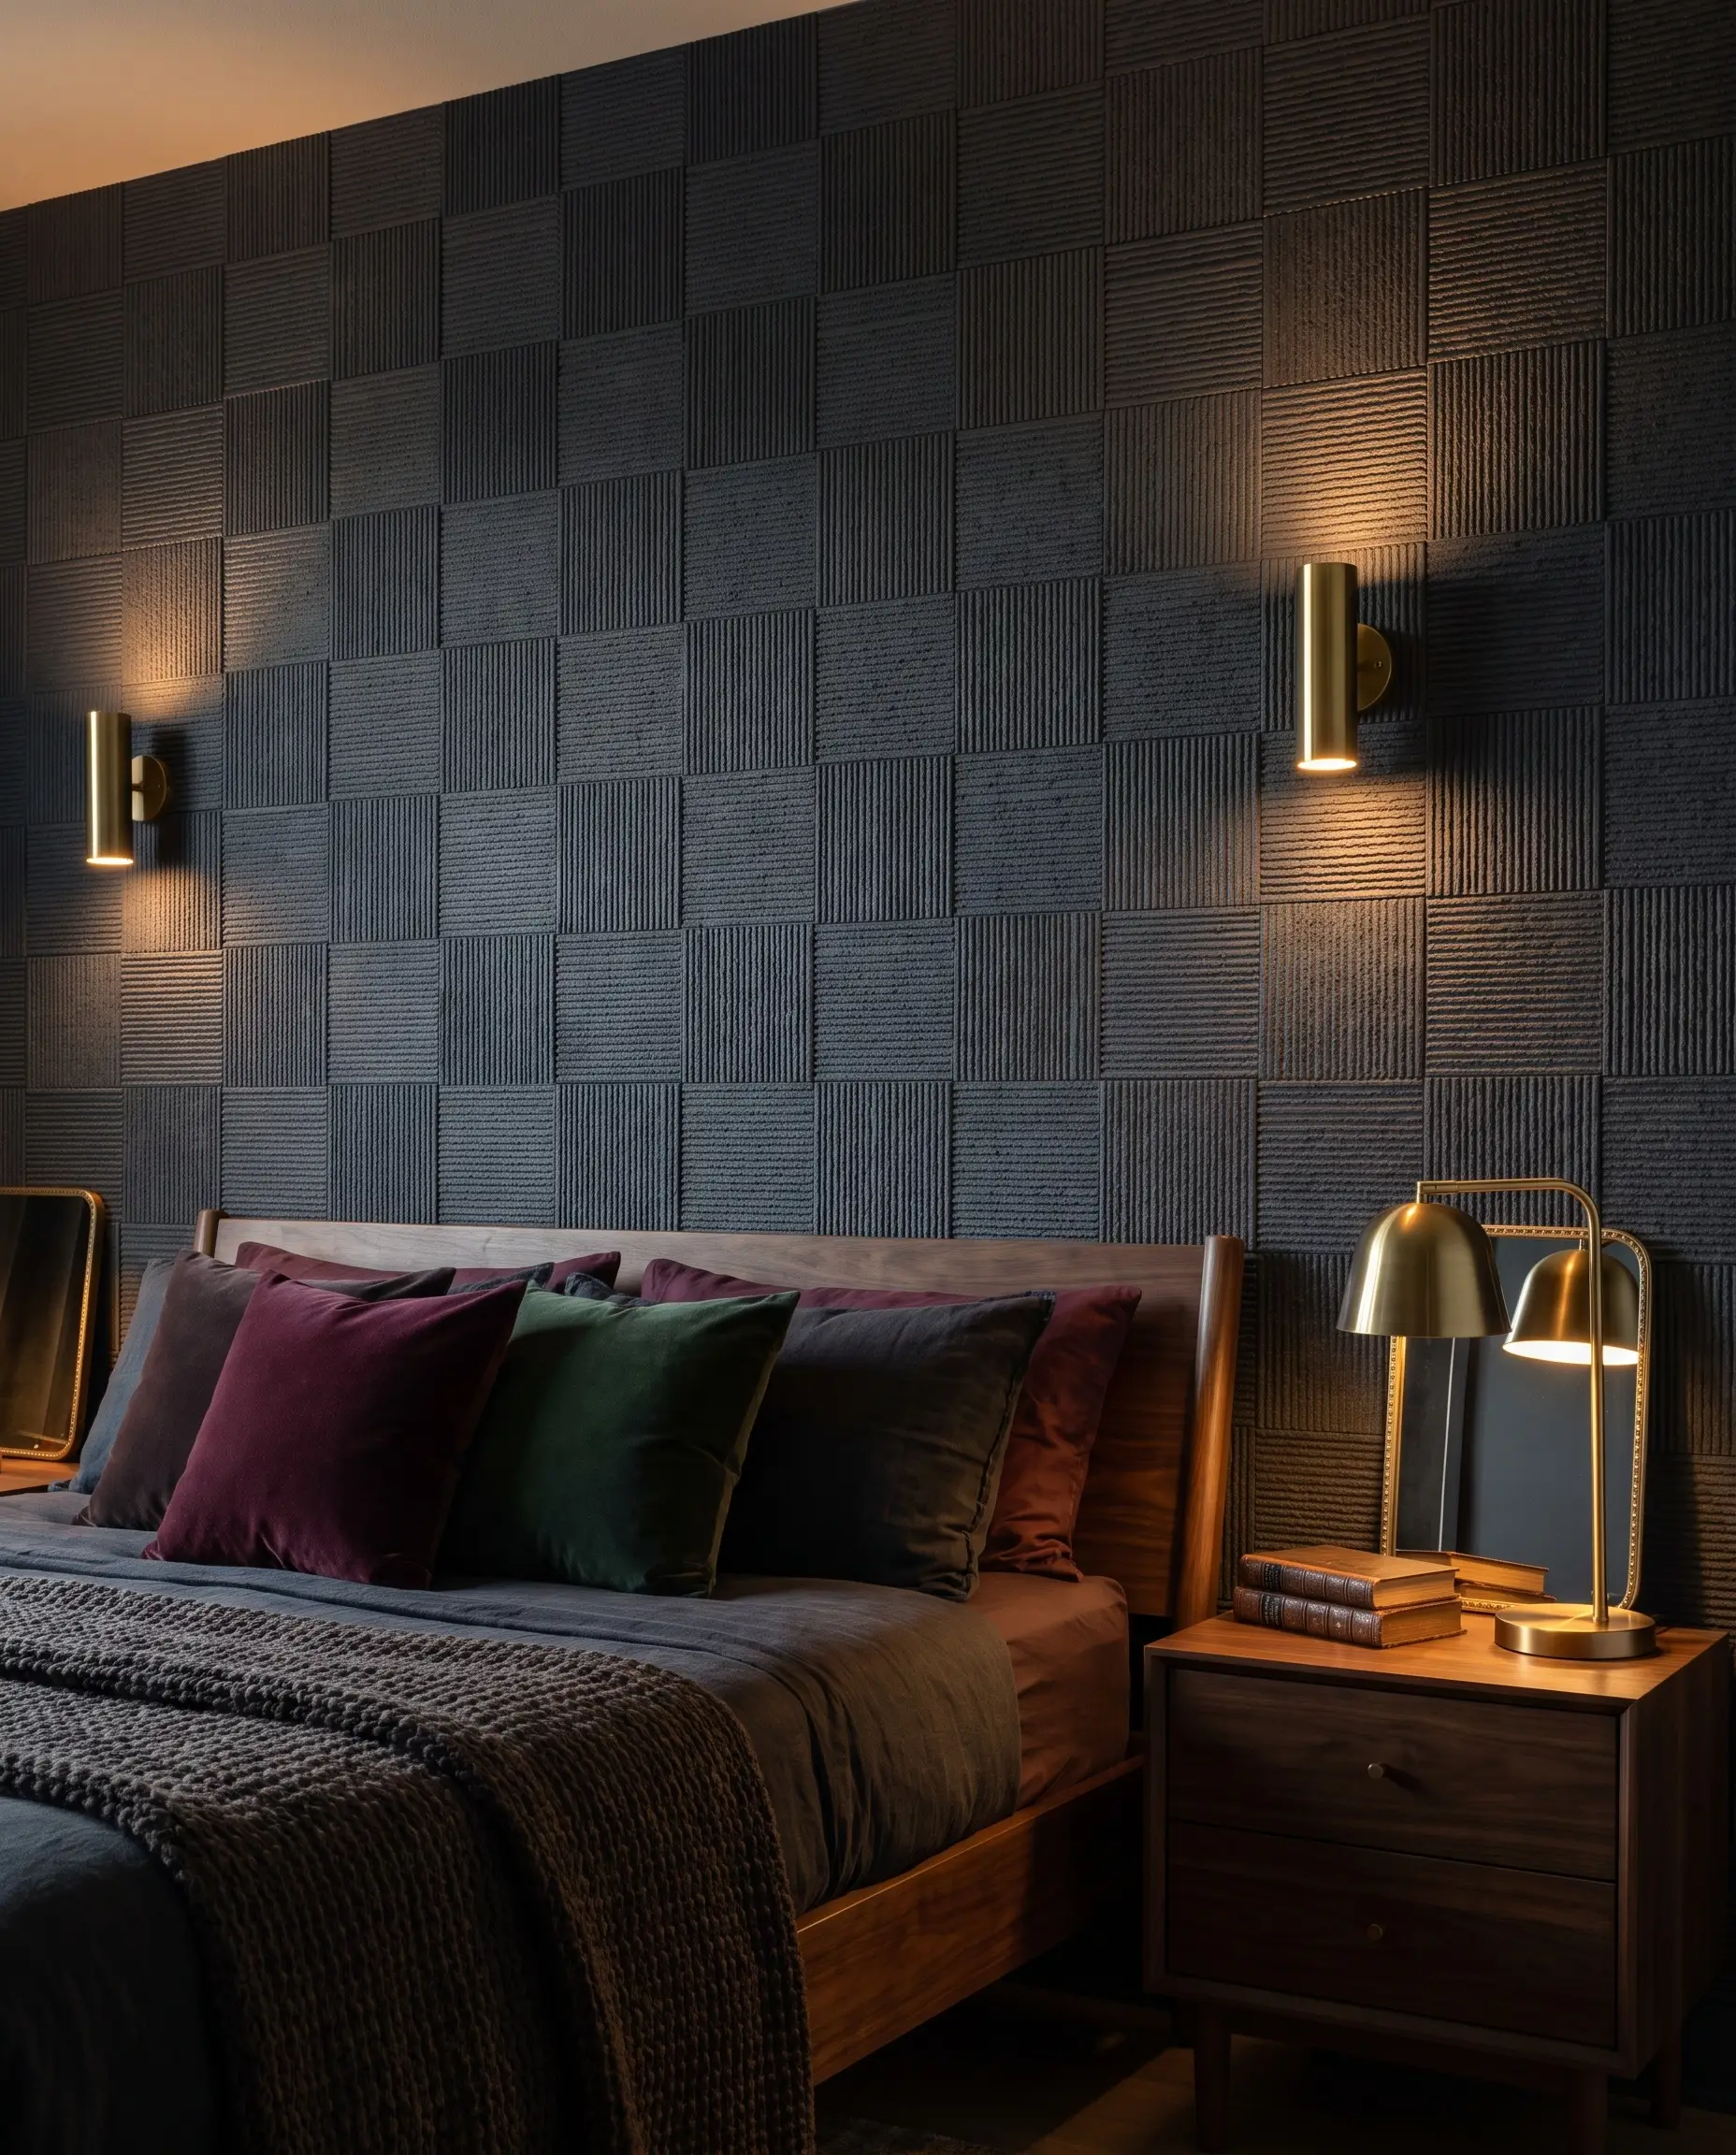
Plant-fiber bagasse (sugarcane) panels take paint beautifully, making them the perfect budget-friendly substrate for a rich, textured backdrop behind the bed. Coating them in a deep matte navy or charcoal transforms an inexpensive material into a highly sophisticated, moody focal point.
- Vibe: Moody / Modern Gothic
- Key Material: Plant-Fiber Bagasse Panels
- Paint Recommendation: Benjamin Moore Hale Navy (HC-154) or Farrow & Ball Railings (No. 31)
- Finish: Flat or Matte
You must explicitly use an HVLP paint sprayer rather than a roller for this application. Rolling paint over bagasse will fill in the fine 3D details and leave an uneven, heavy texture.
Hackrea Pro-Tip
8. Frame Bedside Sconces with Fluted Column Details
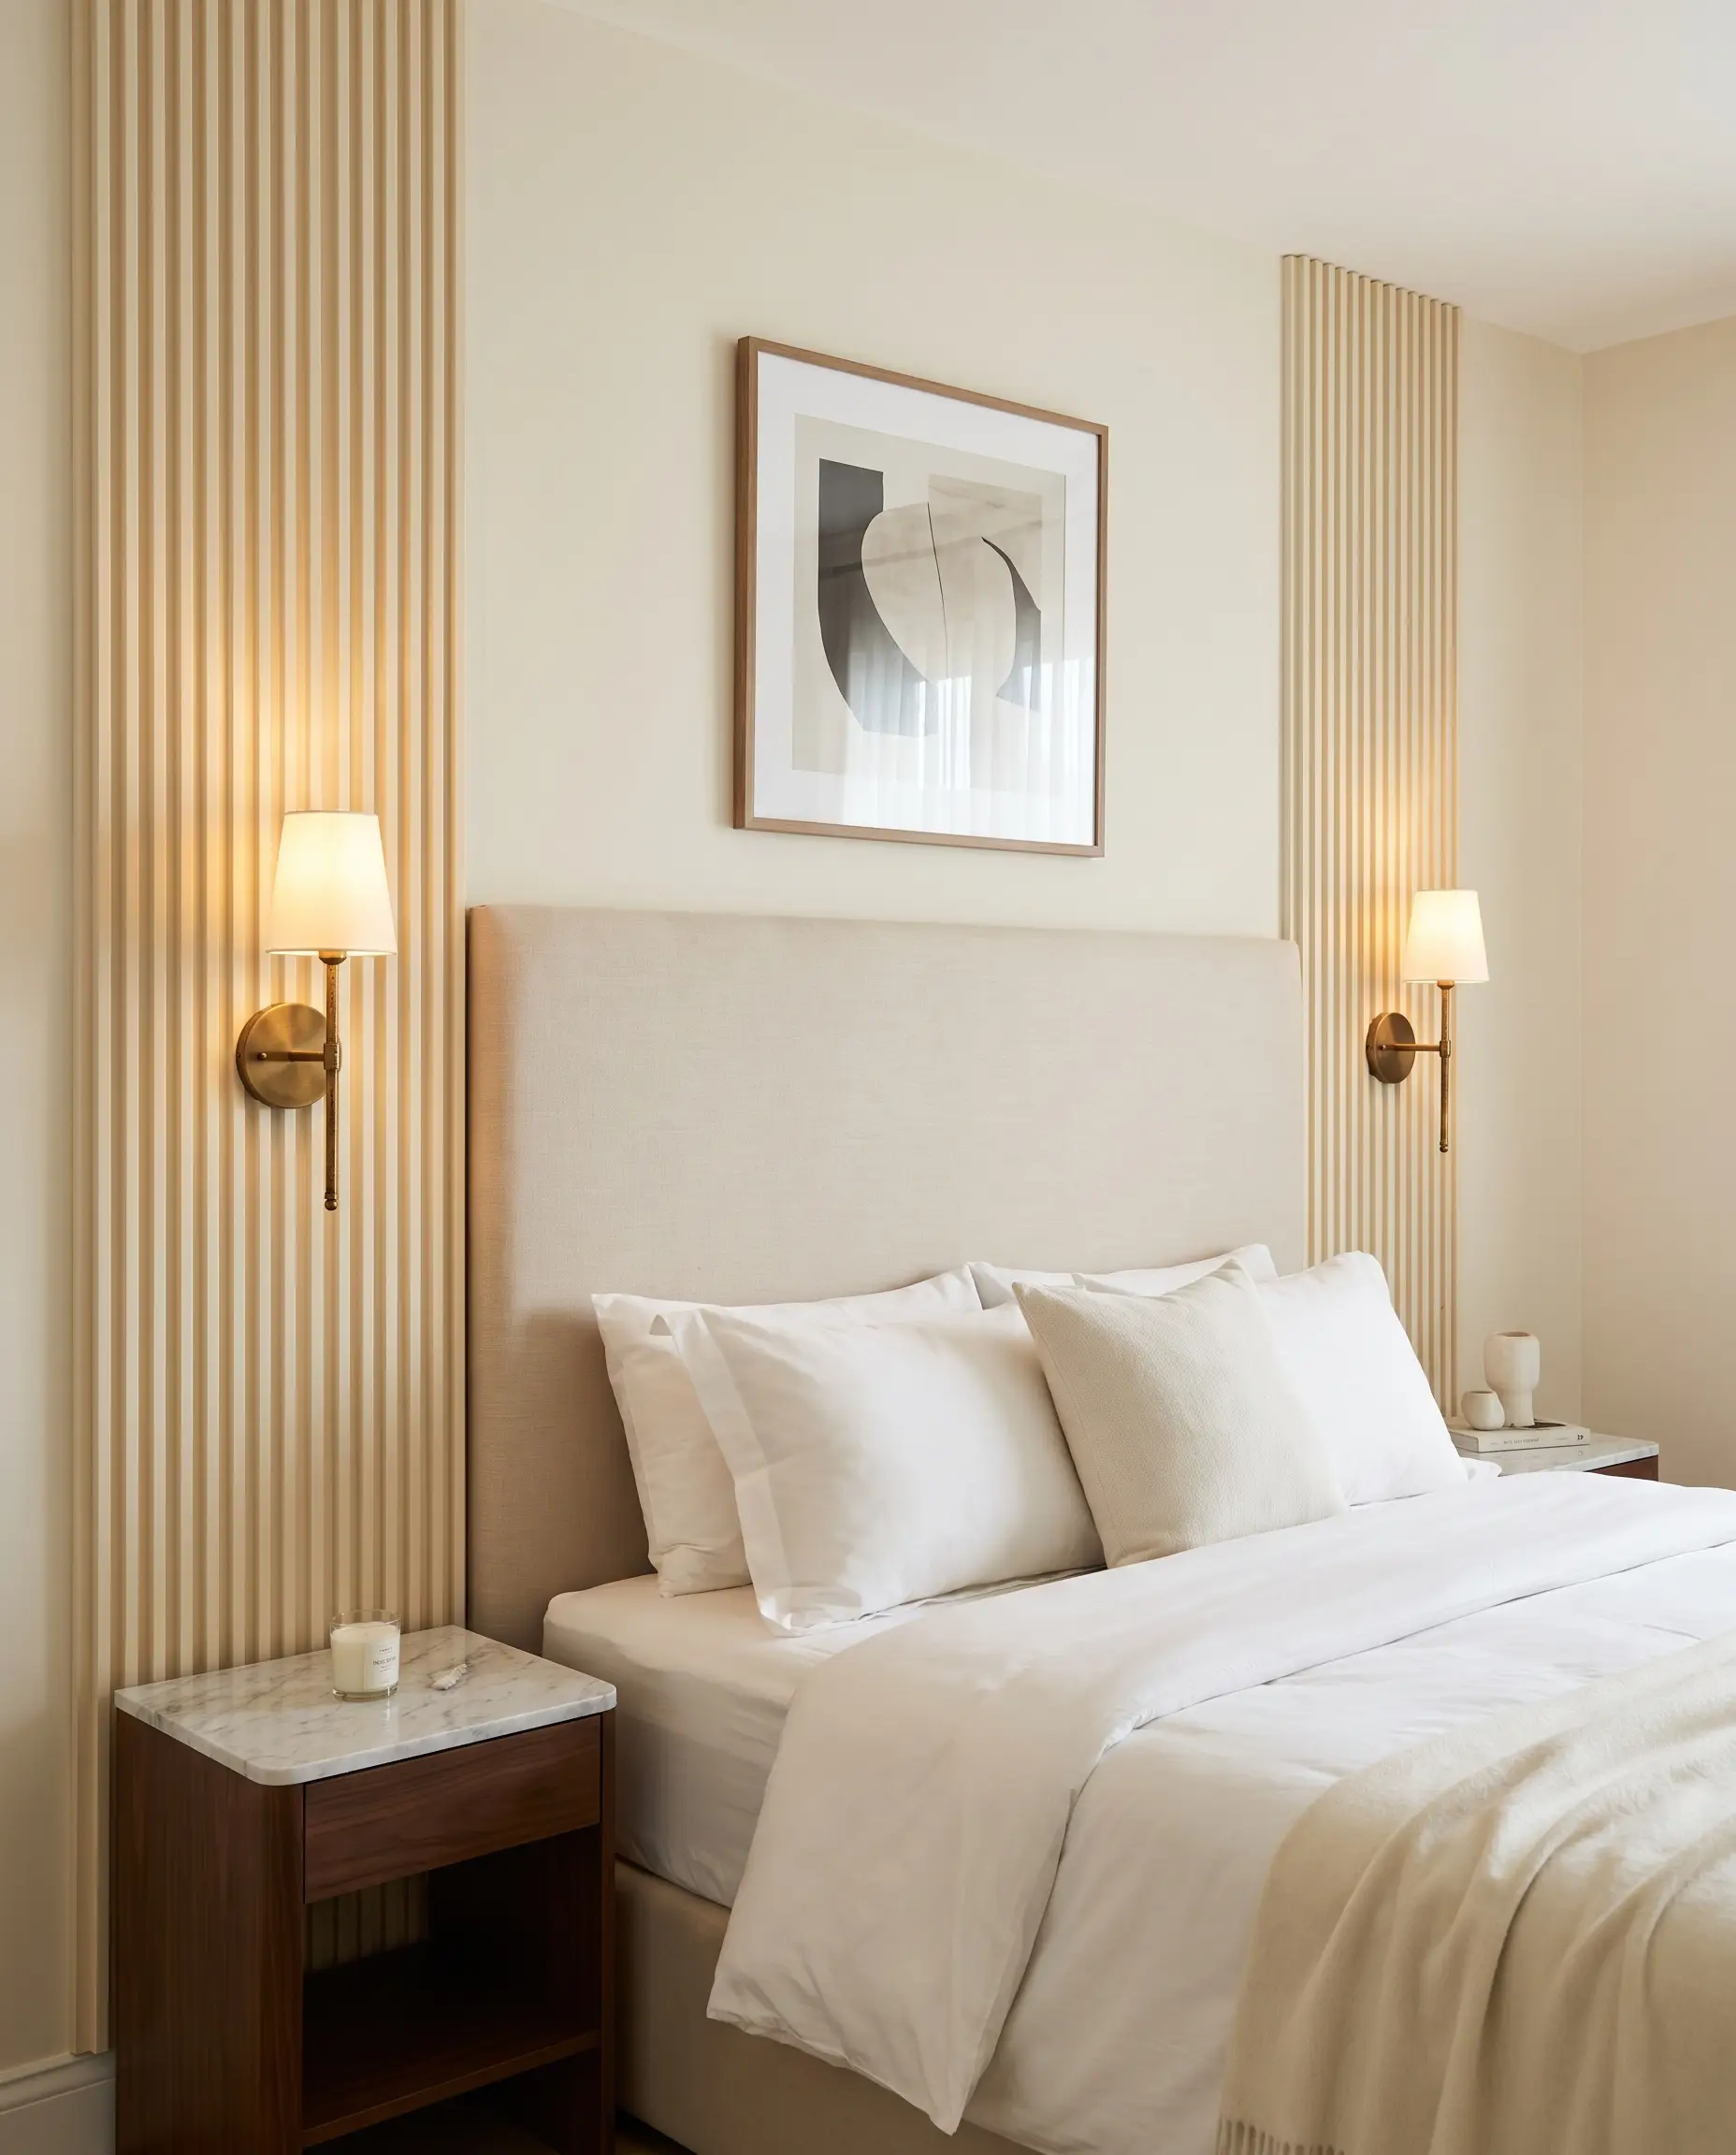
Instead of cladding the entire wall, use narrow vertical strips of fluted 3D panels to build architectural columns on either side of your bed. Hardwiring brass sconces directly onto these fluted textures creates a built-in, custom-fabricated aesthetic that frames the sleeping area perfectly.
- Vibe: Classic Contemporary
- Key Material: 12-inch wide Fluted MDF Strips
- Lighting Pairing: Aged brass hardwired sconces
- Spatial Trick: Visually sections off the nightstand zones
9. Soften the Space with Upholstered 3D Leather Tiles
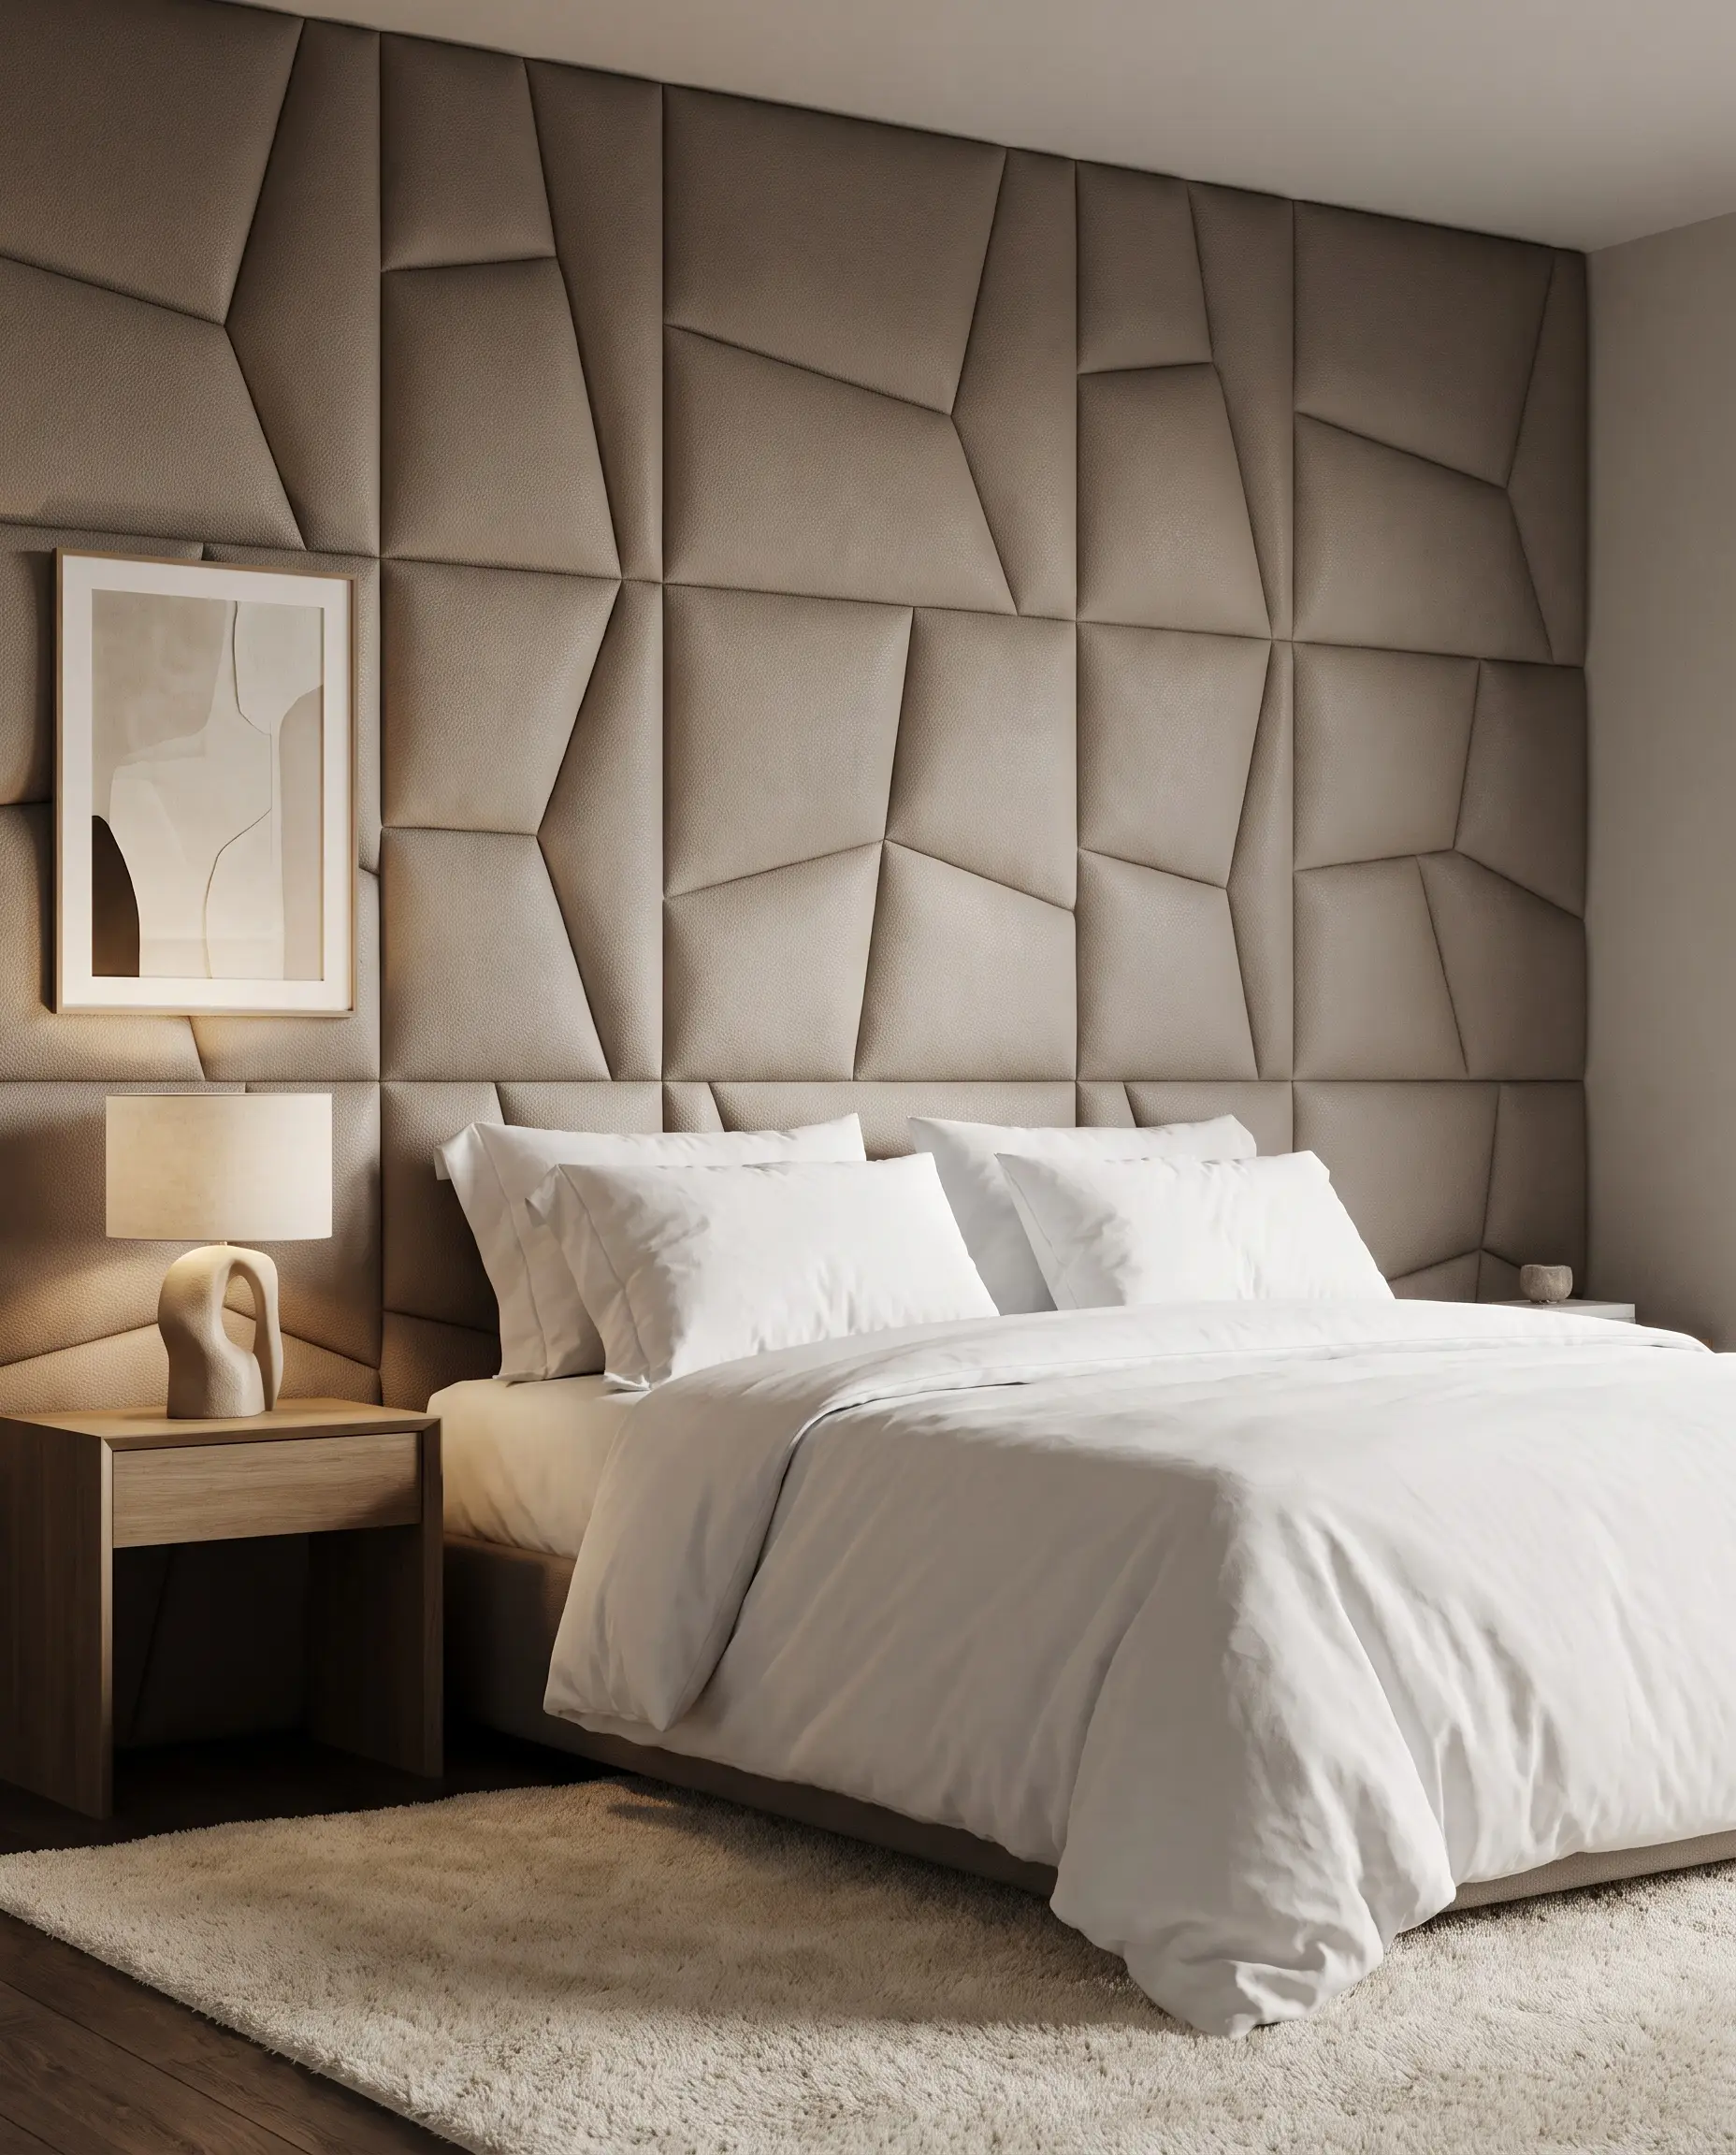
Introduce 3D faux-leather or suede padded tiles for a luxurious, sound-absorbing feature wall that feels incredibly soft to the touch. The heavy, matte texture of the leather tiles contrasts beautifully against crisp, white cotton bedding for a truly high-end classic contemporary aesthetic.
- Vibe: High-End Classic Contemporary
- Key Material: 3D Faux-Leather Padded Tiles
- Textural Contrast: Pair with smooth, 400-thread-count percale cotton sheets
- Acoustic Profile: Excellent high-frequency sound absorption
10. Hide Closet Doors with Seamless Paintable Panels
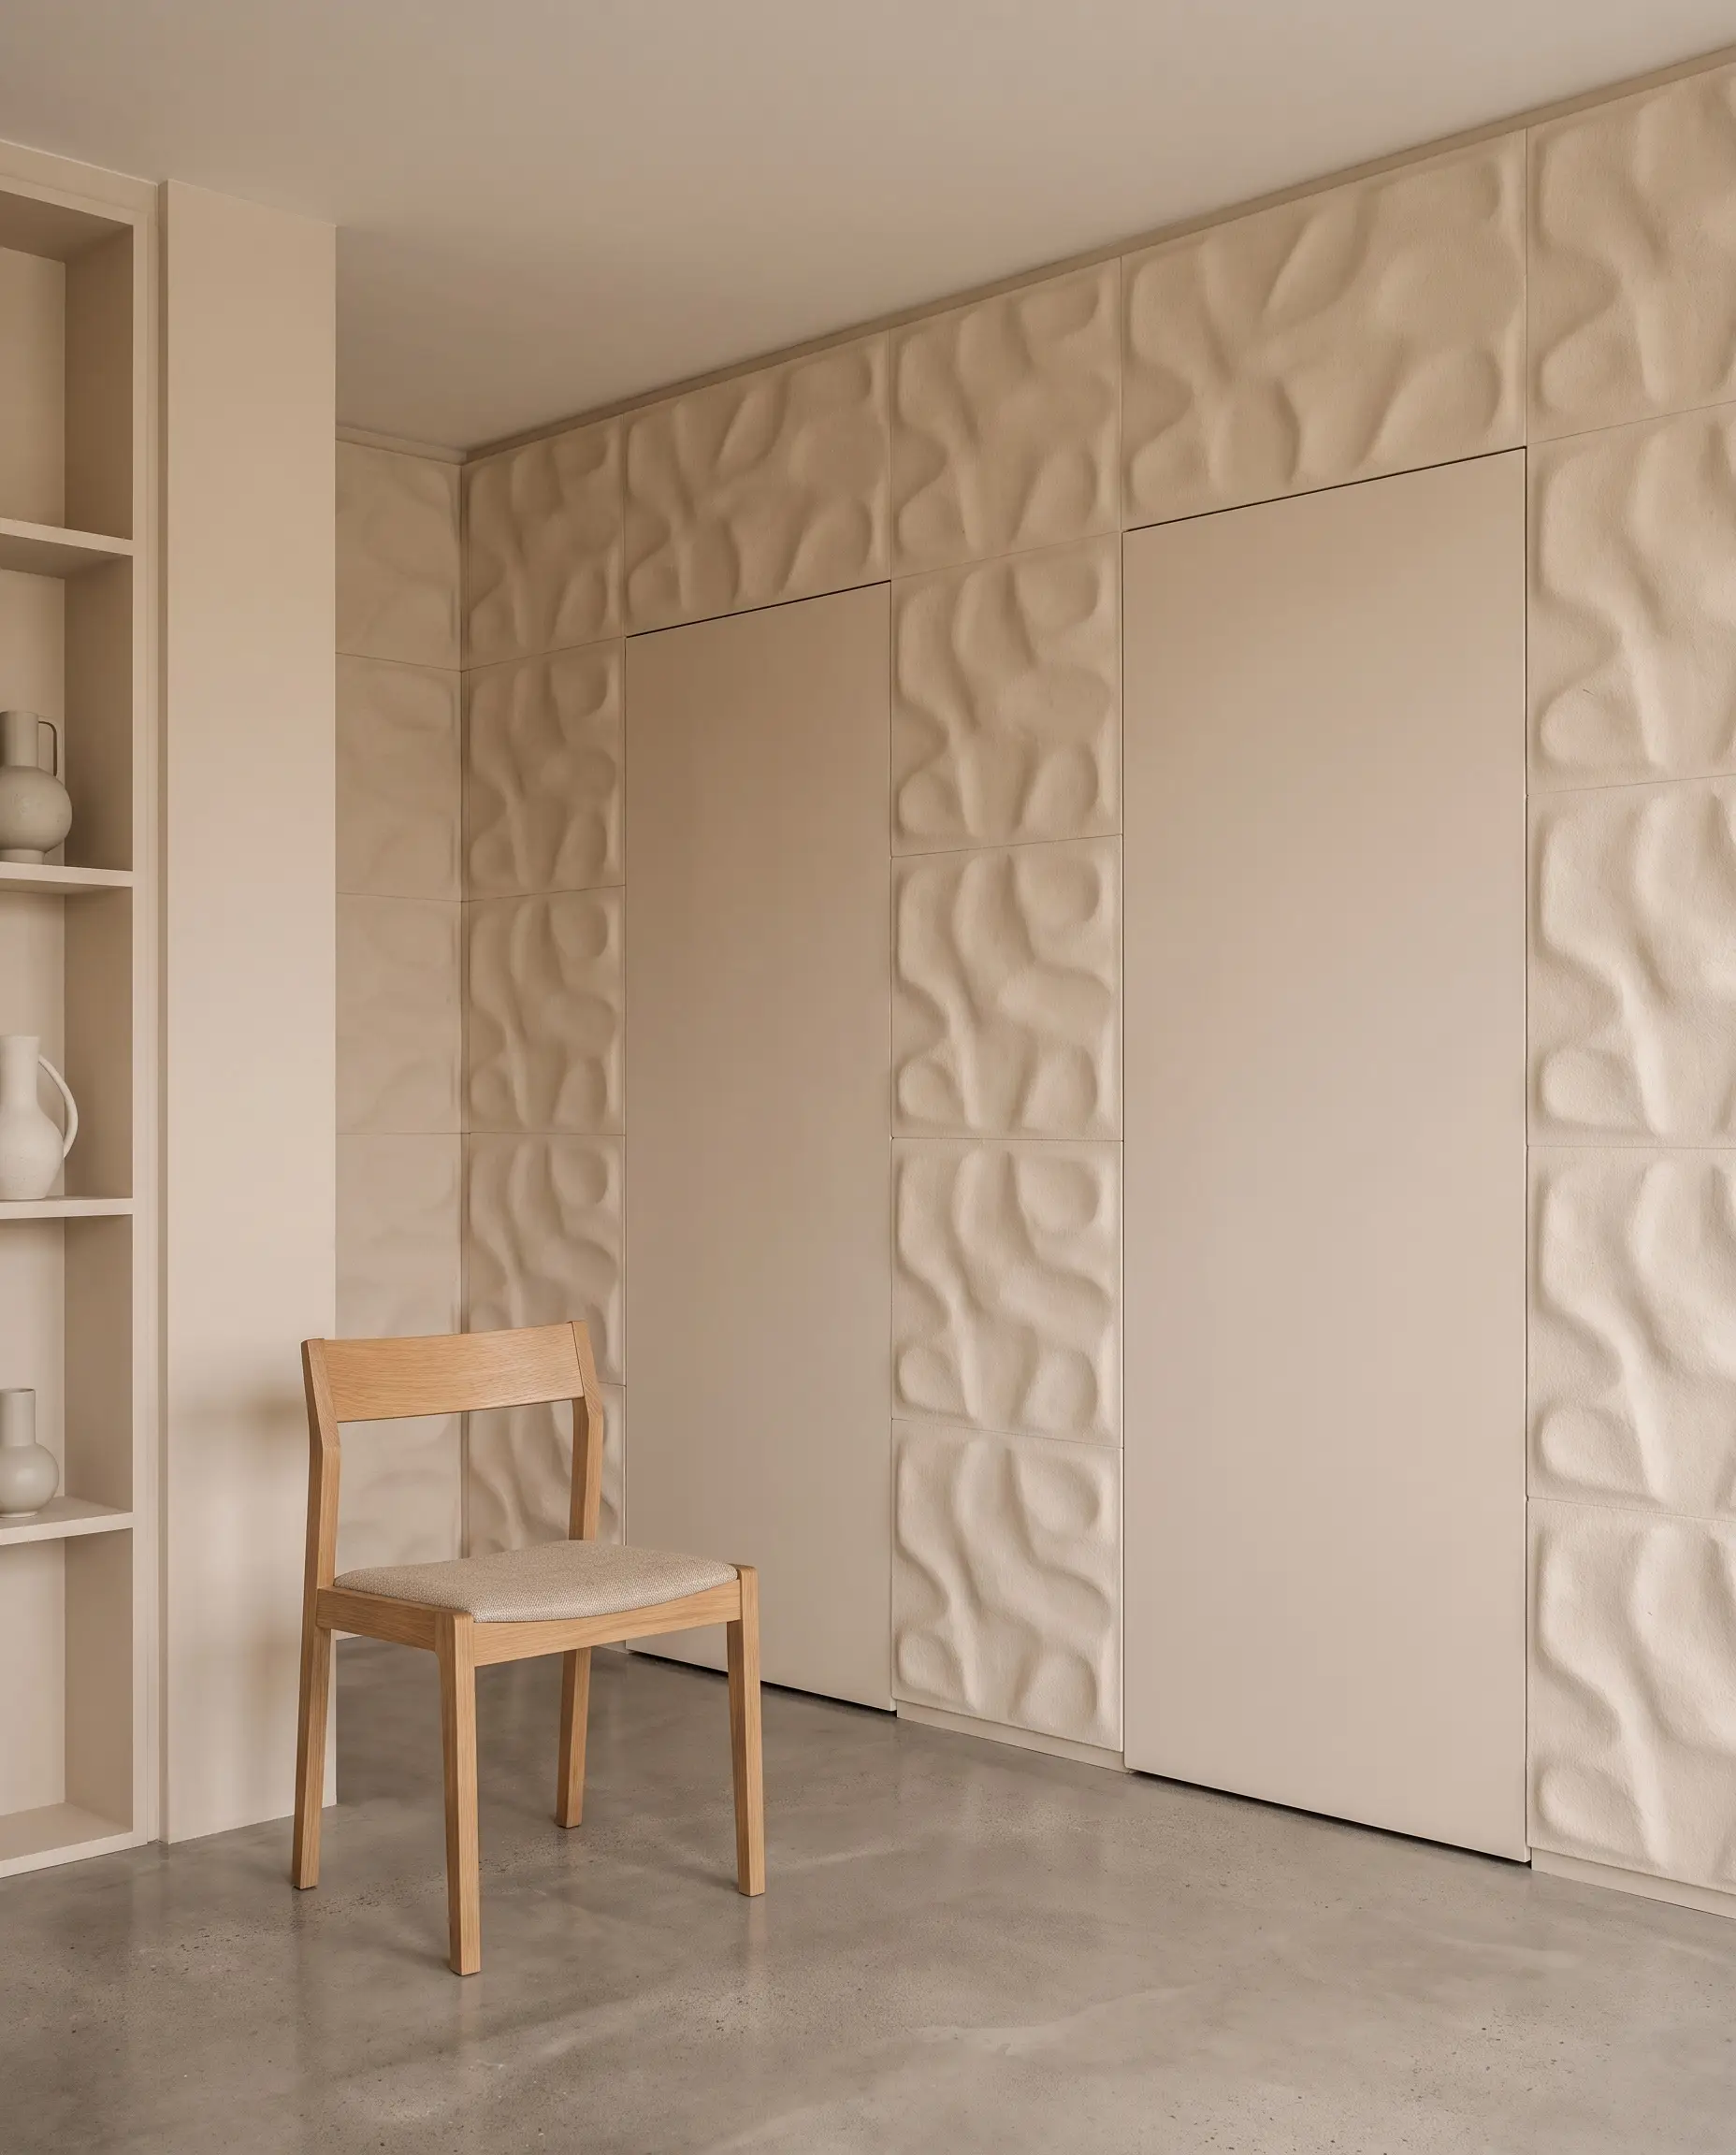
Apply lightweight, paintable 3D panels directly to flush-mount slab closet doors, painting them the exact same shade as the surrounding walls. This technique erases the visual clutter of standard closet doors, resulting in a hidden, textured monolithic storage system.
- Vibe: Ultra-Modern / Minimalist
- Key Material: Lightweight Bagasse or thin PVC panels
- Hardware: Push-to-open magnetic latches to eliminate handles
Before applying panels to a door, verify that your existing hinges can handle the added weight. You may need to upgrade to heavy-duty concealed hinges to prevent sagging over time.
Hackrea Pro-Tip
Dining Room & Transitional Spaces
Hallways and dining rooms are often flat, boxy spaces that desperately require architectural interest and spatial movement. Strategic 3D applications in these transitional zones guide the eye and define open-concept layouts without the need for physical partition walls.
11. Wrap a Dining Room Ceiling in 3D Textures
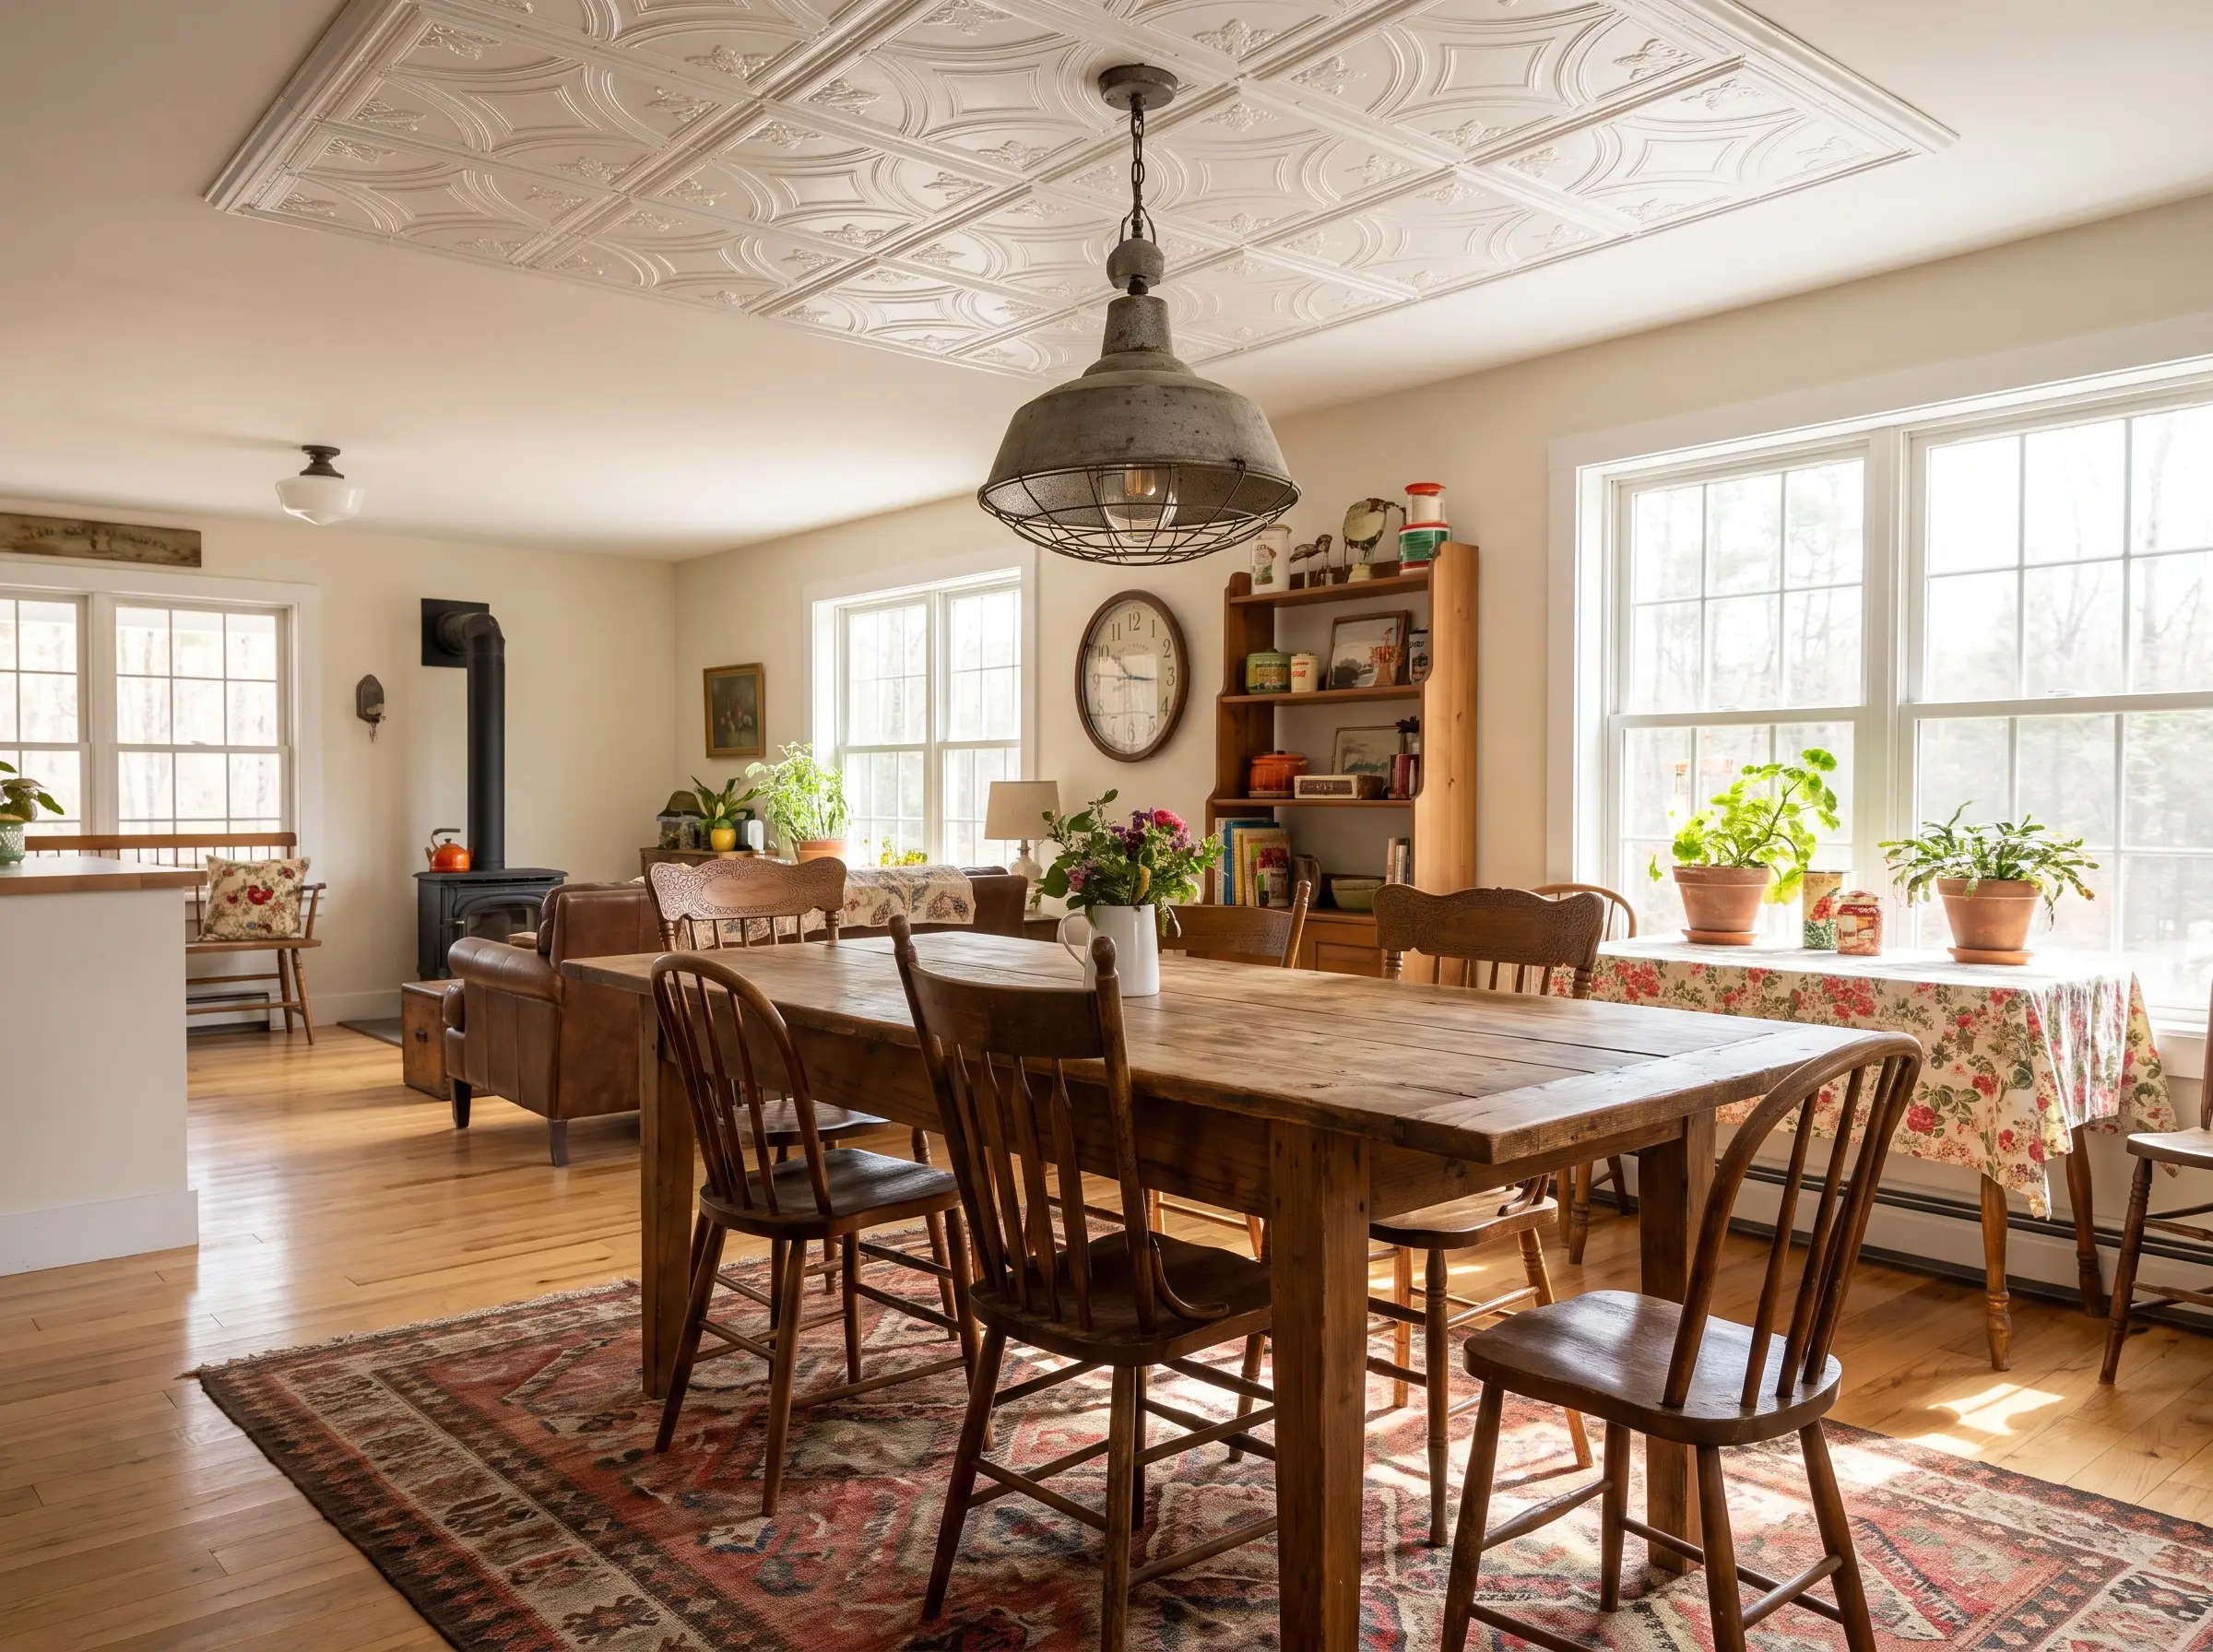
Flip the script on traditional wall applications by installing lightweight PVC ceiling tiles or tin-style 3D panels directly above the dining table. This overhead texture instantly defines the eating area in an open-concept floor plan, anchoring the space from above.
- Vibe: Vintage Industrial / Grandmillennial
- Key Material: Lightweight PVC Tin-Style Ceiling Tiles
- Anchor Element: Pair with an oversized, low-hanging pendant light
- Adhesion: Drop-ceiling grid or direct glue-up
12. Create a Monolithic Entryway with Seamless Gypsum
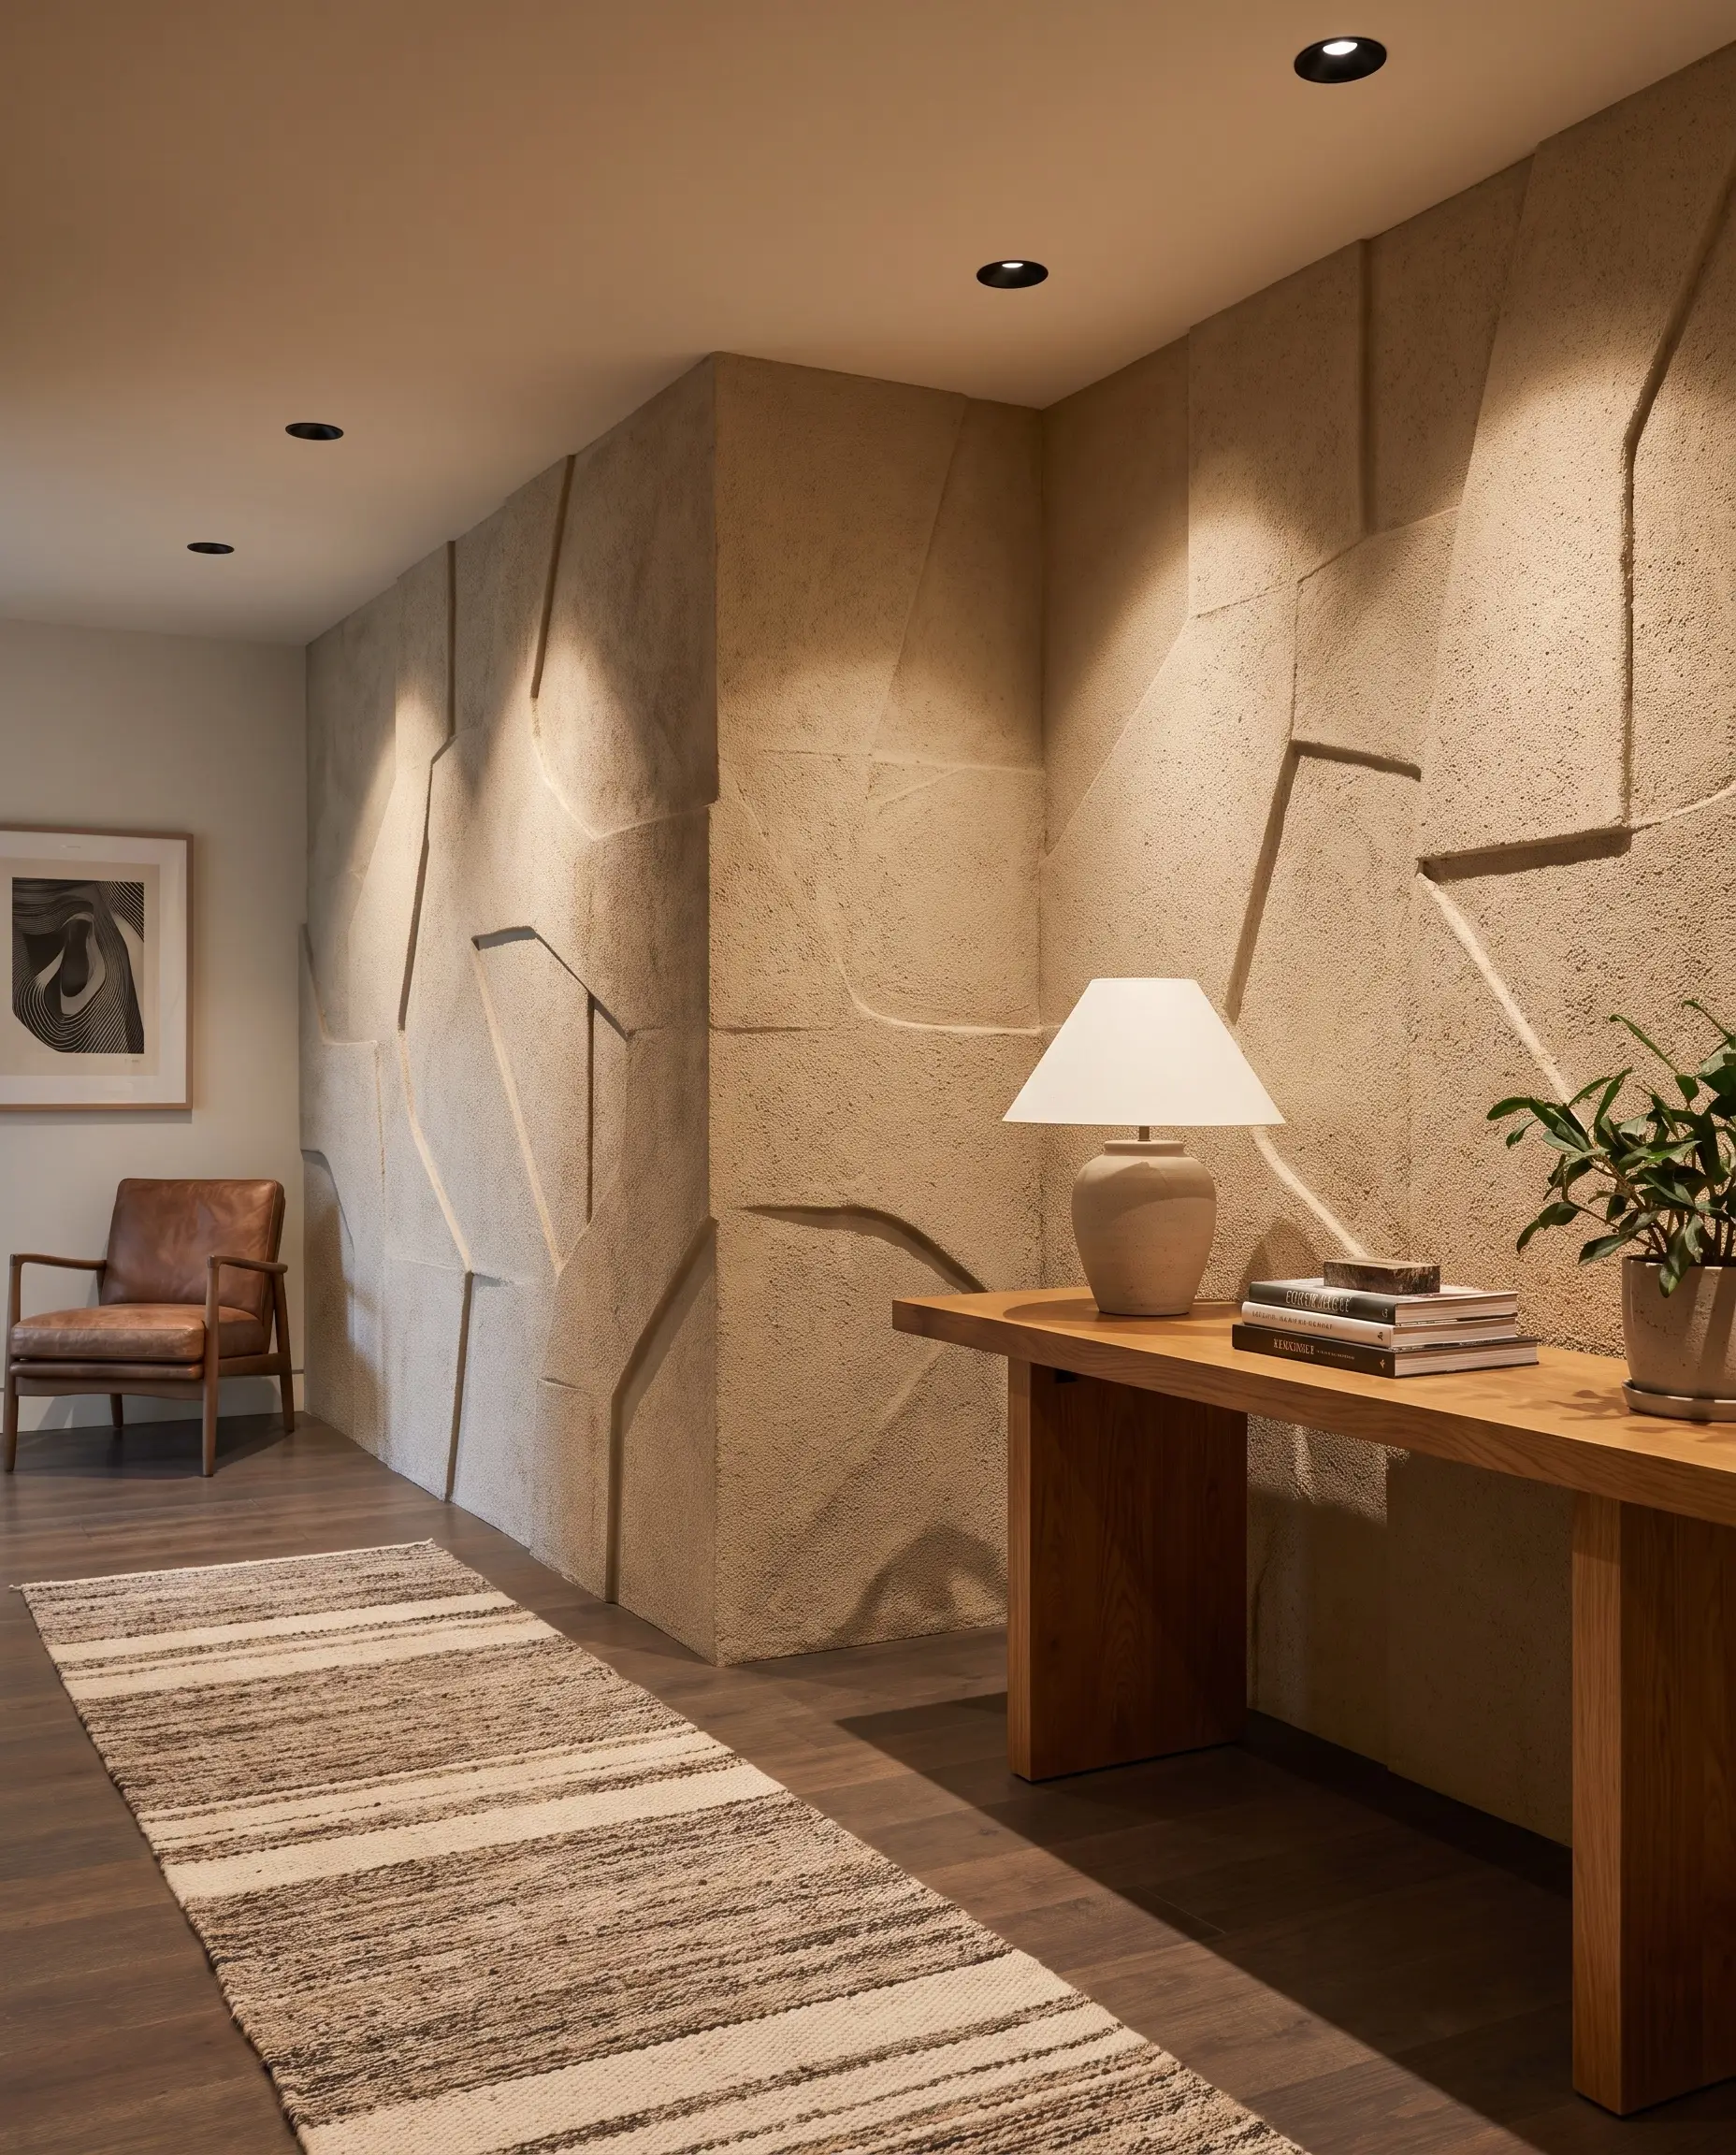
Utilize GRG interlocking panels in your entryway to establish a grand, high-impact first impression. By mudding and sanding the seamless joints, the wall transforms into what appears to be a custom-poured concrete or plaster relief, establishing a flawless monolithic look.
- Vibe: Brutalist / High-End Organic Modern
- Key Material: GRG (Glass Reinforced Gypsum) Interlocking Panels
- Execution Requirement: Professional Level 5 drywall finishing skills
- Lighting: Overhead recessed spotlights to cast downward shadows
13. Cap Exposed Panel Edges with Custom Metal J-Trim
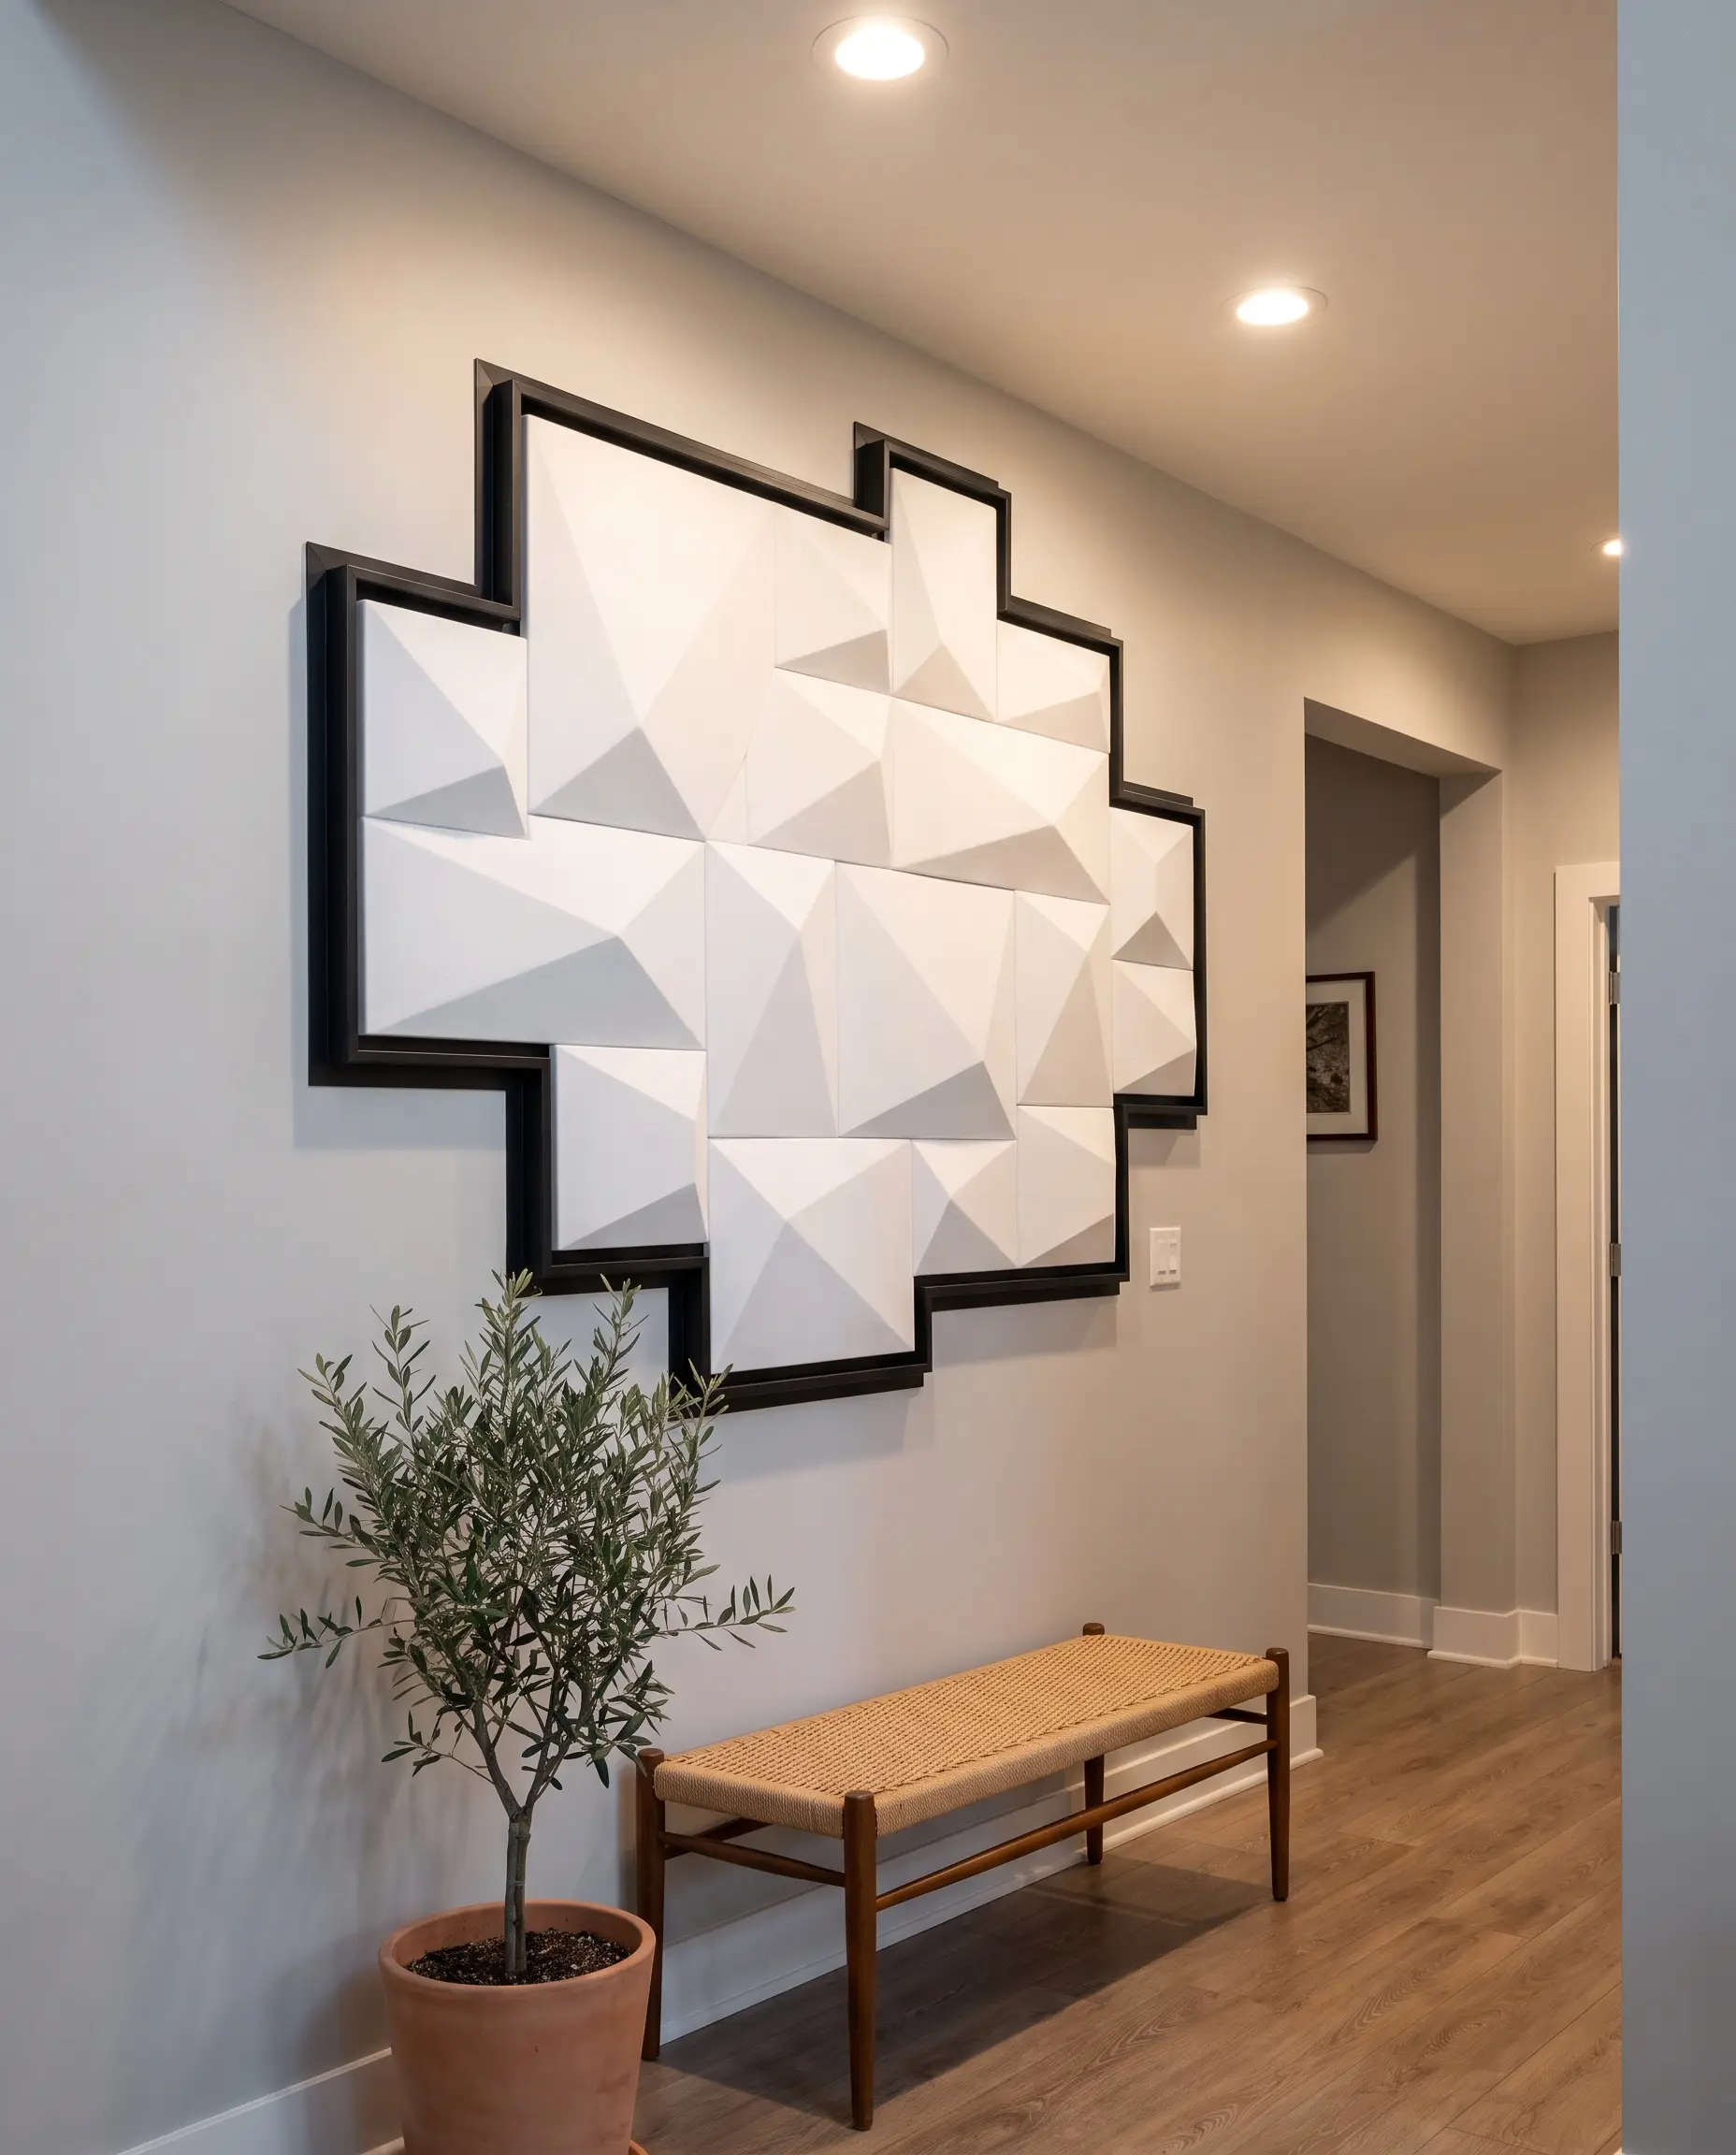
If a 3D panel installation does not run wall-to-wall, the exposed jagged edges will immediately reveal it as a cheap DIY job. Solve this differentiation blindspot by framing the entire installation with a sleek brass or matte black metal J-channel trim to ensure a crisp, tailored finish.
- Vibe: Tailored Architectural
- Key Material: Metal J-Channel Edge Trim (Brass or Black)
- Application: Floating wall installations or half-walls
Leaving raw panel edges exposed is the number one giveaway of an amateur installation. Always plan your edge trim strategy before you order your primary materials.
Hackrea Styling Rule
14. Use Vertical Ridges to Visually Raise Low Hallway Ceilings
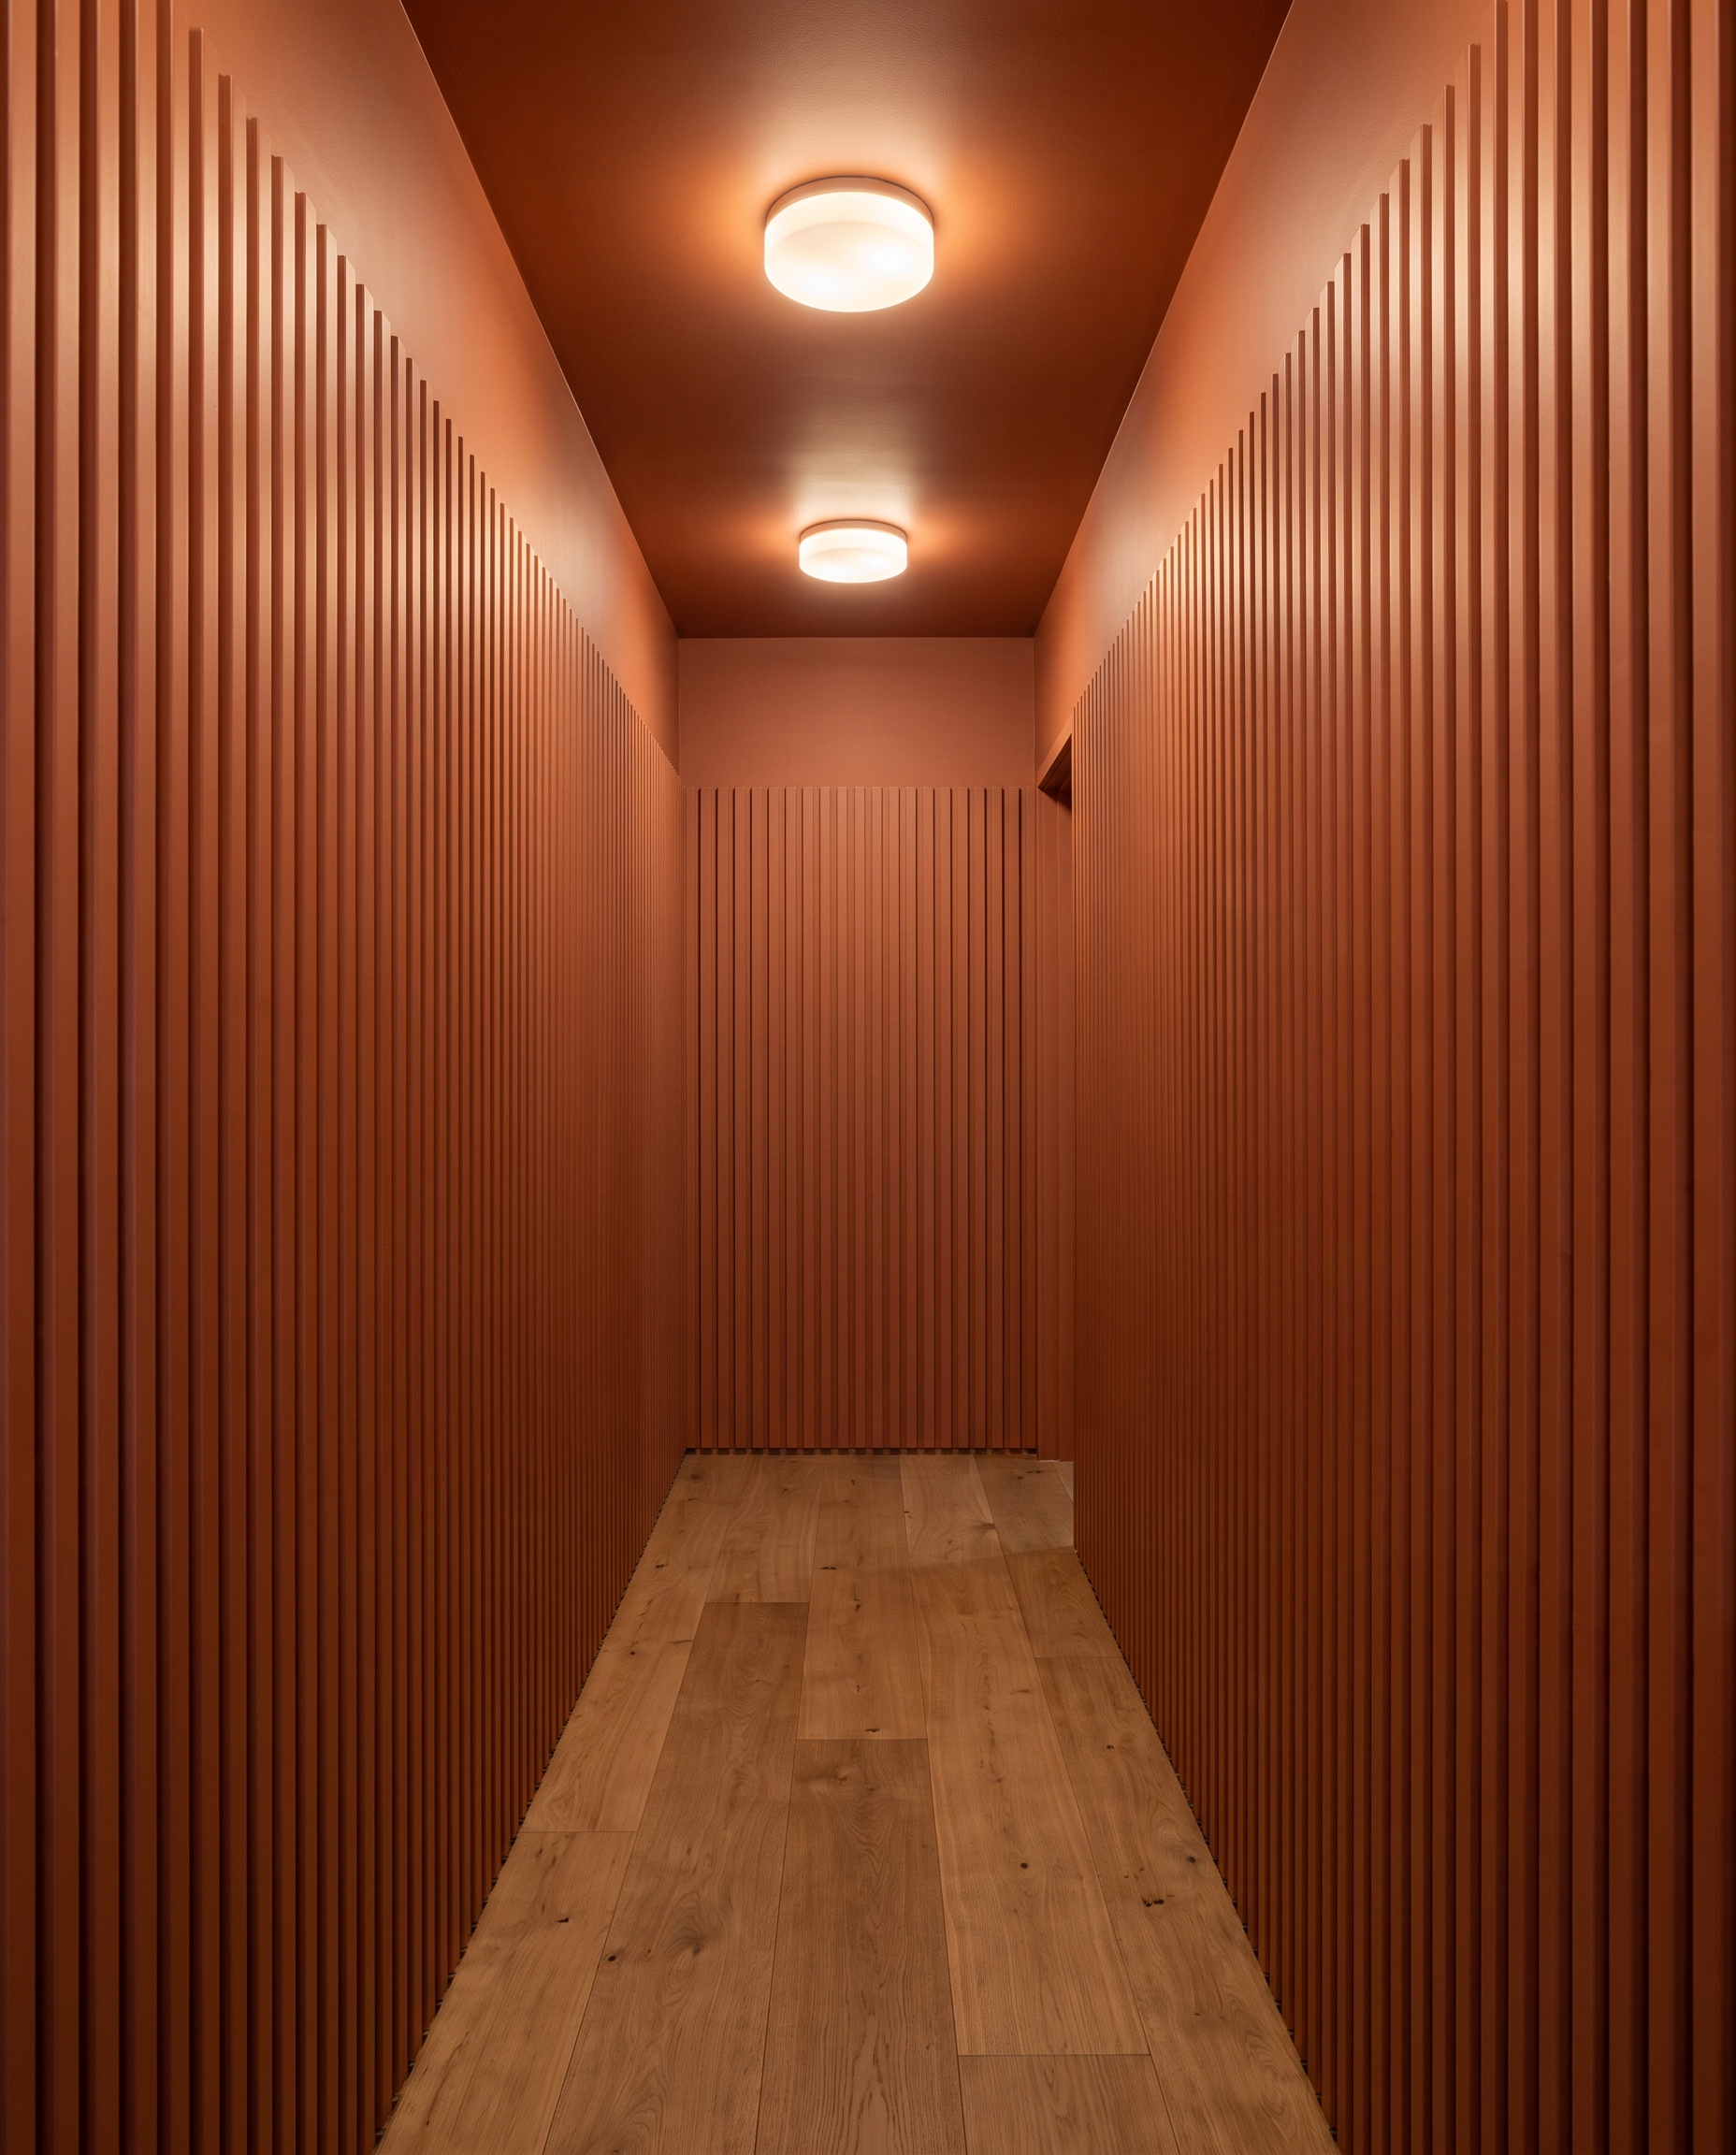
In cramped, low-ceiling hallways, installing deeply grooved, vertical 3D panels acts as a powerful optical illusion. The continuous, unbroken vertical lines draw the eye upward, tricking the brain into perceiving a much taller, grander space.
- Vibe: Modern Minimalist
- Key Material: Deep-groove Fluted MDF or PVC
- Orientation: Strictly vertical
- Paint Match: Color-drench the panels and the ceiling in the same shade
Home Office & Acoustic Treatments
The modern work-from-home era requires a delicate balance of aesthetics and acoustic control. In the home office, 3D panels pull double duty as highly functional sound management tools and polished, professional backdrops.
15. Install PET Felt 3D Hexagons for Zoom Call Backdrops
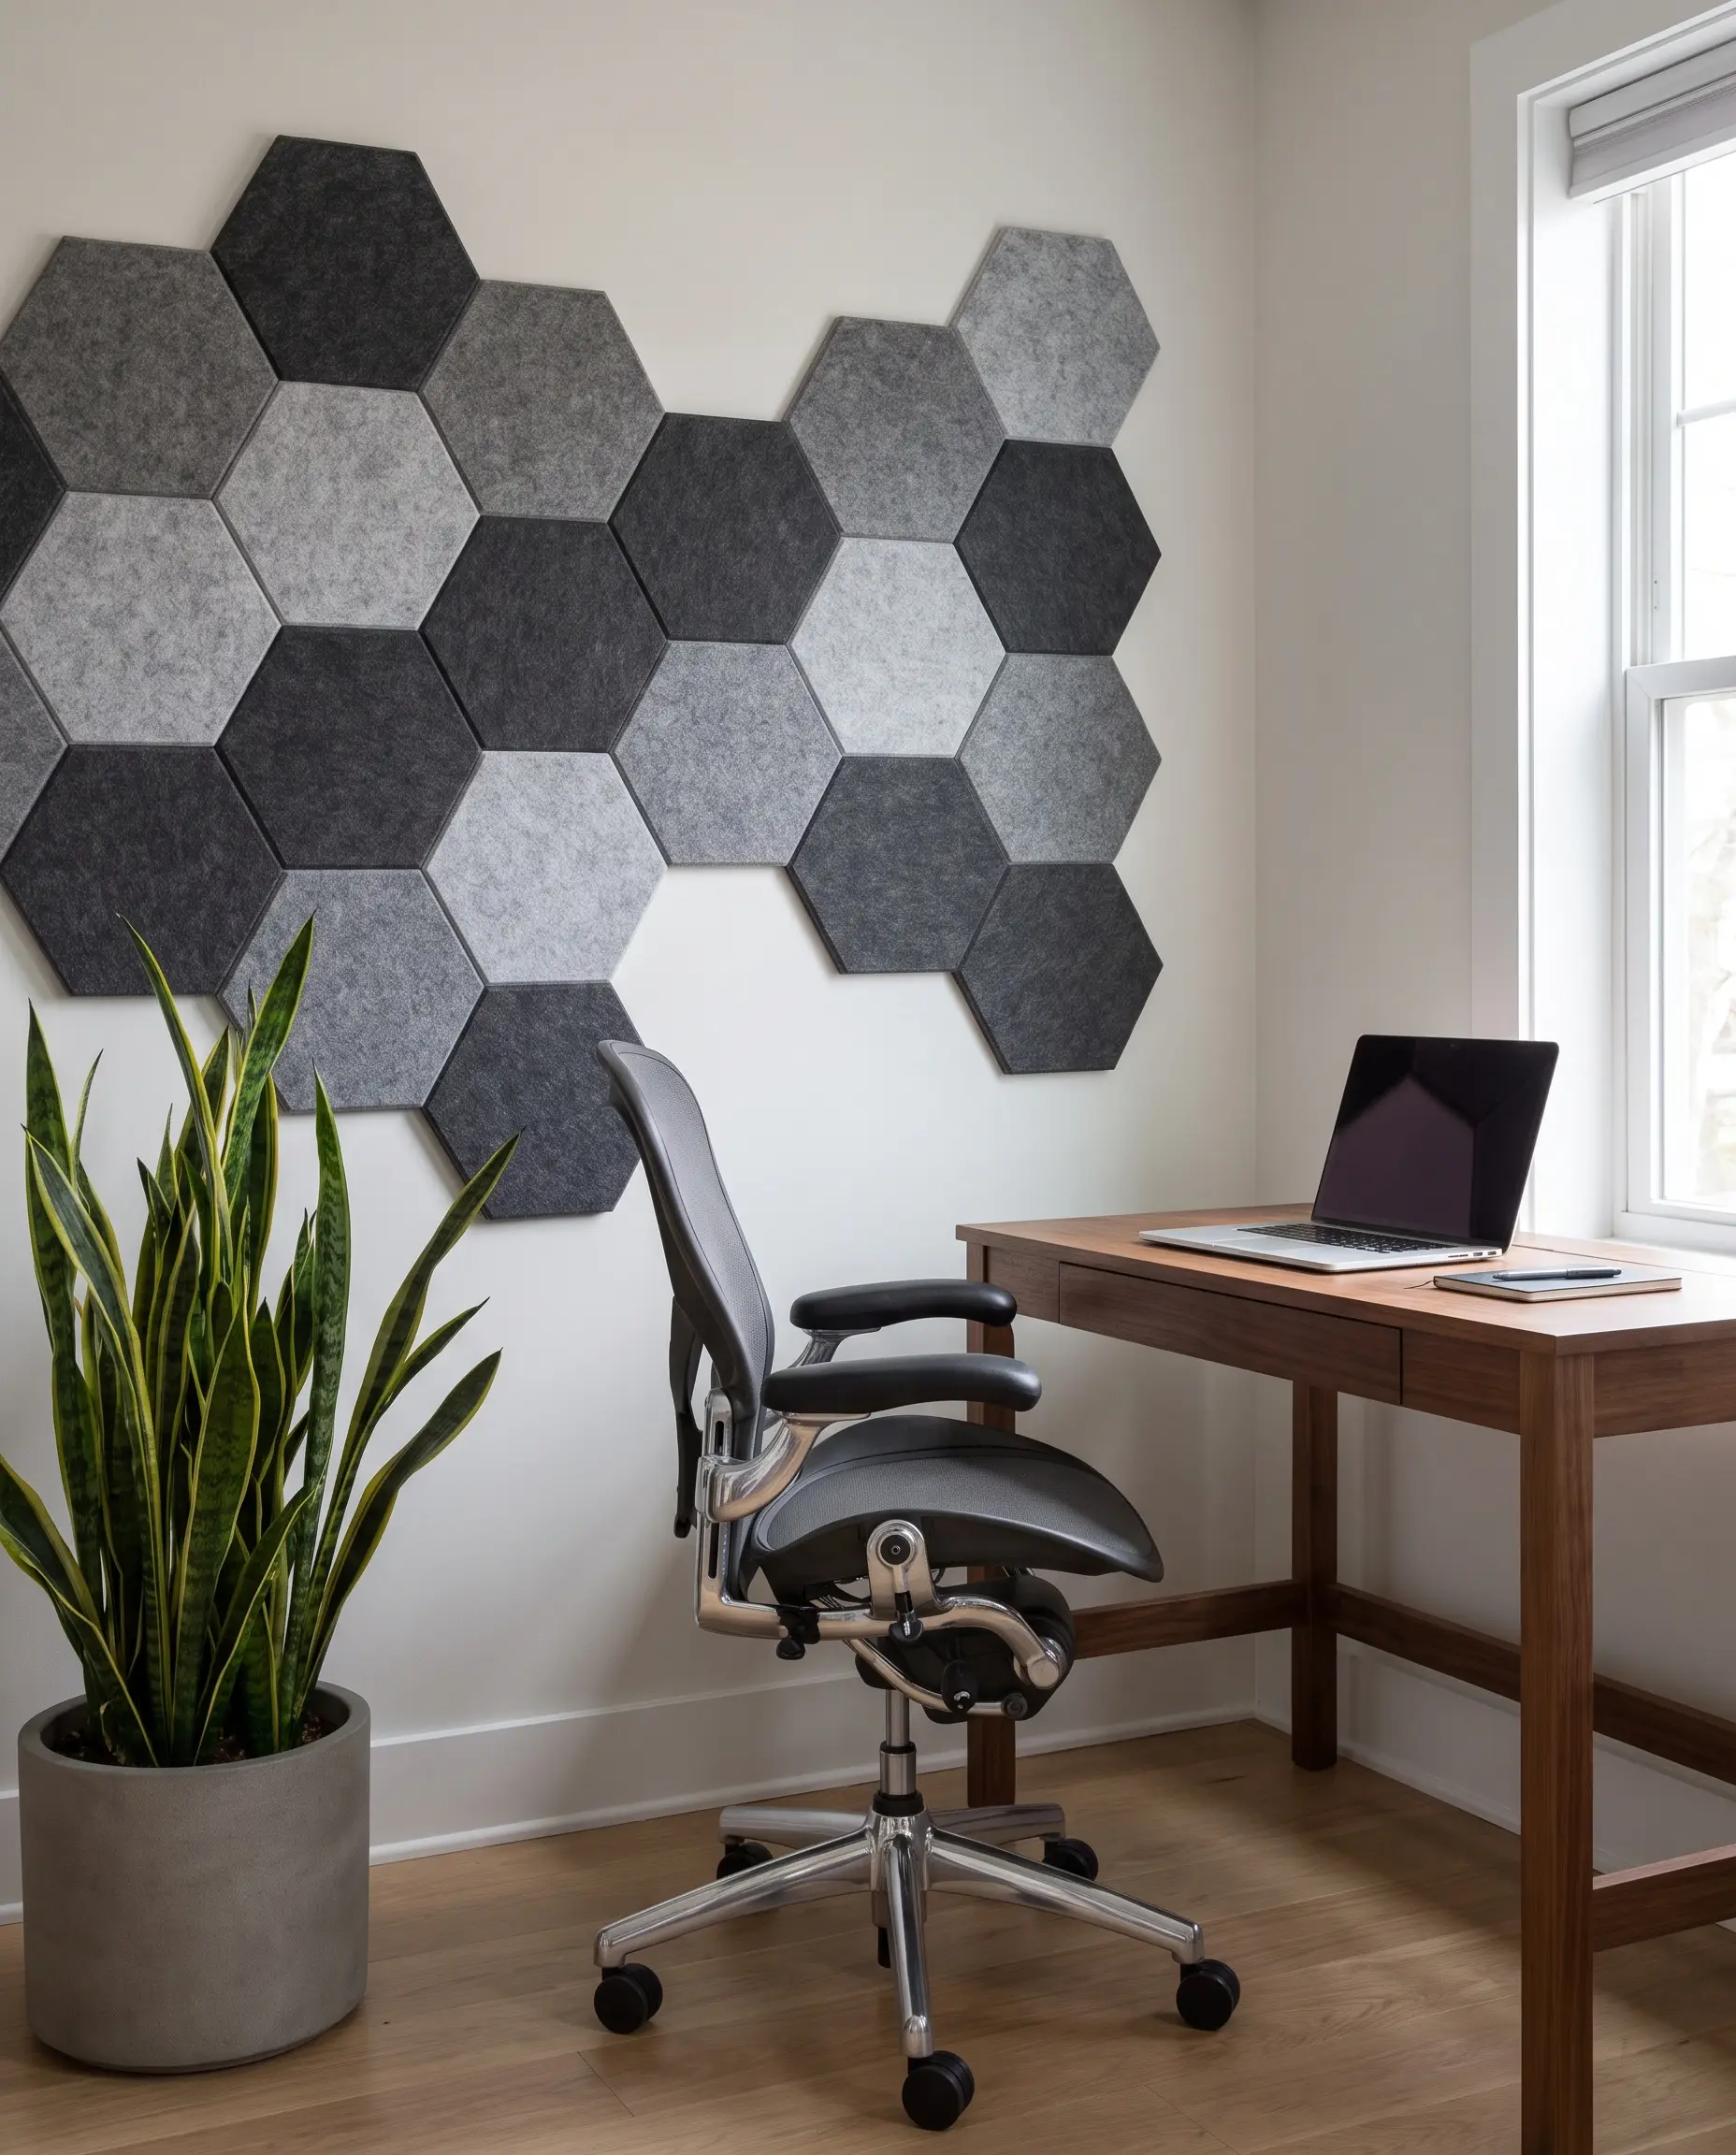
Dense, recycled PET felt panels cut into geometric shapes offer the premier functional aesthetic for a home office. They actively eliminate harsh room echo during video calls while providing a highly professional, textured background that looks superb on camera.
- Vibe: Tech-Forward / Professional
- Key Material: Recycled PET Felt 3D Hexagons
- Acoustic Benefit: Eliminates high-frequency flutter echo
- Application: Clustered directly behind the desk chair
16. Wrap a Freestanding Desk in Fluted Tambour
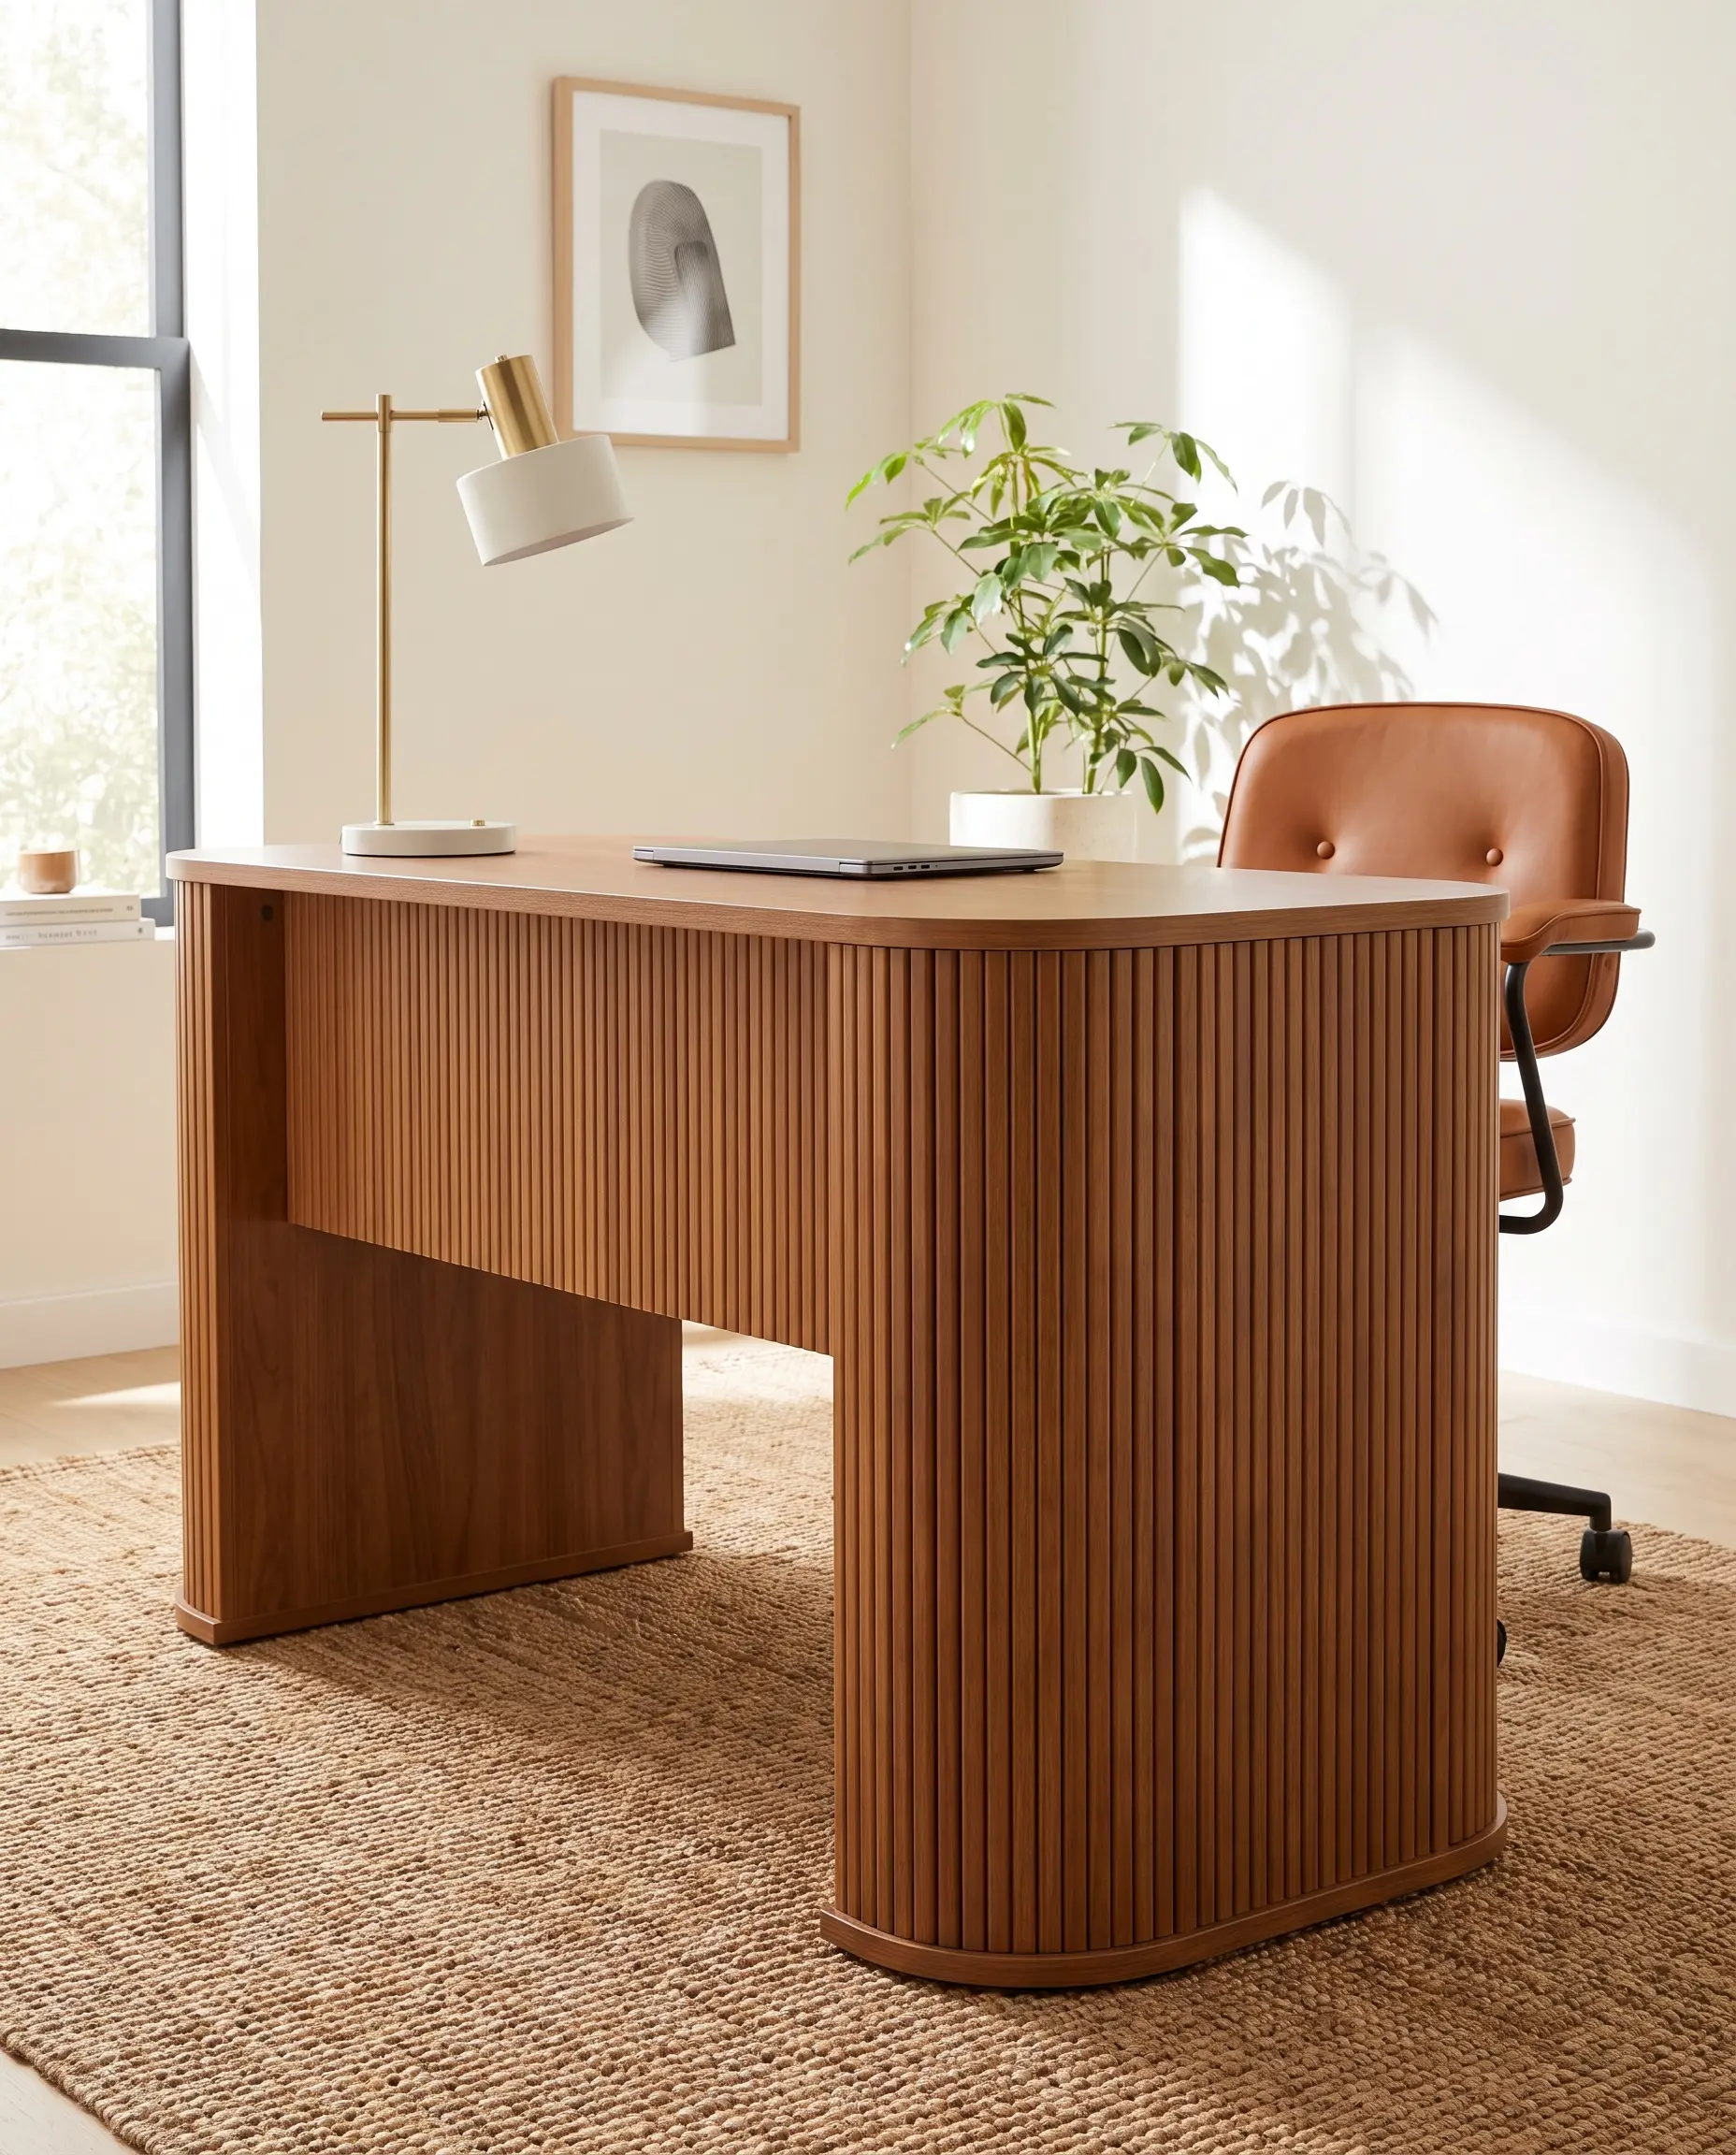
Take 3D paneling completely off the wall by applying flexible fluted tambour wood panels directly to the front modesty panel or rounded edges of a freestanding desk. This simple material wrap instantly customizes generic office furniture, giving it a bespoke, high-end showroom presence.
- Vibe: Mid-Century Modern / Japandi
- Key Material: Flexible Fluted Tambour Wood
- Adhesion: Contact cement or heavy-duty construction adhesive
- Finishing: Sand and seal with a matte polyurethane
17. Integrate Floating Shelves into Wood Slat Gaps
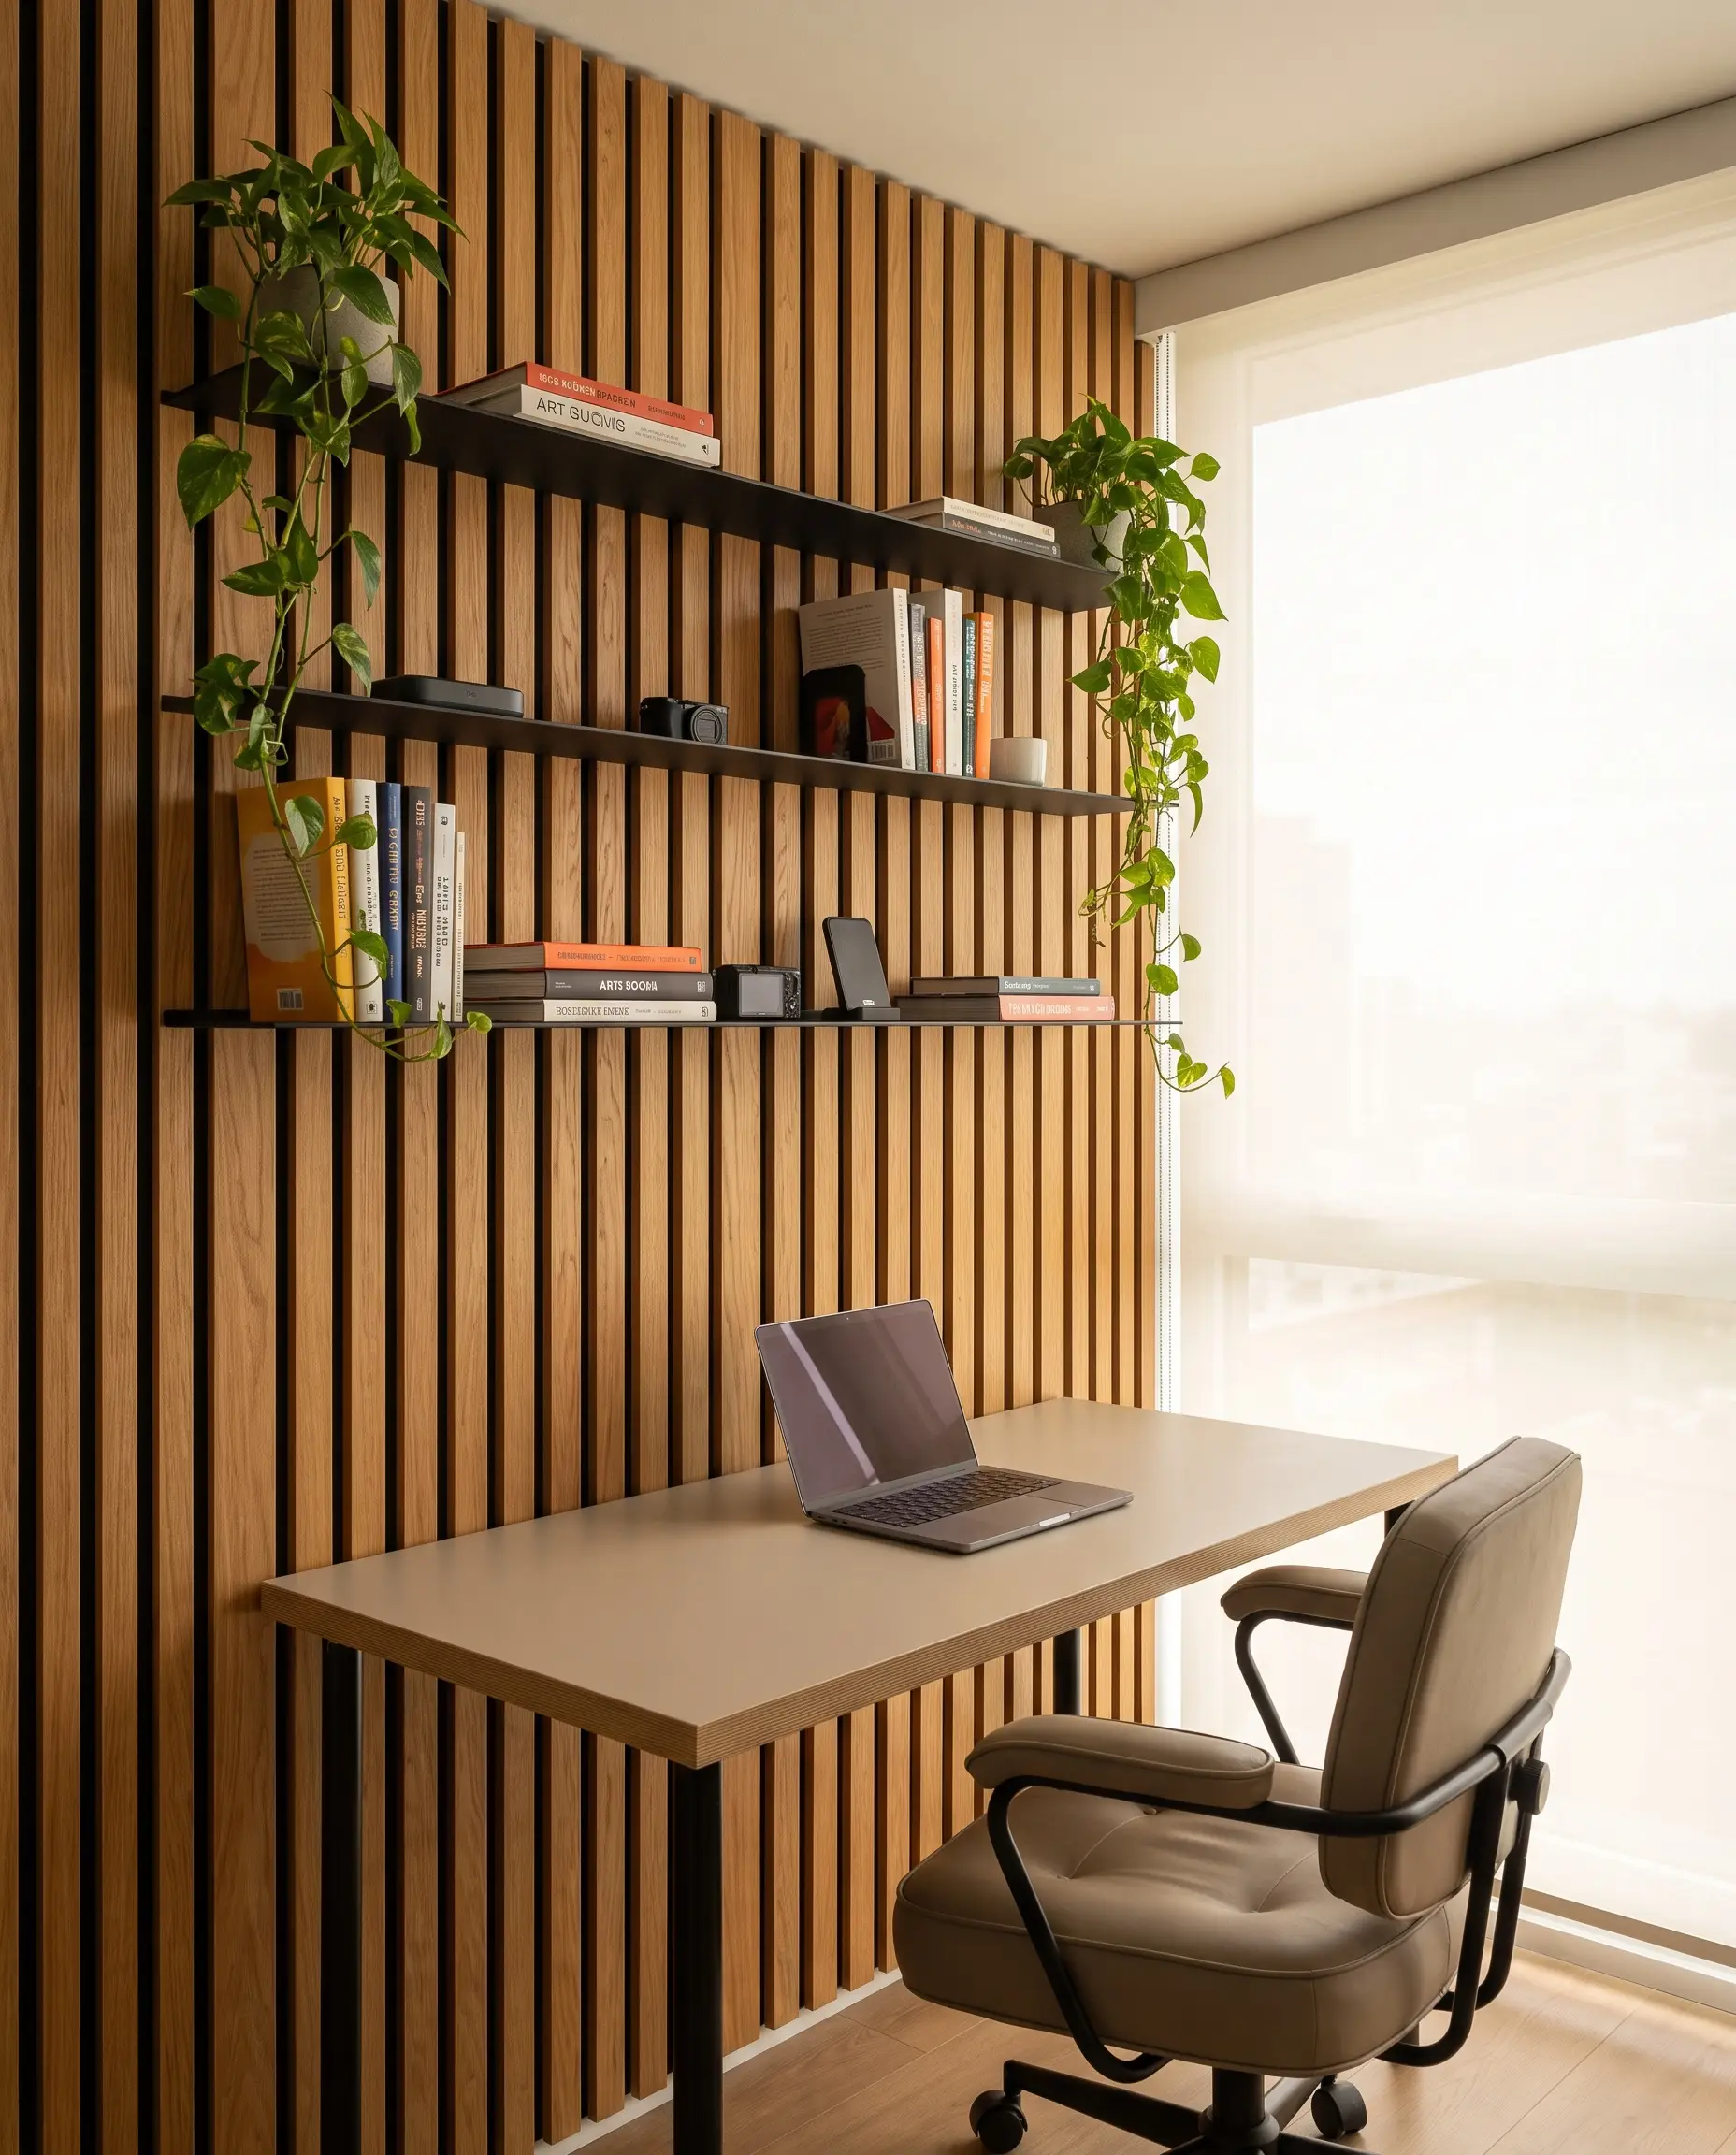
Maximize the utility of your office feature wall by selecting slatted wood panels where the gaps between the slats are specifically spaced to accept custom-cut floating metal shelves. This turns a purely decorative architectural wall into a highly functional, bracket-free storage system.
- Vibe: Functional Minimalism
- Key Material: Wide-gap Acoustic Wood Slats
- Hardware: Friction-fit powder-coated steel shelves
- Utility: Perfect for displaying books, tech, or trailing plants
18. Use Perforated MDF Panels for Tech Ventilation
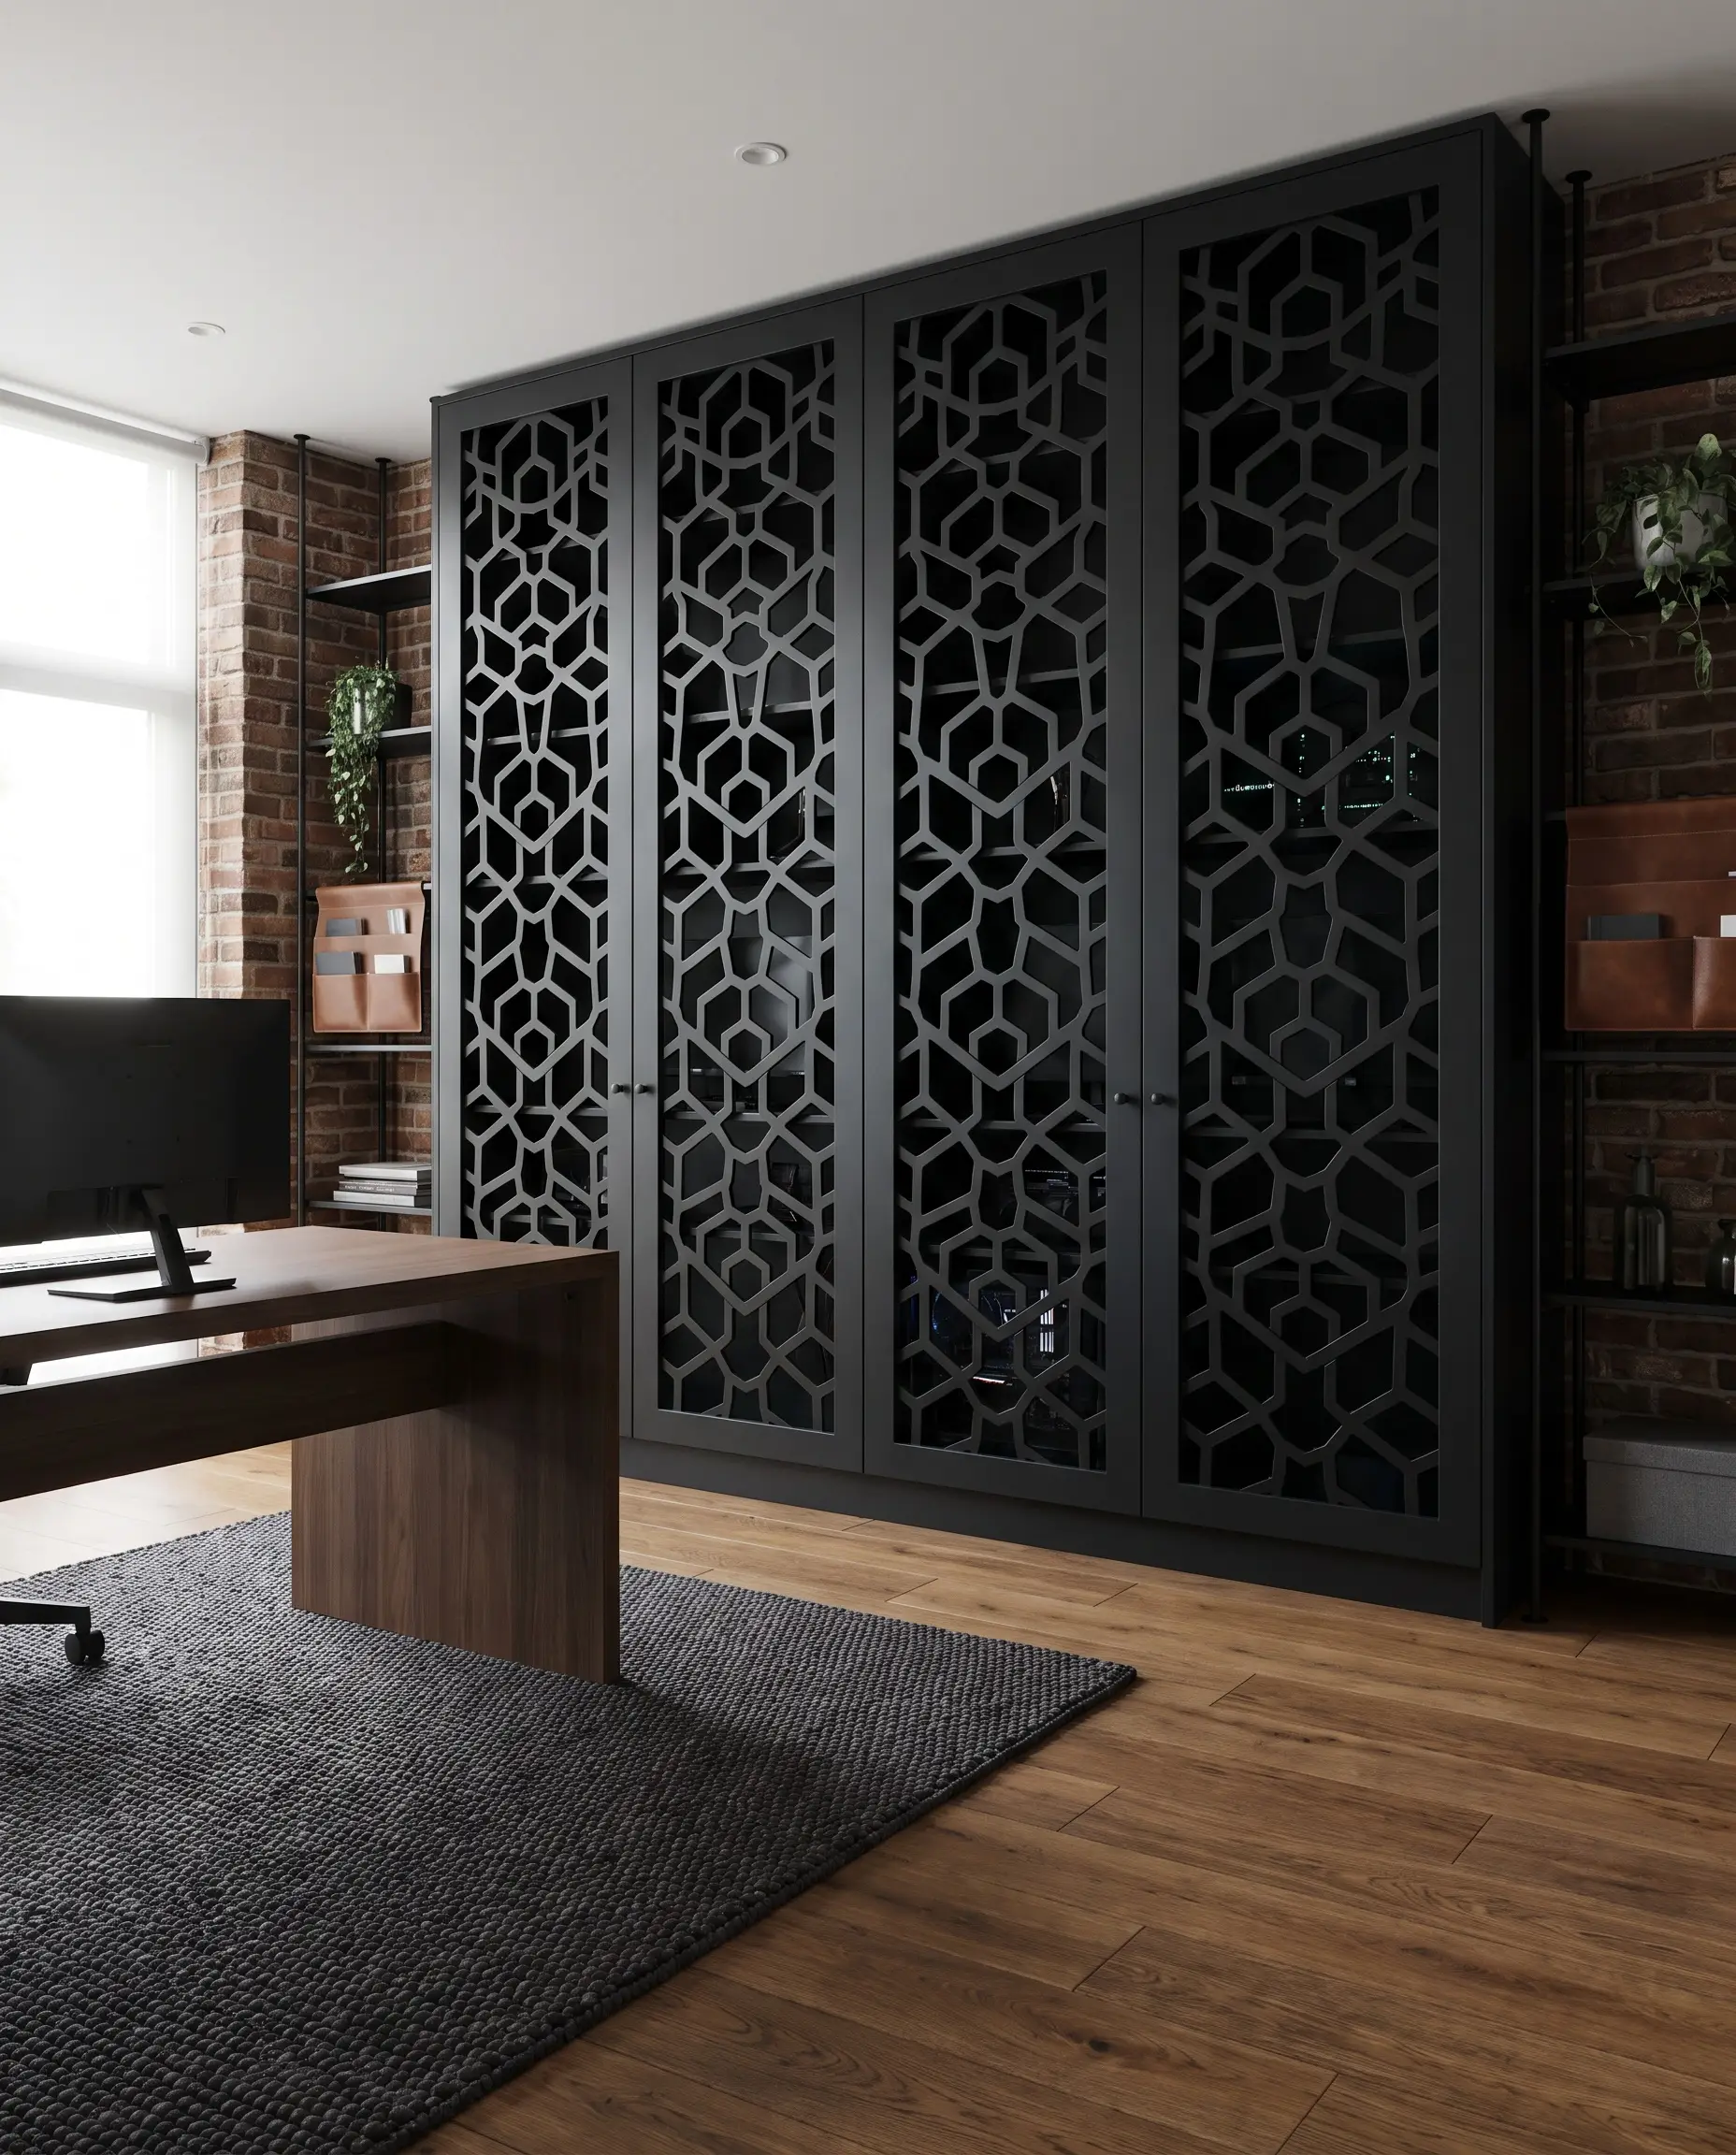
When building a custom built-in office cabinet to hide noisy servers or gaming PCs, swap standard cabinet doors for 3D perforated MDF panels. The geometric cutouts allow critical airflow to prevent electronics from overheating while maintaining a rigorous, design-forward exterior.
- Vibe: Industrial Chic
- Key Material: 3D Perforated MDF Sheets
- Functionality: Passive thermal ventilation
- Finish: Spray-painted matte black to obscure the hardware inside
High-Moisture Zones: Bathrooms & Kitchens
Material science dictates everything in high-moisture zones; installing standard MDF or plant-fiber bagasse in a humid bathroom or a messy kitchen will result in immediate warping and mold. You must pivot strictly to engineered, water-resistant substrates that can survive these harsh environments without sacrificing tactile beauty.
19. Upgrade a Kitchen Island with Washable PVC Fluting
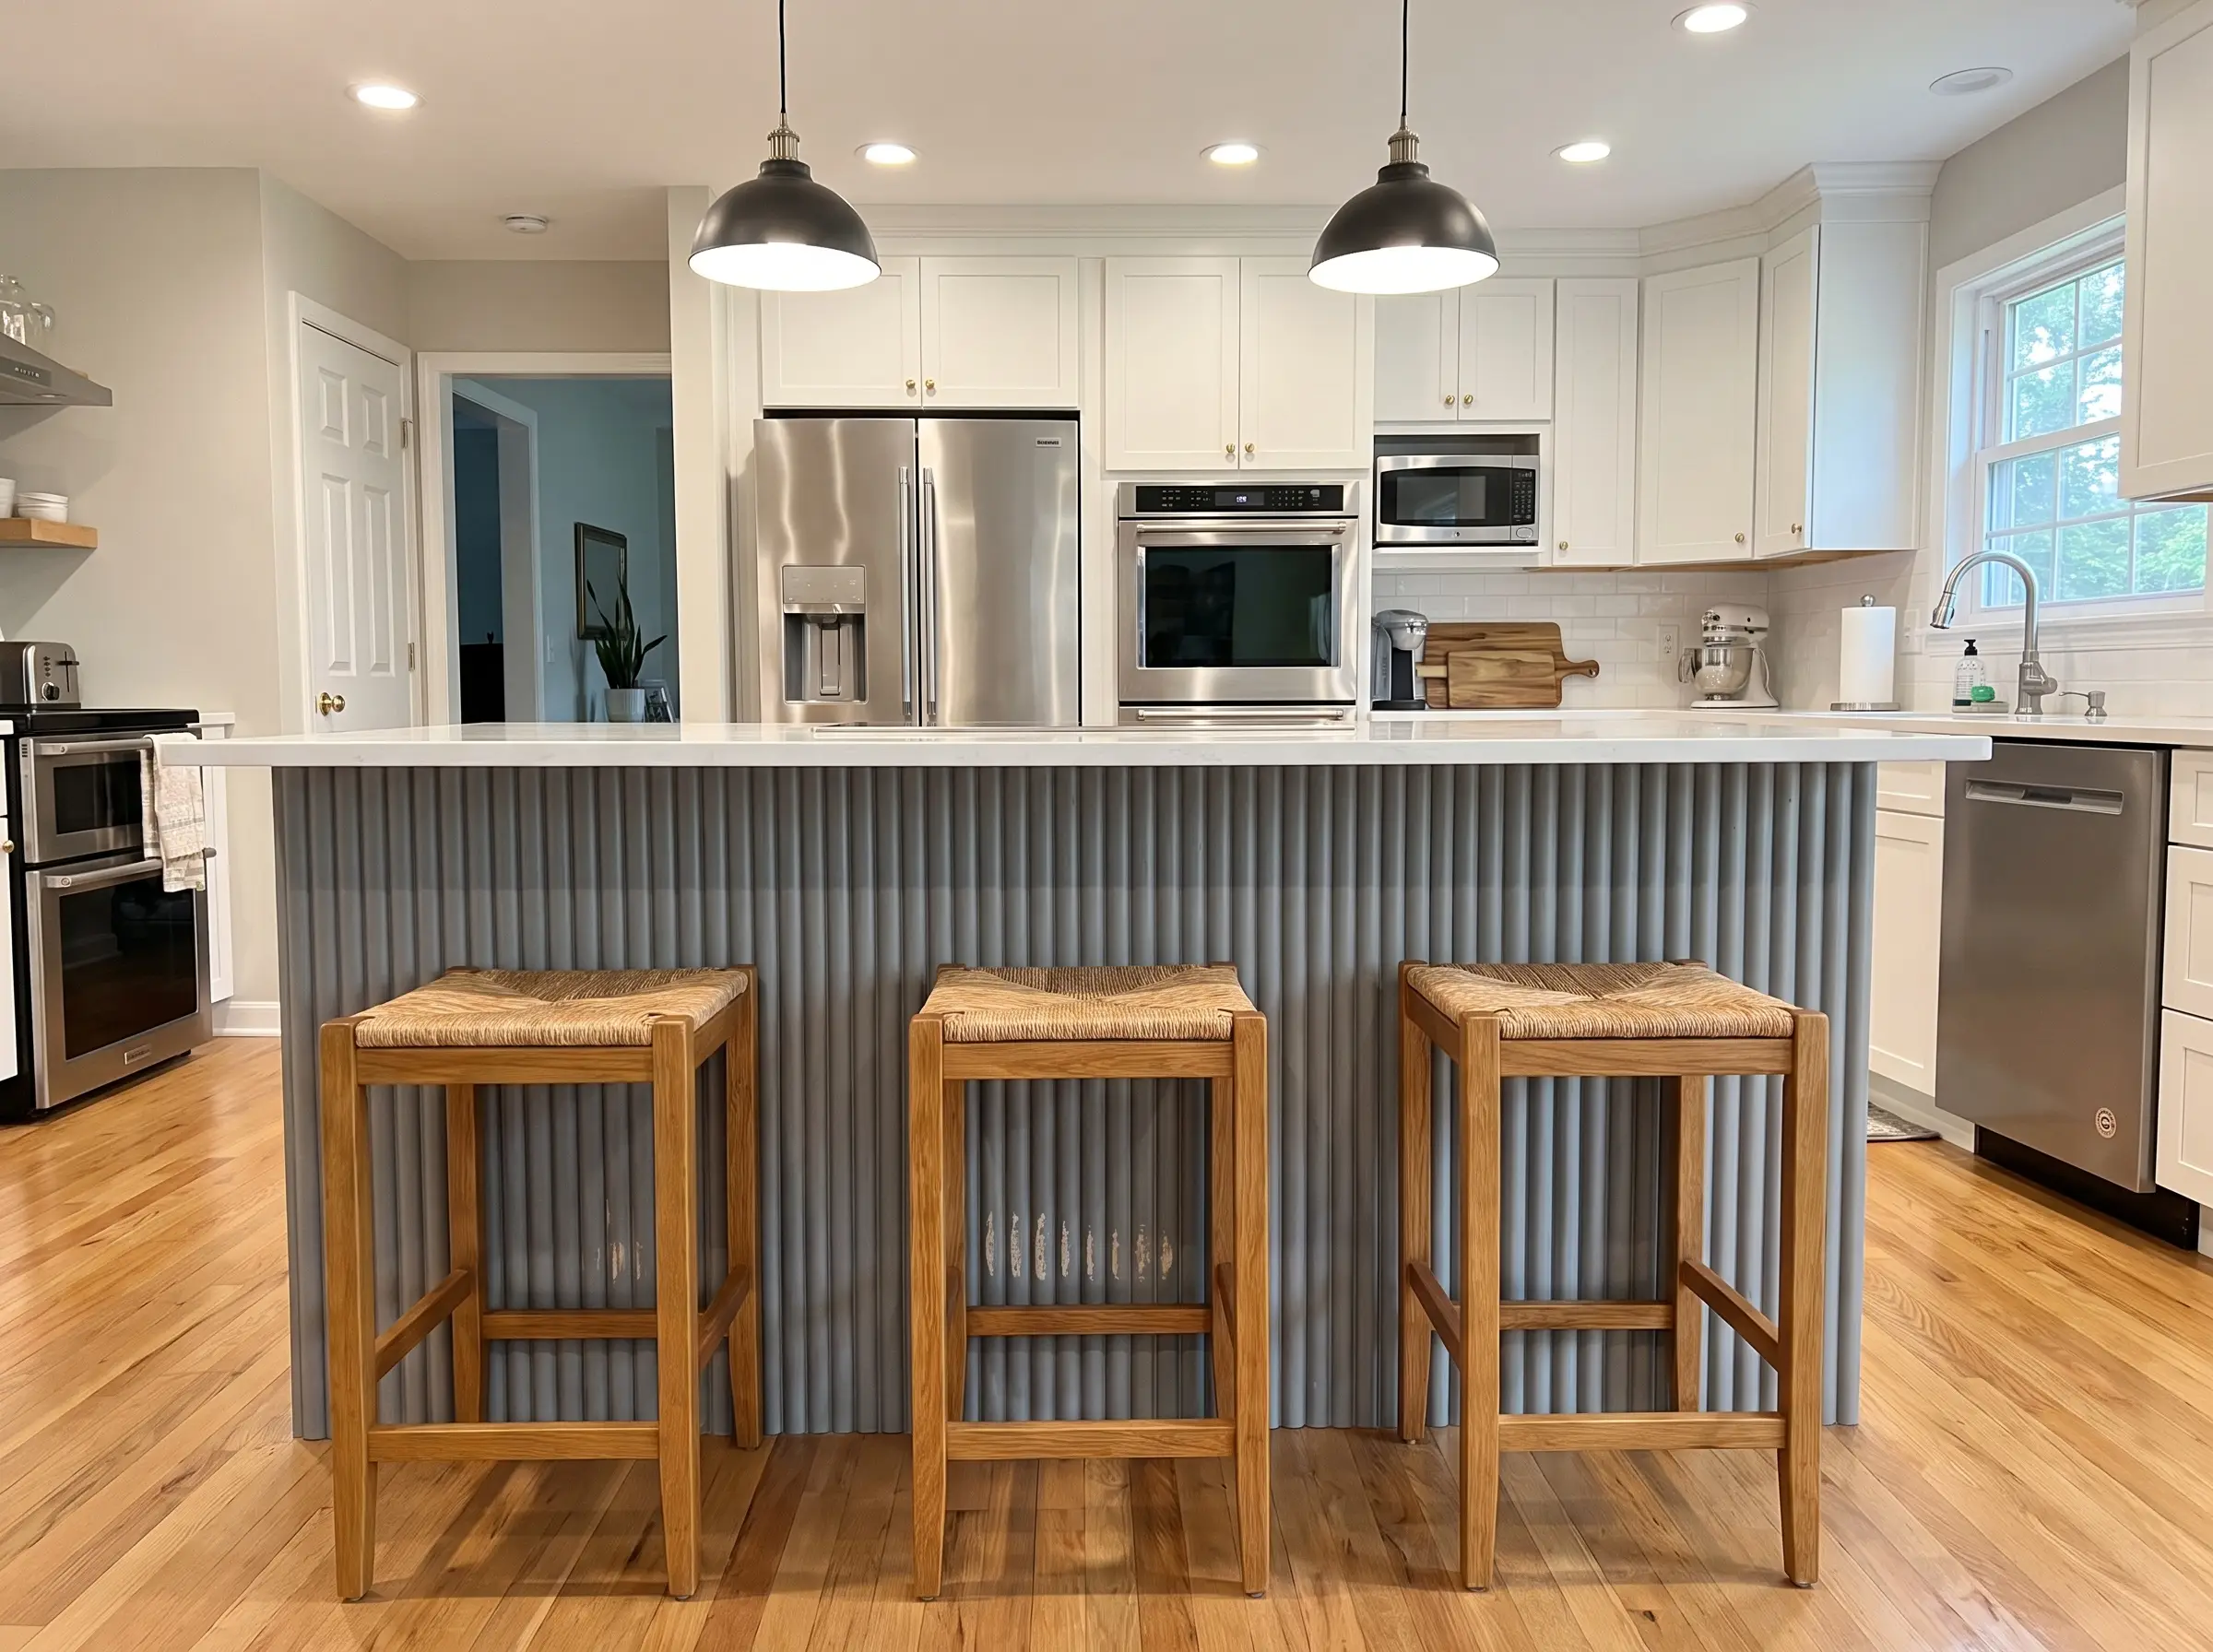
The back panel of a kitchen island constantly suffers from scuff marks and kicks from barstools. Protect and upgrade this high-traffic zone by wrapping it in heavy-duty, scrubbable PVC 3D fluted panels that easily wipe clean with a damp cloth.
- Vibe: Modern Transitional
- Key Material: Scrubbable PVC Fluted Panels
- Durability: High impact and stain resistance
- Maintenance: Cleans easily with mild soap and water
20. Use Waterproof WPC Panels in a Powder Room
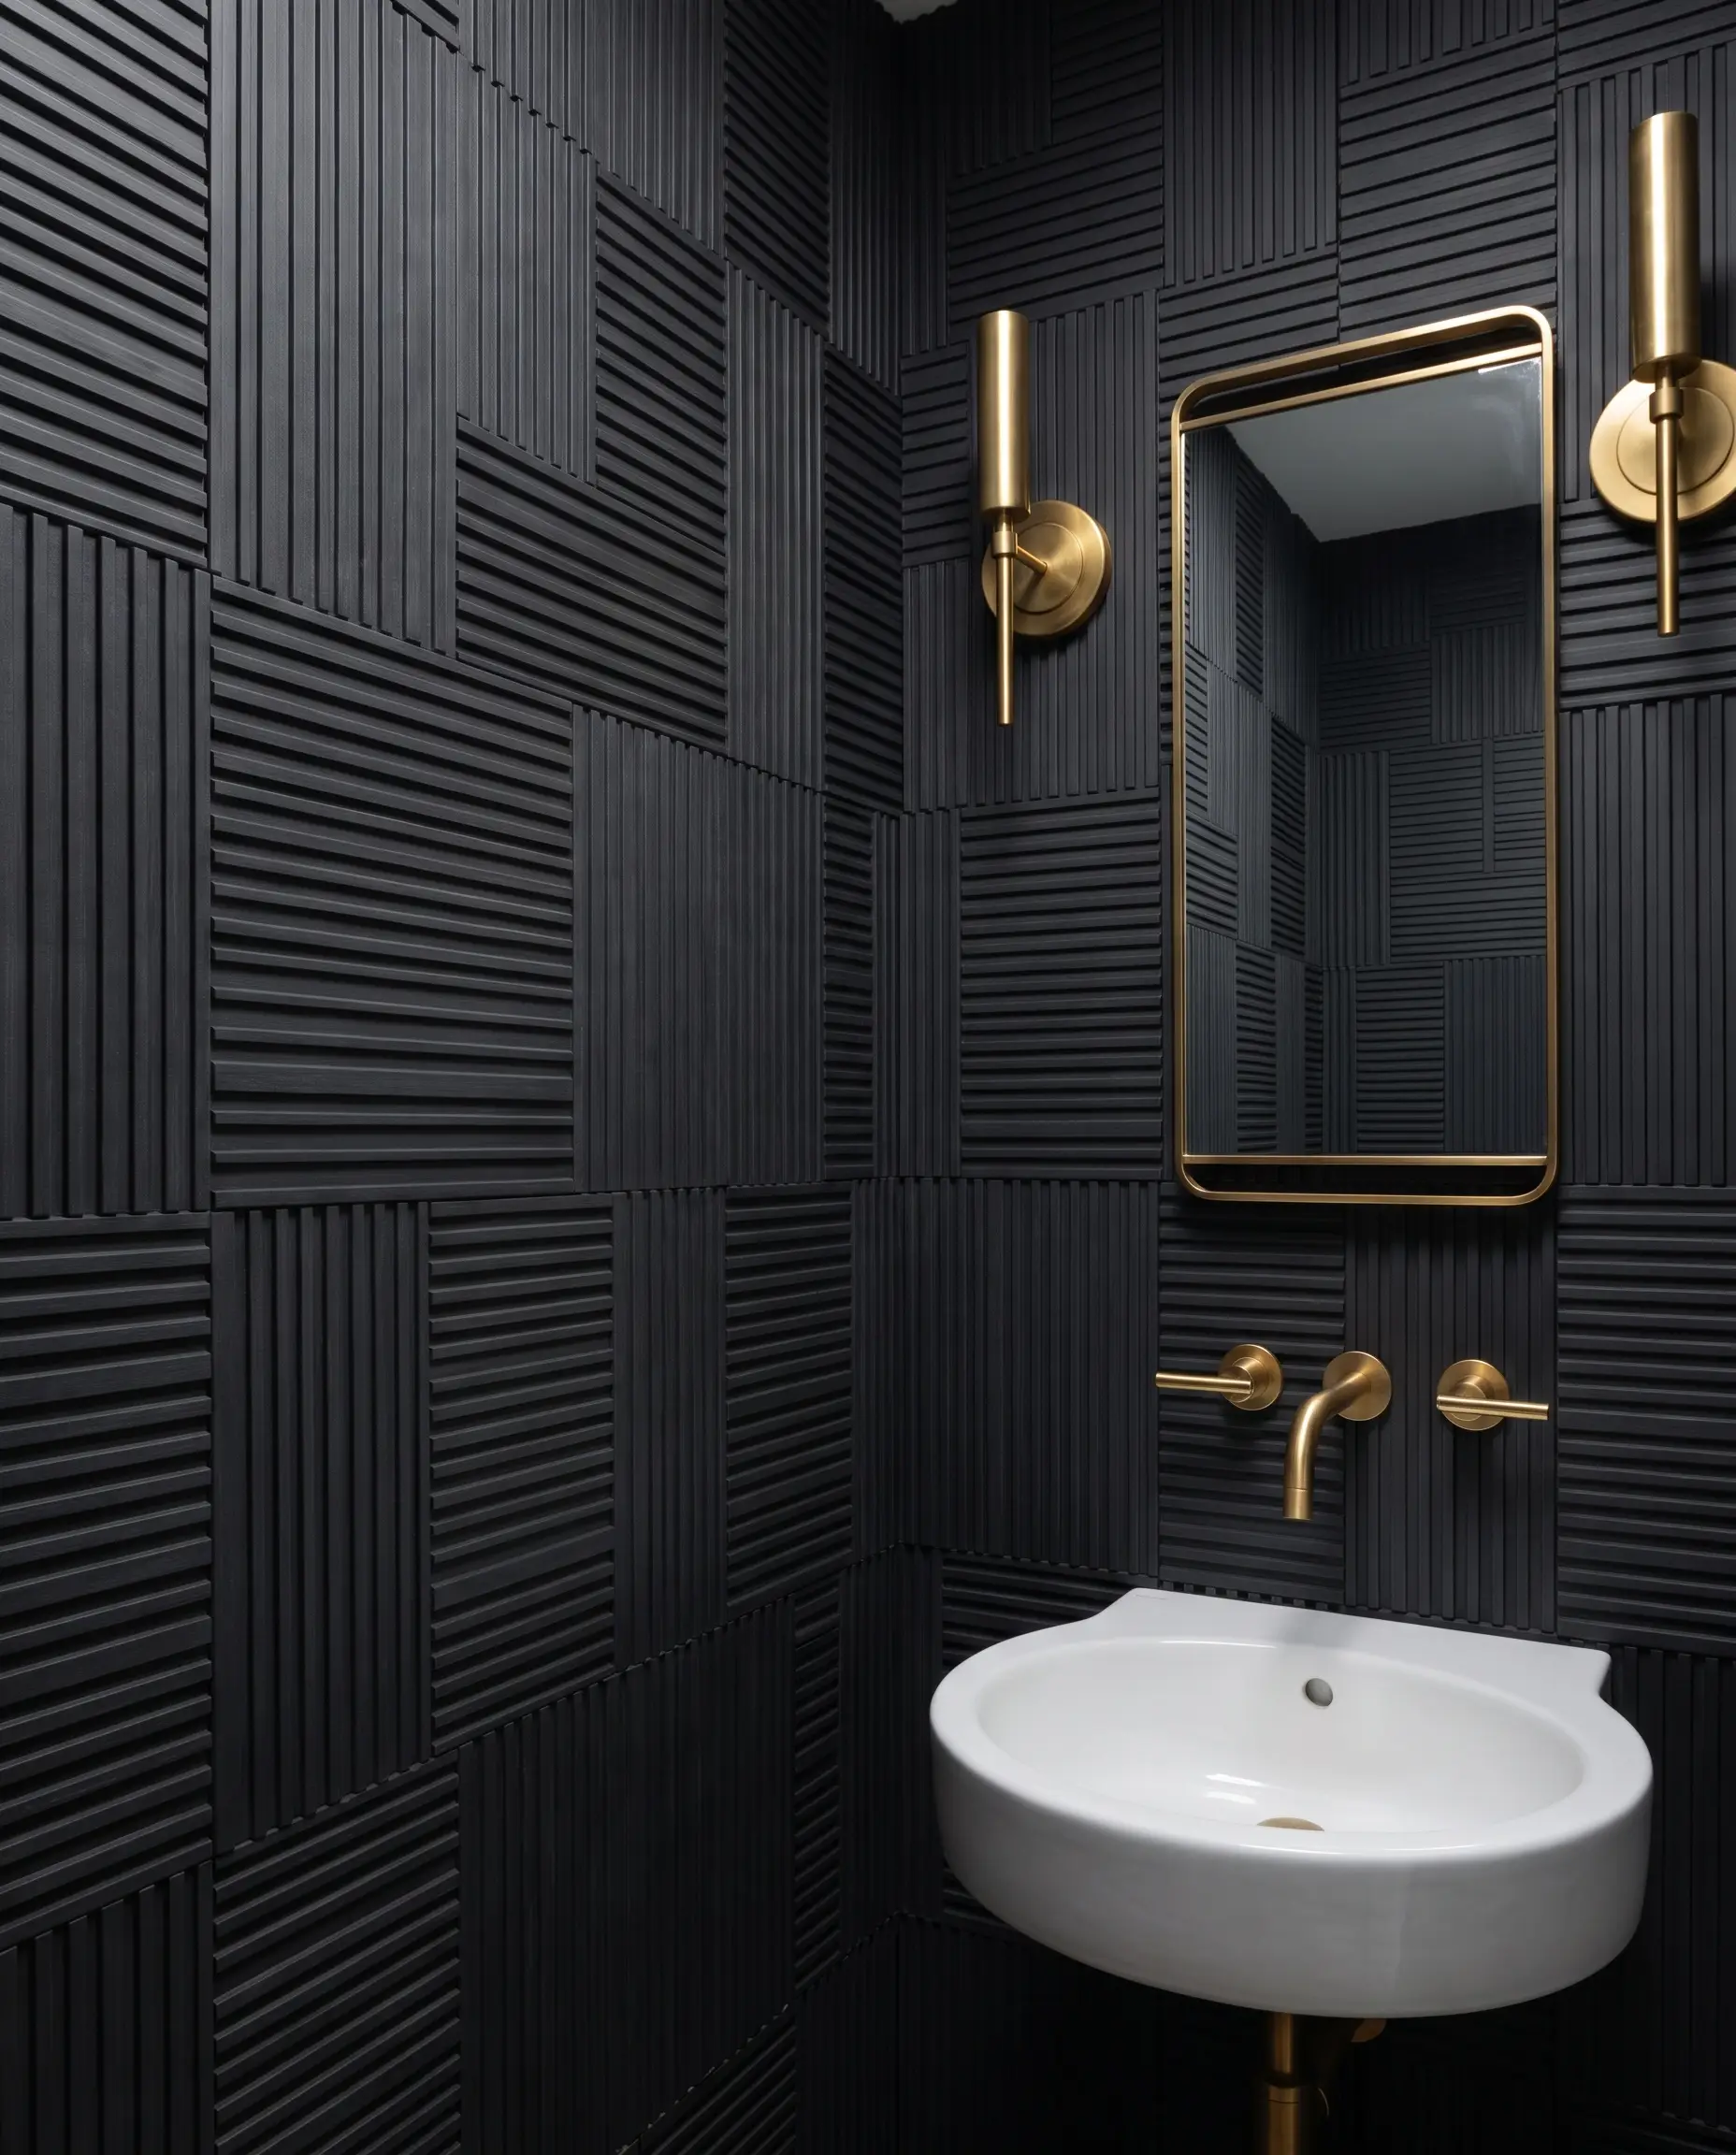
Transform a tiny, sterile half-bath into an immersive jewel box by cladding all four walls in dark, moisture-resistant WPC panels. The rich architectural texture absorbs light, while brass plumbing fixtures pop violently against the dark grooves for maximum visual impact.
- Vibe: Moody Jewel Box
- Key Material: Waterproof WPC (Wood Plastic Composite) Panels
- Contrast Pairing: Unlacquered brass faucets and sconces
- Color Tone: Deep walnut or matte charcoal
21. Create a Faux-Marble Backsplash with UV PVC Sheets
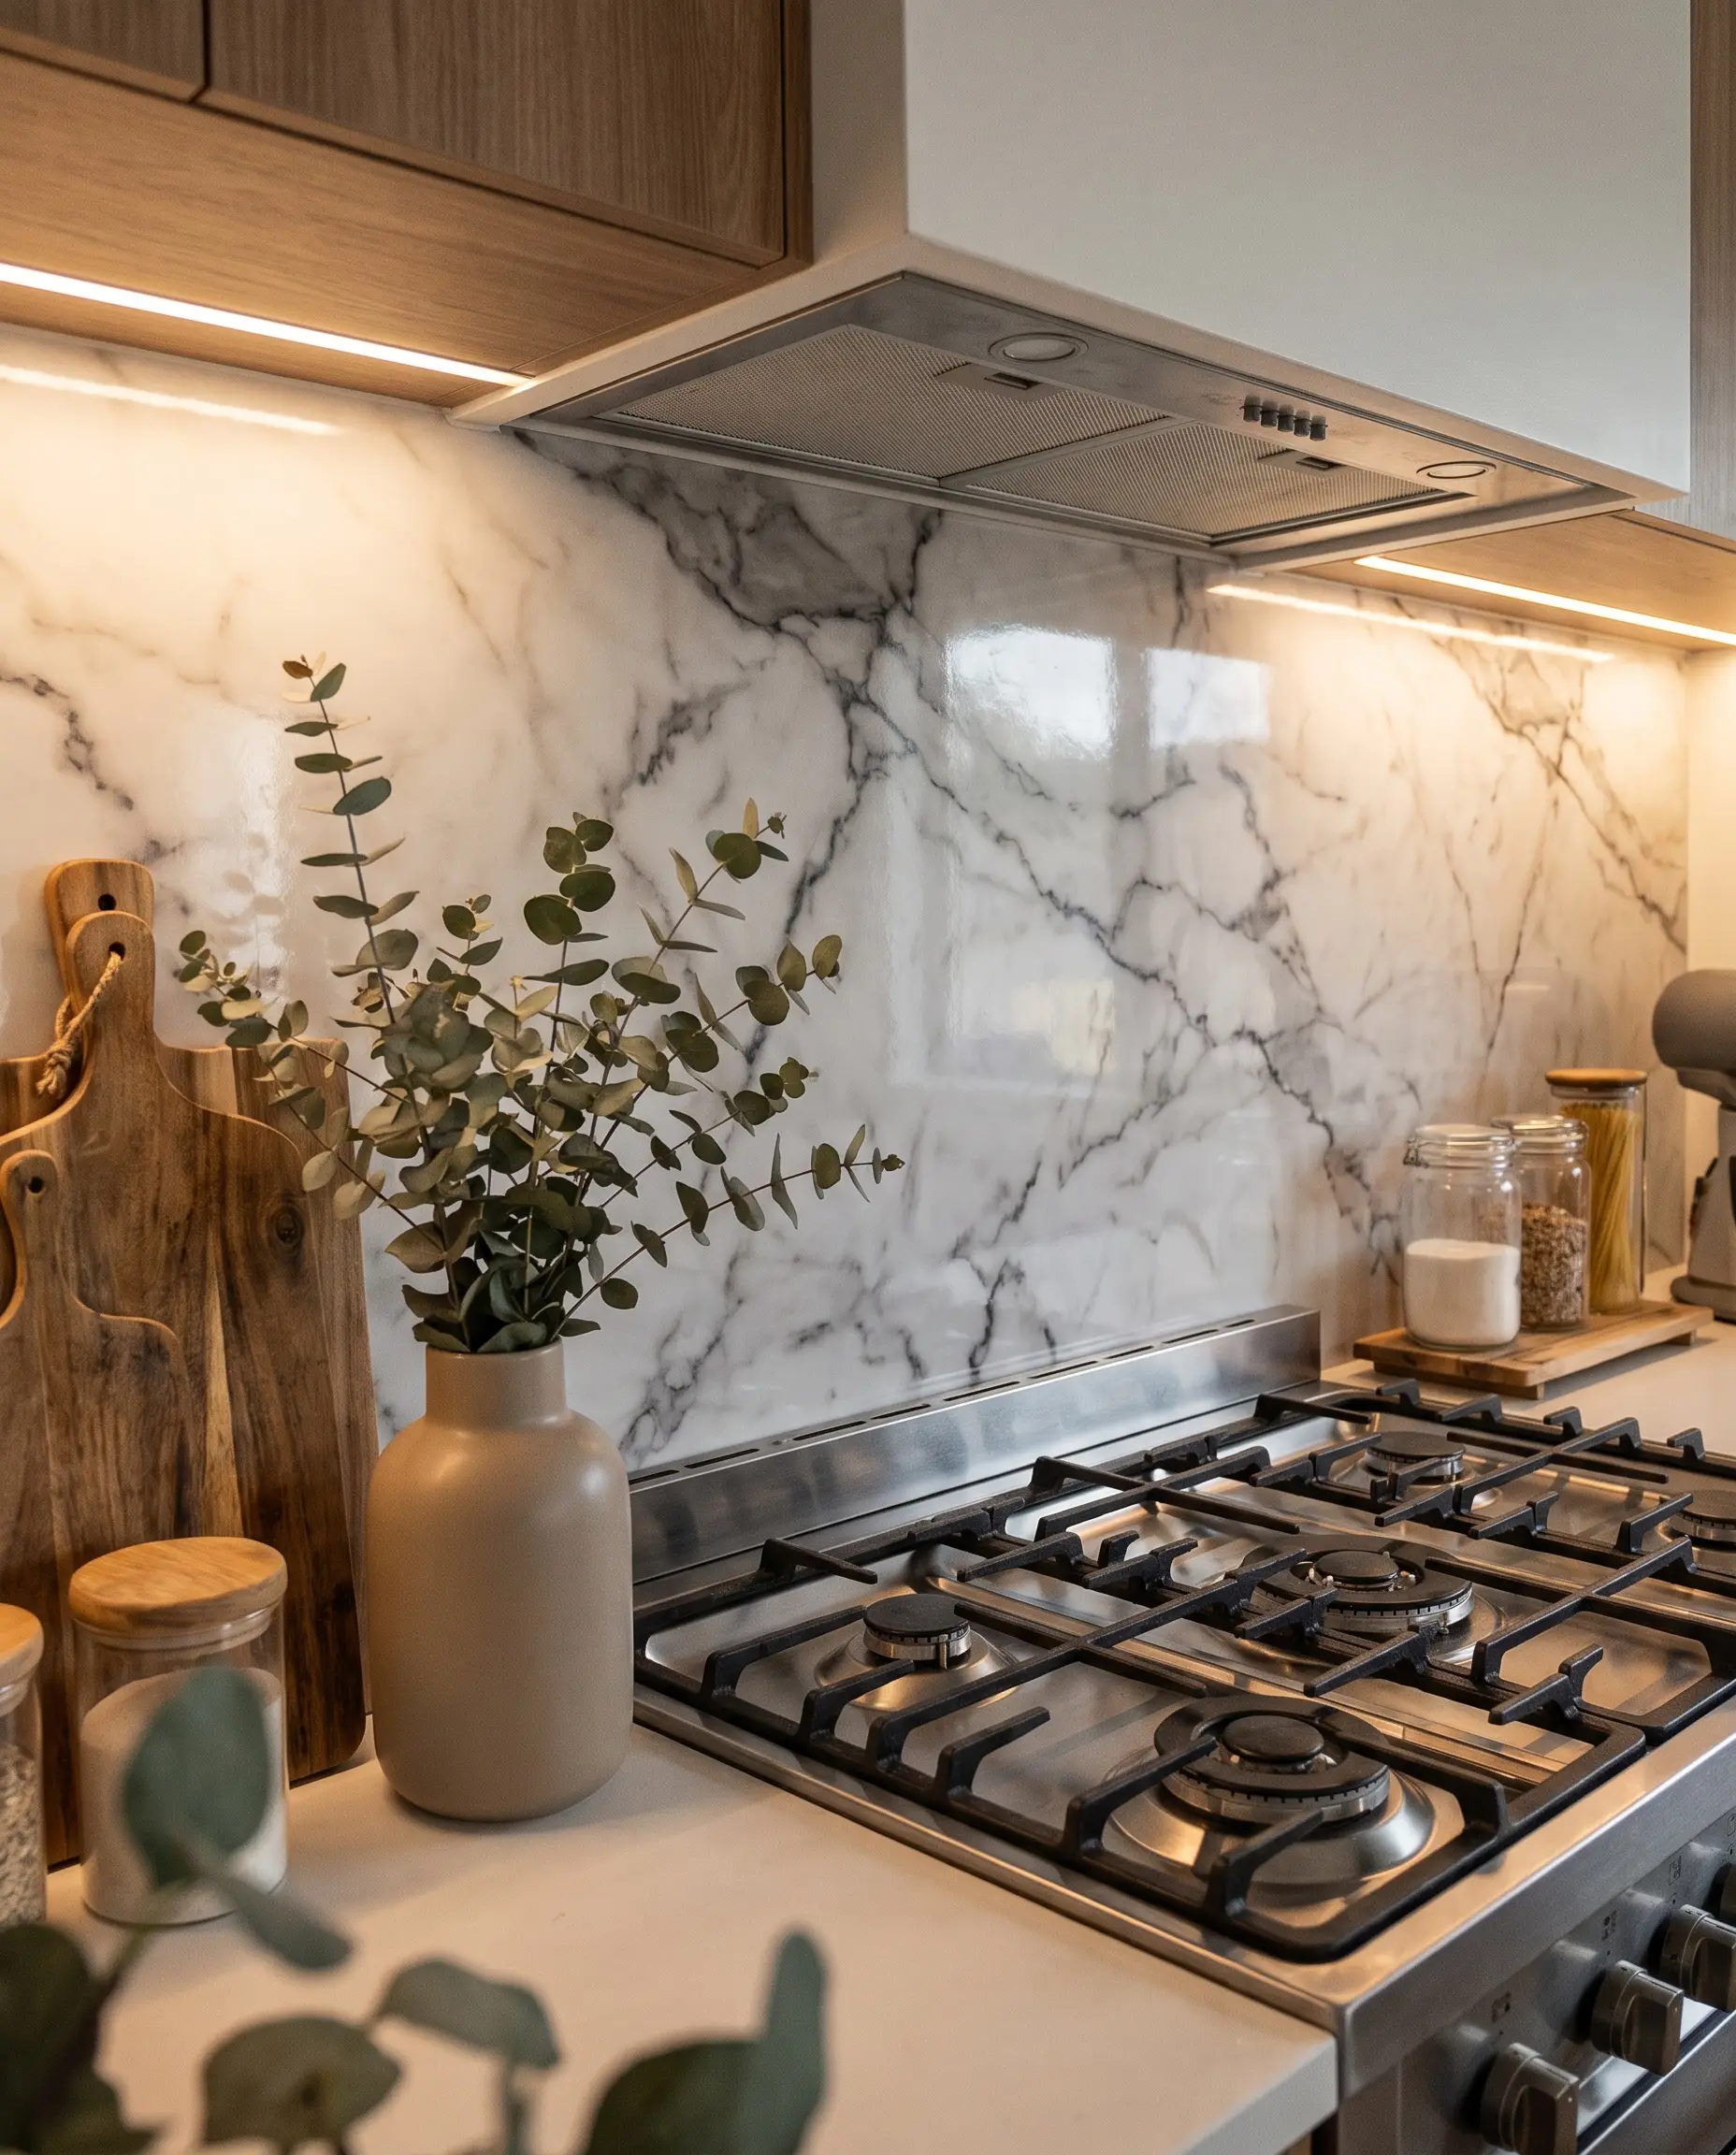
Utilize ultra-thin, 3D-textured UV PVC sheets that flawlessly mimic the deep veining and polished depth of natural marble for a high-end kitchen backsplash. This execution delivers the upscale look of a solid stone slab at a fraction of the cost and weight.
- Vibe: Accessible Luxury
- Key Material: 3D UV PVC Marble-Effect Sheets
- Installation: Cuts easily with a utility knife
While highly durable, PVC sheets must be kept at a safe distance from open gas flames. Always consult your range manufacturer’s clearance specifications before installing polymer-based backsplashes.
Hackrea Safety Warning
22. Clad a Freestanding Tub Surround in Slatted Teak
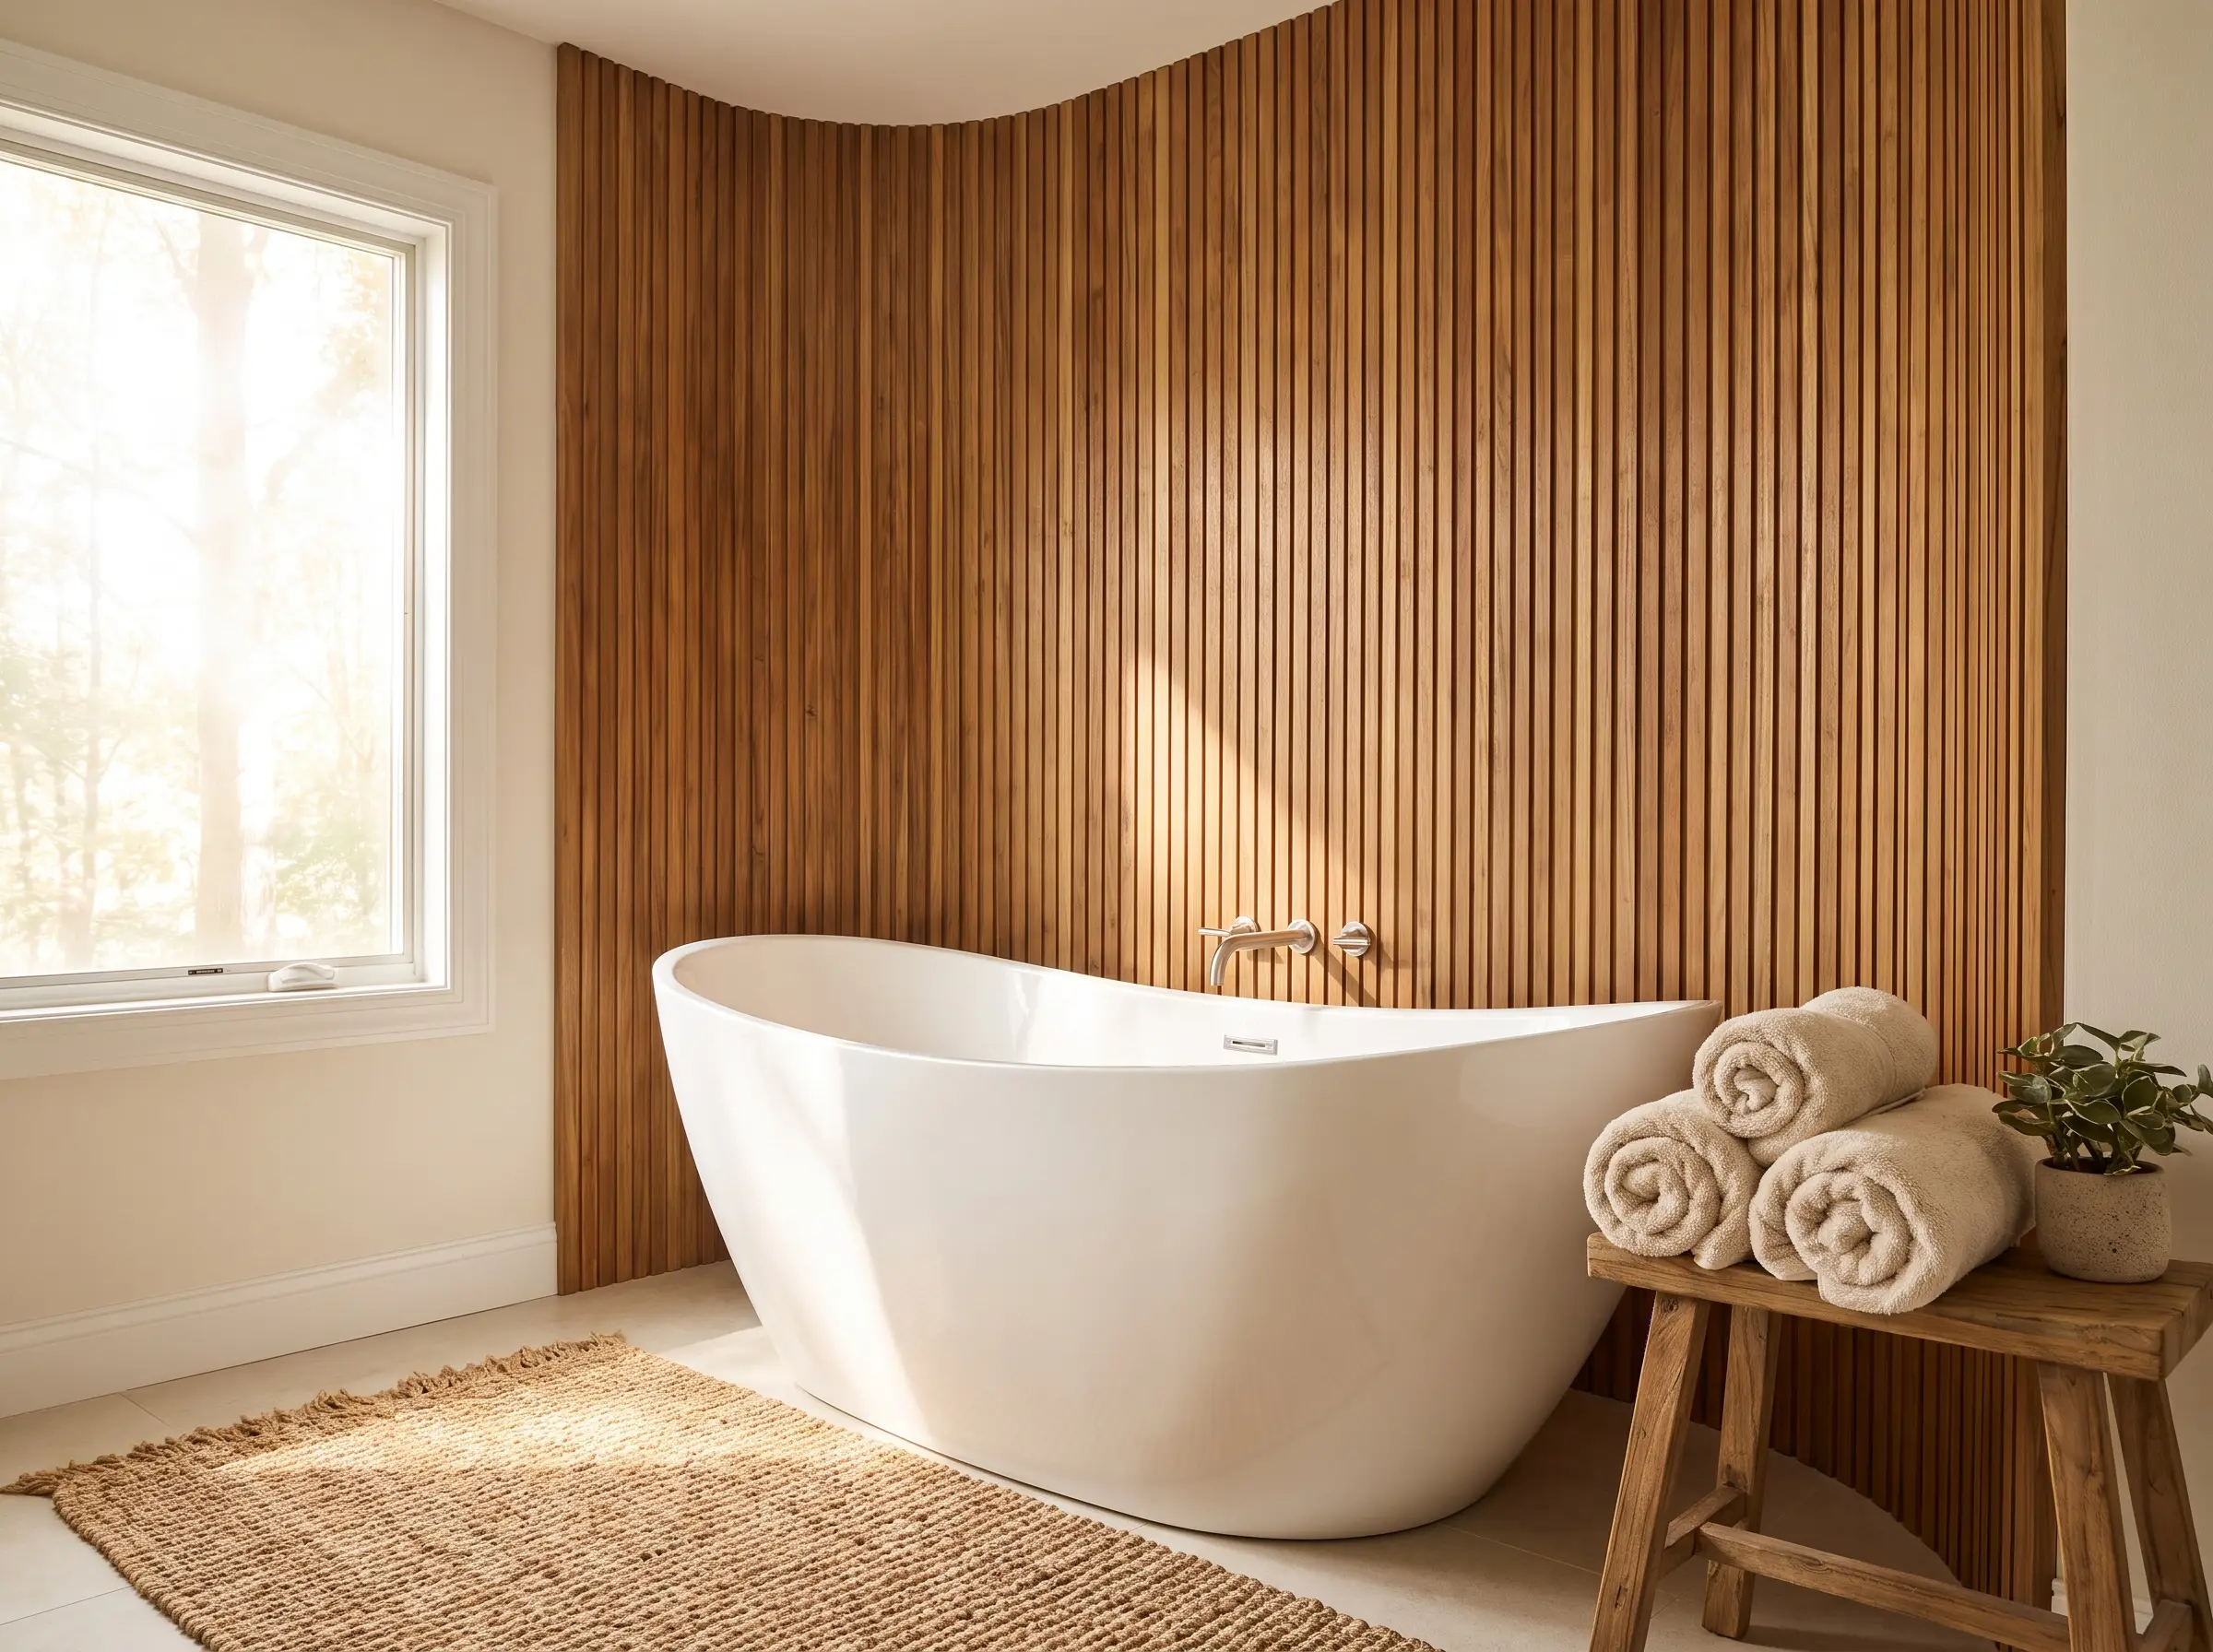
For a spa-like, organic modern bathroom retreat, install slatted teak wood panels on the wall directly behind a freestanding soaking tub. Teak’s natural oils provide baseline water resistance, bringing authentic, tactile warmth into an otherwise cold, tile-heavy room.
- Vibe: Organic Modern / Spa Retreat
- Key Material: Marine-grade or treated Slatted Teak
- Maintenance: Requires periodic oiling to maintain luster
Even with naturally water-resistant woods like teak, you must reinforce the material by sealing it with a high-quality, mold-resistant marine varnish to prevent long-term moisture damage.
Hackrea Pro-Tip
The Execution Checklist: Preparing for Your 3D Panel Installation
Before you purchase a single panel or open a tube of adhesive, you must confront the physical reality of the project. A flawless architectural finish requires rigorous preparation, precise measurement, and the right toolkit.
- Calculate with a Buffer: Always measure your total square footage and add a mandatory 15% to account for waste, complex cuts around outlets, and pattern matching.
- Secure the Right Adhesive: For permanent, rigid holds, insist on a premium VOC-free construction adhesive like Liquid Nails to prevent off-gassing in enclosed spaces.
- Establish a Plumb Baseline: Never trust your floor or ceiling to be perfectly level. Always use a laser level to set your bottom row; if the first panel is off by a millimeter, the top row will be visibly crooked.
- Plan for Electrical Depth: Thick 3D panels will swallow your wall outlets. Purchase and install electrical box extenders so your switches and plugs sit flush with the new textured surface.
- Ready for More? Once your walls are prepped, explore our comprehensive Accent Wall Ideas guide to finalize your aesthetic direction.

The Hackrea Style Desk treats interior decoration as an exact visual science. Rather than focusing on demolition or floor plans, this desk masters the art of color theory, undertone matching, material pairings, and spatial proportion. From balancing the visual weight of mixed metals to finding the perfect bridging tone between disparate wood species, this desk provides the rigorous aesthetic rules needed to achieve high-end, editorial-quality harmony in any space.