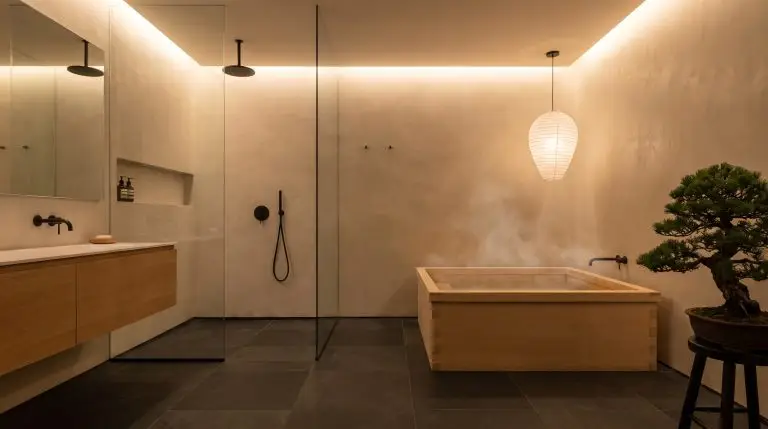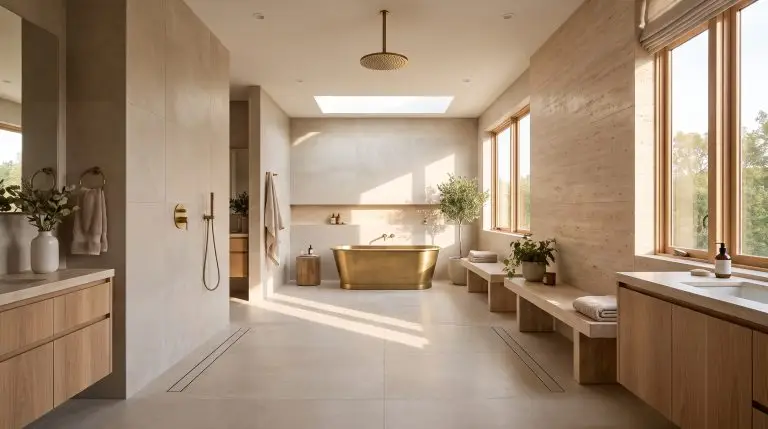
The allure of a doorless walk-in shower is undeniable—it offers the visual continuity of a high-end spa and the functional brilliance of barrier-free living. Yet, stripping away the glass enclosure often triggers immediate anxiety about water migrating onto custom vanities and the dreaded mid-shower cold draft. Successfully executing an open shower requires far more than just laying beautiful tile; it demands a rigorous understanding of spatial geometry, precise drainage slopes, and strategic splash deflection.
By engineering the exact splash radius, integrating advanced waterproofing ecosystems, and mastering thermal comfort, we can bridge the gap between high-end aesthetics and flawless bathroom physics.
Mastering the Layout & Spatial Flow
Removing the door from a standard three-by-three-foot stall guarantees a flooded bathroom. A true doorless shower requires a dedicated architectural footprint, typically demanding a minimum 60-inch depth to properly contain the spray. By manipulating the room’s structural layout, we can capture water efficiently while maintaining a sprawling, barrier-free aesthetic.
The True Wet Room Configuration
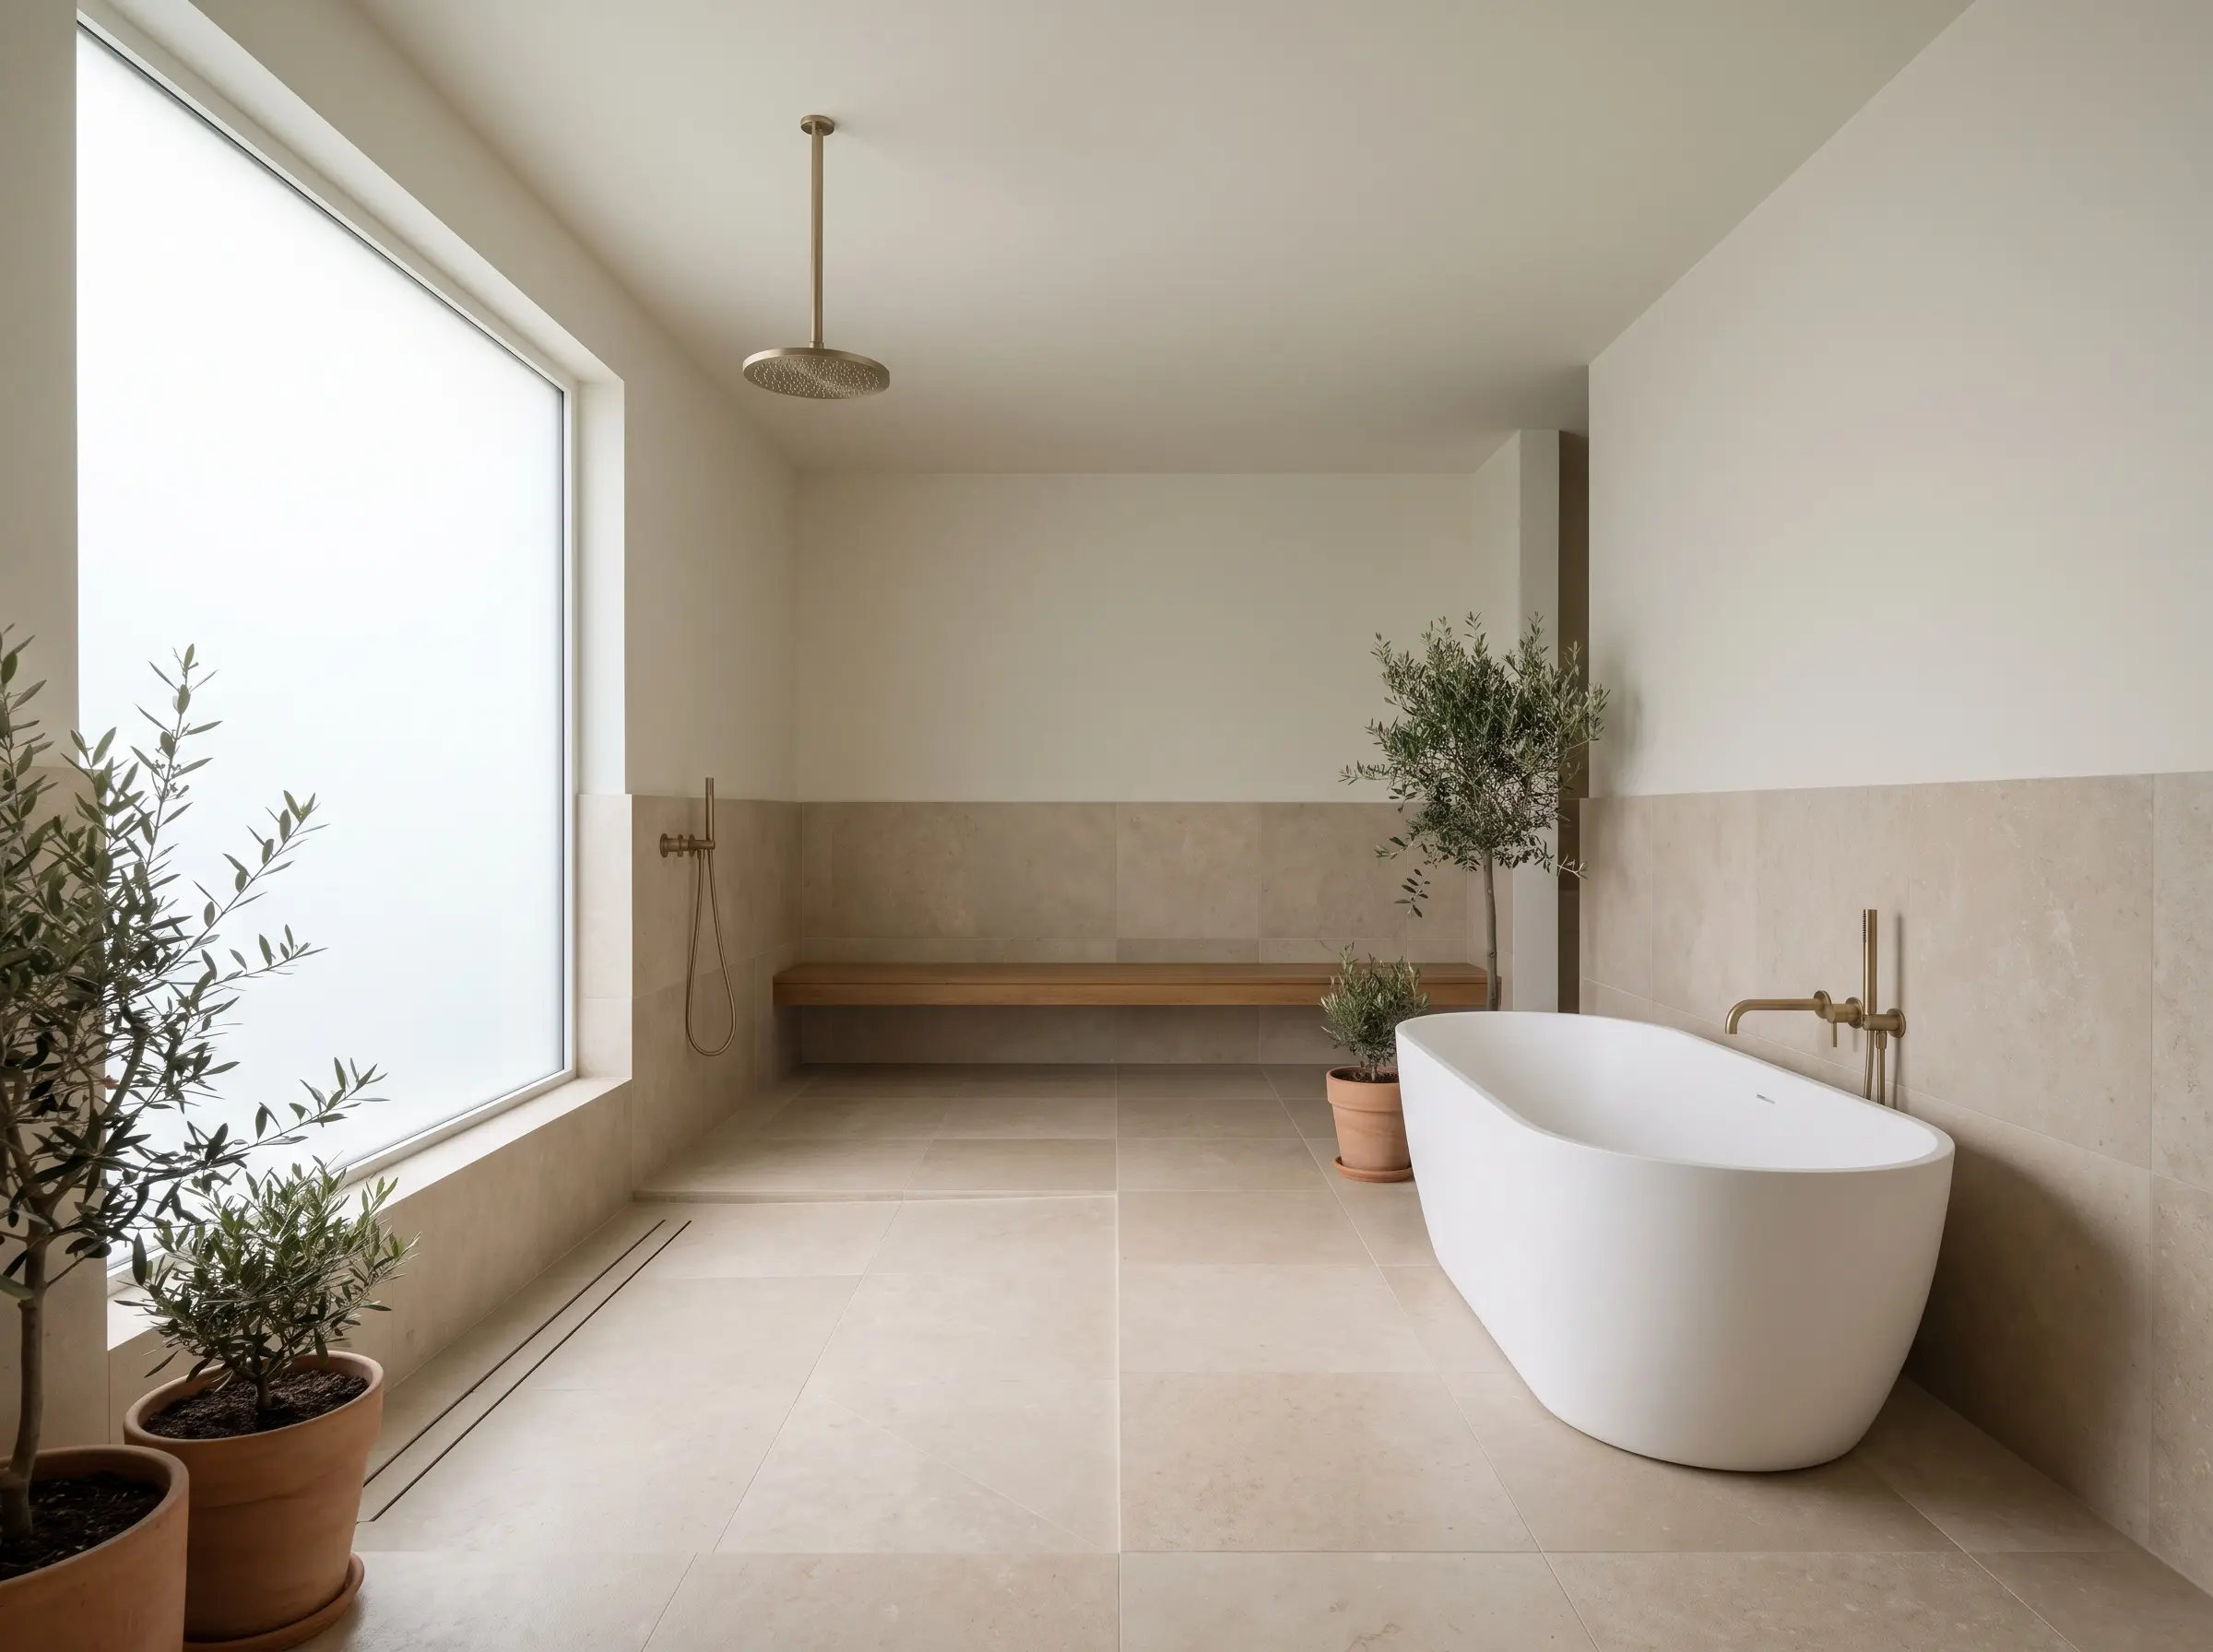
By waterproofing the entire spatial envelope, this layout eliminates borders entirely, allowing a freestanding soaking tub to sit directly inside the shower zone. This approach maximizes visual square footage while consolidating all wet activities into one highly engineered quadrant.
- Vibe: High-End European Spa
- Core Footprint: Minimum 60-inch depth and 72-inch width required for dual-use functionality.
- Wall Color Recommendation: Benjamin Moore Swiss Coffee (A warm, creamy white that softens the hard edges of a tiled room).
- Material Match: High-performance Schluter-Kerdi waterproofing membrane behind all surfaces.
The L-Shaped Corner Baffle
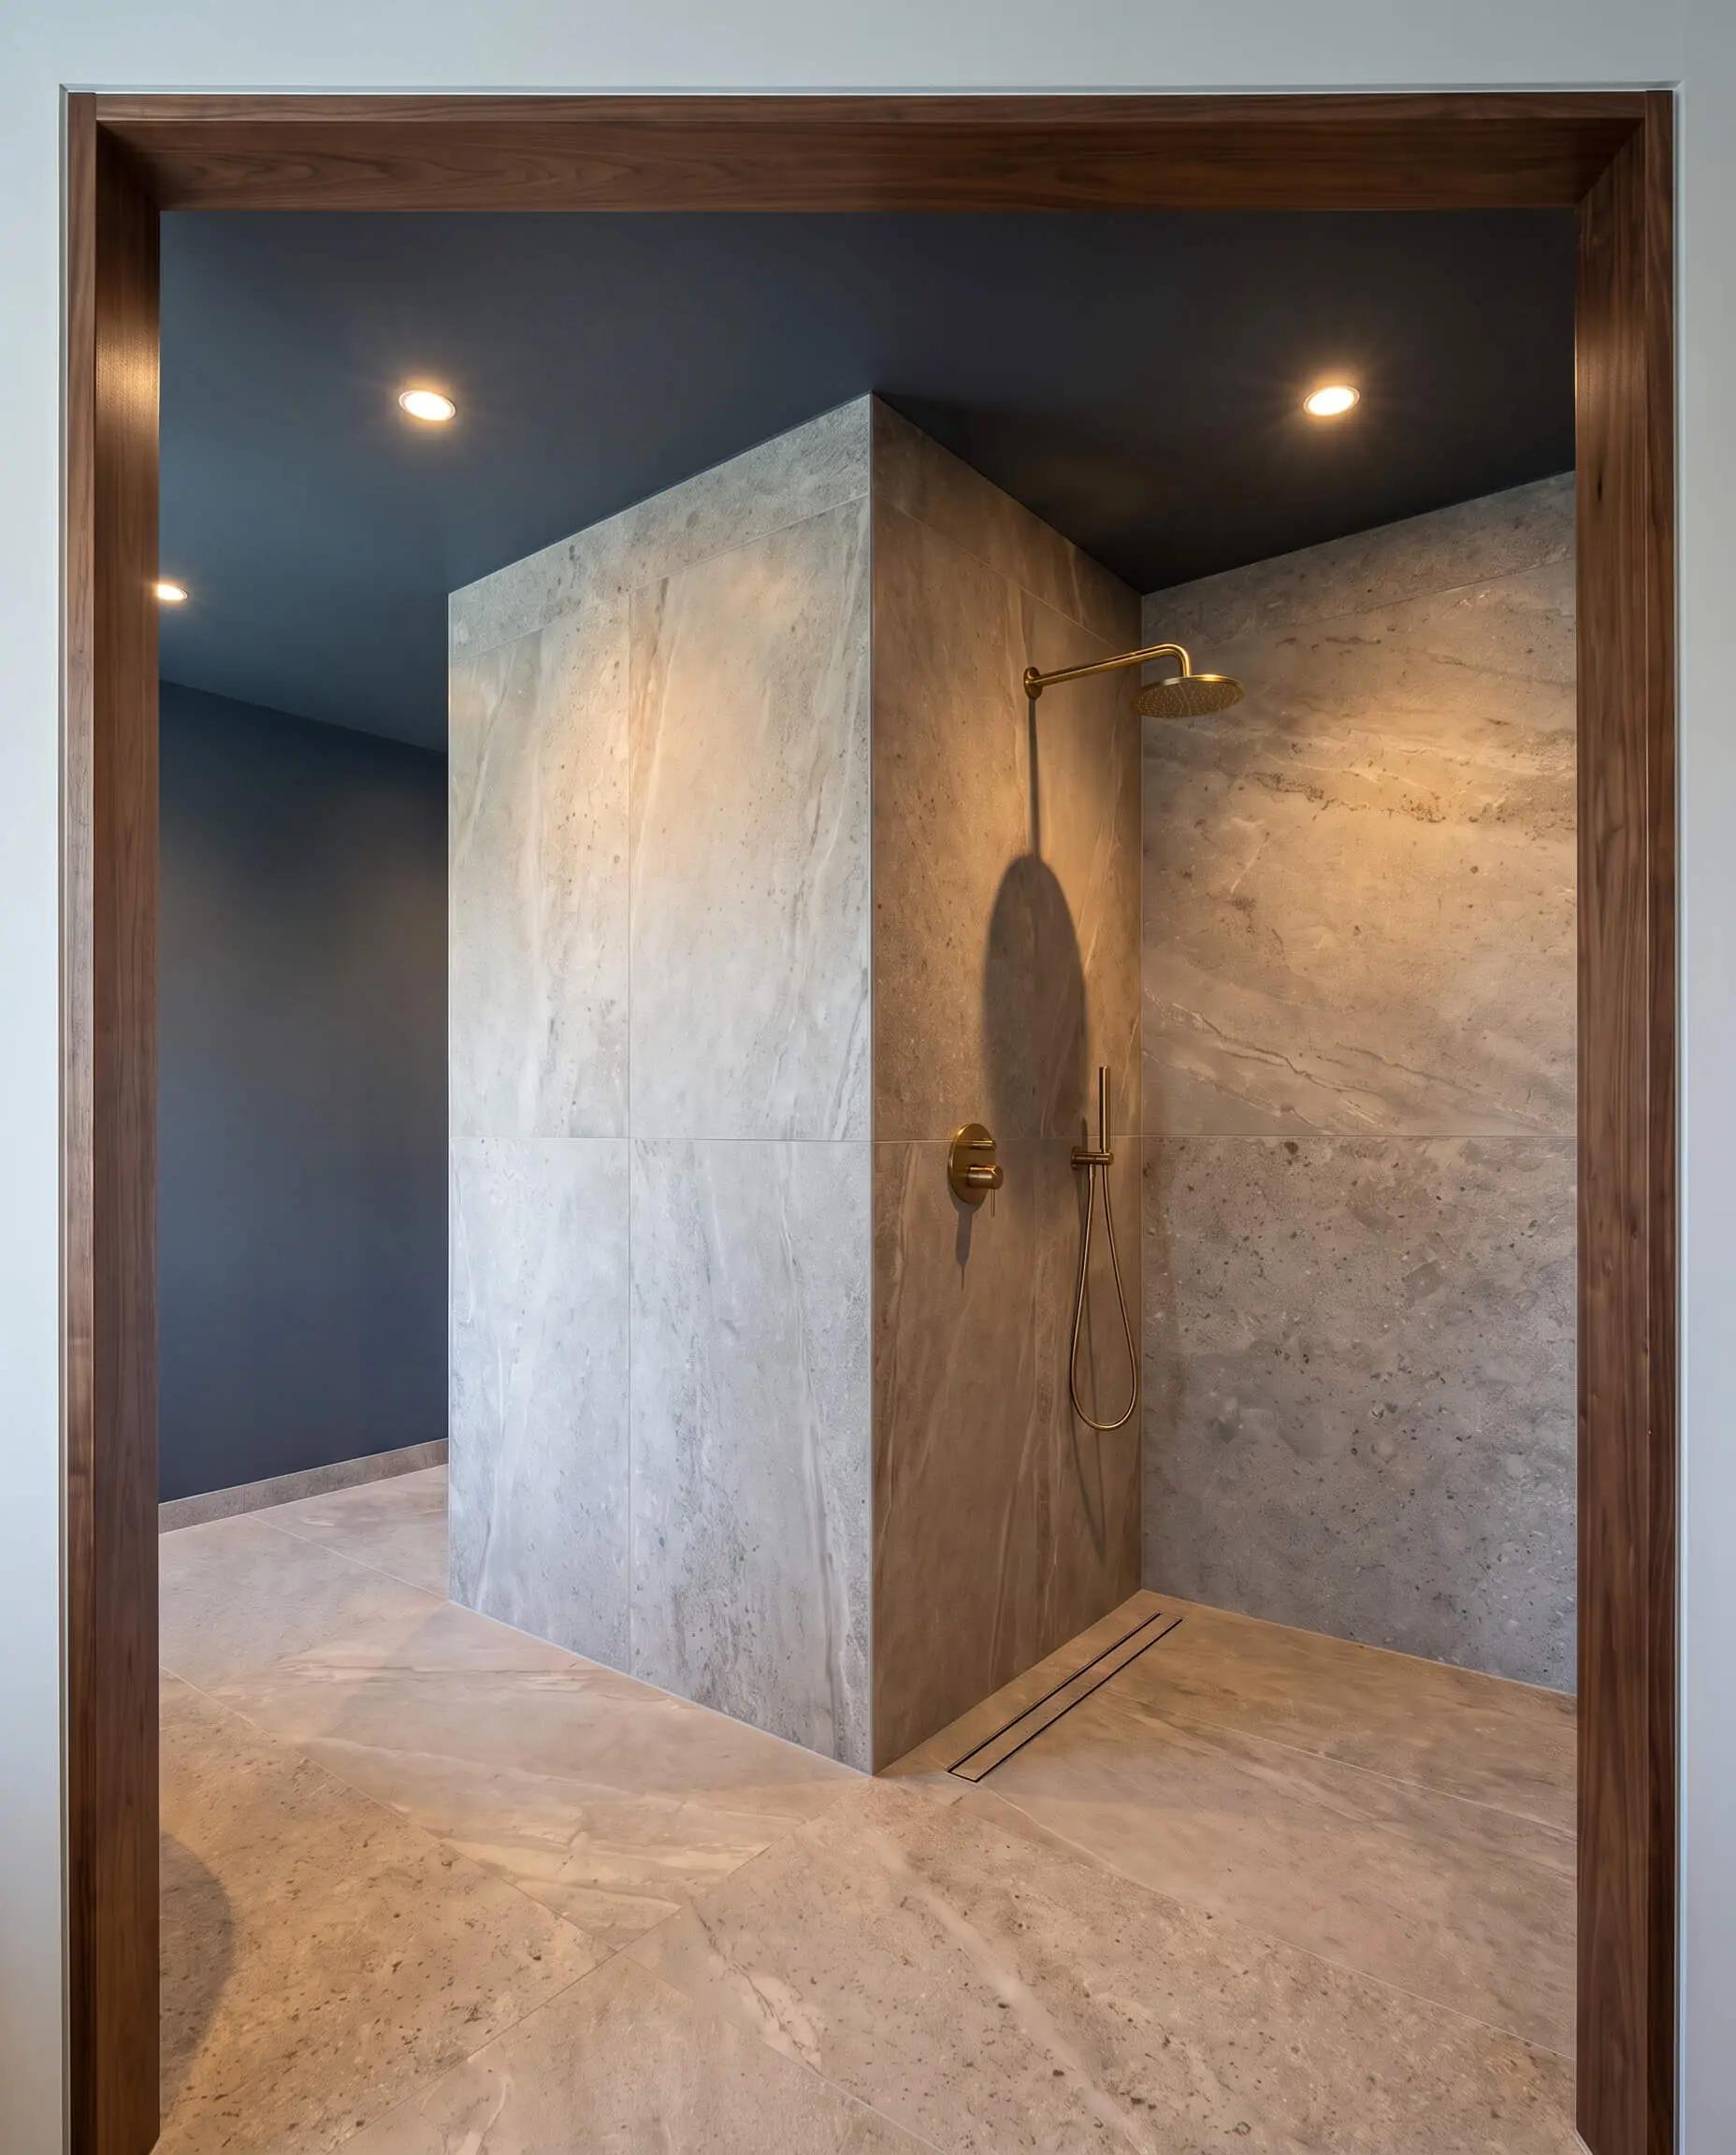
Leveraging the existing architecture, this layout uses a structural corner to naturally block splashing without requiring supplementary glass panels. The bather steps around the structural baffle, entering a highly private, draft-protected alcove that inherently contains the water.
- Vibe: Architectural & Private
- Entry Clearance: Minimum 36-inch width for the walk-through corridor to ensure comfortable access.
- Key Materials: Large-format porcelain slabs to minimize grout lines on the baffle wall.
- Design Ally Tip: Paint the ceiling above the shower a deep, moody hue like Farrow & Ball Hague Blue to create a distinct, cozy zone within the larger bathroom footprint.
The Narrow Galley Shower Walk-Through
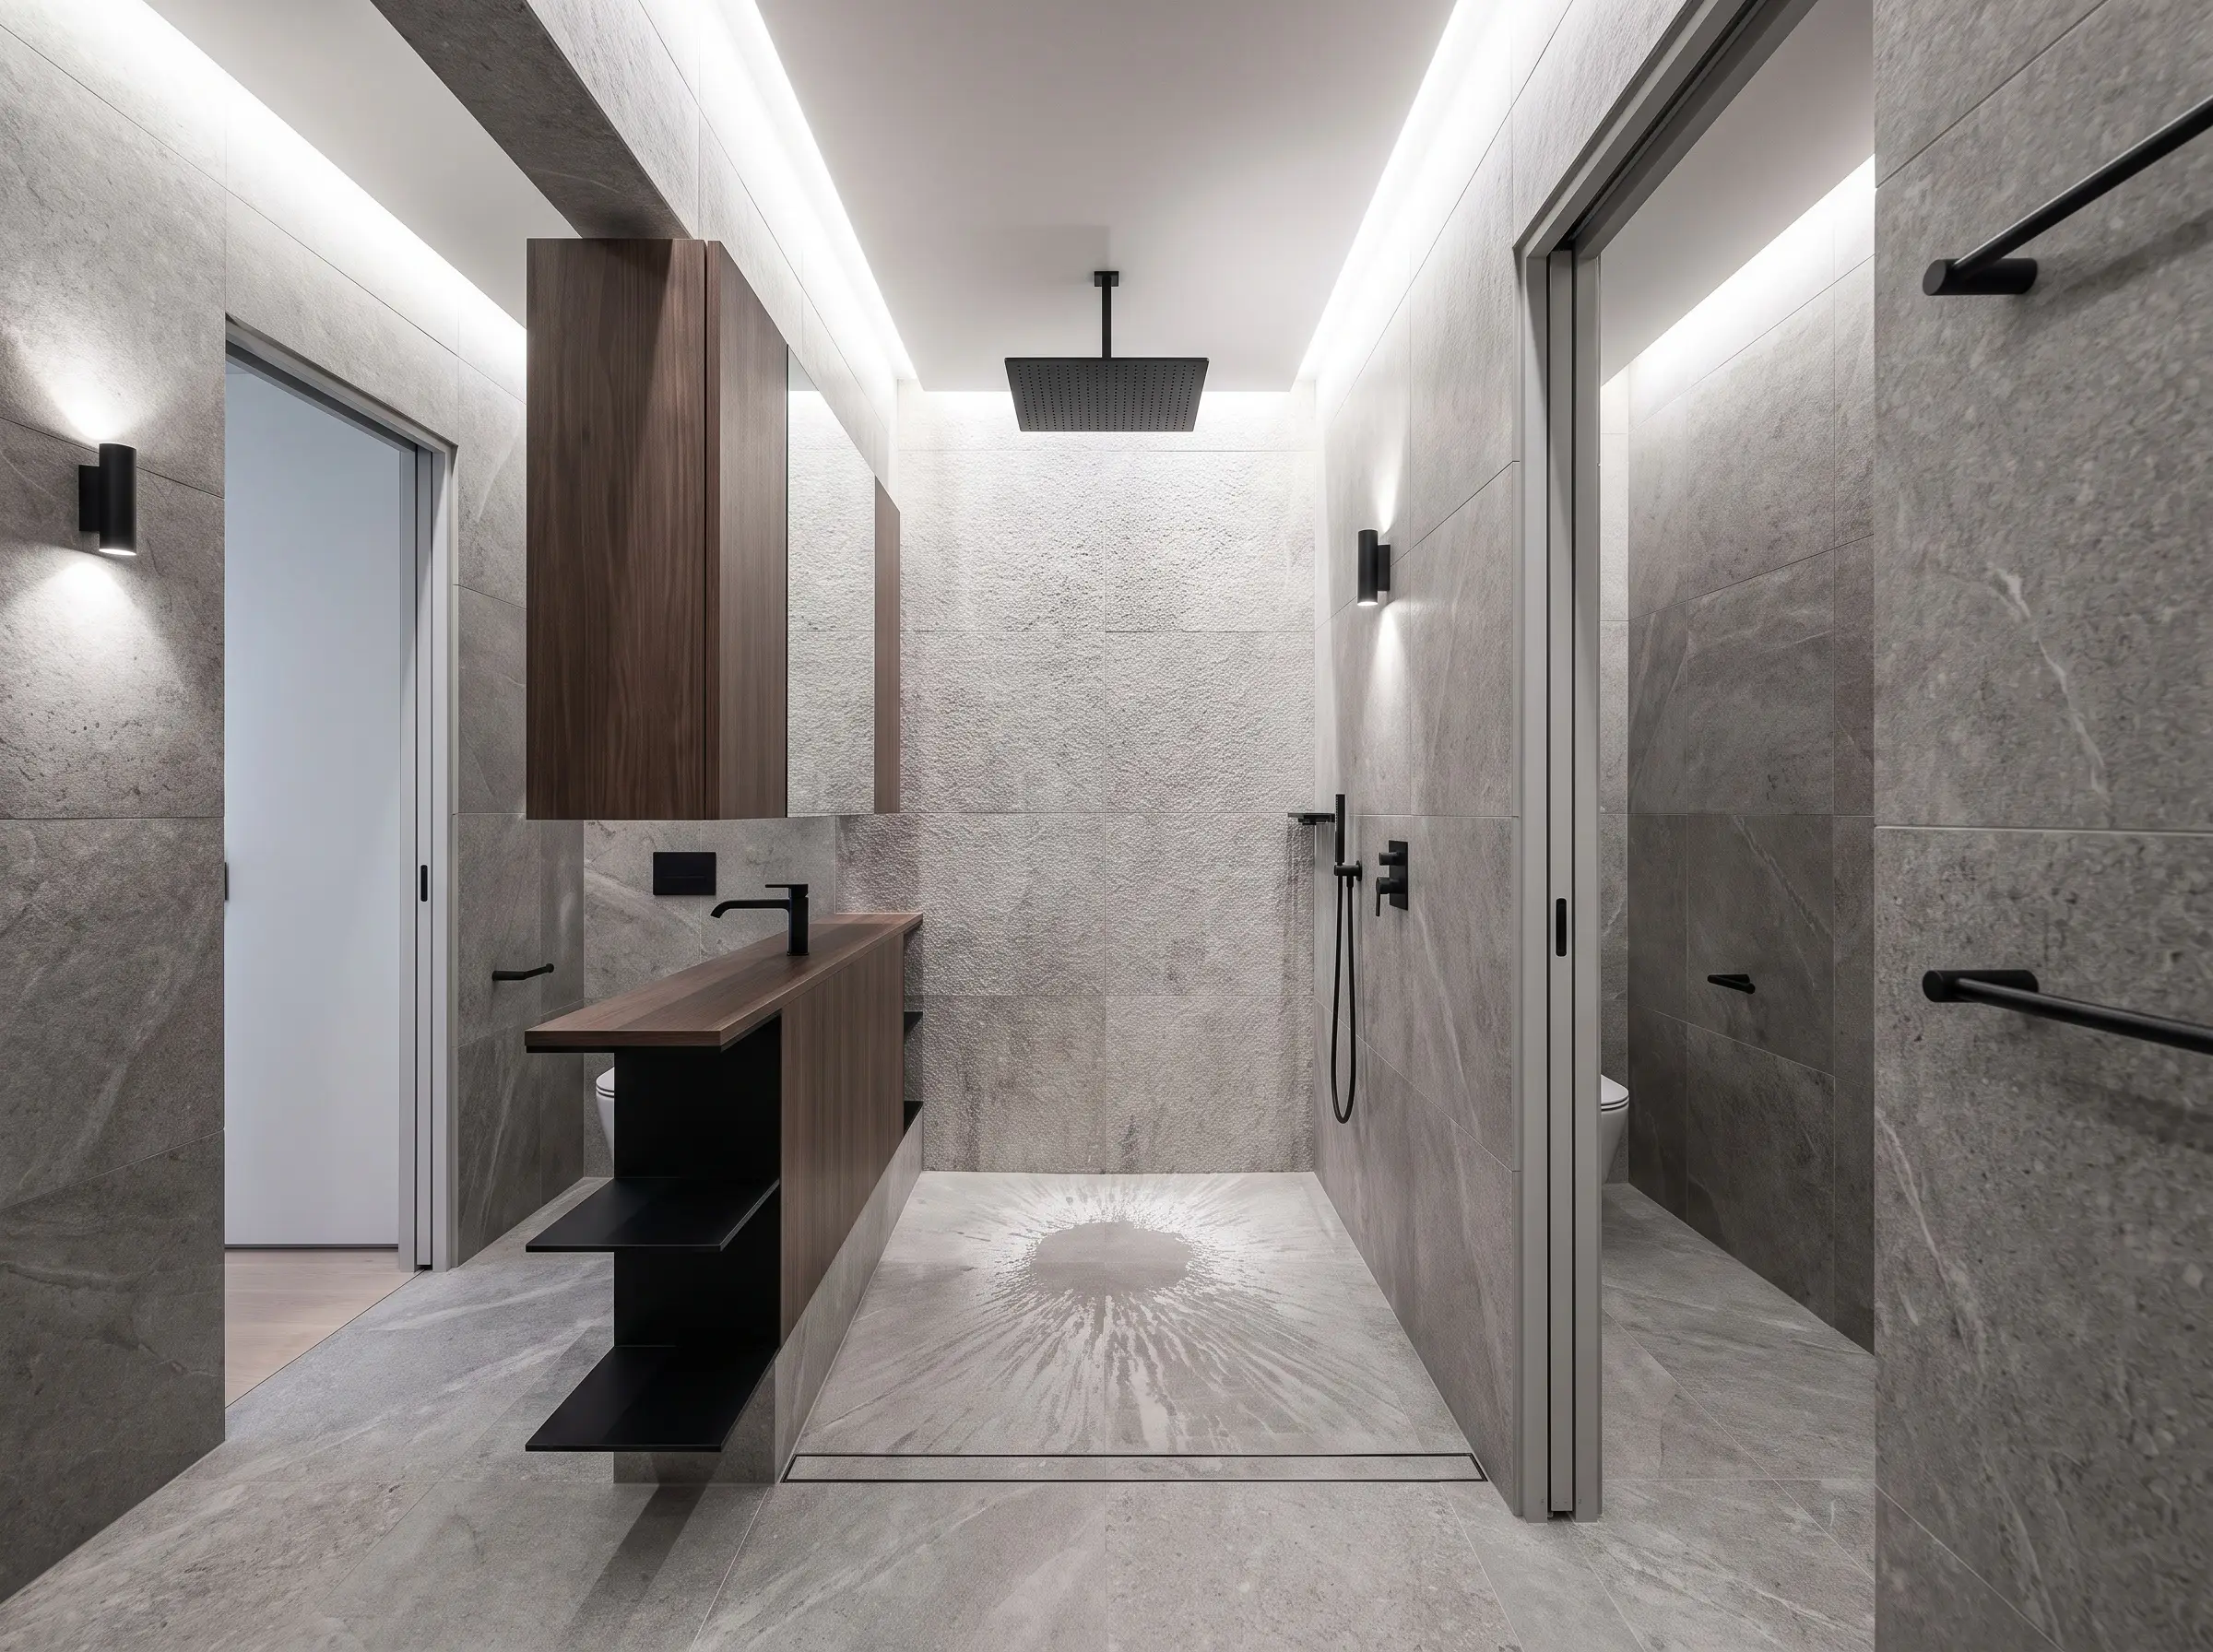
Ideal for long, narrow footprints, this layout positions the shower against the far wall with access from either side of a central vanity or partition. It transforms an awkward, bowling-alley bathroom layout into a symmetrical, highly functional corridor.
- Vibe: Symmetrical & Modern
- Clearance Parameter: Minimum 36-inch width from the showerhead wall to the opposite partition.
- Fixture Placement: Mount the showerhead directly in the center to distribute the splash radius evenly in both directions.
When designing a dual-entry galley, pitch the floor from both entry points toward a single linear drain directly below the showerhead to prevent water from escaping either side.
Architect’s Note
The Recessed Alcove Hideaway
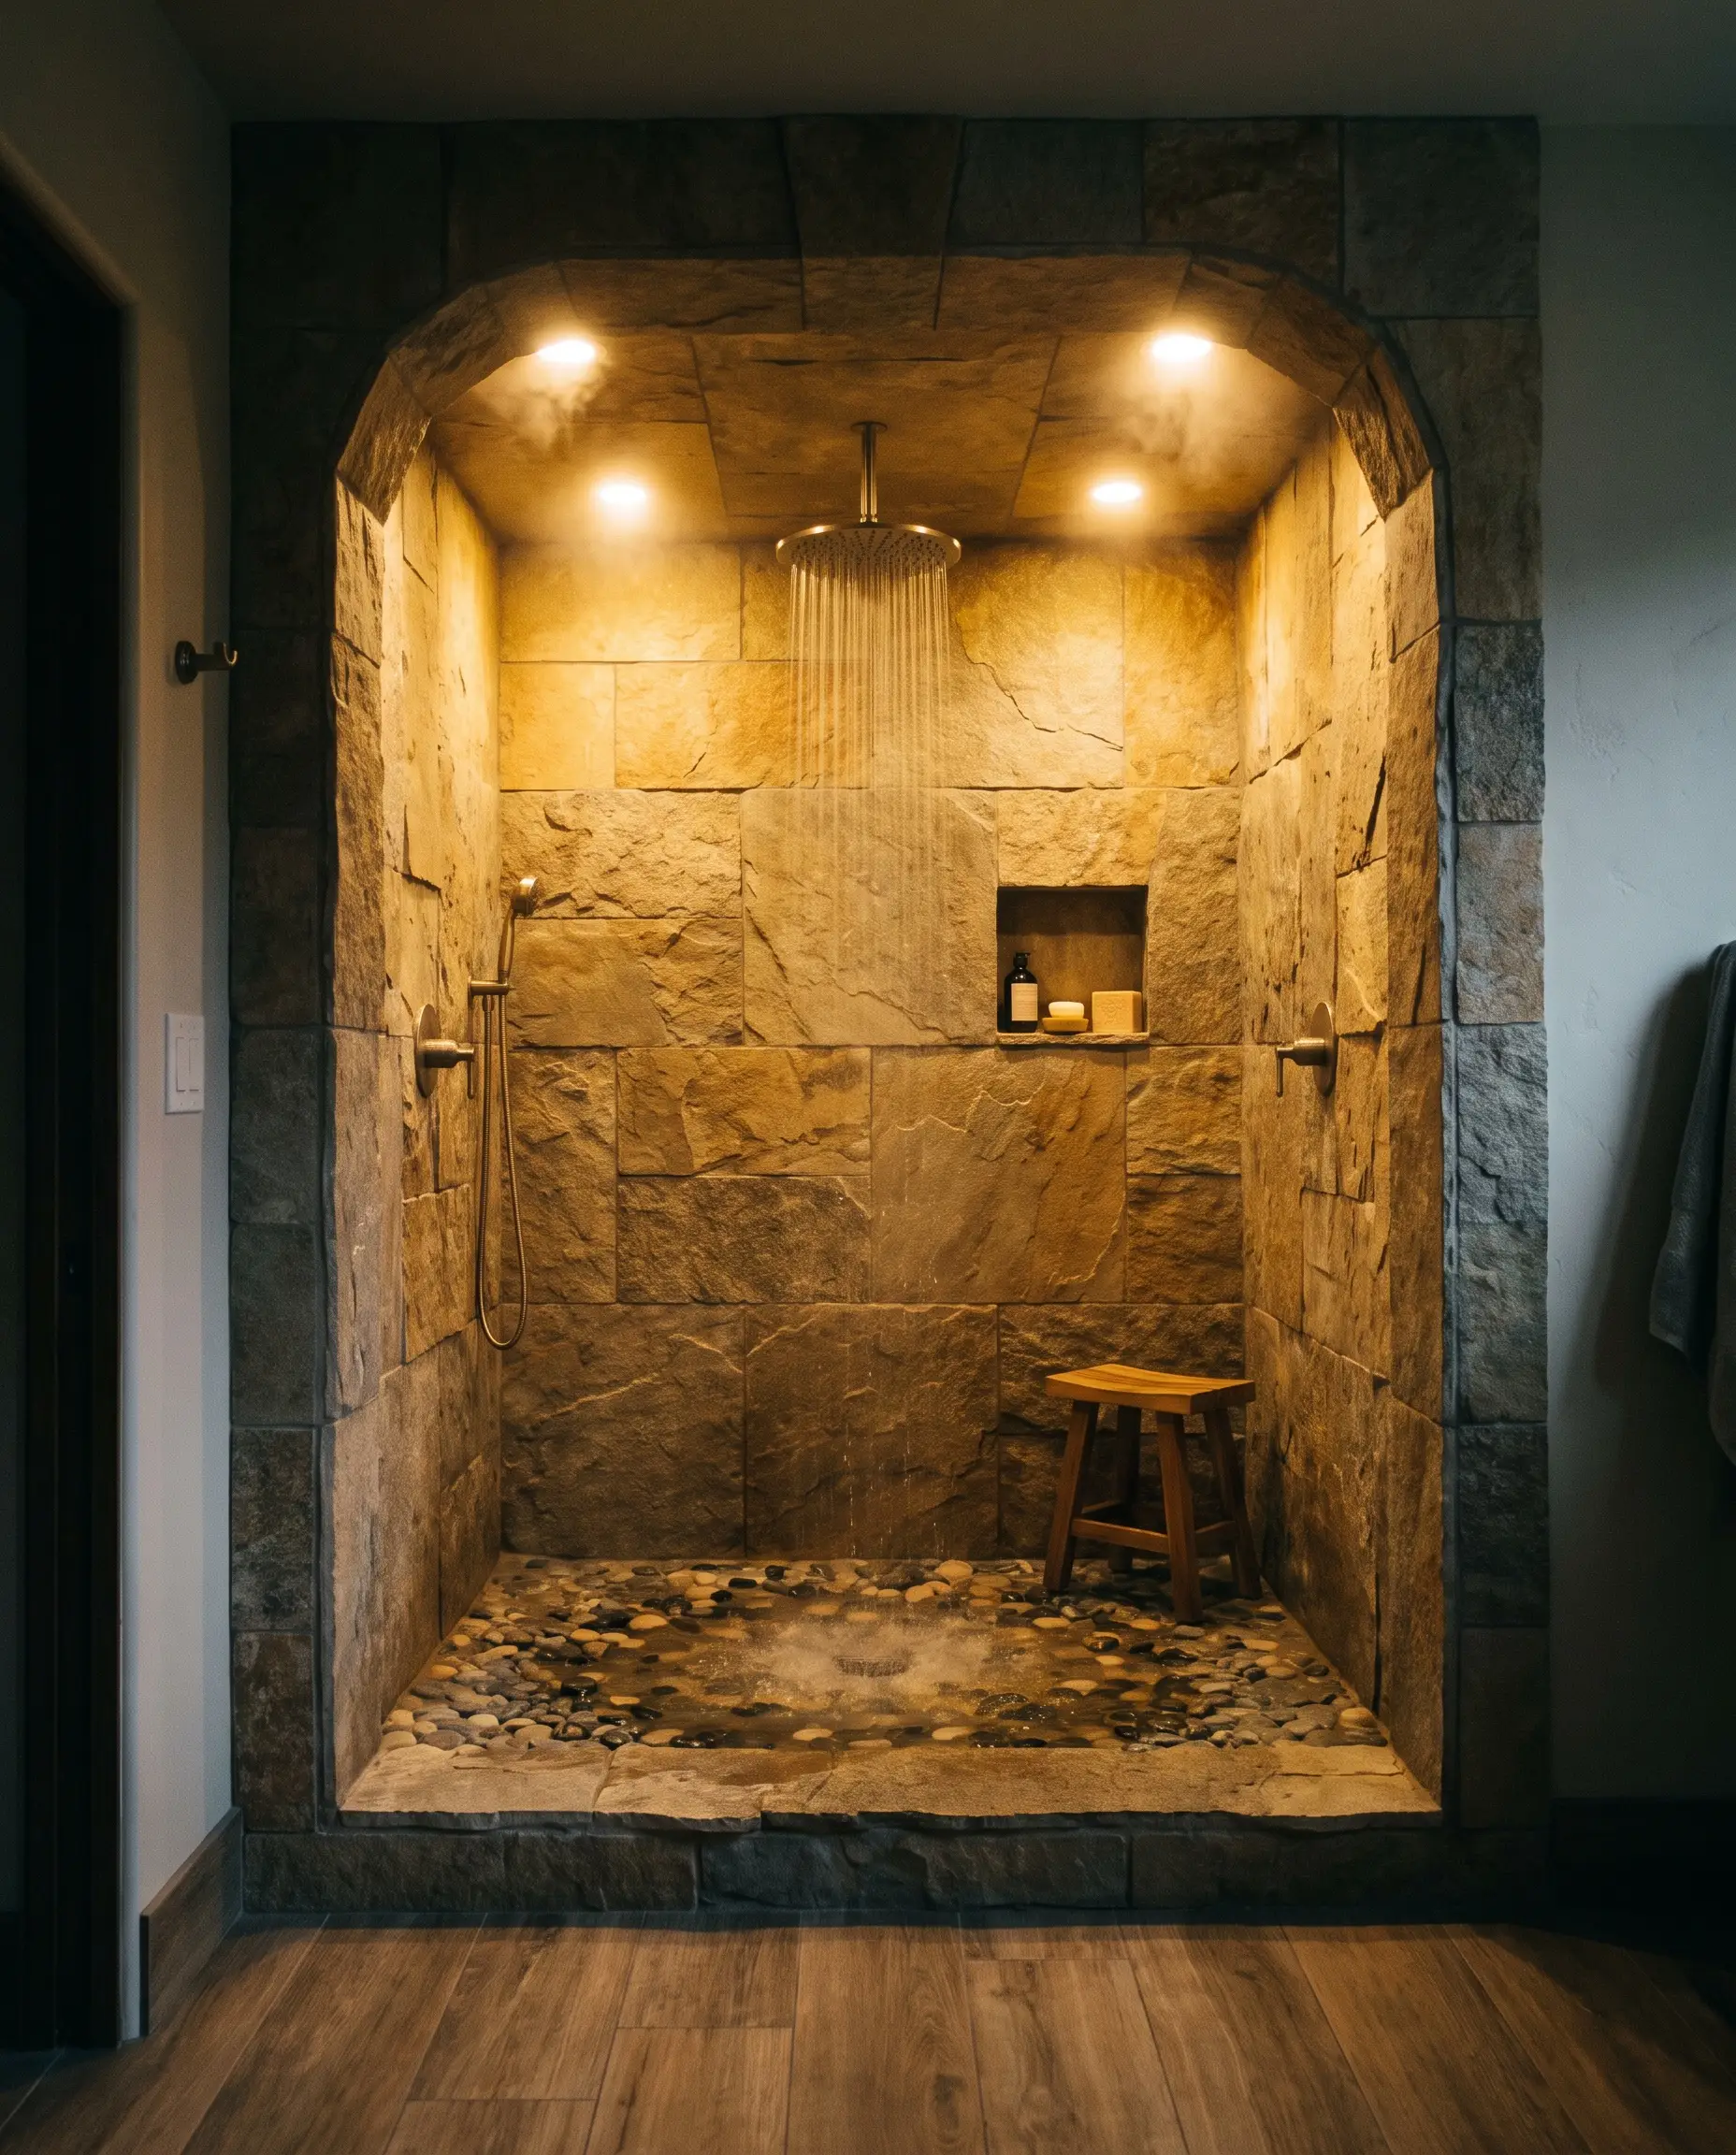
Tucking the shower into a pre-existing structural recess maximizes privacy and drastically reduces ambient drafts. This layout turns a natural room depression into a dedicated wet zone, creating a cozy, cave-like bathing experience.
- Vibe: Intimate & Enclosed
- Depth Requirement: Minimum 48-inch depth if utilizing an overhead rain shower to minimize horizontal splash.
- Lighting Code: Requires wet-rated, recessed LED lighting, as the alcove will block ambient room light.
The Symmetrical Double-Entry Layout
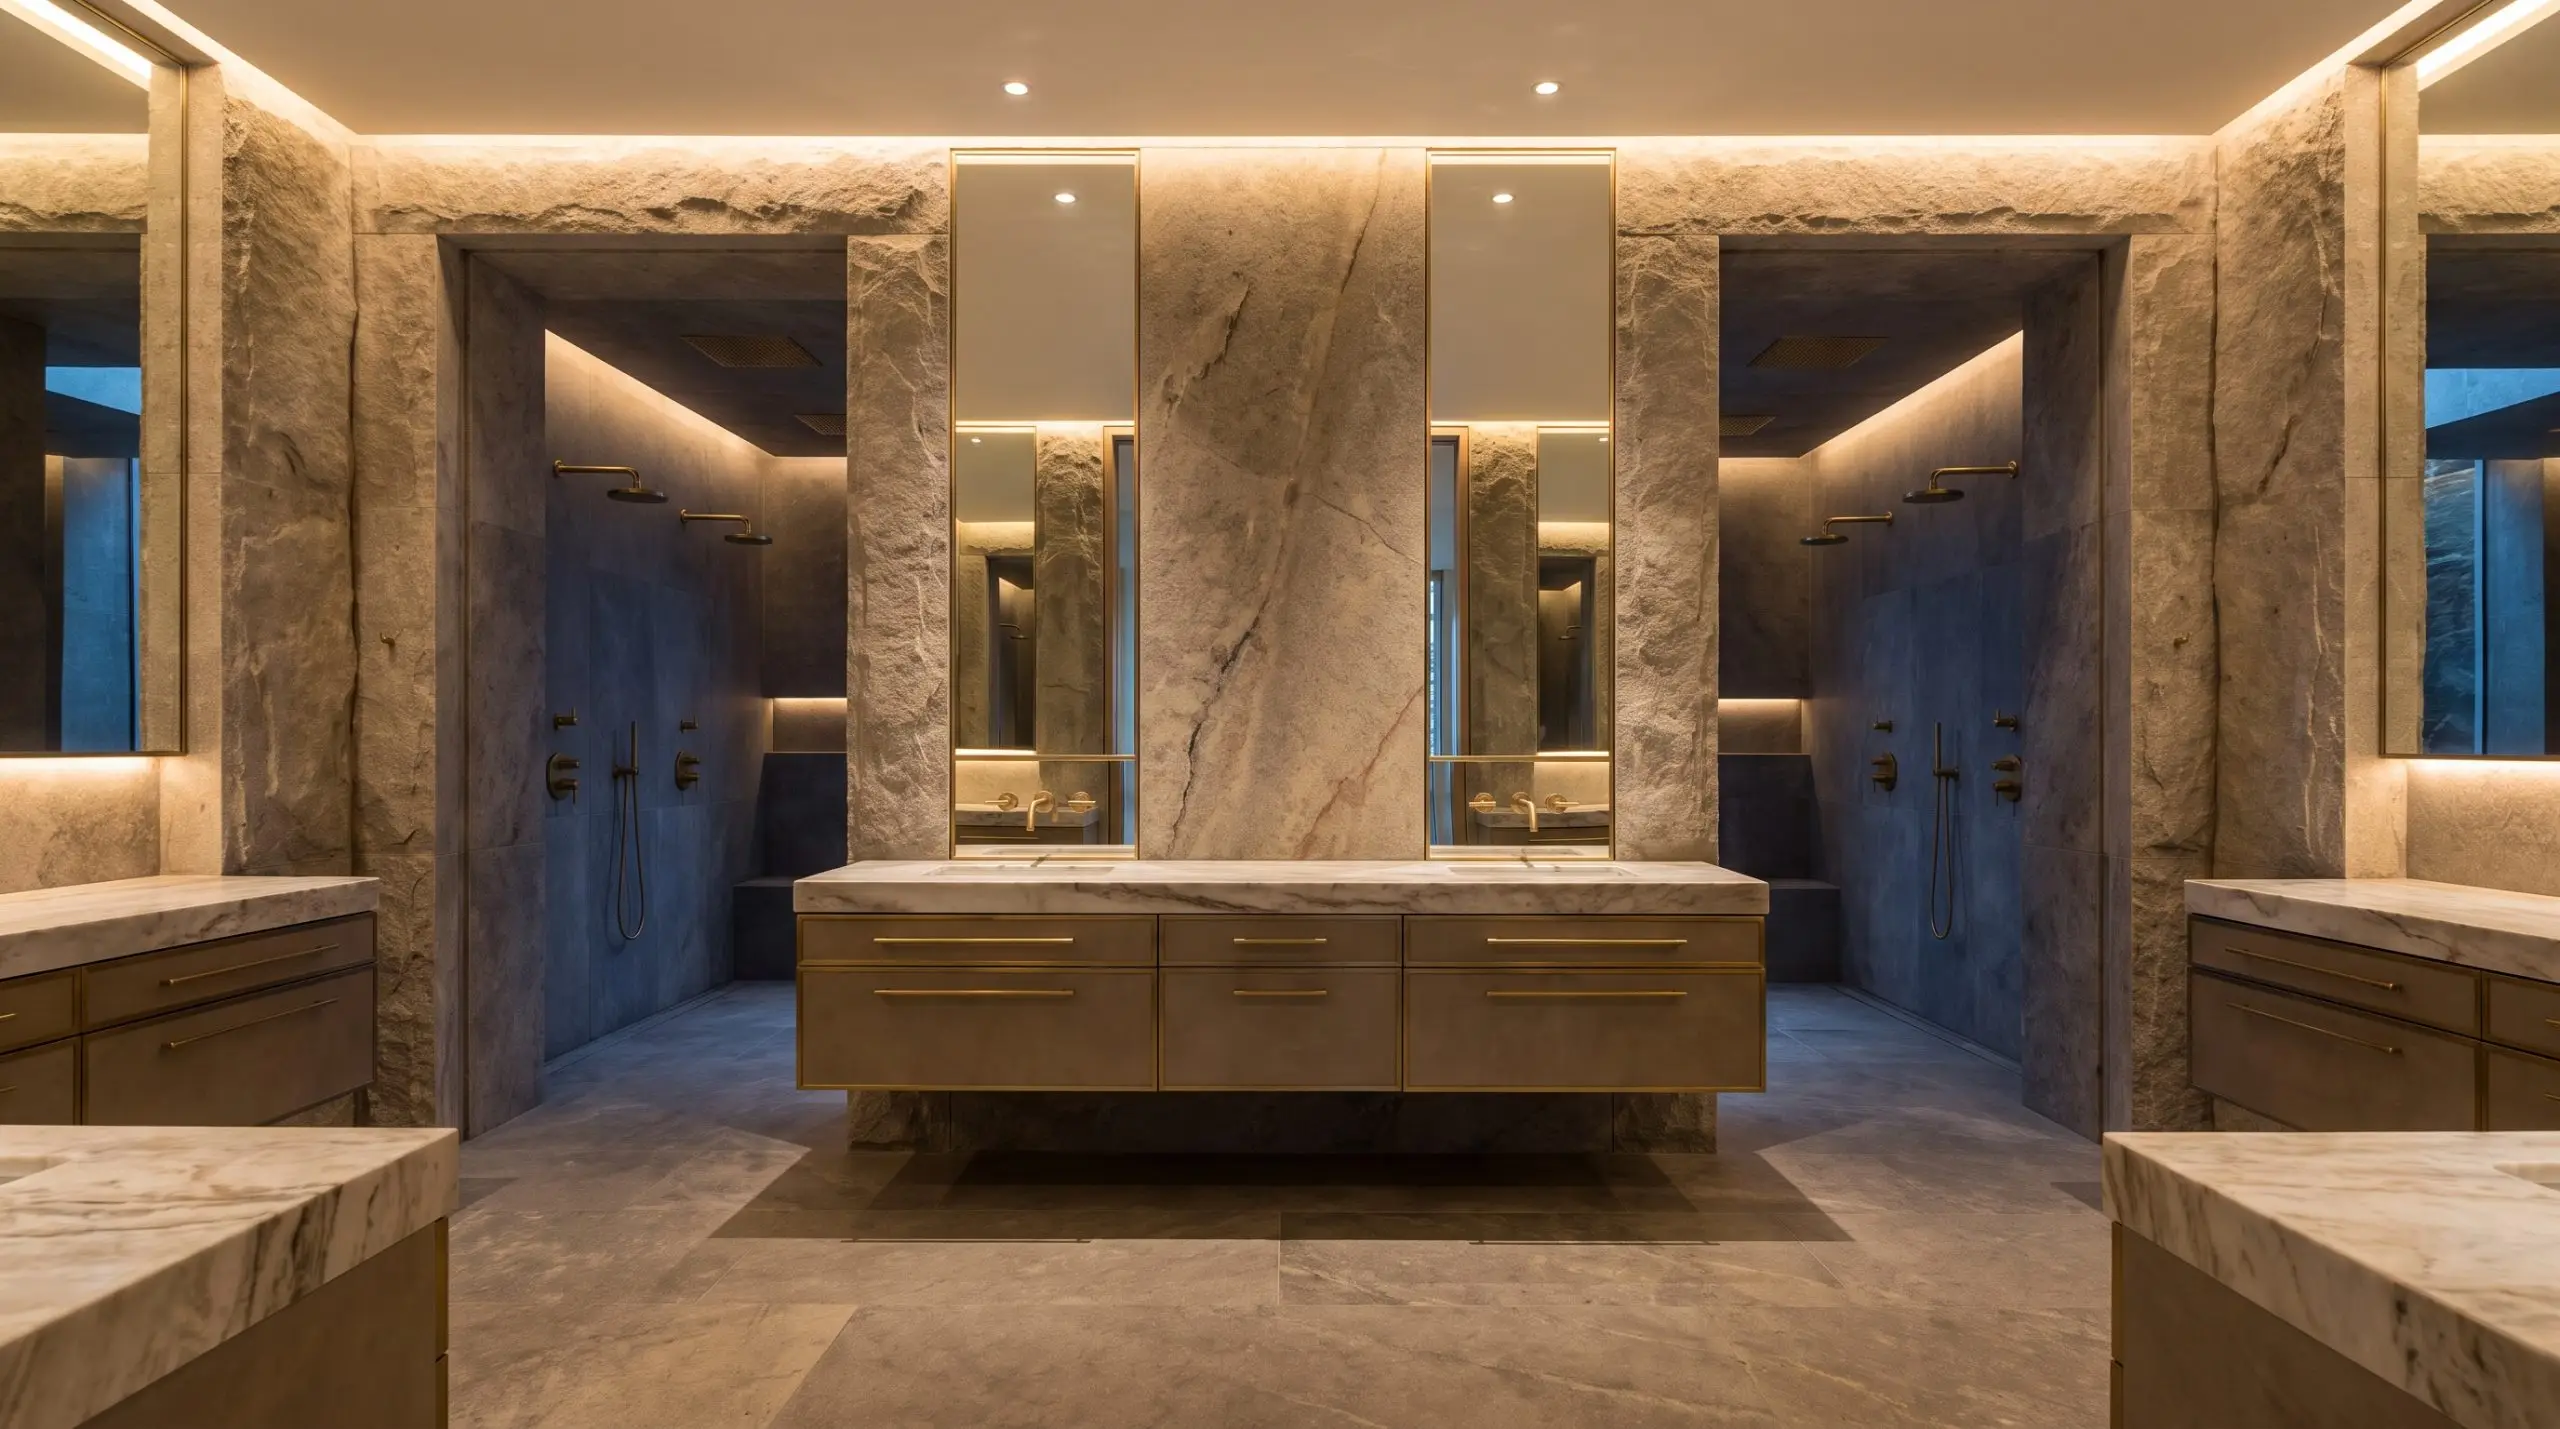
A hallmark of bespoke luxury, this configuration places a floating vanity wall in the center of the room, flanking it with dual, doorless entries into a massive rear shower zone. It creates a stunning focal point while entirely hiding the wet area from the main entrance.
- Vibe: Bespoke Luxury & Grandeur
- Spatial Parameter: Requires a massive footprint, typically a minimum 72-inch width for the shower zone alone.
- Hardware Finish: Unlacquered brass fixtures to add warmth and patinated character against the monumental scale of the walls.
Partition & Splash Deflection Strategies
“Doorless” does not mean “partitionless.” Even the most sprawling layouts require strategic barriers to manage the kinetic energy of water. Mastering splash deflection means choosing architectural interventions that preserve the open-air feel while aggressively protecting your dry zones.
Splash Radius Callout Box Understanding how water behaves is critical to a doorless design:
- Standard Angled Showerhead: Projects water outward, creating a horizontal splash radius of up to 48 to 60 inches.
- Ceiling-Mounted Rain Showerhead: Drops water vertically, reducing the primary horizontal splash radius to a tight 24 to 36 inches, though secondary bounce-off from the floor must still be accounted for.
- Body Sprays: Highly pressurized and horizontal; they can easily project water 72+ inches and should only be used in deeply enclosed layouts.
Fluted Architectural Glass Panels
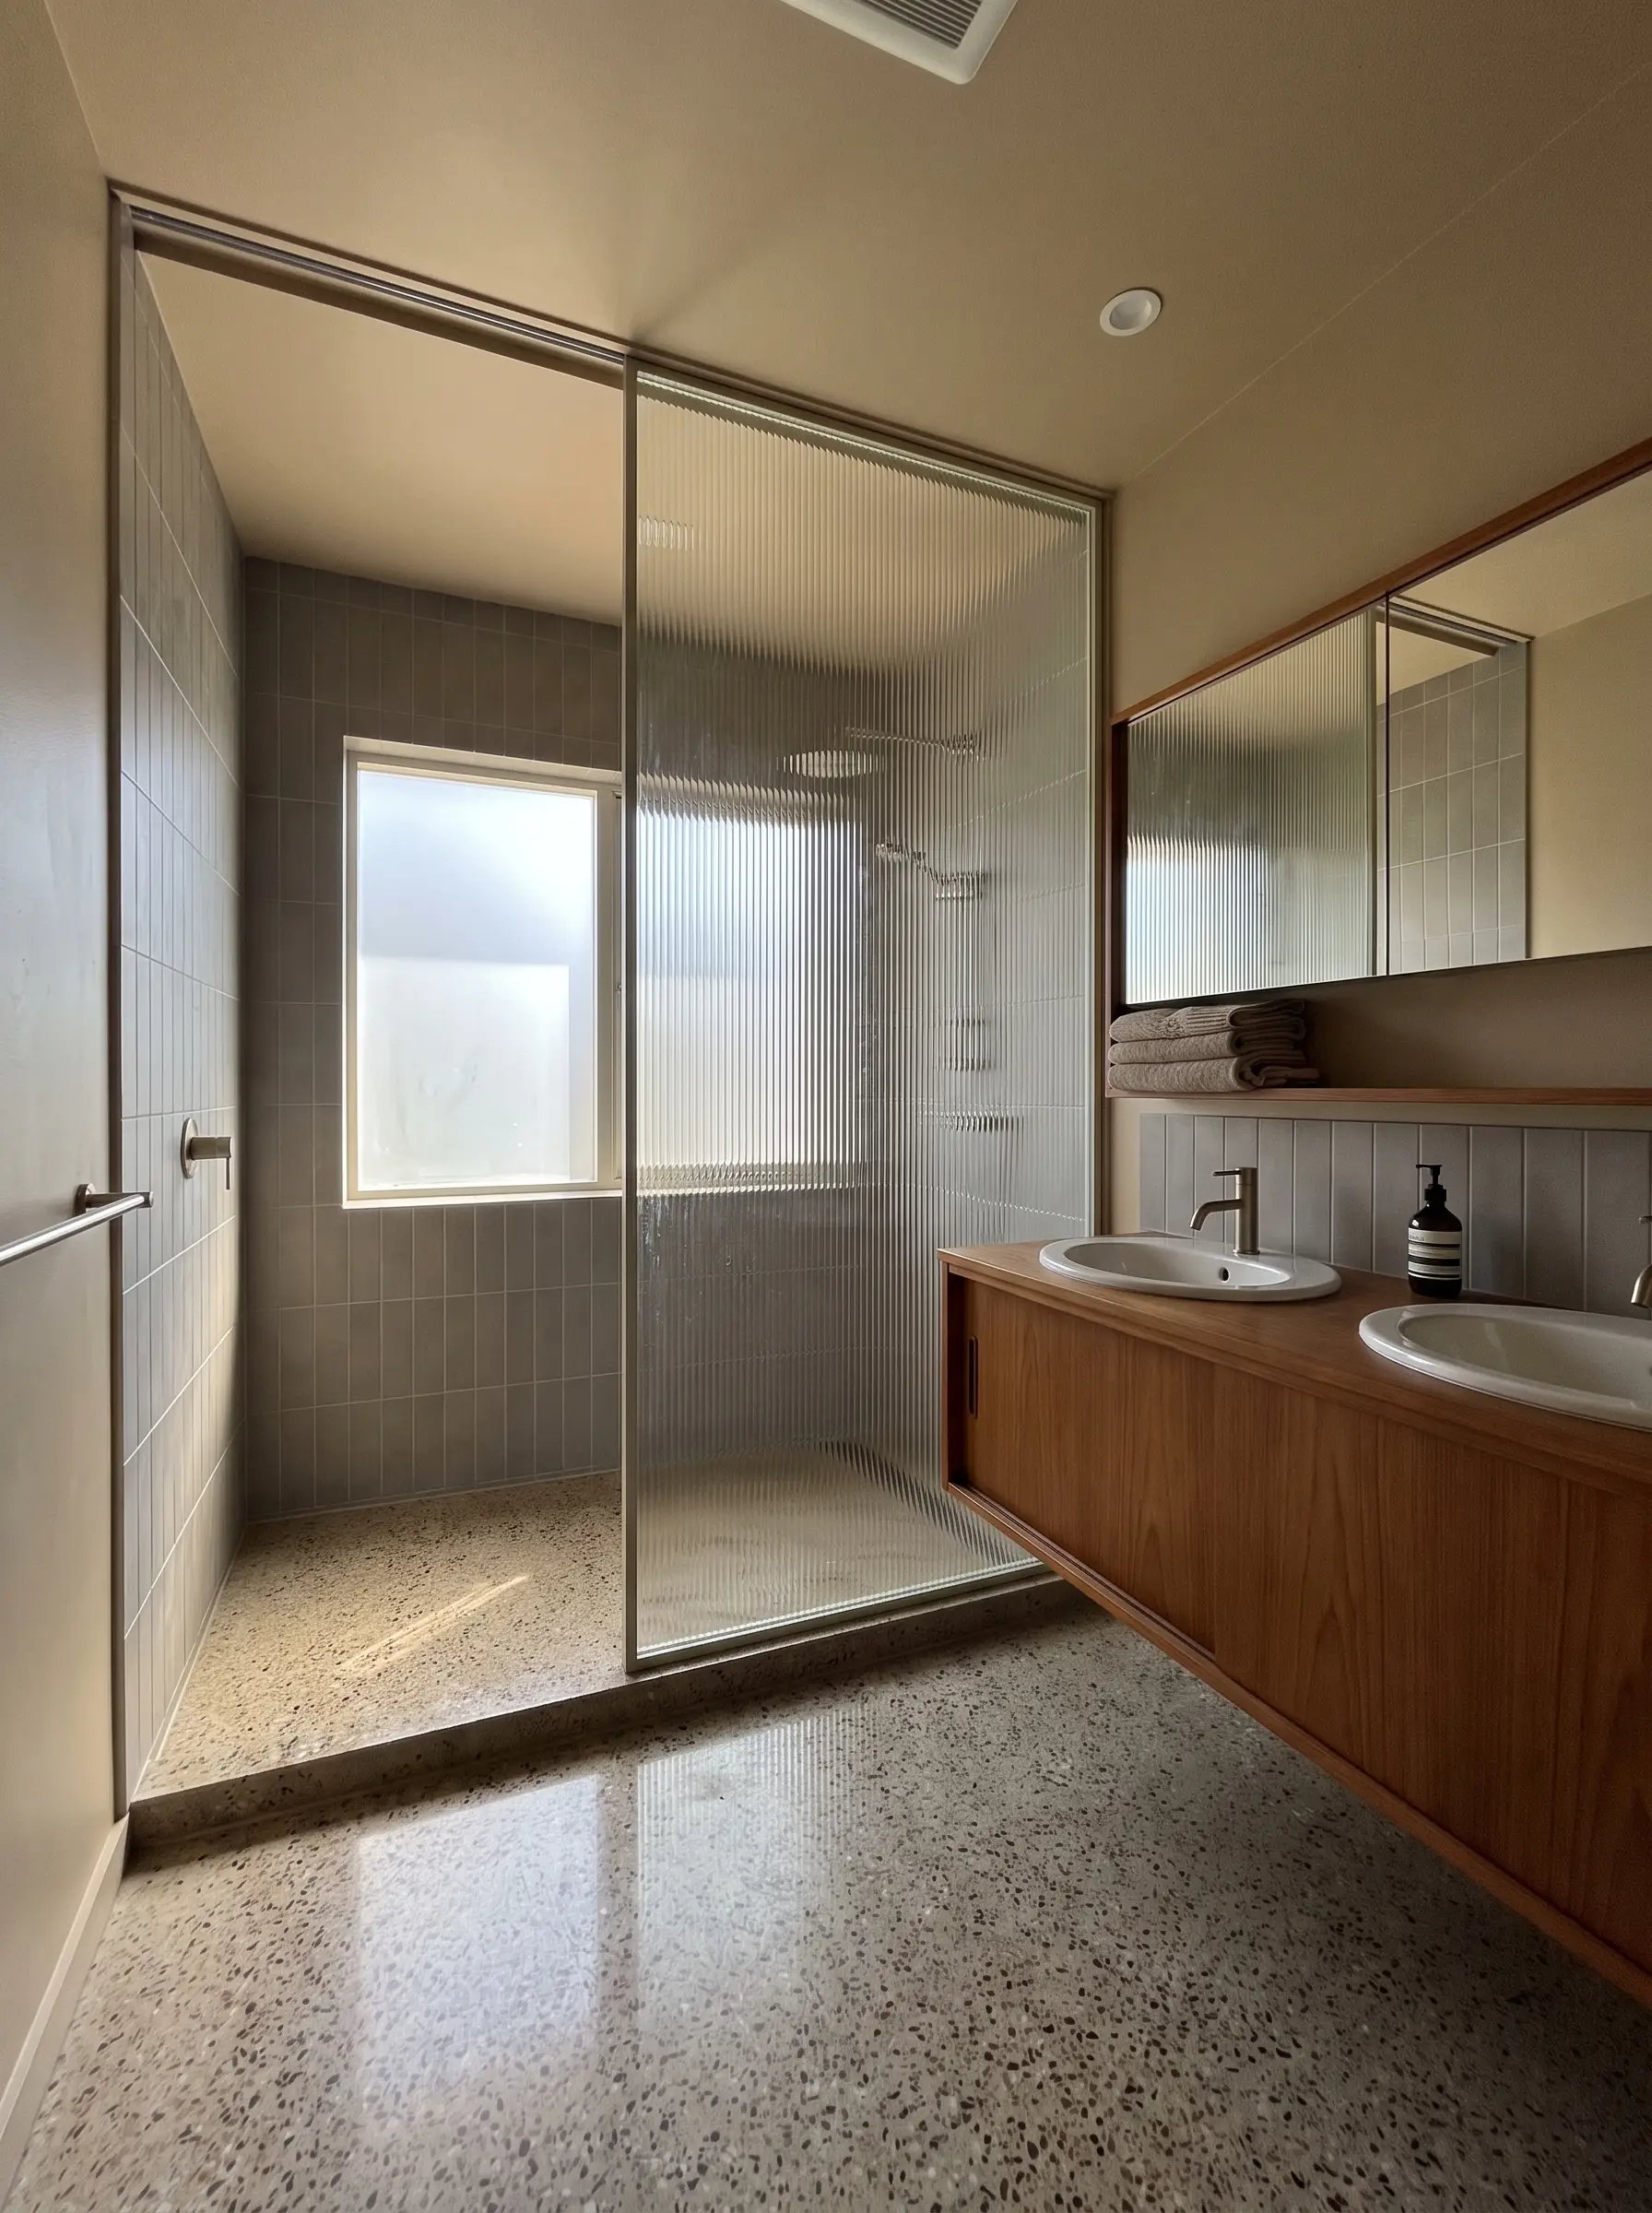
Fluted glass introduces a tactile, ribbed texture that obscures hard water spots while allowing natural light to penetrate the wet zone. It acts as a brilliant privacy screen that feels highly intentional and structural, rather than like a standard builder-grade shower door.
- Vibe: Mid-Century Modern & Textural
- Key Materials: 3/8-inch thick tempered reeded/fluted glass.
- Structural Mount: Recess the glass channel directly into the ceiling and floor for a seamless, floating aesthetic.
The Masonry Pony Wall
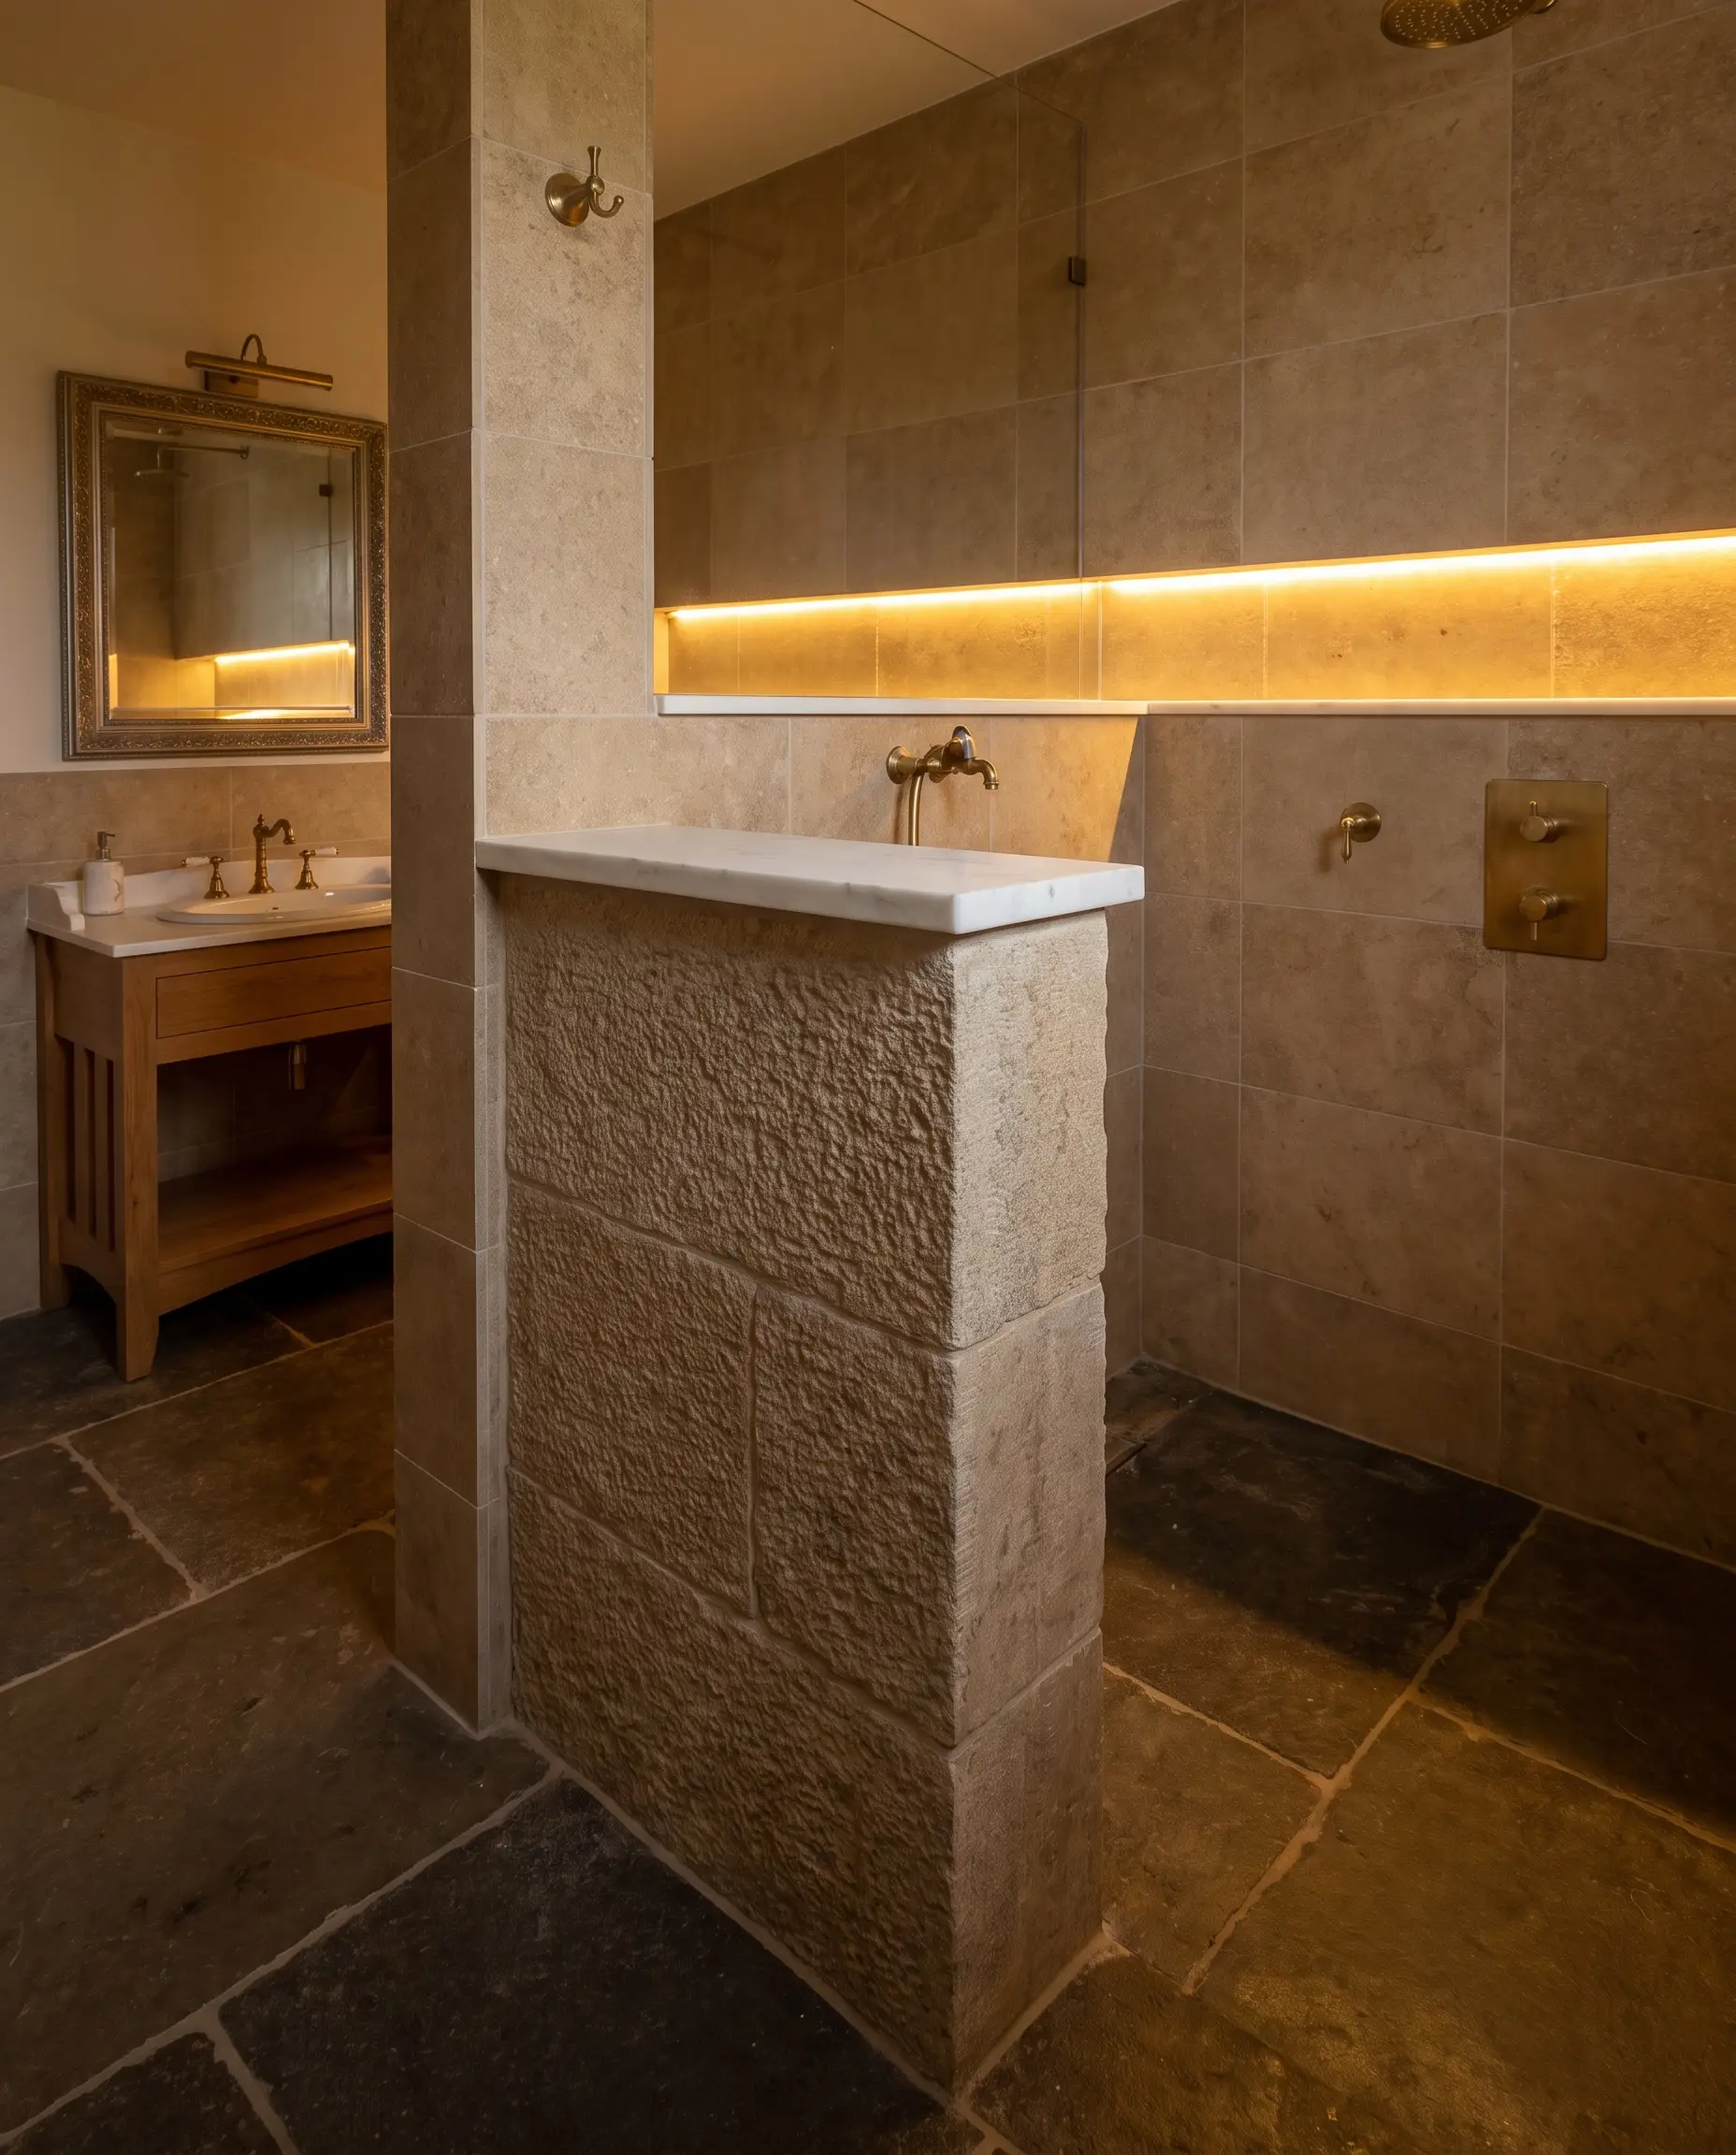
A heavy, half-height pony wall physically anchors the space, providing a robust barrier that blocks lower-body splashing while leaving the upper visual field completely open. It also serves as a brilliant structural cavity to conceal complex plumbing lines for multiple showerheads.
- Vibe: Traditional & Grounded
- Height Parameter: Cap the wall at exactly 42 inches to clear standard vanity heights and block knee-level splash.
- Styling Pro-Tip: Top the pony wall with a solid slab of quartz or quartzite to prevent water penetration into the grout lines of the cap.
Floor-to-Ceiling Steel Crittall Screens
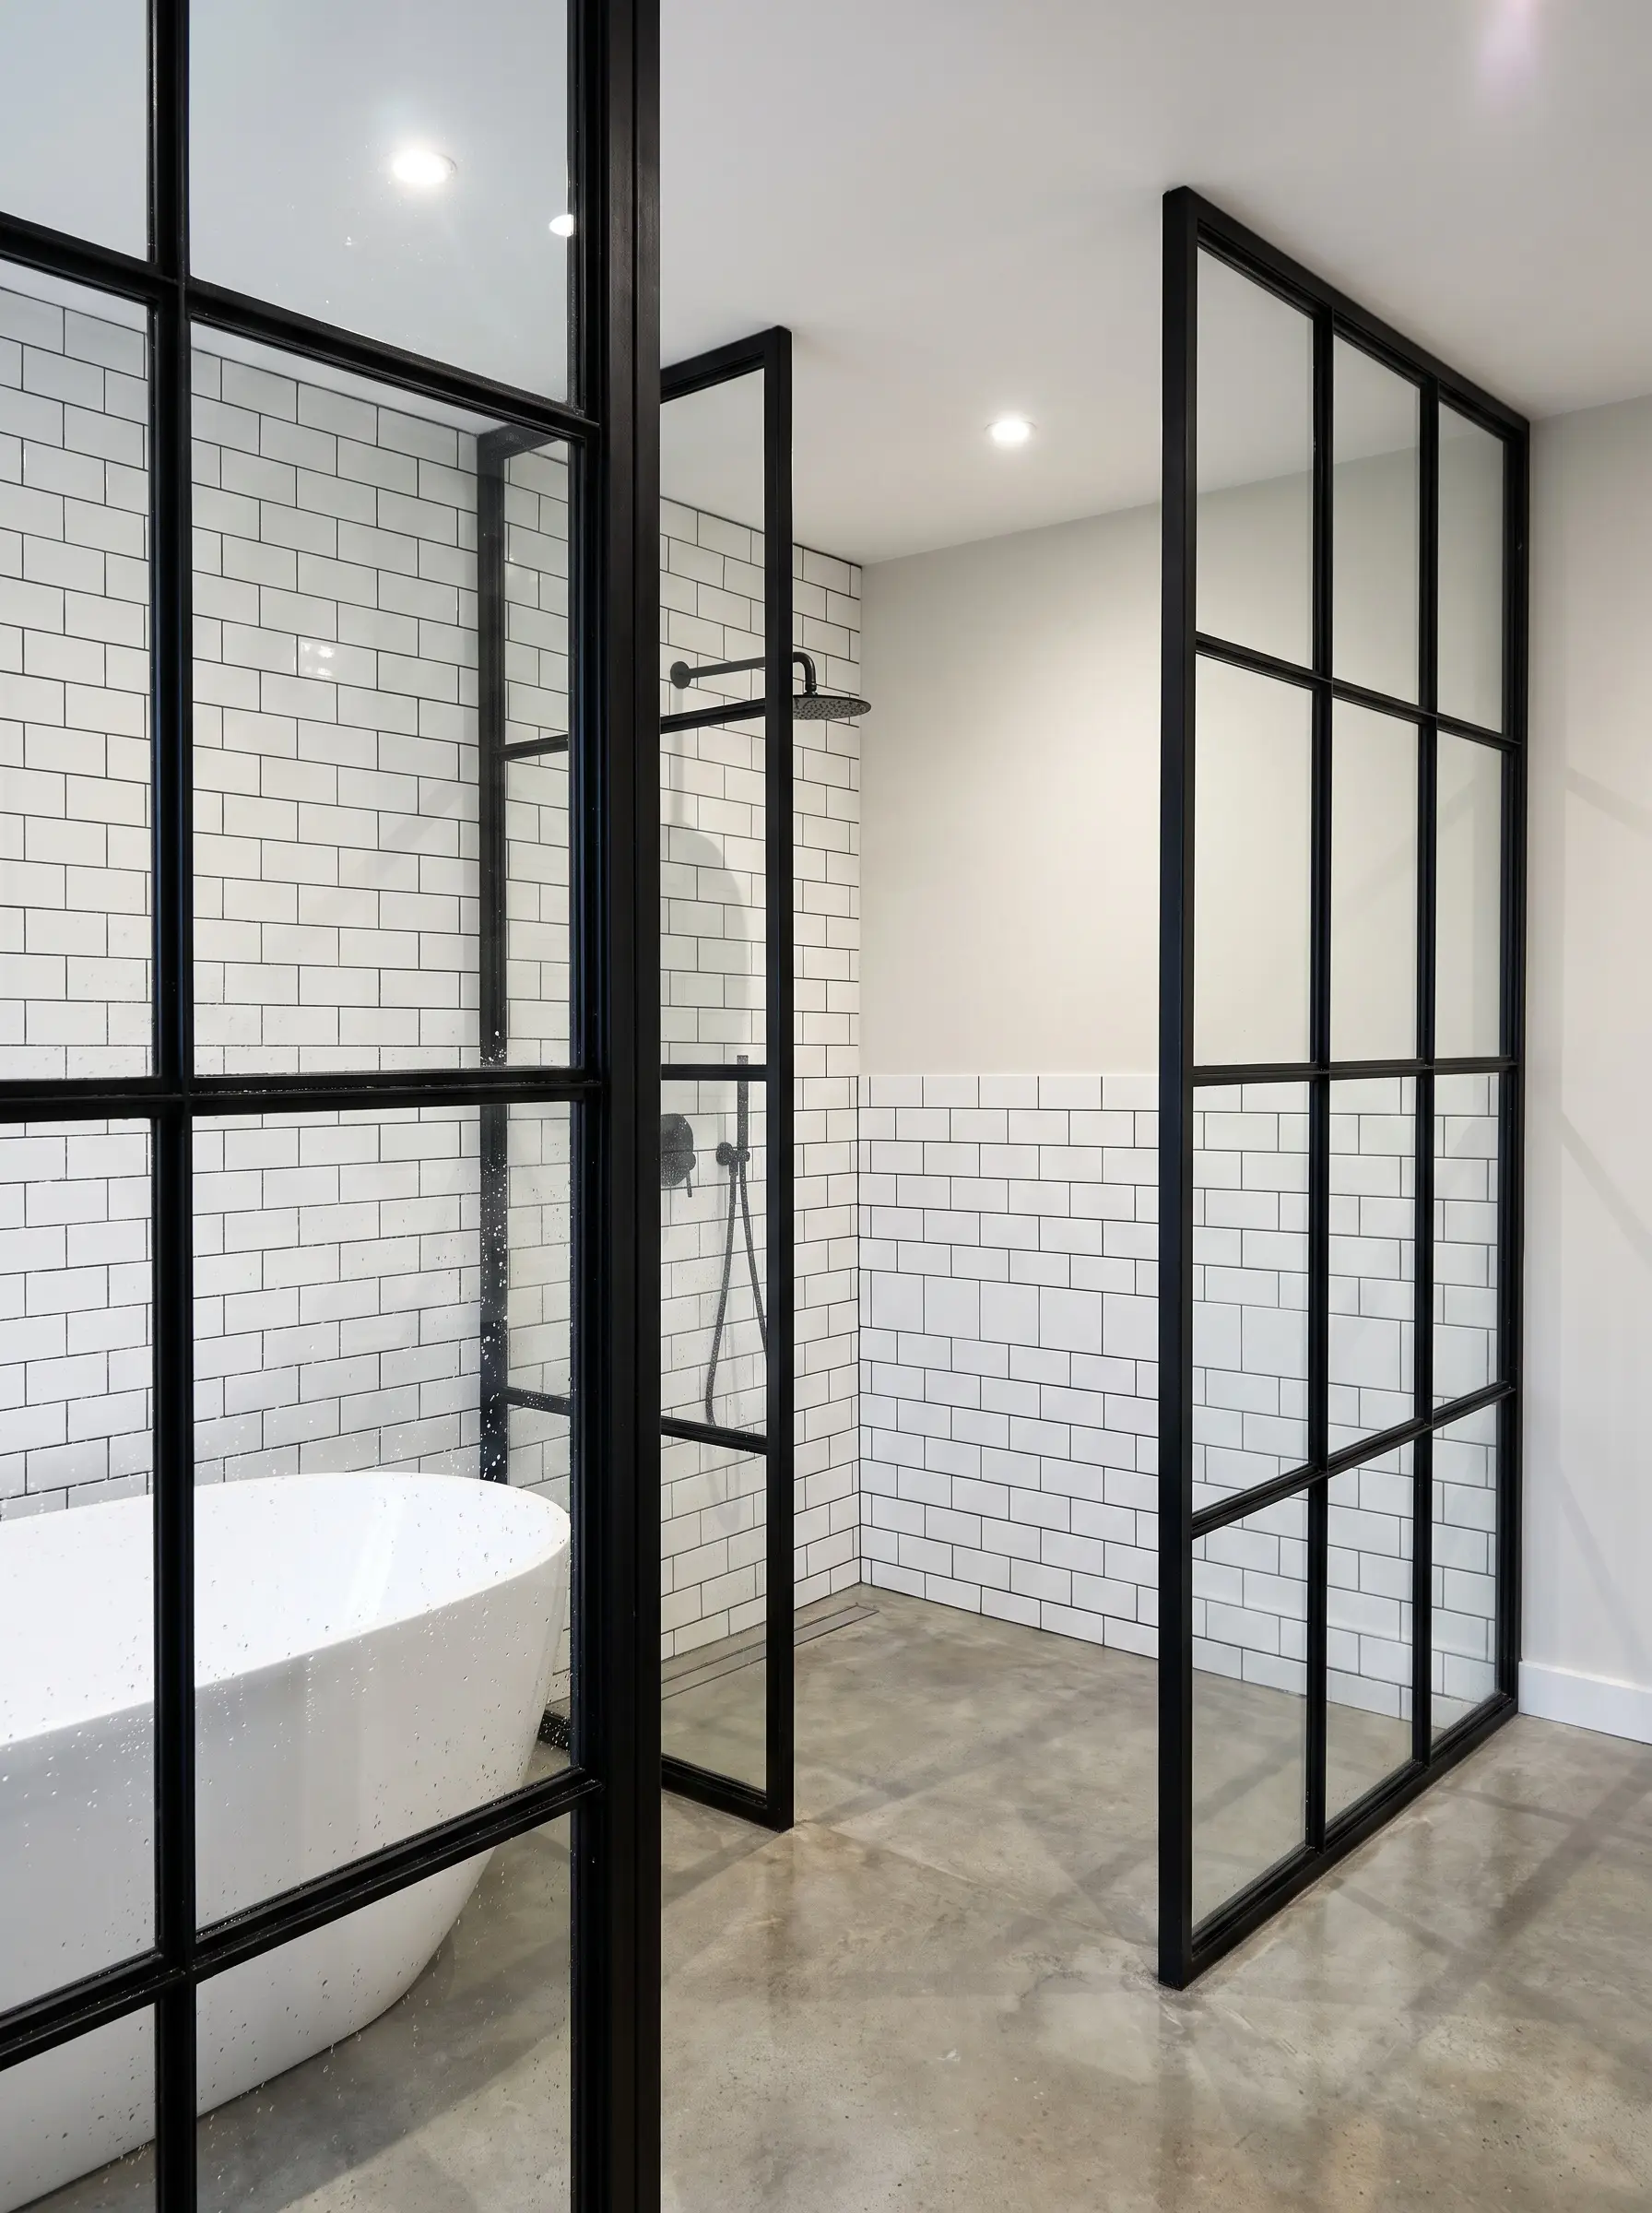
Framing the shower zone with bold, black steel mullions creates a striking industrial contrast against soft bathroom tile. These fixed, doorless screens define the wet zone with rigorous geometry while capturing stray droplets from adjacent freestanding tubs.
- Vibe: Industrial & Graphic
- Key Materials: Powder-coated stainless steel or aluminum (never raw steel, which will rust in a wet environment).
- Wall Color Recommendation: Sherwin-Williams Pure White (Provides a crisp, stark backdrop to make the black framing pop).
Floating Slat-Wood Room Dividers
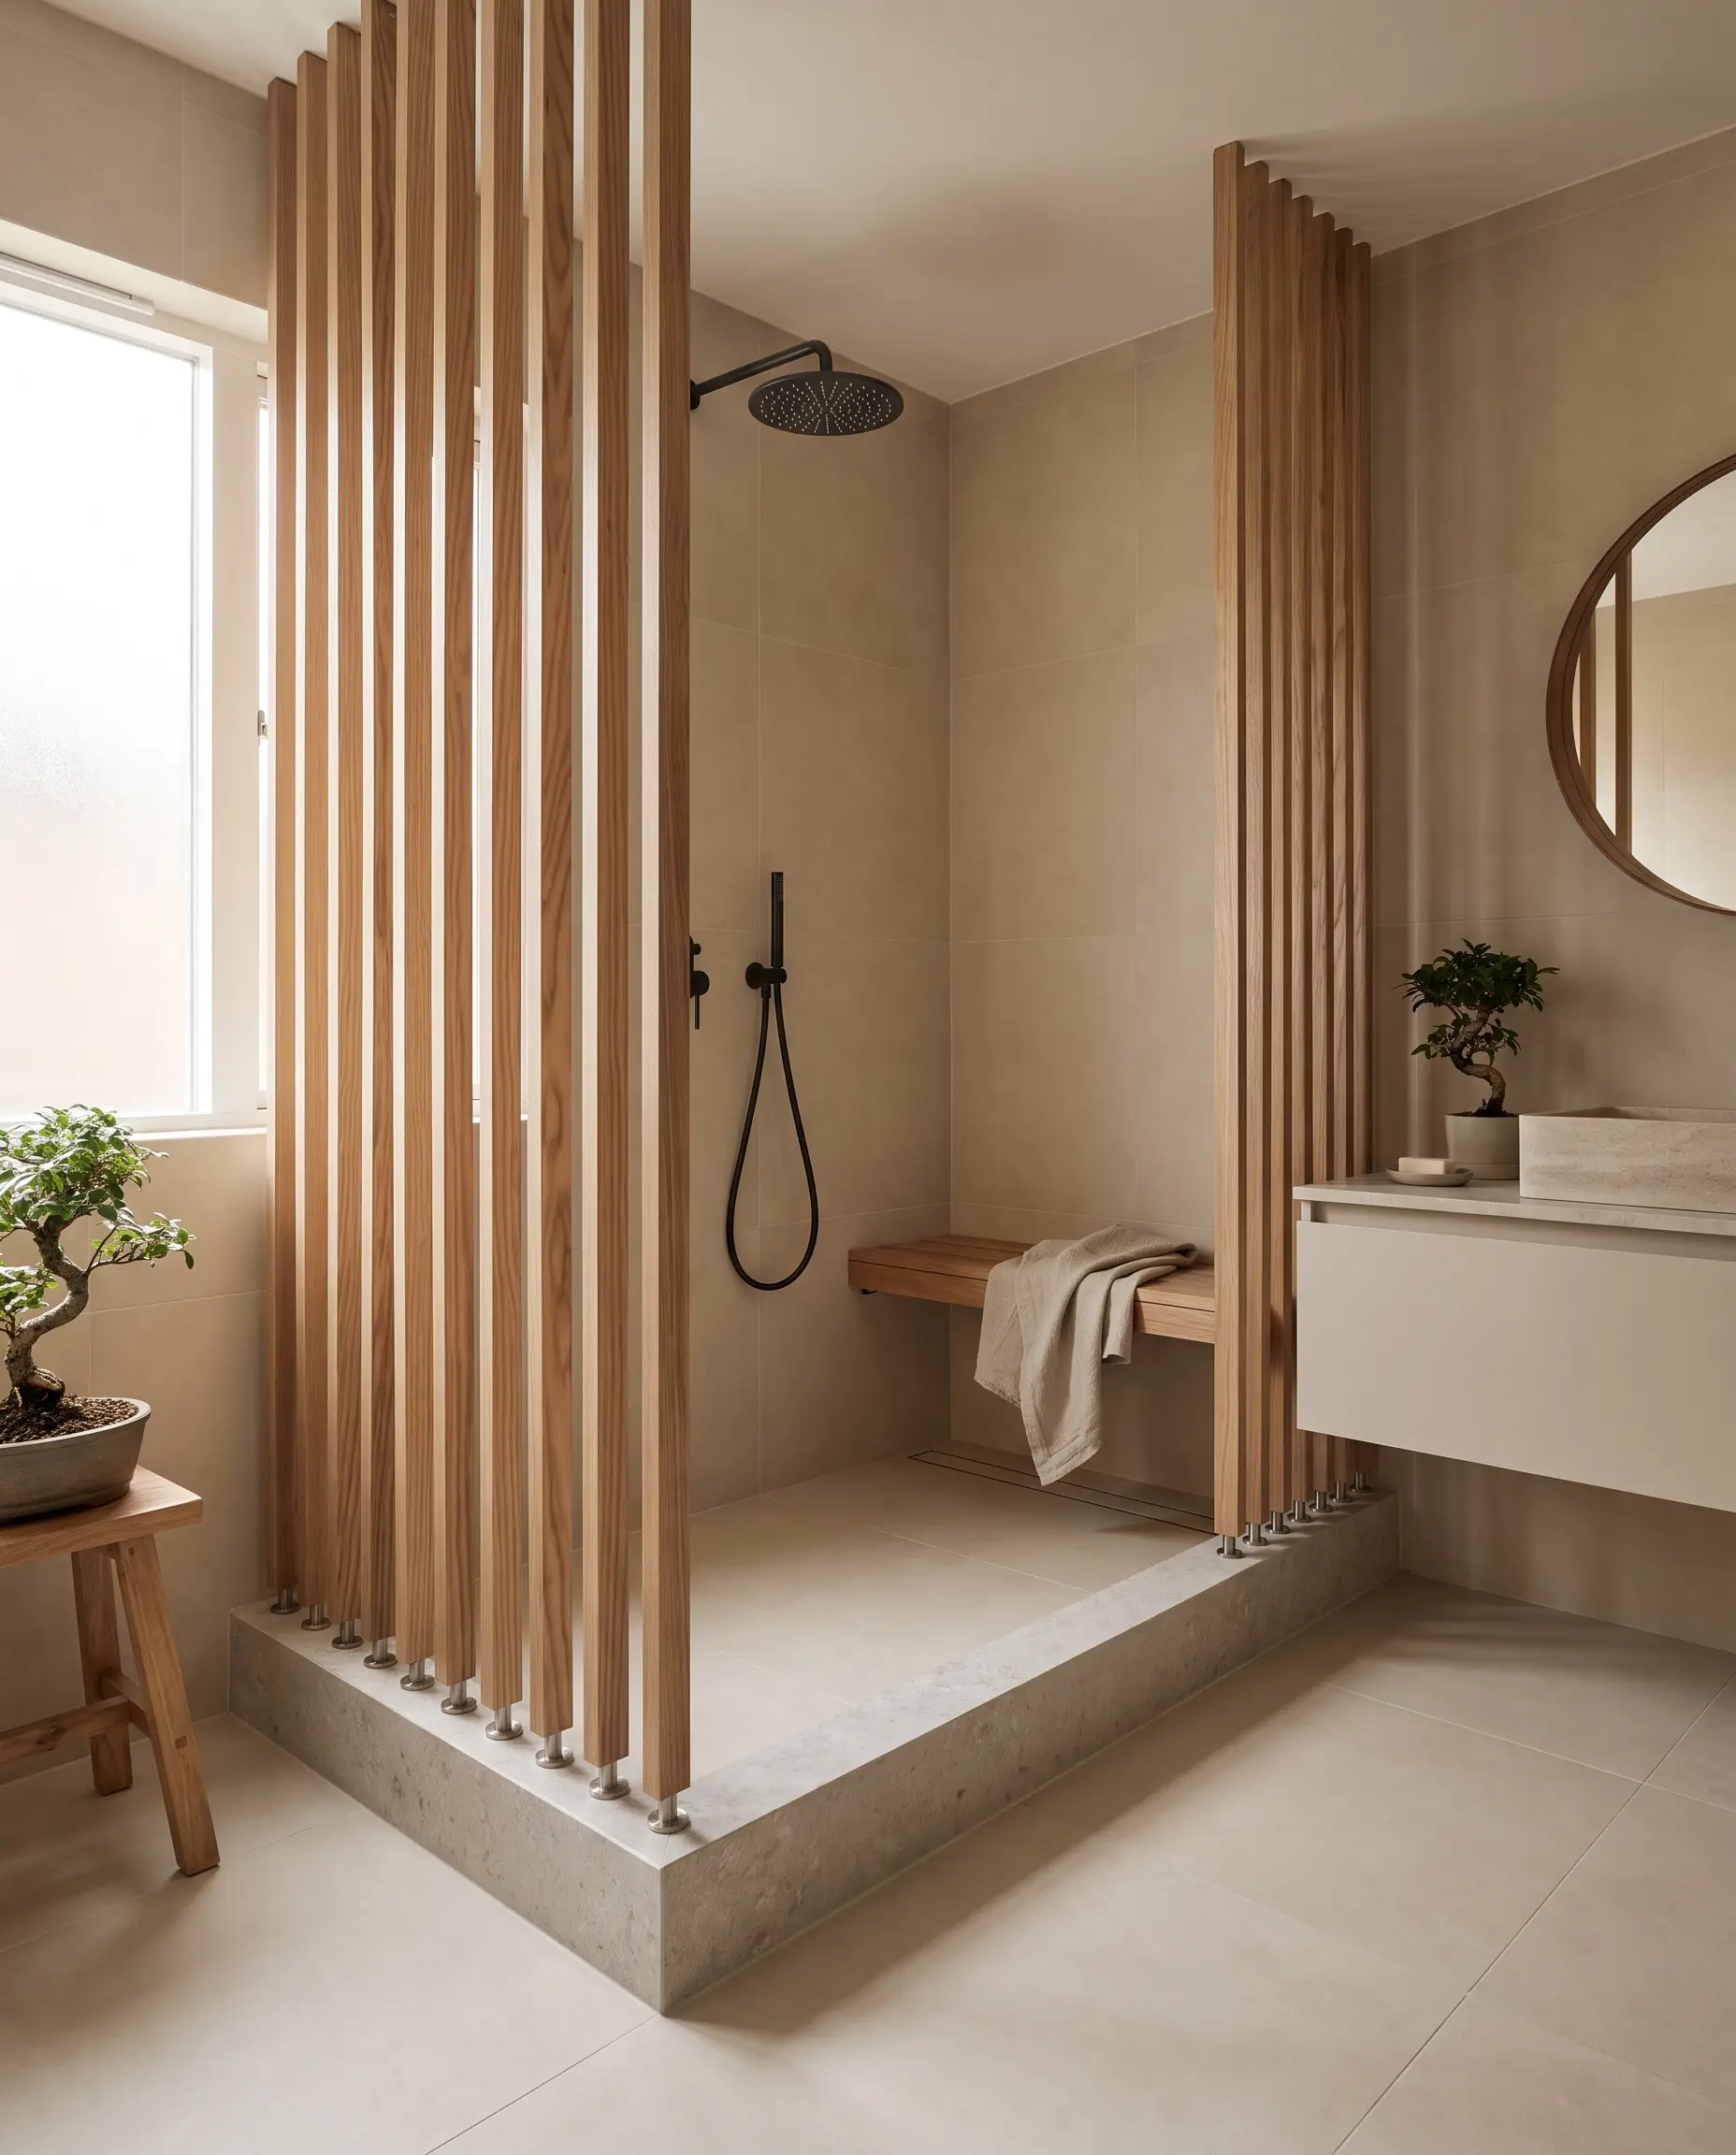
Vertical wood slats introduce warmth and a serene, Japandi aesthetic to the bathroom, gently dividing the space without blocking airflow. By positioning these slats just outside the primary splash zone, you achieve organic separation without subjecting the wood to direct, heavy water pressure.
- Vibe: Japandi & Serene
- Material Match: Thermally modified ash or high-grade teak, sealed meticulously with a penetrating marine oil.
- Base Connection: Mount the slats on a raised stone curb or stainless steel pins to prevent the end-grain from wicking standing water.
The Curved Plaster Entryway
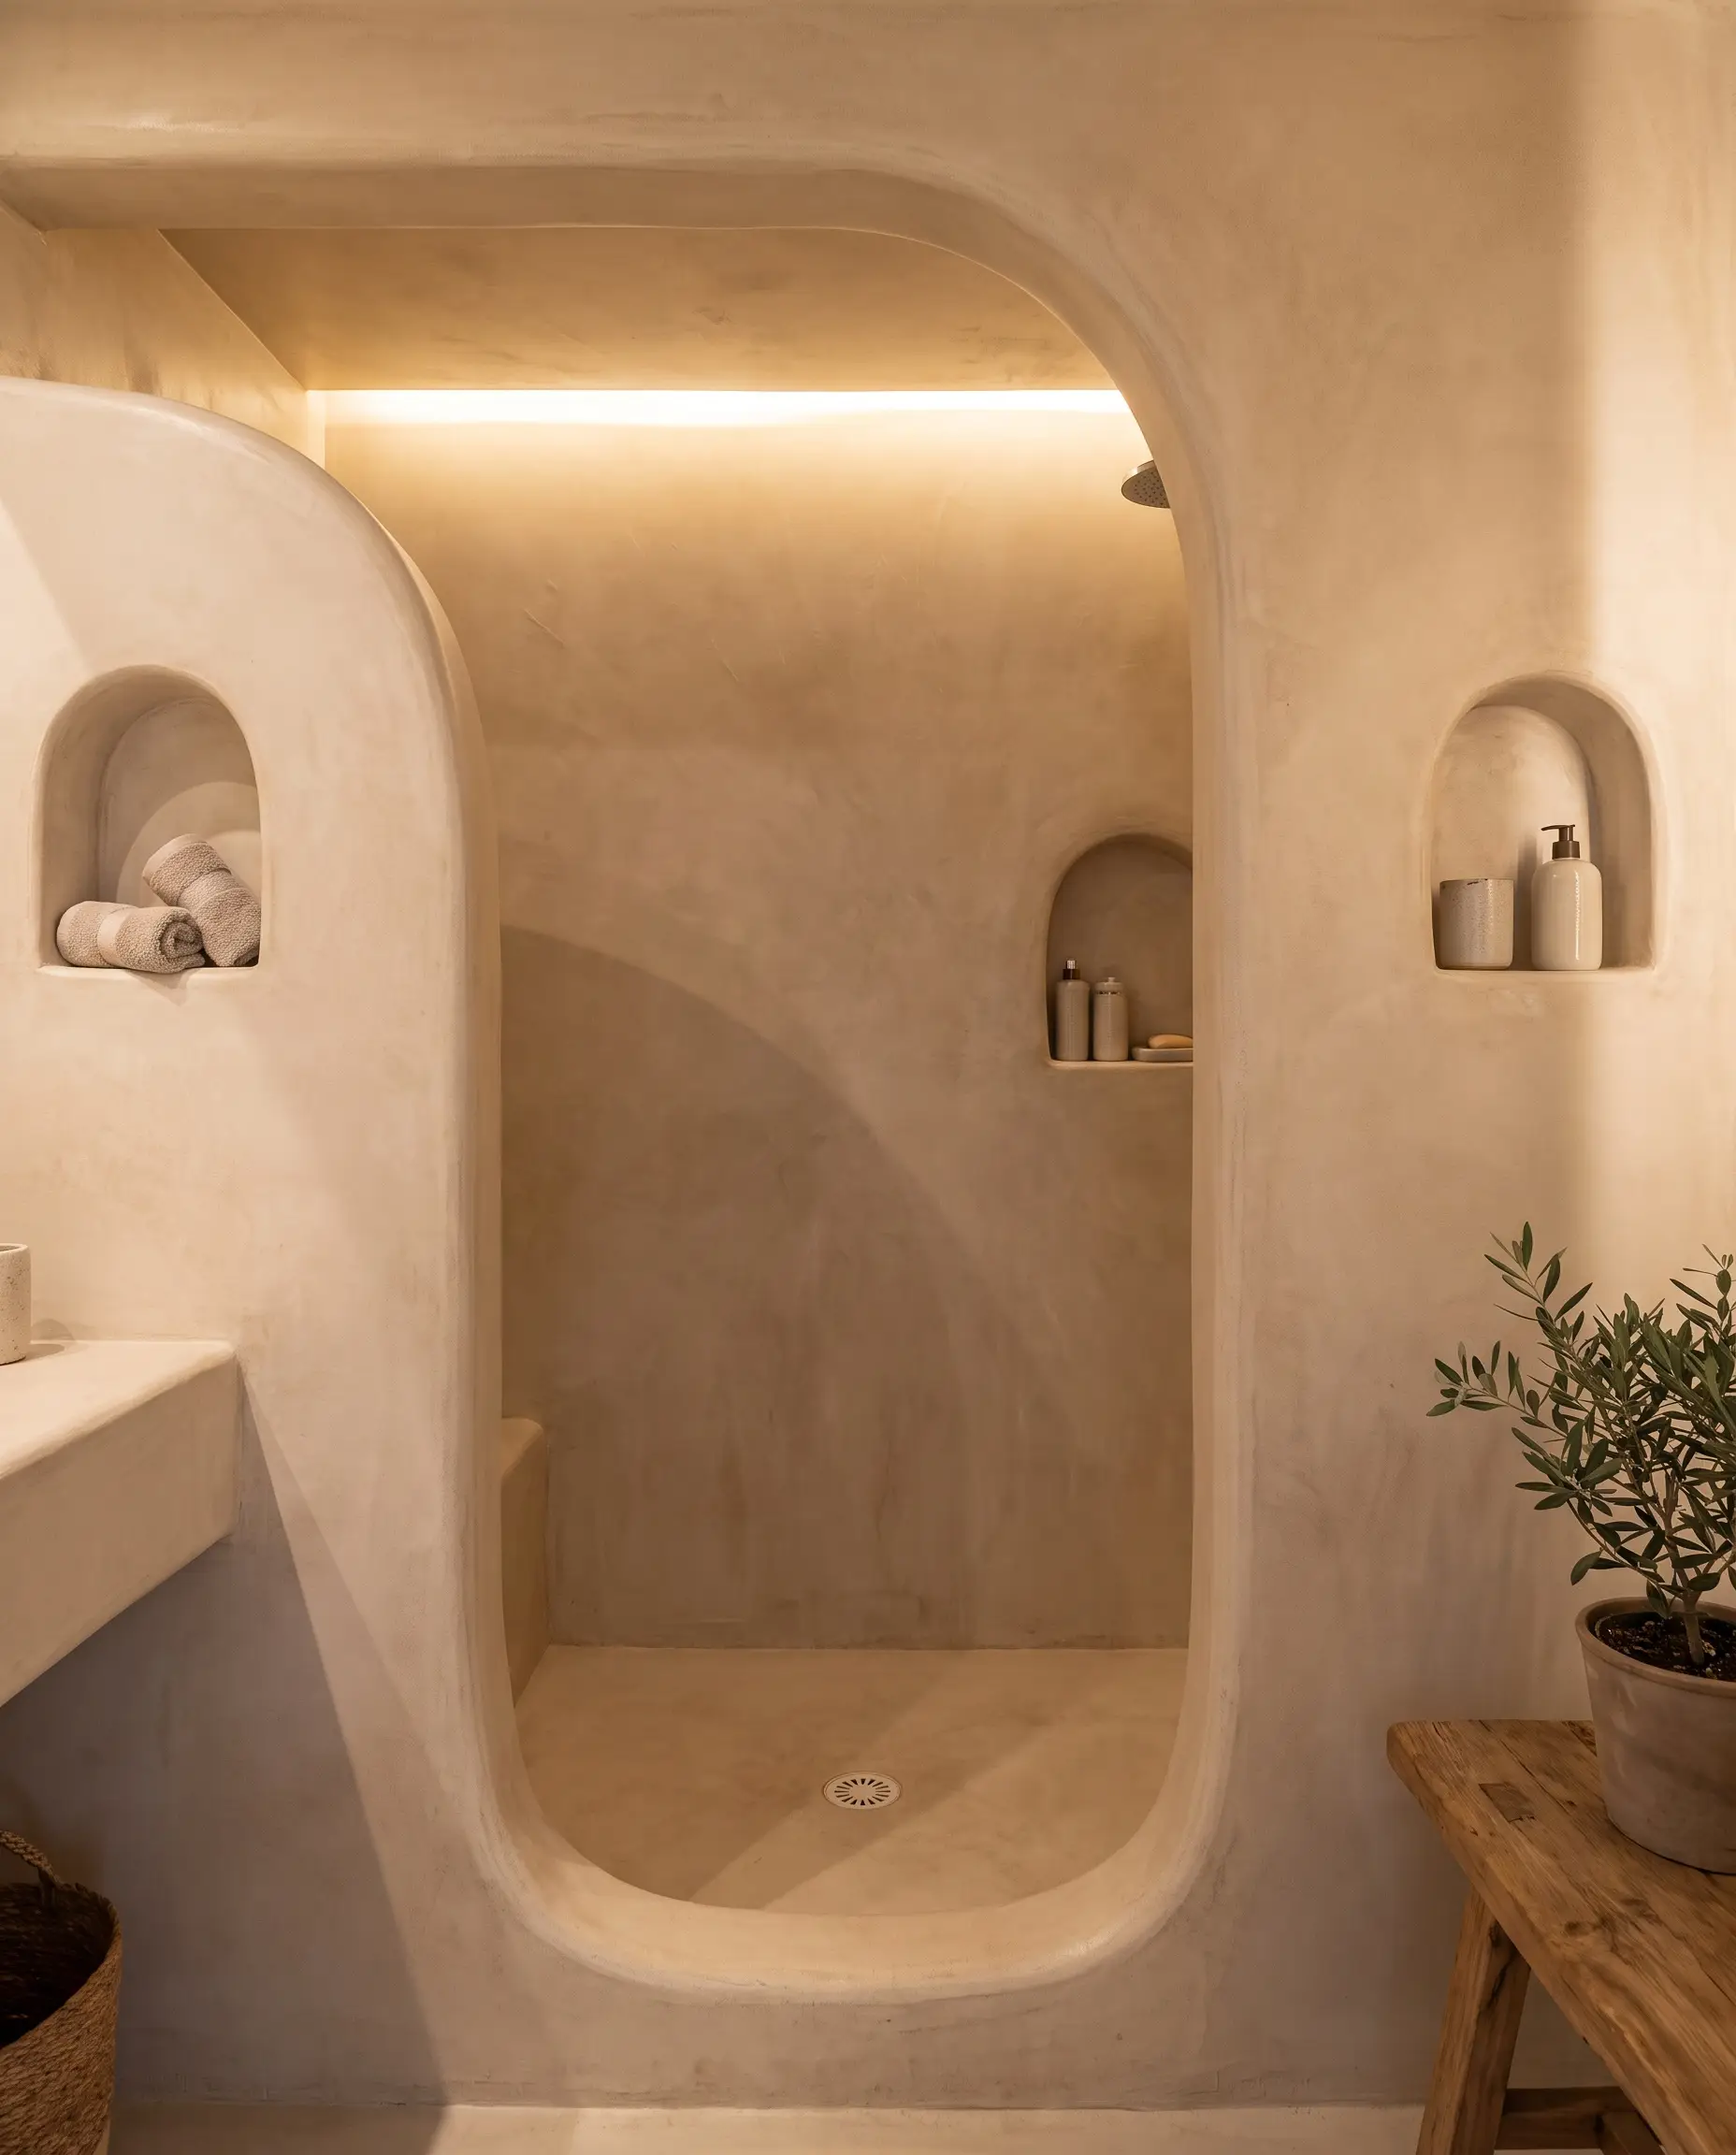
Sweeping, organic curves naturally guide the eye and the bather into the shower zone, using soft architectural geometry to deflect water back toward the drain. This Mediterranean-inspired approach eliminates harsh corners, creating a continuous, cave-like surface that feels effortlessly luxurious.
- Vibe: Organic Modern & Sculptural
- Key Materials: Waterproof microcement or traditional tadelakt plaster.
- Paint Match: Farrow & Ball Setting Plaster (A dusty pink that mimics the raw warmth of natural clay).
When designing curved entryways, eschew standard square niches. Frame your storage alcoves with matching arched tops to echo the room’s fluid architecture.
Hackrea Styling Tip
Foundation & Drainage Mechanics
A doorless shower lives and dies by its floor. Without a door to hold back pooling water, the structural pitch and drainage capacity must be flawless. Integrating a continuous waterproofing membrane and engineering the precise slope dictates whether your bathroom becomes a luxurious retreat or a structural disaster.
The Seamless Curbless Transition
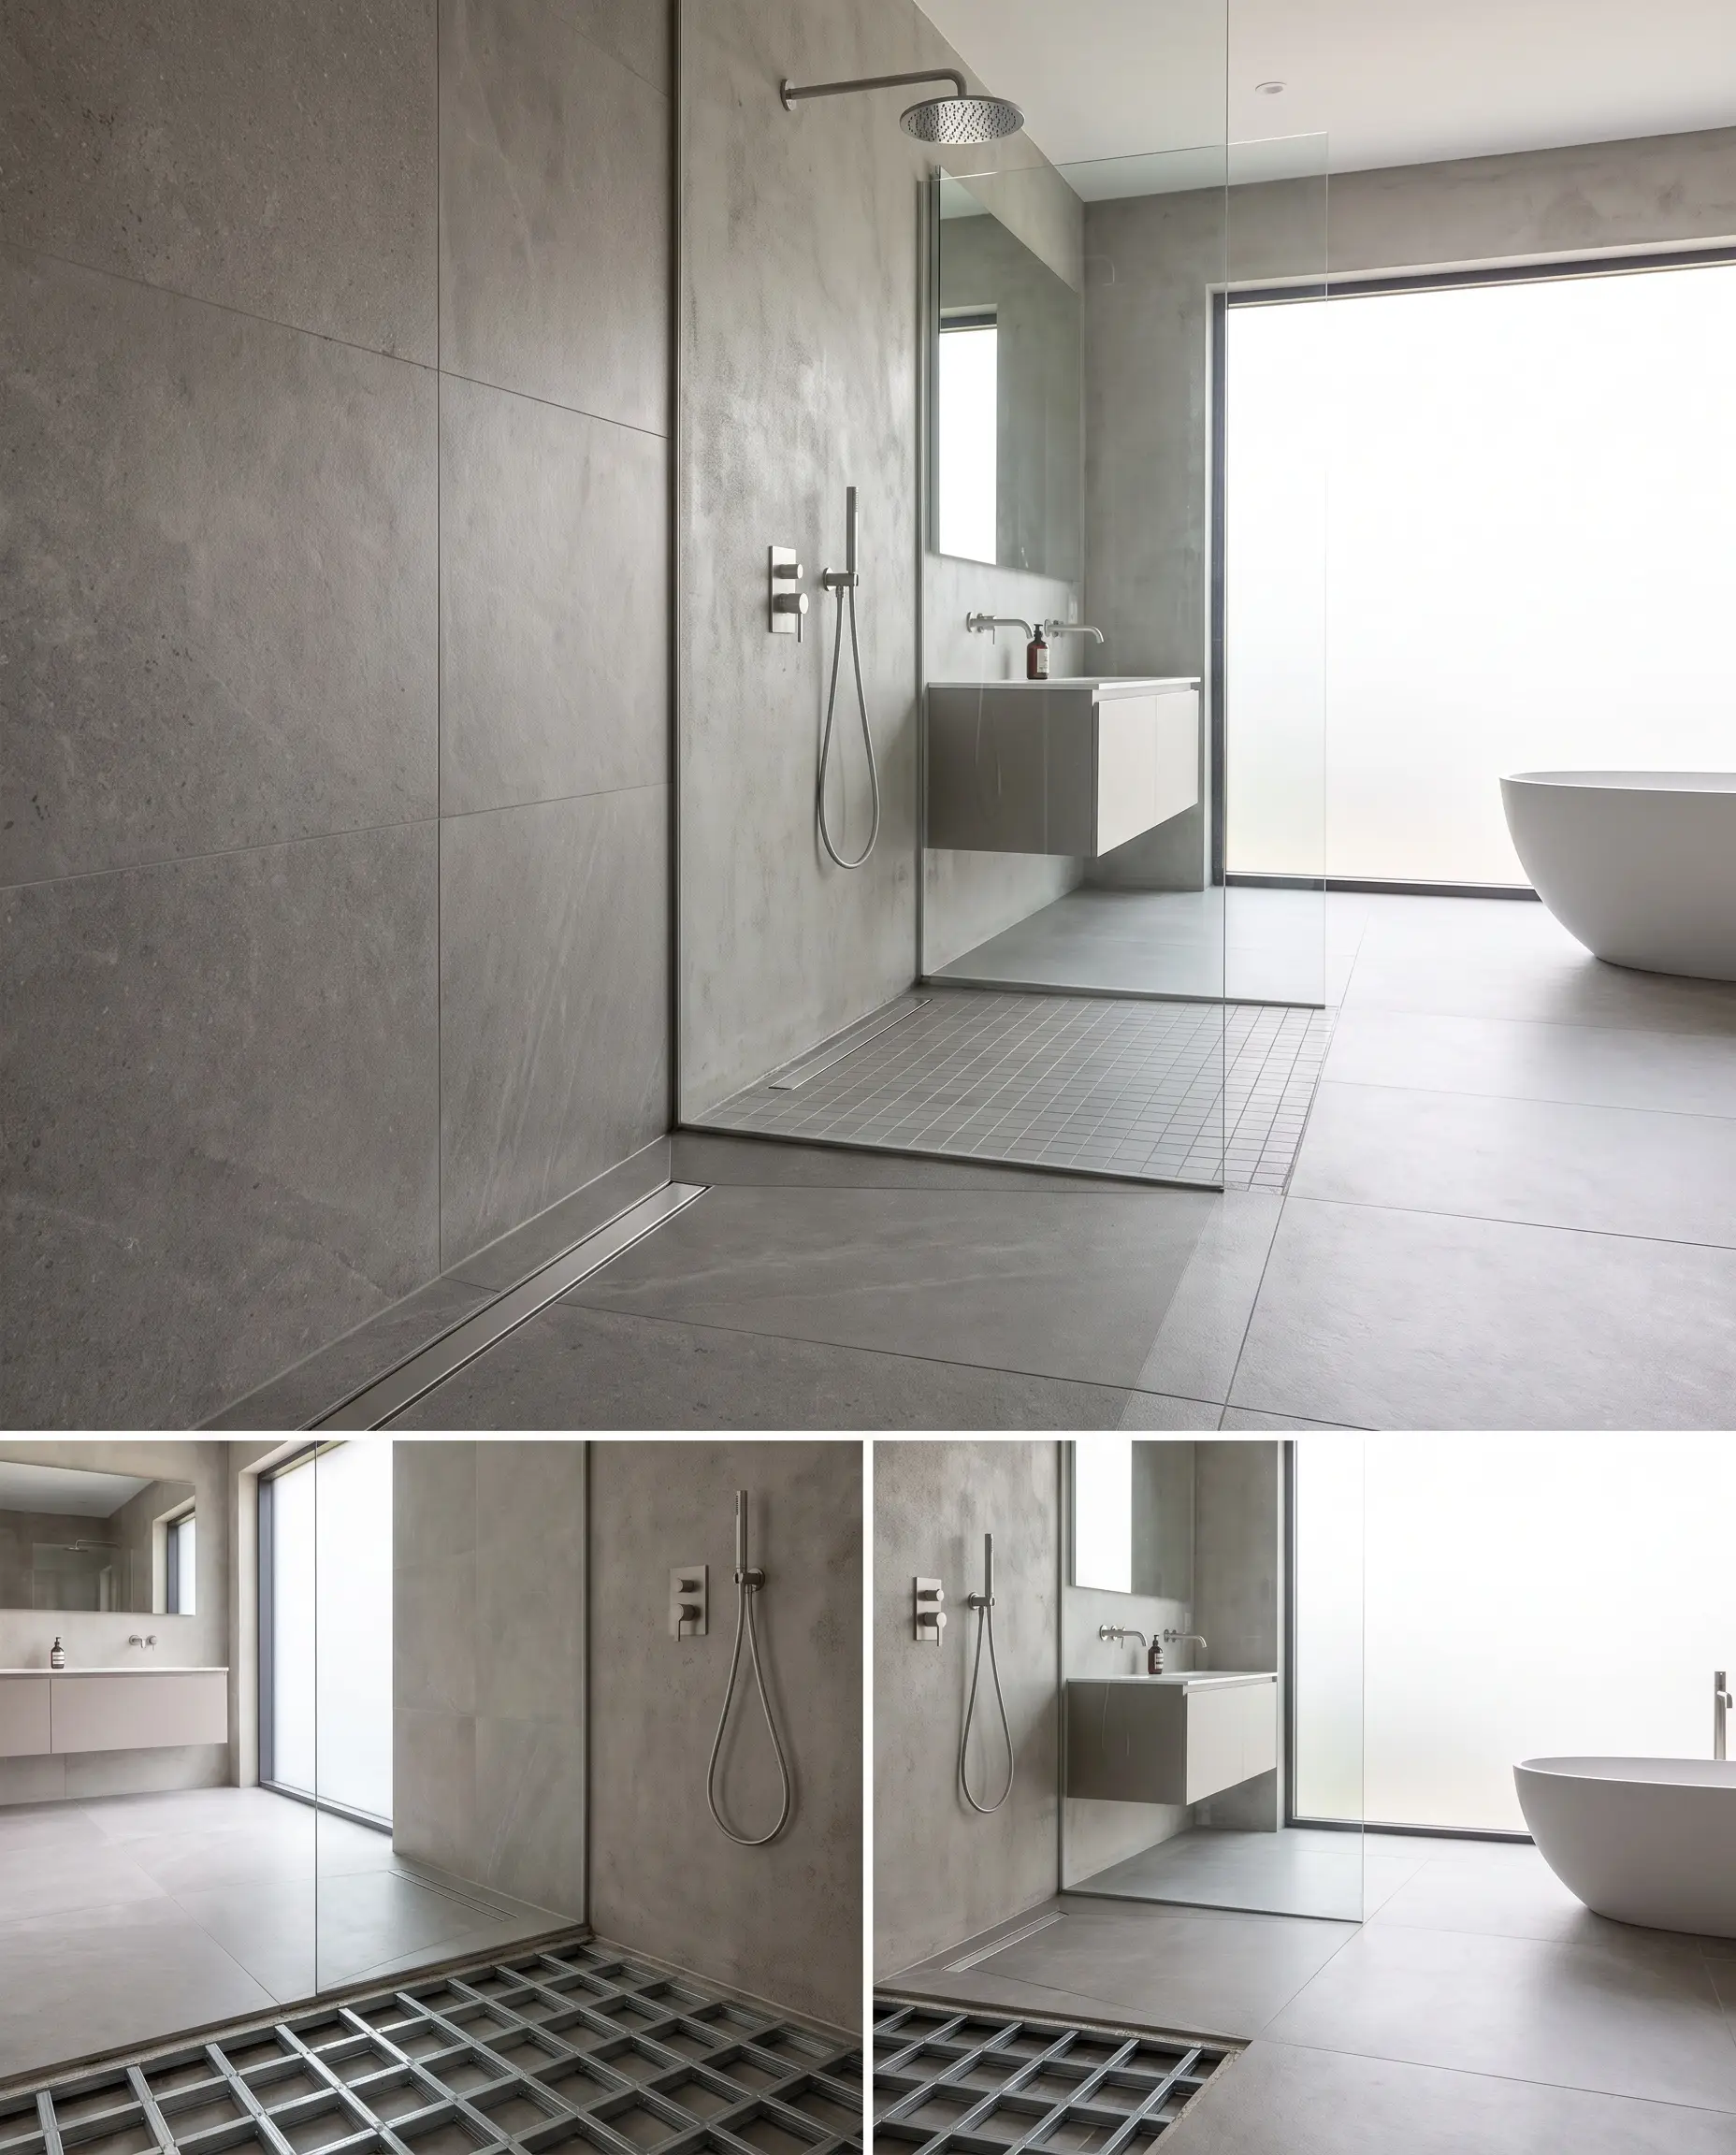
Eliminating the threshold entirely creates an unbroken visual plane across the bathroom floor, essential for aging in place and pristine modern aesthetics. This requires recessing the subfloor during framing to accommodate the necessary slope without creating a step-up.
- Vibe: Minimalist & Accessible
- Crucial Spec: Industry standards dictate a rigid 1/4-inch per foot slope from the entrance to the drain.
- Material Sourcing: Look for Schluter-Kerdi pre-sloped shower trays to guarantee a structurally perfect pitch.
Flush-Mount Infinity Linear Drains
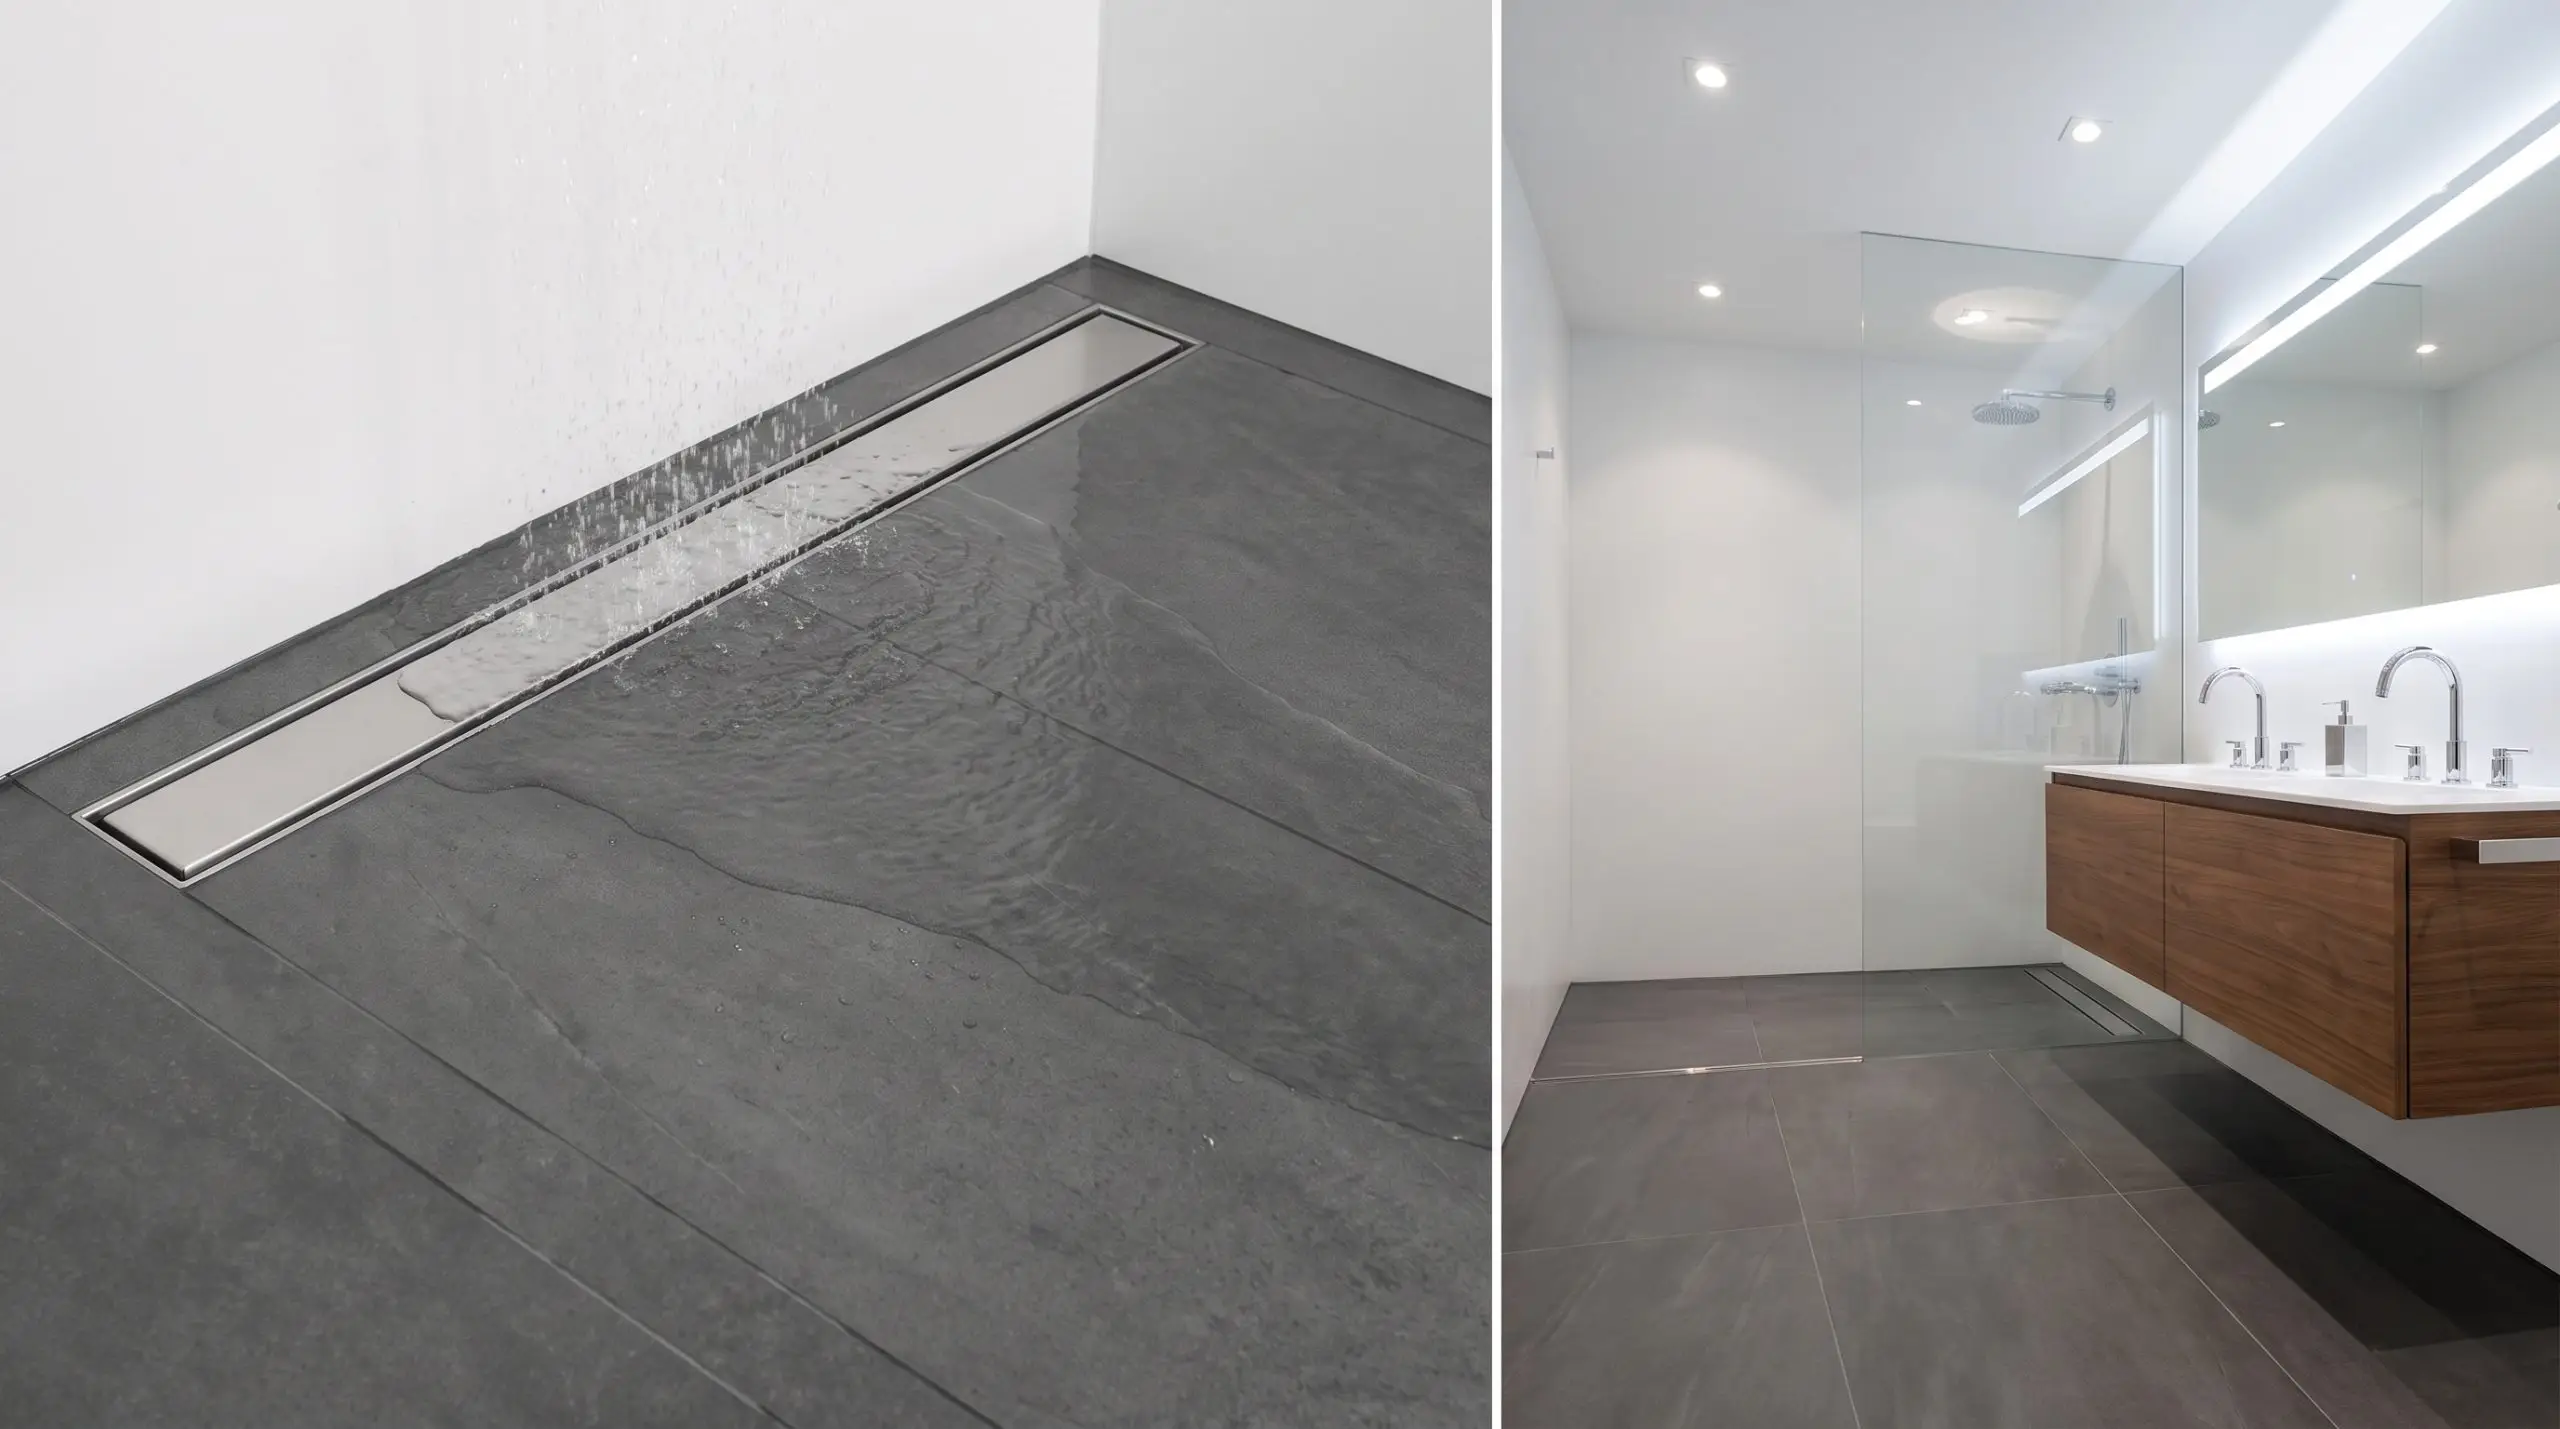
A sleek trench drain positioned at the back wall or right at the shower entrance captures water via sheet-flow, allowing you to use large-format floor tile without cutting it into a geometric envelope. It acts as an invisible moat, fiercely protecting the dry zones of the bathroom.
- Vibe: Sleek & Contemporary
- Key Hardware: Infinity Drain or similar high-capacity stainless steel linear systems.
- Placement Strategy: If placing the linear drain at the entry threshold, ensure the entire bathroom floor is waterproofed as a secondary precaution.
The Sunken Shower Floor
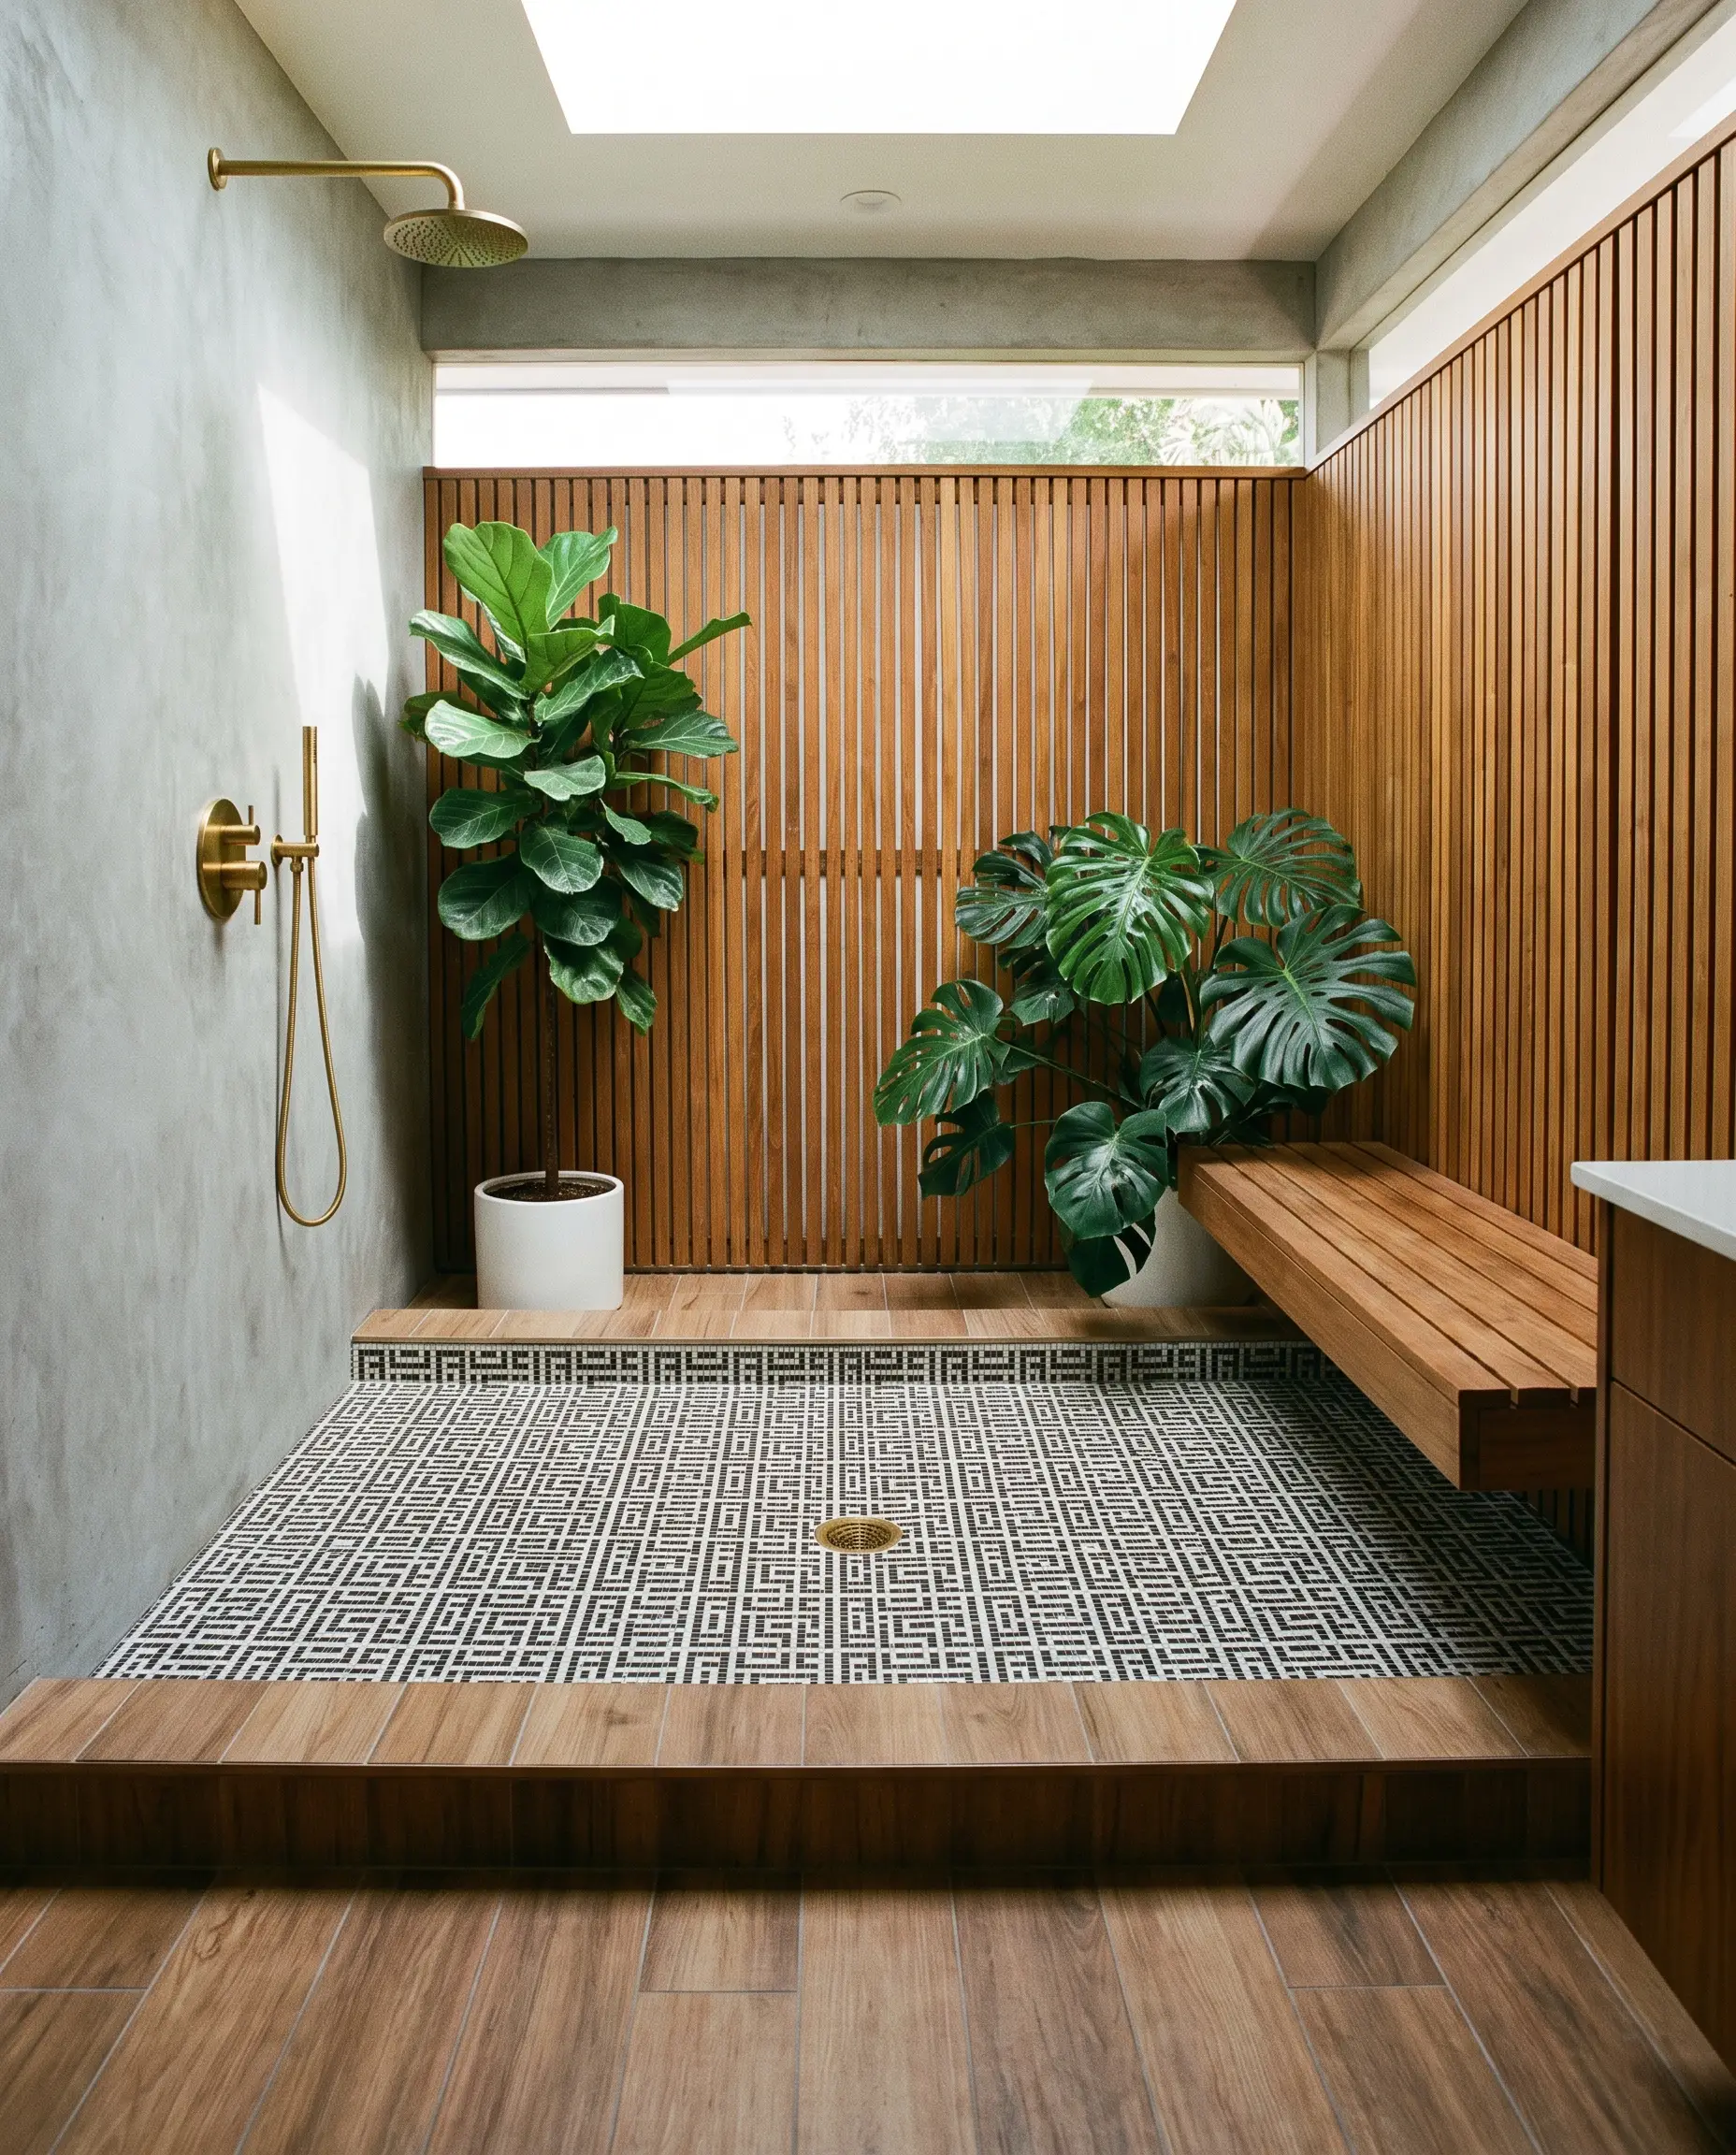
Dropping the shower floor two inches below the main bathroom level offers absolute peace of mind for strict water containment. It clearly delineates the wet zone while maintaining a doorless, open-air feeling, acting as a structural basin for rigorous bathing.
- Vibe: Mid-Century Sunken Bath
- Key Materials: High-contrast mosaic tiles to visually highlight the step-down for safety.
- Drainage Note: Requires a standard center point drain, as the sunken perimeter acts as the primary containment field.
Invisible Tile-Insert Center Drains
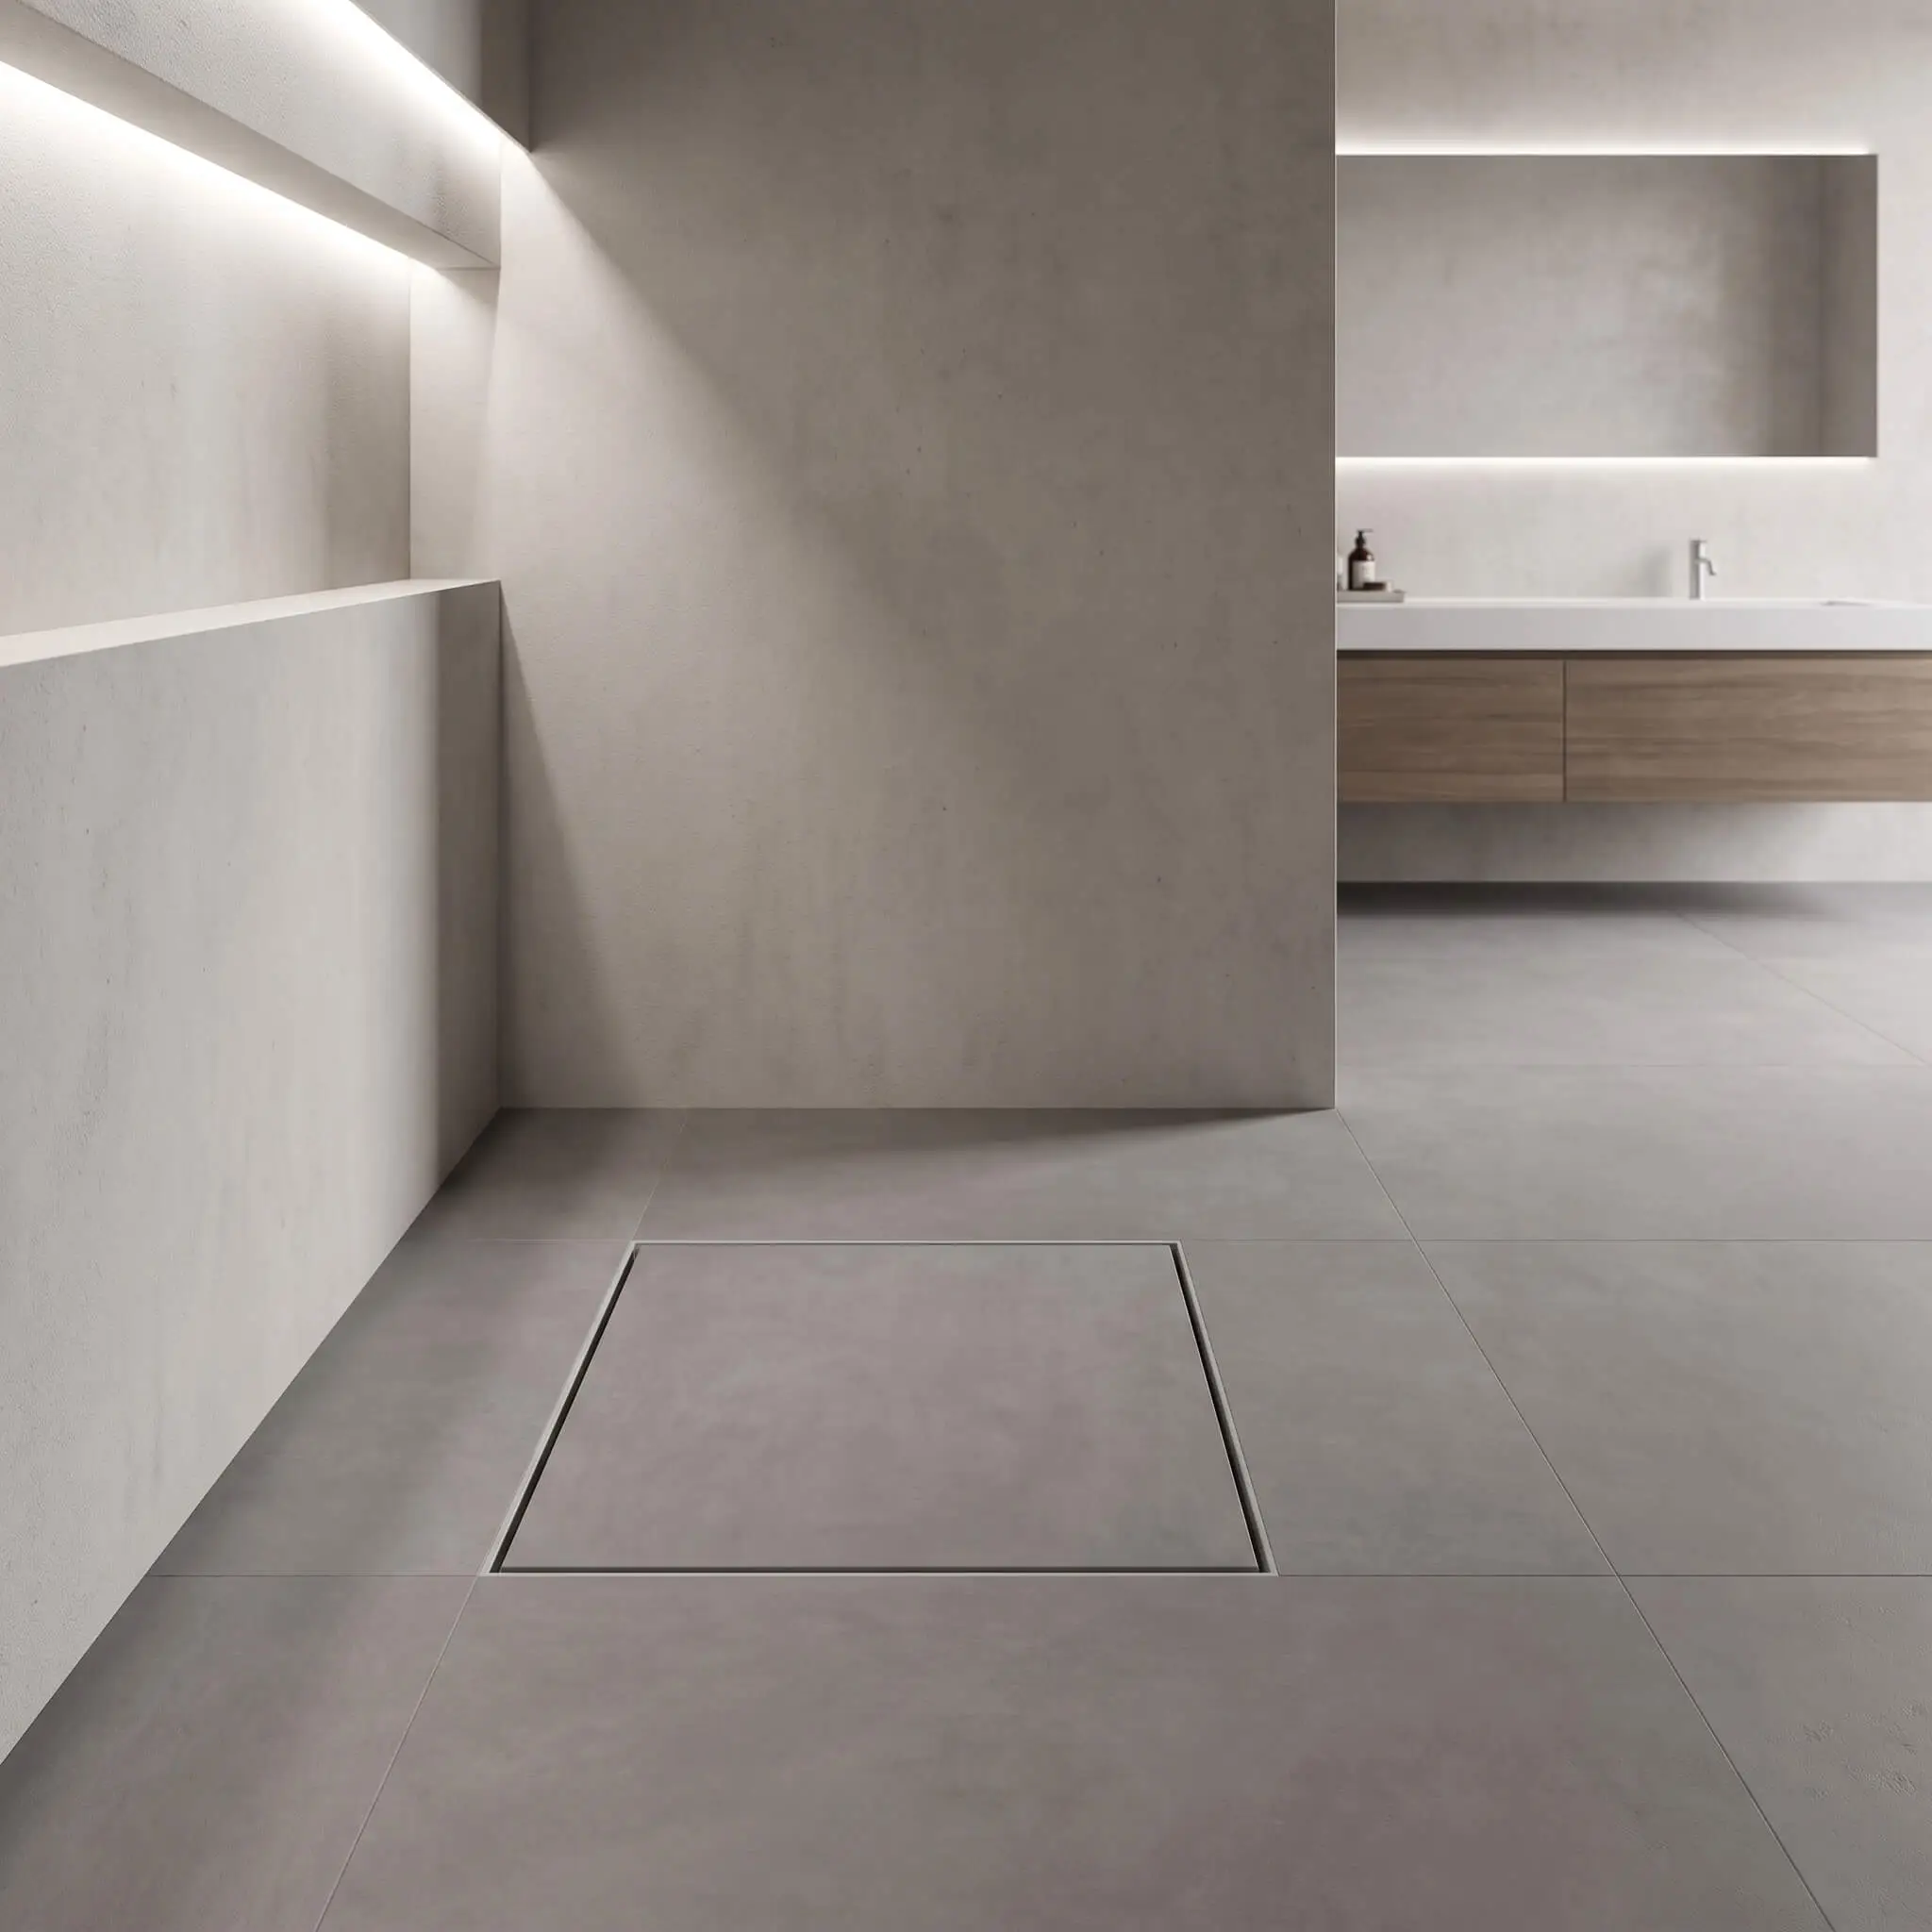
For absolute minimalism, a tile-insert drain camouflages the plumbing by allowing a piece of the surrounding floor tile to sit directly over the grate. Water escapes through a mere 1/4-inch gap around the perimeter, rendering the drain virtually invisible to the naked eye.
- Vibe: Ultra-Minimalist & Clean
- Key Materials: Square tile-in drain grates matching the exact thickness of your floor tile.
- Maintenance Tip: Ensure the insert is easily removable with a specialized key for routine hair clearing.
The Raised Teak Platform
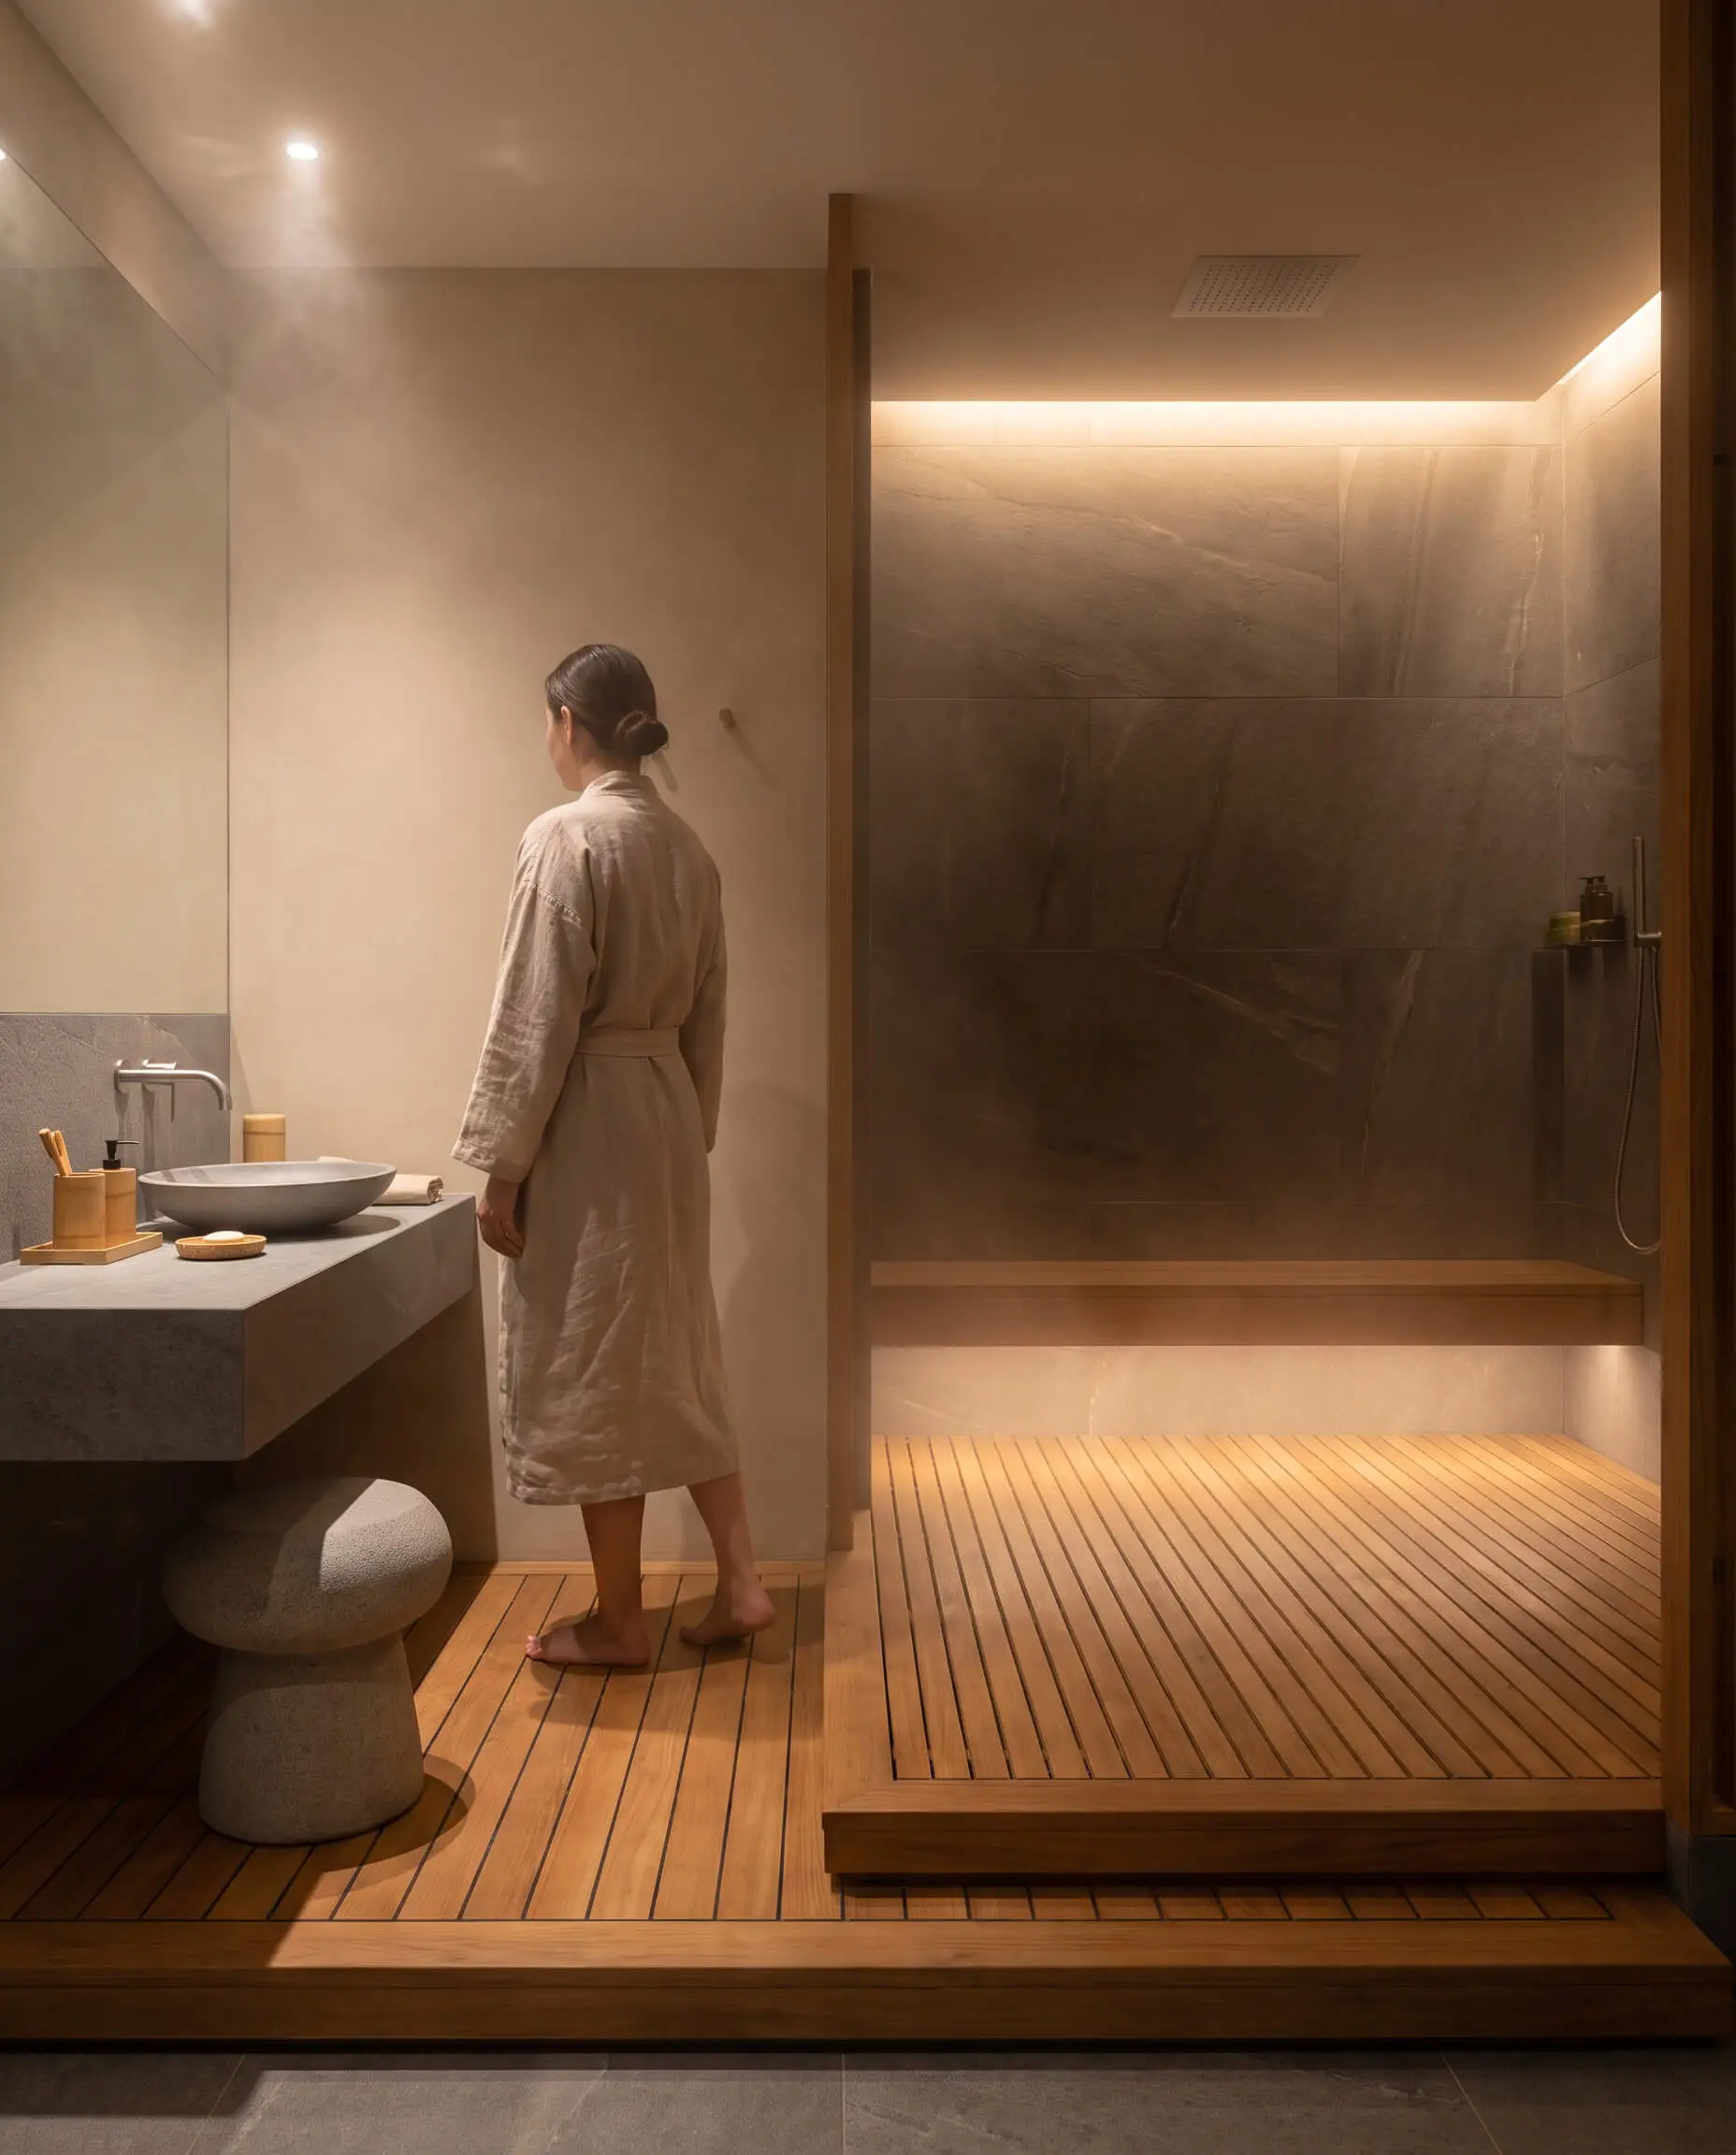
Channeling a Japanese onsen, a slatted teak floor sits flush with the bathroom level while concealing a deeply sloped, waterproofed pan underneath. Water falls through the slats instantly, keeping the bather’s feet elevated and dry while offering a warm, tactile underfoot experience.
- Vibe: Spa-Like & Zen
- Key Materials: Custom-milled, marine-grade teak slats over an epoxy-coated sub-pan.
The sub-pan beneath a teak platform must still be fully pitched and waterproofed with a membrane, as this is where the actual water containment occurs.
Architect’s Note
Material Applications & Slip Resistance
In an open wet room, the floor surface must prioritize safety without compromising the bespoke aesthetic. Because water will travel further without a door, selecting materials with a high Dynamic Coefficient of Friction (DCOF) is an absolute, non-negotiable building requirement.
| Material | Pros | Cons | Ideal For |
|---|---|---|---|
| Pebble Mosaic | Incredible traction, natural foot massage, hides slope cuts easily. | Grout-heavy, requires intensive cleaning, can feel uneven. | Organic/Rustic Layouts |
| Matte Porcelain | Low maintenance, highly durable, mimics natural stone perfectly. | Can be slippery if the specific finish lacks a high DCOF rating. | Modern Minimalist |
| Tadelakt Plaster | Seamless, groutless, naturally water-repellent, highly tactile. | Requires skilled artisan application, sensitive to harsh chemical cleaners. | Organic Modern |
| Epoxy Resin | Completely impermeable, monolithic look, highly customizable. | Industrial aesthetic isn’t for everyone, prone to scratching. | Brutalist/Industrial |
Monolithic Tadelakt Plaster
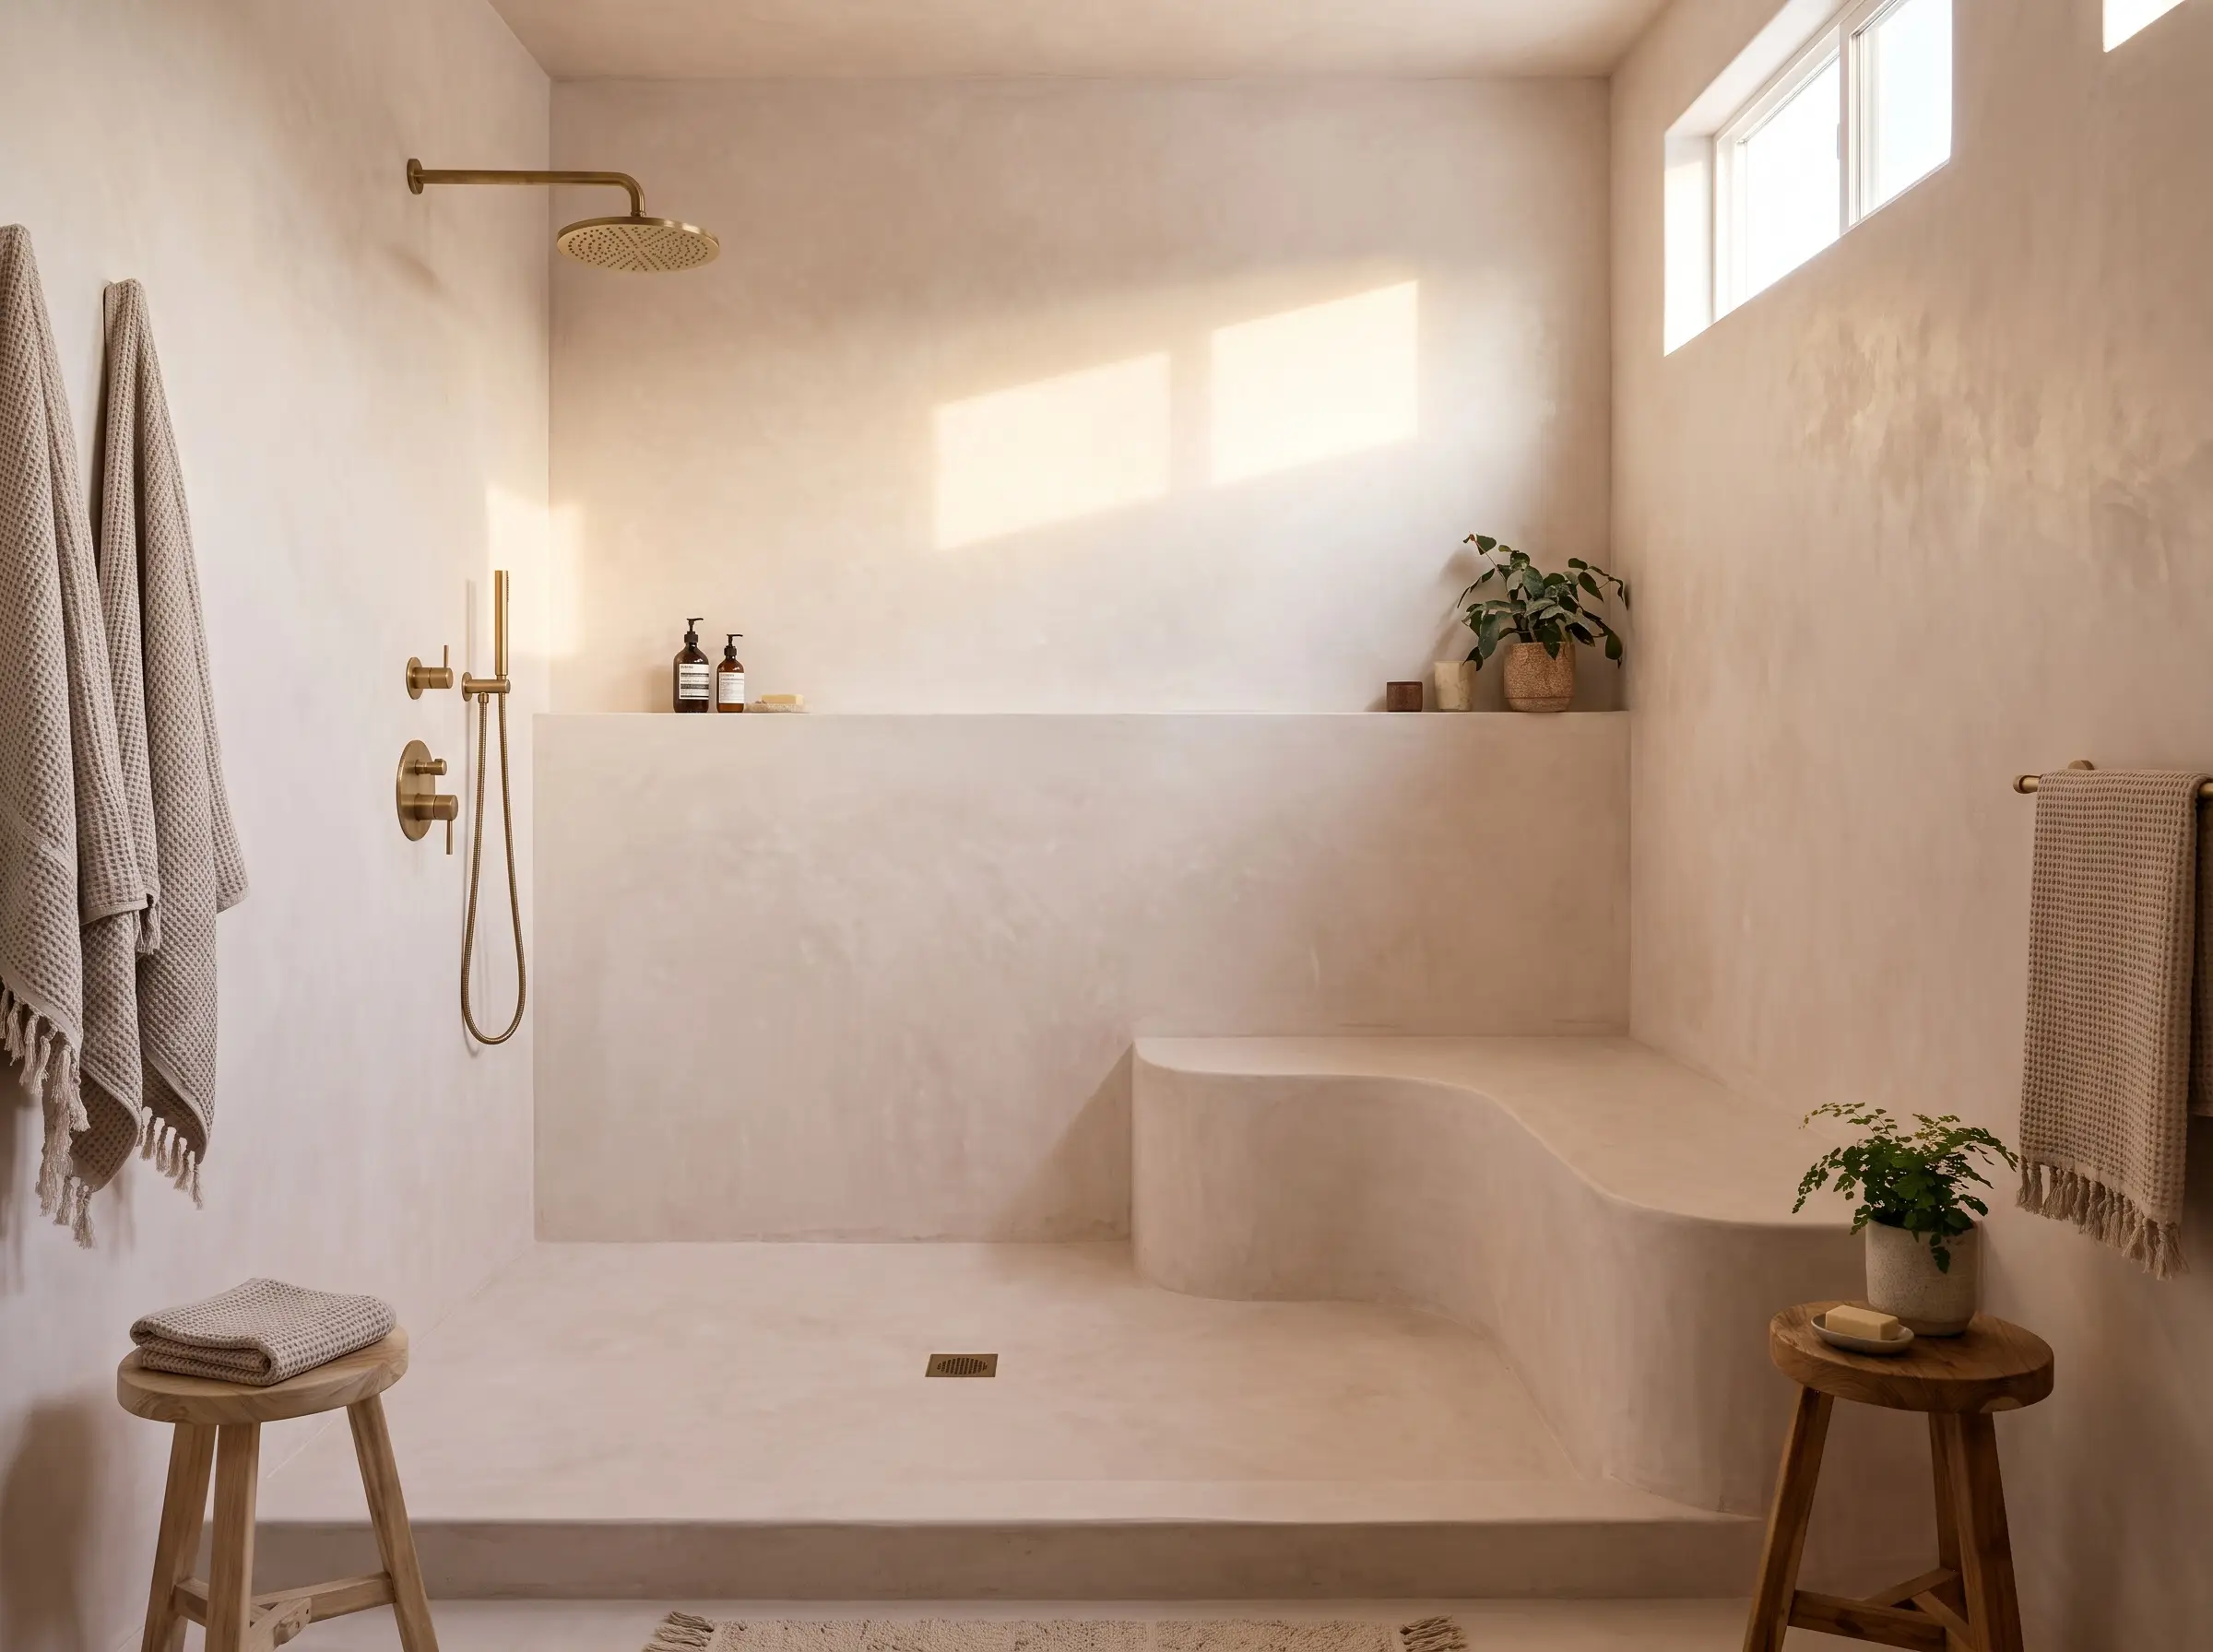
Tadelakt is a Moroccan lime plaster treated with olive soap to create a seamless, waterproof, and groutless finish. It wraps the walls and floors in a soft, mottled texture that feels incredibly organic while naturally repelling water.
- Vibe: Earthy & Bespoke
- Wall Color Recommendation: Portola Paints Roman Clay in ‘El Mirage’ (for dry zones mirroring the wet tadelakt).
- Maintenance Constraint: Must be cleaned with mild, pH-neutral soaps to preserve the protective soap-stone reaction.
High-Traction Pebble Mosaics
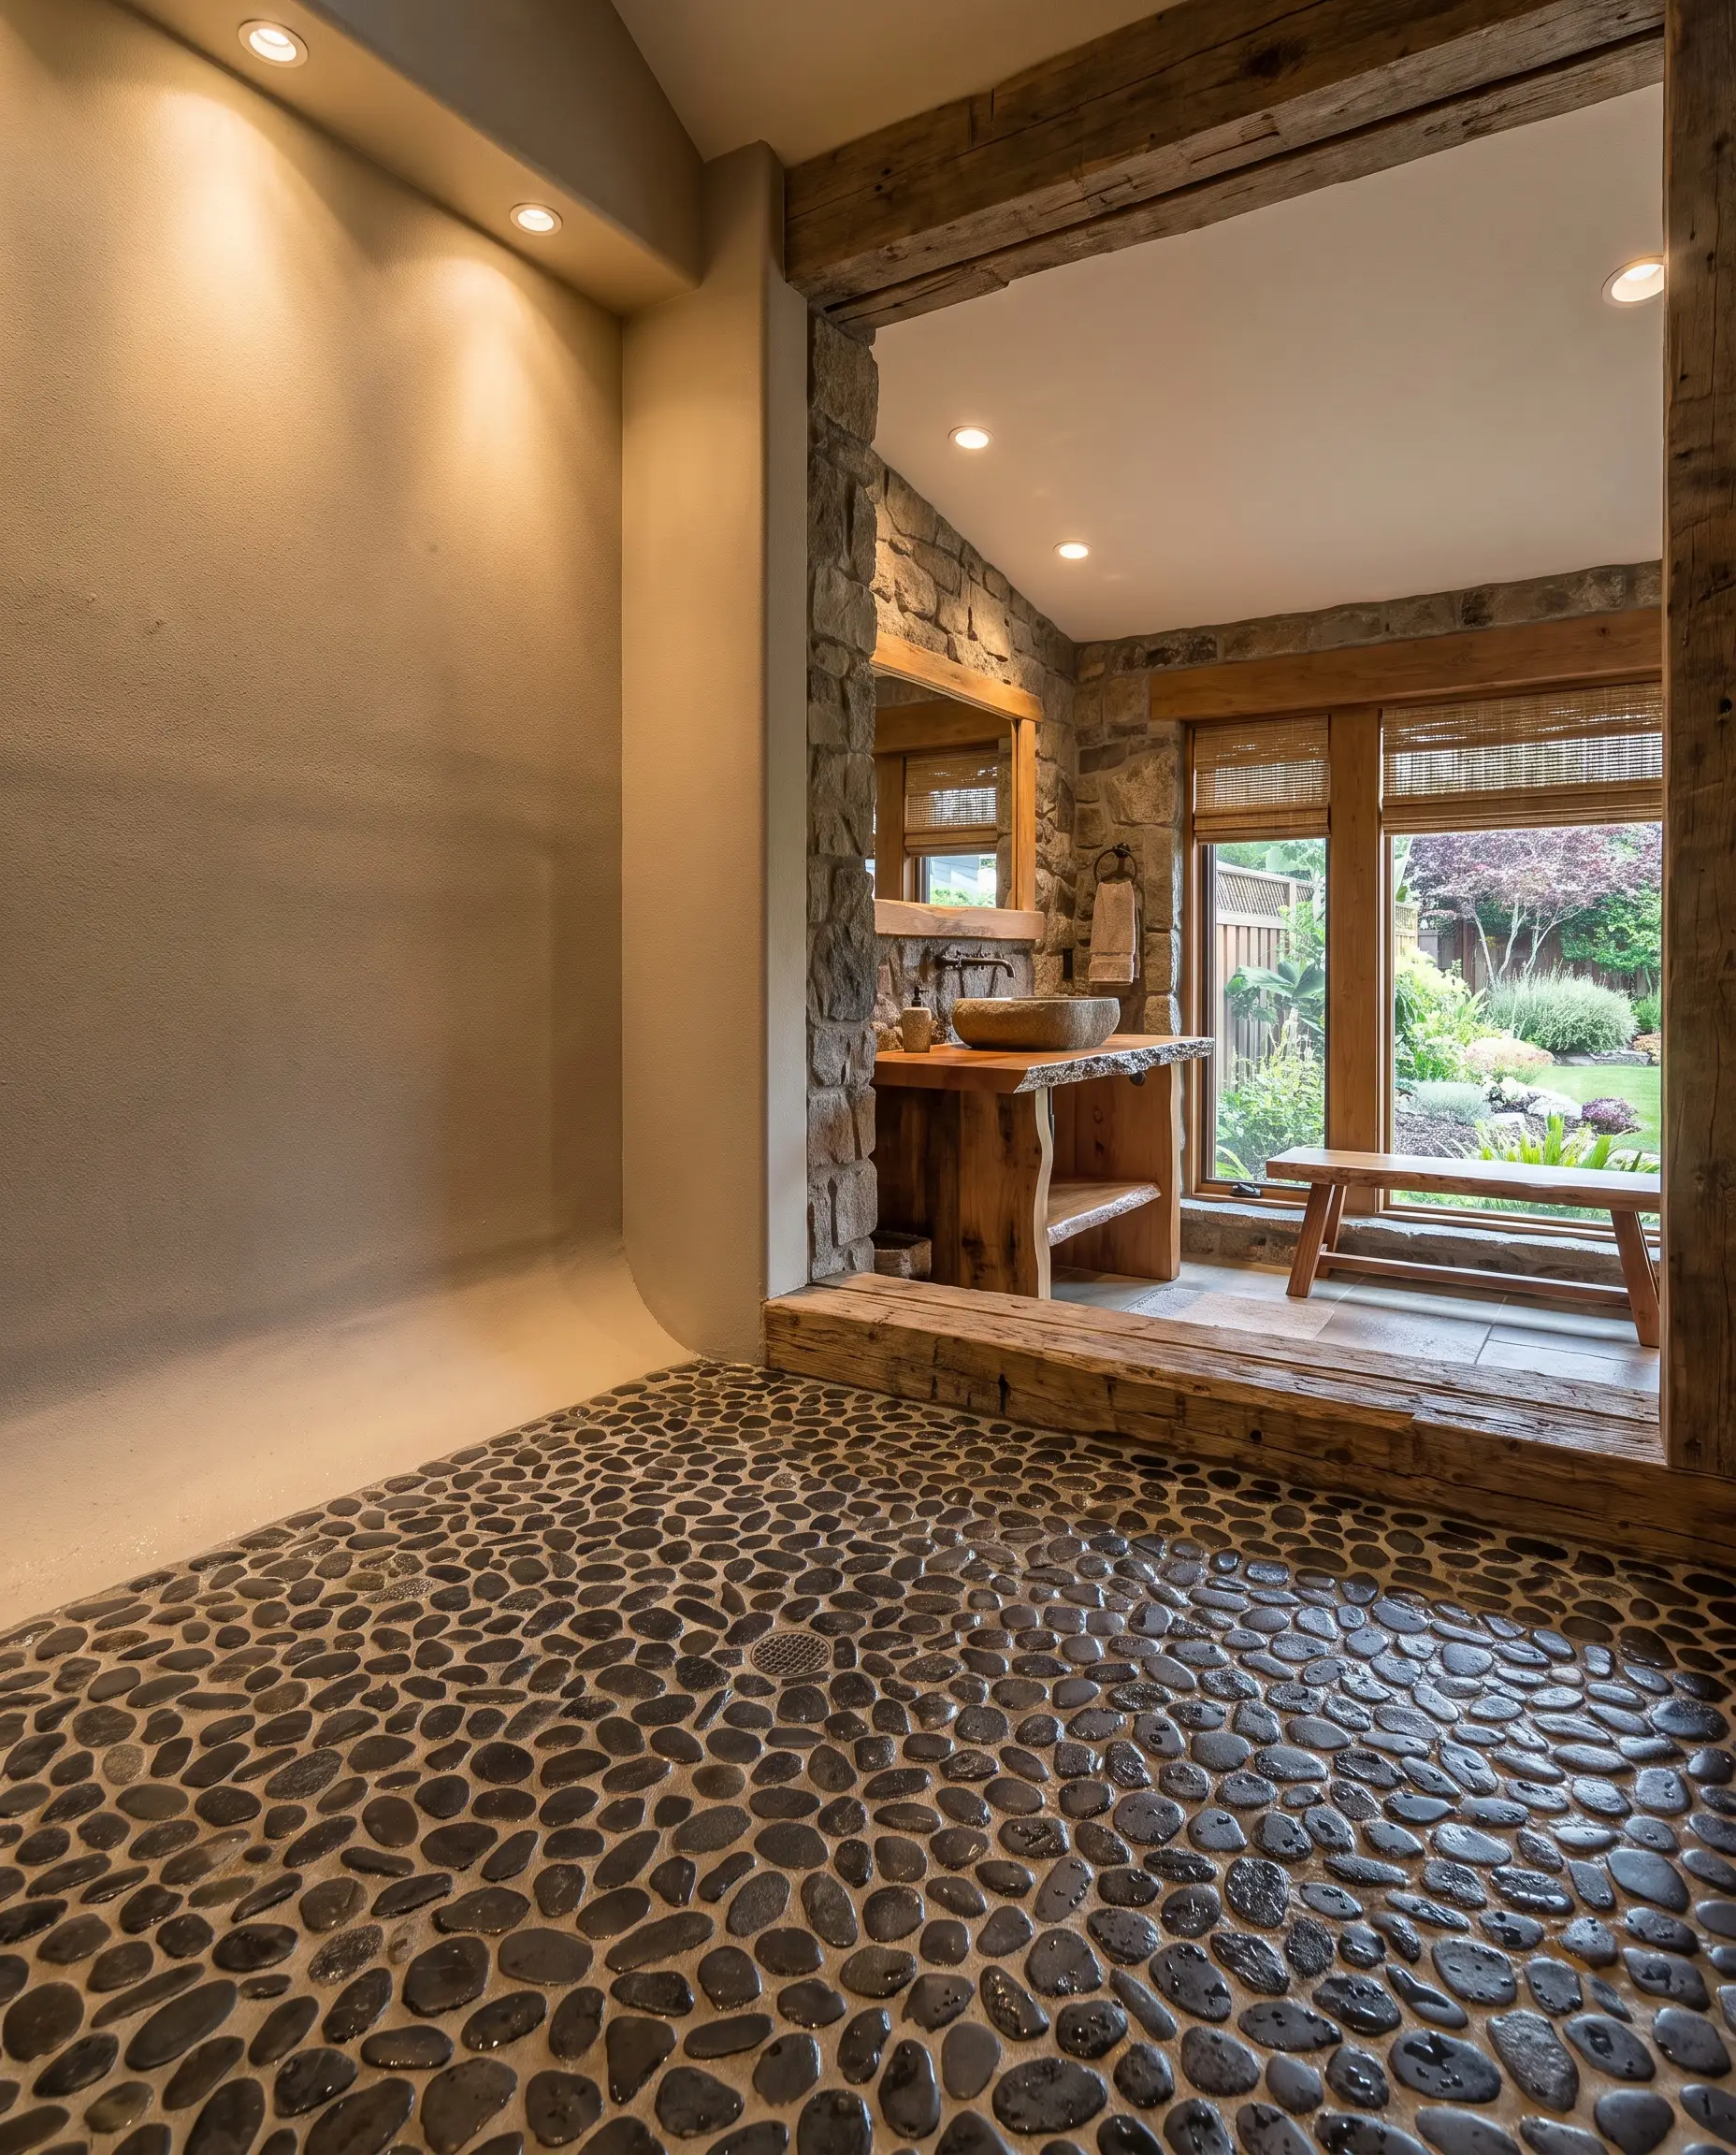
Sliced or rounded river rock offers exceptional grip, making it an incredibly safe choice for expansive wet room floors. The high volume of grout lines required for pebbles inherently acts as a friction grid, heavily reducing slip hazards.
- Vibe: Nature-Inspired Retreat
- Key Materials: Flat-sliced basalt pebbles for a more comfortable underfoot feel than fully rounded stones.
- Grout Requirement: Professional installers require a high-grade epoxy grout to prevent water degradation over time.
Large-Format Matte Porcelain
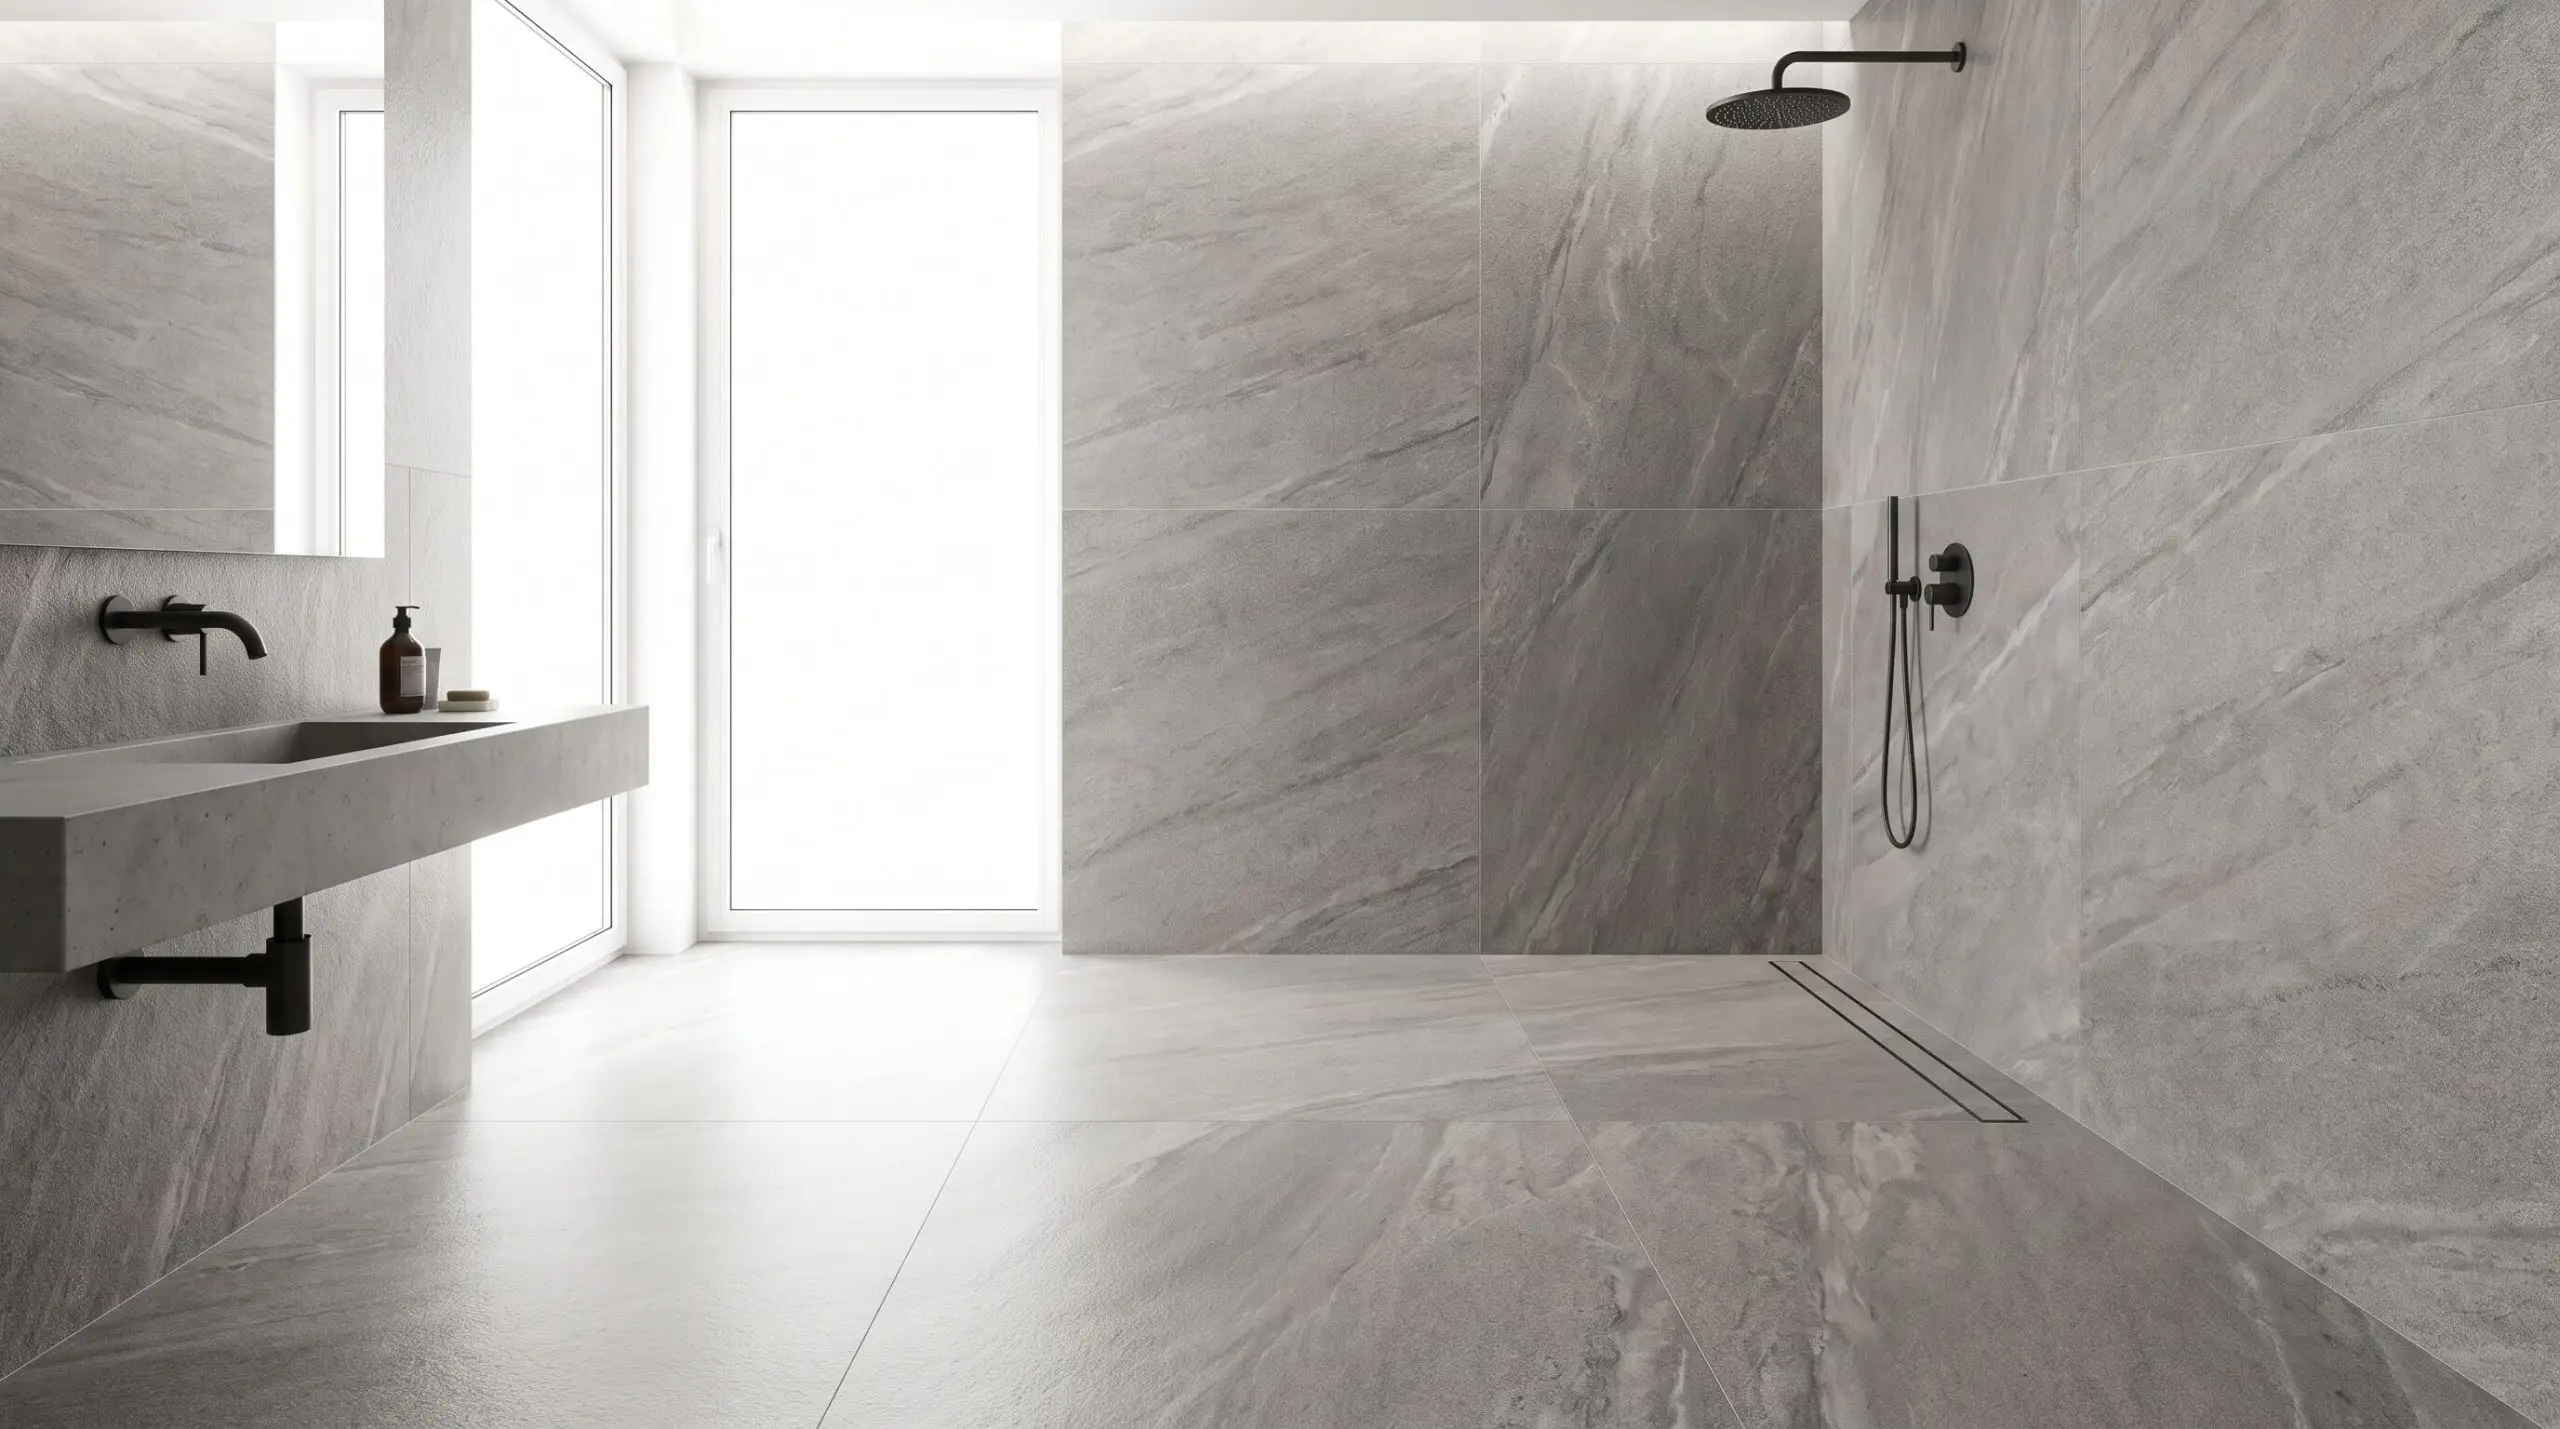
Utilizing massive porcelain slabs on the floor drastically reduces grout lines, offering an uninterrupted, sleek aesthetic that is incredibly easy to clean. However, the surface must be explicitly engineered with a textured, anti-slip glaze to remain safe when flooded.
- Vibe: Sleek & Uninterrupted
- Crucial Spec: Verify the tile carries a DCOF rating of 0.42 or higher for wet environments.
- Drain Pairing: Best paired with a linear trench drain to avoid complex, unsightly diagonal cuts in the large tiles.
Honed Marble Checkerboard
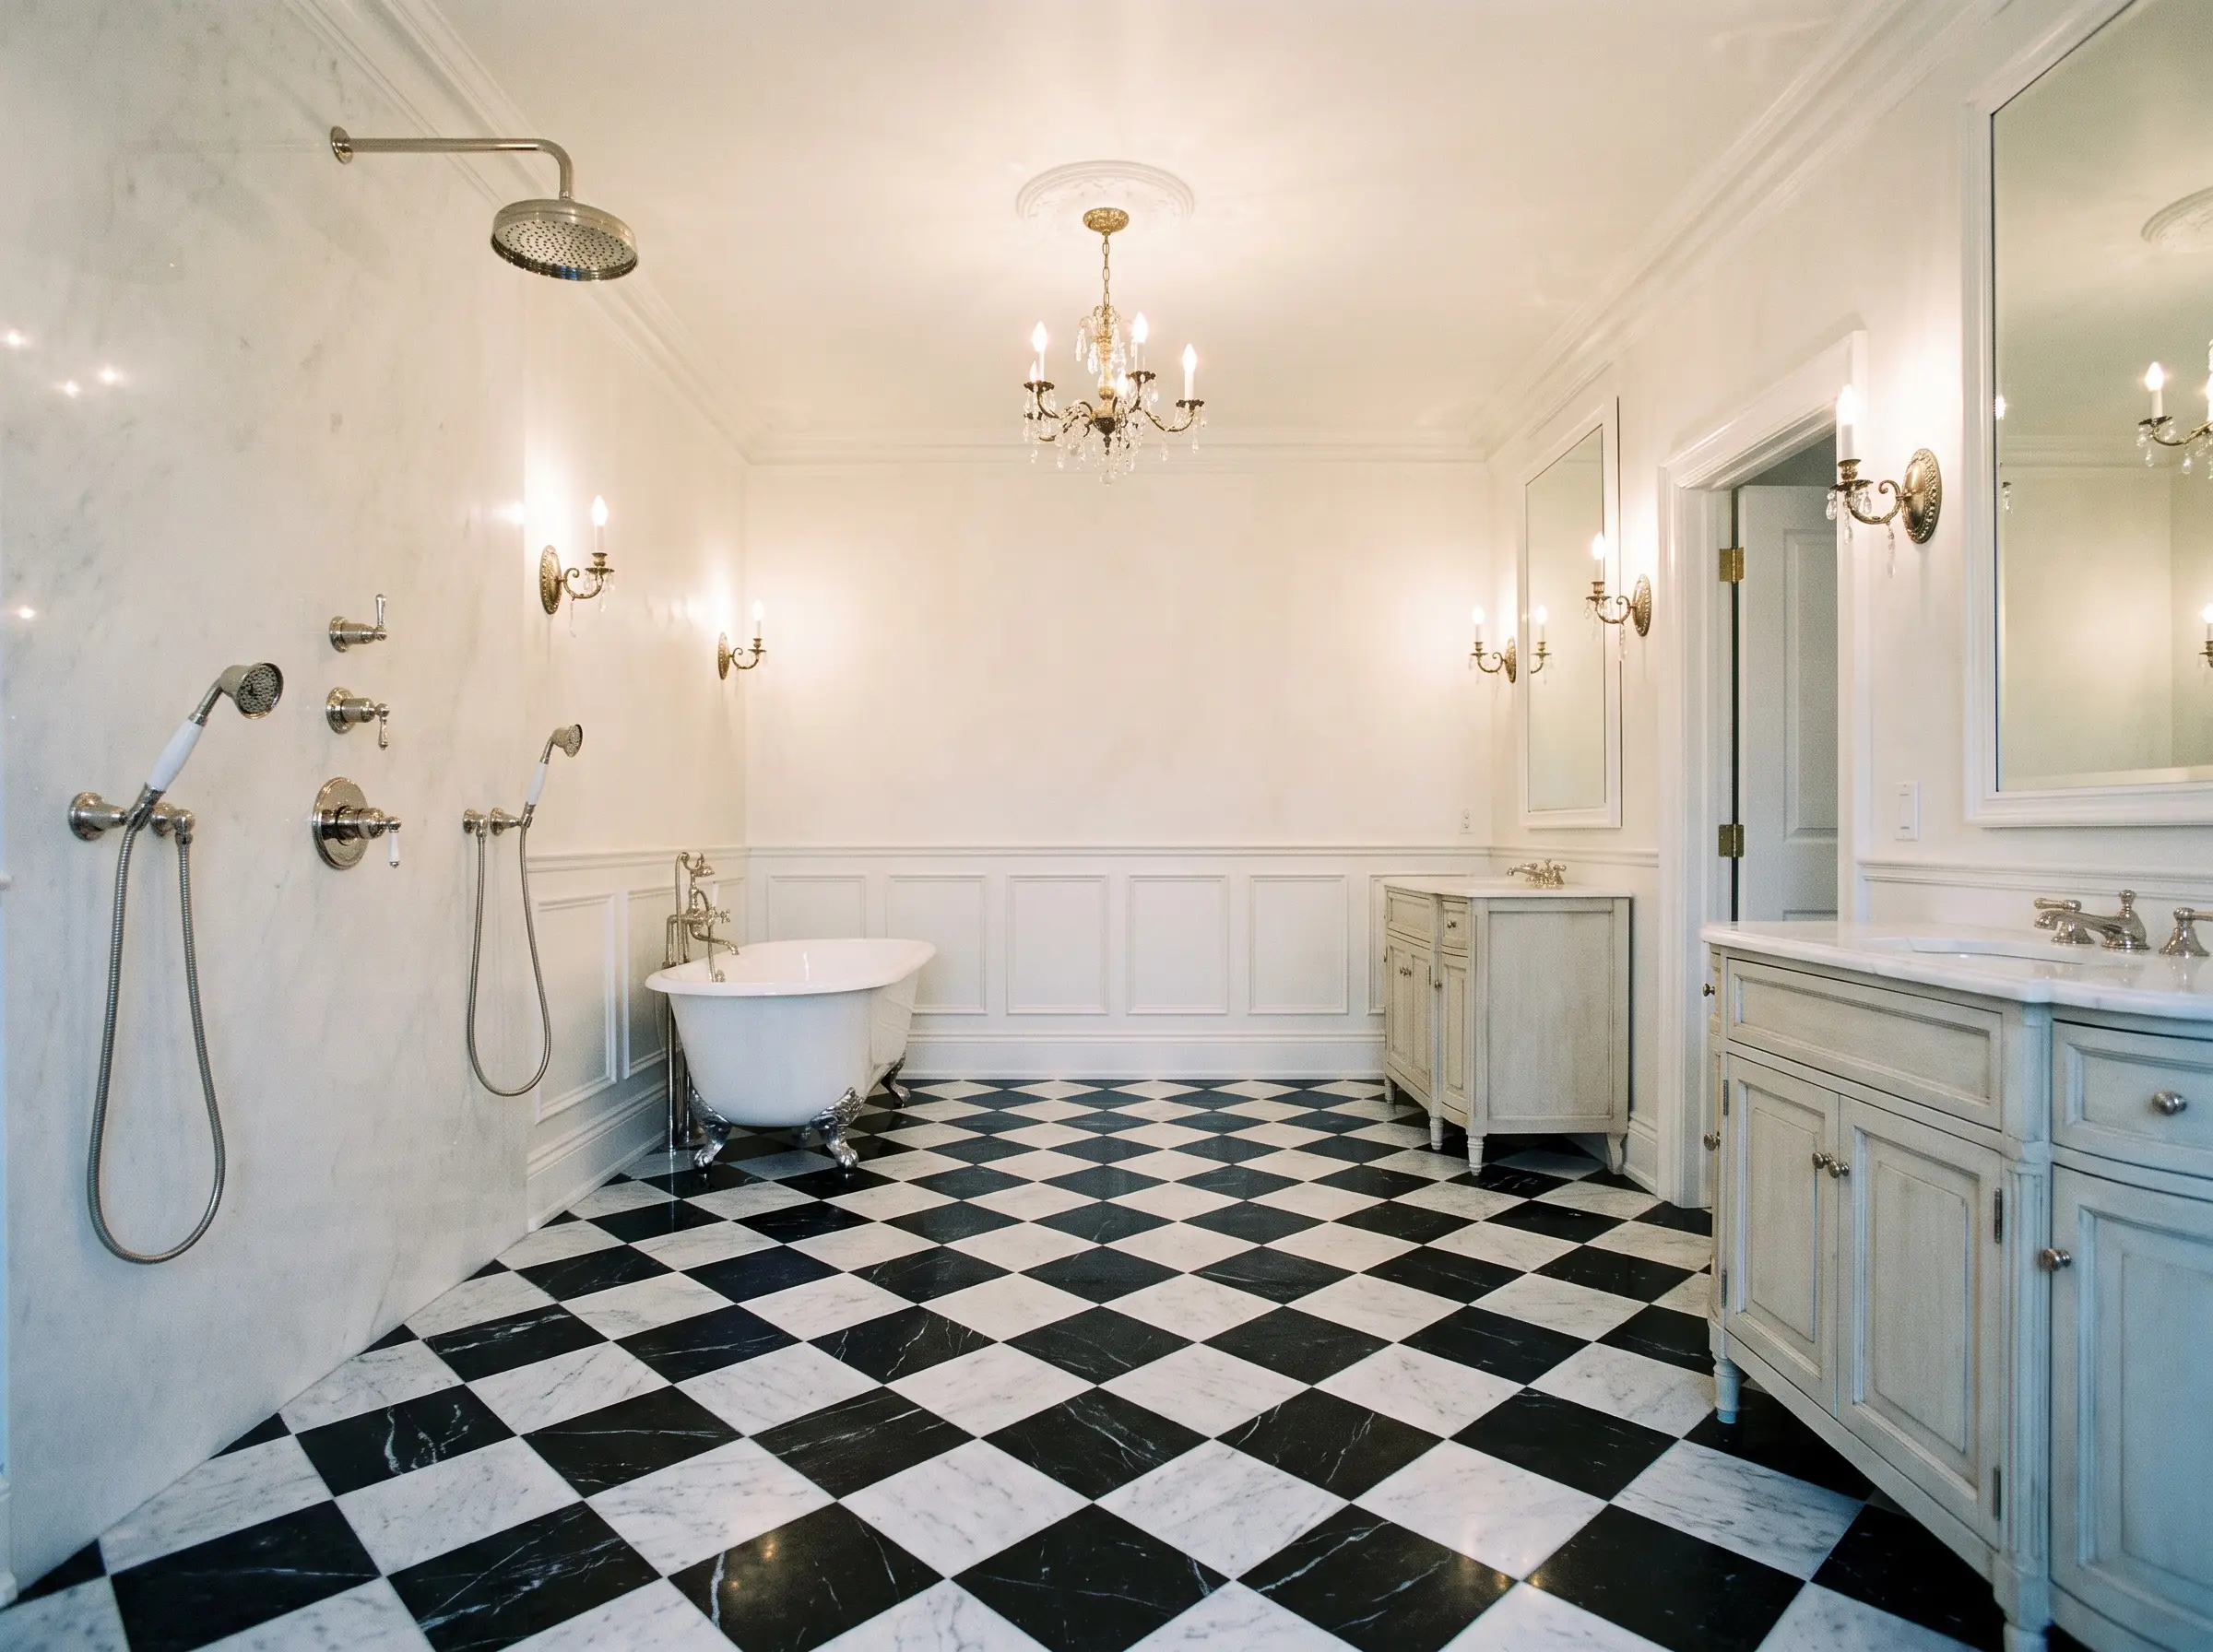
A classic checkerboard floor brings timeless, traditional luxury to an open shower, anchoring the space with bold geometry. By specifying a honed (matte) finish rather than polished, you gain the necessary traction while retaining the rich veining of the natural stone.
- Vibe: Classic Luxury & Heritage
- Key Materials: Honed Carrara and Nero Marquina marble tiles.
Never use polished marble on a doorless shower floor. The combination of soap, water, and a high-gloss finish creates a dangerous, glass-like friction coefficient.
Architect’s Note
Wood-Look Porcelain Planks
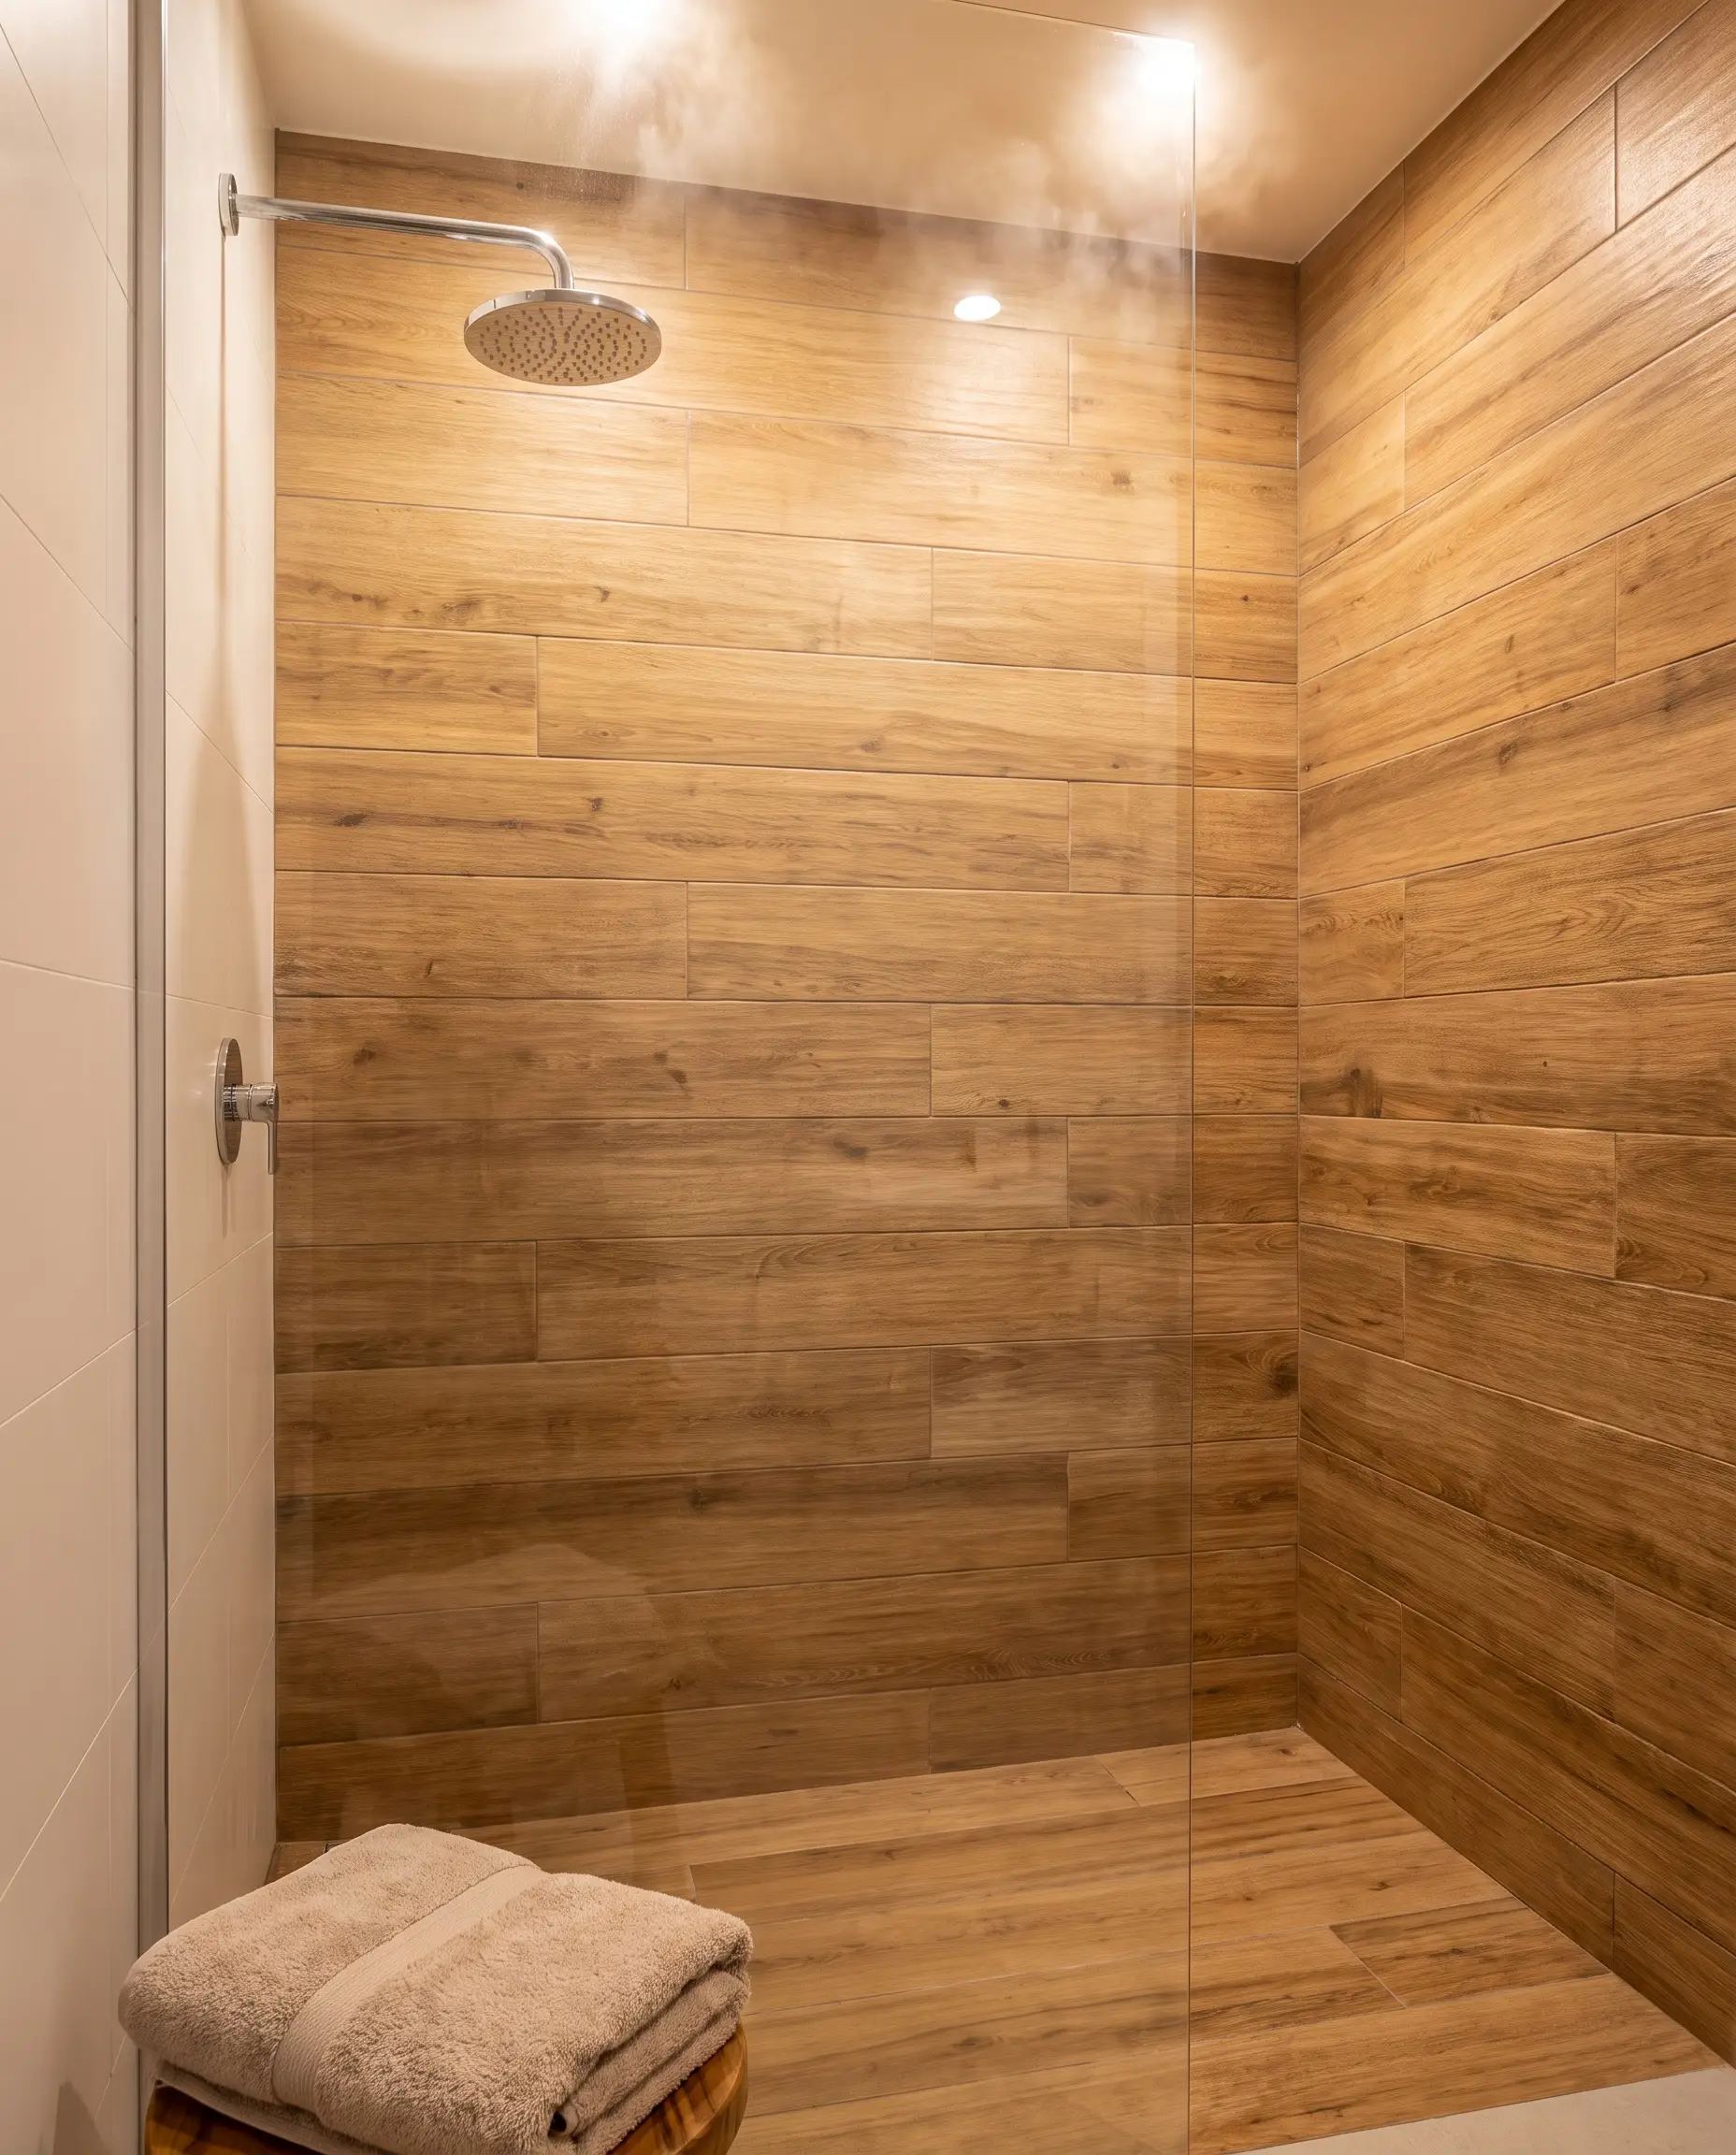
Bringing the visual warmth of hardwood into a wet zone, textured porcelain planks offer the cozy aesthetic of a sauna without the severe rot and maintenance risks of real timber. The deeply embossed wood grain inherently provides excellent slip resistance.
- Vibe: Scandinavian Sauna
- Key Materials: 6×36-inch textured porcelain planks with rectified edges.
- Installation Tip: Lay the planks in a staggered, 1/3 offset pattern to mimic real hardwood flooring flawlessly.
Climate Control, Hardware & Sensory Additions
A doorless shower lacks a glass enclosure to trap the steam, which can lead to rapid heat loss and a chilling draft. To counteract this, we must actively engineer warmth back into the spatial envelope, utilizing advanced climate control hardware to ensure the bathing experience remains a luxurious, sensory retreat.
Radiant Floor Heating Integration
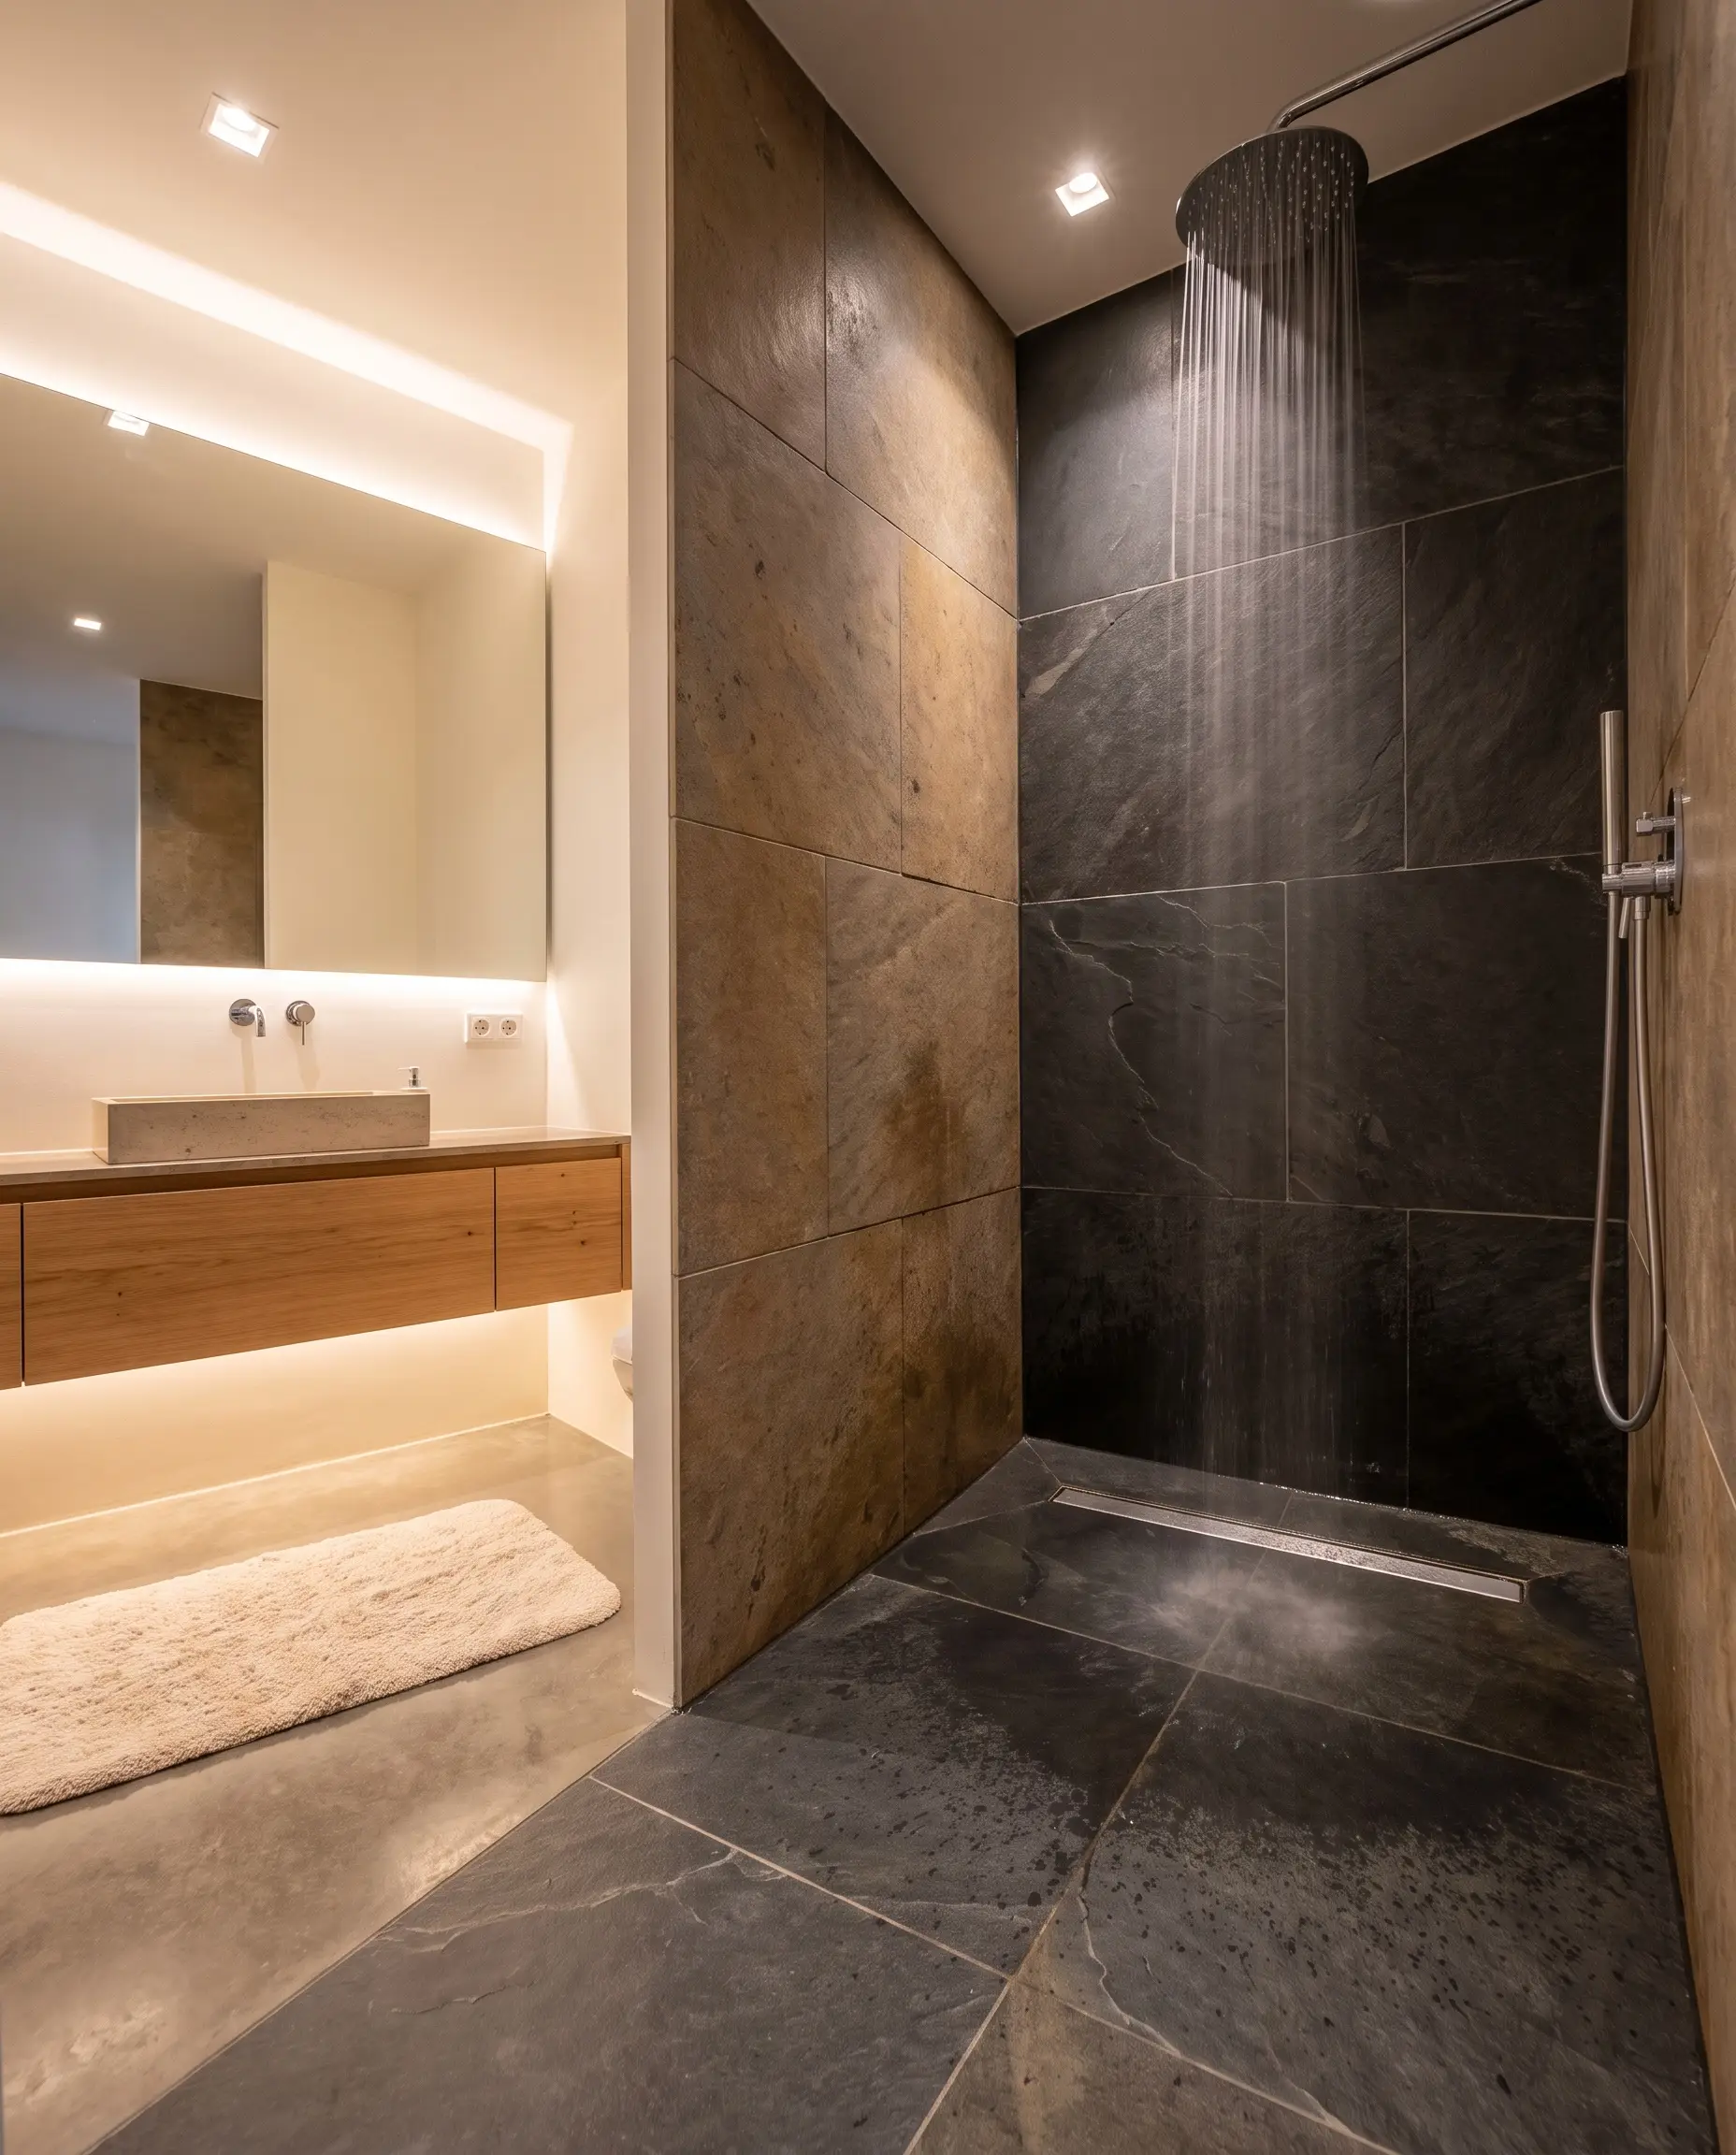
Running electric heating mats directly under the shower floor tile transforms the surface from cold stone into a warm, inviting basin. This invisible luxury not only warms the bather but also accelerates the drying time of the floor, preventing standing water issues.
- Vibe: Invisible Luxury
- Key Hardware: Specialized wet-rated radiant floor heating mats.
- Installation Rule: Ensure the heating element is installed below the final waterproofing membrane to protect the electrical grid.
Ceiling-Mounted Rain Showerheads

A massive rainfall showerhead directs the water vertically rather than horizontally, drastically shrinking the splash radius. This focused, heavy deluge creates a tight column of warm water that envelopes the bather, combating ambient room drafts.
- Vibe: Immersive & Controlled
- Hardware Spec: A 12-inch or 16-inch brass rain head mounted perfectly flush with the ceiling.
- Valve Pairing: Include a thermostatic diverter valve to instantly control exact water temperatures.
Recessed Ceiling Heat Lamps
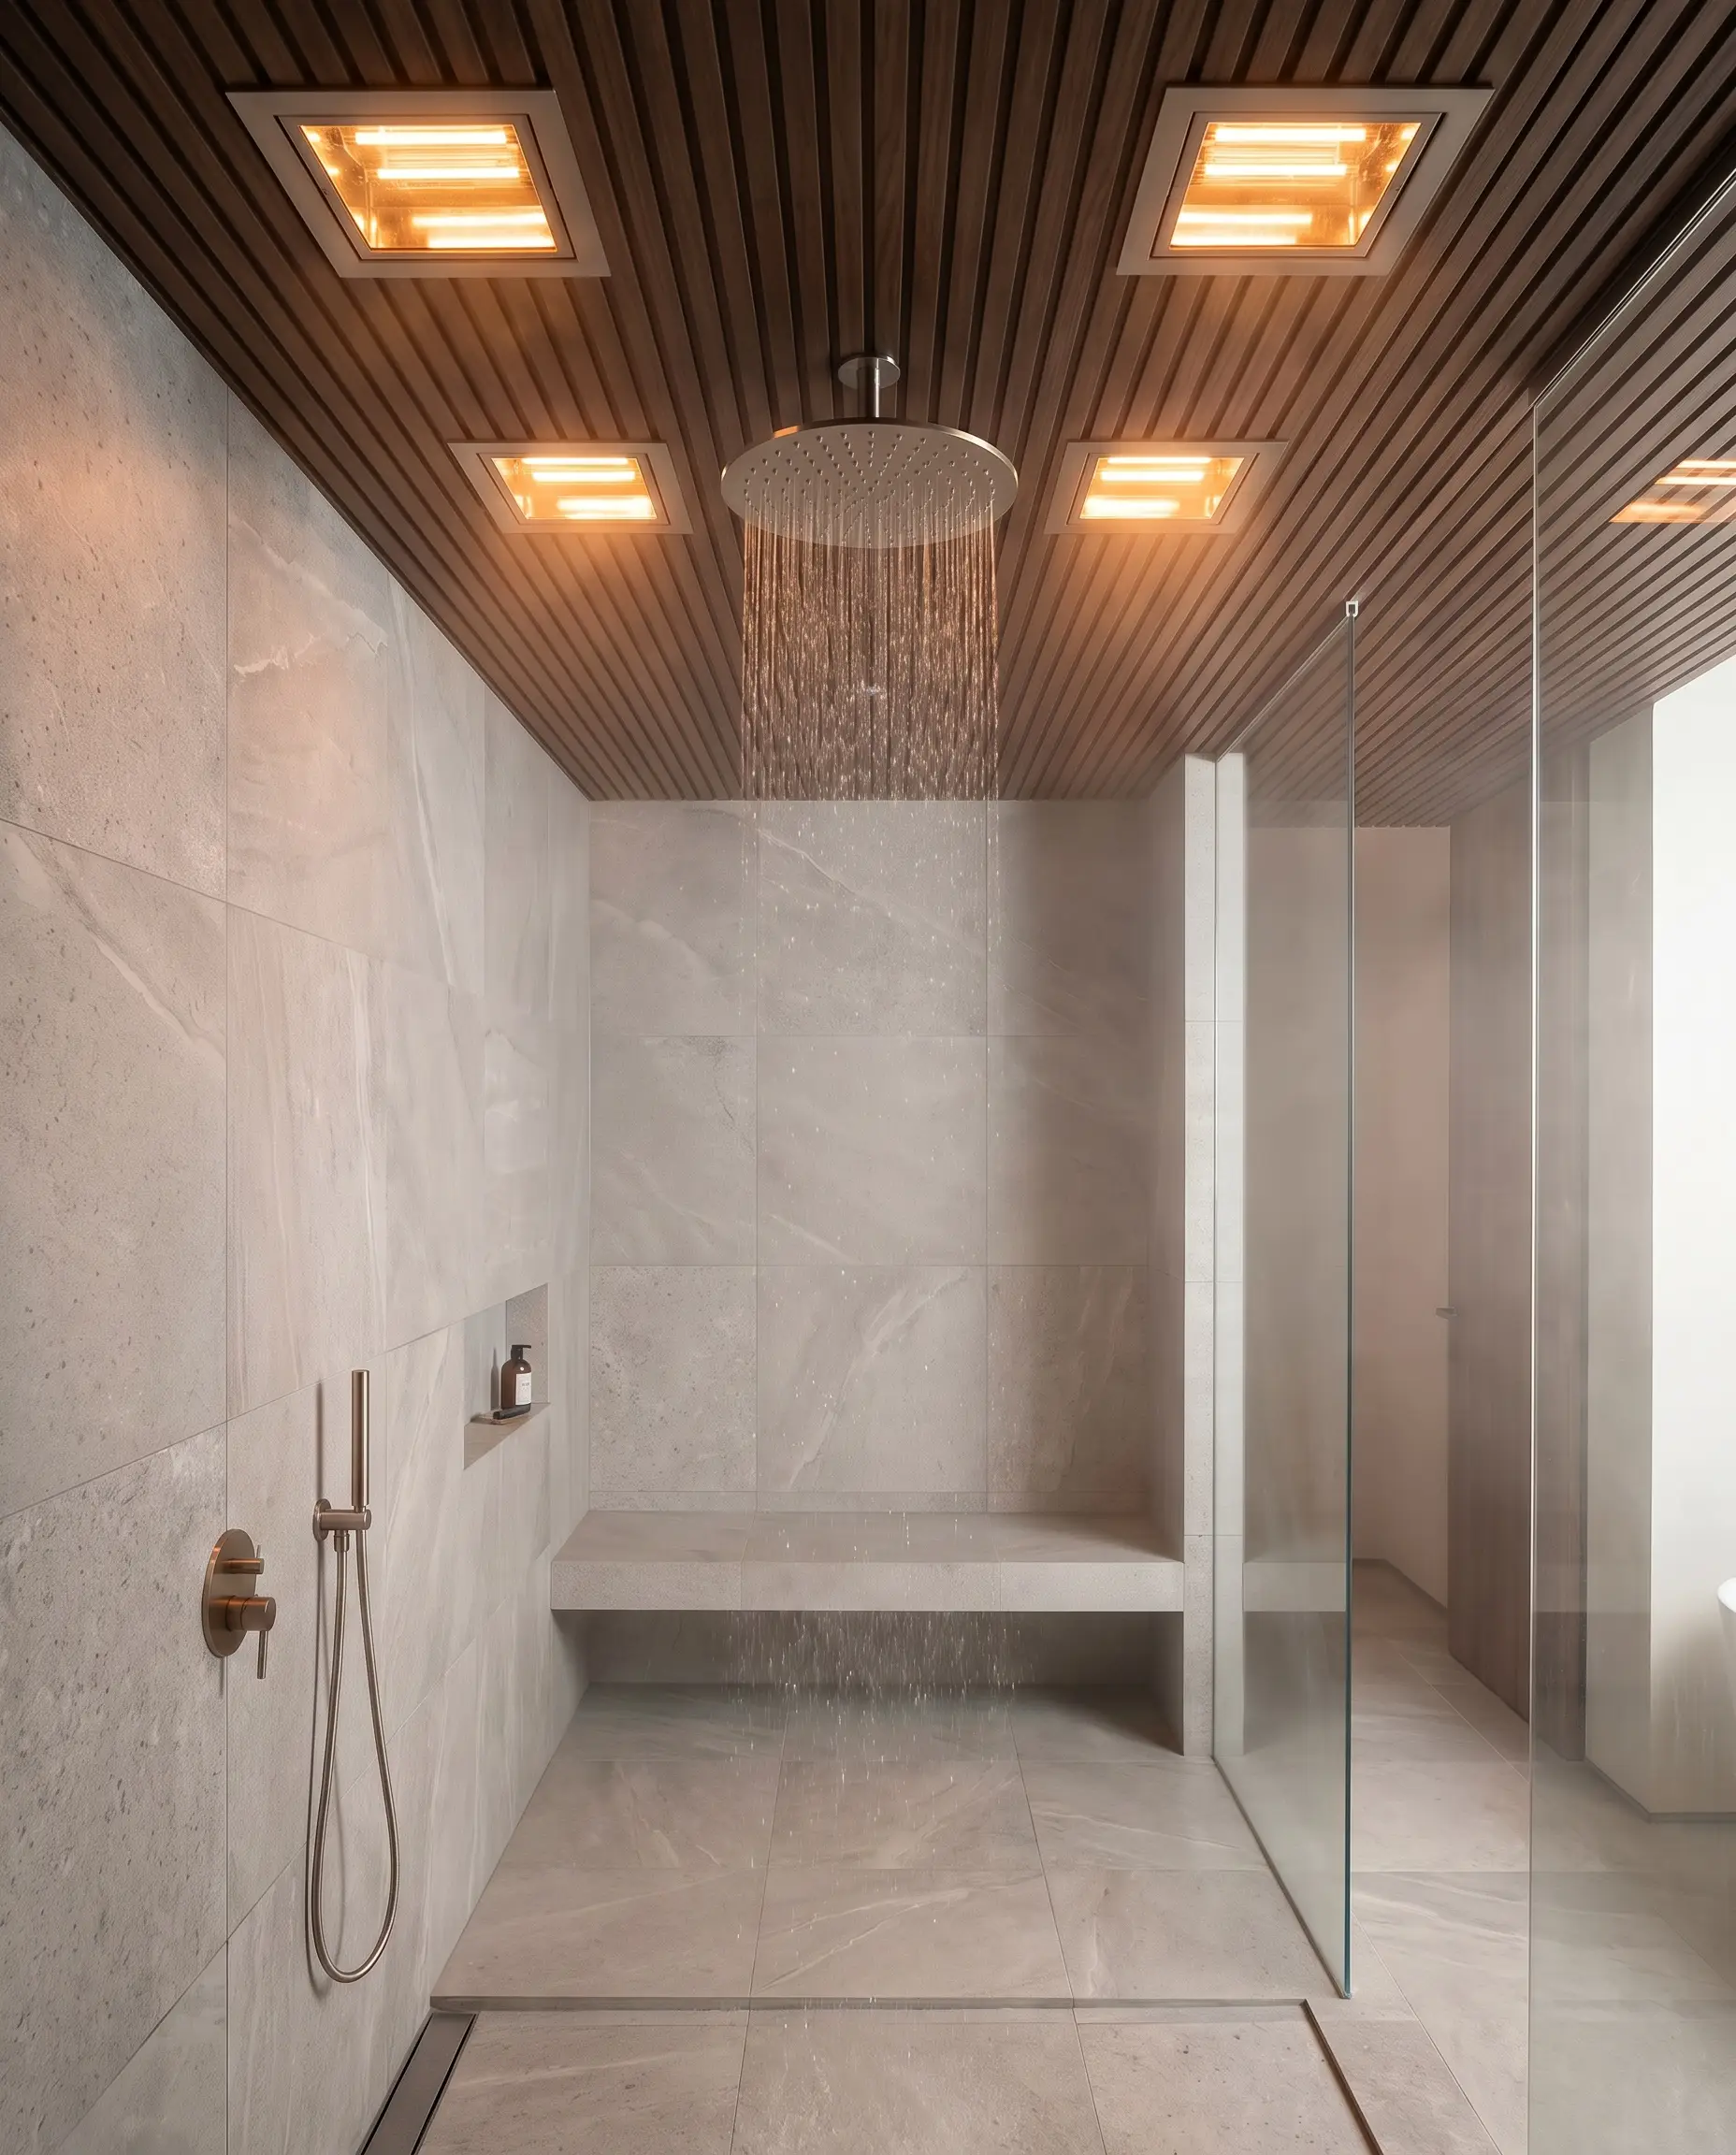
Swapping standard recessed lighting for architectural infrared heat lamps provides immediate, top-down thermal comfort. Positioned just outside the primary water stream, these fixtures blast warmth onto your shoulders the second you turn off the water.
- Vibe: Functional Comfort
- Key Hardware: Low-profile, wet-rated infrared ceiling heaters.
- Design Ally Tip: Wire the heat lamps on a separate switch with a timer dial so they don’t accidentally run all day.
The Built-In Heated Towel Niche
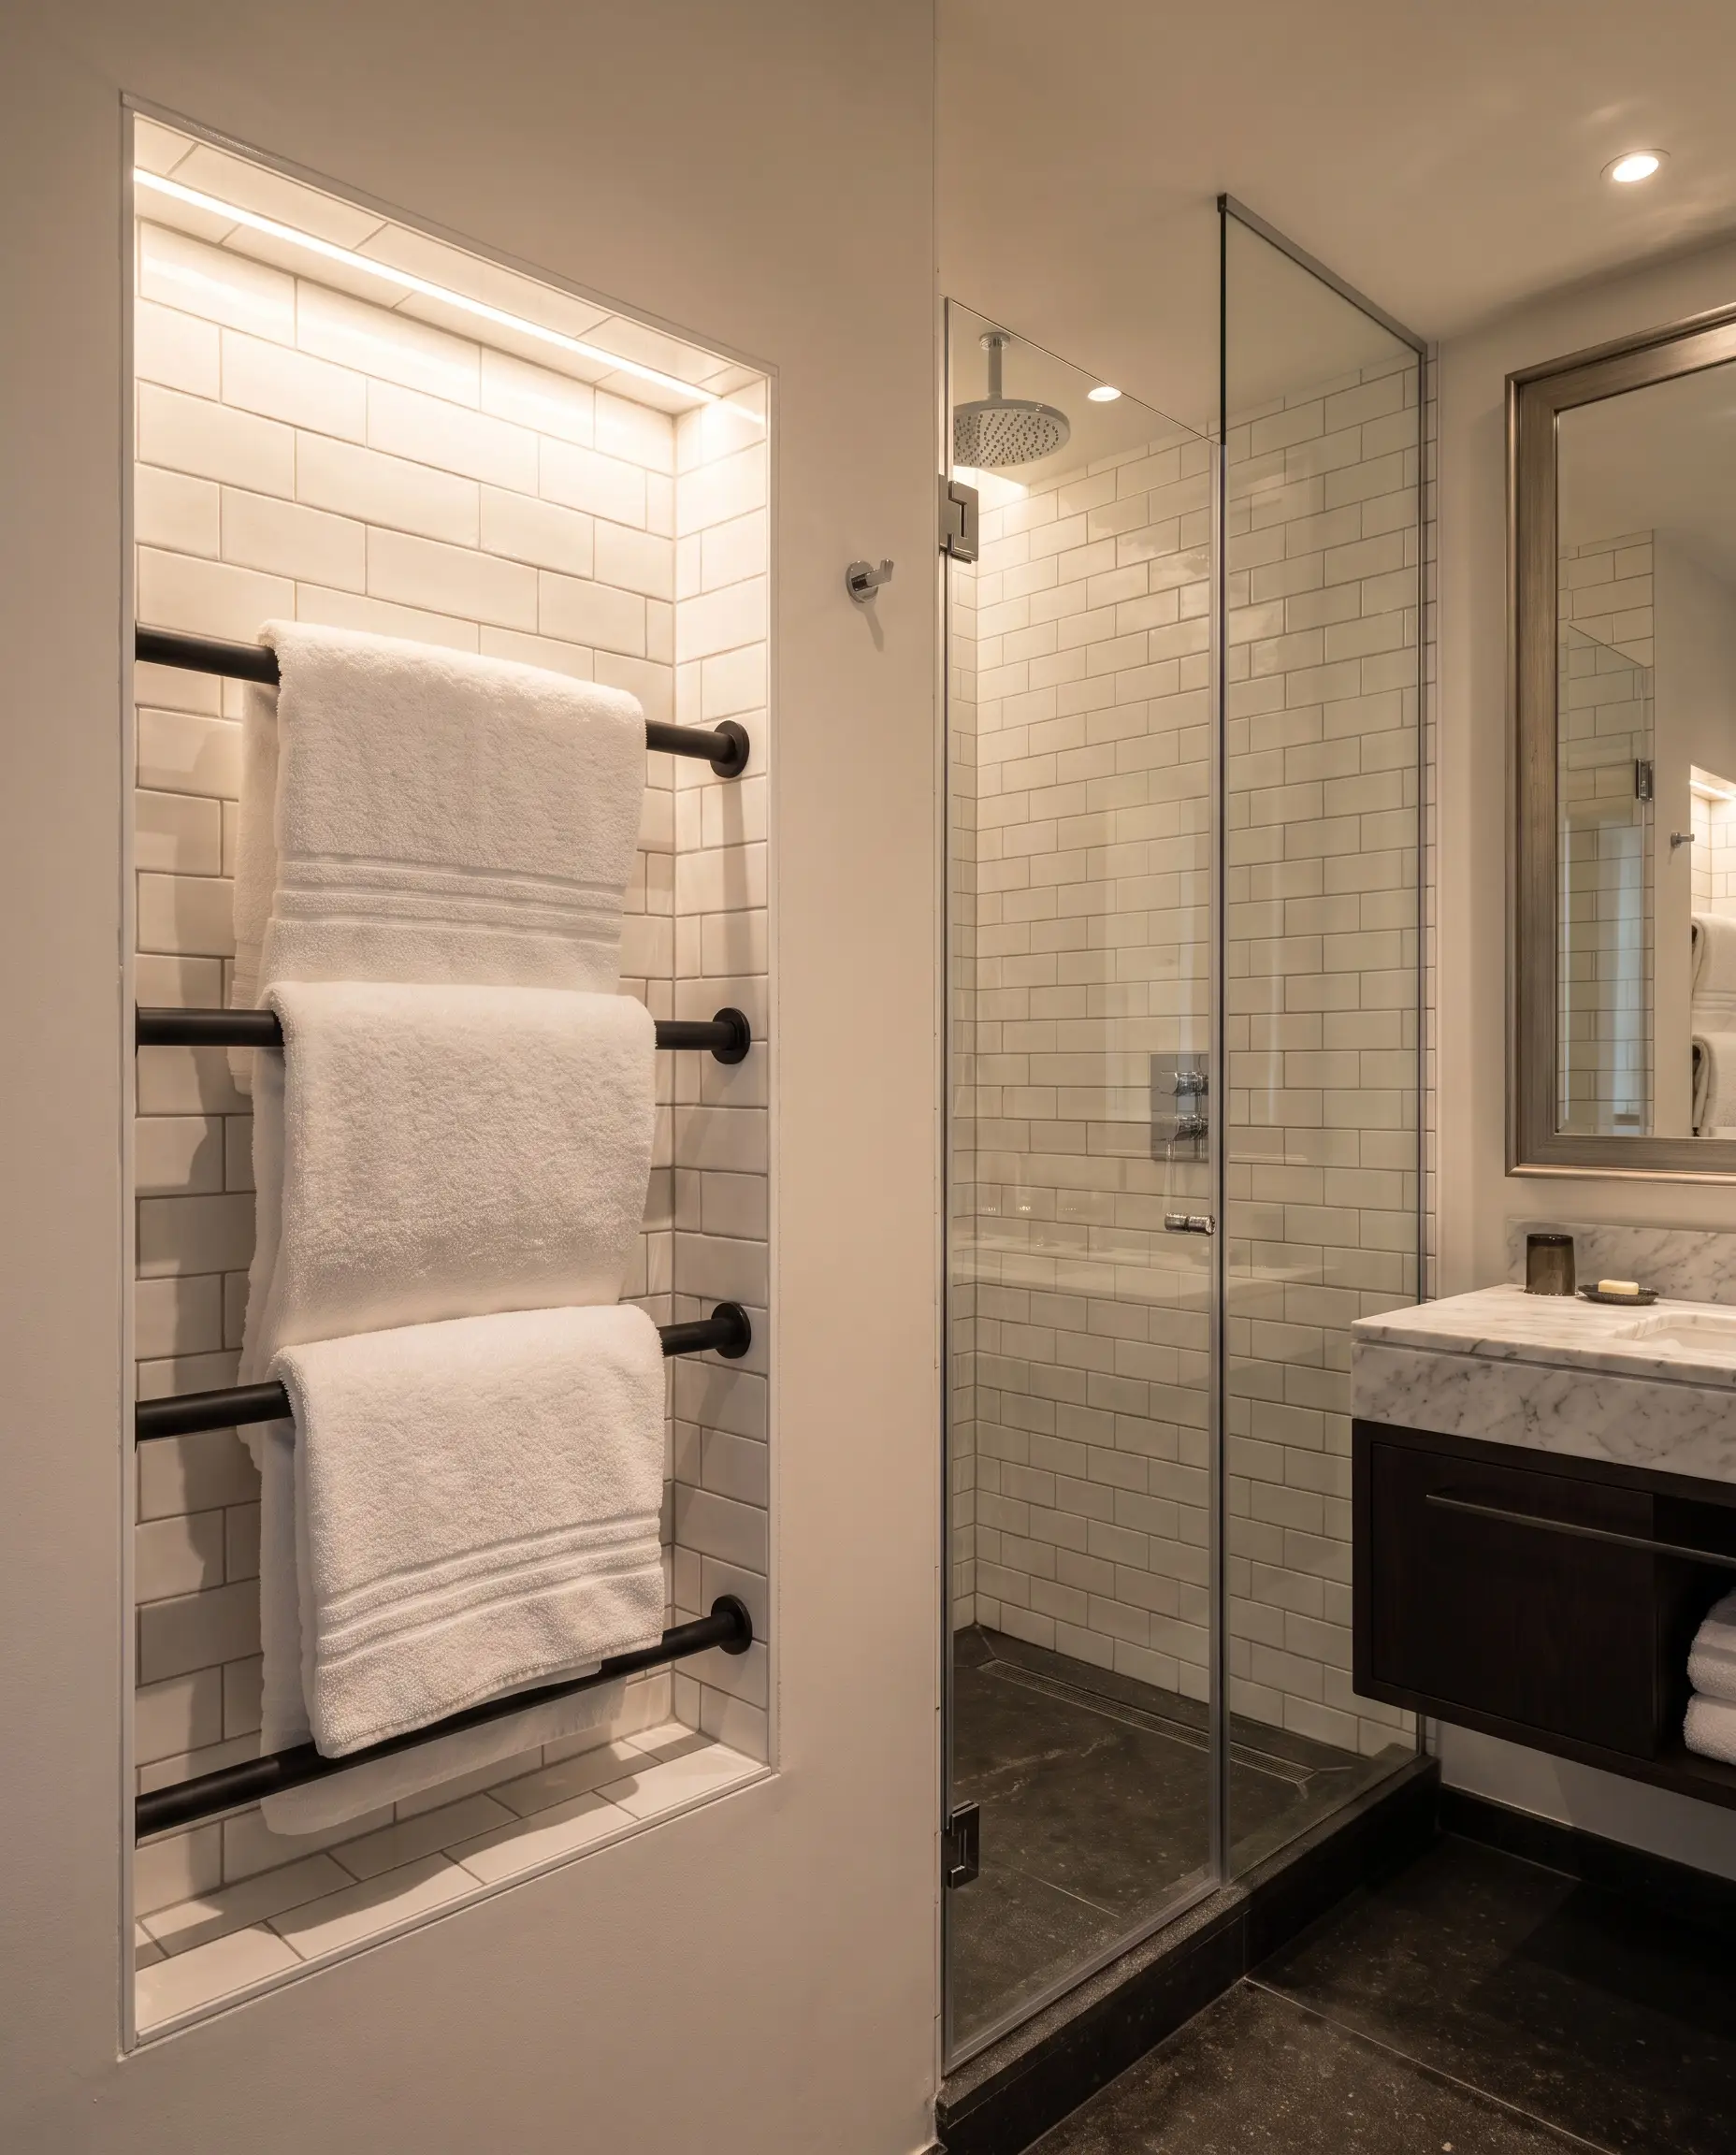
Positioning a hardwired, heated towel bar inside a recessed niche just outside the splash zone ensures a scalding hot towel is always within arm’s reach. It solves the post-shower chill instantly while keeping bulky linens neatly tucked into the architecture.
- Vibe: High-End Hospitality
- Key Hardware: Hardwired, brushed nickel or matte black heated towel rungs.
- Spatial Parameter: Place the niche at least 48 inches away from the showerhead to protect towels from rogue splashing.
Designing Your Seamless Retreat (Next Steps)
A doorless shower is a permanent architectural commitment, not a weekend cosmetic update. Before ordering a single piece of tile, measure your footprint to guarantee a minimum 60-inch depth, finalize your linear drain location, and consult with a licensed professional about structural floor pitching. To ensure your foundation is flawless, dive into our master guide on bathroom waterproofing basics to understand exactly how the layers beneath the tile protect your investment.

The Aesthetics Desk curates the visual direction for Hackrea. Specializing in design history, global architectural movements, and interior styling, this desk focuses on the psychology of space and how to translate high-end, magazine-quality aesthetics into approachable residential design without falling into fleeting micro-trends.