The 2027 Kitchen Lighting Forecast: 15 Ways to Brighten Your Space with High-End Style
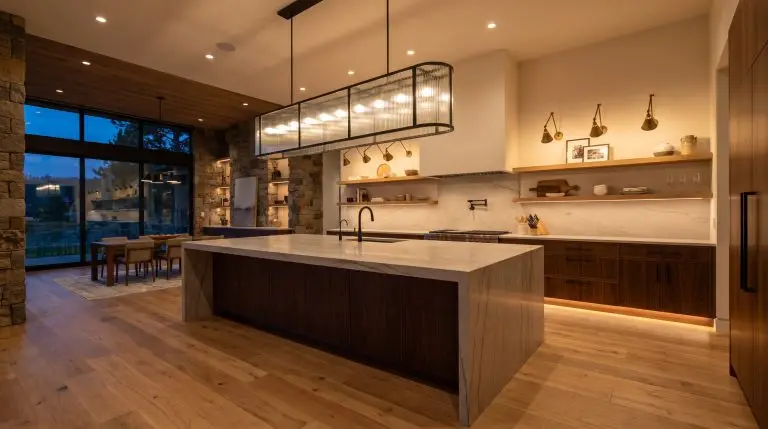
The modern kitchen has completely outgrown its purely utilitarian roots; it is now the primary evening lounge of the home. Navigating kitchen lighting trends 2027 requires aggressively abandoning the harsh, clinical glare of standard overhead grids in favor of what we call “Atmospheric Architecture.” This approach treats illumination as highly tactile, sculptural art during the day, while casting a warm, layered, restaurant-quality ambient glow at night. Let’s explore the fifteen hyper-specific installations and hidden technologies that define the absolute highest tier of upcoming design.
The New Proportions: Rethinking the Kitchen Island
The standard mandate of hanging three identical mini-pendants evenly spaced across a counter is officially dead. The upcoming design shift prioritizes bold scale, intentional rule-breaking, and treating the airspace above your prep zone as a canvas for monumental architectural lighting.
1. The Oversized Linear Suspension
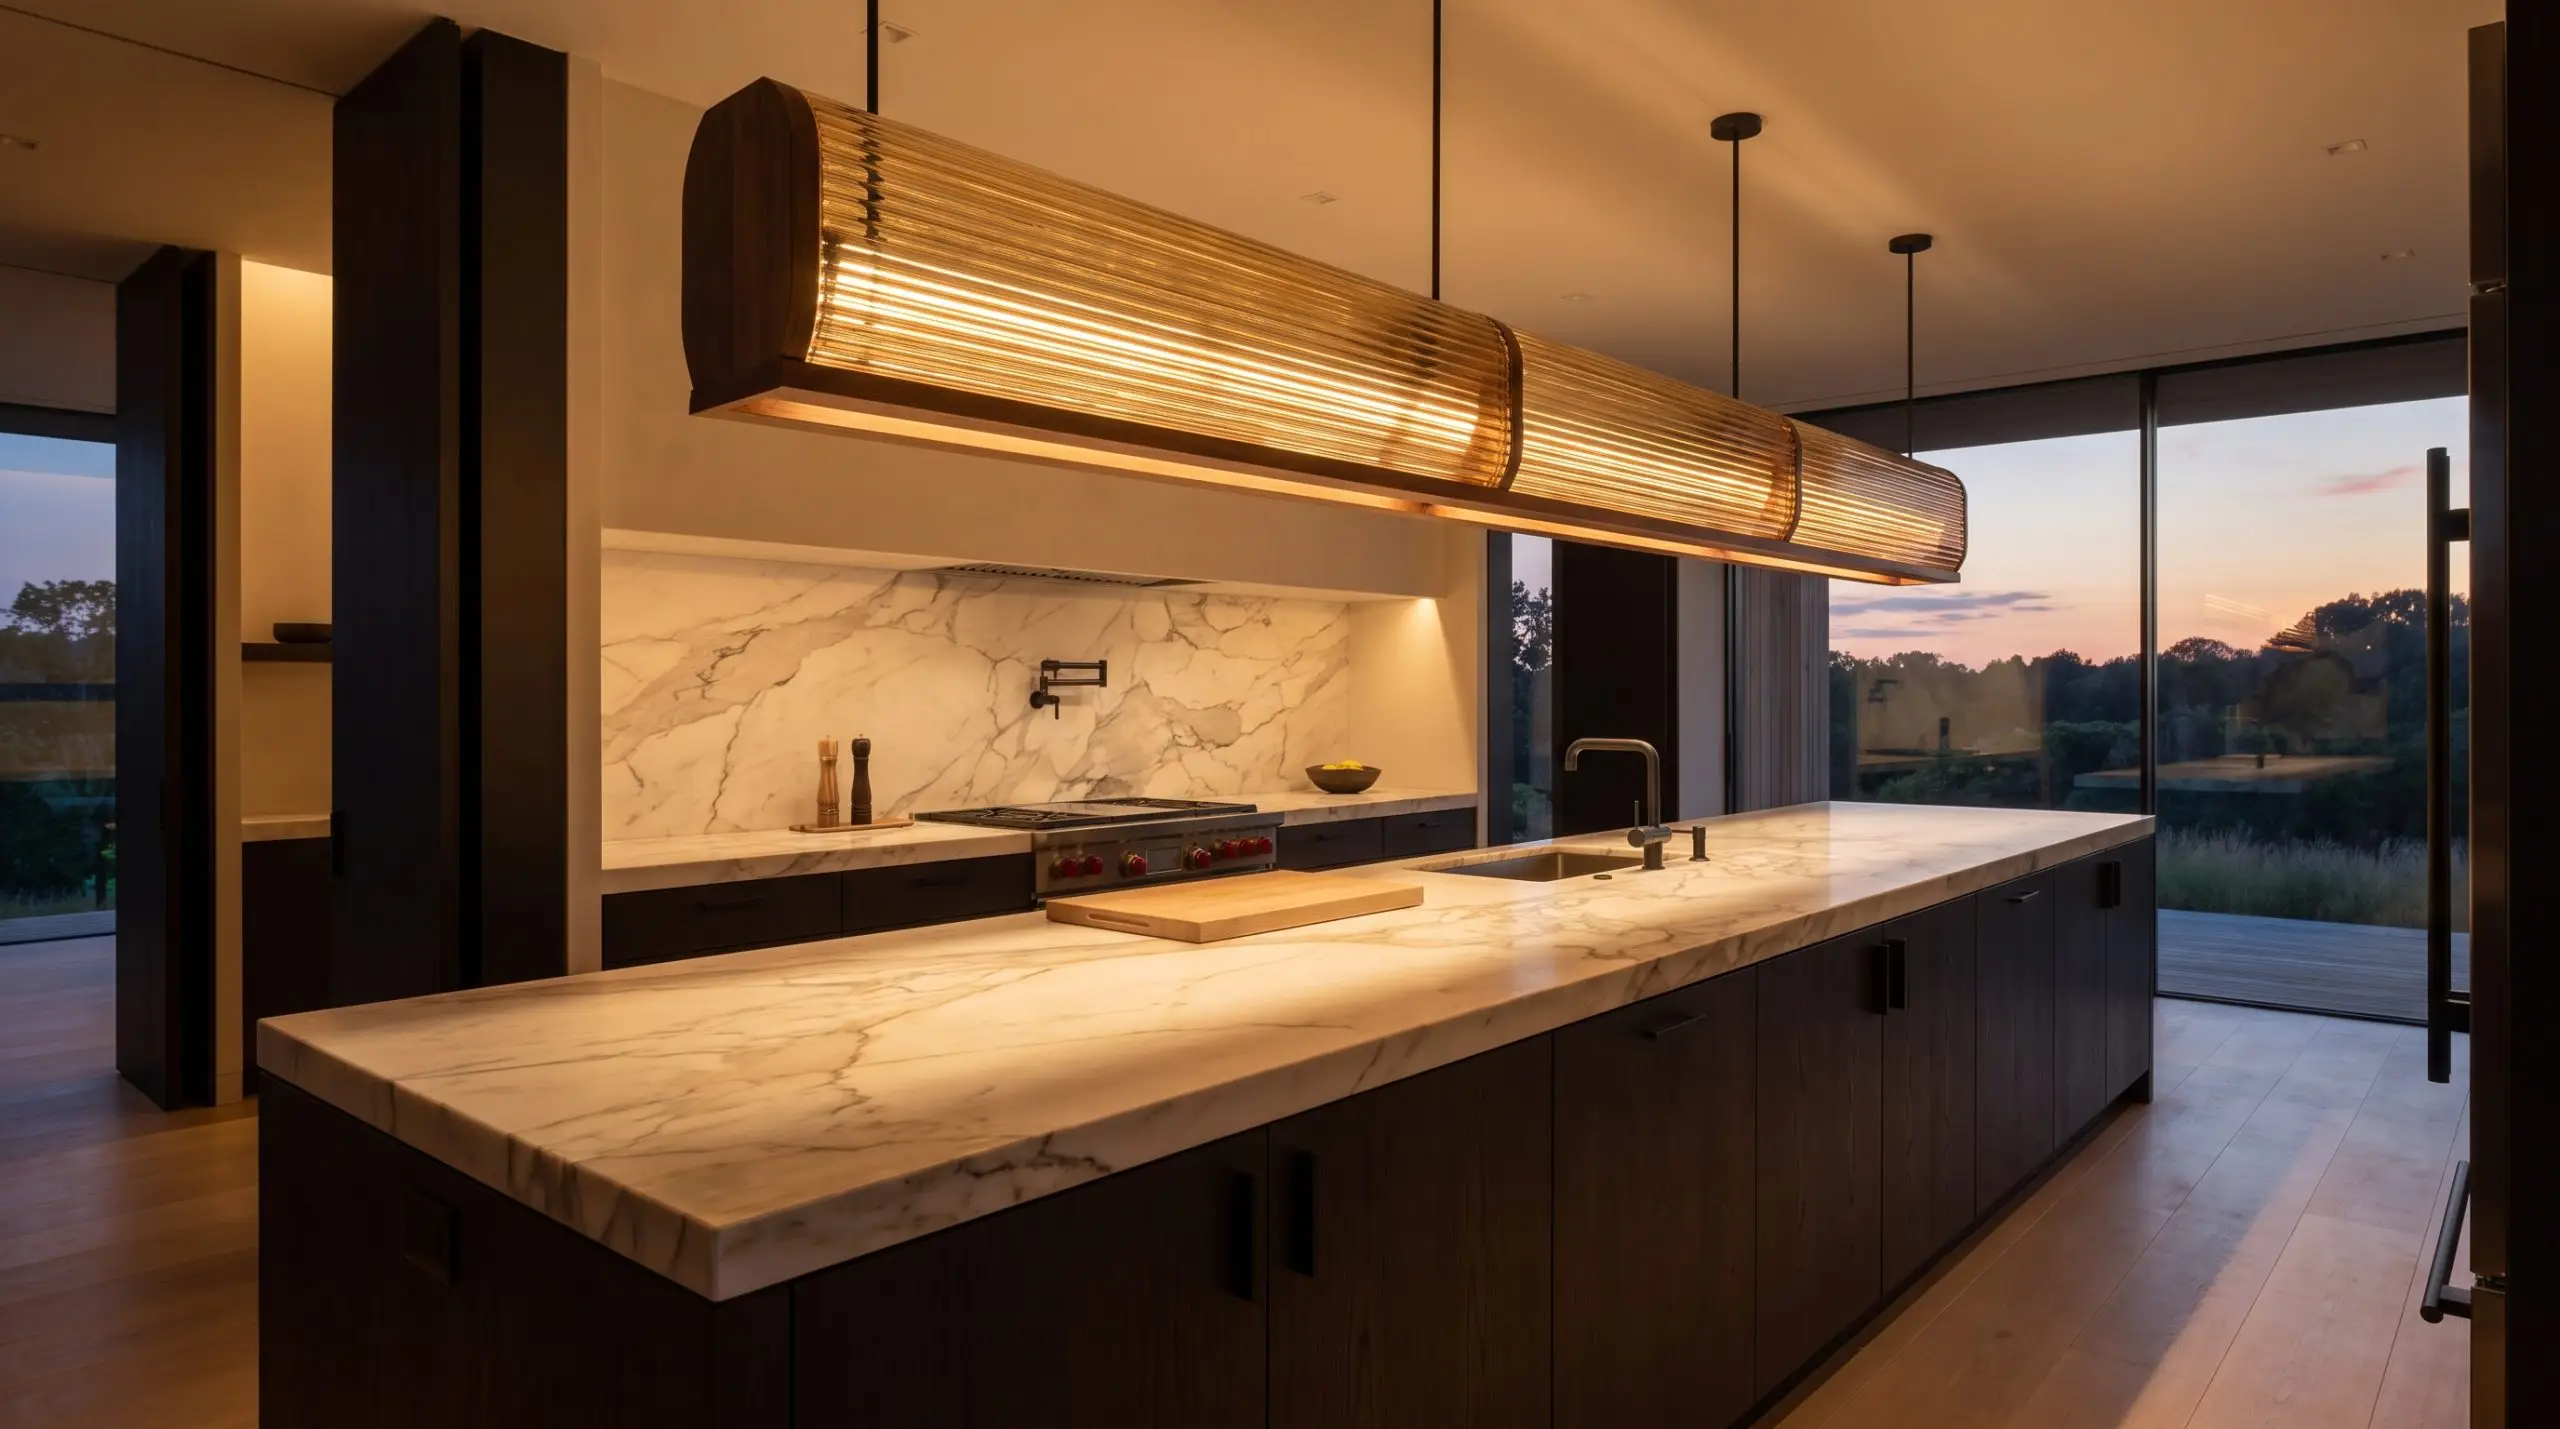
Replacing multiple small pendants with a single, continuous architectural piece instantly cleans up the visual airspace. A long, uninterrupted line of wood, heavy brass, or fluted glass provides powerful task illumination while establishing a highly sophisticated, bespoke silhouette.
Your linear suspension fixture should span exactly one-third to two-thirds the total length of your island counter to maintain proper visual balance without crowding the room.
Scale Check
- Vibe: Streamlined, authoritative, and architecturally rigorous.
- Key Materials: Fluted glass, blackened steel, or solid walnut.
- Placement Strategy: Center directly over the island, ensuring the ends do not extend past the underlying cabinet base.
2. Asymmetrical Groupings
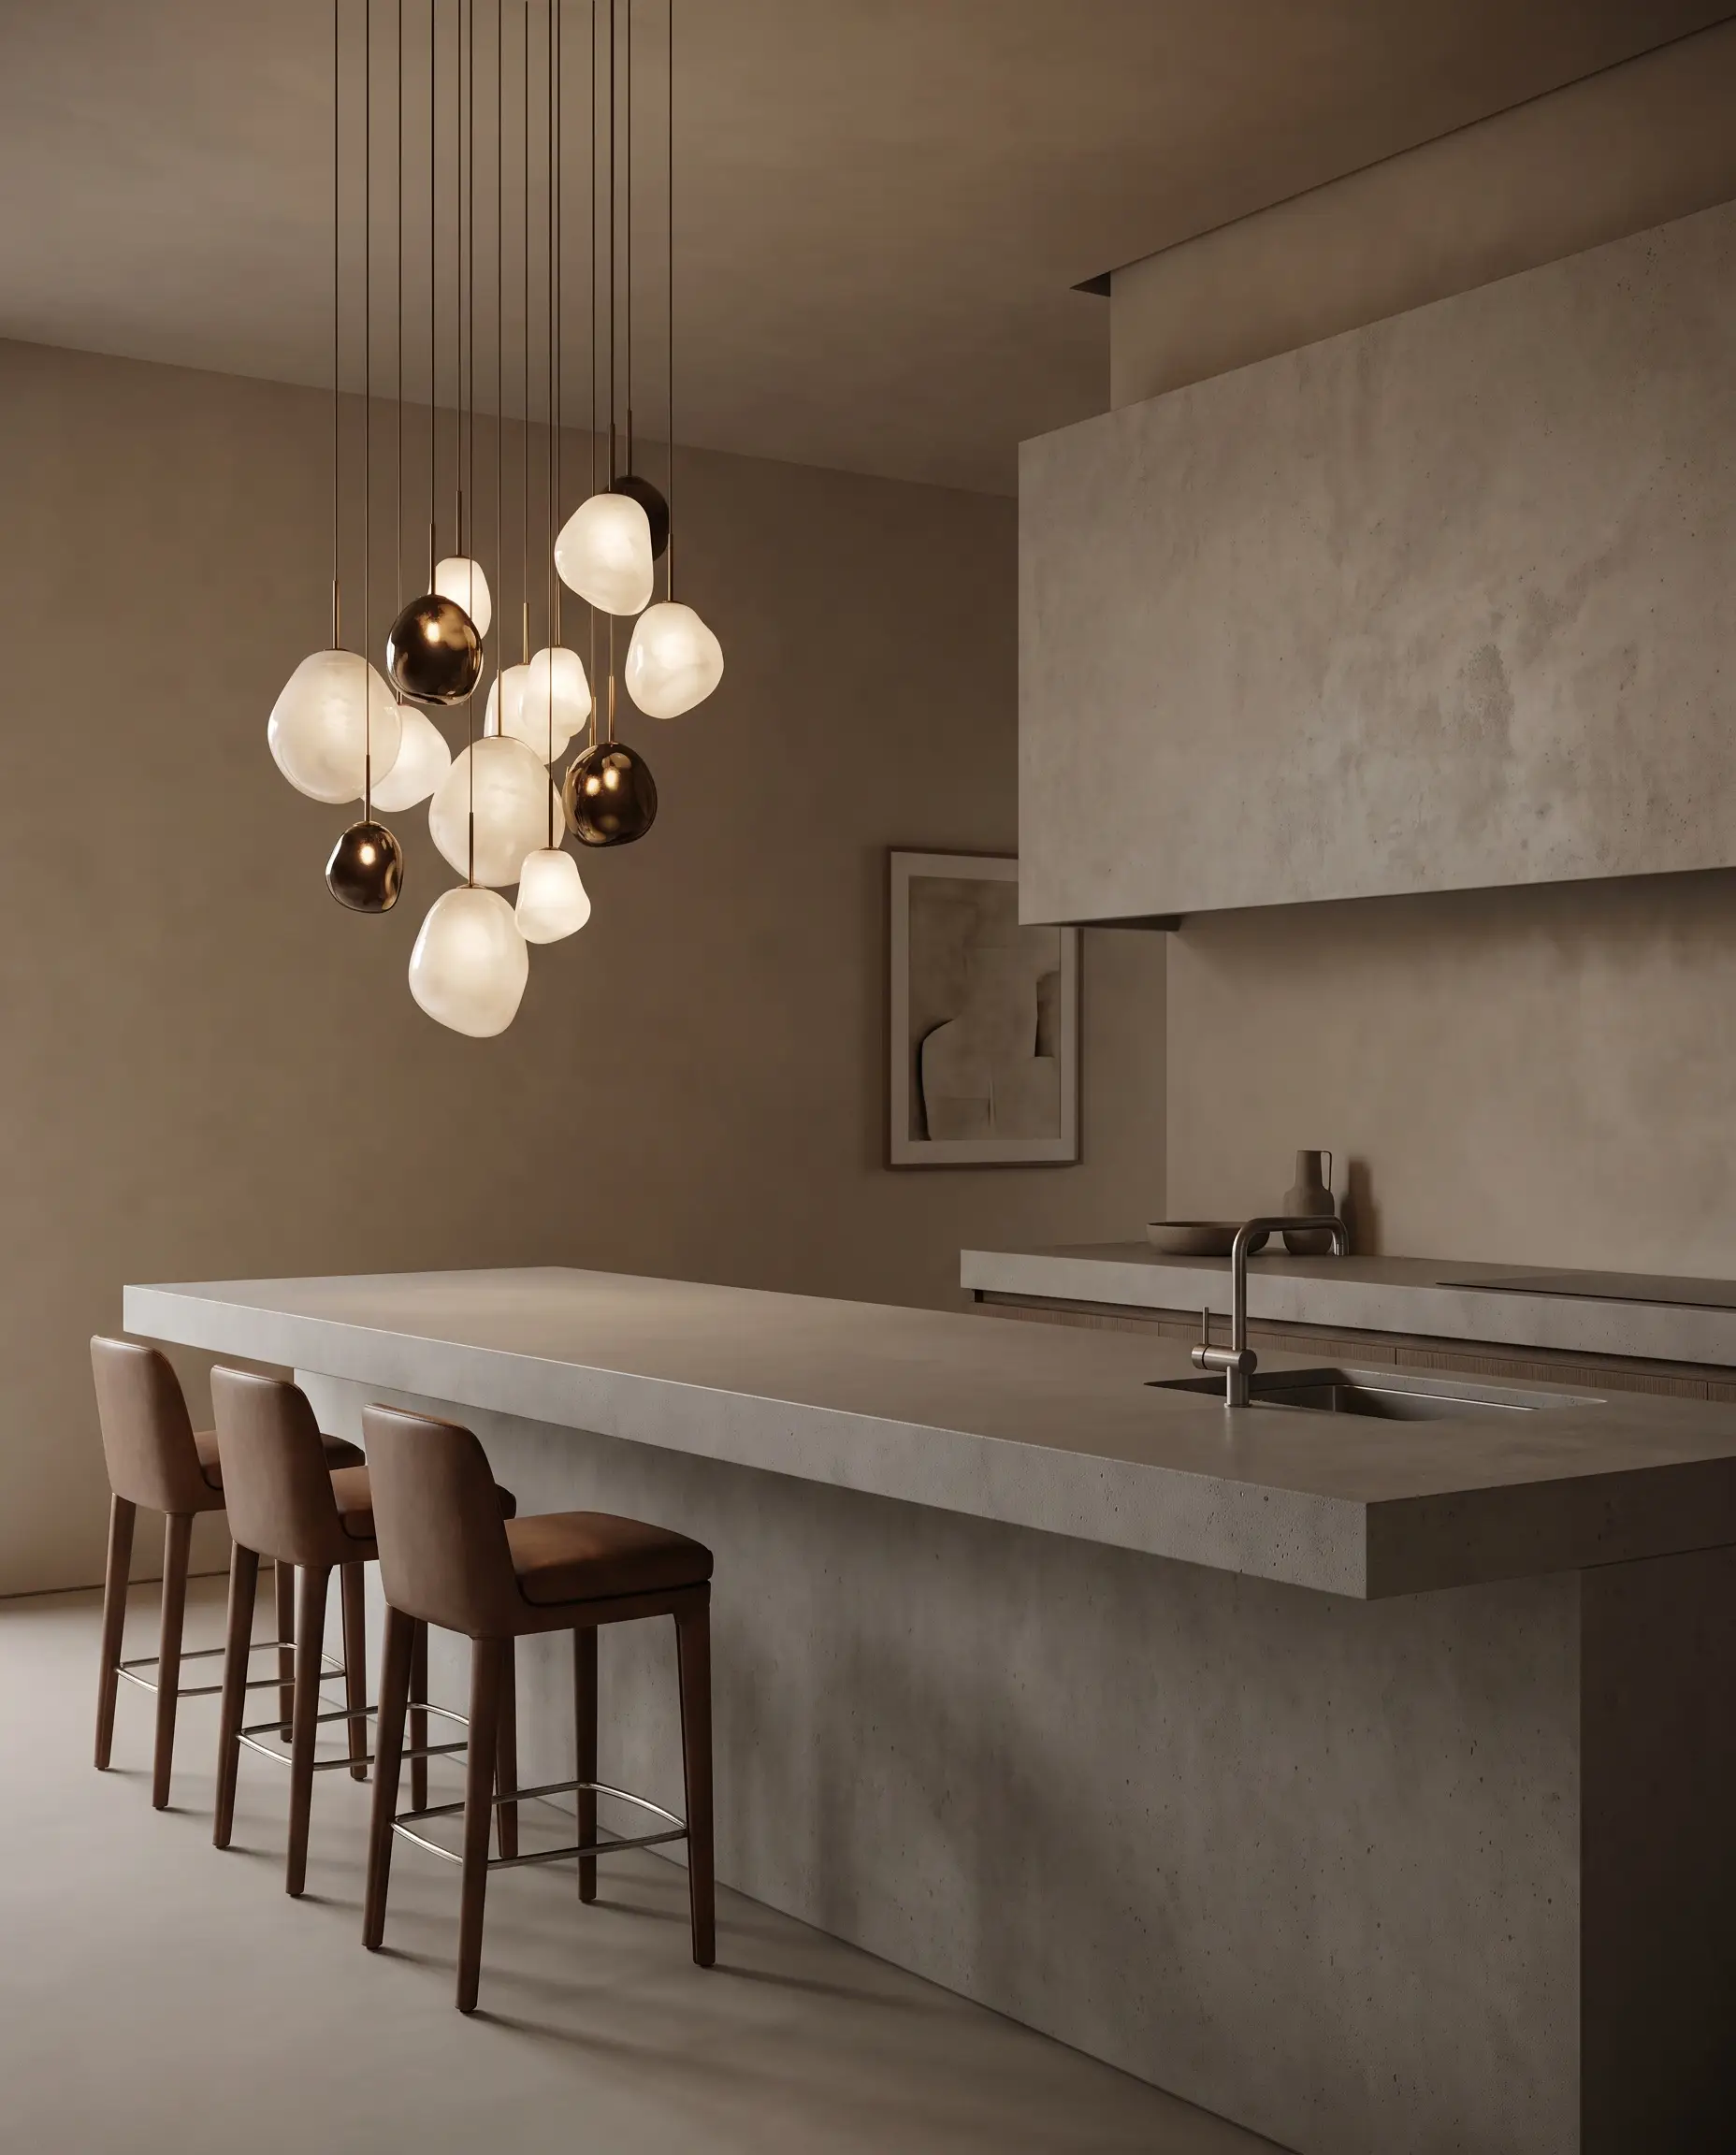
Grouping pendants at varying heights or clustering them entirely on one end of a long kitchen island creates intentional tension and high-end visual interest. This avant-garde asymmetrical placement looks incredibly bespoke and pairs flawlessly with an off-center sink or a cantilevered countertop edge.
- Vibe: Art gallery chic, avant-garde, and effortlessly custom.
- Key Materials: Hand-blown opaque glass, cast bronze.
- Styling Pro-Tip: Anchor the clustered lighting over the primary seating zone of the island rather than the prep sink to create a distinct dining destination.
3. Low-Drop Installations
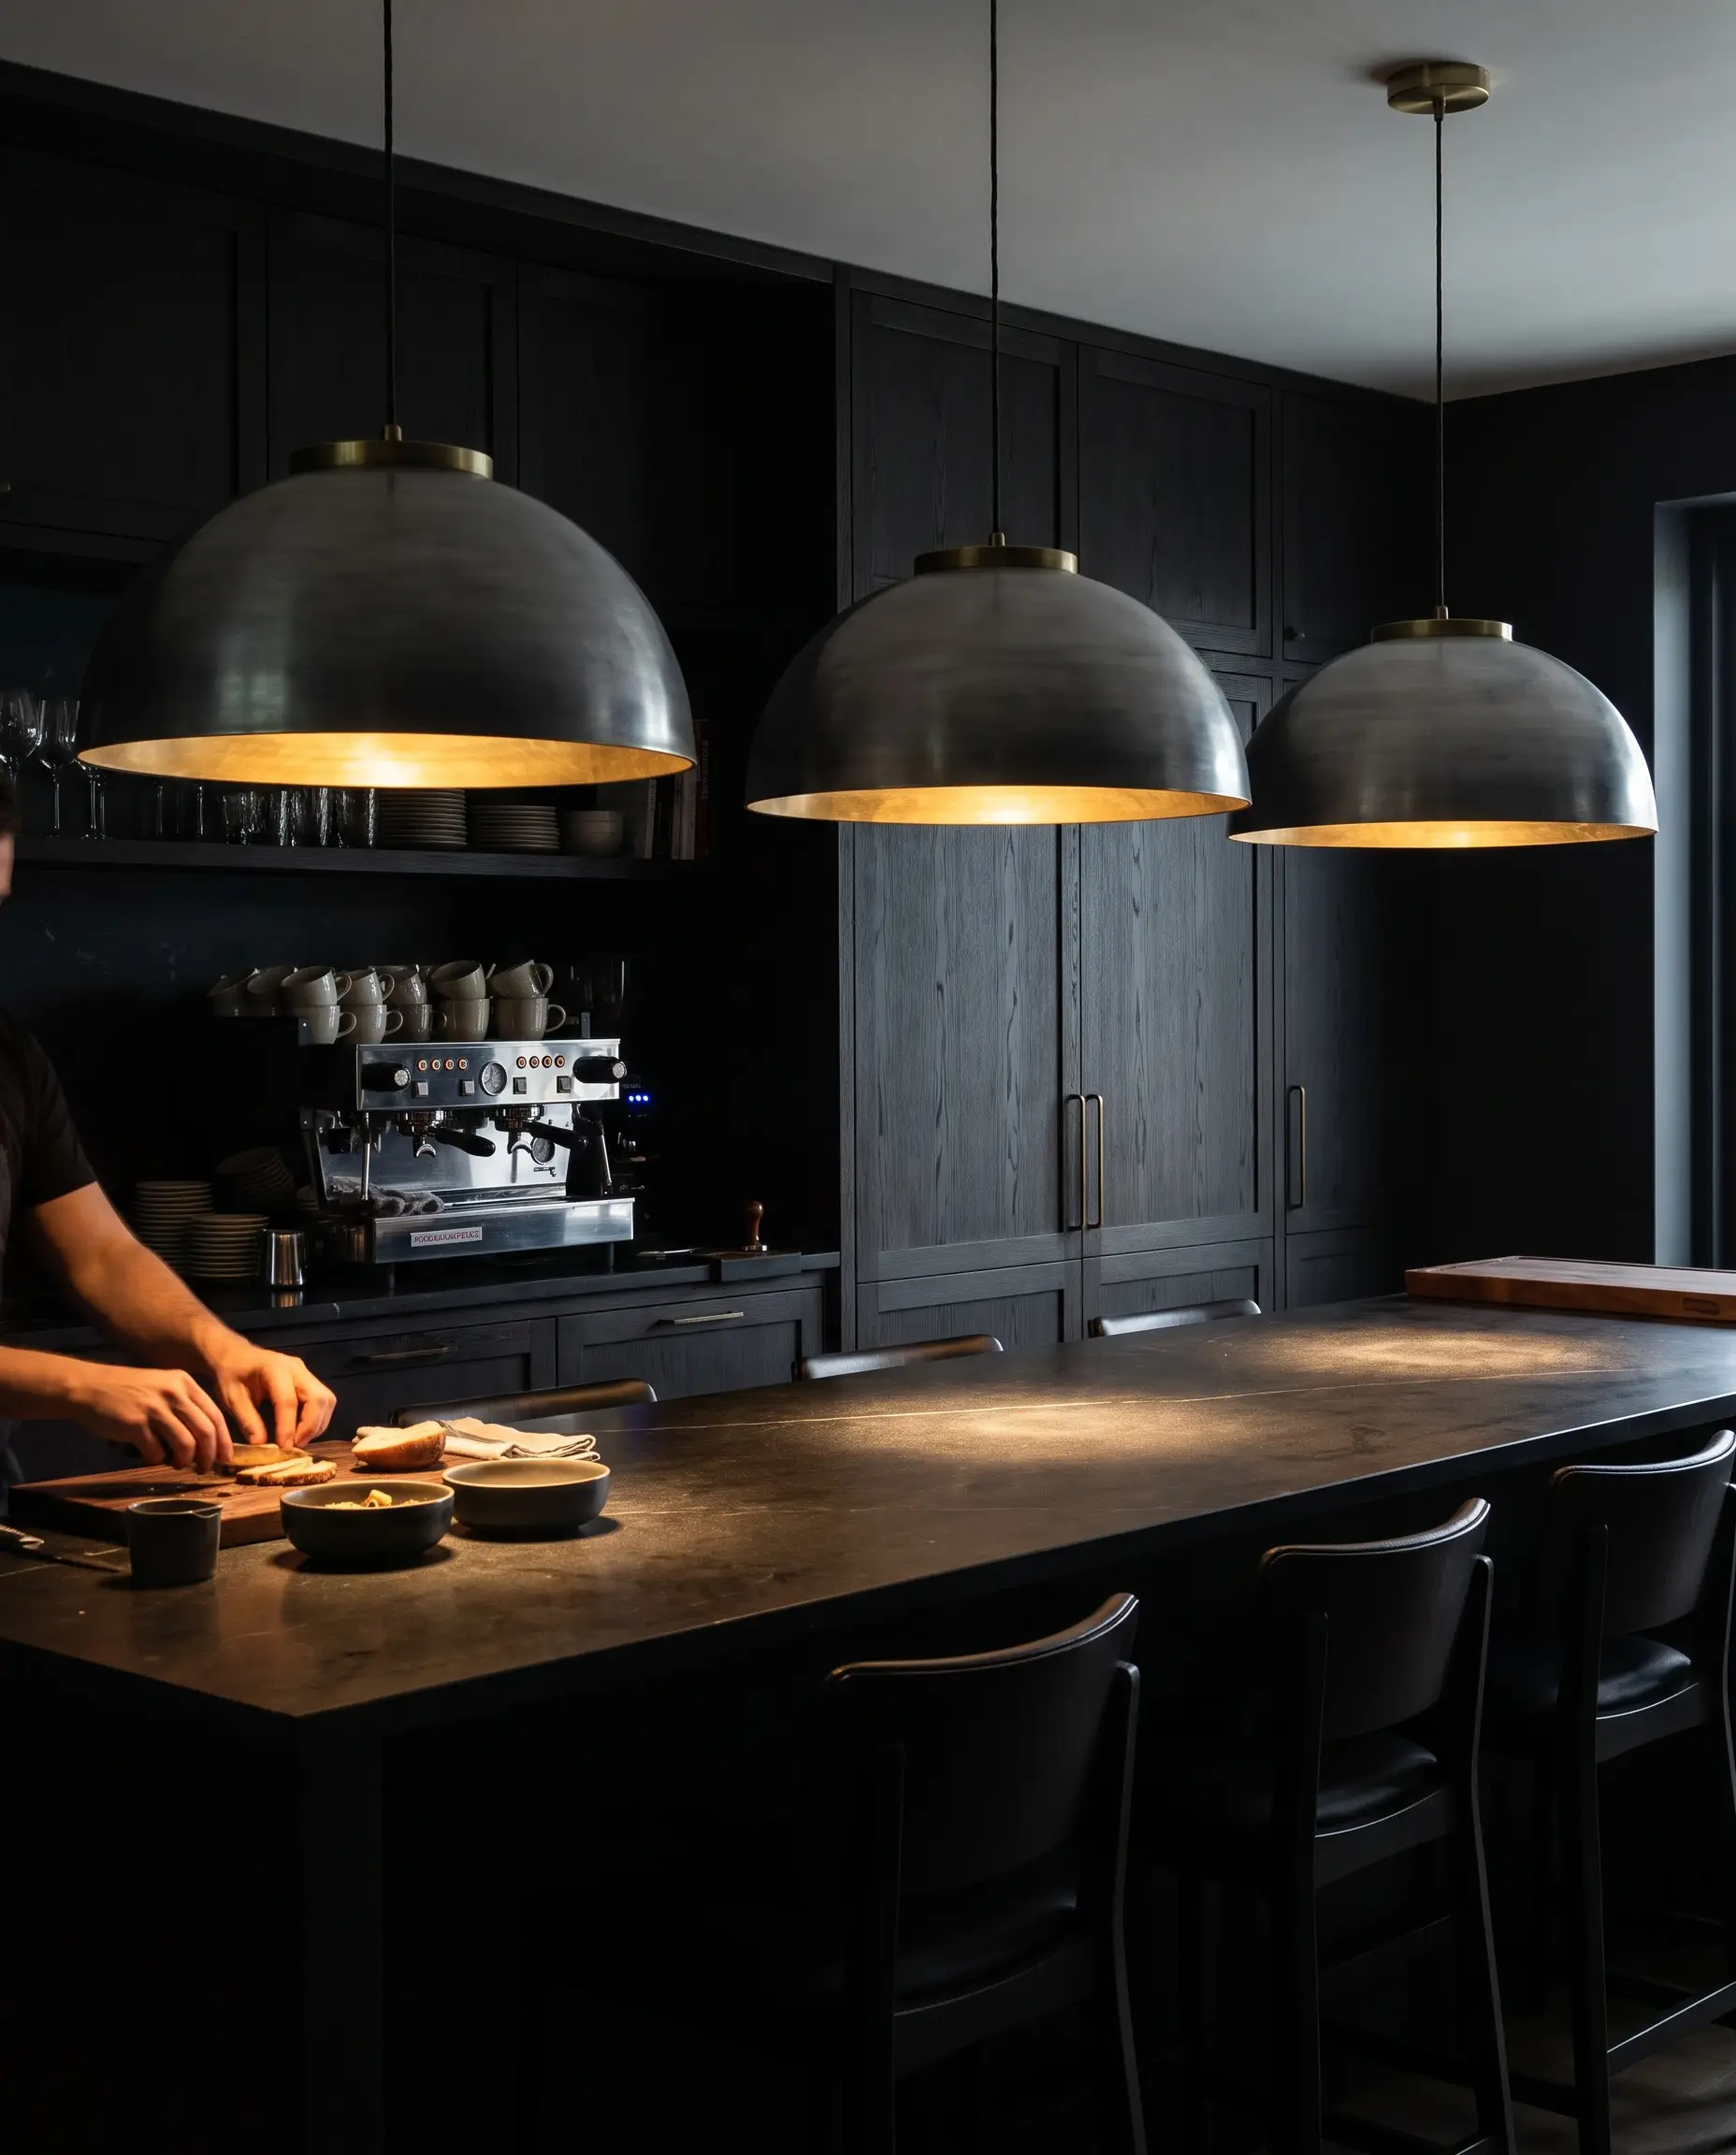
Bringing the light source physically closer to the counter surface generates incredible intimacy, transforming a stark kitchen into a moody, cafe-like atmosphere. Instead of the standard high hang, dropping specialized fixtures lower creates a concentrated pool of light that grounds the entire room.
Drop your opaque pendants to exactly 26 to 28 inches above the counter surface, completely abandoning the standard 30-36 inch rule.
Scale Check
- Vibe: Moody, intimate, and highly curated.
- Key Materials: Heavy spun aluminum, raw brass domes, or solid stone.
- Glare Warning: This technique strictly requires opaque shades (metal or stone) to prevent blinding eye-level glare for seated guests.
4. The Singular Monumental Pendant
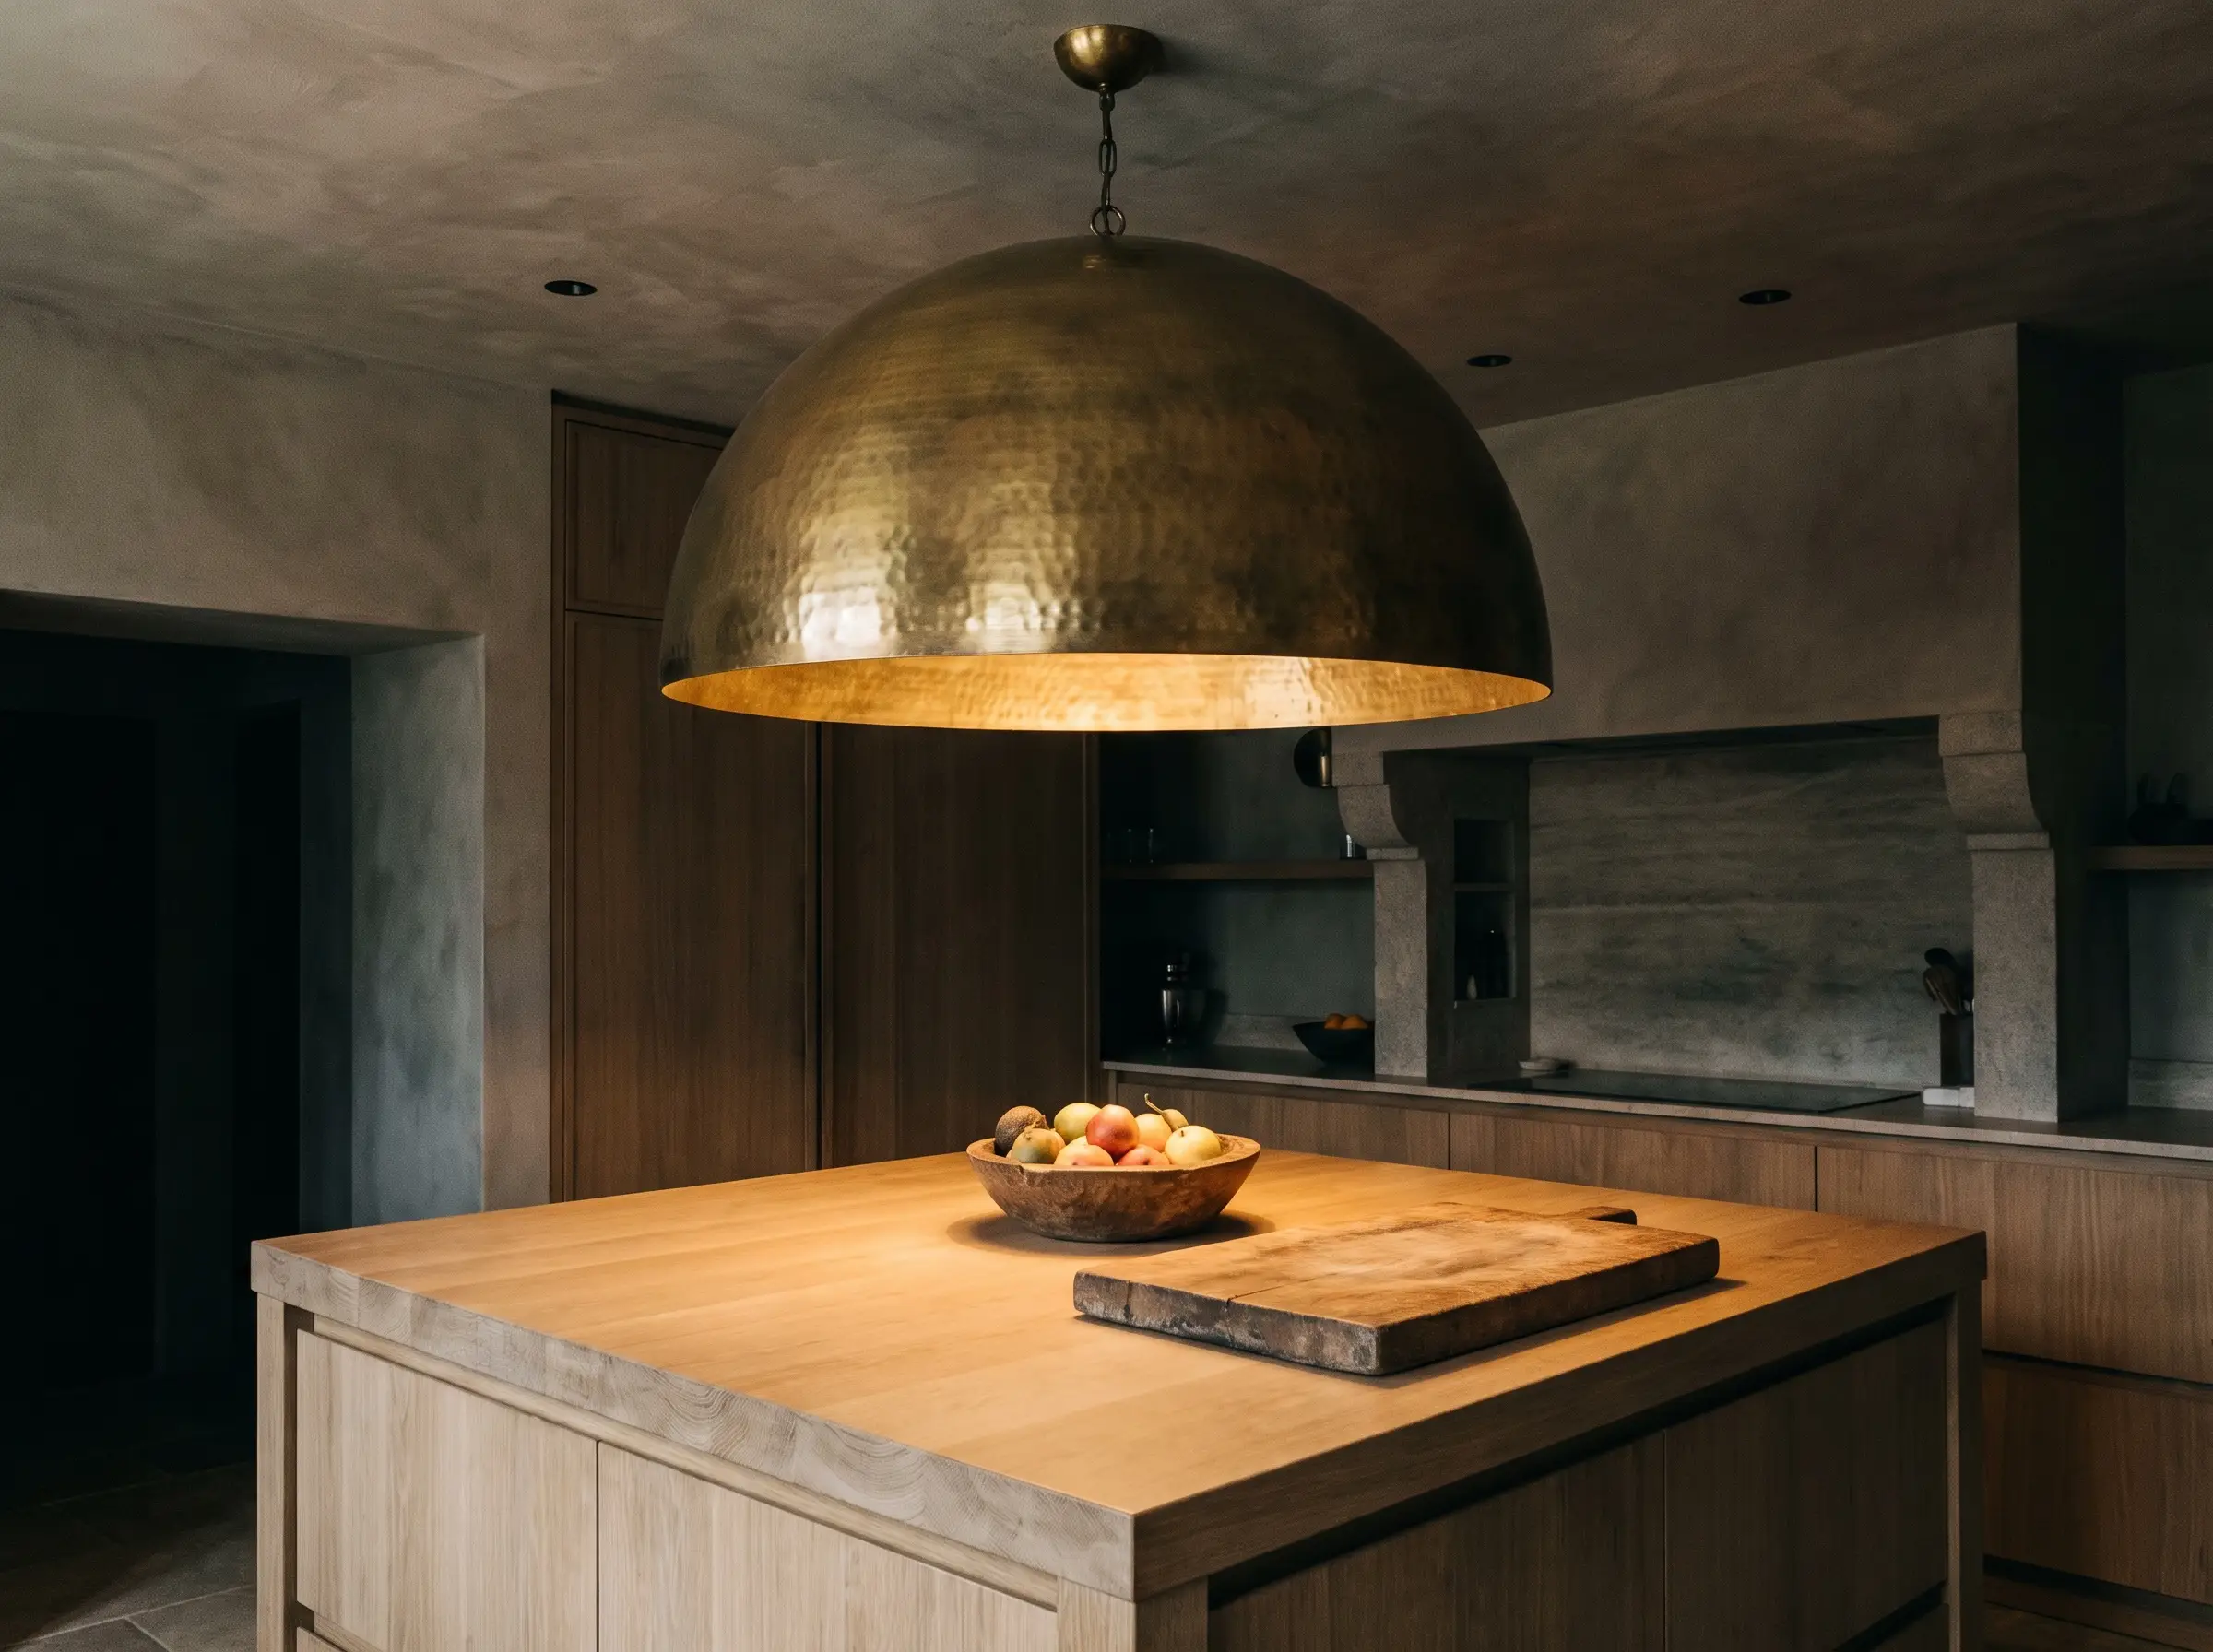
For square or slightly smaller prep islands, deploying one massive, oversized pendant acts as the room’s undeniable focal point. A single giant paper lantern or hammered metal dome commands attention and anchors the visual weight of the space flawlessly.
- Vibe: Postmodern, Wabi-Sabi, and boldly confident.
- Key Materials: Hammered brass, textured rice paper, or oversized ceramic.
- Styling Pro-Tip: Keep surrounding ceiling lighting extremely minimal so the singular monumental fixture has no visual competition.
Materiality and Texture: Fixtures as Sculptural Art
We are witnessing a massive rejection of cheap, clear glass and polished chrome in high-end spaces. The focus is now strictly on organic, tactile materials that command attention and look breathtaking even when the switches are turned completely off.
5. Raw Alabaster and Veined Stone Diffusers
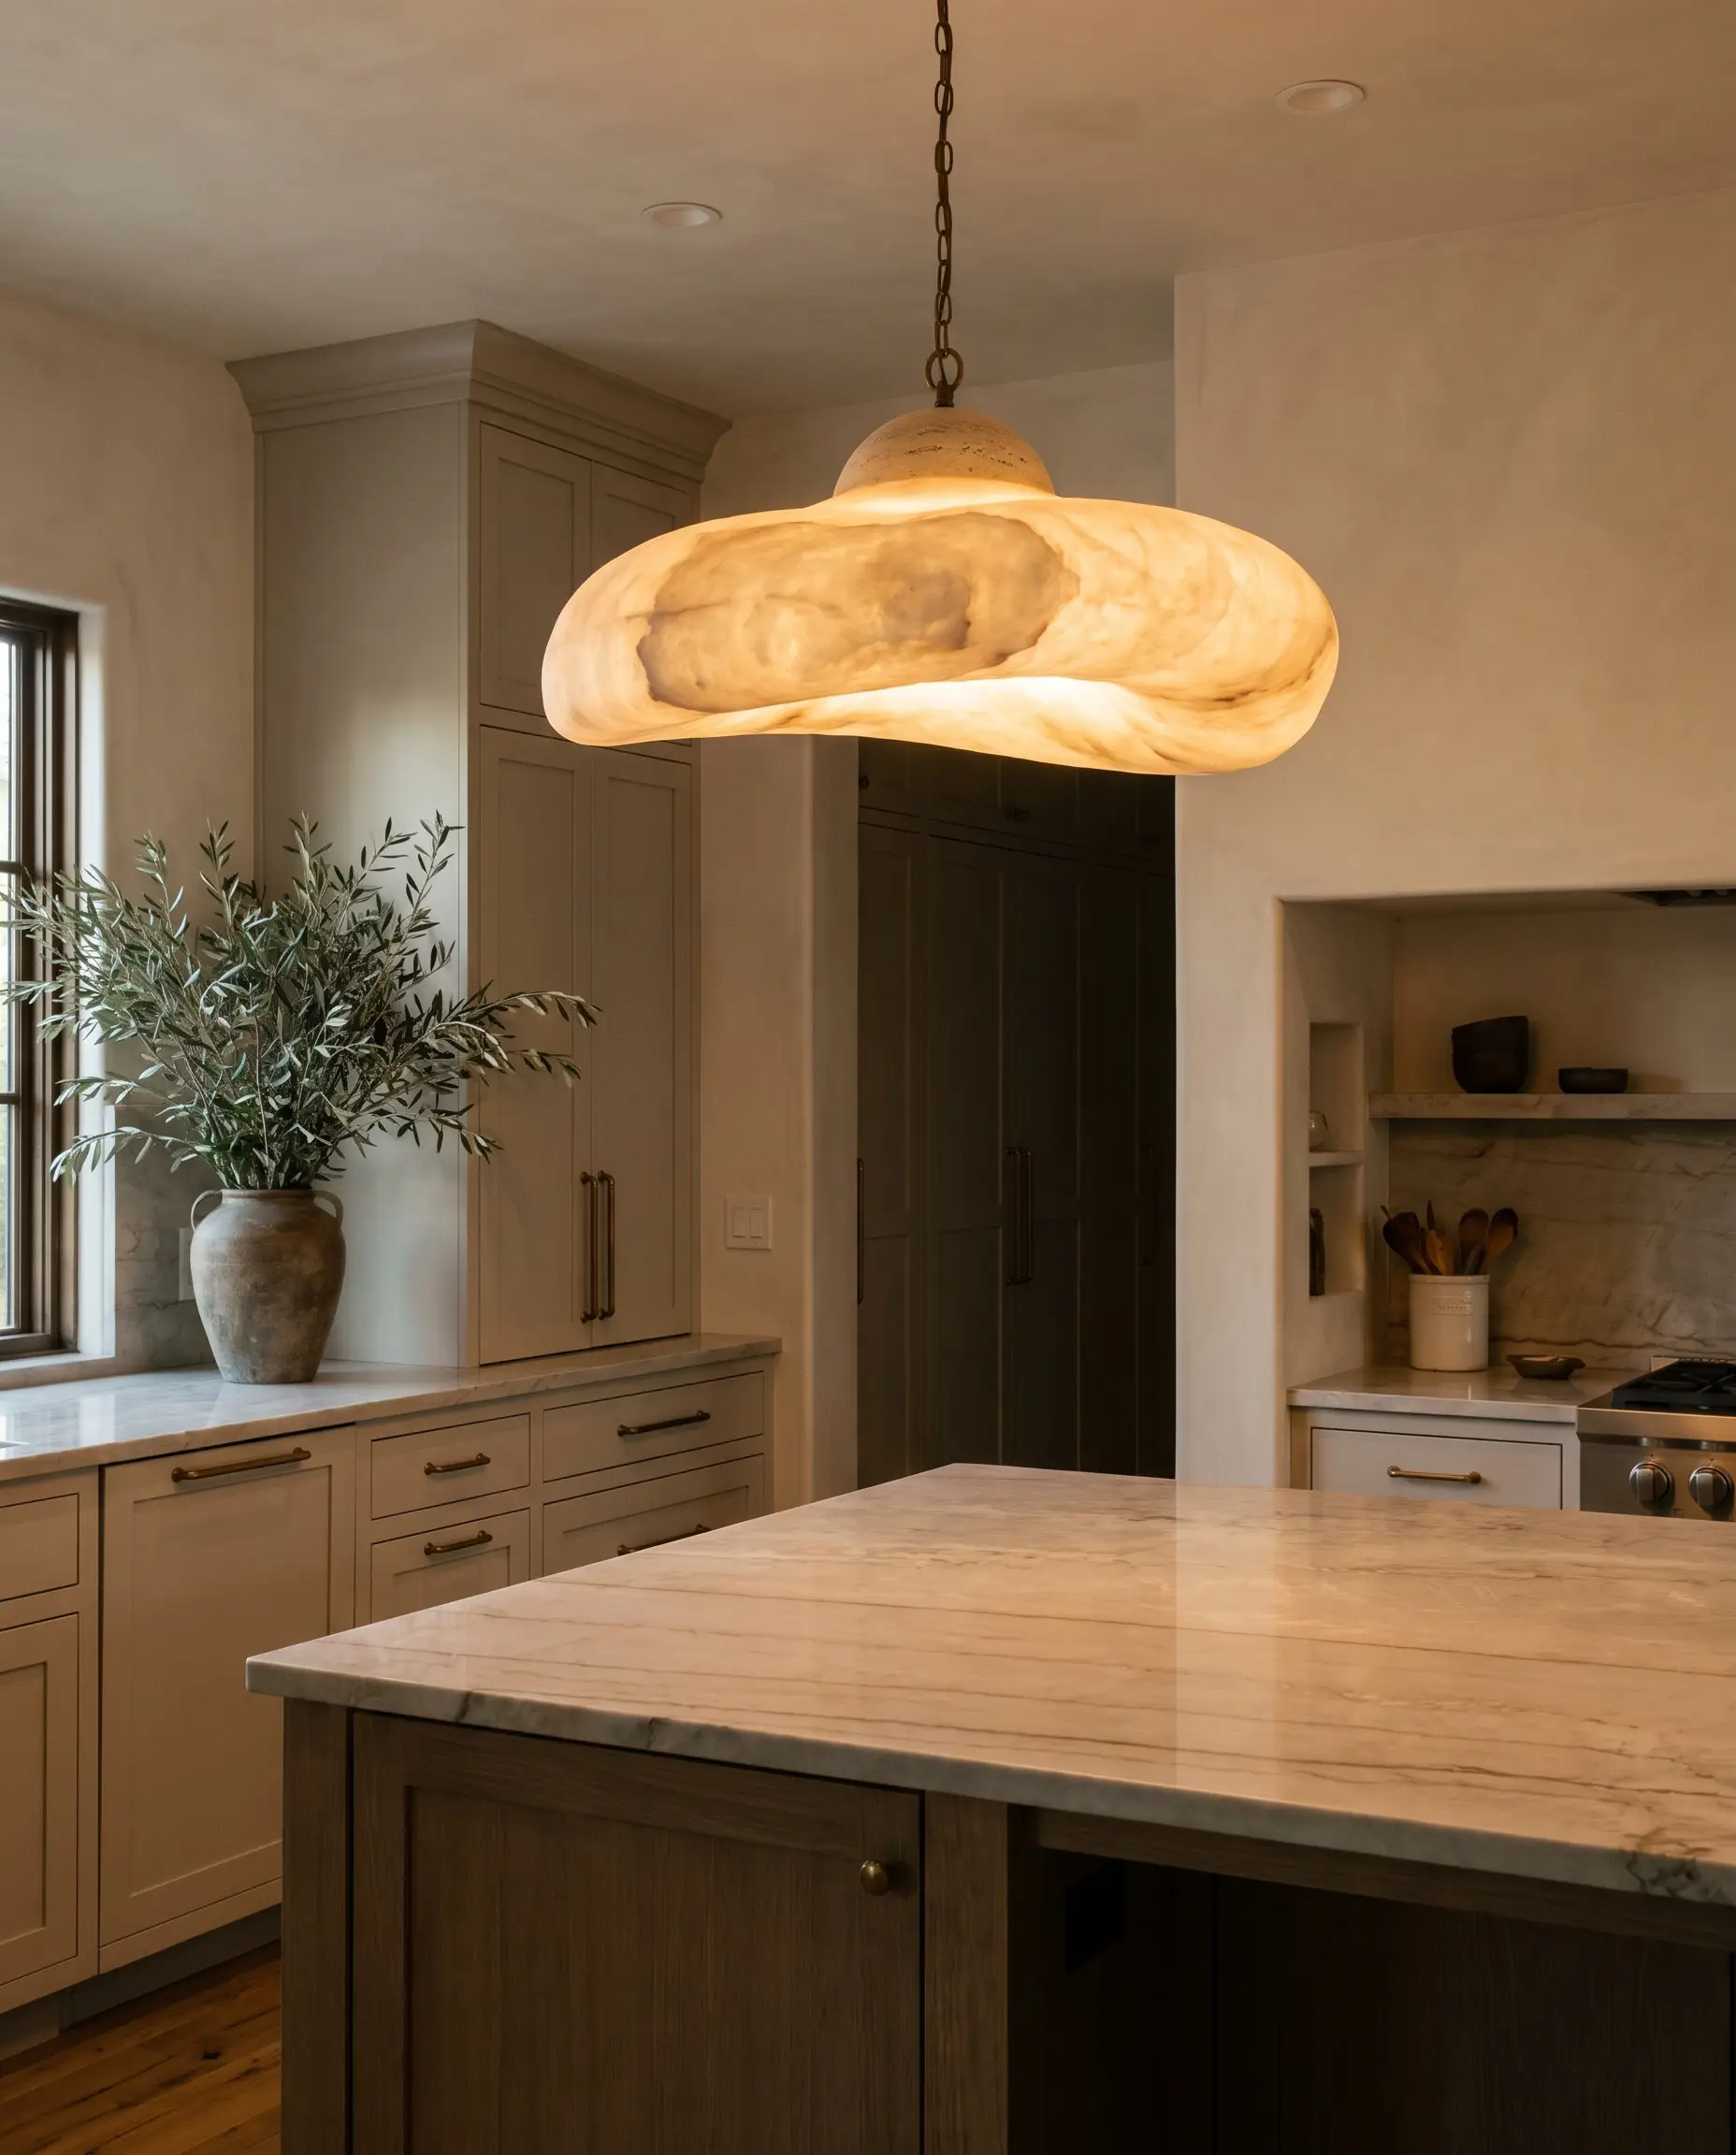
Natural alabaster diffusers capture the absolute essence of “Quiet Luxury” by scattering LED light into a rich, warm, non-directional glow. The inherent organic veining of the stone ensures that every single fixture is a one-of-a-kind sculptural piece.
- Vibe: Earthy, opulent, and quietly luxurious.
- Key Materials: Solid raw alabaster, travertine, and onyx.
- Illumination Quality: Produces a dense, soft ambient light that entirely eliminates harsh shadows.
6. Slumped, Cast, and Fluted Glass
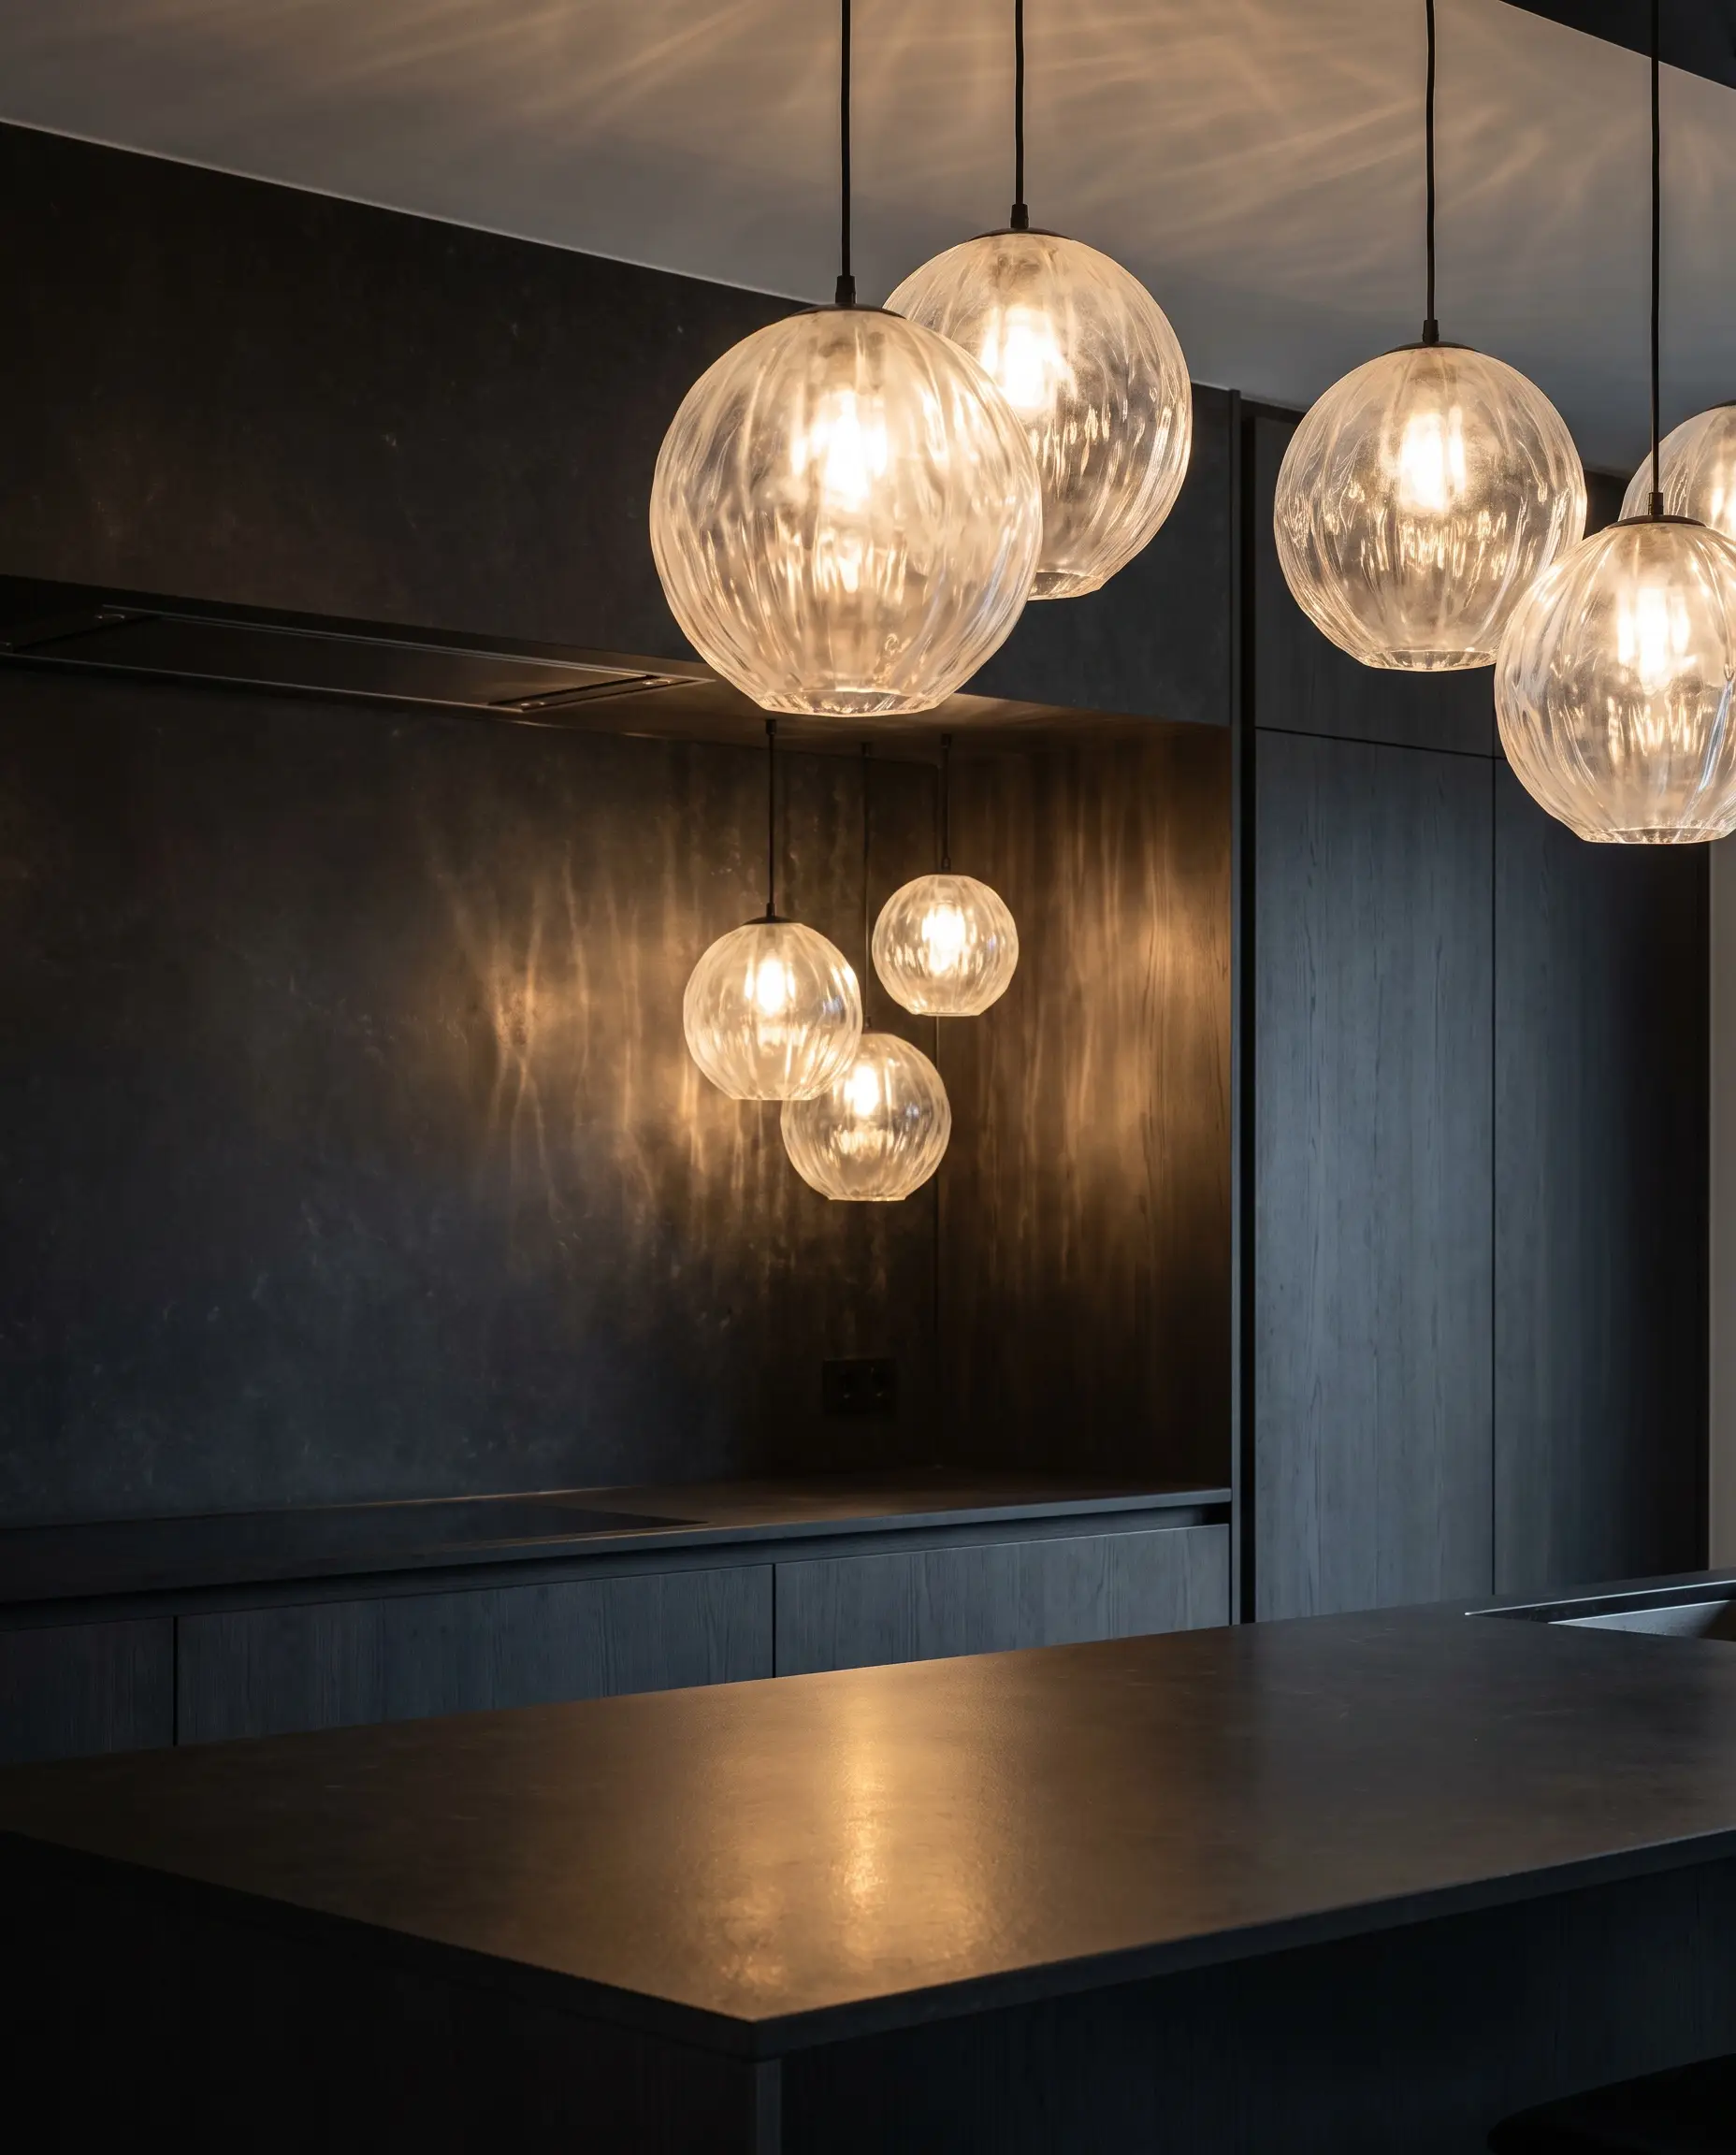
Clear glass globes show every speck of dust and create a piercing bulb glare that ruins the evening mood. The new standard demands heavily textured, slumped glass or fluted glass with organic waves that obscure the bulb and scatter the light into soft, cinematic refractions.
- Vibe: Cinematic, heavily textured, and deeply sophisticated.
- Key Materials: Hand-slumped glass, ribbed/fluted glass, frosted finishes.
- Styling Pro-Tip: Pair these heavily textured pieces with high-end sintered stone backsplashes to contrast the sleek, matte stone with the rippling glass.
7. Unlacquered Brass and Living Patinas
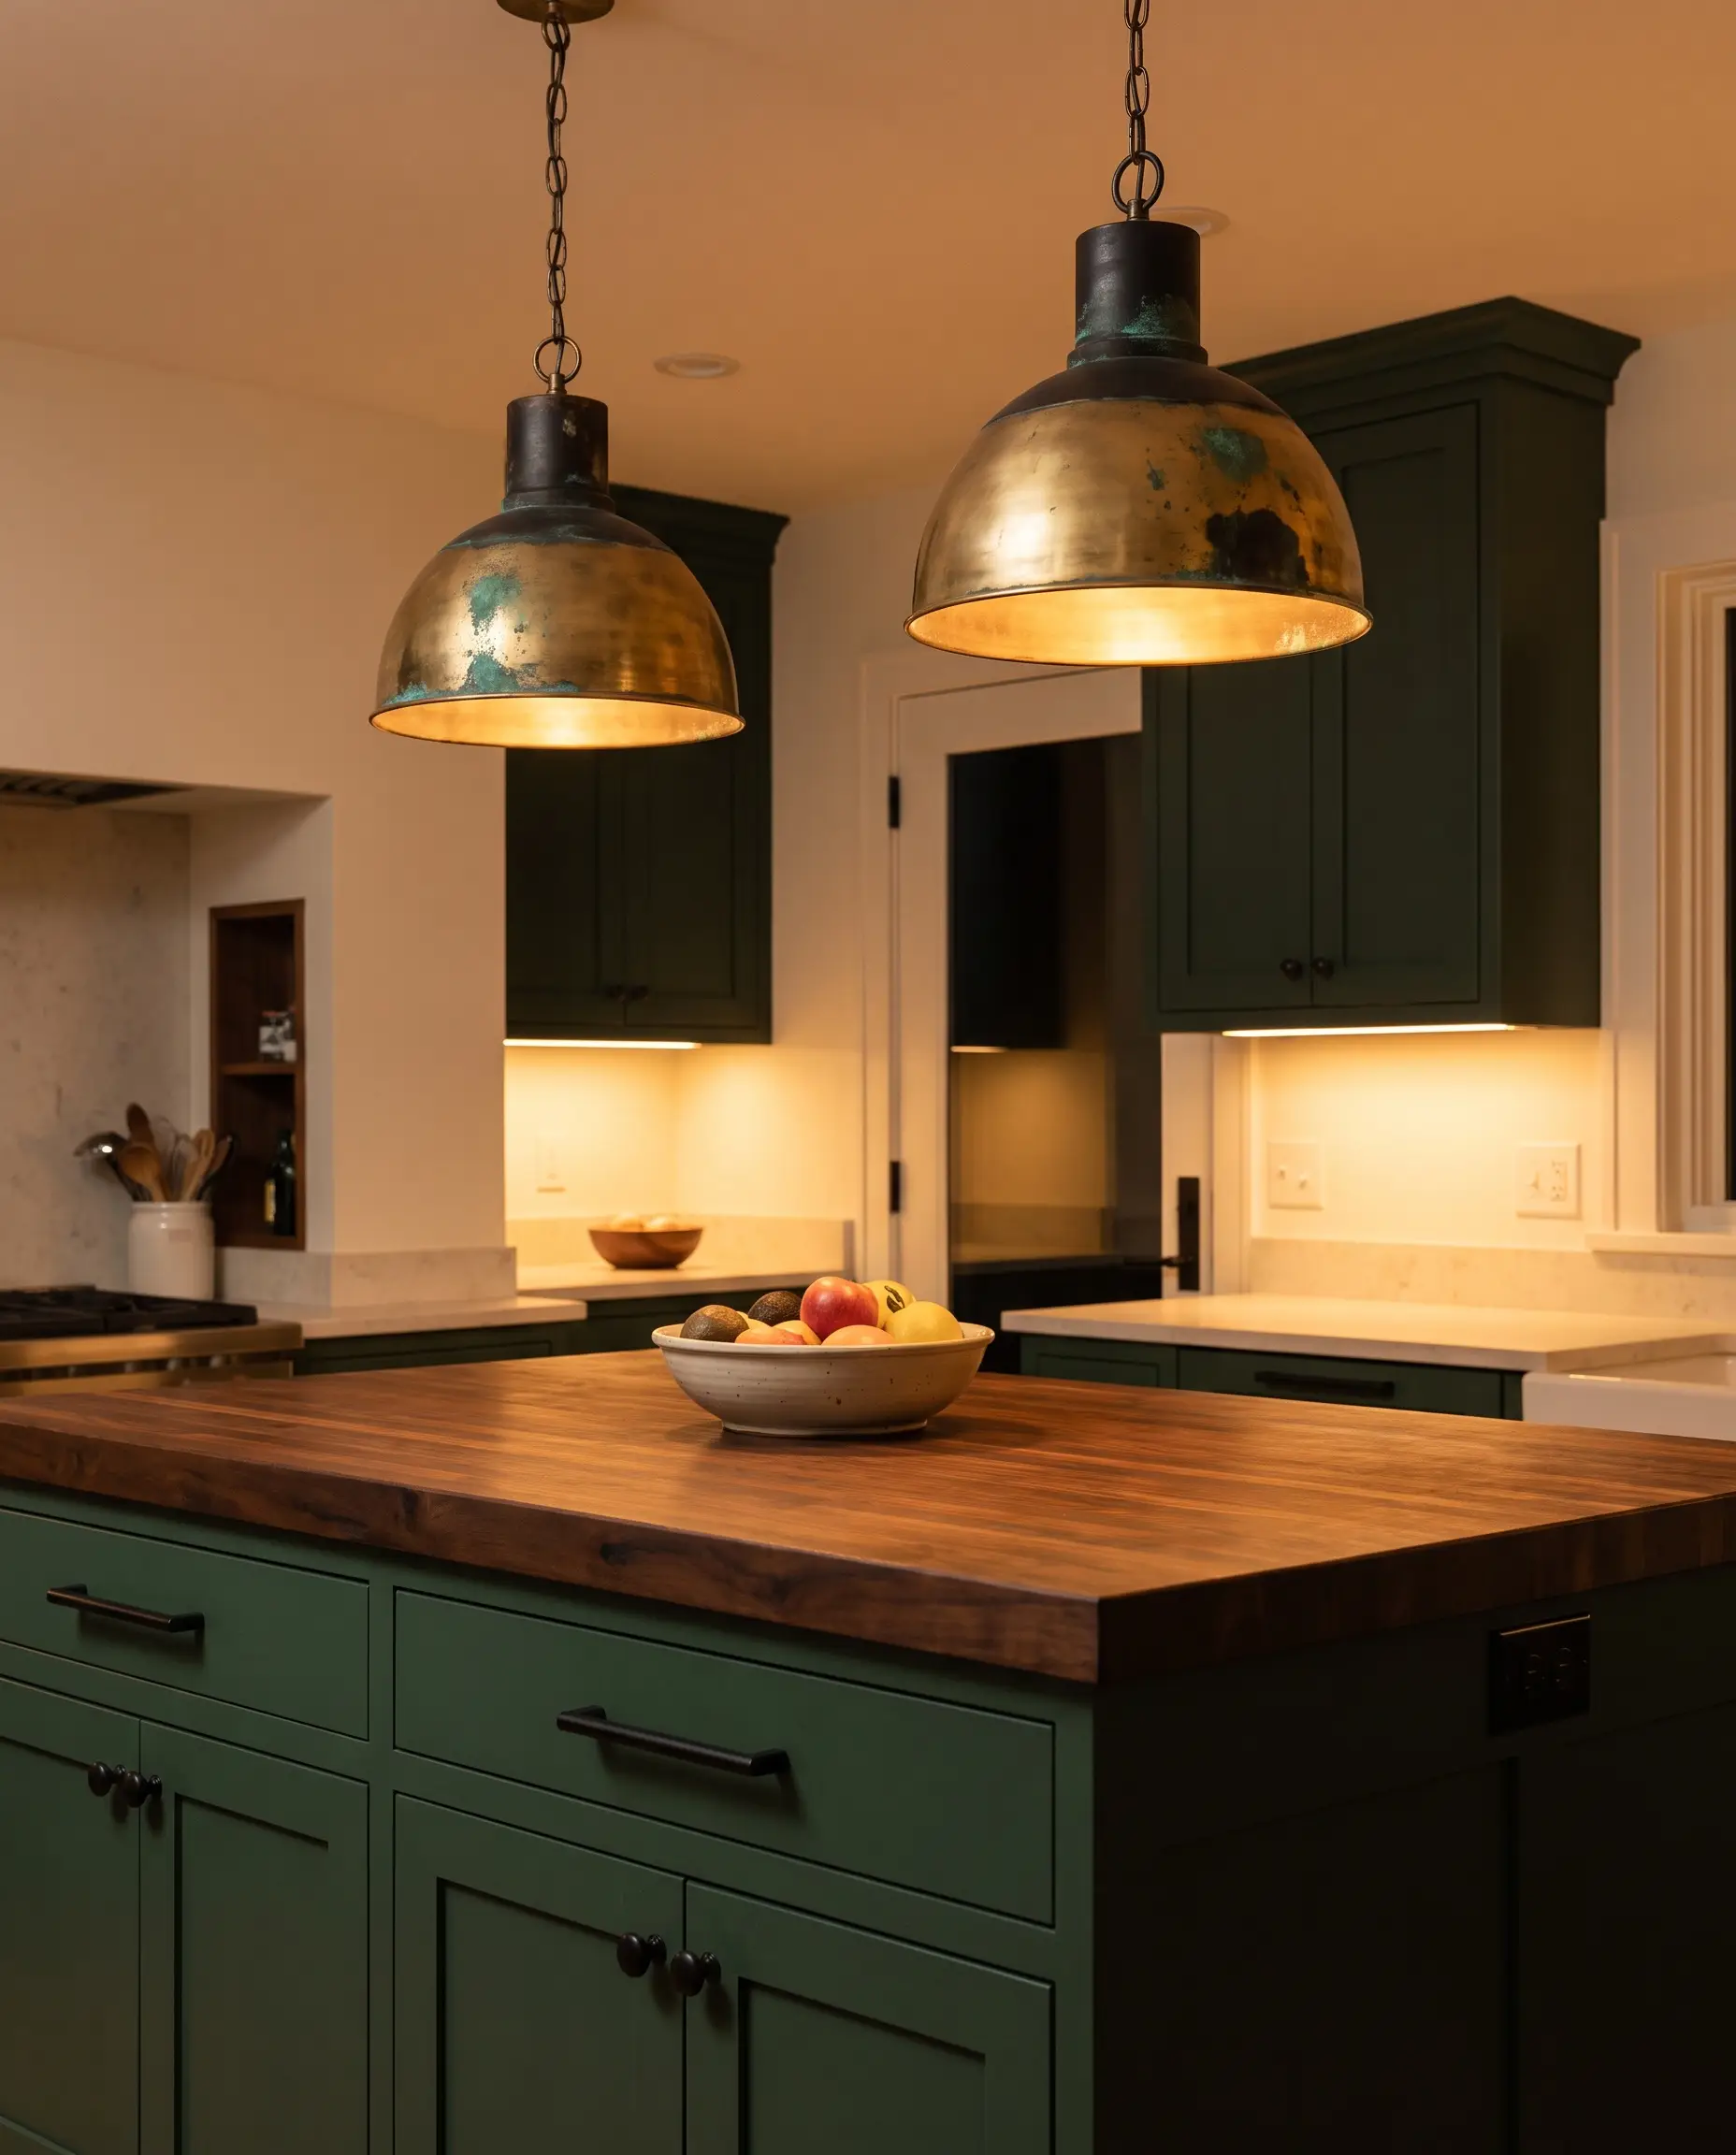
The industry is moving away from perfectly sealed, static satin brass toward raw metals that age gracefully alongside the home. Unlacquered brass, blackened bronze, and raw copper develop a stunning living patina over time, reacting to the natural oils on your hands and the culinary environment.
Unlacquered brass will spot if splashed with lemon juice or acidic liquids—embrace this as part of the organic living patina, or stick to sealed bronze for fixtures located directly over the wet prep zone.
Designer Secret
- Vibe: Historic, authentic, and naturally evolving.
- Key Materials: Unlacquered brass, raw copper, blackened bronze.
- Hardware Match: Mix these living finishes with stable matte black cabinet hardware to anchor the room’s metallic palette.
8. Plaster and Matte Ceramic Finishes
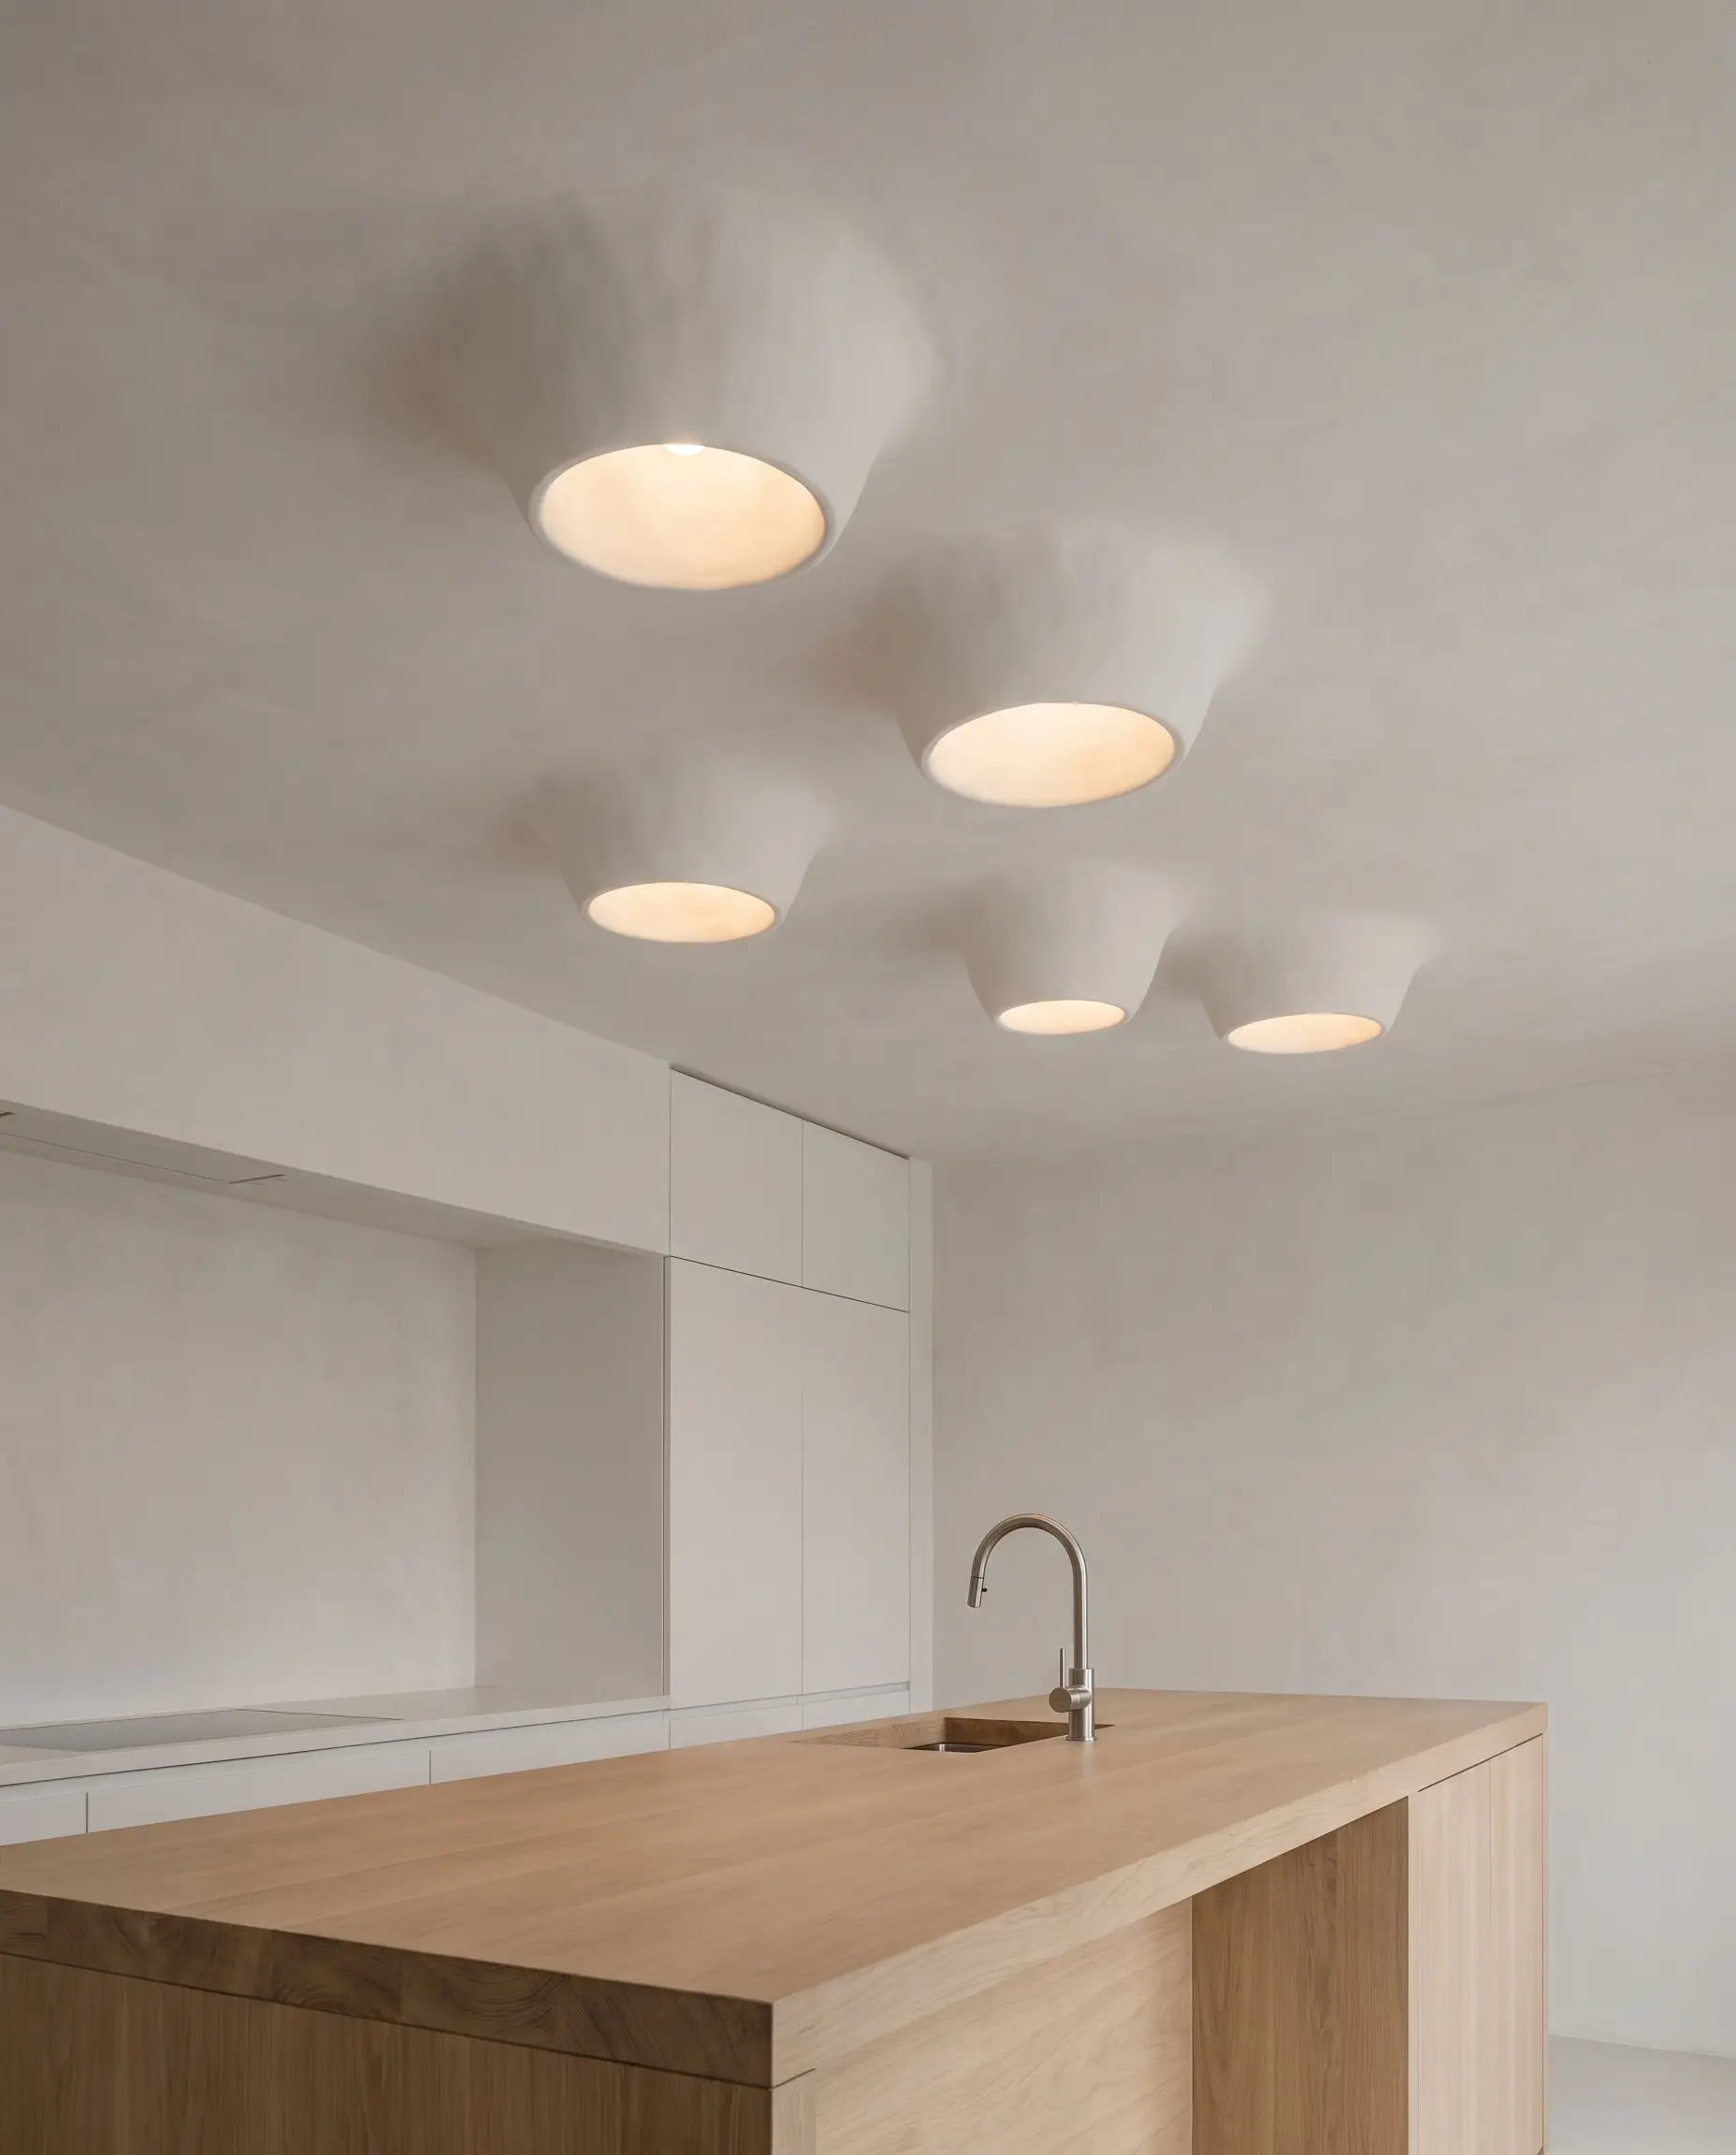
Fixtures coated in chalky plaster or matte ceramic seamlessly blend into painted walls and ceilings for a monolithic, highly architectural aesthetic. This technique makes the light appear to emerge directly from the organic structure of the room itself, rather than hanging as a separate accessory.
- Vibe: Organic Modern, minimal, and structural.
- Key Materials: Chalky plaster, matte white ceramic, slip-cast clay.
- Styling Pro-Tip: Color-match the plaster fixture exactly to your ceiling or wall paint to achieve a truly seamless, built-in appearance.
The Rise of Wall-Mounted Kitchen Illumination
Recessed ceiling grids are being aggressively minimized in favor of eye-level, directional illumination. Sconces have transitioned from decorative living room accents to a mandatory, highly functional layer in the modern culinary space.
9. Articulating Library Sconces Over Open Shelving
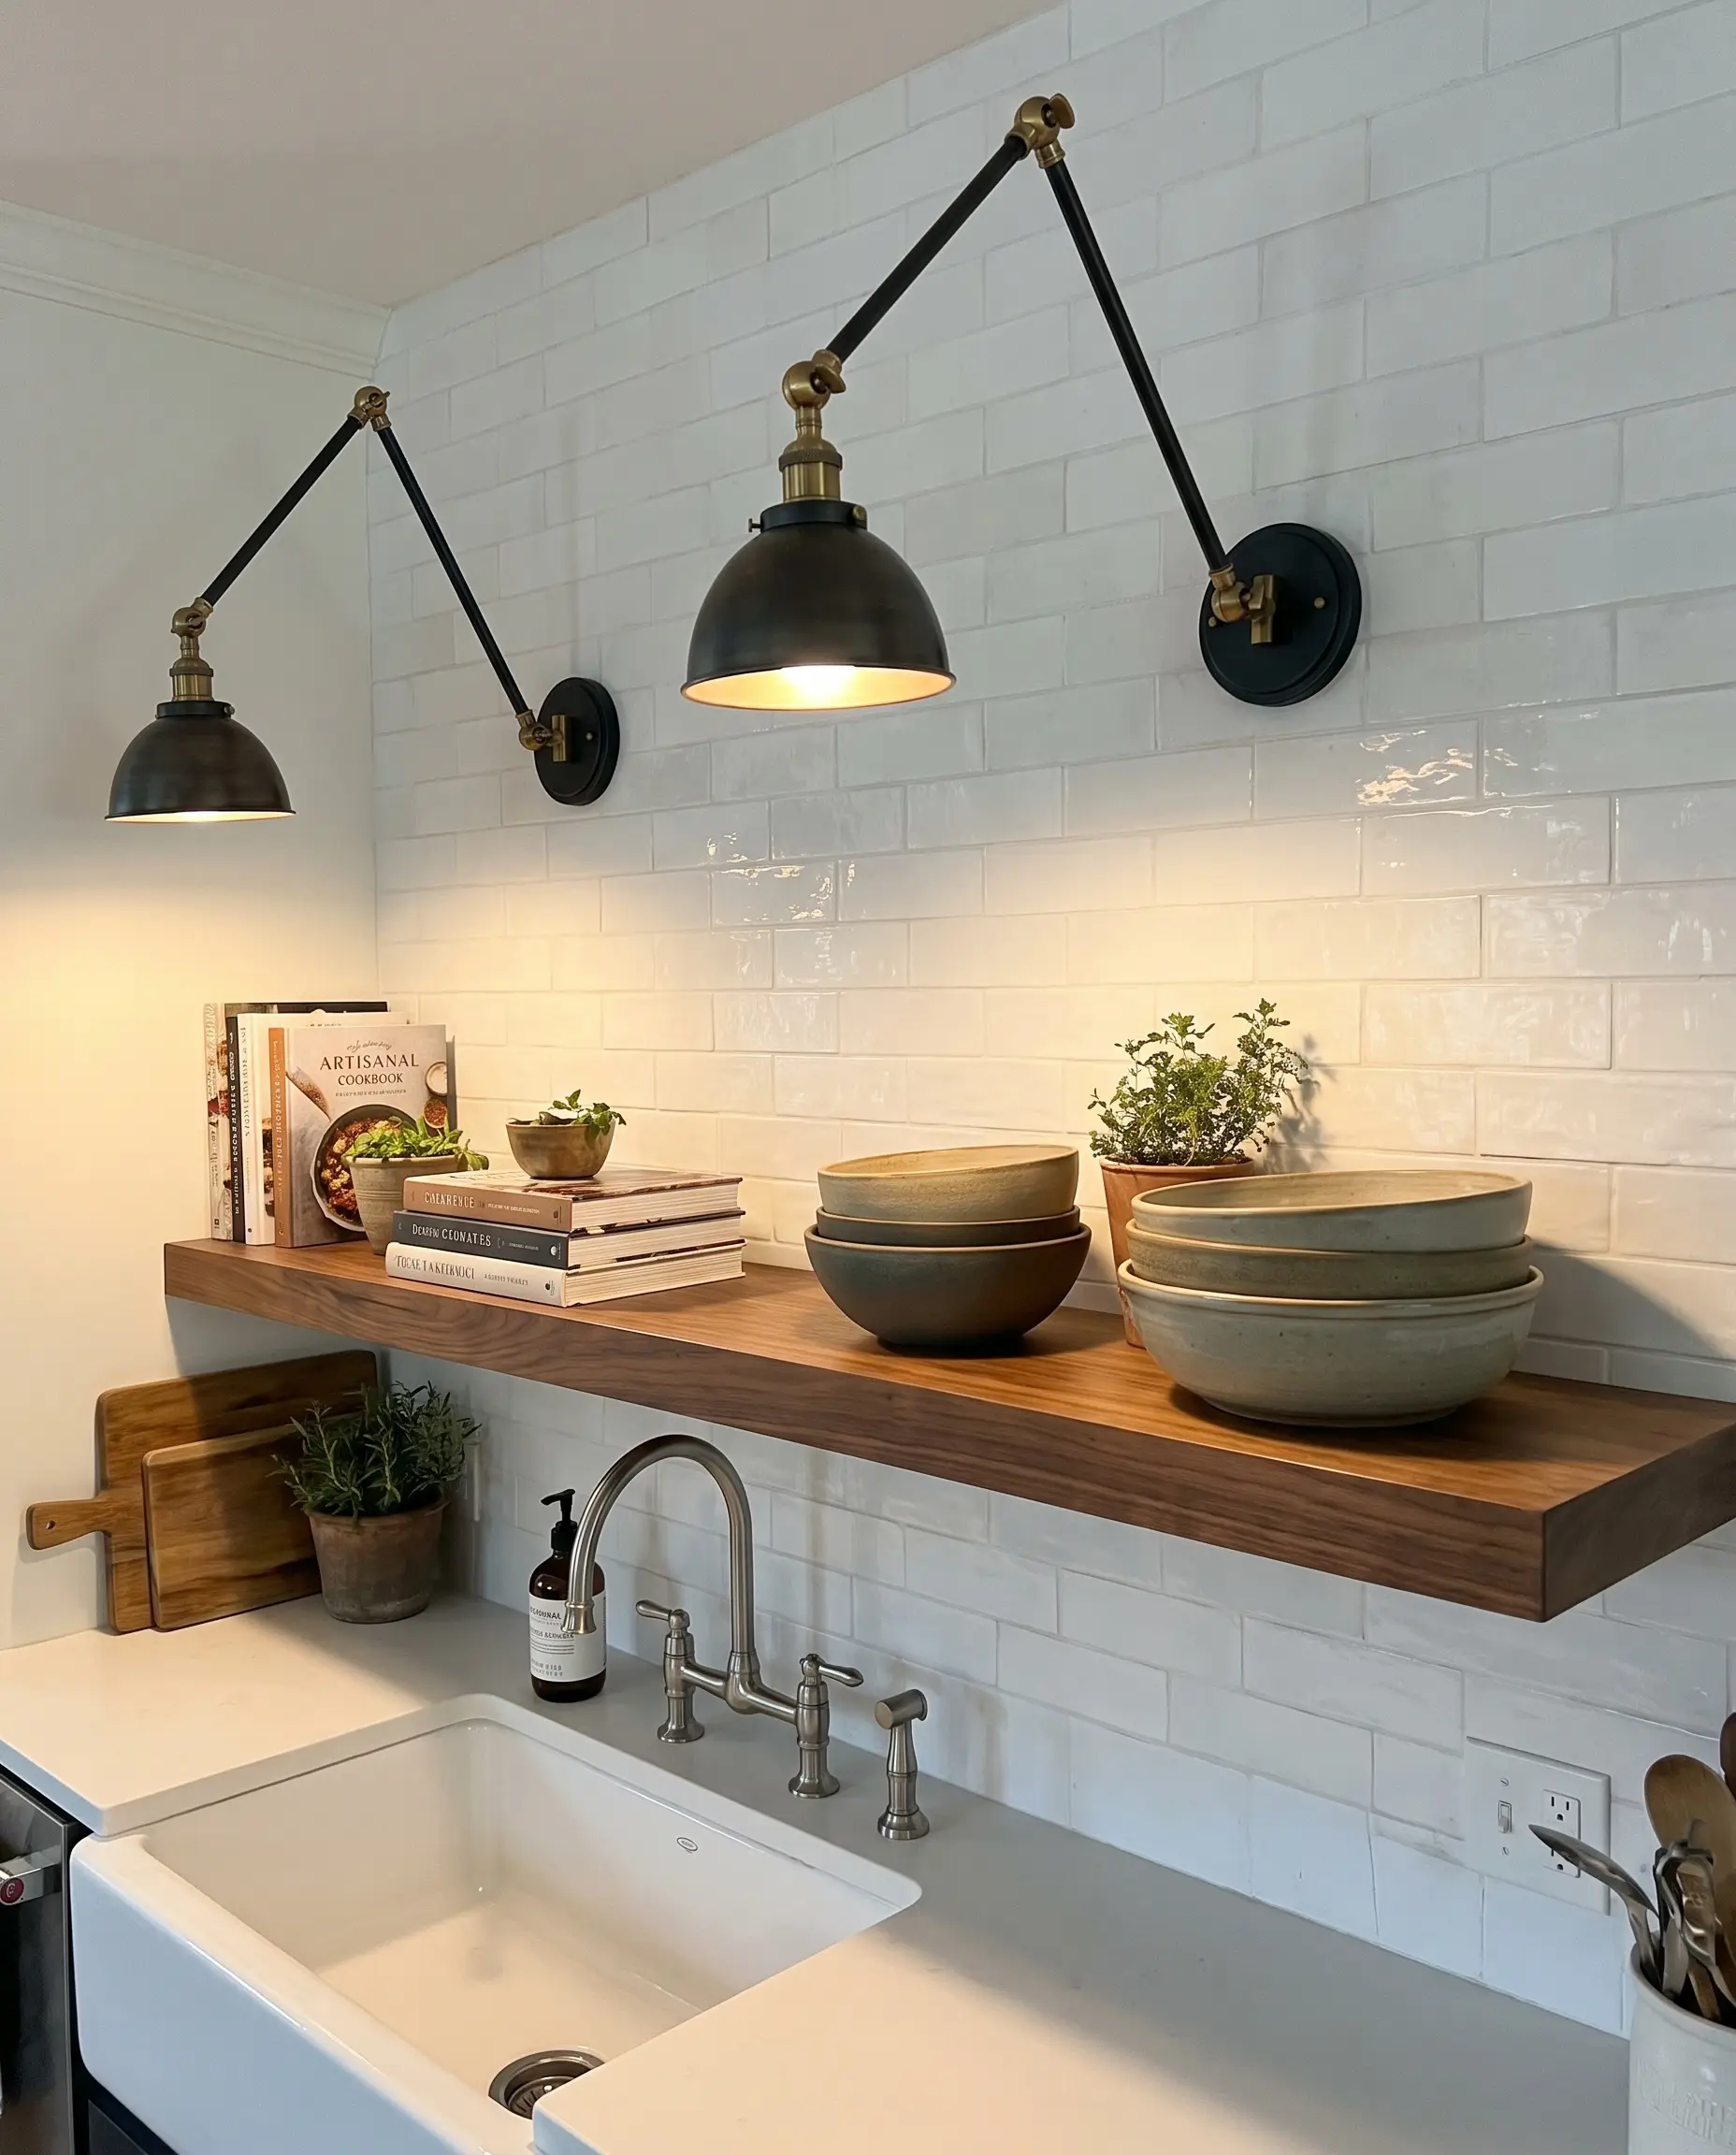
Mounting long-arm, articulating sconces above floating shelves or a deep sink brings a sophisticated, collected library aesthetic directly into the kitchen. These adjustable arms provide highly targeted task illumination exactly where you need it while adding a layer of classic design tension.
- Vibe: Classic, intellectual, and transitional.
- Key Materials: Blackened steel arms, brass joints, metal shades.
- Placement Strategy: Mount these exactly 18 to 24 inches above the highest open shelf to allow full articulation of the arm.
10. Range Hood Flanking
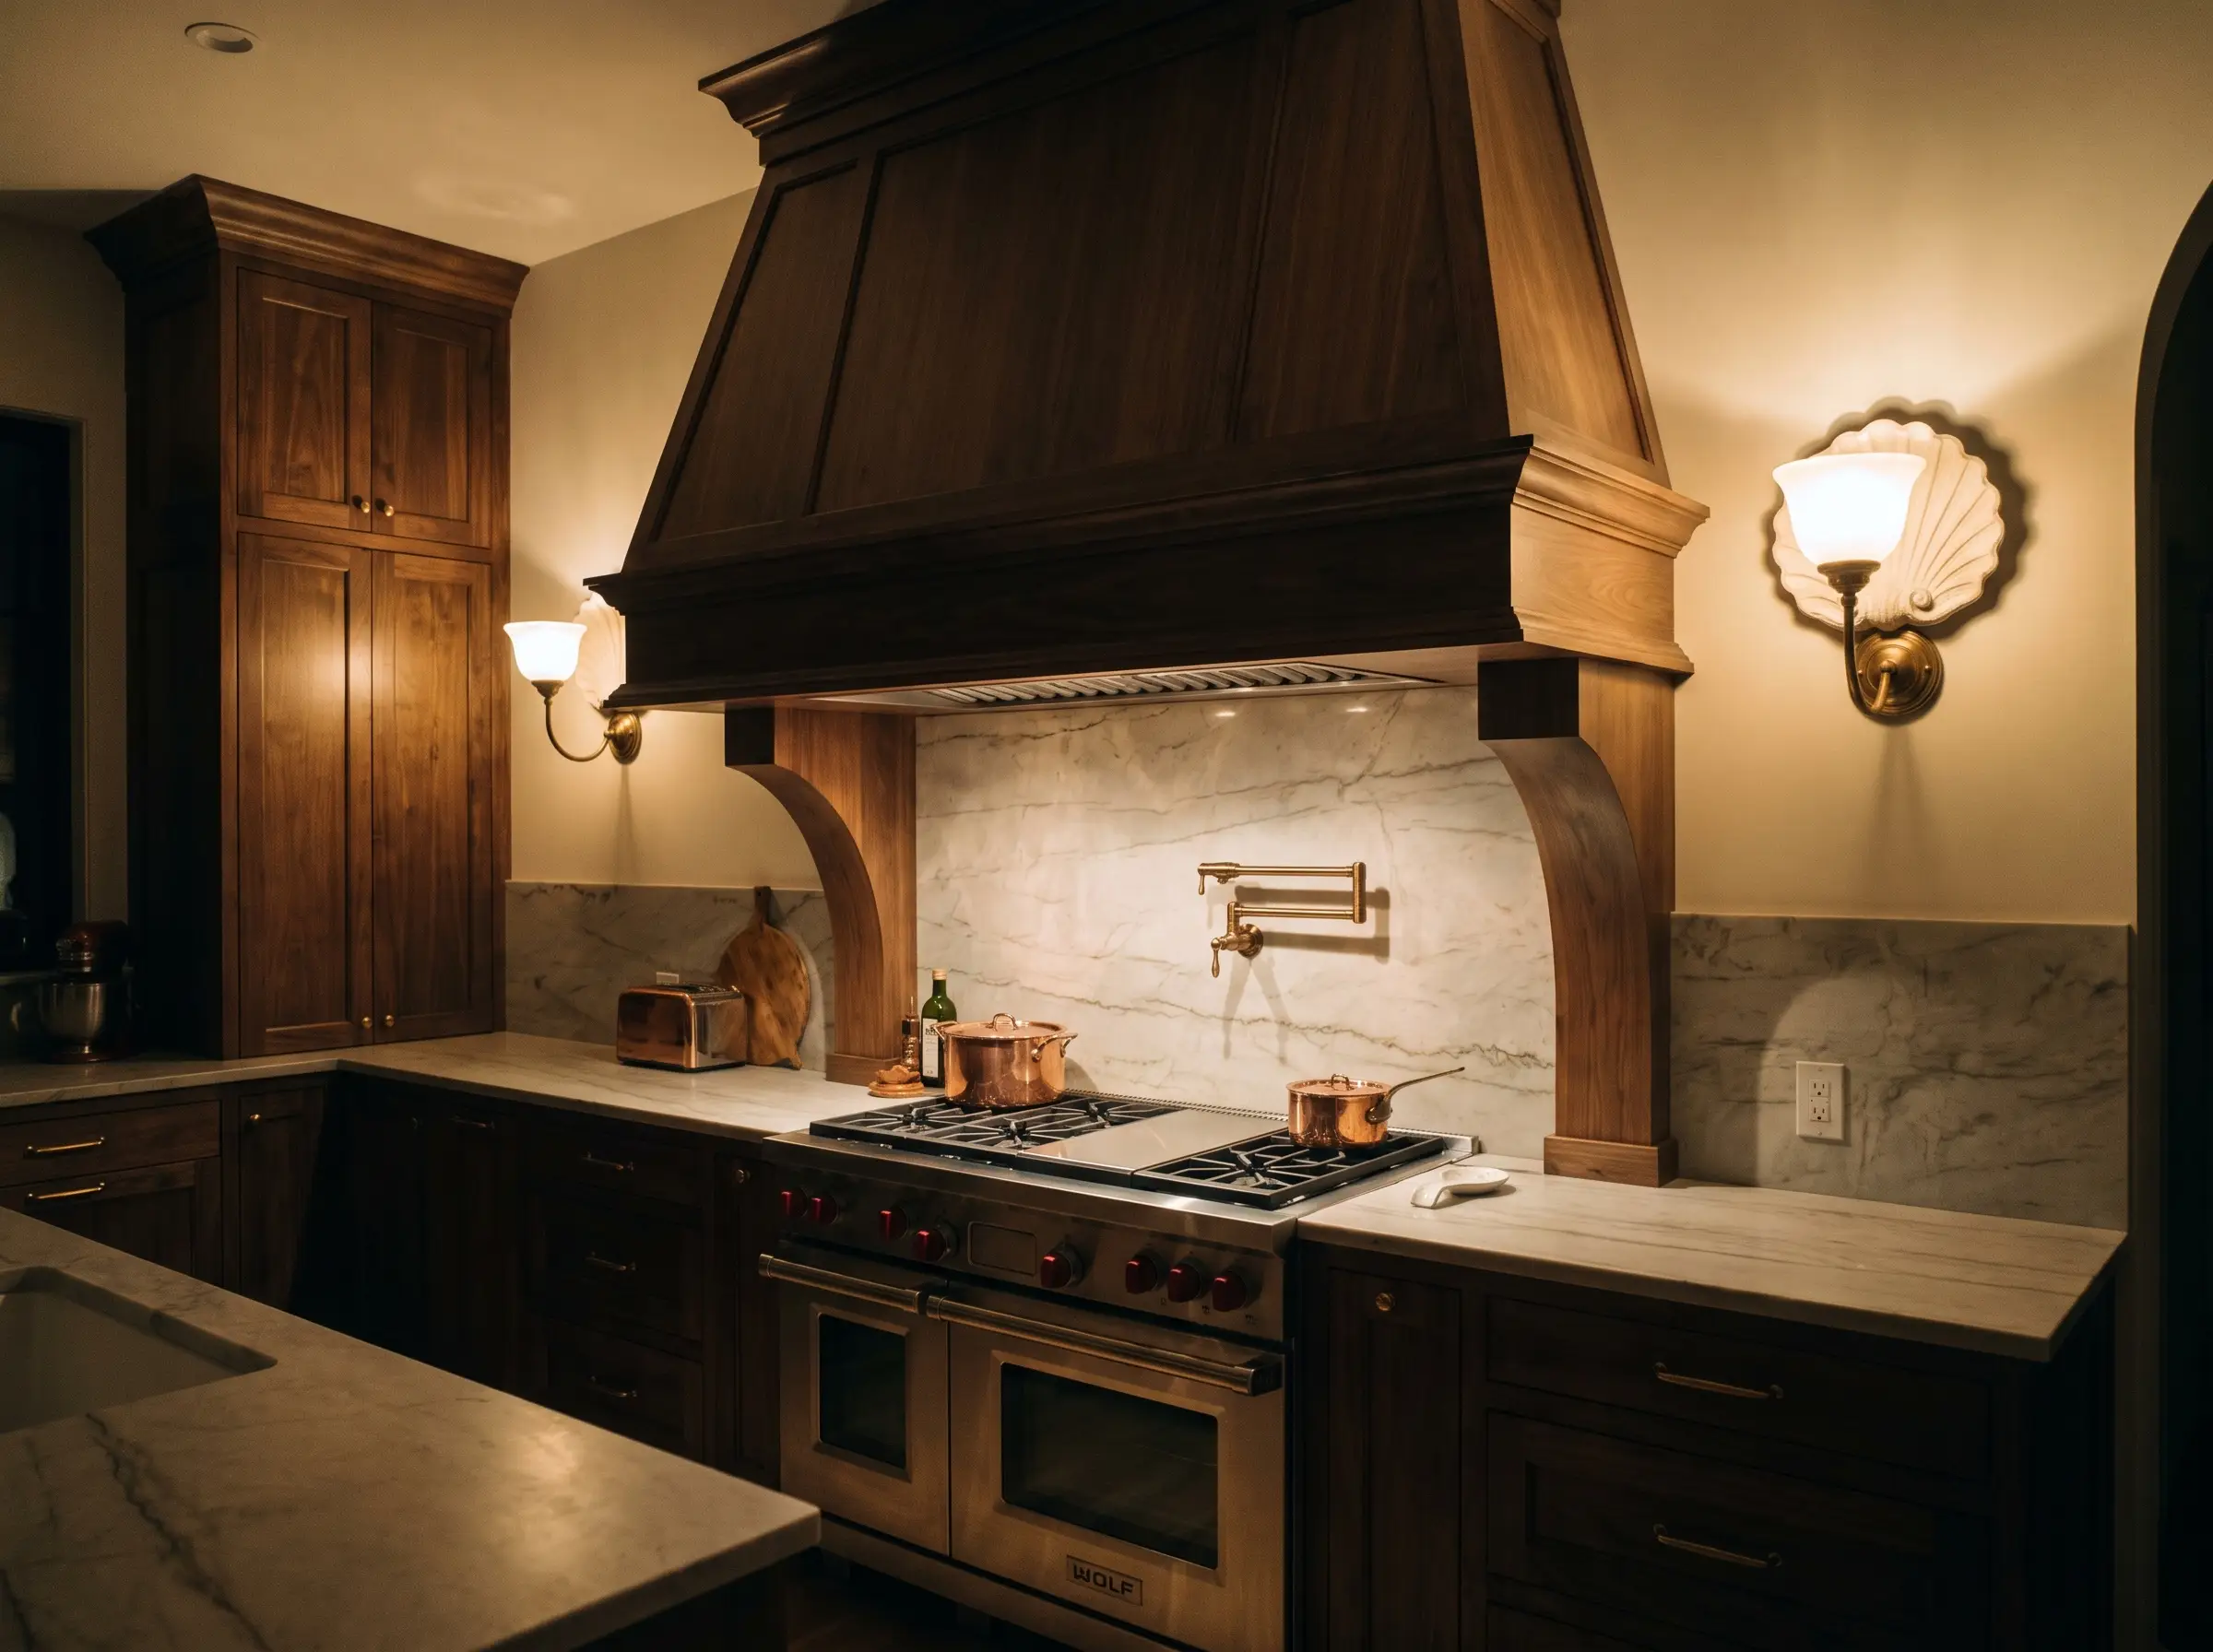
Placing two highly decorative micro-sconces on either side of a custom plaster or wood range hood immediately draws the eye to the cooking alcove. When the main overheads are turned off, these flanking sconces provide a gorgeous layer of evening ambient light that makes the stove area feel like a high-end hearth.
- Vibe: Hearth-centered, dramatic, and grounded.
- Key Materials: Plaster shells, brass backplates, frosted glass.
- Code Warning: Always check local building codes regarding electrical clearances and combustible materials near high-BTU gas ranges before roughing in these electrical boxes.
11. Picture Lights Over Art and Backsplashes
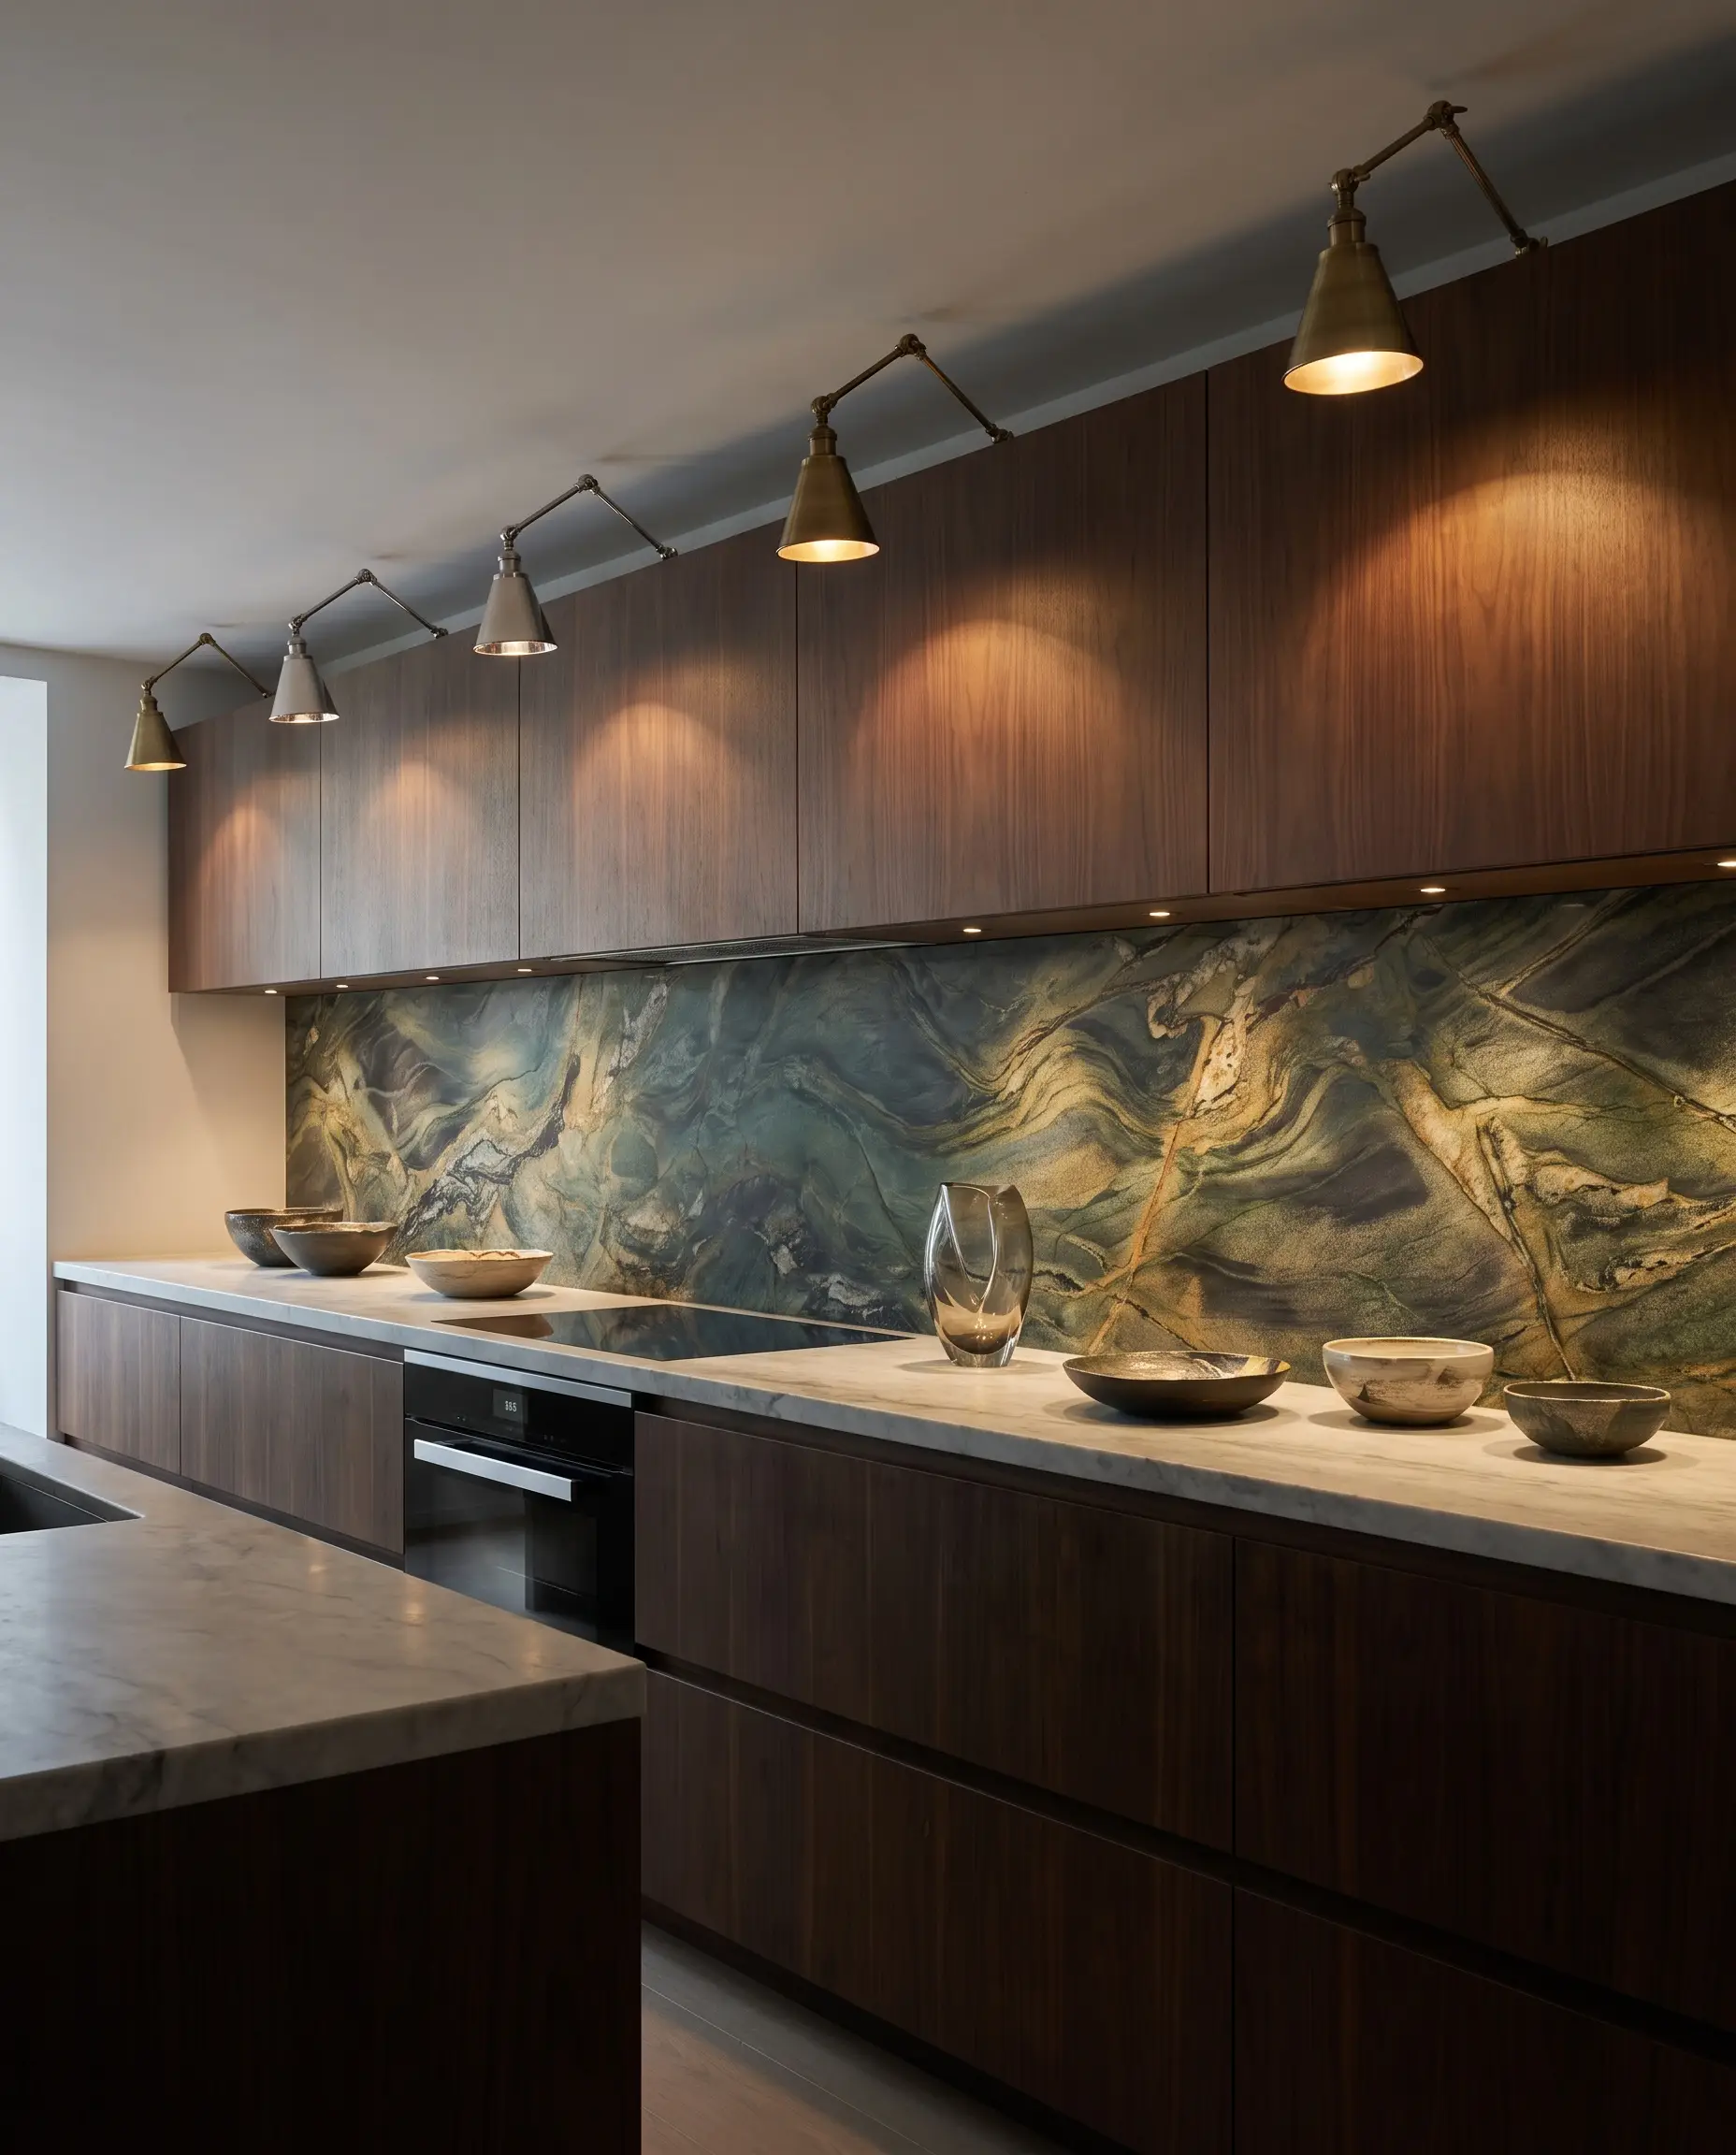
Utilizing traditional brass picture lights is no longer restricted to illuminating framed artwork, though that is heavily trending in kitchens as well. Mounting these slender, directional lights directly over a continuous slab backsplash highlights the dramatic natural veining of the stone, turning the wall itself into a gallery exhibit.
- Vibe: Gallery-inspired, unexpected, and luxurious.
- Key Materials: Slender brass picture lights, polished nickel.
- Styling Pro-Tip: Angle the shade precisely so the beam grazes the stone’s surface, maximizing the perception of depth and texture in the marble or quartzite.
Architectural Integration and Hidden Technology
The absolute best lighting technology in a luxury space is the kind you cannot see. The high-end standard relies entirely on hidden technology—concealing the source of the light while maximizing its visual and psychological impact across the room.
12. Recessed Plaster-In Trimless Downlights
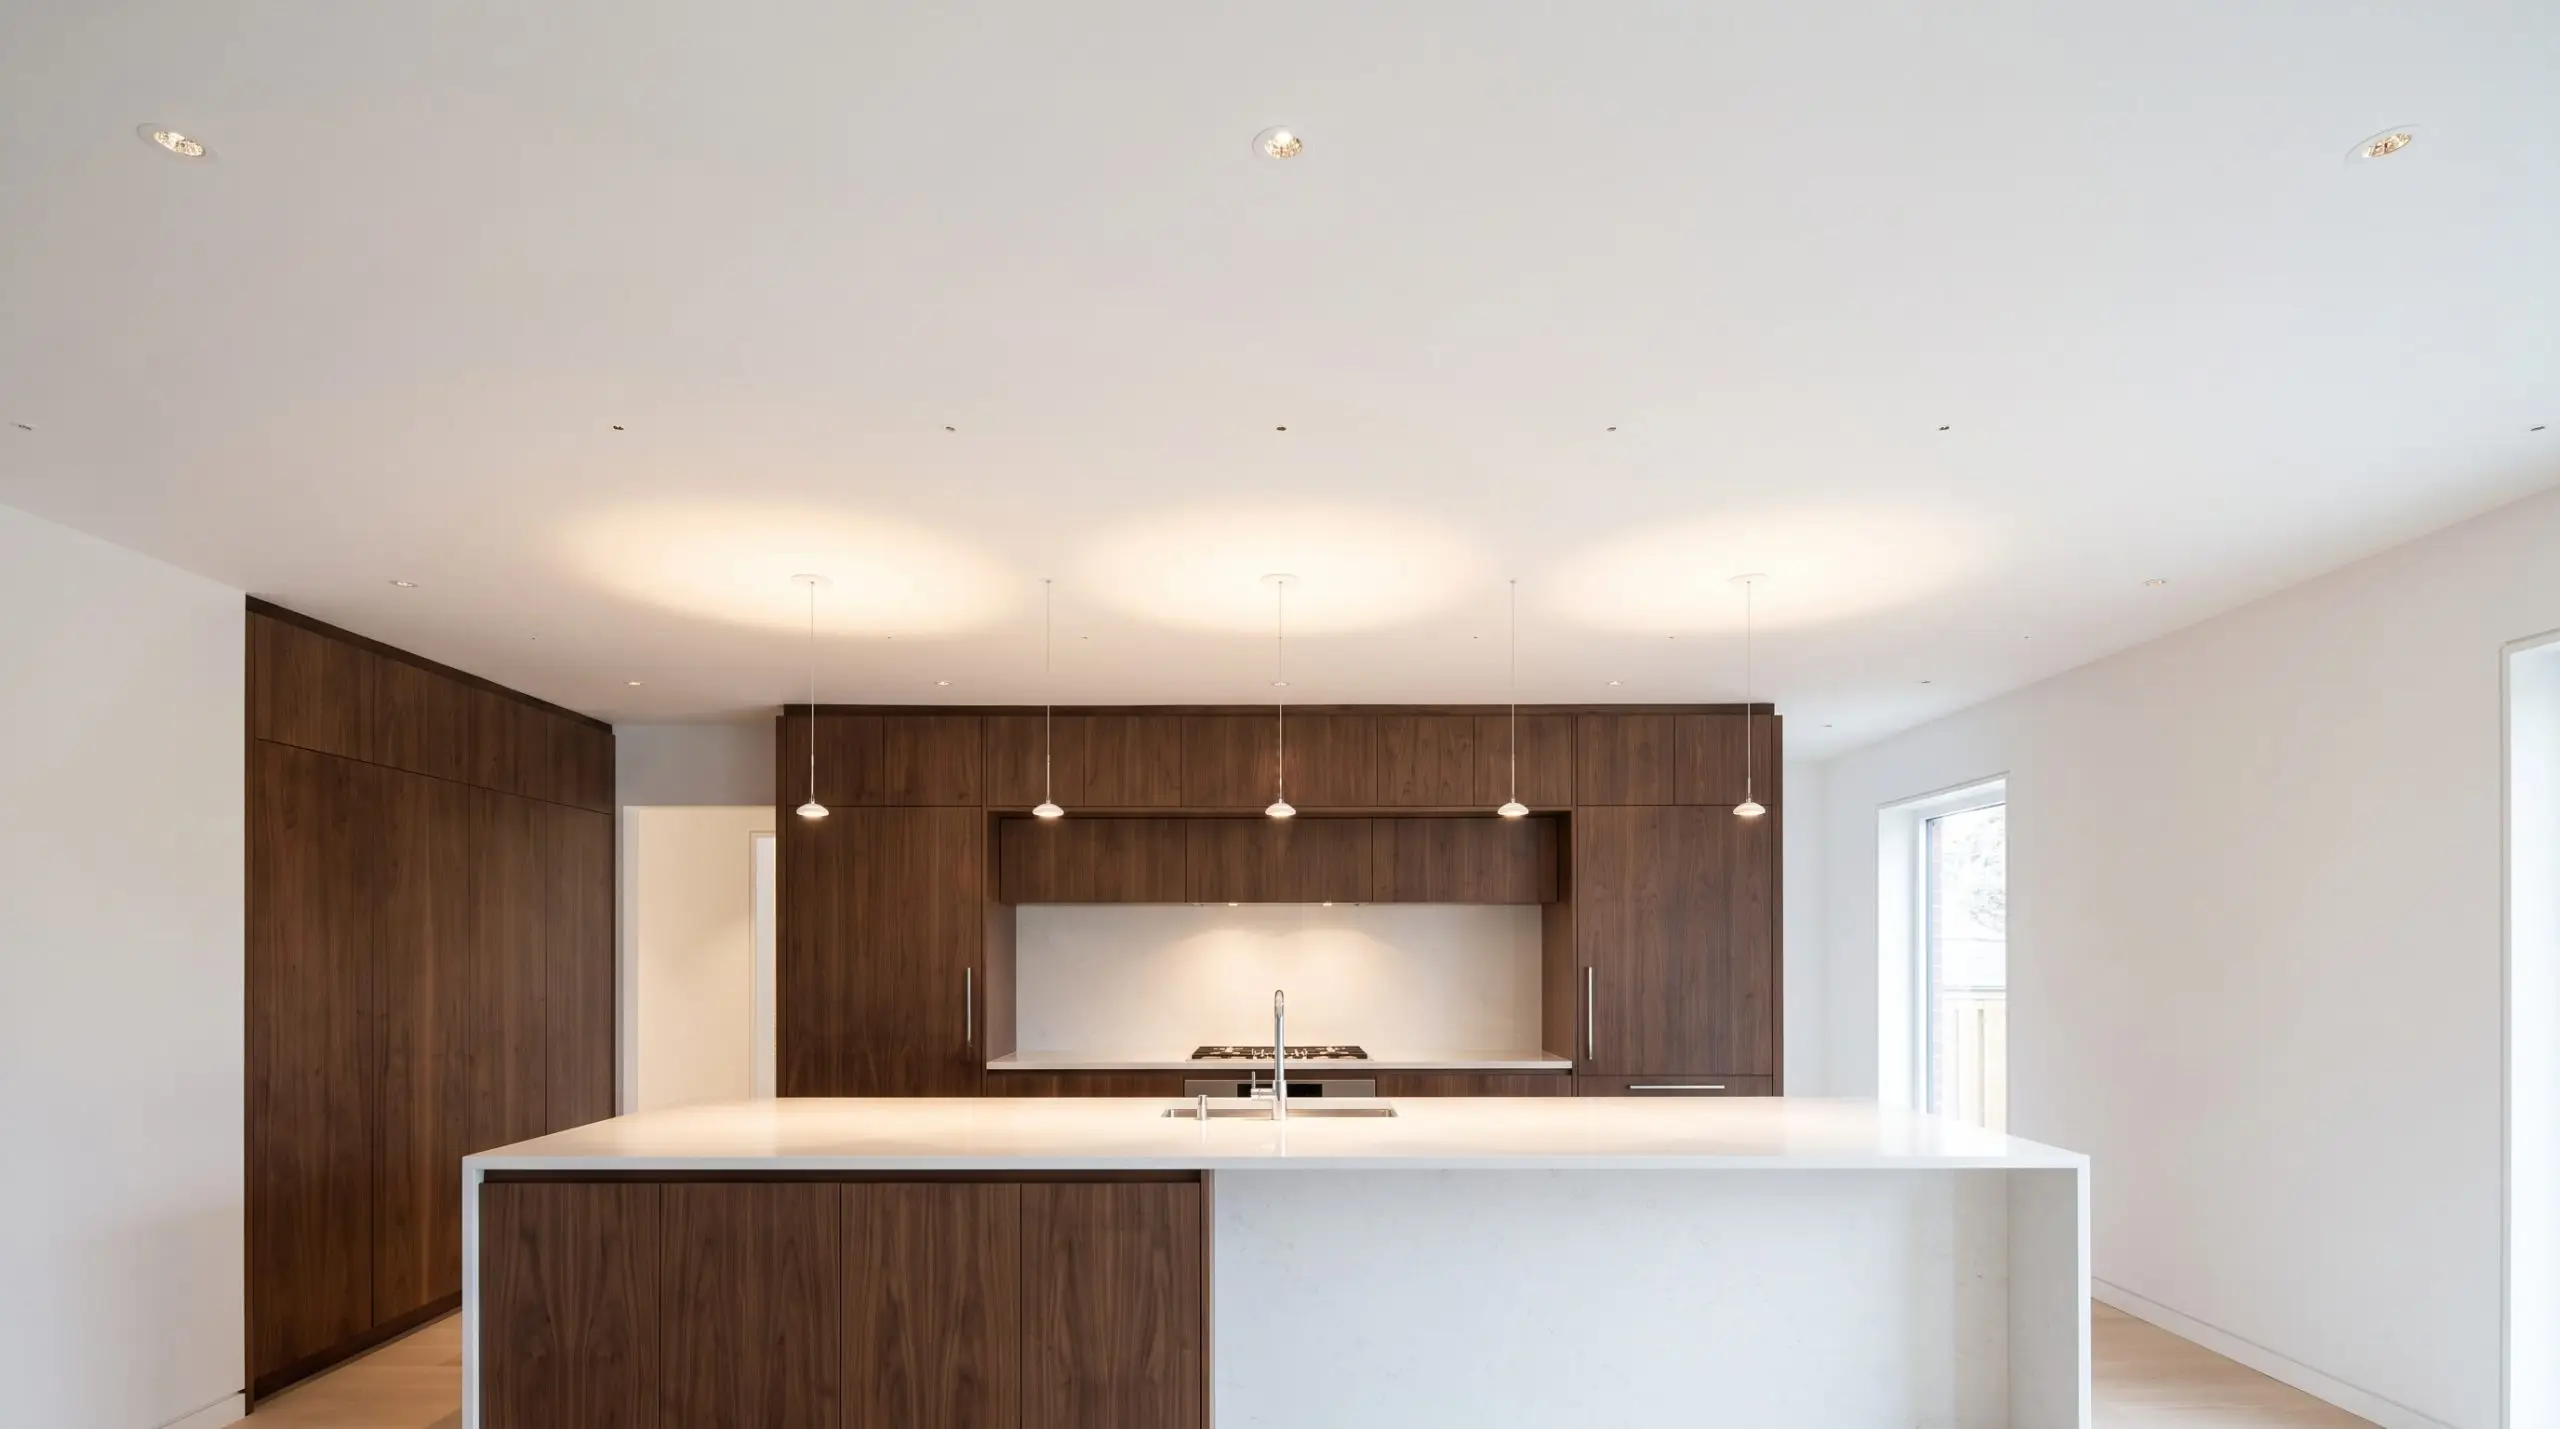
Standard “can lights” with their thick, yellowing plastic trim rings are entirely obsolete in bespoke design. The luxury standard utilizes trimless downlights that are mudded directly into the drywall, leaving only a tiny, seamless aperture that looks remarkably clean and custom.
- Vibe: Ultra-clean, architectural, and invisible.
- Key Materials: Trimless plaster-in LED housings, high-CRI bulbs.
- Planning Requirement: This specific installation requires meticulous planning during the drywall phase and is highly recommended only for full, down-to-the-studs renovations.
13. Continuous, Dotless LED Channels
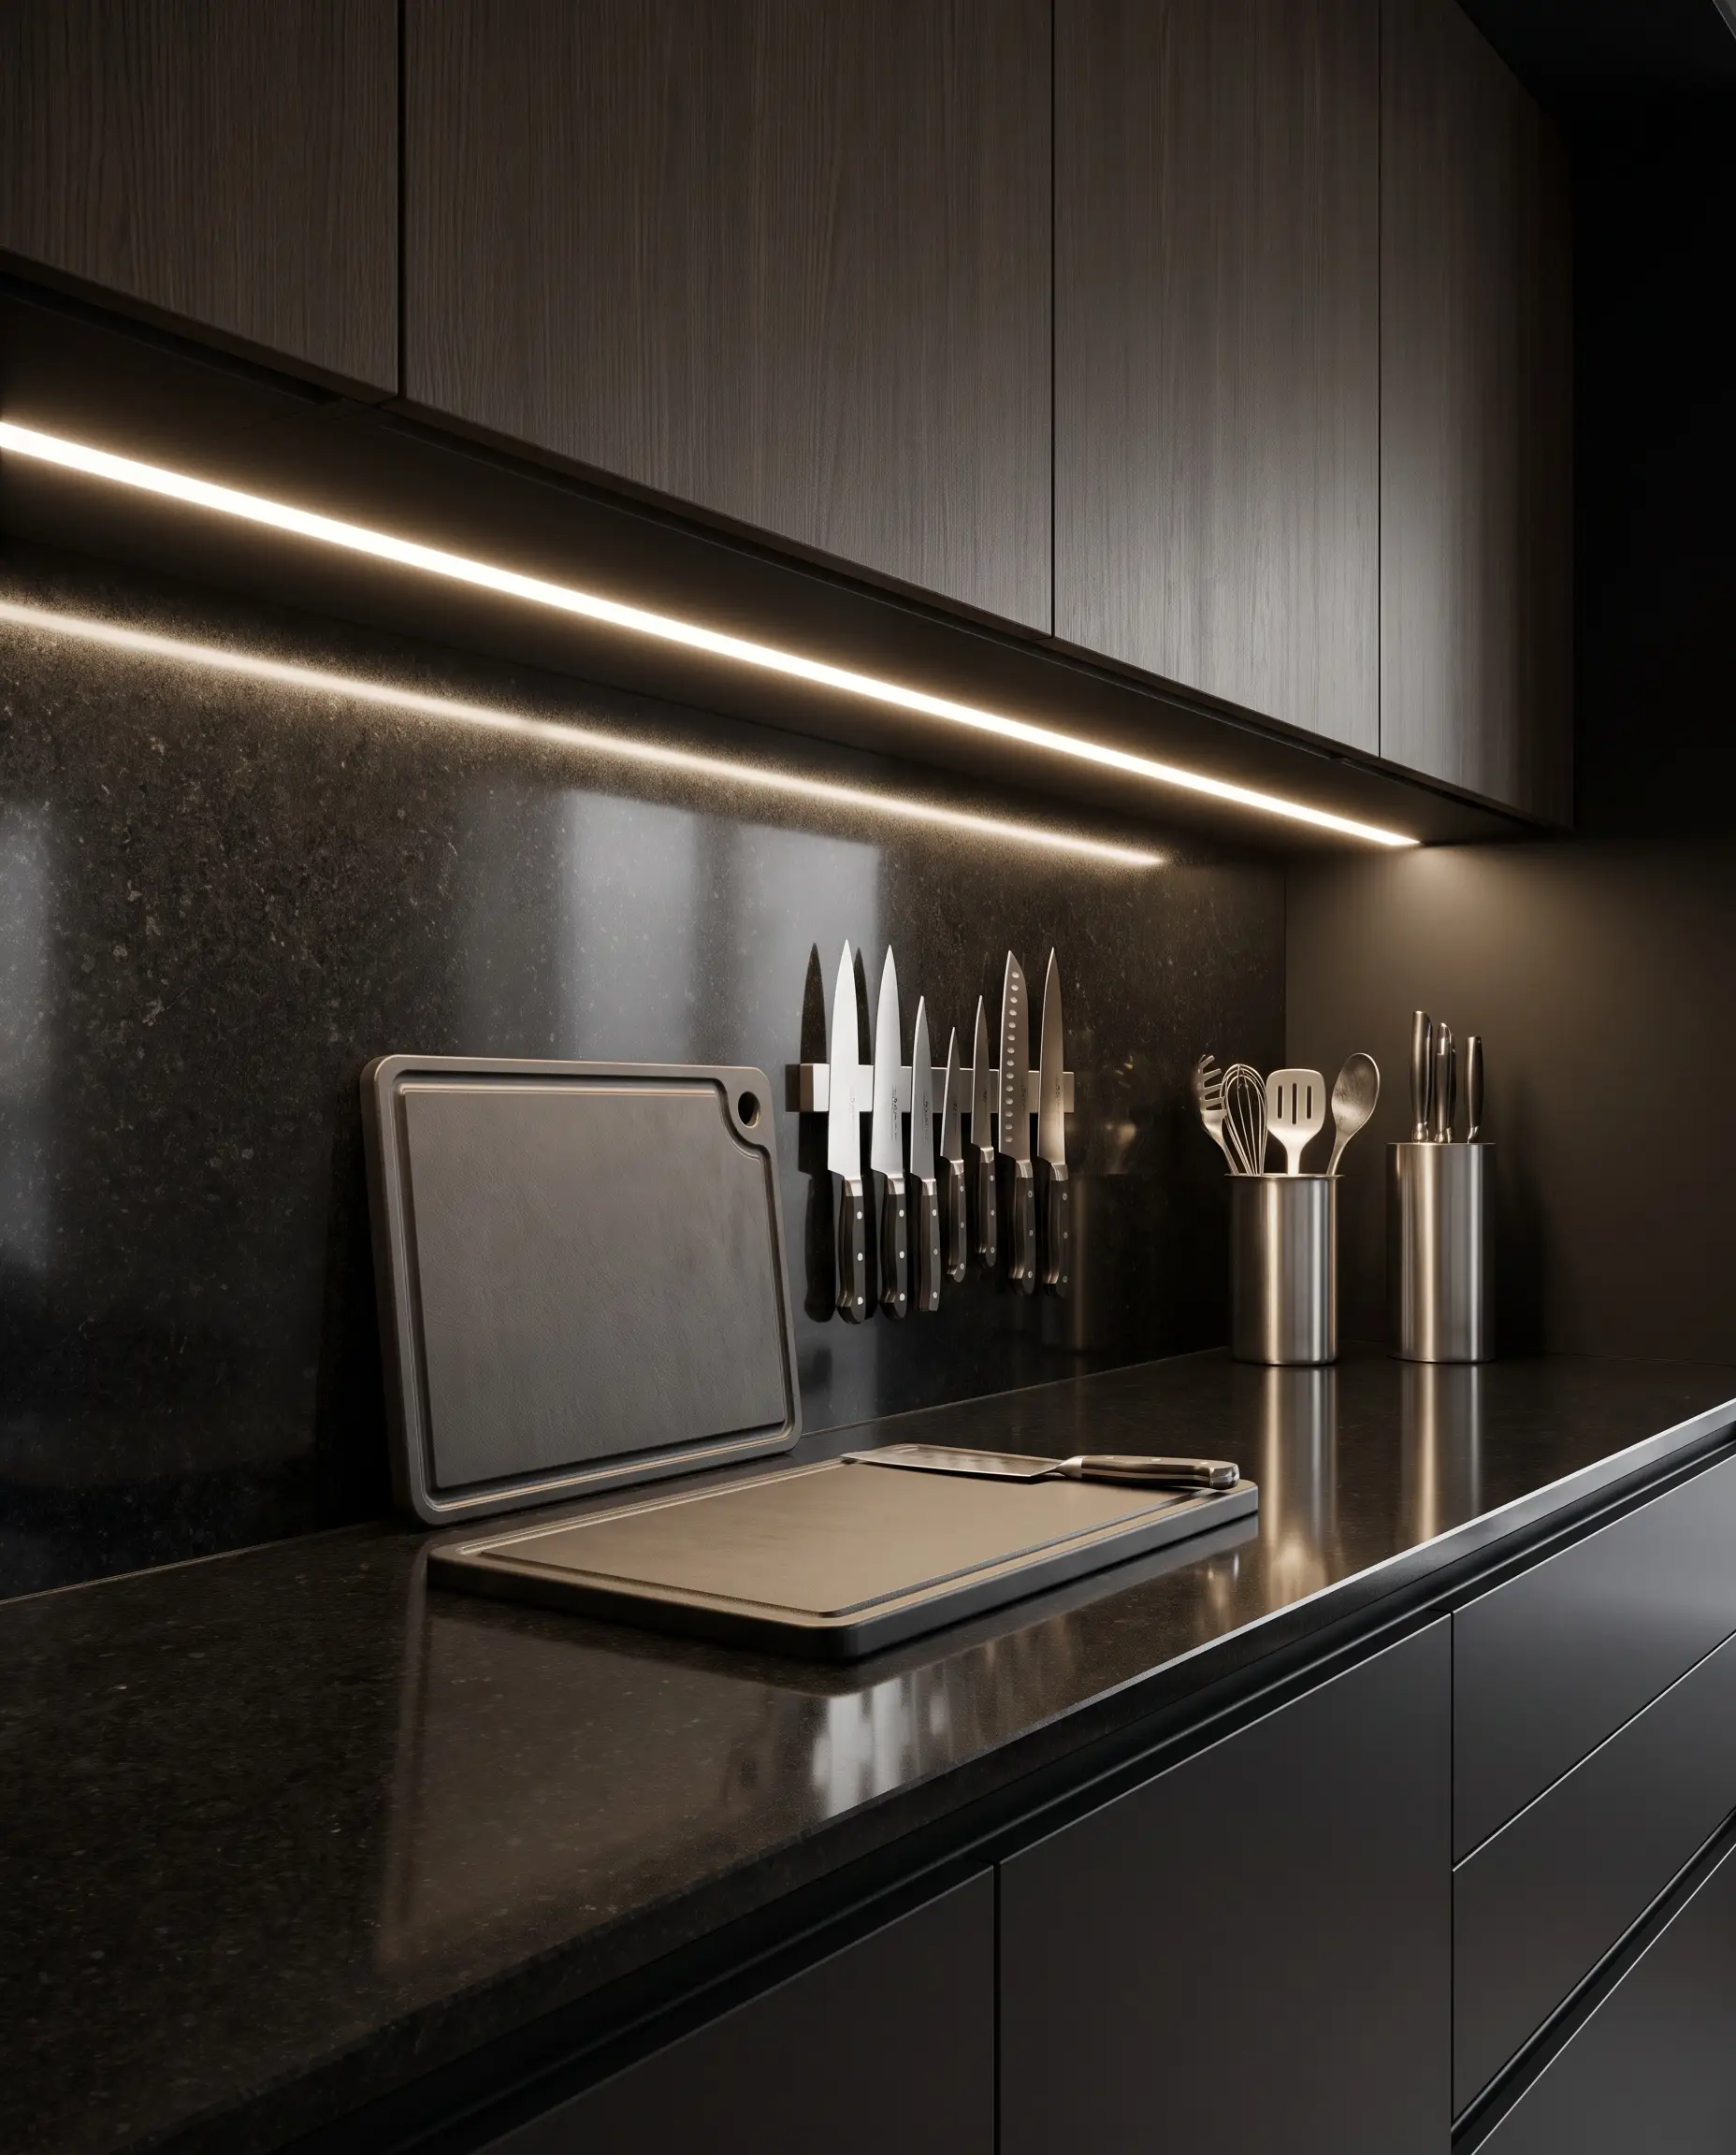
Nothing ruins the look of polished quartz or granite countertops faster than the reflection of cheap LED tape showing individual, dotted diodes. The solution is routing deep aluminum channels directly into the underside of the cabinetry and covering them with heavy frosted diffusers to create a single, continuous, solid wash of light.
- Vibe: Seamless, professional, and razor-sharp.
- Key Materials: Aluminum extrusions, heavy frosted polycarbonate diffusers, high-density LED tape.
- Design Mandate: If you have integrated LED channels over polished countertops, you absolutely must use thick diffusers to eliminate the dotted reflection.
14. Toe-Kick and Floating Island Wash
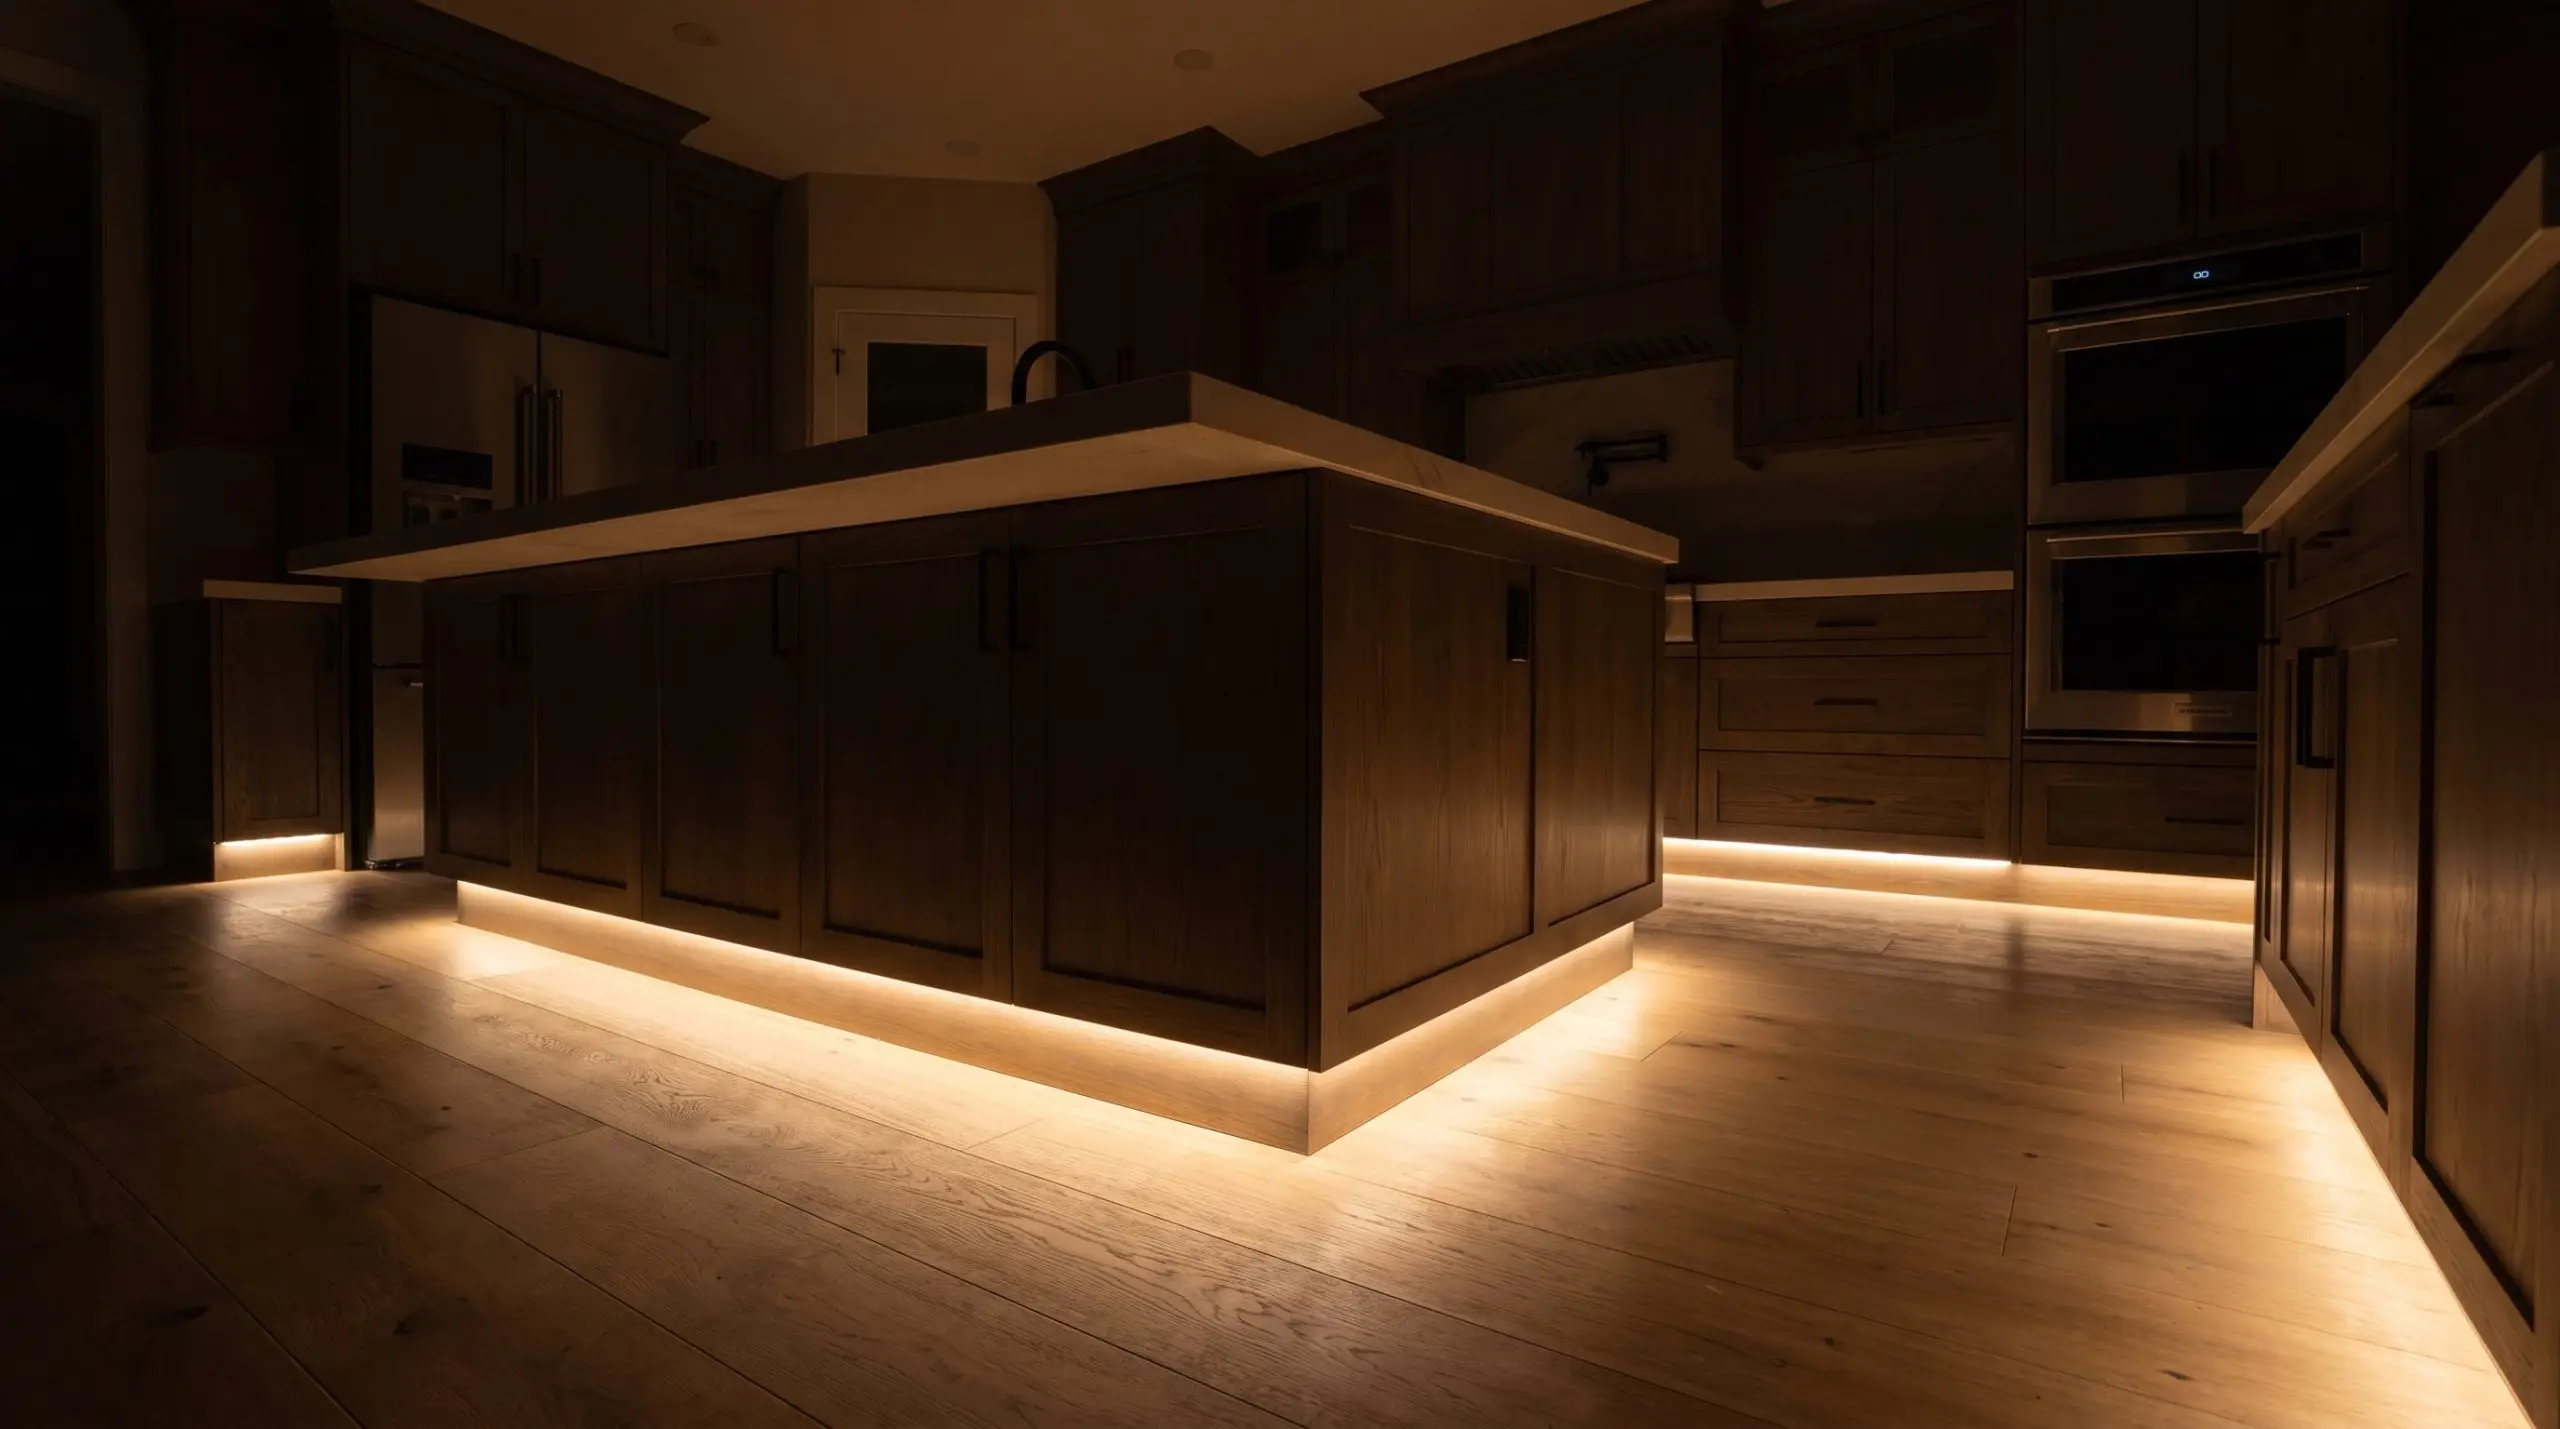
Installing hidden LED channels along the baseboards or tucked perfectly under the lip of the island creates a stunning “floating” effect for heavy cabinetry. Beyond the dramatic aesthetic, this serves as the ideal low-glare nightlight when you walk into the kitchen at midnight for a glass of water.
- Vibe: Ethereal, modern, and highly practical.
- Key Materials: Low-lumen LED strips, angled corner channels.
- Placement Strategy: Angle the light slightly downward to wash the floor rather than projecting it straight out into the room.
15. Warm-Dim Technology and Scene Controllers
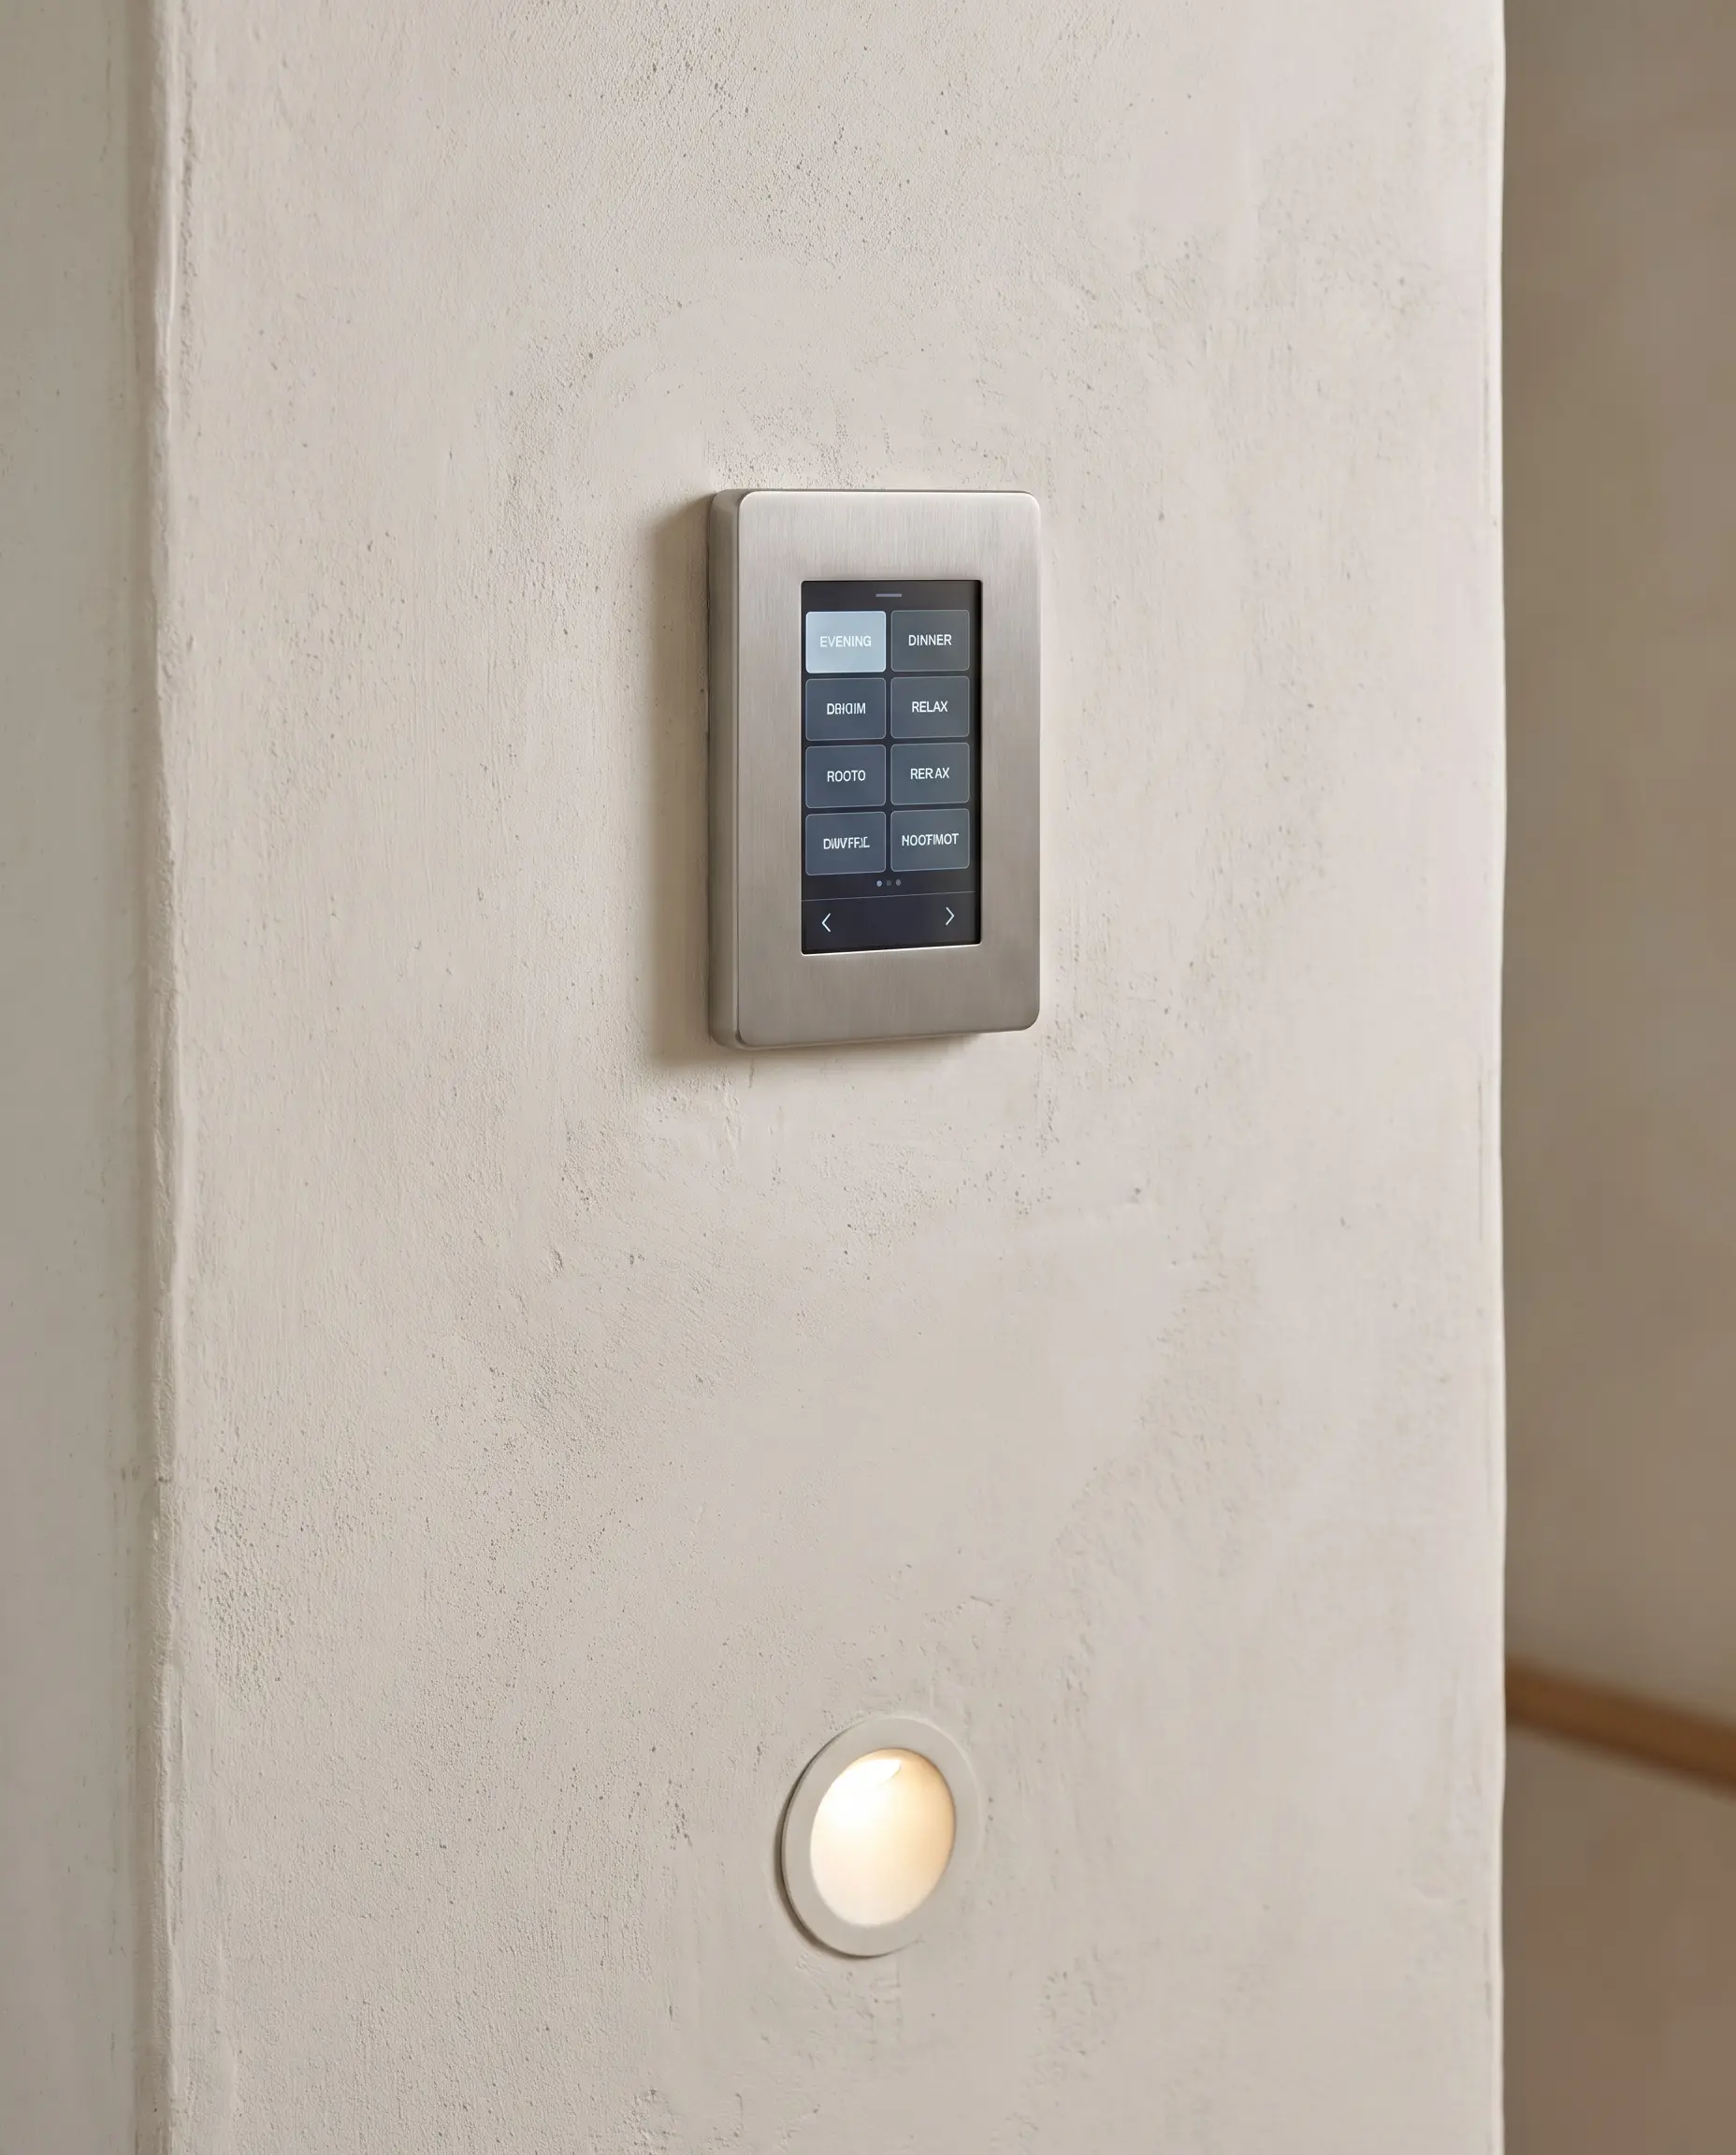
Standard dimmers simply lower output, but “Warm-Dim” LEDs actually change their Kelvin temperature as they dim, shifting from a crisp work light to a candlelight-like glow. Paired with sleek keypad scene controllers that replace banks of six ugly switches, this technology psychologically cues the brain that the evening prep work is done and it is time to relax.
- Vibe: Technologically advanced, moody, and intuitive.
- Key Materials: Warm-Dim LED modules, smart keypad controllers.
- Psychological Benefit: Mimics the natural progression of the sun setting, supporting your circadian rhythm and instantly transitioning the room’s energy.
The 2027 Kelvin & Lumens Cheat Sheet
Nailing the physical fixtures is only half the battle; specifying the exact color temperature and brightness is what separates amateur execution from architectural mastery. Use this precise breakdown to ensure your layers of light work together flawlessly rather than fighting each other.
| Lighting Zone | Ideal Kelvin (Color Temp) | Ideal Function |
|---|---|---|
| Overhead/Recessed | 3000K | General illumination and cleaning |
| Under-Cabinet Task | 3000K – 3500K | Precision chopping and food prep |
| Island Pendants | 2700K | Dining, socializing, and visual anchoring |
| Evening Sconces/Toe-Kicks | 2200K – 2700K | Late-night ambient glow and mood setting |
Finalizing Your Lighting Layout: The Layering Rule
A flawlessly executed kitchen does not rely on a single, overpowering light source to do all the heavy lifting. The true magic lies entirely in the layering—seamlessly combining the architectural trimless downlights, the sculptural alabaster pendants, and the hidden dotless LEDs to create a flexible, highly adaptable environment. When you control these zones independently, the space effortlessly shifts from a highly functional morning prep station to an intimate, shadow-rich evening lounge.
Before you close your walls, discuss Warm-Dim capabilities and trimless aperture specs with your electrician or general contractor early in the design phase. For a deeper breakdown of how these custom electrical additions impact your overall budget, explore our comprehensive Kitchen Remodeling Cost Guide.
The Aesthetics Desk curates the visual direction for Hackrea. Specializing in design history, global architectural movements, and interior styling, this desk focuses on the psychology of space and how to translate high-end, magazine-quality aesthetics into approachable residential design without falling into fleeting micro-trends.