Bringing a television into the primary suite often feels like a design compromise, resulting in an ugly black box surrounded by a chaotic tangle of cords. This visual clutter actively fights against the room’s primary purpose: rest and recovery. Rather than settling for a media zone that feels like an afterthought, you can engineer the space to prioritize both technology and tranquility.
The most effective architectural cure for this modern dilemma is the acoustic wood slat wall. Premium panels from brands like WoodUpp or The Wood Veneer Hub offer a dual-purpose solution that goes far beyond mere aesthetics. They provide deep, tactile visual texture through fluted millwork, while their dense PET felt backing absorbs harsh sound echoes—a critical upgrade for shared walls or apartment living.
By treating the screen as a component of the room’s architecture rather than a floating appliance, you establish a sense of deliberate containment. Upgrading your bedroom’s media zone requires precise spatial planning, strict lighting parameters, and deliberate material pairings to ensure the technology serves the sanctuary, rather than disrupting it.
The Core Elements of a Bedroom Media Wall
A successful installation relies on four non-negotiable components: a high-quality wood veneer, a sound-absorbing felt backing, a slim VESA mount to keep the screen flush against the slats, and an integrated wire concealment system. In a bedroom environment, the acoustic dampening properties of these panels are paramount, actively reducing noise transfer through shared walls while softening the room’s overall sonic profile.
Accessible Luxury (DIY Pre-Made Acoustic Panels):
- Pros: Rapid installation, pre-engineered PET felt backing for immediate acoustic dampening, cost-effective scaling for smaller bedroom alcoves.
- Cons: Limited to standard veneer finishes, fixed slat spacing, requires precise cutting around outlets.
Bespoke (Custom Milled Slats):
- Pros: Total control over wood species and stain, ability to create seamless architectural millwork over curved walls or ceilings, flawless flush-mount hardware integration.
- Cons: Significantly higher cost, requires professional carpentry, acoustic backing must be sourced and installed separately.
You can apply wallpapers, paints, etc. on walls and see how they look in various interiors.
Spatial Layouts and Architectural Framing
Bedrooms demand an entirely different scale and proportion than living rooms. You cannot simply cover a twenty-foot expanse in floor-to-ceiling slats; without deliberate containment, the heavy texture will visually crush the bed opposite it. You must use strategic architectural framing to control the visual weight and maintain the room’s restful equilibrium.
Frame the TV Asymmetrically to Balance a Vanity or Desk
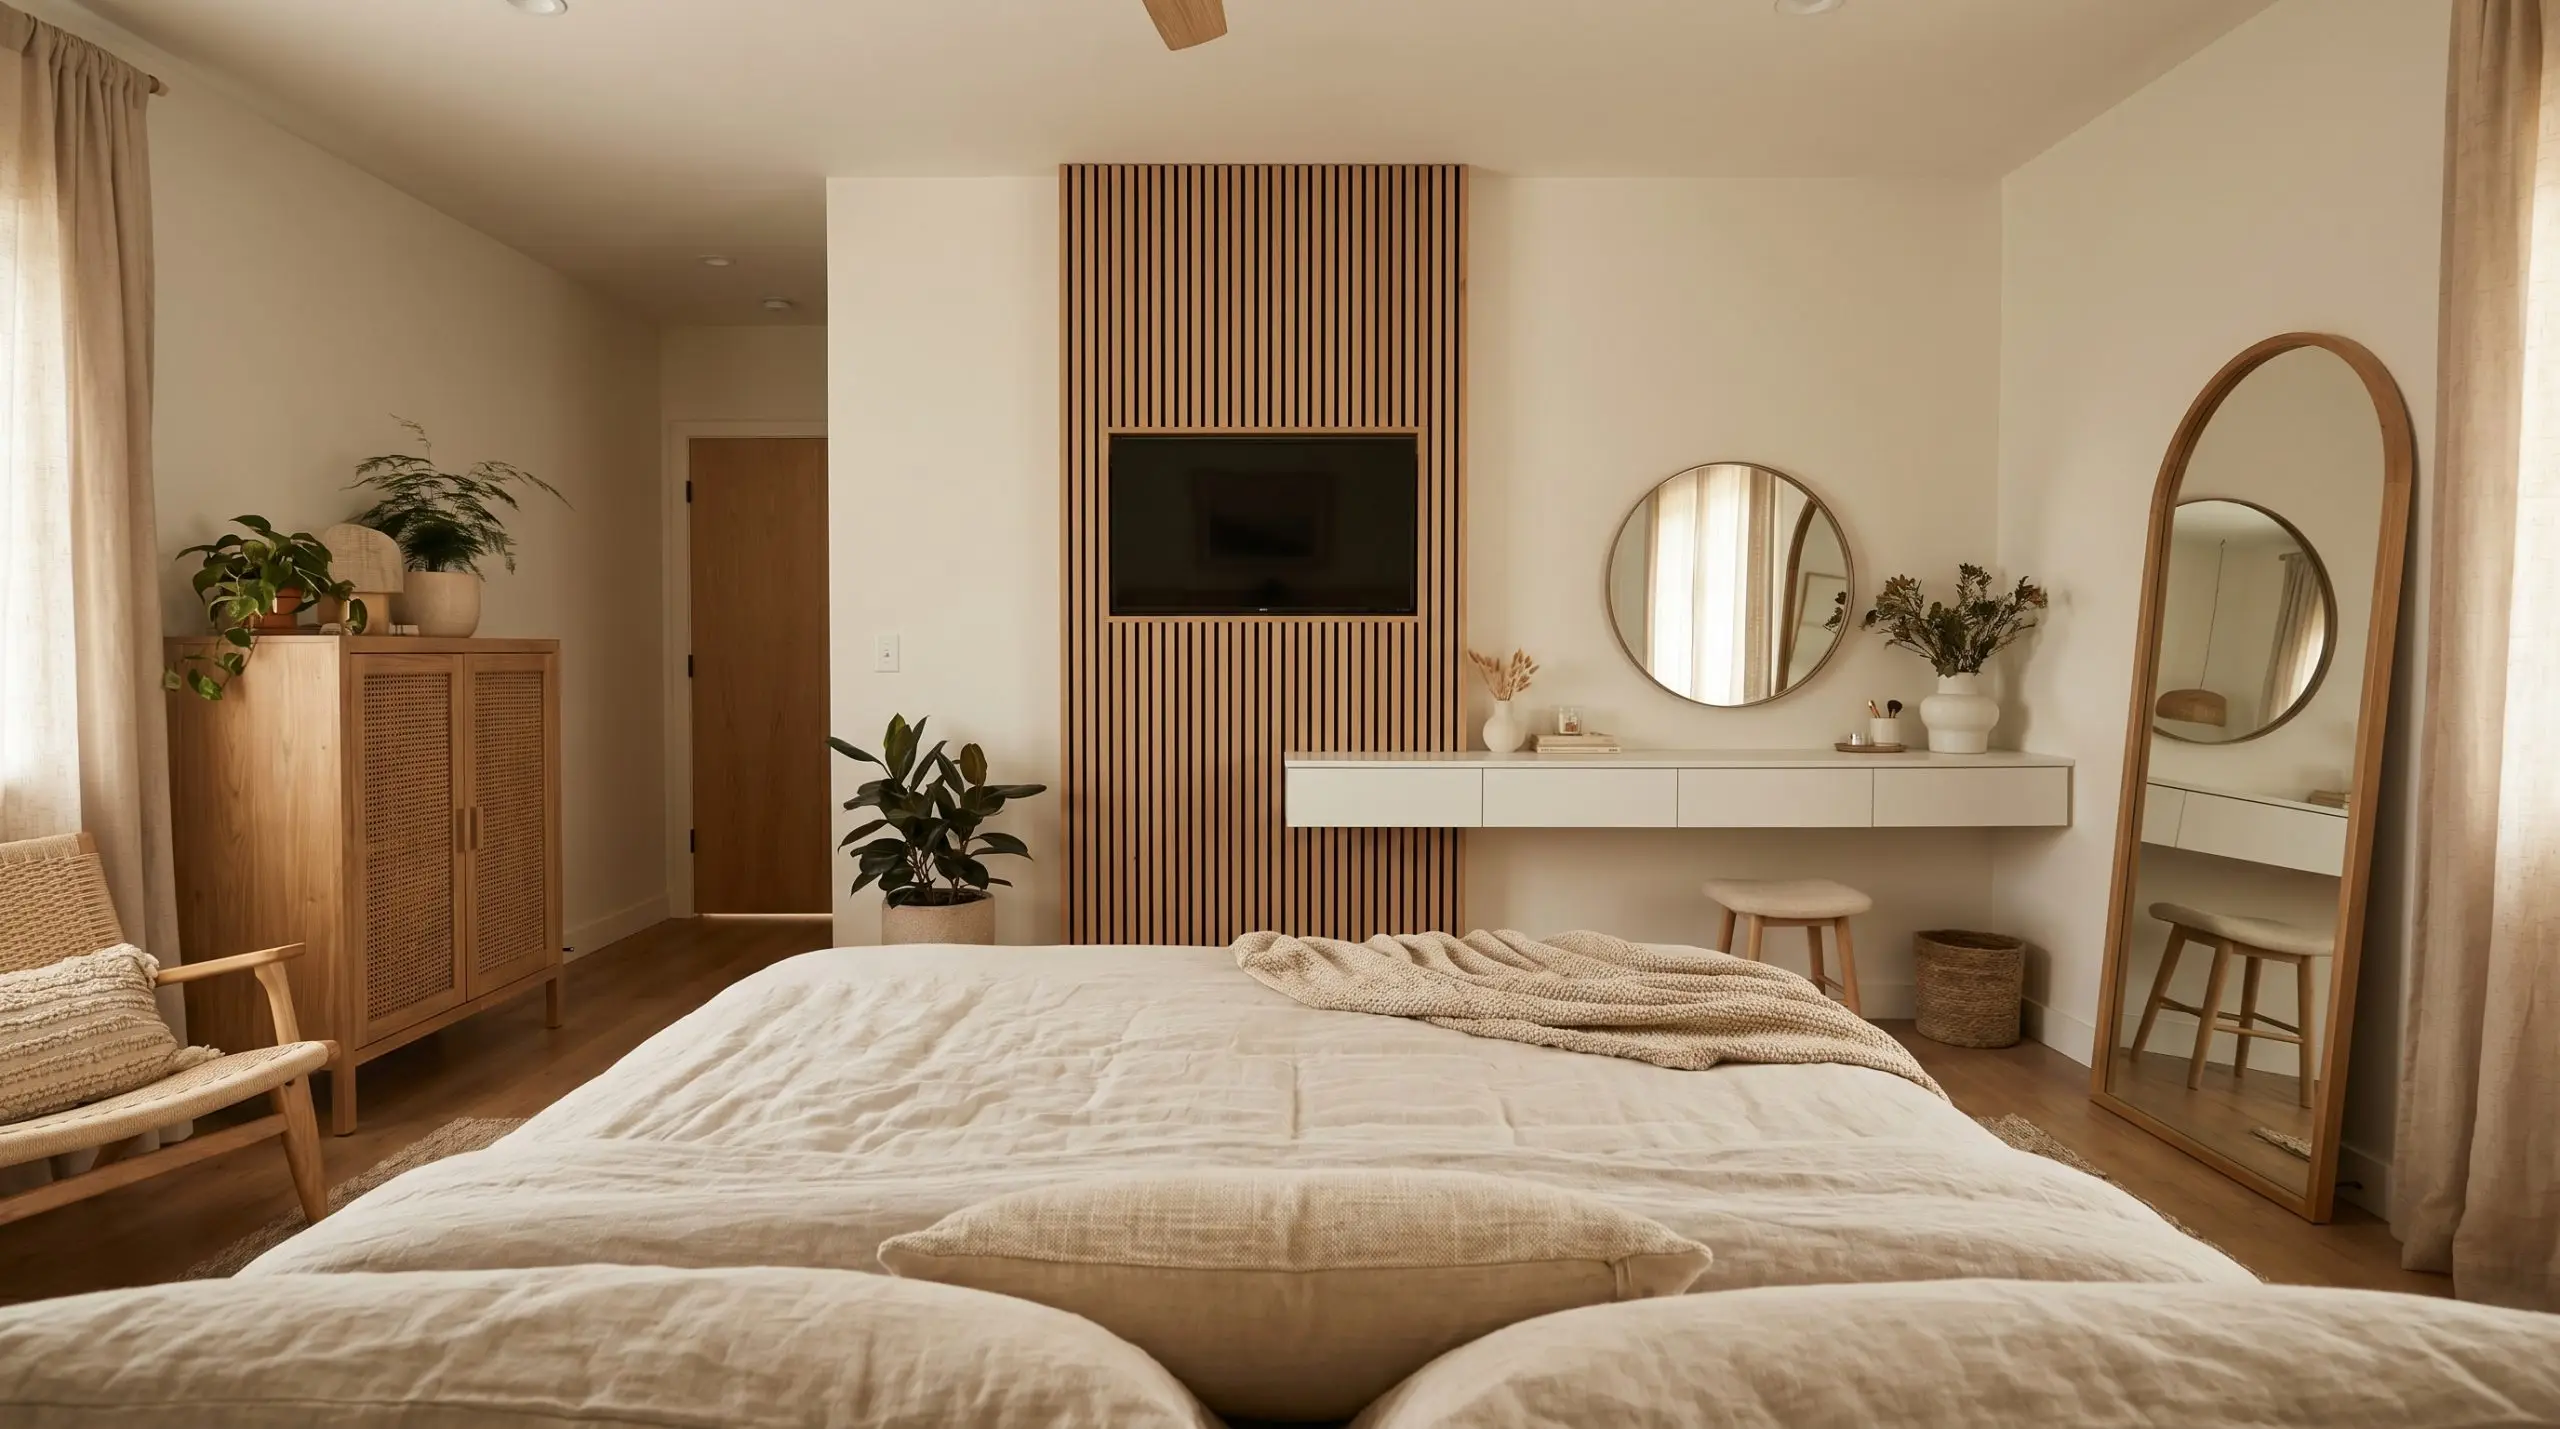
Break the rigid rule of perfect symmetry to accommodate the functional realities of a bedroom suite. Install a vertical column of slats behind the television on the left, and allow a sleek makeup vanity or floating desk to span out horizontally to the right into the negative space. This asymmetrical framing distributes visual weight beautifully across a shared wall without overcrowding the footprint.
- Vibe: Boutique Hotel / Organic Modern
- Key Materials: White oak panels, matte white floating vanity
- Styling Pro-Tip: Anchor the vanity side with a tall, arched floor mirror to counterbalance the dark rectangle of the TV.
Build a Floor-to-Ceiling Slat Column to Heighten the Room
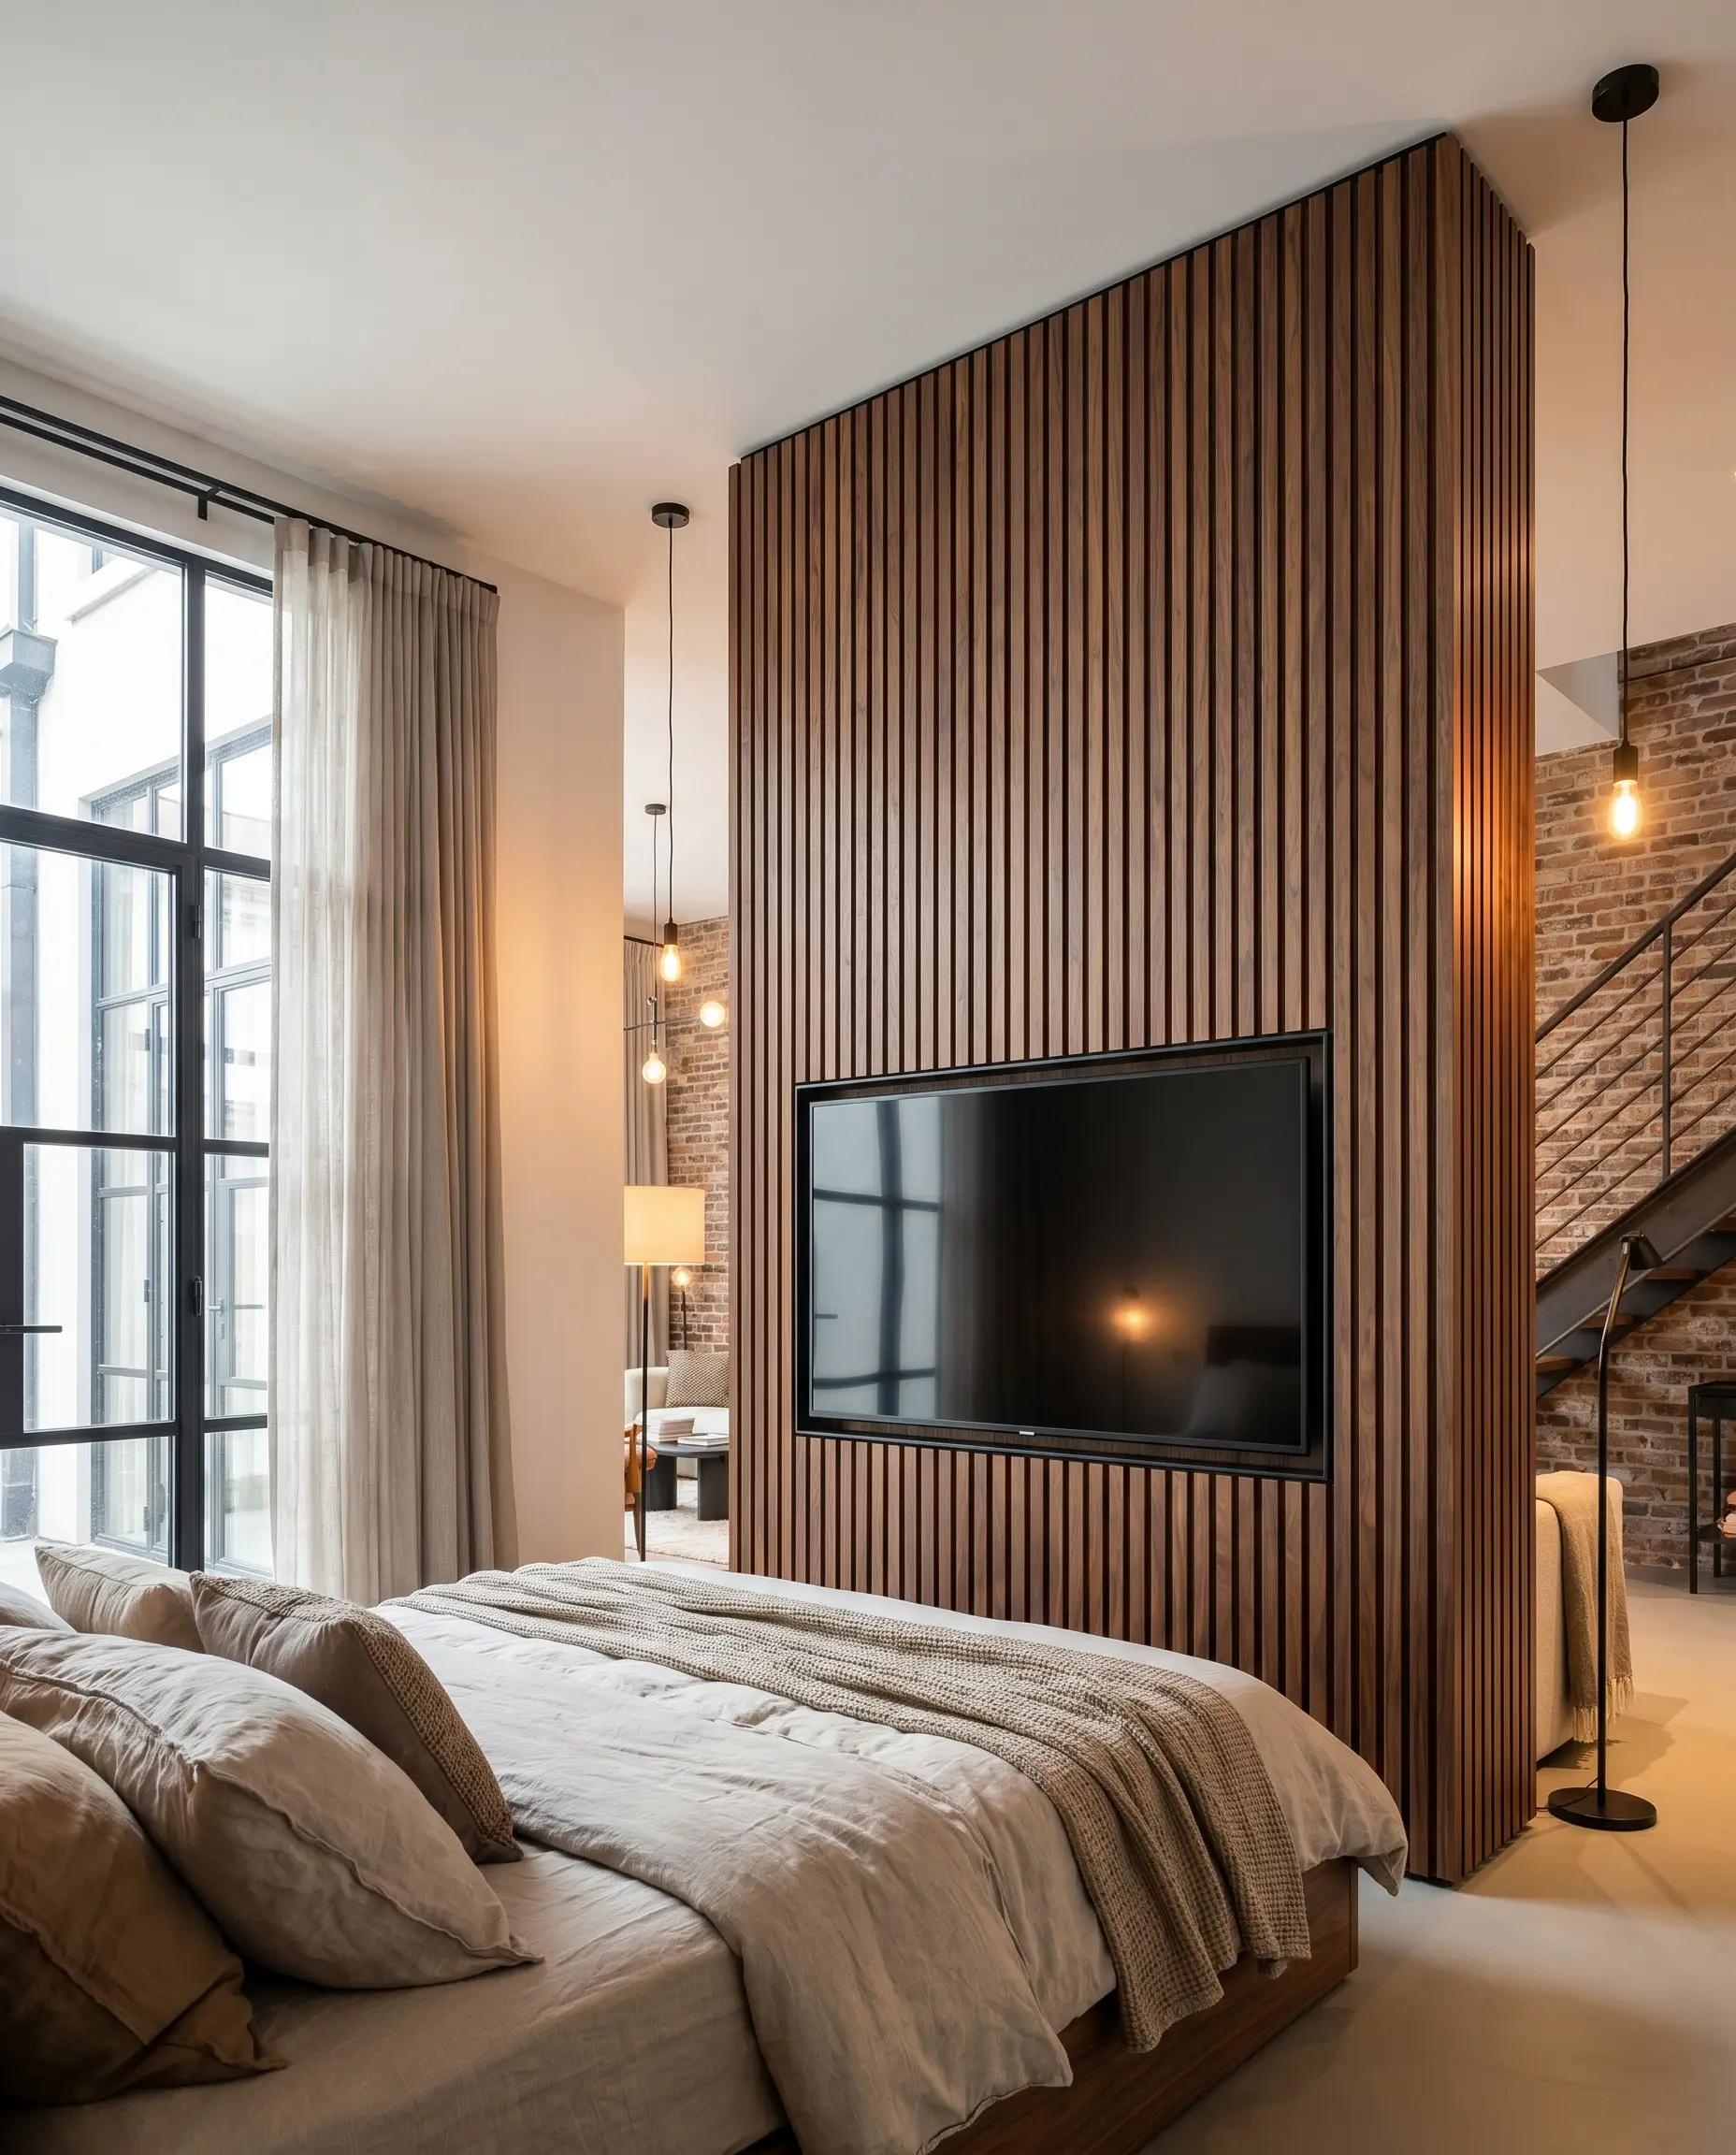
For primary suites constrained by standard eight-foot ceilings, running the panels continuously from the baseboard straight up to the top plates draws the eye skyward. This vertical continuity makes the room feel significantly taller, establishing a commanding architectural presence behind the screen.
- Vibe: Contemporary Loft
- Key Materials: Walnut veneer panels, black metal trim
- Installation Rule: Stop the slats exactly one inch short of the ceiling to create a crisp shadow gap effect.
Wrap the Wood Slats Onto the Ceiling Over the Bed

Execute this bespoke, high-end look by extending the media wall slats up and directly across the ceiling, stopping precisely over the bed to form an architectural canopy. This continuous flow visually connects the media zone to the sleeping zone, creating a deeply immersive environment.
- Vibe: Ultra-Luxury Bespoke
- Key Materials: Custom milled MDF core panels, reinforced ceiling joist anchors
- Fabrication Note: This requires professional carpentry to prevent the overhead millwork from sagging over time.
Center the TV Inside a Recessed Slat Niche
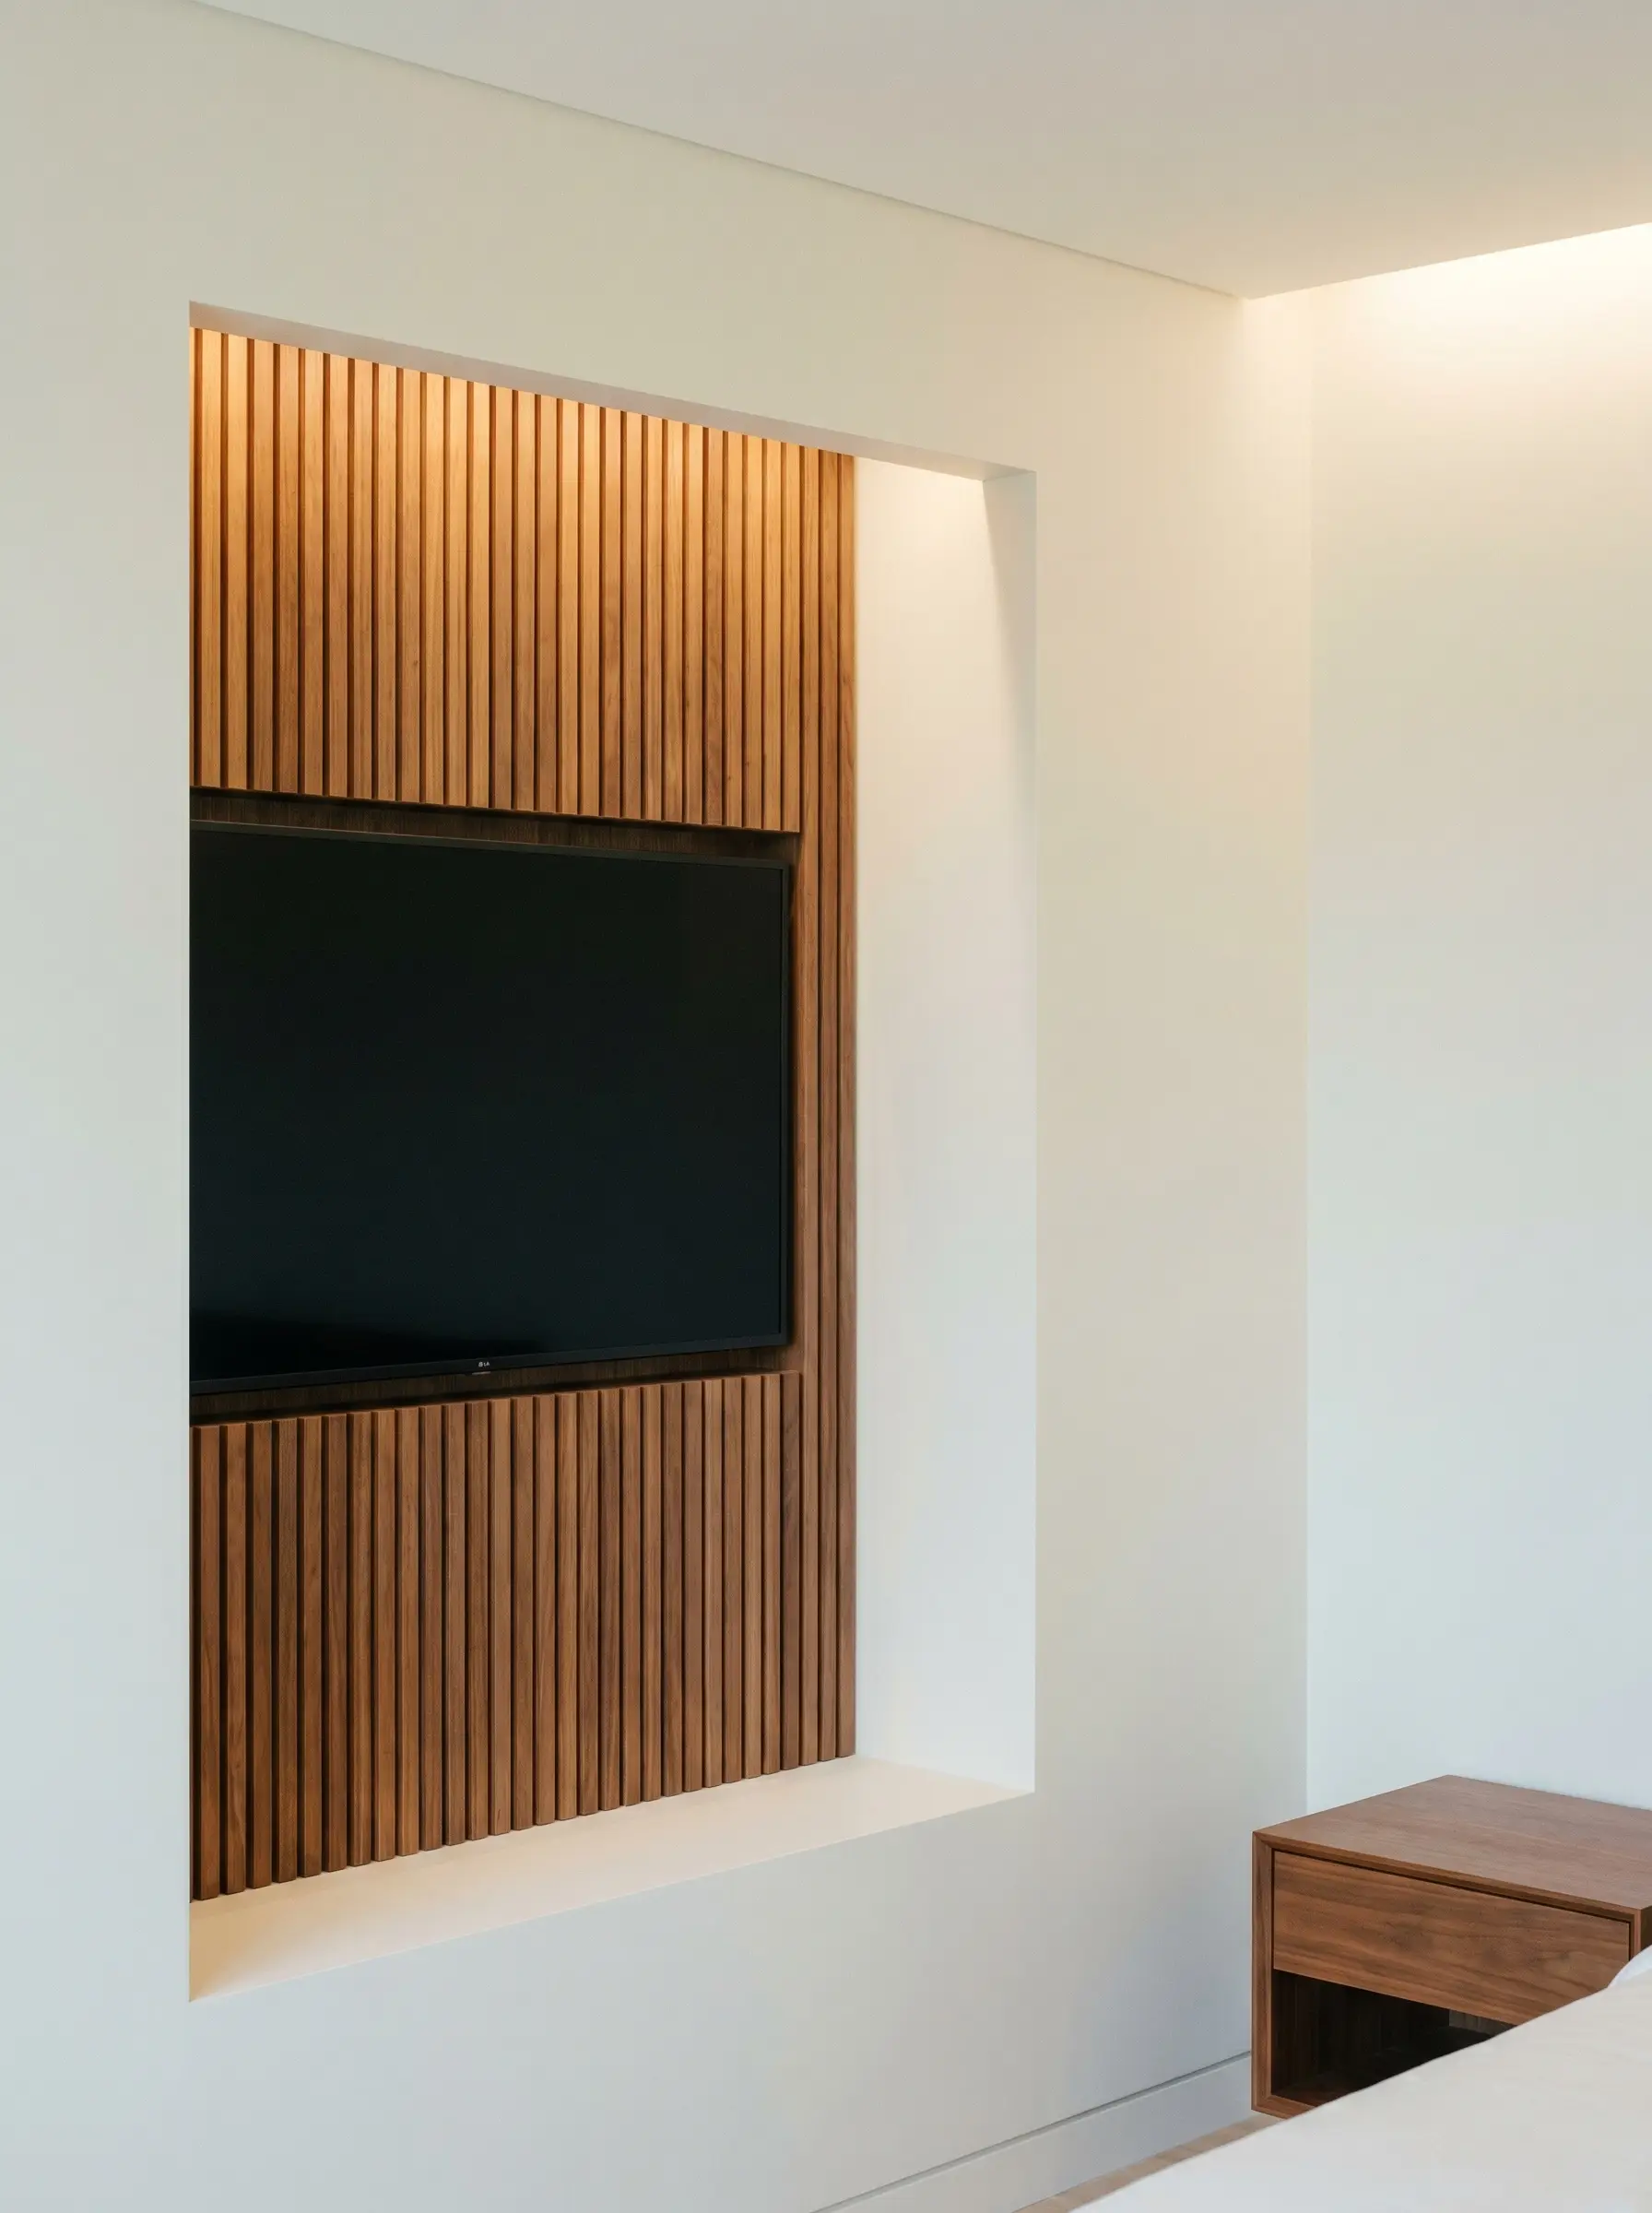
Ideal for new builds or deep renovations, this flush-mount execution involves building a false drywall bump-out and lining the recessed interior entirely with wood slats. By mounting the television deep inside this niche, the screen sits perfectly flush with the outer drywall, completely erasing the bulky profile of the appliance.
- Vibe: Minimalist / Architectural
- Key Materials: Drywall corner bead, slim articulating VESA mount
- Design Secret: Paint the interior sides of the drywall bump-out the same color as the room to make the slatted backplate visually advance.
Create a Half-Wall Slat Wainscoting Behind the Screen
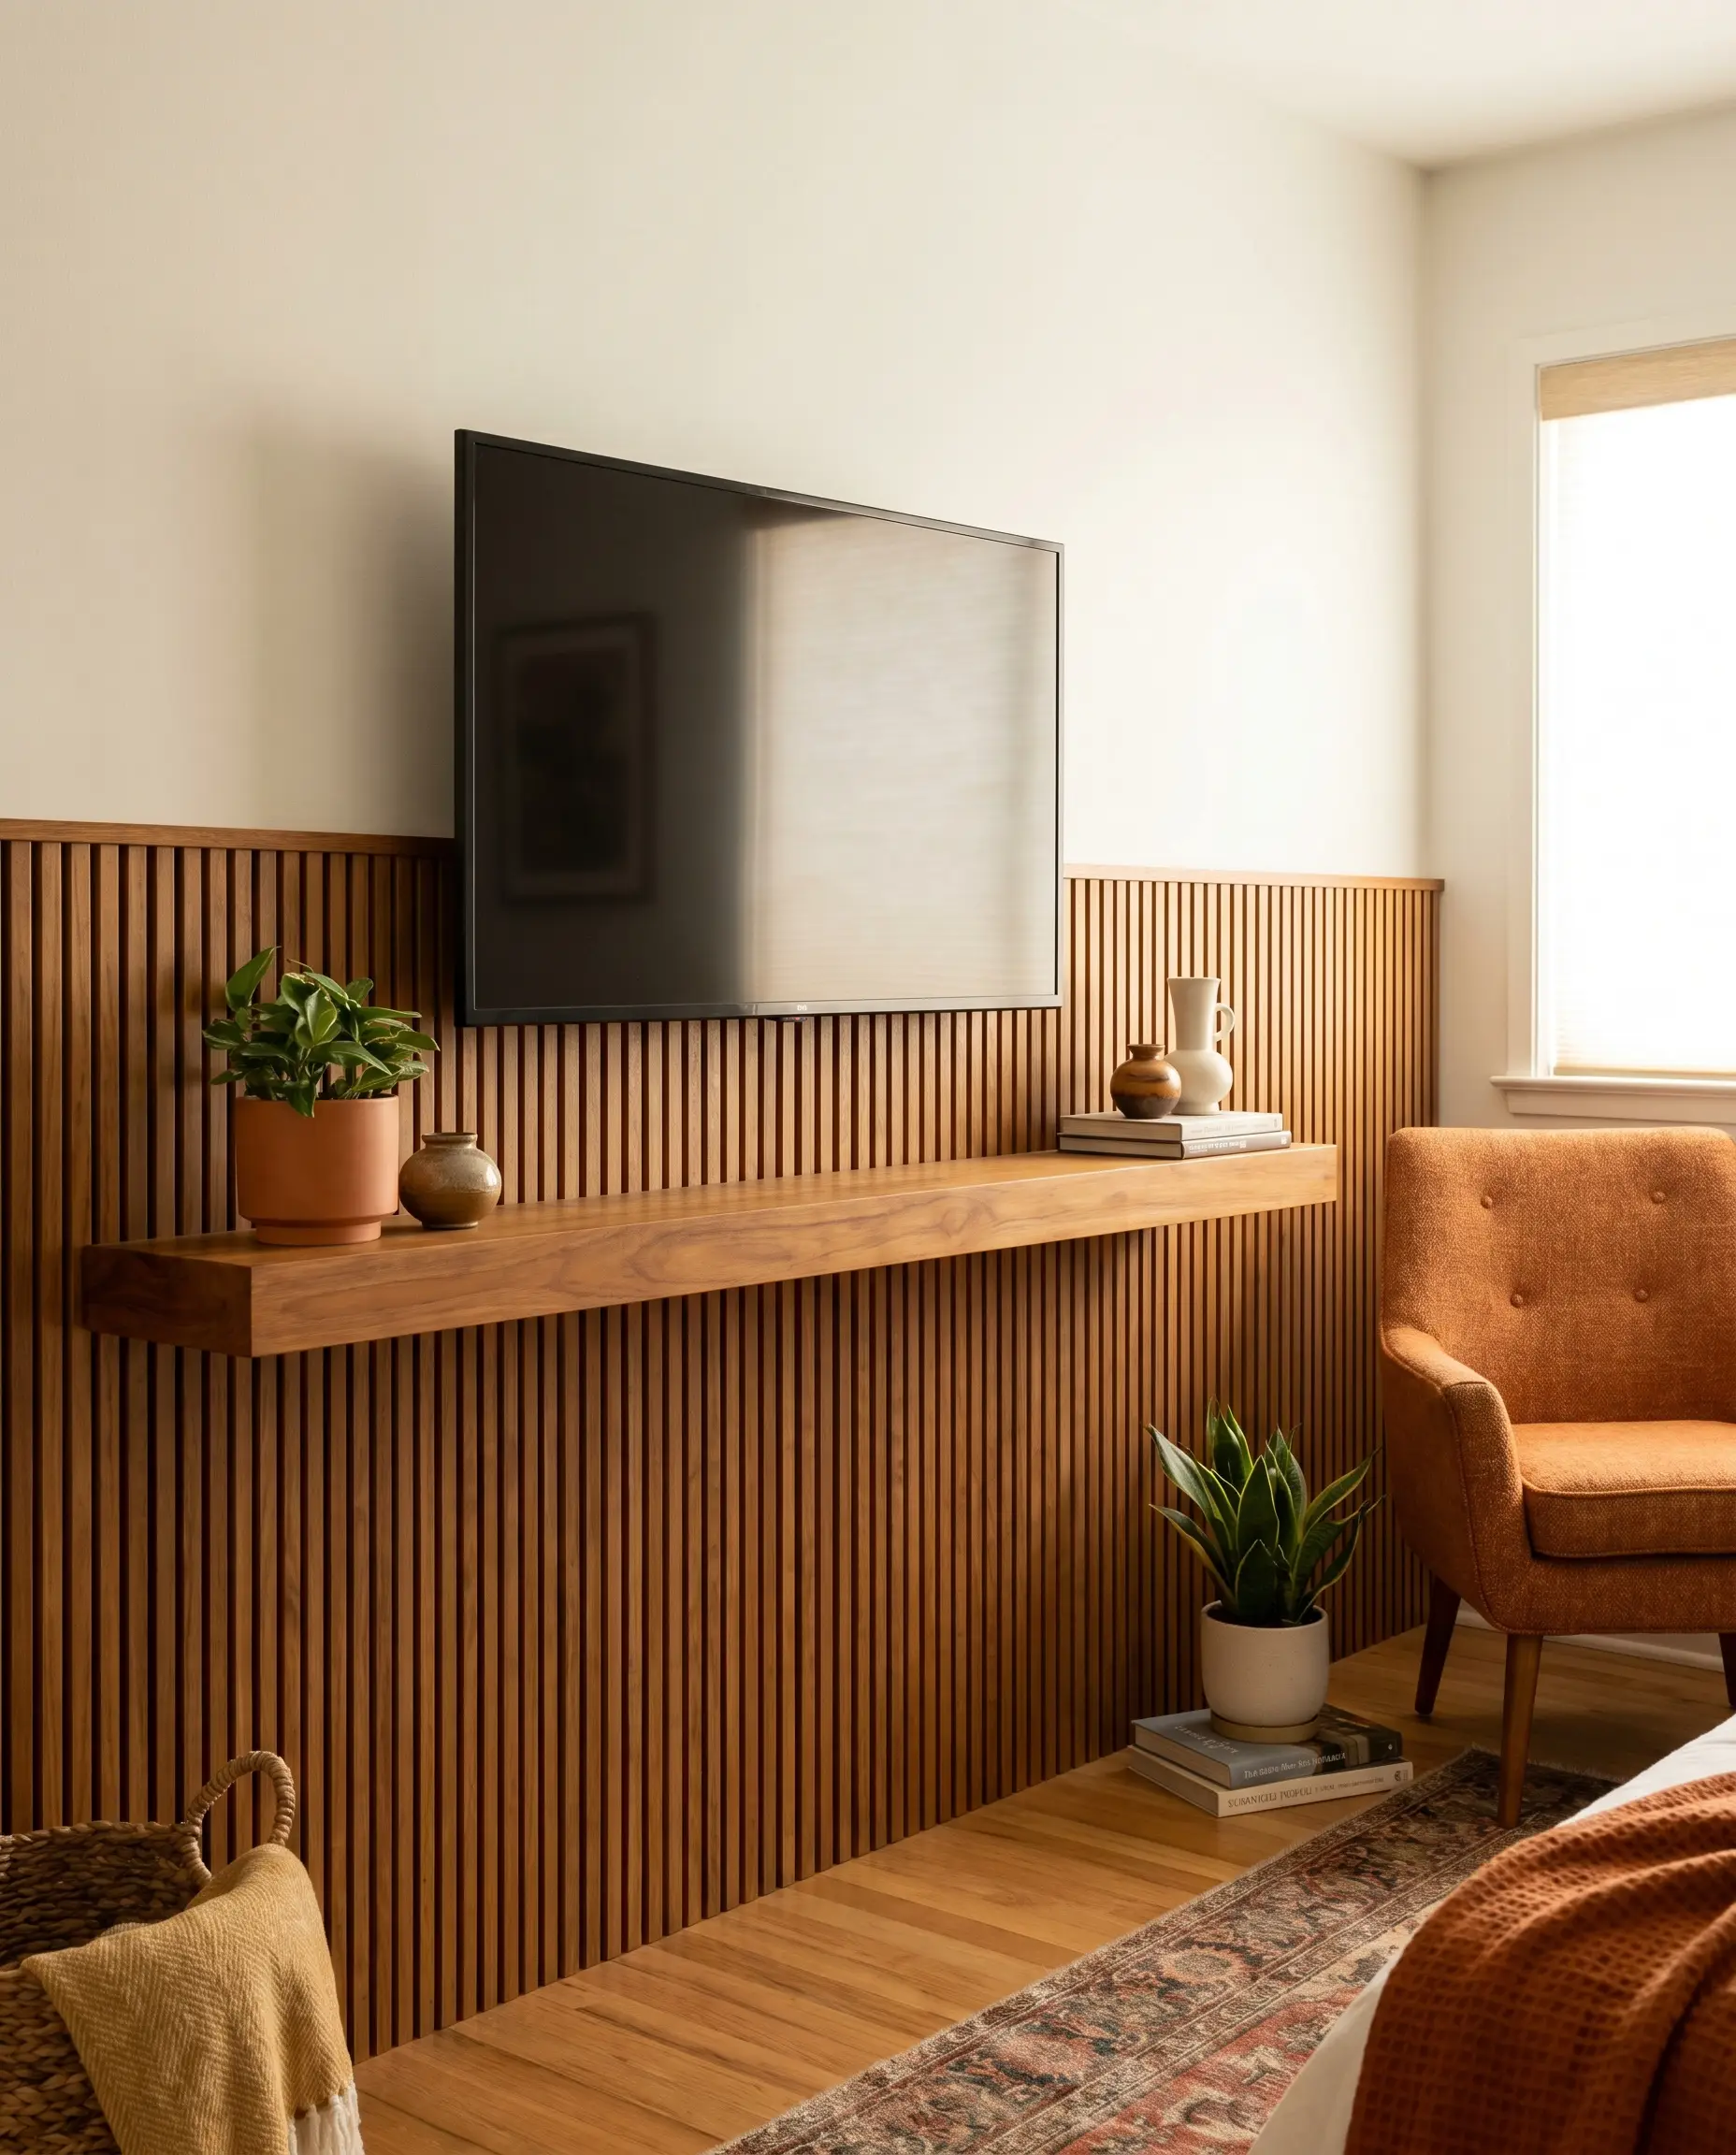
Instead of towering vertical columns, run the slats horizontally or stop them midway up the wall, capping the raw edge with a solid floating shelf. Mount the television so it visually bridges the gap between the tactile wood wainscoting below and the smooth, painted drywall above, forcing a horizontal visual expansion in narrow bedrooms.
- Vibe: Mid-Century Modern
- Key Materials: Teak veneer, solid wood capping ledge
- Paint Match: Sherwin-Williams Pure White (SW 7005) for the upper drywall to maximize contrast.
Wood Tones and Textural Pairings
The wood species you specify dictates the entire emotional temperature of the bedroom. A strict Hackrea rule applies here: you must match the undertone of the slats to the undertone of your flooring, though they do not need to be an exact match in darkness. This ensures the room’s foundational architecture speaks the same visual language.
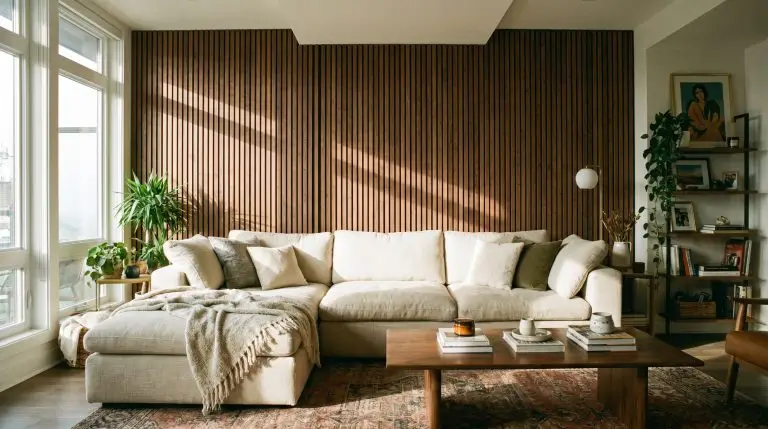
Use Smoked Walnut for a Moody, Cave-Like Atmosphere
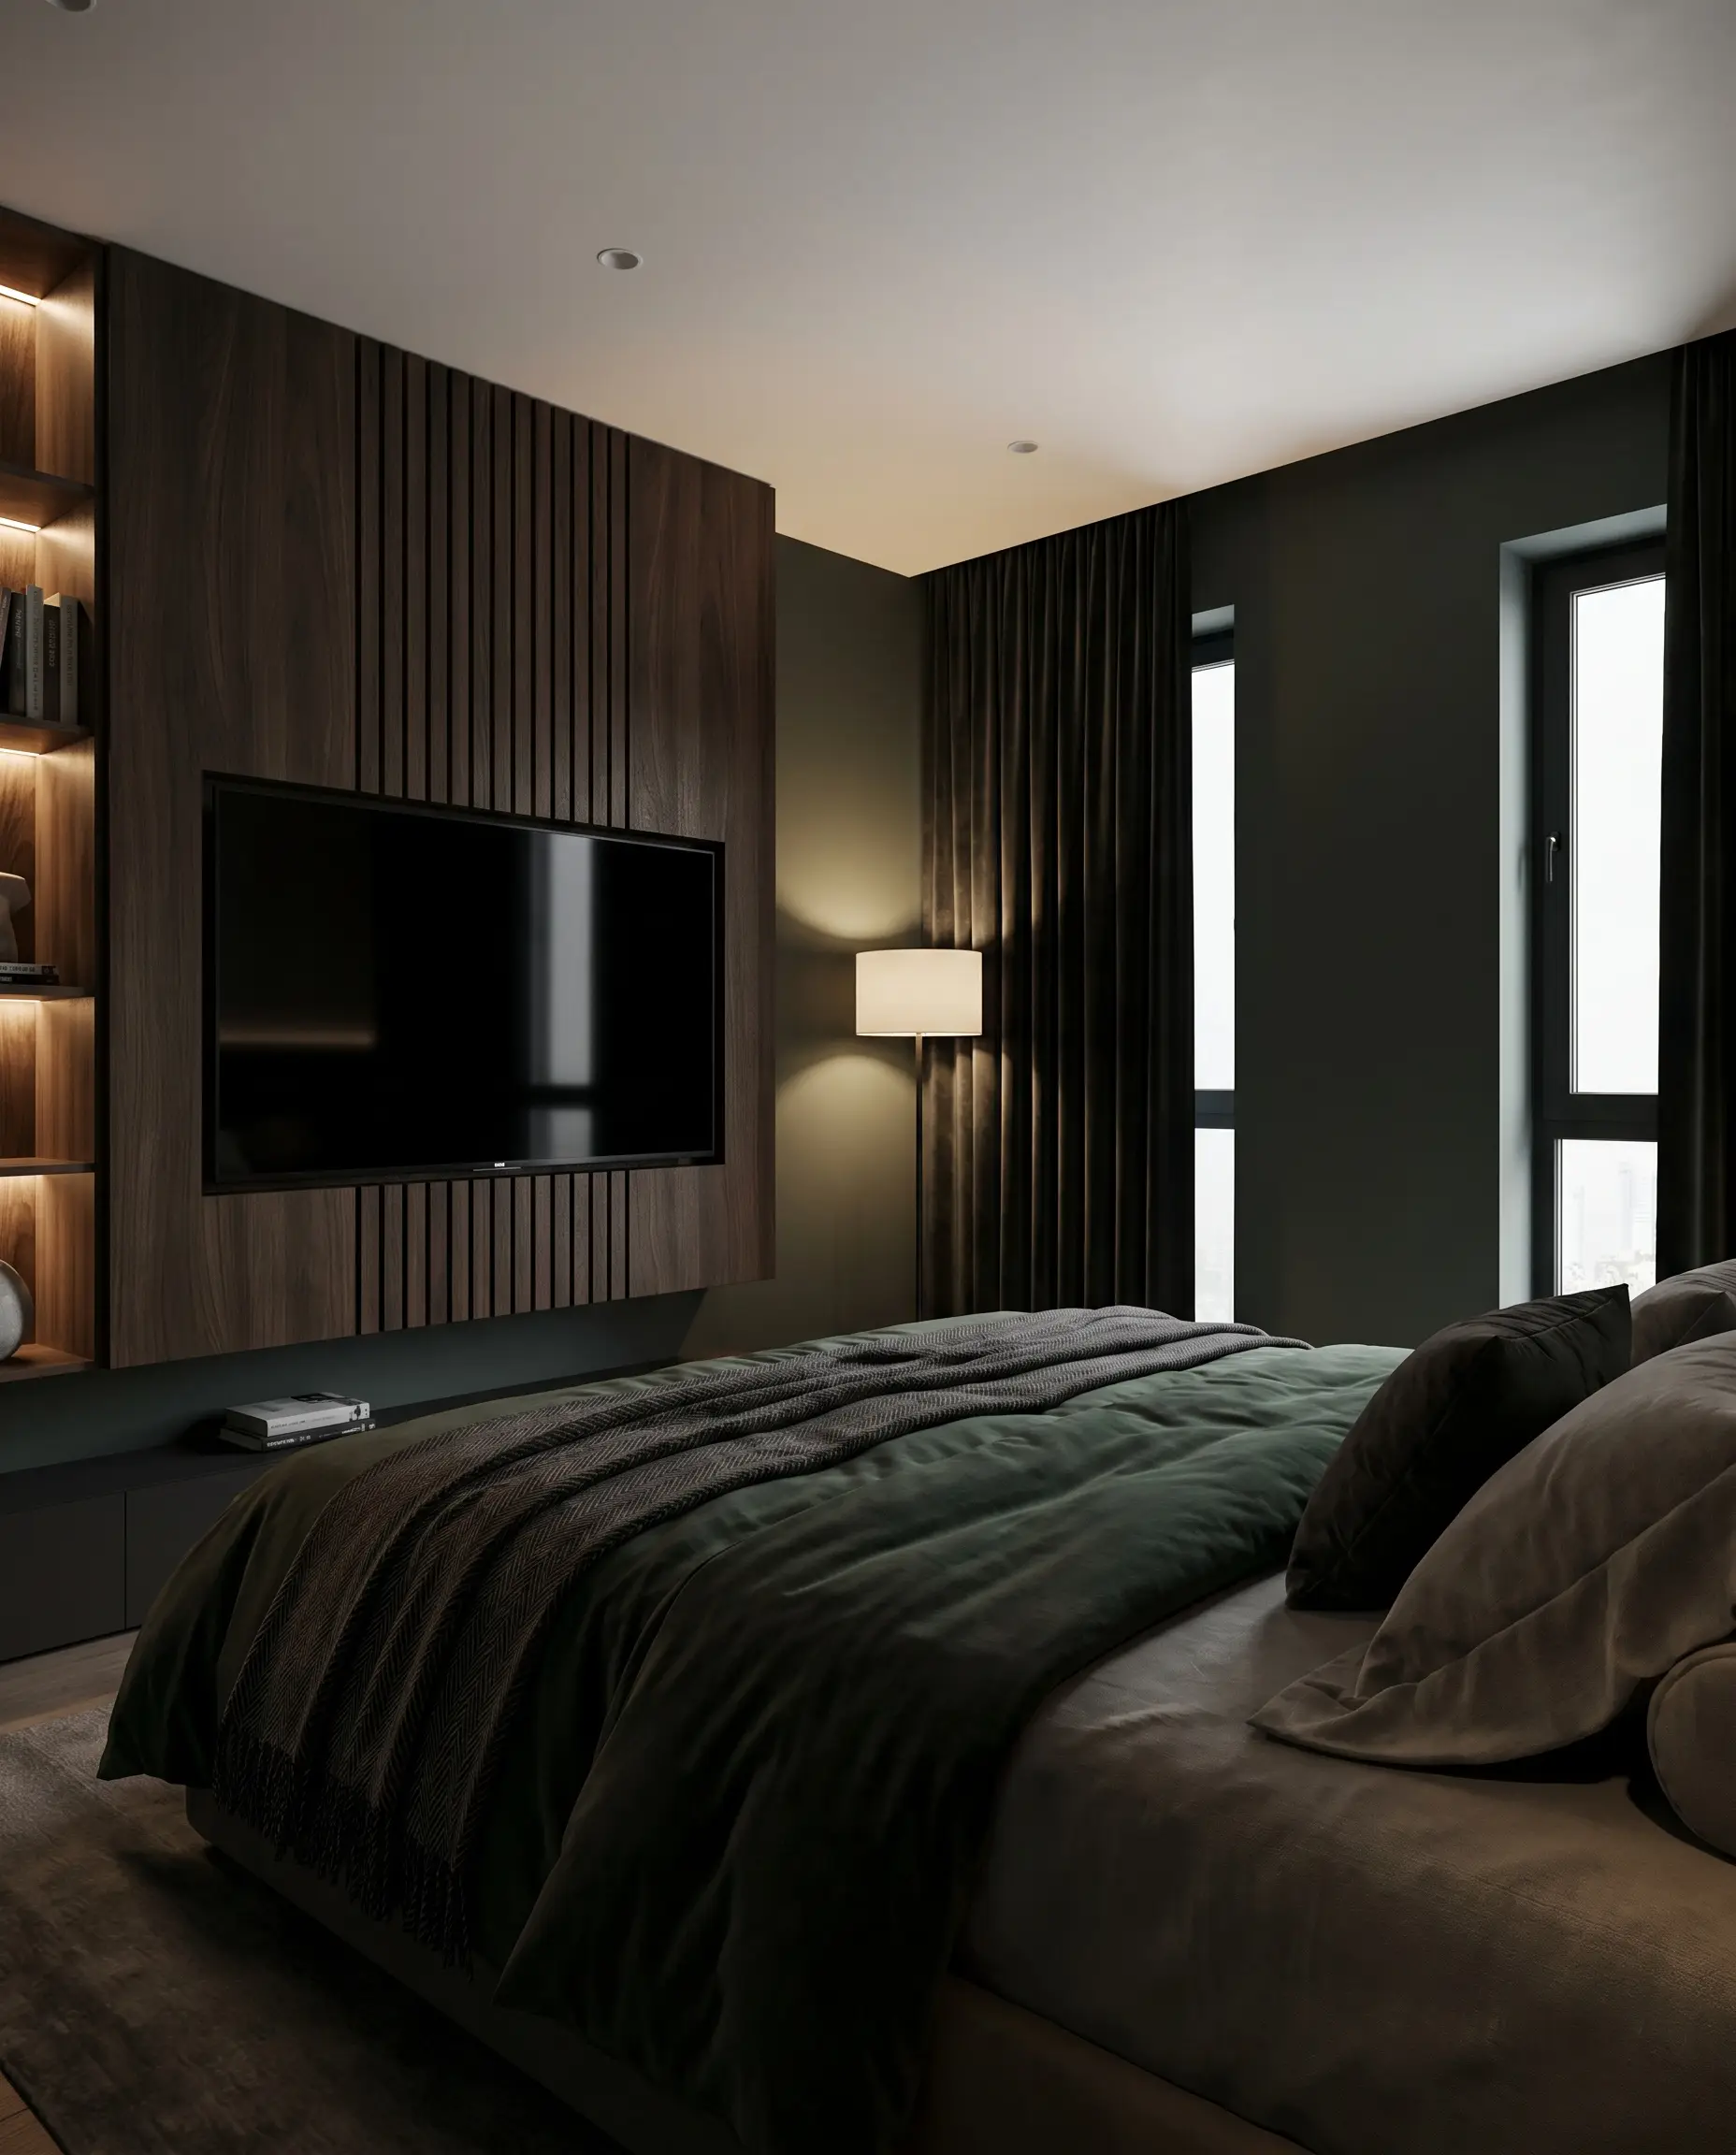
Perfect for dark, sleep-focused environments, rich smoked walnut panels—or even a heavily stained smoked oak—absorb excess light and cultivate a deeply cocooning effect. Pair this heavy, tactile wood with dark, saturated walls to erase the boundaries of the room and make the television screen melt into the shadows.
- Vibe: Moody Contemporary
- Key Materials: Smoked walnut panels, velvet blackout curtains
- Paint Match: Farrow & Ball Studio Green (No. 93) on adjacent walls.
Material Tension Rule: Deep smoked walnut requires the harsh, matte porosity of a roman clay or flat plaster wall finish to prevent the dark room from feeling like a flat, glossy cavern.
Hackrea Design Ally Tip
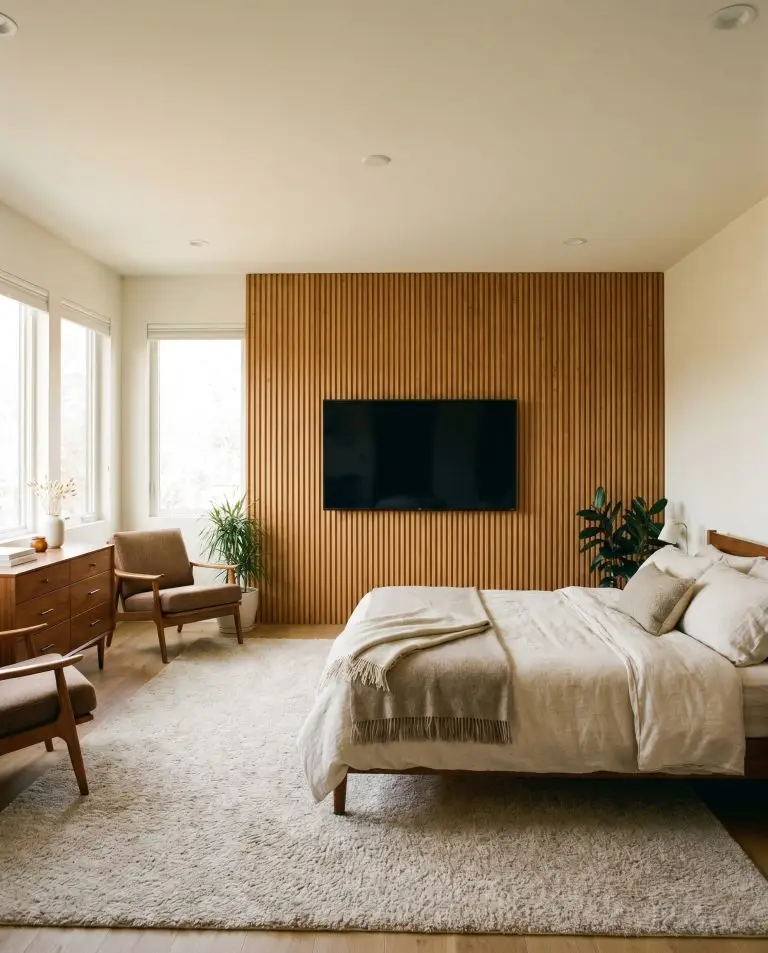
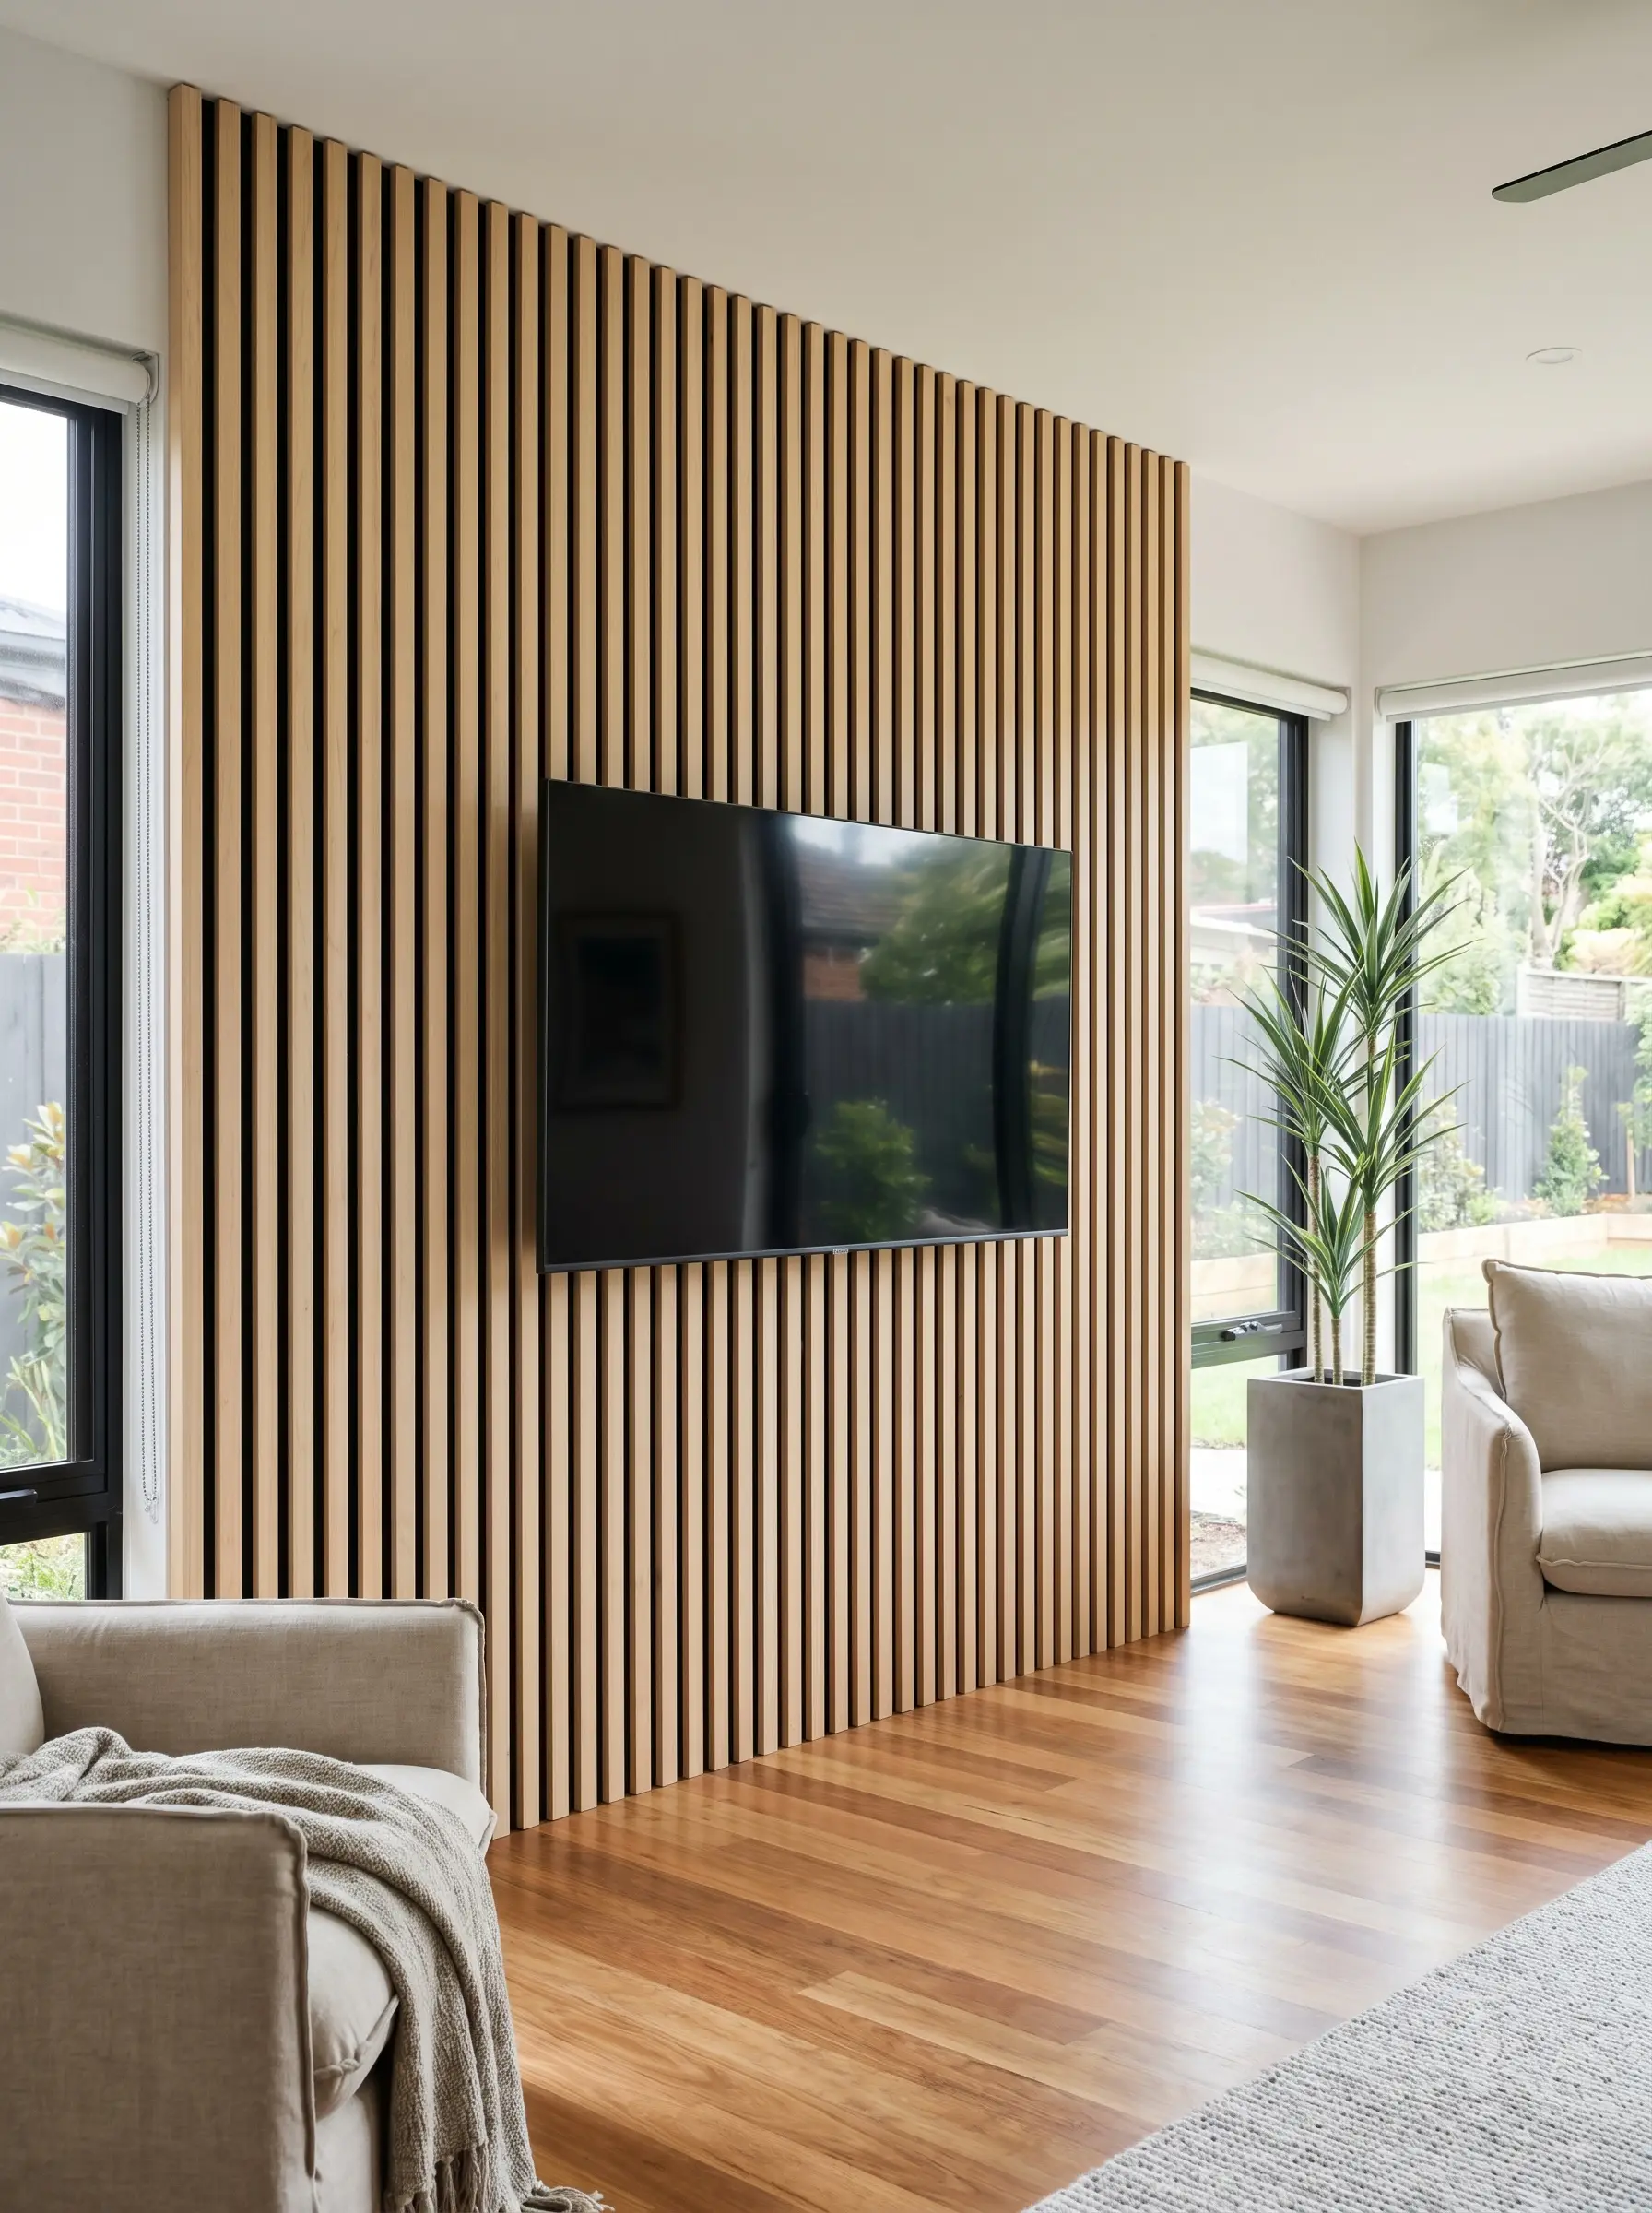
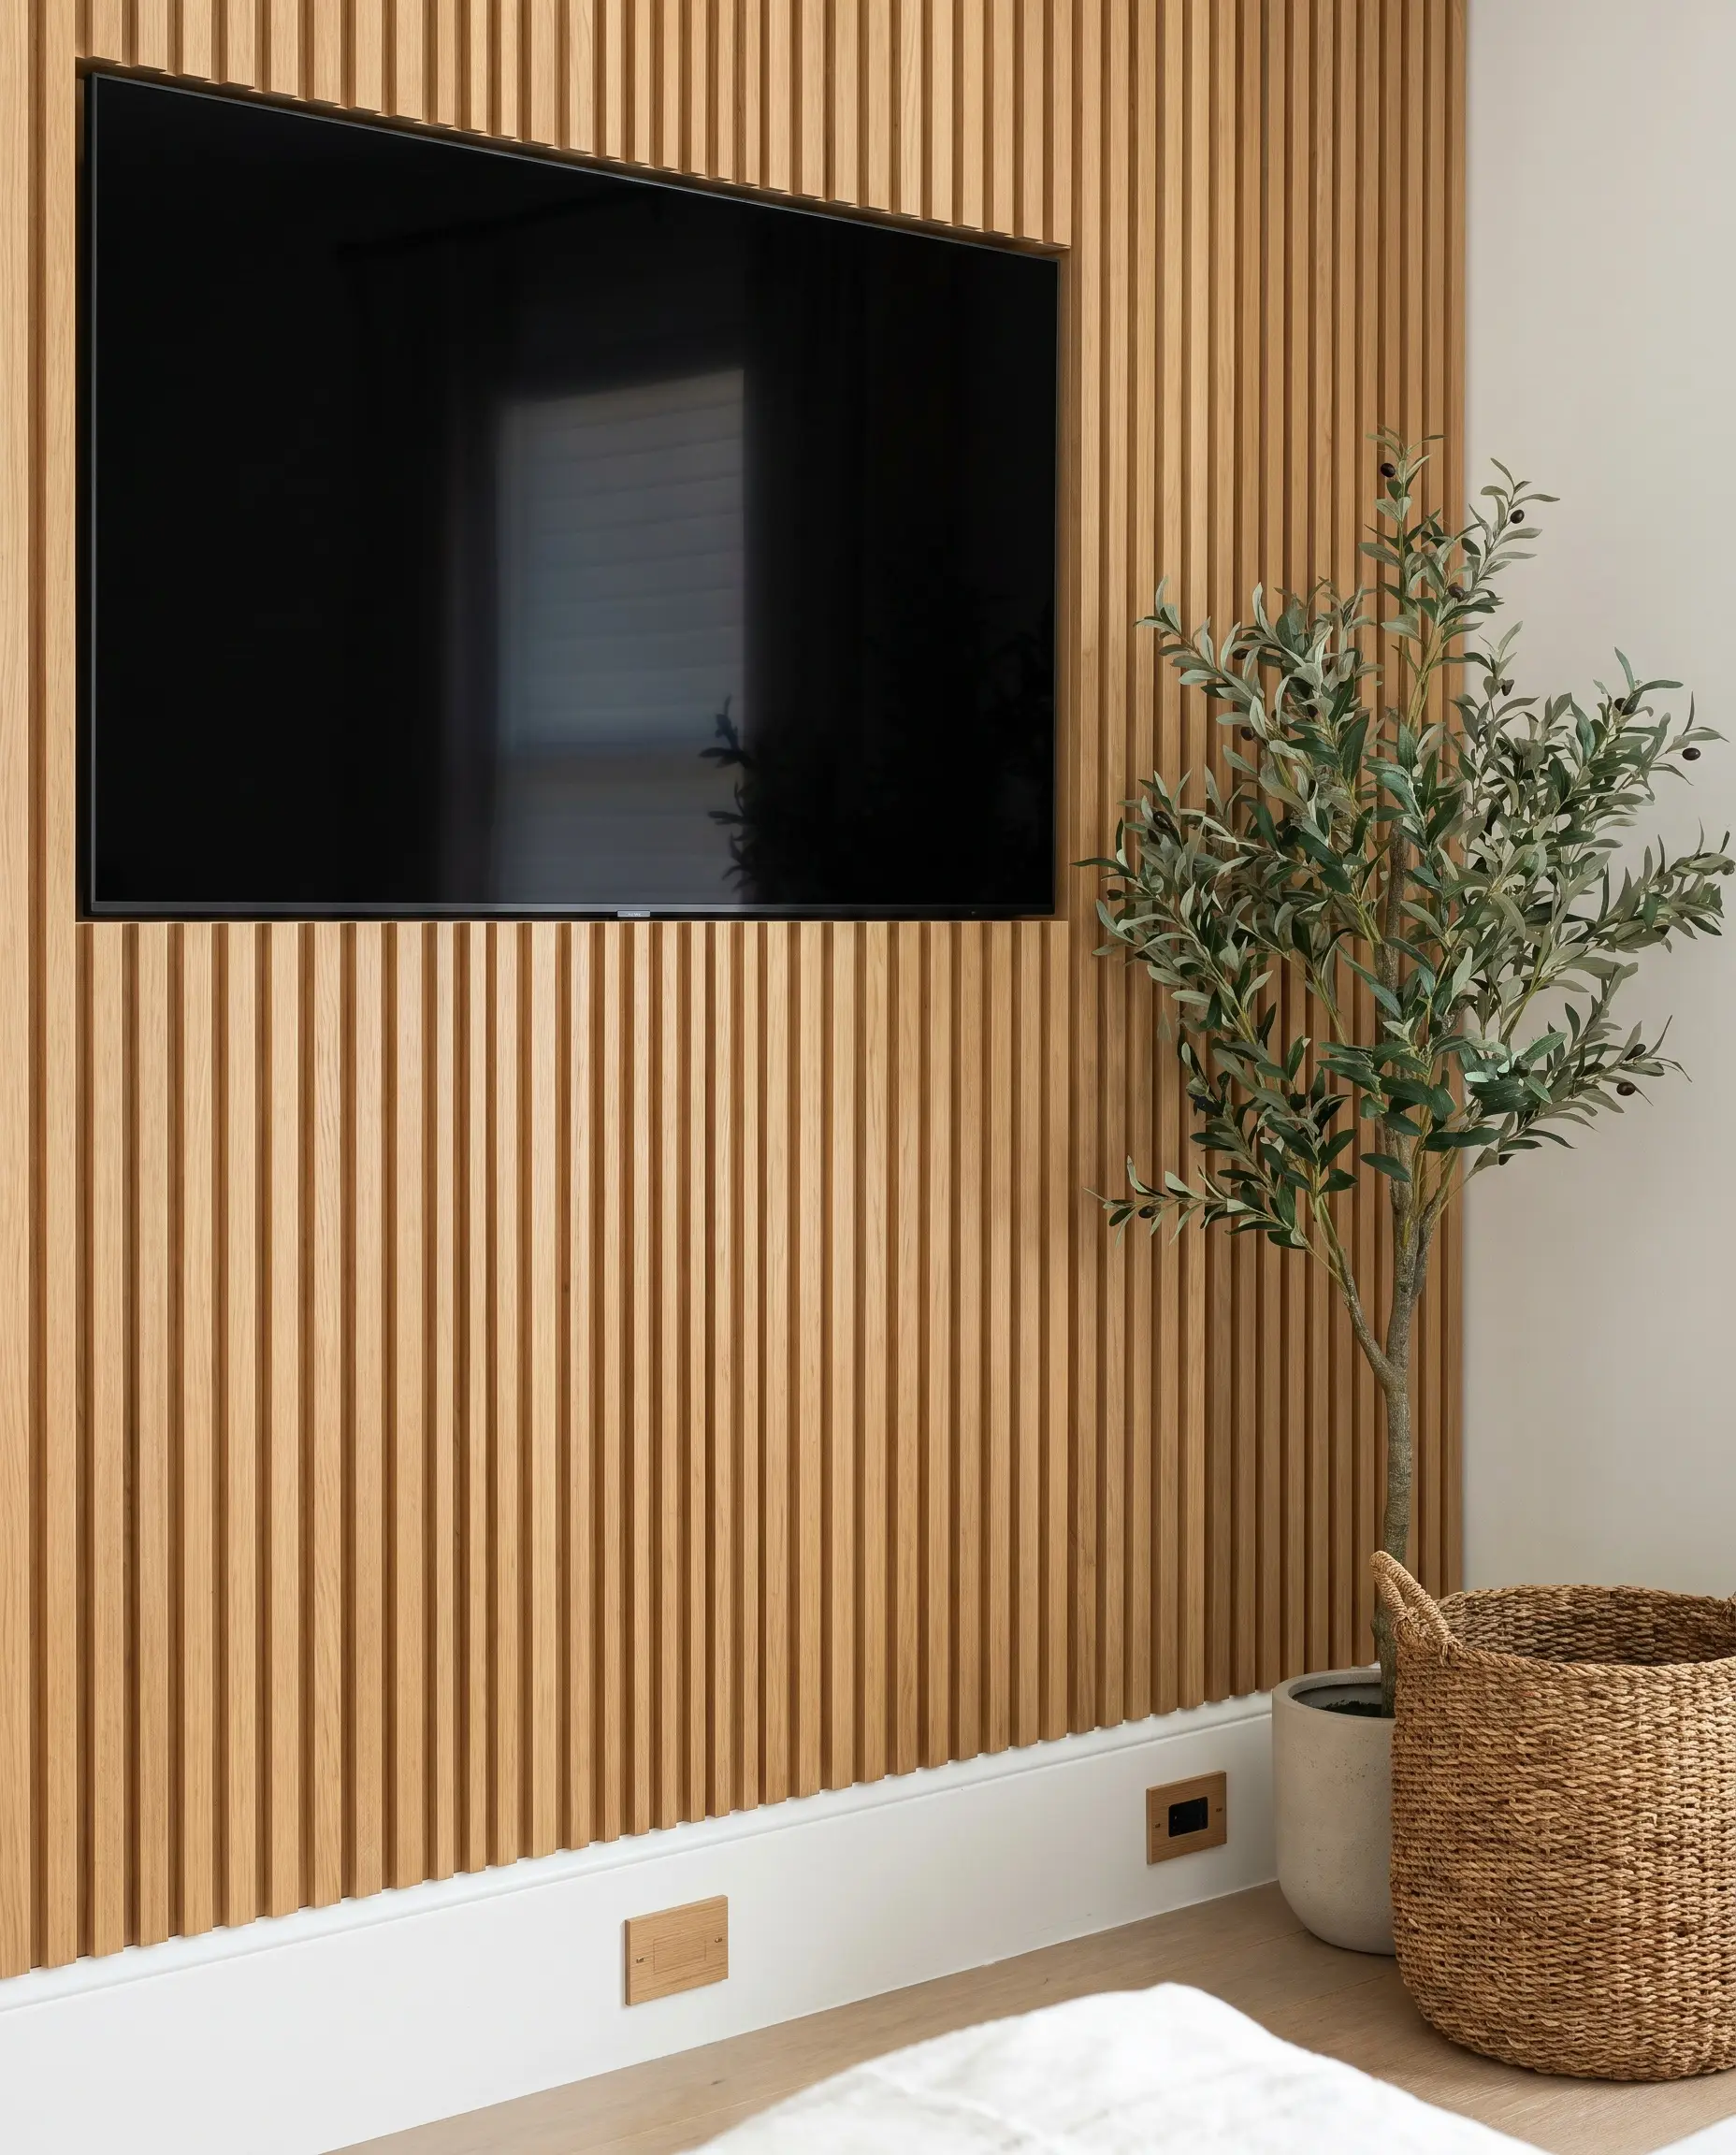
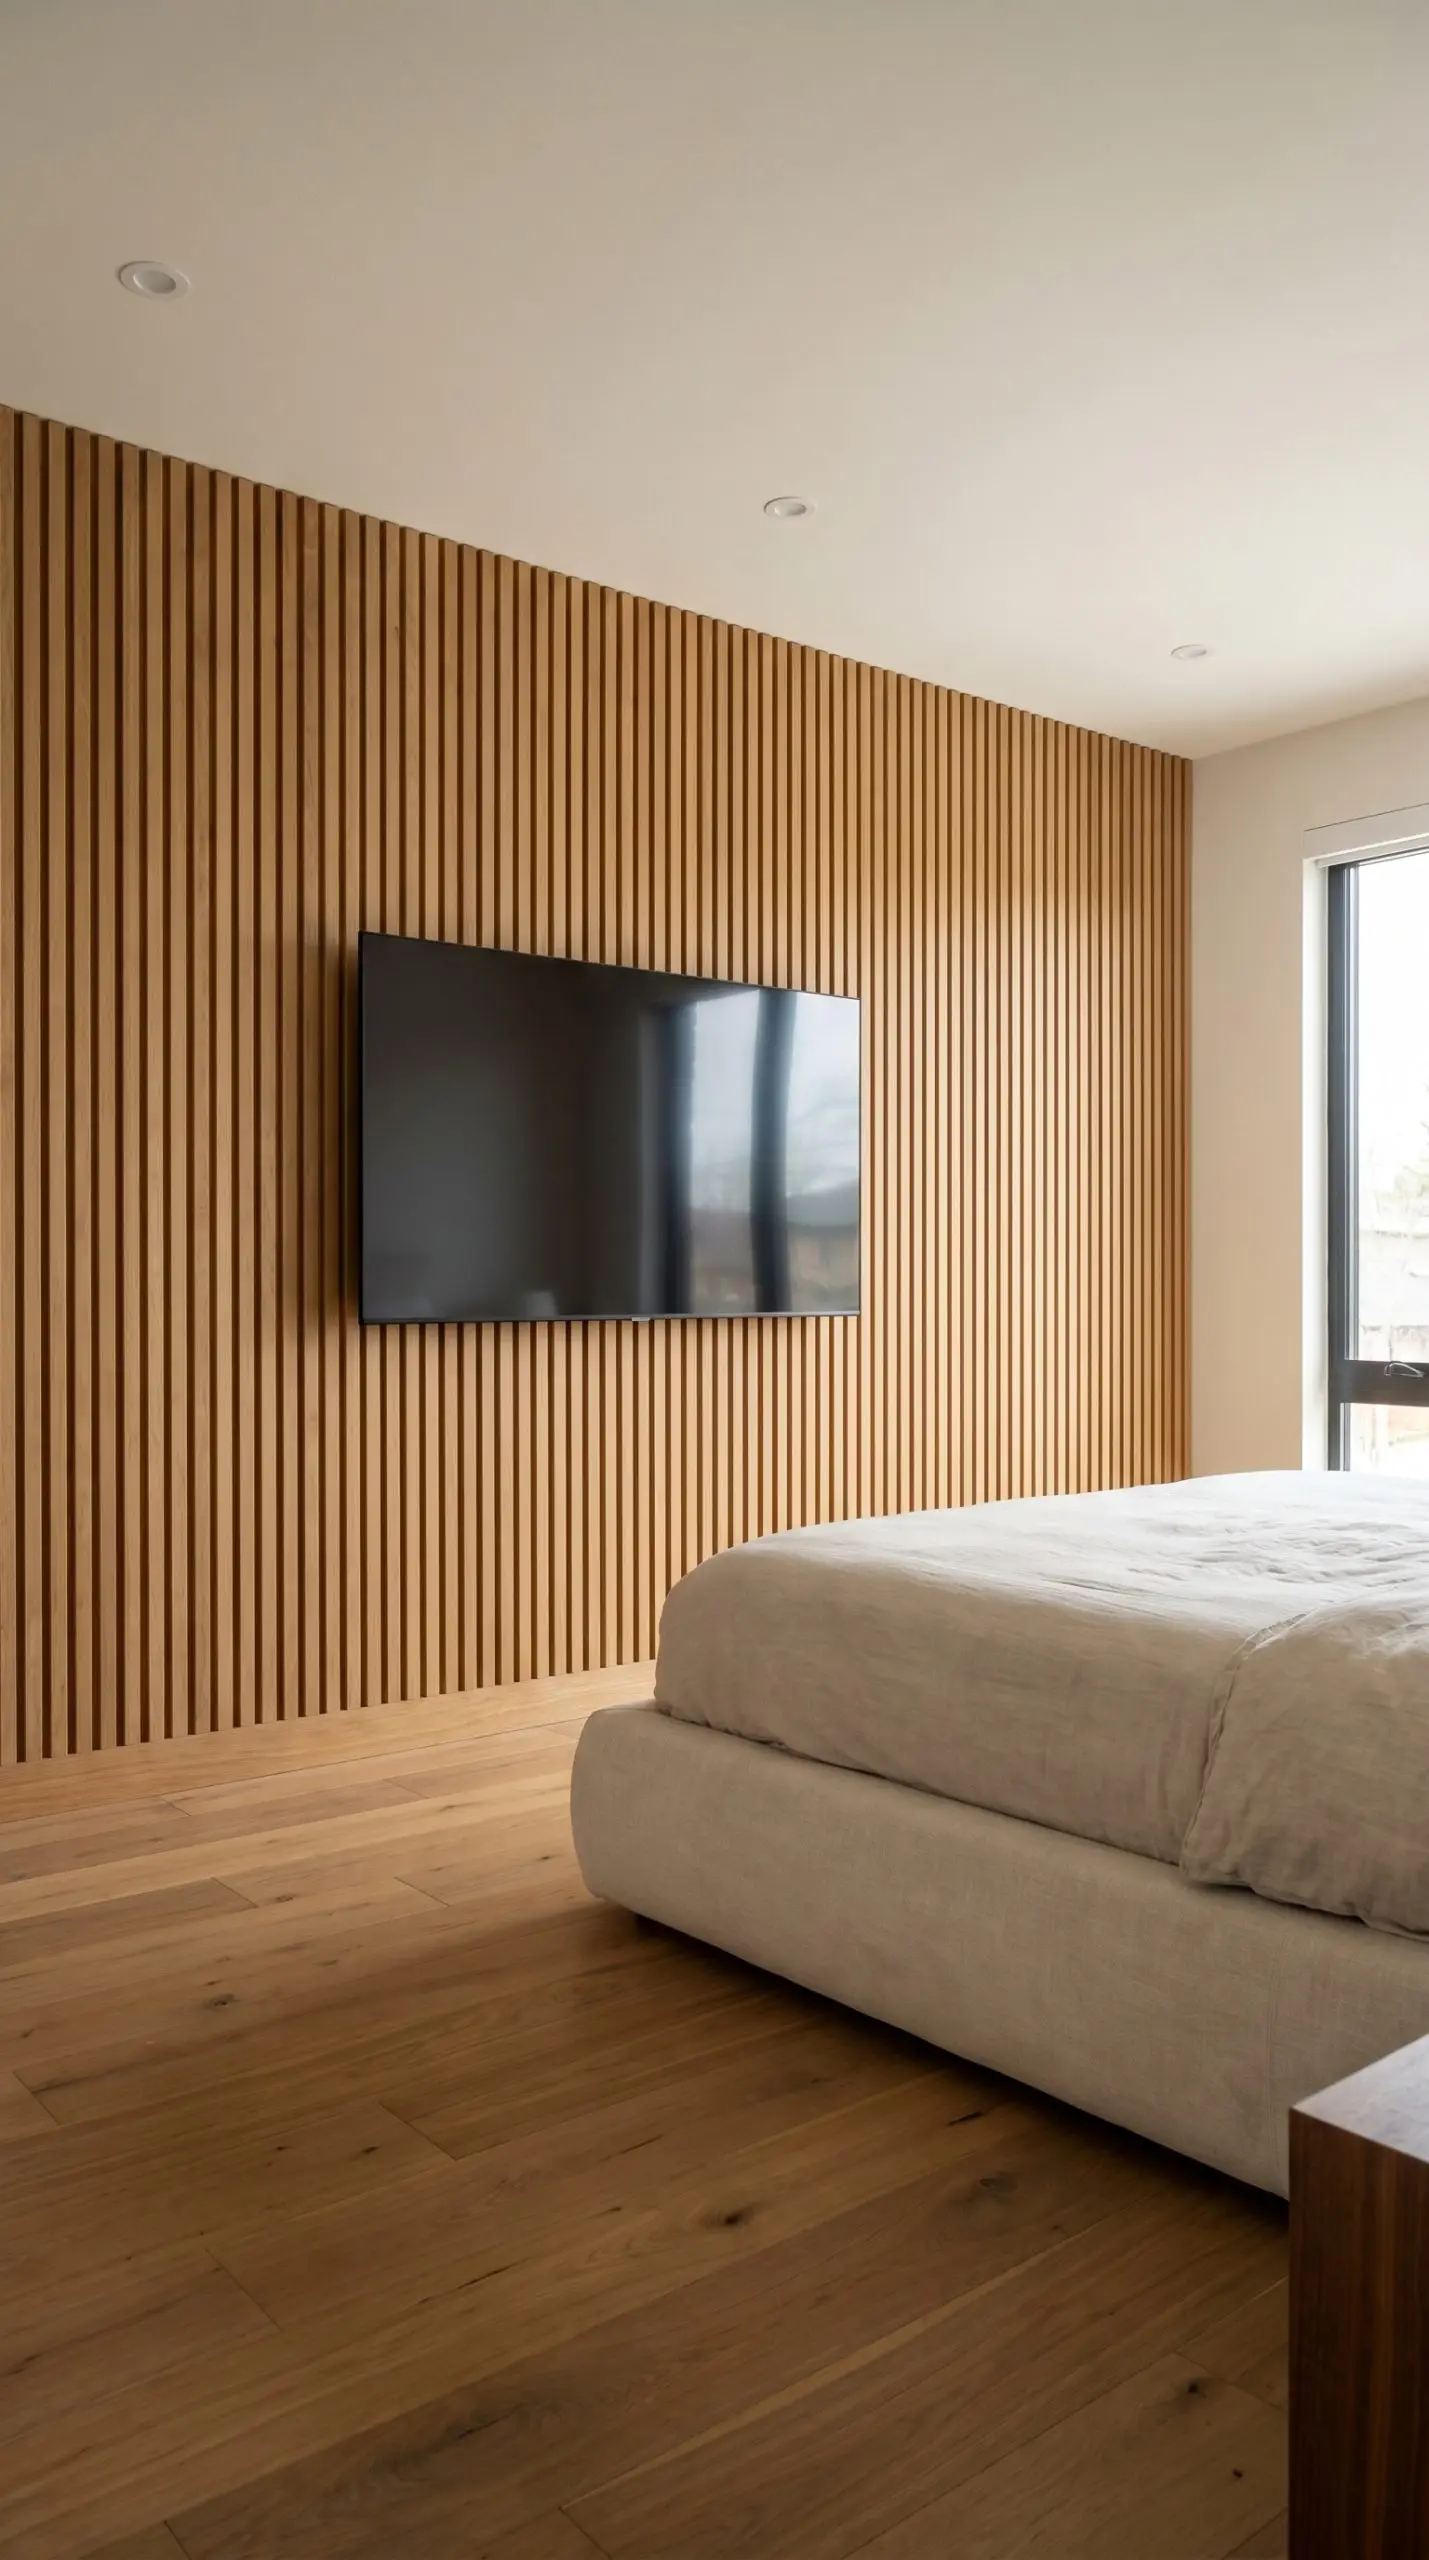
Brighten the Room with Rift-Sawn White Oak Slats
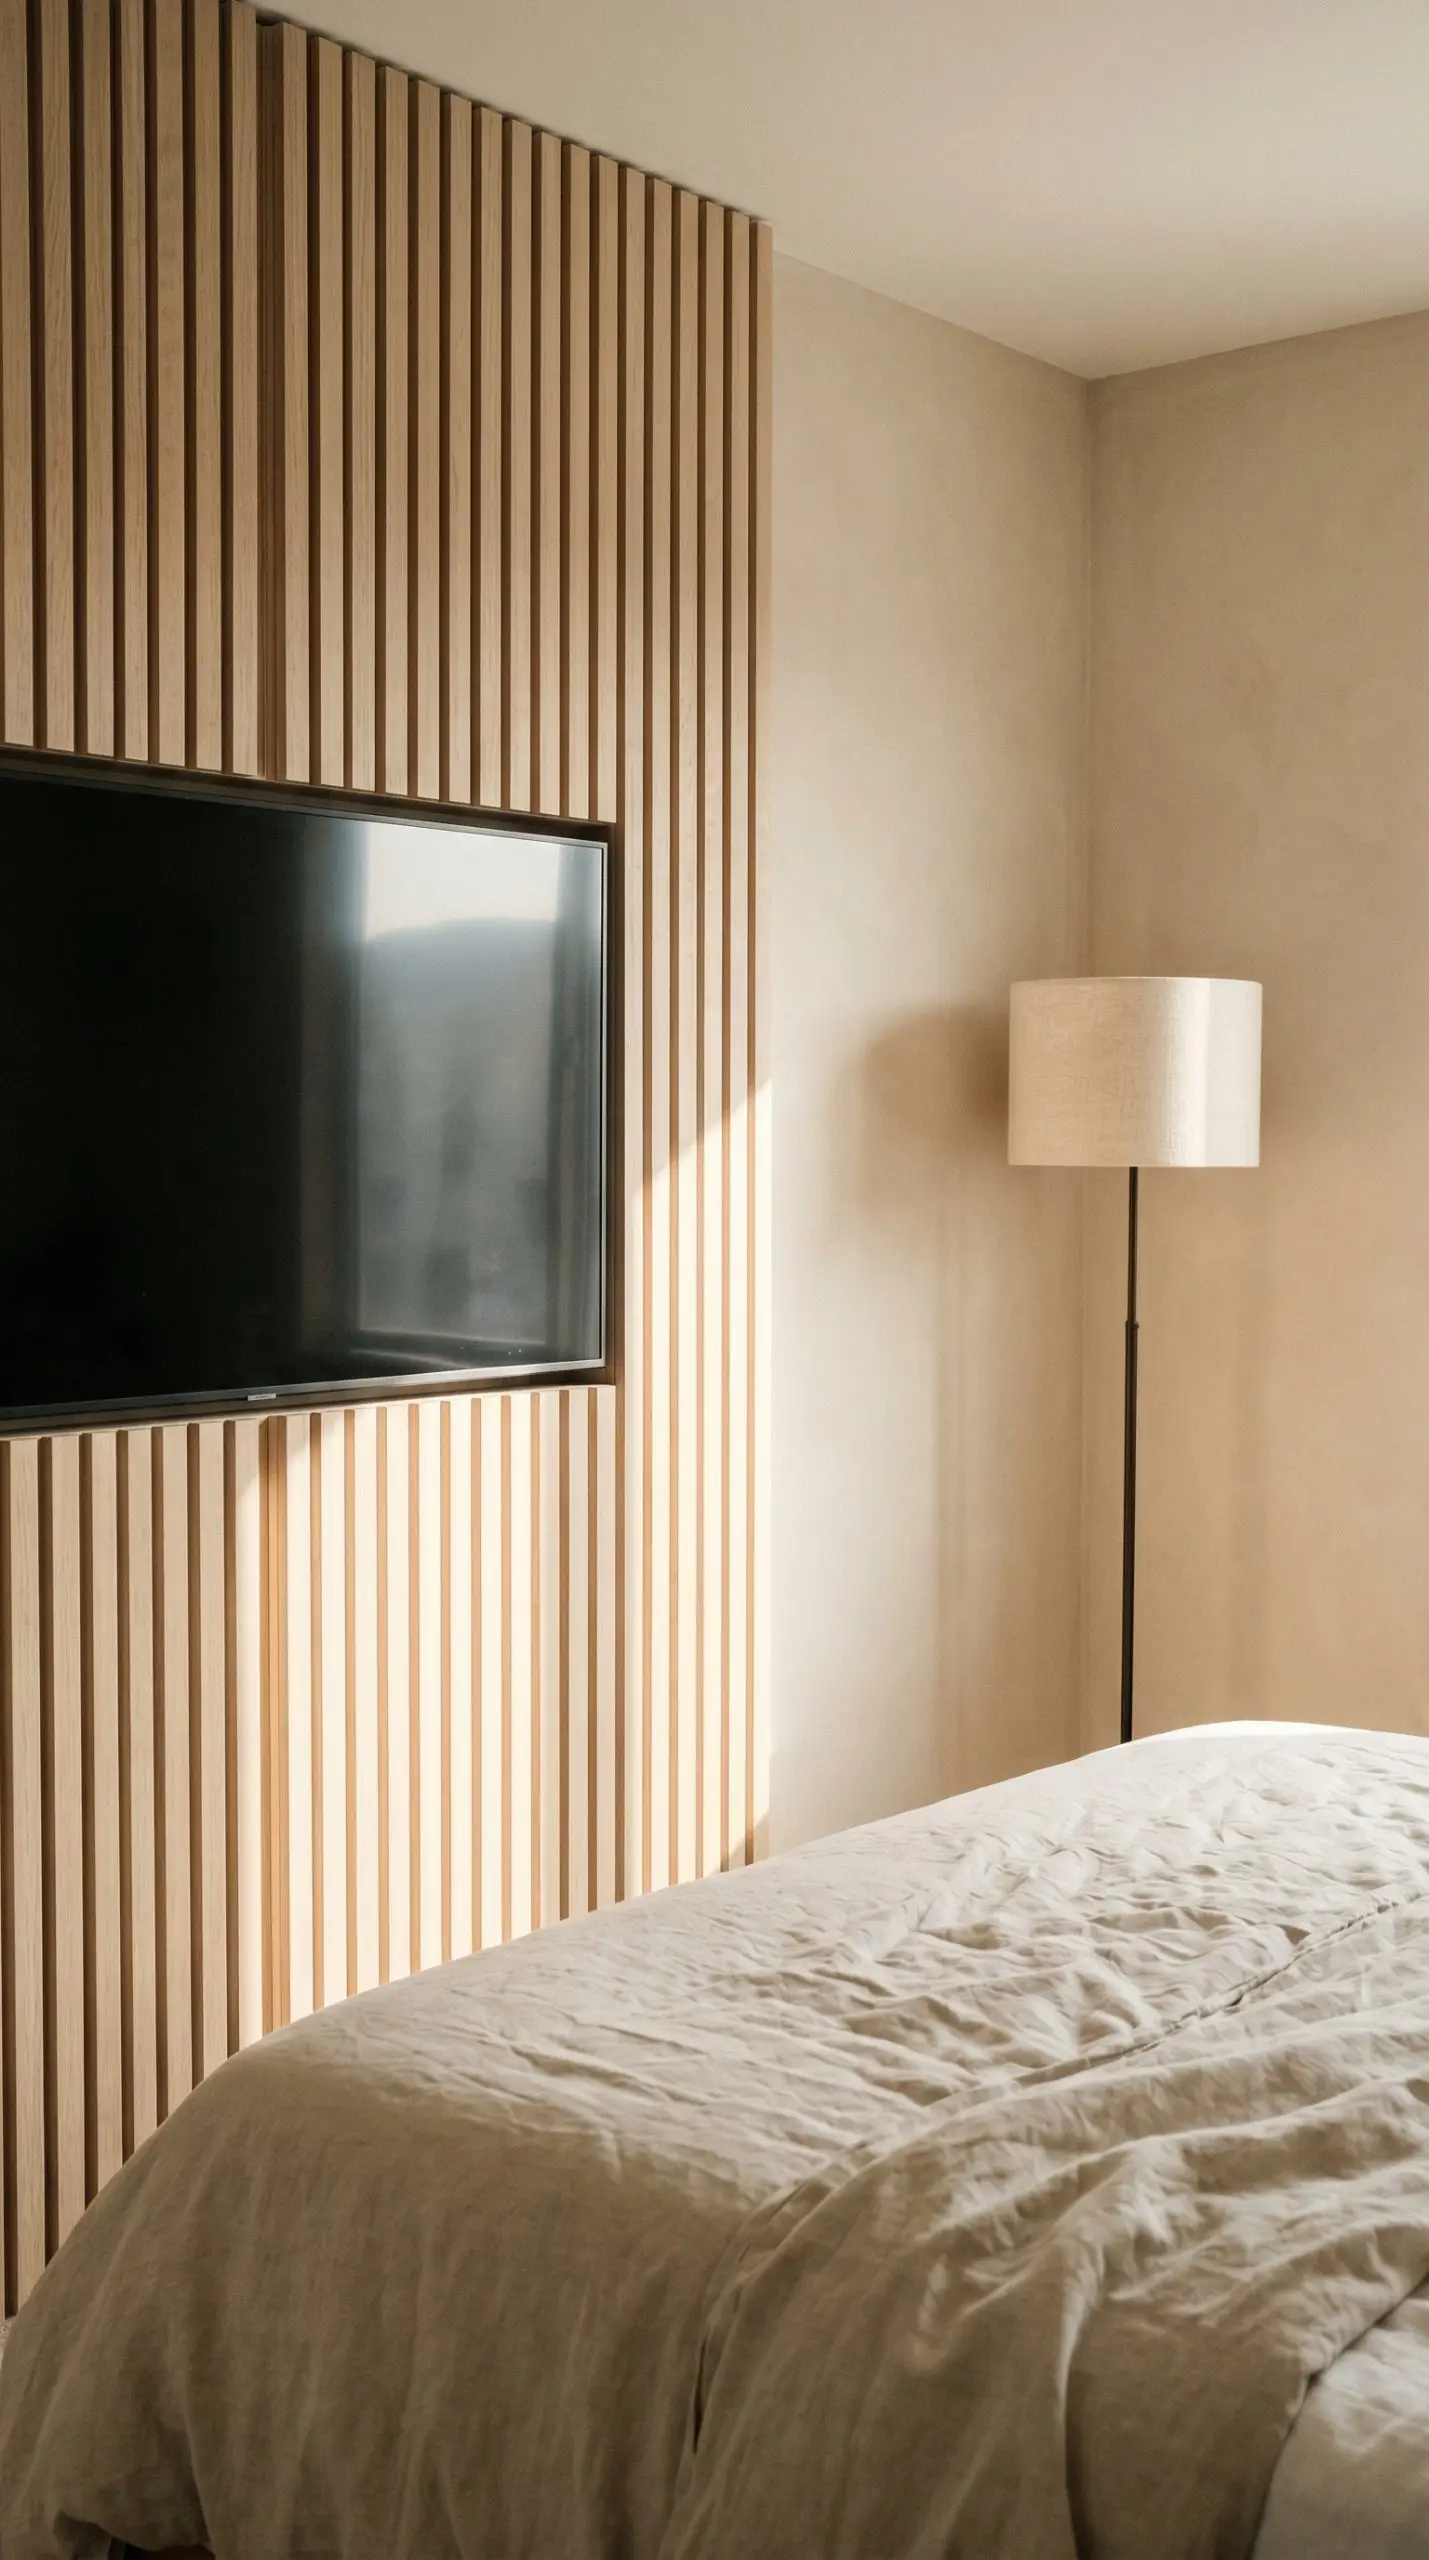
The undeniable foundation of the Japandi aesthetic, rift-sawn white oak features a remarkably straight grain that looks infinitely cleaner and more modern than traditional plain-sliced oak. This pale, organic wood brings a sense of morning light and breathability to the primary suite.
- Vibe: Organic Modern / Japandi
- Key Materials: Rift-sawn white oak veneer, limewash paint
- Styling Pro-Tip: Keep the surrounding textiles in unbleached linen and raw cotton to maintain the organic narrative.
Paint the Slats Matte Black to Camouflage the TV
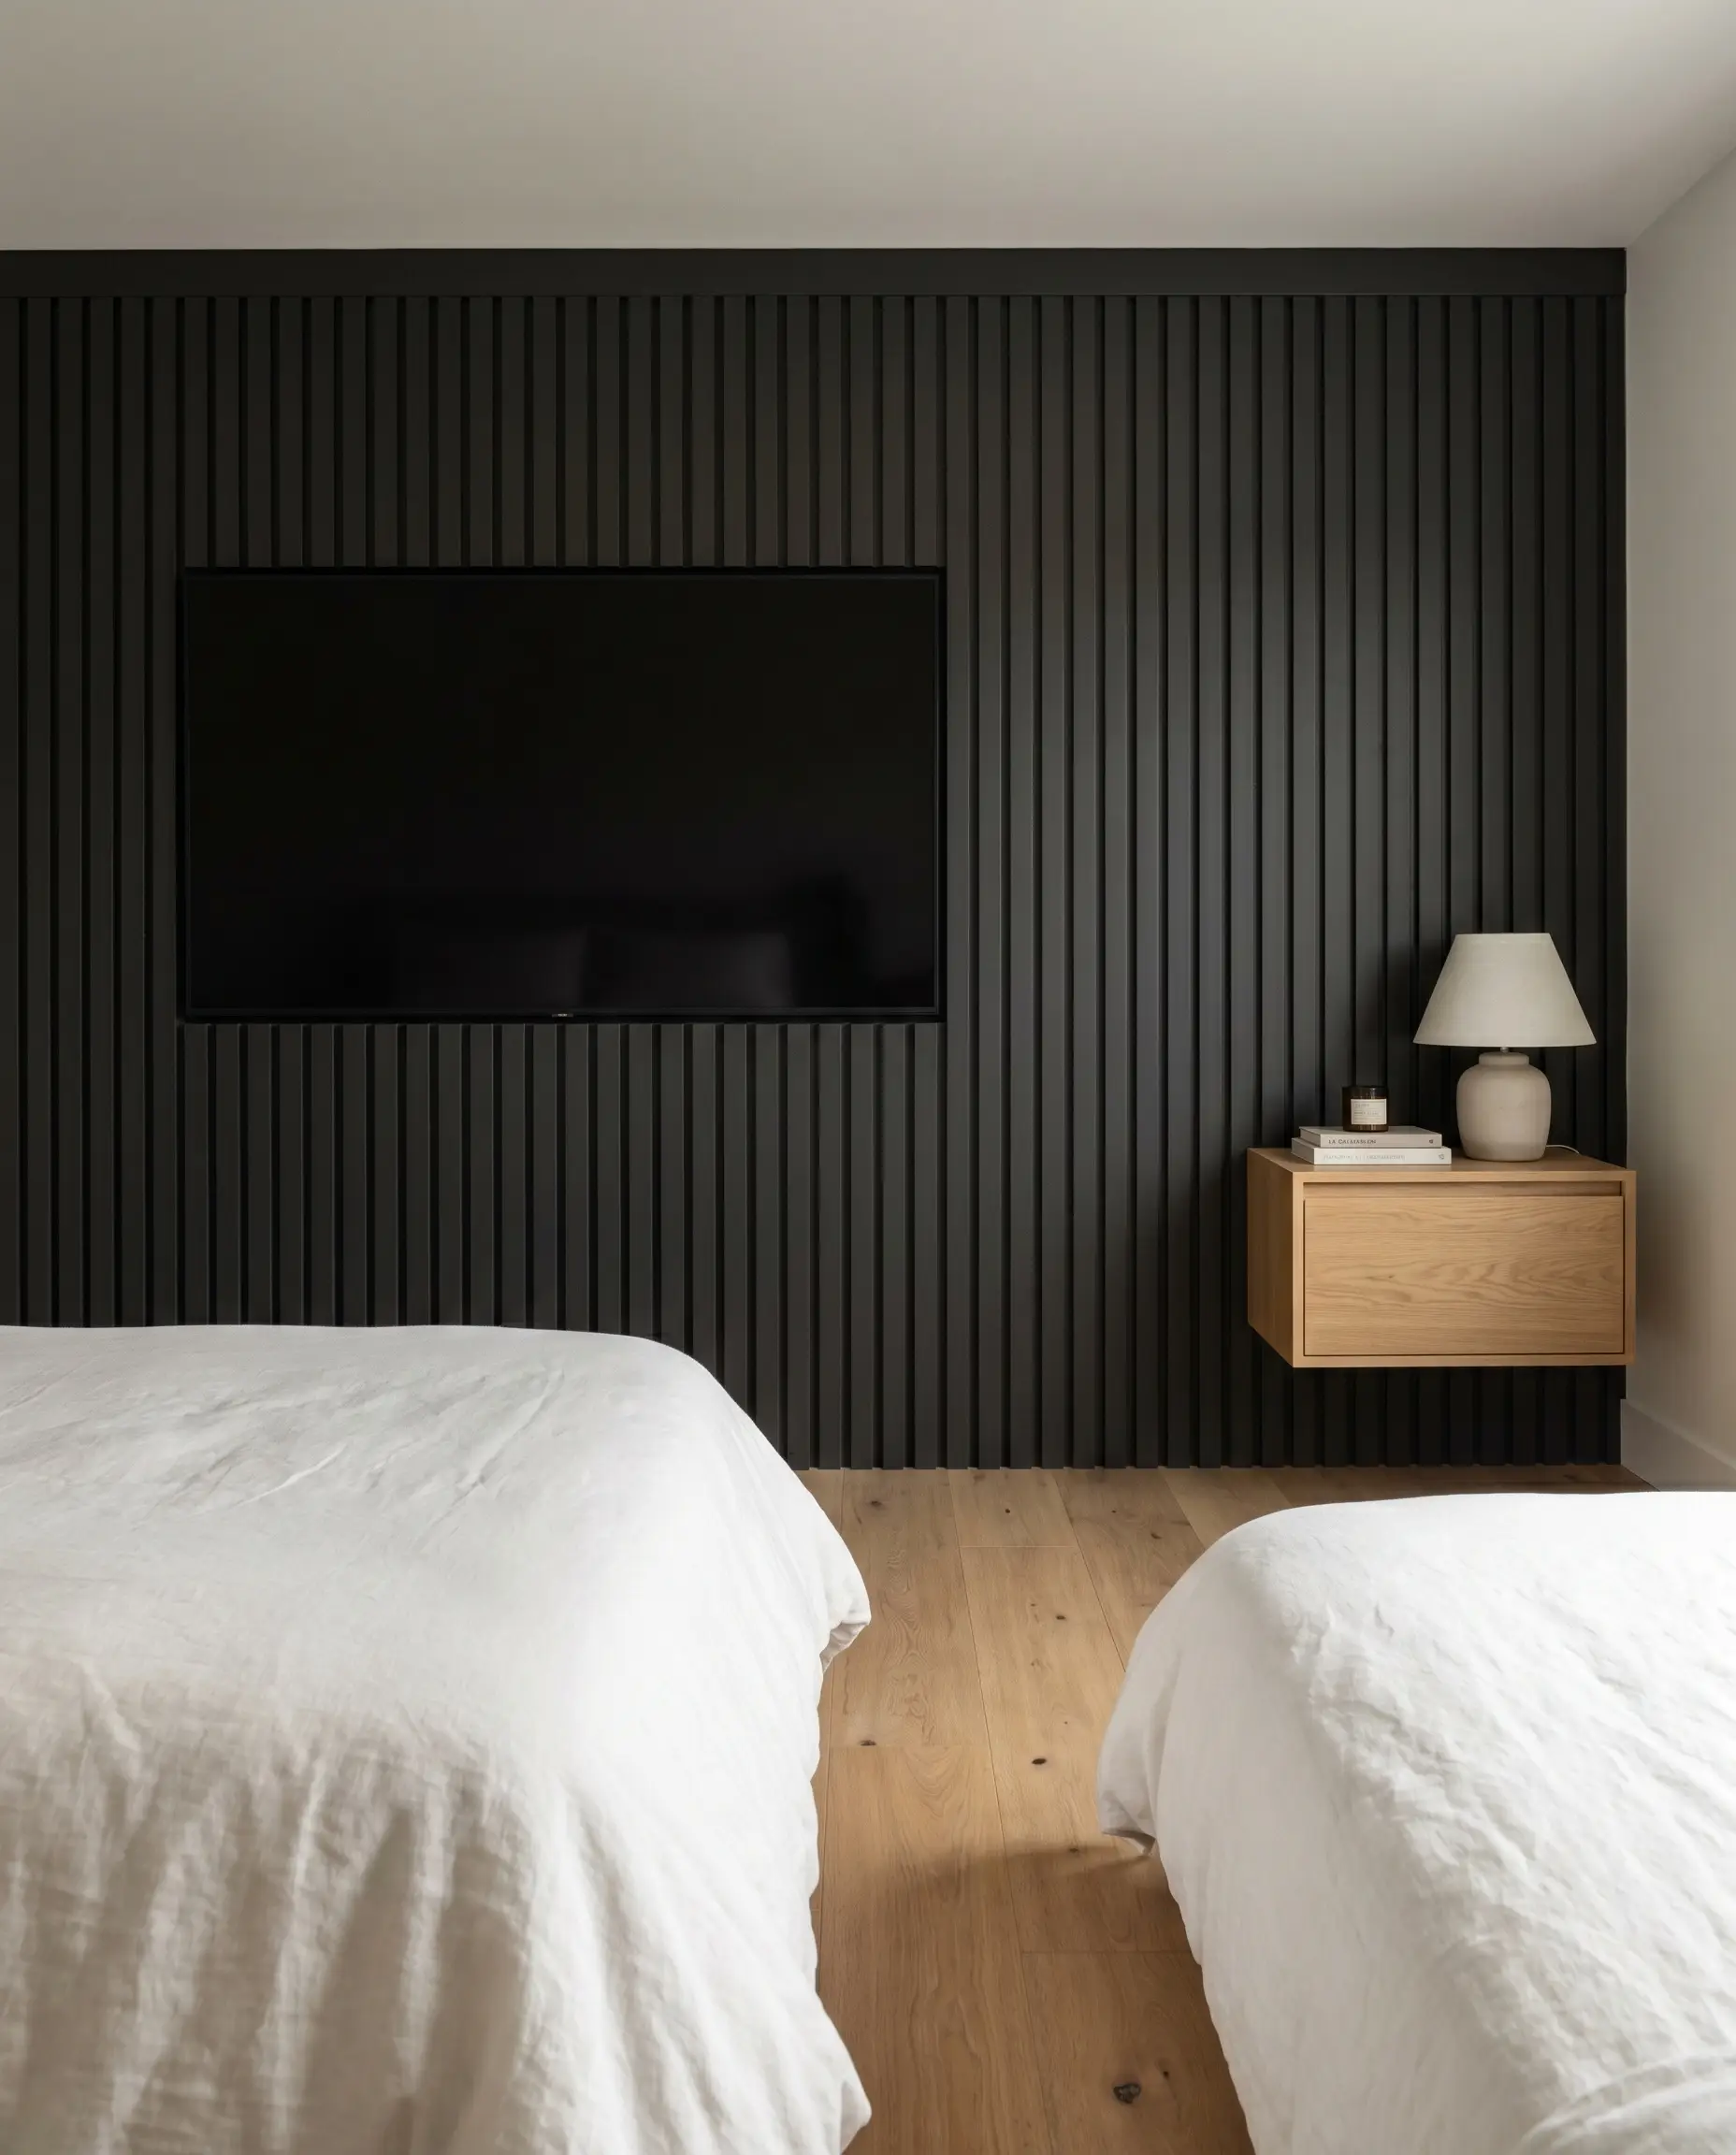
Deploy the Anti-Tech Camouflage technique by coating the wood slats in a flat, matte black finish. Because the fluted millwork provides rich physical texture, the black paint doesn’t look dead; instead, it allows the powered-down television screen to completely disappear into the wall.
- Vibe: Monochromatic Minimalist
- Key Materials: Paint-grade pine slats, high-density foam roller
- Paint Match: Sherwin-Williams Tricorn Black (SW 6258) in a flat or matte finish.
Contrast Wood Slats with a Raw Concrete Accent Wall
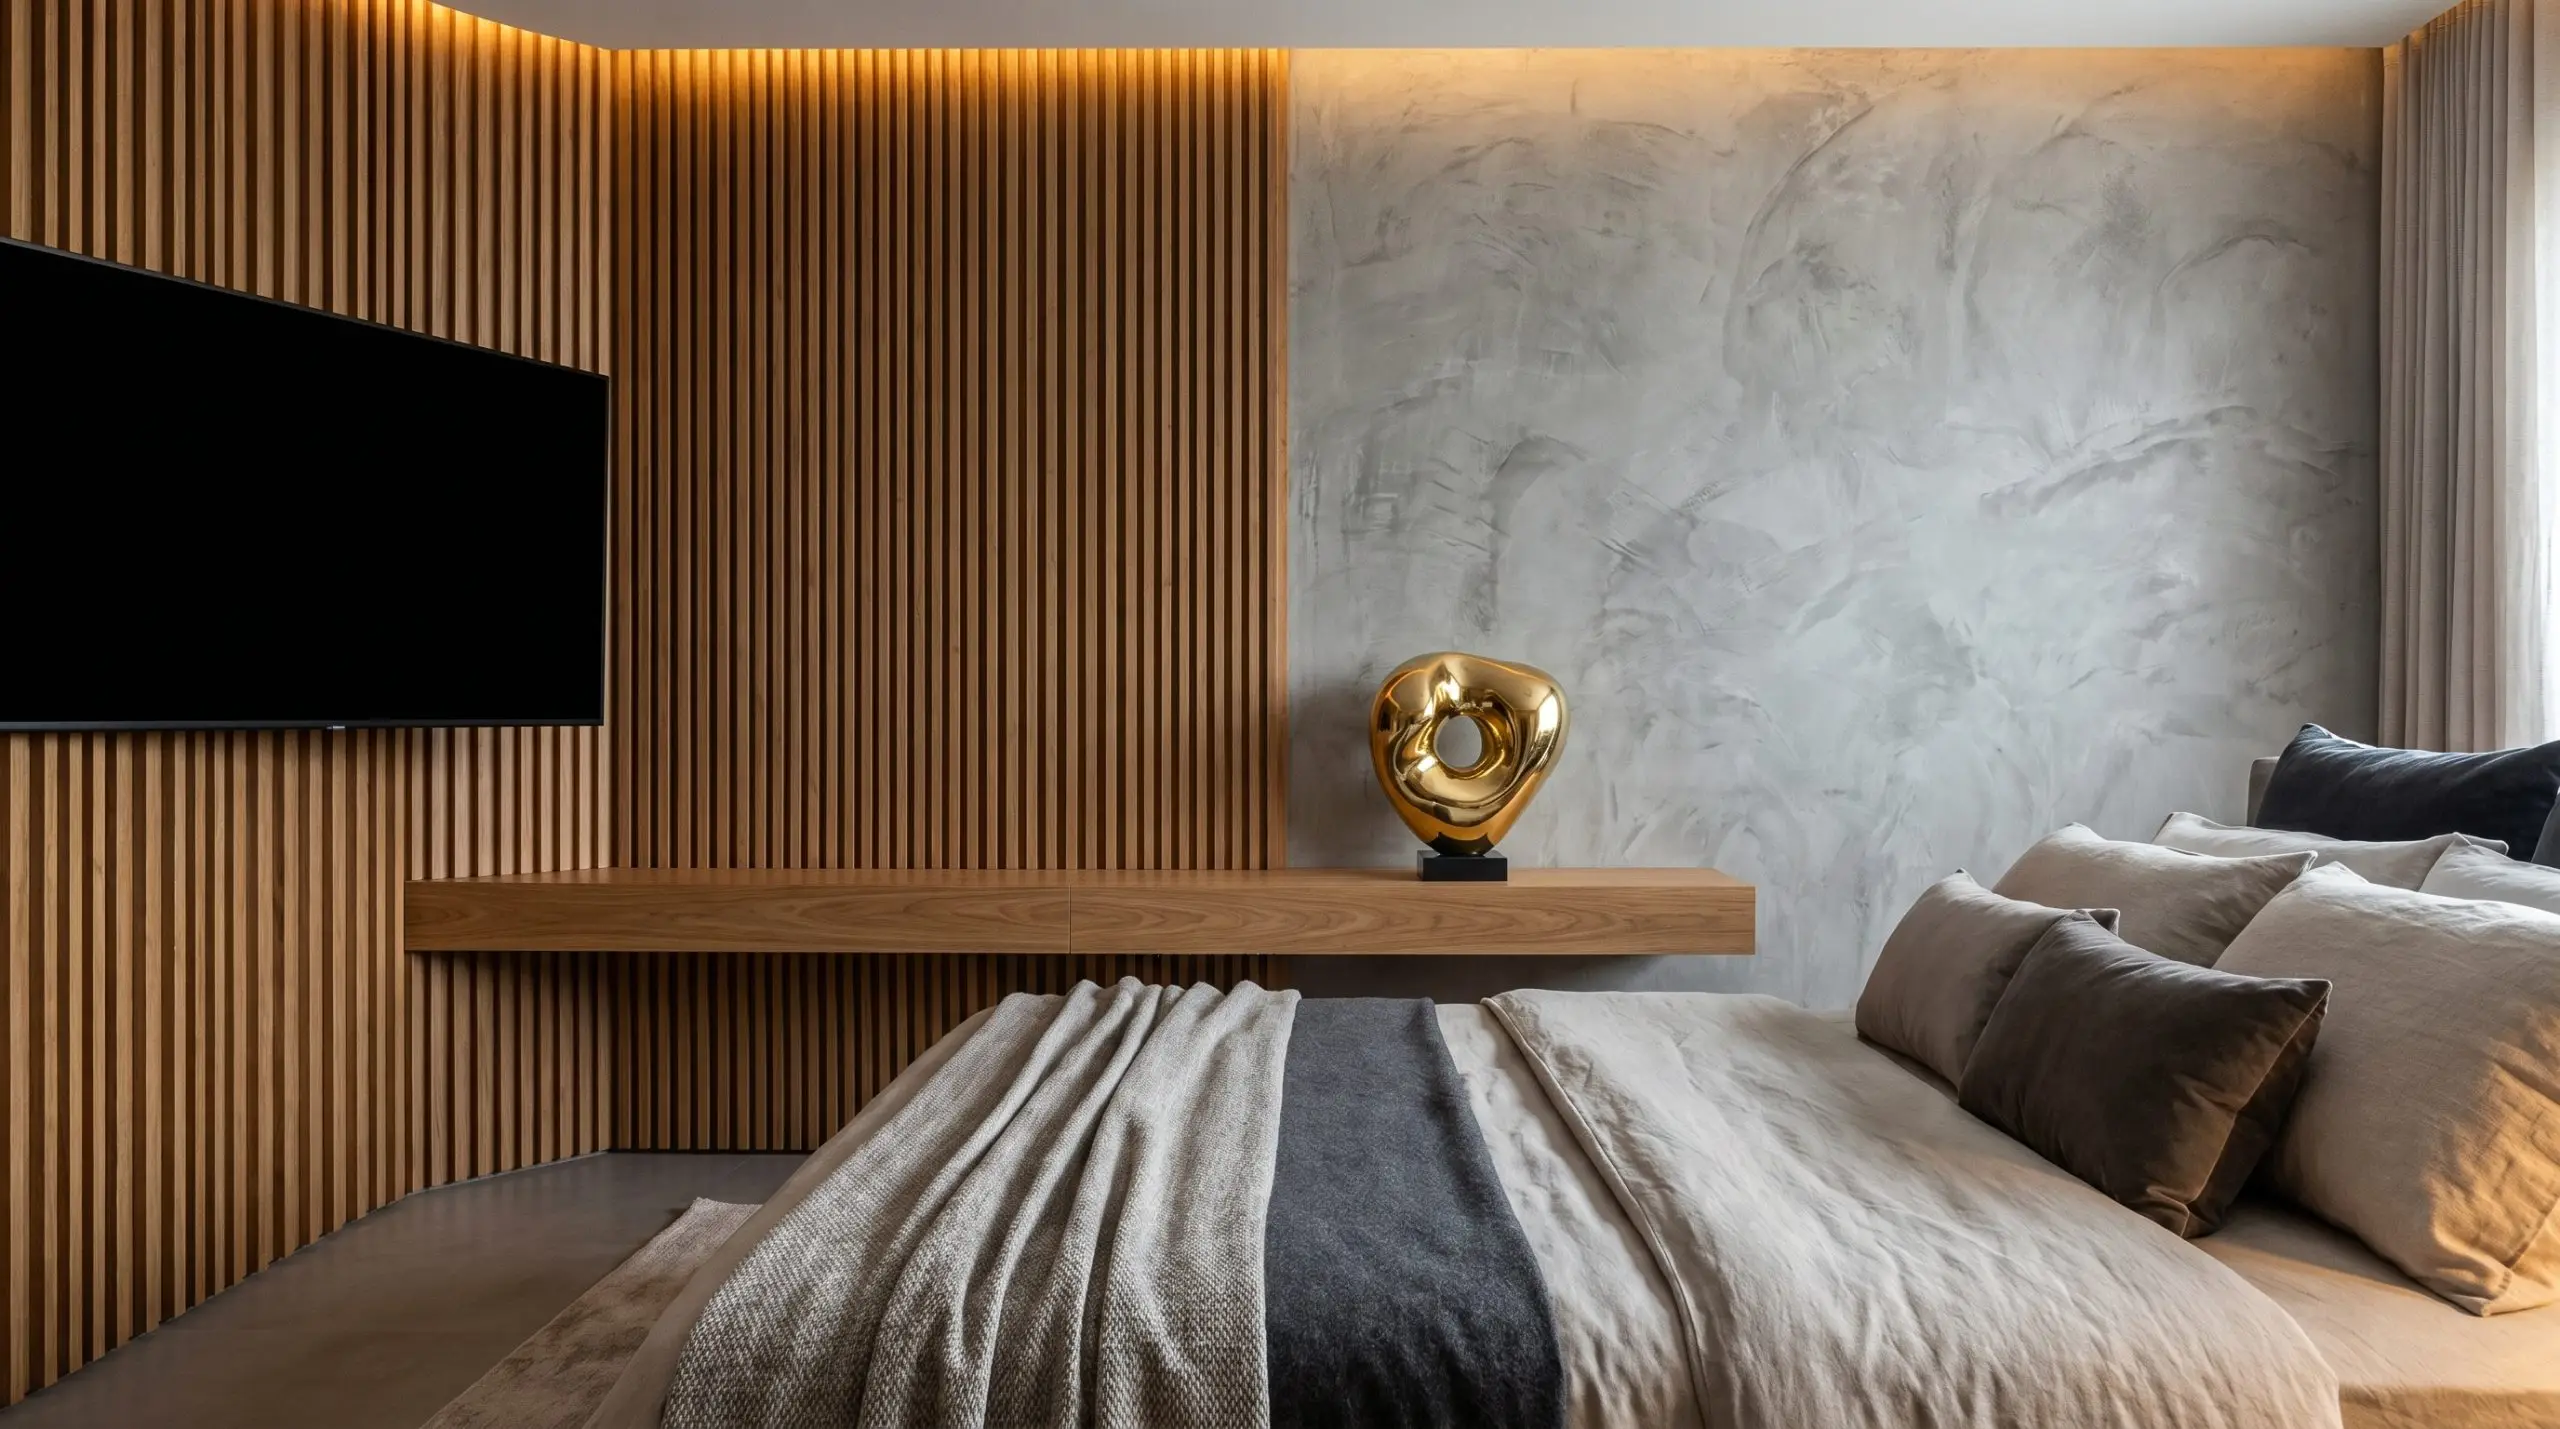
Channel high-tension material contrast by placing the organic warmth of wood immediately adjacent to a cool, troweled concrete or Roman clay wall finish. This industrial-luxe pairing relies on the friction between the precise, rigid lines of the slats and the imperfect, sweeping texture of the concrete.
- Vibe: Industrial-Luxe
- Key Materials: Medium-tone ash slats, Portola Paints Roman Clay
- Styling Pro-Tip: Introduce a single, highly polished brass object nearby to break up the matte surfaces.
Install Black Acoustic Felt Backing to Deepen the Shadow Lines
The backing material is just as critical as the wood face. Utilizing a deep black PET felt backing behind the veneer strips makes the wood visually jump forward by enforcing sharp, high-contrast shadow lines, all while delivering exceptional sound dampening to quiet the sleeping space.
- Vibe: High-Contrast Contemporary
- Key Materials: 9mm black PET acoustic felt, light birch veneer
- Acoustic Benefit: Significantly reduces high-frequency echo from hardwood floors and glass windows.
Pair Warm Teak Slats with Brushed Brass Hardware
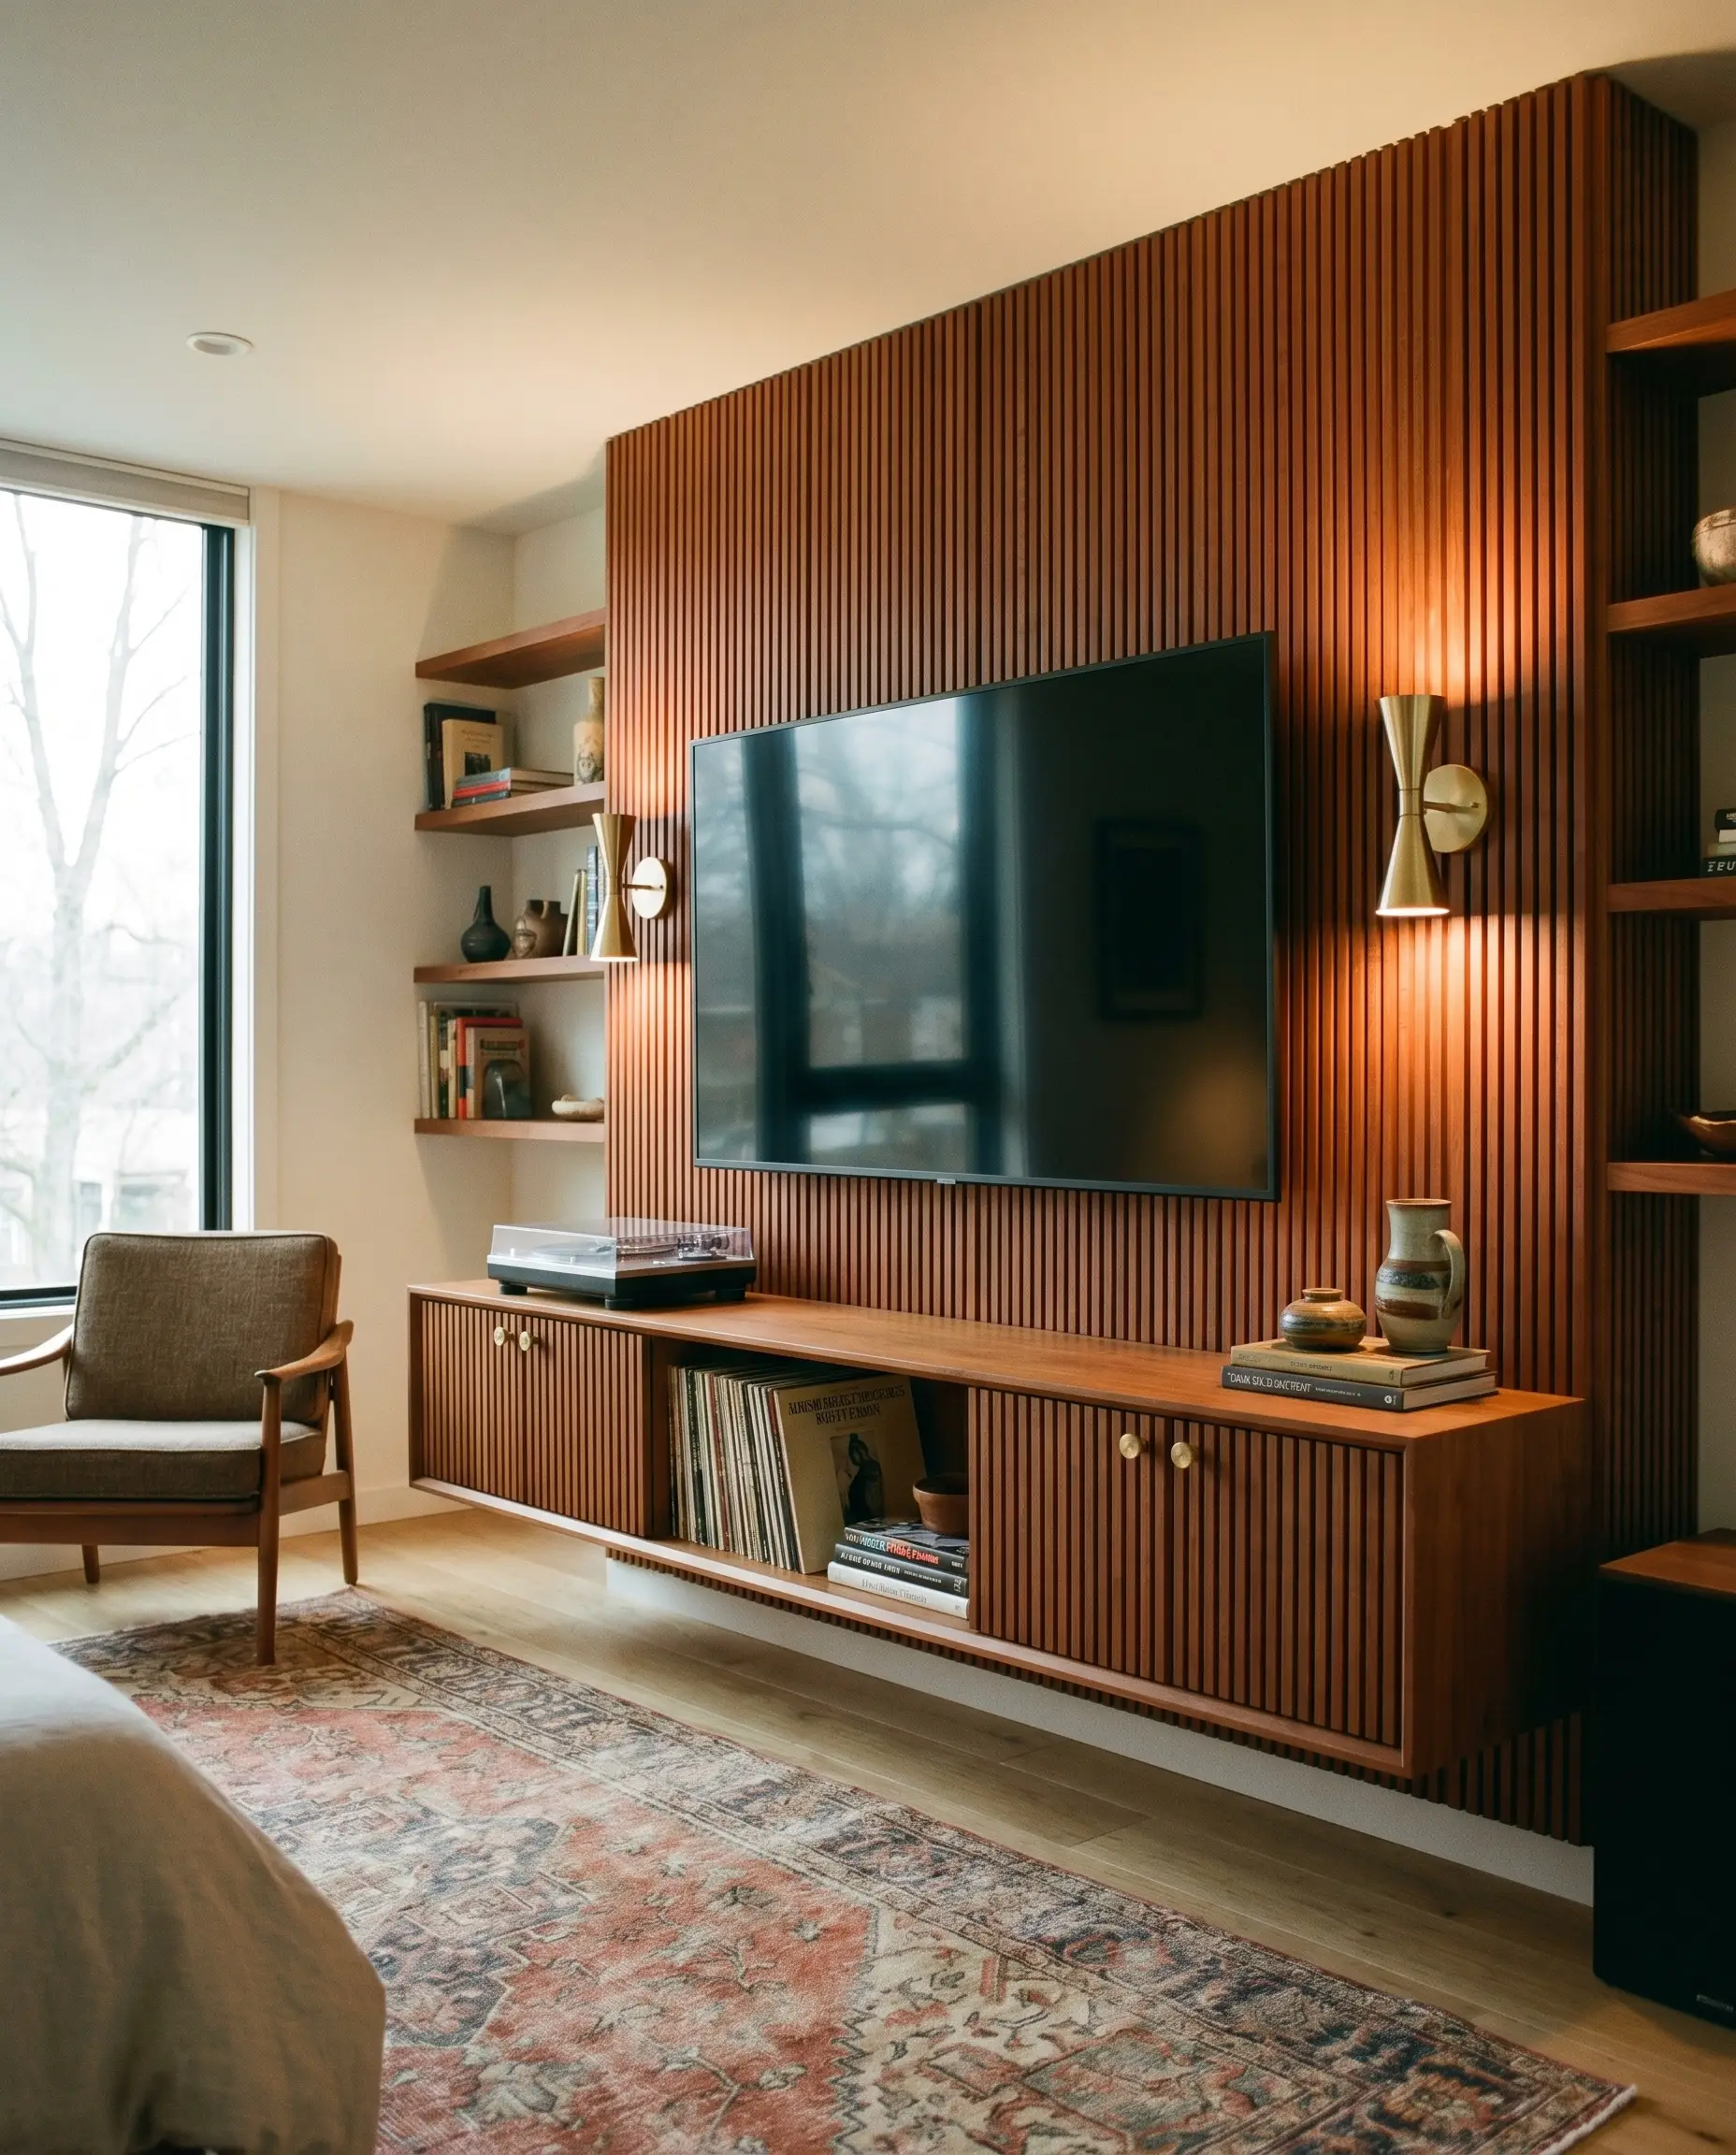
Embrace strict Mid-Century Modern principles by pairing the reddish-brown warmth of teak wood with brushed brass accents. You must consistently use brass for the switch plates, flanking sconces, and floating media console hardware to create a cohesive, historically informed material palette.
- Vibe: Mid-Century Modern
- Key Materials: Teak acoustic panels, unlacquered brass hardware
- Hardware Sourcing: Look for knurled brass knobs to mimic the linear texture of the wall panels.
Ambient Lighting and Tech Integration
Bright, blue-toned LED lights actively destroy sleep hygiene by suppressing melatonin production. Integrating technology into the bedroom is not about turning the space into a neon lounge; it is about utilizing discreet, low-level ambient illumination that supports the body’s natural circadian rhythm while highlighting the architectural millwork.
Backlight the TV with 2700K Warm LED Strips
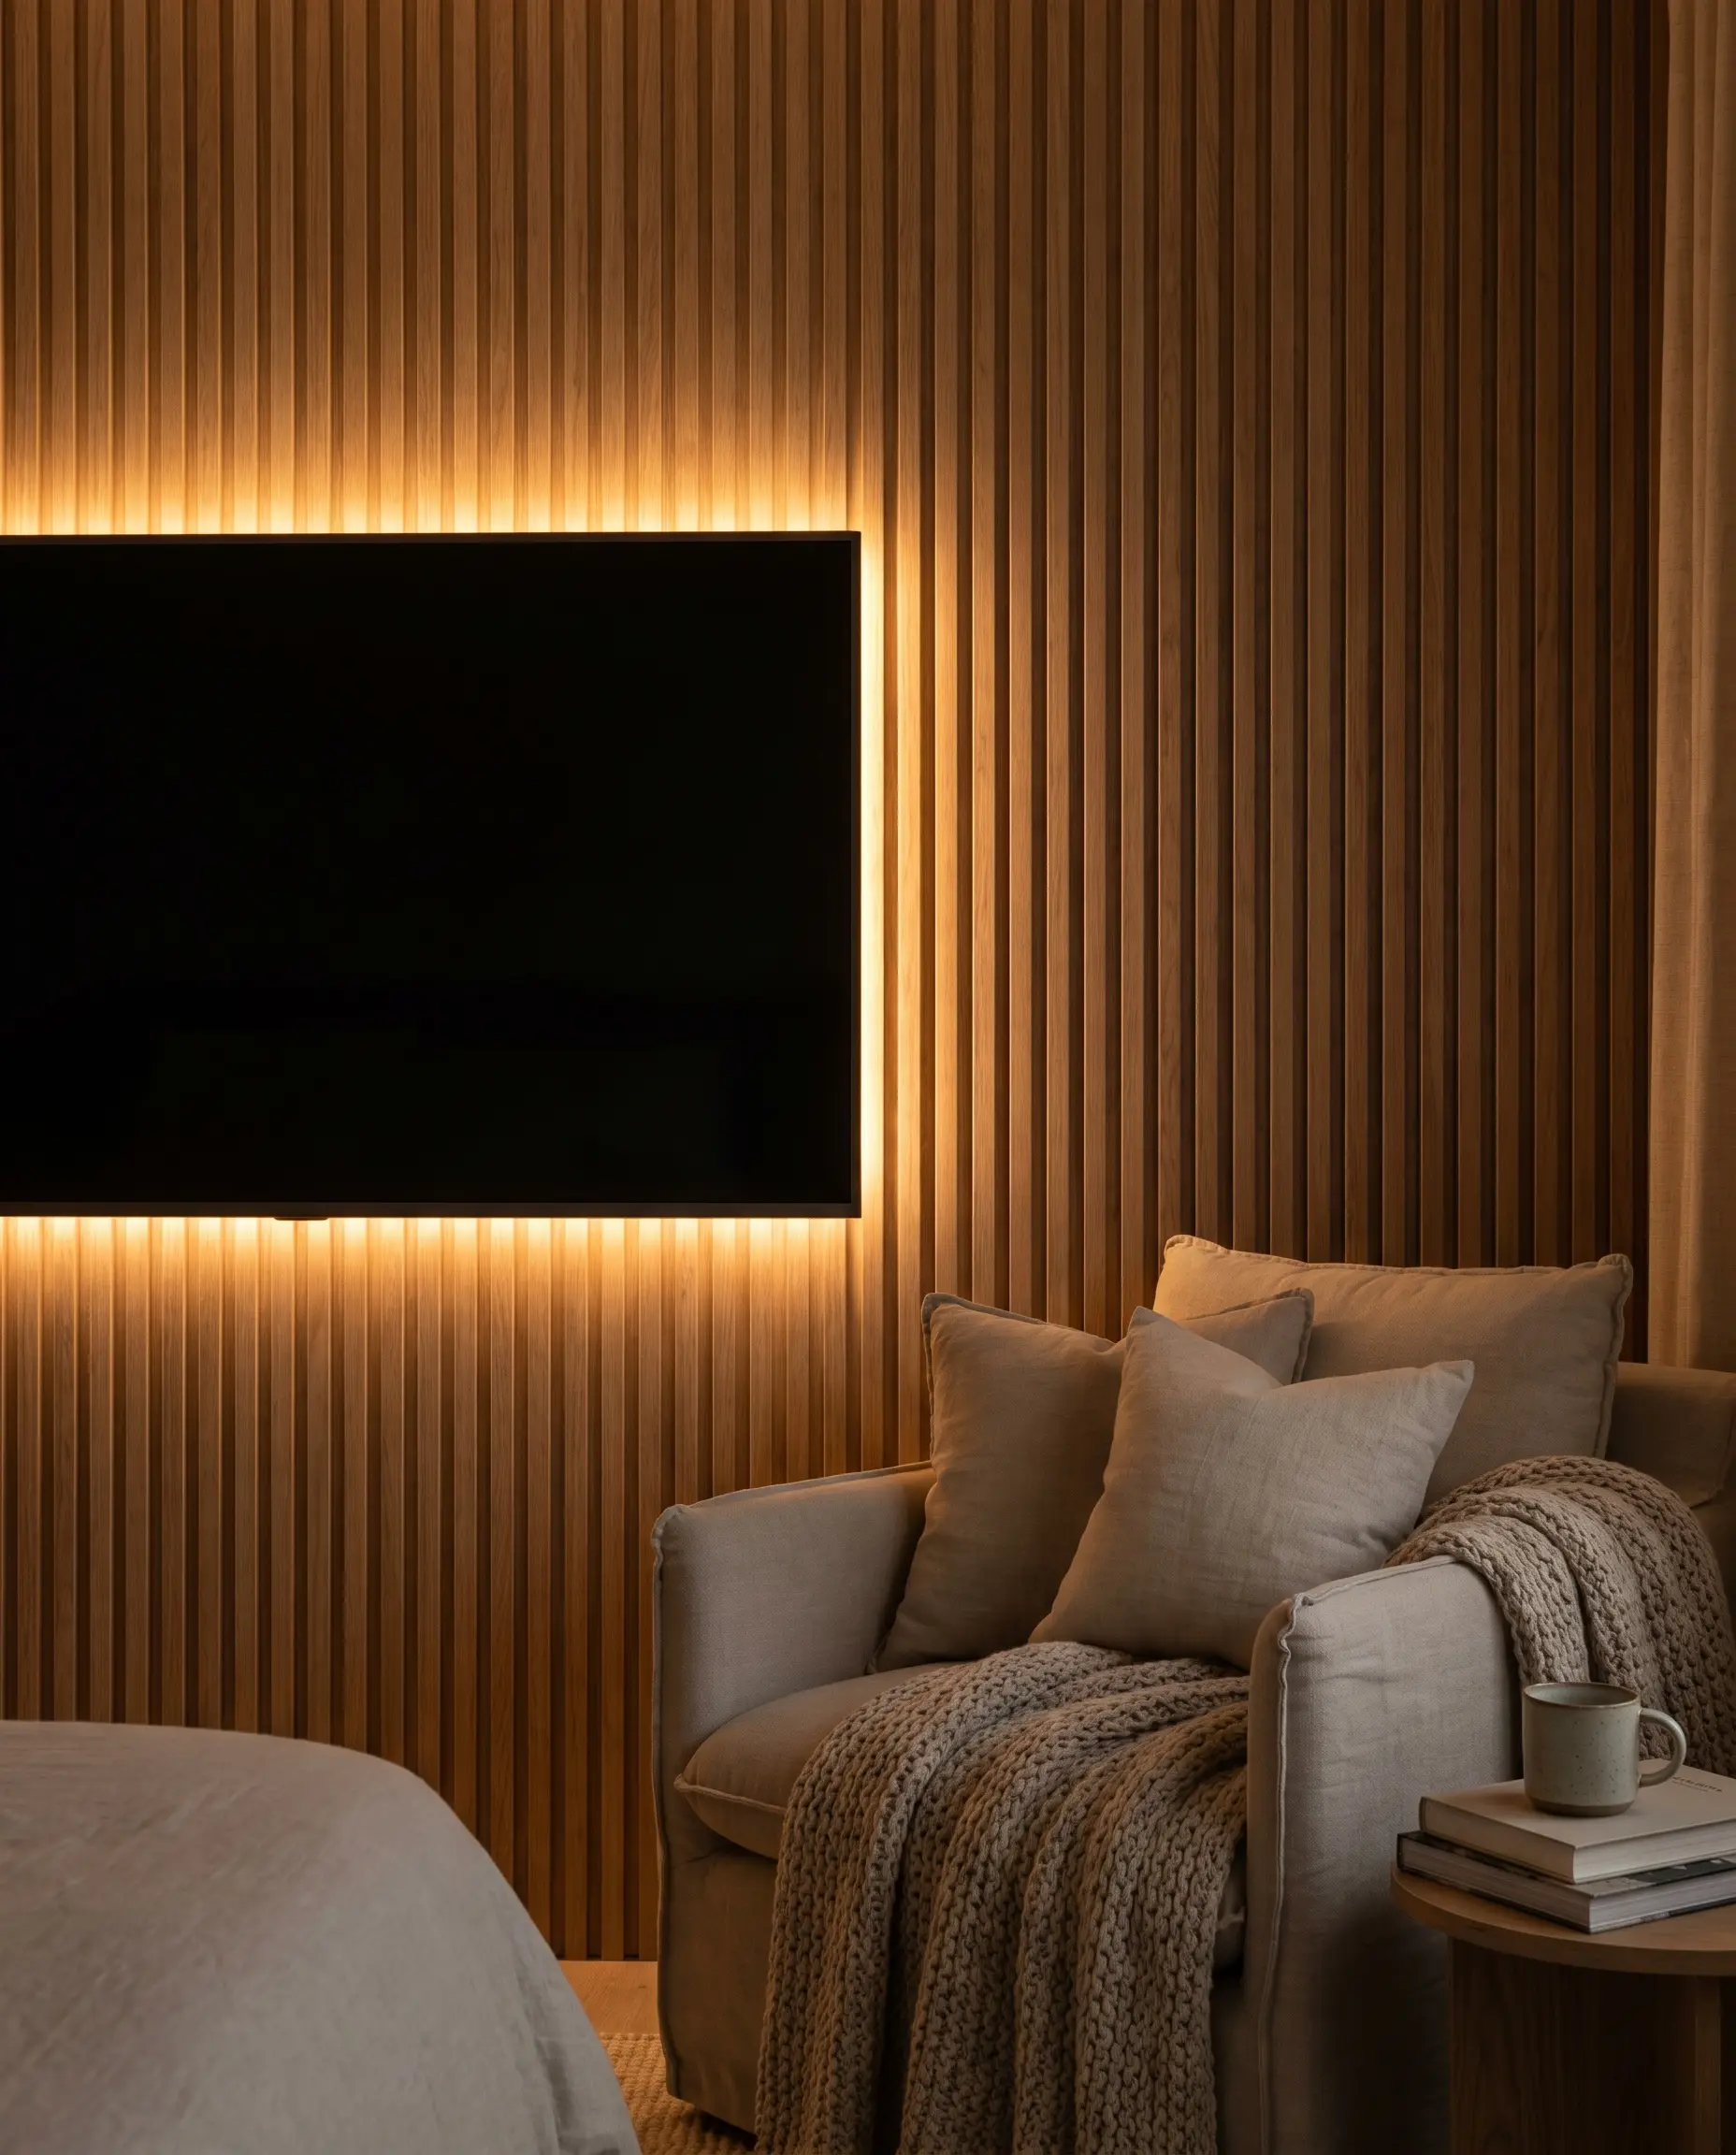
The golden rule of bedroom lighting is absolute adherence to warm color temperatures. Install ambient LED backlighting behind the screen to significantly reduce eye strain in a dark room, ensuring the soft glow never signals the brain to wake up.
- Vibe: Restful Sanctuary
- Key Tech: Dimmable LED tape light, smart plug
- Lighting Protocol: 2700K strictly: Never use cool 5000K daylight bulbs or harsh RGB color-changing strips in a sleep environment.
Embed Vertical LED Profiles Between the Wood Slats
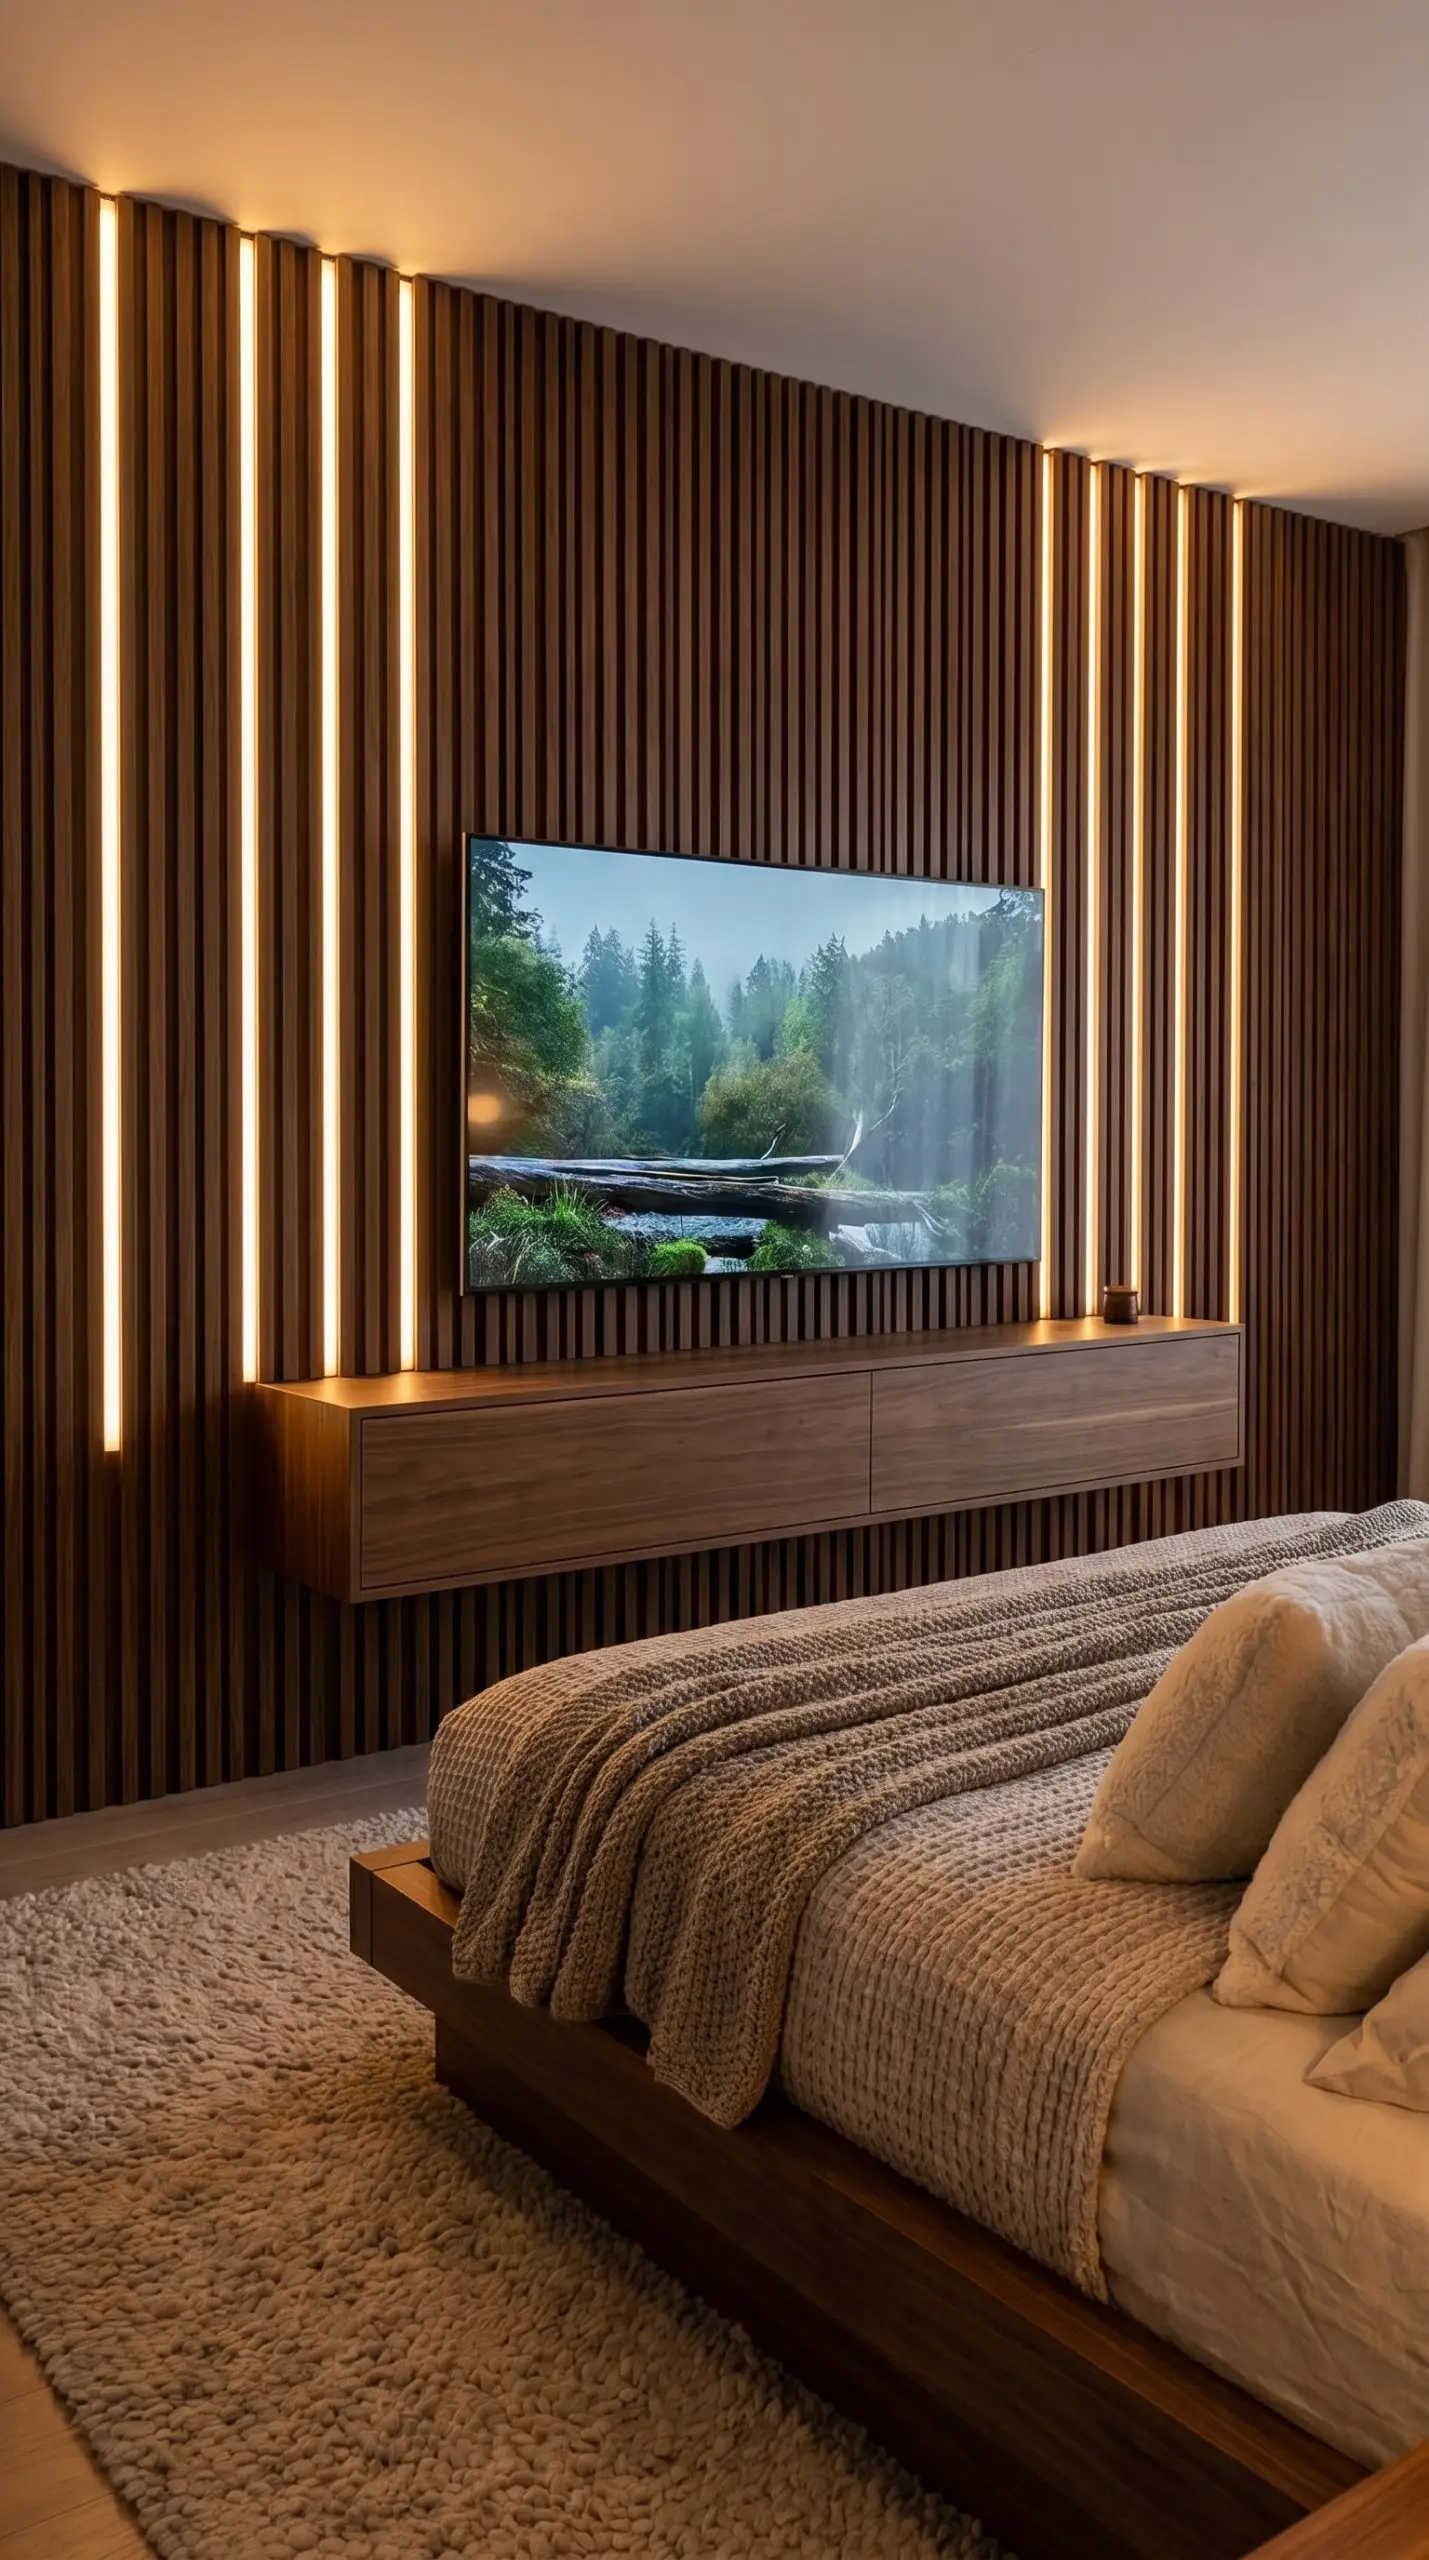
For flawless architectural integration, embed slim aluminum LED channels fitted with frosted diffusers directly into the gaps between the wood strips. This creates a futuristic, flush-mounted nightlight that washes the wall in a soft, indirect glow without exposing the raw diodes.
- Vibe: Ultra-Modern
- Key Tech: 8mm aluminum LED channels, frosted acrylic covers
- Installation Rule: Route the channel wiring behind the felt backing before securing the panels to the drywall.
Hide All Cords Behind a Brush Plate Wall Plate
Eliminating visual clutter is an unglamorous but mandatory execution step. First, cut a hole behind the TV and another down near the baseboard. Second, drop an in-wall power kit and route your HDMI cables down the cavity. Finally, cap both ends with brush plates to keep the wire concealment completely out of sight.
- Vibe: Clean & Functional
- Key Tech: In-wall rated power kit, low-voltage brush plates
- Pro-Tip: Always run two more HDMI cables than you currently need to future-proof the installation.
Mount Asymmetrical Brass Sconces on the Slat Wall

Drill directly through the wood veneer to hardwire elegant brass or matte black wall sconces flanking the television. This provides a necessary secondary layer of reading light while breaking up the repetitive vertical geometry of the paneling.
- Vibe: Boutique Hotel
- Key Materials: Hardwired articulating sconces, hole saw drill bit
- Installation Rule: Ensure the sconces are mounted at least 18 inches away from the screen edge to prevent glare.
Pair the Slats with a Motorized Blackout Shade System
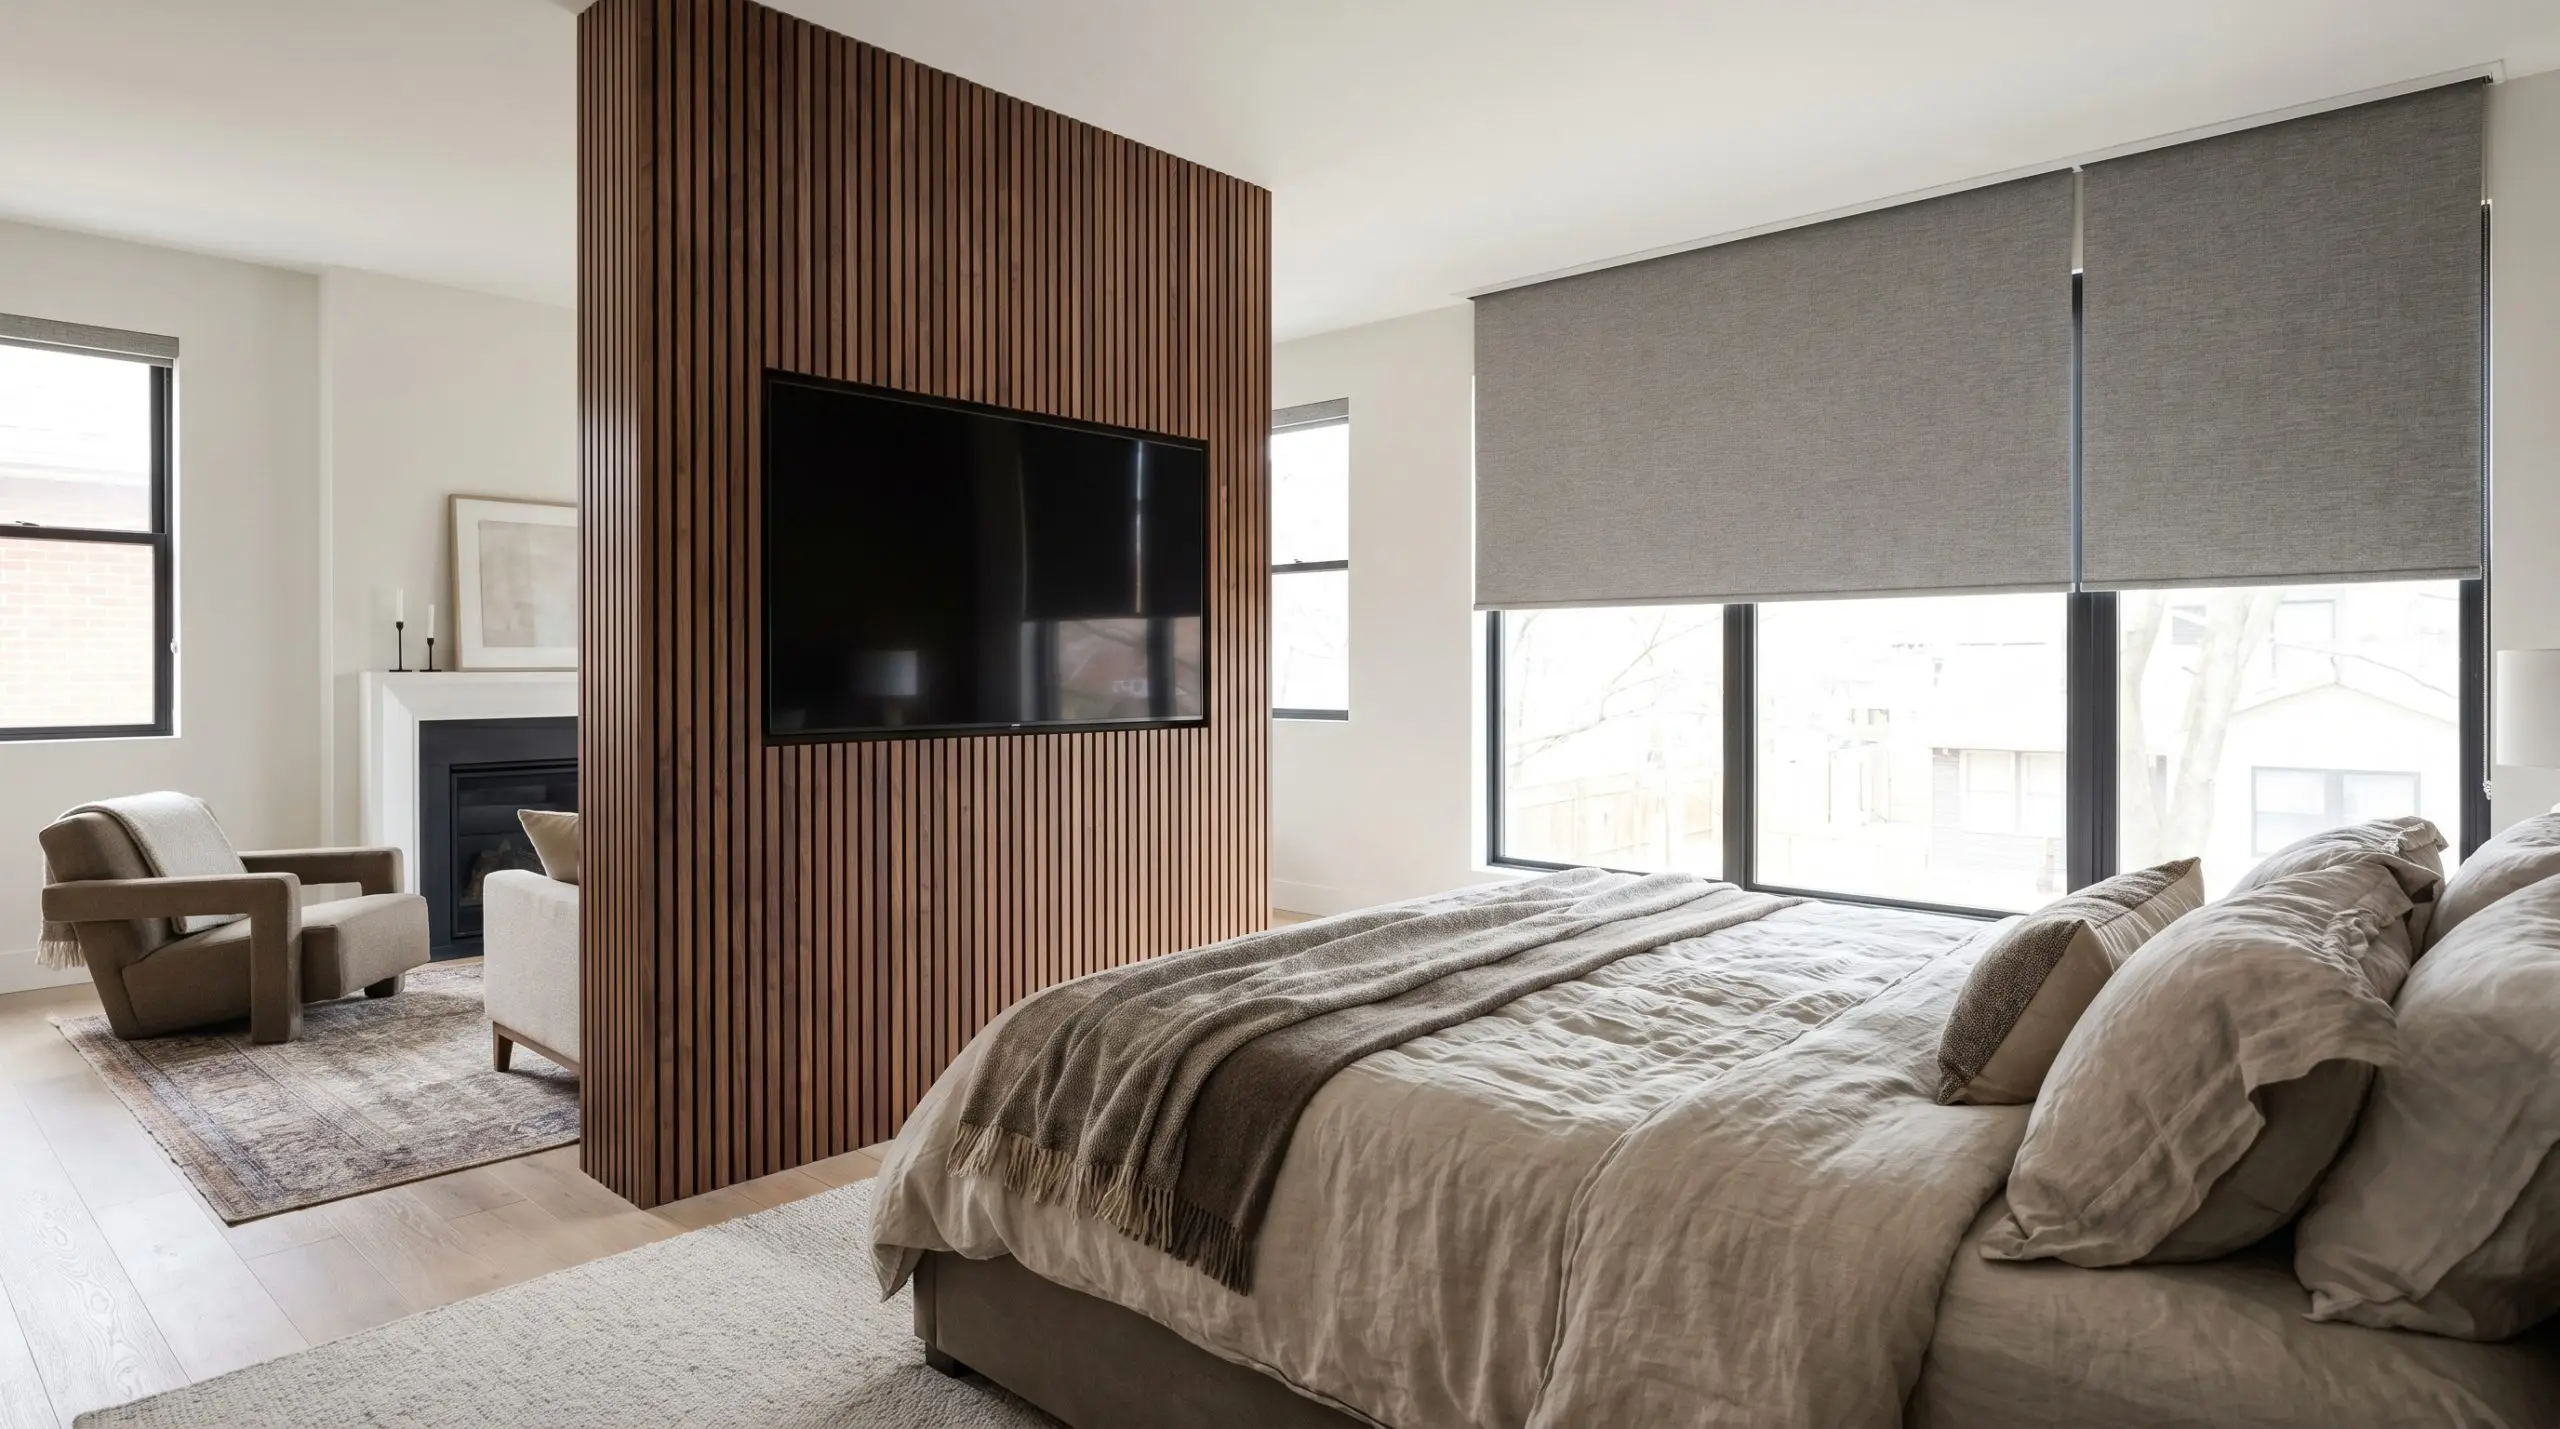
Integrate the media zone into the primary suite’s smart ecosystem for a true High-End/Bespoke lifestyle upgrade. Program an automation routine so that powering on the television triggers the motorized blackout shades to silently drop, instantly eliminating all screen glare from nearby windows.
- Vibe: High-End / Bespoke
- Key Tech: Smart motorized roller shades, smart home hub integration
- Fabrication Note: Conceal the shade housing within a custom ceiling pocket for a seamless architectural look.
Conceal the Soundbar within a Slatted Floating Console
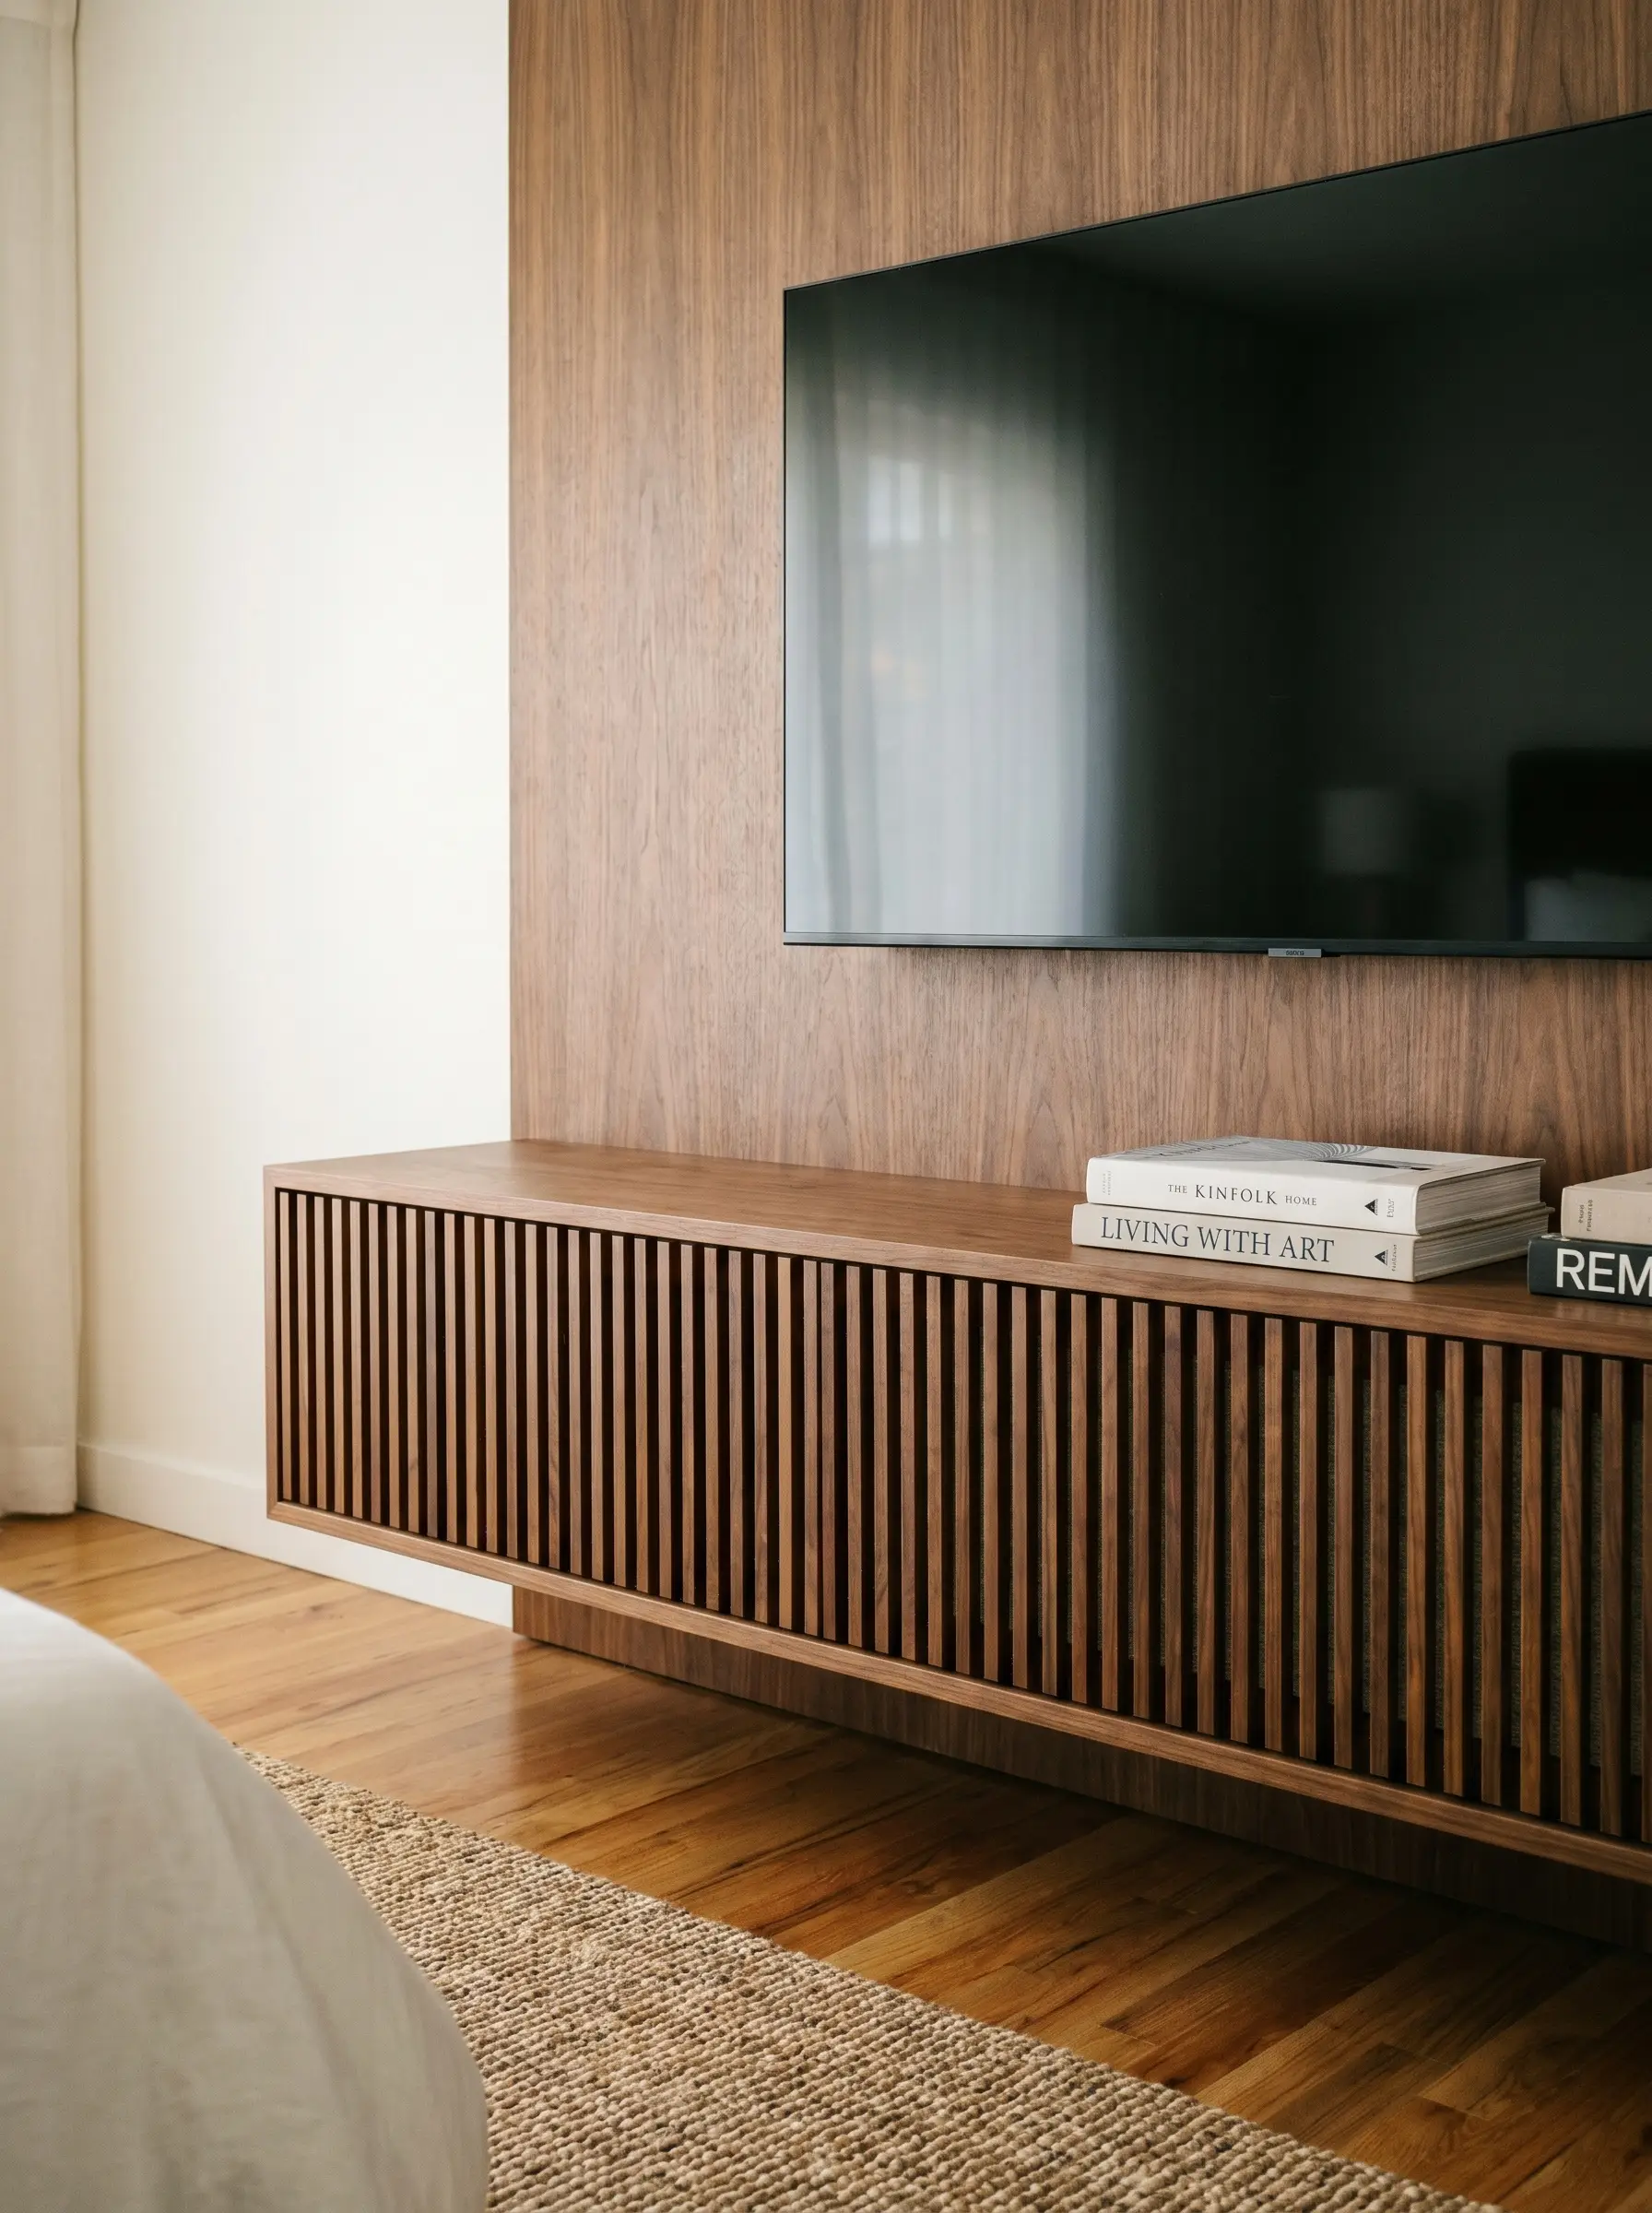
Do not ruin your carefully curated wall by mounting an ugly plastic soundbar underneath the screen. Instead, utilize a floating media console featuring a slatted front door, which provides acoustic transparency for the hidden speaker while maintaining strict minimalist containment.
- Vibe: Minimalist Containment
- Key Tech: IR repeater, slatted media console
- Acoustic Benefit: The gaps in the console door allow high-frequency audio to pass through without muffling dialogue.
Lower-Profile Furniture Pairings
Bulky living room credenzas will choke a bedroom’s walkways, making the space feel cramped and difficult to navigate in the dark. The furniture anchoring the media wall must be explicitly tailored for tight clearances, prioritizing shallow depths and floating designs to maximize the visible floor space.
Anchor the Space with a Floating Minimalist Drawer Unit
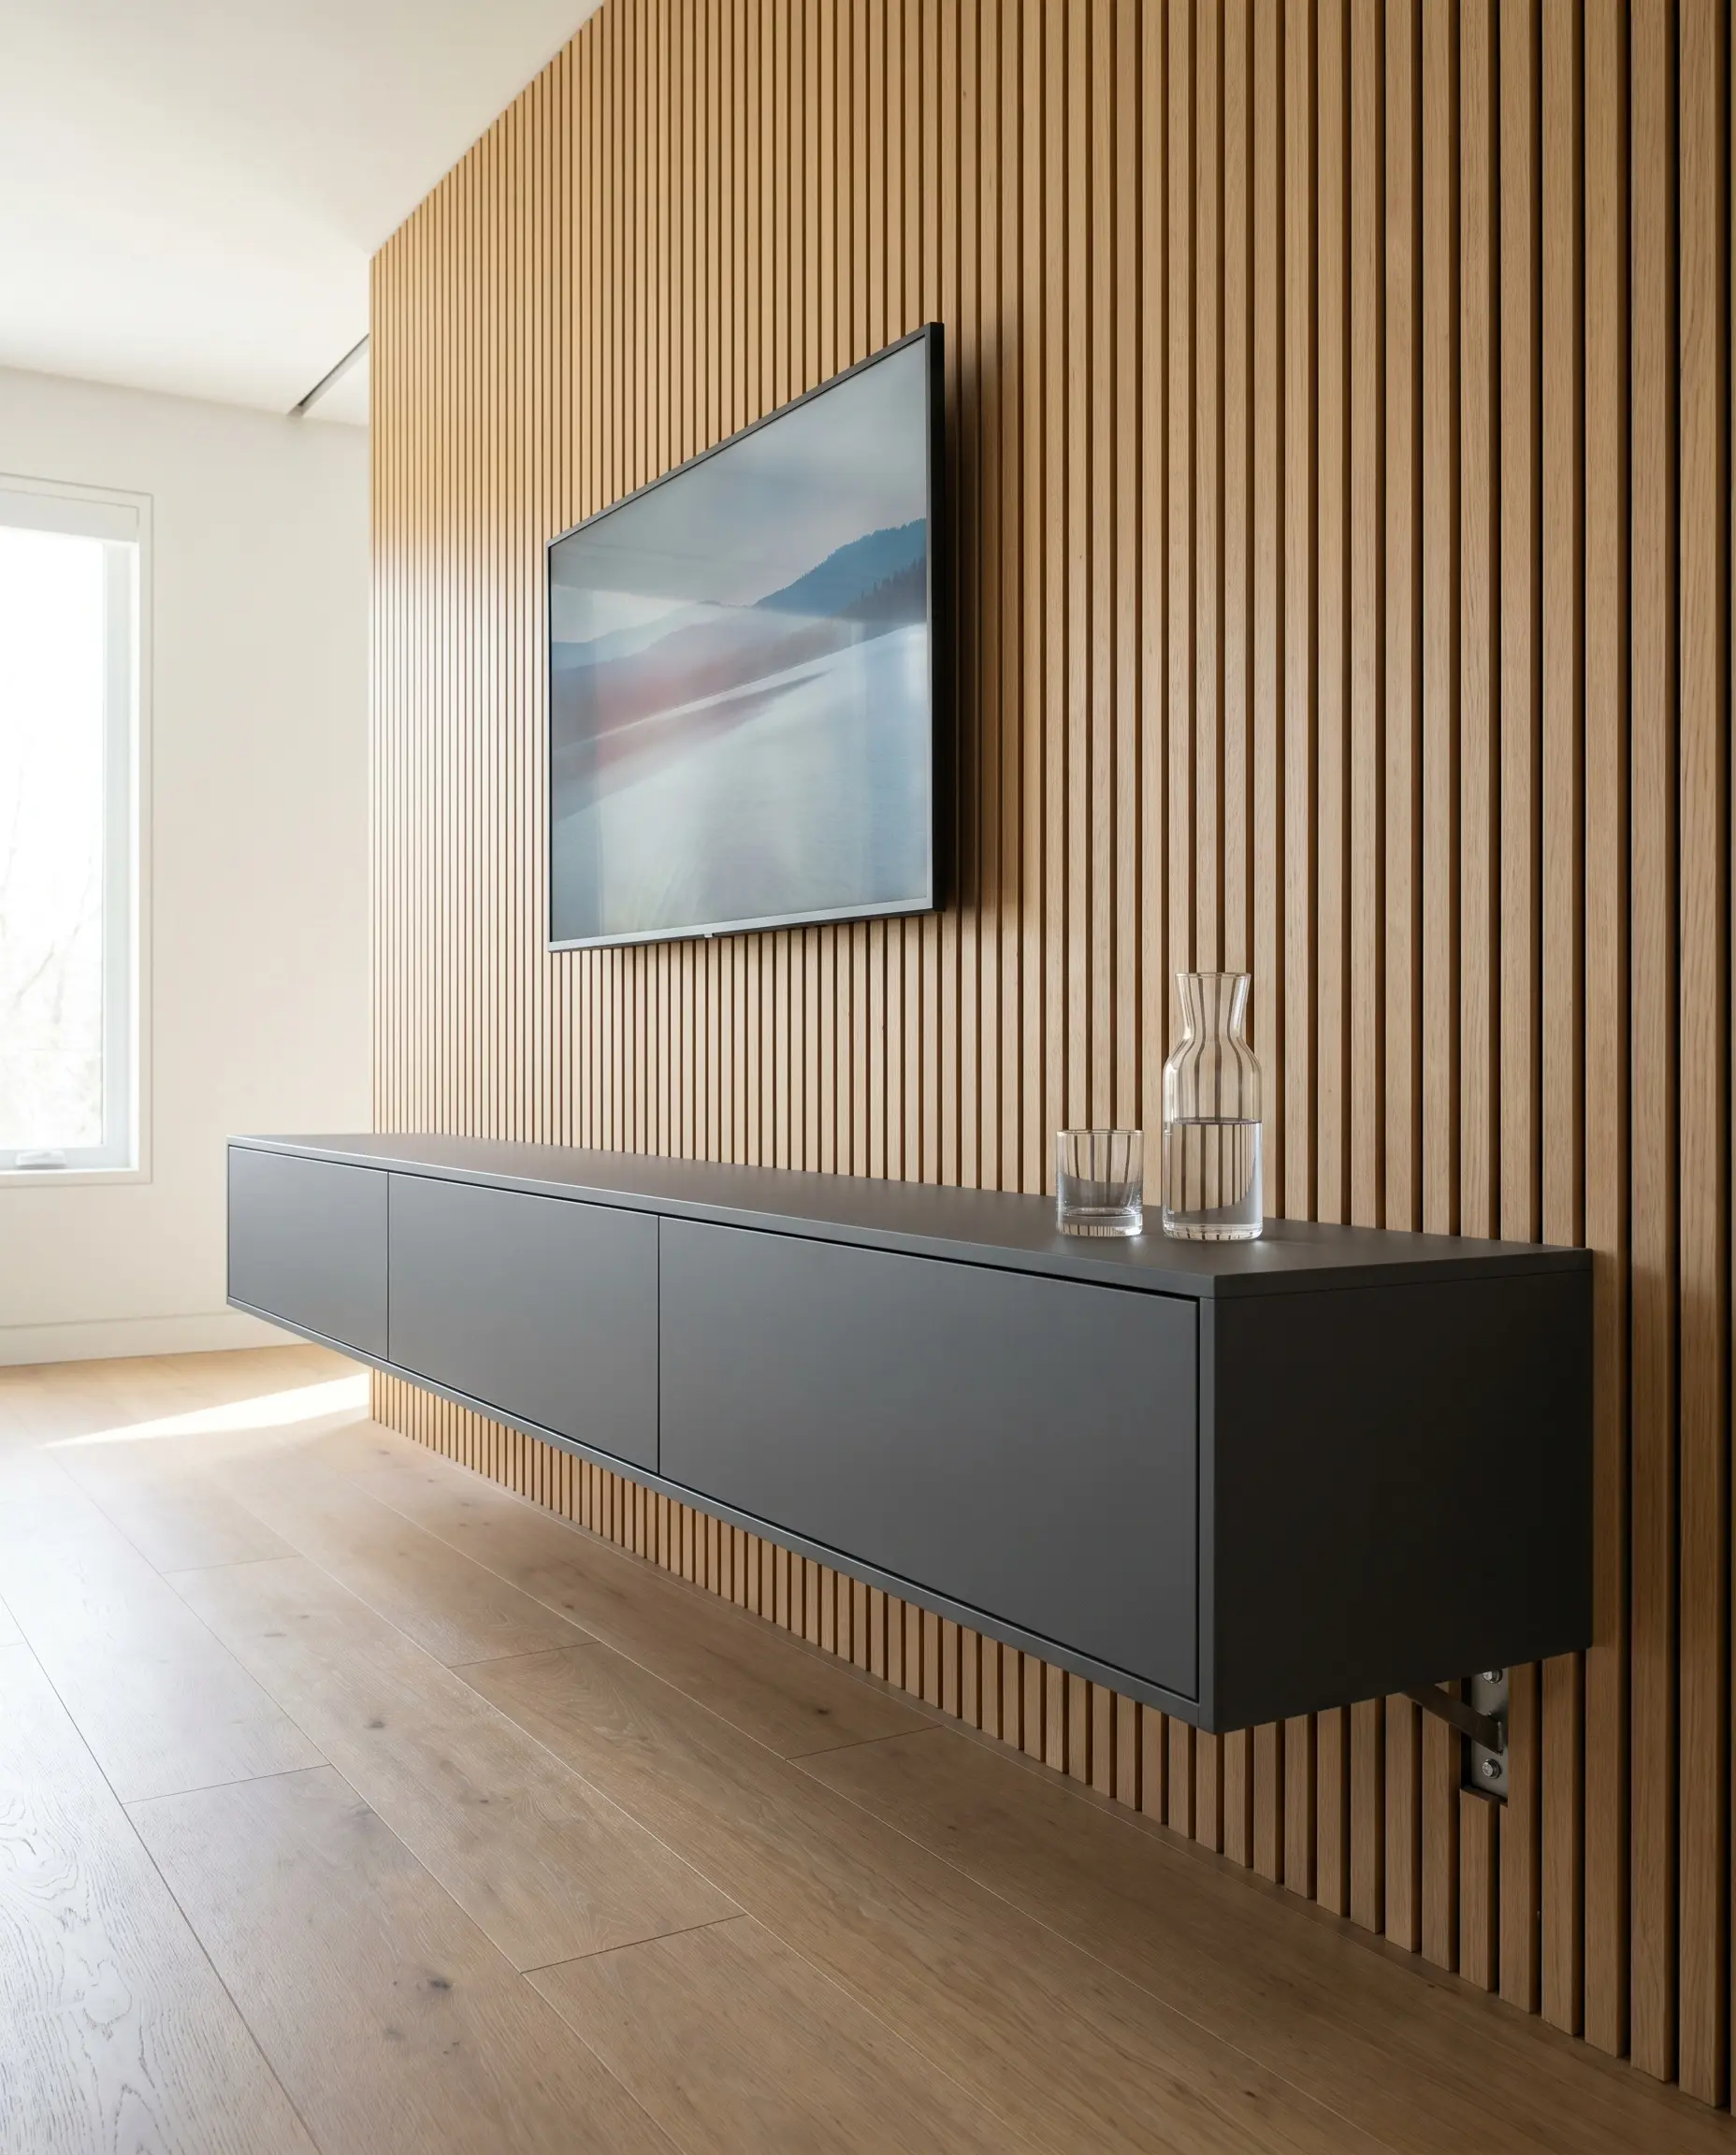
Wall-mount a shallow, low-profile dresser or drawer unit directly onto the lower half of the slat wall to ground the television visually. This provides essential, hidden storage for remotes and folded garments without eating up precious square footage at the foot of the bed.
- Vibe: Scandinavian Modern
- Key Materials: Matte painted drawer fronts, heavy-duty wall anchors
- Depth Protocol: Max 15 inches: Exceeding this depth will restrict foot traffic and ruin the low-profile aesthetic.
Use a Low-Profile Upholstered Bench Instead of a Console
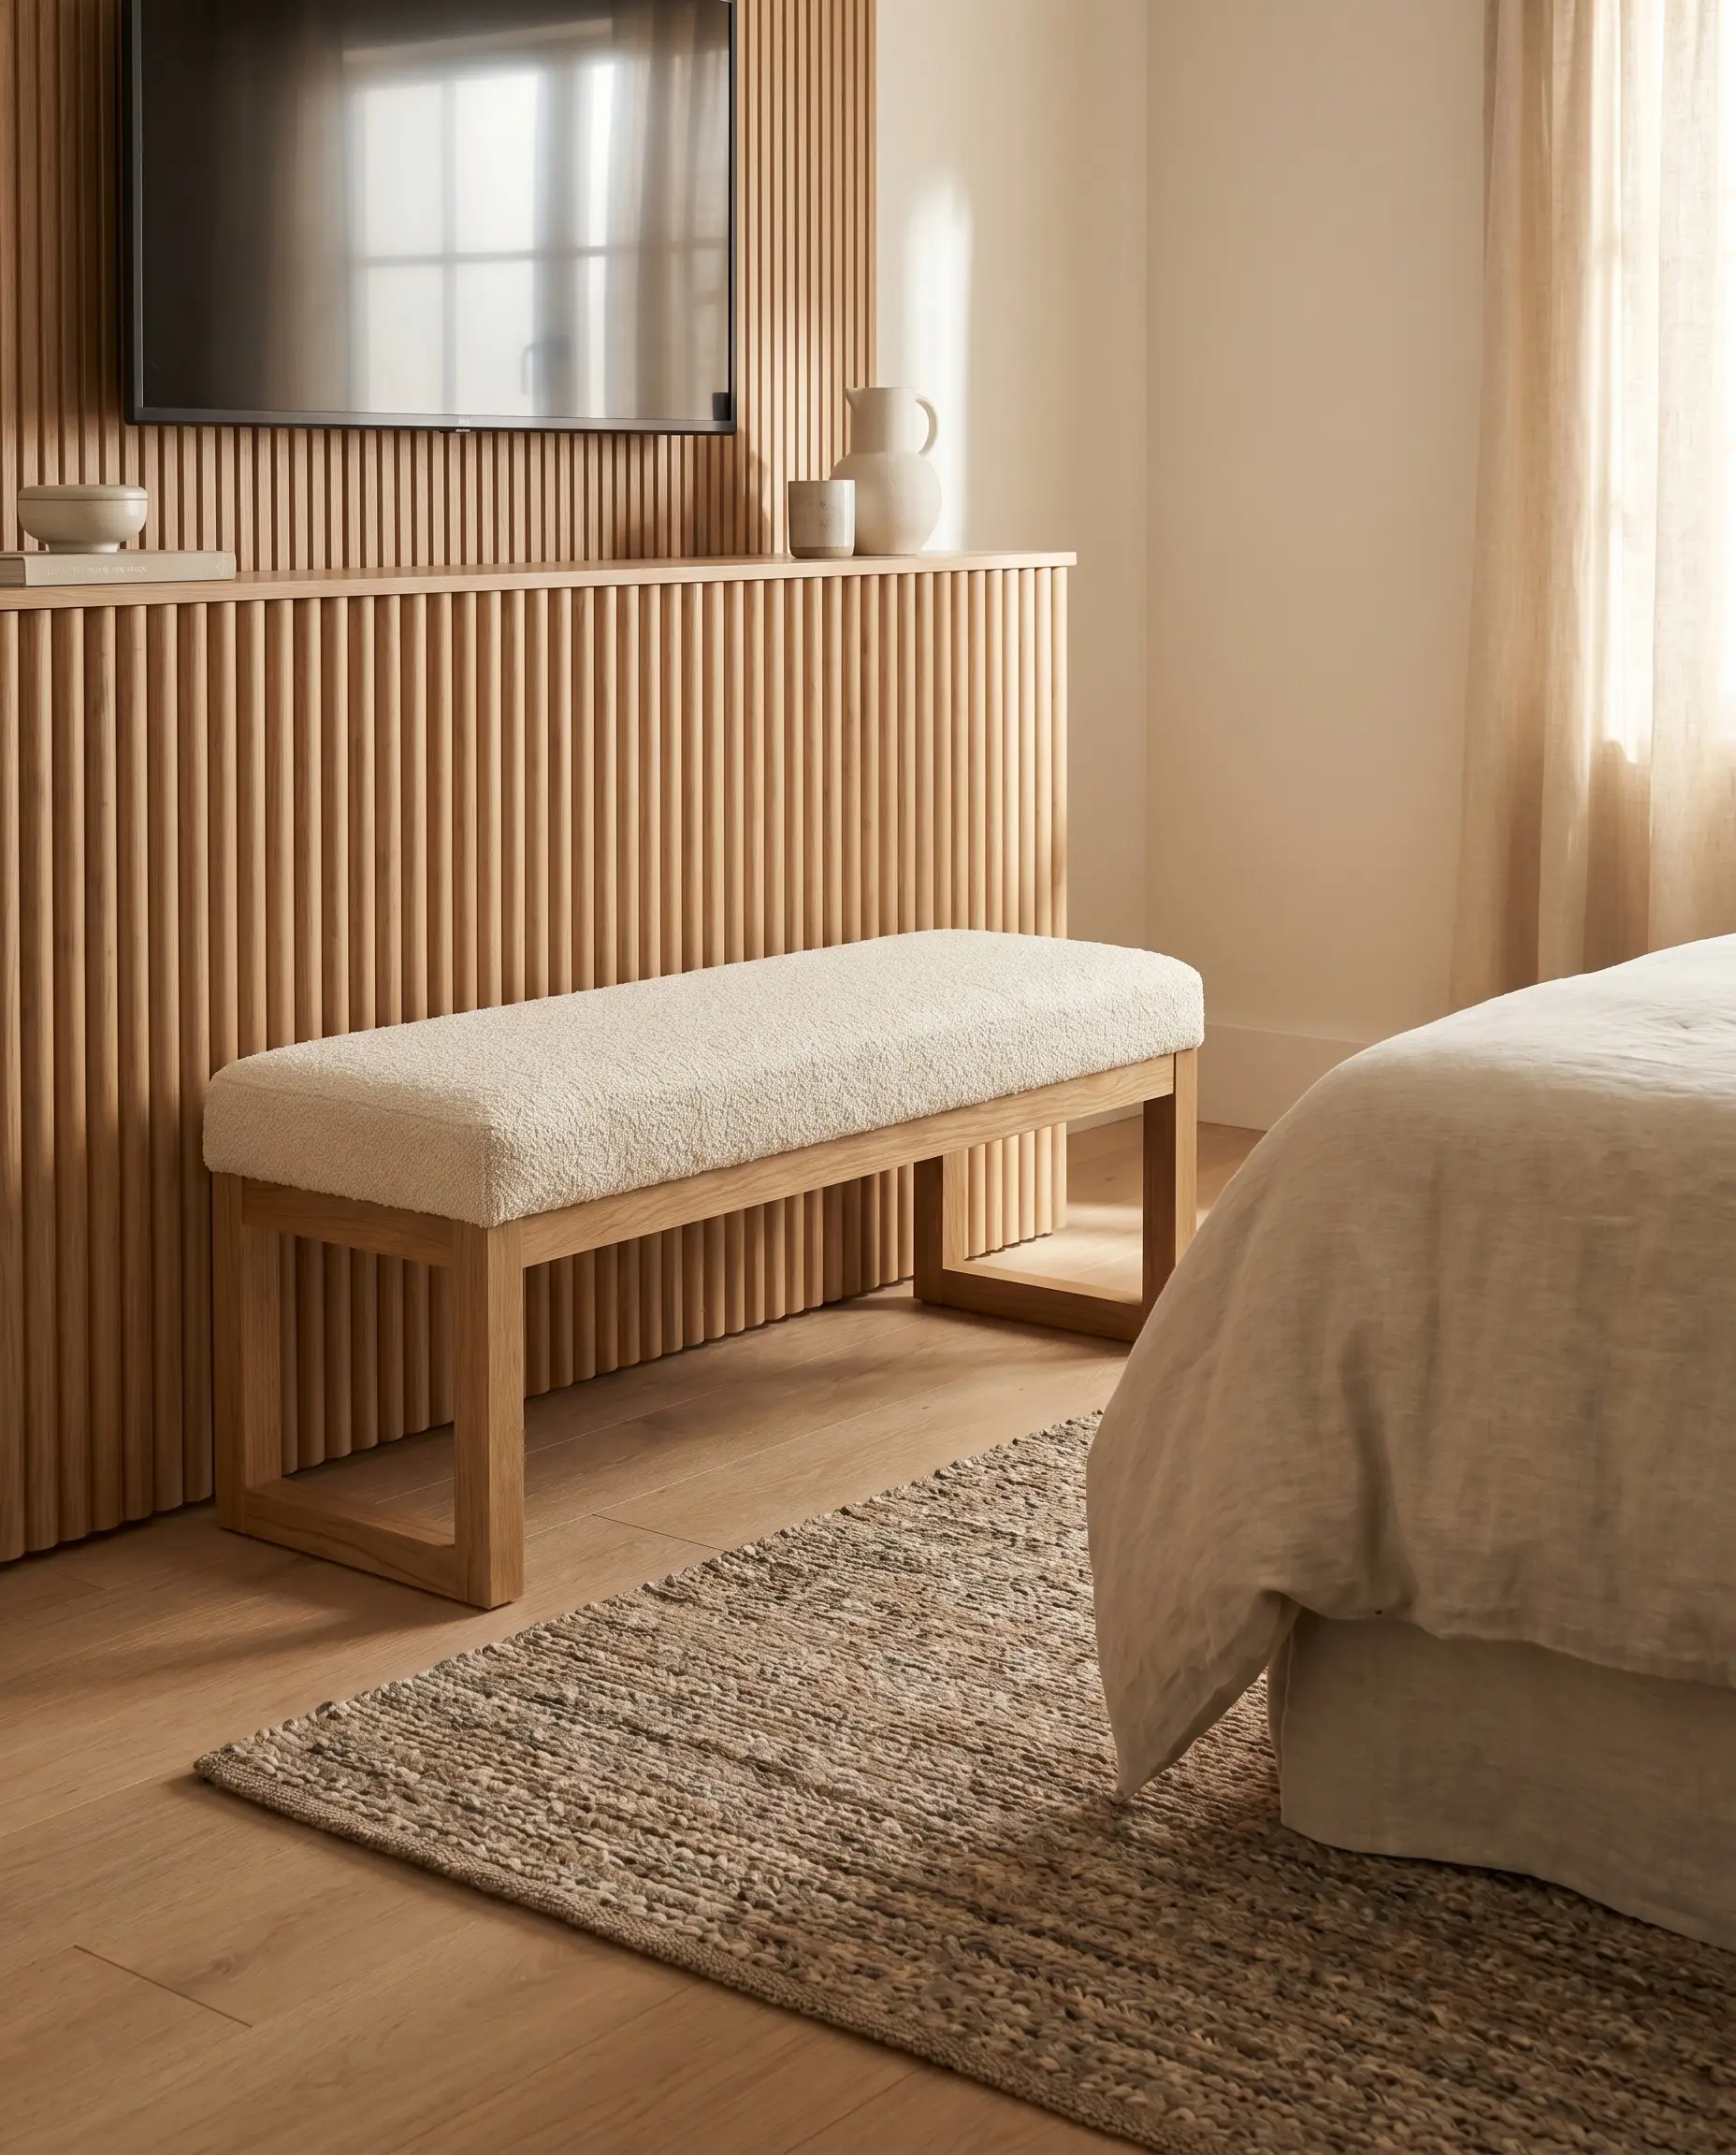
If heavy closed storage isn’t strictly necessary, place a bouclé or saddle leather upholstered bench directly at the base of the wall. This brilliant pairing contrasts the hard, rigid texture of the wood with deeply soft upholstery, while providing a functional place to sit while dressing.
- Vibe: Soft Minimalism
- Key Materials: Bouclé fabric, solid oak bench frame
- Styling Pro-Tip: Keep the bench height under 18 inches so it doesn’t crowd the bottom edge of the screen.
Transition the Slats into a Built-In Window Seat
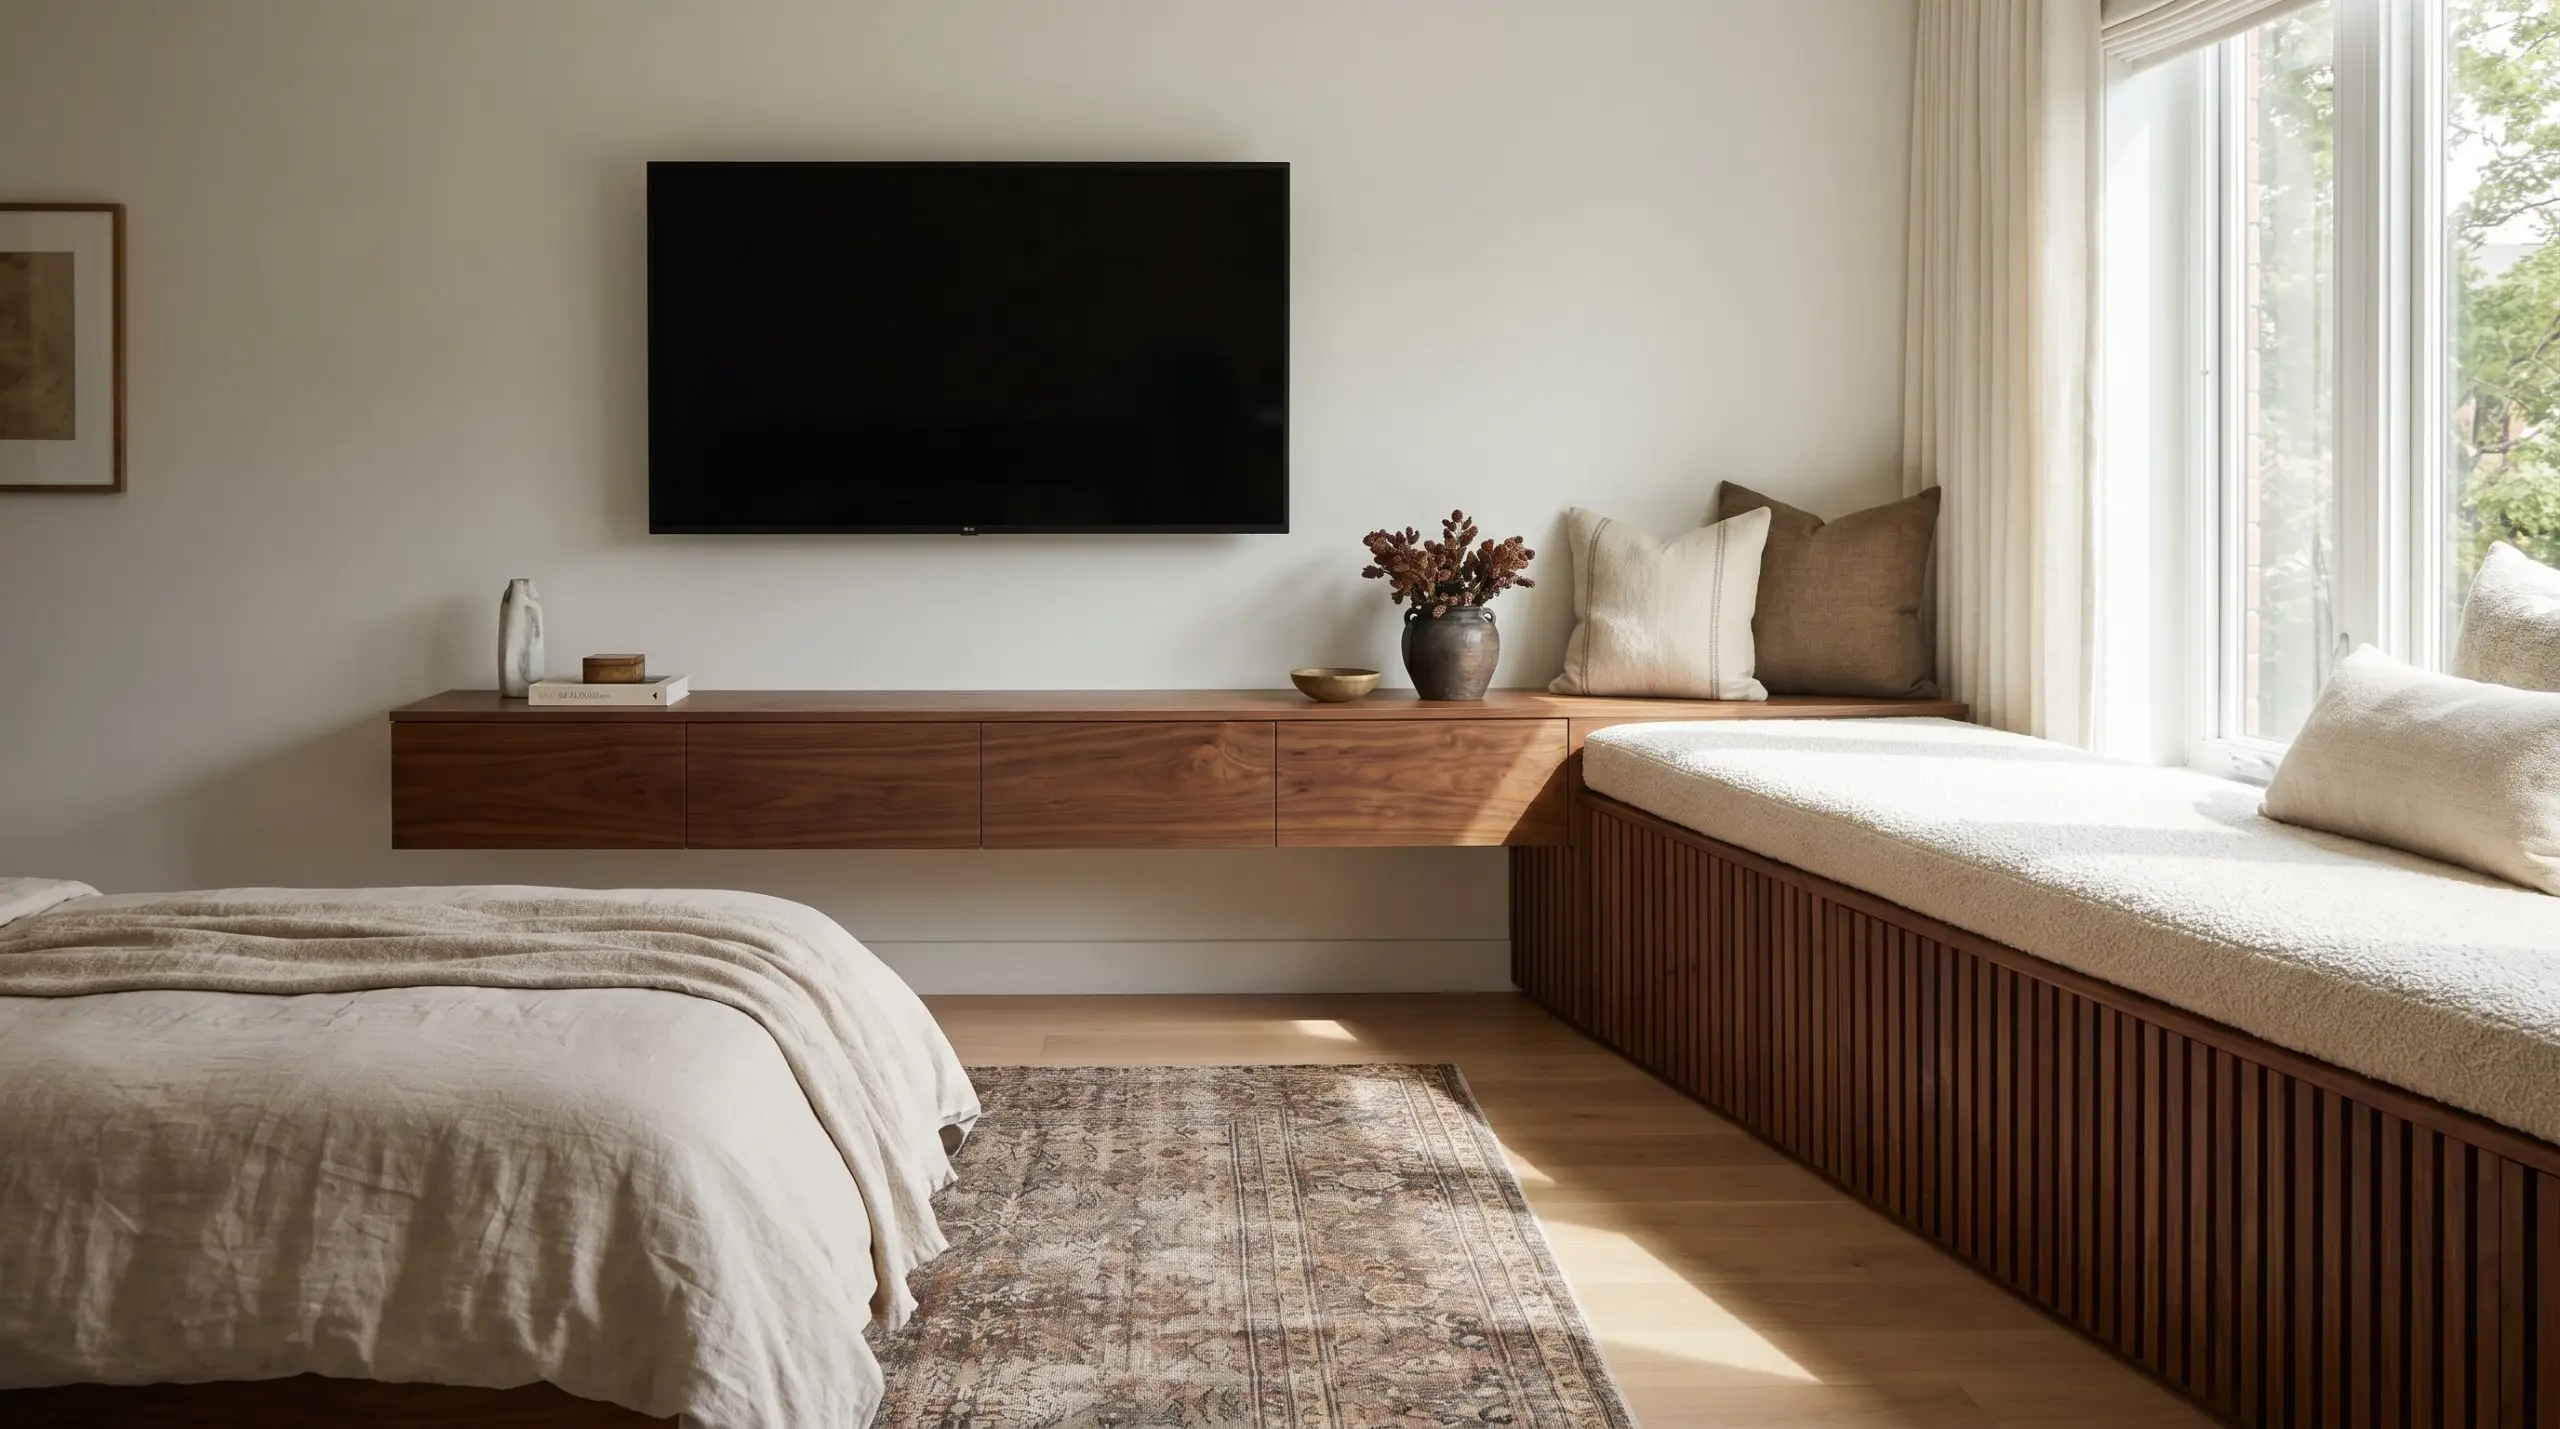
When the media zone is located adjacent to a window, seamlessly extend the floating console laterally into a built-in slatted window seat. This custom architectural flow connects the disparate elements of the room into one unified, highly functional millwork installation.
- Vibe: Custom Architectural
- Key Materials: Matching wood veneer, custom upholstered seat cushion
- Design Secret: Build hidden, flip-top storage into the bench seat for extra bedding.
Style the Console with Soft, Organic Silhouettes
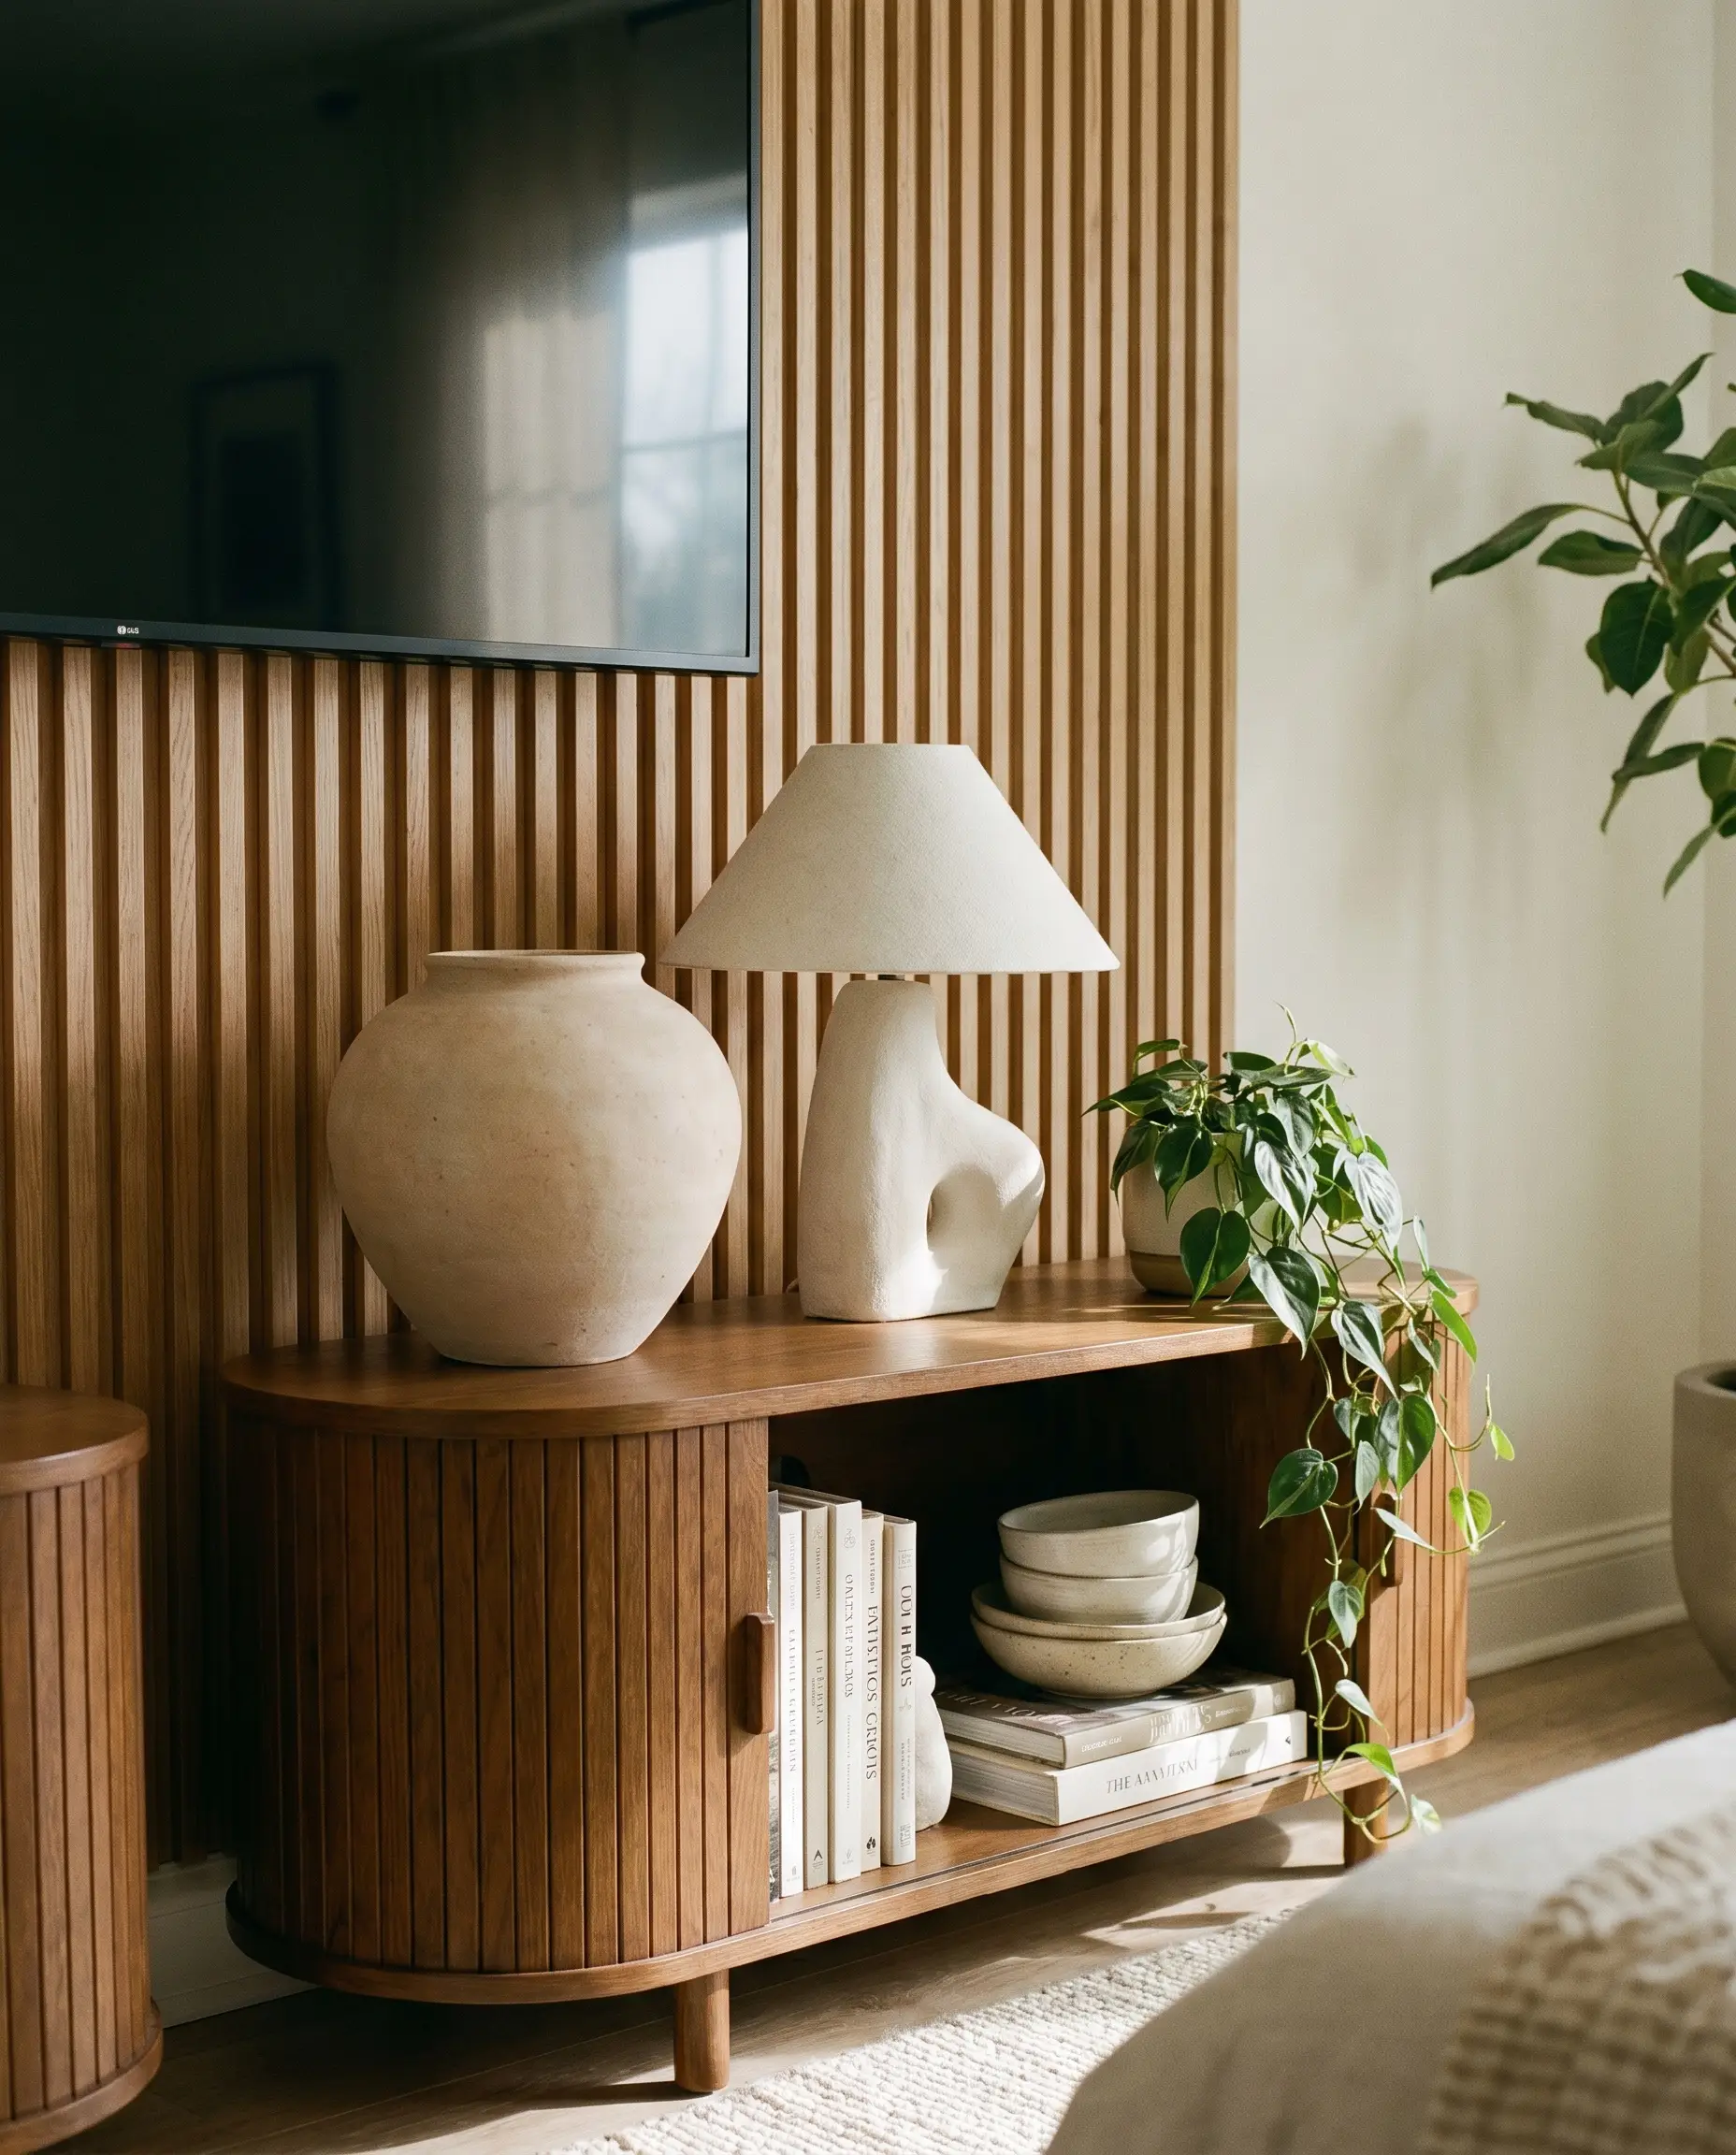
Actively break up the rigid, unrelenting straight lines of the fluted wall by styling the console below with curved, organic objects. Introducing fluid shapes—like a rounded, raw ceramic vase or a sculptural, asymmetrical table lamp—softens the strict geometry of the background.
- Vibe: Organic Modern
- Key Materials: Plaster lamps, unglazed ceramic vessels
- Styling Pro-Tip: Cluster items in asymmetrical groups of three to create natural visual balance.
Forego the Console for a Seamless Floor-to-Ceiling Look
For the absolute minimalist choice, eliminate the media console entirely and let the wood slats run uninterrupted from the ceiling straight down to the baseboards. This leaves nothing but the floating screen, creating a hyper-clean, gallery-like void that feels incredibly restful.
- Vibe: Extreme Minimalism
- Key Materials: Continuous 8-foot slat panels
- Warning: This requires flawless in-wall wire management, as there is absolutely no furniture to hide dangling cables.
The Final Polish: Curating Your Restful Retreat
A well-executed slat wall bridges the difficult gap between obtrusive technology and essential tranquility. The objective is never just to mount a screen, but to engineer a visually quiet, acoustically soft environment that actively promotes rest. By controlling the spatial layout, demanding warm lighting, and utilizing tactile materials, you strip away the chaotic energy of the outside world.
Assess your primary suite’s natural light, review your flooring undertones, and define your functional storage needs. Which specific wood tone and architectural layout will best serve your personal sanctuary?
The Hackrea Style Desk treats interior decoration as an exact visual science. Rather than focusing on demolition or floor plans, this desk masters the art of color theory, undertone matching, material pairings, and spatial proportion. From balancing the visual weight of mixed metals to finding the perfect bridging tone between disparate wood species, this desk provides the rigorous aesthetic rules needed to achieve high-end, editorial-quality harmony in any space.