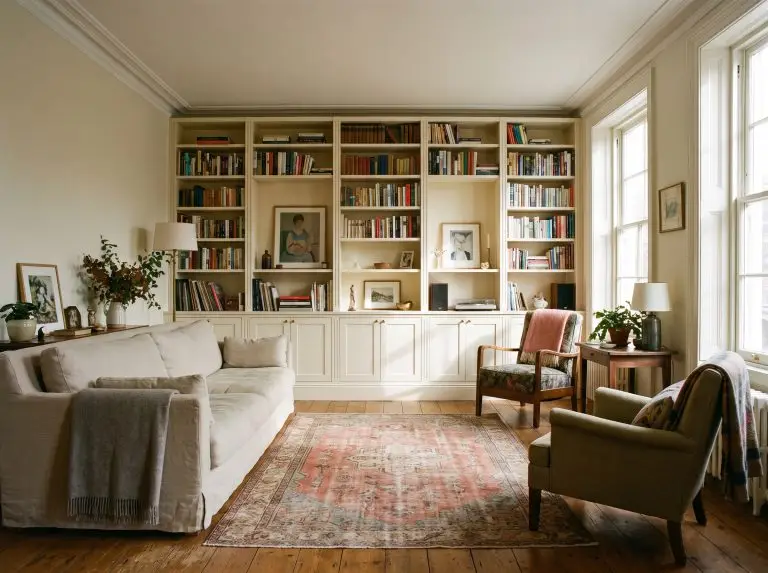
A massive blank wall can feel intimidating, but installing floor to ceiling built-in bookshelves solves both aesthetic and functional problems simultaneously. Successful built-ins are never just stacked boxes; they require precise face-framing, intelligent material selection, and strategic negative space to anchor the room’s footprint. This guide covers exactly how to integrate these structures into your home’s unique layout, the exact finishes to request from your carpenter, and the styling ratios the pros use to avoid a cluttered look.
Architectural Integration & Spatial Layouts
The difference between cheap, flimsy shelving and bespoke millwork is entirely dictated by how the unit handles the ceiling line, floorboards, and room transitions. To make a unit read as true interior architecture, it must physically interact with the room’s existing structural footprint.
Frame an Arched Doorway for a Mediterranean Transition
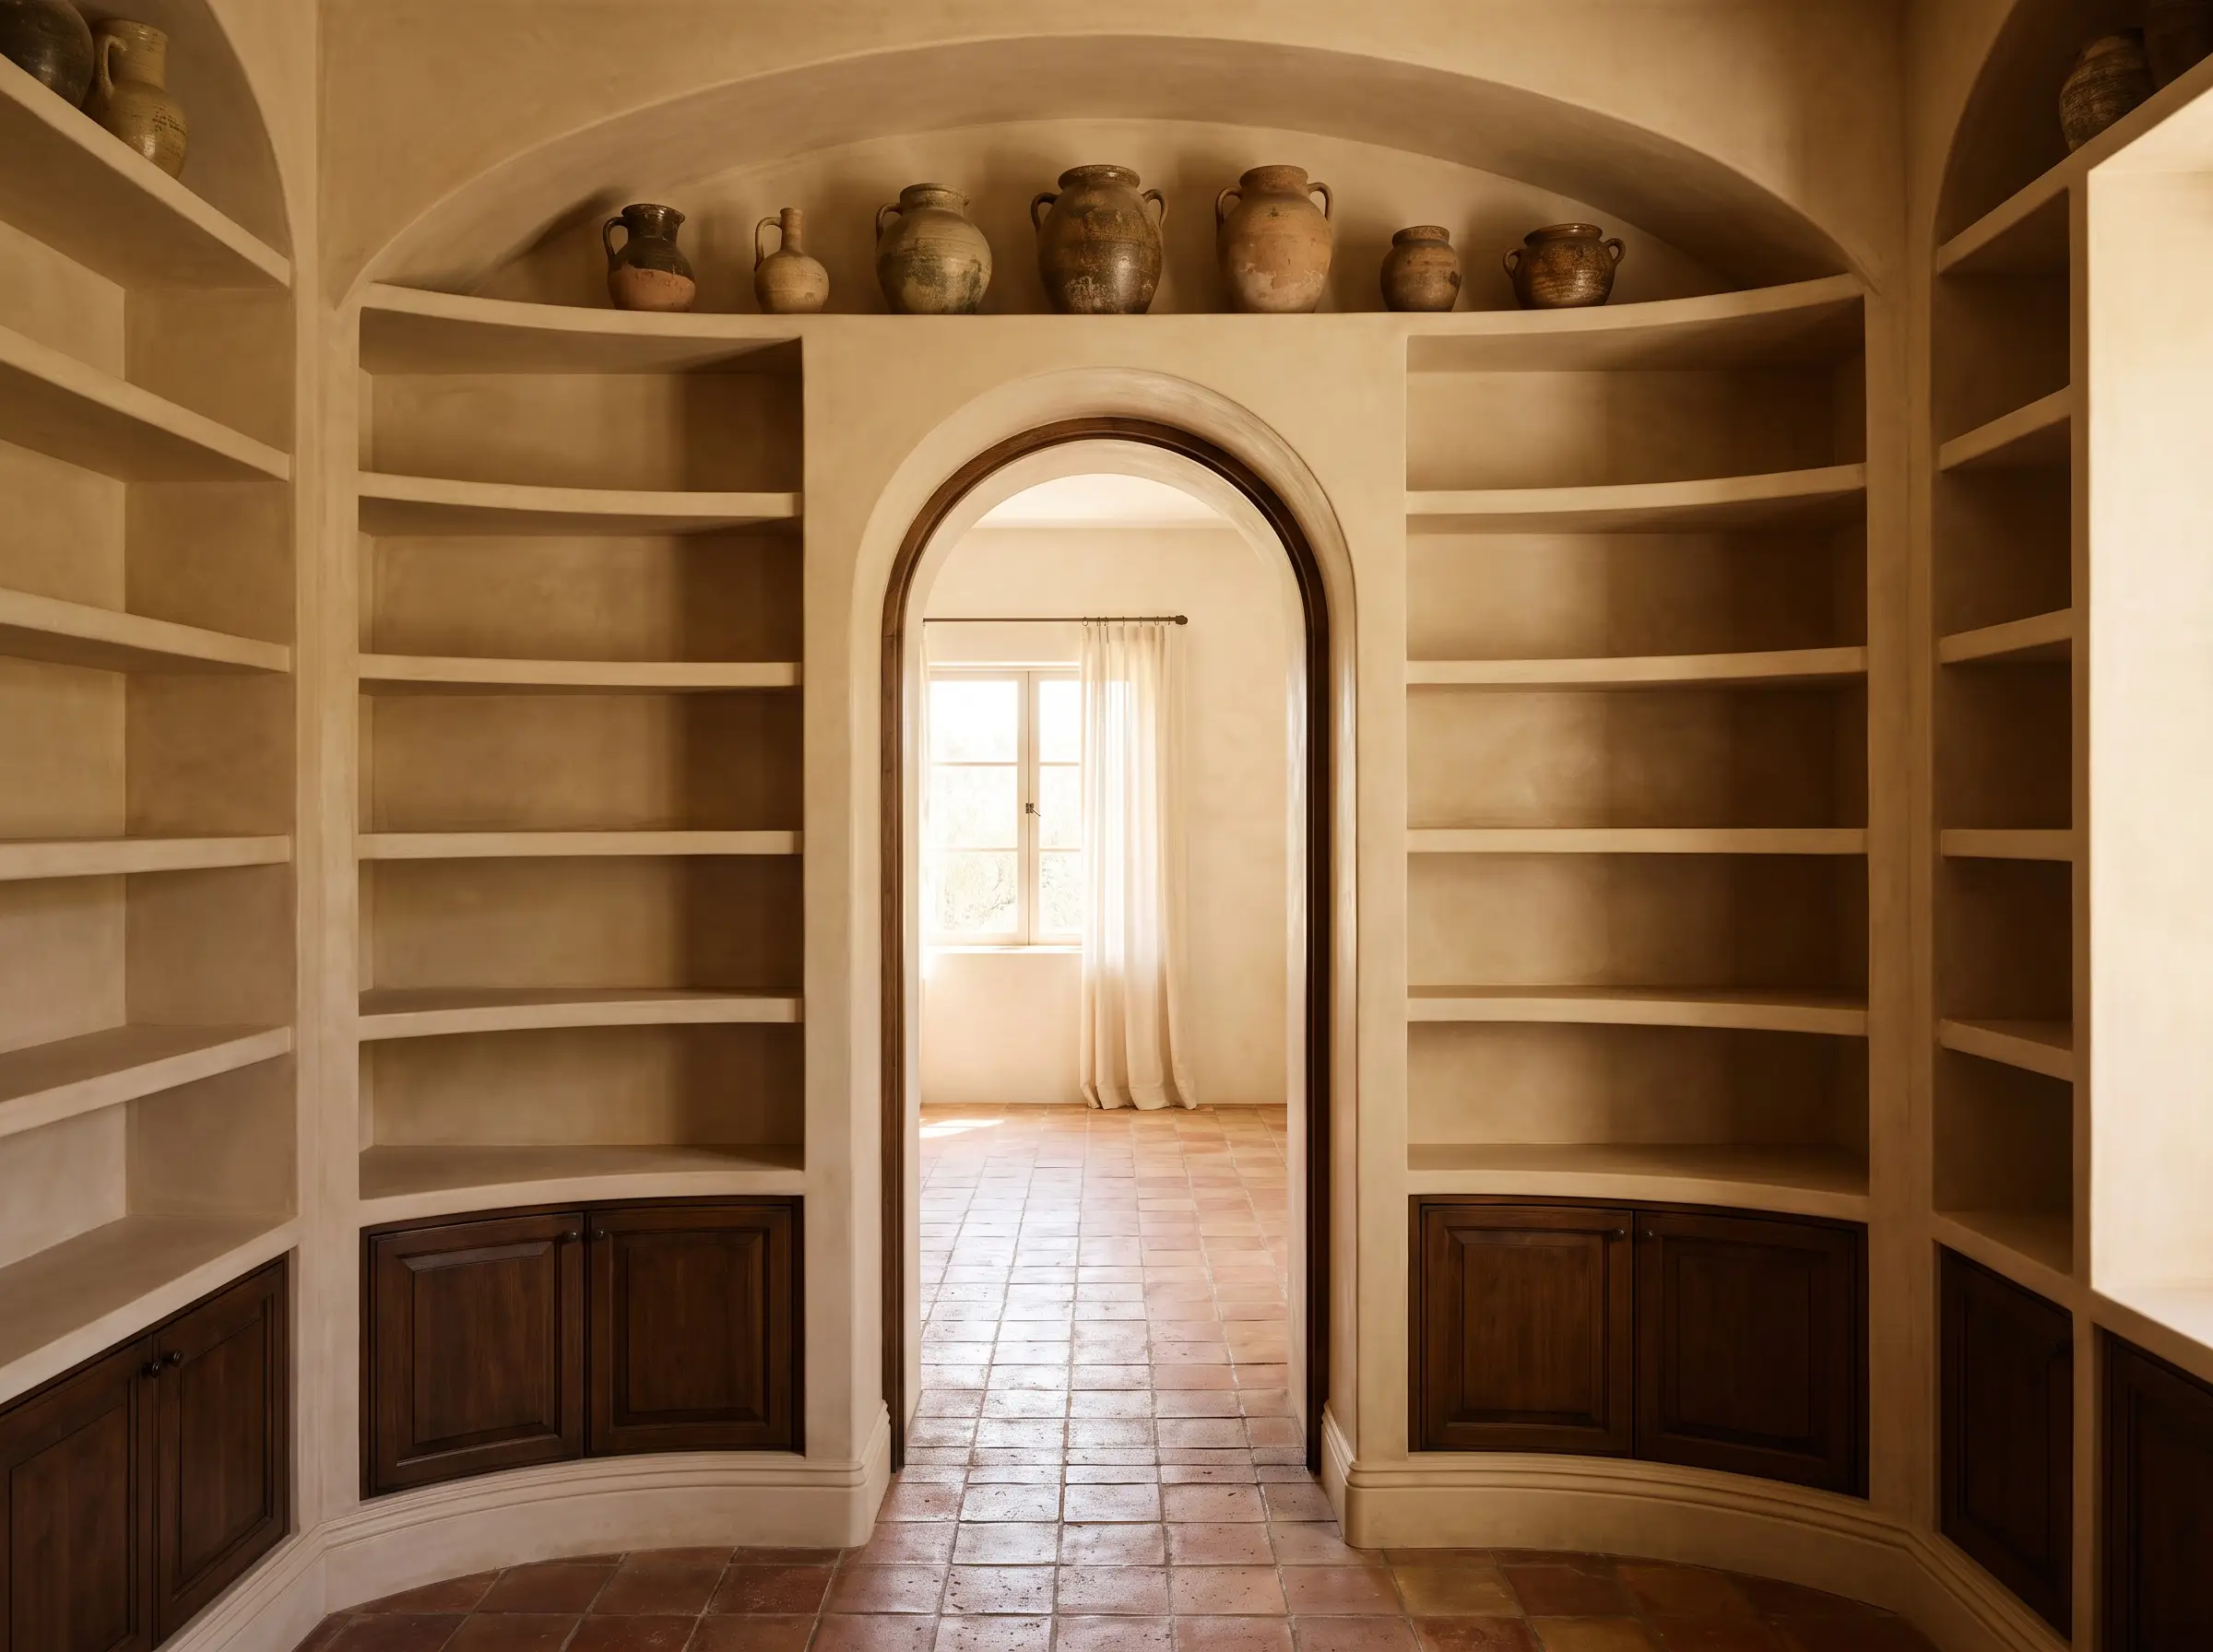
Instead of a flat wall, wrap the built-ins entirely around an existing doorway, utilizing an arched header to create a tunnel-like, library transition between rooms. This execution pulls the eye upward and adds immense architectural weight, perfectly suited for Mediterranean or Traditional aesthetics.
- Vibe: Old-world structural permanence.
- Key Materials: Plaster-coated MDF or flexible plywood for the arch radius.
- Styling Pro-Tip: Keep the top arched shelf heavily edited with low-profile ceramics to emphasize the curved plaster.
When framing a doorway, ensure your baseboard wraps seamlessly around the bottom of the new base cabinets to ground the entire structure as original architecture.
Designer Secret
Wrap the Perimeter of a Window to Construct a Seat
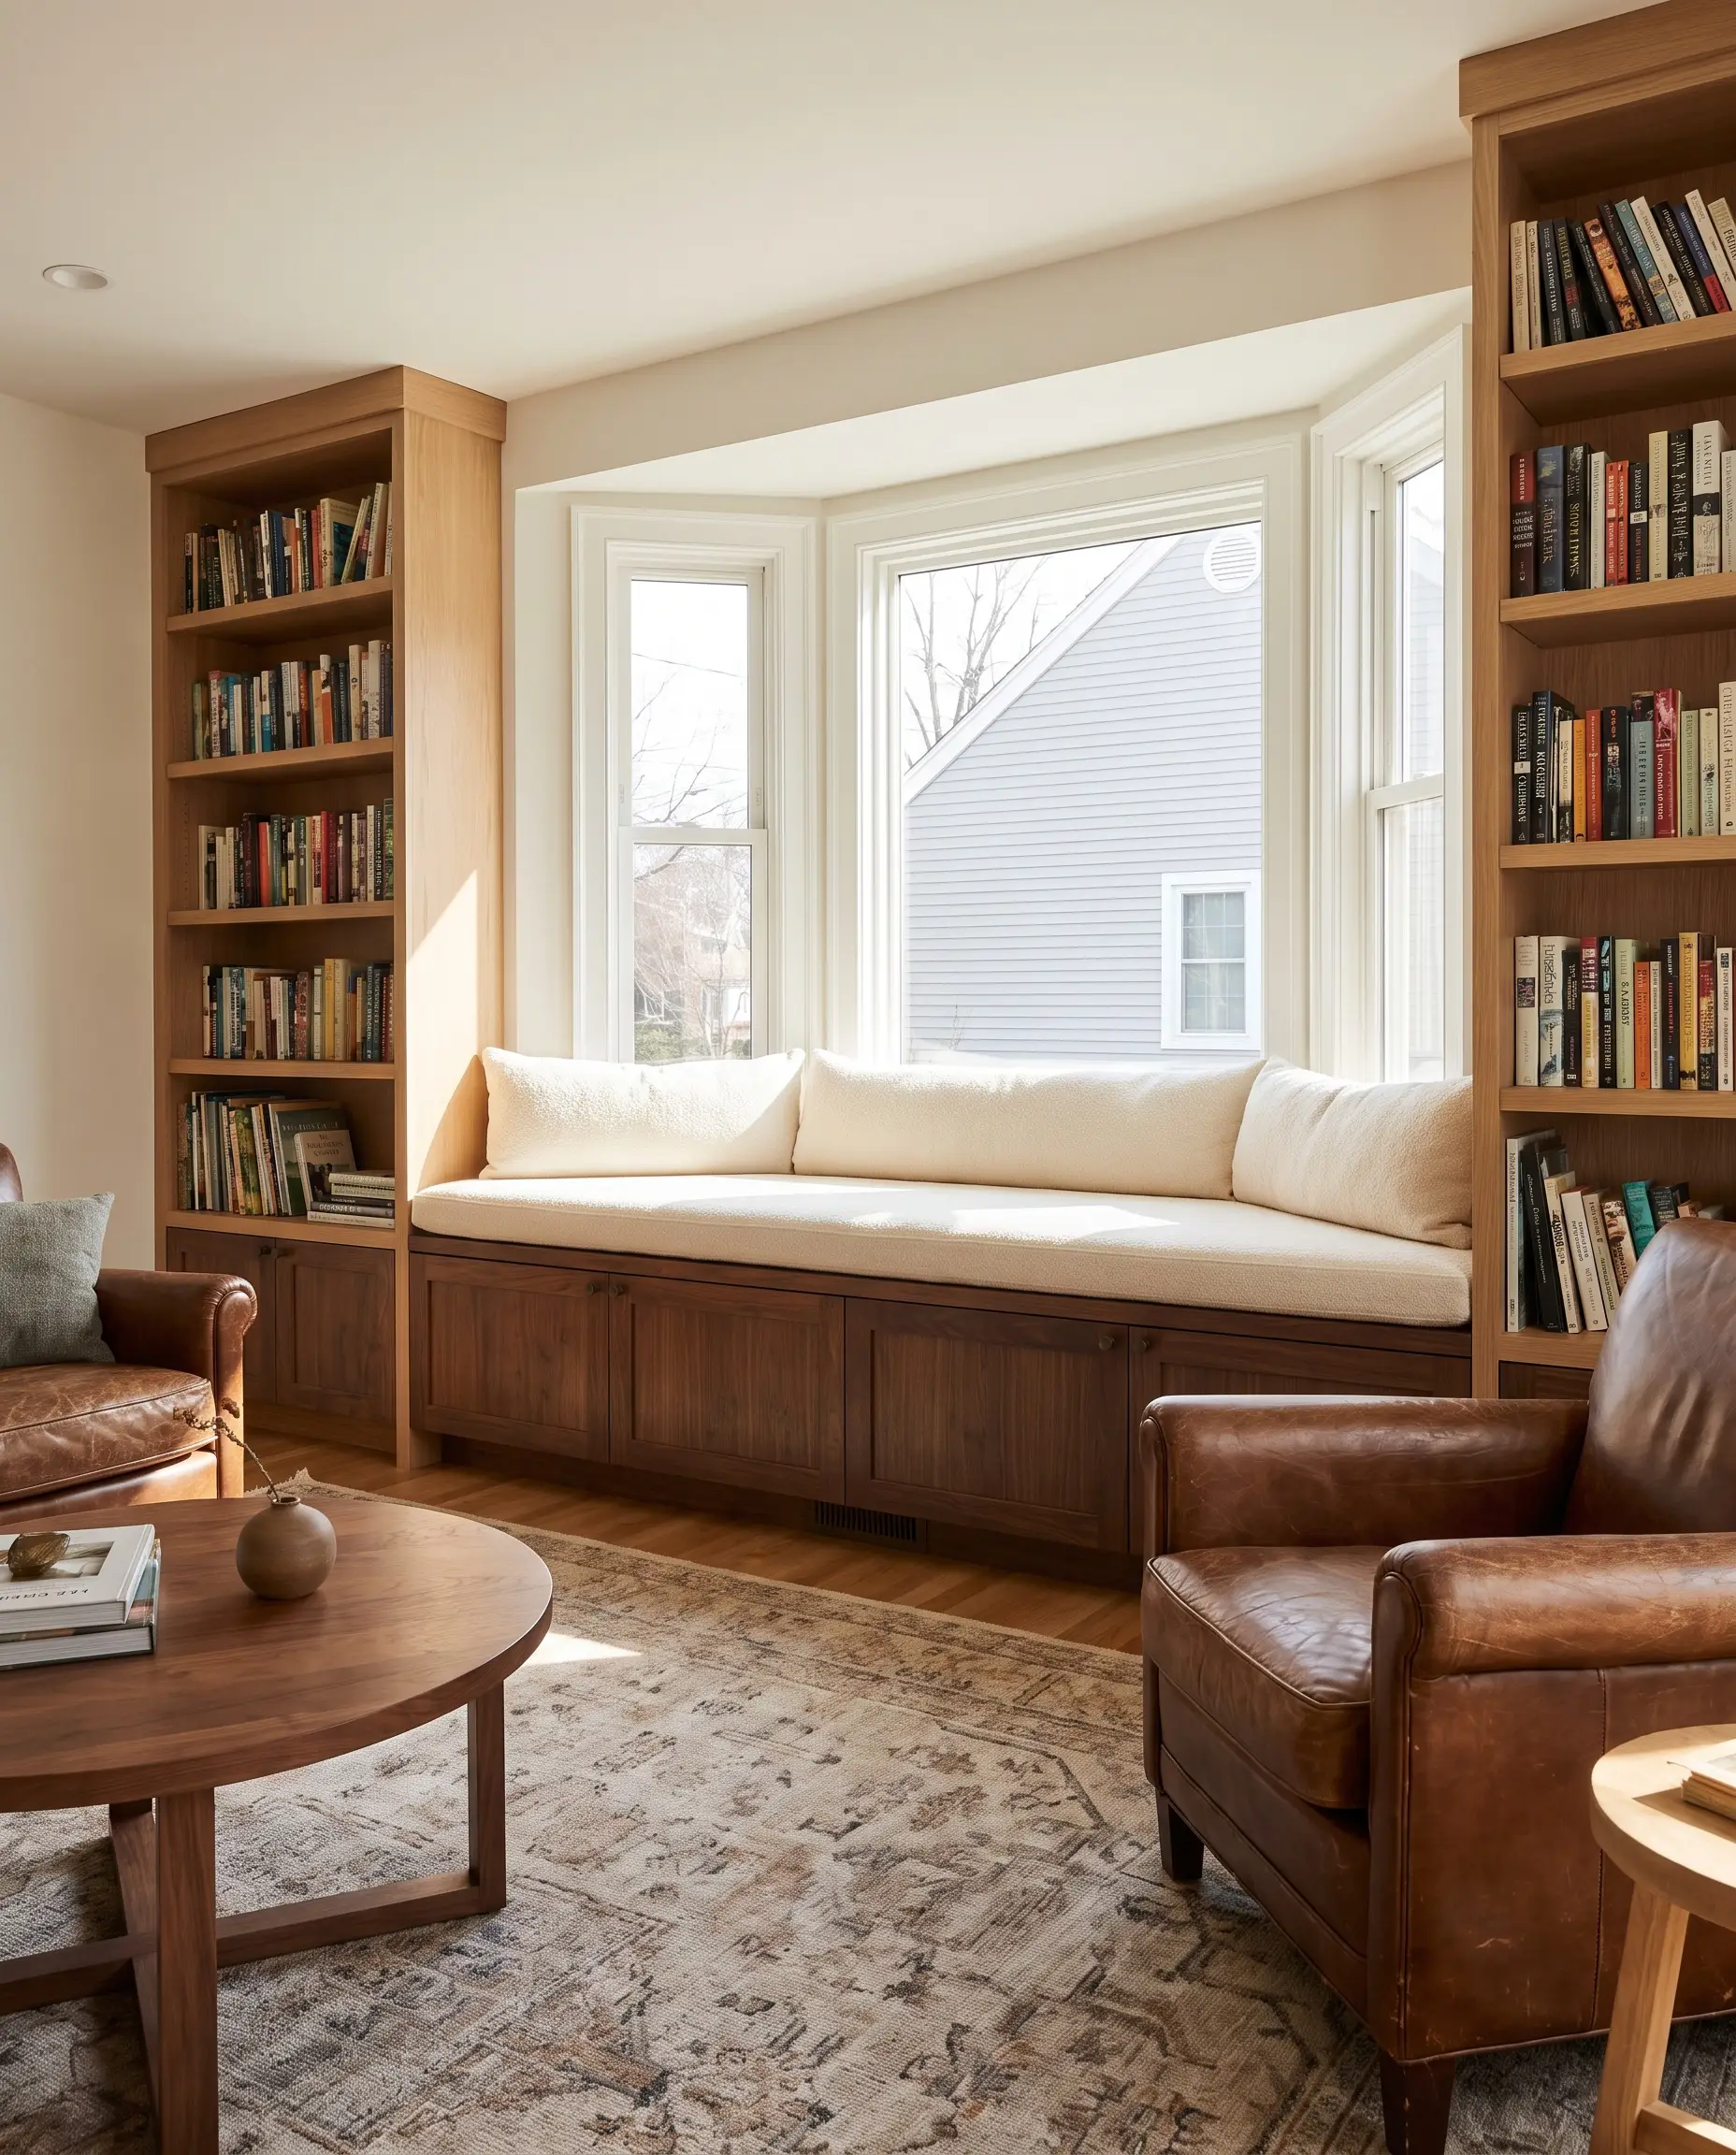
Utilize the dead space around a large window by running the vertical shelves down the sides and connecting them with a sturdy, reinforced base cabinet beneath the sill. This creates a functional reading bench that instantly maximizes square footage while gaining massive storage capacity.
- Vibe: High-end residential comfort.
- Key Measurement: Build the bench seat to a standard height of 18 inches (including the cushion) for ergonomic lounging.
- Material Match: Solid wood framing for the bench top to support human body weight without bowing.
Scribe the Top Fascia to Match Vaulted Ceilings Perfectly
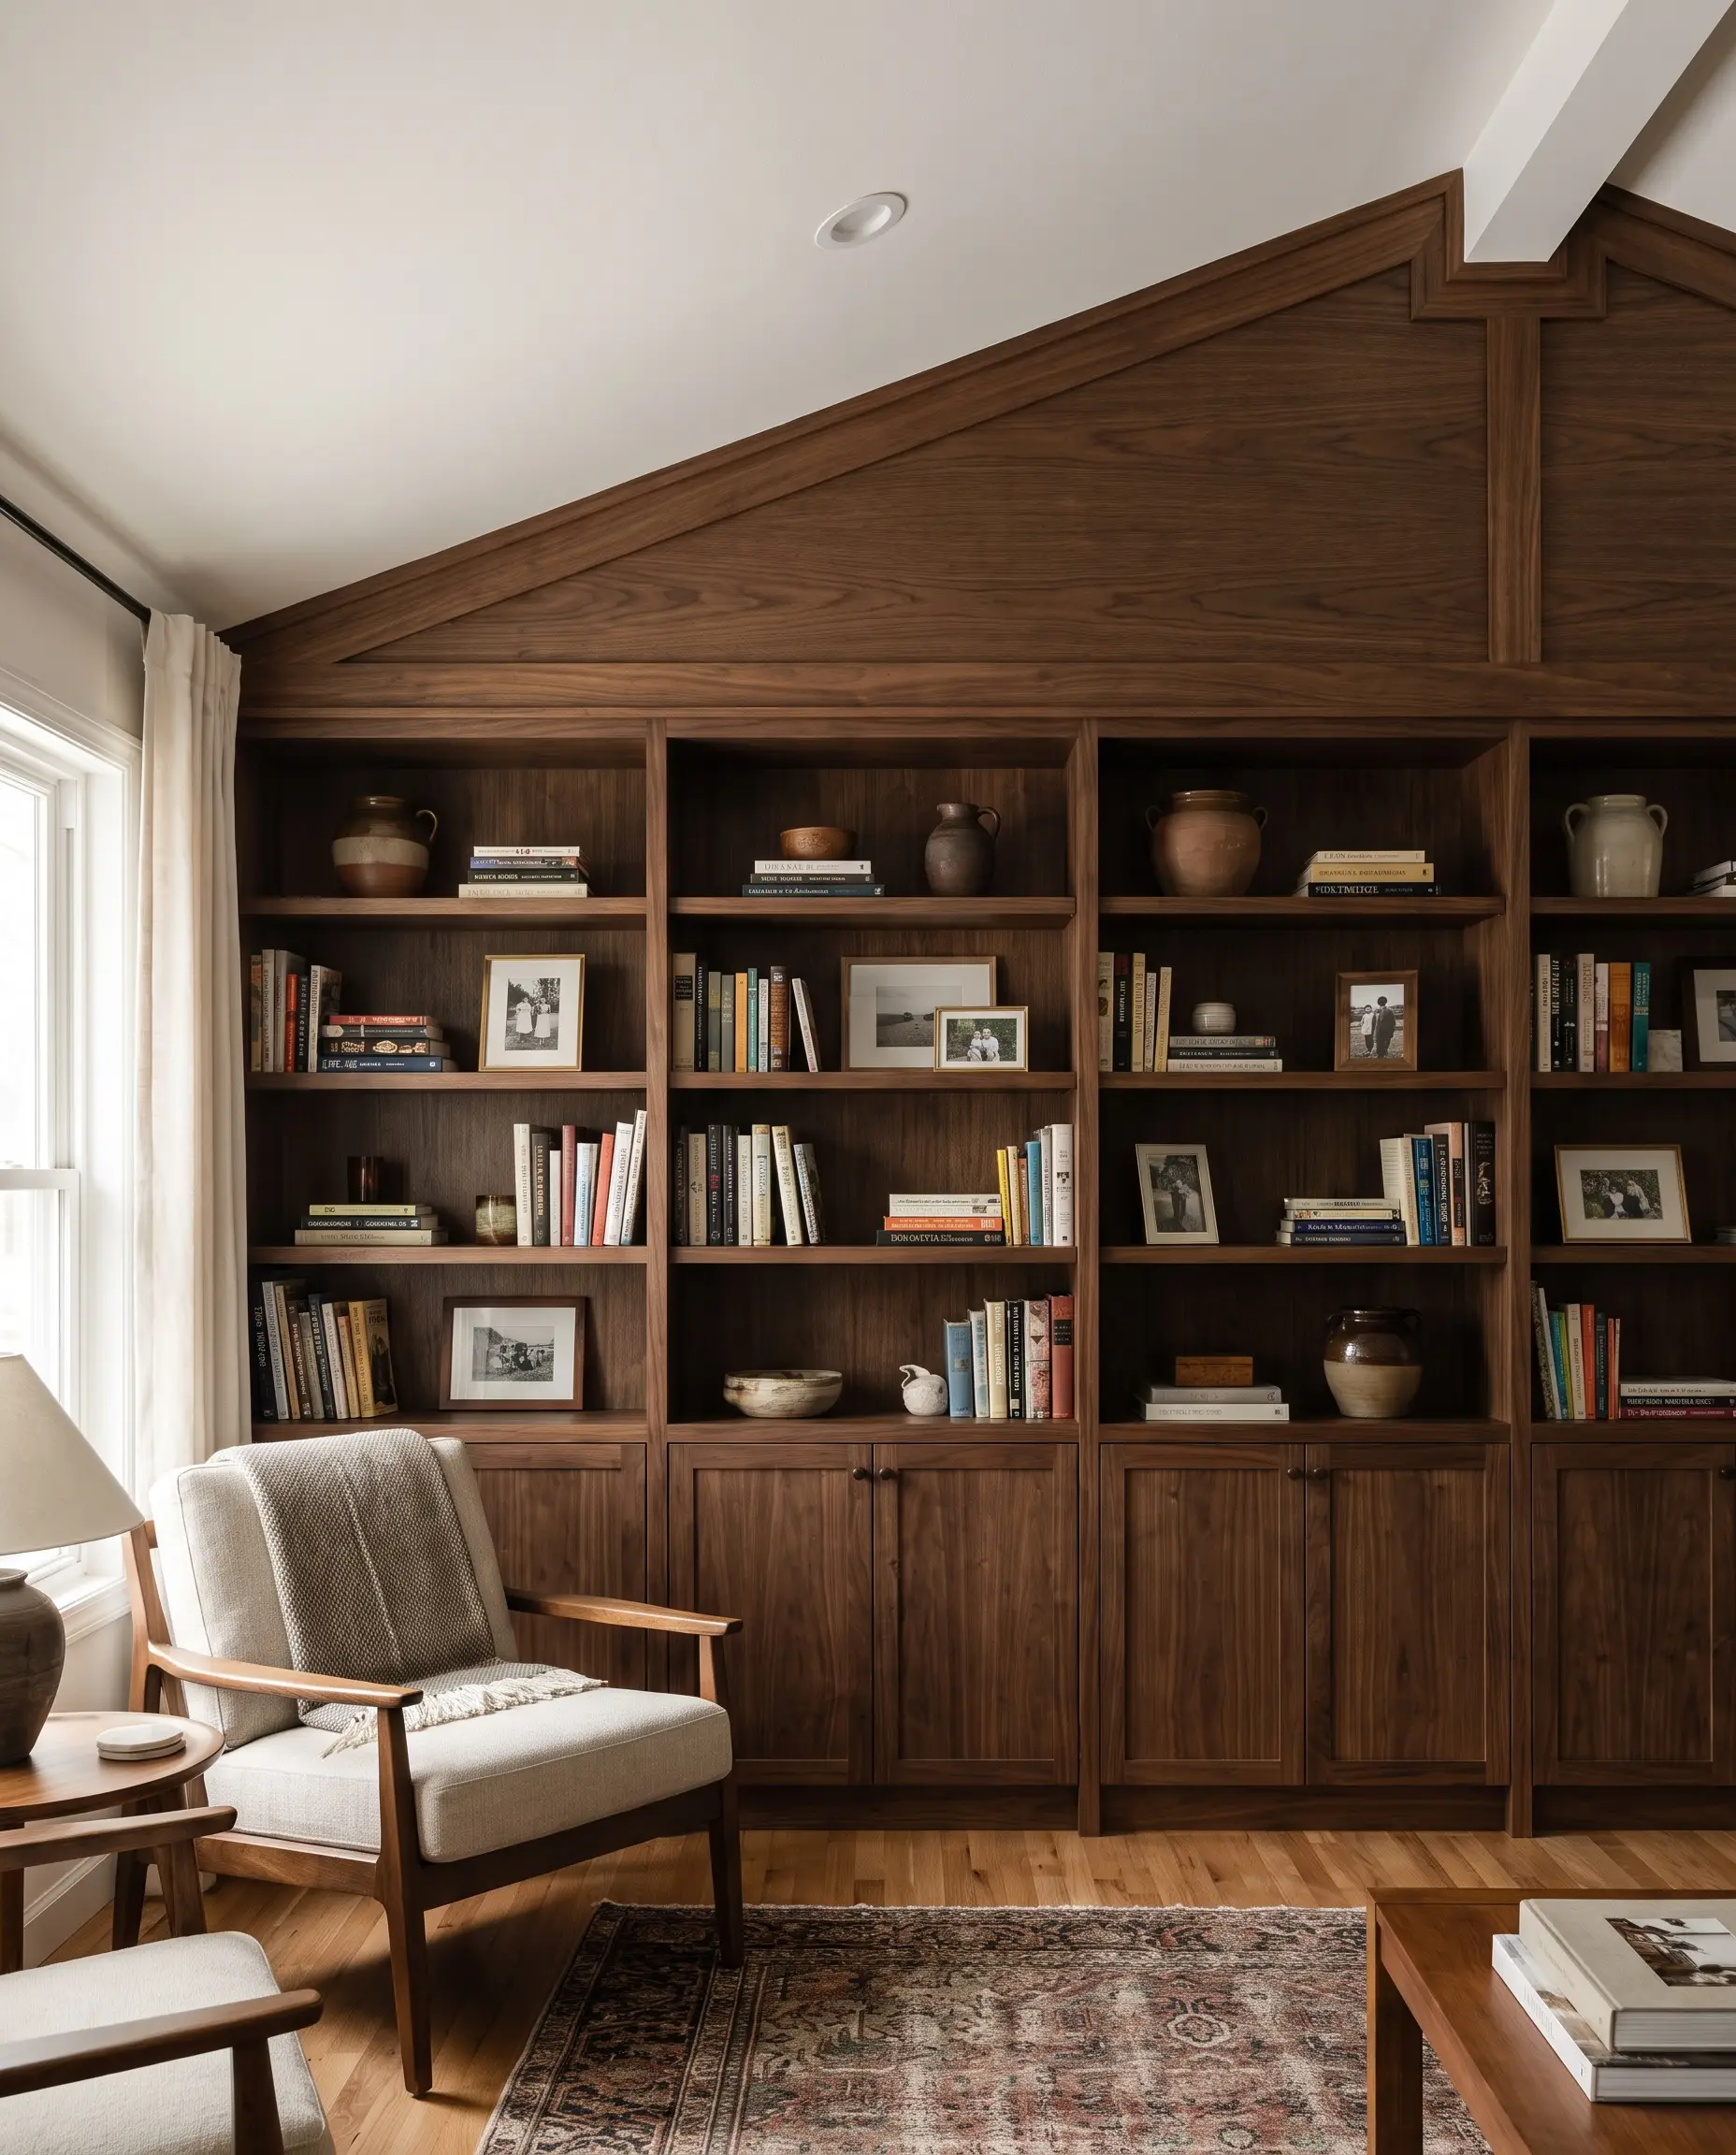
For rooms with angled or vaulted ceilings, leaving a dust-collecting gap at the top ruins the illusion of custom millwork. The top fascia must be custom scribed and cut to perfectly trace the drywall’s slope, ensuring the unit reads as a permanent structural fixture.
- Vibe: Precision bespoke craftsmanship.
- Key Technique: Use a compass or scribing tool to transfer the exact ceiling angle onto the fascia board before making the final cut.
- Installation Rule: Always run a plumb line down from the highest point to ensure the vertical face frame stays dead straight against the angled ceiling.
Flank a Chimney Breast for Symmetrical Balance
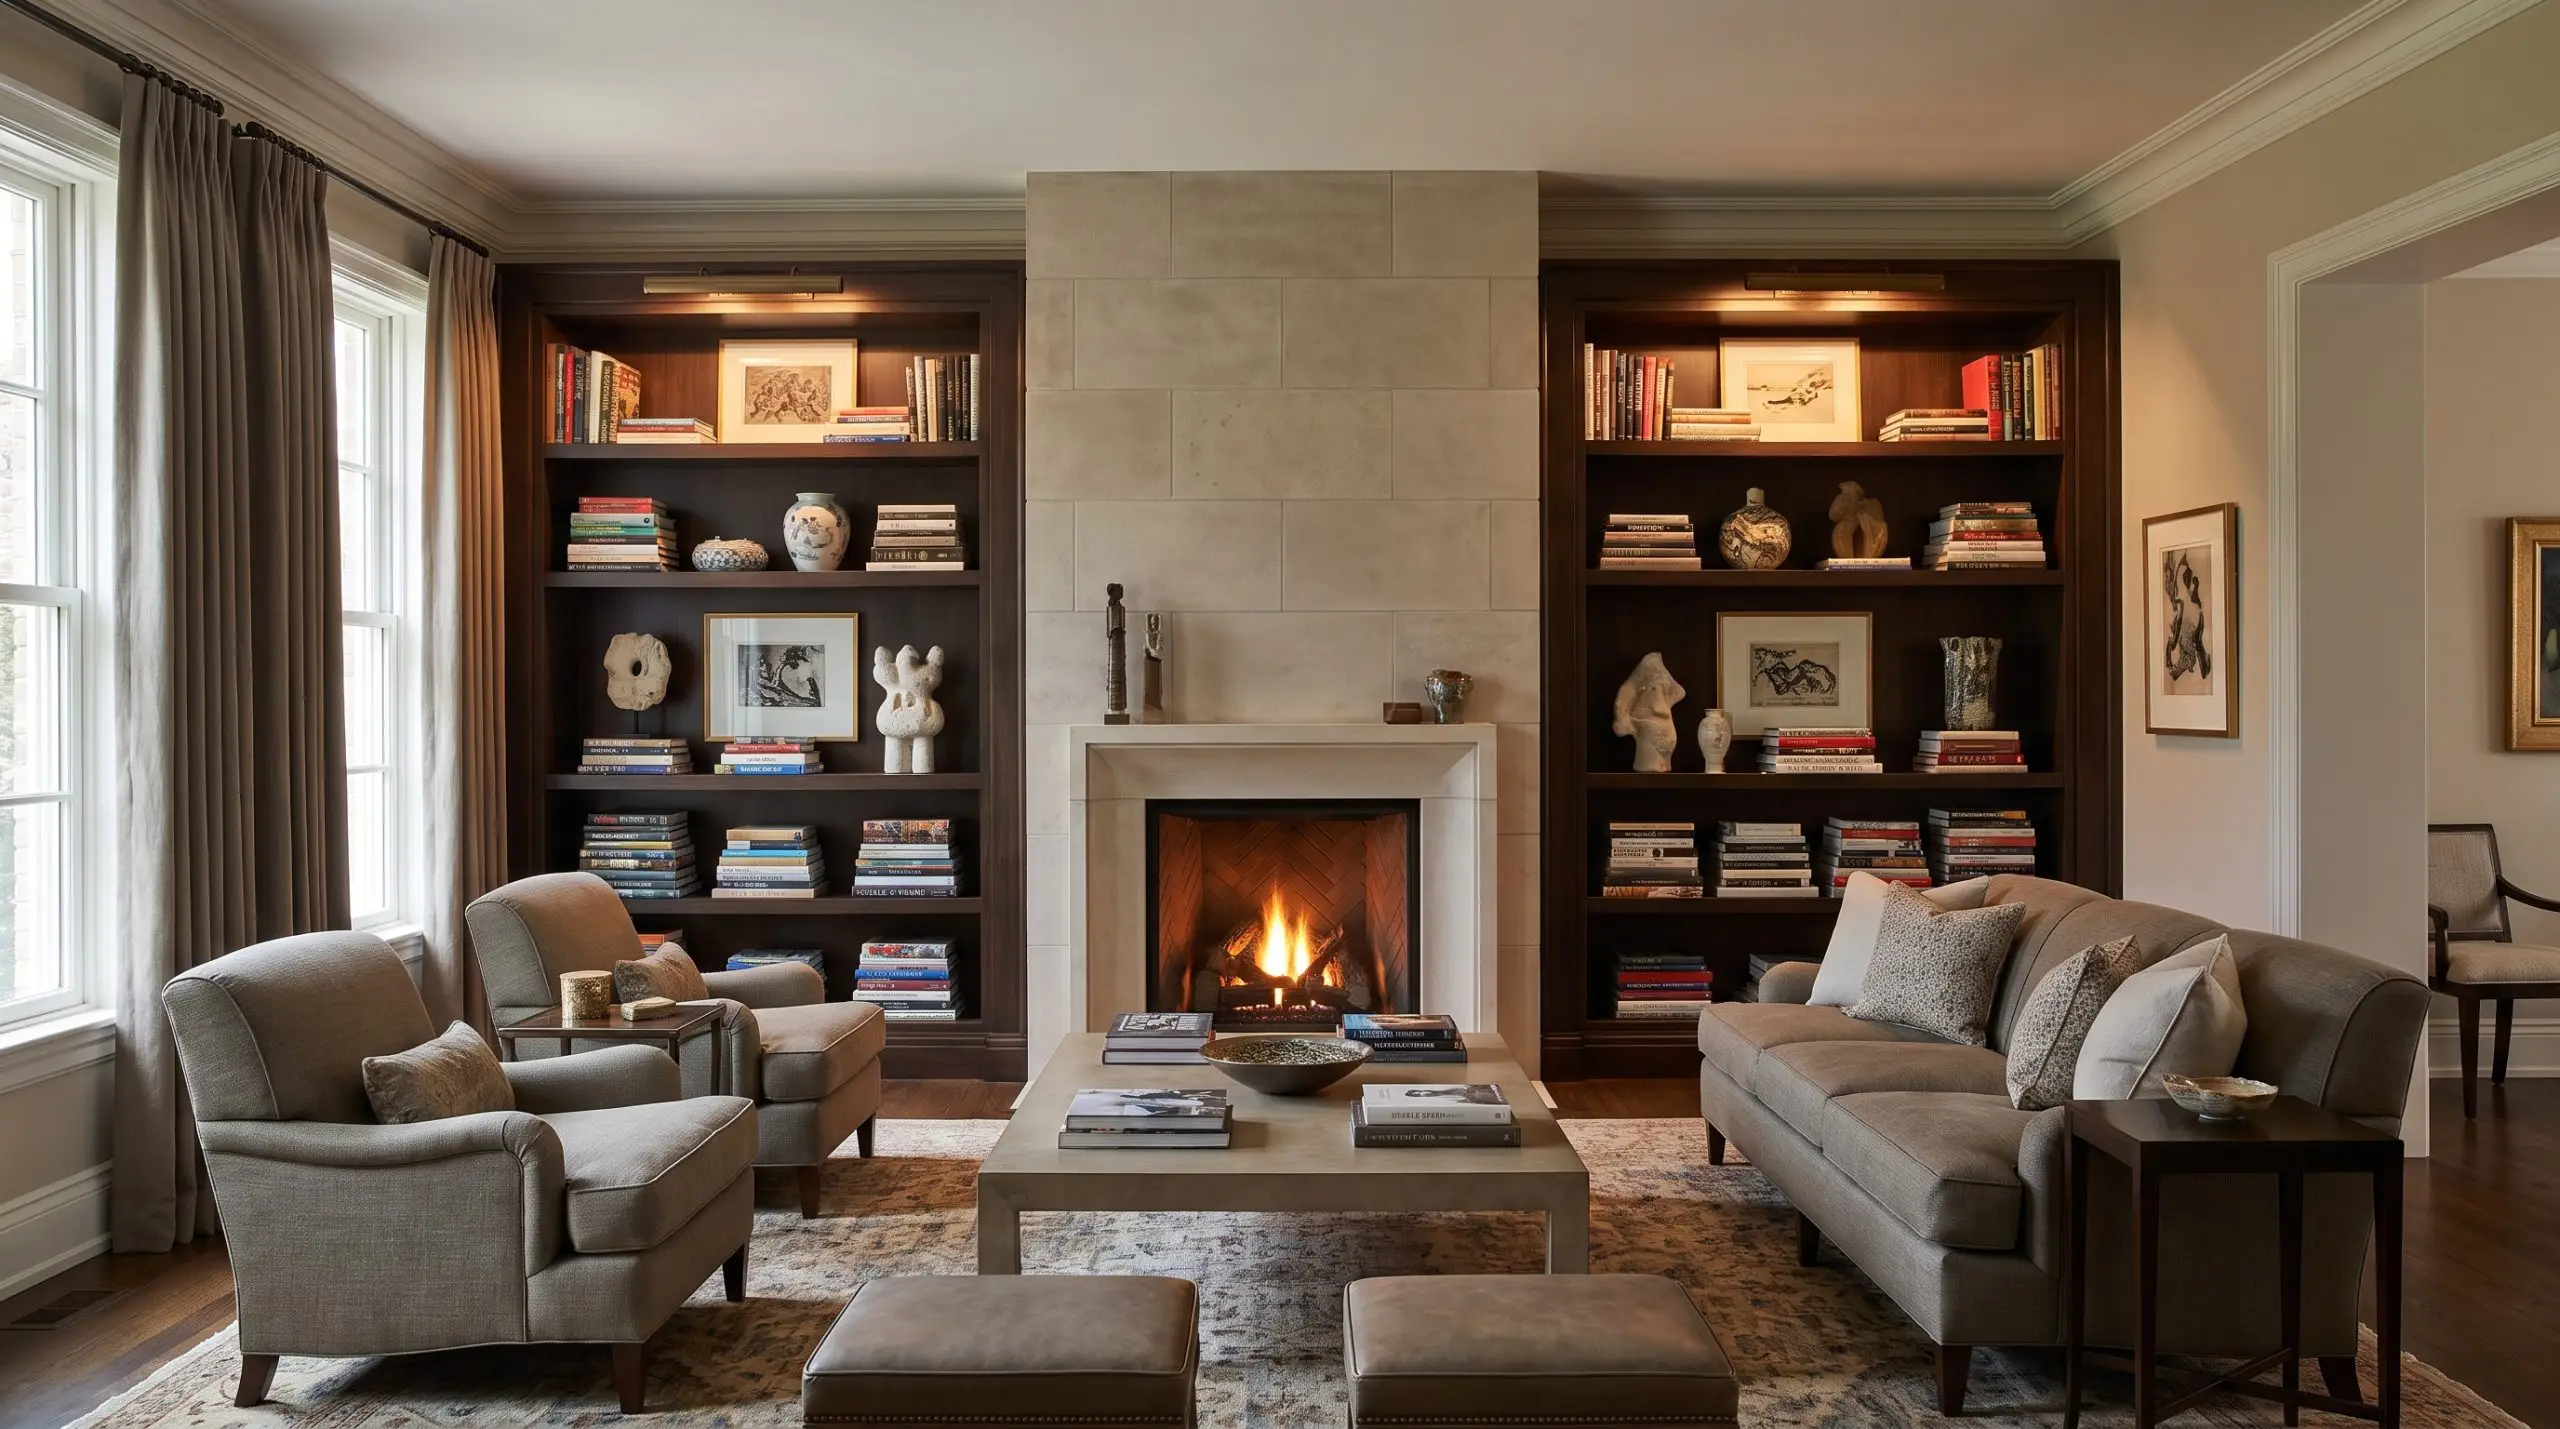
Running identical floor-to-ceiling units on either side of a fireplace is a classic execution, but modernization requires specific depth control. Ensure the depth of the shelves sits flush with, or slightly recessed from, the face of the chimney breast hearth so the fireplace remains the dominant architectural feature.
- Vibe: Tailored, symmetrical formality.
- Key Measurement: Shelf depth should typically range from 12-14 inches to accommodate large books without protruding past the hearth.
- Styling Pro-Tip: Mirror the visual weight on both sides, but do not perfectly duplicate the objects to avoid a rigid, showroom appearance.
Wrap an External Room Corner to Soften Hallways
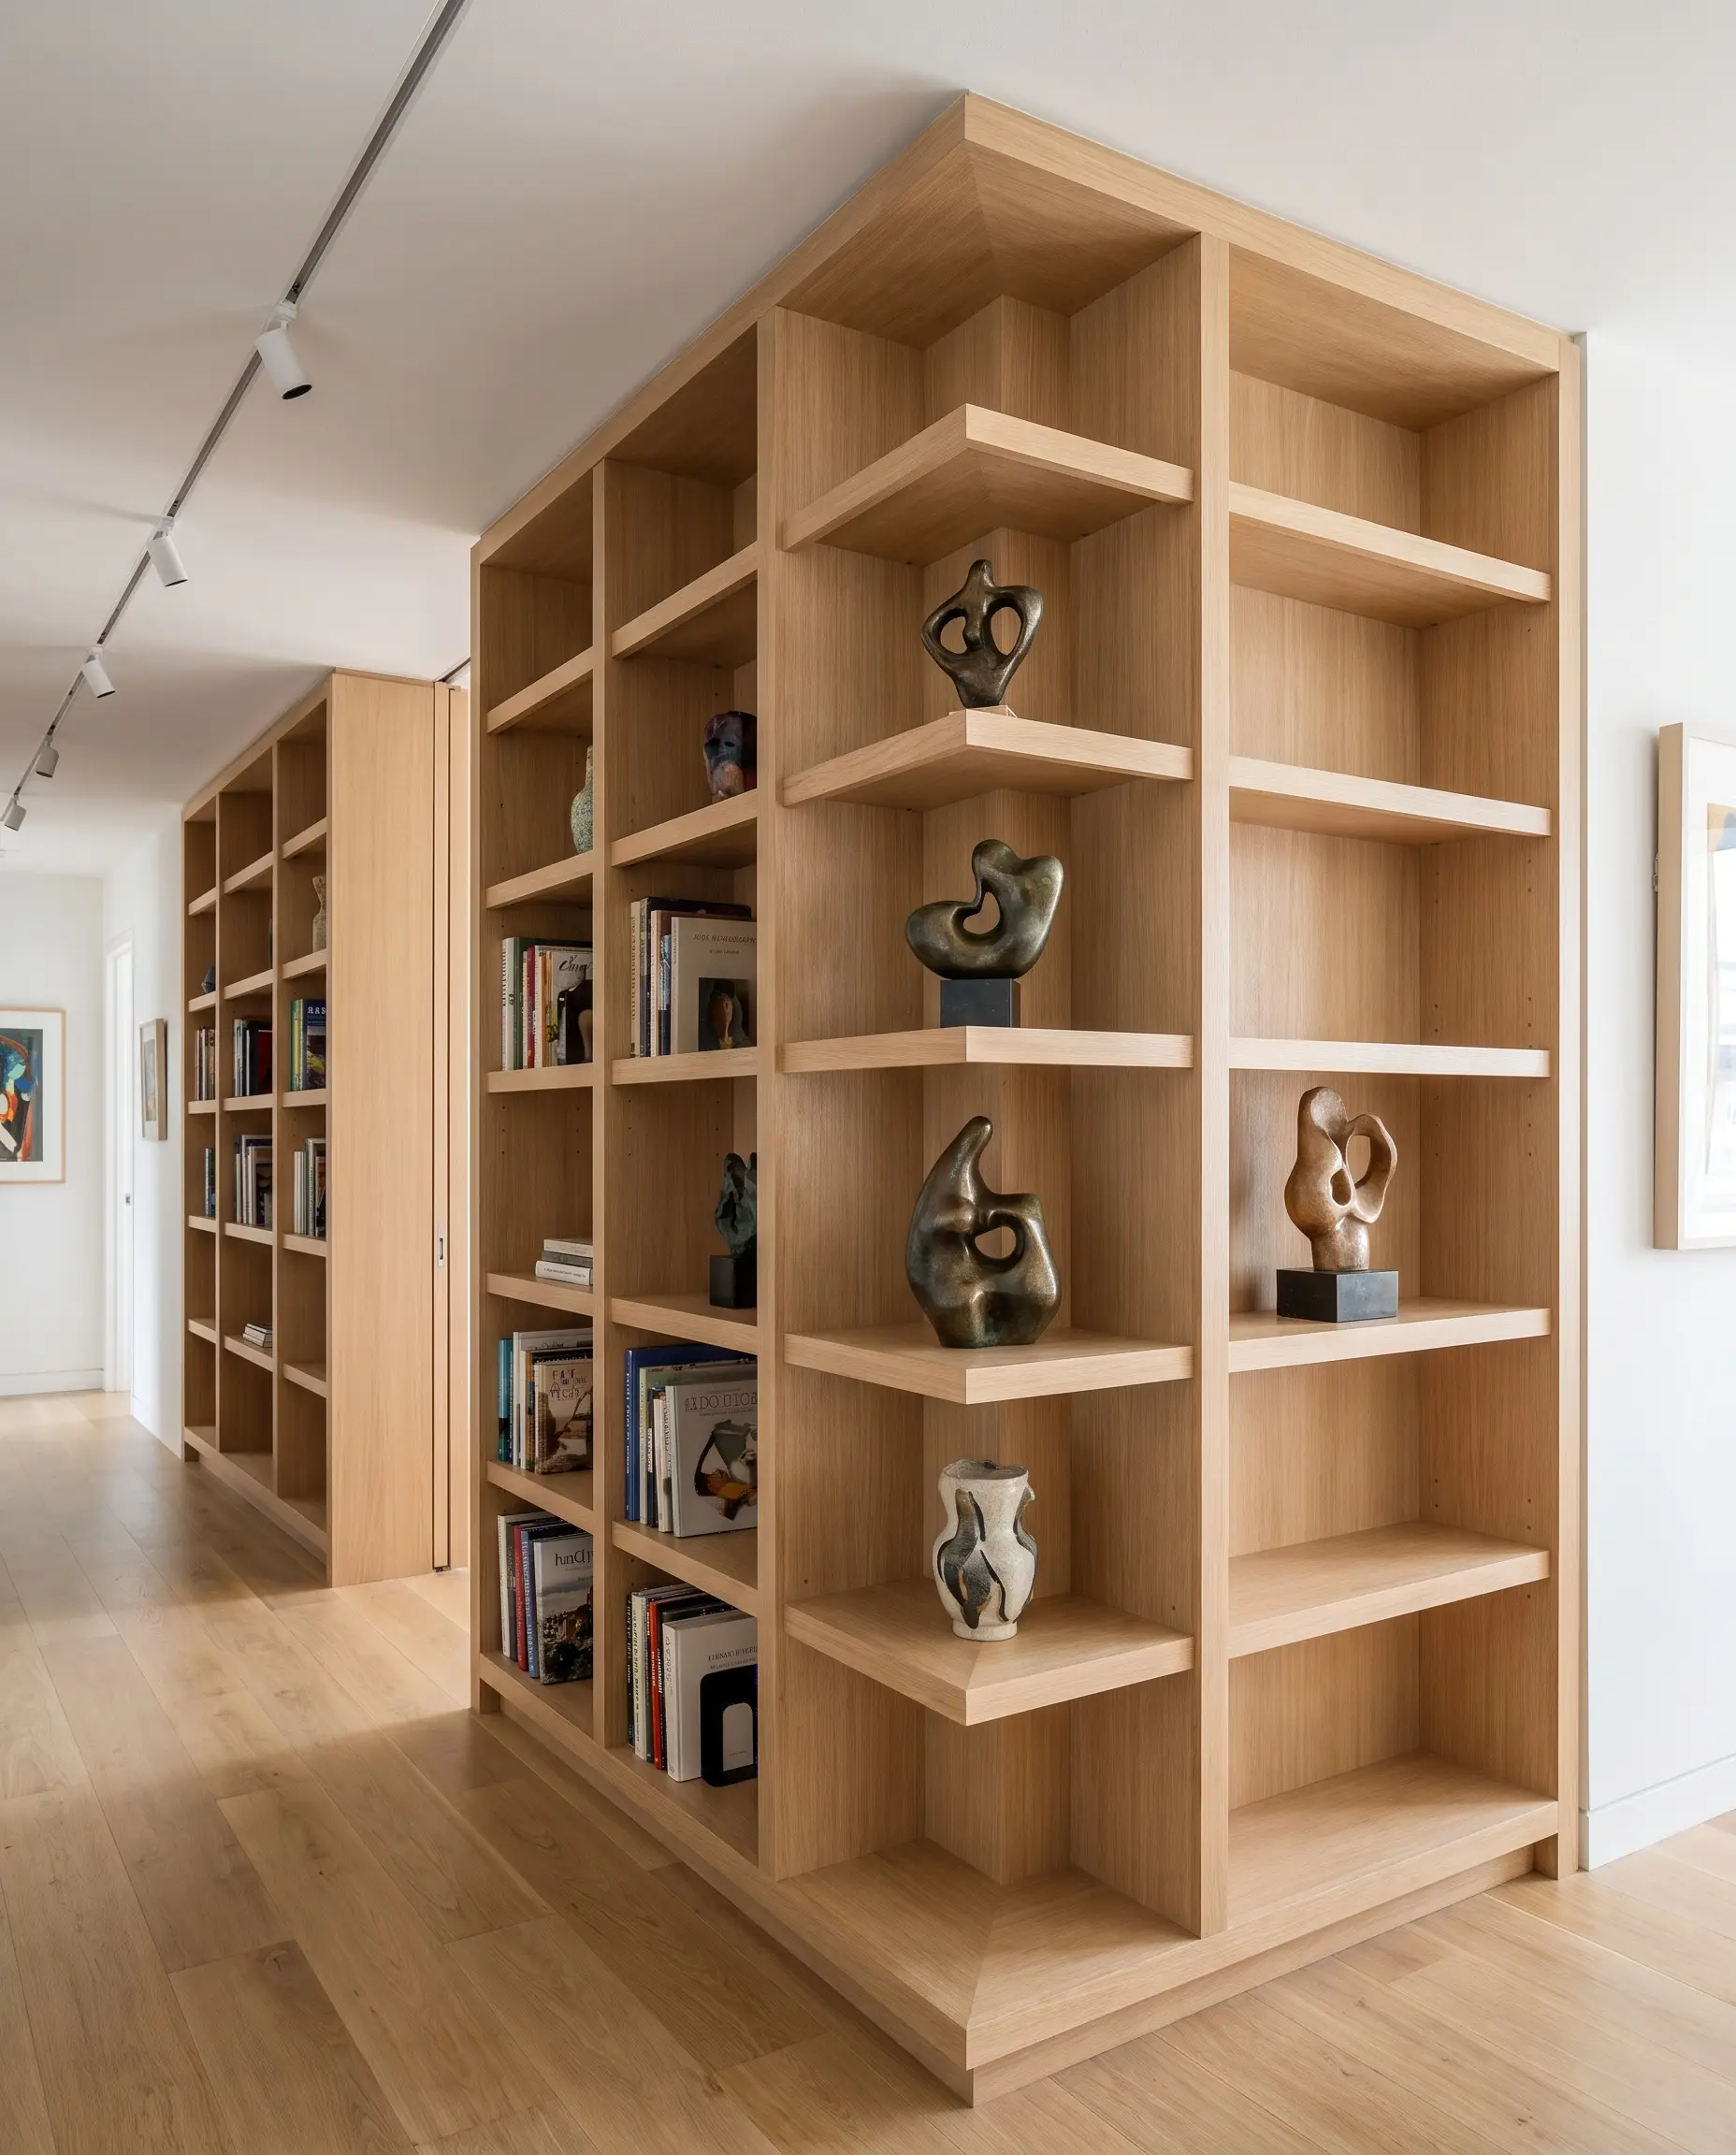
Instead of stopping abruptly at the edge of a living room wall, carry the millwork completely around an external corner and into the adjacent hallway. This continuous architectural feature softens harsh angles and physically pulls the eye through the space, creating a highly custom spatial flow.
- Vibe: Expansive, custom architectural flow.
- Key Materials: Mitered edge-banding on the corner joints for a seamless, sharp transition.
- Styling Pro-Tip: Place your most striking sculptural objects on the corner shelves where they can be viewed from multiple angles.
Extend Across the Entire Wall to Create a Library Dining Room
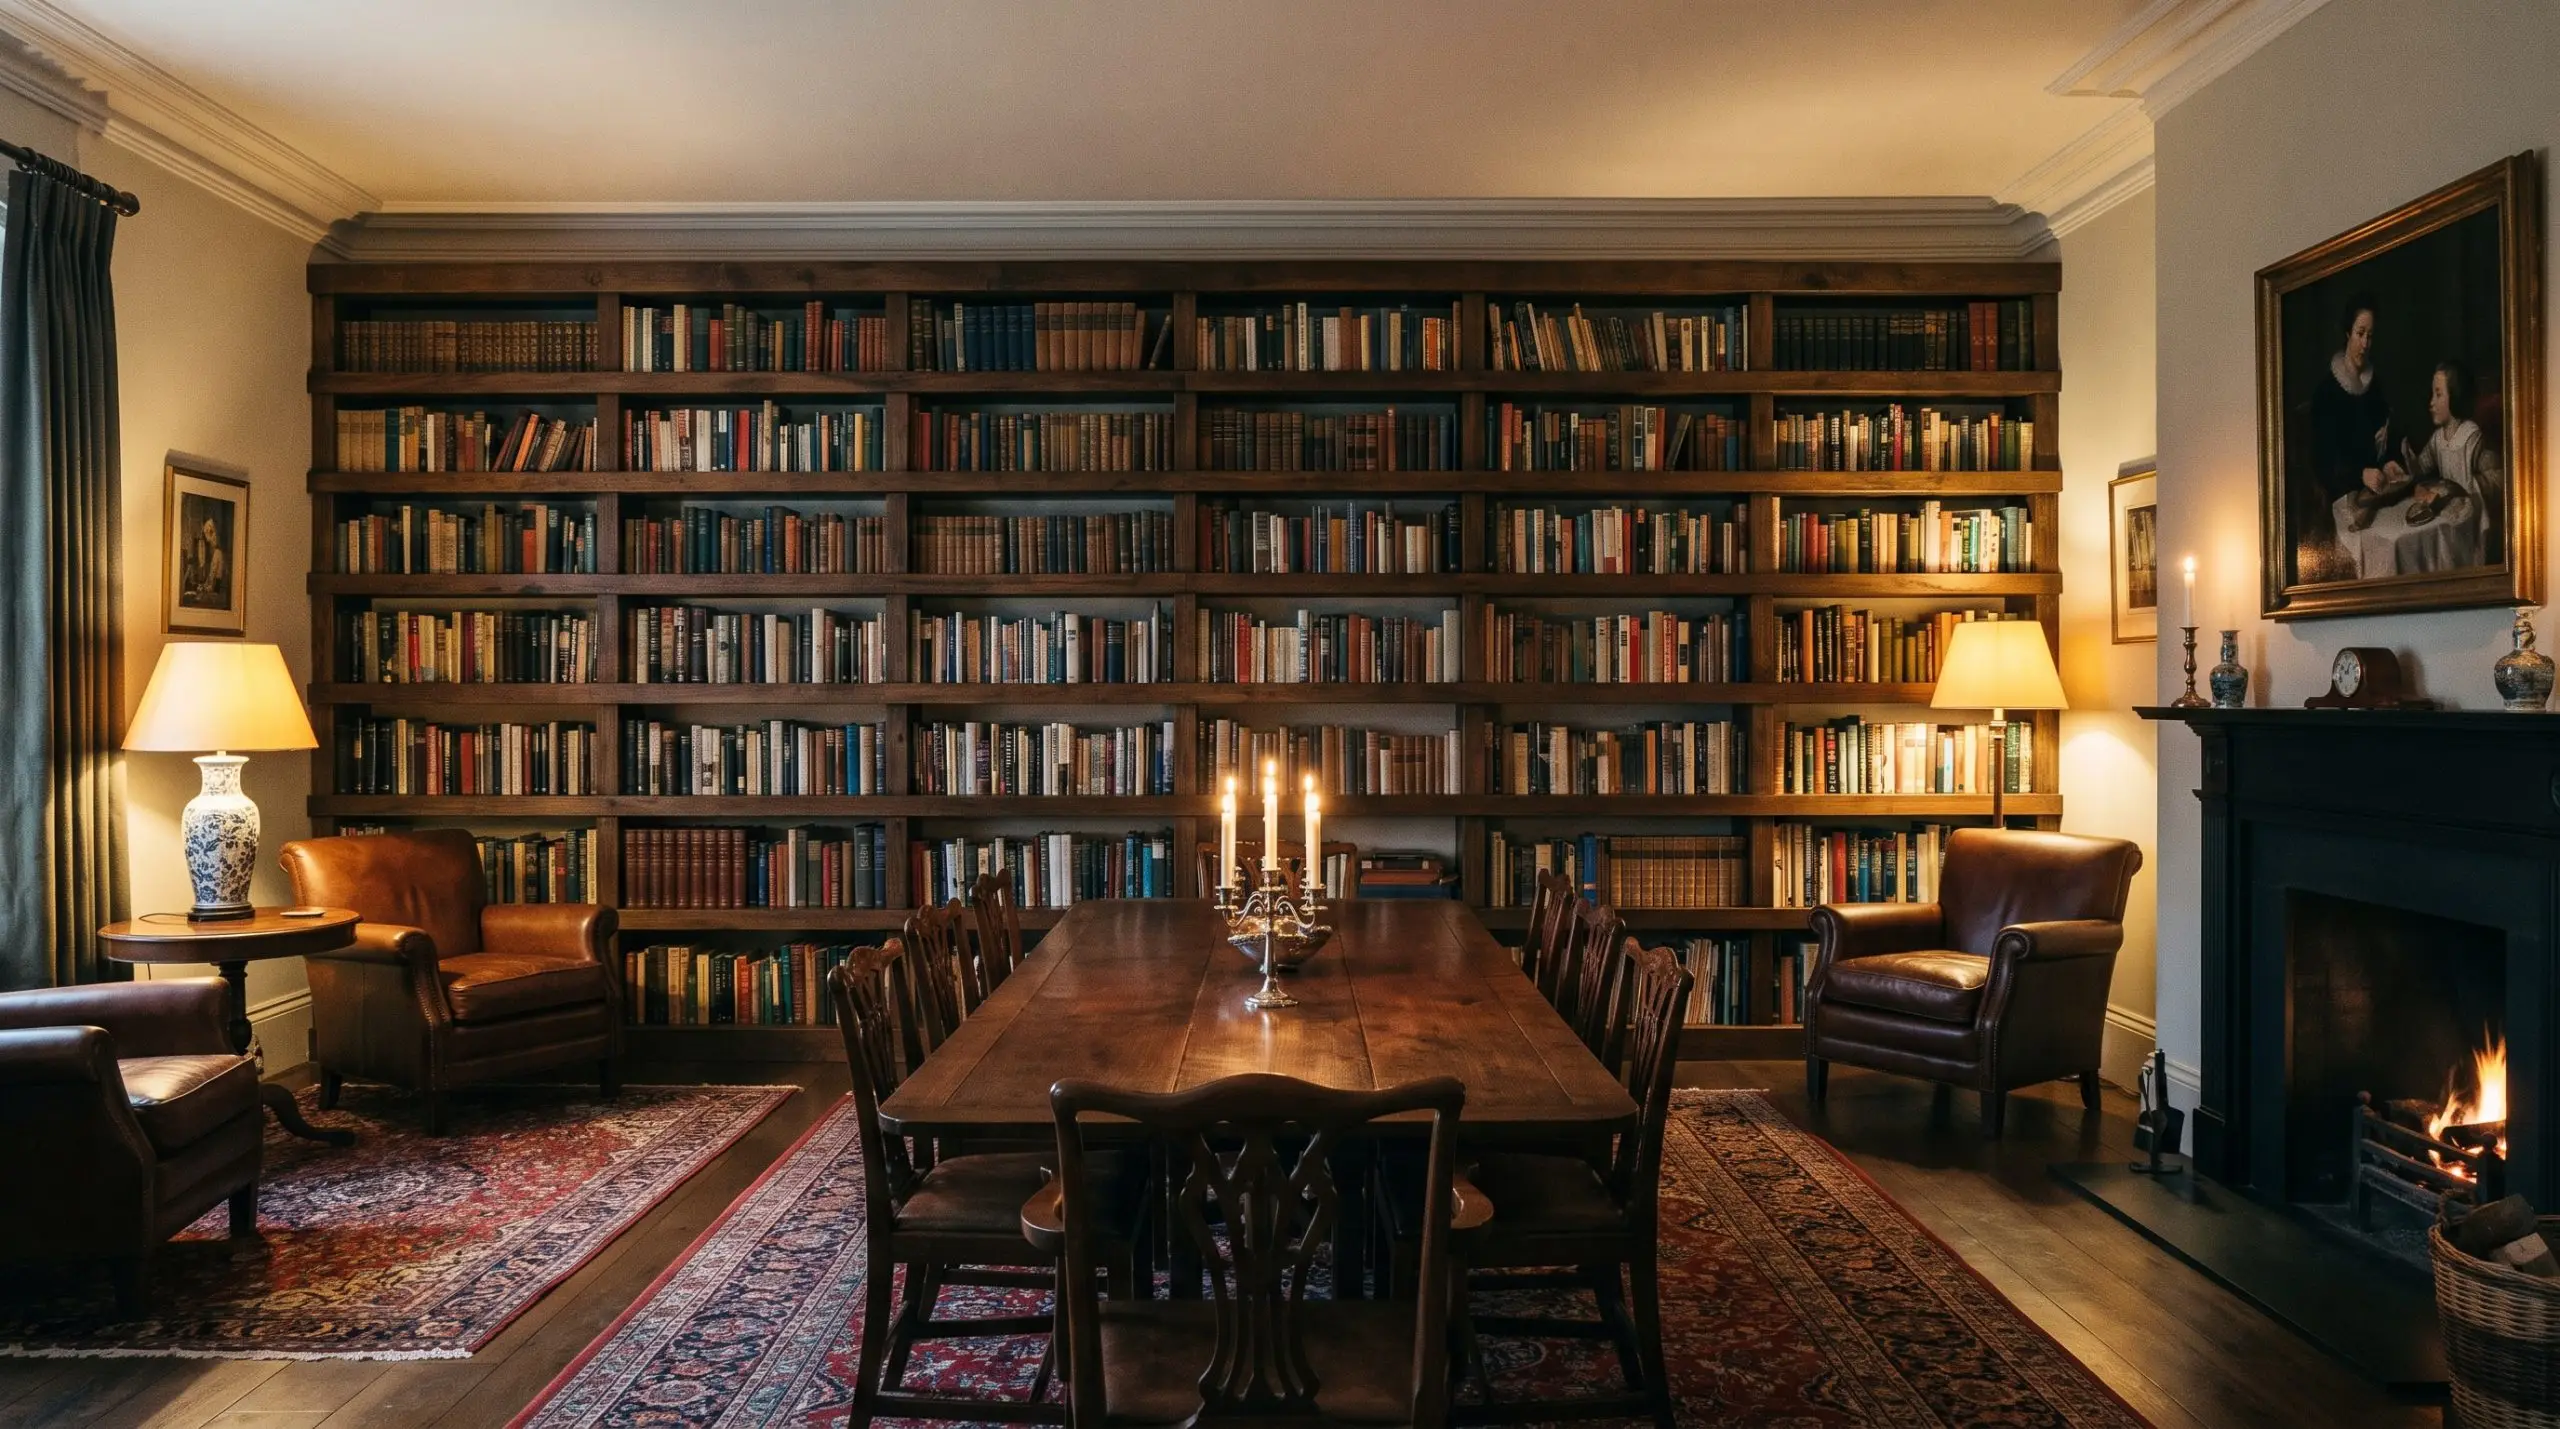
Repurpose an underutilized formal dining room by dedicating one unbroken, wall-to-wall span of shelving to house an extensive collection. This high-impact, moody lifestyle choice frames the dining table with literary texture, creating an unforgettable atmosphere for evening hosting.
- Vibe: Moody, intellectual dining experience.
- Key Measurement: An unbroken span typically requires 72 to 96 inches of width, necessitating vertical supports every 30-36 inches to prevent shelf sag.
- Material Match: Heavy-duty 3/4-inch plywood or solid timber for the horizontal spans.
Millwork Materials, Finishes, and Color Applications
The wood species and paint application dictate the entire aesthetic tier of your project. Skipping the standard white MDF and opting for deeply considered finishes instantly commands attention and drastically increases the room’s perceived value.
Color-Drench the Shelves, Trim, and Wall in One Tone
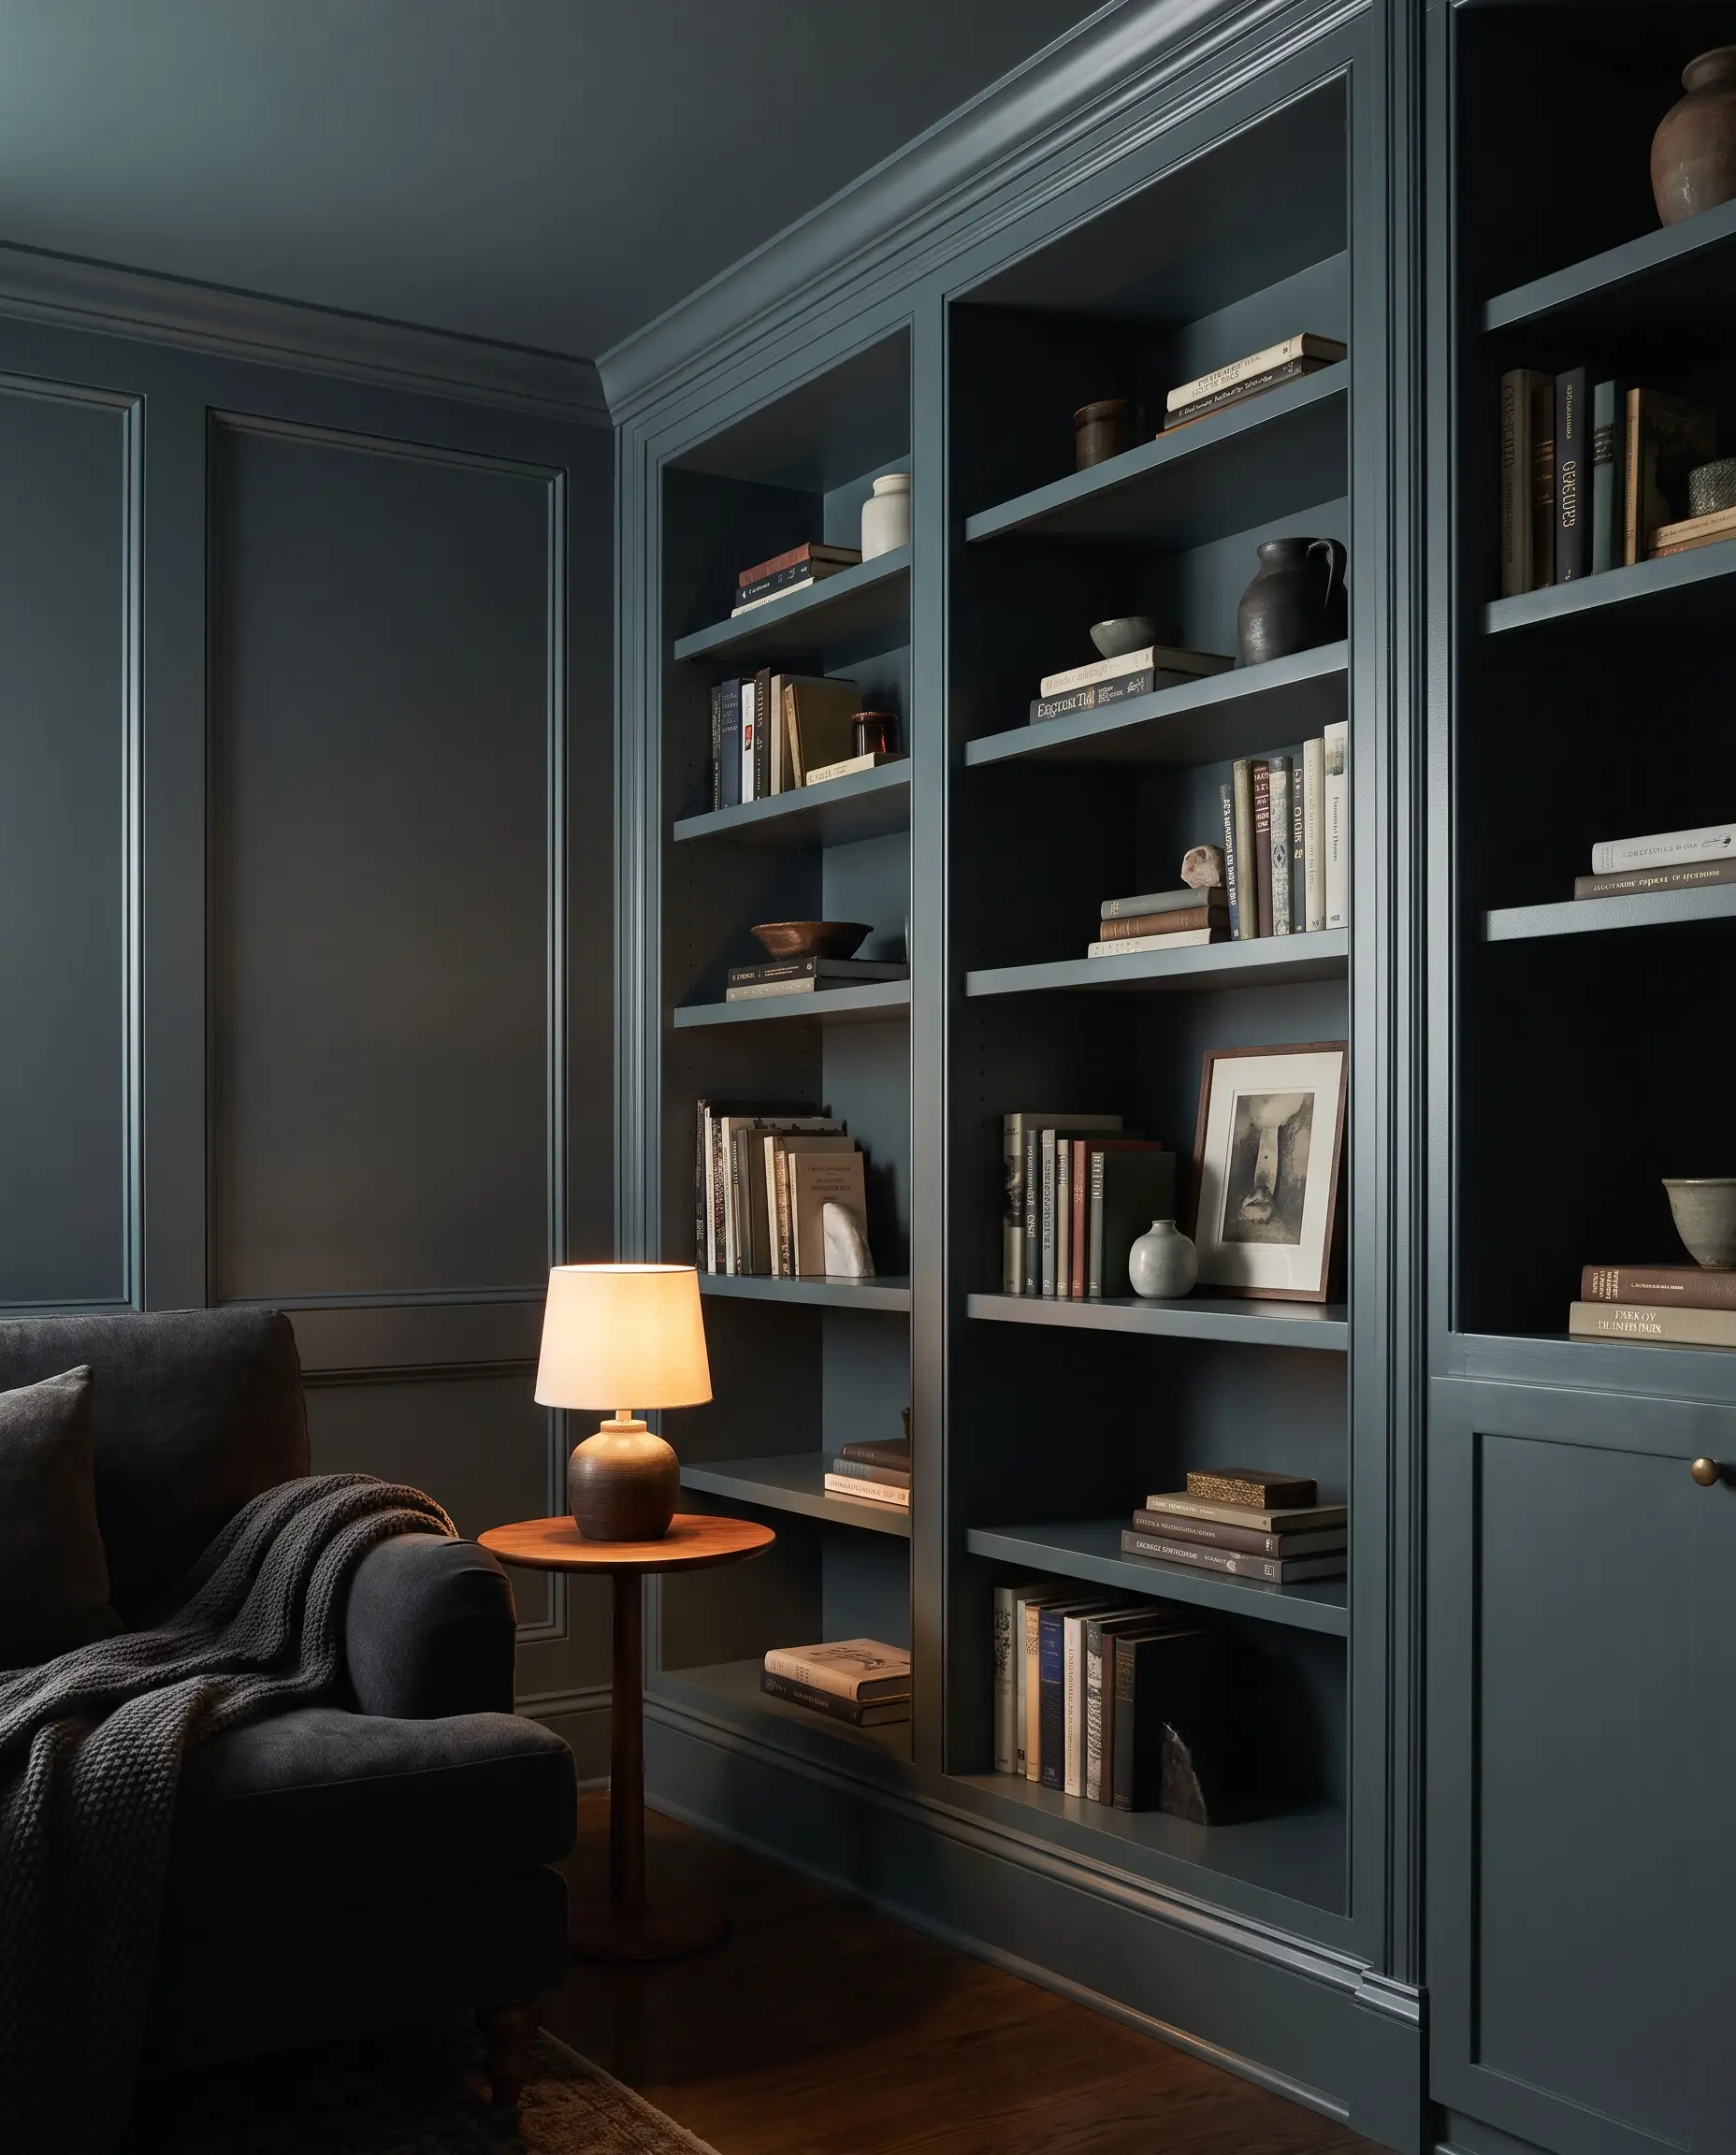
Apply the exact same paint color to the shelves, the face frame, and the surrounding walls to color-drench the room. Leaving the back open and painting the drywall the exact same shade creates the illusion of a solid, integrated architectural surface while saving significant money on backing materials.
- Vibe: Immersive, modern monolithic design.
- Paint Recommendation: Farrow & Ball Hague Blue.
- Color Match: A deeply saturated, moody navy that absorbs shadows and hides minor drywall imperfections.
Always paint the millwork in a satin or semi-gloss finish to contrast with the flat or eggshell wall paint, even when color-drenching in the exact same hue. The slight sheen difference highlights the carpentry details.
Designer Secret
Line the Backing with Grasscloth Wallpaper for Texture
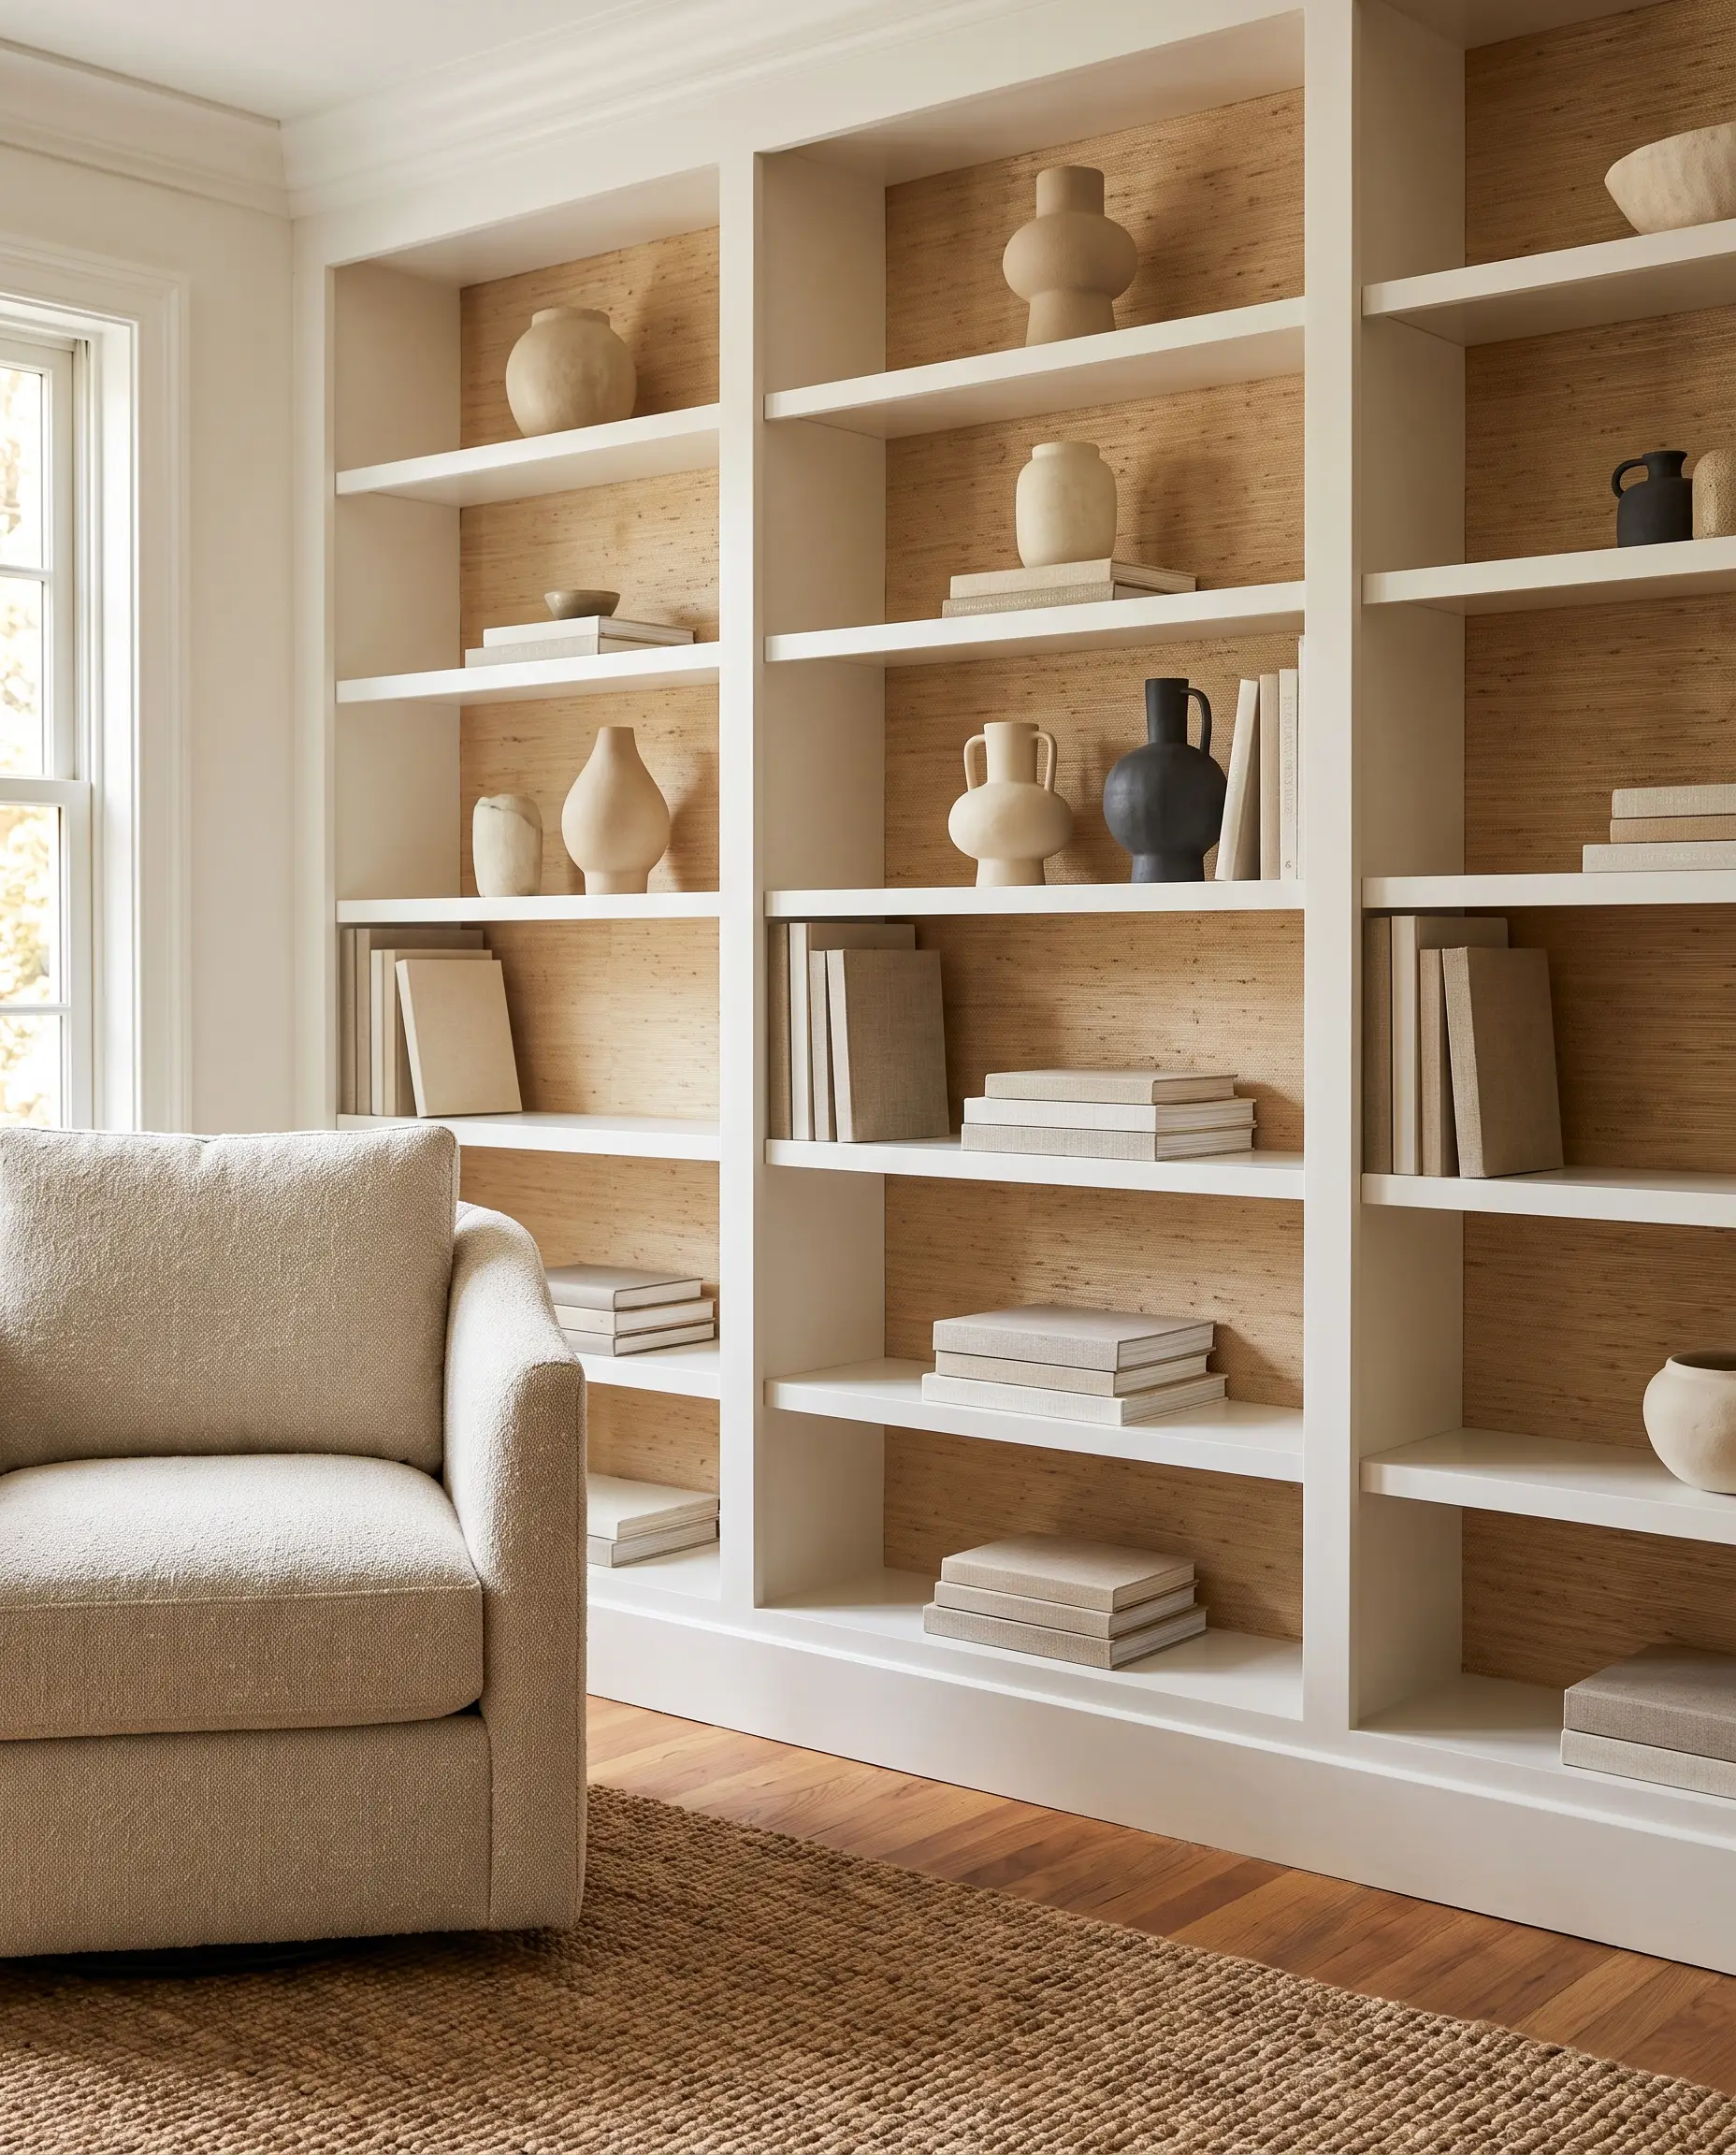
If using a crisp white or neutral face frame, install a natural grasscloth wallpaper on the back panel before attaching the shelves. The tactile contrast between smooth painted wood and woven, organic texture creates a rich, sophisticated backdrop for ceramics and literature.
- Vibe: Layered, textural luxury.
- Key Materials: Natural sisal or jute grasscloth.
- Styling Pro-Tip: Keep the objects in front of the grasscloth relatively solid and minimalist so they do not compete with the heavy texture of the backing.
Specify Rift-Sawn White Oak for an Organic Modern Grain
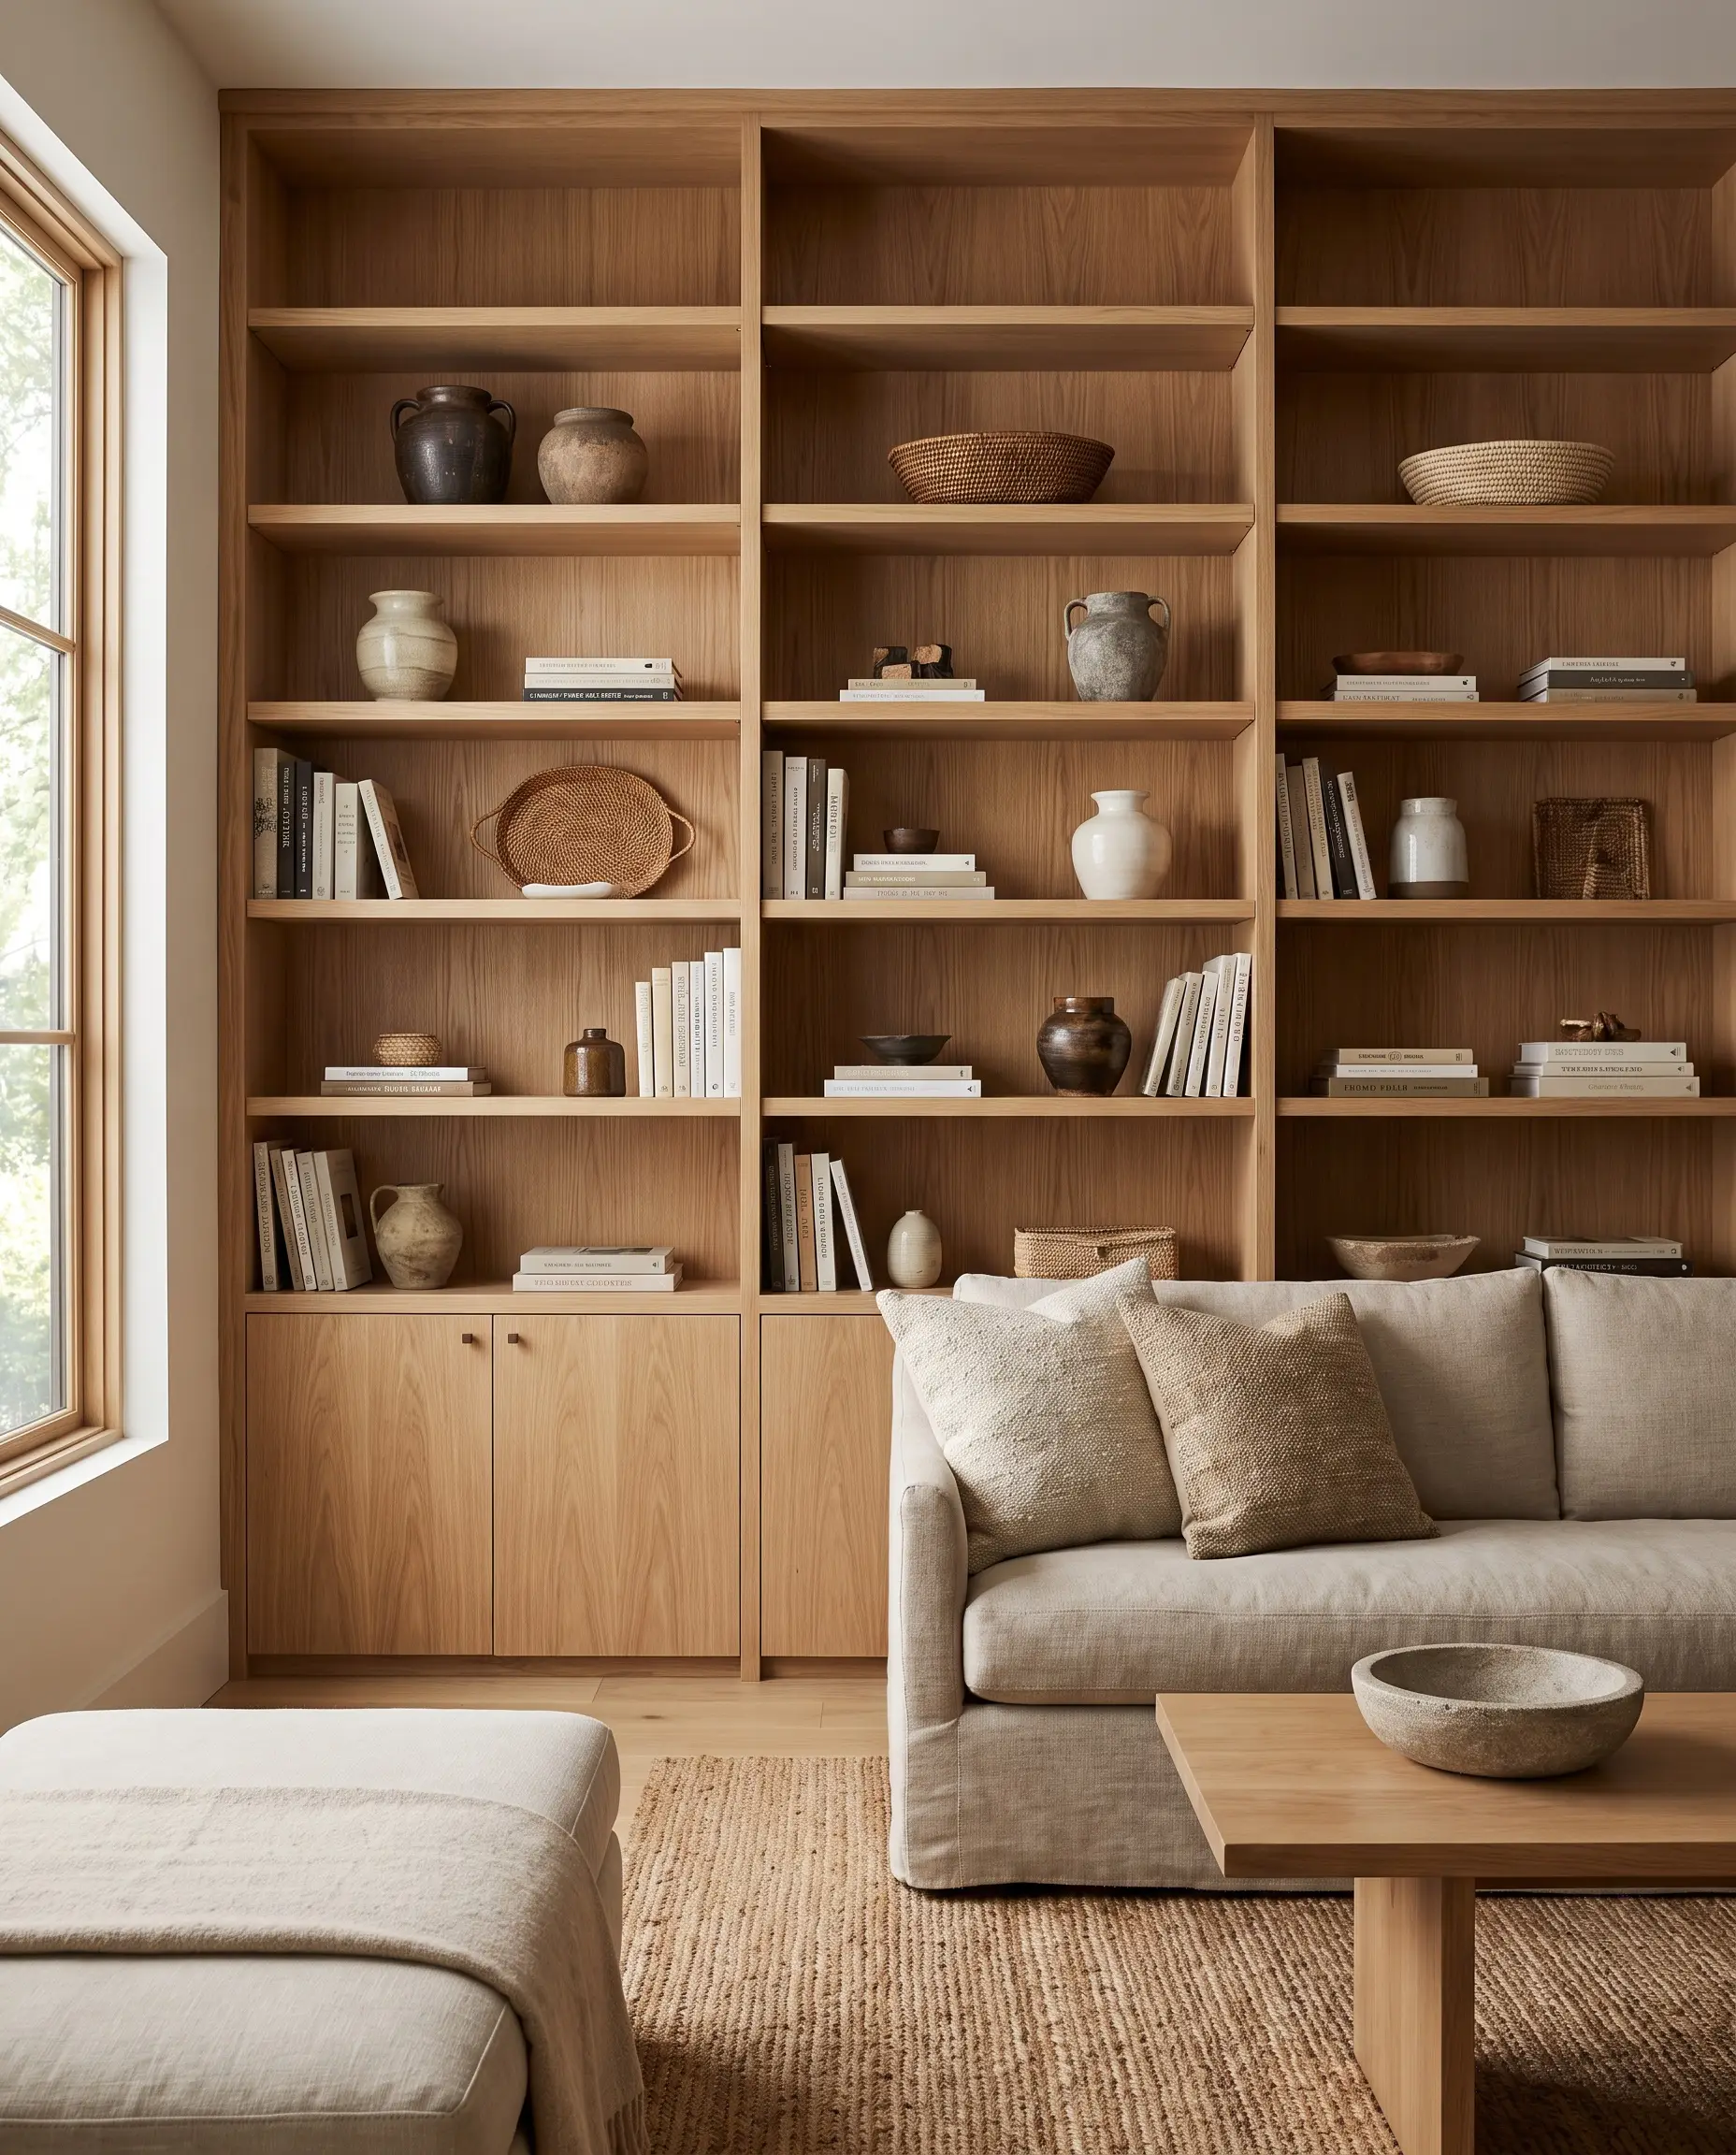
For a high-end, unpainted aesthetic, specify Rift-Sawn White Oak for the entire build. The linear, straight grain avoids the heavy, dated cathedrals of traditional red oak and perfectly anchors an Organic Modern interior with warm, natural restraint.
- Vibe: Quiet luxury and natural warmth.
- Key Materials: Rift-sawn white oak veneer for the boxes, solid rift-sawn white oak for the face frame.
- Finish Recommendation: A matte, water-based polyurethane to protect the wood without altering its raw, natural tone.
Paint a High-Gloss Lacquer Finish for Art Deco Glamour
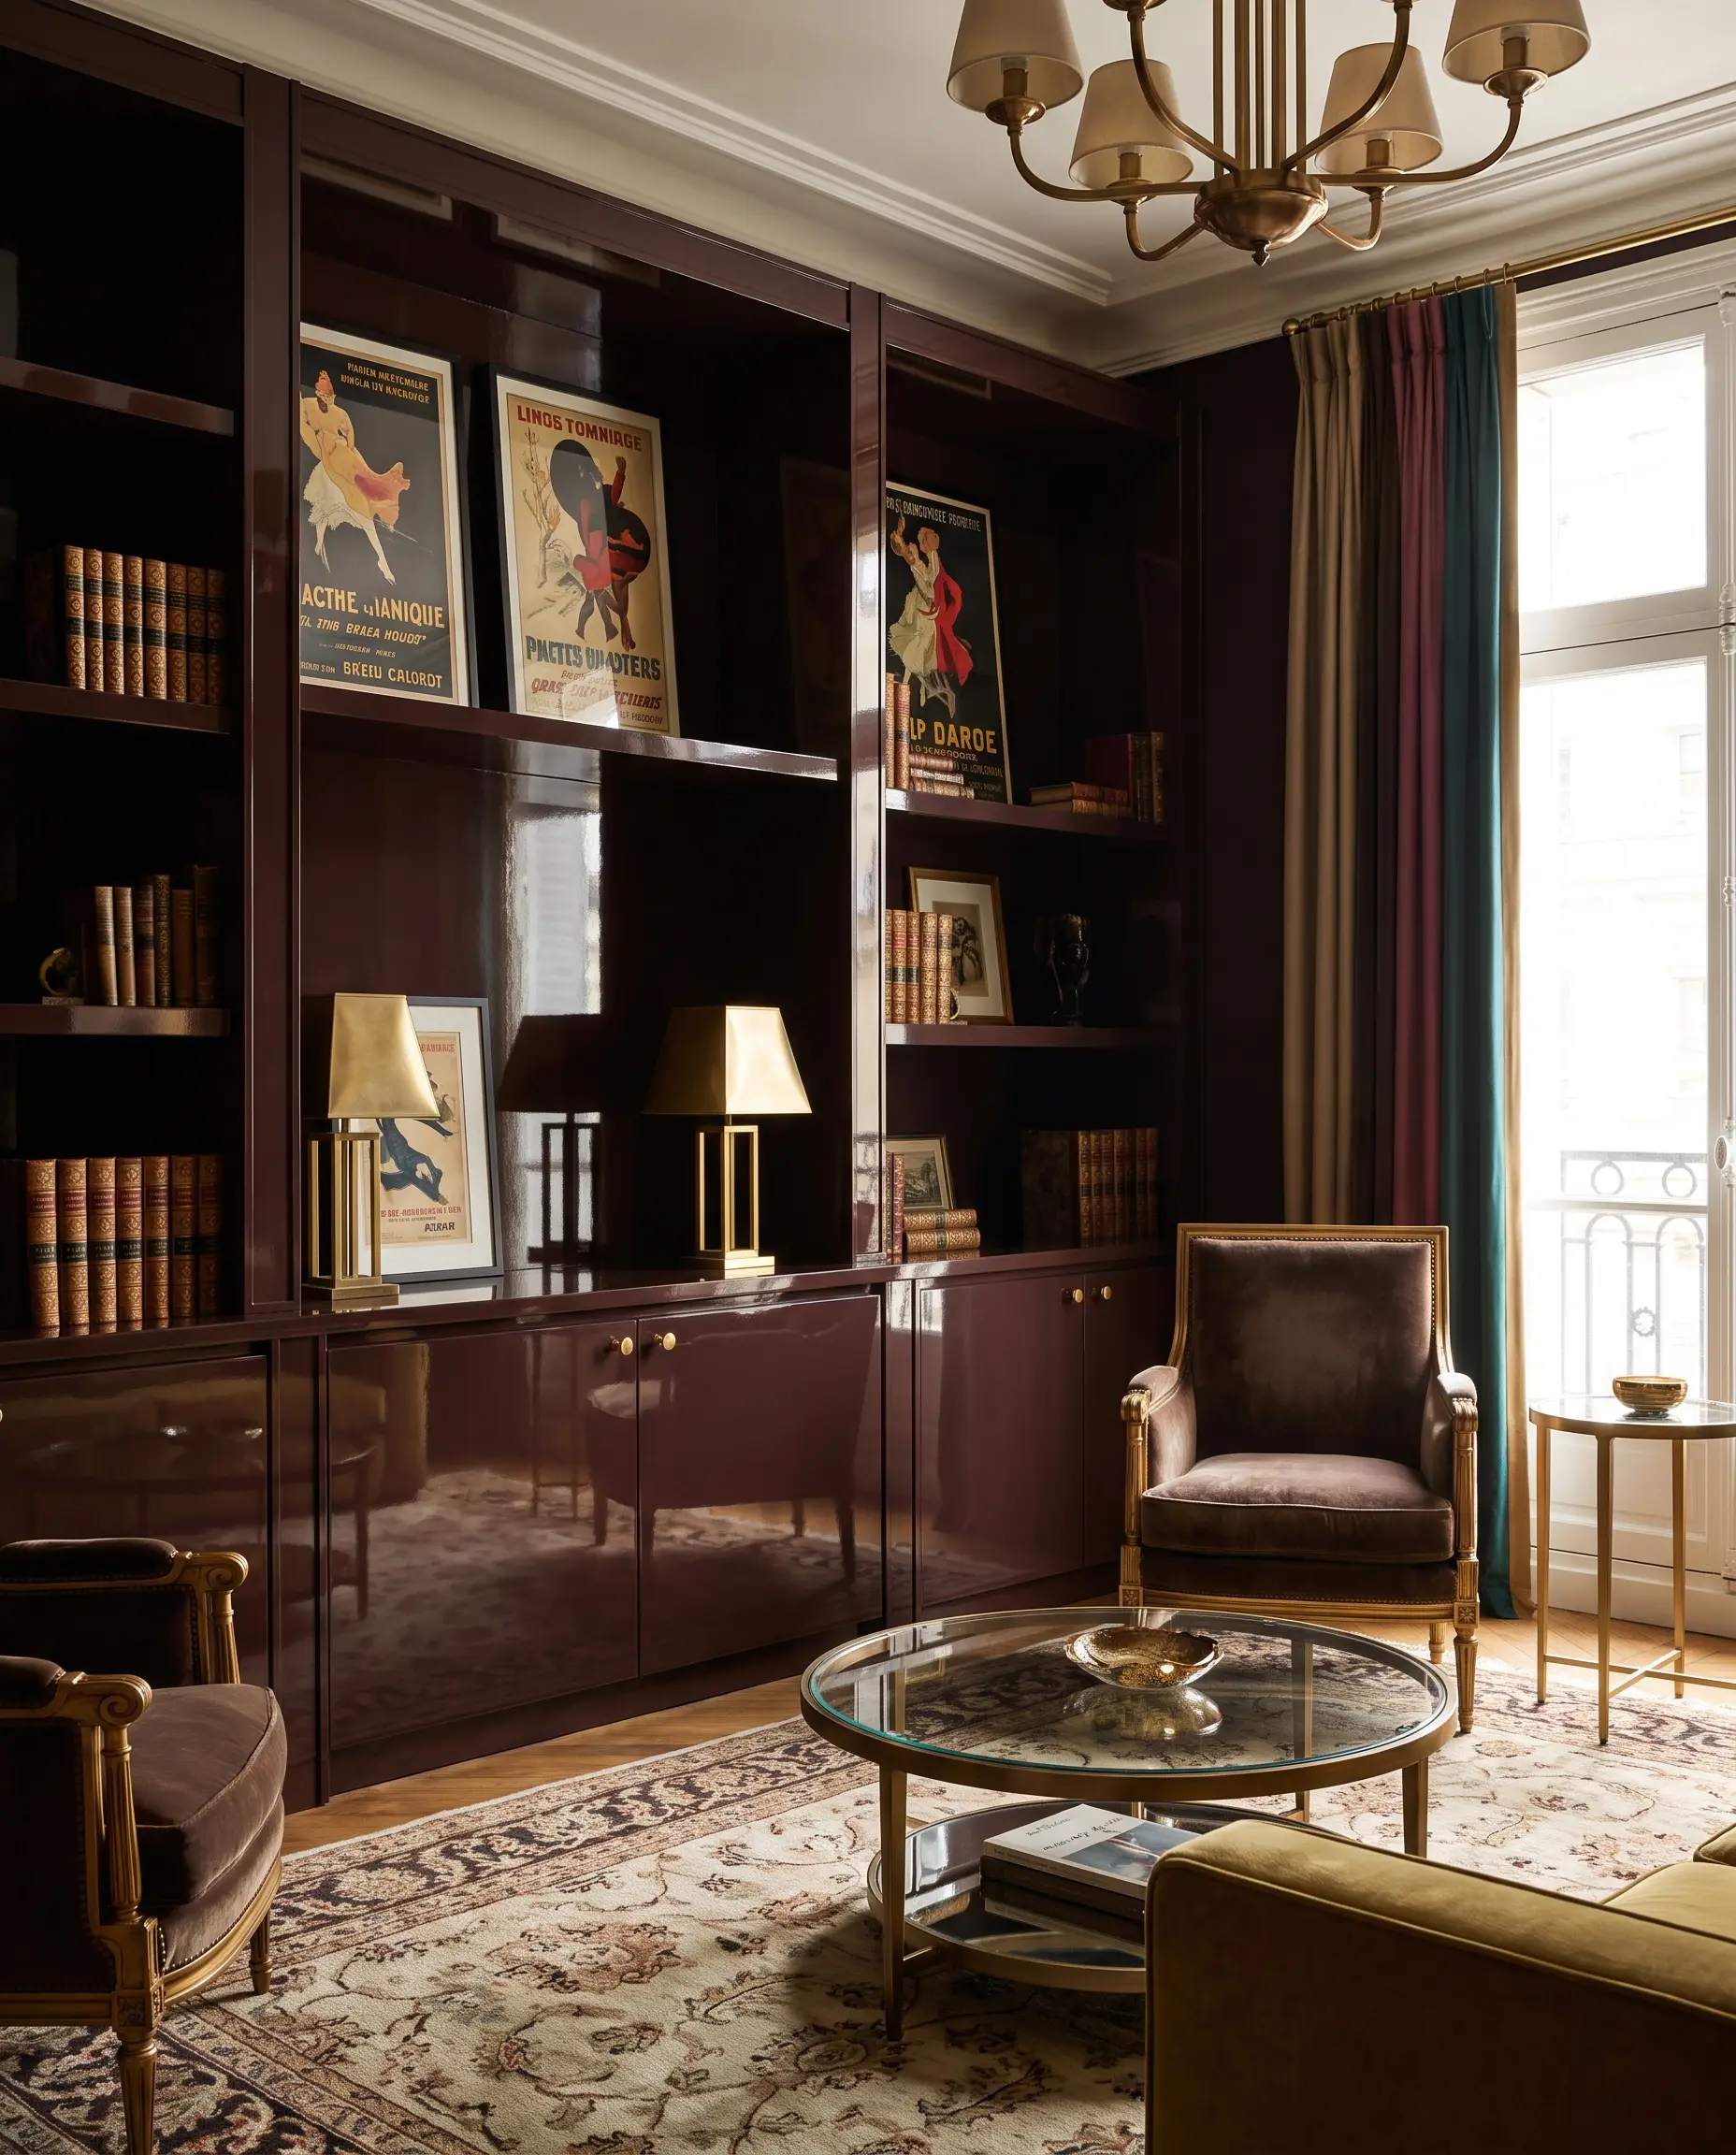
Take a dramatic, high-impact approach by finishing the built-ins in a high-gloss lacquer. The highly reflective surface bounces ambient light around the room, leaning heavily into an Art Deco or Hollywood Regency aesthetic that feels dripping with opulence.
- Vibe: High-octane glamour and reflection.
- Paint Recommendation: Sherwin-Williams Rookwood Dark Red.
- Color Match: A rich, historical oxblood that looks incredibly sophisticated under high-gloss lacquer.
- Execution Warning: High-gloss finishes require absolutely flawless sanding and prep work, as the sheen will highlight every single scratch or dent.
Install Fluted Wood Cabinet Doors on the Base Units
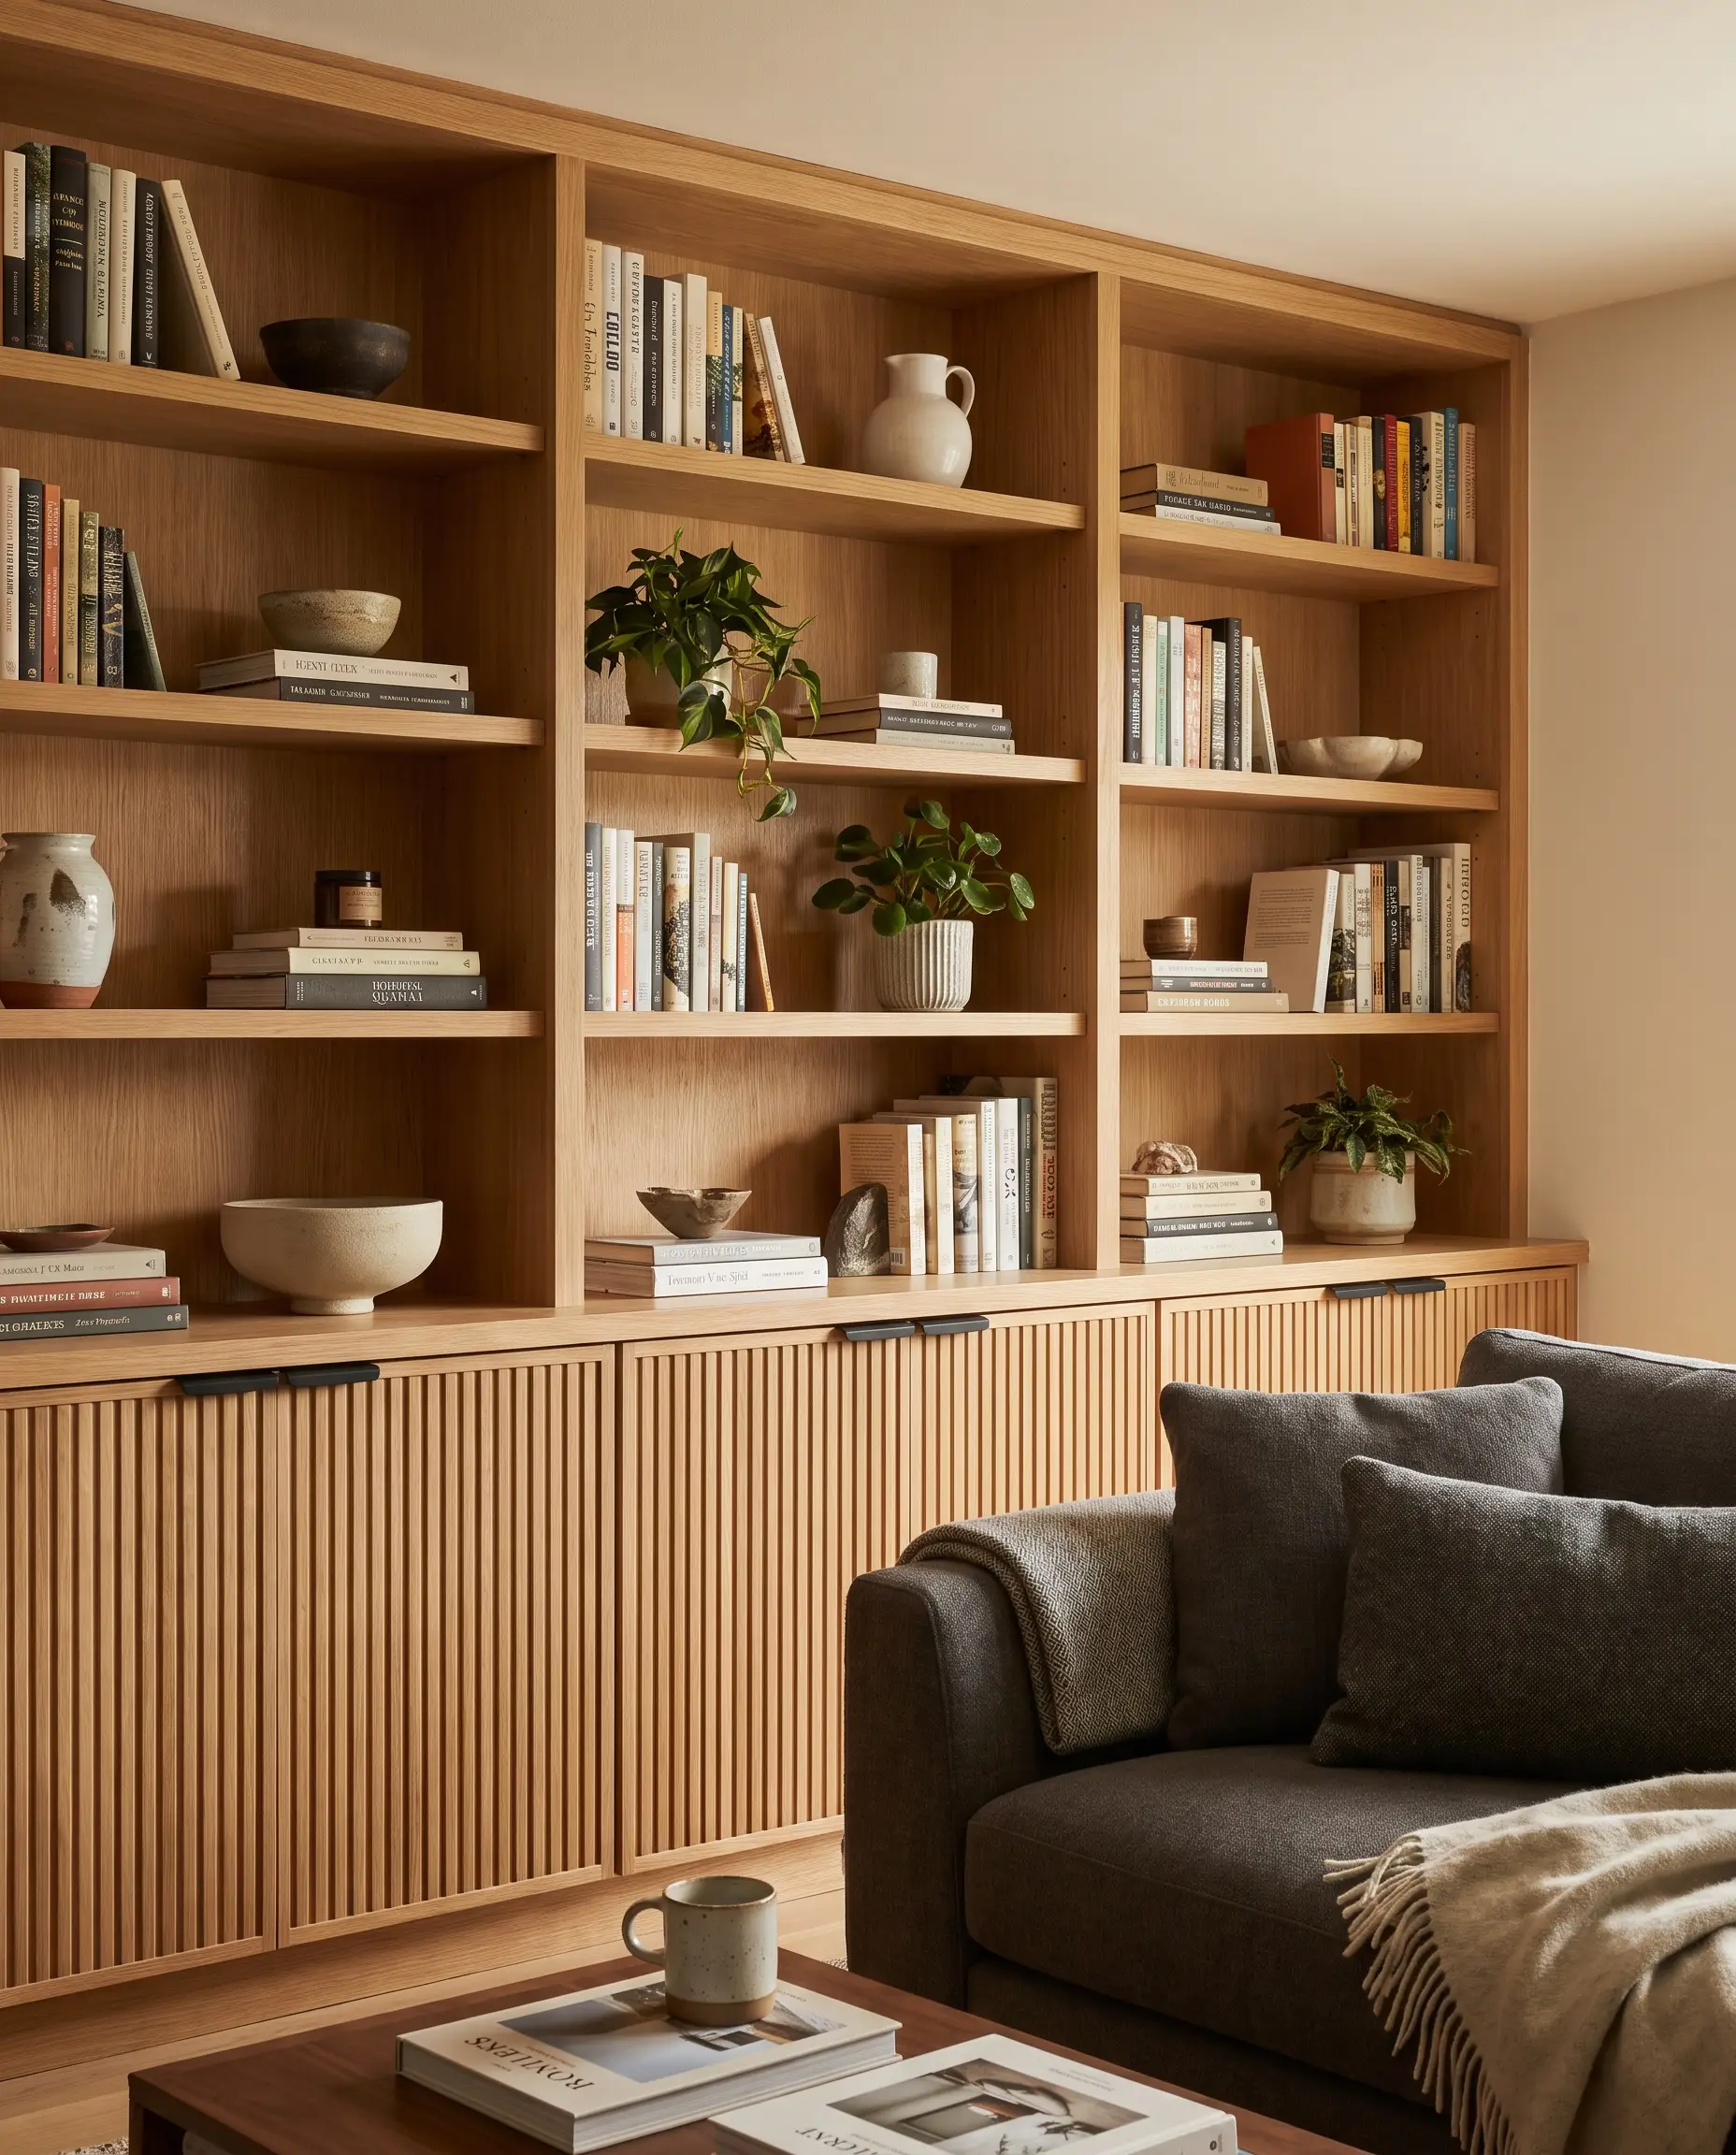
Ground the massive vertical height of the shelves by installing closed base cabinets featuring fluted or reeded door fronts. This tactile, contemporary detail adds incredible texture to the lower half of the room while successfully hiding ugly electronics and routers.
- Vibe: Contemporary, tactile sophistication.
- Key Measurement: Base cabinets should sit at 15-17 inches tall to provide substantial visual grounding.
- Hardware Match: Minimalist matte black or unlacquered brass edge pulls to let the fluted wood remain the star.
Contrast a Crisp White Face Frame with a Charcoal Interior
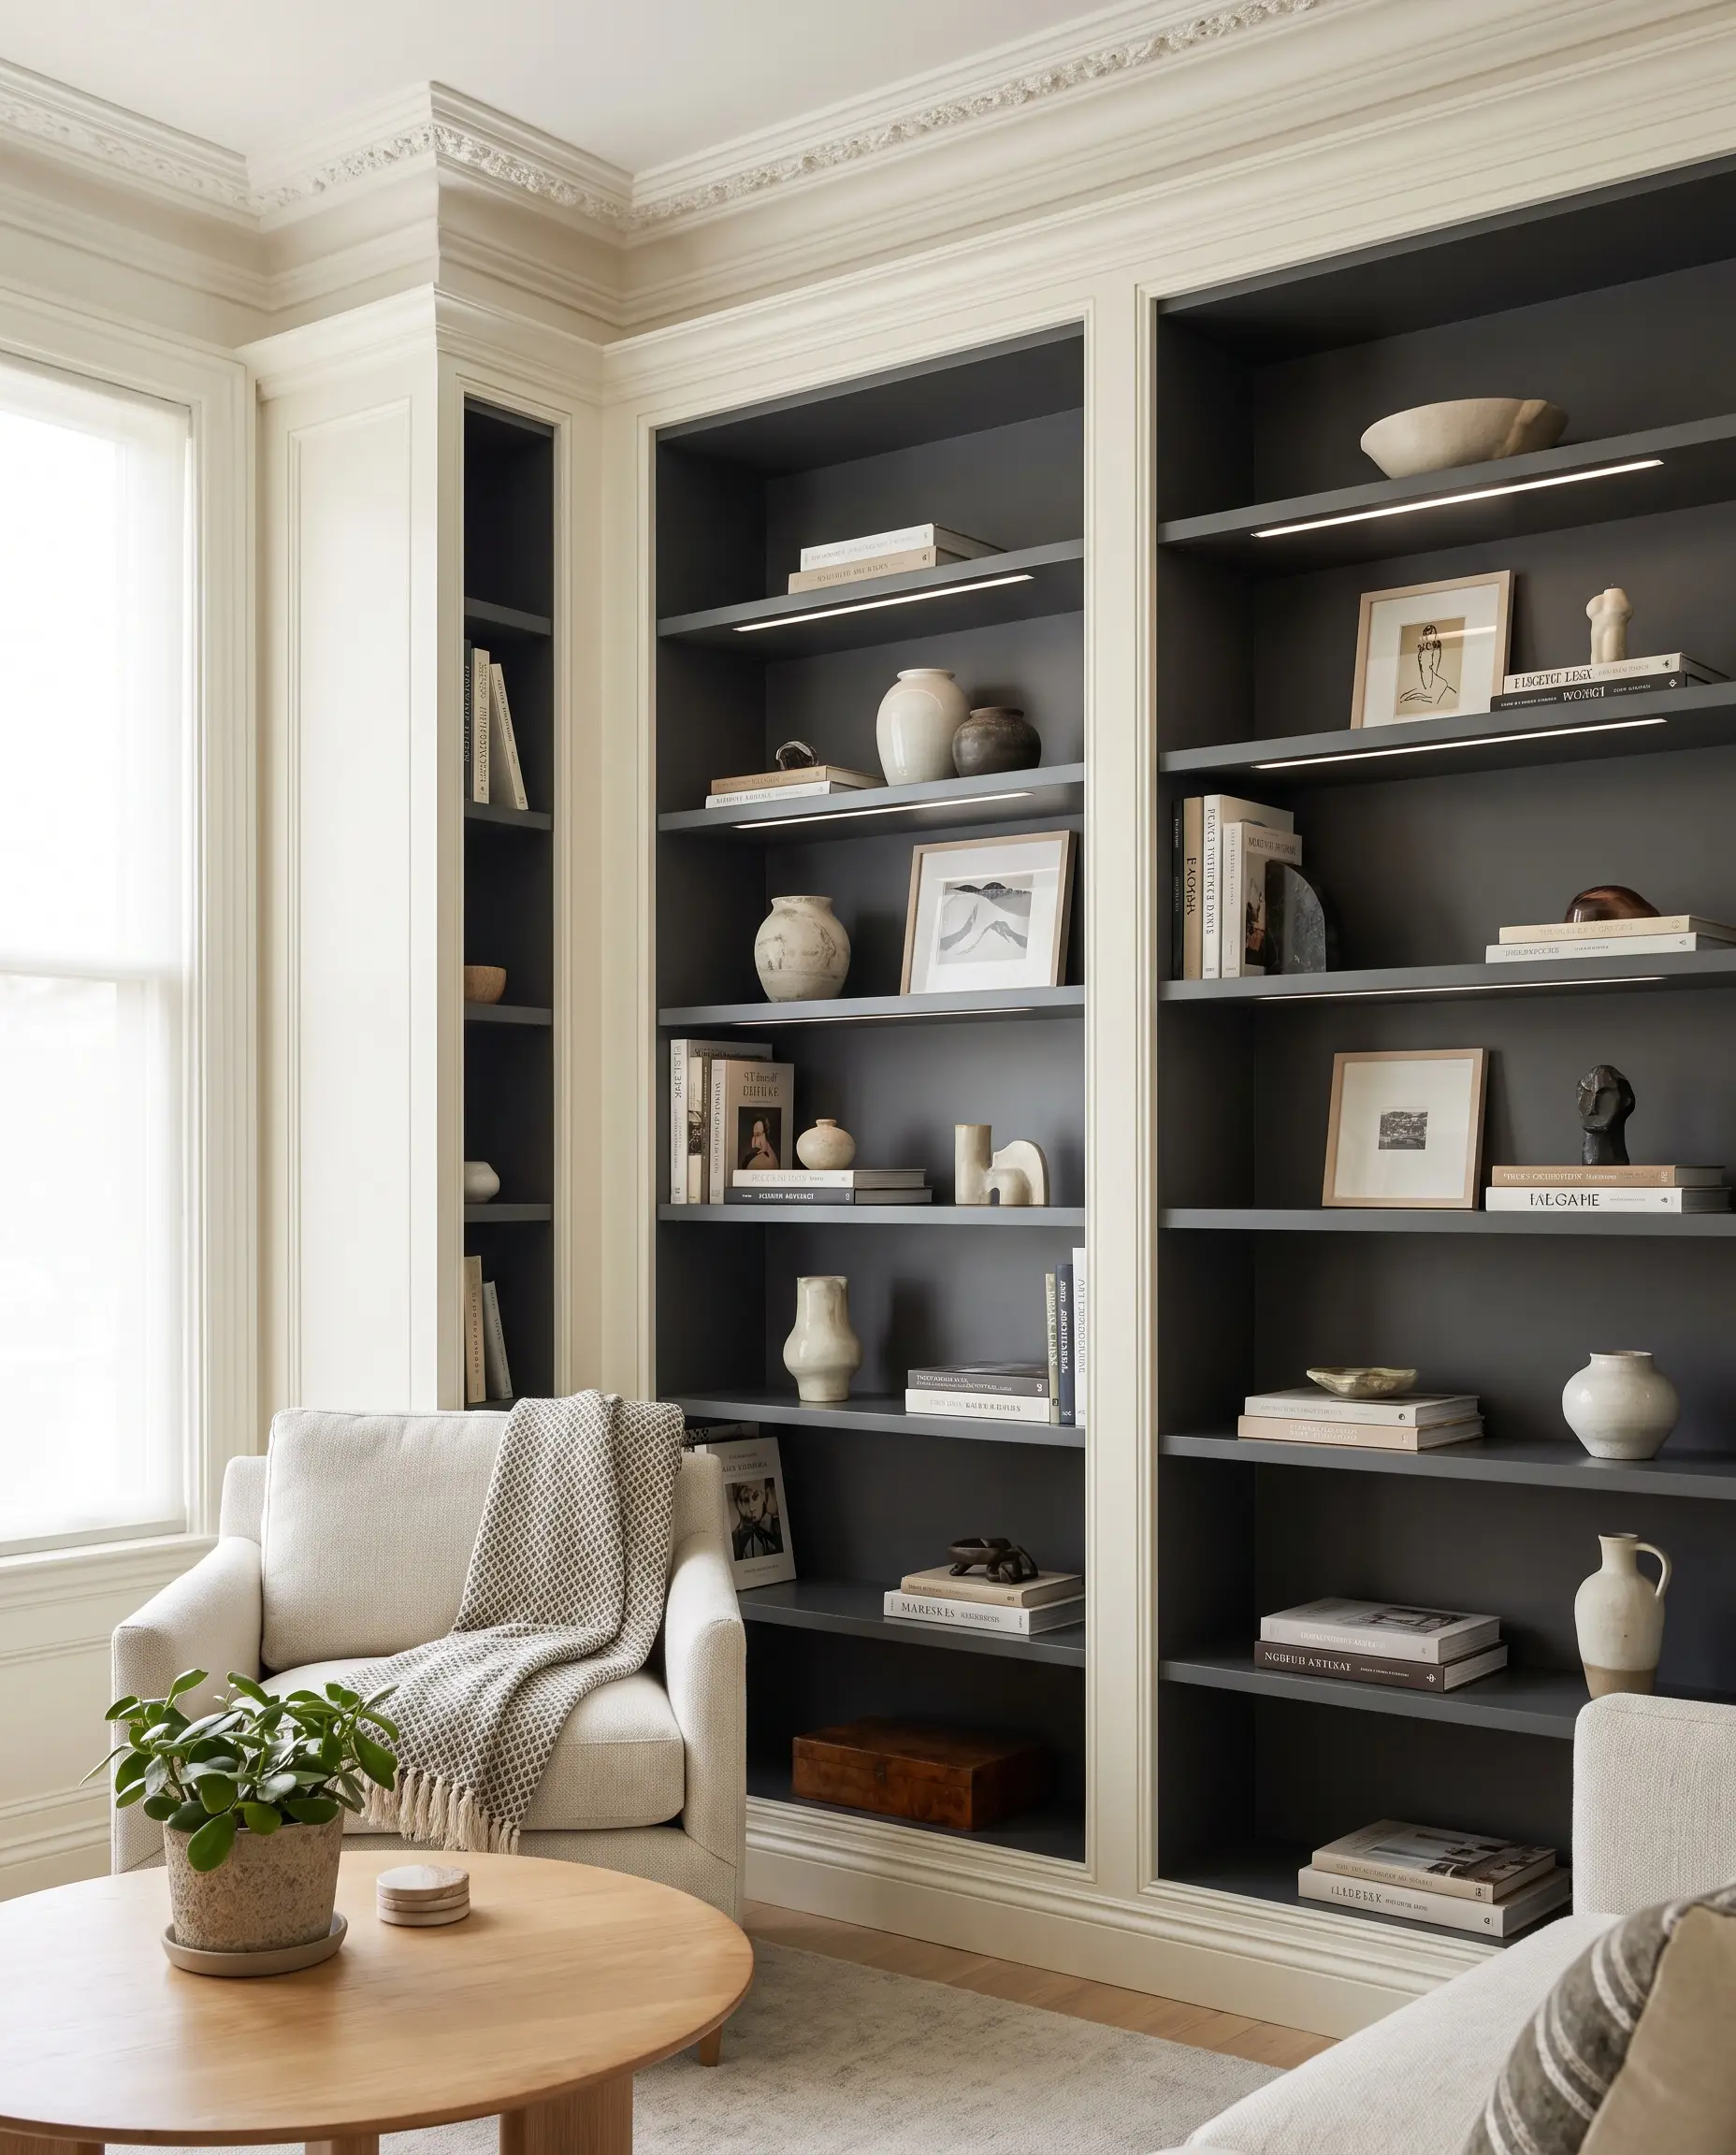
Create dramatic forced depth by painting the interior backing and the horizontal shelf faces a deep charcoal, while keeping the vertical face frames and crown molding bright white. This shadow box effect makes the objects on the shelves command focus, acting as individual museum displays.
- Vibe: High-contrast, tailored definition.
- Paint Recommendation: Benjamin Moore Wrought Iron (Interior) paired with Benjamin Moore Chantilly Lace (Exterior Frame).
- Color Match: A soft, faded black interior contrasting against a brilliant, clean white exterior frame.
Hardware, Lighting, and Functional Add-Ons
Hardware and lighting act as the jewelry of custom millwork, elevating standard boxes into a bespoke library. These functional add-ons require strict pre-planning during the framing phase for structural support and electrical wiring.
Mount a Brass Rolling Library Ladder on a Custom Rail
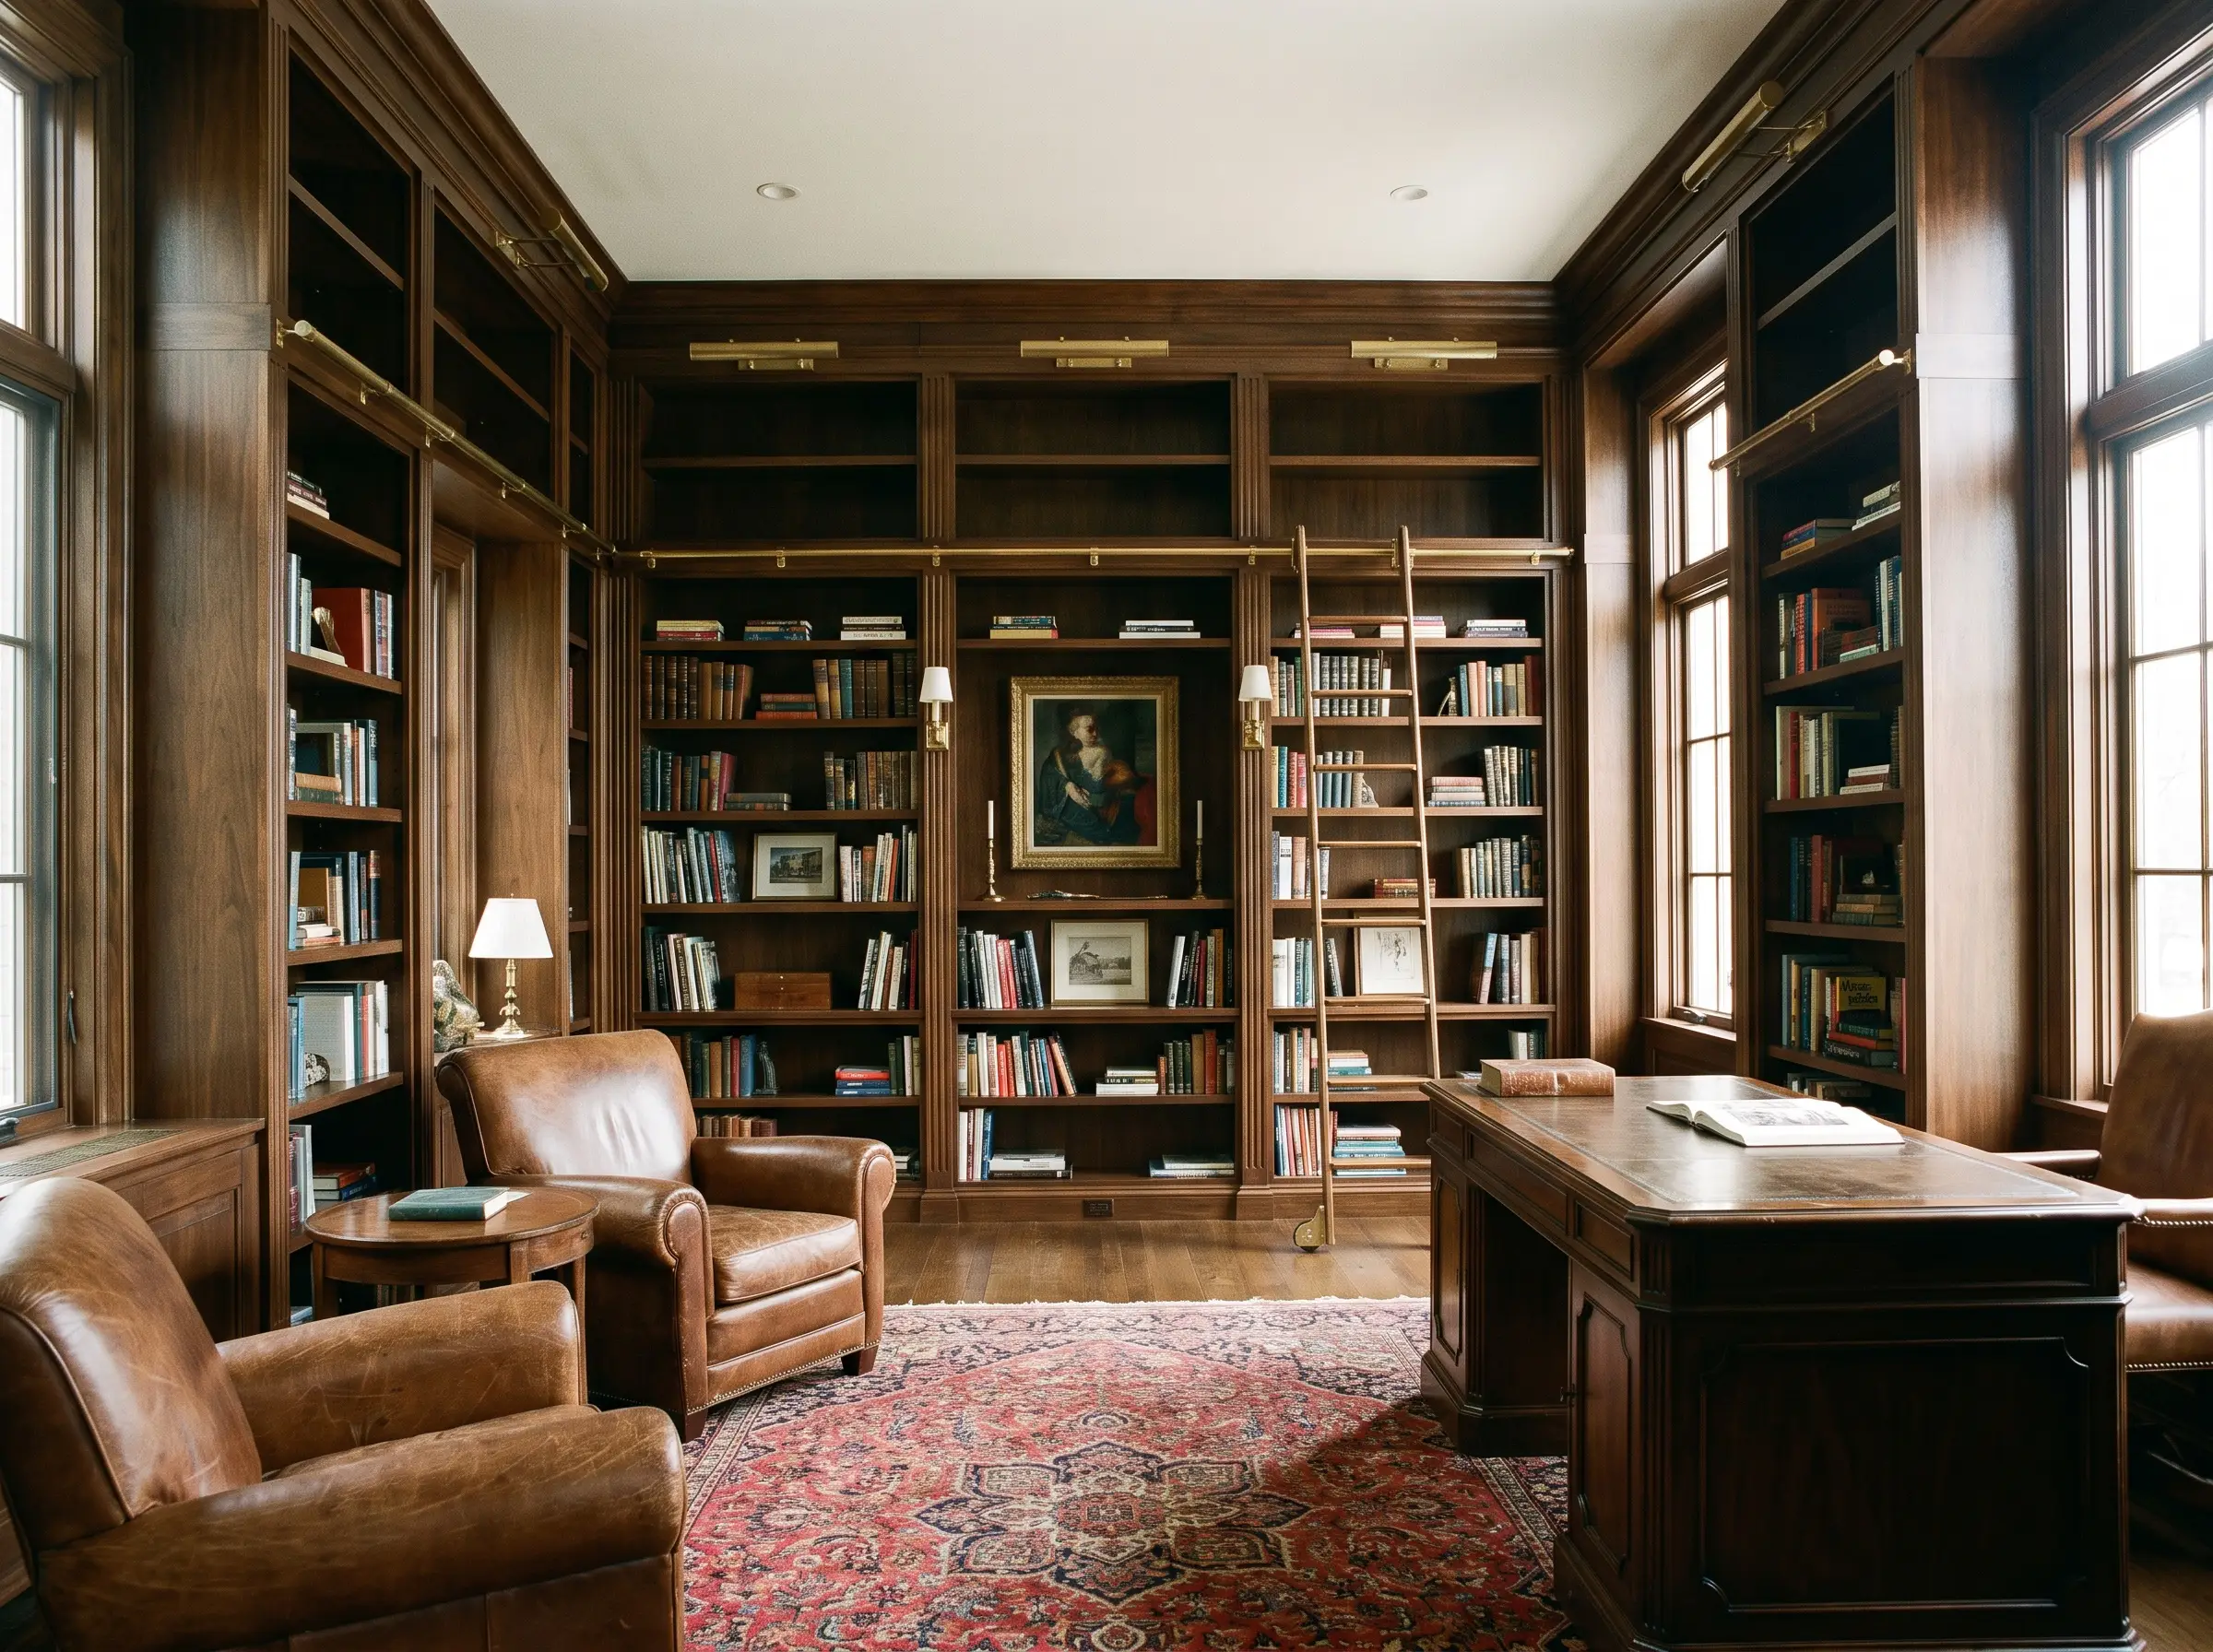
For ceilings 9 feet or taller, install a metal rail along the top fascia to support a rolling library ladder. This kinetic, highly functional hardware is the ultimate bespoke feature, marrying classic warmth with undeniable architectural permanence.
- Vibe: Historic, high-end bespoke craftsmanship.
- Key Materials: Unlacquered brass hardware against deep wood tones.
- Structural Rule: The fascia board holding the rail must be backed with solid blocking tied directly into the wall studs to support the kinetic weight of a human climbing the ladder.
Always order your ladder hardware before finalizing the shelf depths. The pitch and angle of the ladder will dictate exactly how far out your base cabinets can protrude.
Designer Secret
Hardwire Picture Sconces Directly into the Top Header
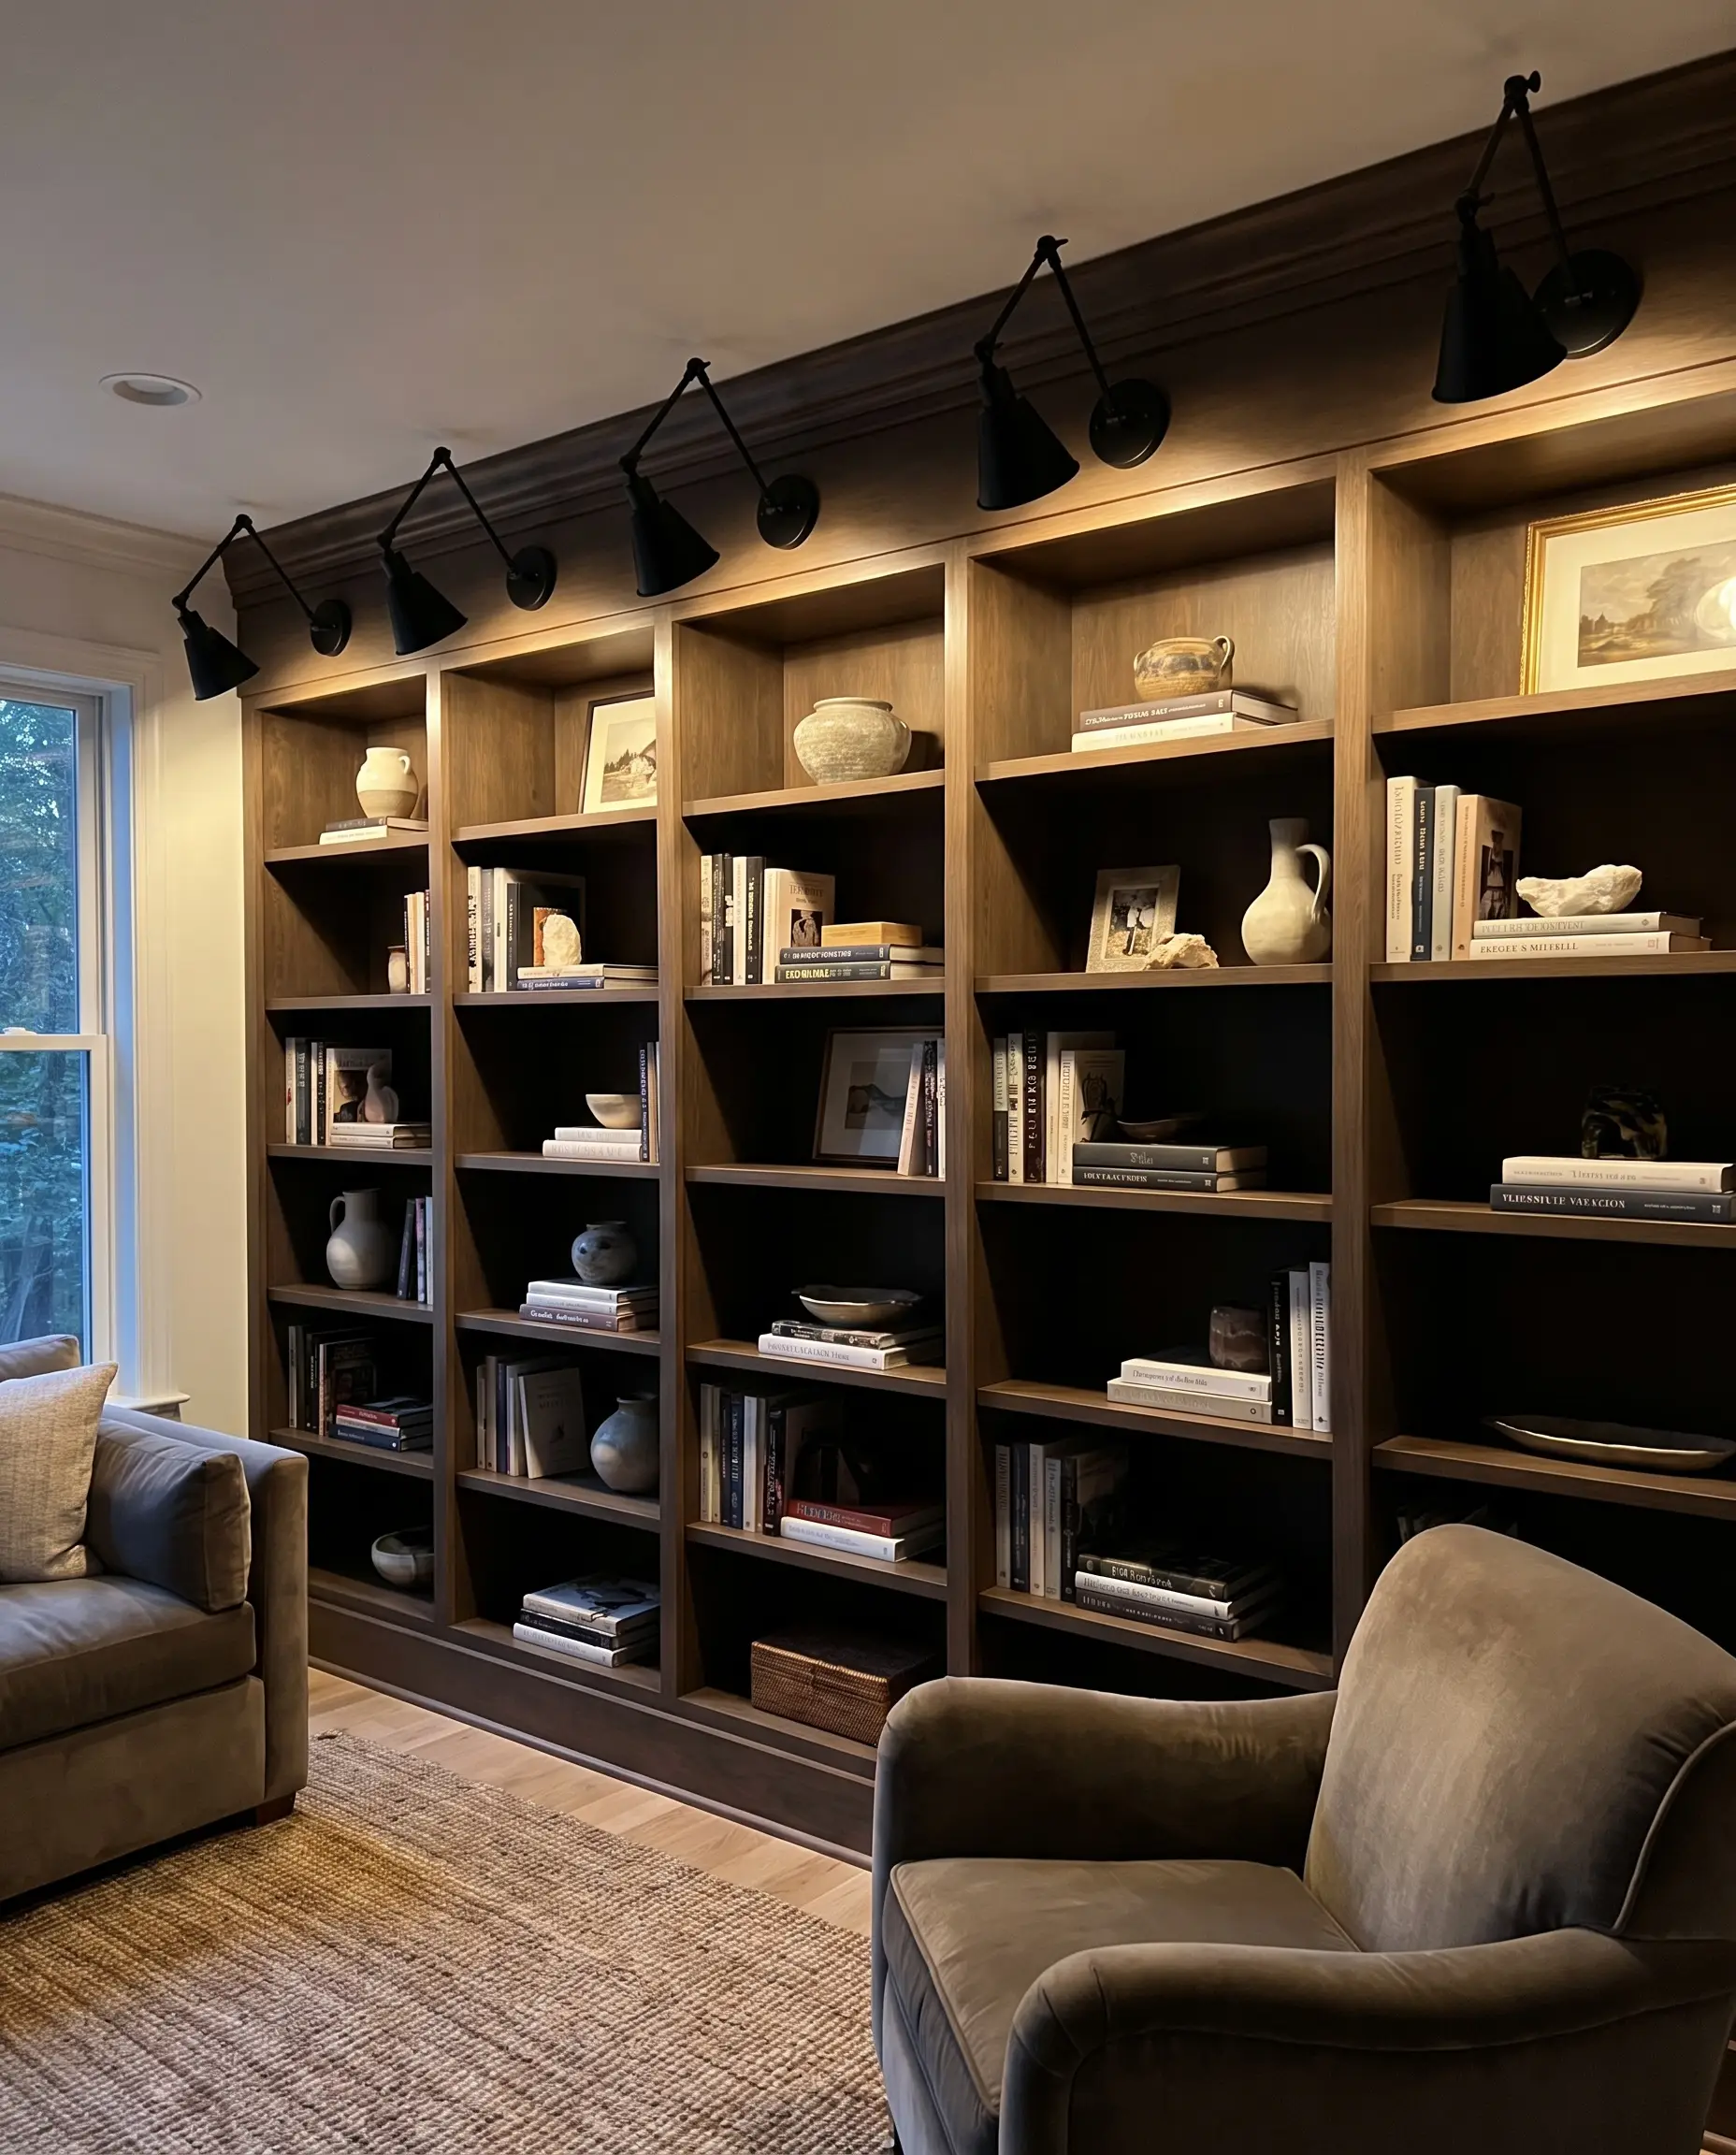
Plan ahead with a licensed electrician to hardwire brass or matte black picture sconces directly along the top crown molding. Washing light down the front plane of the shelves highlights your styling and provides gorgeous ambient evening lighting.
- Vibe: Curated, gallery-like illumination.
- Key Materials: Hardwired picture sconces with articulating arms.
- Spacing Rule: Mount sconces precisely centered over each vertical bay, ensuring the light cone evenly washes the shelves below.
Route Hidden LED Strip Lighting Behind the Shelf Noses
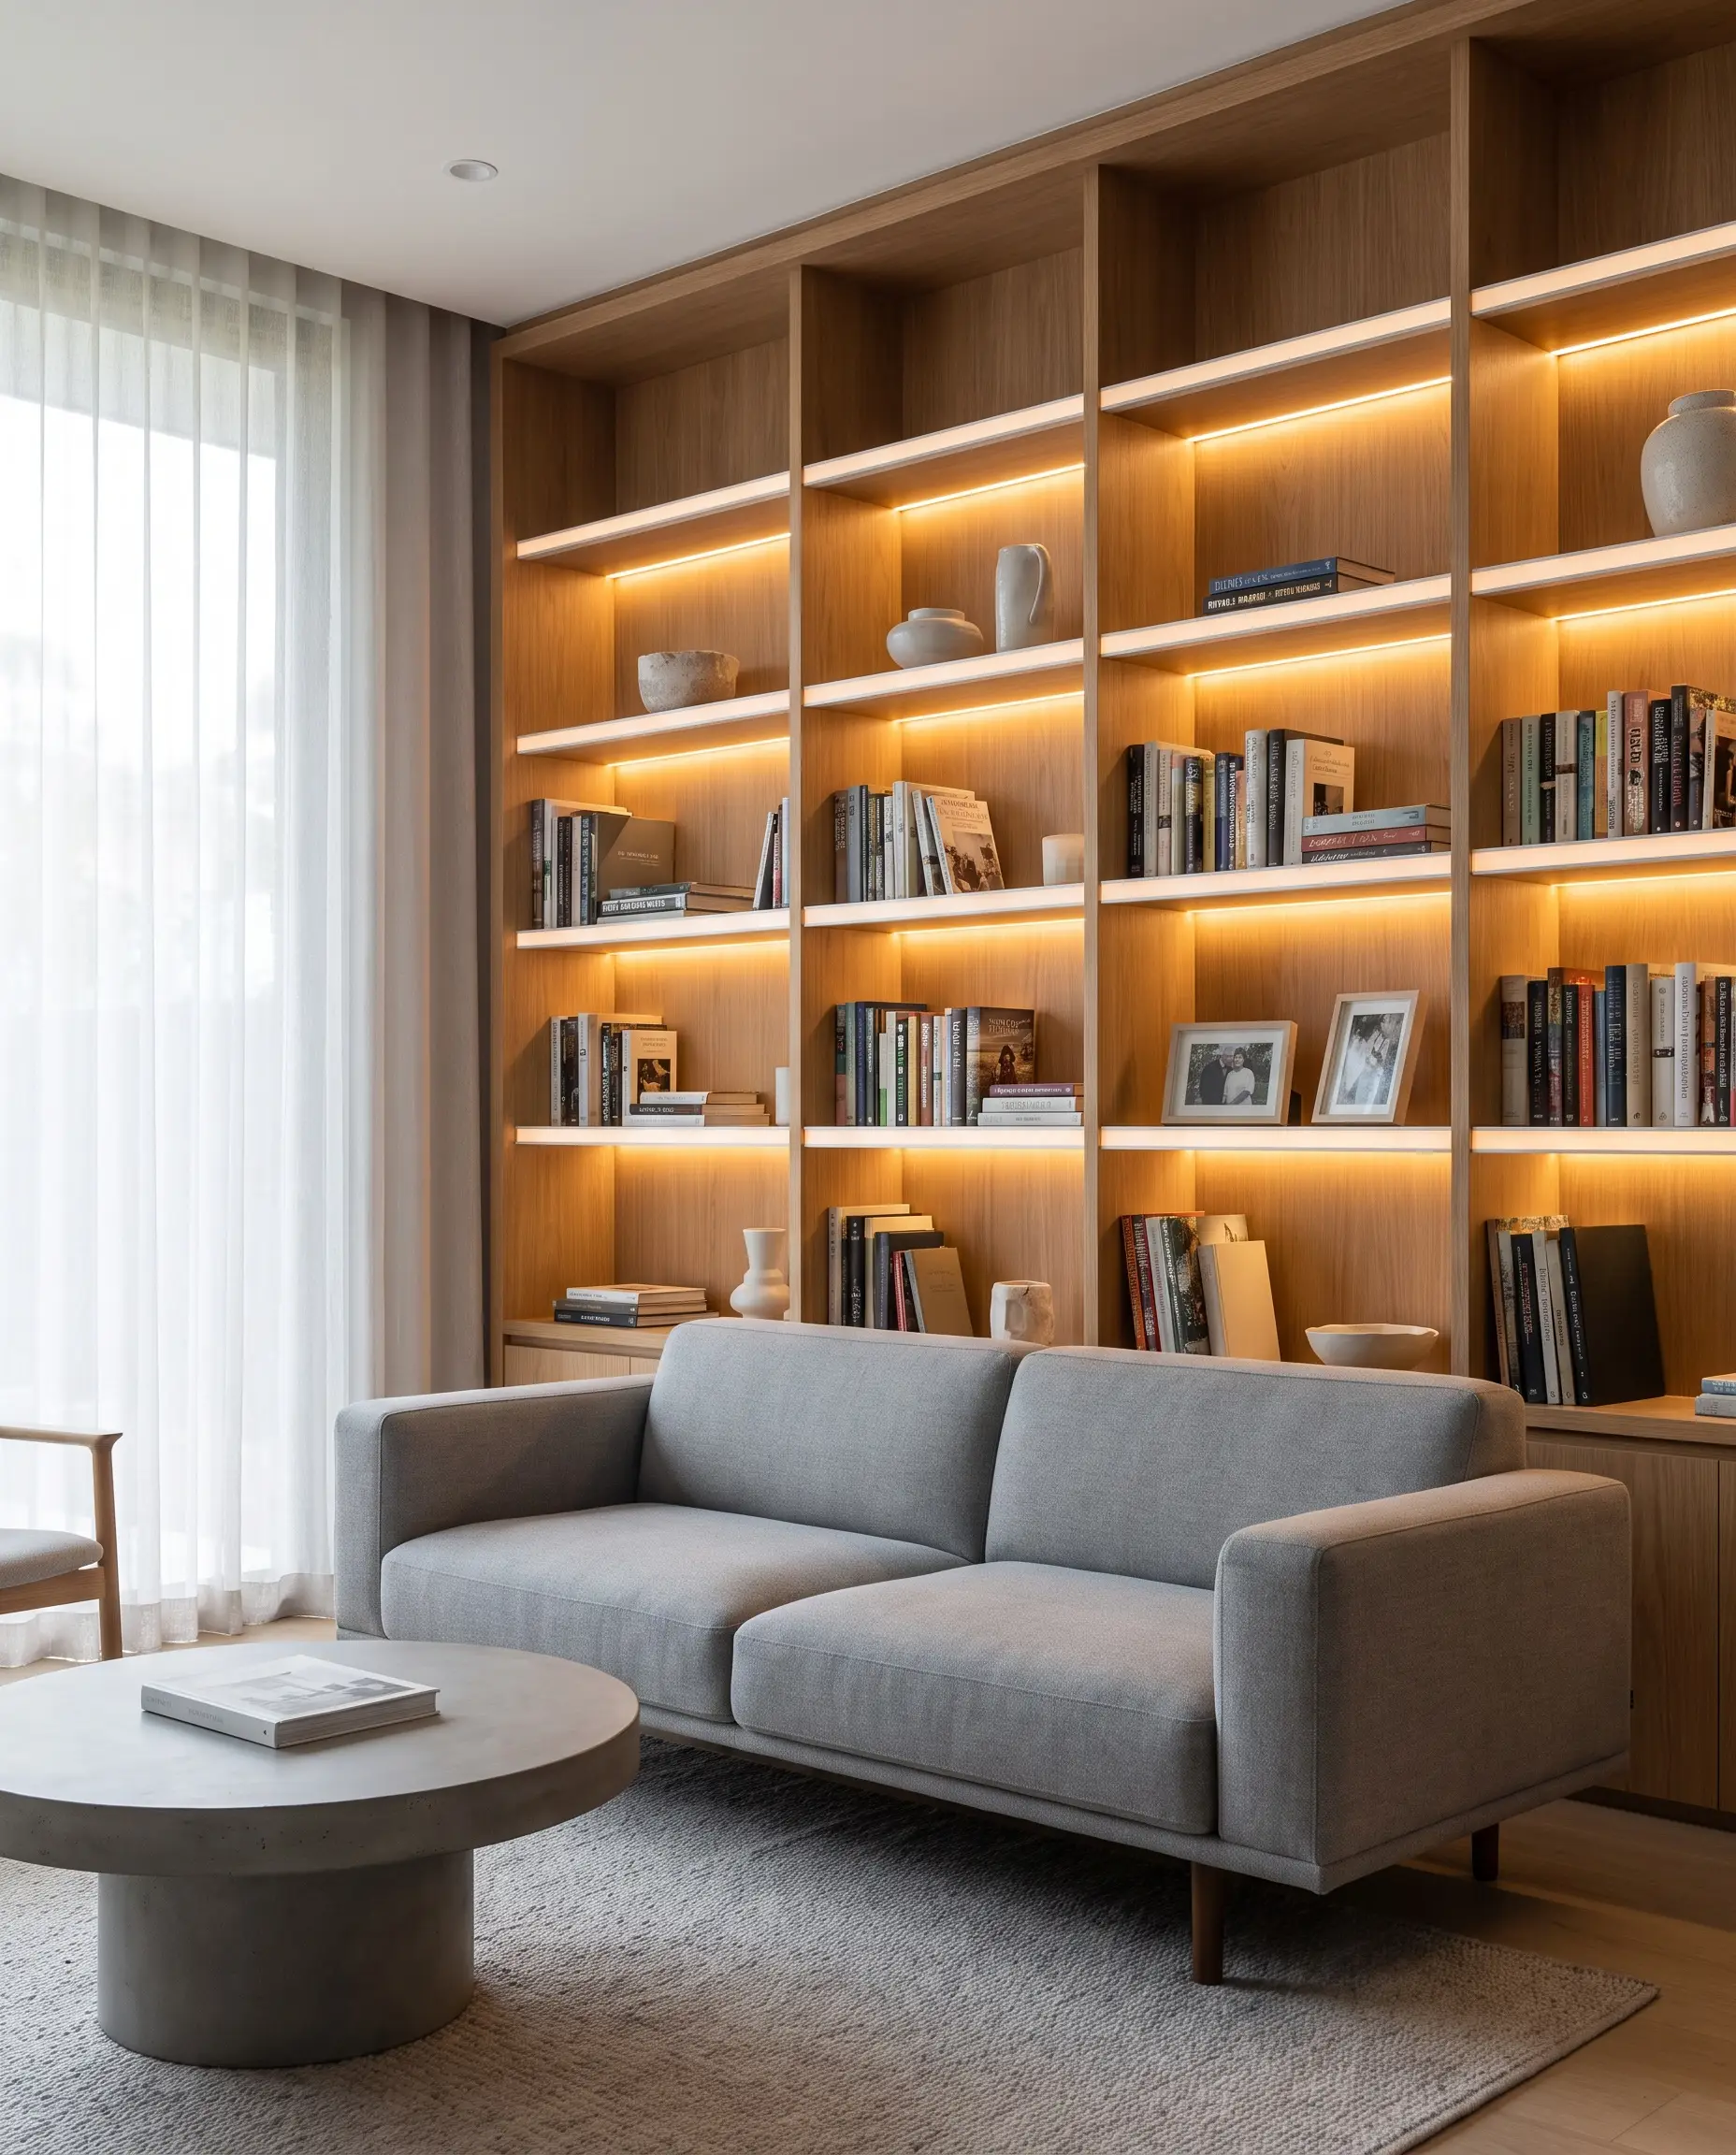
For a highly modern, floating effect, use a router to create a channel under the front nose of each horizontal shelf and inset LED strip lighting. This technique illuminates the objects below without any visible fixtures, creating a clean, minimalist glow.
- Vibe: Sleek, architectural modernism.
- Key Materials: Aluminum LED channels with milky diffusers to prevent harsh hot spots on the objects below.
- Color Temperature: Specify 2700K LED strips for a warm, inviting residential glow rather than a sterile commercial white.
Integrate a Drop-Down Desk Panel for a Concealed Office
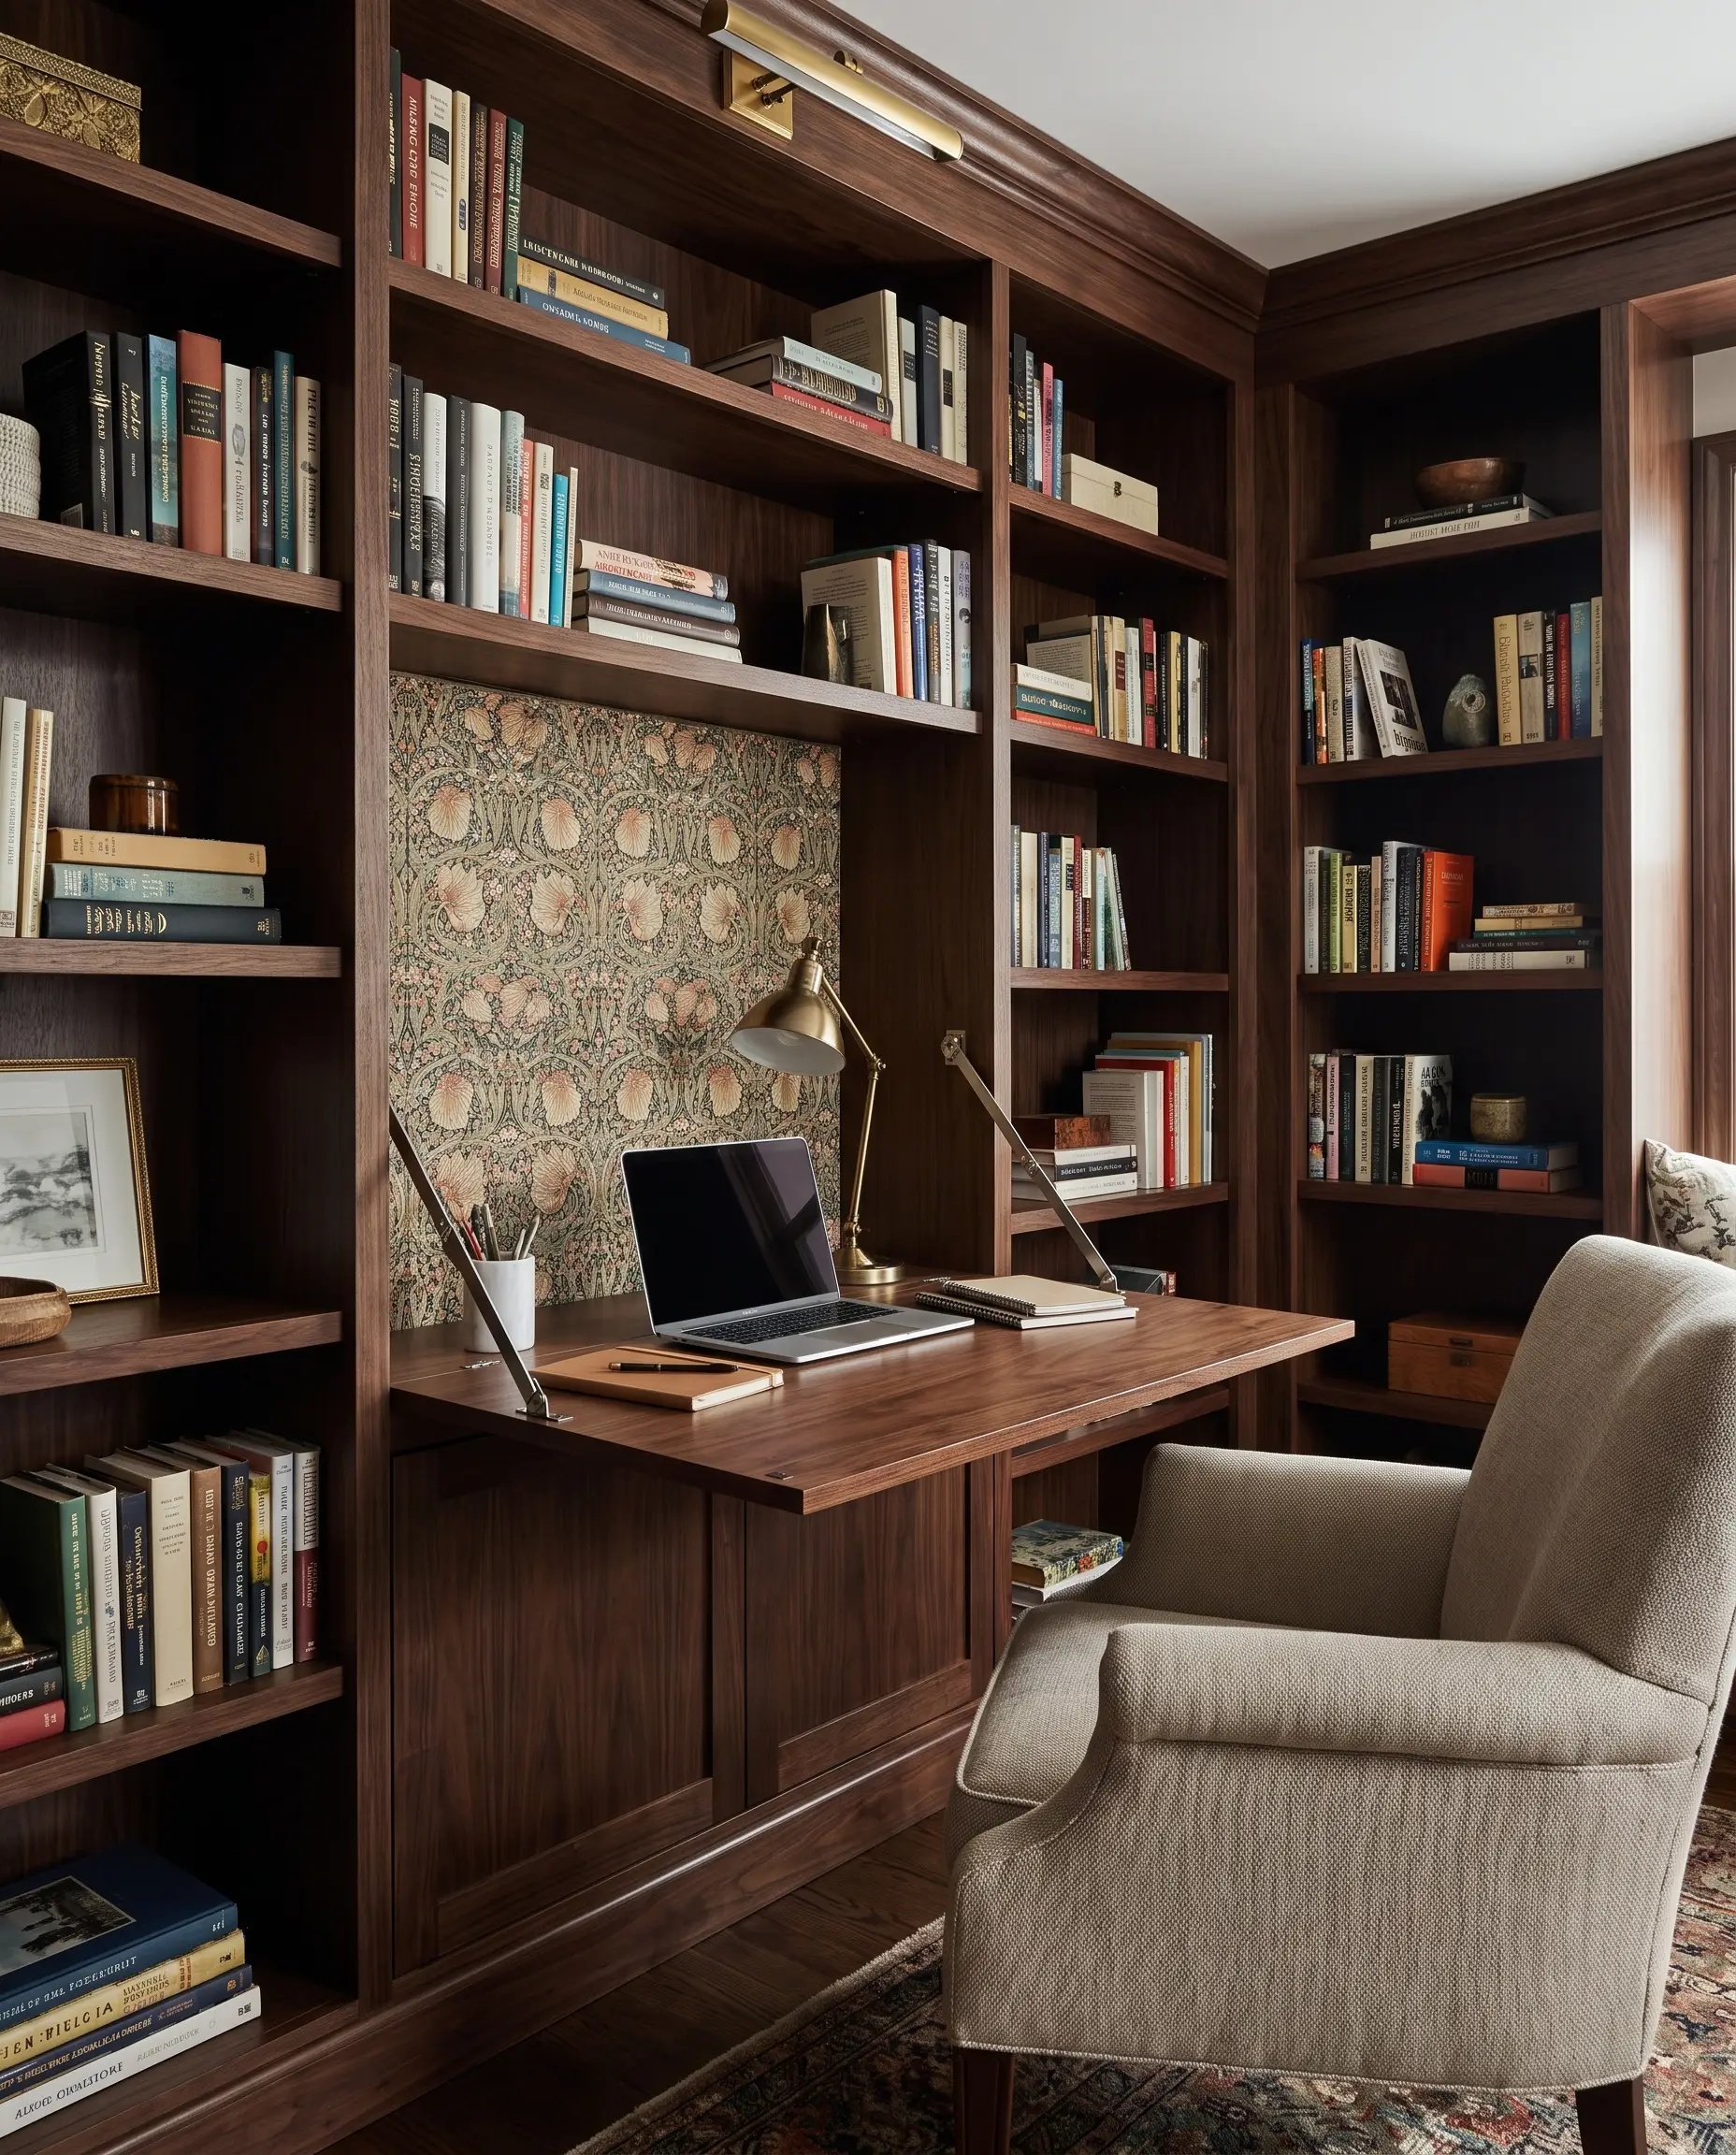
Merge architectural style with extreme practicality by building a drop-down, secretary-style desk into the center bay of the unit. When closed, it reads as a standard, seamless cabinet door; when open, it reveals a highly functional, compact home office perfect for smaller square footage.
- Vibe: Stealthy, highly functional utility.
- Key Hardware: Heavy-duty drop-down flap hinges and reliable magnetic catches.
- Styling Pro-Tip: Line the interior of the desk cavity with a bold wallpaper or corkboard for a hidden moment of joy when the workstation is open.
Add Integrated Art Hanging Wires Over the Bookshelves
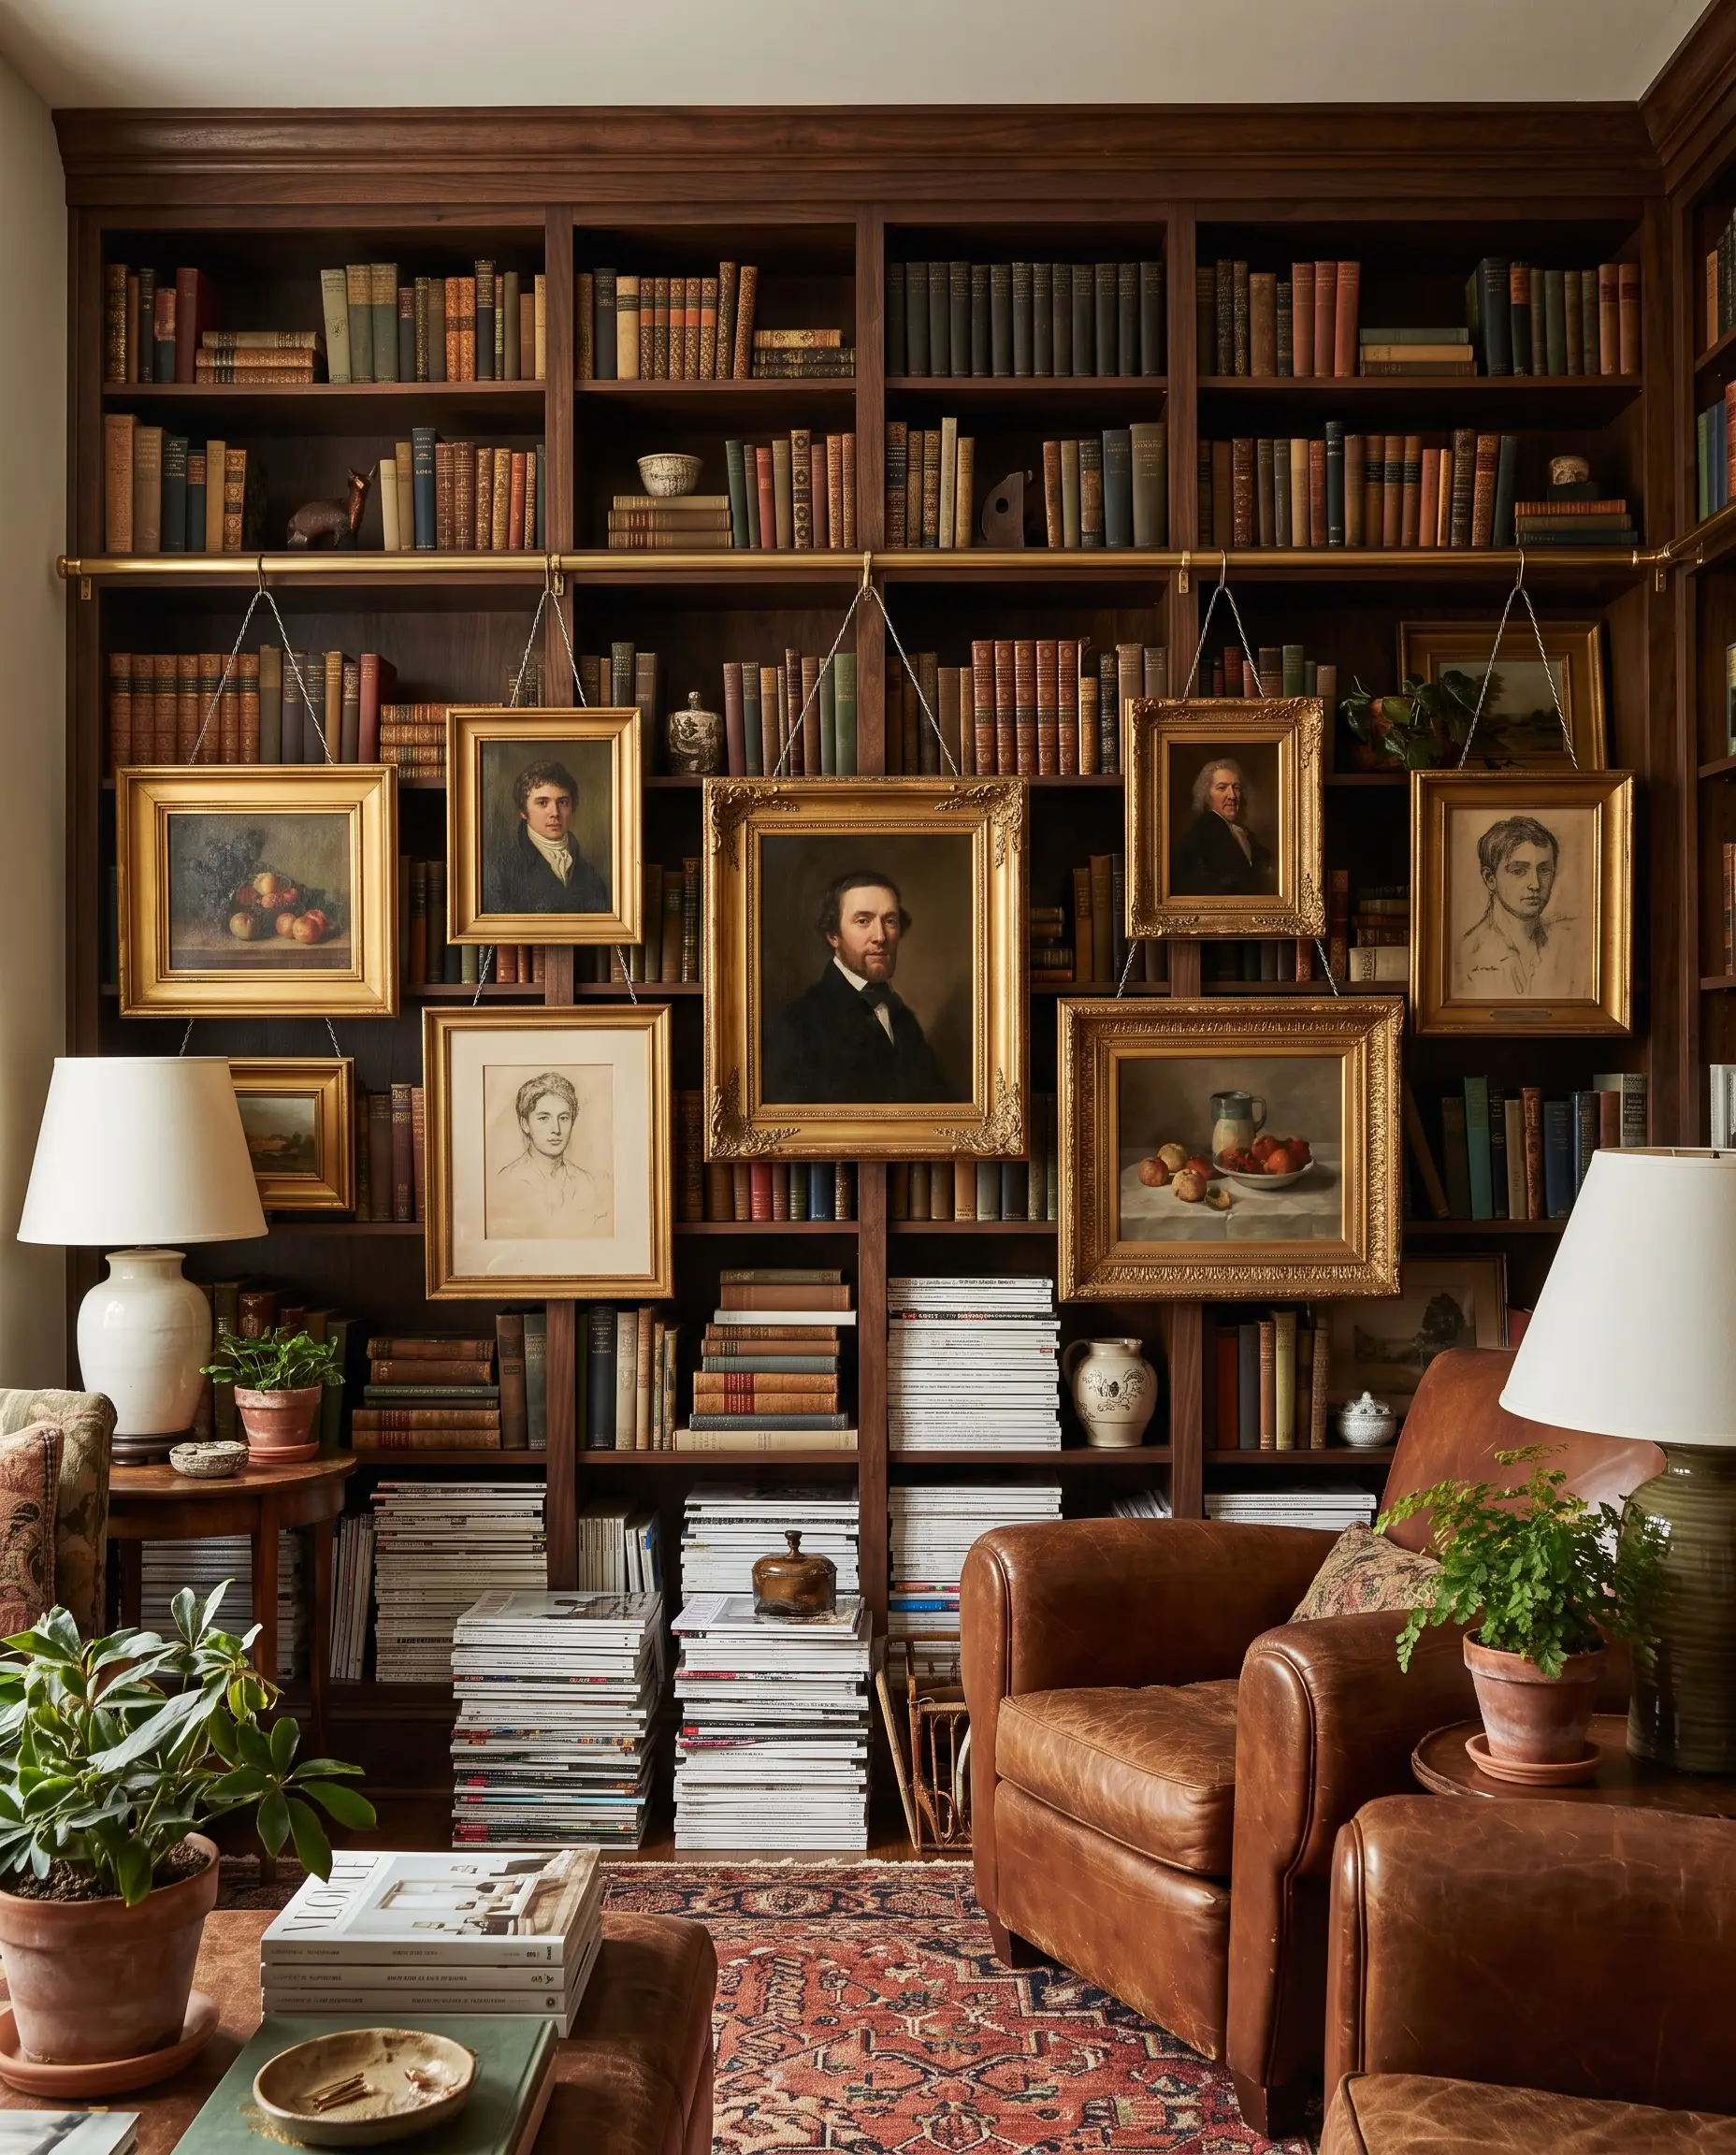
Instead of leaving the front plane of the millwork totally open, install a brass gallery rail at the top and suspend framed artwork directly in front of the shelves. This layers the room visually and breaks up the rigid grid of the shelving with unexpected focal points.
- Vibe: Eclectic, collected, and heavily layered.
- Key Materials: Traditional brass picture rail hooks and braided steel wire.
- Styling Pro-Tip: Hang the art low enough to intersect the middle shelves, forcing the eye to stop and appreciate the depth between the canvas and the books behind it.
The Pro Styling Ratios and Methods for Full-Height Shelving
Floor-to-ceiling shelves can quickly look like a cluttered thrift store if not styled with fierce intention. Relying on strict visual ratios and mathematical styling methods keeps the eye moving gracefully across the massive vertical plane.
Apply the 60/30/10 Ratio for Books, Objects, and Negative Space
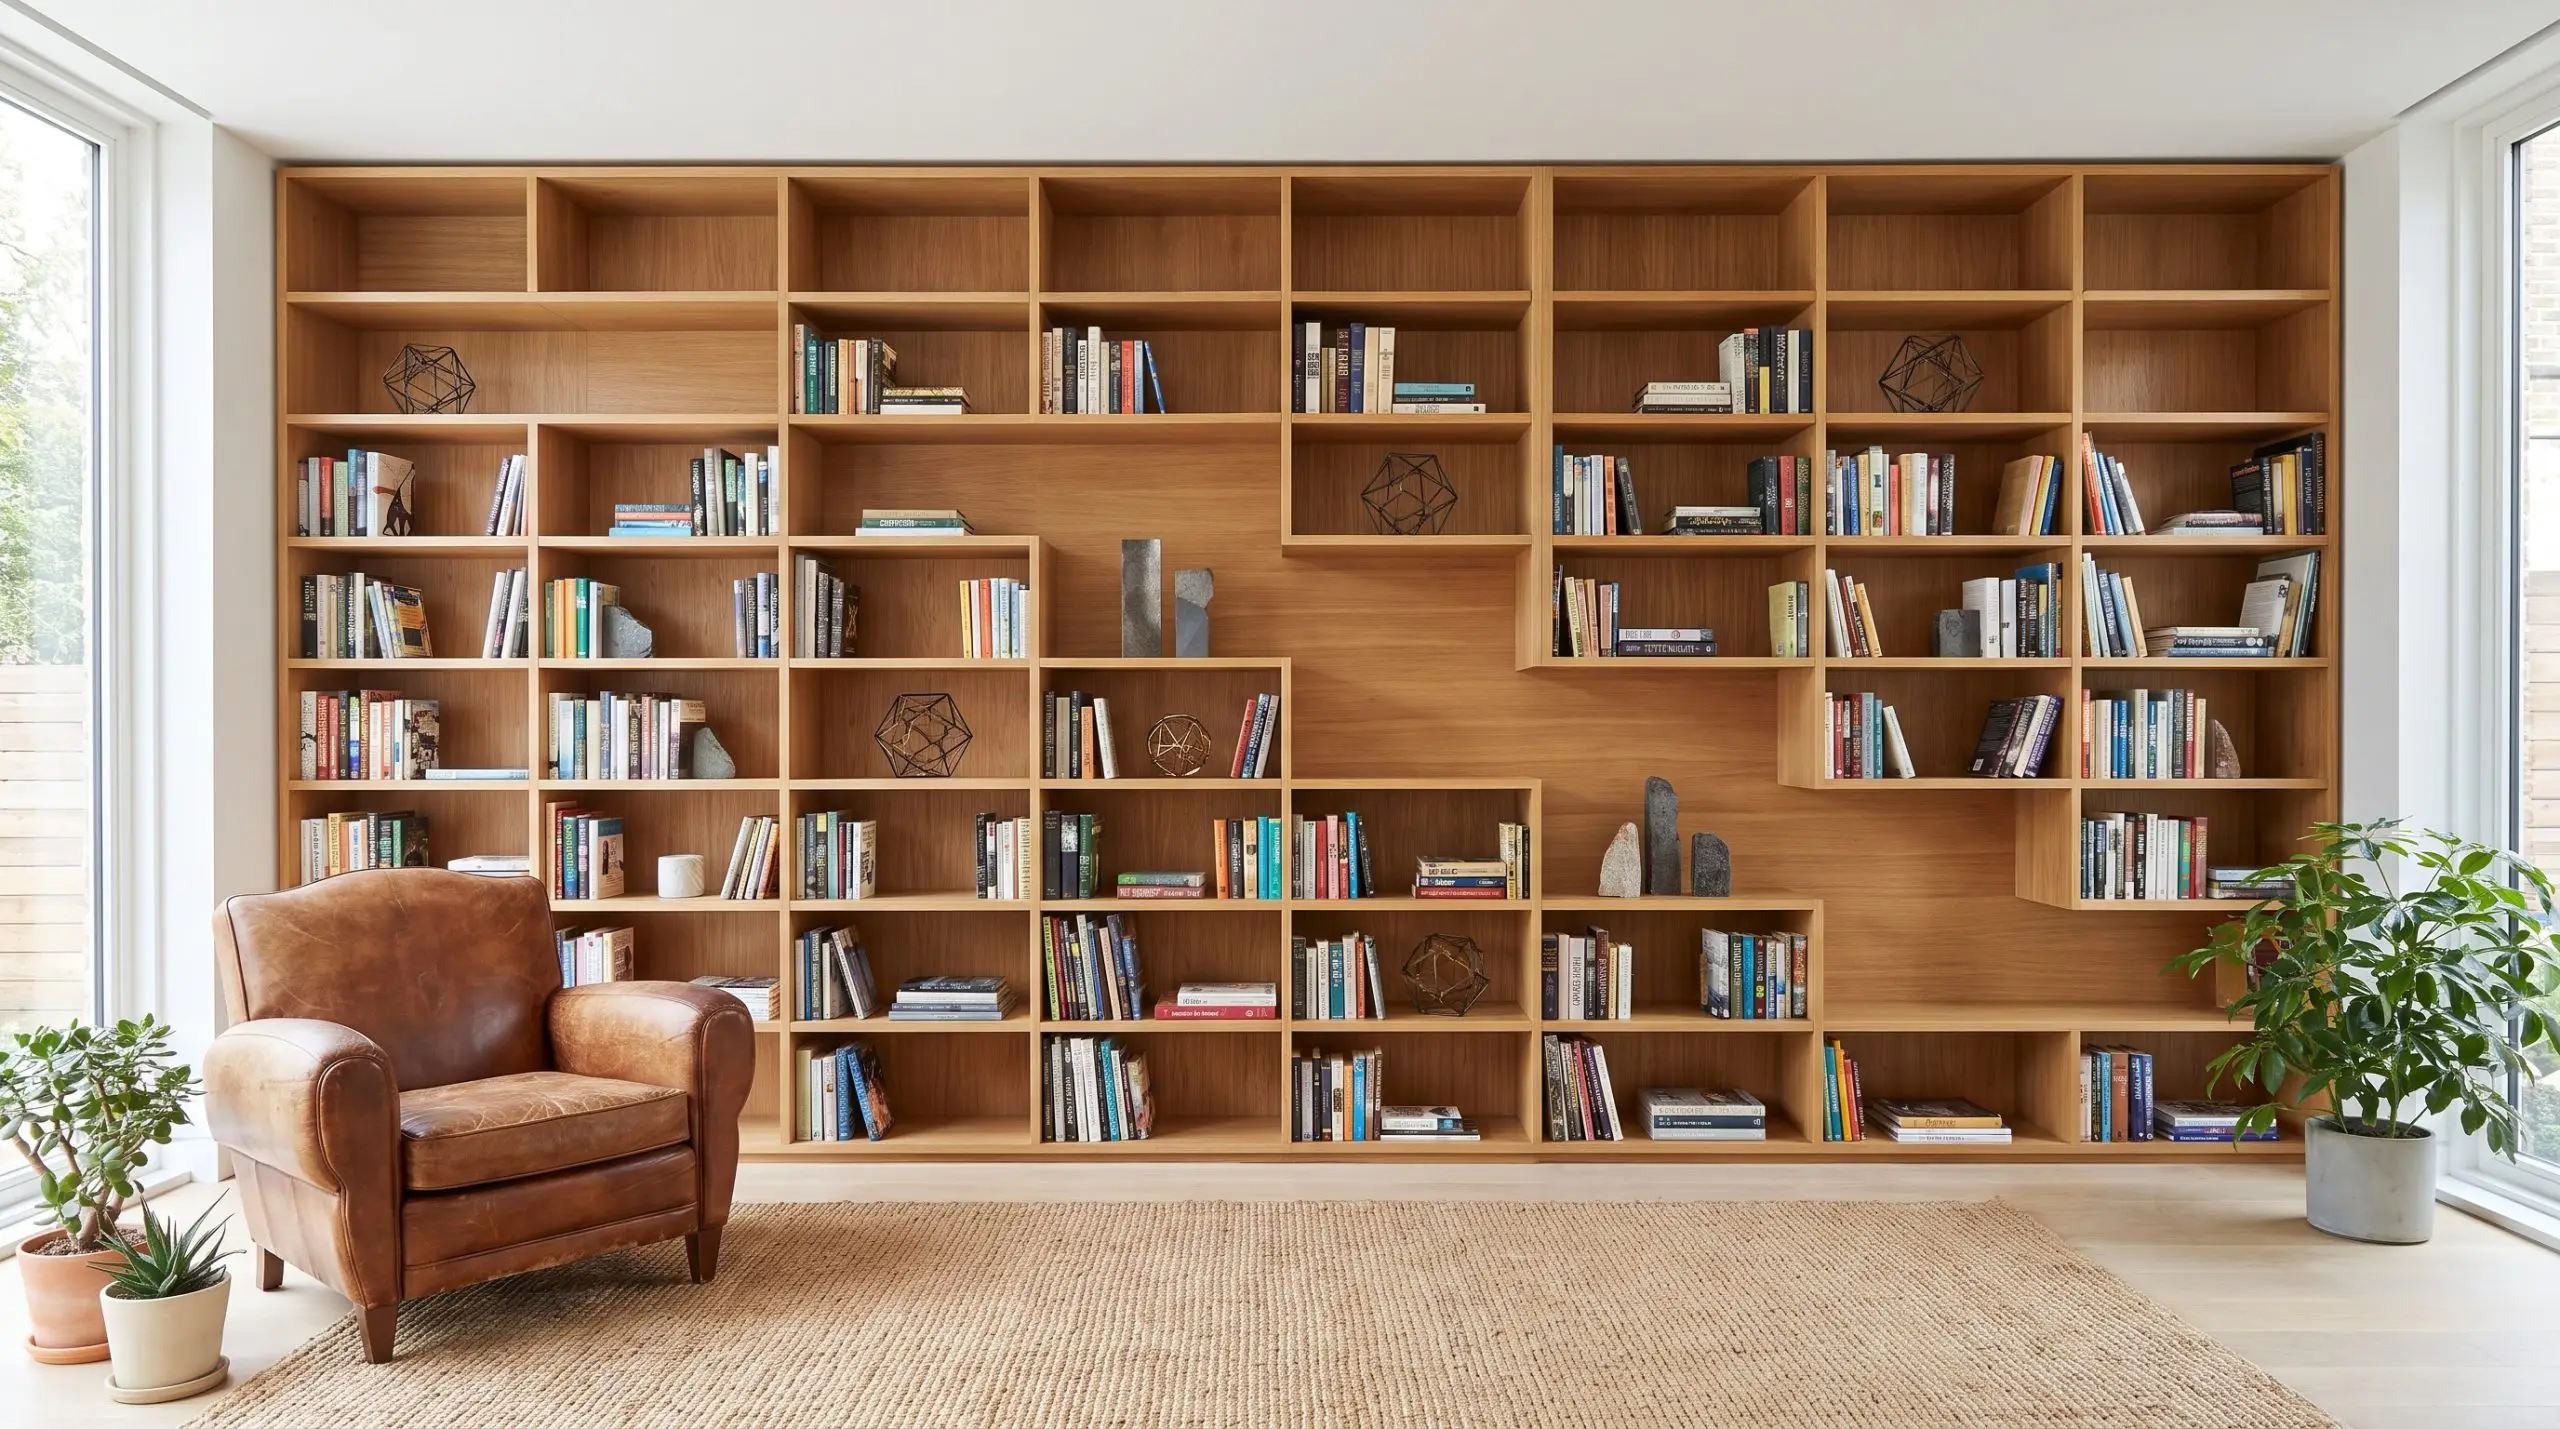
To avoid severe visual fatigue on a large wall, dedicate 60% of the shelf space to actual books, 30% to sculptural objects like ceramics and art, and leave exactly 10% of the shelf entirely empty. Negative space is a crucial, active design element that gives the heavy structure room to breathe.
- Vibe: Balanced, highly curated restraint.
- Key Technique: Group the 10% negative space asymmetrically across different bays rather than leaving one entire shelf barren.
- Styling Pro-Tip: Edit mercilessly. If an object does not fit the ratio, it belongs in closed storage.
Step back 10 feet from the shelves and squint. The negative space should form a subtle, zigzagging diagonal line across the entire unit, rather than stacking vertically.
Designer Secret
Utilize the Horizontal Stack Plus Sculptural Object Method
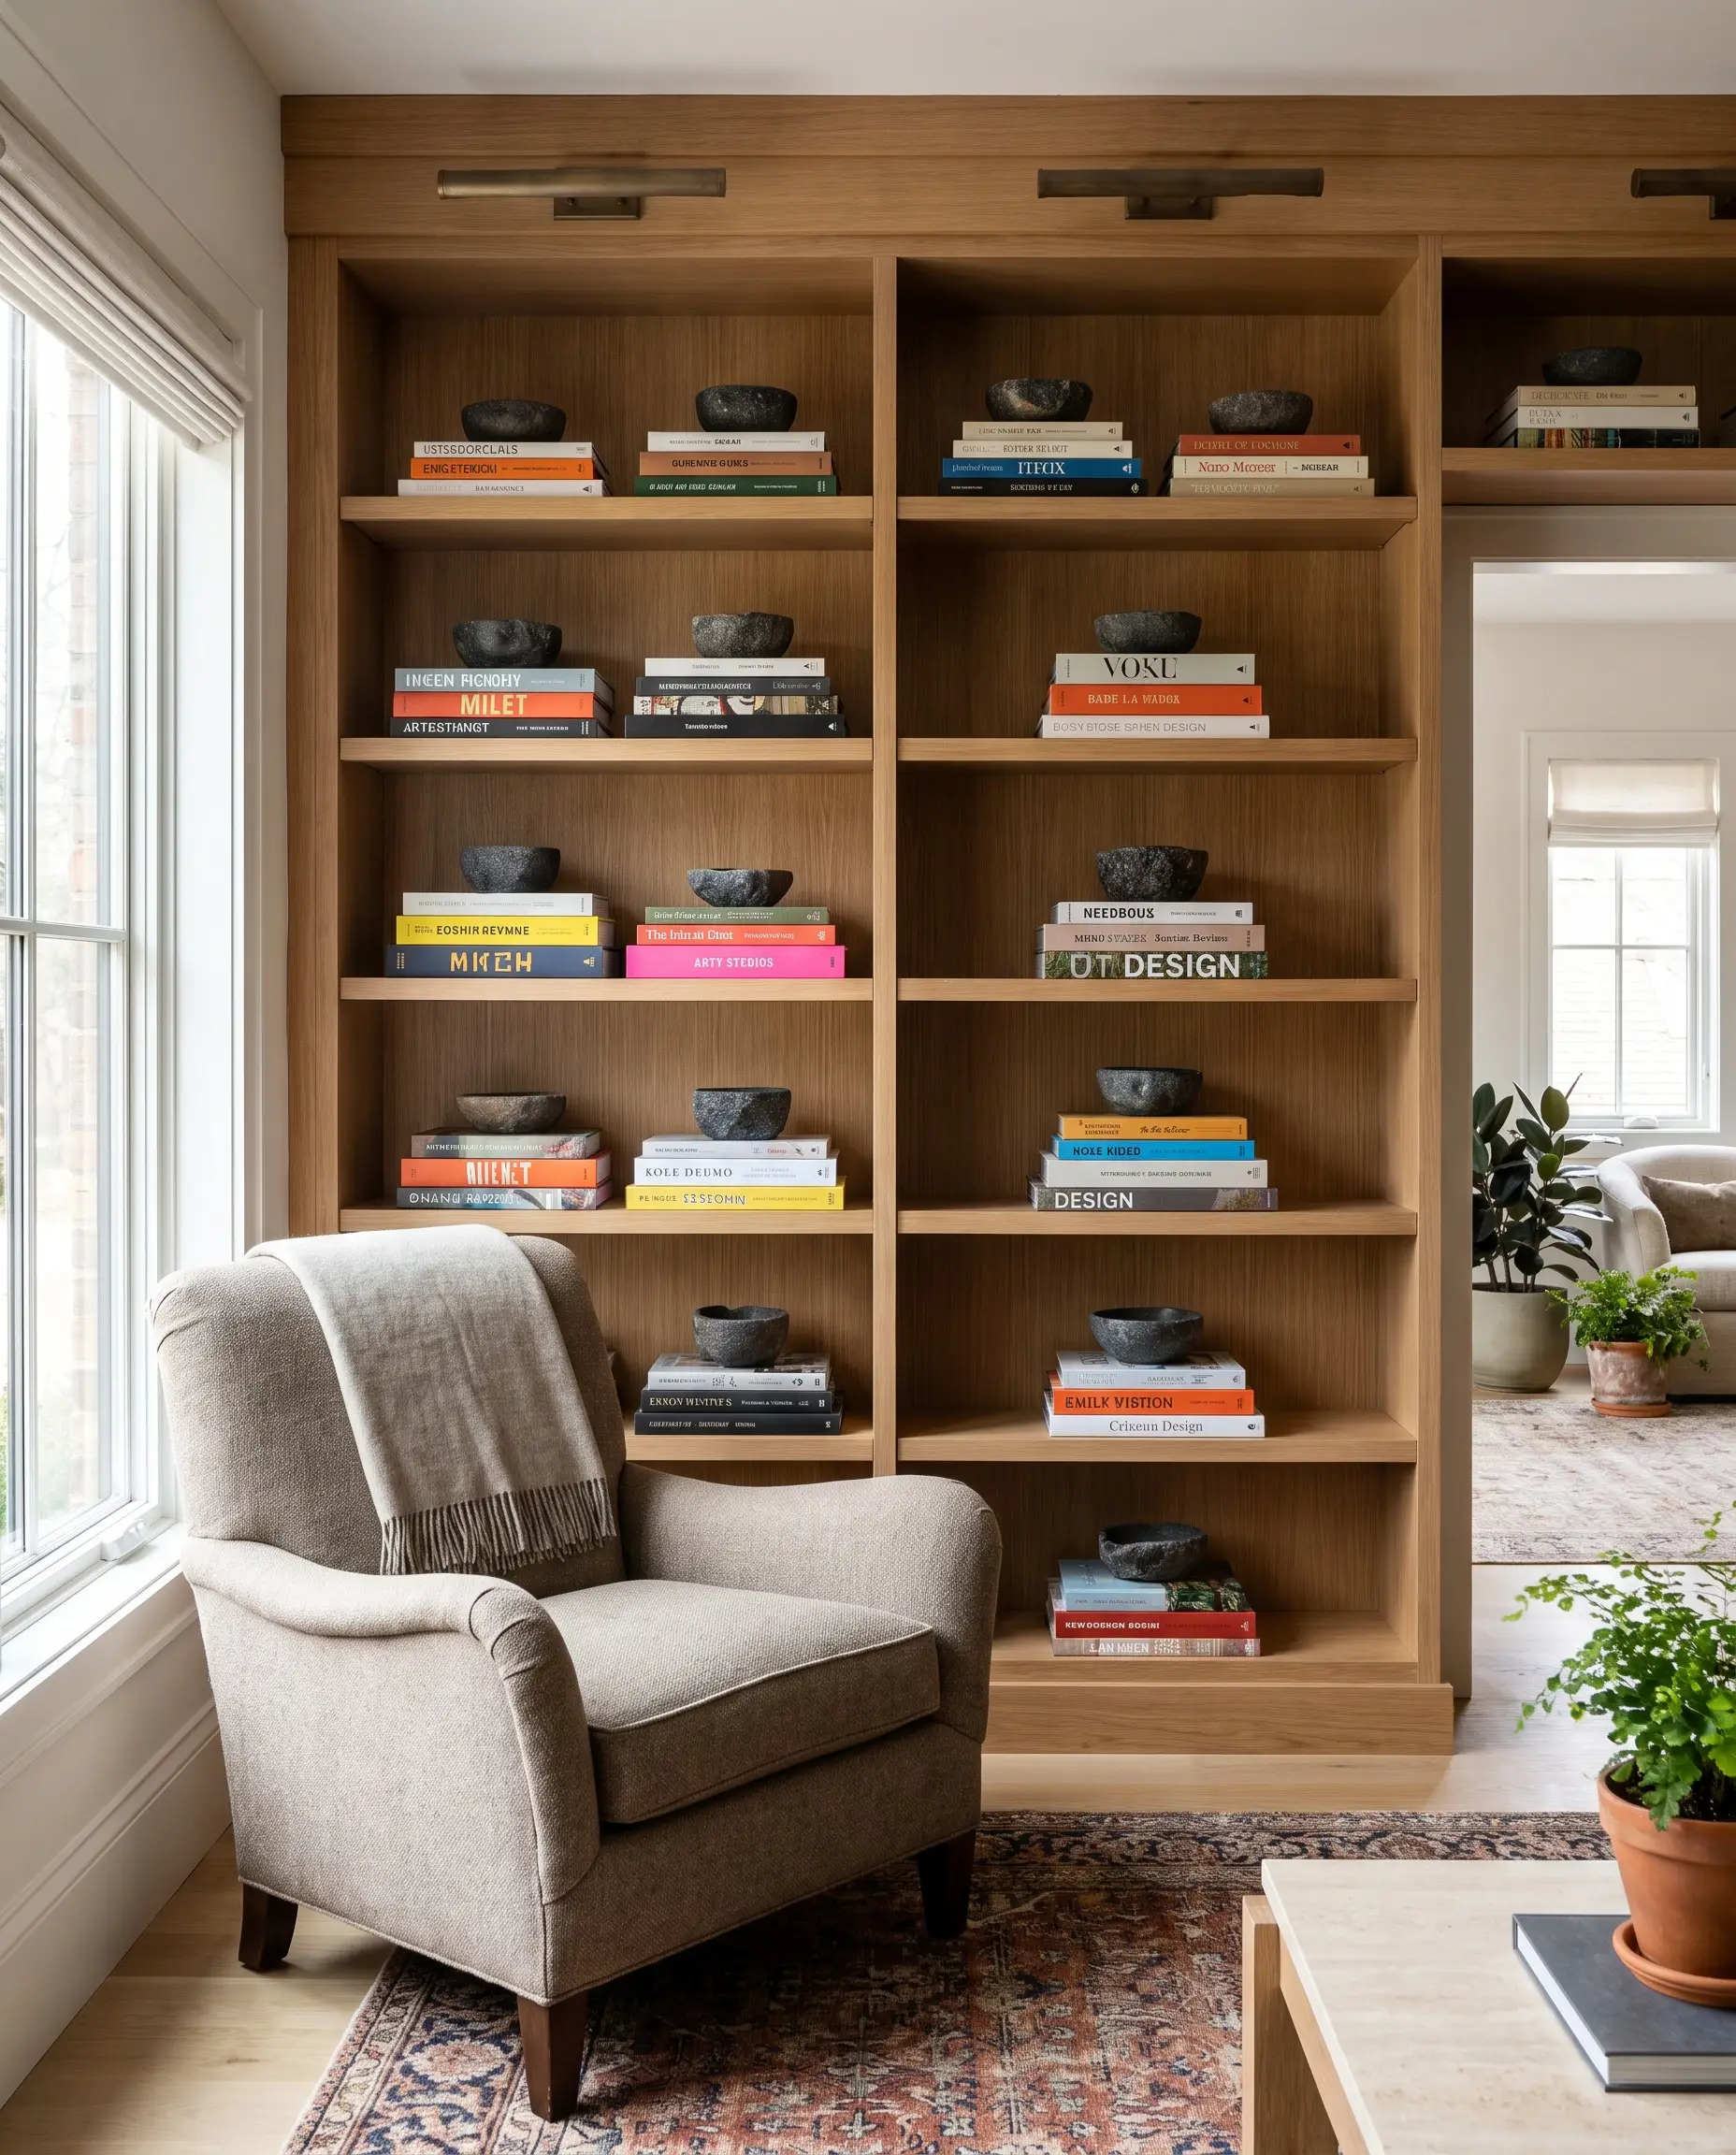
Break up the endless vertical lines of standing book spines by stacking two or three large coffee table books horizontally, then placing a single, contrasting sculptural object on top. This heavily favored designer technique brilliantly fills awkward vertical gaps and adds immediate tactile interest.
- Vibe: Dynamic, varied geometry.
- Key Materials: Oversized art and architecture books paired with stone bowls, brass knots, or jagged crystal bookends.
- Styling Pro-Tip: Ensure the object placed on top is smaller than the width of the books beneath it to maintain a stable visual pyramid.
Group Books by Spine Color for a Maximalist Pop
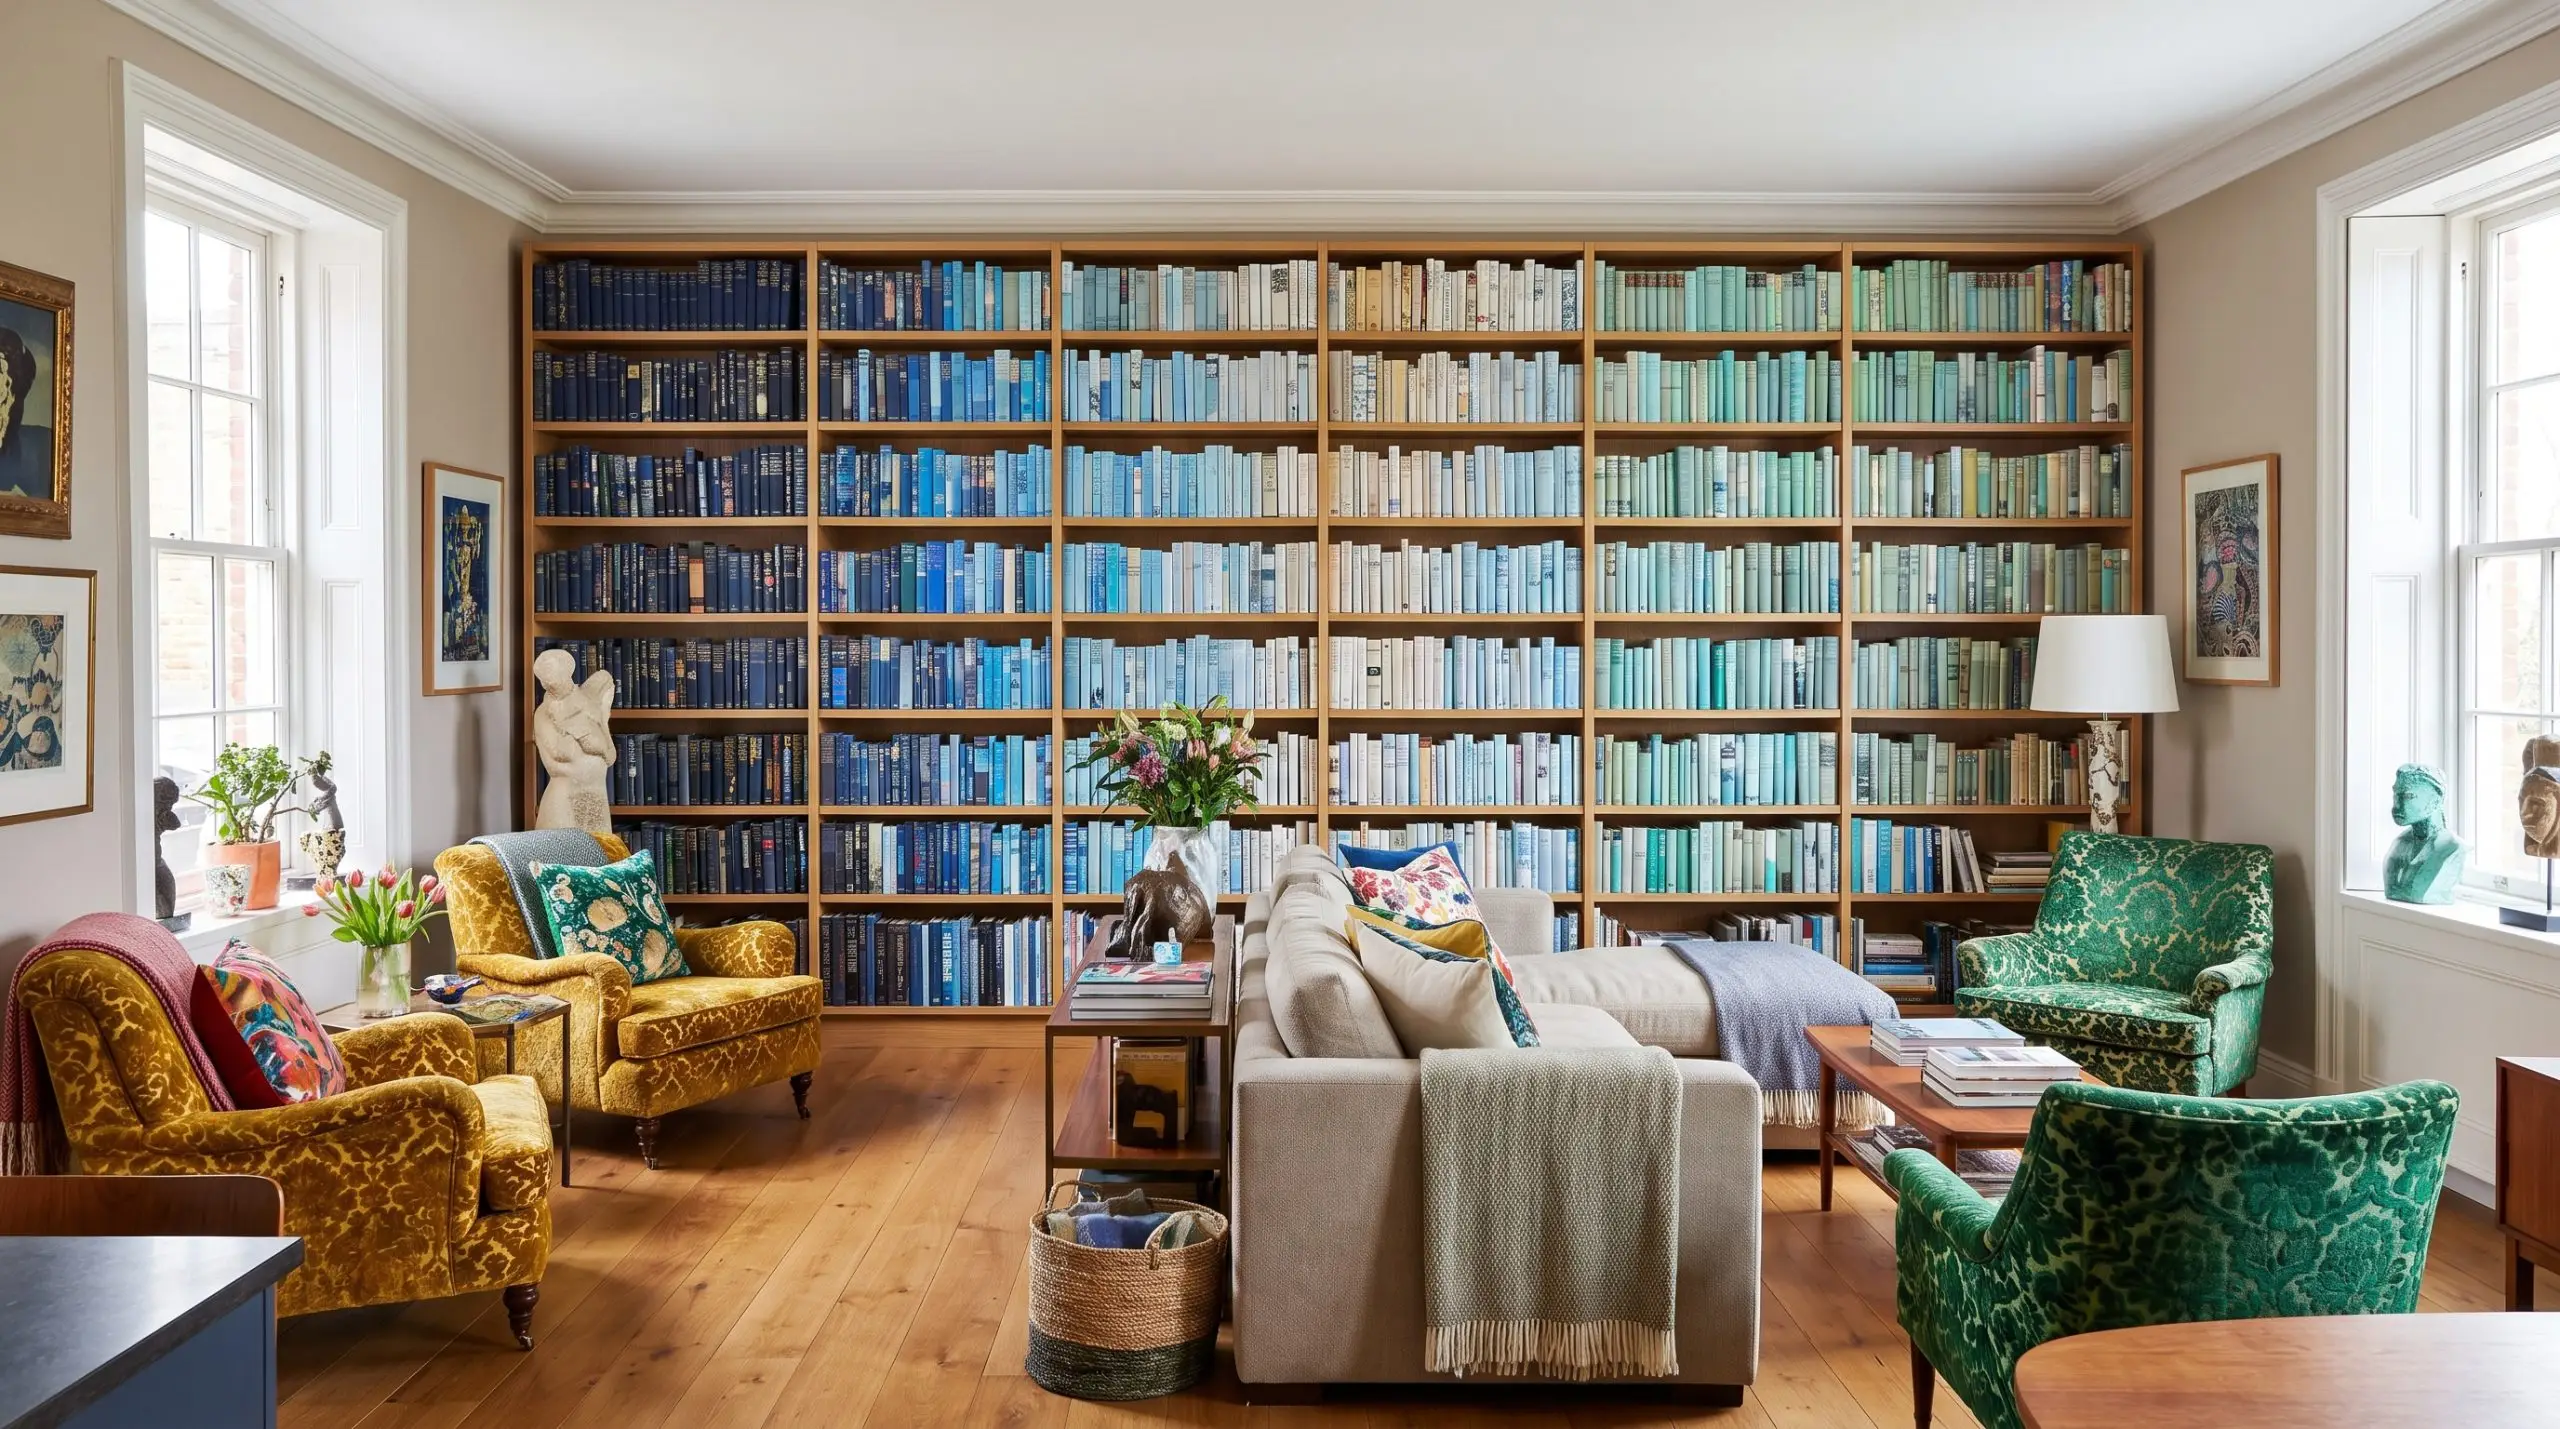
For creative or maximalist spaces, group books by spine color to create a sweeping rainbow or gradient effect across the entire wall. While this is a polarizing choice, it remains highly effective for adding a massive, structured influx of color to an otherwise neutral room.
- Vibe: Bold, structured maximalism.
- Key Technique: Transition the colors softly (e.g., navy to light blue to seafoam) rather than blocking them in harsh, abrupt stops.
- Execution Warning: This method requires a massive, diverse collection of books to execute properly without looking sparse.
Invert Book Spines for a Neutral, Monochromatic Palette
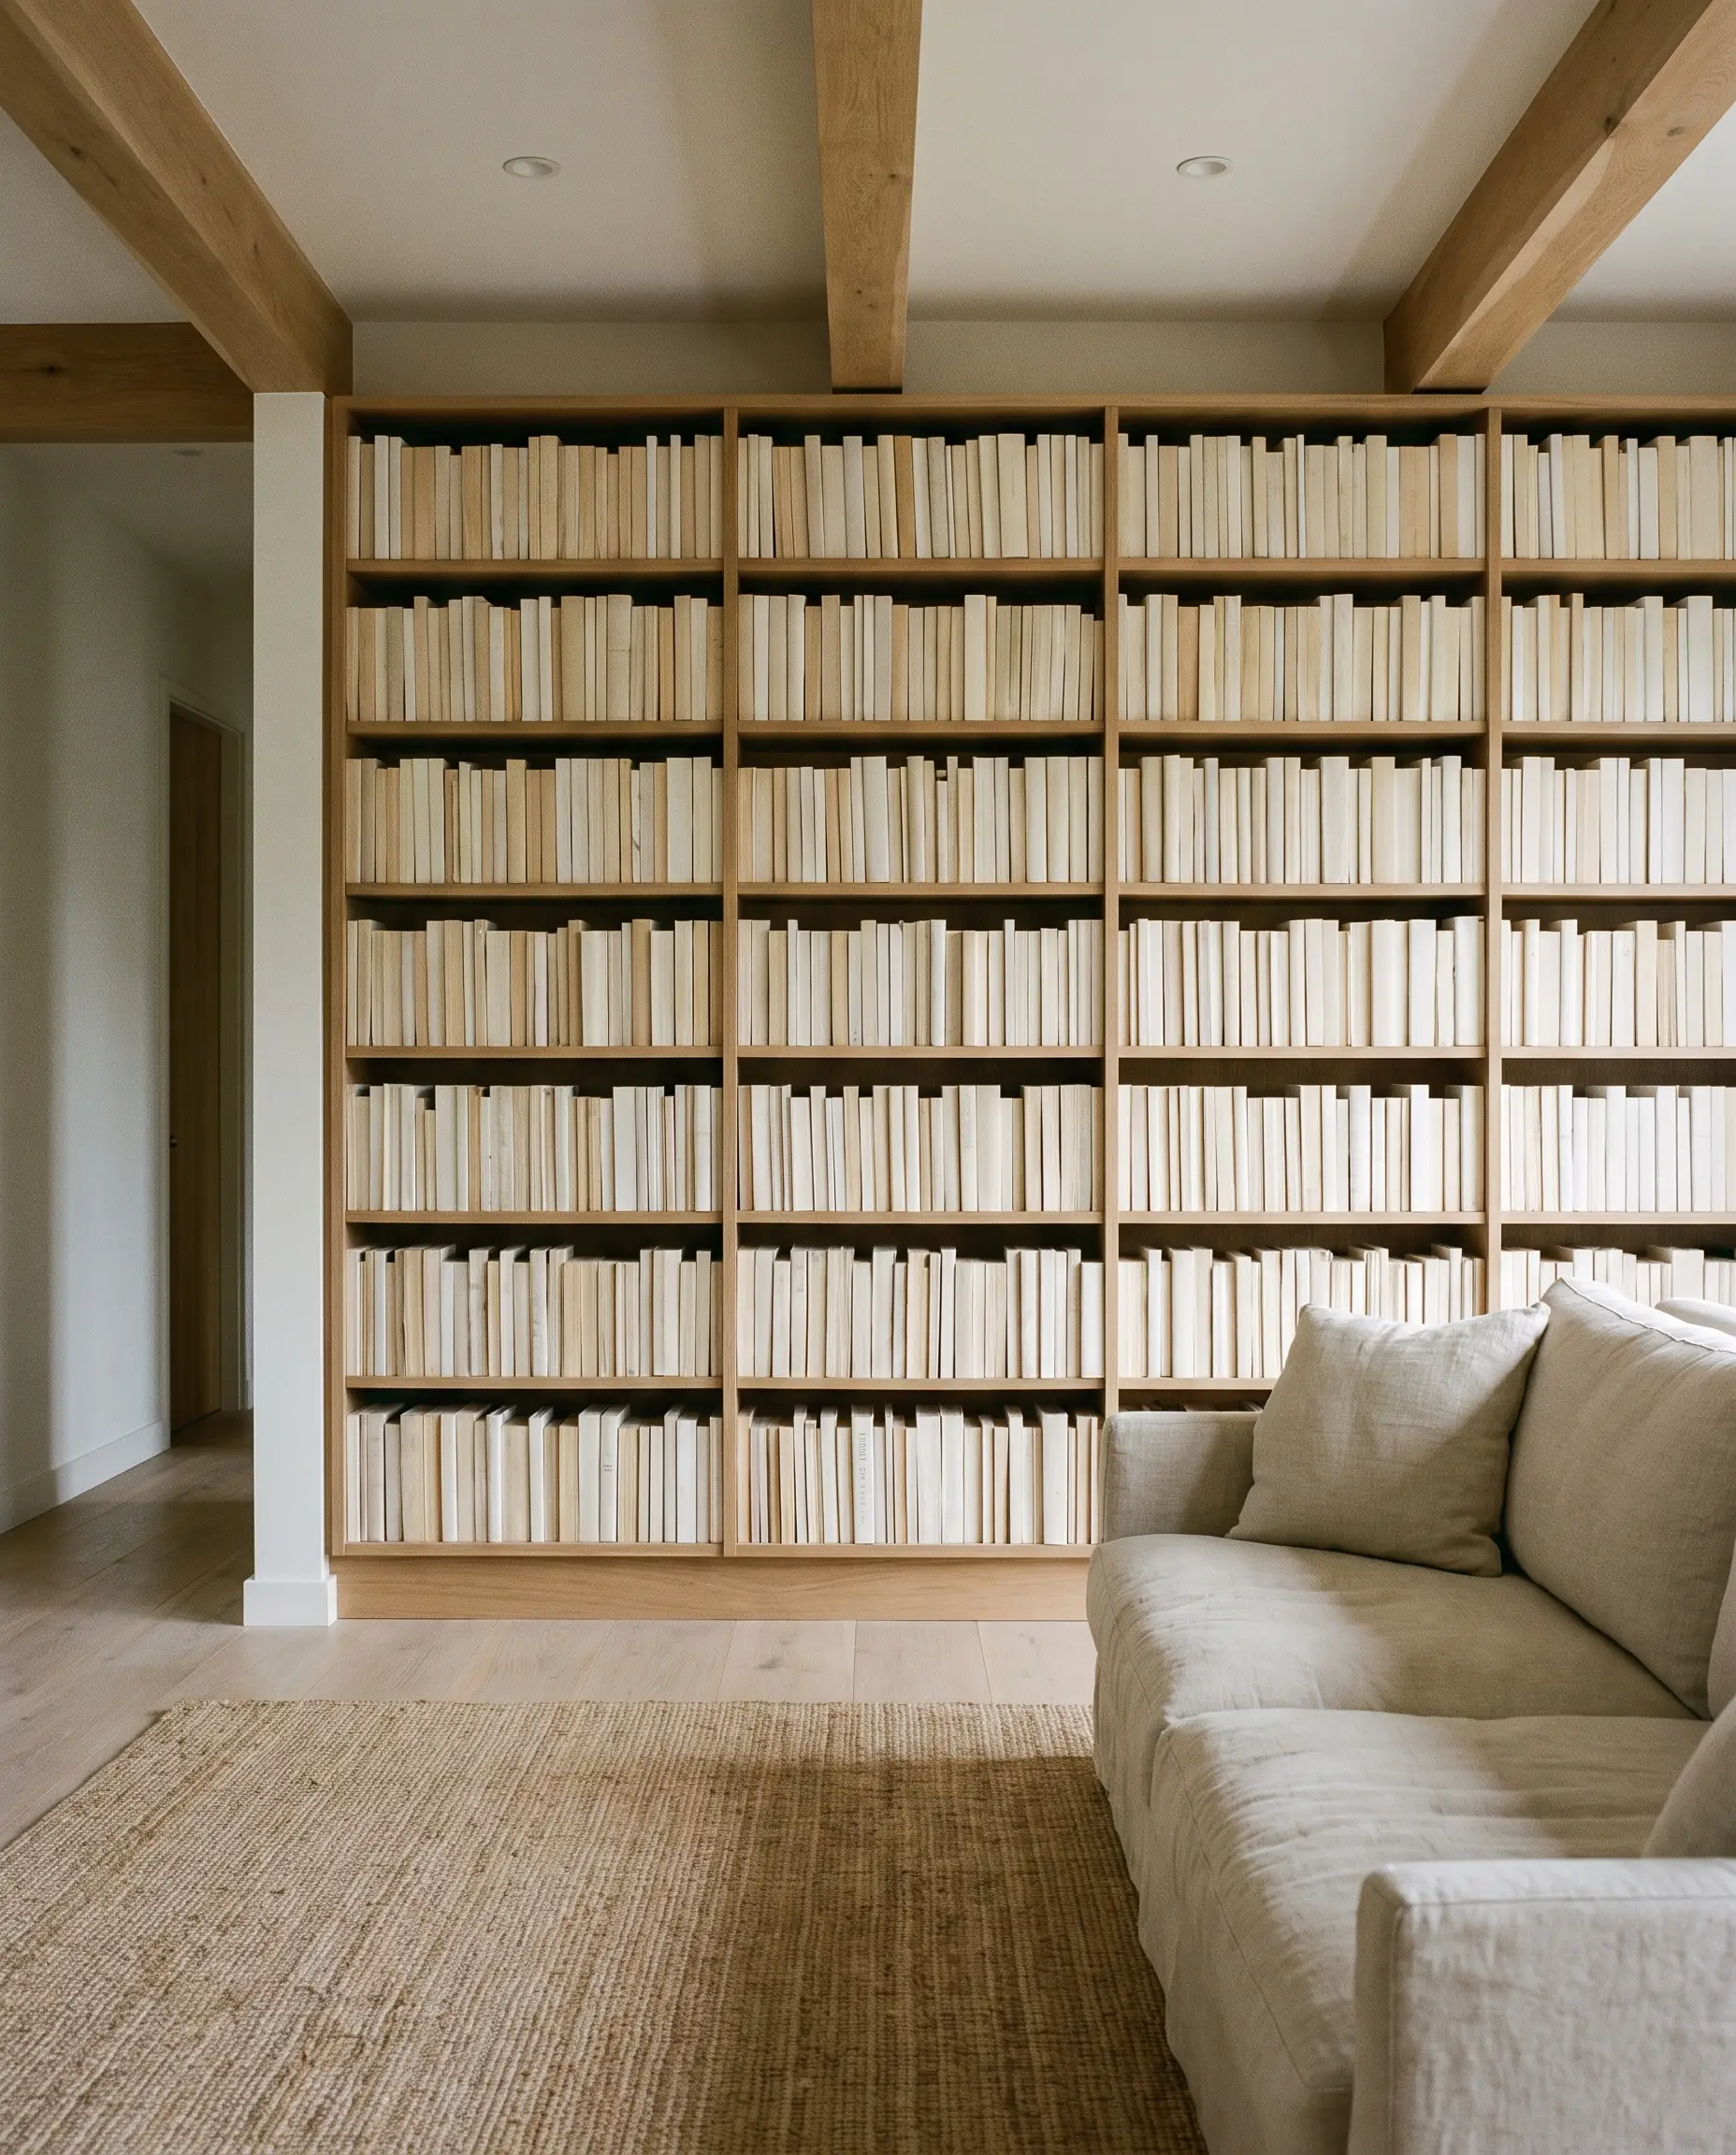
Turn the books completely around so the raw paper pages face outward. This controversial method strips chaotic jacket colors away, leaving a highly textured, neutral, monochromatic wall of ivory and cream that allows the architecture to command the room.
- Vibe: Textural, monochromatic minimalism.
- Key Benefit: Unifies a highly mismatched collection of paperbacks and hardcovers into a single cohesive texture.
- Execution Warning: This sacrifices functionality for aesthetics, as finding a specific title becomes nearly impossible.
Lean Oversized Artwork Directly on the Middle Shelves
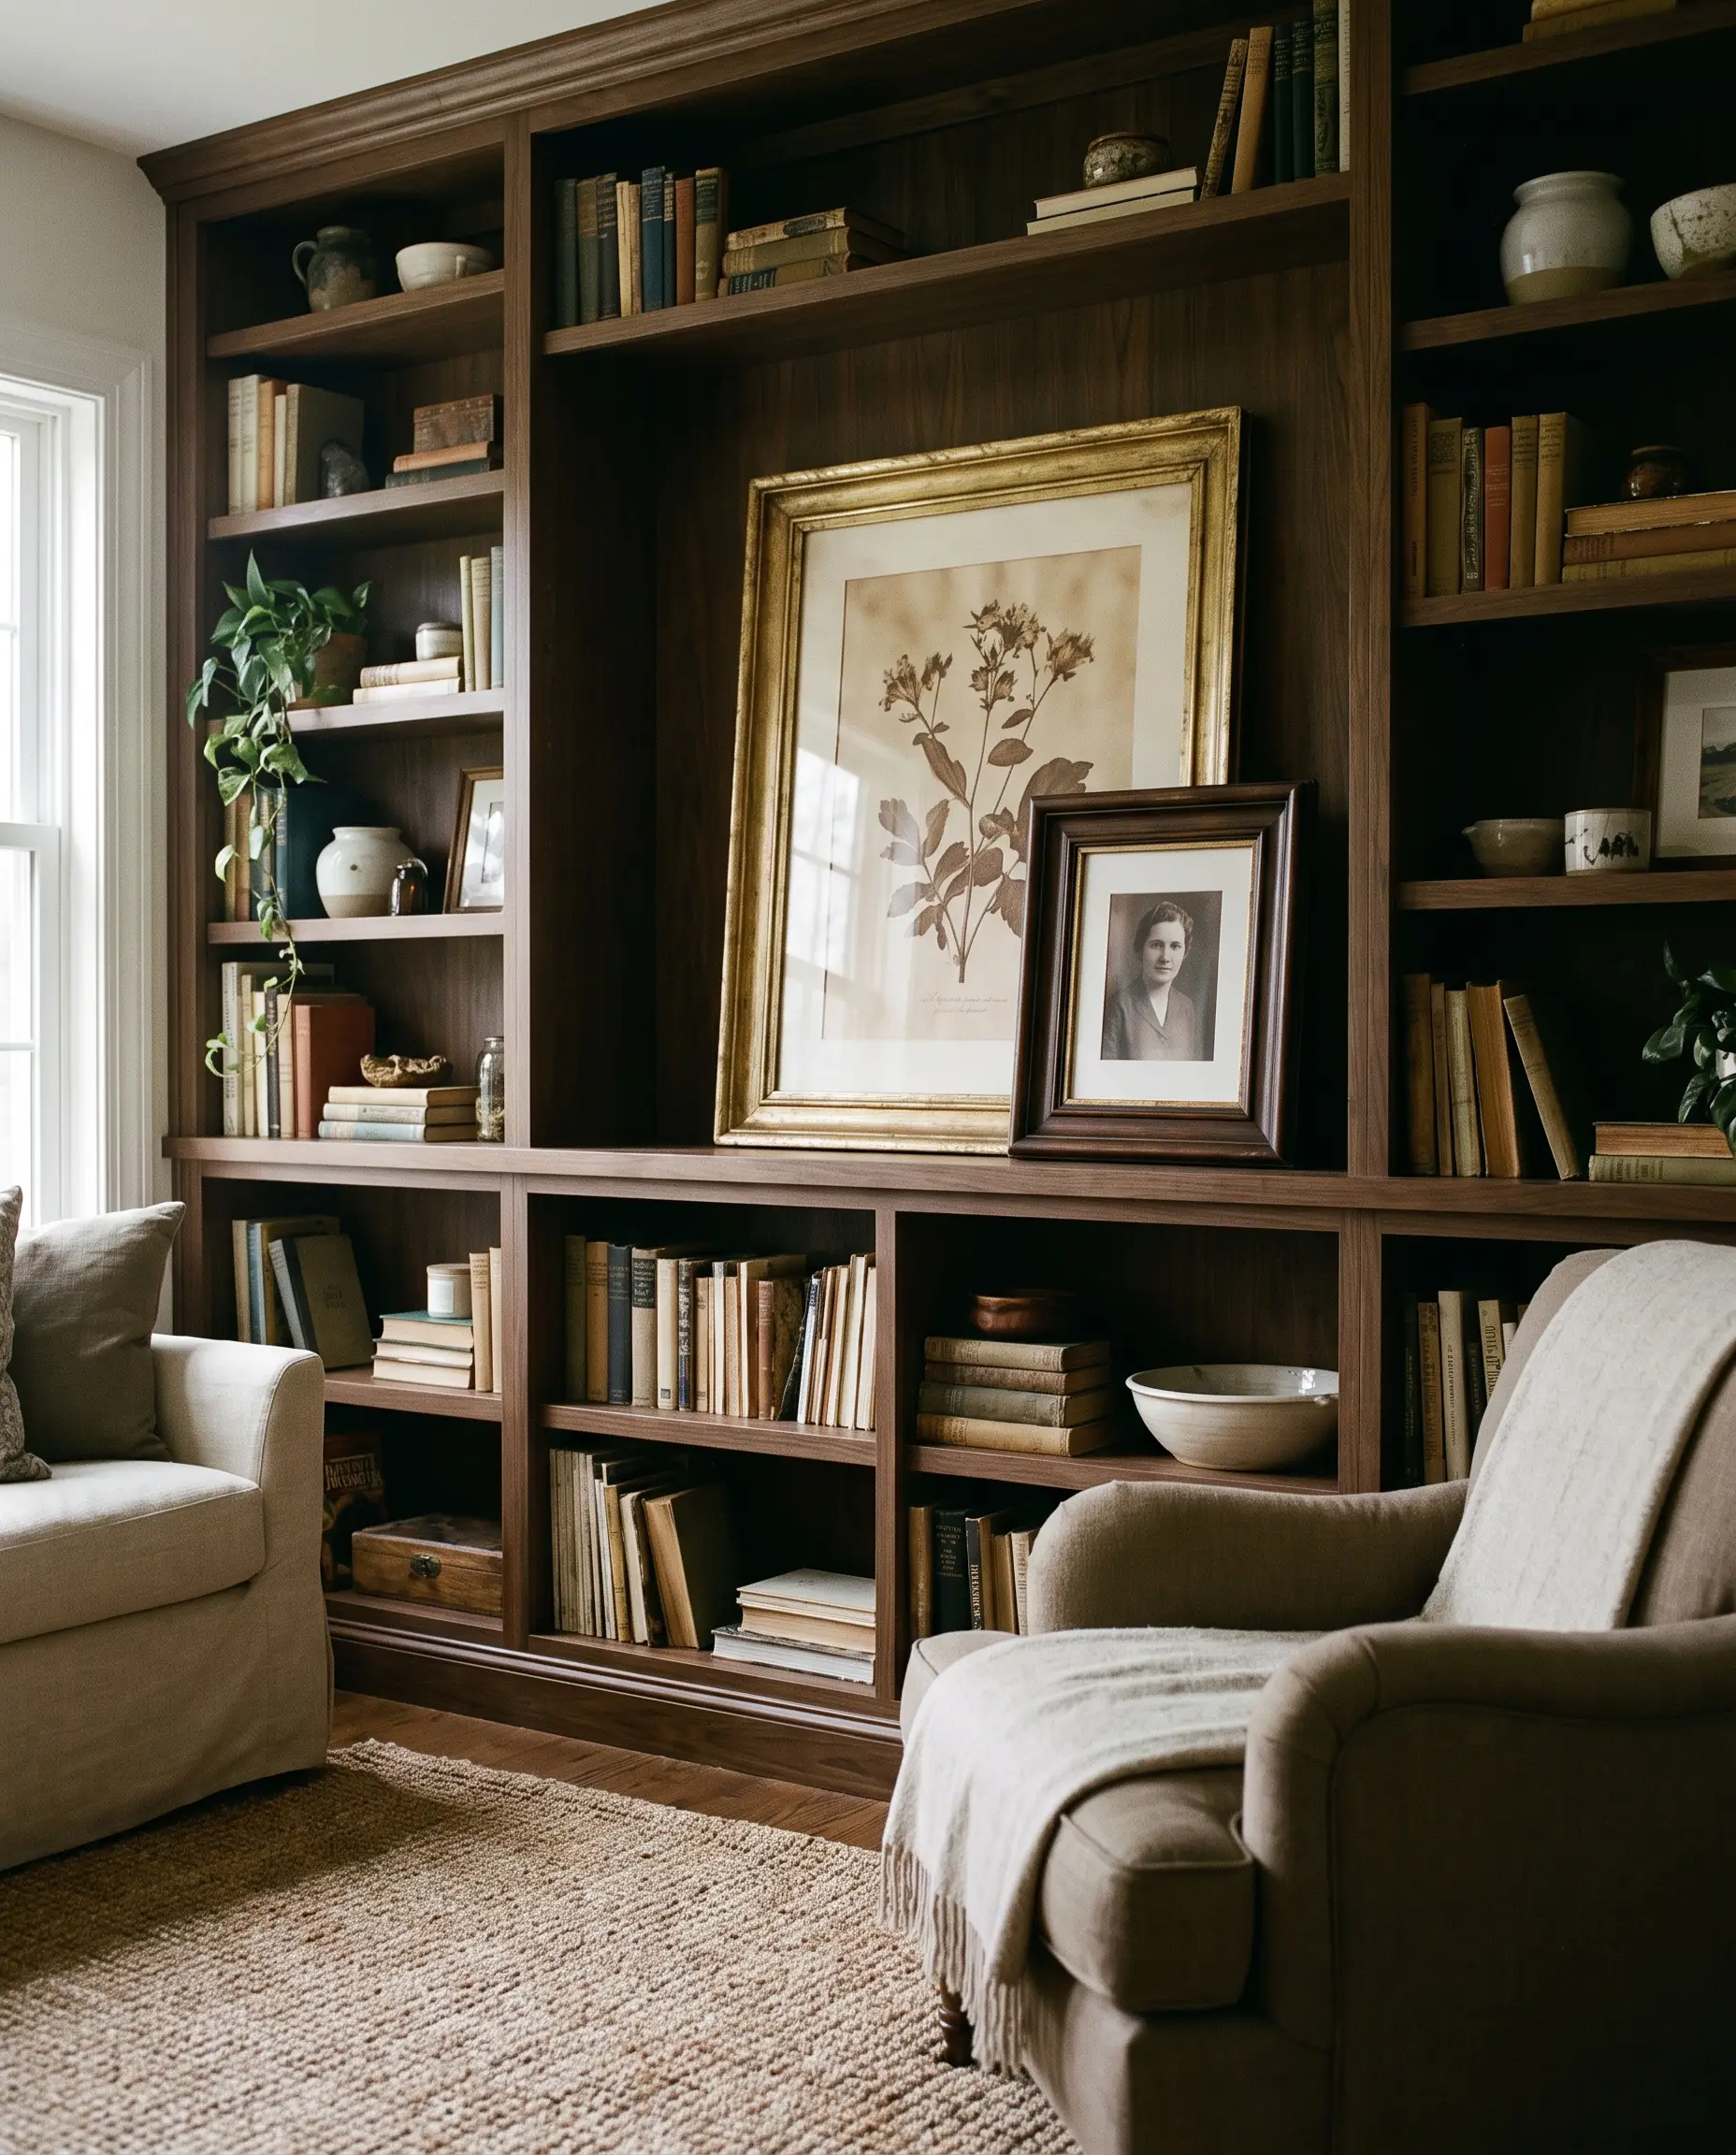
Dedicate one of the prime, eye-level shelves to lean a large, framed piece of vintage art against the backing. This instantly breaks the rigid grid, adds a massive focal point, and allows you to hide less attractive paperbacks or routing wires directly behind the frame.
- Vibe: Casual, effortlessly chic layering.
- Key Measurement: Use frames that take up at least 70% of the vertical height of that specific shelf bay for proper scale.
- Styling Pro-Tip: Overlap a smaller, secondary frame in front of the large one to build a layered vignette.
Budget & Execution: What Do Floor-to-Ceiling Bookshelves Cost?
Understanding the massive price difference between hiring a custom millworker and executing a DIY approach with big-box store lumber is critical before finalizing your design plans. Here is the exact breakdown of what you can expect to spend based on your execution strategy.
| Execution Strategy | Estimated Cost | Pros | Cons |
|---|---|---|---|
| Professional Custom Millwork | $350 to $1,400 per linear foot | Perfectly scribed to walls, high-end materials like solid oak, zero labor for the homeowner. | Extremely expensive, requires contractor scheduling and lead times. |
| The DIY Approach (MDF & Poplar) | $200 to $450 total in materials per unit | 10% to 20% of the cost of a pro, highly customizable on the fly. | Requires power tools, advanced caulking skills, and significant personal time. |
Curating Your Space: Final Layout Decisions
Whether you choose a budget-friendly, color-drenched DIY build utilizing poplar trim, or commission a bespoke rift-sawn oak installation, the objective remains the same: creating a space that feels deeply personal and architecturally significant. Do not let a massive blank wall intimidate you. Grab a tape measure today, mark out your ideal depth and width on the floor with painter’s tape, and start planning your framing. If you are rethinking your entire spatial flow before committing to built-ins, review our comprehensive Living Room Architecture & Layouts guides to ensure your new custom millwork perfectly anchors your daily life.

The Hackrea Style Desk treats interior decoration as an exact visual science. Rather than focusing on demolition or floor plans, this desk masters the art of color theory, undertone matching, material pairings, and spatial proportion. From balancing the visual weight of mixed metals to finding the perfect bridging tone between disparate wood species, this desk provides the rigorous aesthetic rules needed to achieve high-end, editorial-quality harmony in any space.