Stop apologizing for your small bathroom footprint. Most compact bathrooms suffer from a standard builder-grade approach—choked by bulky vanities, harsh lighting, and a chaotic grid of grout lines. But tackling small bathroom design is not about slapping white paint on the walls and hoping for the best; it requires intentional architectural spatial engineering. By manipulating scale, controlling sightlines, and reducing visual clutter through exacting material choices, a tiny spatial footprint can easily outperform a massive, poorly planned room.
Here are 17 high-impact, space-saving architectural strategies to turn your compact bathroom into a highly engineered, bespoke retreat.
Architectural Layouts & Spatial Engineering
Great design fundamentally starts with the floor plan and structural layout, rather than surface decoration. Manipulating the physical footprint and carefully planning your clearances yields the highest return on investment for any compact space.
Curbless Wet Room Configurations
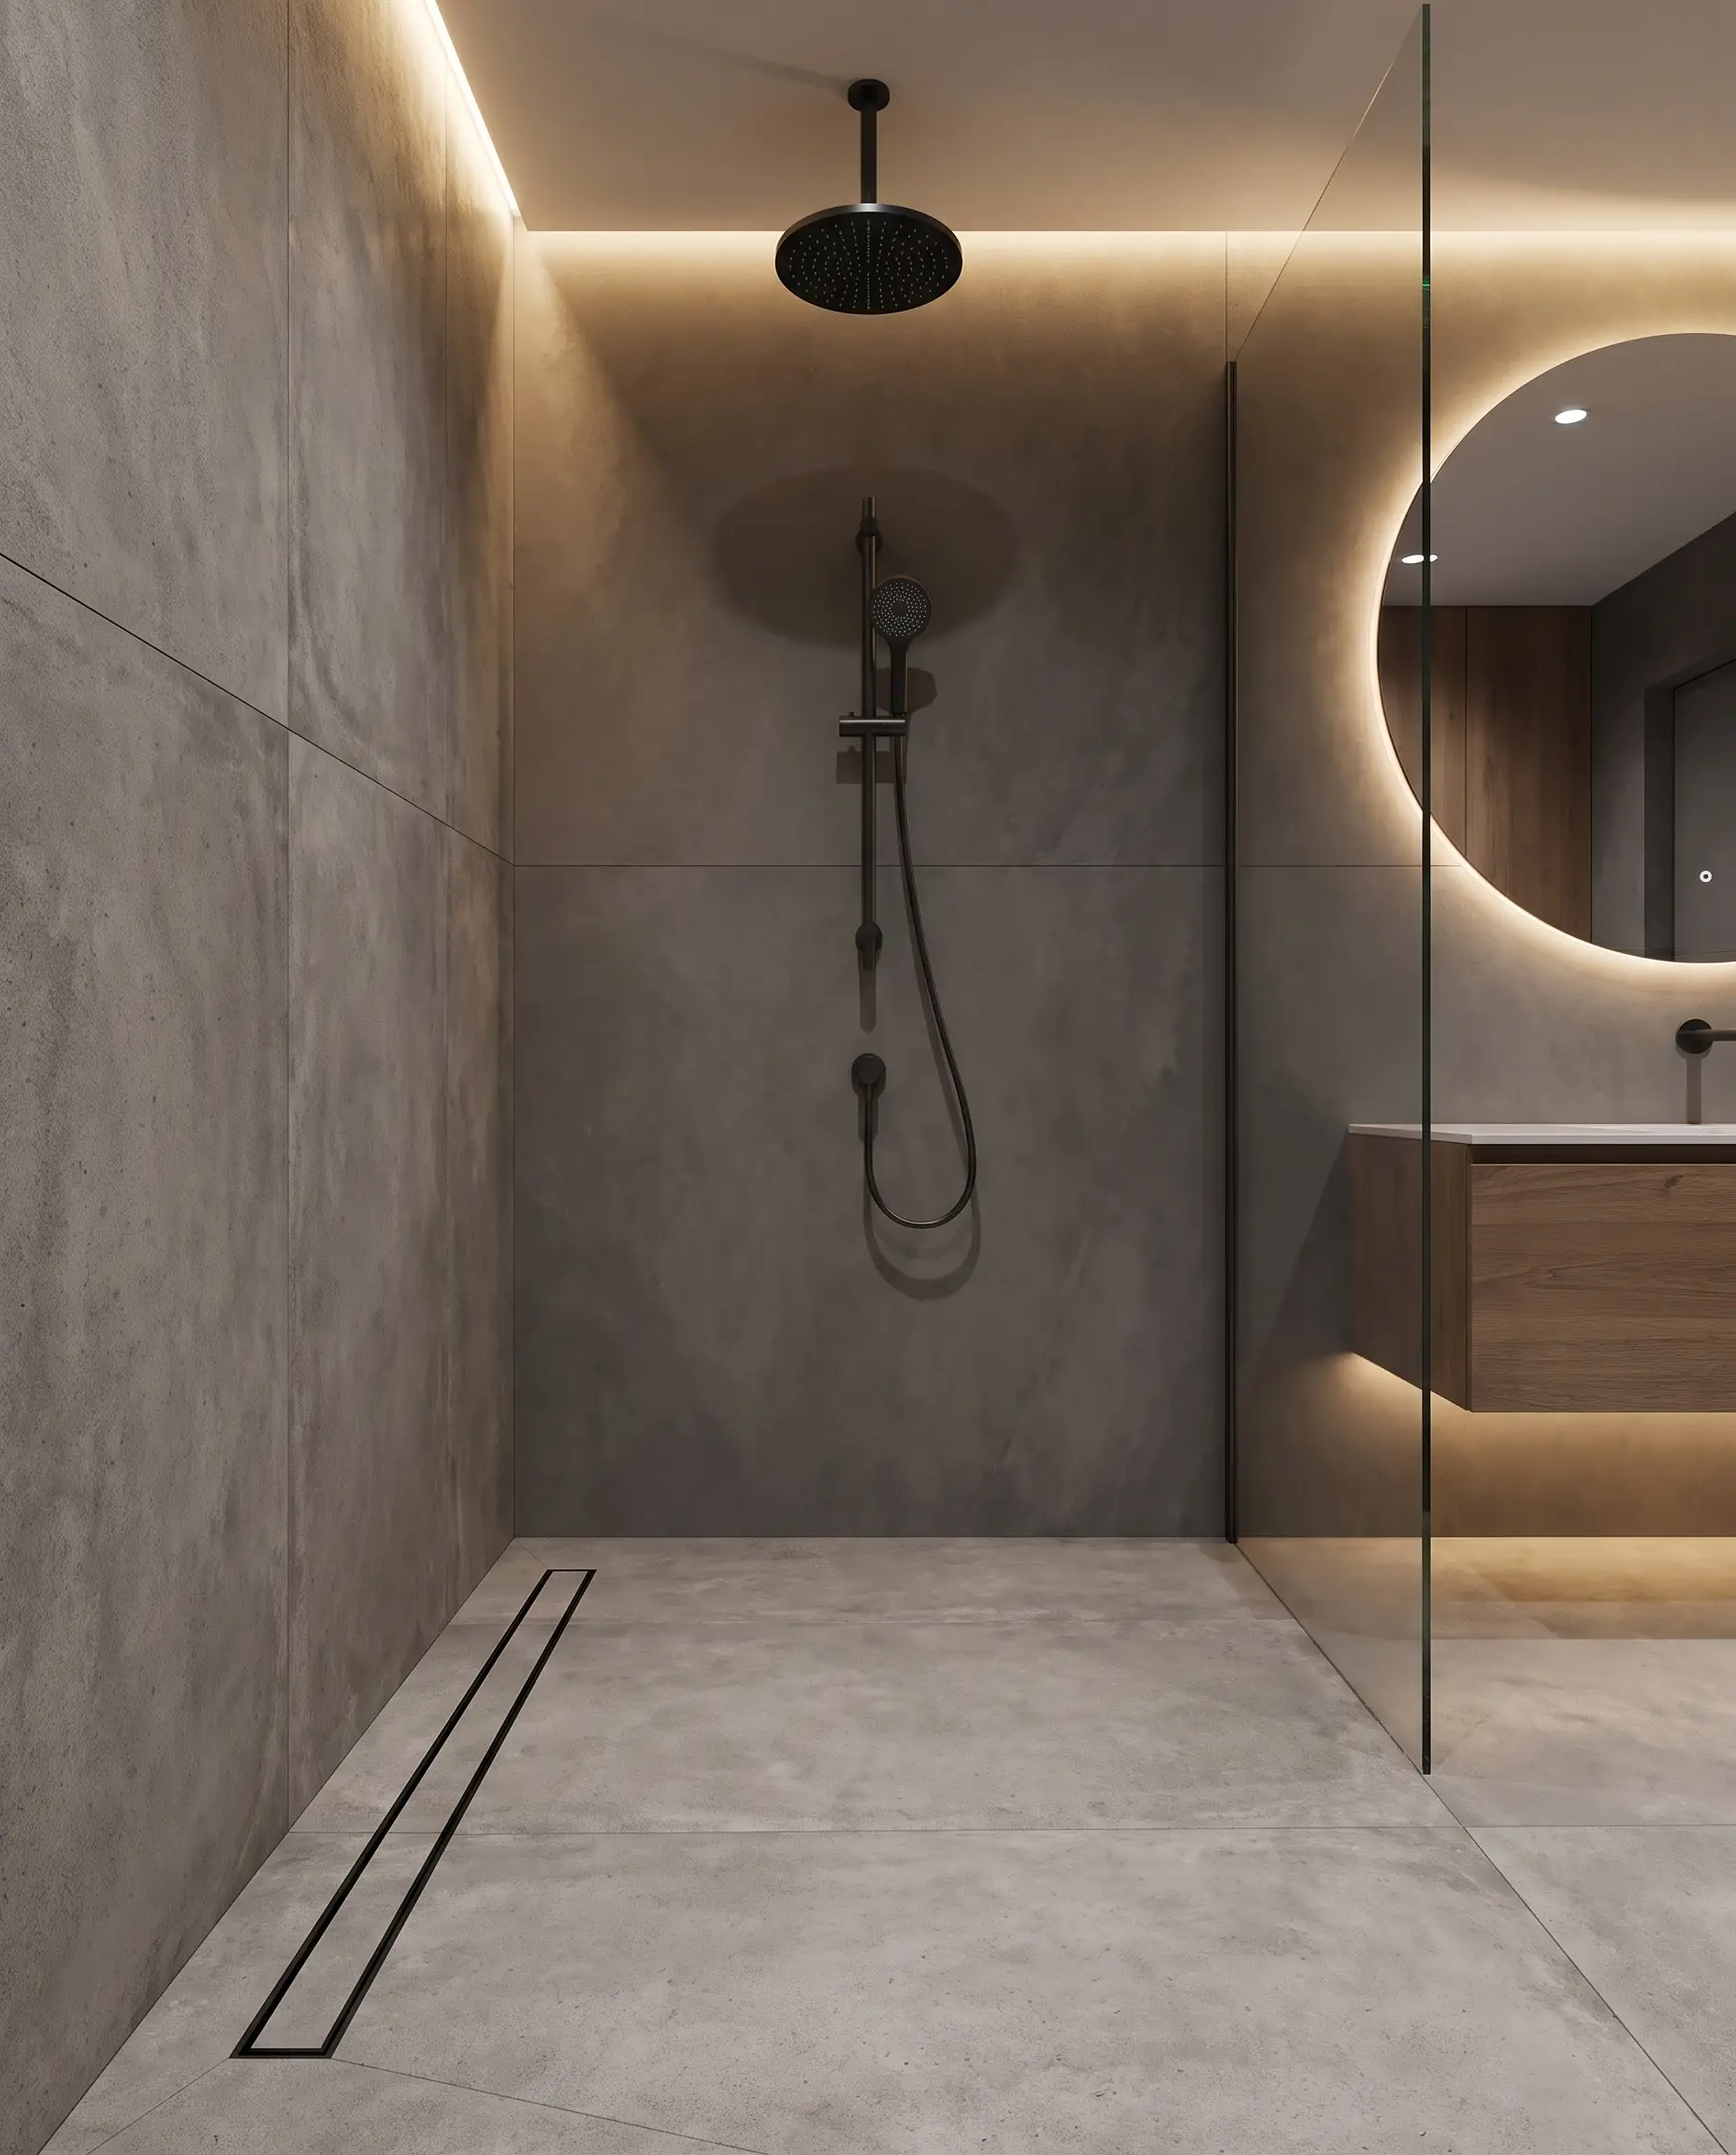
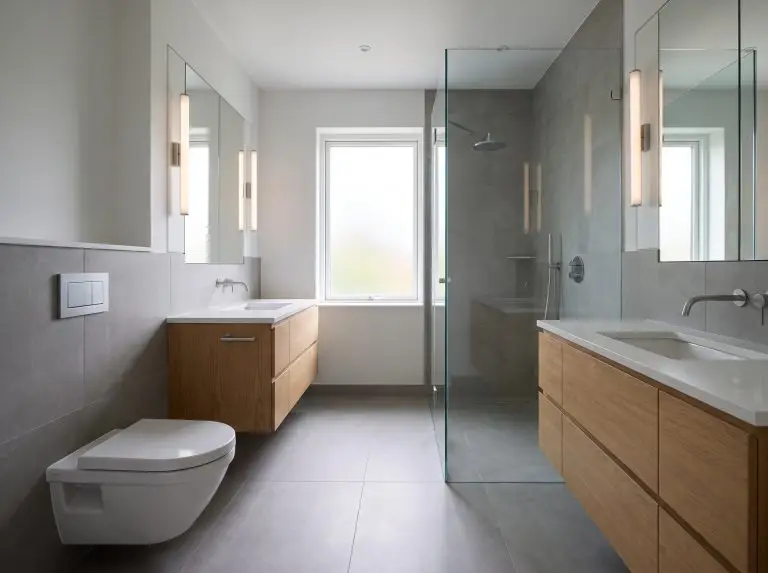
Eliminating the traditional shower curb and bulky tray expands your usable floor space immediately. A continuous, properly waterproofed, sloped floor into a frameless glass or fully open curbless wet room allows the eye to travel from wall to wall entirely uninterrupted.
By removing physical barriers and running the same material straight through the shower zone, a standard 5×8 footprint suddenly feels like a luxury hotel spa.
Designer Secret
- Vibe: Unrestricted modern luxury.
- Key Materials: Linear trench drains, liquid waterproofing membranes, slip-resistant large-format floor tile.
- Styling Pro-Tip: Match the drain cover to your primary floor tile for a completely invisible water-management system.
Wall-Mounted Toilets with Concealed Cisterns
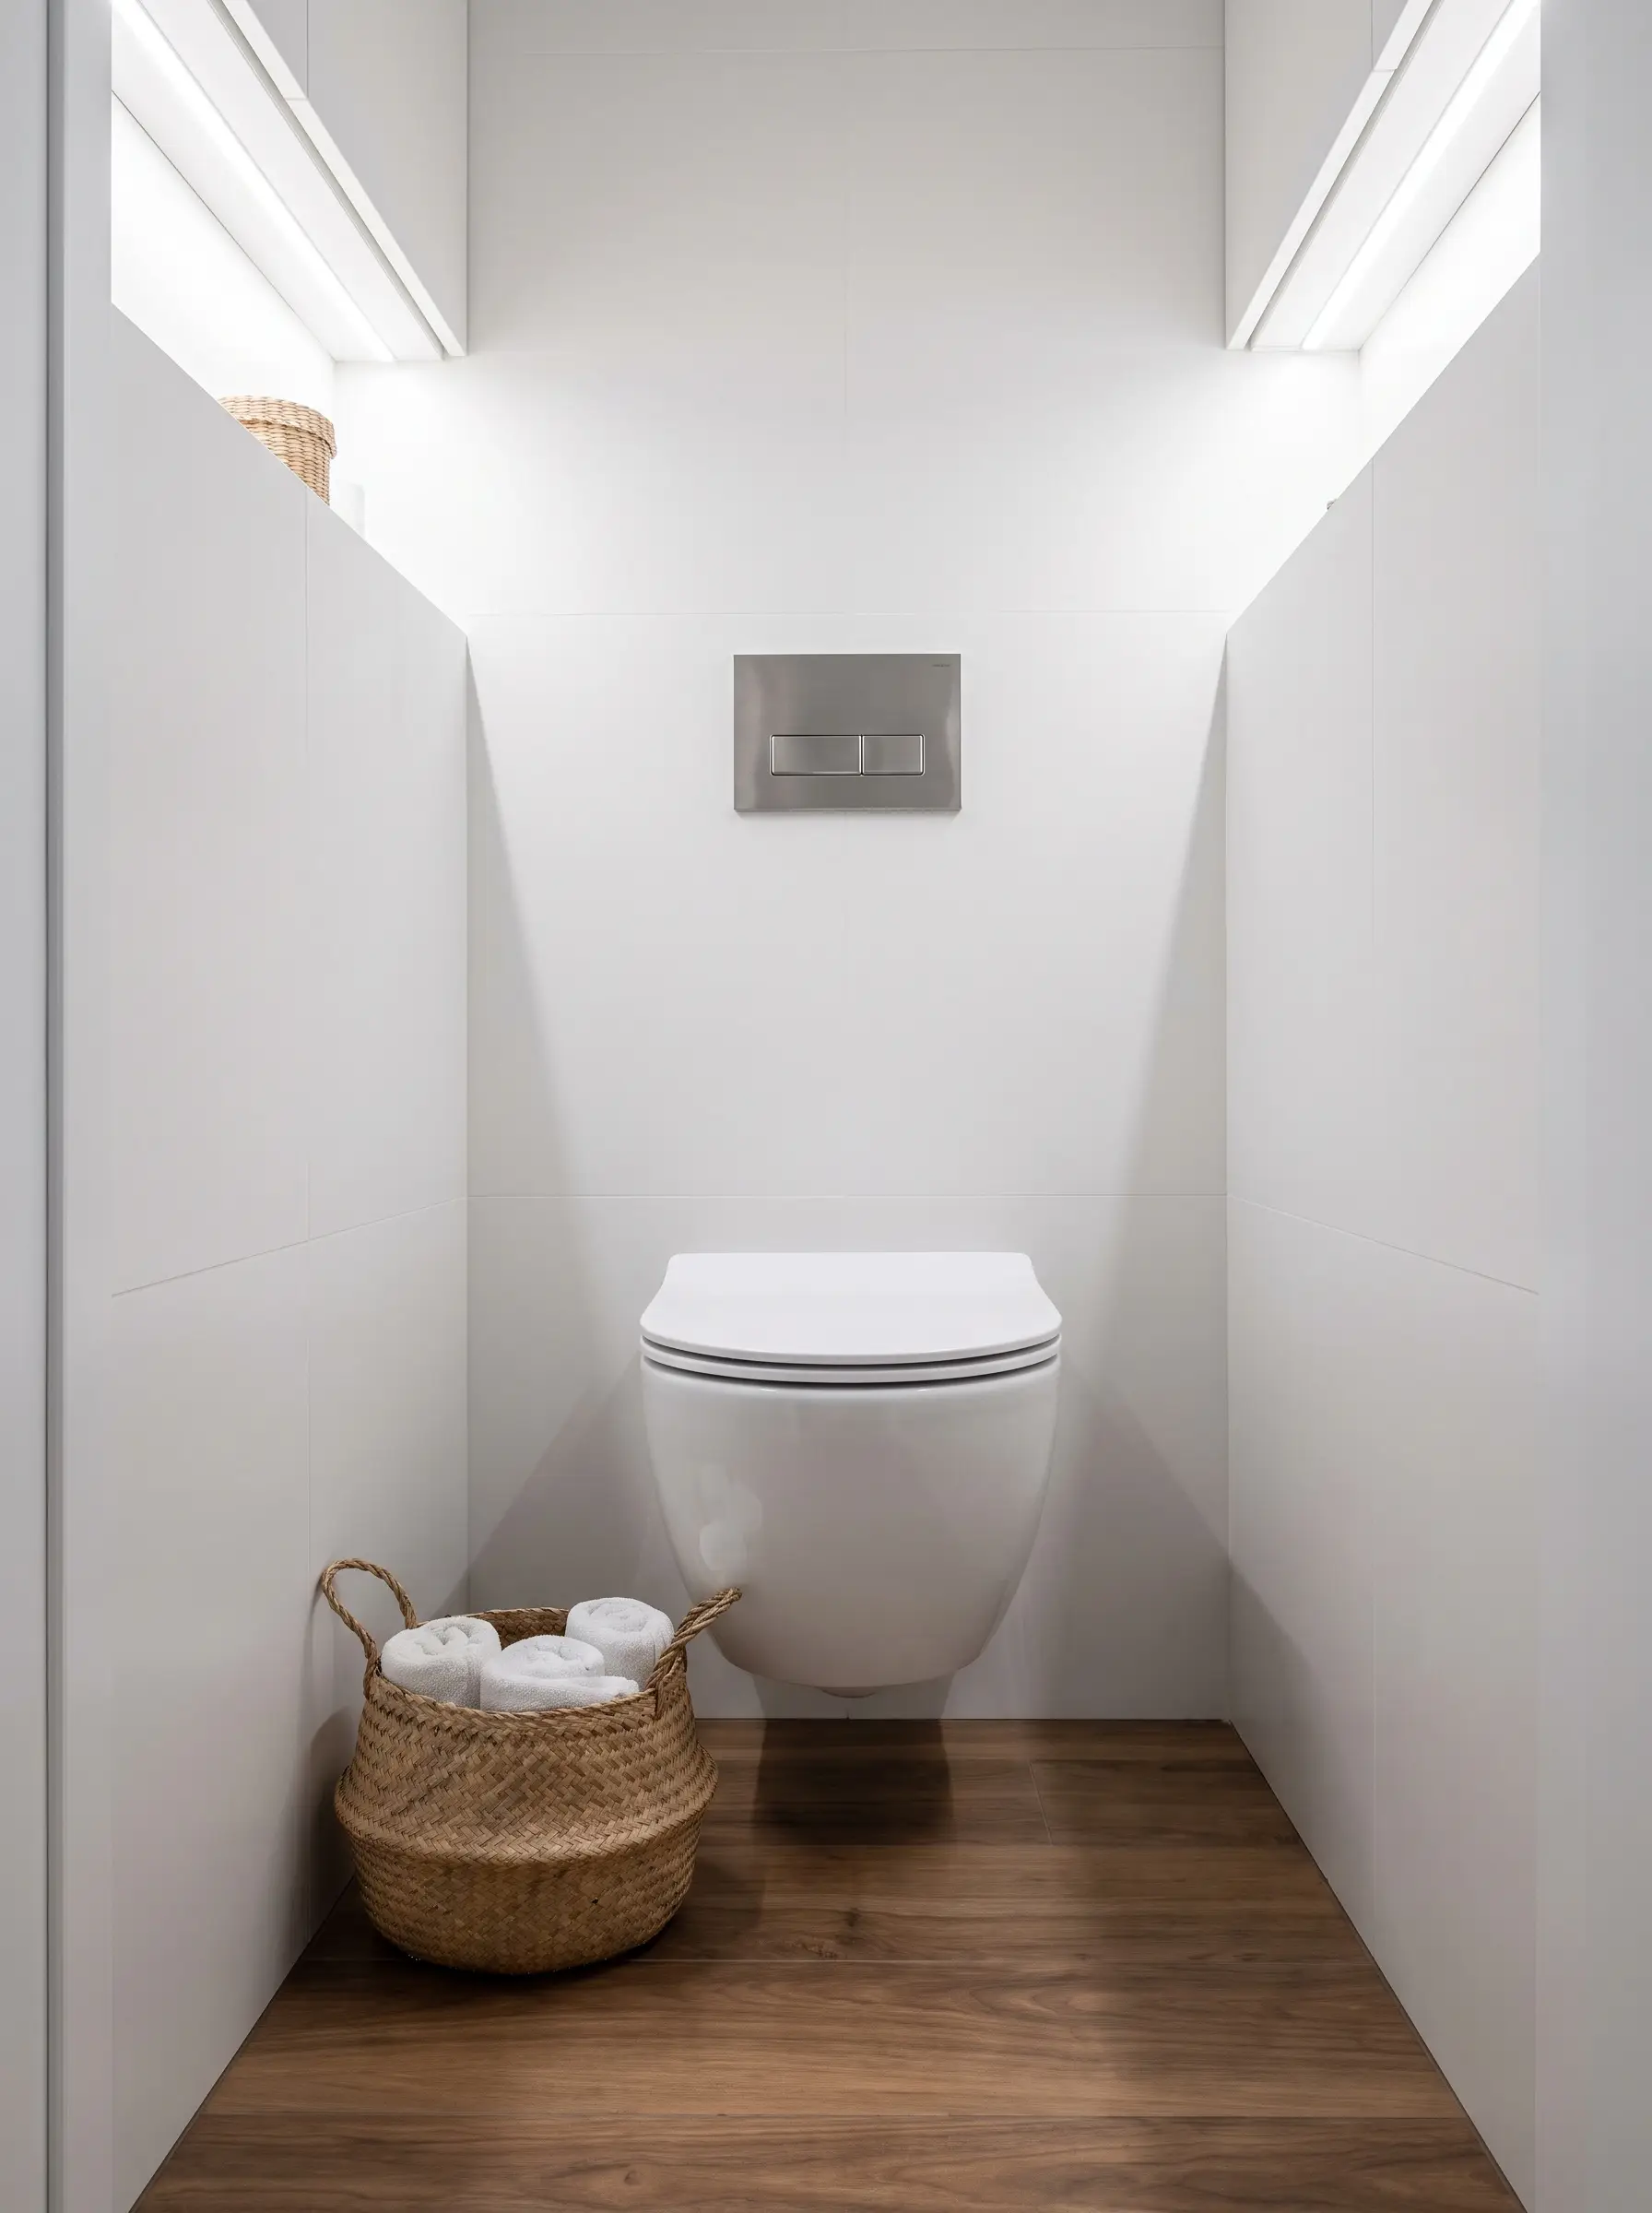
Floor-mounted fixtures consume a massive amount of visual weight and physical real estate. By moving the water tank inside the wall cavity, you push the entire fixture back, exposing more floor tile underneath to mathematically trick the brain into perceiving a larger room.
- Vibe: Sleek, European-inspired efficiency.
- Key Materials: In-wall carrier systems (like Geberit or Toto), wall-hung toilet bowl, dual-flush actuator plate.
- Space Saved: Up to 9 inches of forward projection.
Pocket Doors and External Sliders
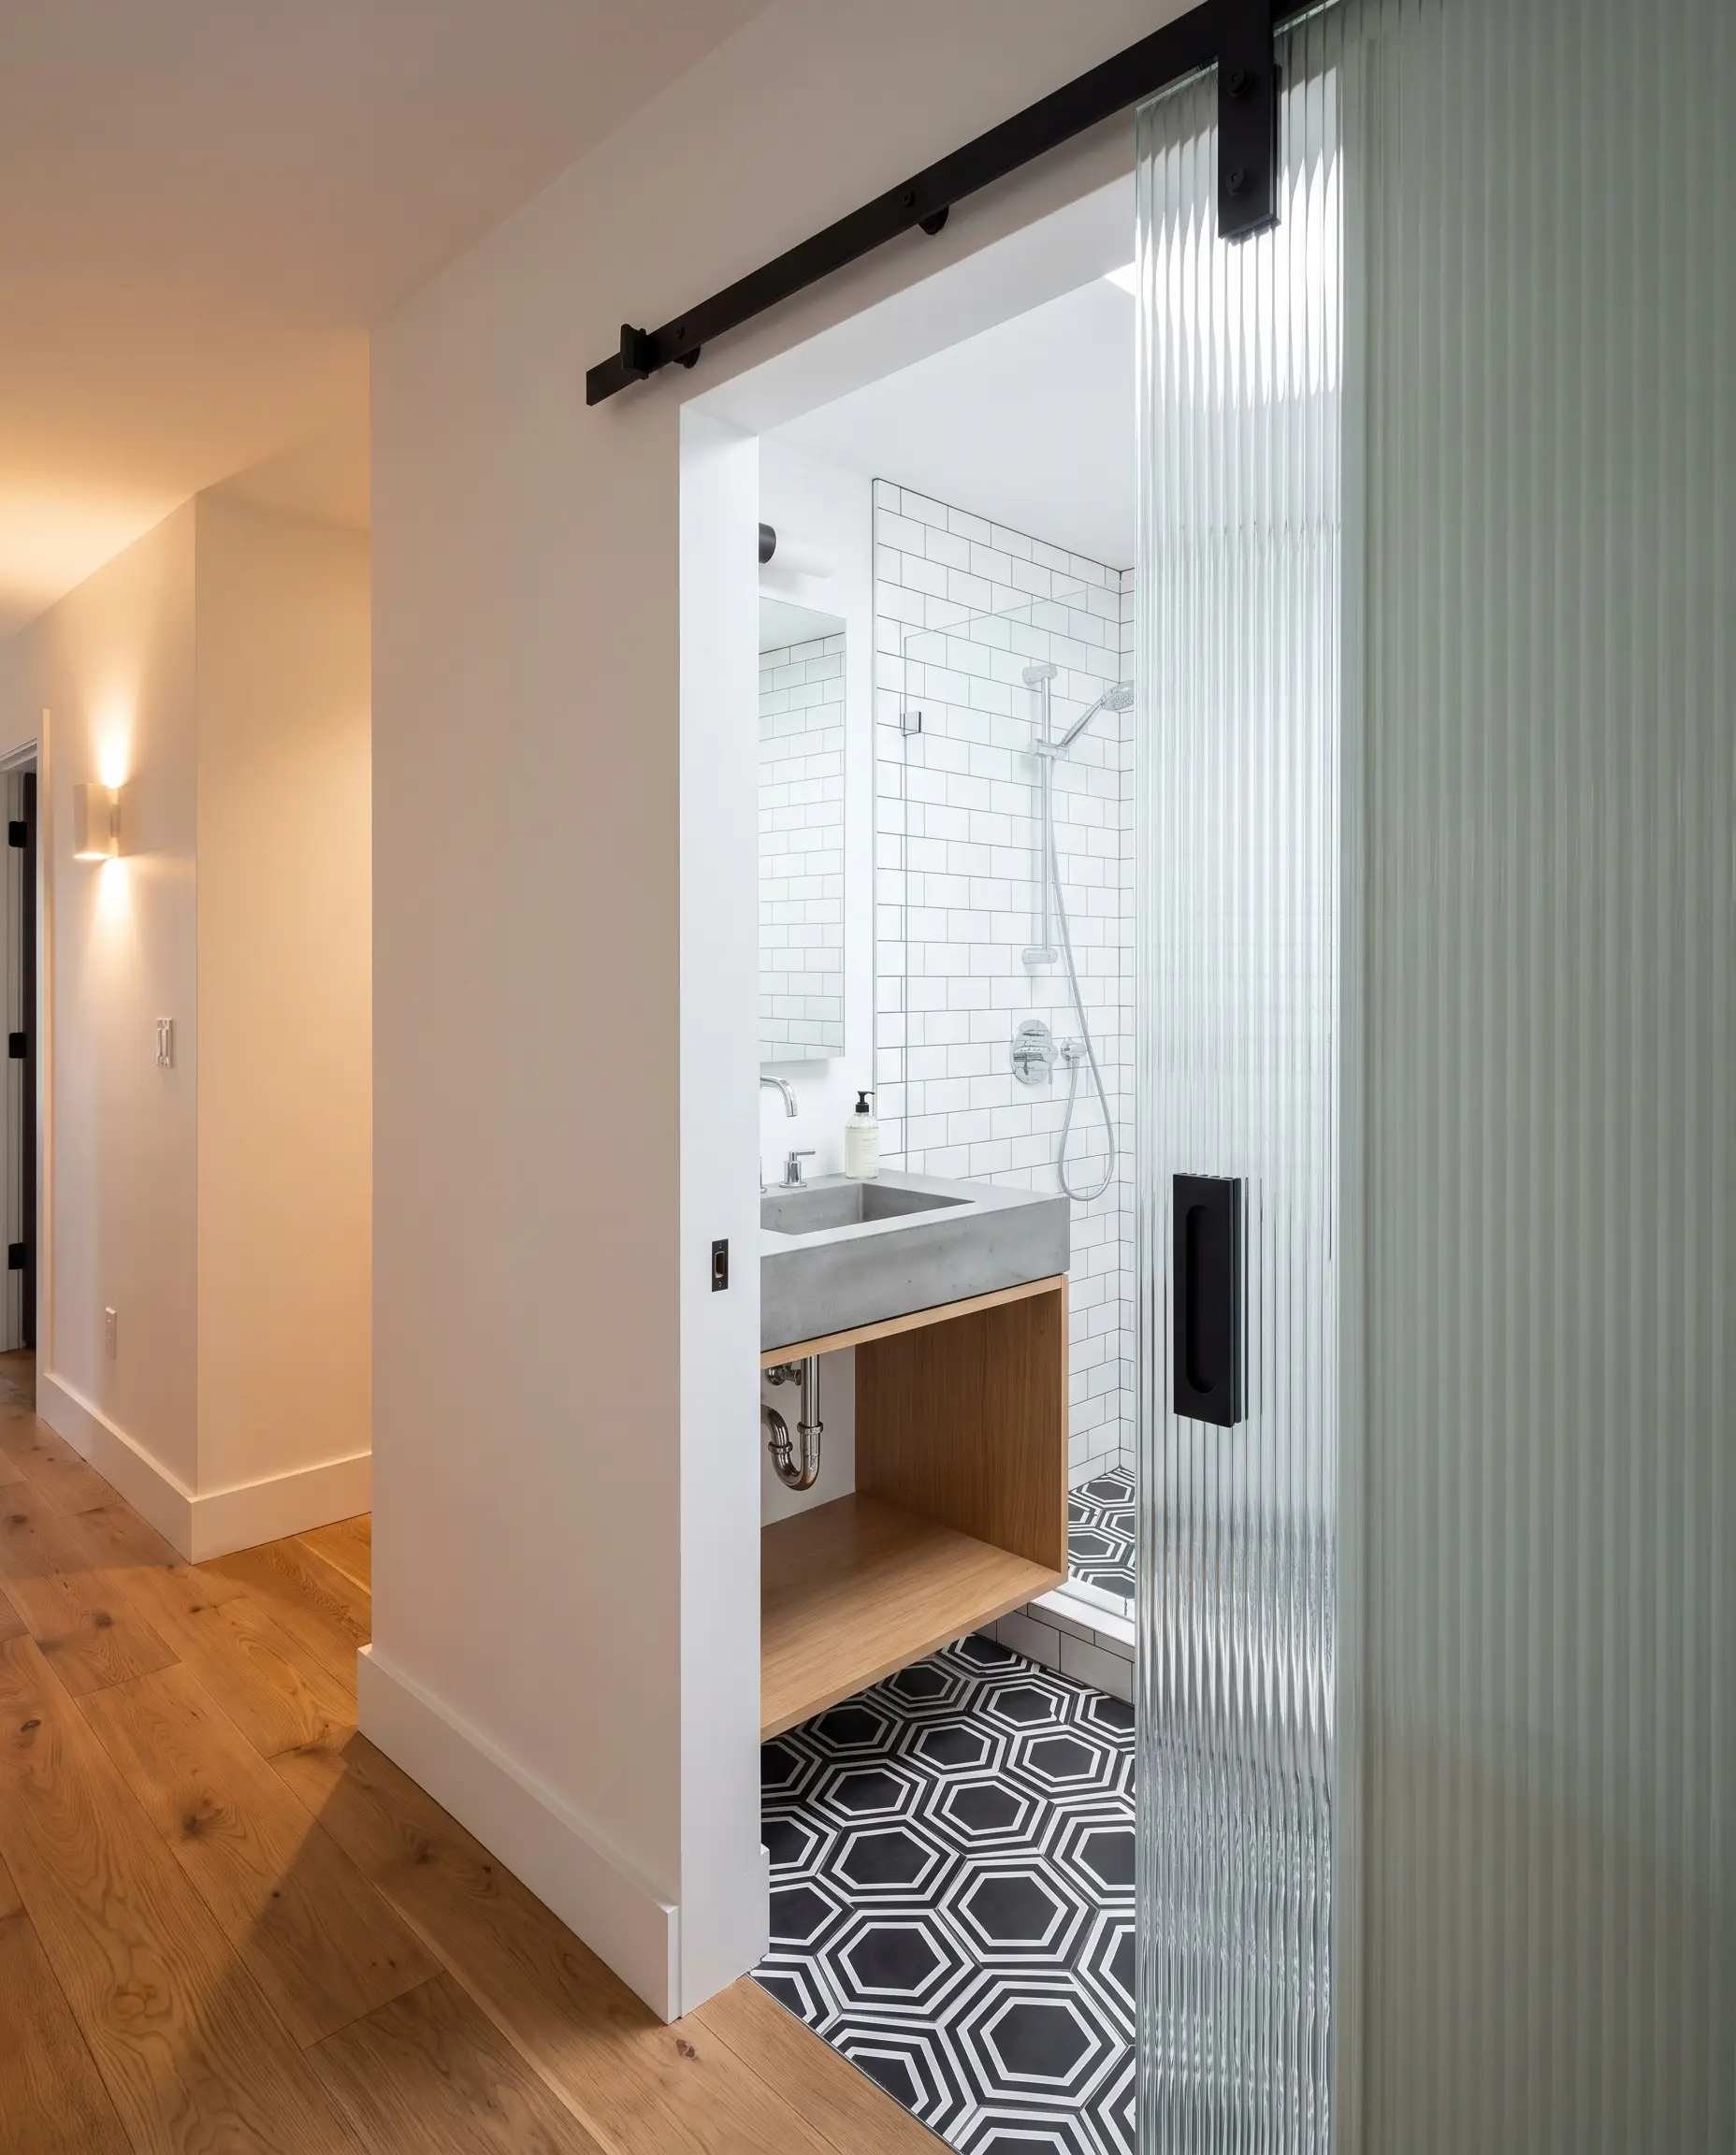
Traditional hinged doors require a massive clearance arc that instantly kills usable interior space. Upgrading to a pocket door that slides directly into the drywall—or a heavy-fluted glass barn door mounted on the exterior hallway side—is a non-negotiable structural upgrade for ultra-tight layouts.
- Vibe: Streamlined and unobstructed.
- Key Materials: Heavy-duty pocket door track hardware, solid-core slab doors, or fluted glass with matte black exterior tracks.
- Styling Pro-Tip: Install edge pulls that sit perfectly flush with the door for a completely flat, custom look when open.
Material Selections for Visual Expansion
Surface materials have immense power to manipulate light and depth within a confined space. High-contrast grout lines and abrupt color breaks act as visual speed bumps, which means our primary goal here is seamless, uninterrupted visual continuity.
Monolithic Large-Format Slabs
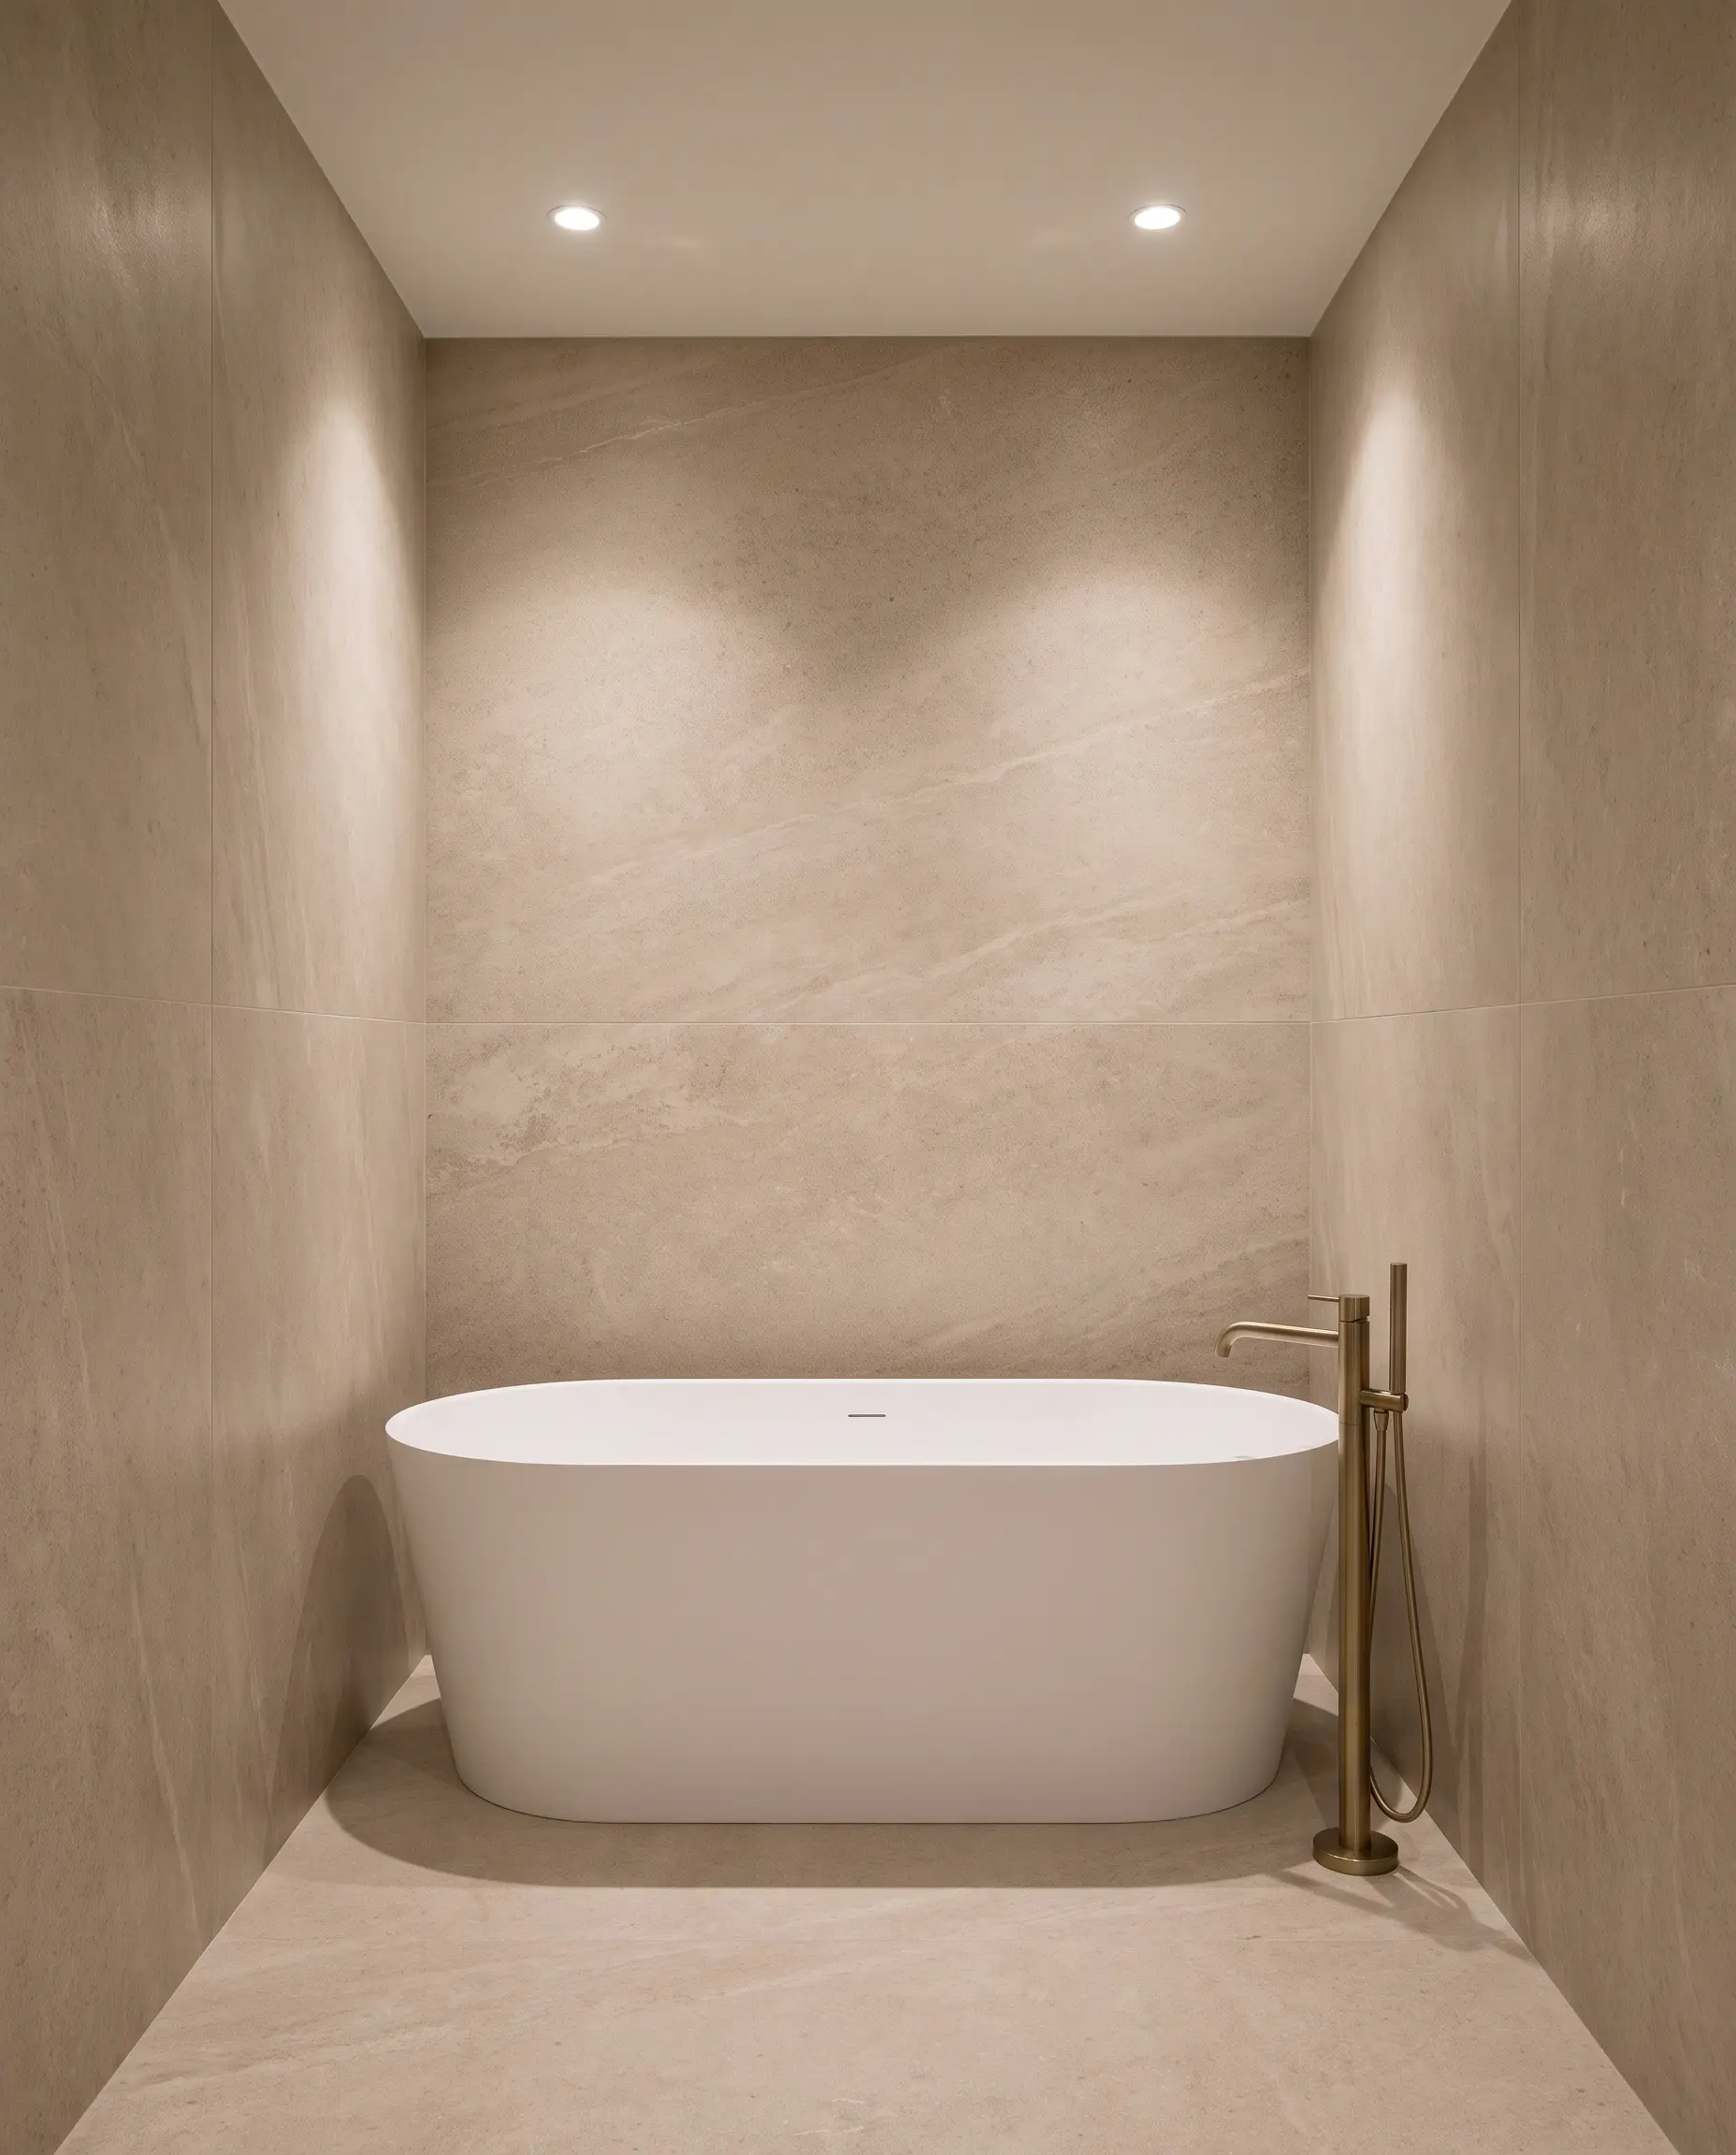
Small, busy subway tiles create a chaotic grid that immediately highlights the limited dimensions of the room. Transitioning to sleek 24×48-inch porcelain slabs or continuous poured terrazzo drastically reduces grout lines, creating an expansive, monolithic surface that feels incredibly high-end.
- Vibe: Sophisticated, continuous modernism.
- Key Materials: 24×48-inch or larger rectified porcelain slabs, premium polymer-modified thin-set mortar.
- Styling Pro-Tip: Use a color-matched epoxy grout to render the remaining joints virtually invisible.
Continuous Floor-to-Wall Tile Applications
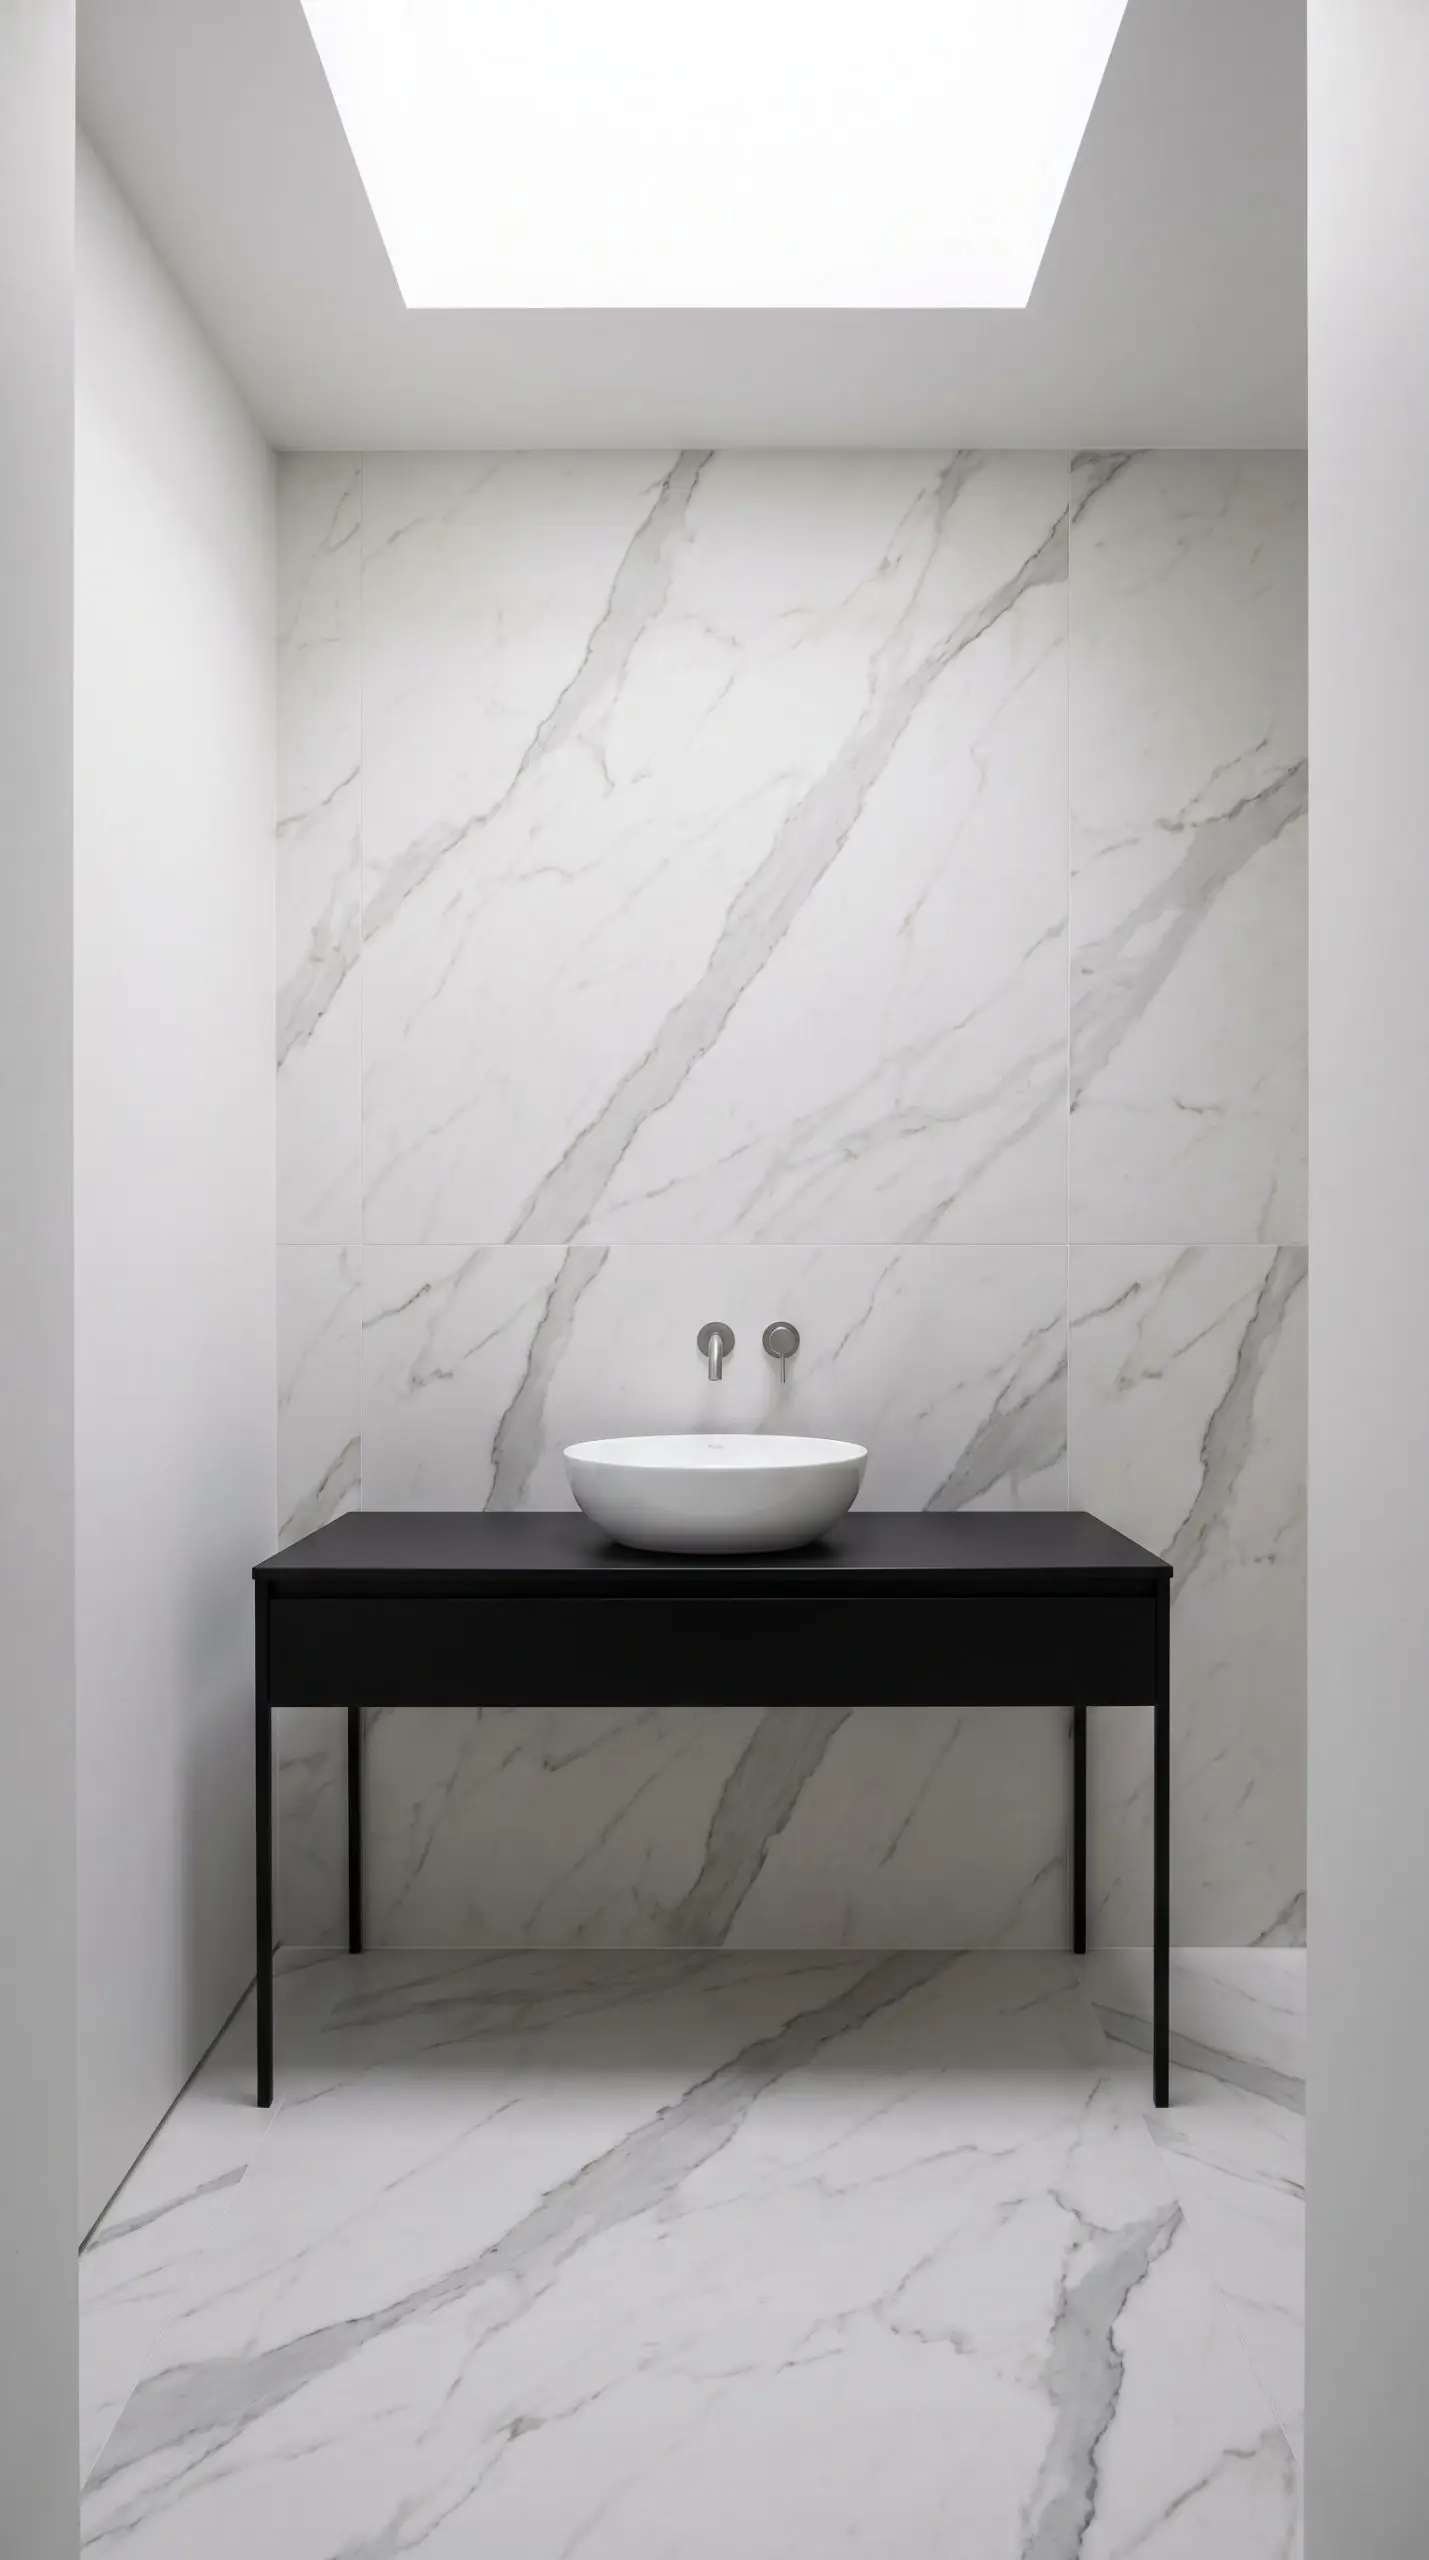
Running the exact same large-format tile from the floor straight up the wall behind the vanity creates a brilliant optical illusion. This technique blurs the hard boundary between the floor and ceiling, generating an infinity edge effect that is highly popular in custom wet room bathroom designs.
- Vibe: Monolithic and expansive.
- Key Materials: Identical porcelain or natural stone tiles for both horizontal and vertical planes.
- Styling Pro-Tip: Keep the veining or grain direction consistent as it transitions from the floor up the wall to maintain the seamless illusion.
Vertical Stacked Zellige for Height Illusion
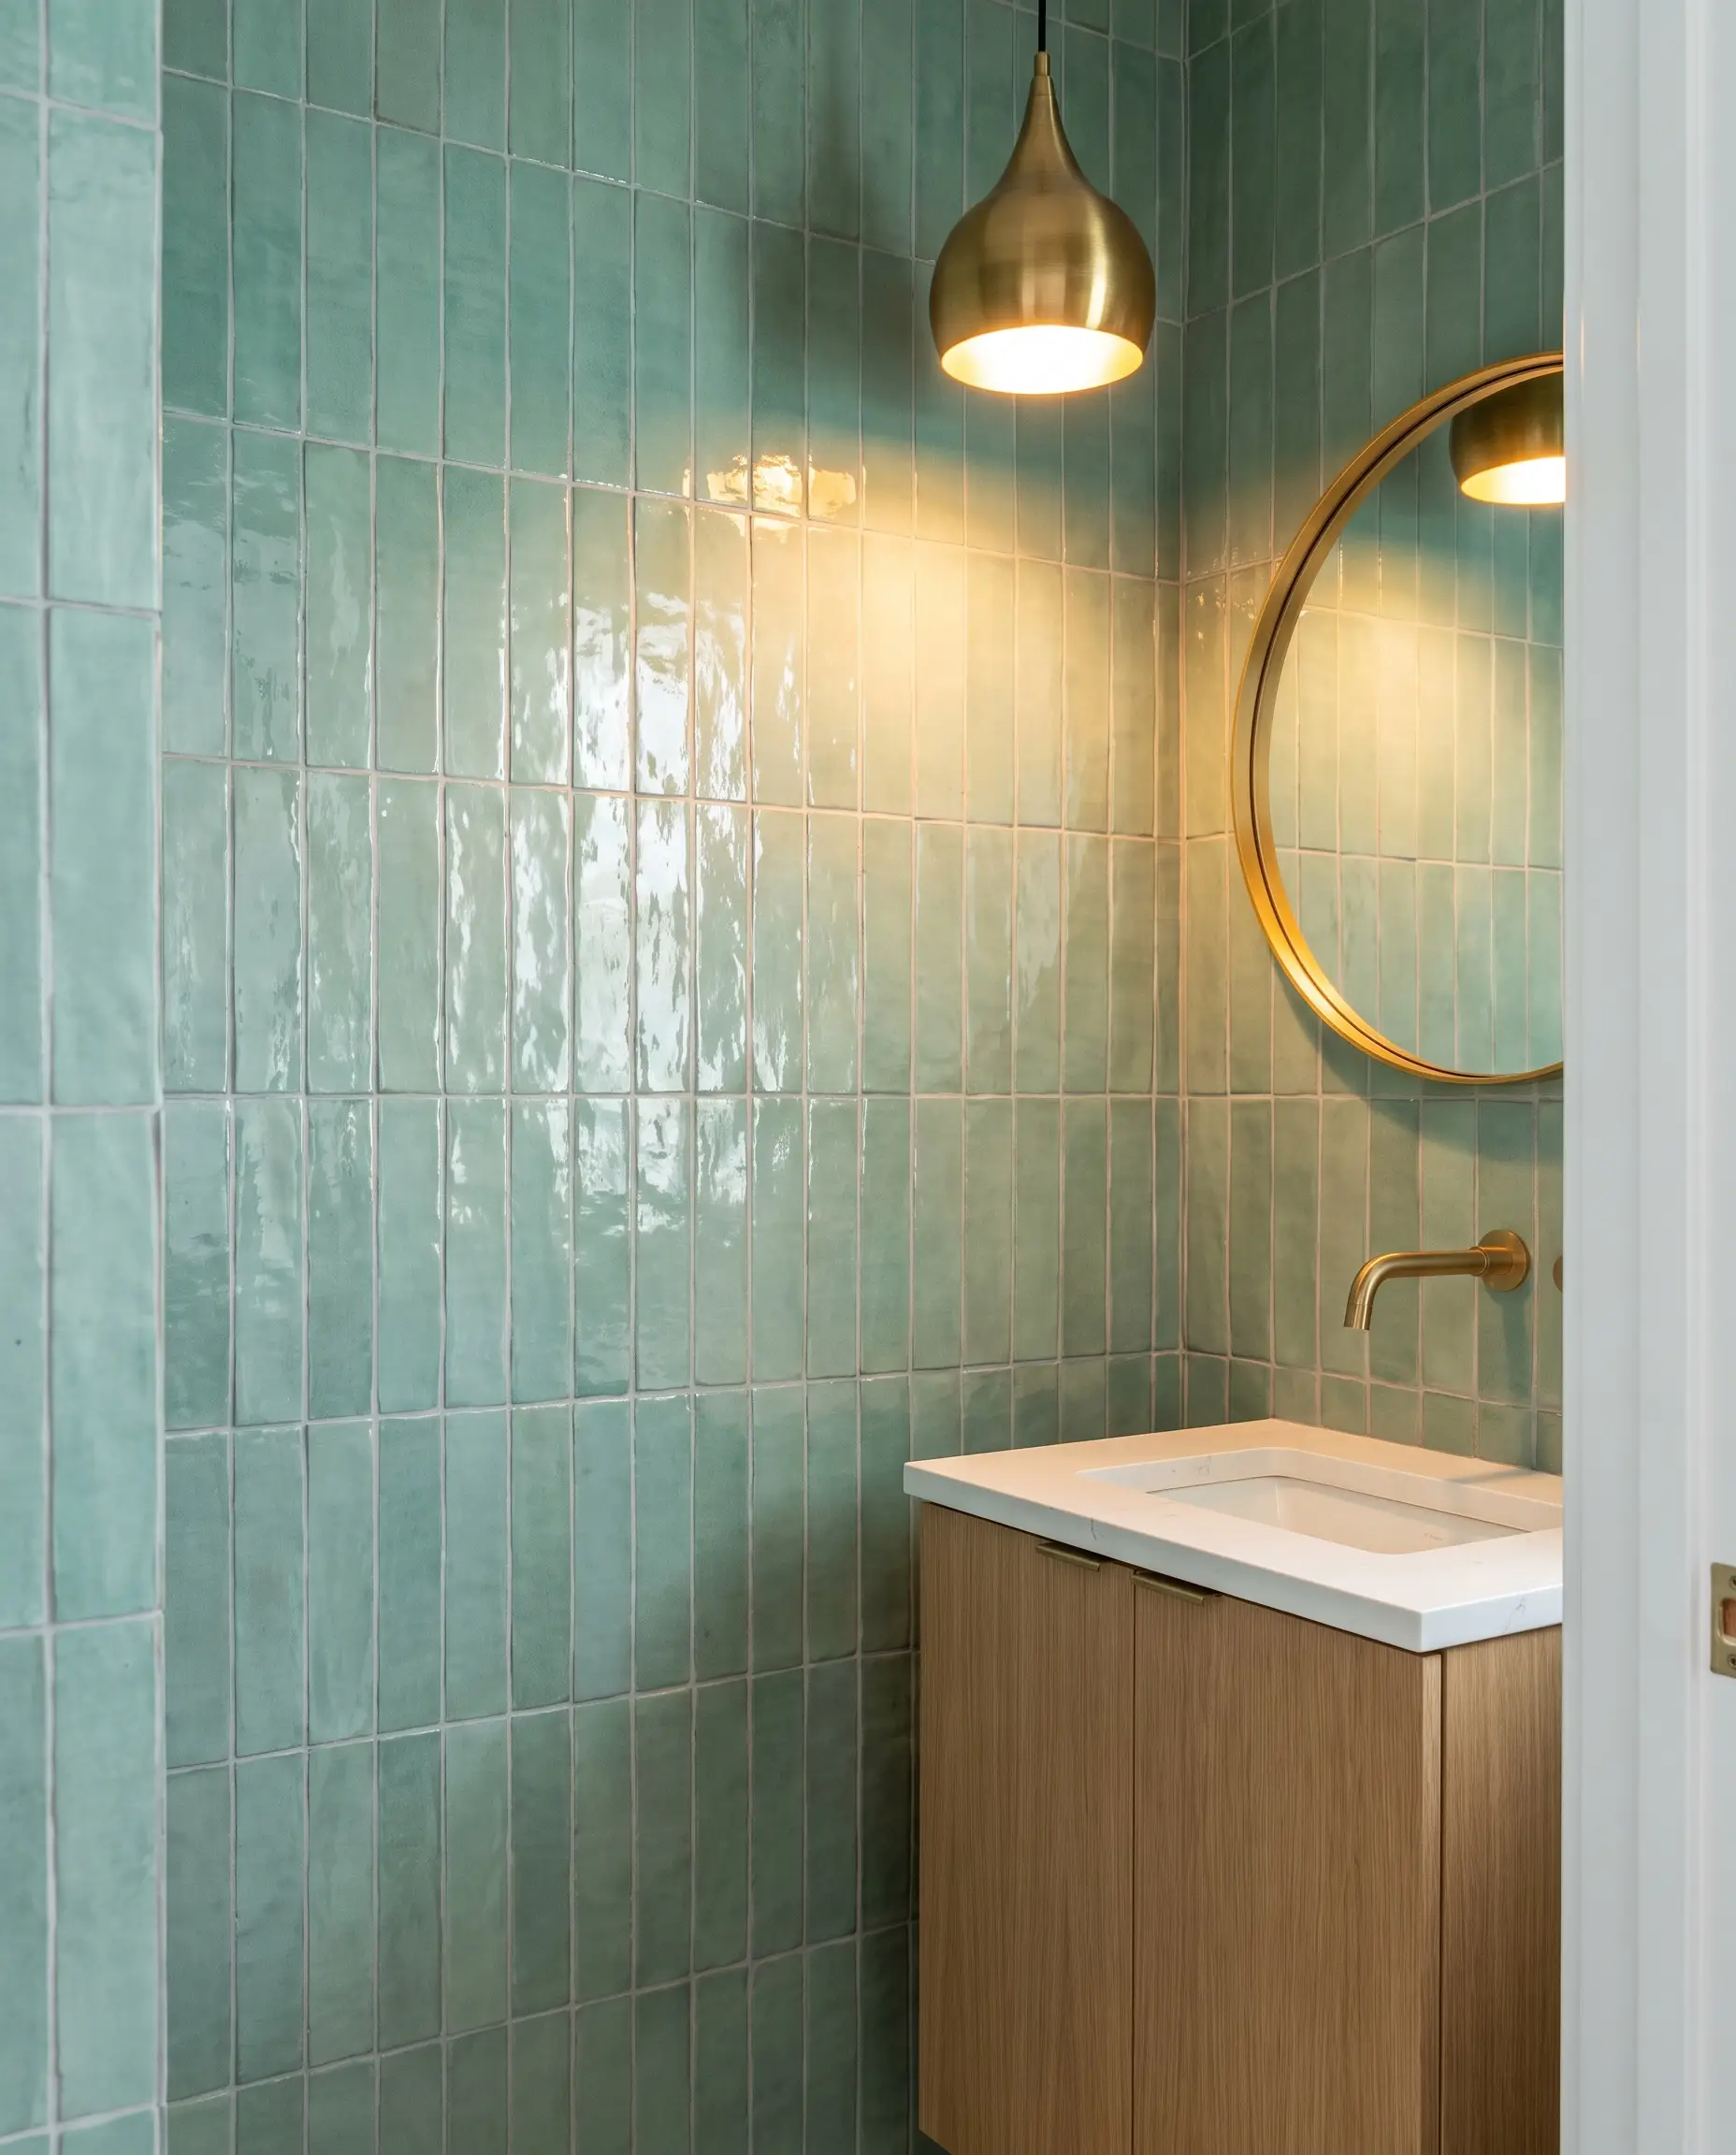
If you are drawn to the artisanal texture of smaller tiles like Zellige, you must dictate the geometry to fight low ceilings. Forgoing the traditional horizontal brick bond in favor of a straight vertical stacking layout immediately draws the eye upward, faking a significantly taller ceiling line.
- Vibe: Hand-crafted yet structurally modern.
- Key Materials: Authentic Moroccan Zellige tiles, un-sanded grout.
- Tile Layout: Vertical Straight Stack.
Seamless Tadelakt Plaster Walls
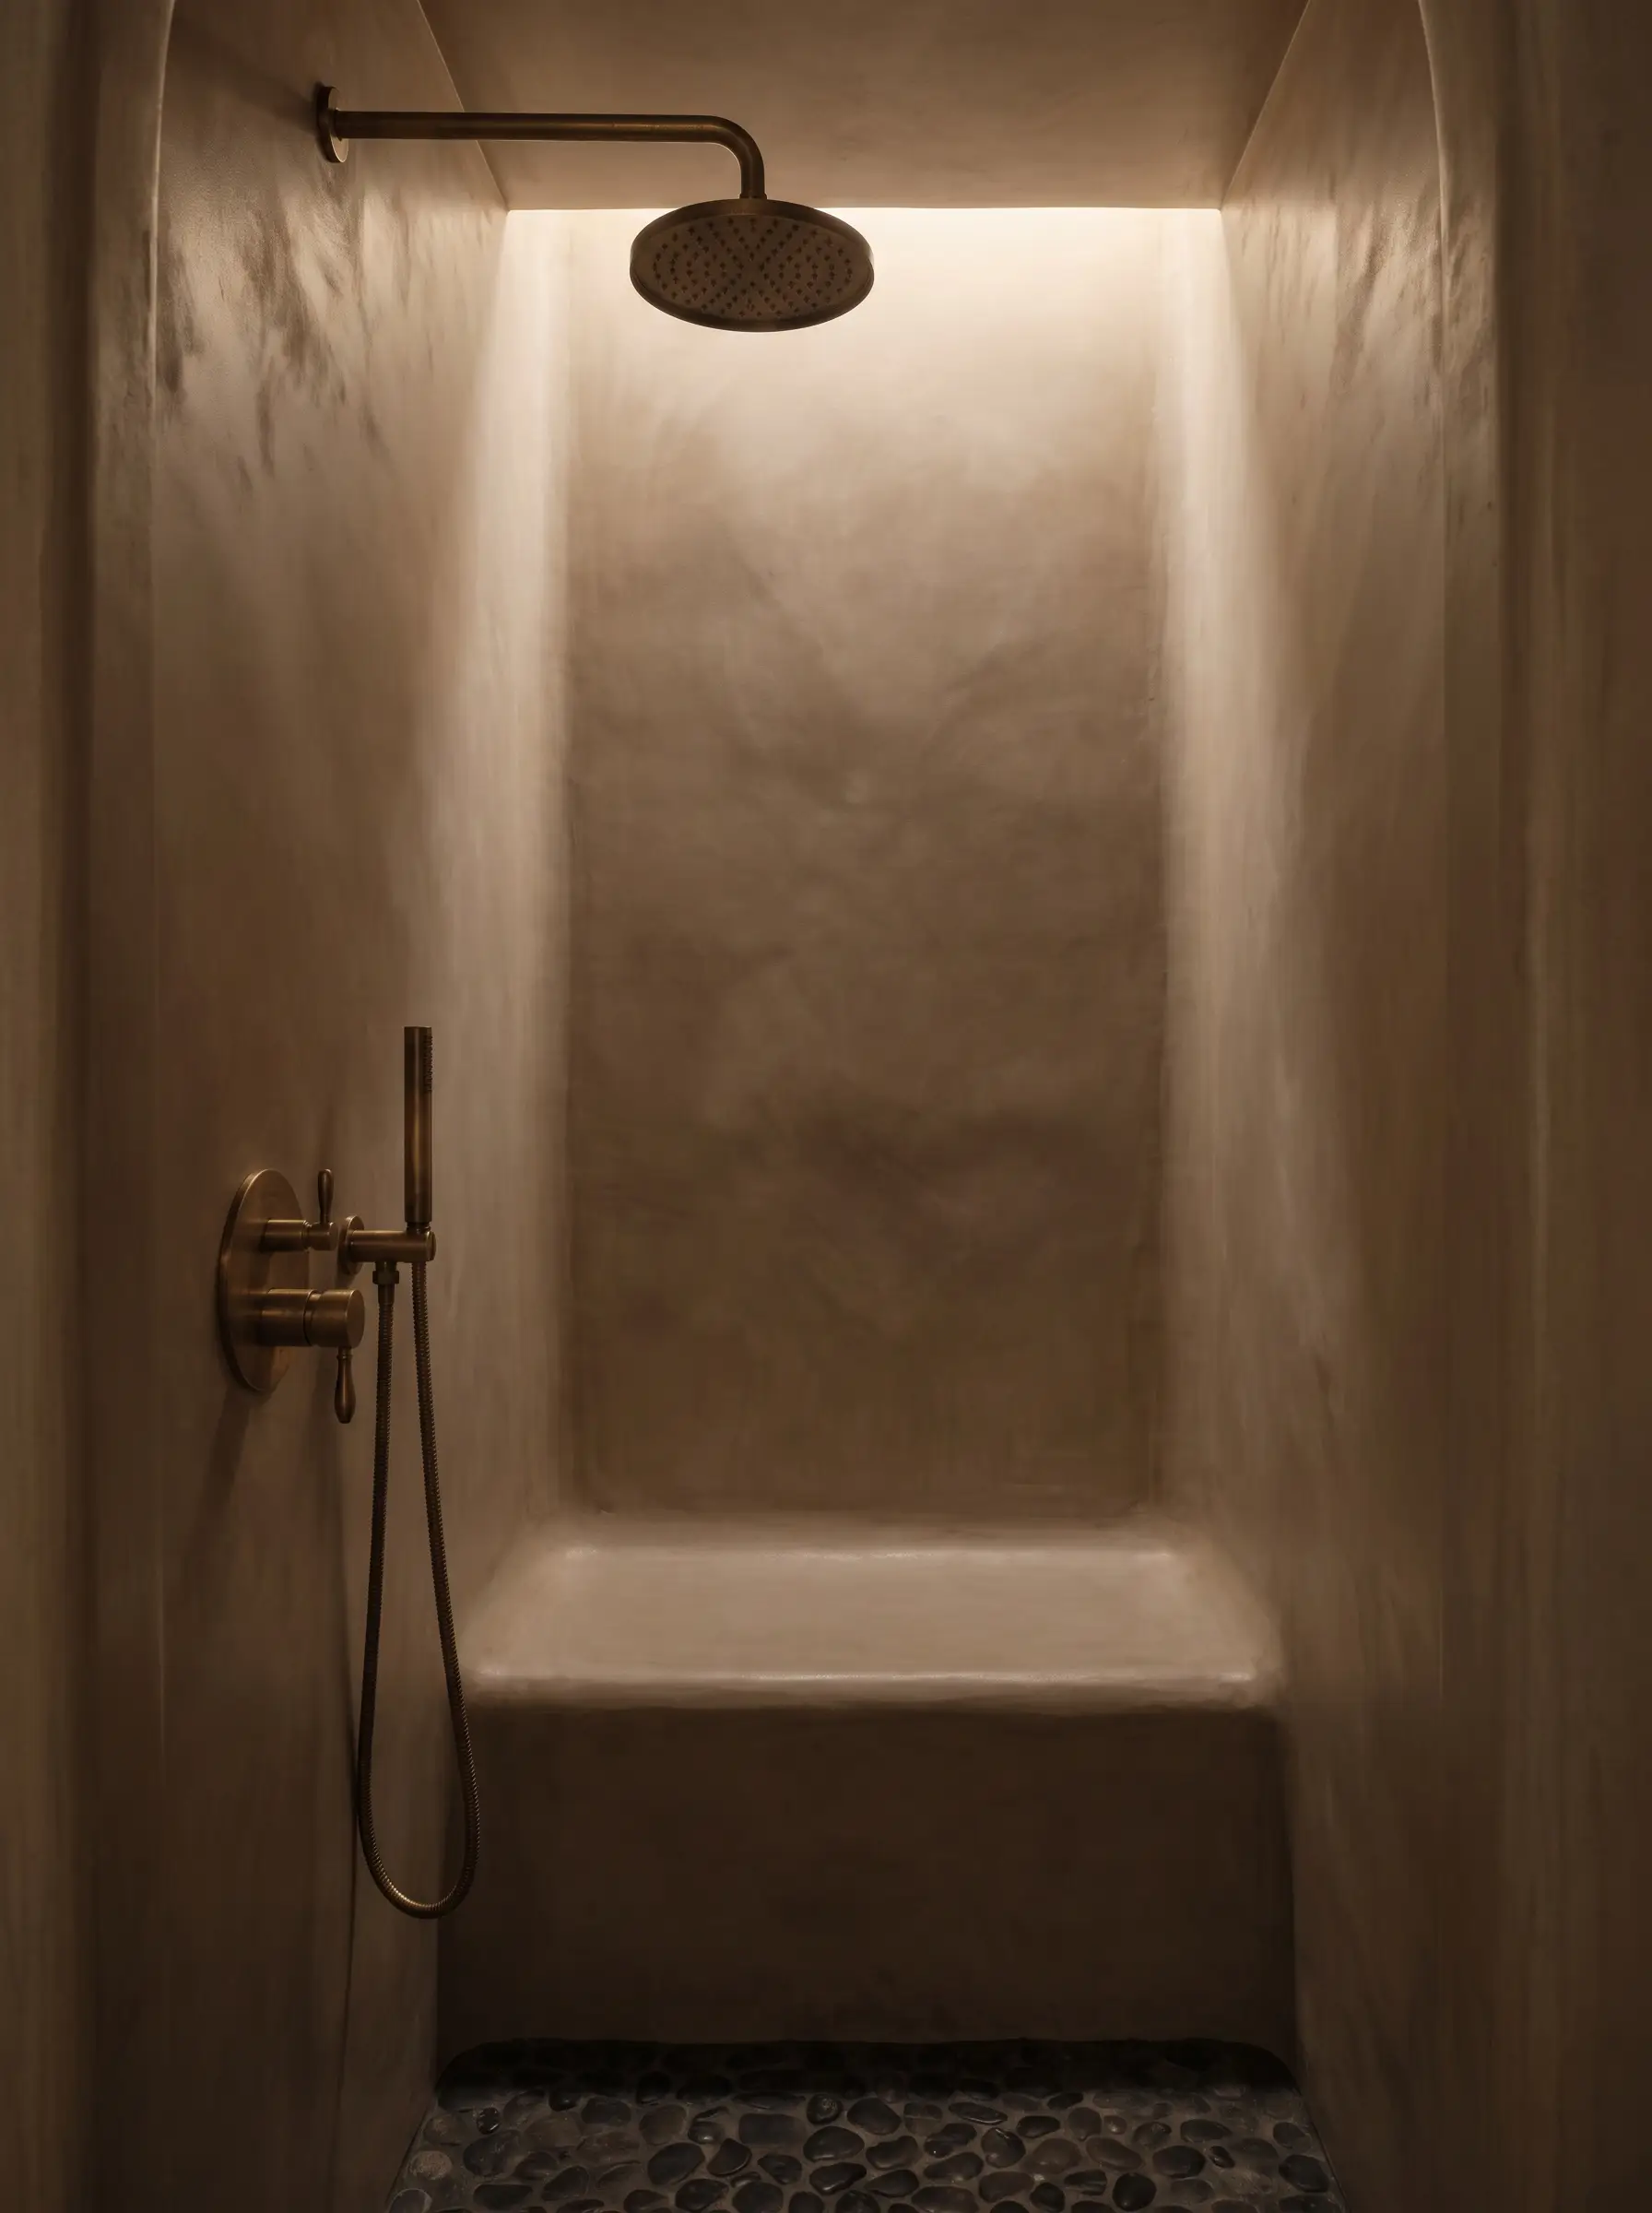
For a completely groutless, organic modern alternative to tile, waterproof Moroccan plaster is unparalleled. Tadelakt provides a soft, undulating texture without a single joint or seam, perfectly softening the hard edges and claustrophobic corners of a compact room.
- Vibe: Warm, earthy Organic Modern.
- Key Materials: Authentic lime-based Tadelakt plaster, olive oil soap sealer.
- Styling Pro-Tip: Pair with unlacquered brass fixtures that will naturally patina alongside the organic plaster walls.
High-Impact Vanity & Storage Solutions
The greatest tension in compact layouts is the battle between necessary storage and open floor space. Mastering this requires a strict pivot away from bulky furniture and toward recessed or cantilevered architecture.
| Fixture | Standard Dimension | Small Bath Optimal Dimension |
|---|---|---|
| Vanity Depth | 21″ – 22″ | 18″ Narrow Depth |
| Toilet Projection | 28″ – 30″ | 21″ Wall-Mounted |
| Medicine Cabinet | 4″ – 6″ Surface Mount | 4″ Fully Recessed |
| Walkway Clearance | 36″ Recommended | 30″ Minimum Tolerance |
Cantilevered Floating Vanities
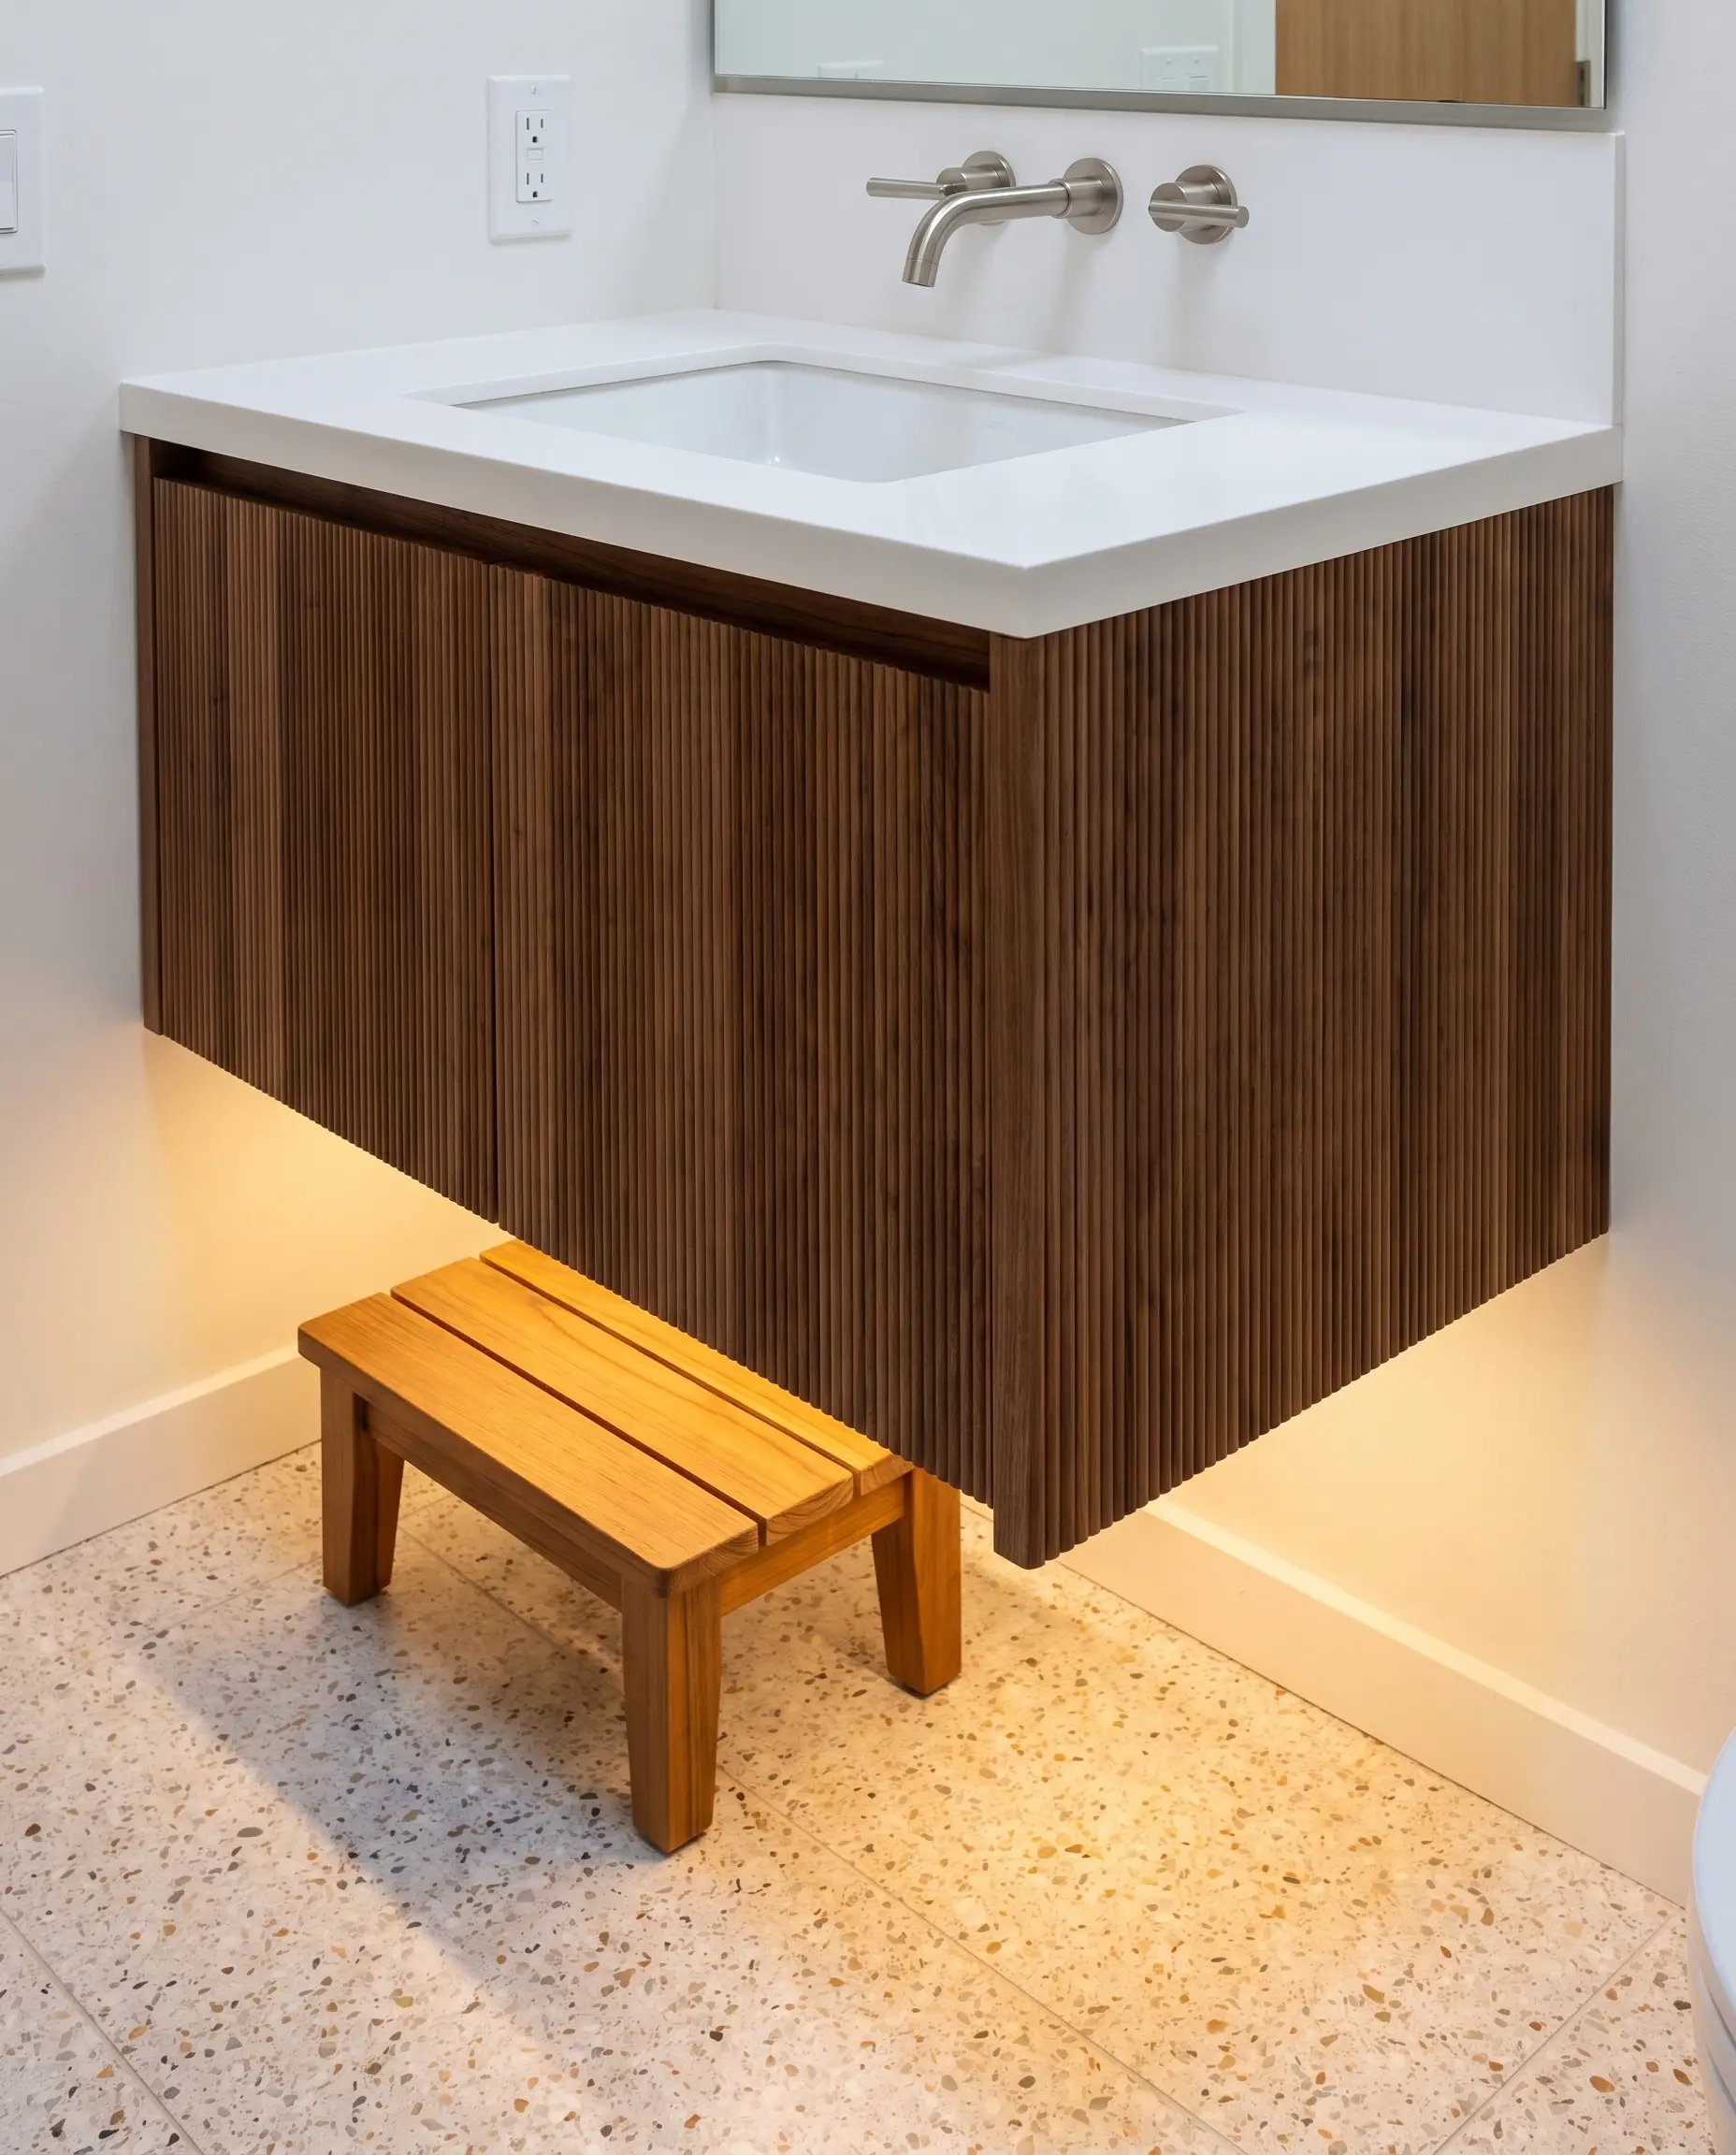
Heavy, floor-bound builder-grade cabinets anchor the room down and eat up precious visual square footage. Mounting a bespoke floating vanity directly to the wall and leaving 10 to 12 inches of negative space beneath it maximizes visible floor tile and provides the perfect alcove to tuck away a minimal step stool or scale.
- Vibe: Airy, architectural precision.
- Key Materials: Heavy-duty wall blocking, custom millwork, under-cabinet LED channel lighting.
- Styling Pro-Tip: Run the baseboard tile continuously behind the floating vanity to emphasize the unbroken floor plane.
Recessed Medicine Cabinets and Wall Niches
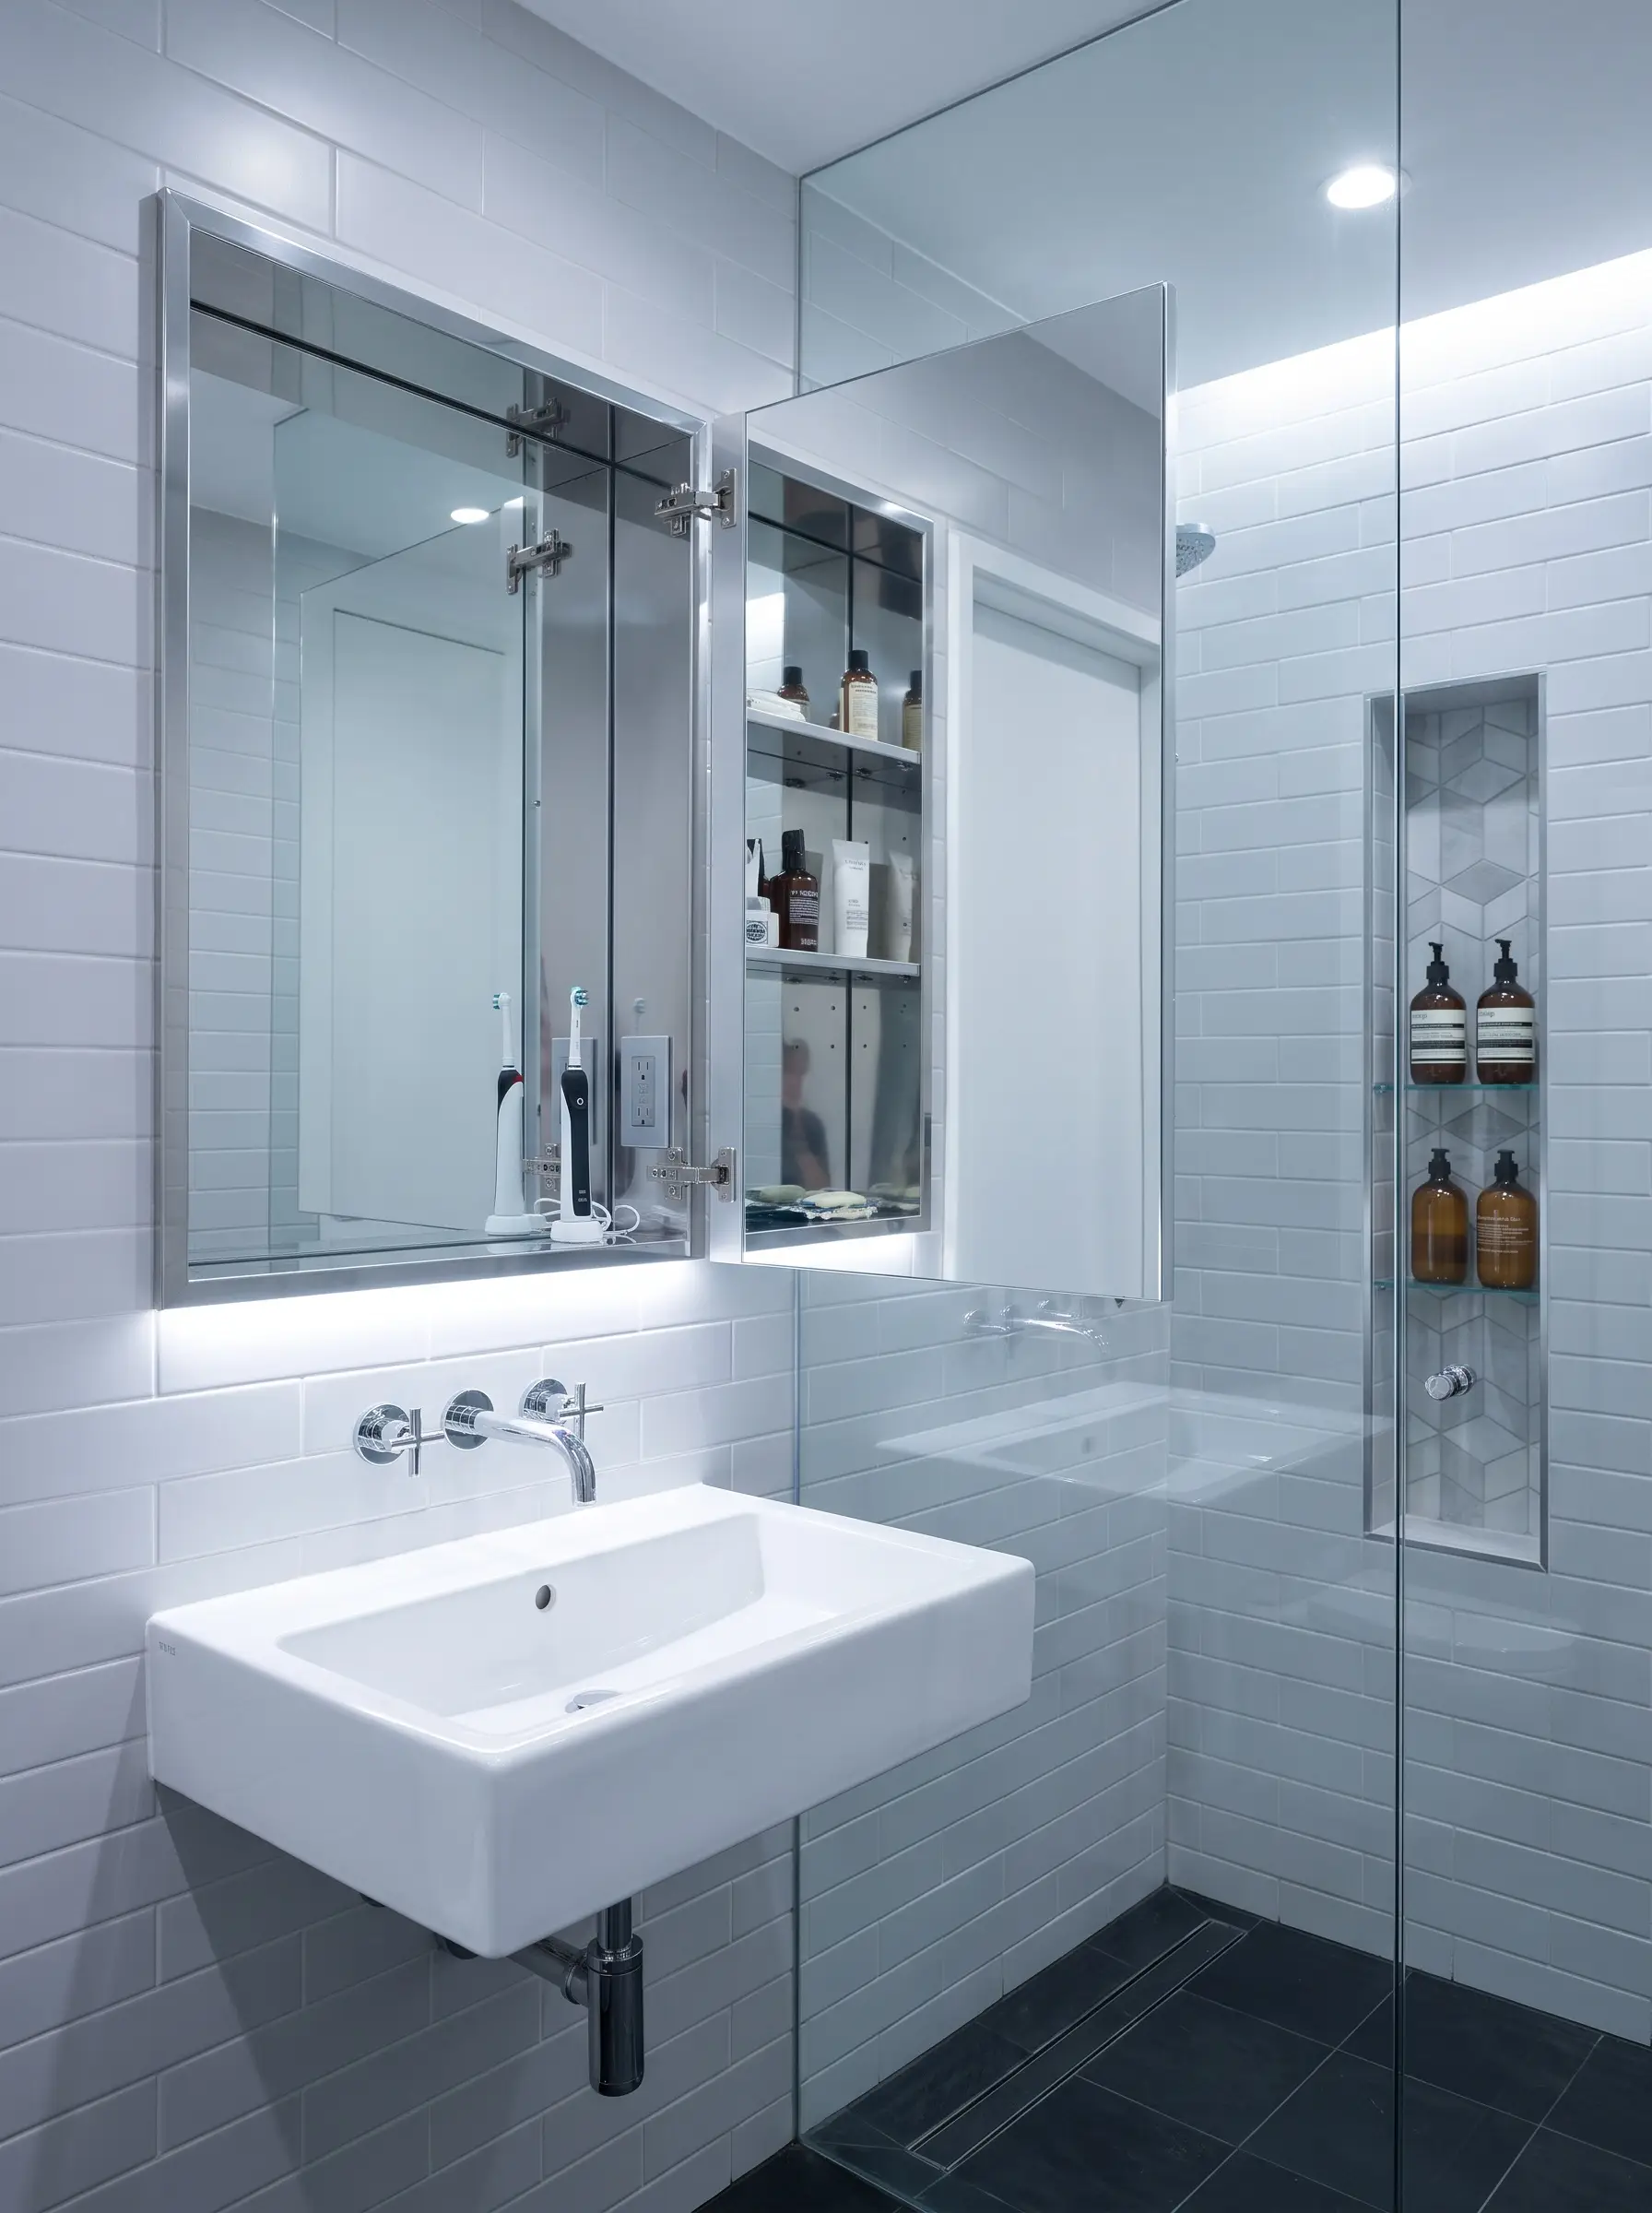
Instead of letting storage protrude into your breathing room, steal that space directly from the wall cavities between the studs. A fully recessed, frameless medicine cabinet provides essential eye-level storage, while tall recessed shower niches eliminate the need for cluttered corner wire caddies.
- Vibe: Hyper-efficient and concealed.
- Key Materials: Frameless mirrored recessed cabinets, custom-tiled Schluter niches.
- Styling Pro-Tip: Add integrated electrical outlets inside the recessed cabinet to keep toothbrushes and razors off the counter.
Shallow-Depth Custom Cabinetry
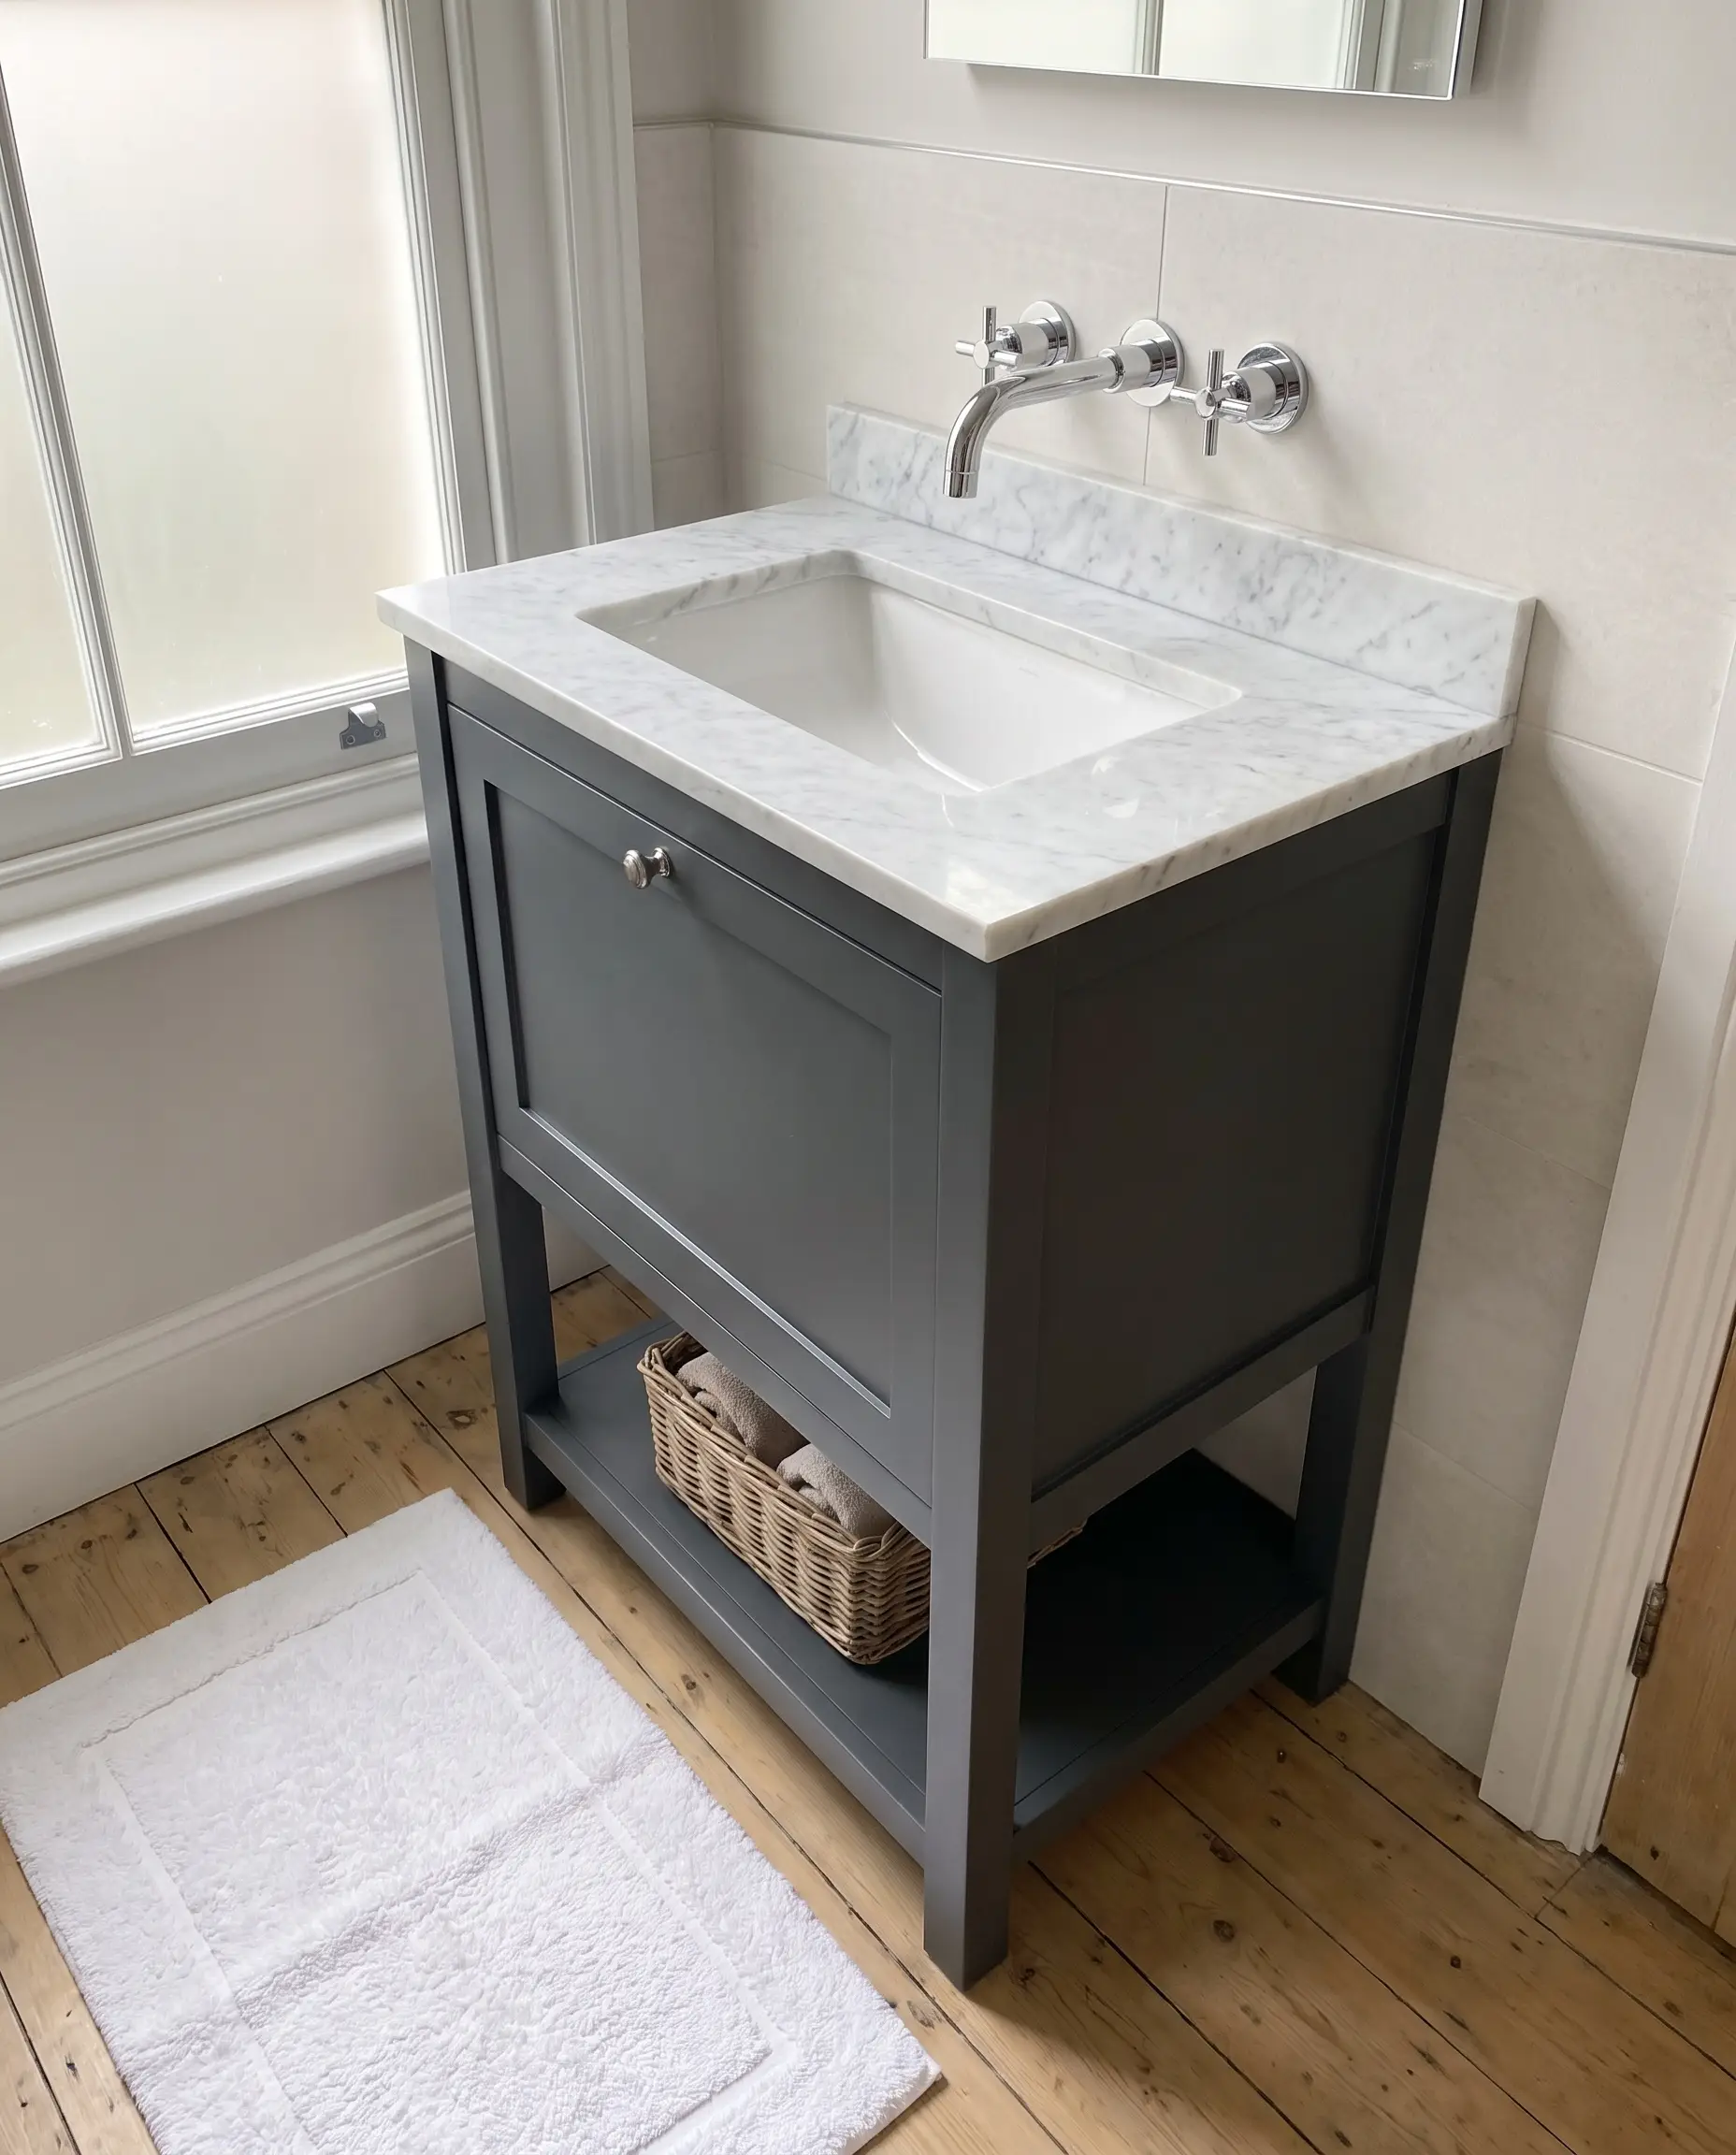
Standard 21-inch deep vanities choke narrow bathrooms, leaving barely enough room to pass. Sourcing 18-inch narrow depth vanities, or fabricating custom shallow millwork, opens up the walkway drastically, especially when paired with wall-mounted faucets to save counter depth.
- Vibe: Tailored and proportionate.
- Key Materials: 18-inch depth vanity bases, wall-mounted widespread faucets, custom stone counters.
- Styling Pro-Tip: Because the basin will be narrower, ensure your wall-mounted faucet spout has a shorter reach so water hits directly over the drain.
Integrated Trough Sinks
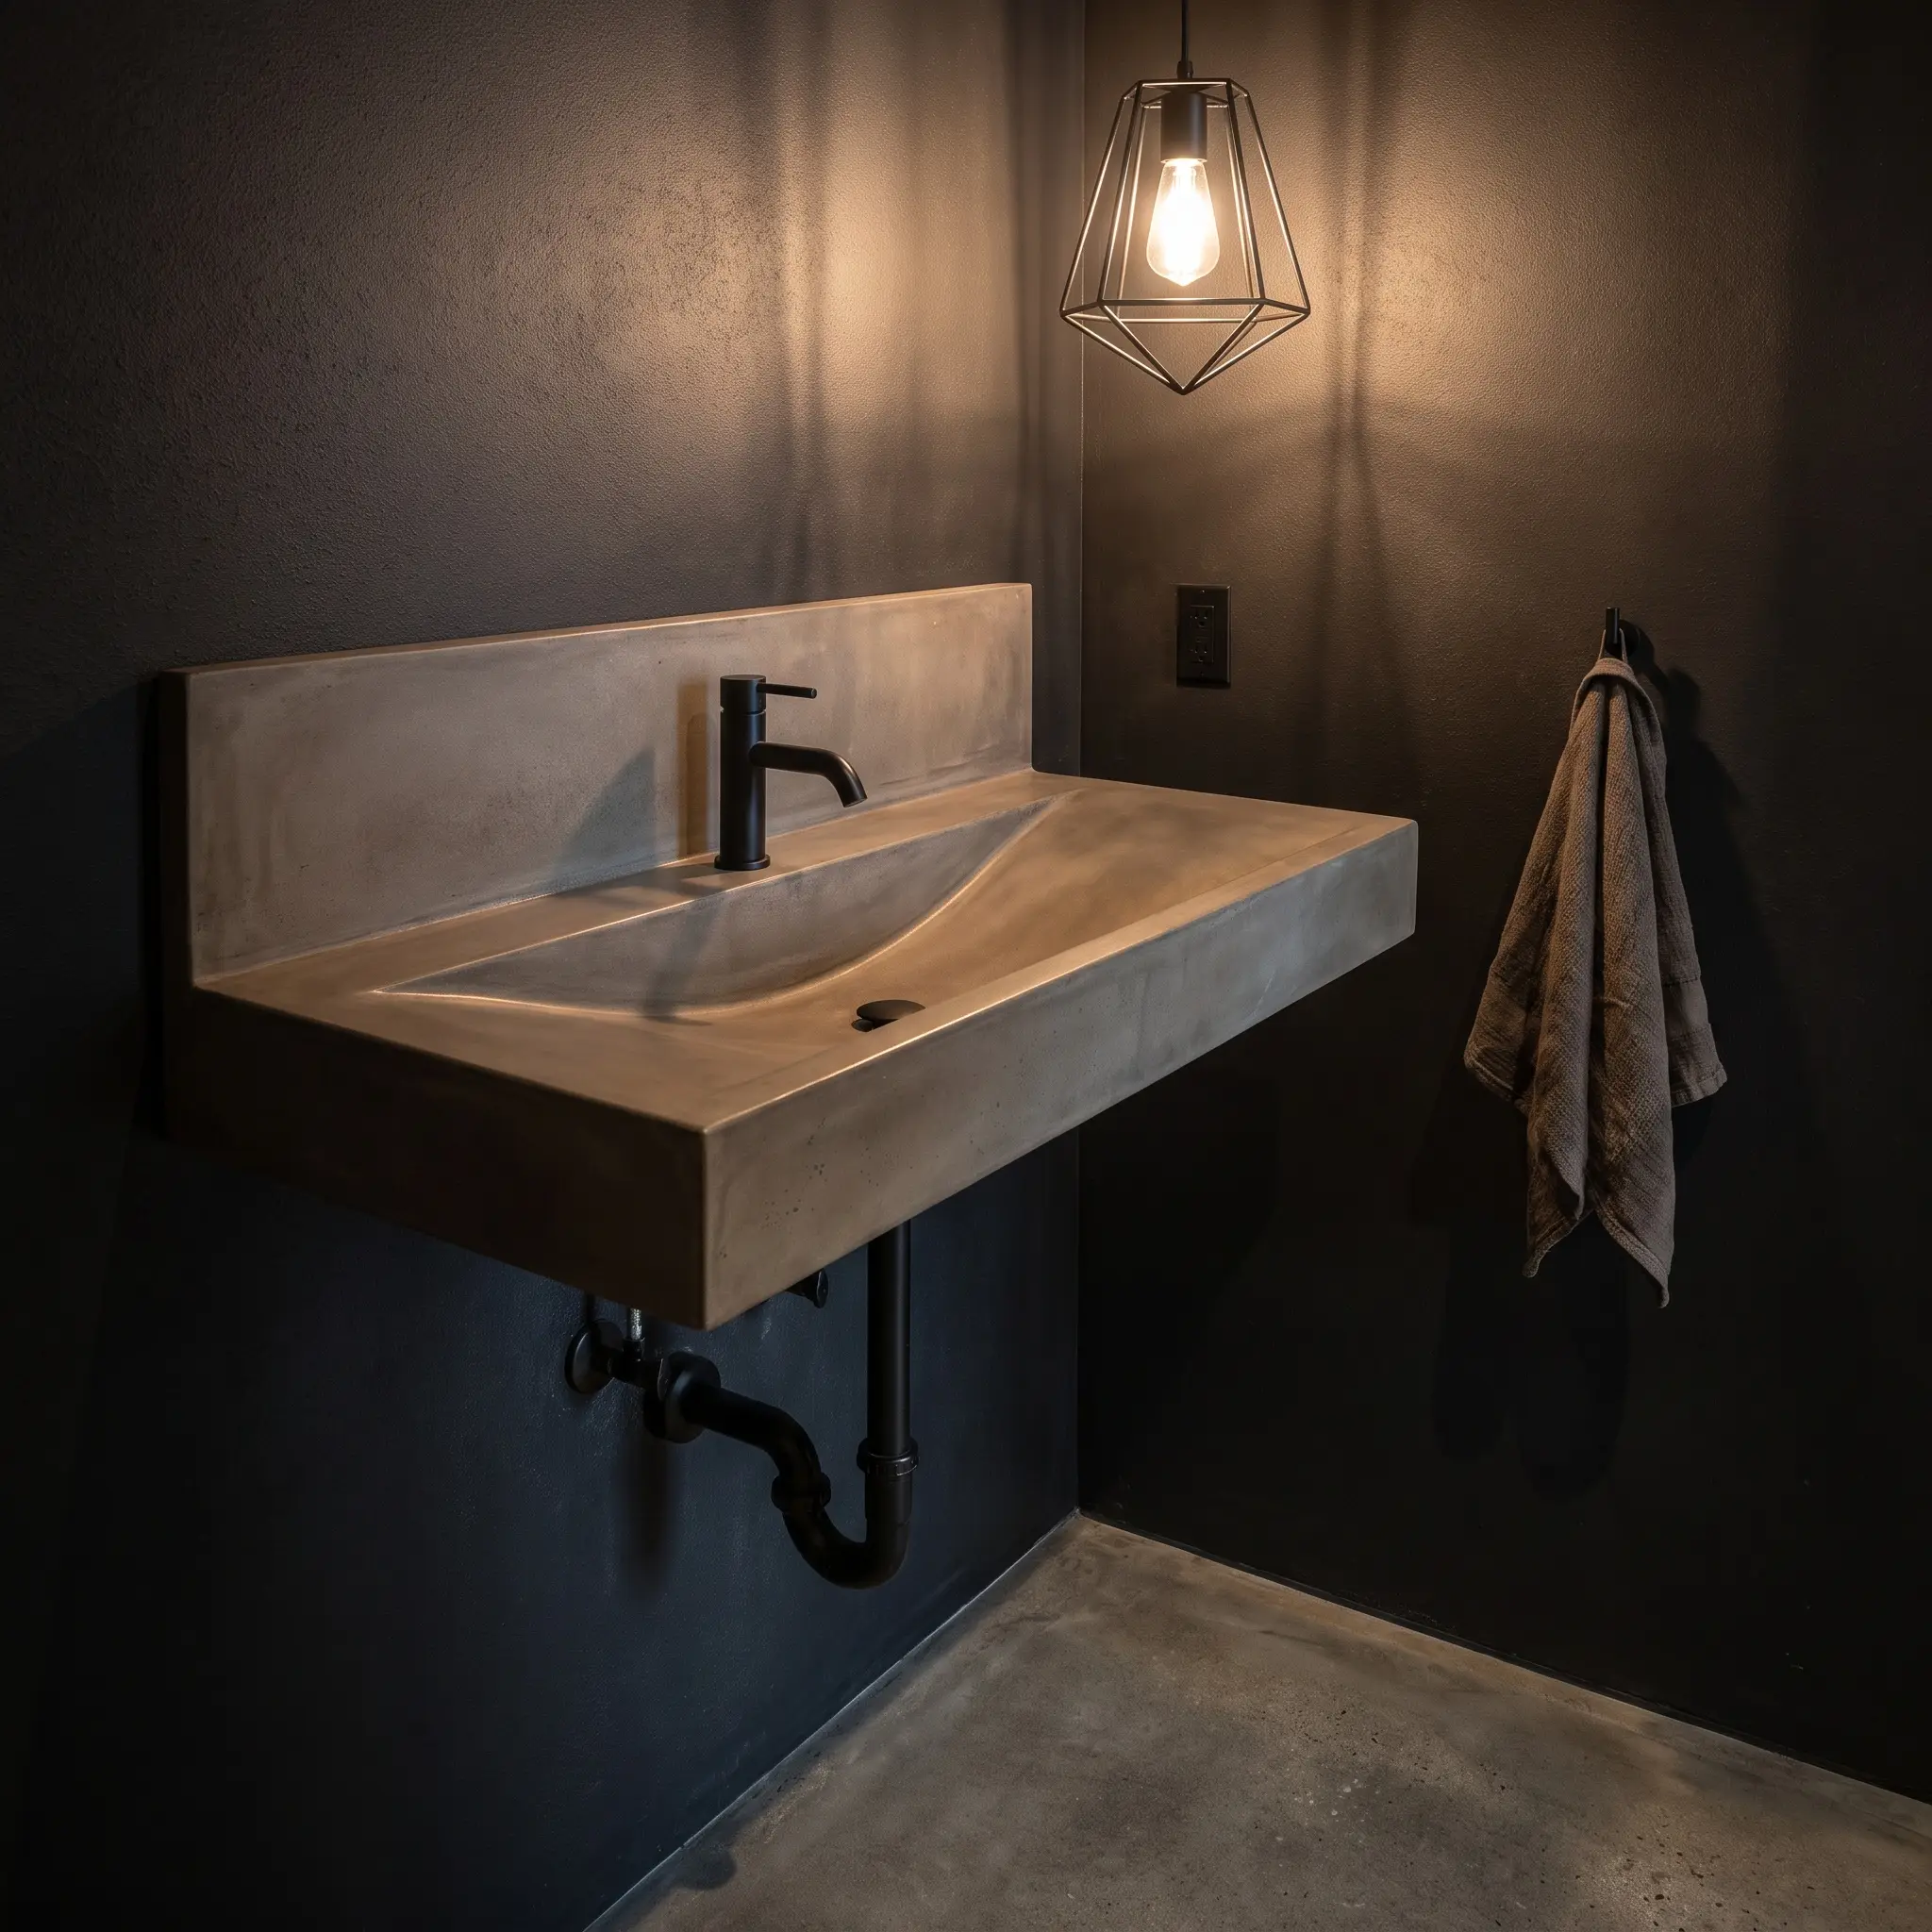
For powder rooms where heavy storage isn’t required, a low-profile washing station is a brilliant architectural move. Integrated trough sinks, where the counter and the basin are carved from one continuous, sloped piece of stone or cast concrete, deliver a sleek, bespoke aesthetic.
- Vibe: Sculptural accessible luxury.
- Key Materials: Cast concrete, honed Carrara marble, or solid surface composites.
- Styling Pro-Tip: Keep the plumbing underneath exposed, opting for a polished chrome or matte black decorative P-trap to act as jewelry for the room.
Lighting & Mirror Strategies
Confined, windowless spaces can easily feel like caves if illuminated poorly. Strategic lighting and reflective surfaces are your most powerful tools for bouncing ambient light and creating artificial depth.
Edge-to-Edge Custom Mirrors
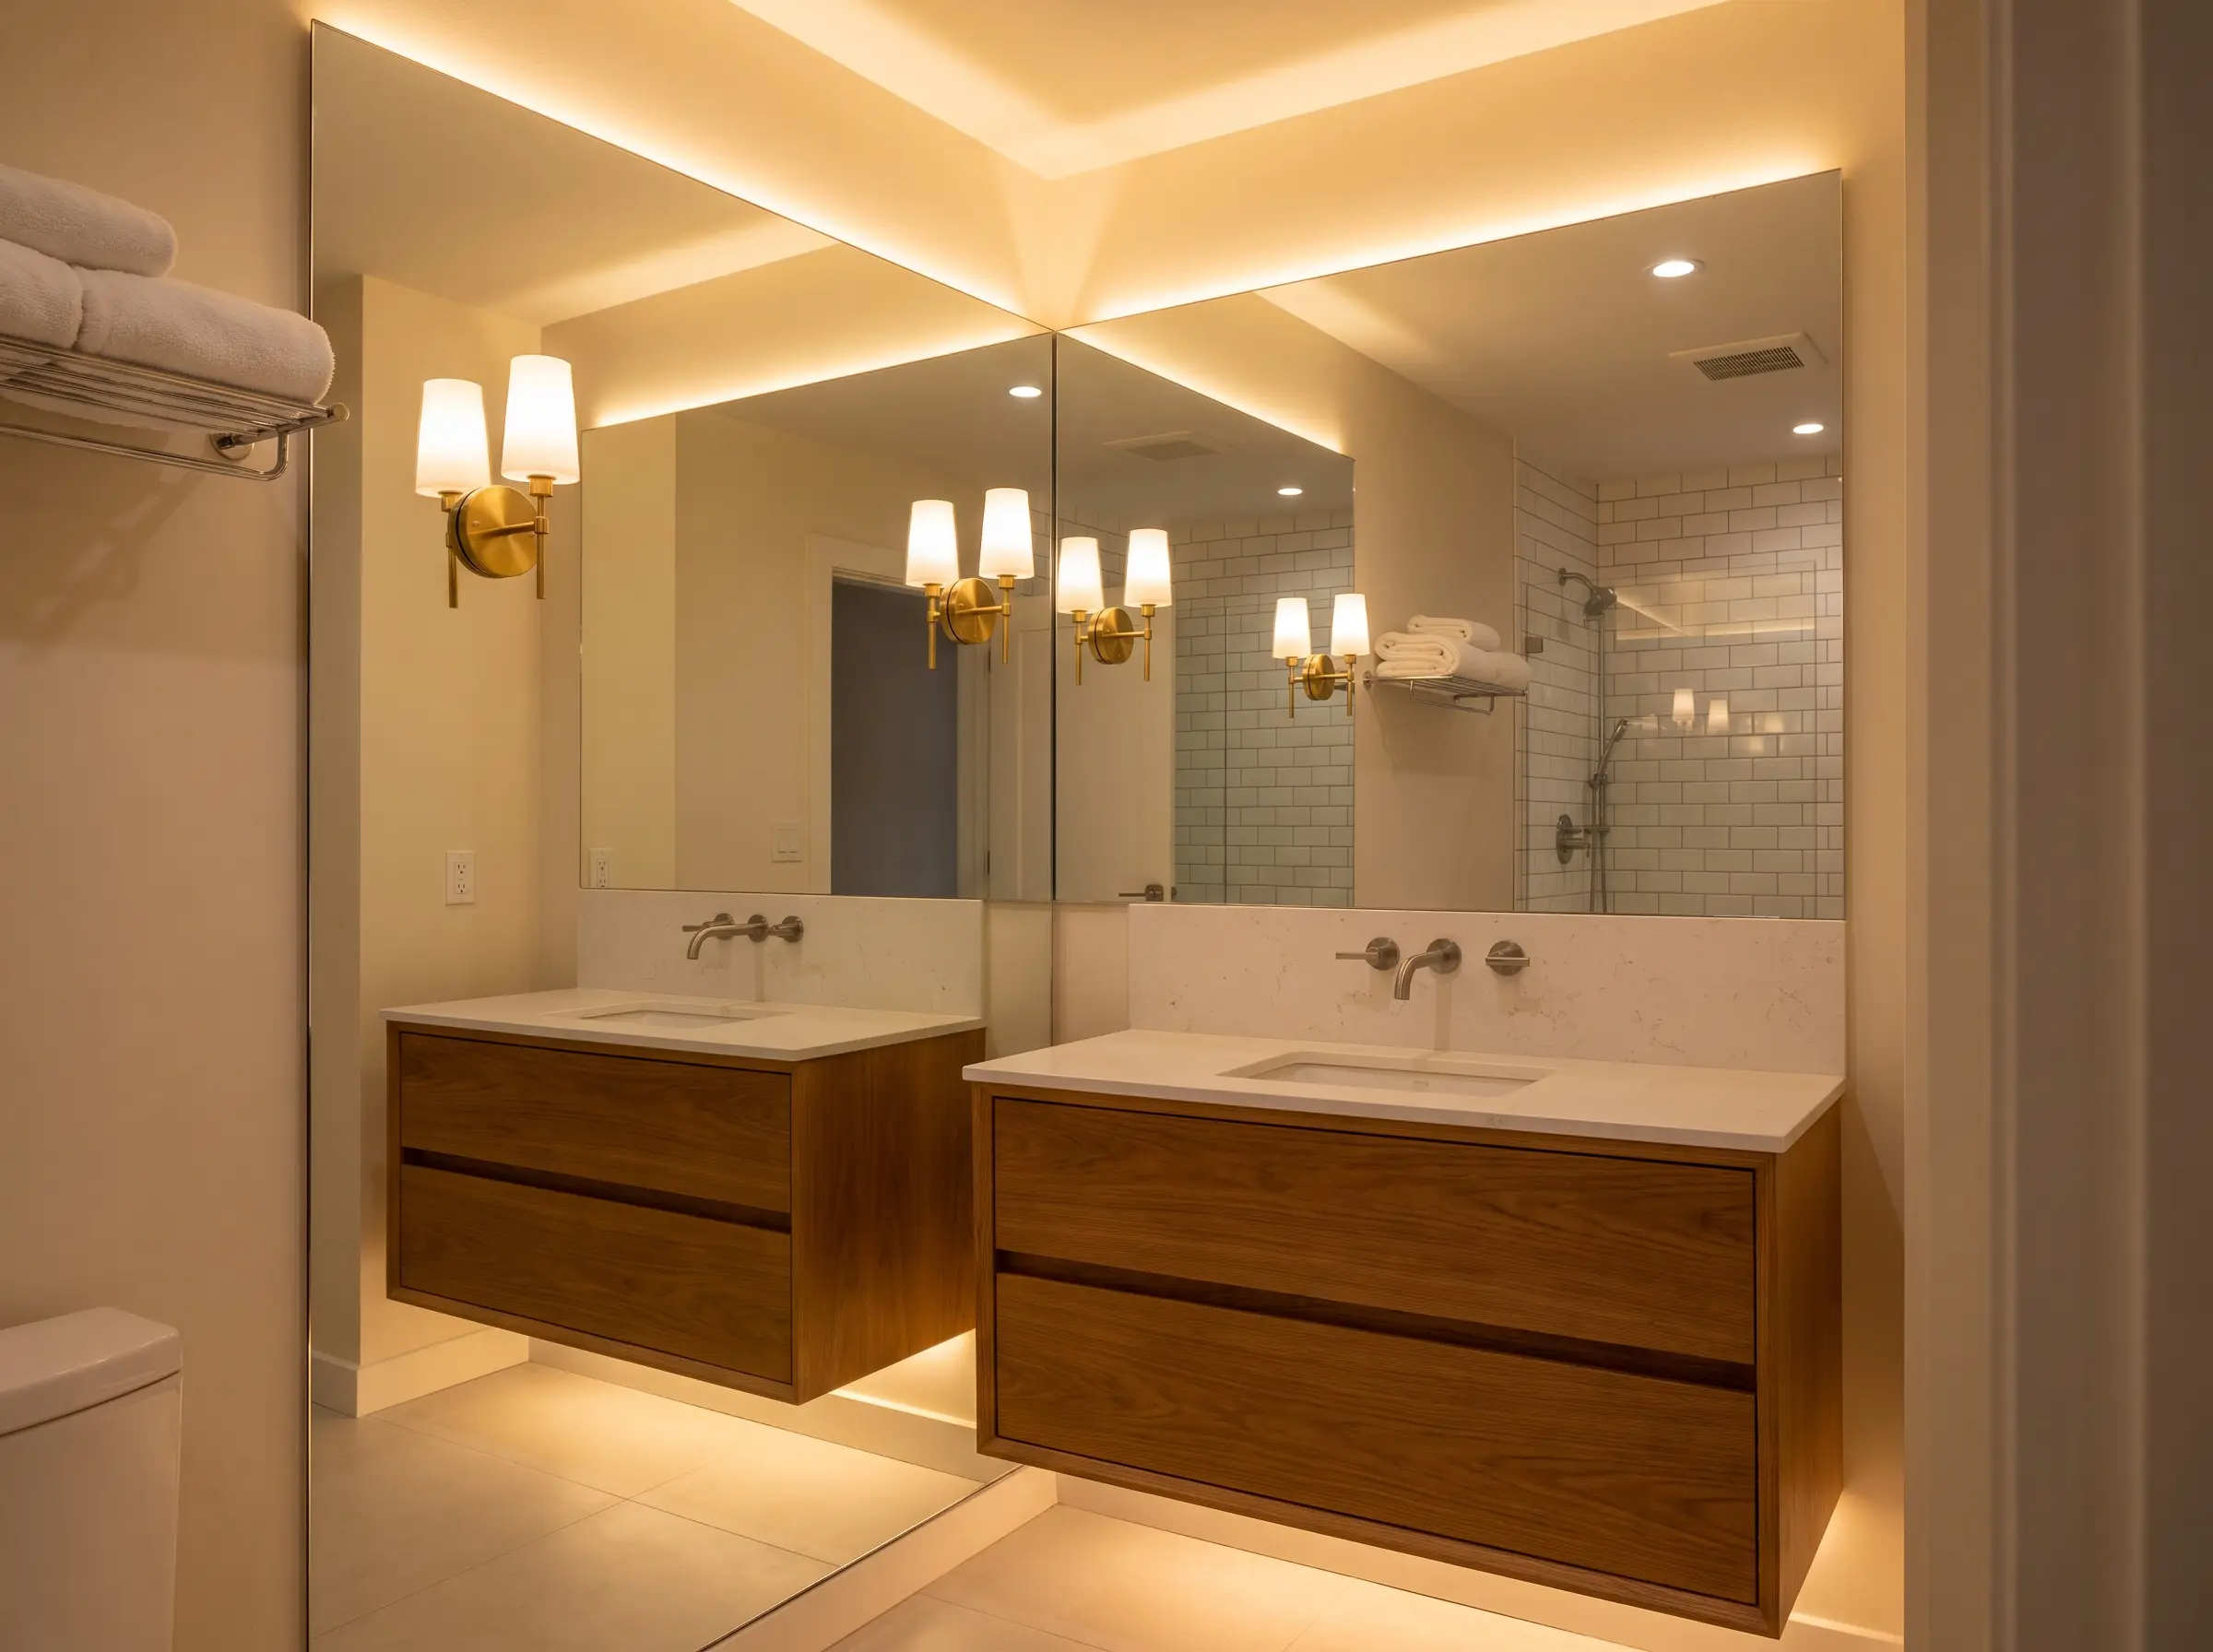
Skip the small, framed decorative mirror that breaks up the wall. Running a custom sheet of mirror glass from the top of the vanity splash all the way to the ceiling—and edge-to-edge across the entire wall—literally doubles the visual depth of the room, a classic boutique hotel tactic.
- Vibe: Expansive and highly reflective.
- Key Materials: Custom-cut mirror glass, J-channel mounting hardware, defogger heating pads.
- Styling Pro-Tip: Have your glass fabricator cut holes directly into the mirror to mount your sconces seamlessly on top of the glass.
Flanking Vertical Tube Sconces
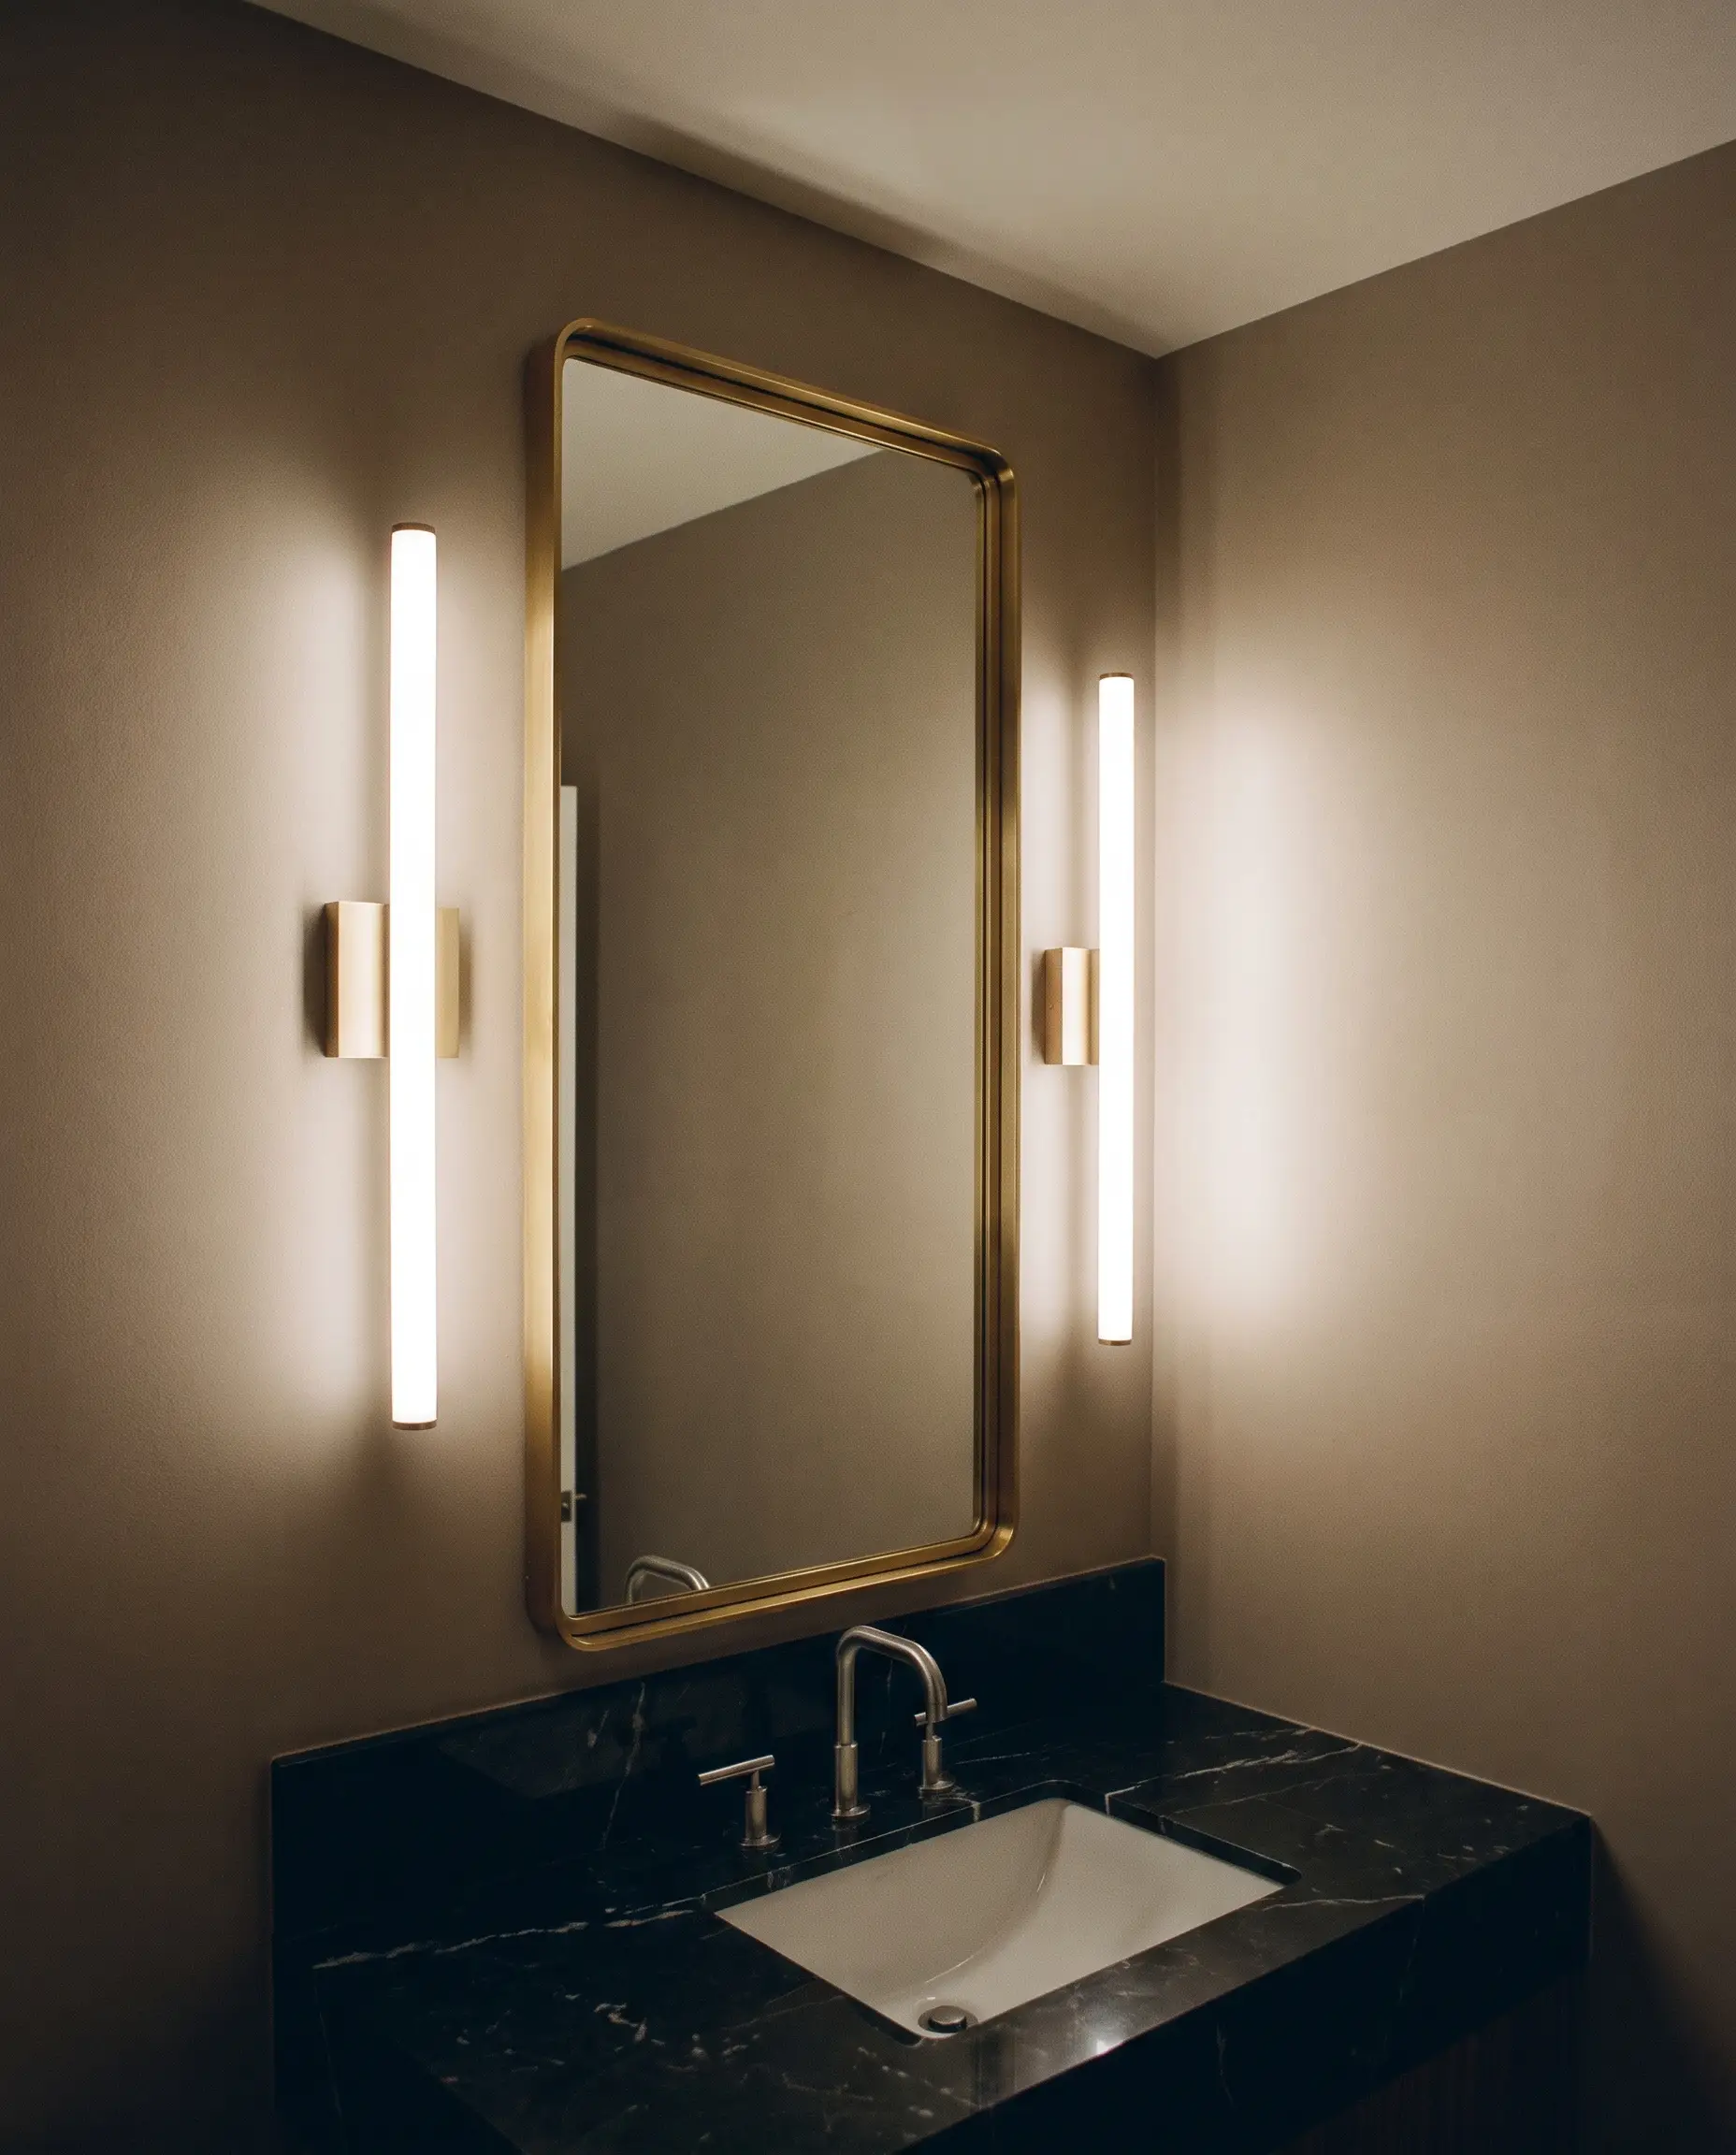
Bulky overhead vanity lights cast harsh, unflattering shadows and clutter the upper sightlines. Slim, low-profile vertical tube sconces flanking the mirror wash the face in even, diffuse light without protruding aggressively into the room.
- Vibe: Cinematic and flattering.
- Key Materials: Frosted glass or acrylic LED tube sconces, dimmable drivers.
- Styling Pro-Tip: Mount the center of the sconces roughly 60 to 65 inches from the floor to align perfectly with the average eye level.
High-Gloss and Light-Reflective Ceilings
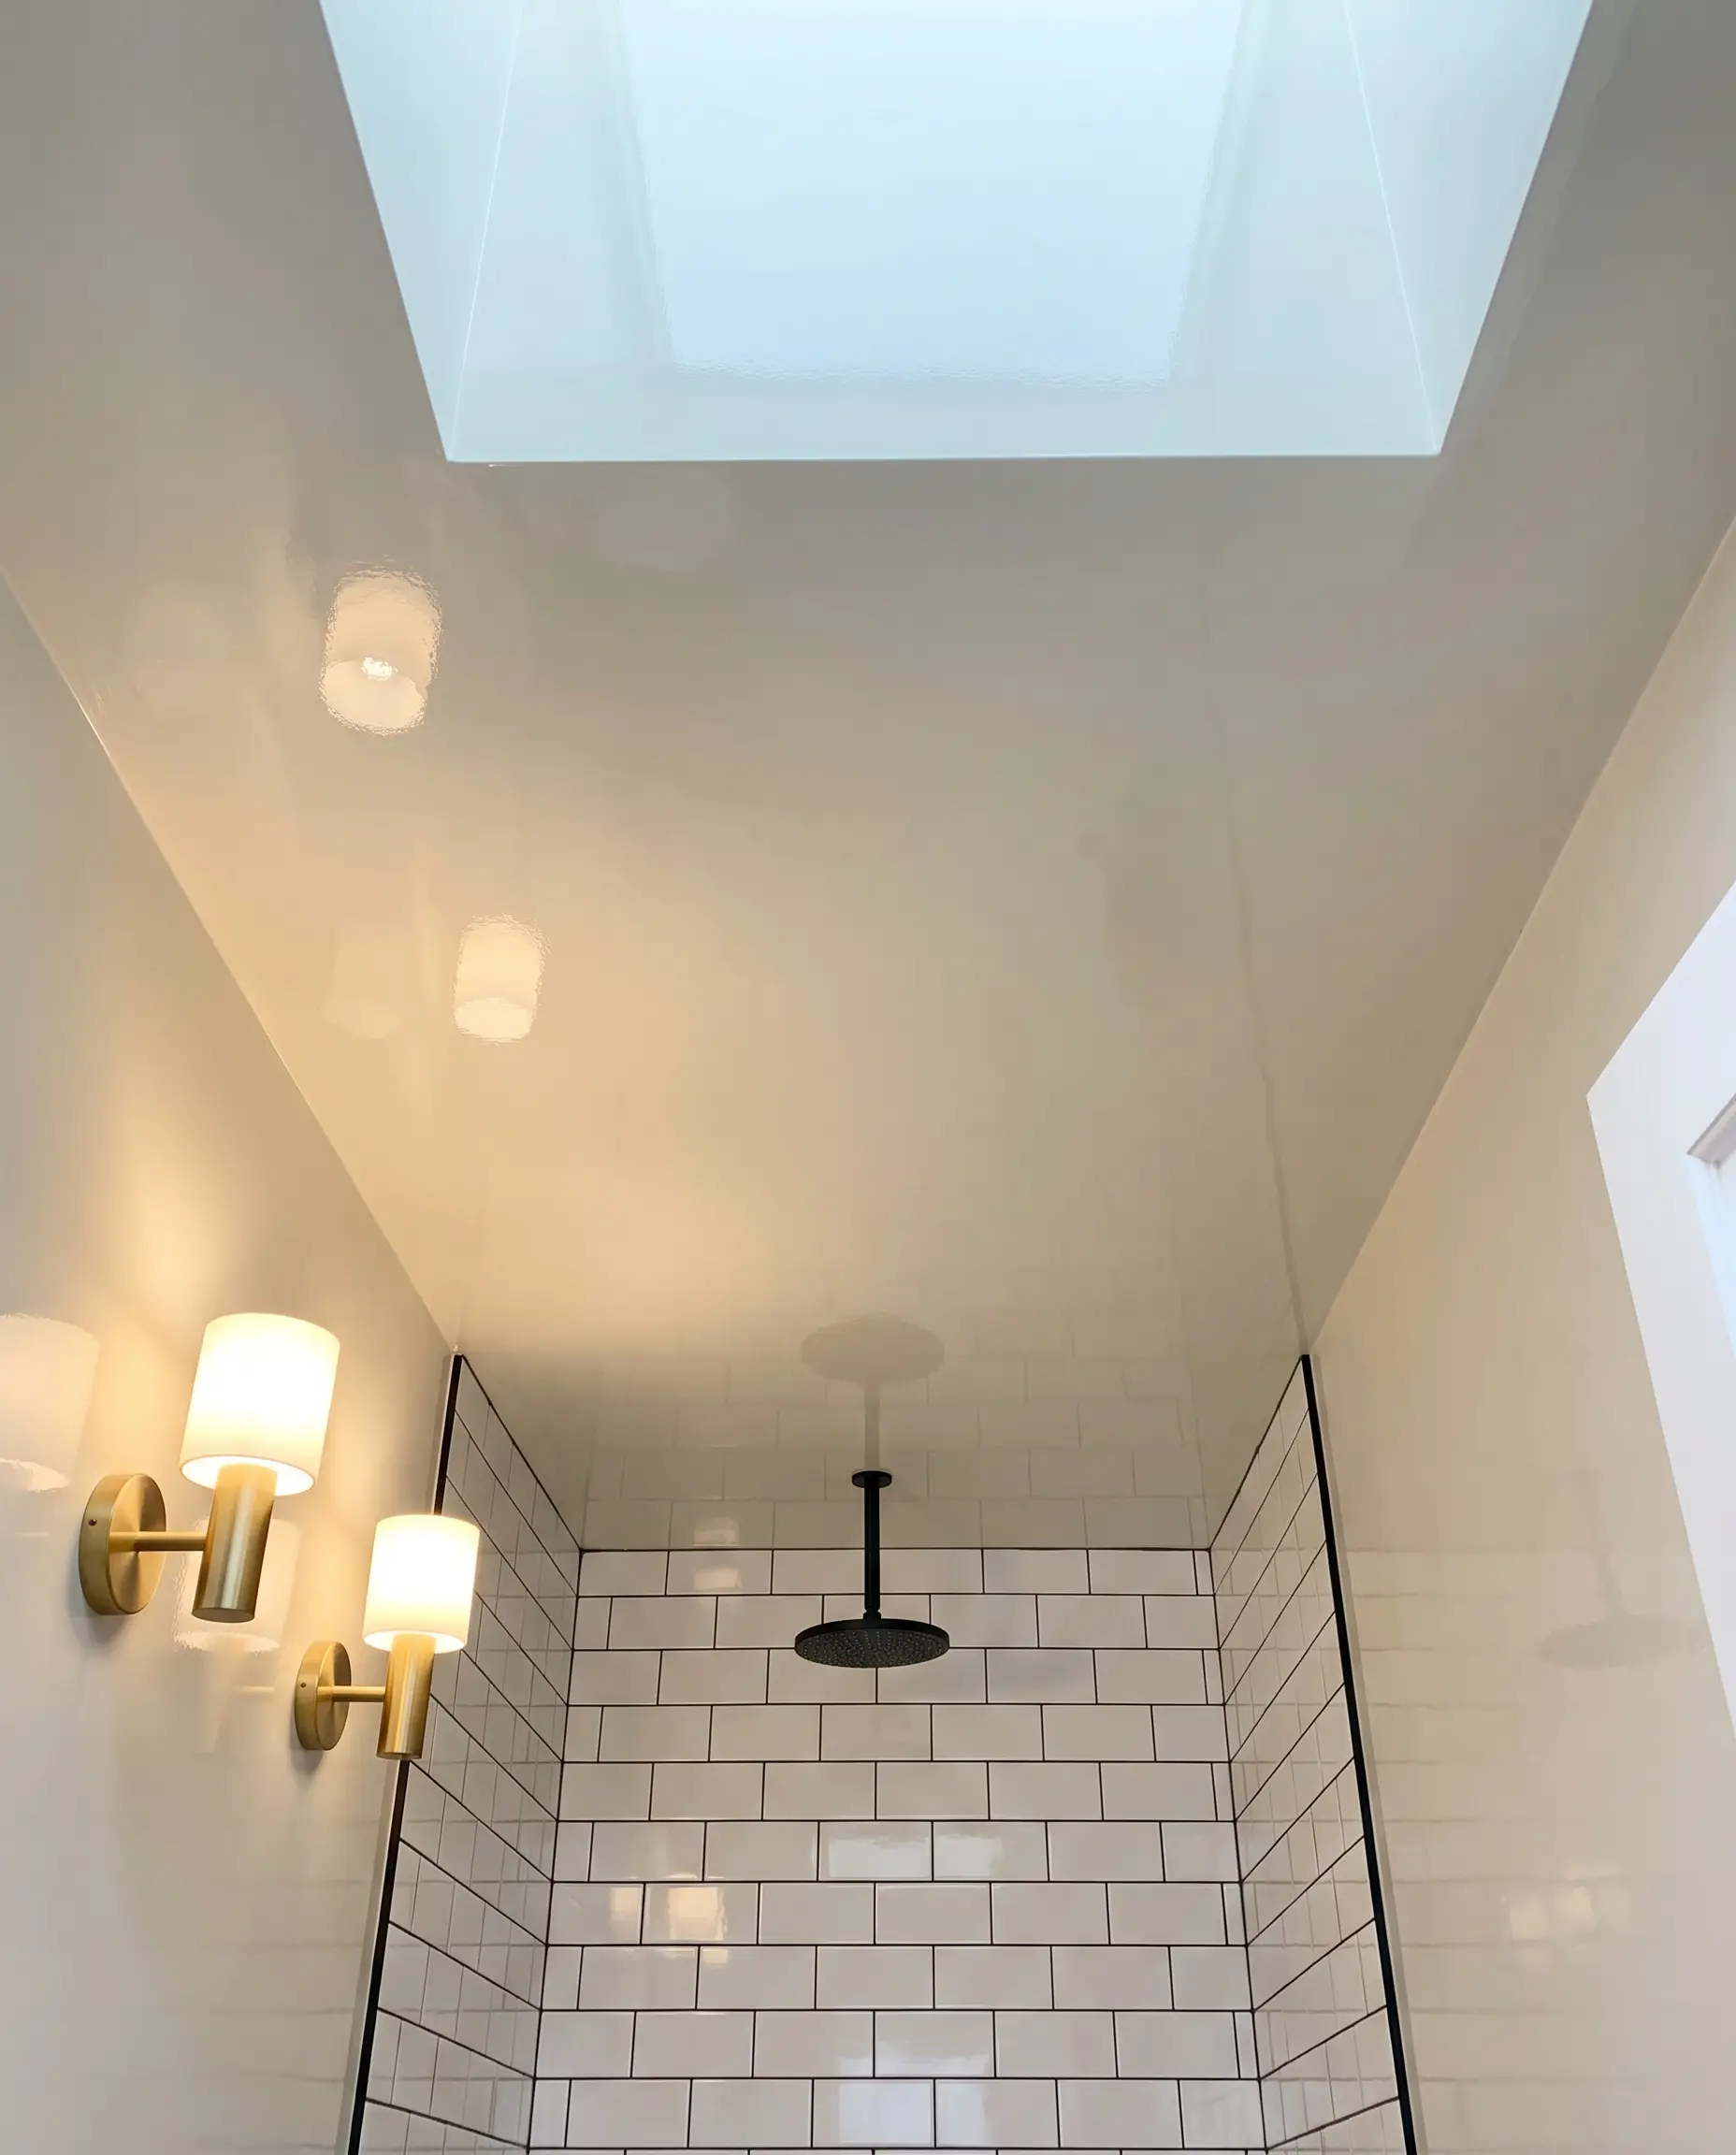
The ceiling is an often-ignored fifth wall that can drastically alter spatial perception. Painting it in a high-gloss lacquer catches the ambient glow from your sconces and bounces it back down, faking the illusion of a skylight.
Proper prep is mandatory for high-gloss finishes. The drywall must be skim-coated to a Level 5 finish, as lacquer will highlight every single imperfection.
Pro-Tip
- Vibe: Luminous and unexpected.
- Key Materials: High-gloss lacquer or ultra-gloss enamel paint.
- Paint Recommendation: Farrow & Ball All White.
The “Jewel Box” Powder Room Approach
While full bathrooms require light and bright expansion, windowless half-baths do not need to fight their size. Instead, you can embrace the compression through the “Jewel Box” design theory, utilizing dark, moody treatments for massive theatrical impact.
Color-Drenching for Depth
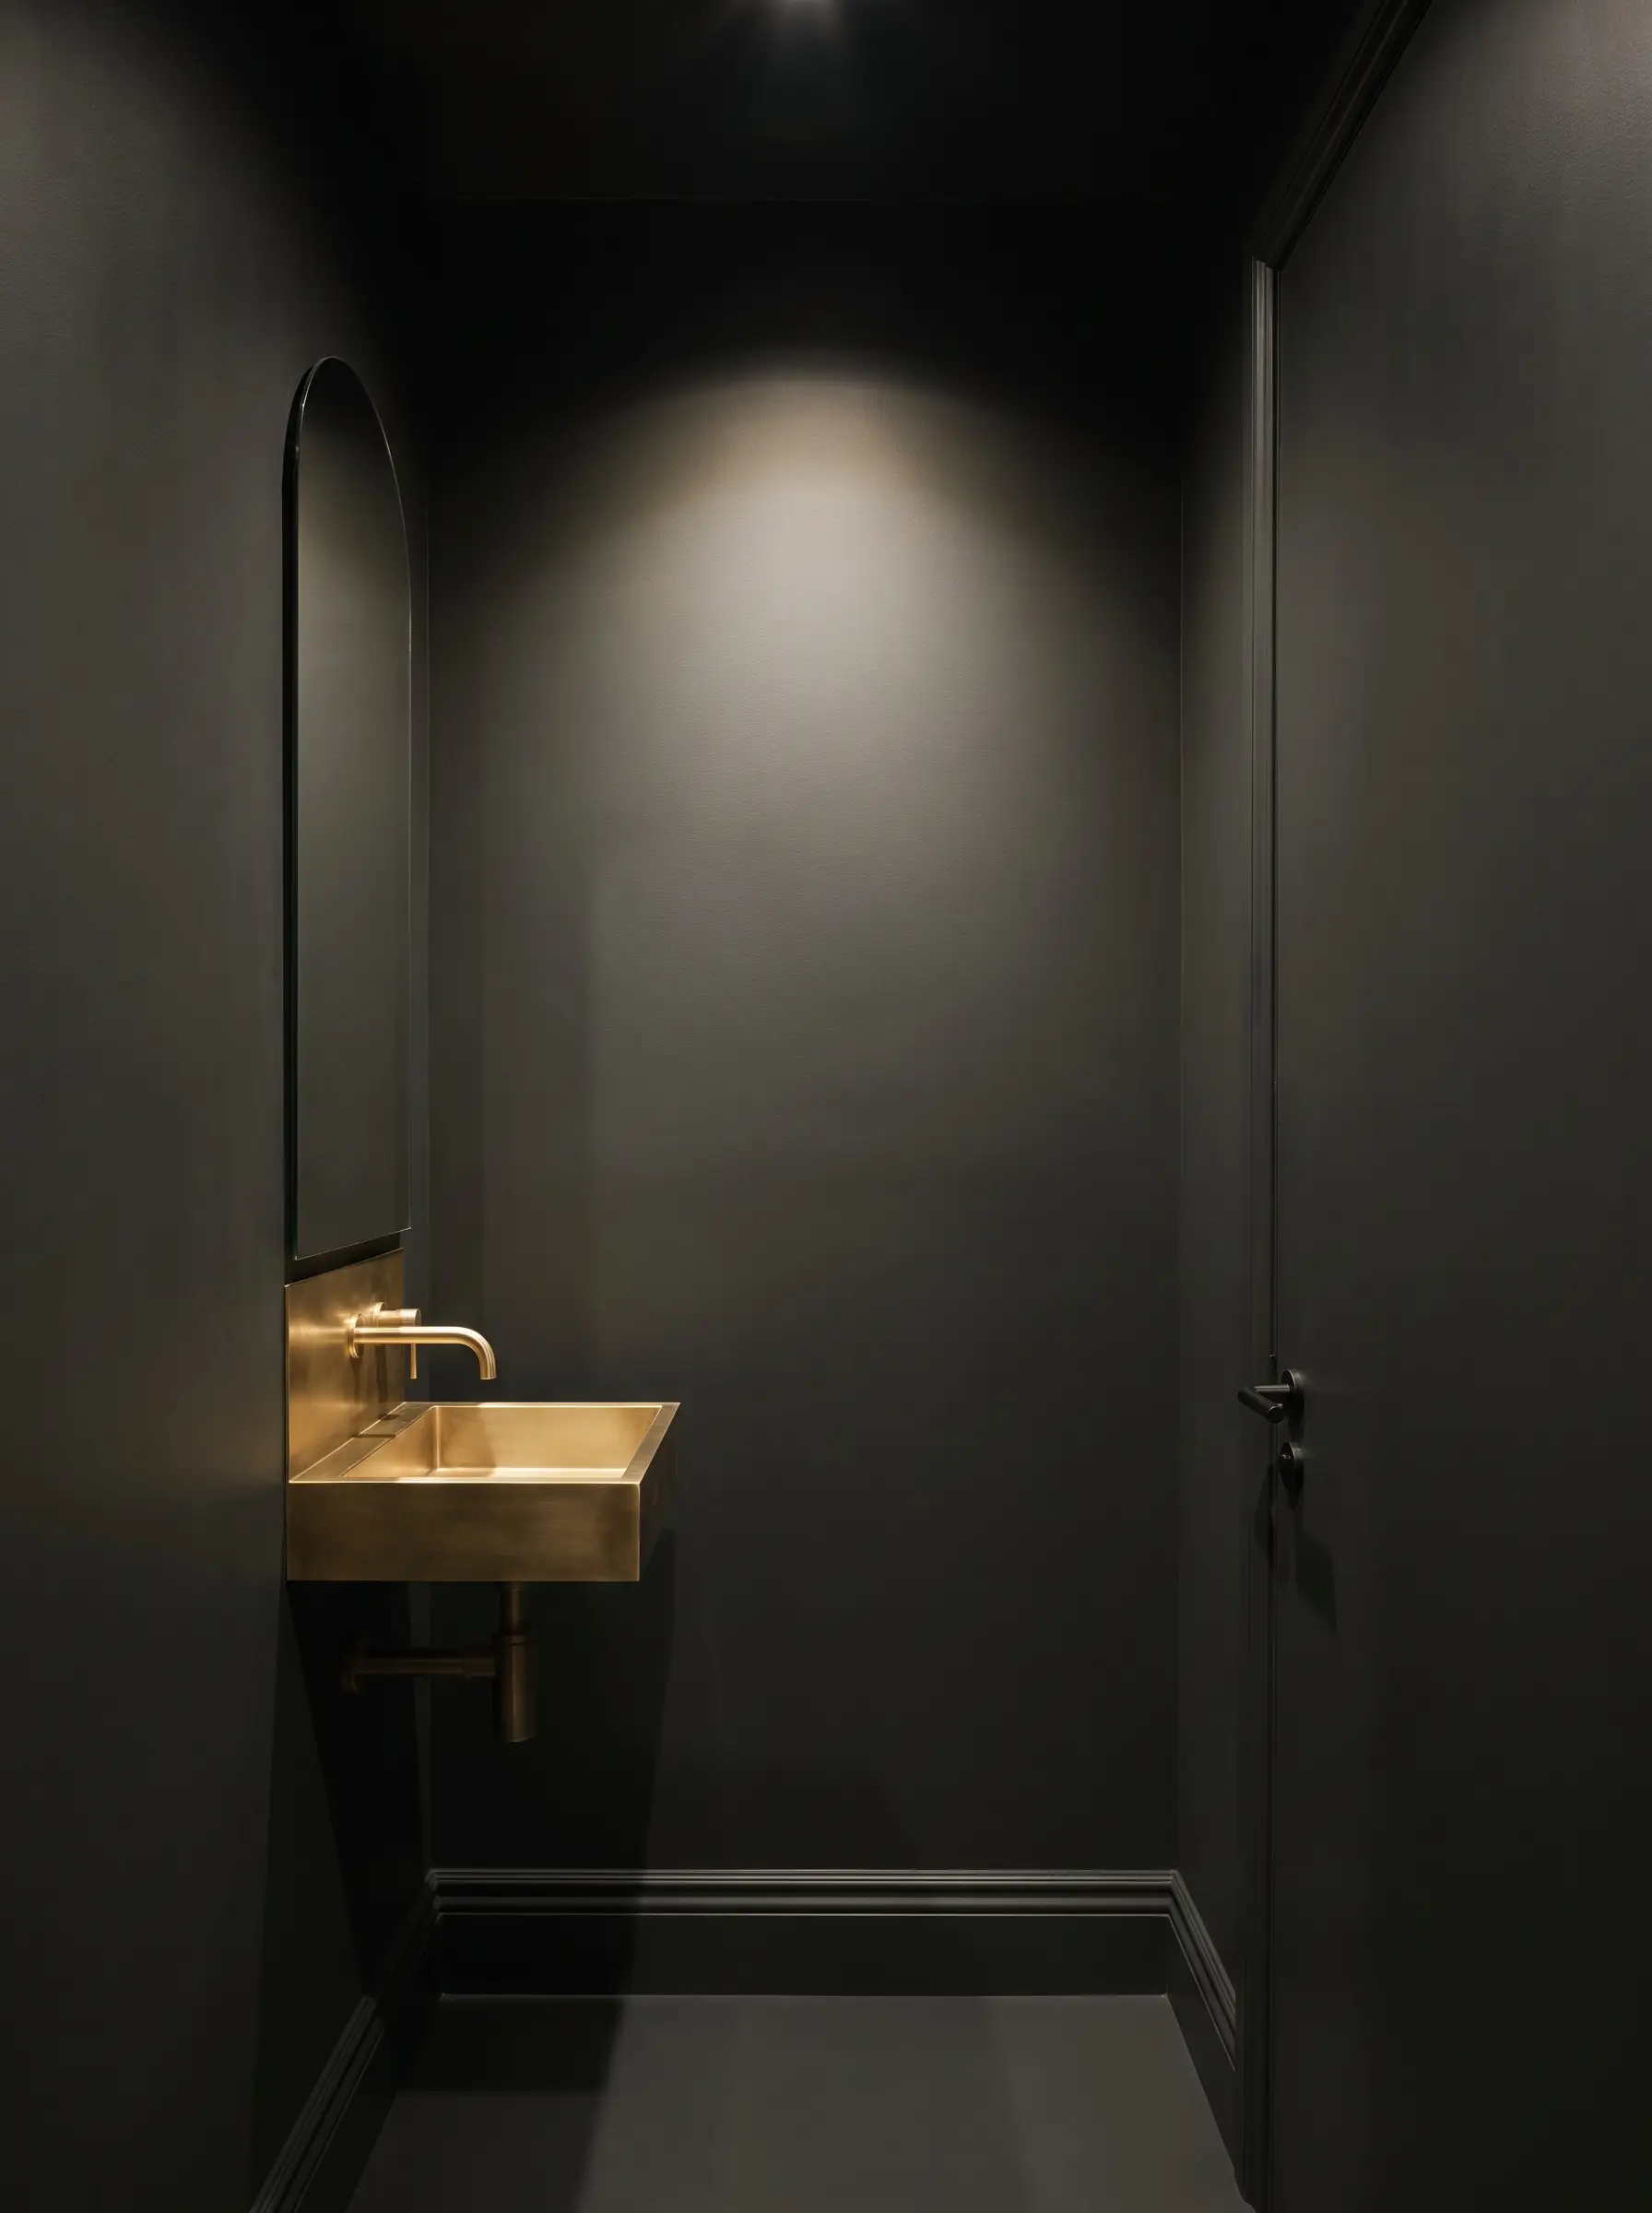
Erase the visual boundaries of a tiny powder room by painting the baseboards, walls, doors, and ceiling all the exact same dark shade. This technique, essential when choosing the best paint colors for windowless rooms, creates an infinite, velvety depth where the corners simply disappear into the shadows.
- Vibe: Moody, enveloping, and sophisticated.
- Key Materials: Matte finish for the walls and ceiling, satin finish for the trim (in the exact same color).
- Color Recommendation: Sherwin-Williams Greenblack.
Panoramic Immersive Wallcoverings
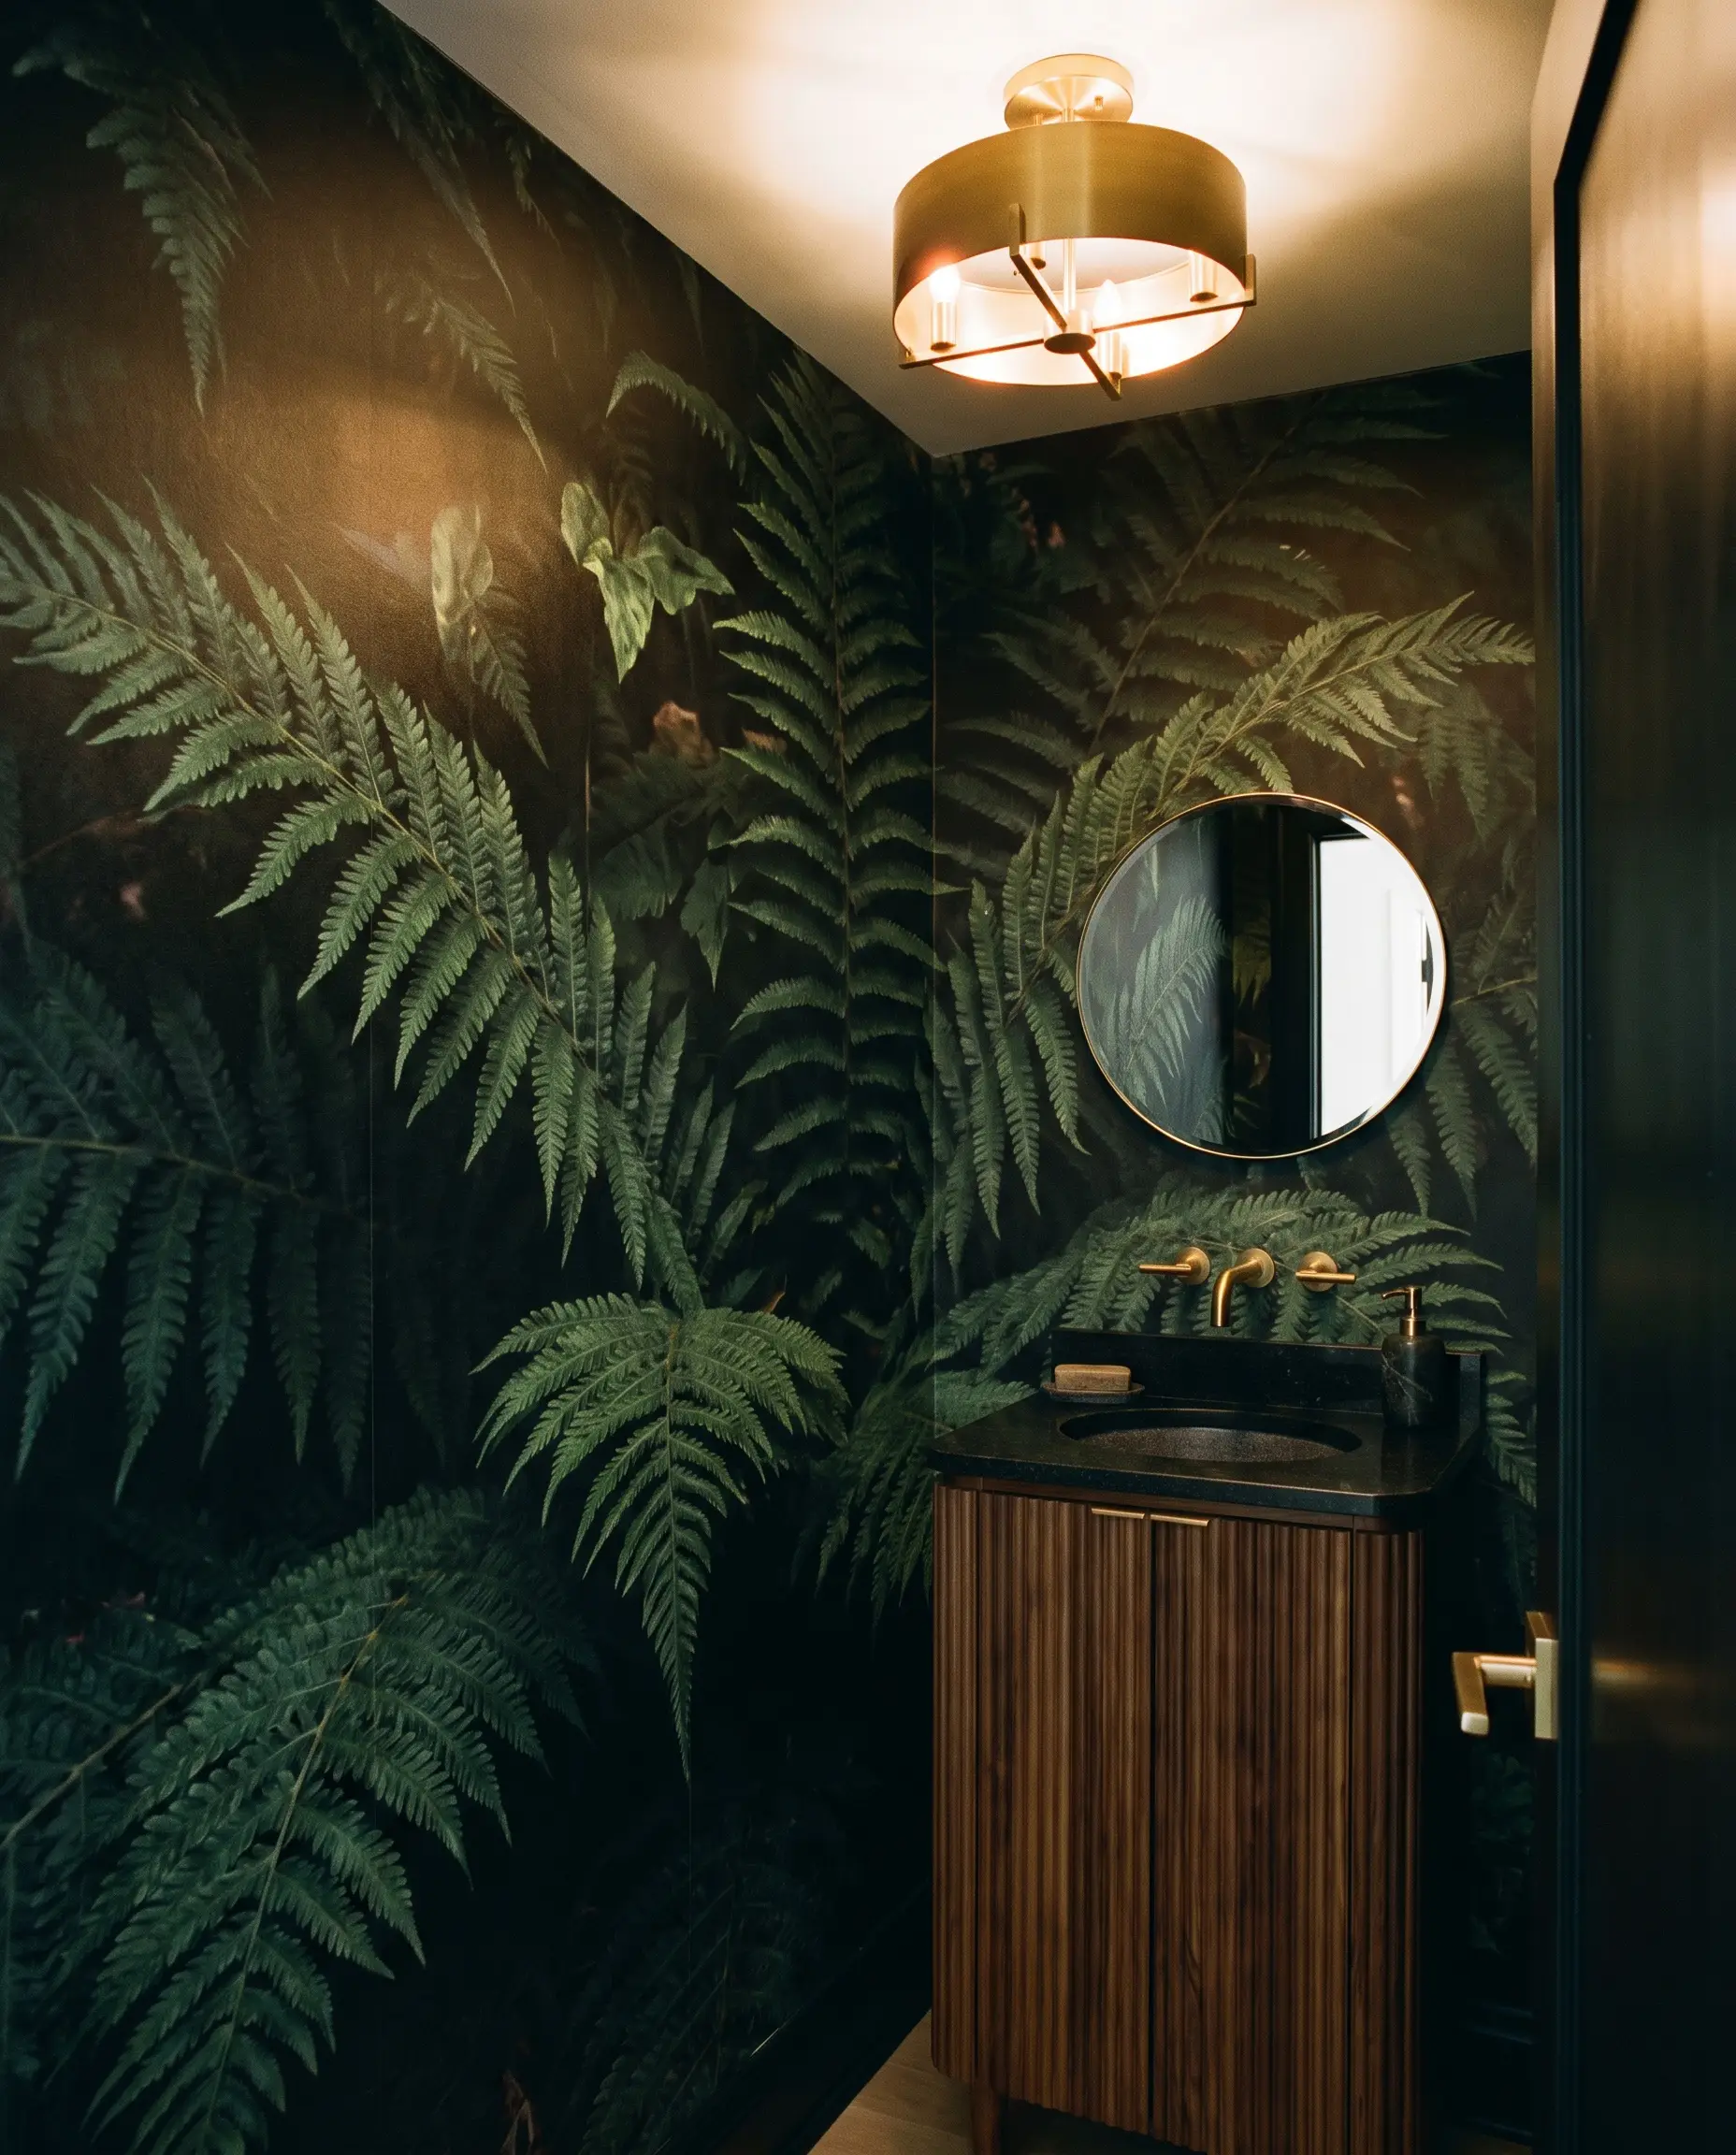
It is a common misconception that small spaces require small patterns. In reality, wrapping all four walls in an oversized, panoramic mural—like a dark botanical or dramatic landscape—distracts from the tight dimensions and makes the space feel incredibly immersive and theatrical.
- Vibe: Dramatic and expansive.
- Key Materials: Non-woven or vinyl panoramic wallpaper murals, premium wallpaper paste.
- Styling Pro-Tip: Ensure the mural is scaled correctly to your ceiling height so the focal points of the artwork aren’t cut off by the vanity.
High-Contrast Marble Wainscoting
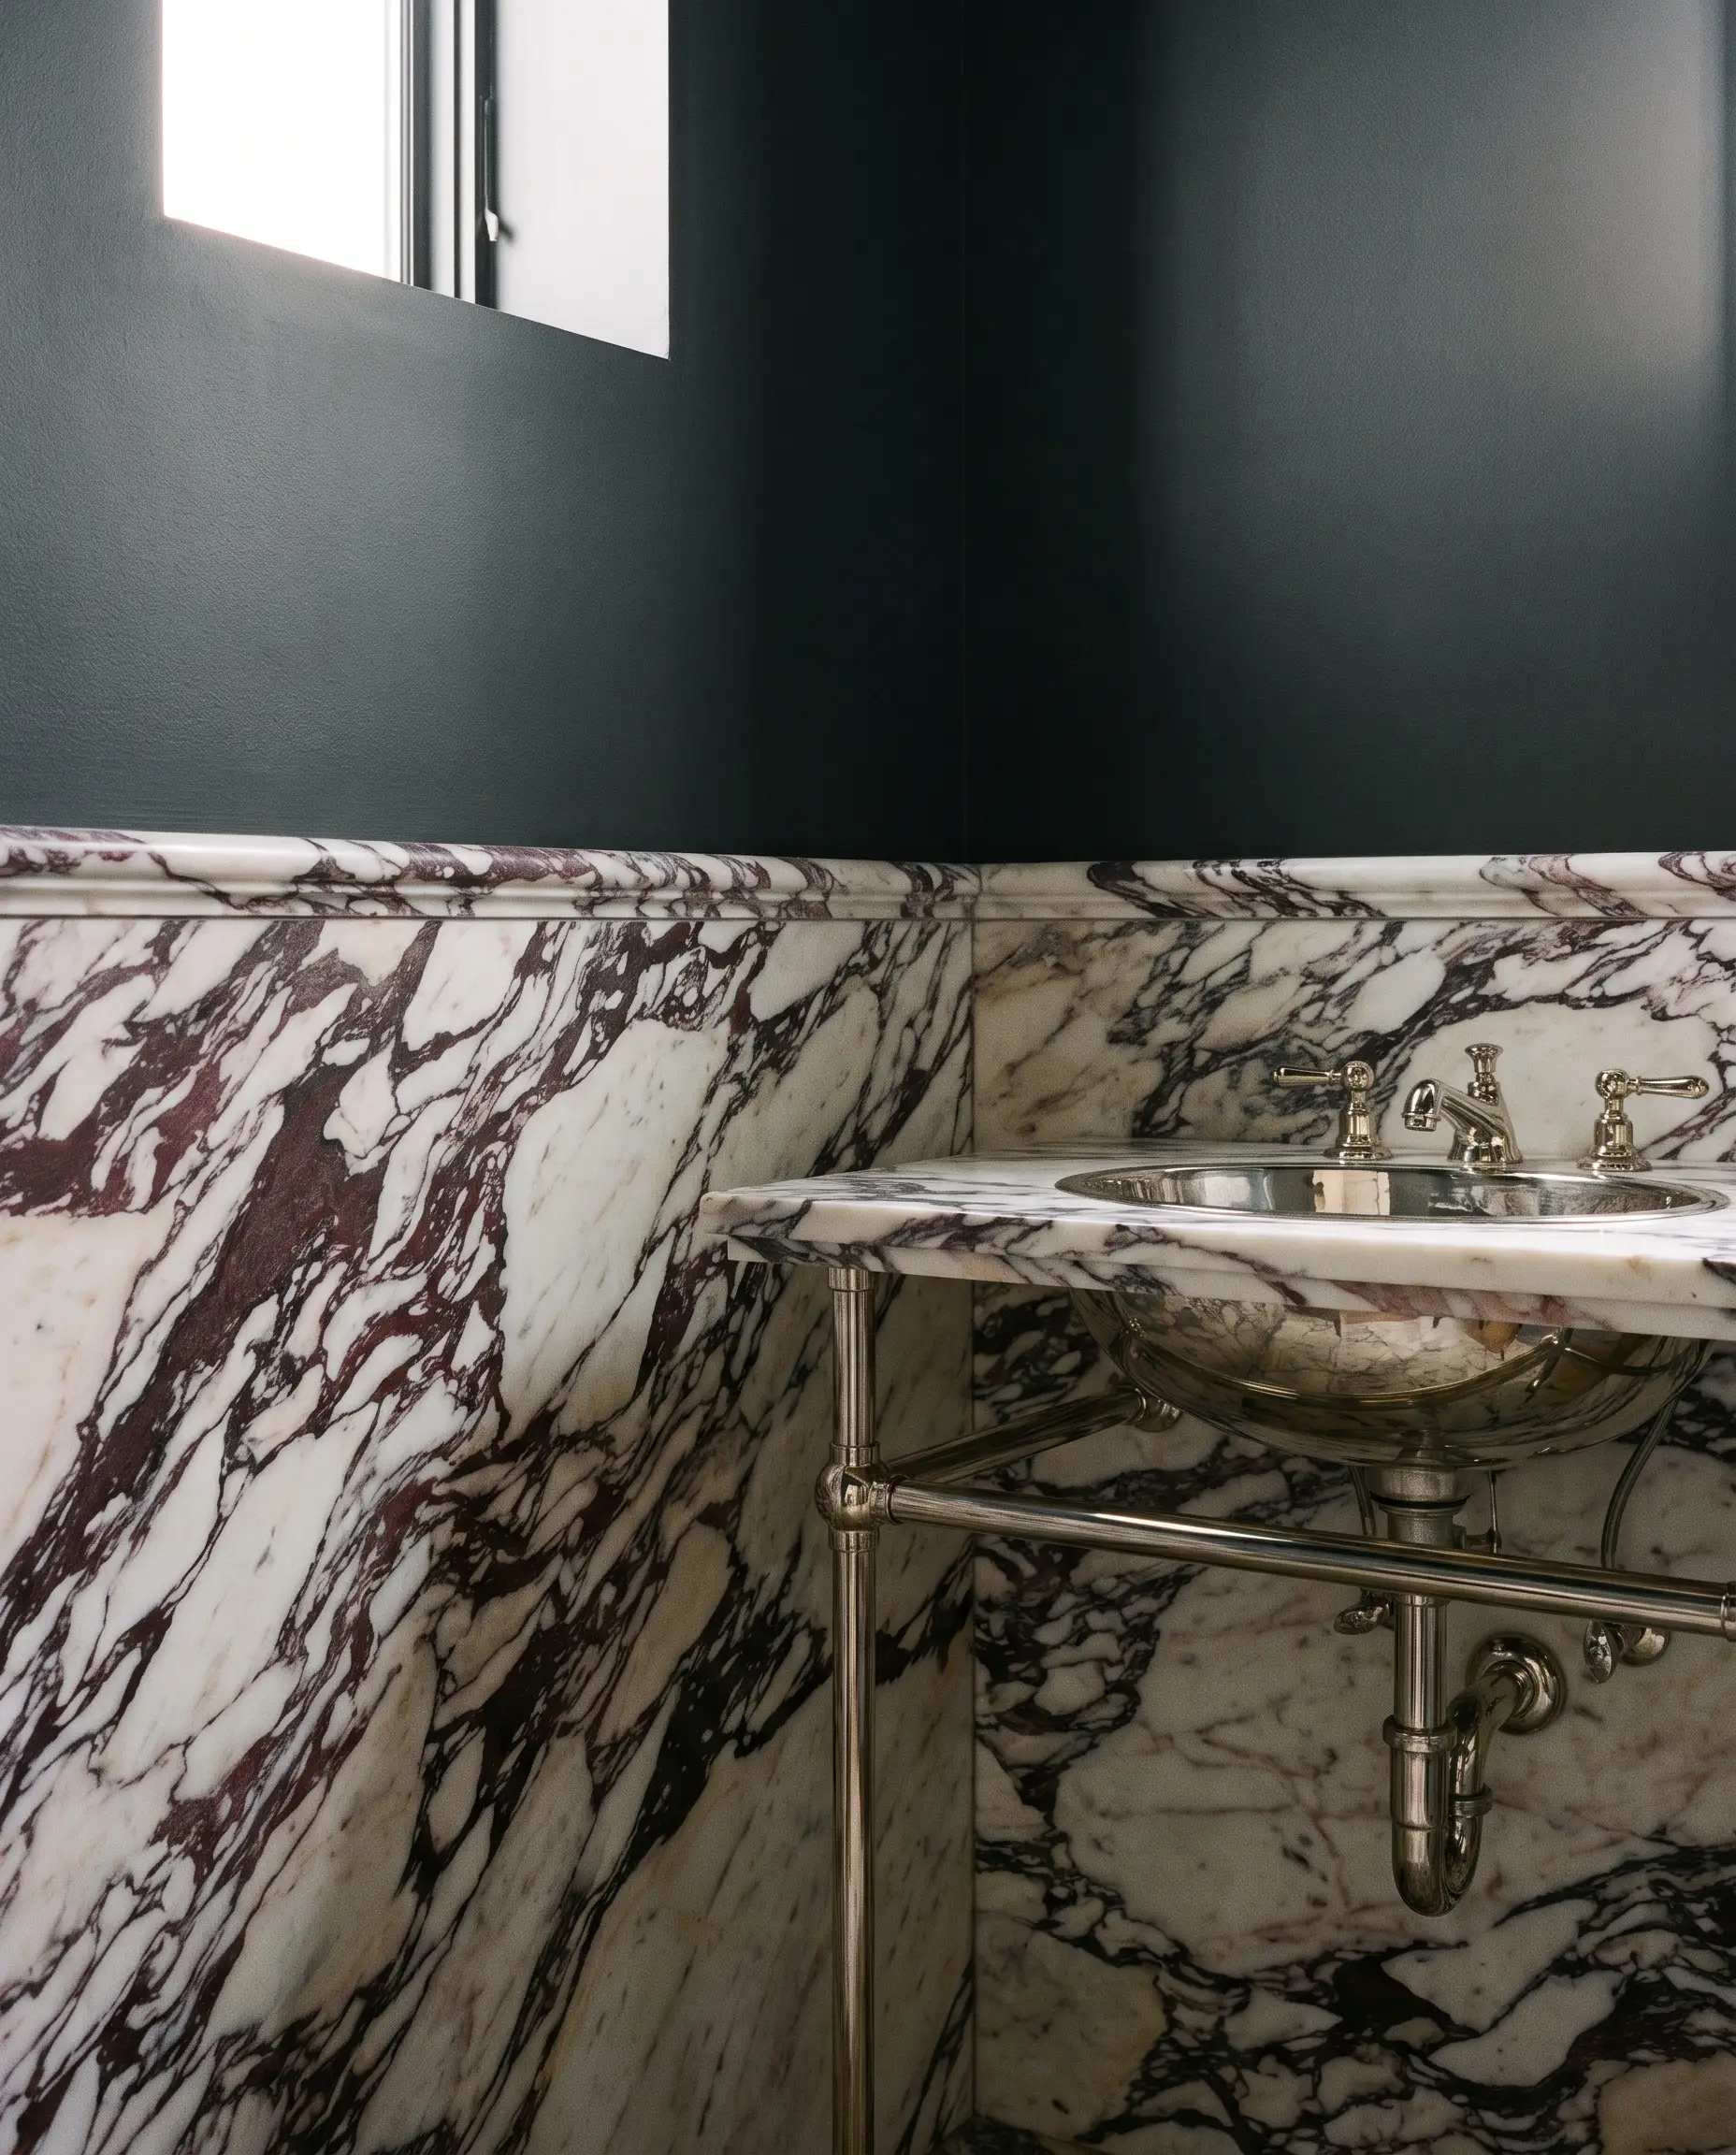
Grounding the lower half of the room with a heavy, luxurious material immediately commands attention. Installing heavily veined stone halfway up the wall, paired with a dark paint above, creates an ultra-luxurious aesthetic where the eye focuses entirely on the material richness rather than the square footage.
- Vibe: Bespoke, high-contrast luxury.
- Key Materials: Calacatta Viola or Nero Marquina marble slabs (or large-format tile equivalents).
- Styling Pro-Tip: Cap the wainscoting with a custom marble pencil edge or small ogee profile for a highly finished architectural detail.
Stop Compromising on Your Spatial Footprint
A compact bathroom is an exercise in absolute precision. By actively controlling your sightlines, investing in wall-mounted fixtures, and being intensely intentional with material scale, your tiny footprint can easily outshine a massive, poorly designed space. You do not have to settle for cramped, builder-grade mediocrity. Which architectural intervention are you planning to engineer into your upcoming remodel?
The Aesthetics Desk curates the visual direction for Hackrea. Specializing in design history, global architectural movements, and interior styling, this desk focuses on the psychology of space and how to translate high-end, magazine-quality aesthetics into approachable residential design without falling into fleeting micro-trends.