The 2026 home decor forecast is all about warmth, personalization, and high-end texture. Swap out stark minimalism for cozy, intentional design with these high-impact, low-cost DIY projects:
| 2026 Trend | DIY Project to Get the Look | Style Focus |
| 1. Bio-Luxe | Framed Moss Wall Art | Nature-integrated, architectural greenery |
| 2. Color Drenching | Painting a Room (Walls/Trim/Ceiling) in One Color | Cocooning, immersive color experience |
| 3. Neo-Retro Tiling | Tiled Cube Side Table | Geometric, 70s/80s revival texture |
| 4. Textural Minimalism | Baking Soda Paint Hack for Faux Stone Vases | Raw, imperfect, matte surfaces (clay/plaster) |
| 5. The “Fluted” Accent Wall | Half-Wall Wood Fluting | Adding rhythm and “Quiet Luxury” texture |
| 6. Organic “Pond” Shapes | “Puffy” Pond Mirror | Soft, amorphous, and asymmetrical forms |
| 7. Color Capping | Painting the Ceiling a Darker/Brighter Color | Making large spaces feel intimate |
| 8. Soft Lighting | No-Sew Pleated Lampshade | Diffused, romantic, “golden hour” light |
| 9. Grandmacore | Ruffled Cafe Curtains | Nostalgic, casual charm for kitchens |
| 10. Jewel-Box Hardware | “Rub ‘n Buff” Hardware Makeover | Mixing metals for a luxury, curated look |
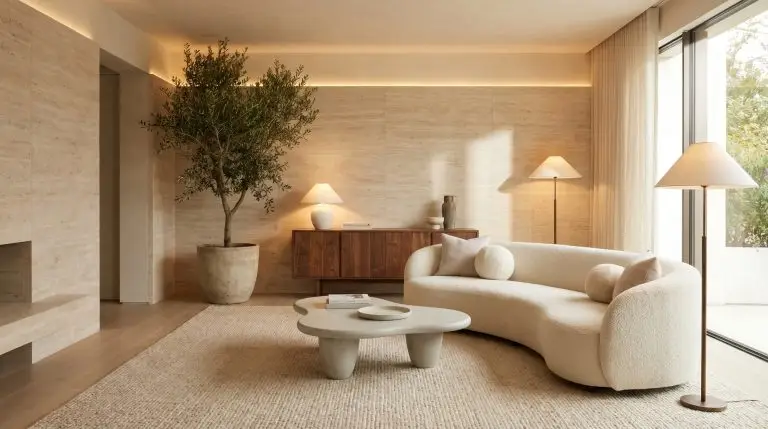
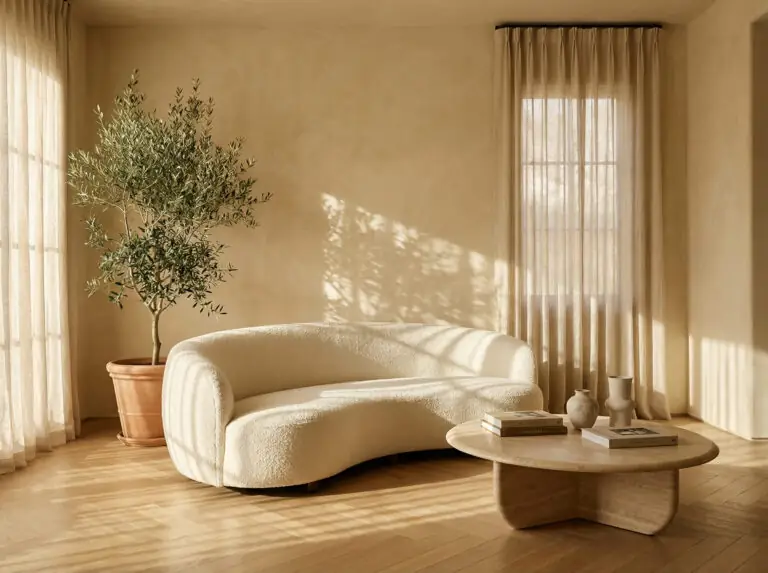
If the last few years were defined by “clean and cool” aesthetics—think stark whites, gray floors, and rigid minimalism—2026 is the year we finally exhale. The forecast for the coming year is all about warmth, deep personalization, and tactile comfort.
We are moving away from the “showroom” look and towards the “storyteller” home. The most exciting trends for 2026 focus on Bio-Luxe (bringing nature in, but making it fancy), Cremèle palettes (creamy, warm beiges replacing gray), and Neo-Retro character.
The best part? You don’t need a contractor to get the look. This guide breaks down the top 10 interior design trends of 2026 and provides step-by-step DIY instructions to bring them to life on a budget.
1. Bio-Luxe: The Living Art Movement
Plants have been trendy for a decade, but in 2026, we are moving beyond simple potted plants to integrated biophilic design. The goal is to make greenery look like a permanent architectural feature rather than an afterthought. The “Moss Wall” is the hero project of this trend—it adds soundproofing, texture, and a high-end spa vibe without the maintenance of a living vertical garden.

DIY Project: How to Make a Framed Moss Wall Art
Difficulty: Beginner | Cost: $$
Materials:
Instructions:
- Prep the Frame: If you are using an upcycled frame, remove the glass. If the backing is flimsy cardboard, replace it with a thin piece of plywood or sturdy foam board glued into the frame grooves.
- Create the Base: Cover the entire backing with the flat “sheet moss” first. Apply hot glue generously to the board and press the sheet moss down. This ensures no board shows through.
- Sculpt the Texture: Take clumps of the fluffier “Reindeer moss.” Do not glue them flat; squeeze them together to form tight, puffy mounds. Glue these mounds onto the base layer in an organic, flowing pattern (like a river or cloud shape).
- Add Details: For a “Bio-Luxe” look, tuck small pieces of dried fern or bark into the crevices between the moss mounds.
- Seal: Preserved moss is dyed and treated, so it doesn’t need water. Keep it out of direct sunlight to prevent fading.
Trend Connection: For more inspiration on sustainable materials, check out our guide on Eco-Sustainable Interior Design Trends.
2. “Color Drenching”: The Wrapped Room
Say goodbye to the standard “white ceiling, colored walls” formula. Color Drenching is the practice of painting everything—walls, trim, baseboards, doors, and even the ceiling—in a single color.
In 2026, this is primarily done with warm earth tones like terracotta, sage green, or the trending “Cremèle” (a rich, buttery beige). This technique blurs the boundaries of the room, making small spaces feel larger and large spaces feel cozier.
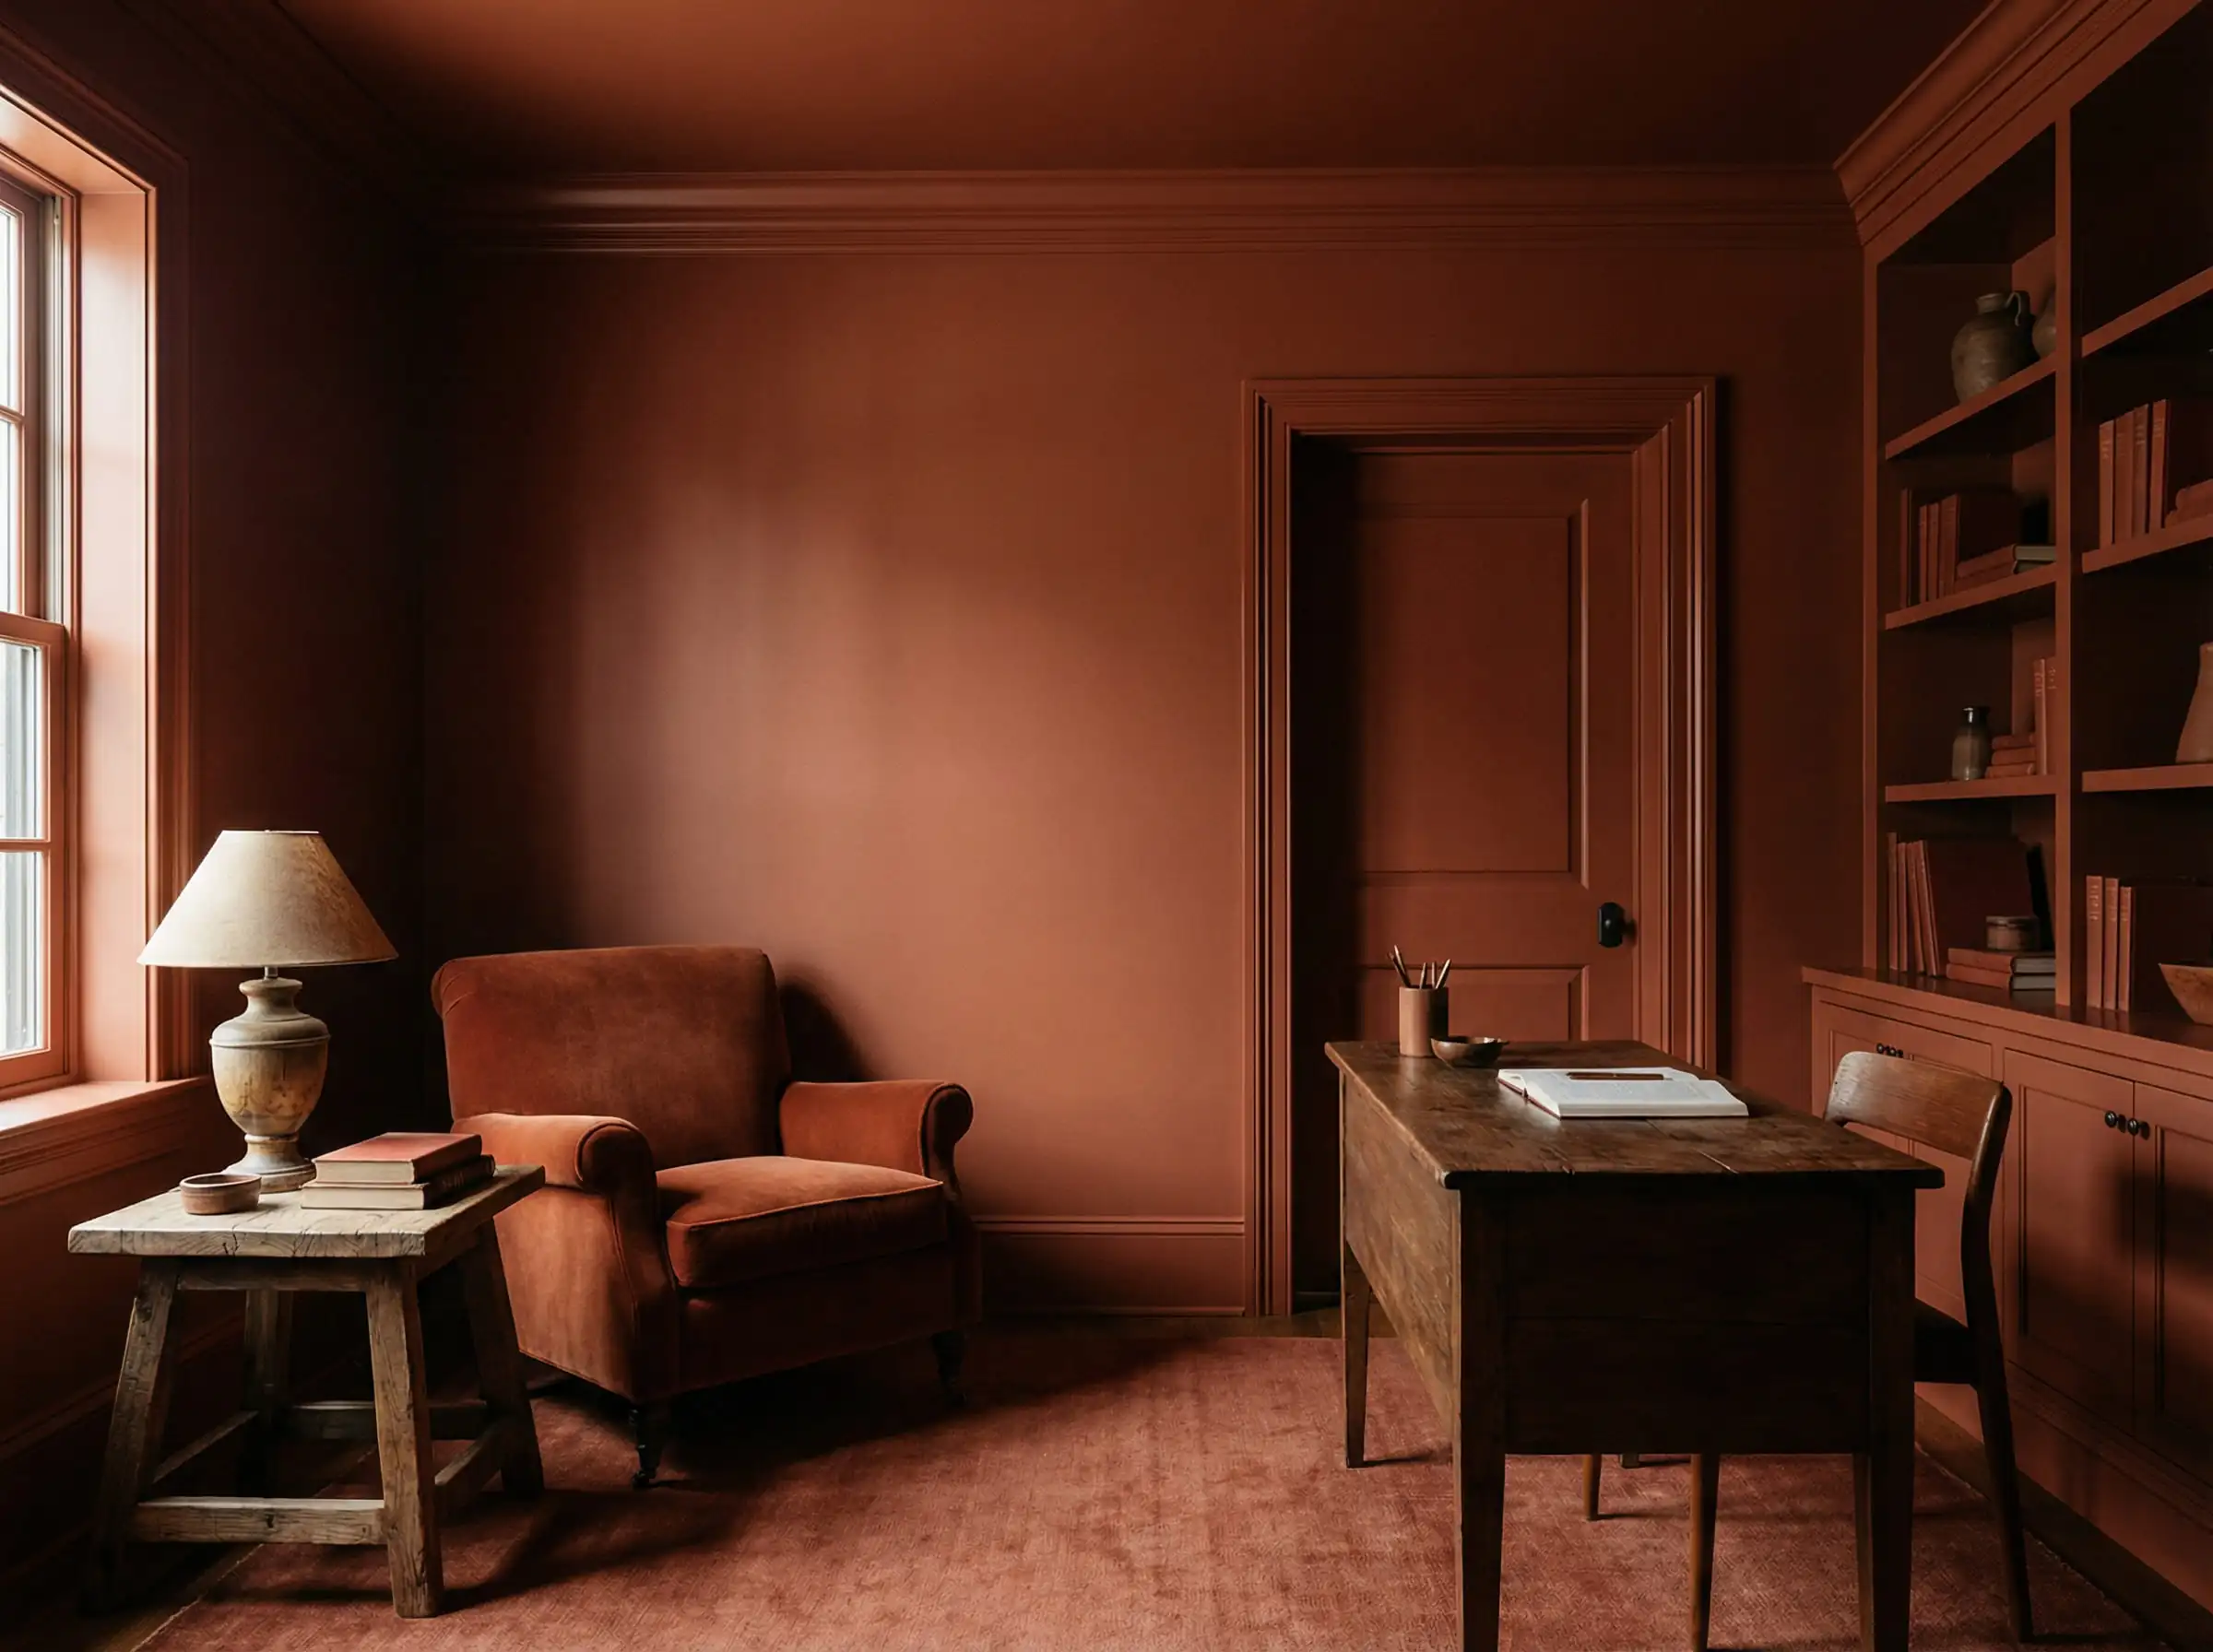
DIY Project: Color Drenching Your Powder Room or Office
Difficulty: Intermediate | Cost: $
The Secret to Success: Sheen variation. To keep the room from looking flat, you must use different paint finishes in the exact same color code.
Instructions:
- Choose Your Color: Pick a mid-tone warm color. Darker colors create a “jewel box” effect; lighter colors create a “cocoon” effect.
- Map Your Finishes:
- Walls: Matte or Eggshell (hides imperfections).
- Ceiling: Flat (hides light reflection/glare).
- Trim, Doors & Baseboards: Satin or Semi-Gloss (durability and slight contrast).
- Paint Order: Always paint the ceiling first. Because you are using the same color, you don’t need to be as precise with your cutting-in line at the top of the wall!
- The Trim: Sand your baseboards and door frames lightly before painting. Apply the semi-gloss paint last. The subtle shine difference against the matte walls will look incredibly high-end.
Trend Connection: This look works exceptionally well on doors. See how to pair it with Interior Door Trends 2026.
3. Neo-Retro Tiling: The Cube Table
The 70s and 80s revival is maturing. It’s no longer about kitschy shag carpets; it’s about geometric grids and tile work. The “Tiled Cube” side table is a massive trend for 2026, bridging the gap between retro nostalgia and modern clean lines.
DIY Project: Tiled Cube Side Table
Difficulty: Intermediate | Cost: $$
Materials:
Instructions:
- Build the Box: Assemble your MDF panels into a cube using wood glue and finish nails. Let it dry completely.
- Plan the Layout: Crucial Step: Measure your cube so it fits full tiles perfectly without needing to cut them. If your tiles are 1 inch, make your box 16 inches, not 16.5 inches.
- Apply Adhesive: Spread the tile adhesive on one side of the box using a notched trowel. Press your tile sheet into the adhesive. Repeat for all sides. Let dry for 24 hours.
- Grout: Mix your grout. Smear it over the tiles with a rubber float, pushing it deep into the lines.
- Clean: Wait 15-20 minutes for the grout to set slightly, then wipe the tiles with a damp (not wet!) sponge to remove the haze.
Trend Connection: Tiles are taking over furniture. See how this fits into broader Modern Coffee Table Trends.
4. Textural Minimalism: The “Faux Stone” Vase
“Japandi” (Japan + Scandi) style is evolving into Textural Minimalism. The focus is on raw, imperfect, and organic surfaces. Smooth glass and shiny plastic are out; rough stone, plaster, and clay are in. You don’t need to buy expensive pottery to get this look—you can upcycle thrift store glass.
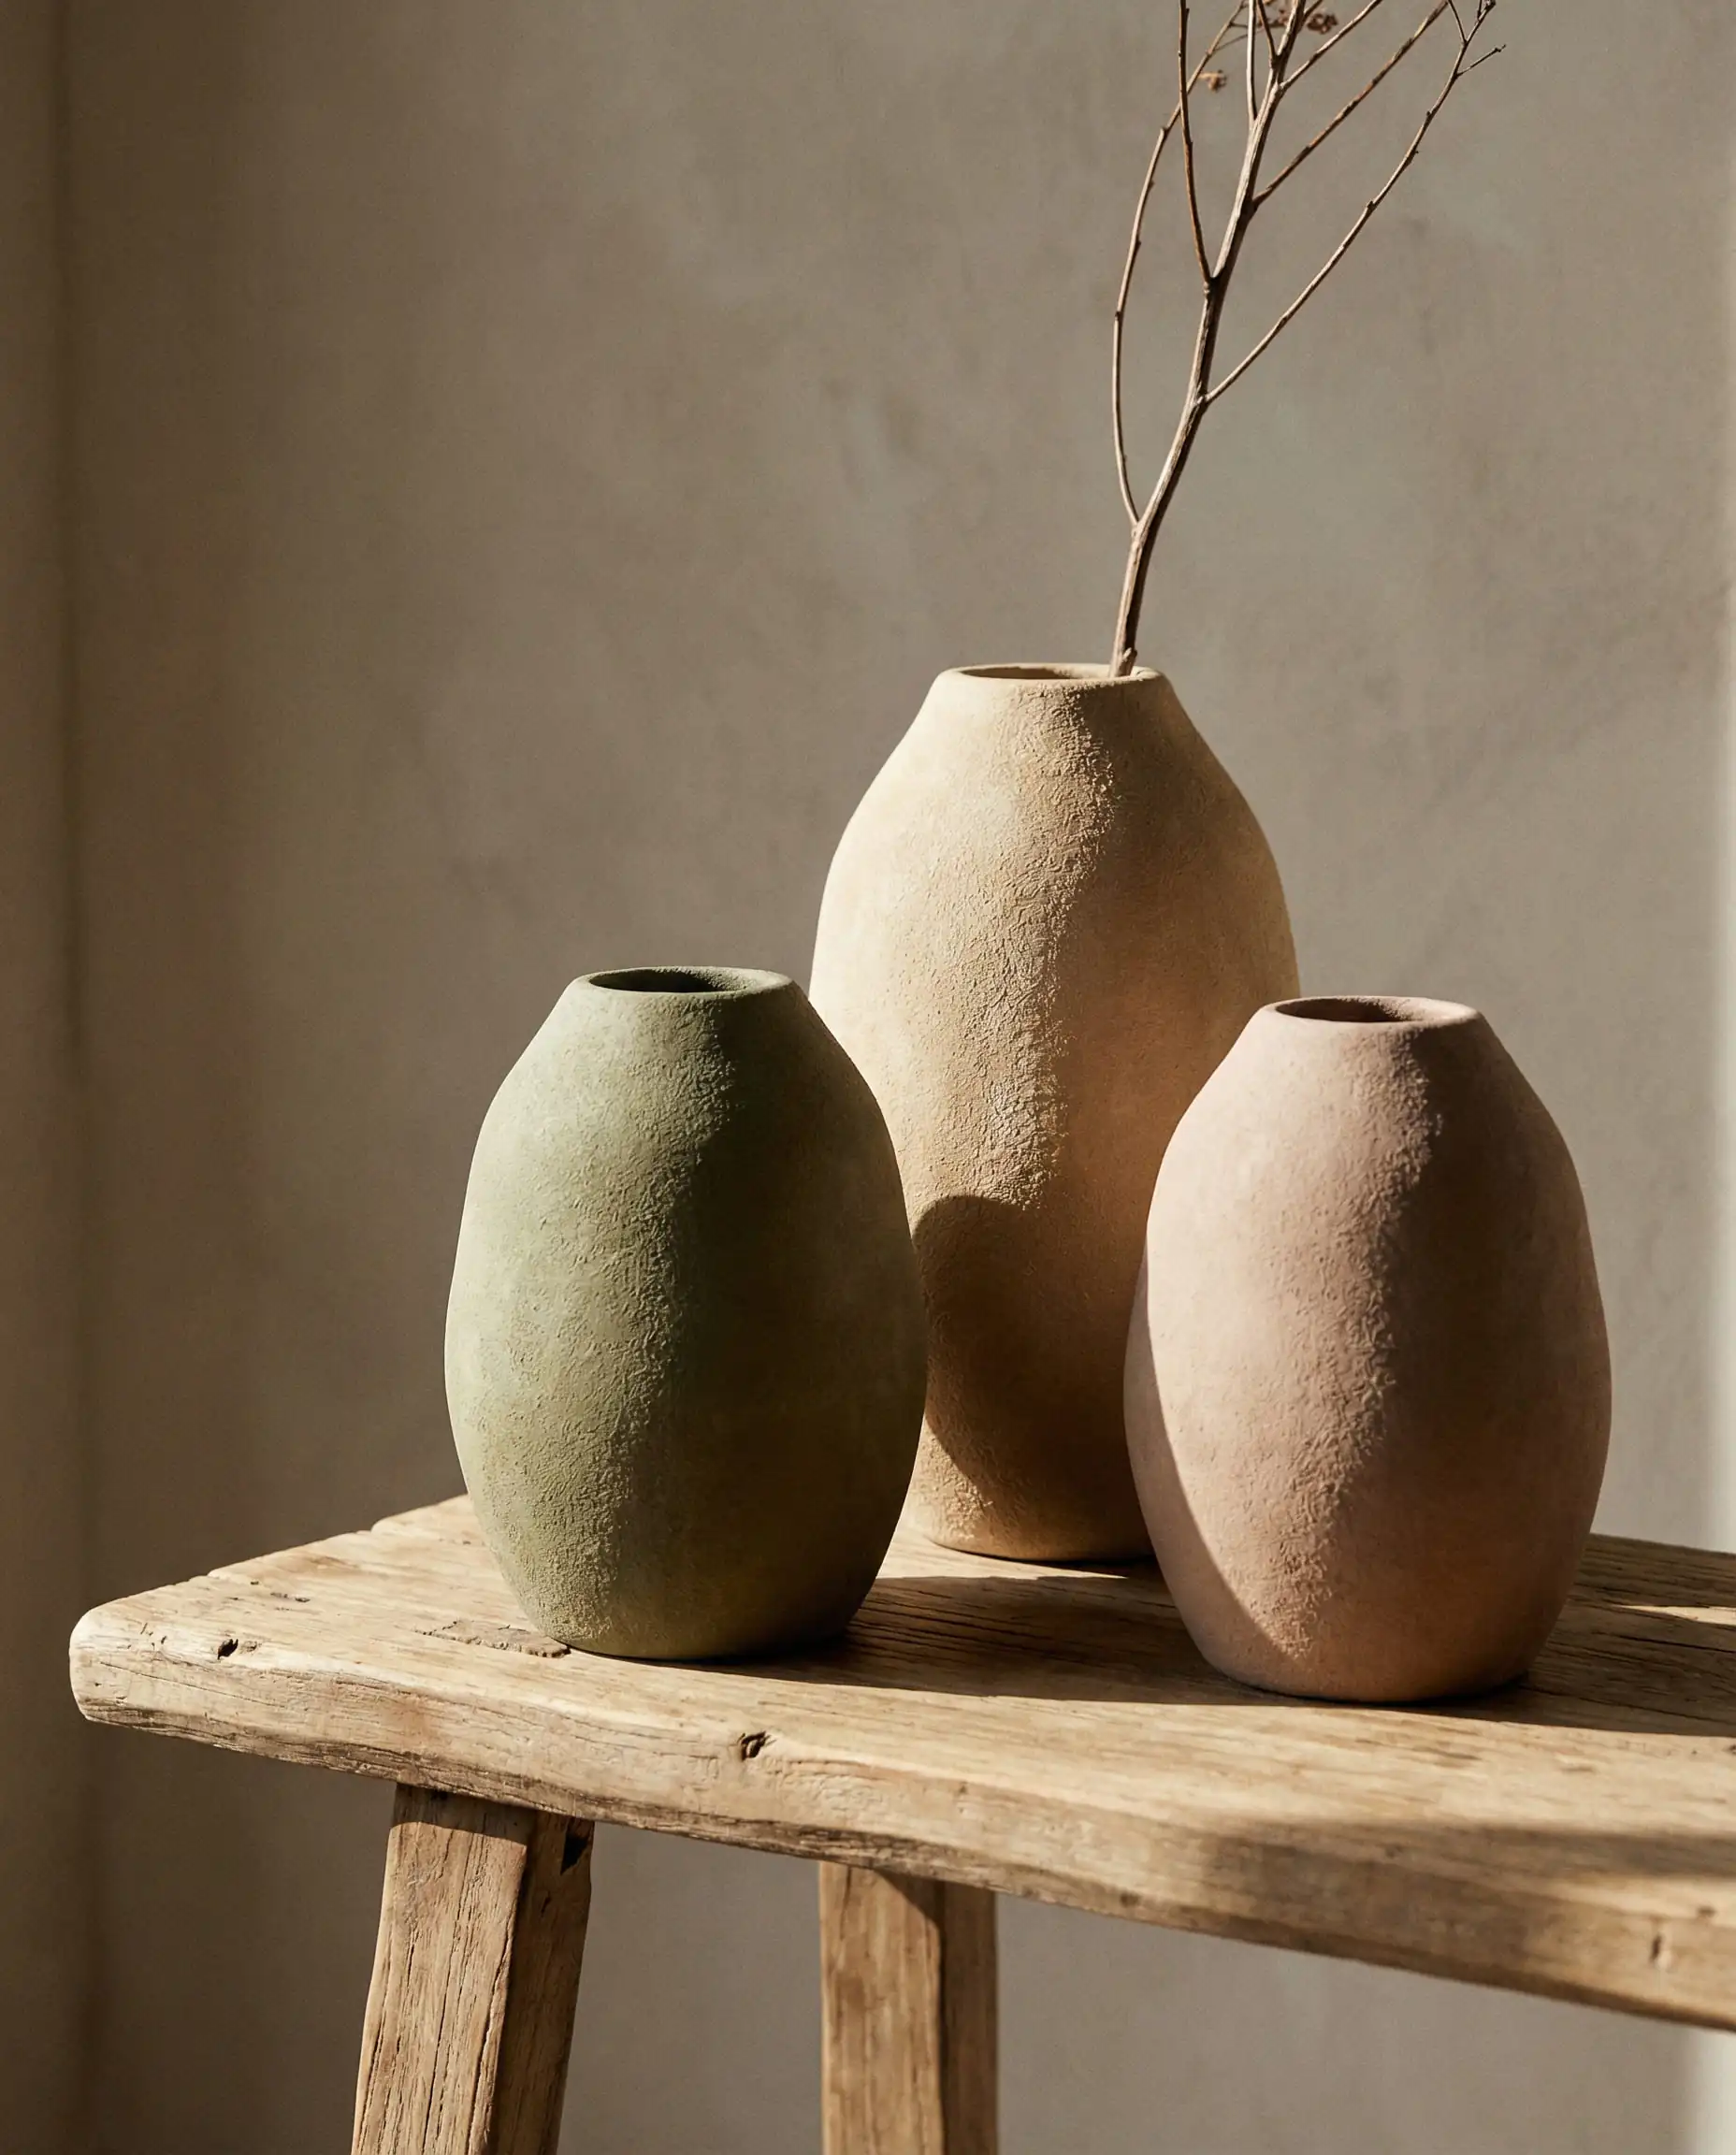
DIY Project: Baking Soda Paint Hack
Difficulty: Very Easy | Cost: $
Materials:
Instructions:
- Mix the Paint: Pour 1 cup of paint into a container. Add 1 tablespoon of baking powder.
- Note: Baking powder creates a fluffier, “ceramic” texture. Baking soda creates a sandier, “stone” texture. Both work well!
- Watch it React: The mixture will bubble up slightly and become mousse-like.
- Apply: Paint your vase. Do not use smooth strokes; use cross-hatch (X-shape) strokes to build up texture.
- Layer: Let the first coat dry (it will look streaky). Apply a second coat. The texture will start to look like unglazed clay or limestone.
Trend Connection: These vases are the perfect accessory for shelves. Check out our Modern Vases Trends for shape inspiration before you thrift.
5. The “Fluted” Accent Wall
Texture is the new color. Fluted (grooved) details are appearing on vanity units, glass, and now, walls. A fluted wall panel adds rhythm and height to a room, fitting perfectly into the 2026 “Quiet Luxury” aesthetic.
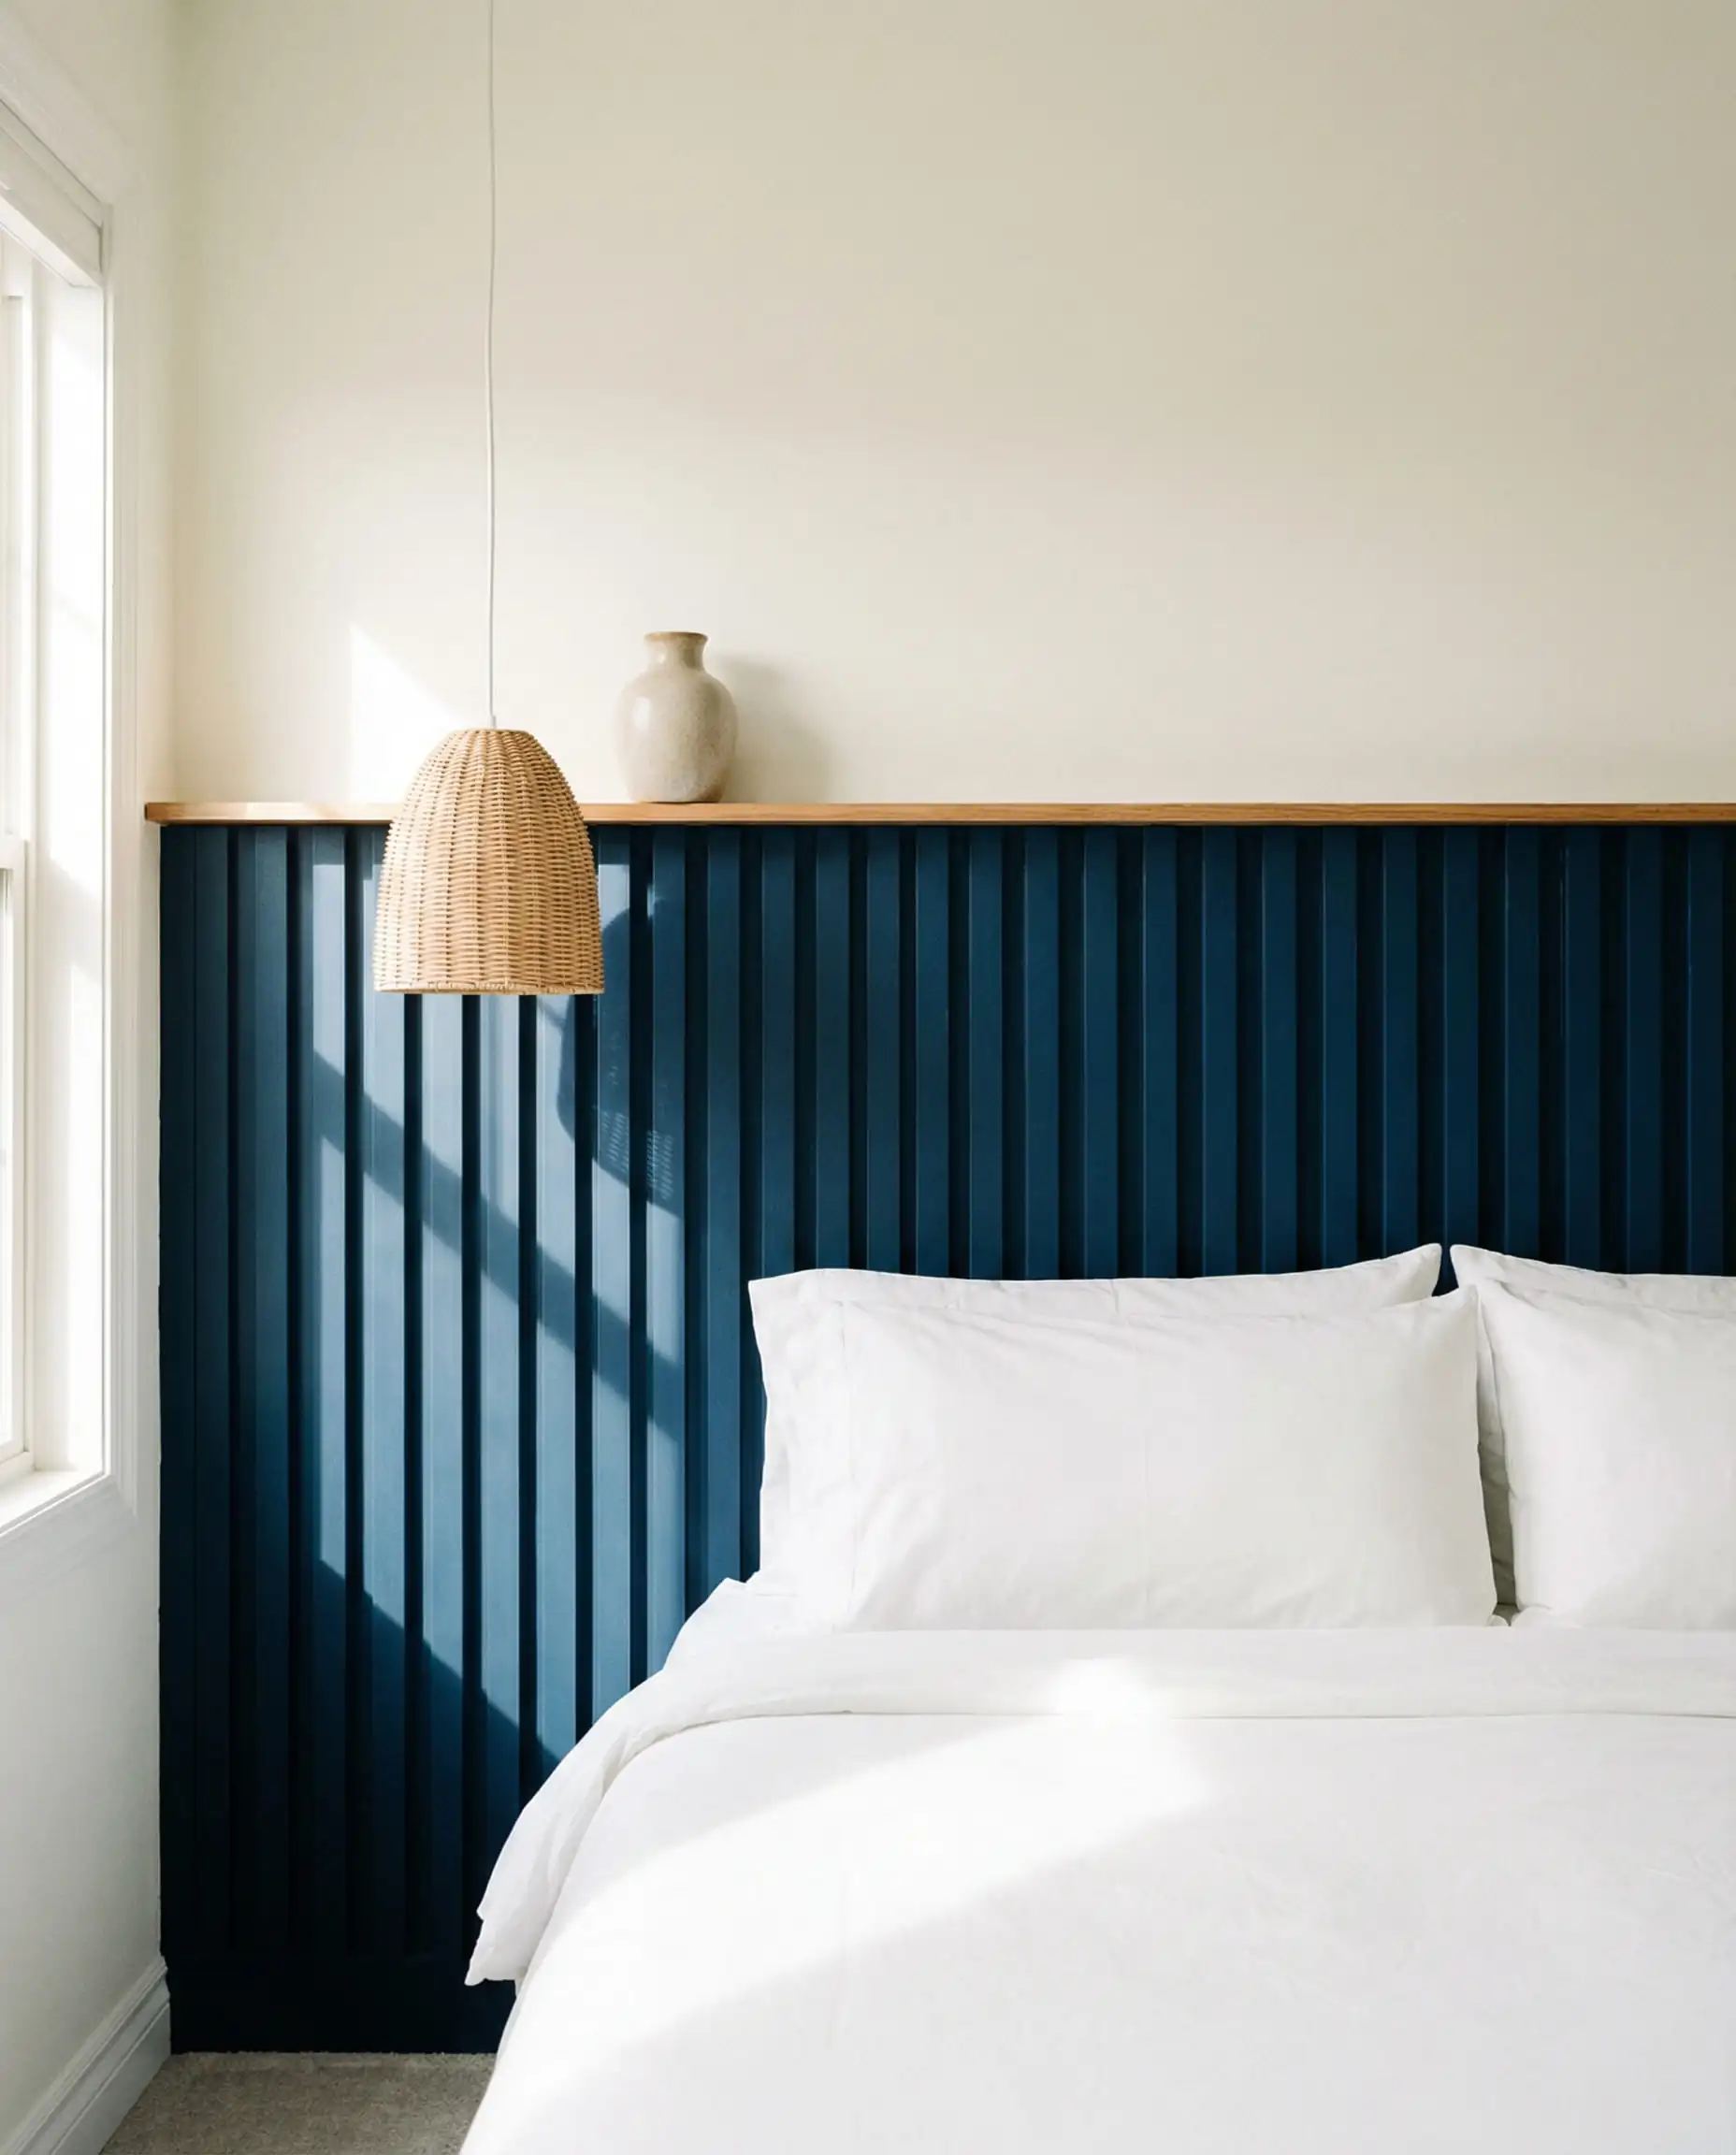
DIY Project: Half-Wall Wood Fluting
Difficulty: Advanced | Cost: $$$
Materials:
Instructions:
- Measure: Decide if you want a full wall or a half-wall (wainscoting style). Half-walls are trendy for bedrooms behind the bed.
- Cut: Cut your half-round molding strips to the desired height.
- Install: Apply adhesive to the back of the first strip. Place it on the wall, ensuring it is perfectly level vertically. Nail it in place.
- Repeat: Butt the next strip tightly against the first. Repeat until the area is covered.
- Finish: Caulk any gaps between the wood and the wall. Paint the entire fluted section.
- 2026 Tip: Paint the fluted section a deep, moody color (like charcoal or navy) and leave the wall above it a creamy white for high contrast.
Trend Connection: This texture adds depth that wallpaper often can’t. Compare this look with our Wall Covering Materials Trends.
6. Organic “Pond” Shapes
Rigid rectangles are being replaced by amorphous, organic blobs. We see this in “pond mirrors” (mirrors that look like puddles) and curved sofas. This trend softens the hard edges of modern architecture.
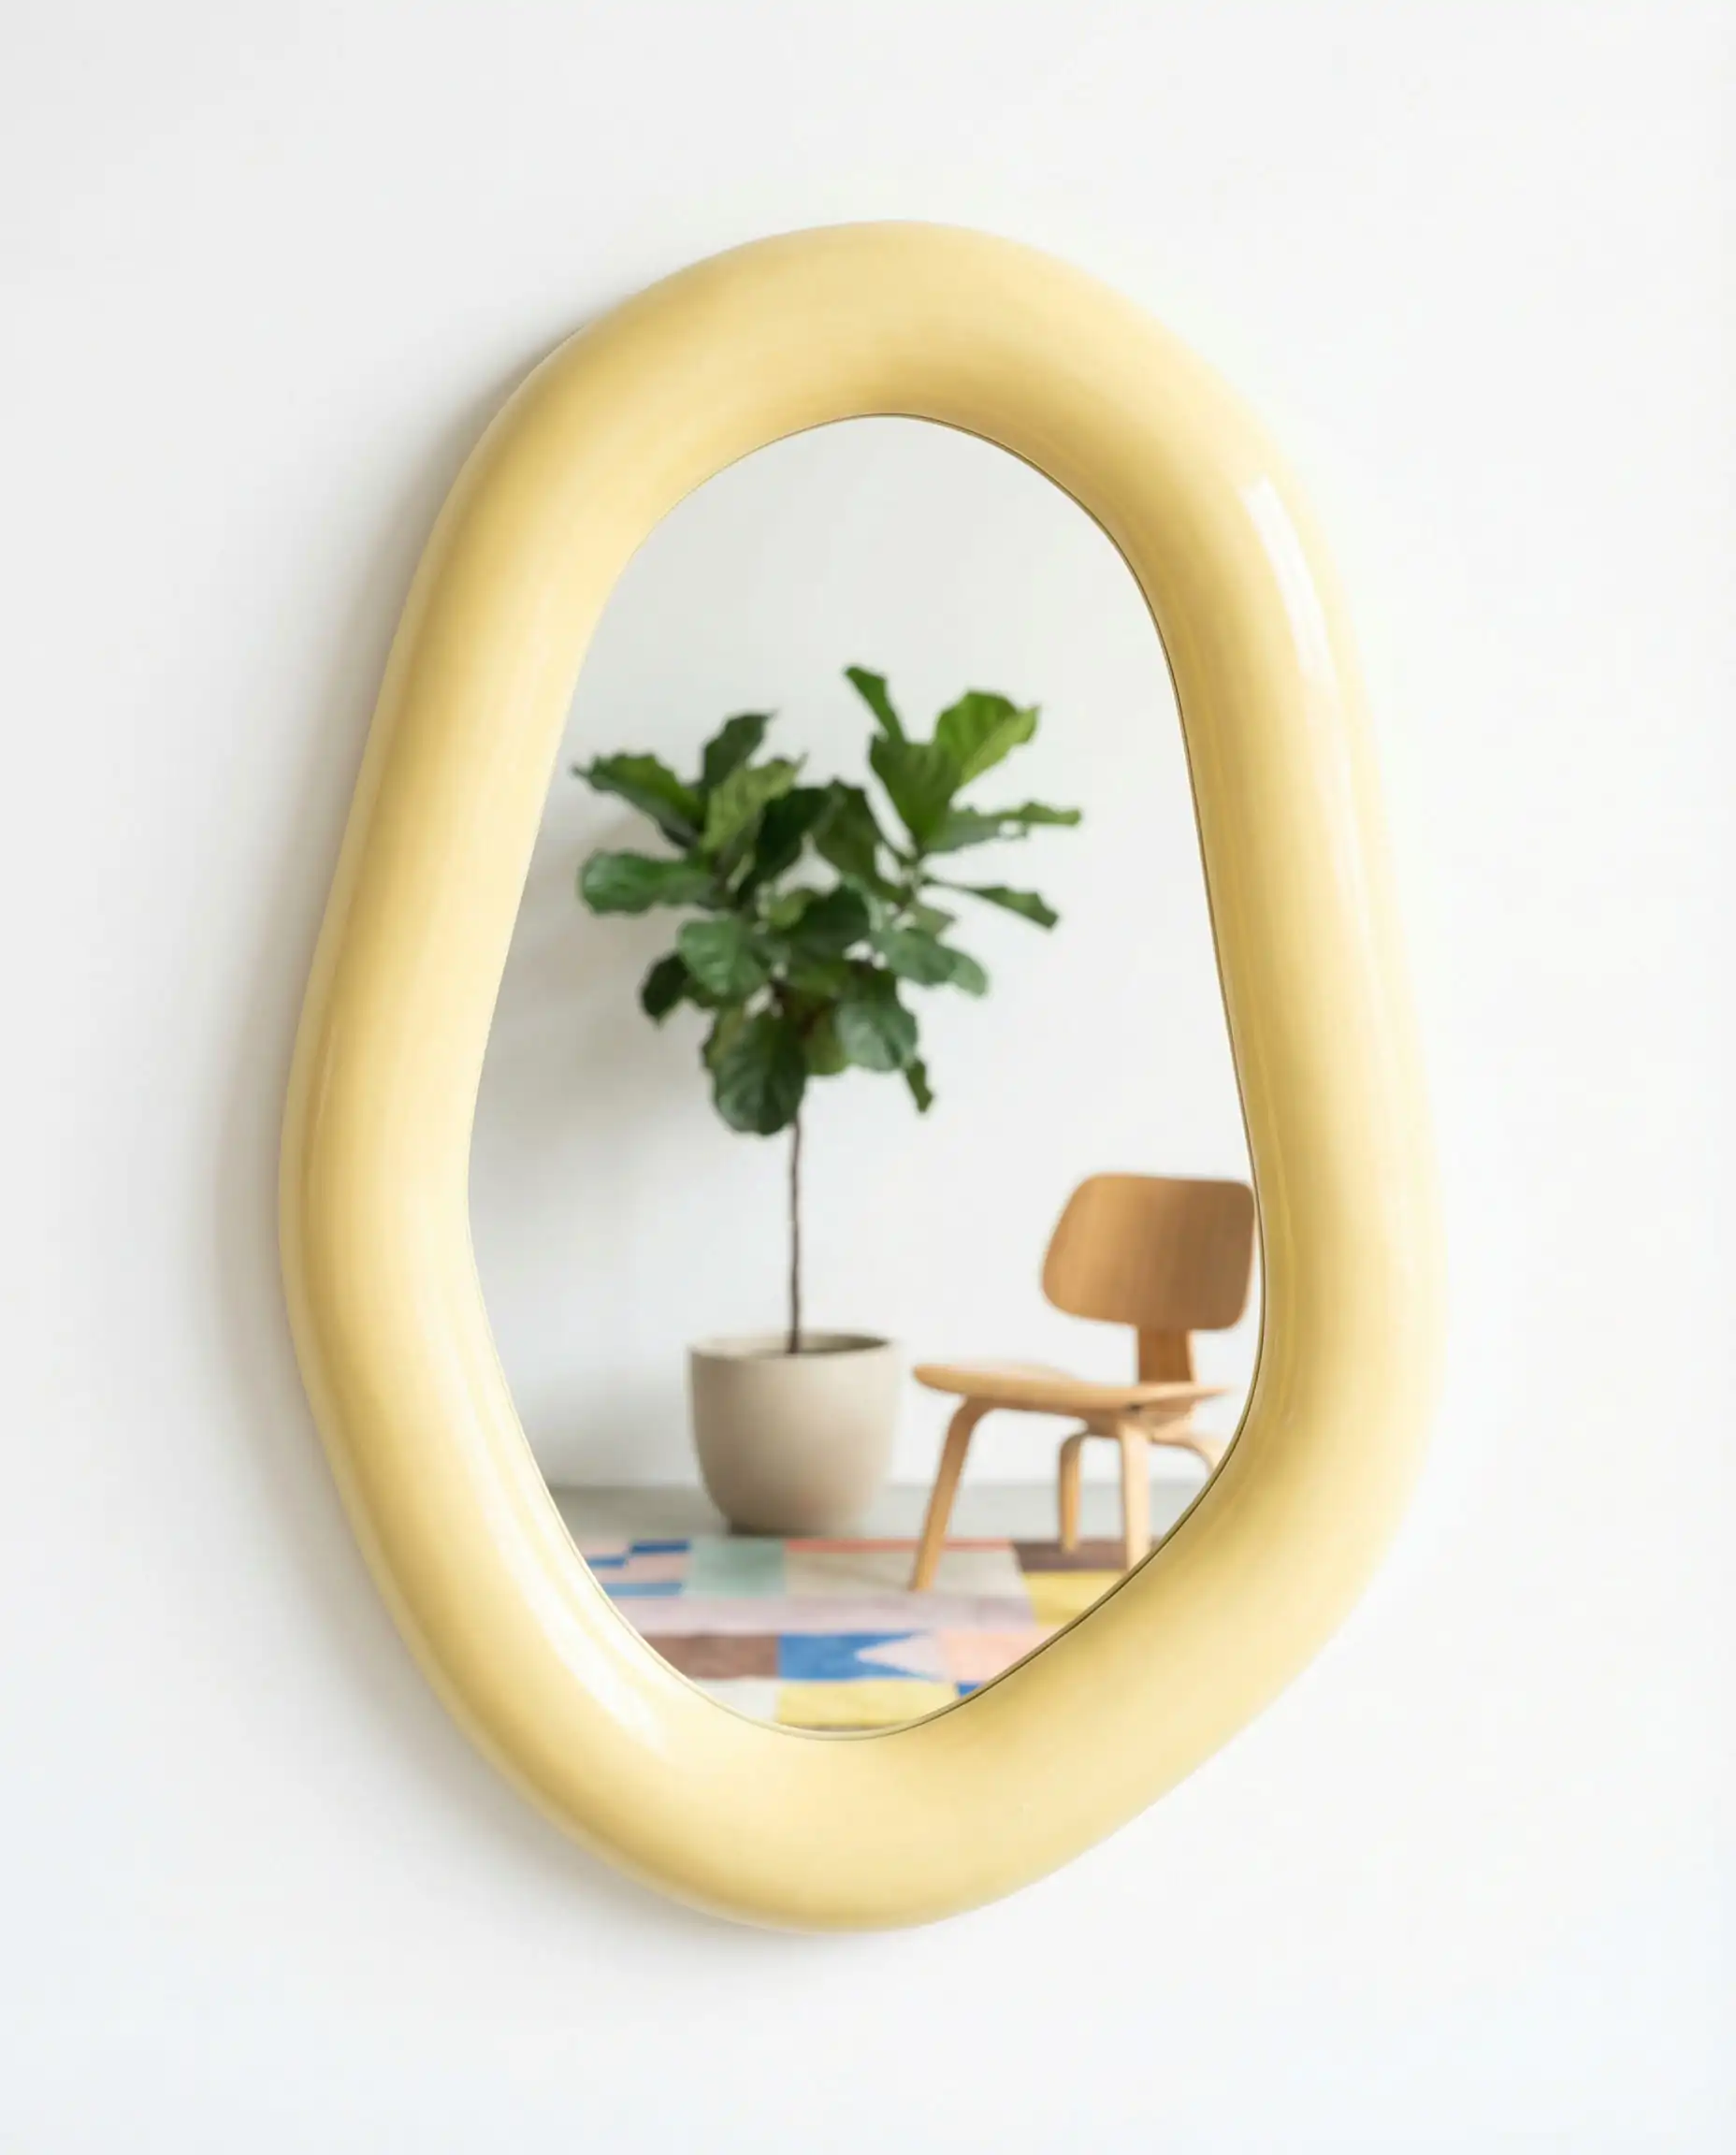
DIY Project: The “Puffy” Pond Mirror
Difficulty: Easy | Cost: $
Materials:
Instructions:
- Clean the Mirror: Ensure the edges are dry.
- Sculpt the Frame:
- Clay Method: Roll air-dry clay into long “snakes.” Coil them around the edge of the mirror to create a chunky, uneven frame. You can overlap them for a “fat” look.
- Foam Method: Spray expanding foam around the edge of the mirror (protect the center with paper!). Let it cure, then carve it into a smooth, cloud-like shape with a serrated knife.
- Paint: Once the frame is hard, paint it a funky pastel color (lilac and butter yellow are huge for 2026) or a metallic chrome for a futuristic touch.
Trend Connection: Mirrors are essential for light. See other shapes in Modern Mirror Trends.
7. Color Capping (The Painted Ceiling)
Similar to color drenching, but more focused. Color Capping involves painting the ceiling a color darker or brighter than the walls. It acts like a “lid” on the room, making large, impersonal spaces feel intimate.
2026 Trend Alert: A warm “latte” or “toffee” ceiling paired with cream walls is the ultimate living room vibe for the coming year.
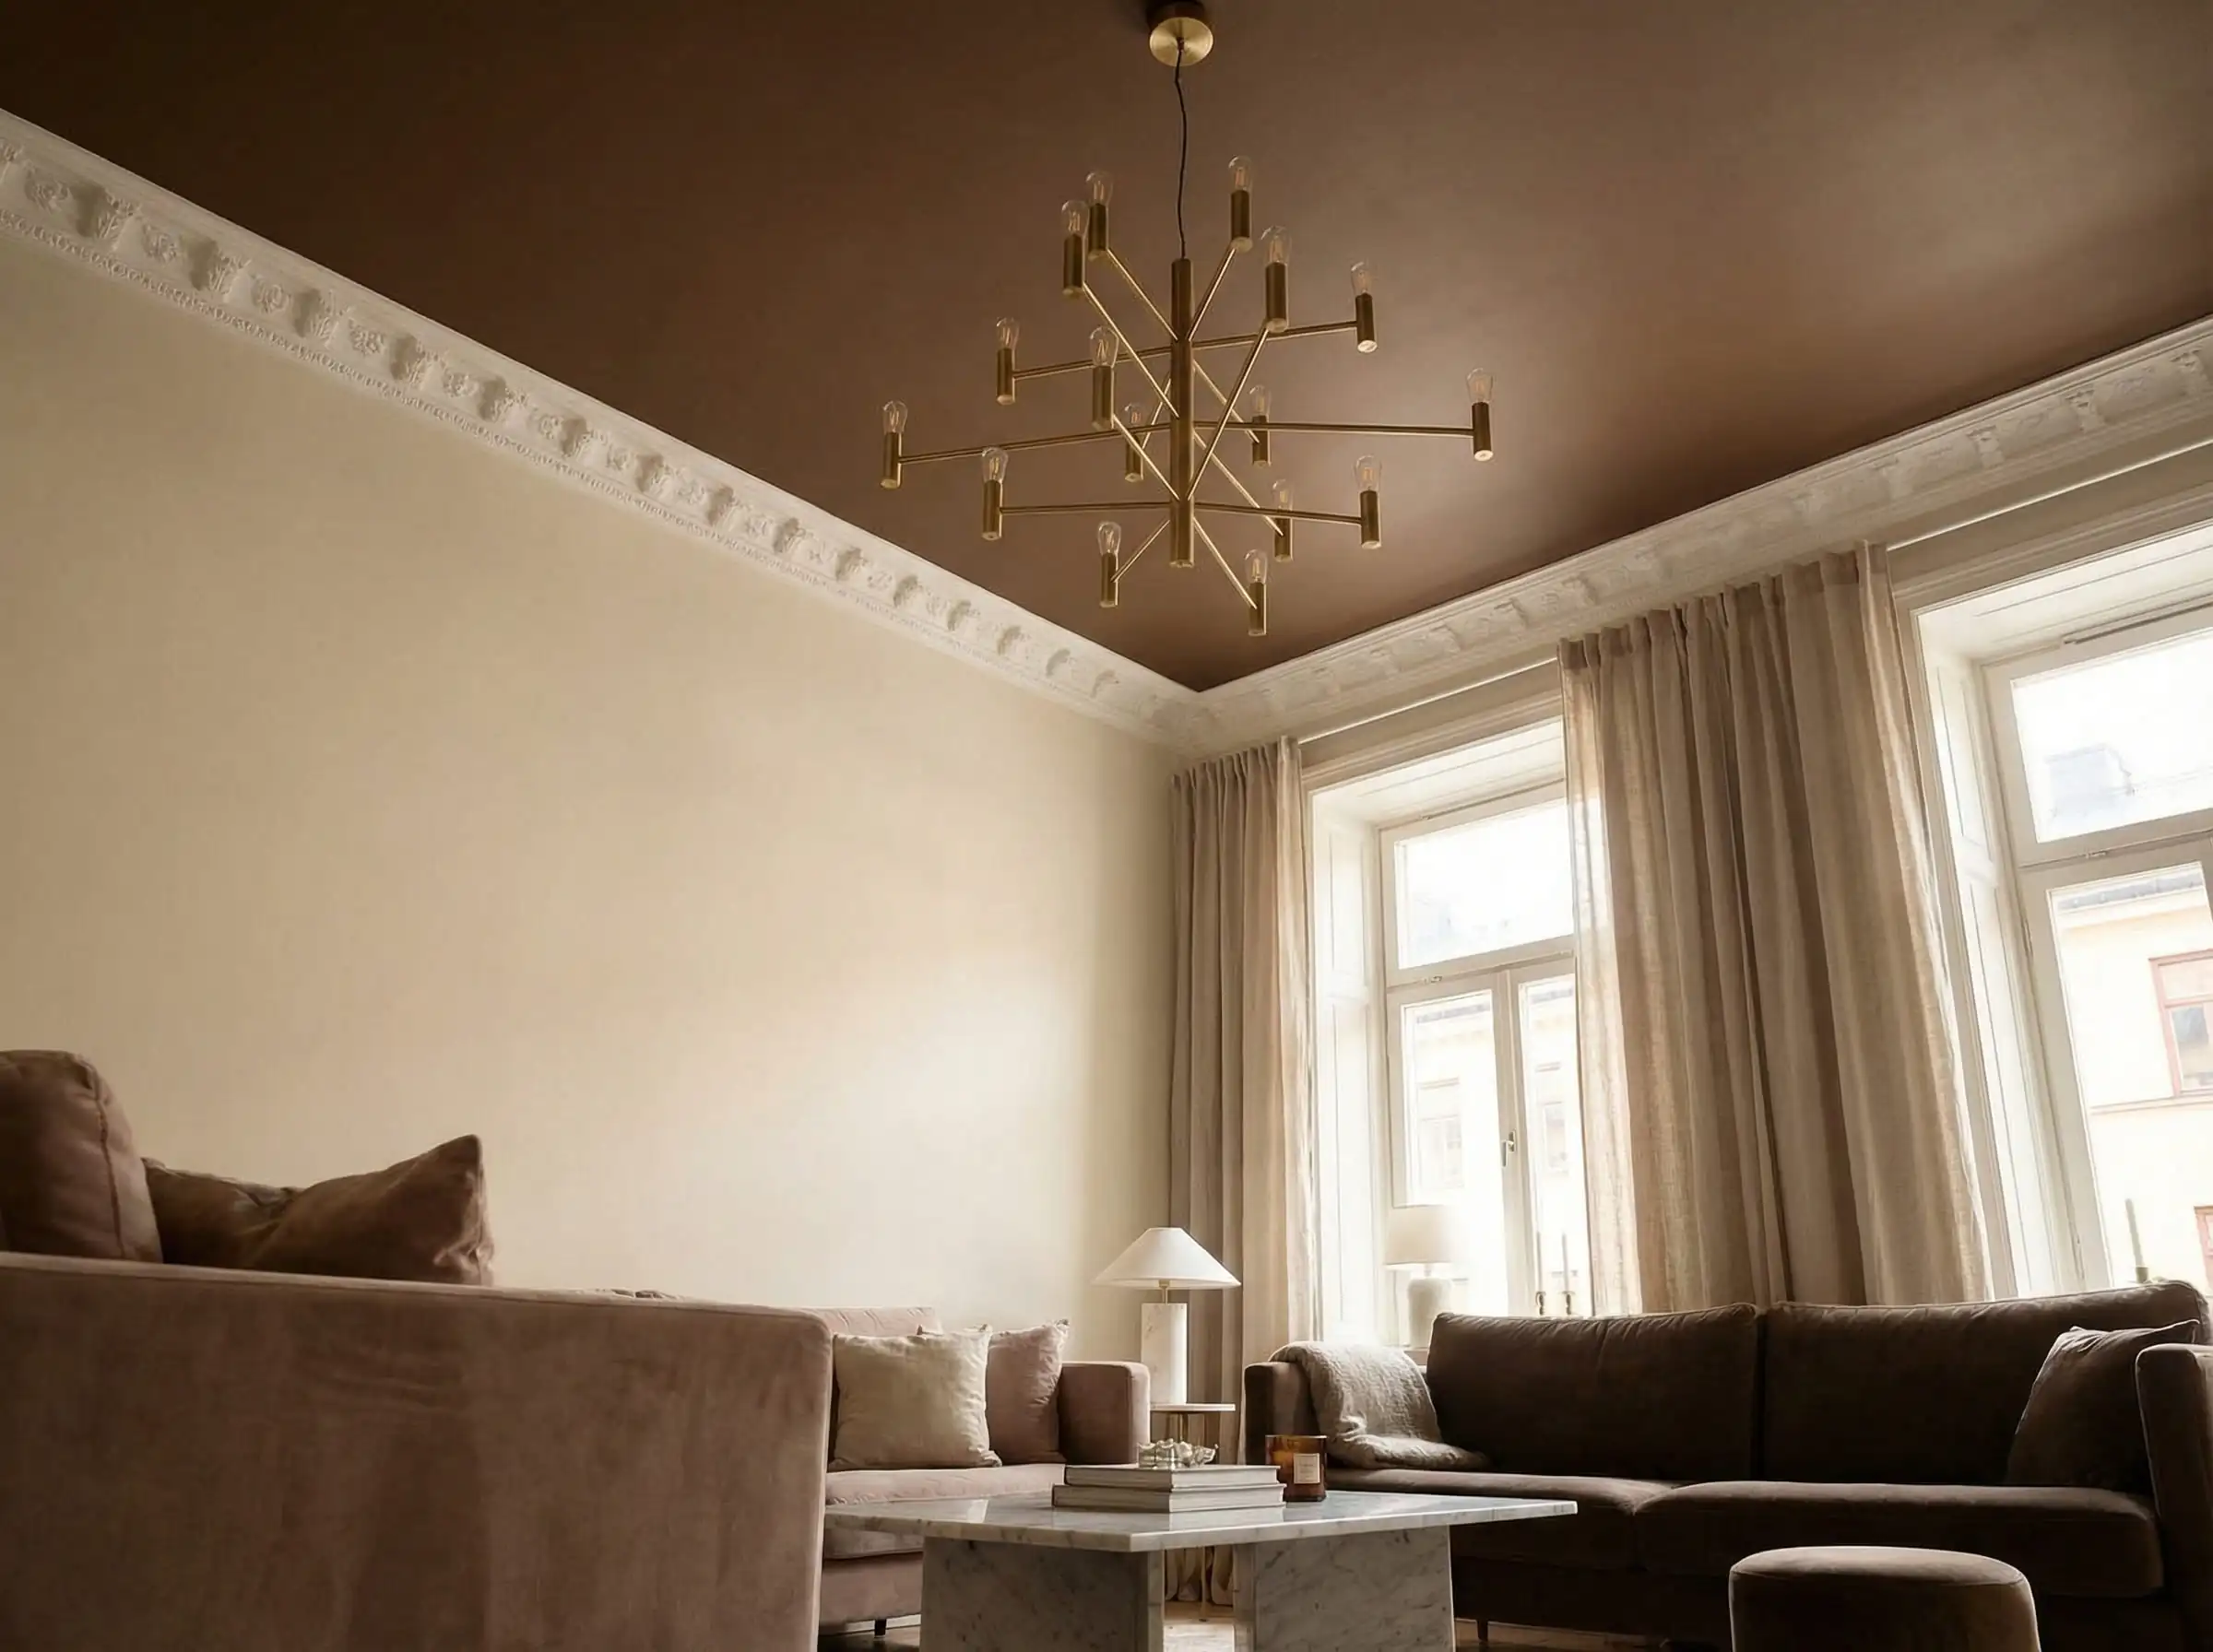
Trend Connection: This significantly impacts lighting. Ensure your fixtures stand out by reviewing Ceiling Design Trends.
8. Soft Lighting: The Pleated Shade Revival
In 2026, exposed bulbs and industrial fixtures are being retired. The focus is now on diffused, romantic lighting. Pleated fabric shades and paper lanterns are back, adding a touch of vintage charm and softening the light output to create a “golden hour” feel all day long.
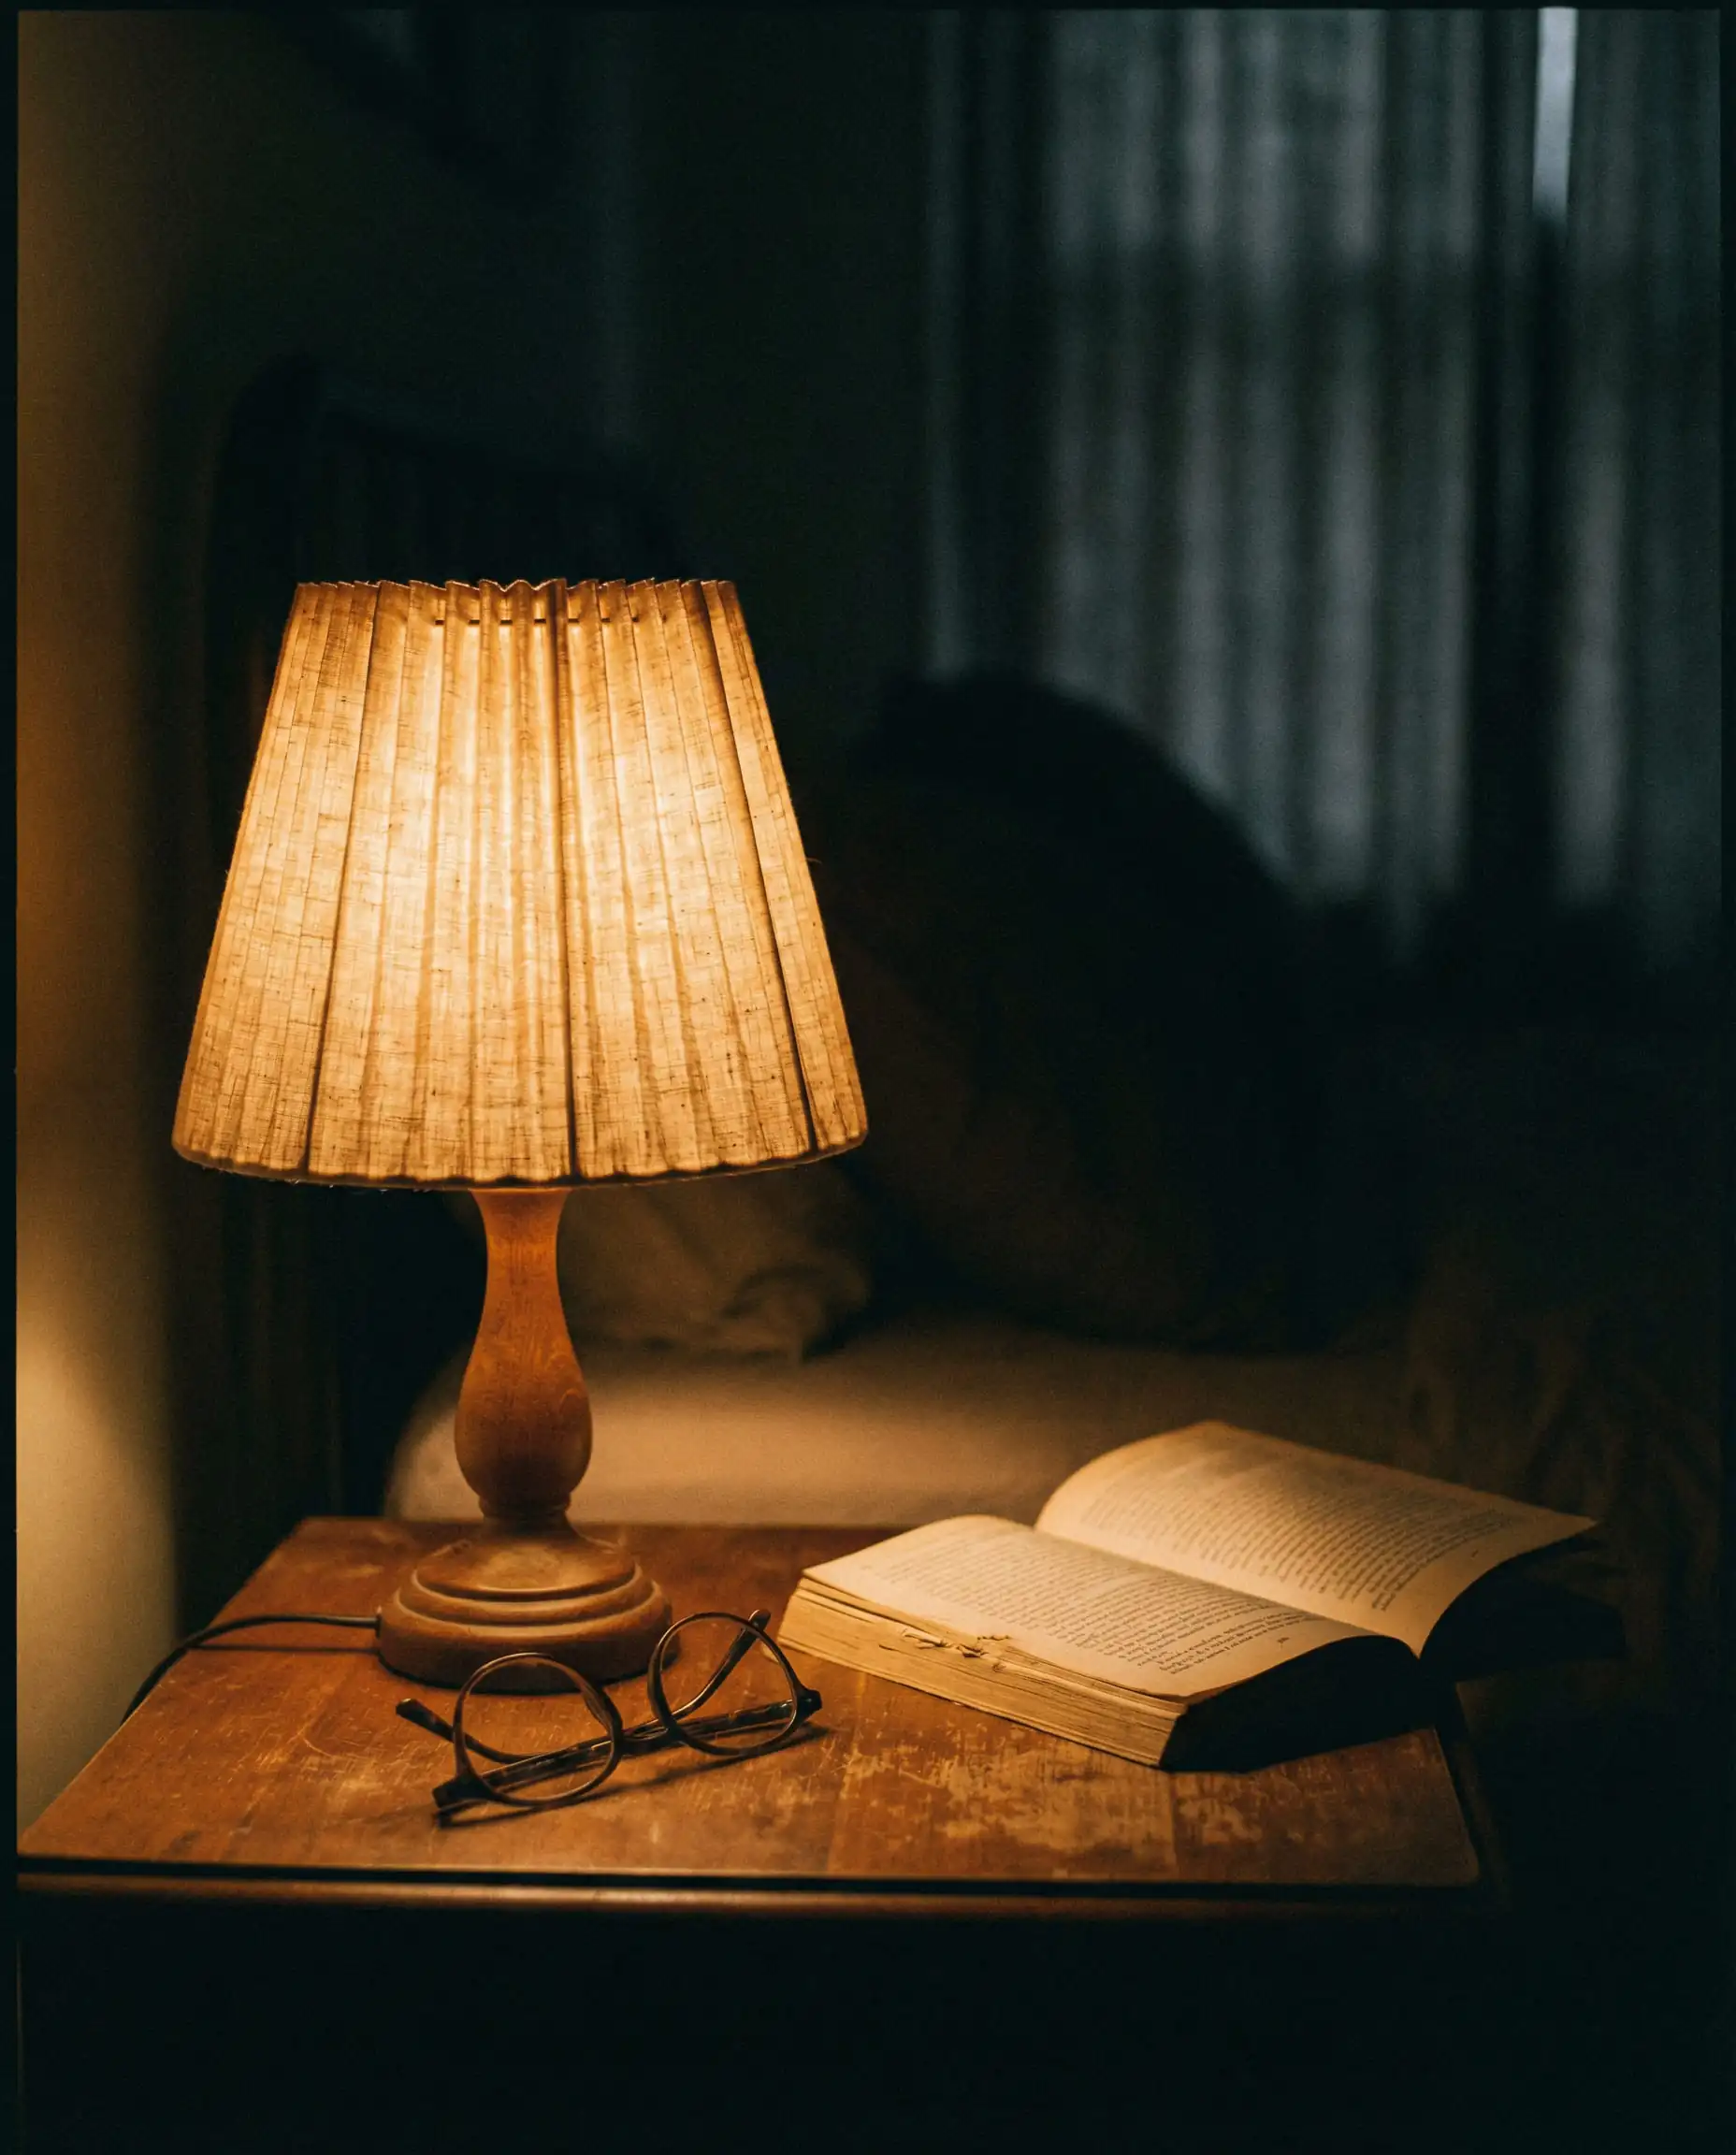
DIY Project: No-Sew Pleated Lampshade
Difficulty: Intermediate | Cost: $
Materials:
Instructions:
- Prep Fabric: Cut a strip of fabric that is 2x the circumference of your lampshade bottom. Spray with fabric stiffener and iron flat.
- Fold Pleats: Begin folding the fabric into accordion pleats (about 1 inch wide). Iron each pleat as you go to set a sharp crease.
- Attach: Using hot glue, attach the top of the pleats to the top rim of the lampshade. The bottom of the pleats will naturally flare out slightly.
- Finish: Glue a matching ribbon or bias tape over the top edge to hide the raw fabric cuts.
Trend Connection: Lighting sets the mood. Pair this with ideas from Lighting Trends.
9. Grandmacore: Ruffled Cafe Curtains
The “Grandmillennial” or “Grandmacore” style is shifting towards the kitchen window. Cafe curtains (which cover only the bottom half of the window) are massive for 2026. They provide privacy while letting light flood in from the top, and the addition of a ruffle adds that necessary layer of nostalgic texture.
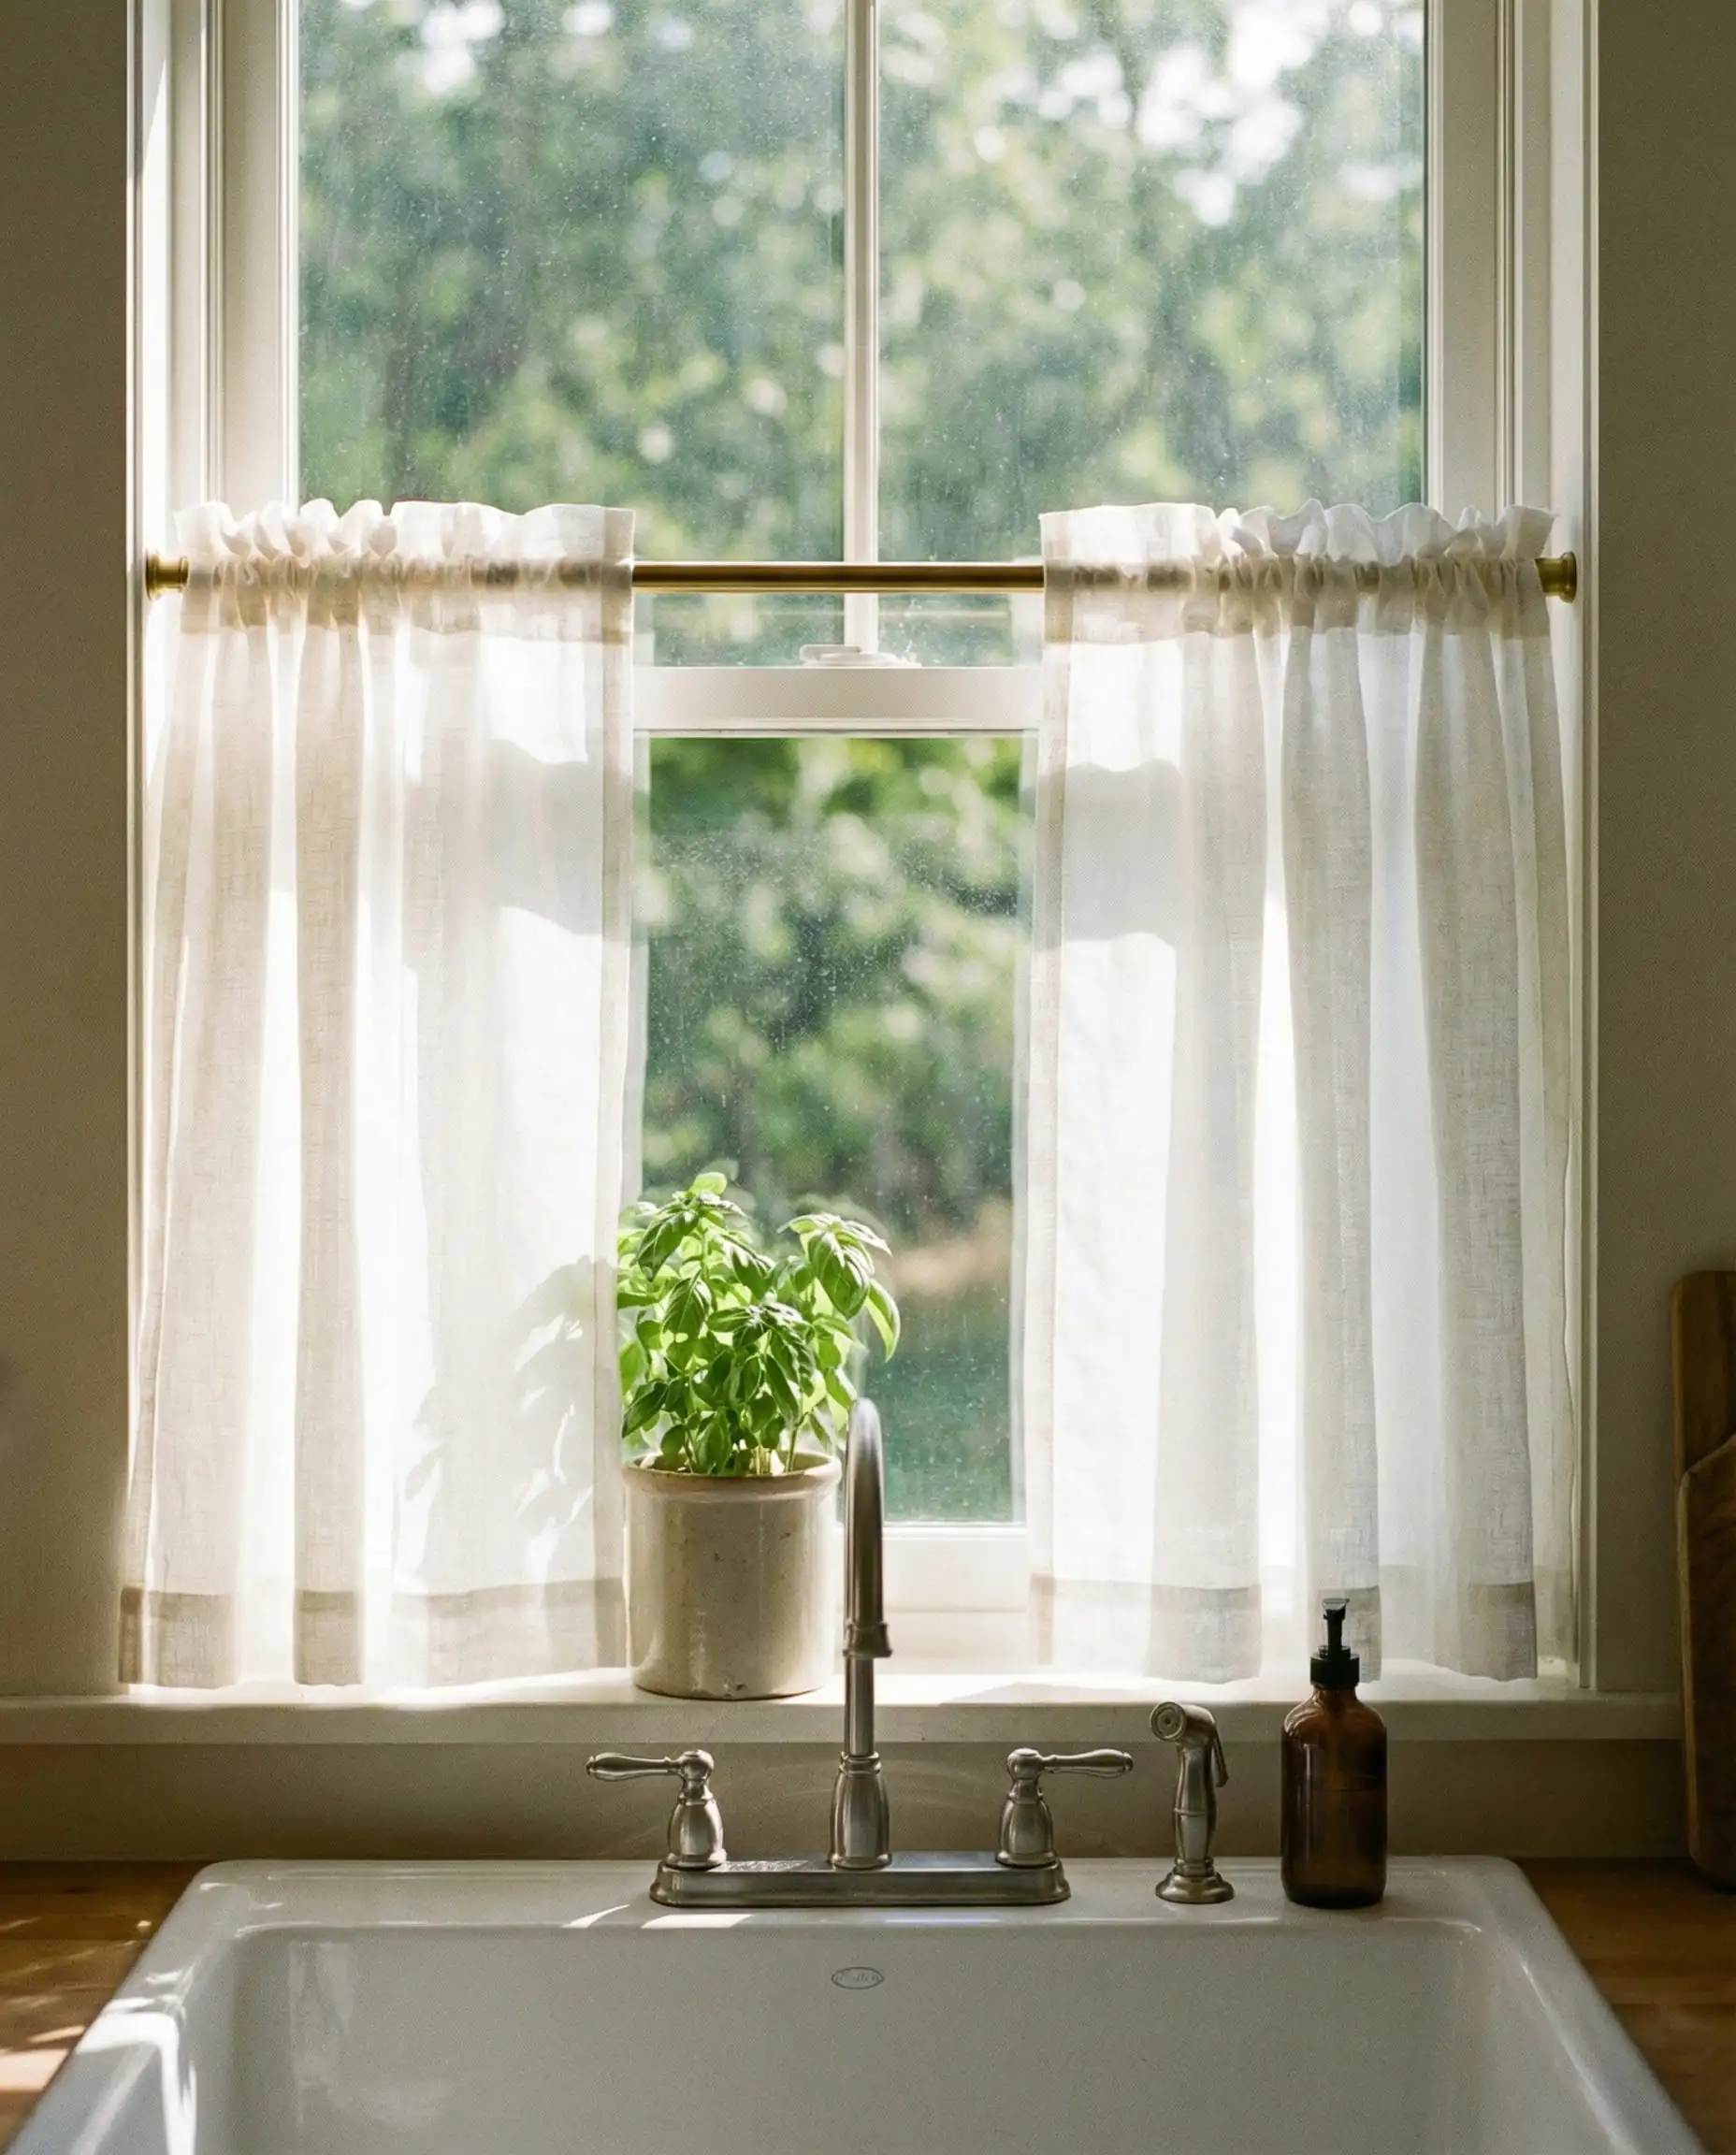
DIY Project: Tension Rod Cafe Curtains (No Drill!)
Difficulty: Easy | Cost: $
Materials:
Instructions:
- Measure: Measure the width of your window and double it (for fullness). Measure the height from the sill to the halfway point of the window.
- Cut & Hem: Cut your fabric. Use iron-on hem tape to create a clean edge on all four sides if you don’t sew.
- The Ruffle (Optional): If you are feeling adventurous, sew a 3-inch strip of fabric, gather it, and attach it to the top edge for that trendy “ruffle top” look.
- Hang: Clip the curtain rings onto the top of the fabric (or the ruffle) and slide onto the tension rod. Install inside the window frame.
Trend Connection: Window treatments are key for 2026. See more in Curtain Trends 2026.
10. Jewel-Box Hardware: Mixed Metals
Standard chrome is out; mixed metals and “jewelry” for your cabinets are in. 2026 kitchens and bathrooms feature unlacquered brass, antique copper, and matte black mixed together. You don’t need to buy expensive new handles to get this look.
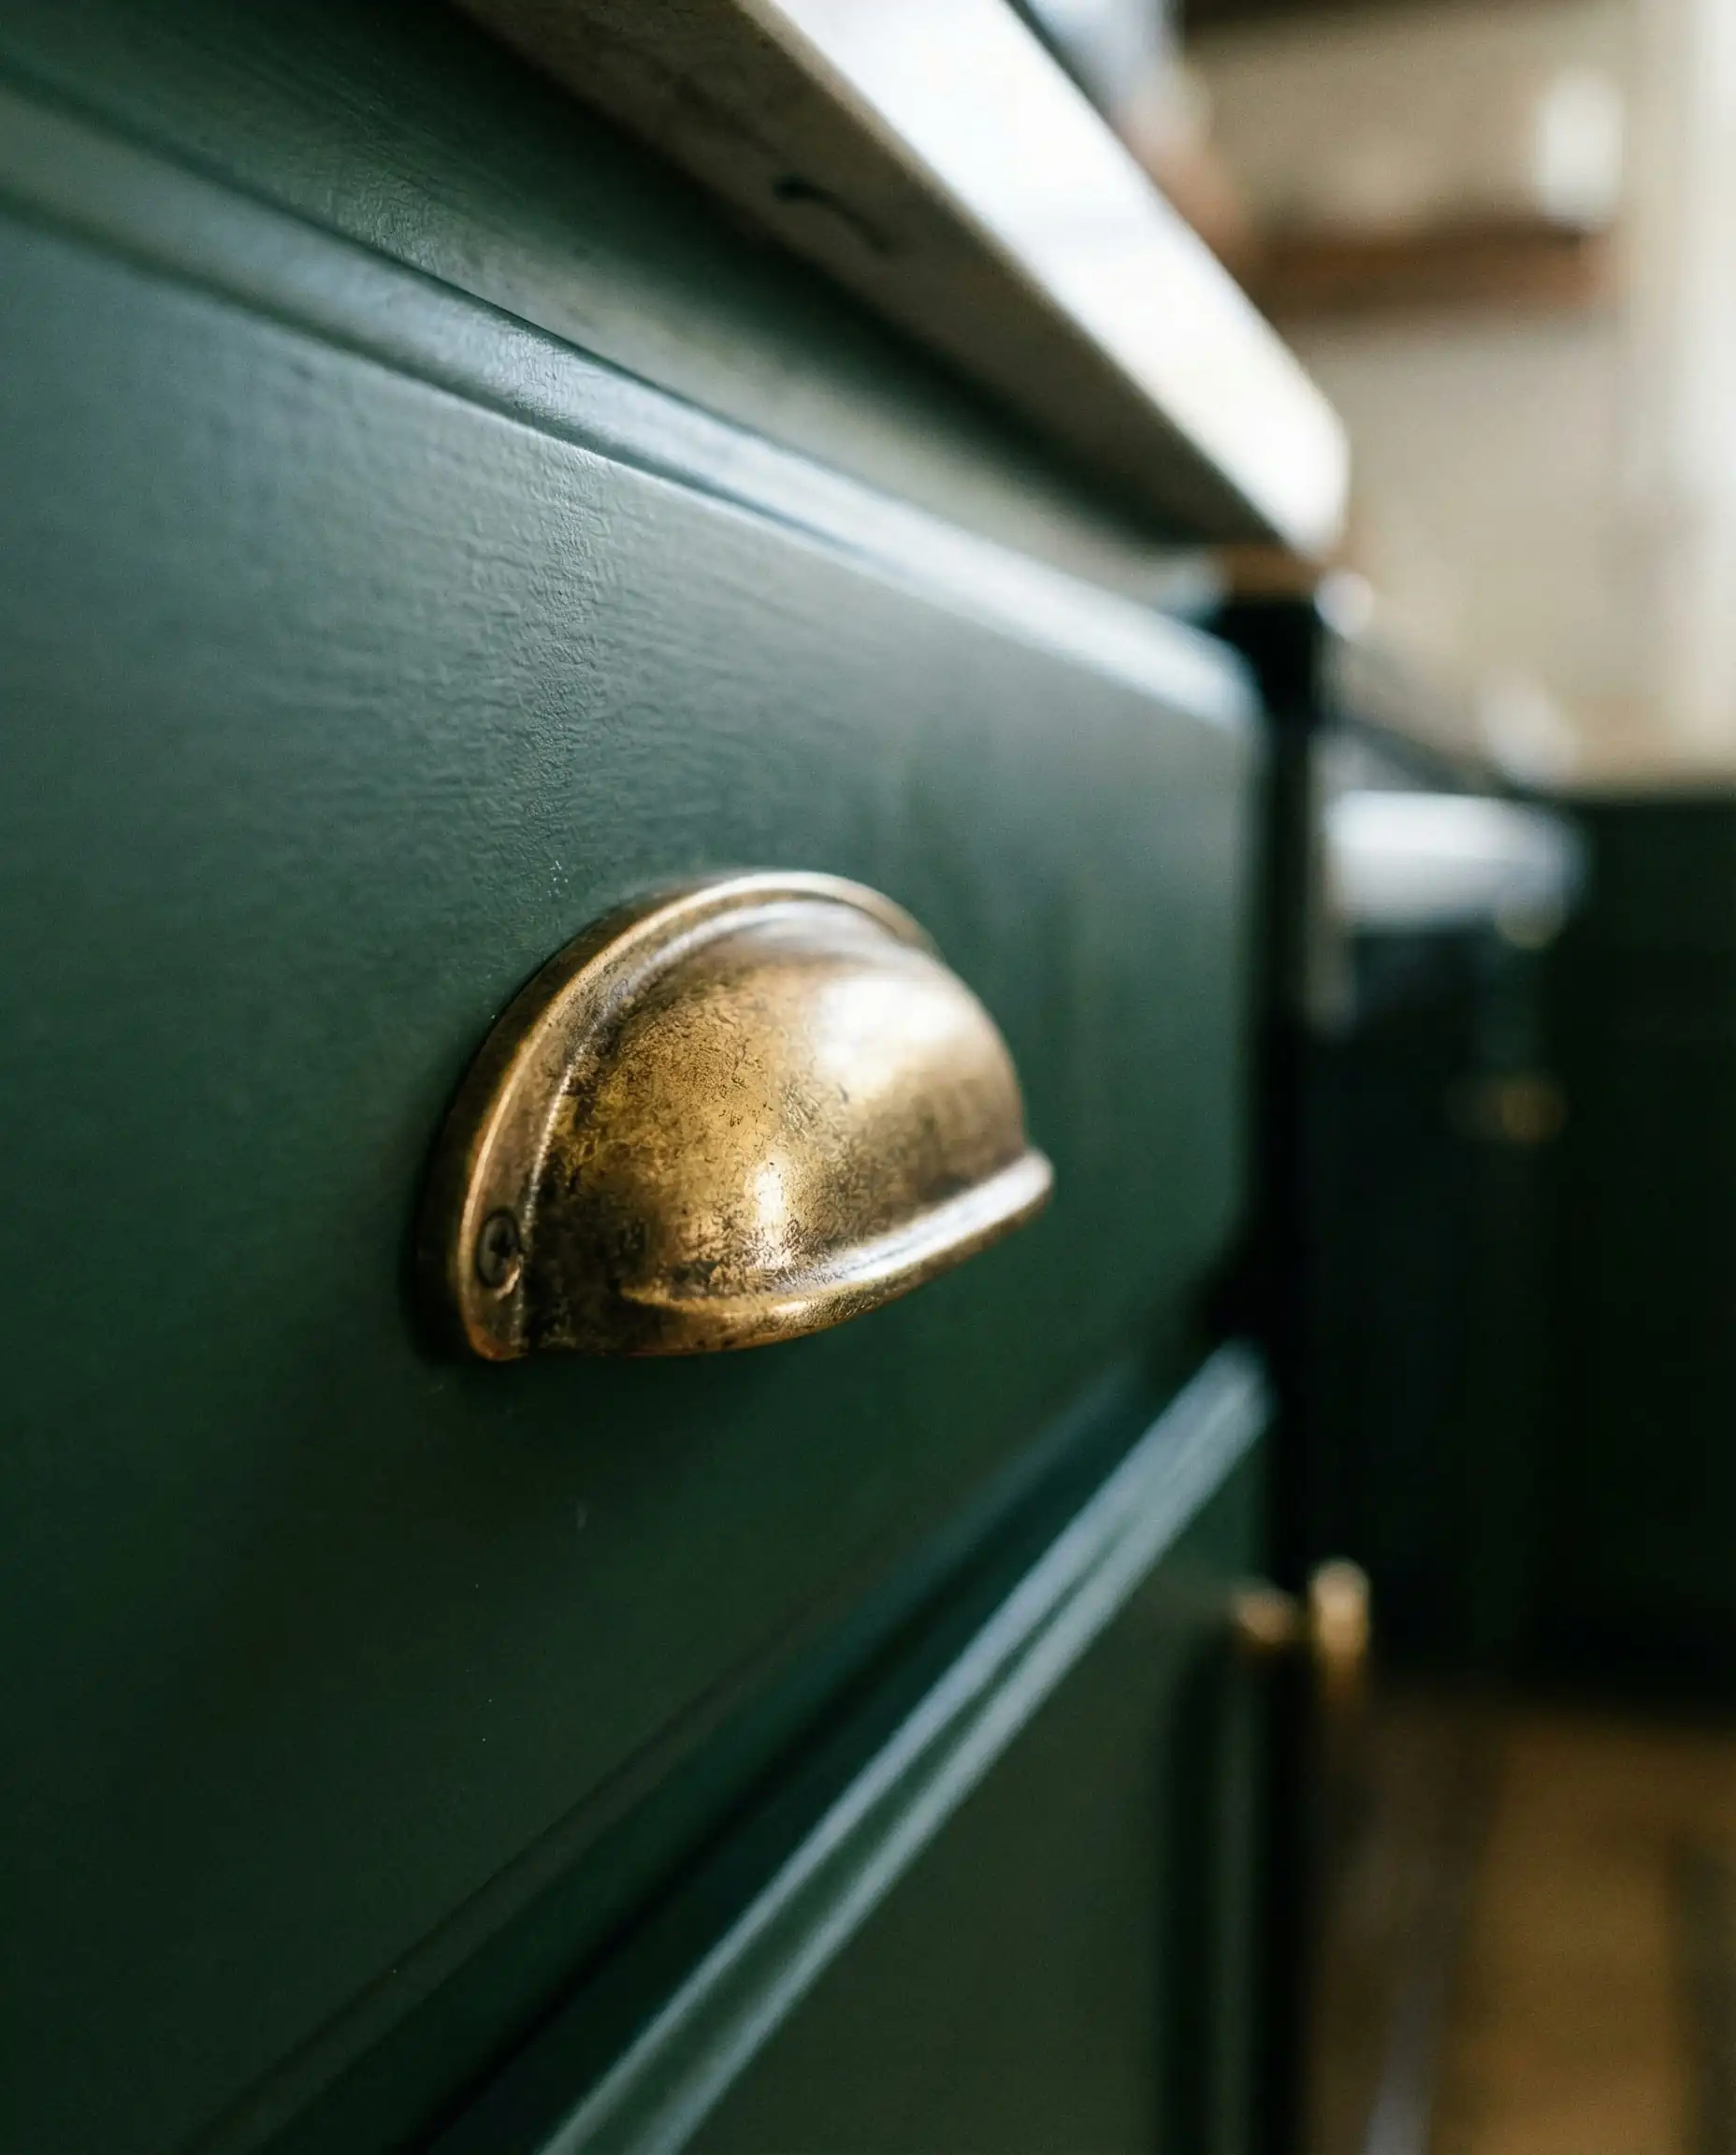
DIY Project: “Rub ‘n Buff” Hardware Makeover
Difficulty: Very Easy | Cost: $
Materials:
Instructions:
- Clean: Remove your hardware and scrub it thoroughly with soapy water to remove grease. Sand lightly if the surface is glossy.
- Apply: Squeeze a pea-sized amount of Rub ‘n Buff onto a cloth. Rub it onto the hardware. It covers incredible well!
- Buff: Let it dry for a minute, then buff it with a clean cloth to create a shine.
- Seal: Because cabinet handles are touched often, spray them with a clear coat sealer to prevent the gold from wearing off.
Trend Connection: Hardware is the jewelry of the room. Explore more styles in Kitchen Cabinet Hardware Trends.
Conclusion
2026 is inviting you to stop chasing “perfection” and start chasing “feeling.” Whether it’s the tactile roughness of a baking soda vase or the enveloping warmth of a color-drenched office, these trends are about creating a home that feels good to live in.
Pick one project from this list to start this weekend. A single textured vase or a new coat of paint on the ceiling can completely shift the energy of a room.
Ready to get started? We’d love to see your projects! Tag us on social media so we can share your 2026 DIY transformations.