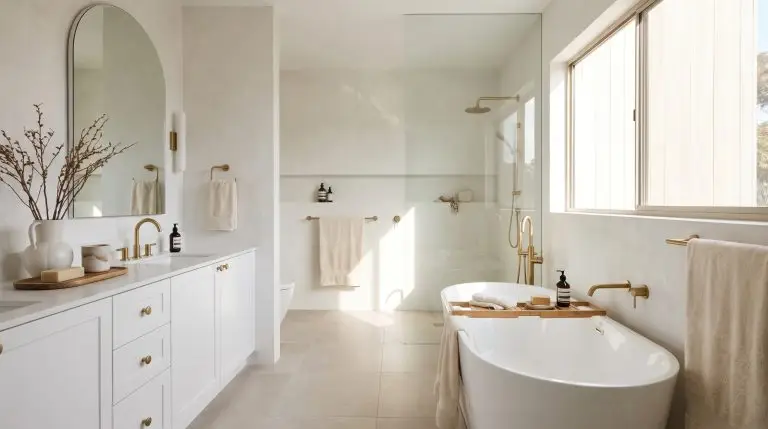
The desire for a white and gold bathroom is rooted in a craving for clean, enduring luxury. Yet, for many homeowners, executing this palette triggers an immediate fear of recreating a tacky, 1980s builder-grade nightmare. The difference between a dated space and a truly bespoke sanctuary comes down to one critical principle: textural restraint.
A modern white and gold bathroom is not a flat, sterile box decorated with shiny accessories. It is a highly deliberate study in material integrity. “White” should never be just a coat of standard drywall paint; it must be treated as a tactile surface, ranging from the chalky depth of Roman clay to the aggressive veining of Calacatta marble. Similarly, “gold” is not a singular, blinding color but a nuanced spectrum of finishes, moving from the muted warmth of champagne bronze to the raw, evolving beauty of unlacquered brass.
When you rely on the innate visual weight of authentic materials rather than flat colors, the white and gold palette transforms from a superficial trend into timeless architecture.
The Finish Guide: Selecting the Right Gold for a Wet Room
Selecting the correct metal finish is the most consequential decision in your bathroom design. High-moisture wet rooms demand a choice between sealed finishes, which remain statically perfect, and living finishes, which actively interact with water and air to develop a unique patina over time.
| Gold Finish Type | Maintenance Level | Patina Potential | Best Style Match |
|---|---|---|---|
| Unlacquered Brass | High (Requires periodic polishing if an even finish is desired) | Maximum (Darkens and spots naturally with moisture exposure) | Parisian Chic, Organic Modern |
| Champagne Bronze | Low (Wipe with a damp microfiber cloth) | None (Sealed clear coat prevents oxidation) | Transitional, Accessible Luxury |
| Polished Gold | Medium (Shows water spots and fingerprints easily) | None (PVD coating ensures color permanence) | Art Deco, High-Contrast Modern |
Vanity and Hardware Applications
The vanity serves as the architectural anchor of the bathroom, dictating the room’s initial impression. Because it grounds the space, cabinet hardware presents the most accessible, high-impact entry point for introducing gold tones against a white foundation.
1. Pair Knurled Brass Pulls with a Fluted White Oak Vanity
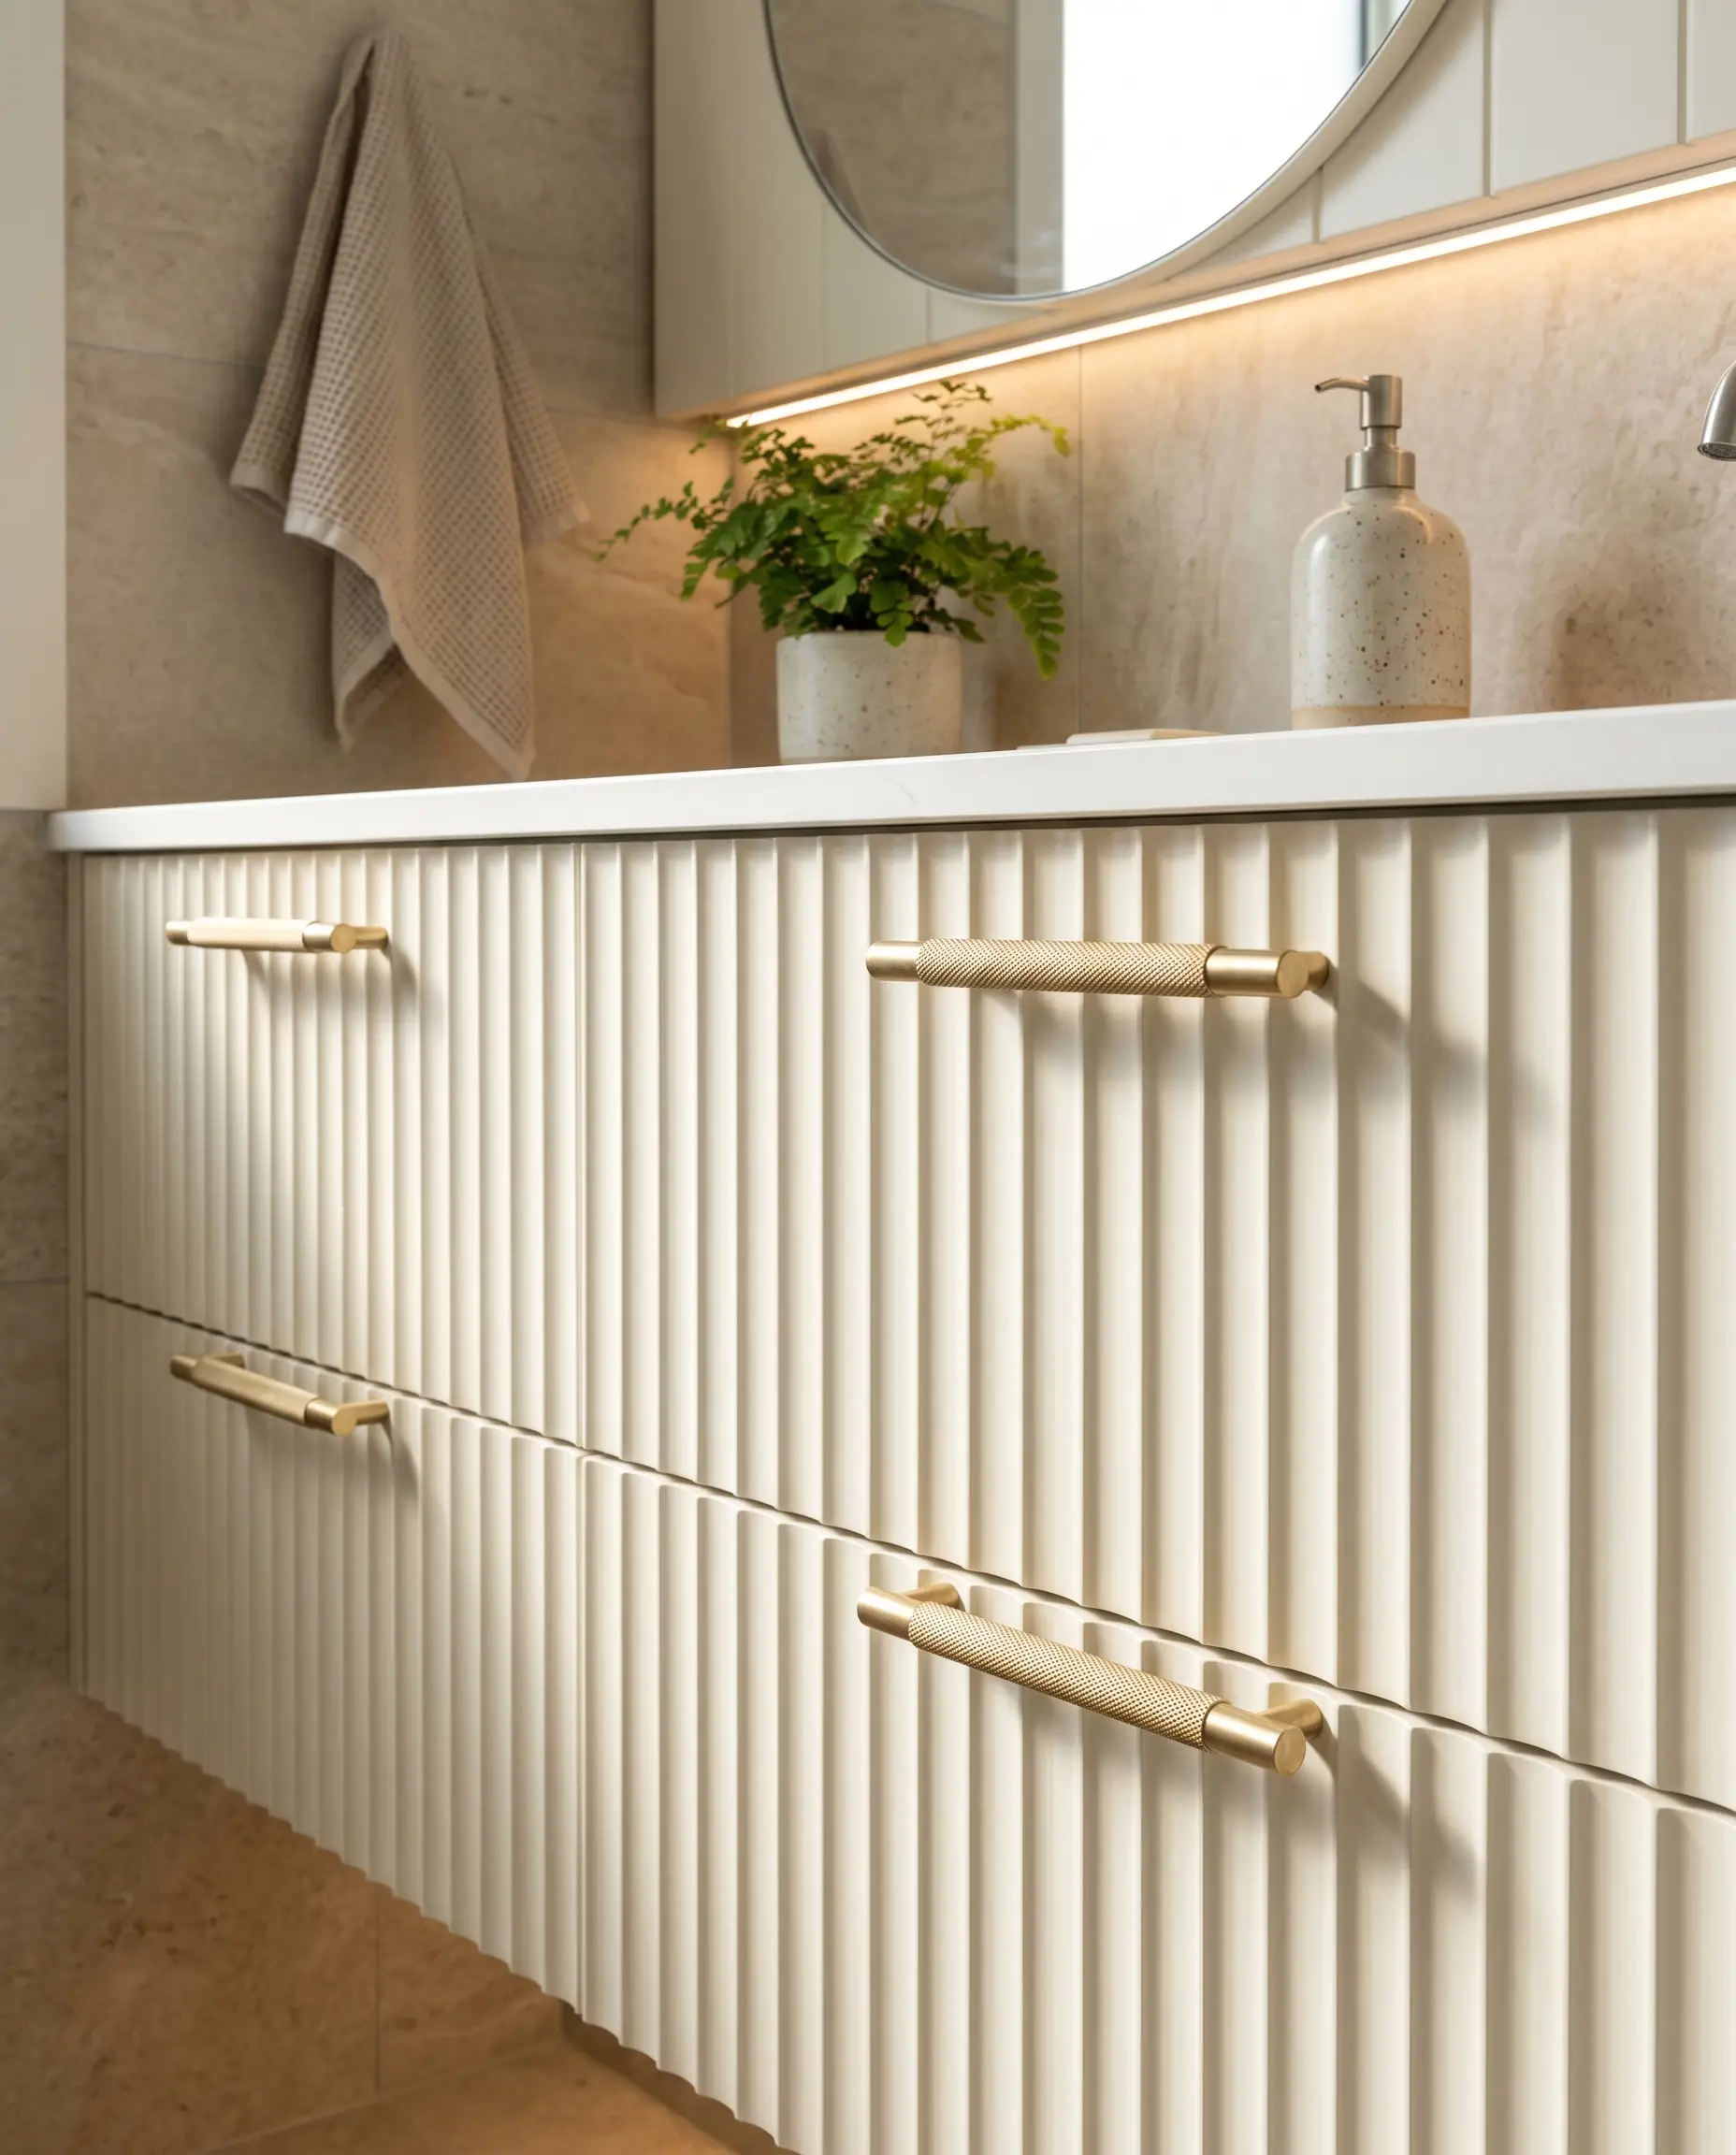
The heavy visual weight of a fluted wood profile requires hardware that can compete texturally. Knurled brass provides an aggressive, tactile grip that catches shadows, creating a striking contrast against the pale, rhythmic ridges of a painted white vanity.
- Vibe: Organic Modern
- Key Materials: Solid brass bar pulls, fluted wood veneer
- Paint Recommendation: Benjamin Moore Chantilly Lace (for painted fluting)
Look for solid brass core hardware rather than zinc-alloy for a heavier, more luxurious feel that anchors the cabinetry.
Sourcing Secret
2. Mount Champagne Bronze Faucets on a Thick-Veined Calacatta Countertop
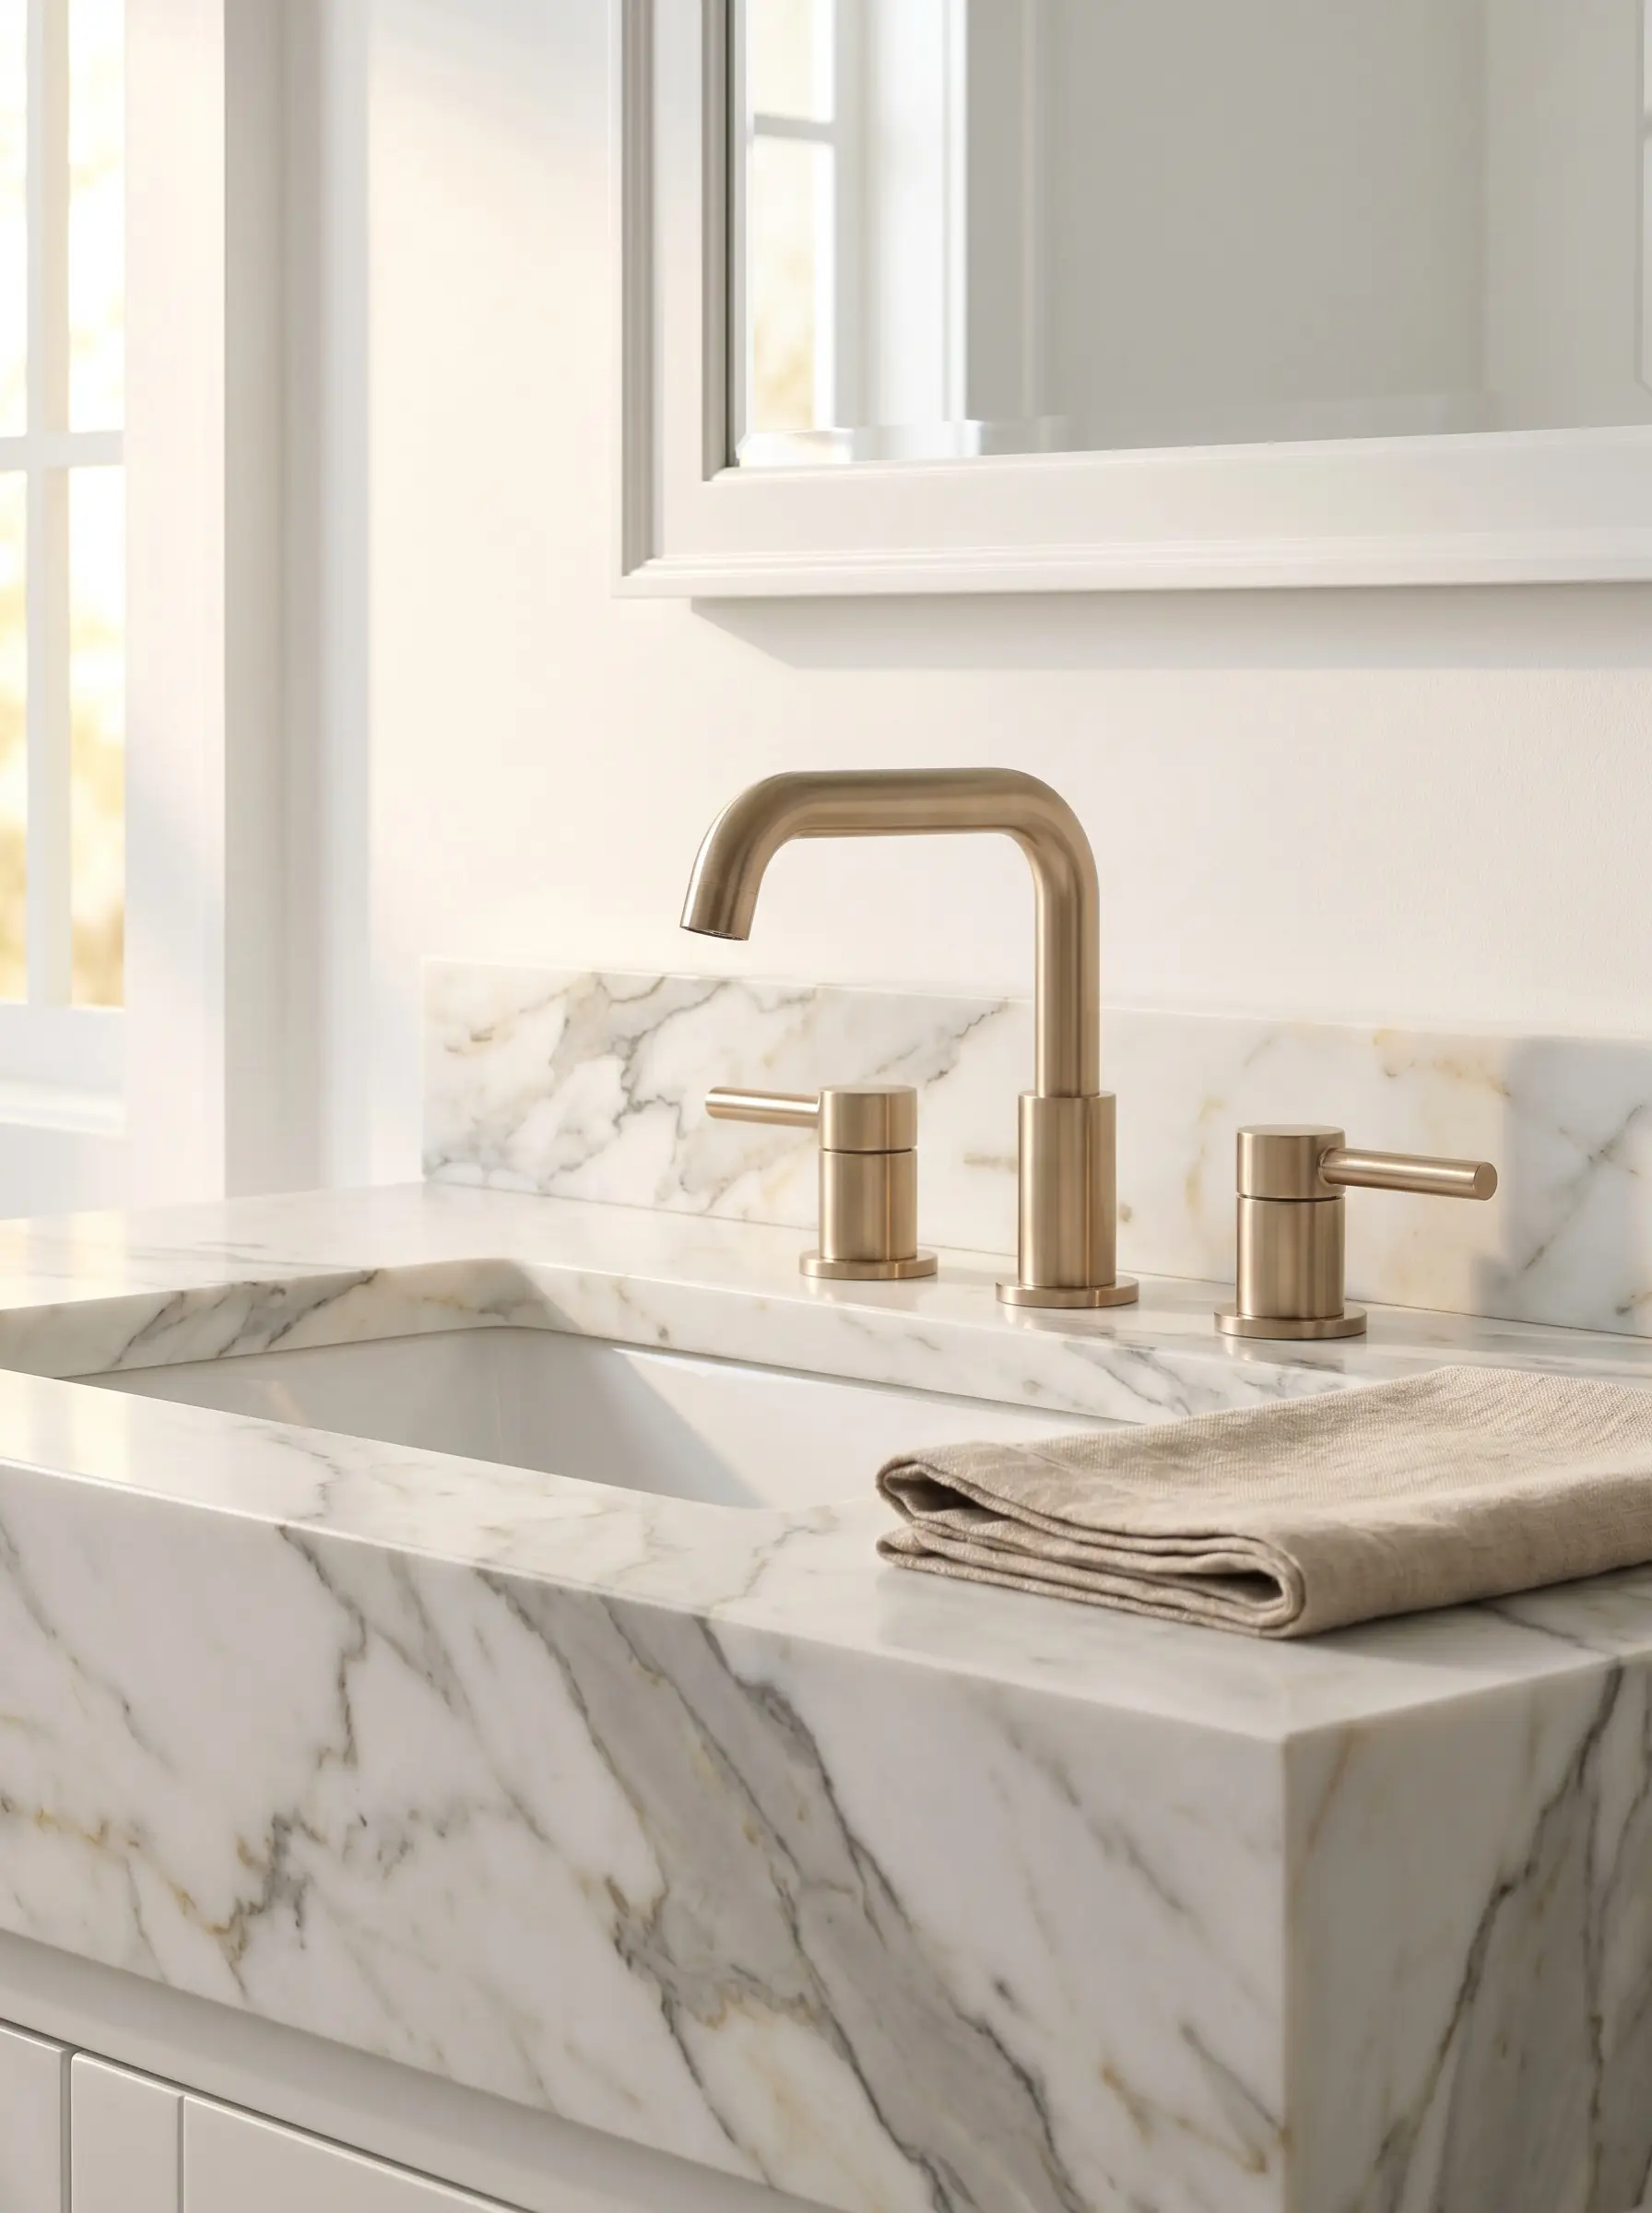
The muted, brownish undertones of champagne bronze perfectly neutralize the stark, sometimes icy background of white marble. A thick-mitered stone edge demands a faucet with substantial visual weight to maintain spatial balance.
- Vibe: Transitional Luxury
- Key Materials: 2-inch mitered Calacatta marble, champagne bronze widespread faucet
- Styling Pro-Tip: Keep the widespread handles at least 8 inches apart to allow the marble veining to breathe.
Specify a PVD (Physical Vapor Deposition) finish for champagne bronze to ensure absolute resistance to scratching against the hard stone surface.
Sourcing Secret
3. Contrast High-Gloss White Lacquer Cabinets with Matte Brushed Brass
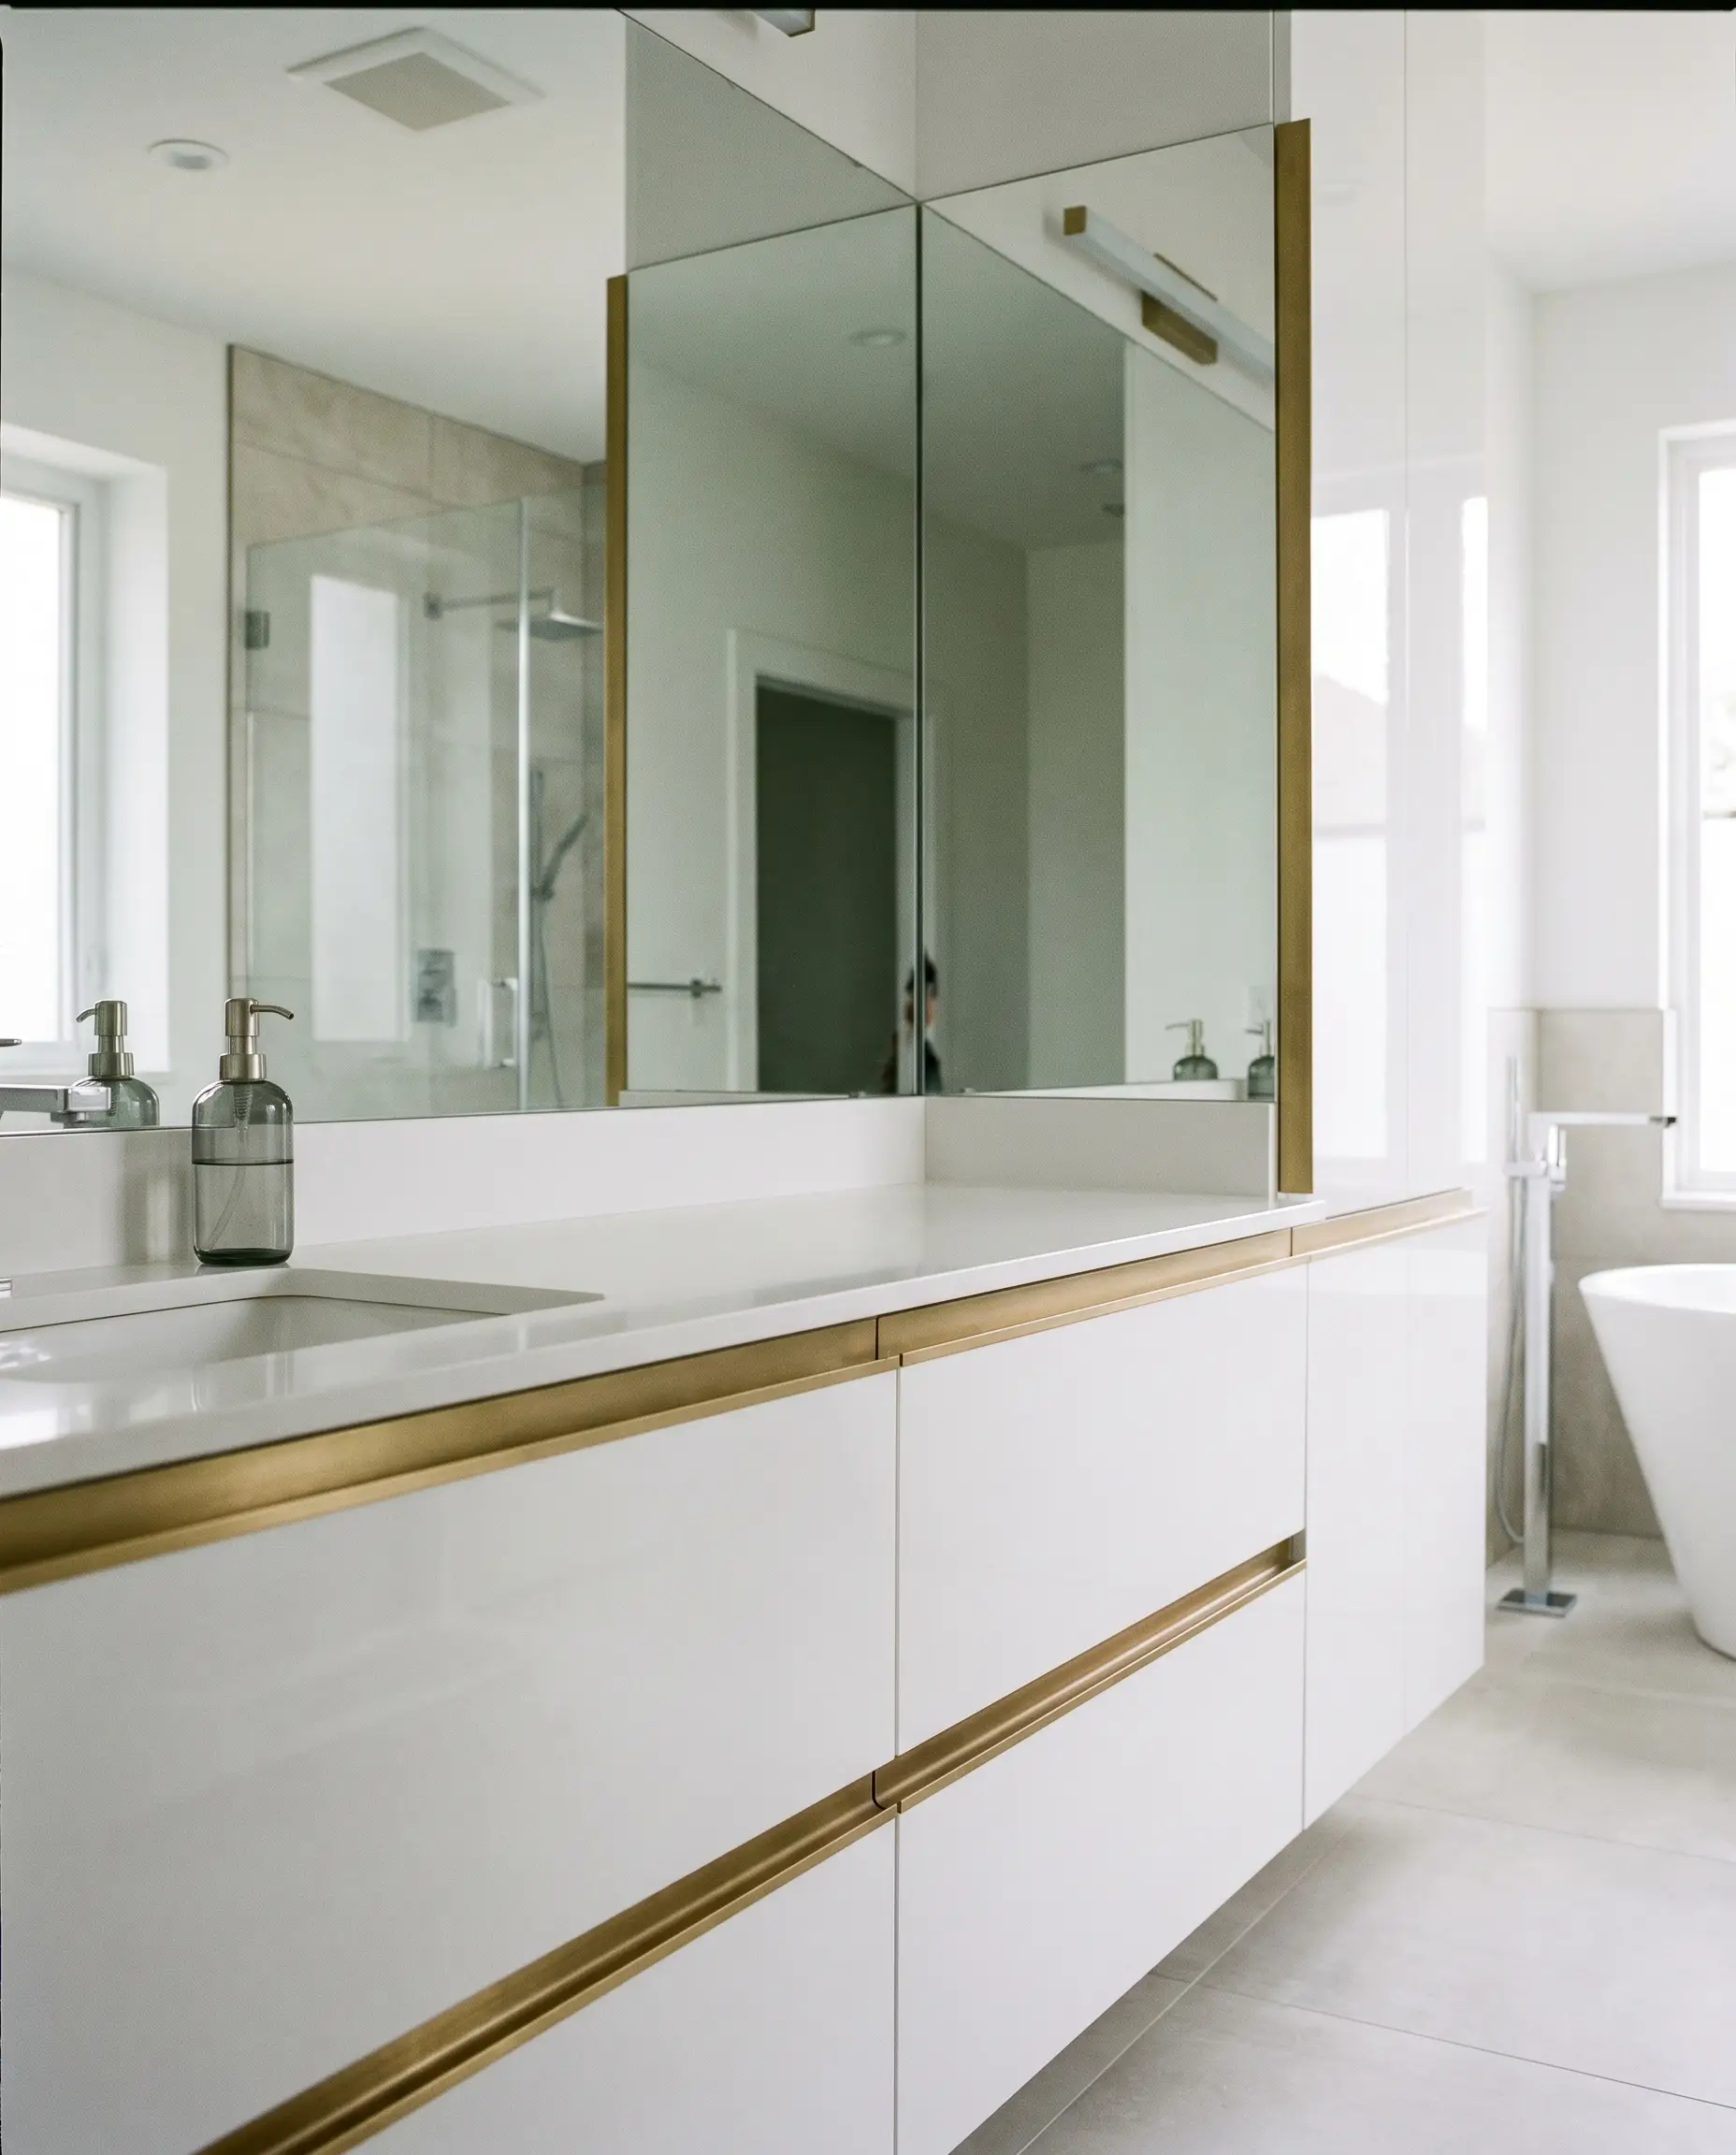
Executing a high-gloss vanity requires strict adherence to the rule of opposing sheen levels. To prevent the reflective lacquer from looking cheap, pair it strictly with a flat, brushed brass that absorbs light rather than bouncing it.
- Vibe: Ultra-Modern
- Key Materials: High-gloss white polyurethane cabinetry, brushed brass edge pulls
- Styling Pro-Tip: Use continuous finger-pull hardware to maintain an unbroken, linear silhouette.
Source edge pulls that mount from behind the drawer face to avoid drilling through the delicate high-gloss lacquer finish.
Sourcing Secret
4. Float a Minimalist White Resin Sink with Exposed Brass Plumbing
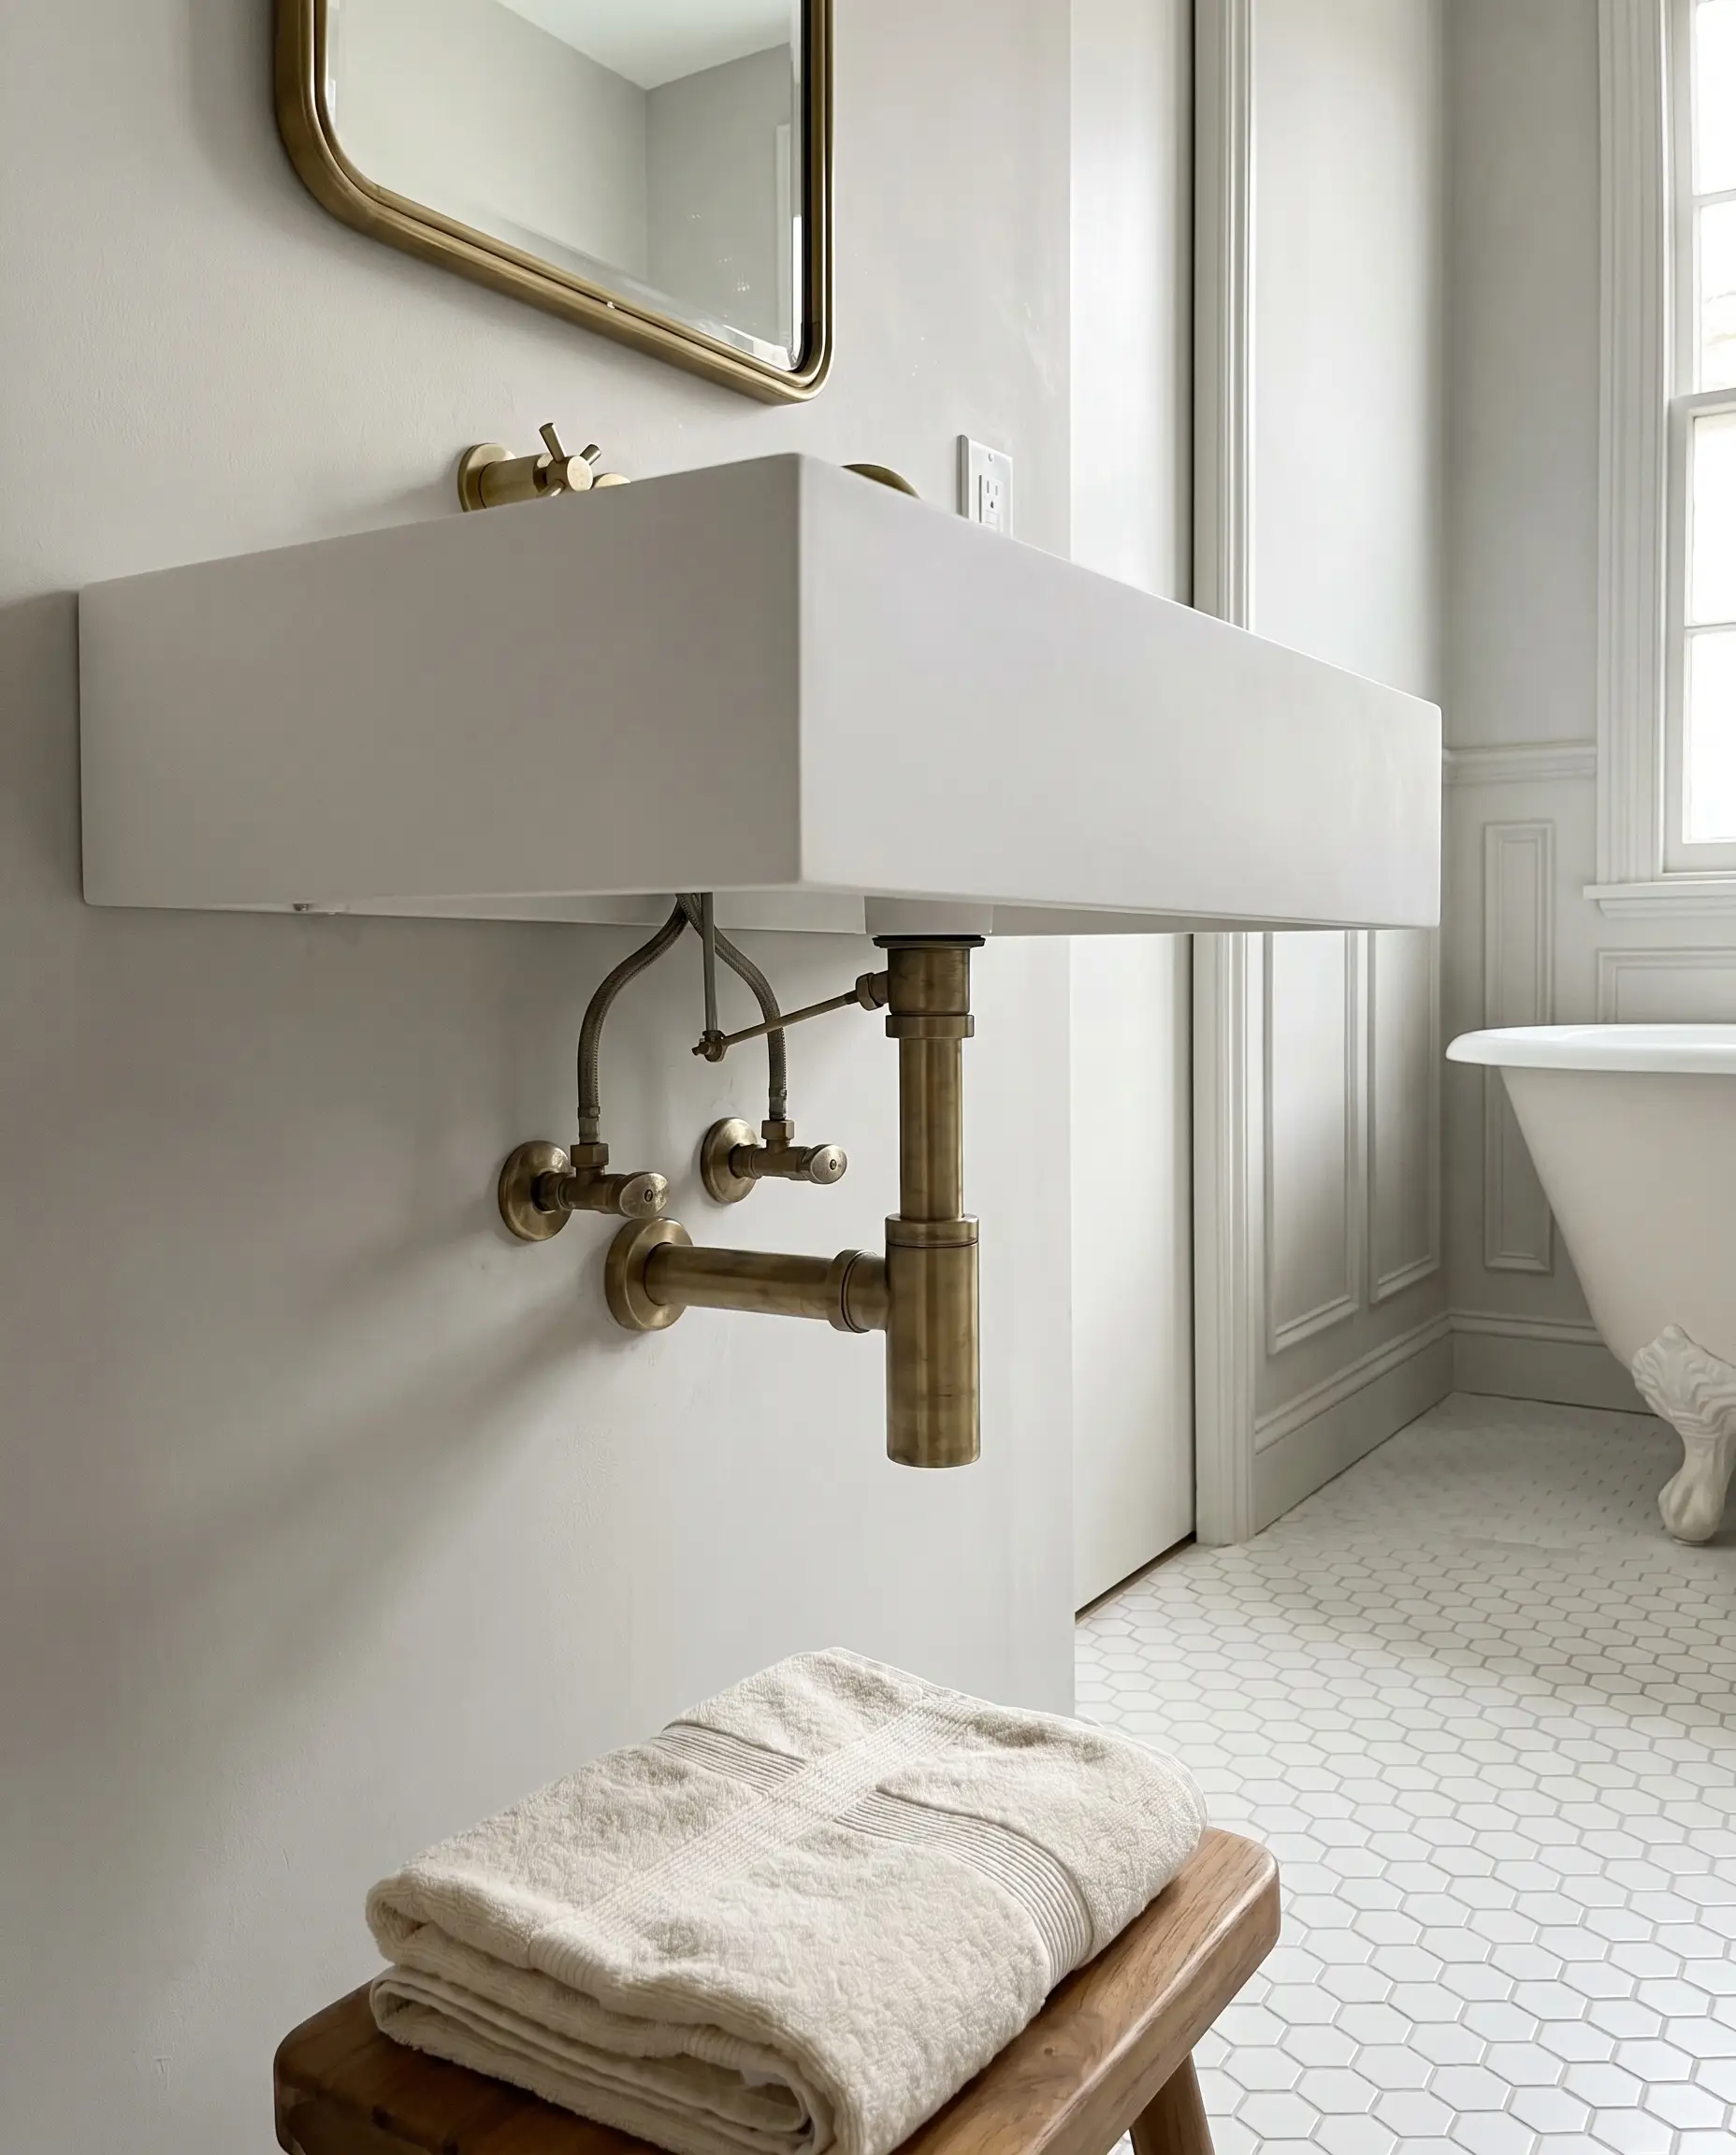
A wall-mounted, matte white resin trough sink strips the bathroom down to its architectural bones. Leaving the raw brass P-trap and supply lines fully exposed turns utilitarian plumbing into an intentional, industrial-chic focal point.
- Vibe: Parisian Chic
- Key Materials: Solid surface white resin, raw brass bottle trap
- Styling Pro-Tip: Ensure the wall behind the sink is perfectly plumb, as exposed fixtures offer zero tolerance for uneven surfaces.
Order the P-trap, supply lines, and angle stops from the exact same manufacturer to guarantee a flawless finish match below the sink.
Sourcing Secret
5. Frame a Classic White Shaker Vanity with Oversized Brass Cup Pulls
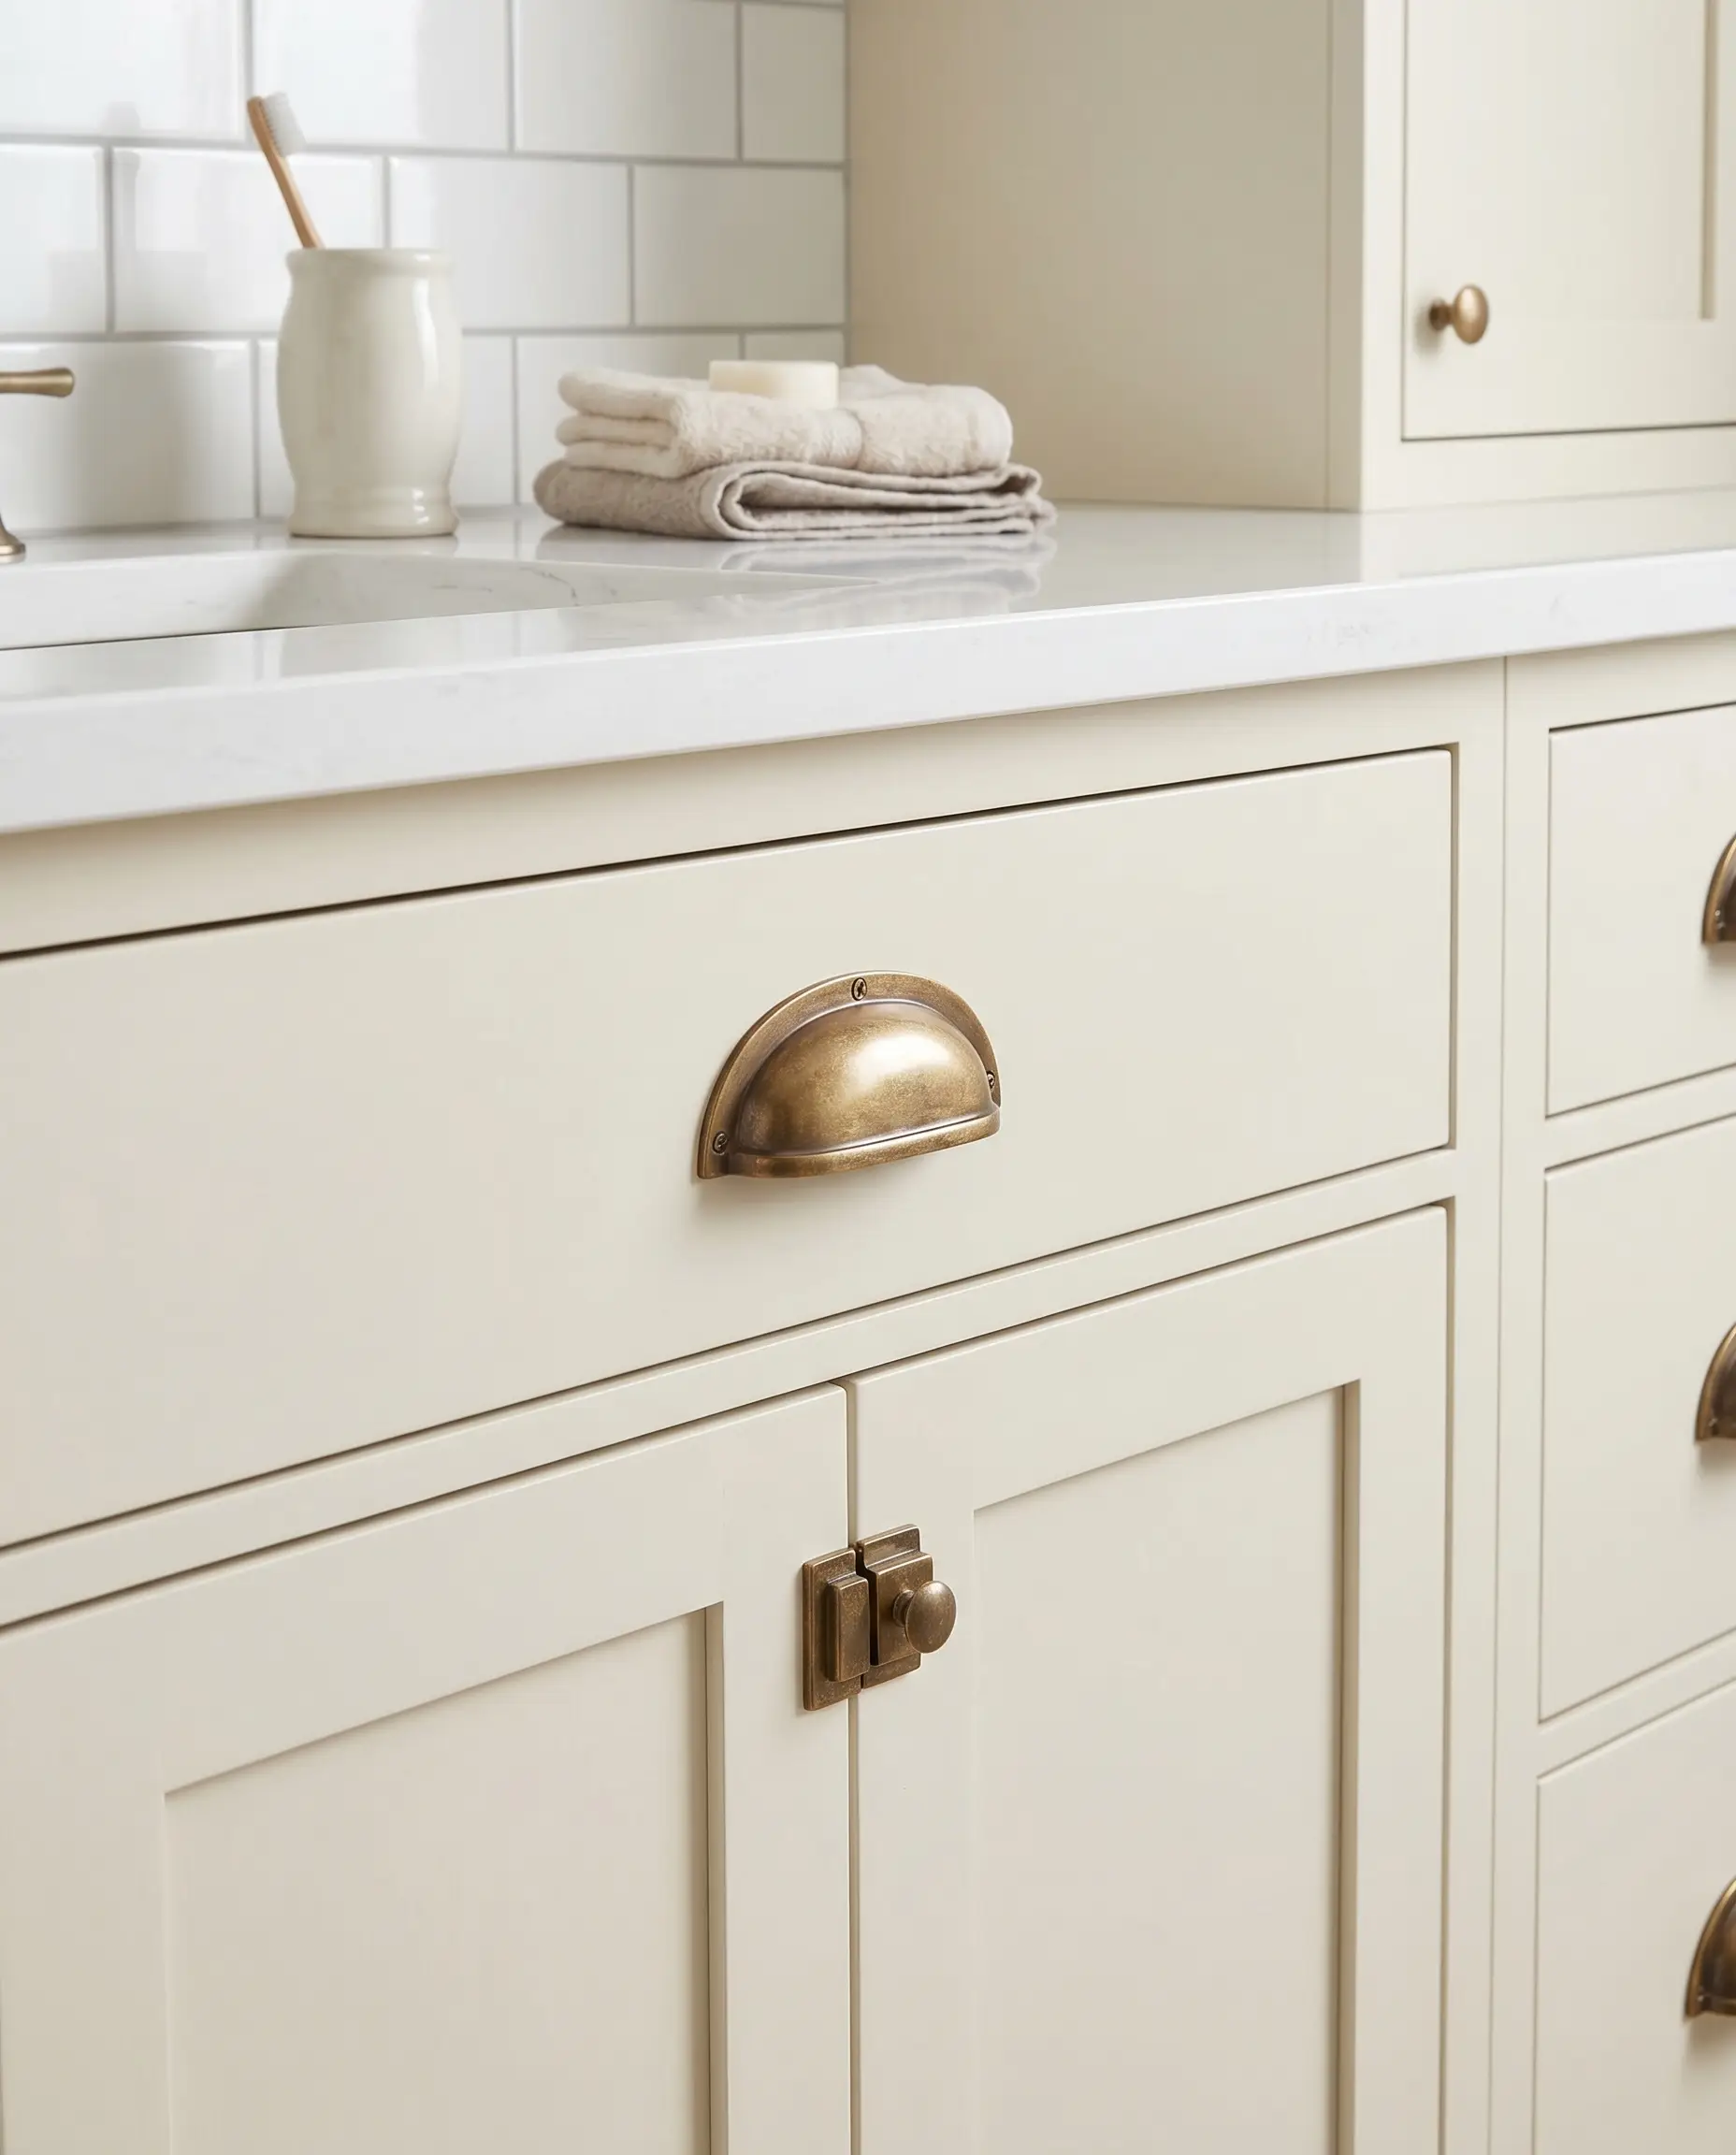
The traditional geometry of a white Shaker door benefits from the soft, curved lines of half-moon cup pulls. Upscaling the hardware size modernizes the classic profile, making the accessible luxury aesthetic feel heavily customized.
- Vibe: Tailored Traditional
- Key Materials: 5-inch brass cup pulls, 5-piece Shaker doors
- Paint Recommendation: Sherwin-Williams Alabaster
Purchase unlacquered brass cup pulls and allow the natural oils from your hands to polish the grip area while the edges darken with patina.
Sourcing Secret
Wall Treatments and Tile Pairings
Moving to the largest surface area in the room, the treatment of your walls dictates the success of the entire palette. Flat, untextured white walls will render gold finishes harsh and clinical; applying a tactile surface is mandatory to soften the transition between light and metal.
6. Install Handmade White Zellige Tiles with Unlacquered Brass Fixtures
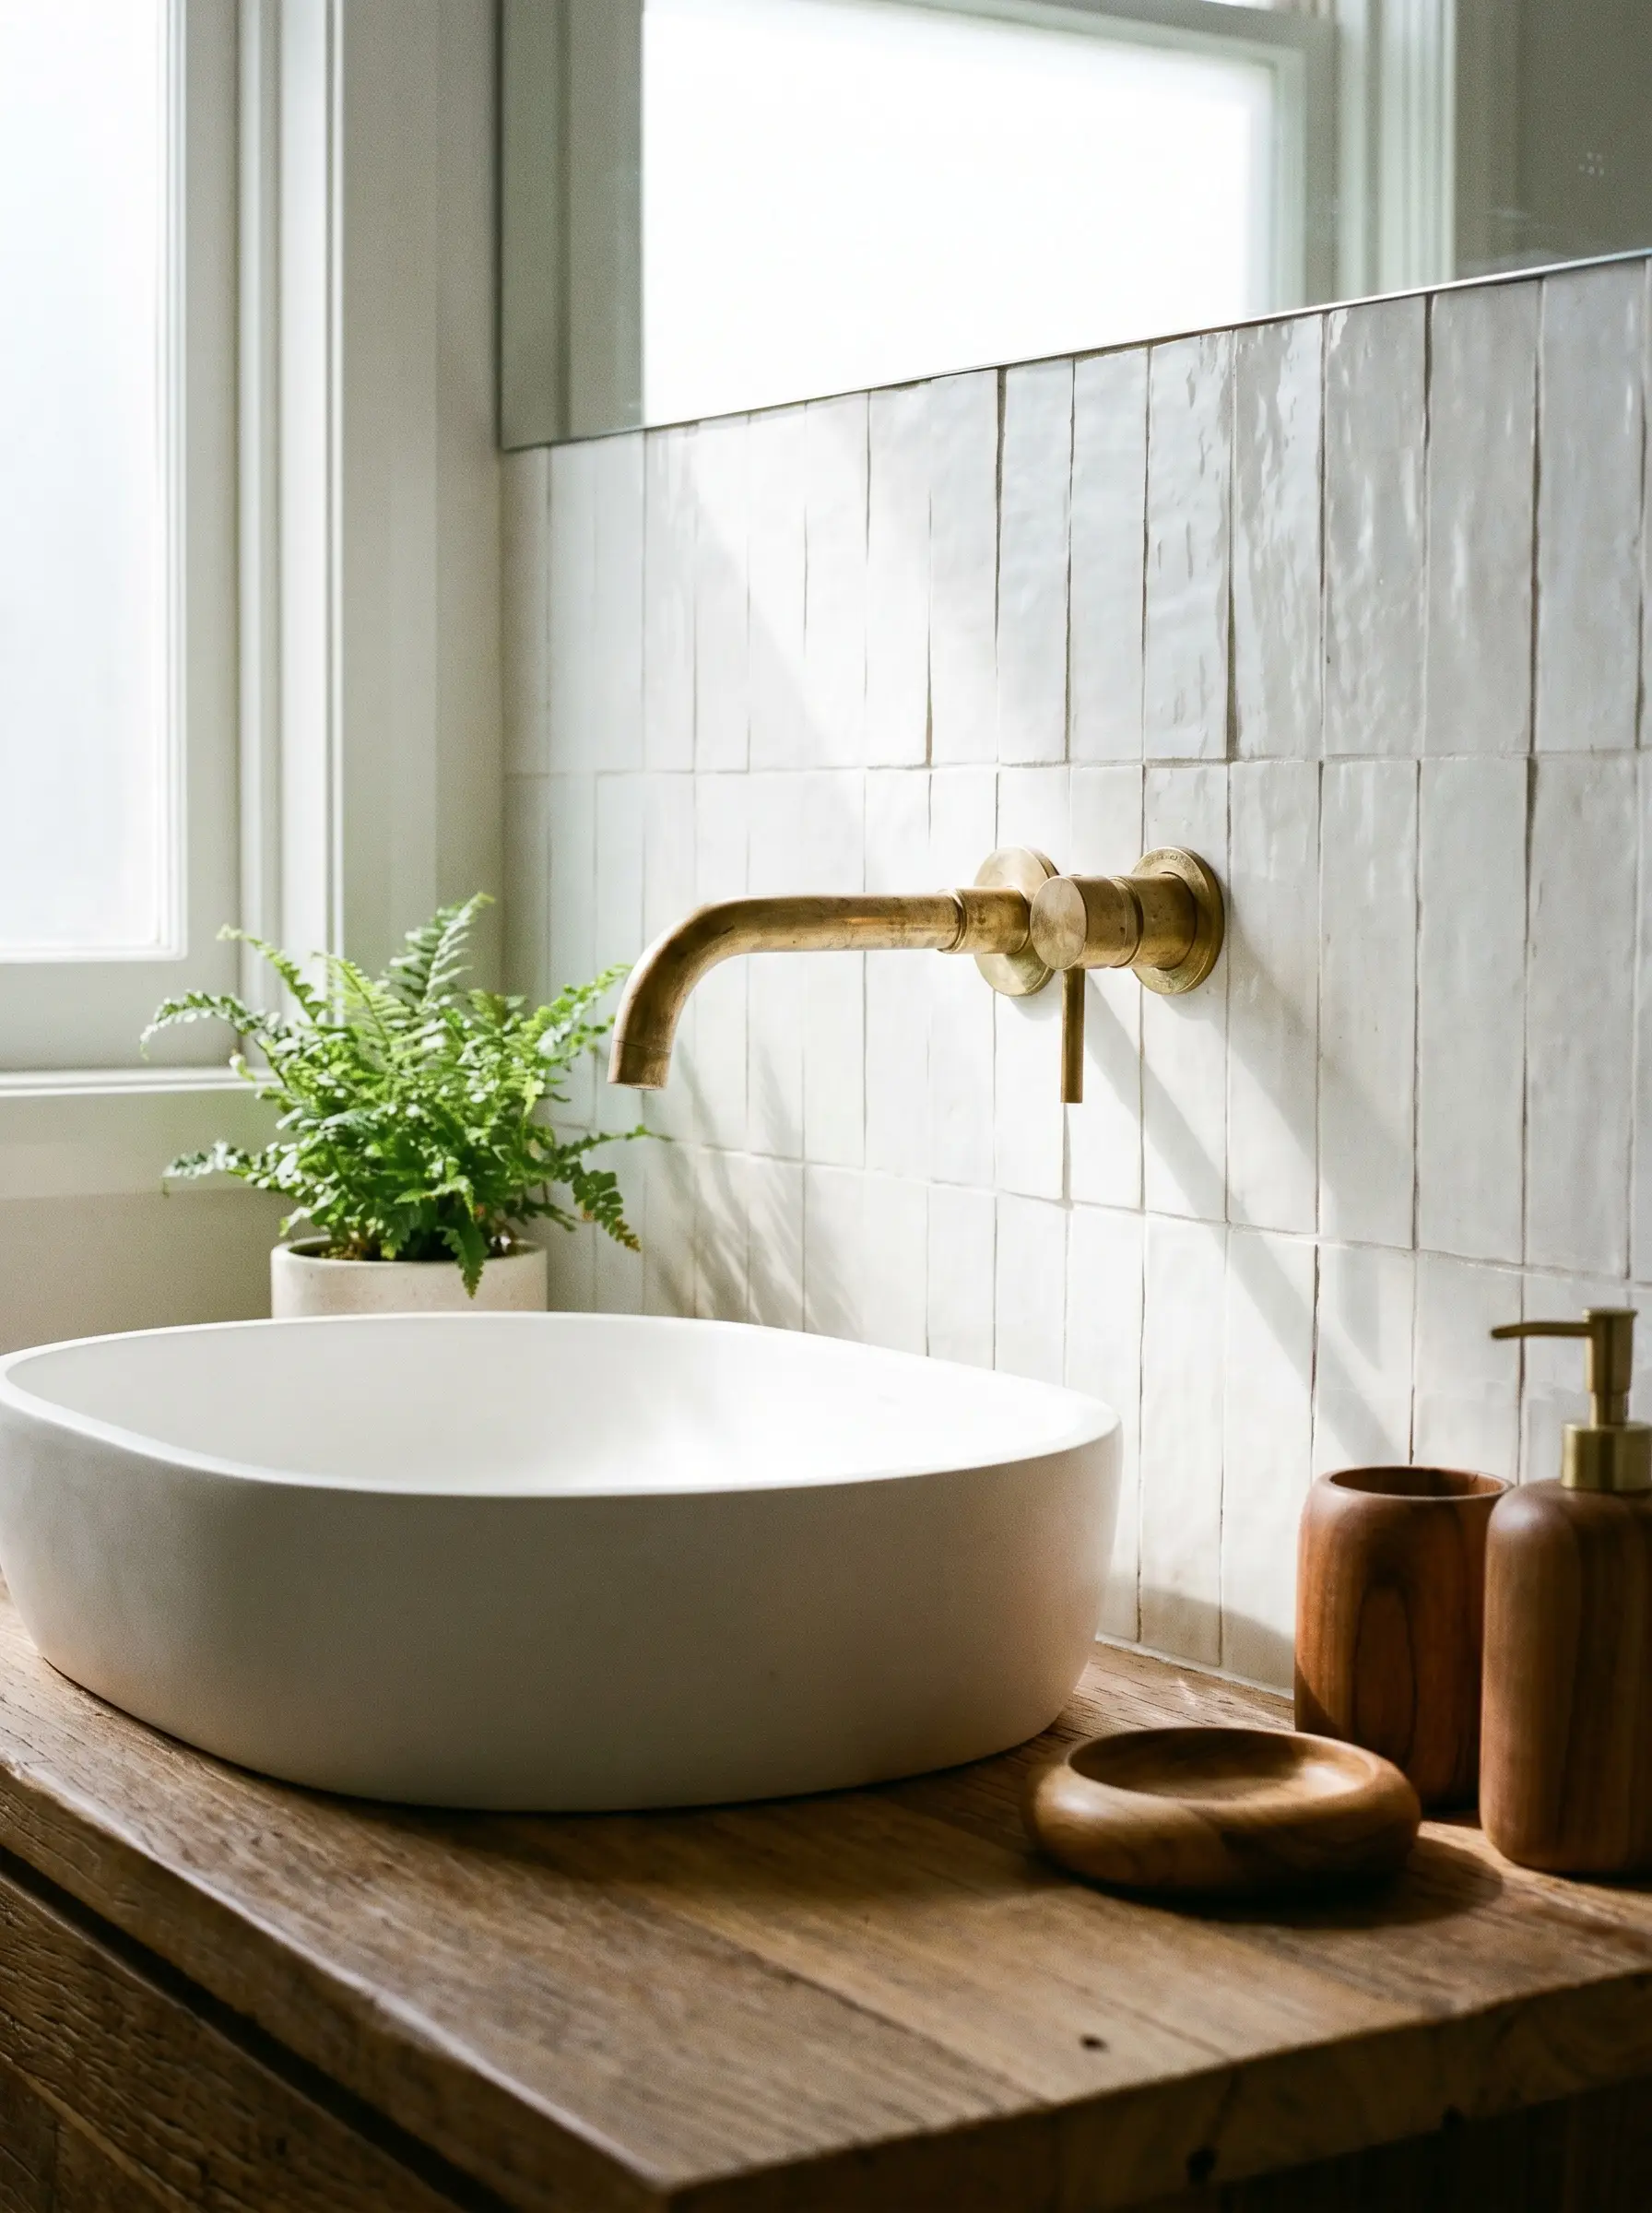
The undulating, imperfect glaze of handmade Moroccan zellige tile catches ambient light, bouncing it erratically across the room. This organic reflection brilliantly illuminates the raw, evolving surface of unlacquered brass, making the metal appear luminous.
- Vibe: Organic Modern
- Key Materials: 4×4 White Zellige tile, unlacquered brass wall-mount faucet
- Styling Pro-Tip: Stack the tiles in a straight vertical bond rather than a staggered brick pattern for a more contemporary edge.
7. Run White Carrara Marble Slabs Continuously Behind a Brass Freestanding Tub
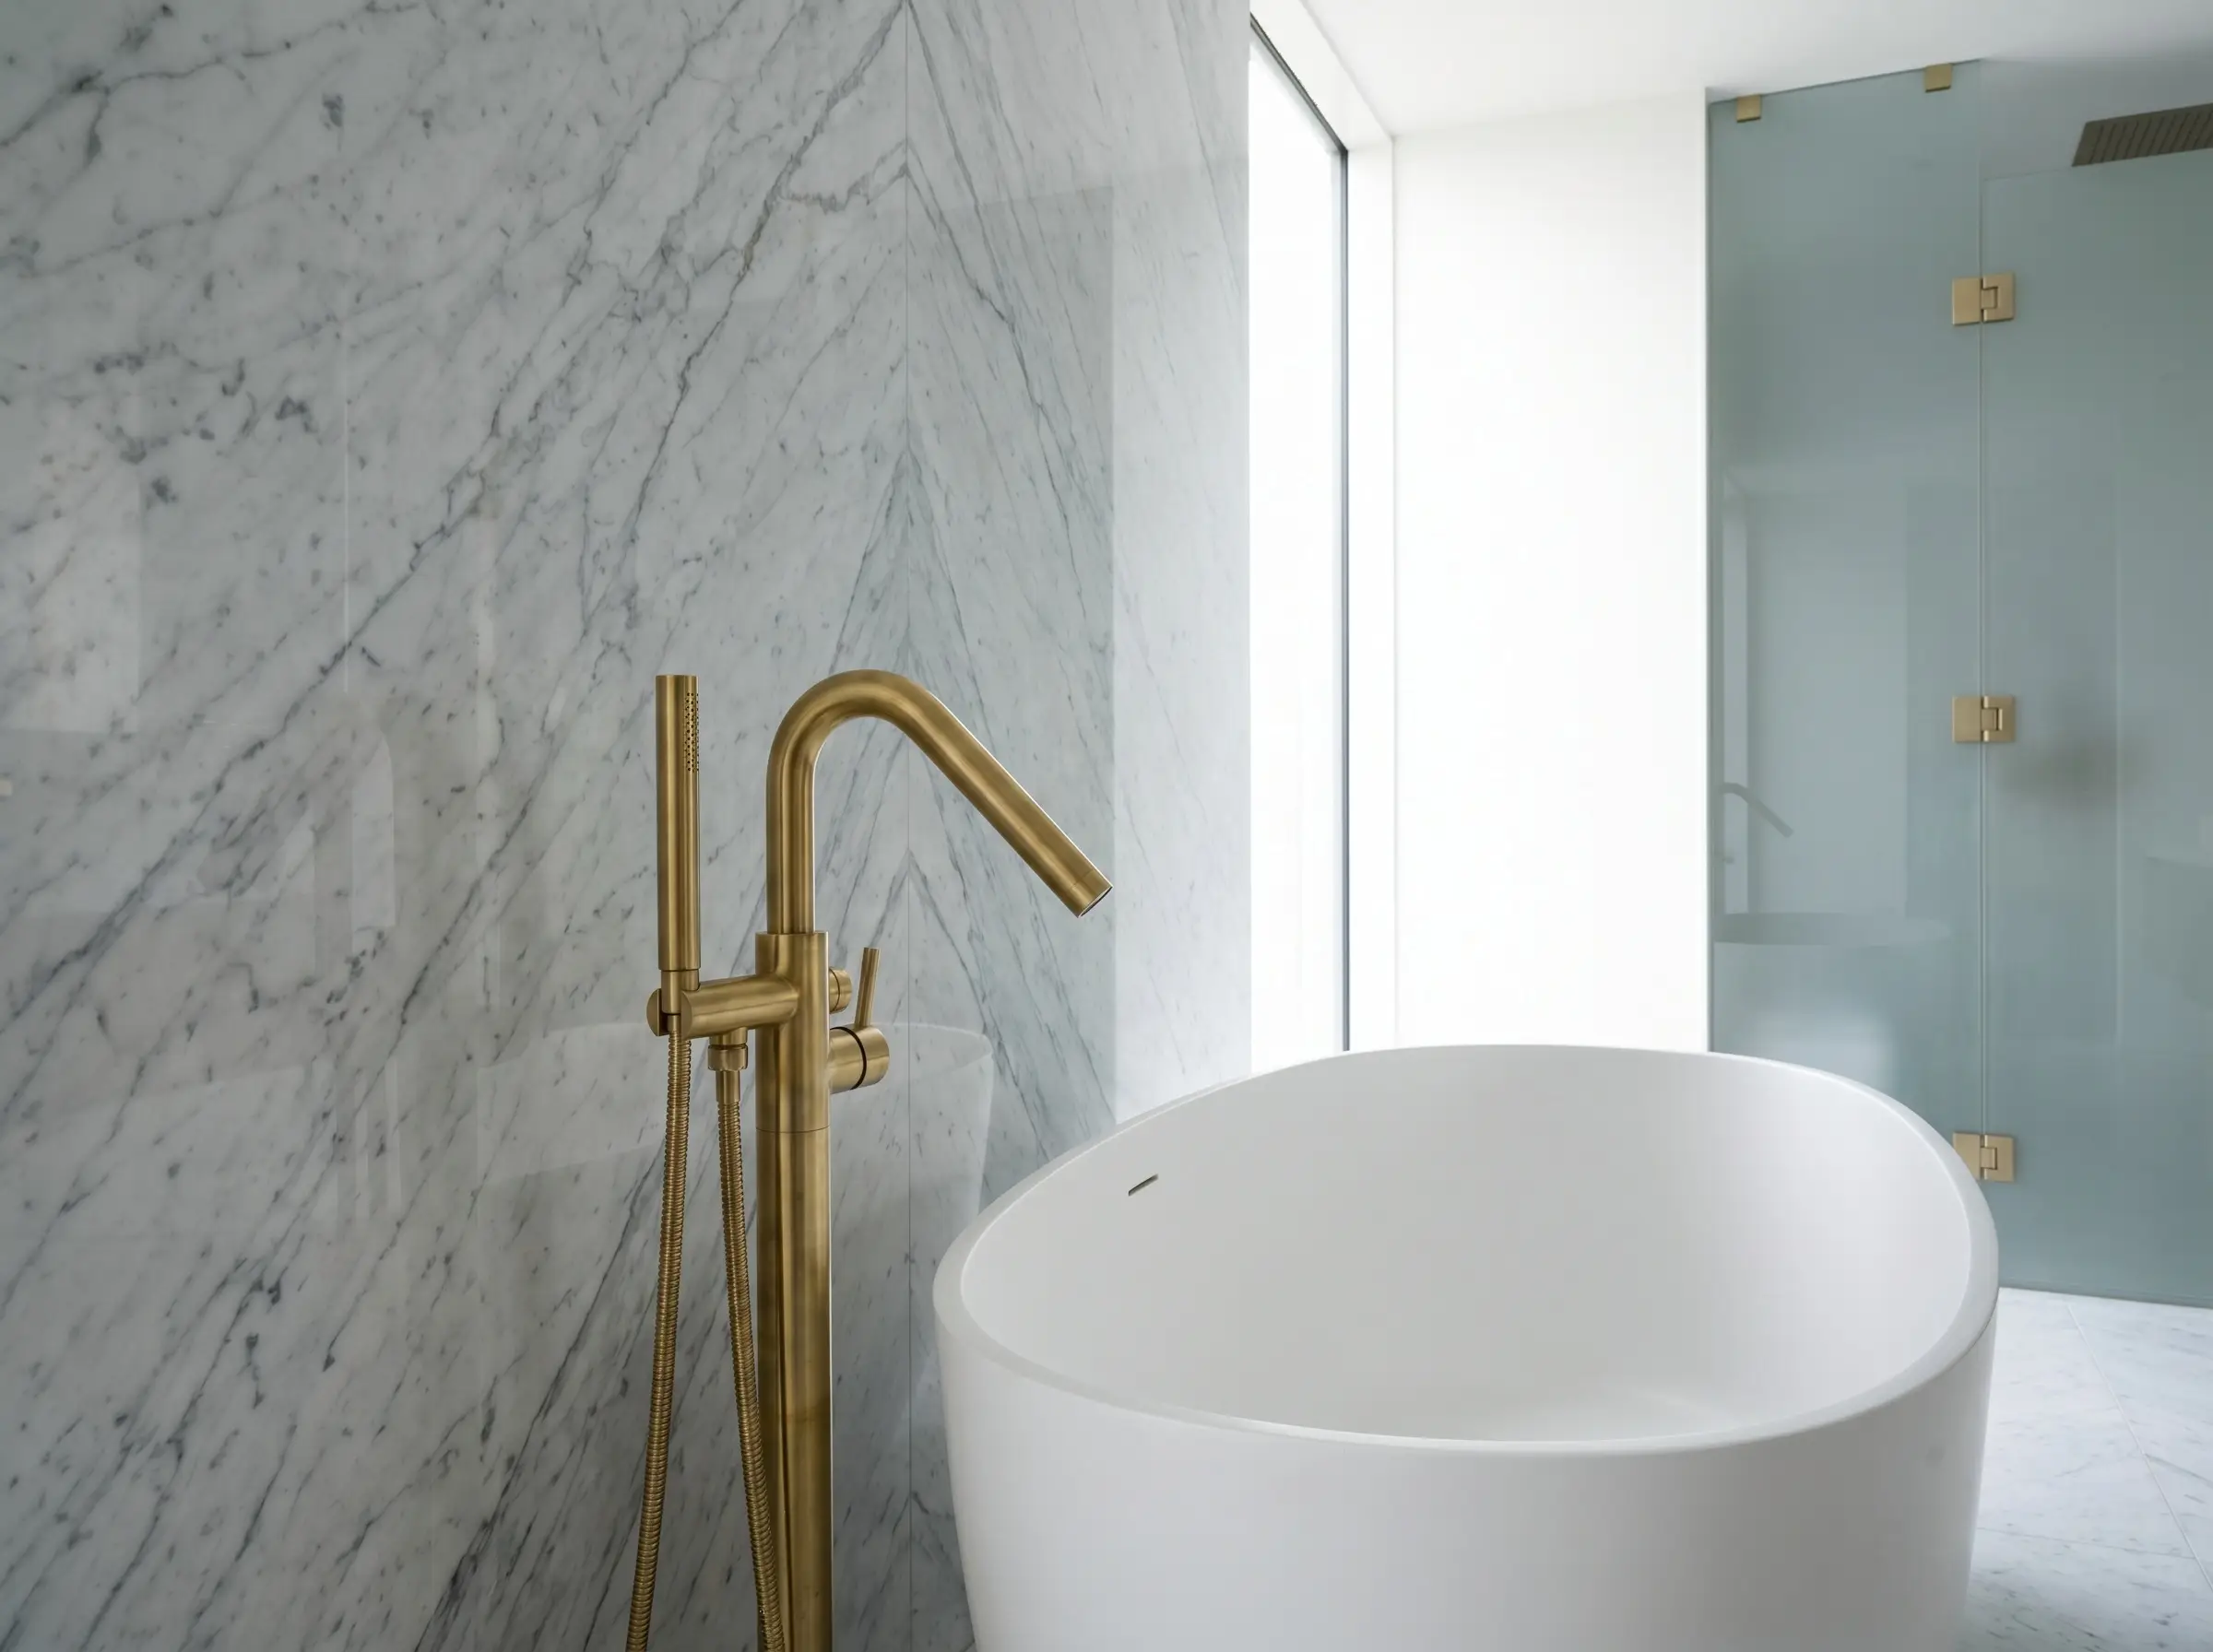
Wrapping a wet wall in continuous, full-height Carrara marble slabs creates a seamless, monolithic backdrop. The cool, grey veining provides the perfect restrained canvas for a warm, sculptural brass tub filler to stand out as a piece of functional art.
- Vibe: High-End Bespoke
- Key Materials: Bookmatched Carrara marble slabs, floor-mounted brass tub filler
- Styling Pro-Tip: Align the heaviest concentration of the marble’s veining off-center to draw the eye toward the hardware.
8. Soften the Space with White Roman Clay Walls and Warm Gold Accents
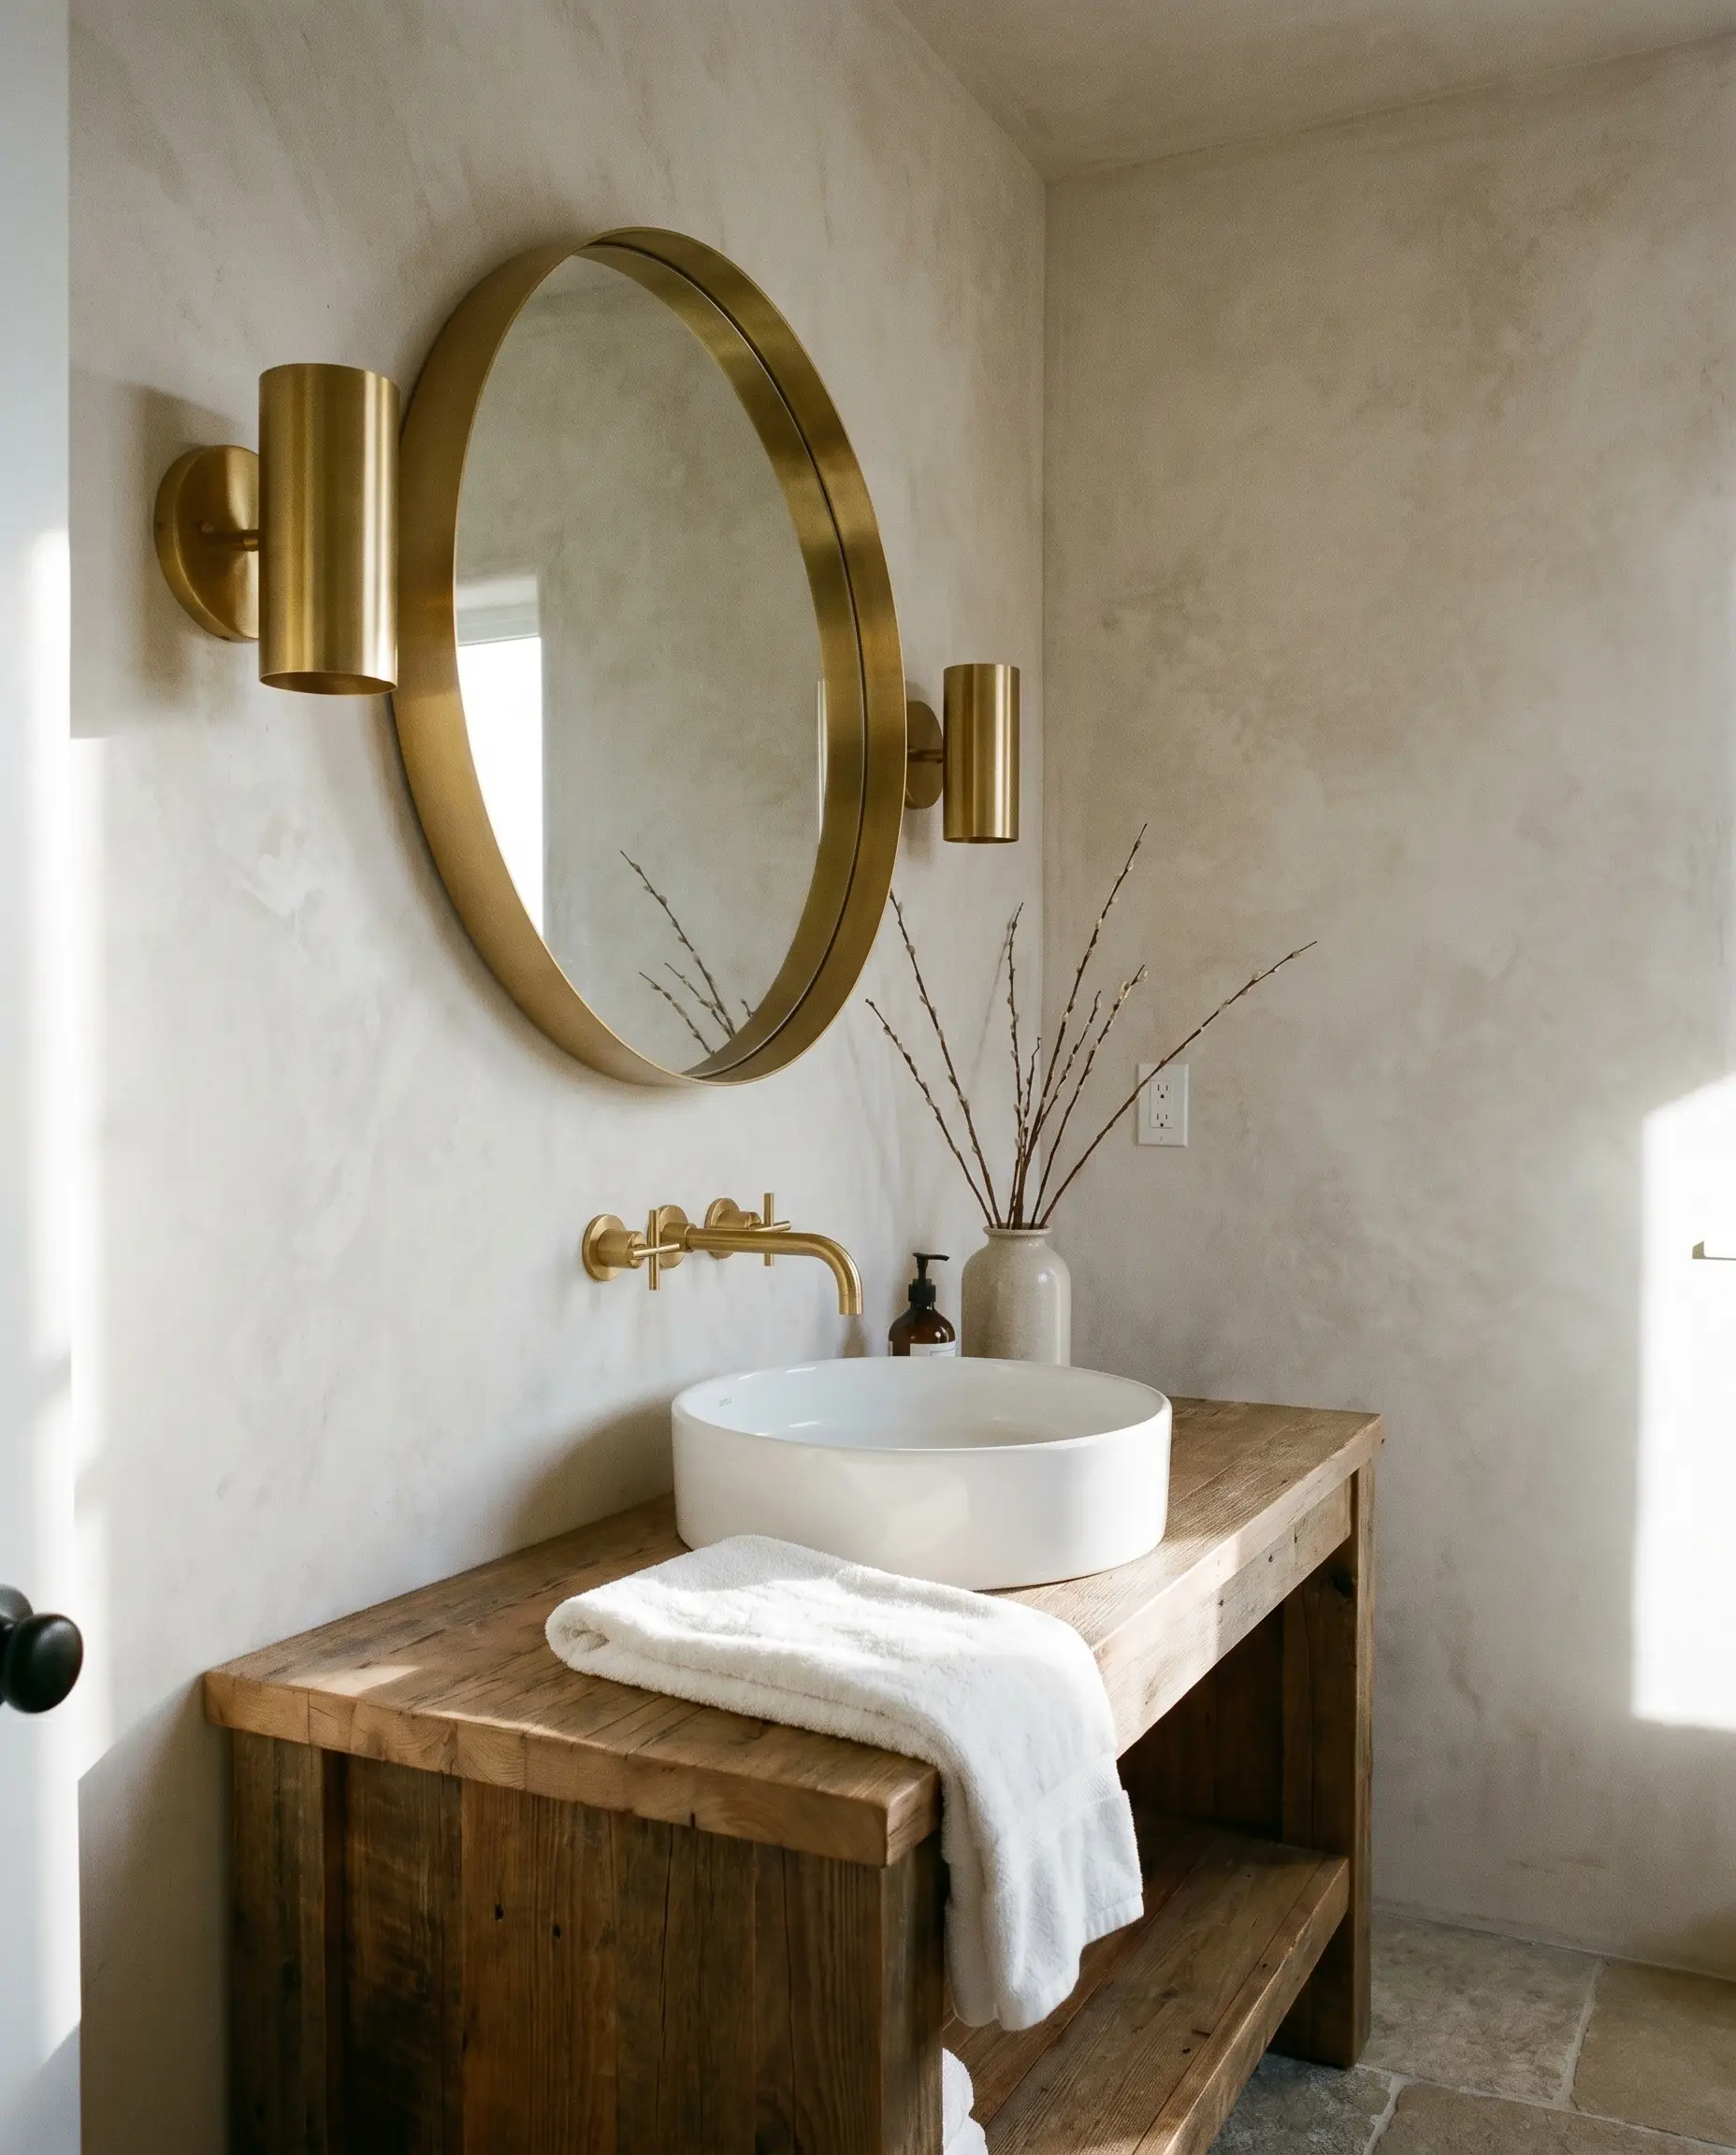
Roman clay provides a chalky, mottled texture that completely absorbs light, offering a soft, cloud-like perimeter. This ultra-matte finish beautifully juxtaposes the sharp, metallic gleam of polished or brushed gold sconces and mirrors.
- Vibe: Wabi-Sabi / Organic Modern
- Key Materials: White Roman clay plaster, brushed gold metal accents
- Paint Match: Portola Paints Roman Clay in “Mariposa”
9. Use Warm Gray Grout with White Subway Tile to Anchor Gold Hardware
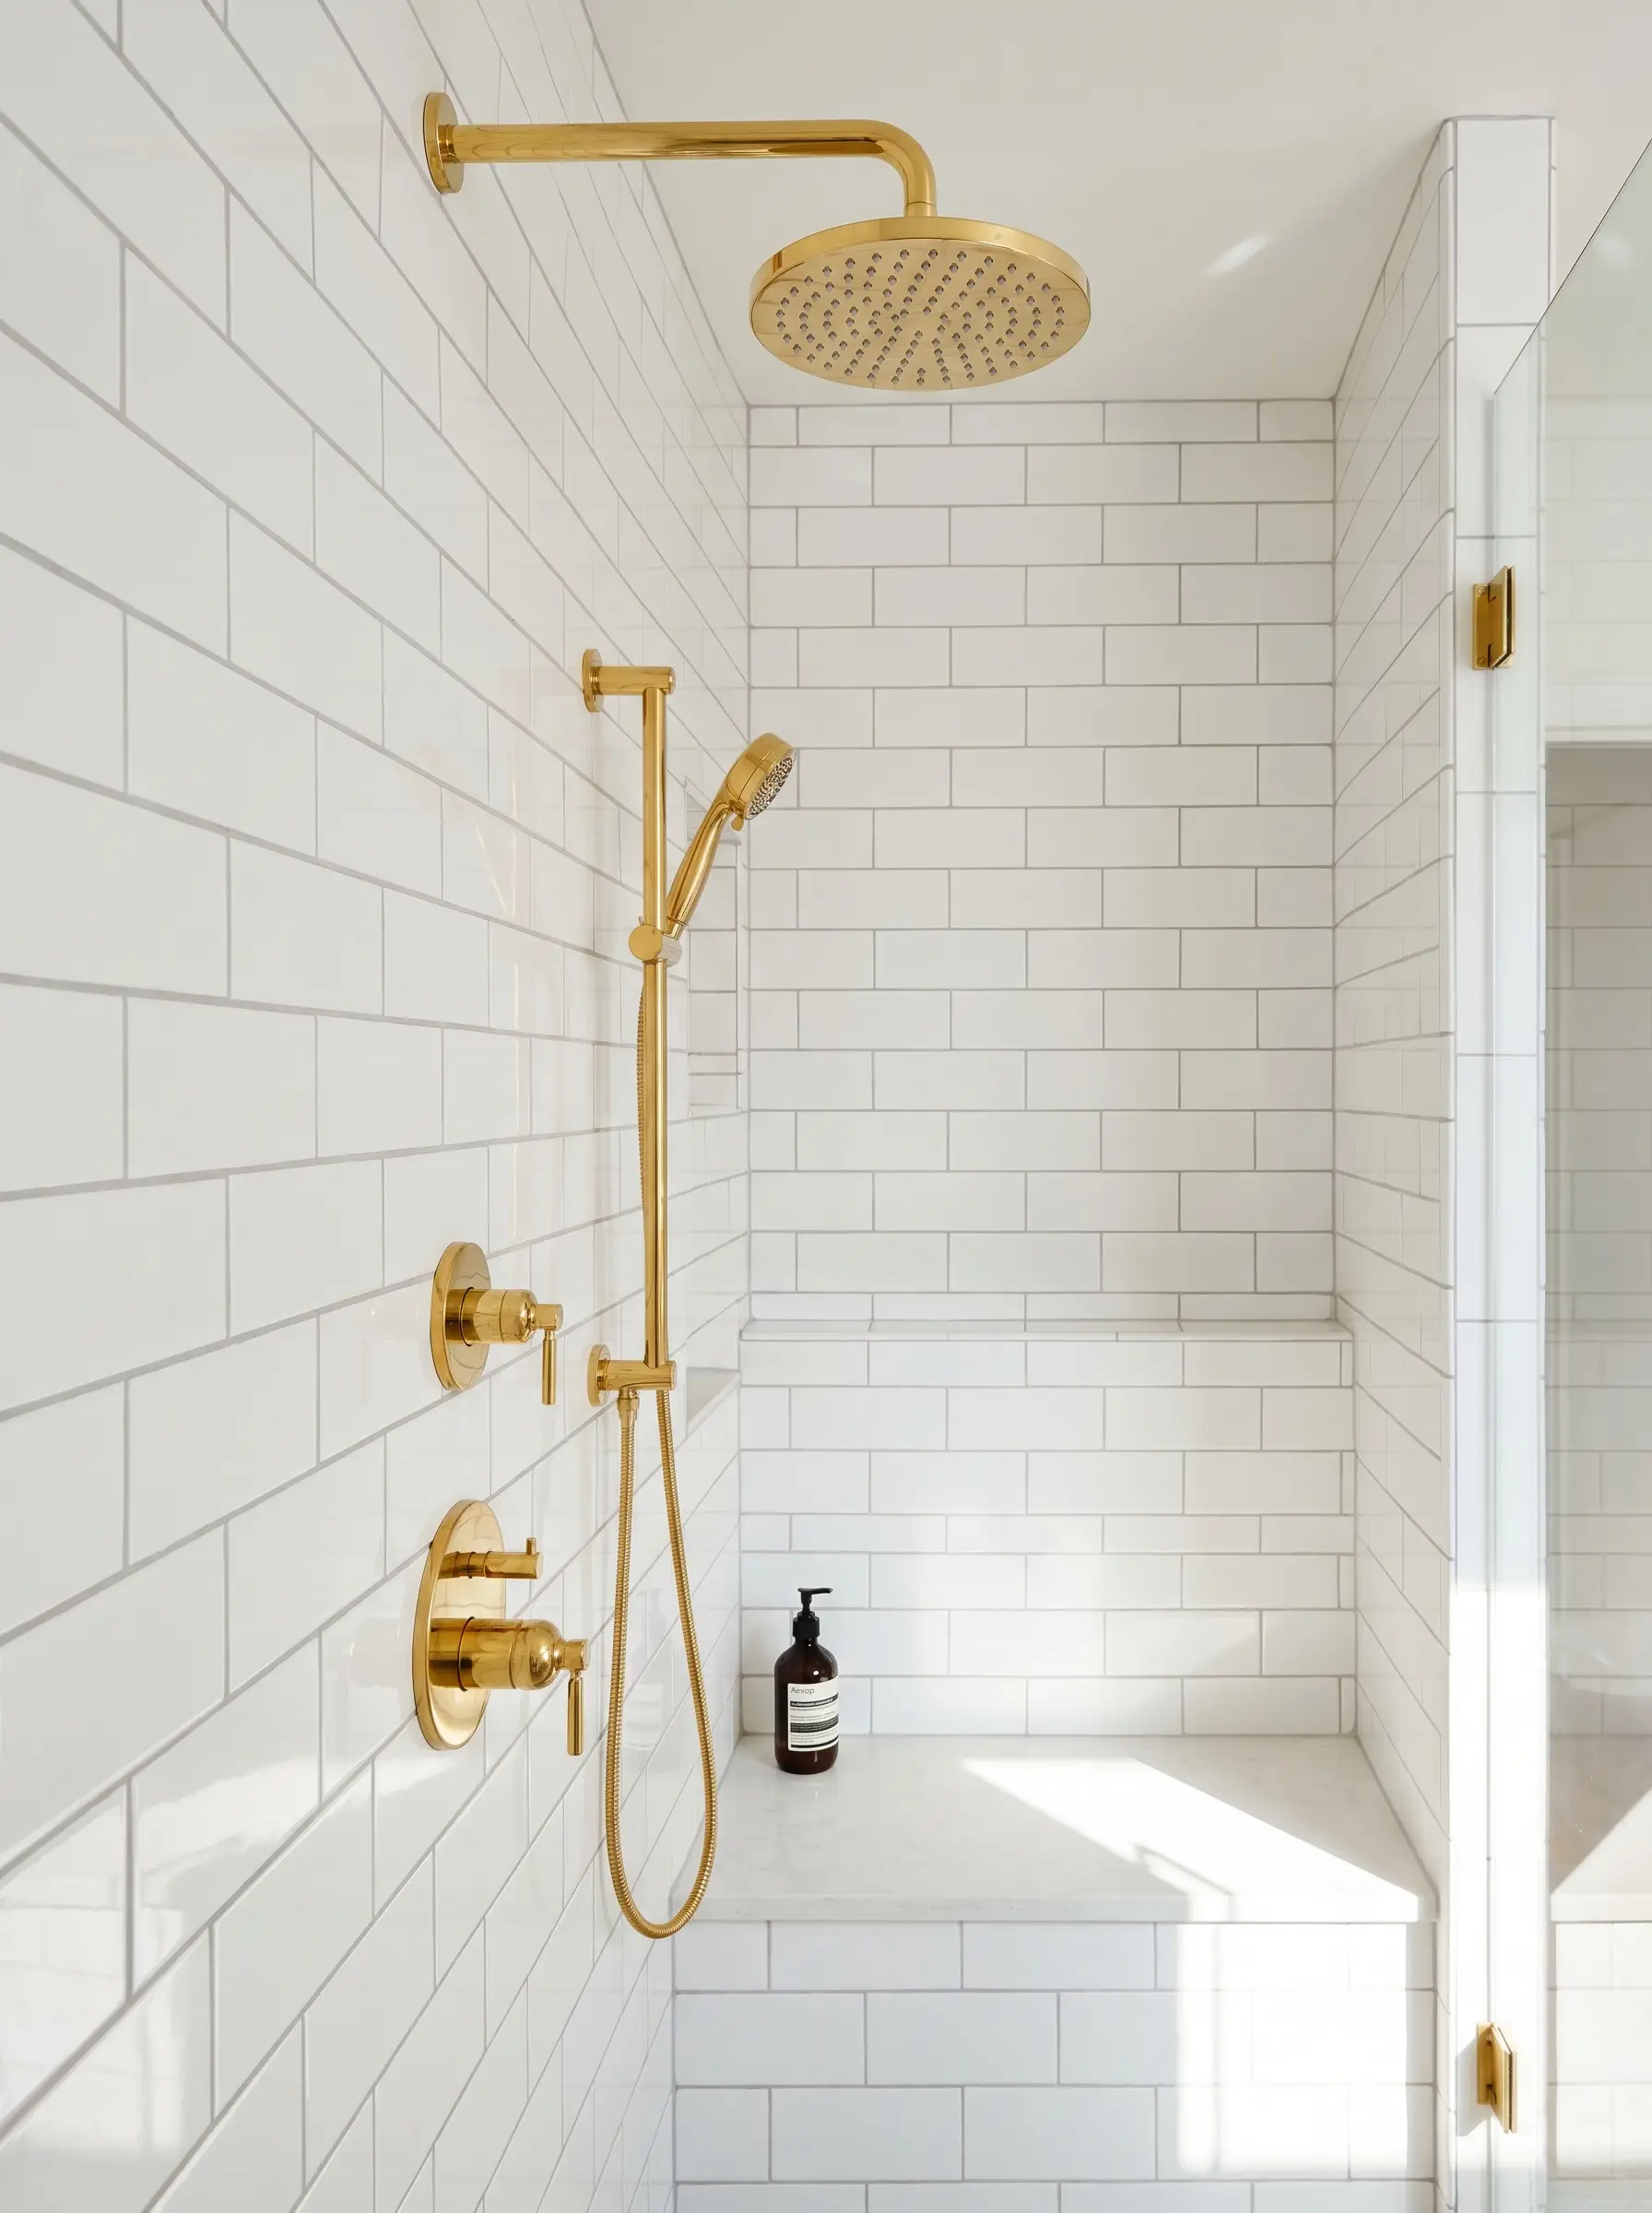
Utilizing stark white grout with white tile completely washes out the architectural grid, leaving gold hardware floating awkwardly on a blank wall. A warm, pale gray grout defines the tile edges, subtly bridging the visual gap between the bright ceramic and the metal.
- Vibe: Accessible Luxury
- Key Materials: 3×6 ceramic white subway tile, warm gray sanded grout
- Styling Pro-Tip: Keep the grout joint tight at 1/16th of an inch to maintain a refined, high-end appearance.
10. Frame a White Wet Room Entry with a Sleek Brass Schluter Strip
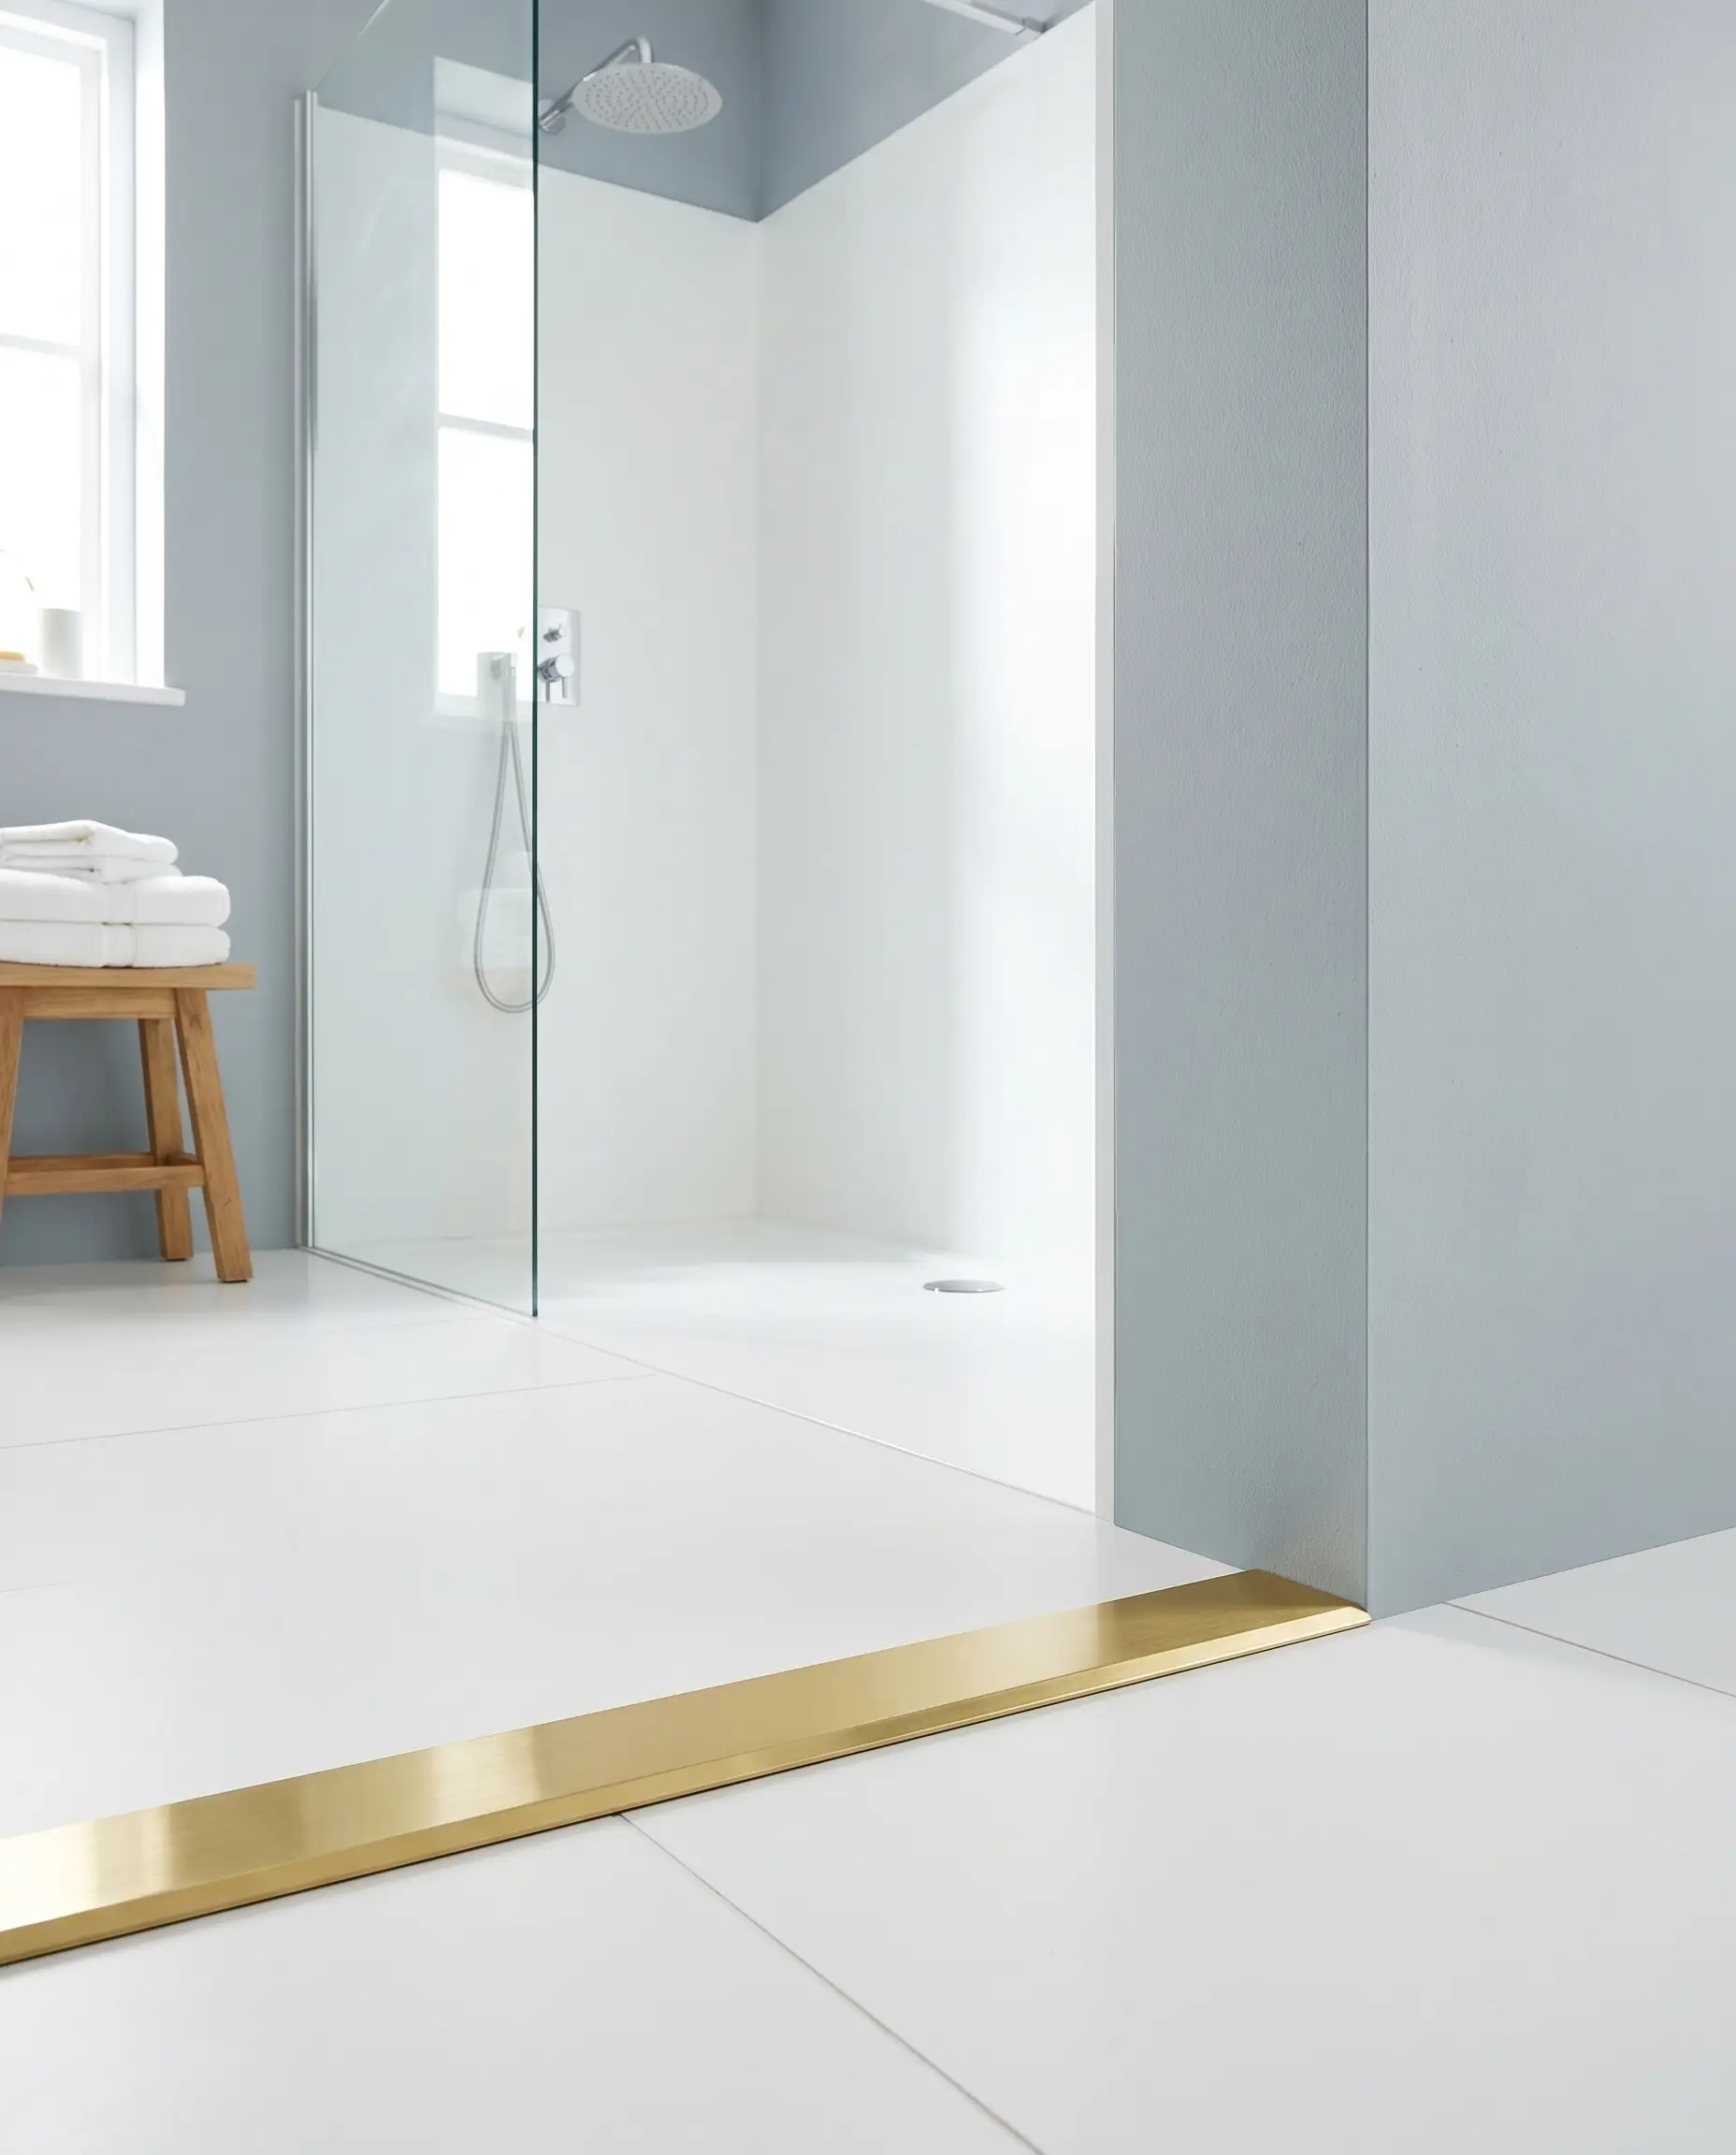
The transition from a painted bathroom wall to a fully tiled white wet room requires a definitive architectural boundary. A thin brass Schluter edge trim offers a razor-sharp, metallic border that caps the tile flawlessly without the bulk of a ceramic bullnose.
- Vibe: Crisp Modern
- Key Materials: Large-format white porcelain tile, brass metal edge profile
- Styling Pro-Tip: Match the thickness of the Schluter strip exactly to the depth of your tile and thin-set mortar combined.
11. Contrast Matte White Penny Tiles with a Polished Brass Floor Drain
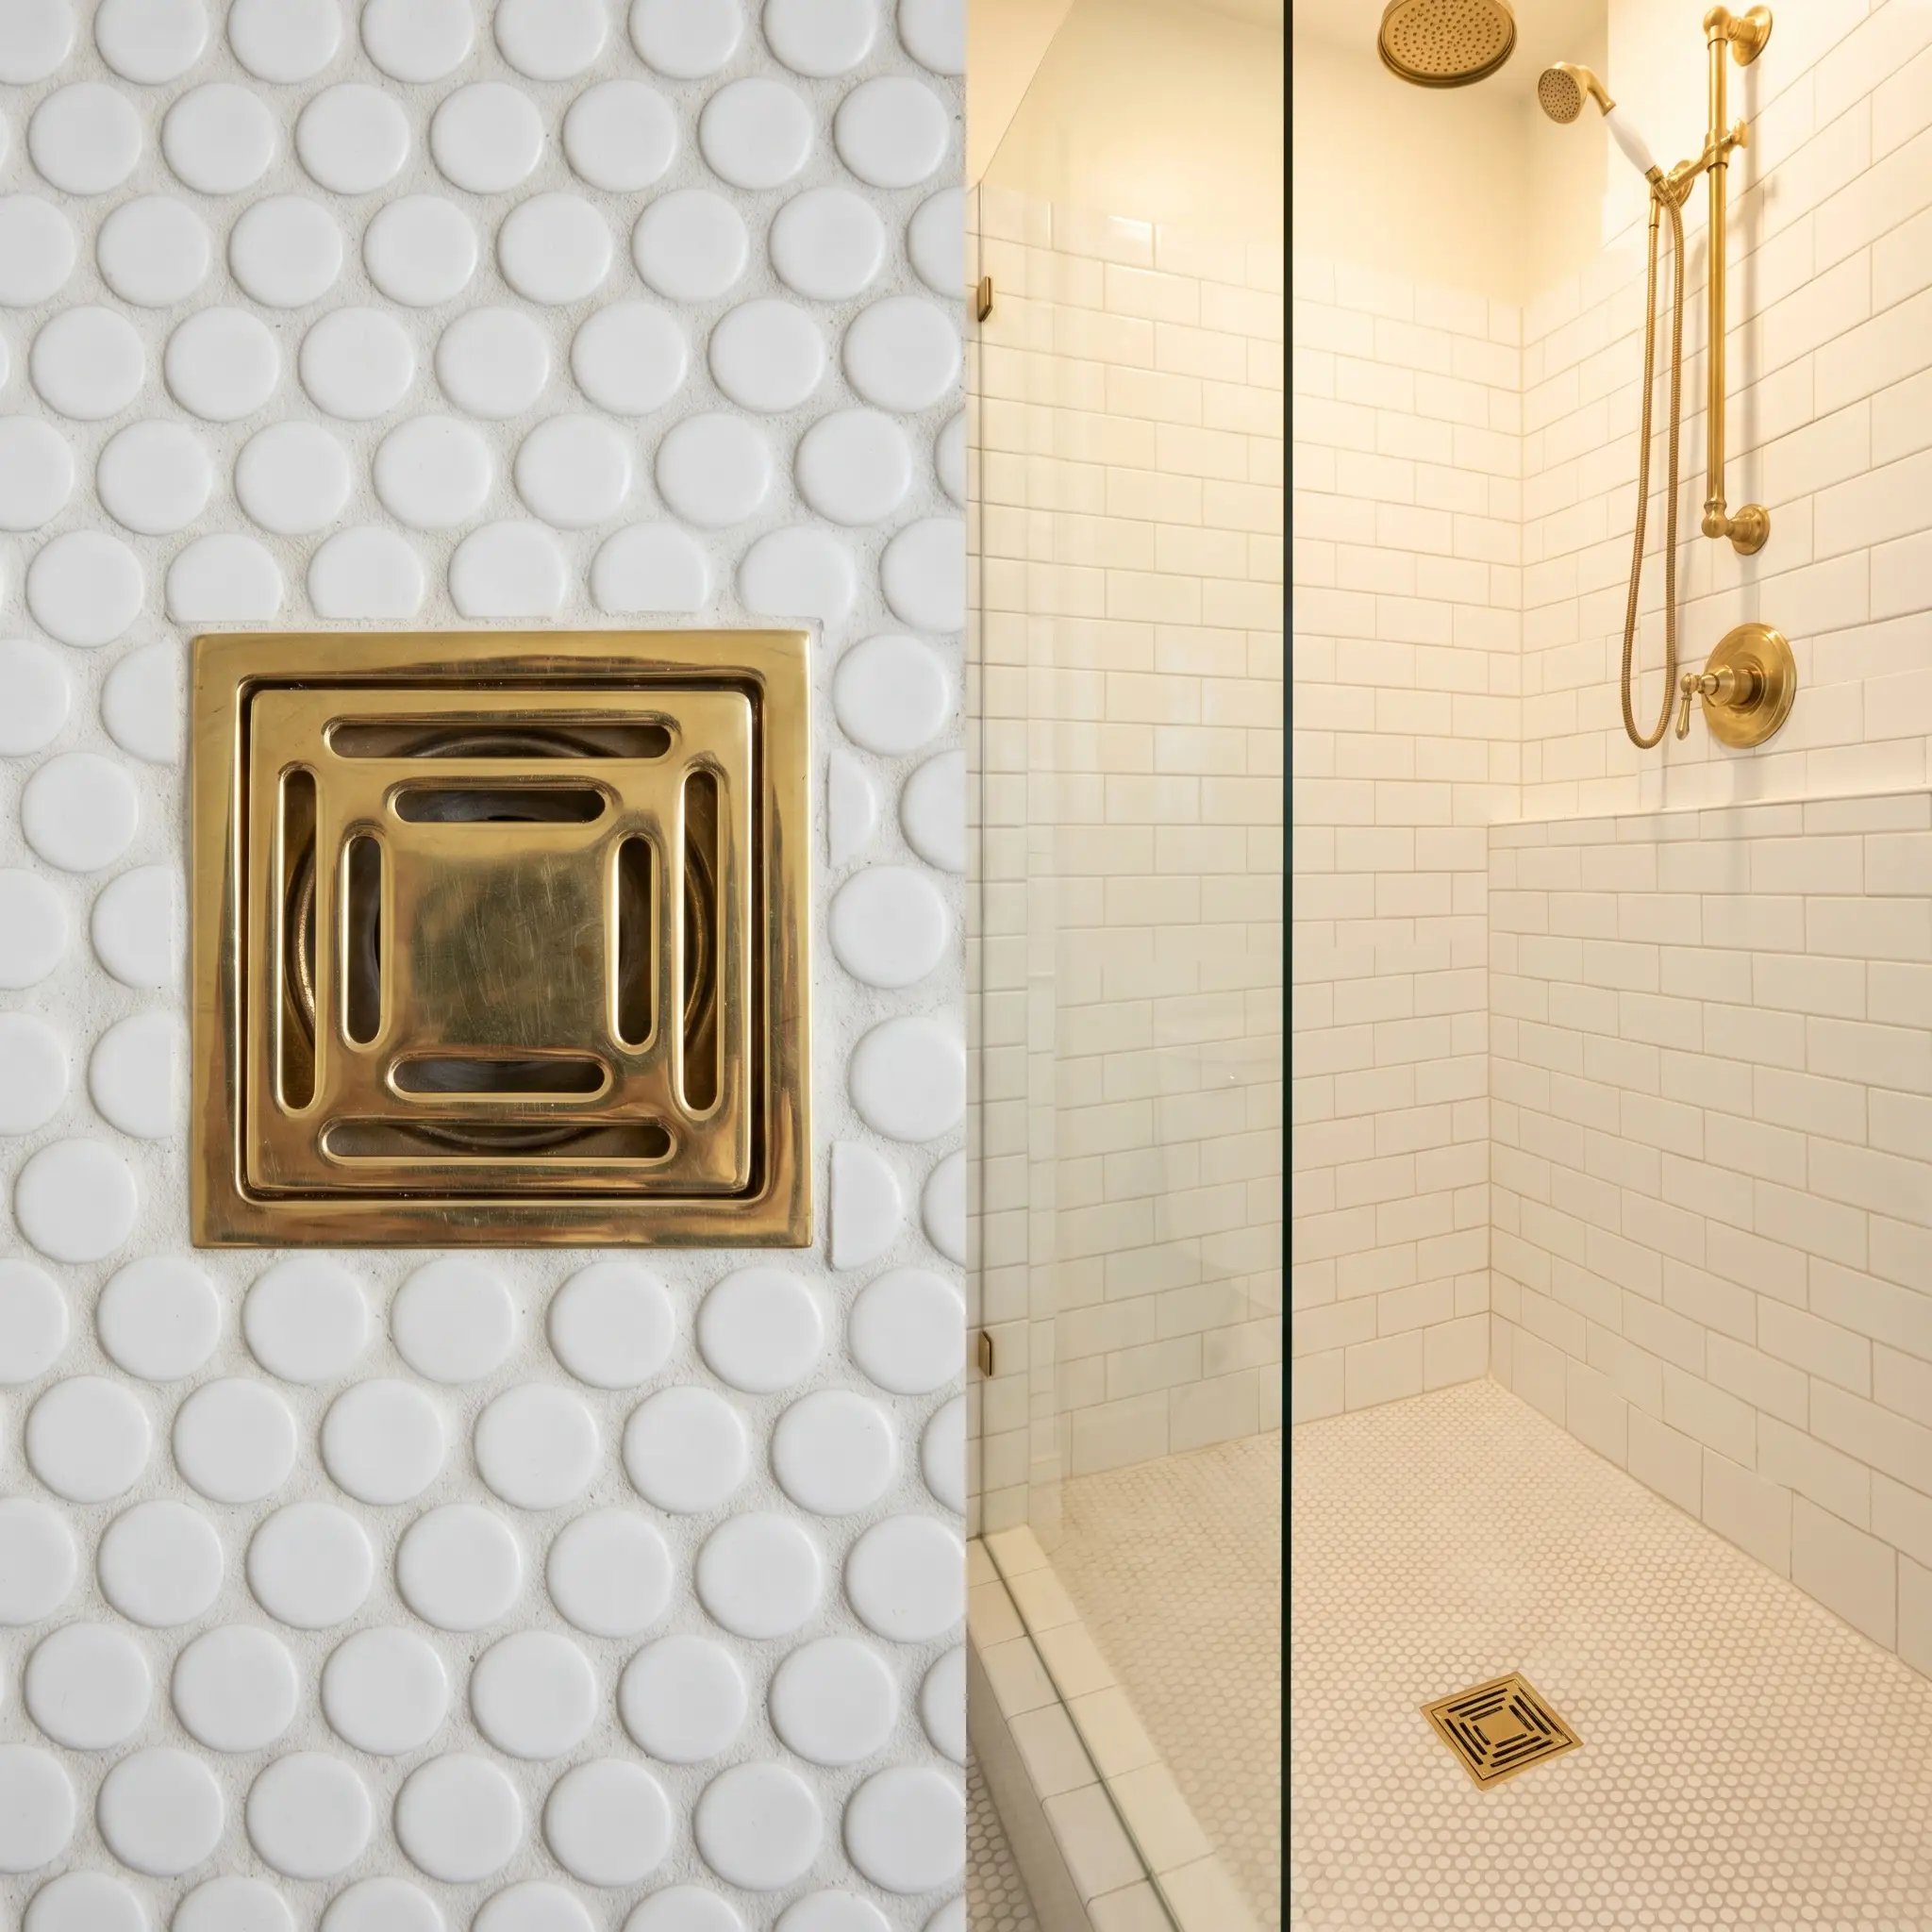
Luxury is found in the micro-details of a space. Setting a heavy, polished brass square drain cover into a sea of matte white penny rounds creates a striking, geometric focal point on the shower floor.
- Vibe: Vintage Revival
- Key Materials: Matte white porcelain penny rounds, polished brass square drain
- Styling Pro-Tip: Use an epoxy grout on the shower floor to prevent the white field from discoloring over time.
Statement Lighting and Mirrors
The interplay of artificial light and metallic surfaces can either make a bathroom feel like a sanctuary or degrade it into a sterile laboratory. The temperature of your lighting directly dictates how your gold finishes are perceived, requiring strict adherence to warm Kelvin parameters.
12. Flank a Pivot Brass Mirror with Fluted Glass Sconces
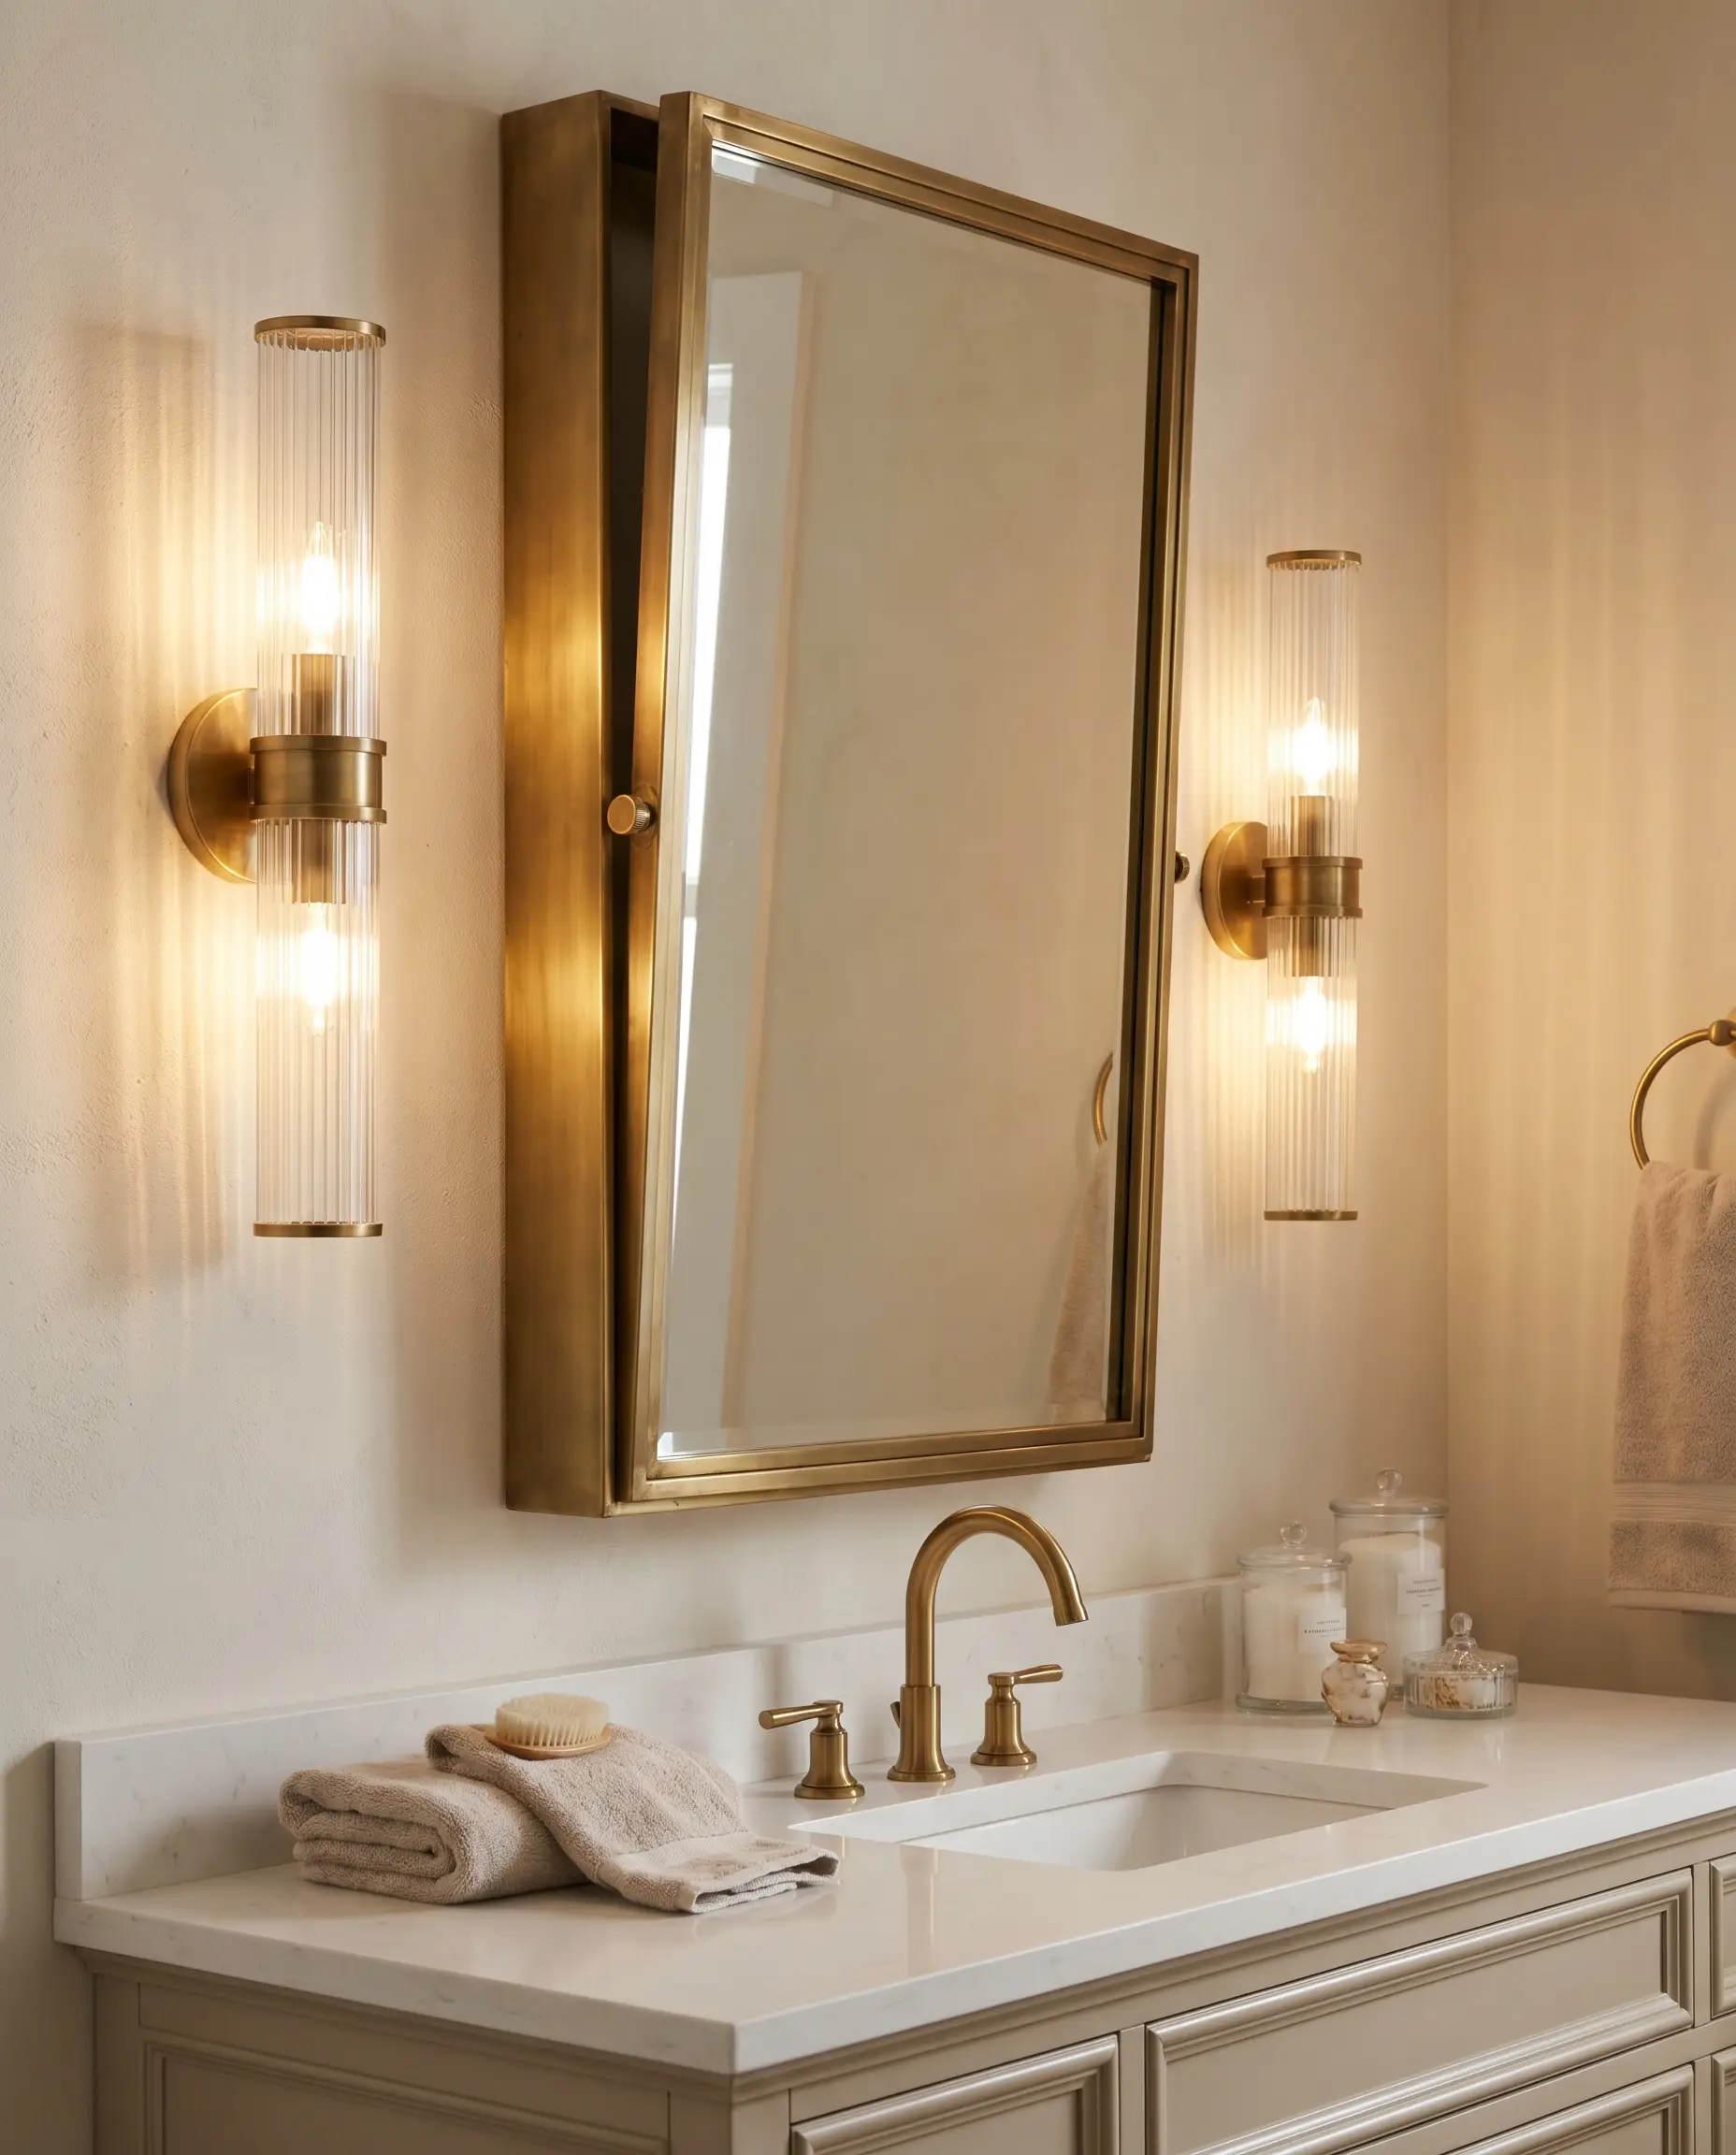
A heavy brass pivot mirror introduces substantial visual weight over the vanity. Pairing it with fluted glass sconces diffuses the harshness of the bulbs, casting a soft, ribbed glow that highlights the metal’s warmth.
- Vibe: Transitional Luxury
- Key Materials: Solid brass pivot mirror, ribbed glass tube sconces
- Styling Pro-Tip: Mount the sconces exactly at eye level (roughly 60 to 65 inches from the floor) to eliminate overhead shadows.
13. Install a Backlit White Frameless Mirror Above a Brass Wall-Mounted Faucet
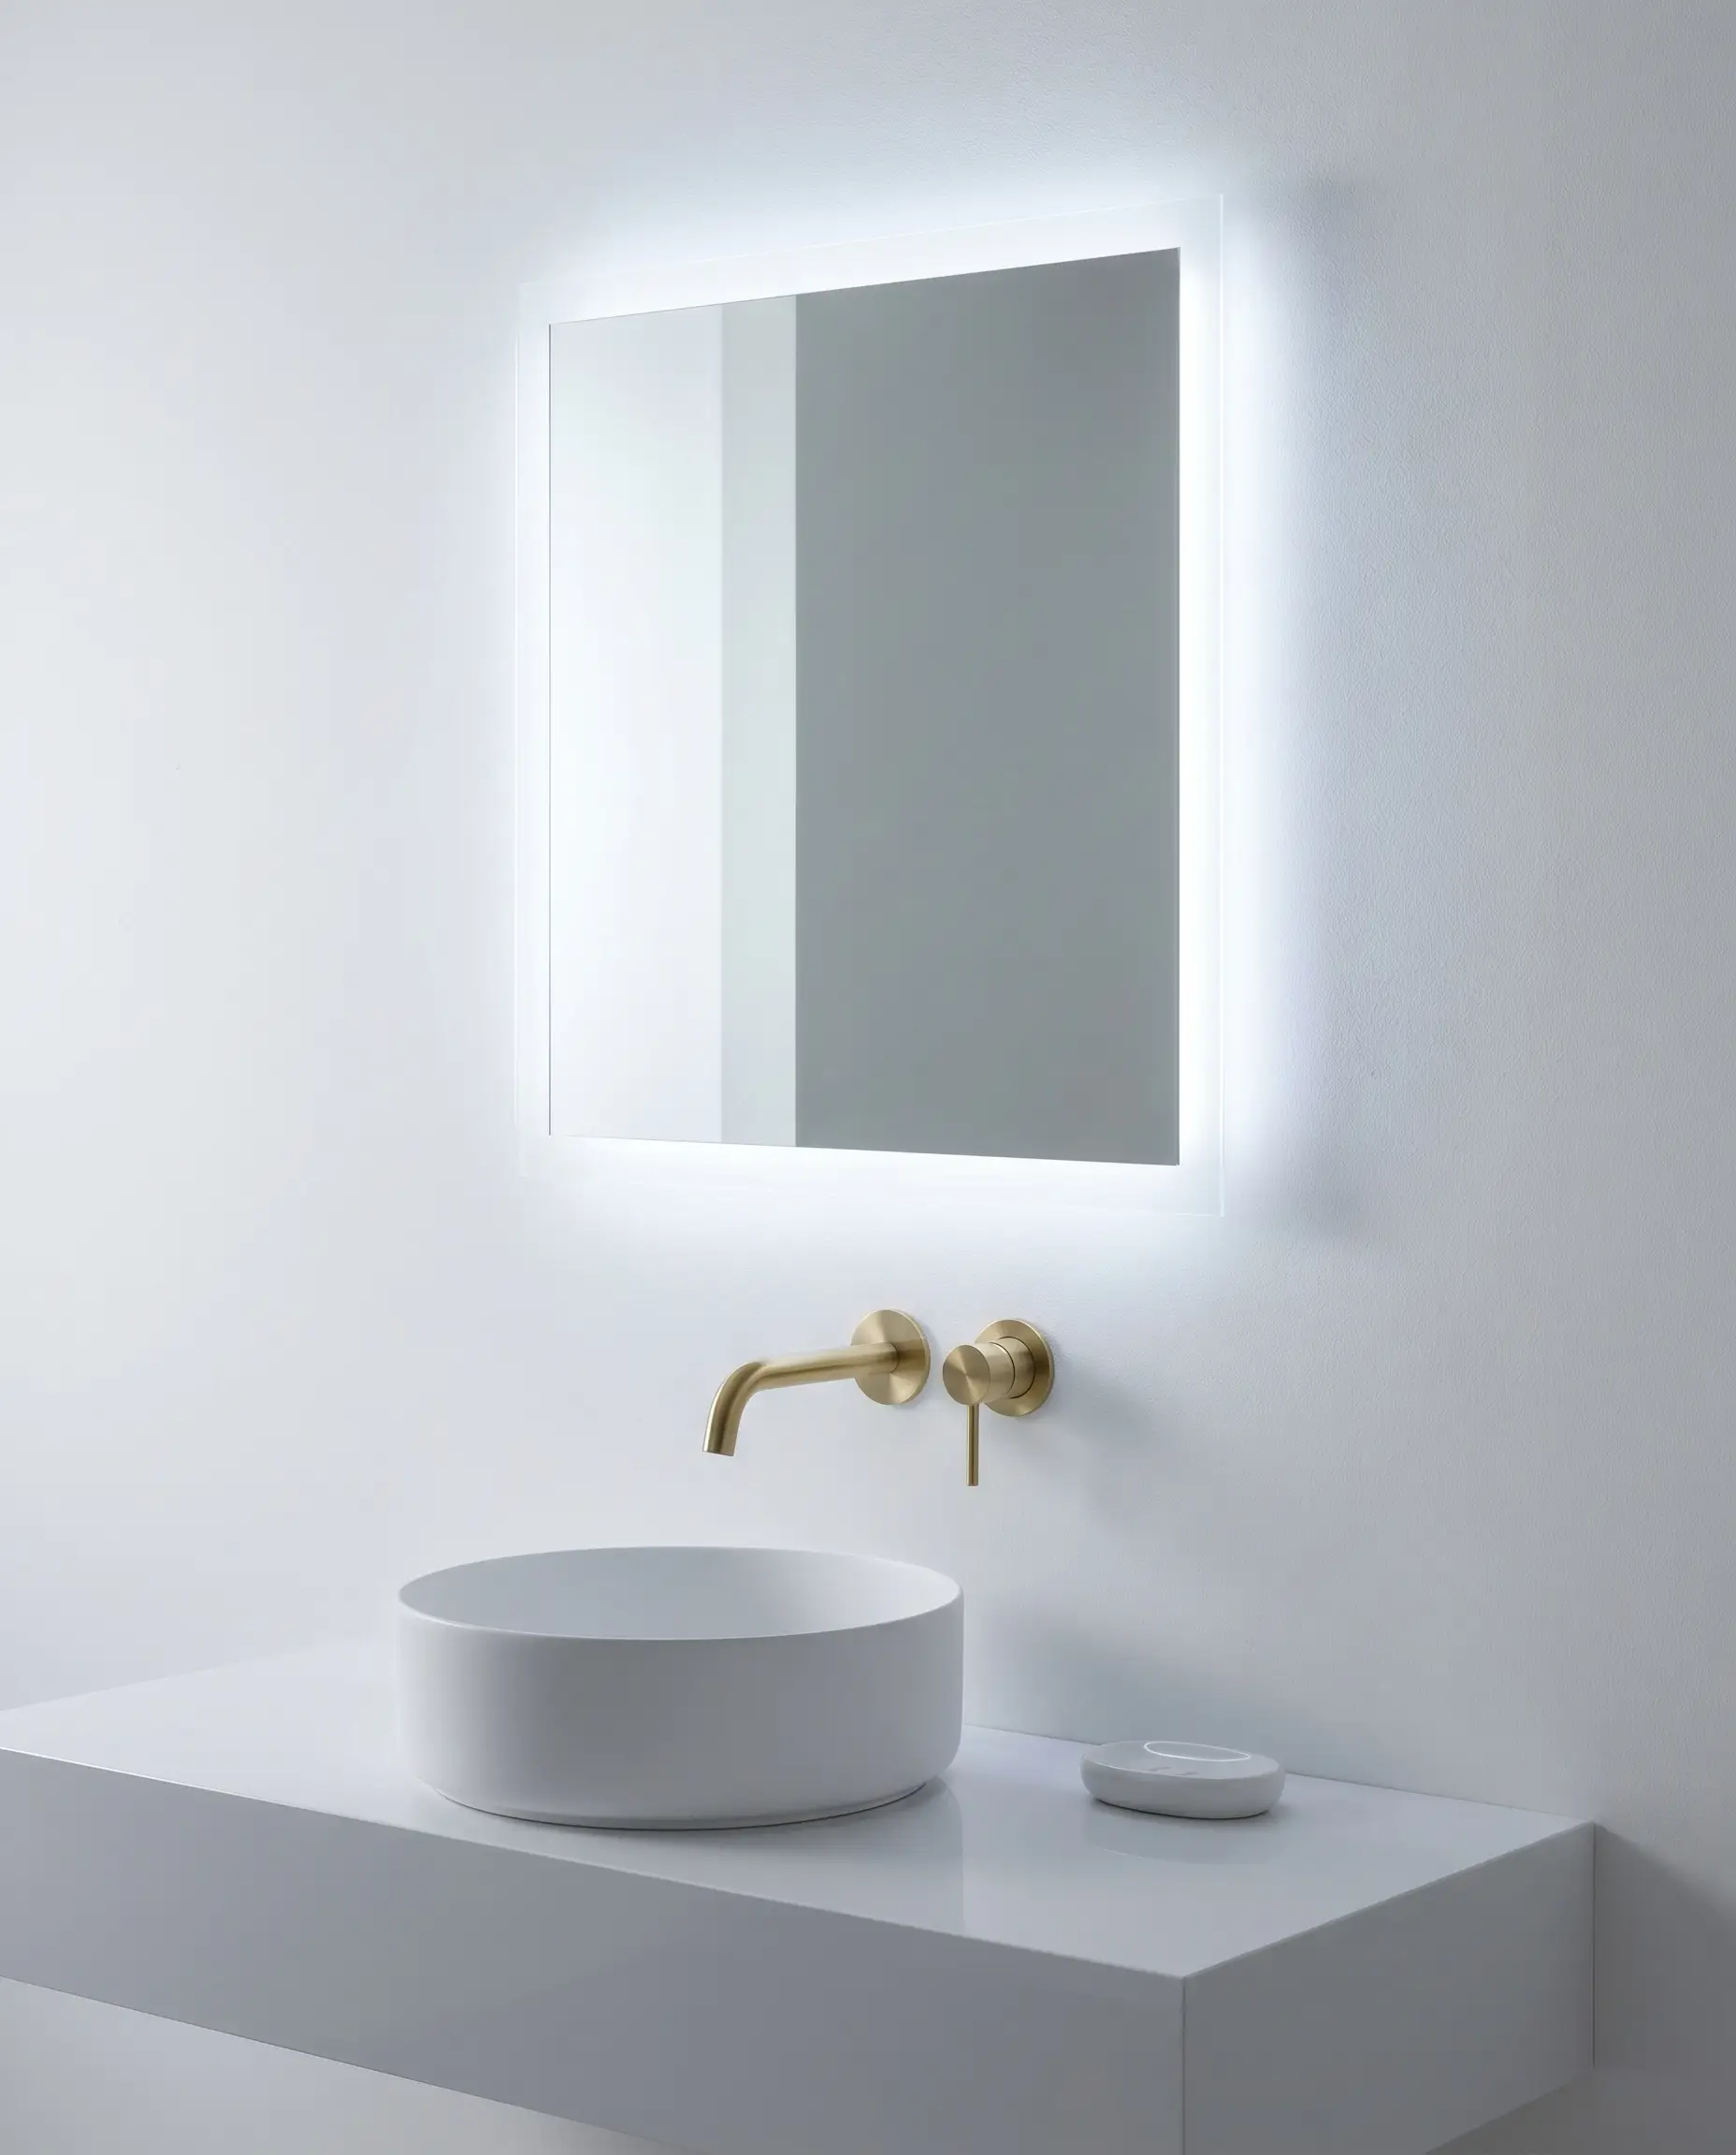
Removing the frame from the mirror and hiding the LED lighting behind the glass creates a glowing, ethereal silhouette against the wall. This luminous white halo effect allows a wall-mounted brass faucet to command absolute attention without competing for visual space.
- Vibe: Ultra-Modern
- Key Materials: Floating backlit LED mirror, wall-mount brass basin mixer
- Styling Pro-Tip: Ensure the wall-mounted faucet is installed at least 3 inches above the vessel sink rim for proper clearance.
14. Hang a Vintage Brass Chandelier Above a White Freestanding Tub
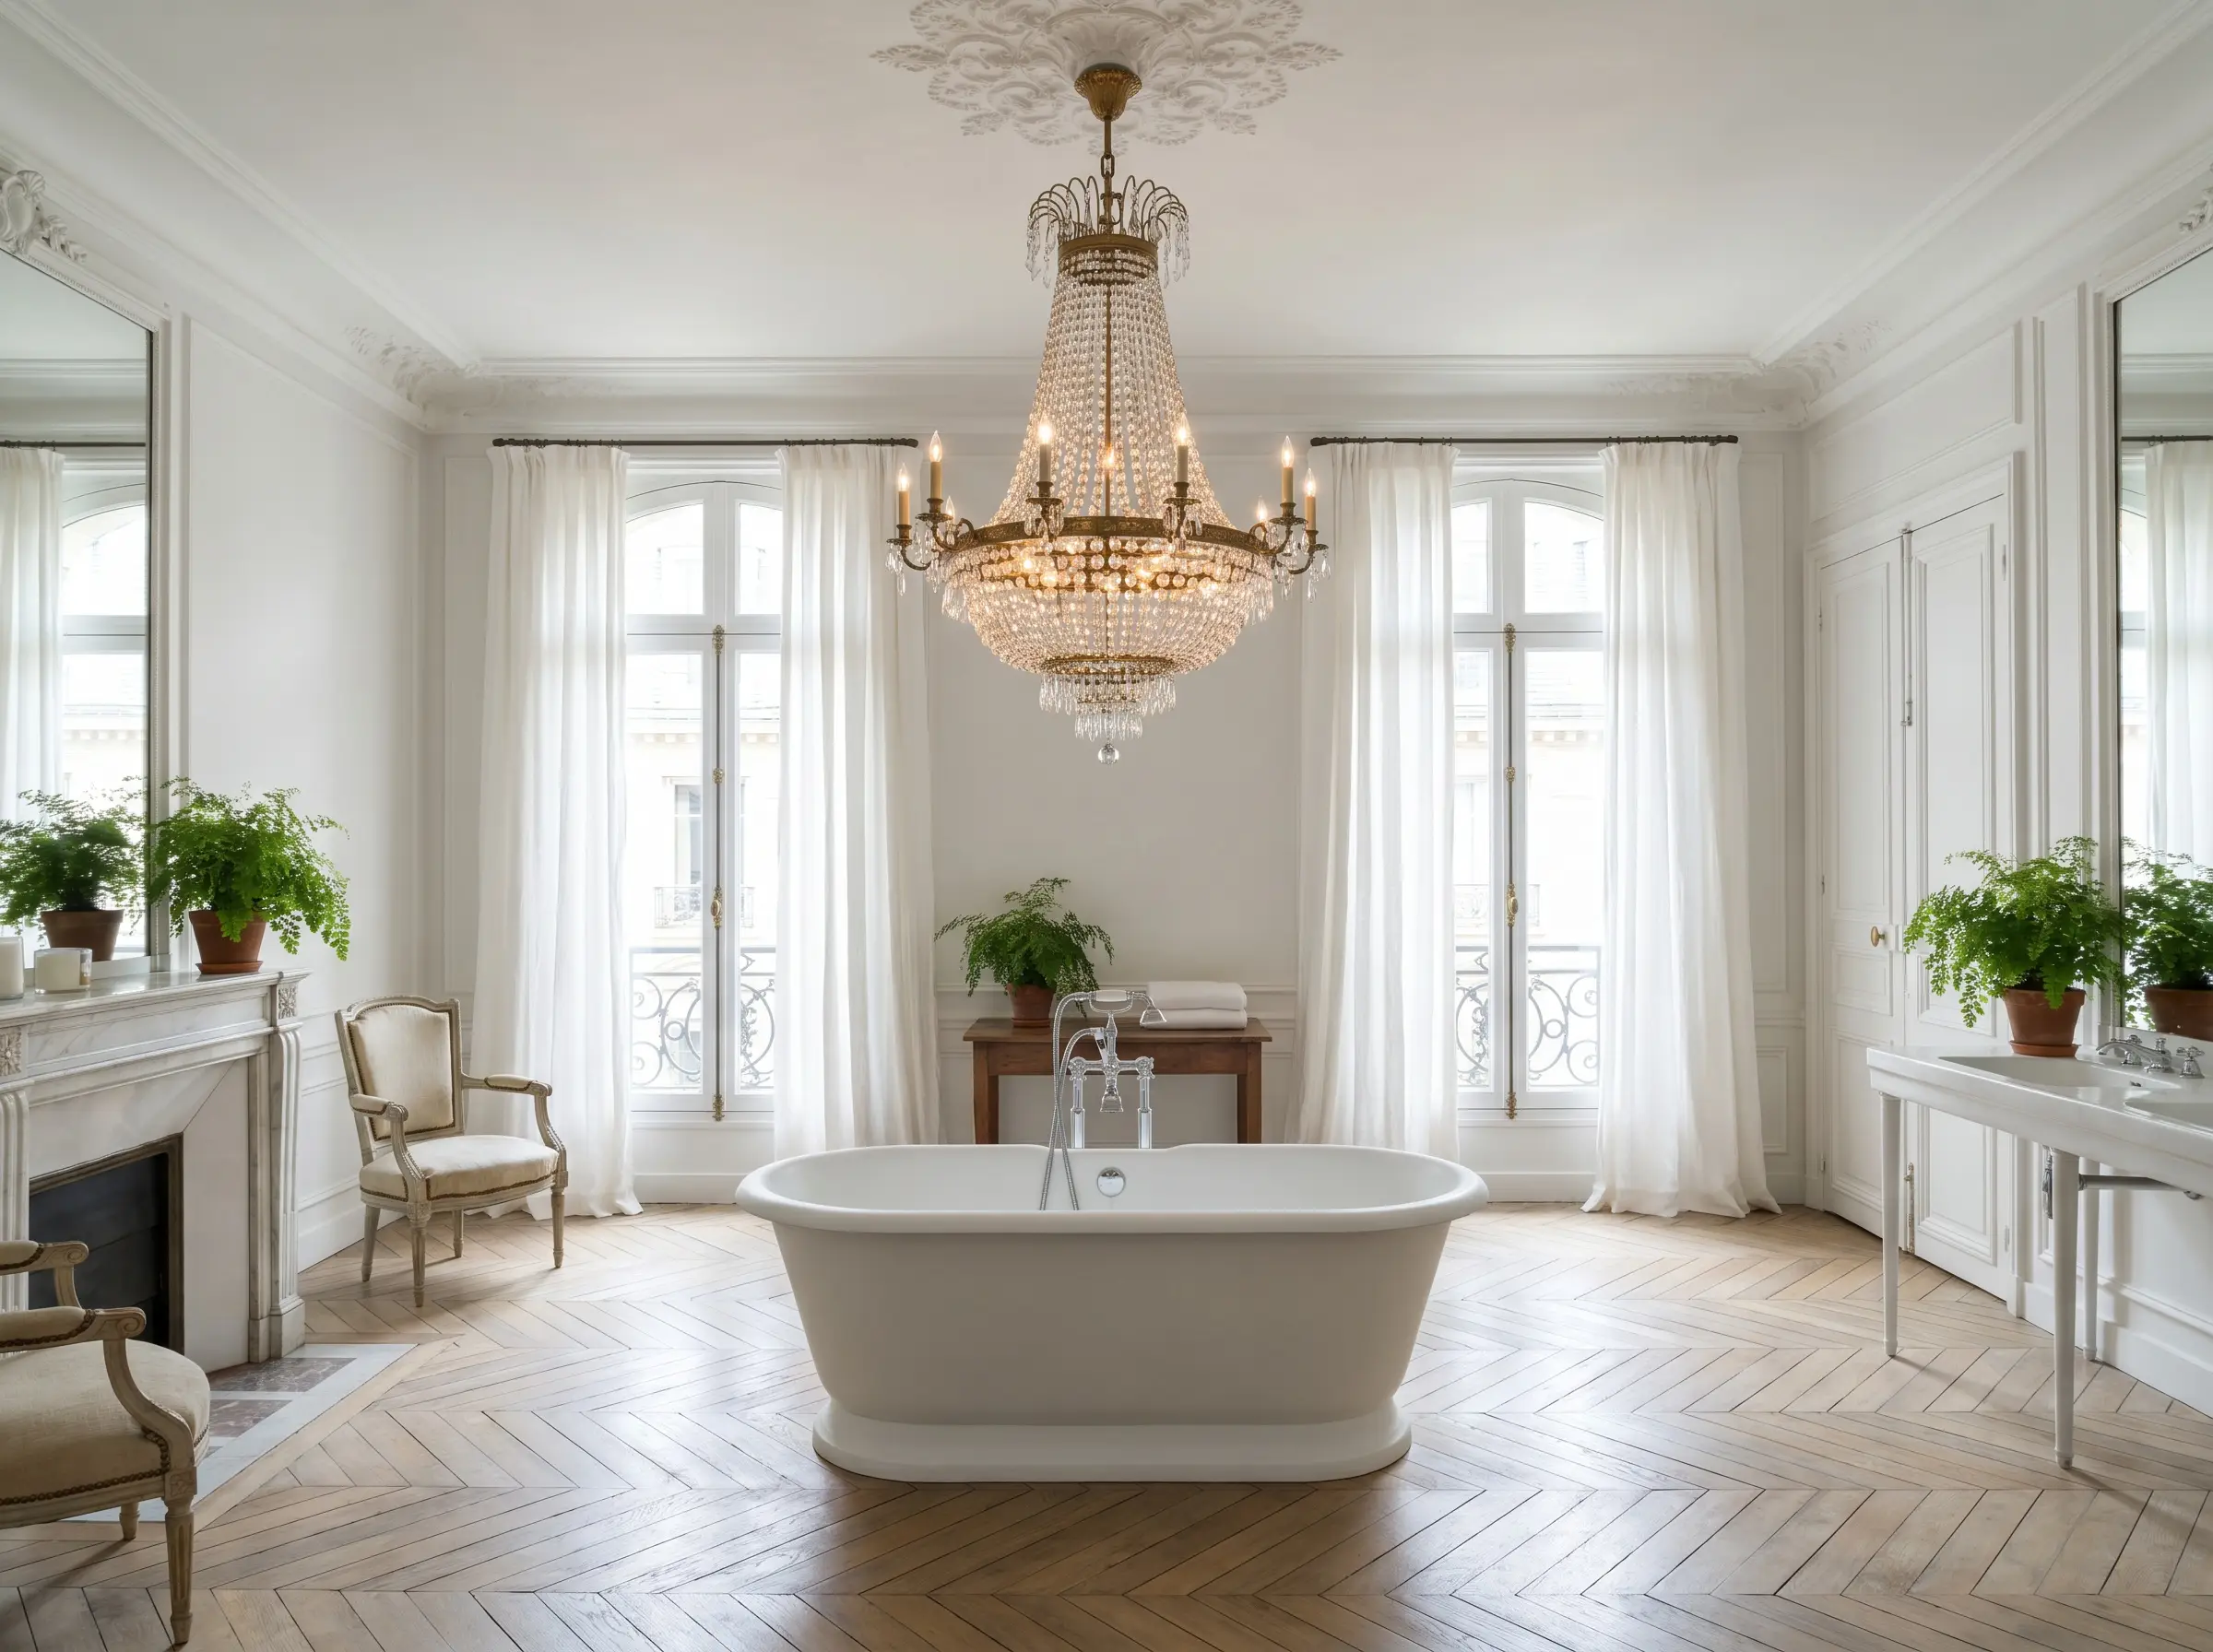
A freestanding white resin or cast-iron tub demands a strong vertical focal point to anchor it within the room’s volume. Dropping an intricate, vintage brass chandelier directly above the bath introduces scale and historic tension to an otherwise clean space.
- Vibe: Parisian Chic
- Key Materials: Matte white soaking tub, tiered unlacquered brass chandelier
- Styling Pro-Tip: Building codes dictate that the bottom of the chandelier must hang at least 8 feet above the highest water level of the tub.
15. Match Warm 2700K LED Bulbs to Champagne Bronze Fixtures
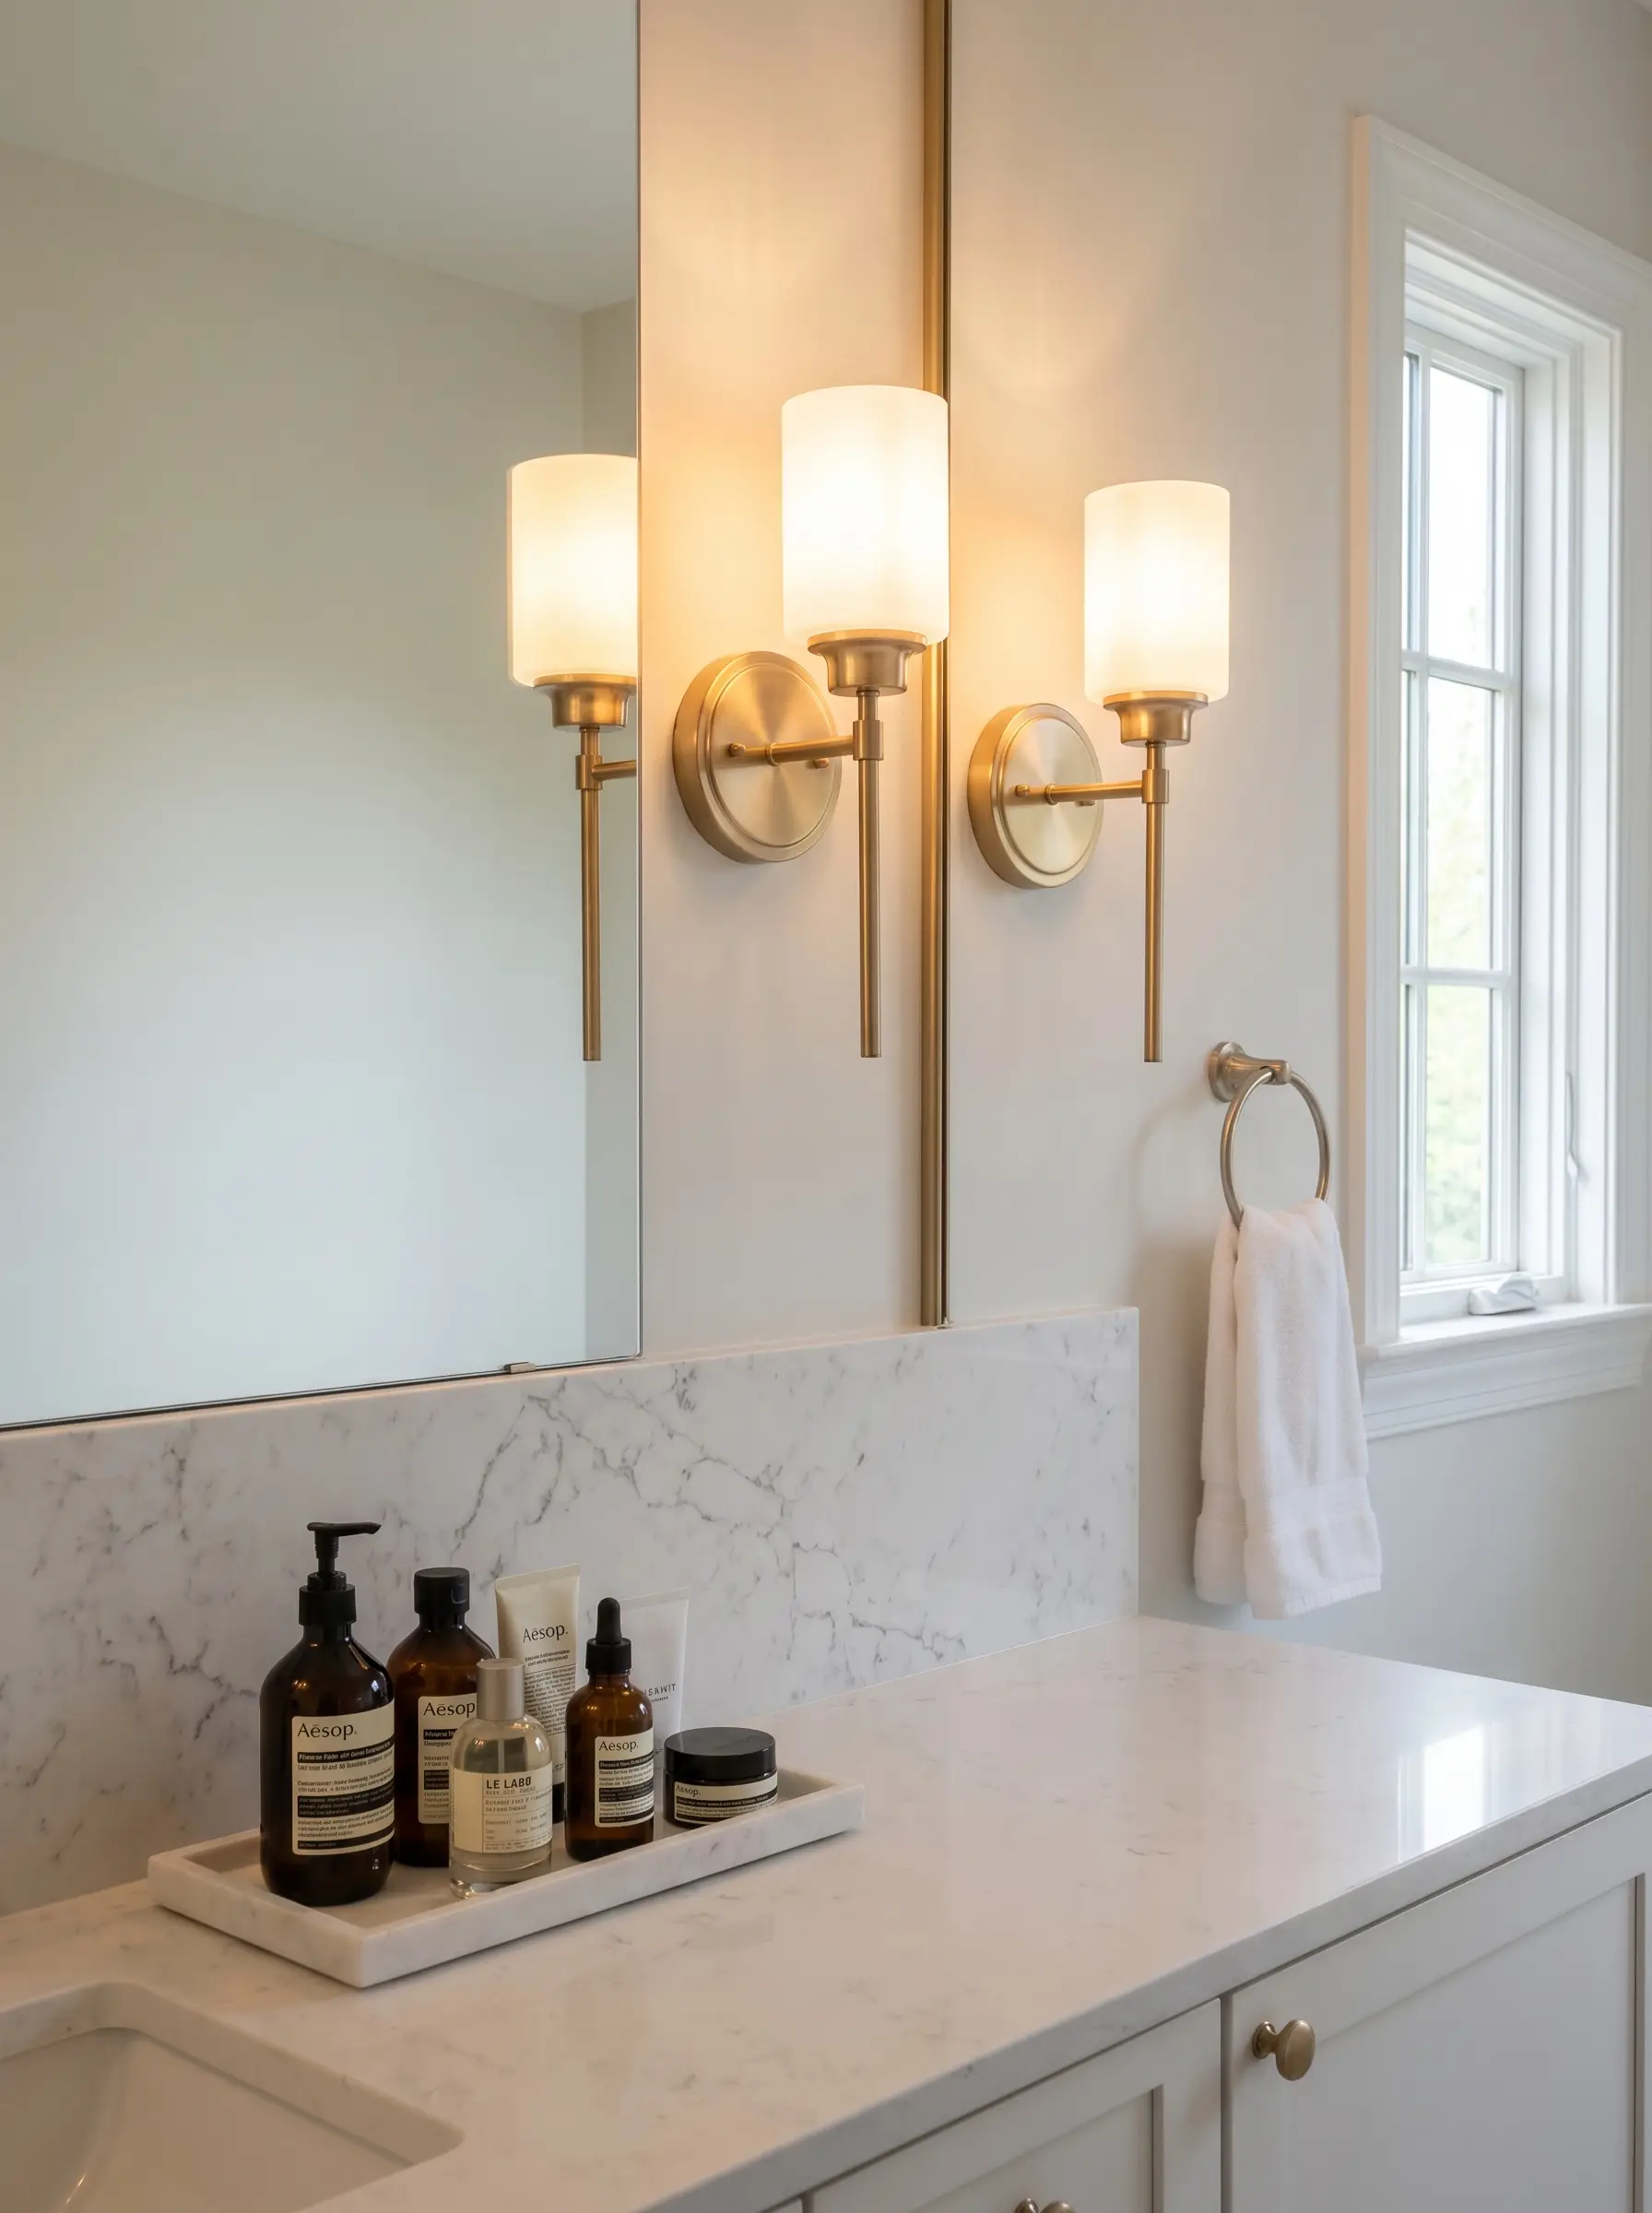
The specific shade of champagne bronze relies on warm ambient light to bring out its rich, golden-brown undertones. Installing bulbs with a higher, cooler temperature will instantly strip the warmth from the metal, rendering the entire room clinical.
- Vibe: Restrained Luxury
- Key Materials: 2700K LED bulbs, champagne bronze vanity lighting
- Styling Pro-Tip: Install all vanity lighting on a dedicated dimmer switch to control the light bounce off the white surfaces.
Never pair cool 4000K LED bulbs with warm brass finishes; the light will cast a cheap, greenish hue on the metal, destroying the bespoke aesthetic.
Design Rule
16. Layer a Thin-Frame Brass Mirror Over Floor-to-Ceiling White Slab
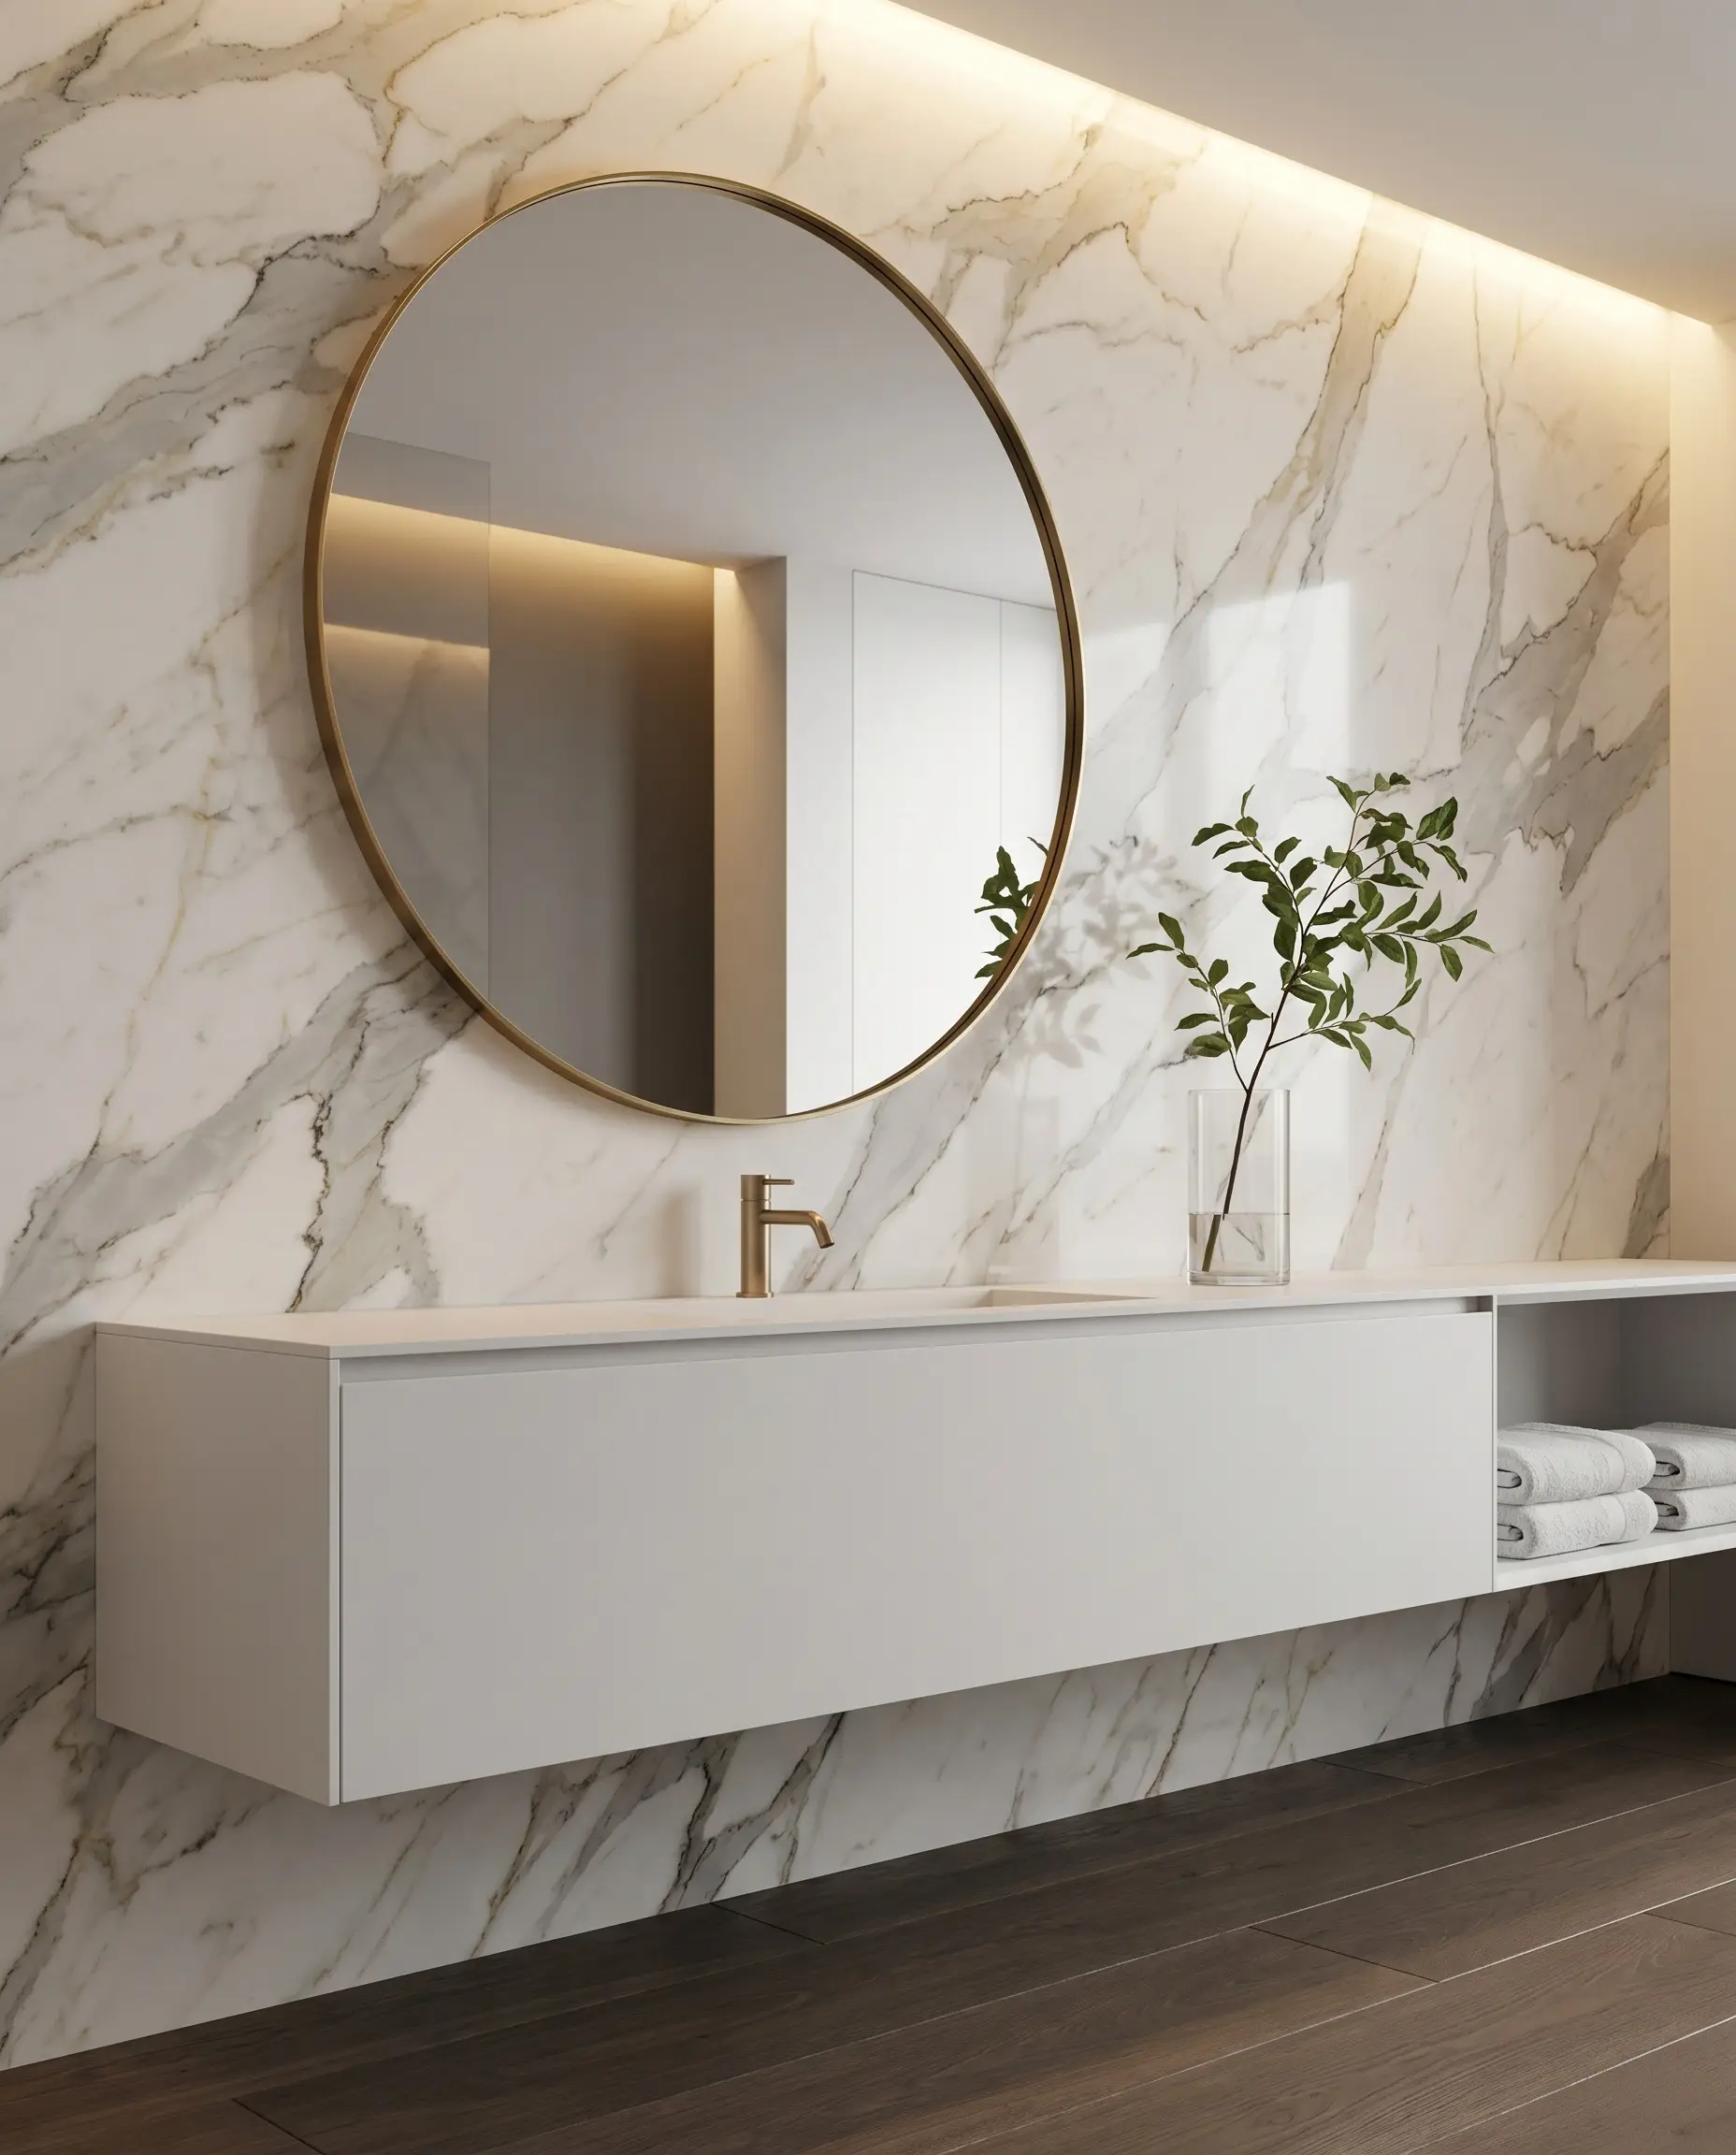
Proportional contrast is vital when working with monumental materials like full-height stone slabs. A razor-thin brass mirror frame respects the heavy visual weight of the stone behind it, providing a delicate metallic boundary without obscuring the veining.
- Vibe: High-End Bespoke
- Key Materials: 1/4-inch profile brass mirror, continuous Calacatta quartz slab
- Styling Pro-Tip: Use heavy-duty French cleats to mount the mirror securely into the stone without damaging the slab face.
Plumbing Fixtures and Shower Details
Transitioning into the wet zone presents the highest stakes for finish durability and aesthetic cohesion. Master tradespeople generally recommend sourcing all concealed thermostatic valves, showerheads, and trim kits from the exact same manufacturer to guarantee your gold tones match perfectly across complex plumbing arrays.
17. Expose Vintage-Style Brass Shower Pipes Against White Subway Tile
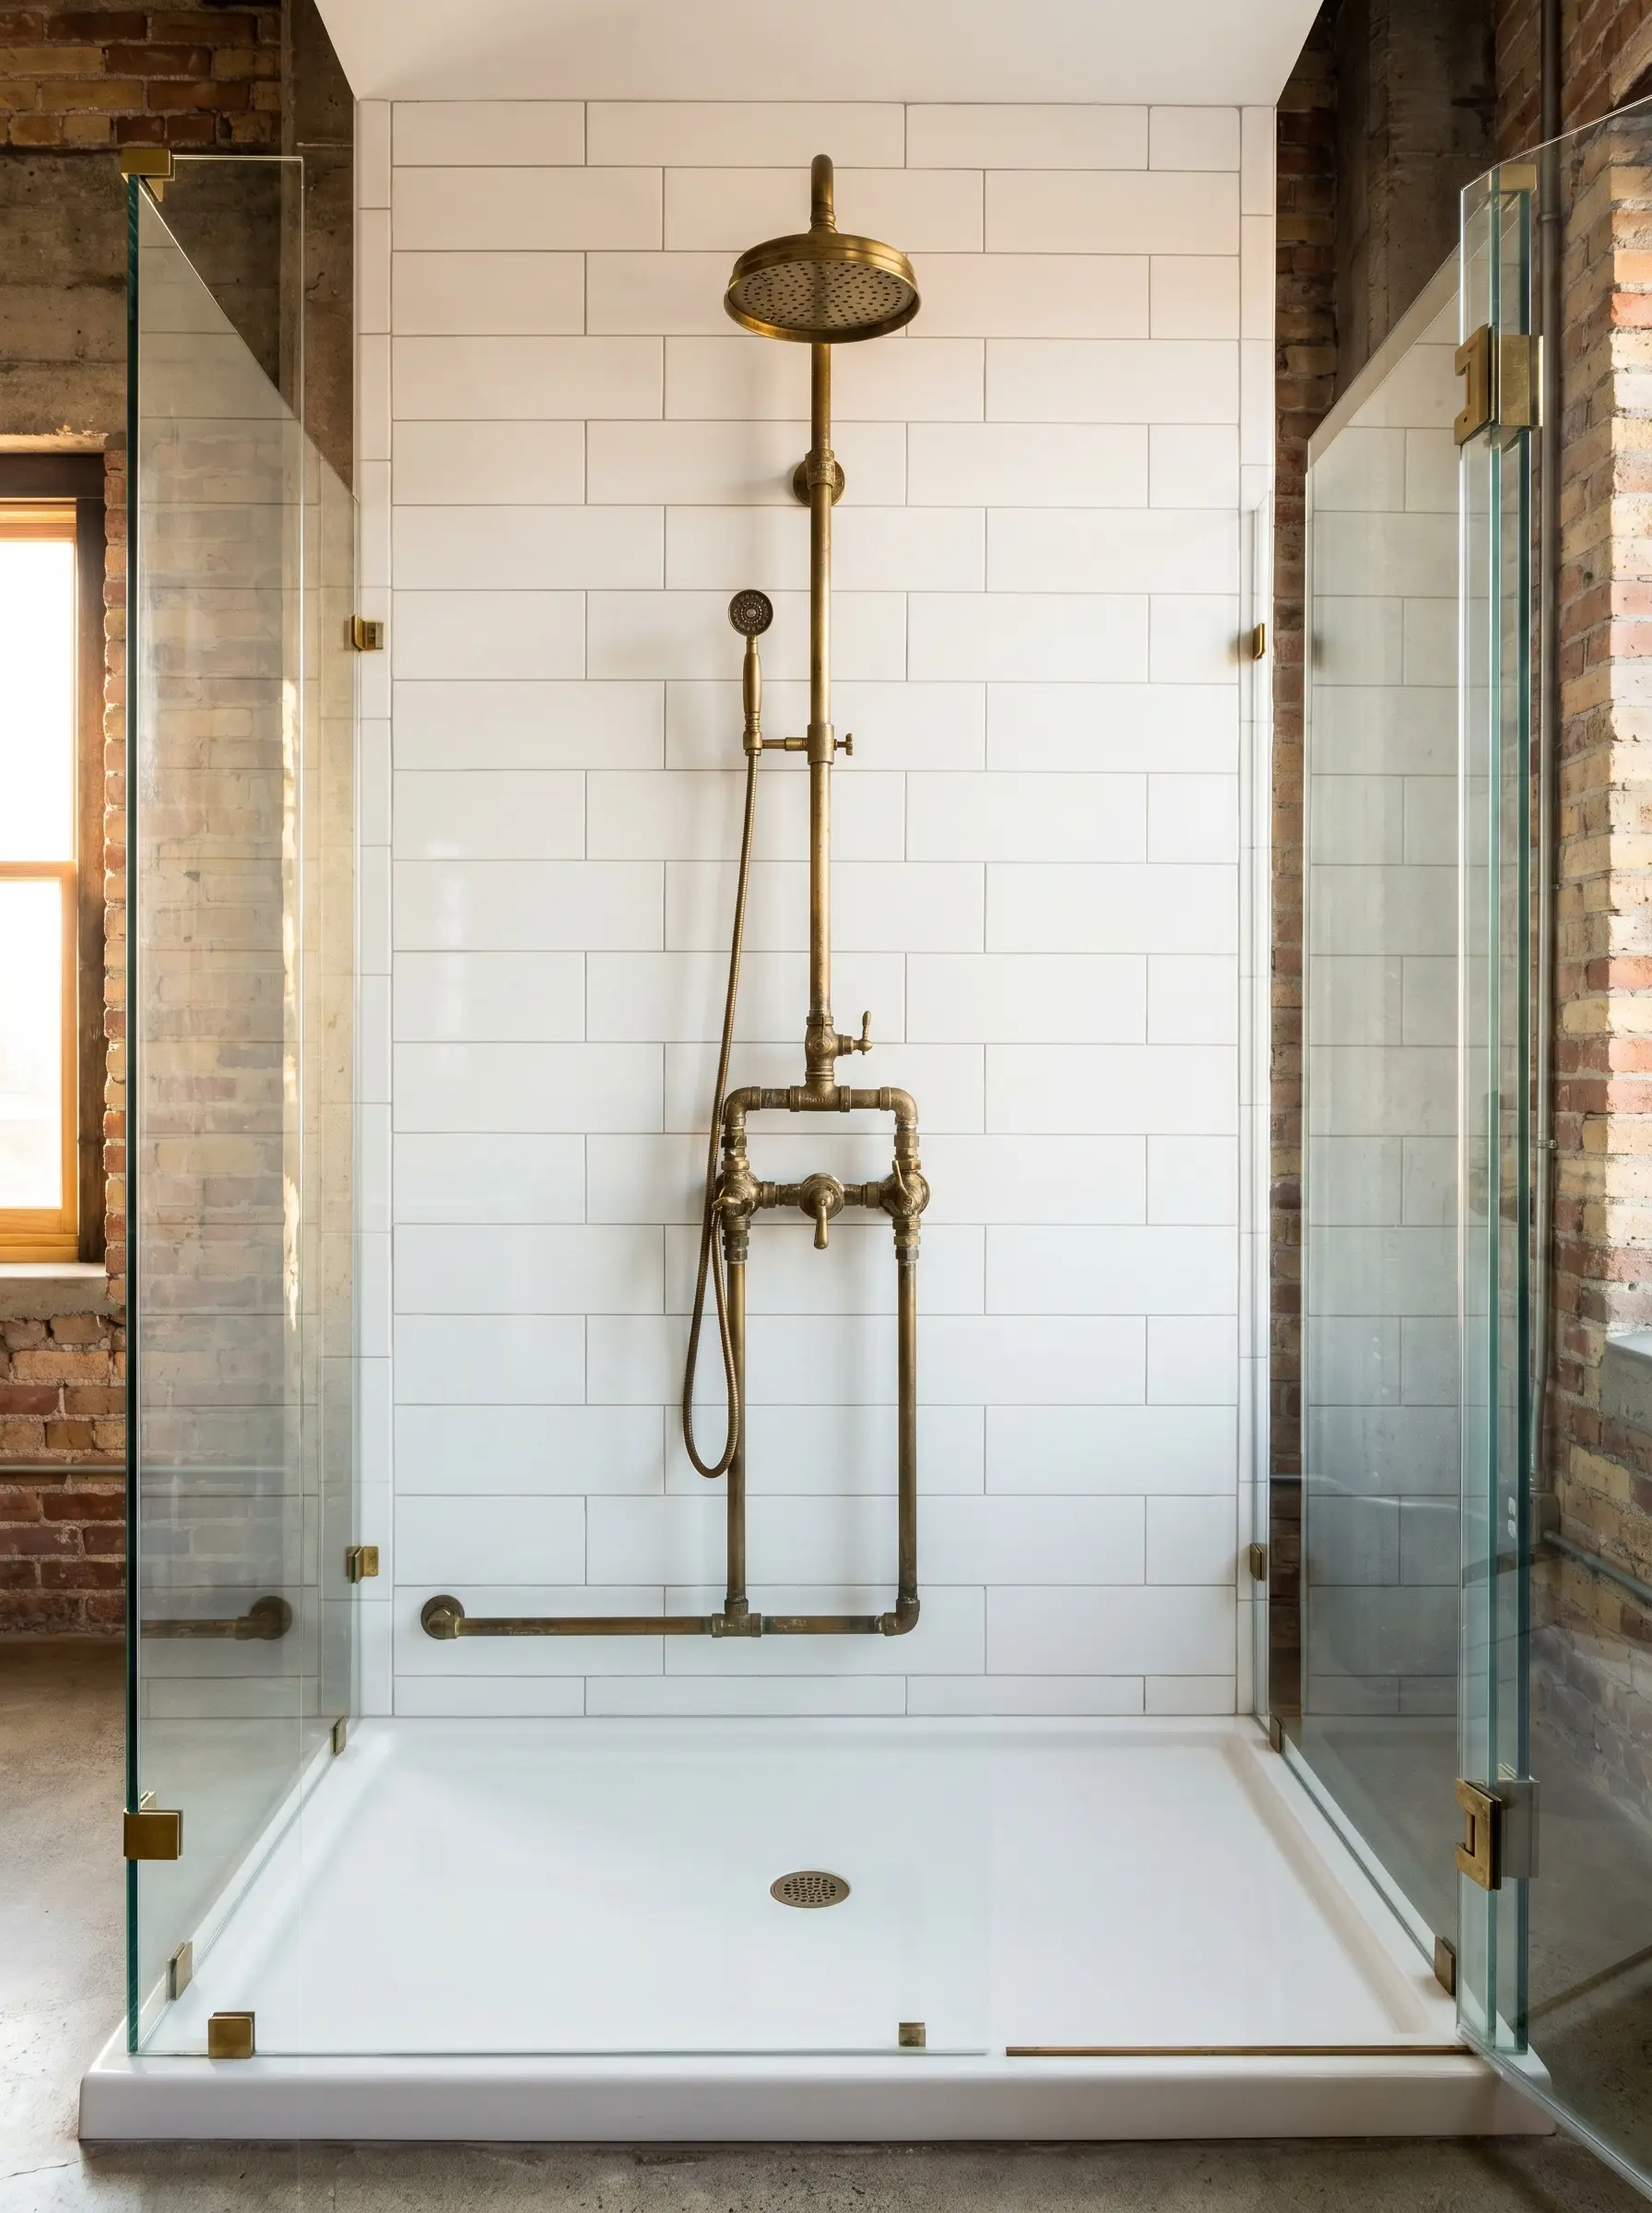
An exposed, wall-mounted shower system turns necessary plumbing into a rugged, architectural statement. Set against a crisp, restrained background of white subway tile, the intricate brass piping and diverters become a study in utility-as-art.
- Vibe: Industrial Heritage
- Key Materials: Exposed brass shower column, 3×6 gloss white ceramic tile
- Styling Pro-Tip: Center the exposed pipe perfectly on a vertical grout line for a flawless, symmetrical installation.
18. Recess a Brass-Trimmed Niche Inside a White Marble Shower
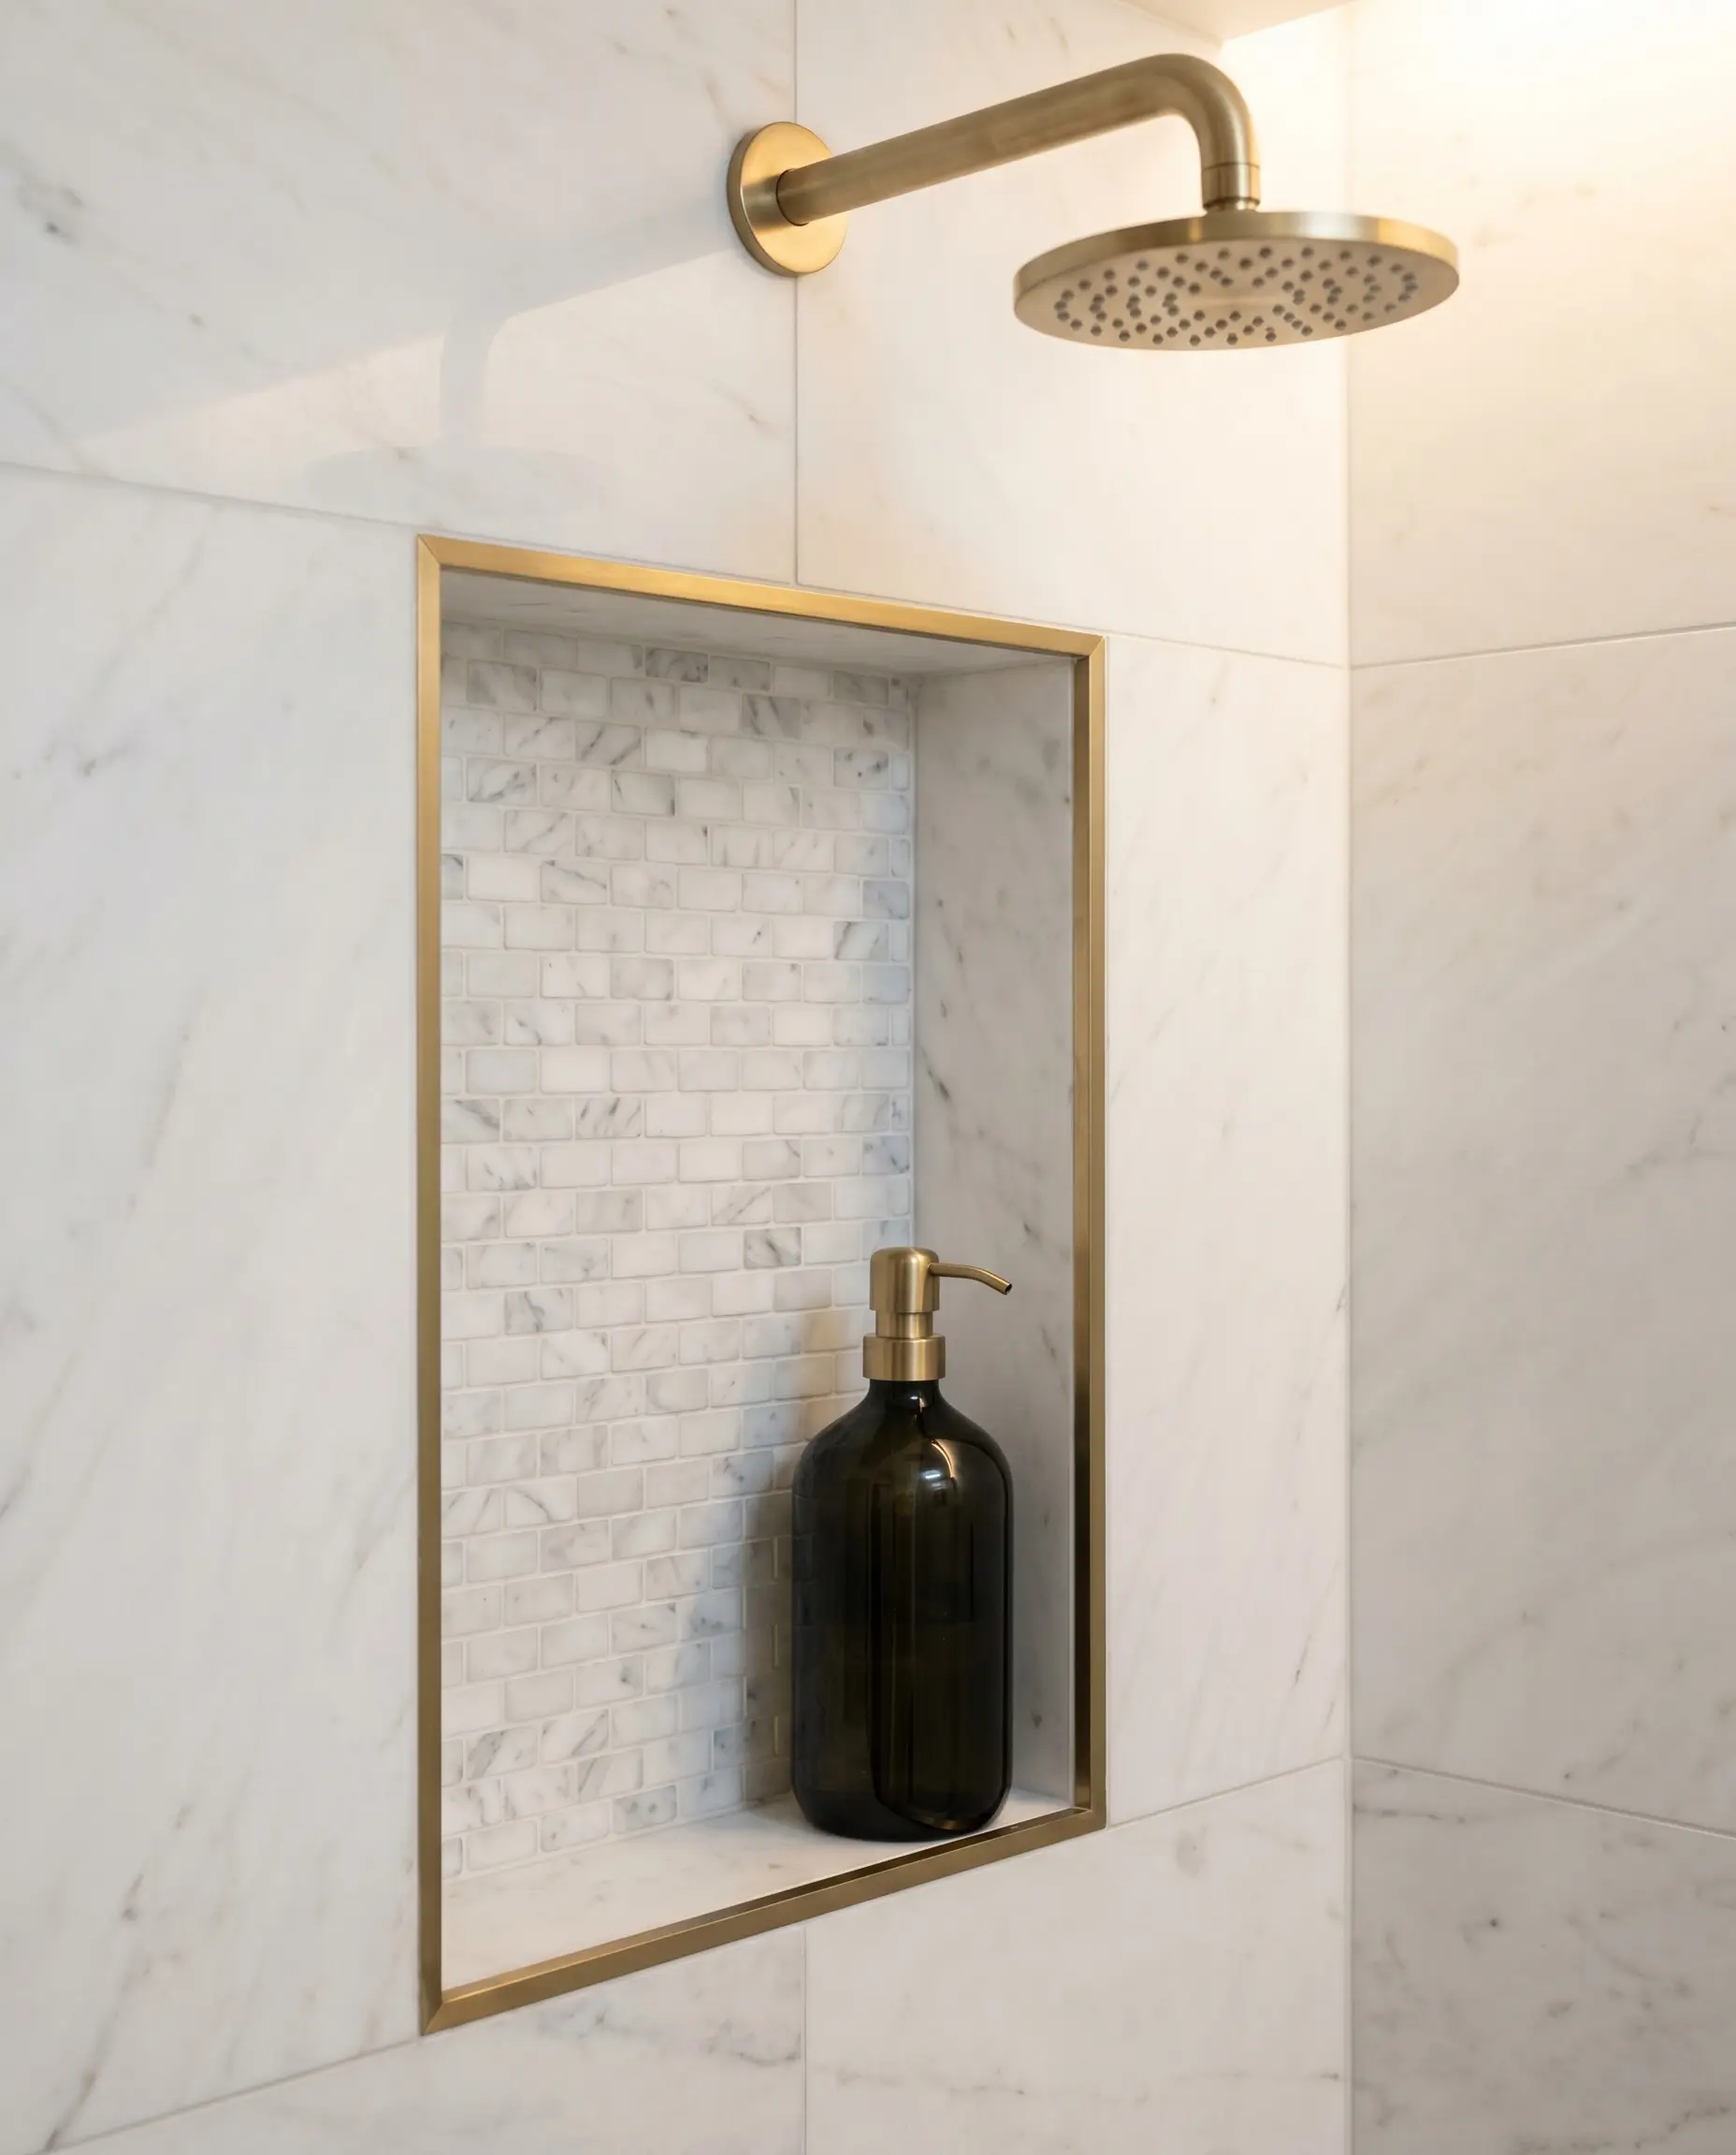
Functional storage should never interrupt the visual flow of a luxury wet room. Trimming the inside edges of a white marble shower niche with a thin brass profile transforms shampoo storage into an intentional, jewel-box design feature.
- Vibe: Tailored Modern
- Key Materials: White marble mosaic tile, brass metal edge trim
- Styling Pro-Tip: Size the height of your niche to perfectly accommodate your tallest luxury pump bottle.
19. Upgrade a Standard White Tub with a Floor-Mount Brass Filler
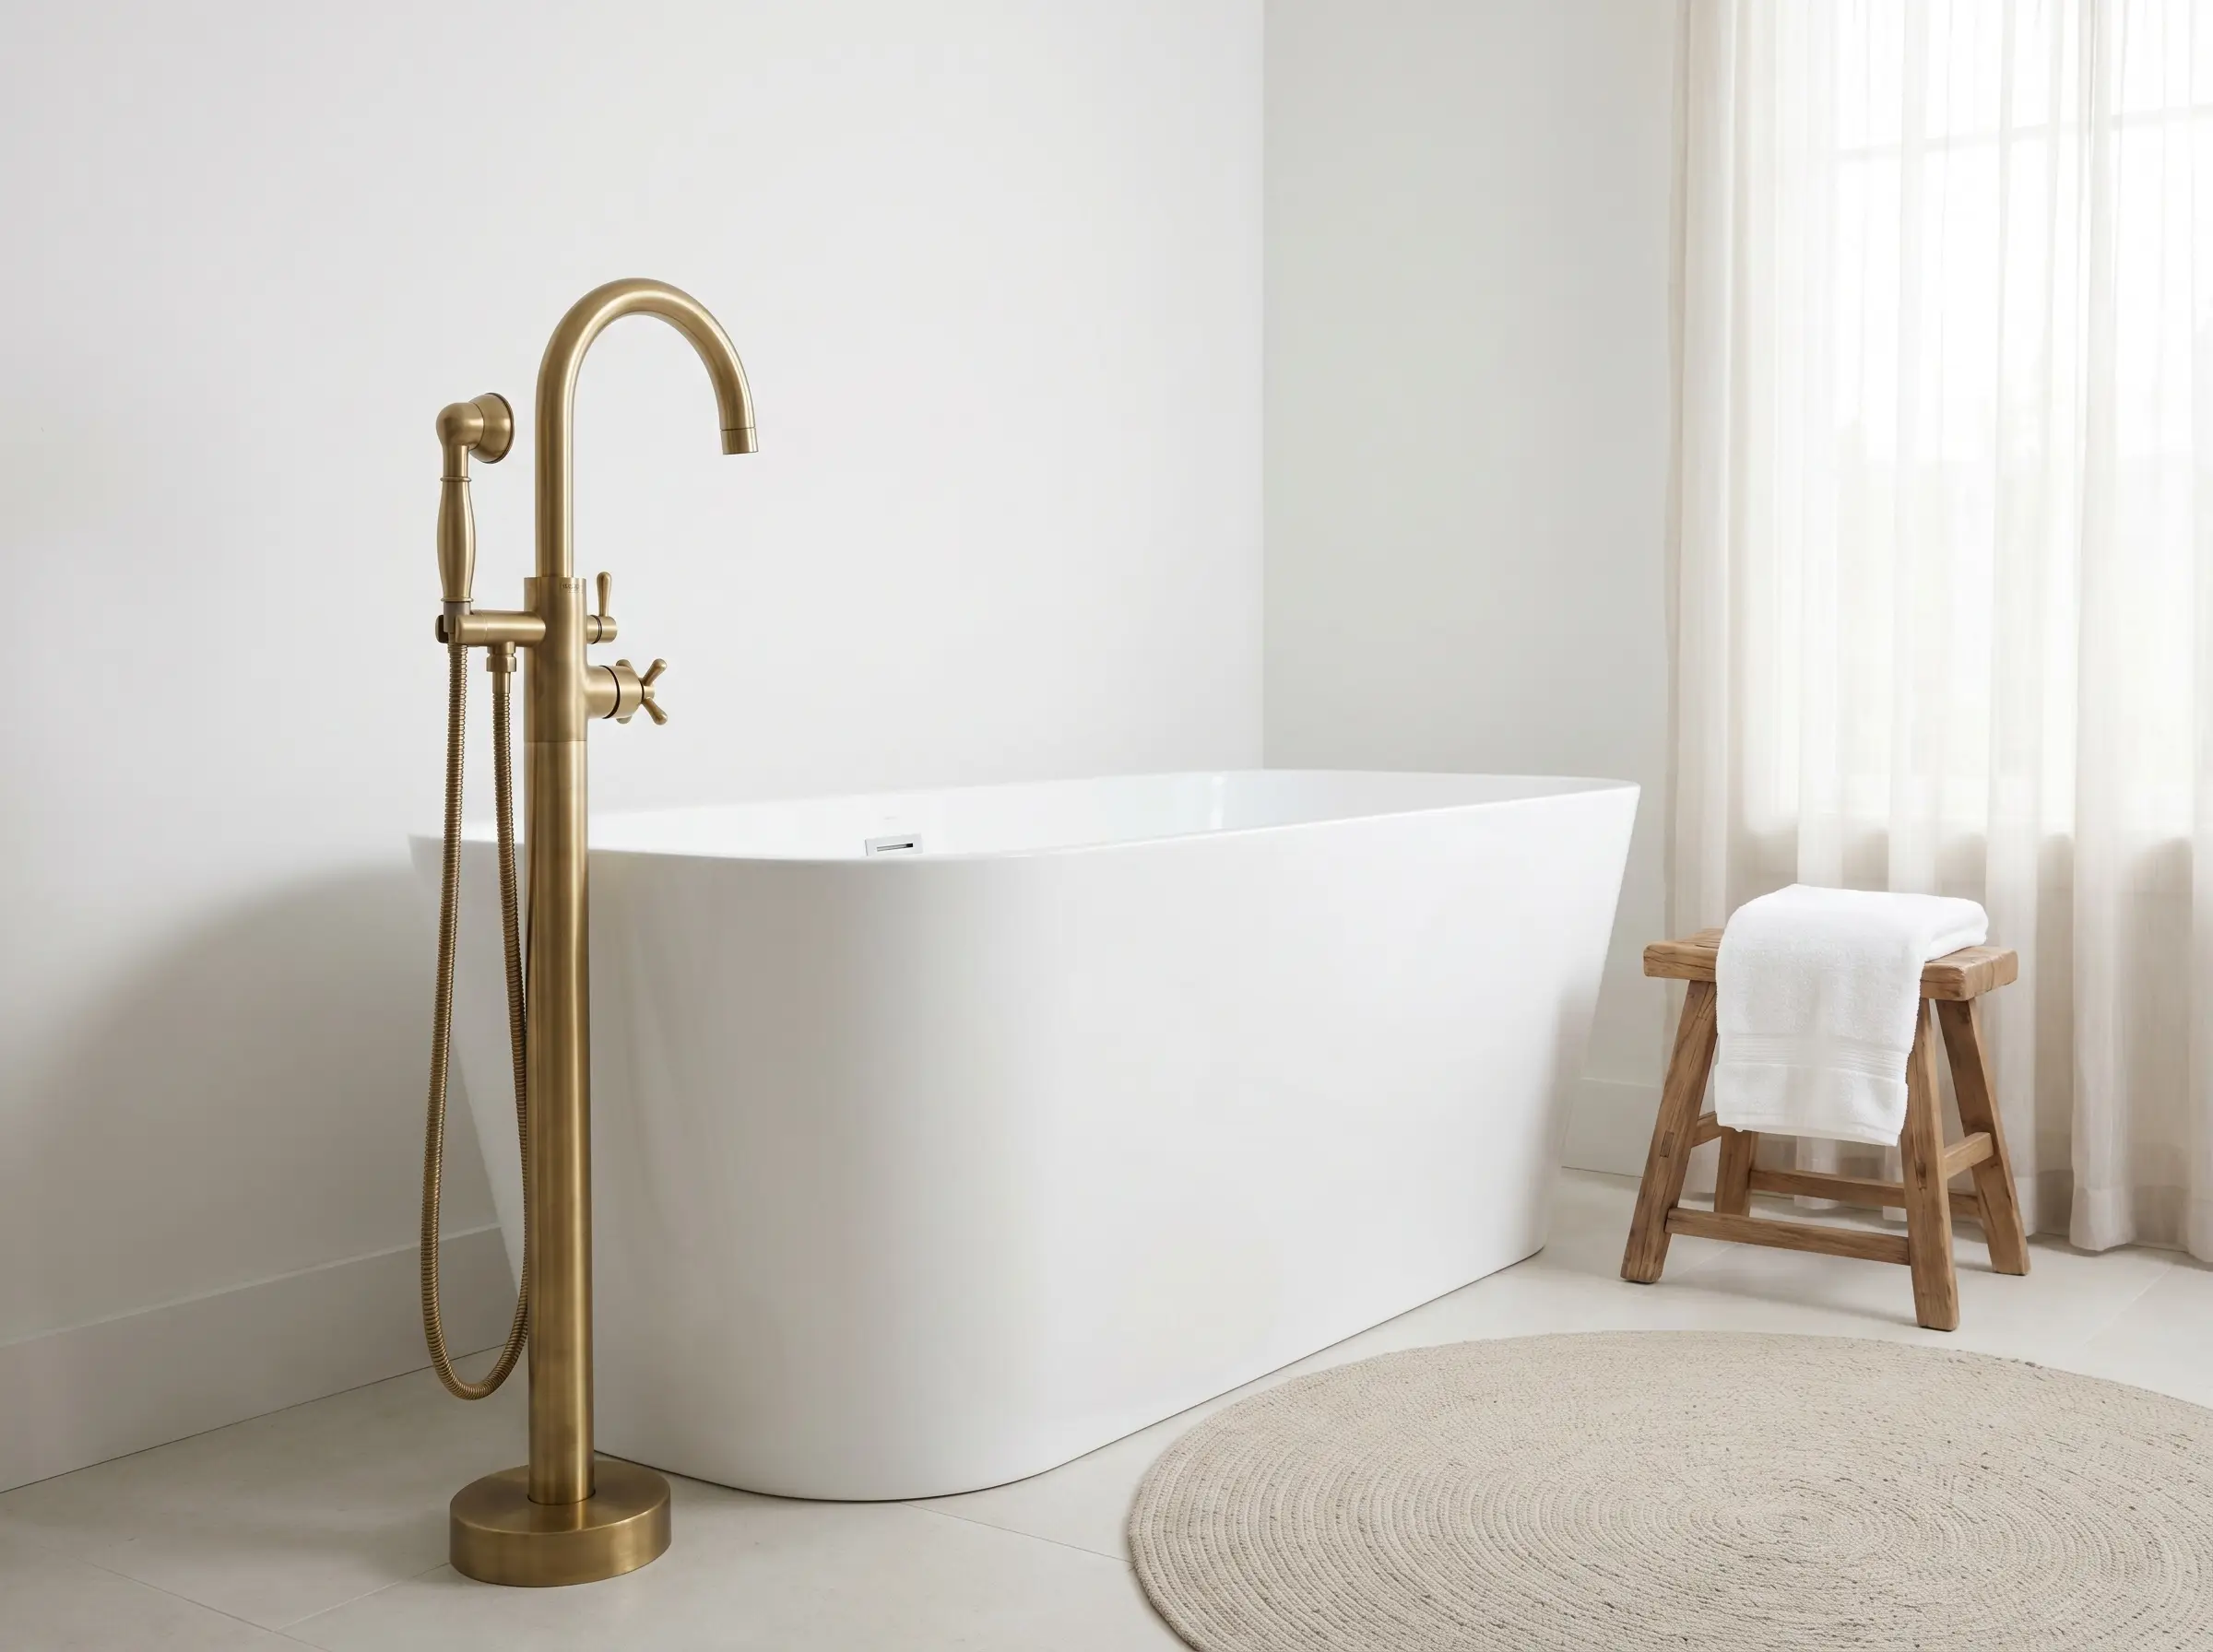
You can dramatically upgrade an accessible white acrylic soaking tub by investing heavily in the surrounding hardware. A statuesque, floor-mounted brass tub filler introduces immediate verticality and high-end hotel appeal to a standard fixture.
- Vibe: Accessible Luxury
- Key Materials: Freestanding acrylic tub, floor-mounted brass telephone faucet
- Styling Pro-Tip: Ensure the spout reach extends far enough past the tub’s lip to prevent splashing on the floor.
20. Mix Unlacquered Brass Showerheads with Concealed Thermostatic Valves
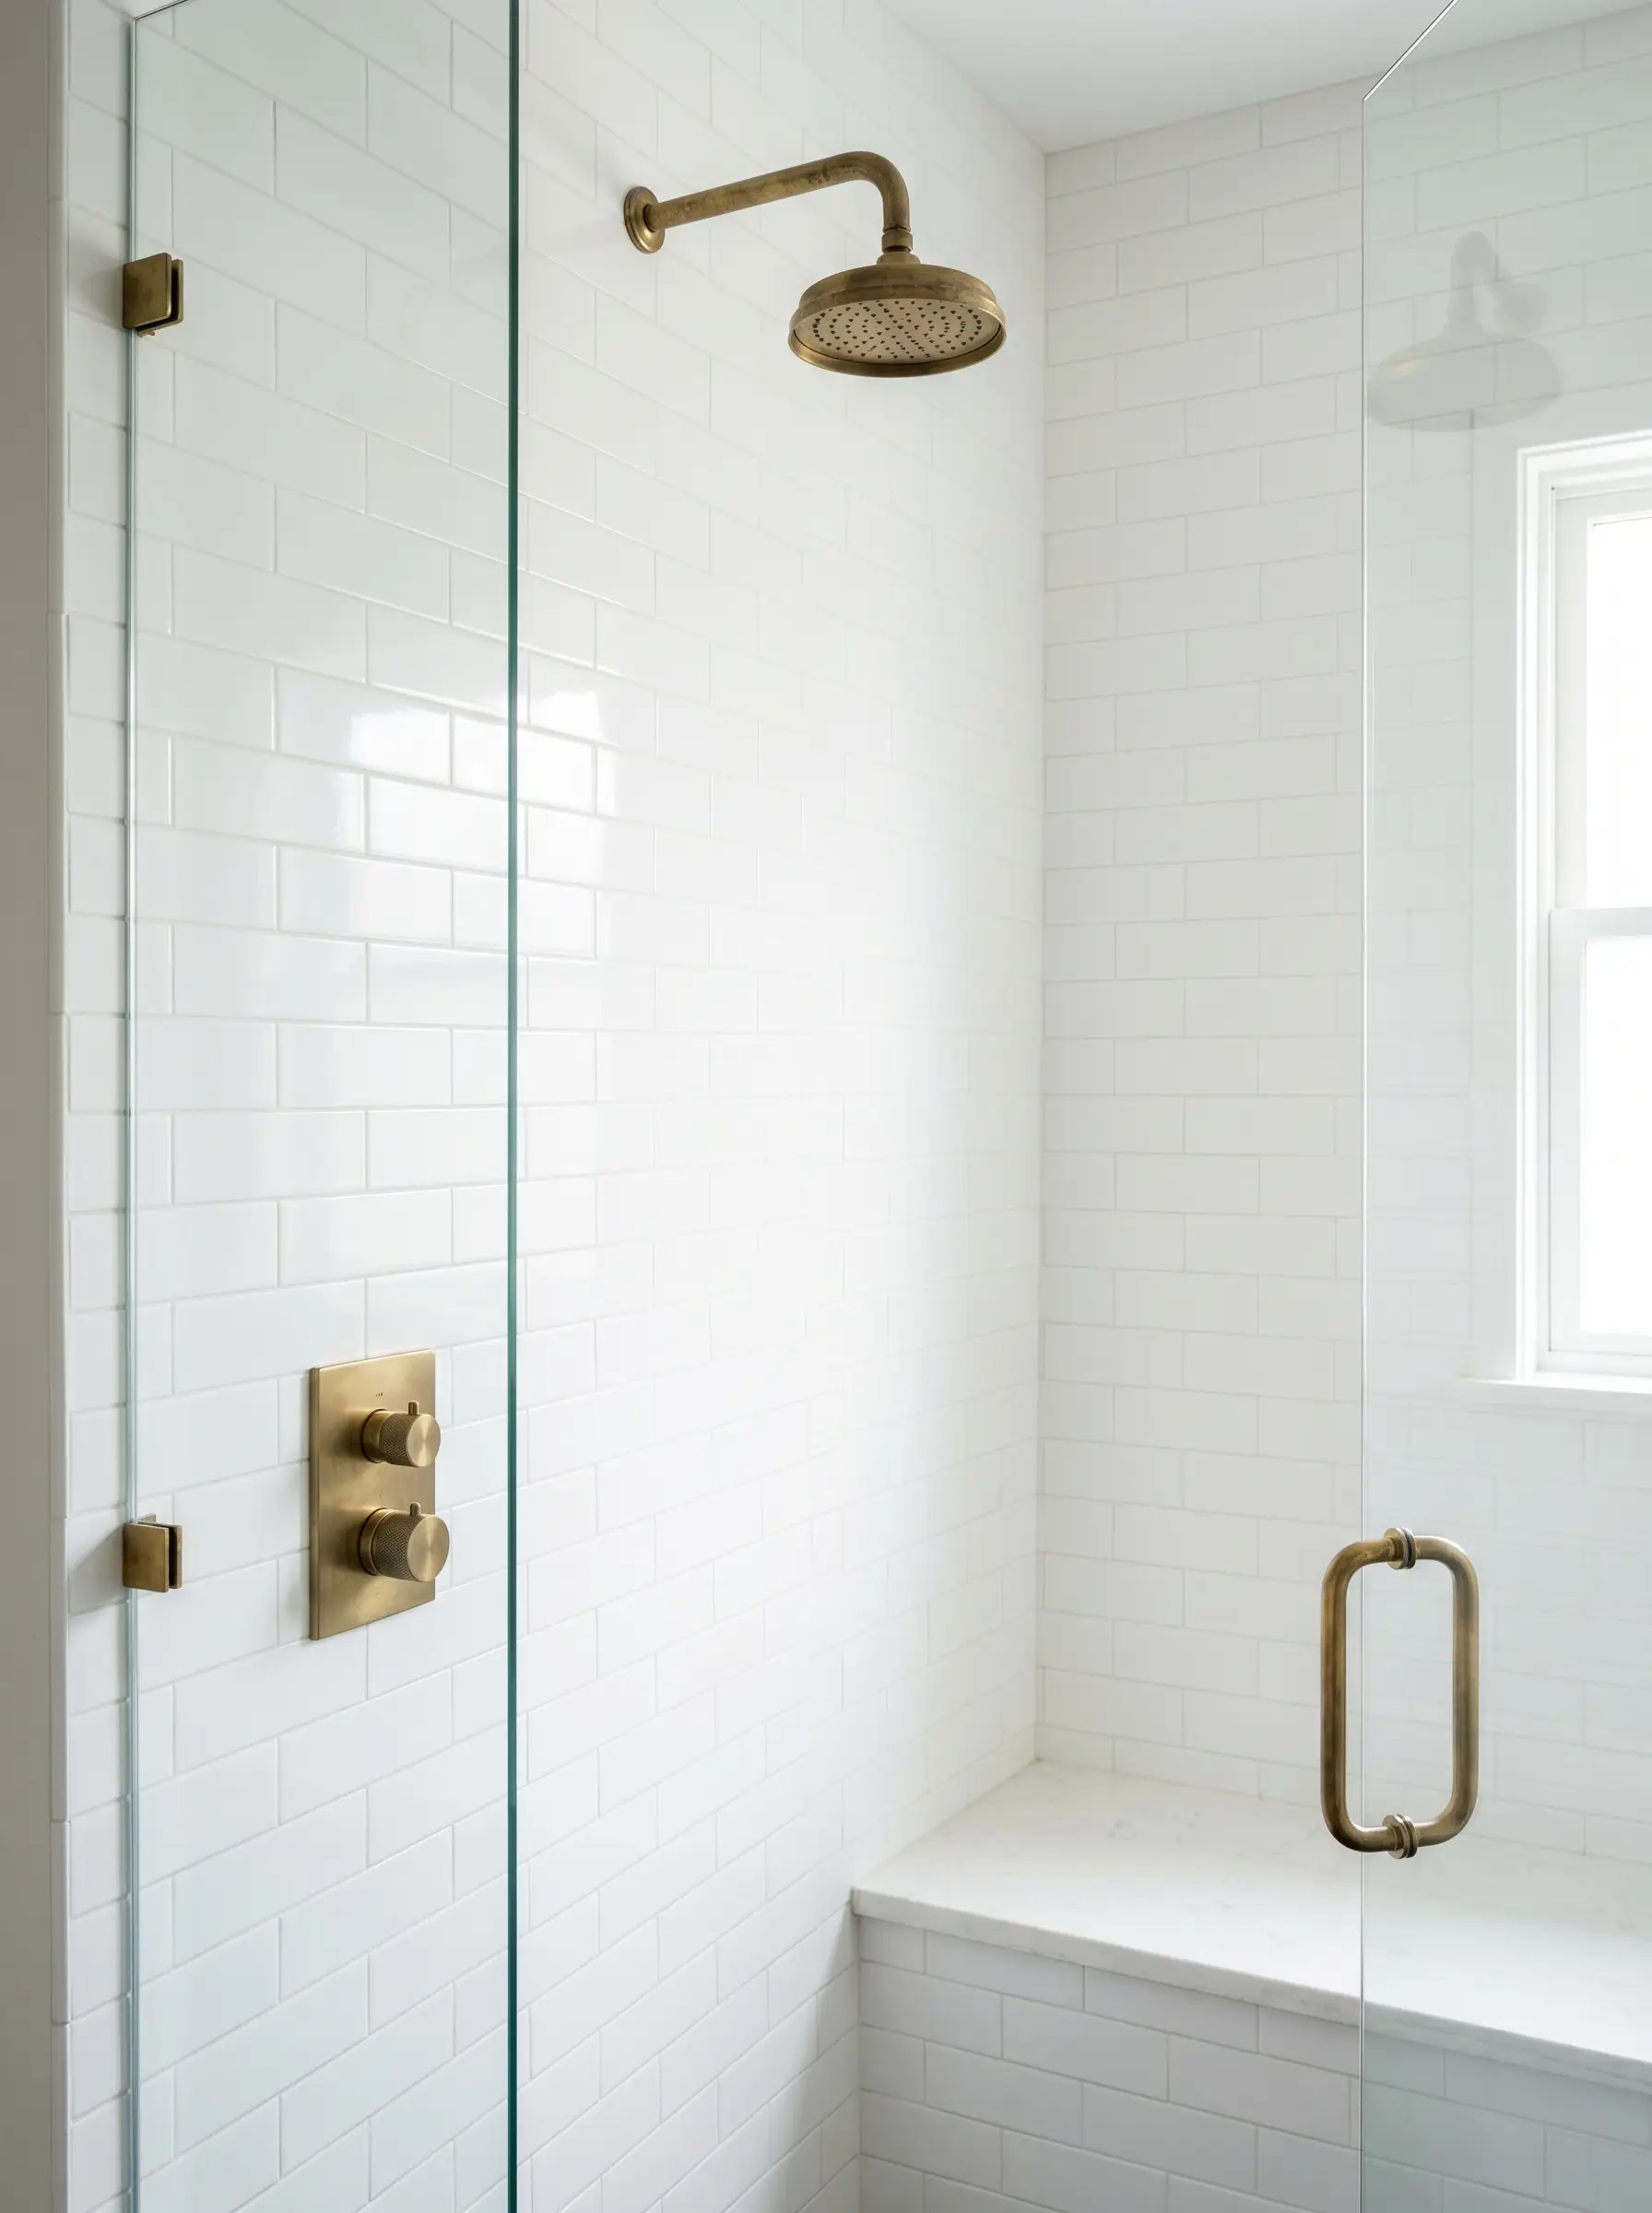
High-end bespoke showers balance traditional, tactile finishes with highly modern, precise plumbing technology. Pairing a classic, wide-face unlacquered brass showerhead with a sleek, minimalist thermostatic control plate offers the best of both eras.
- Vibe: Bespoke Luxury
- Key Materials: 8-inch unlacquered brass rainhead, brass thermostatic trim plate
- Styling Pro-Tip: Install the thermostatic valve near the shower entrance so you can turn on the water without getting wet.
21. Select a Living Finish Brass Drain to Age with the Shower Floor
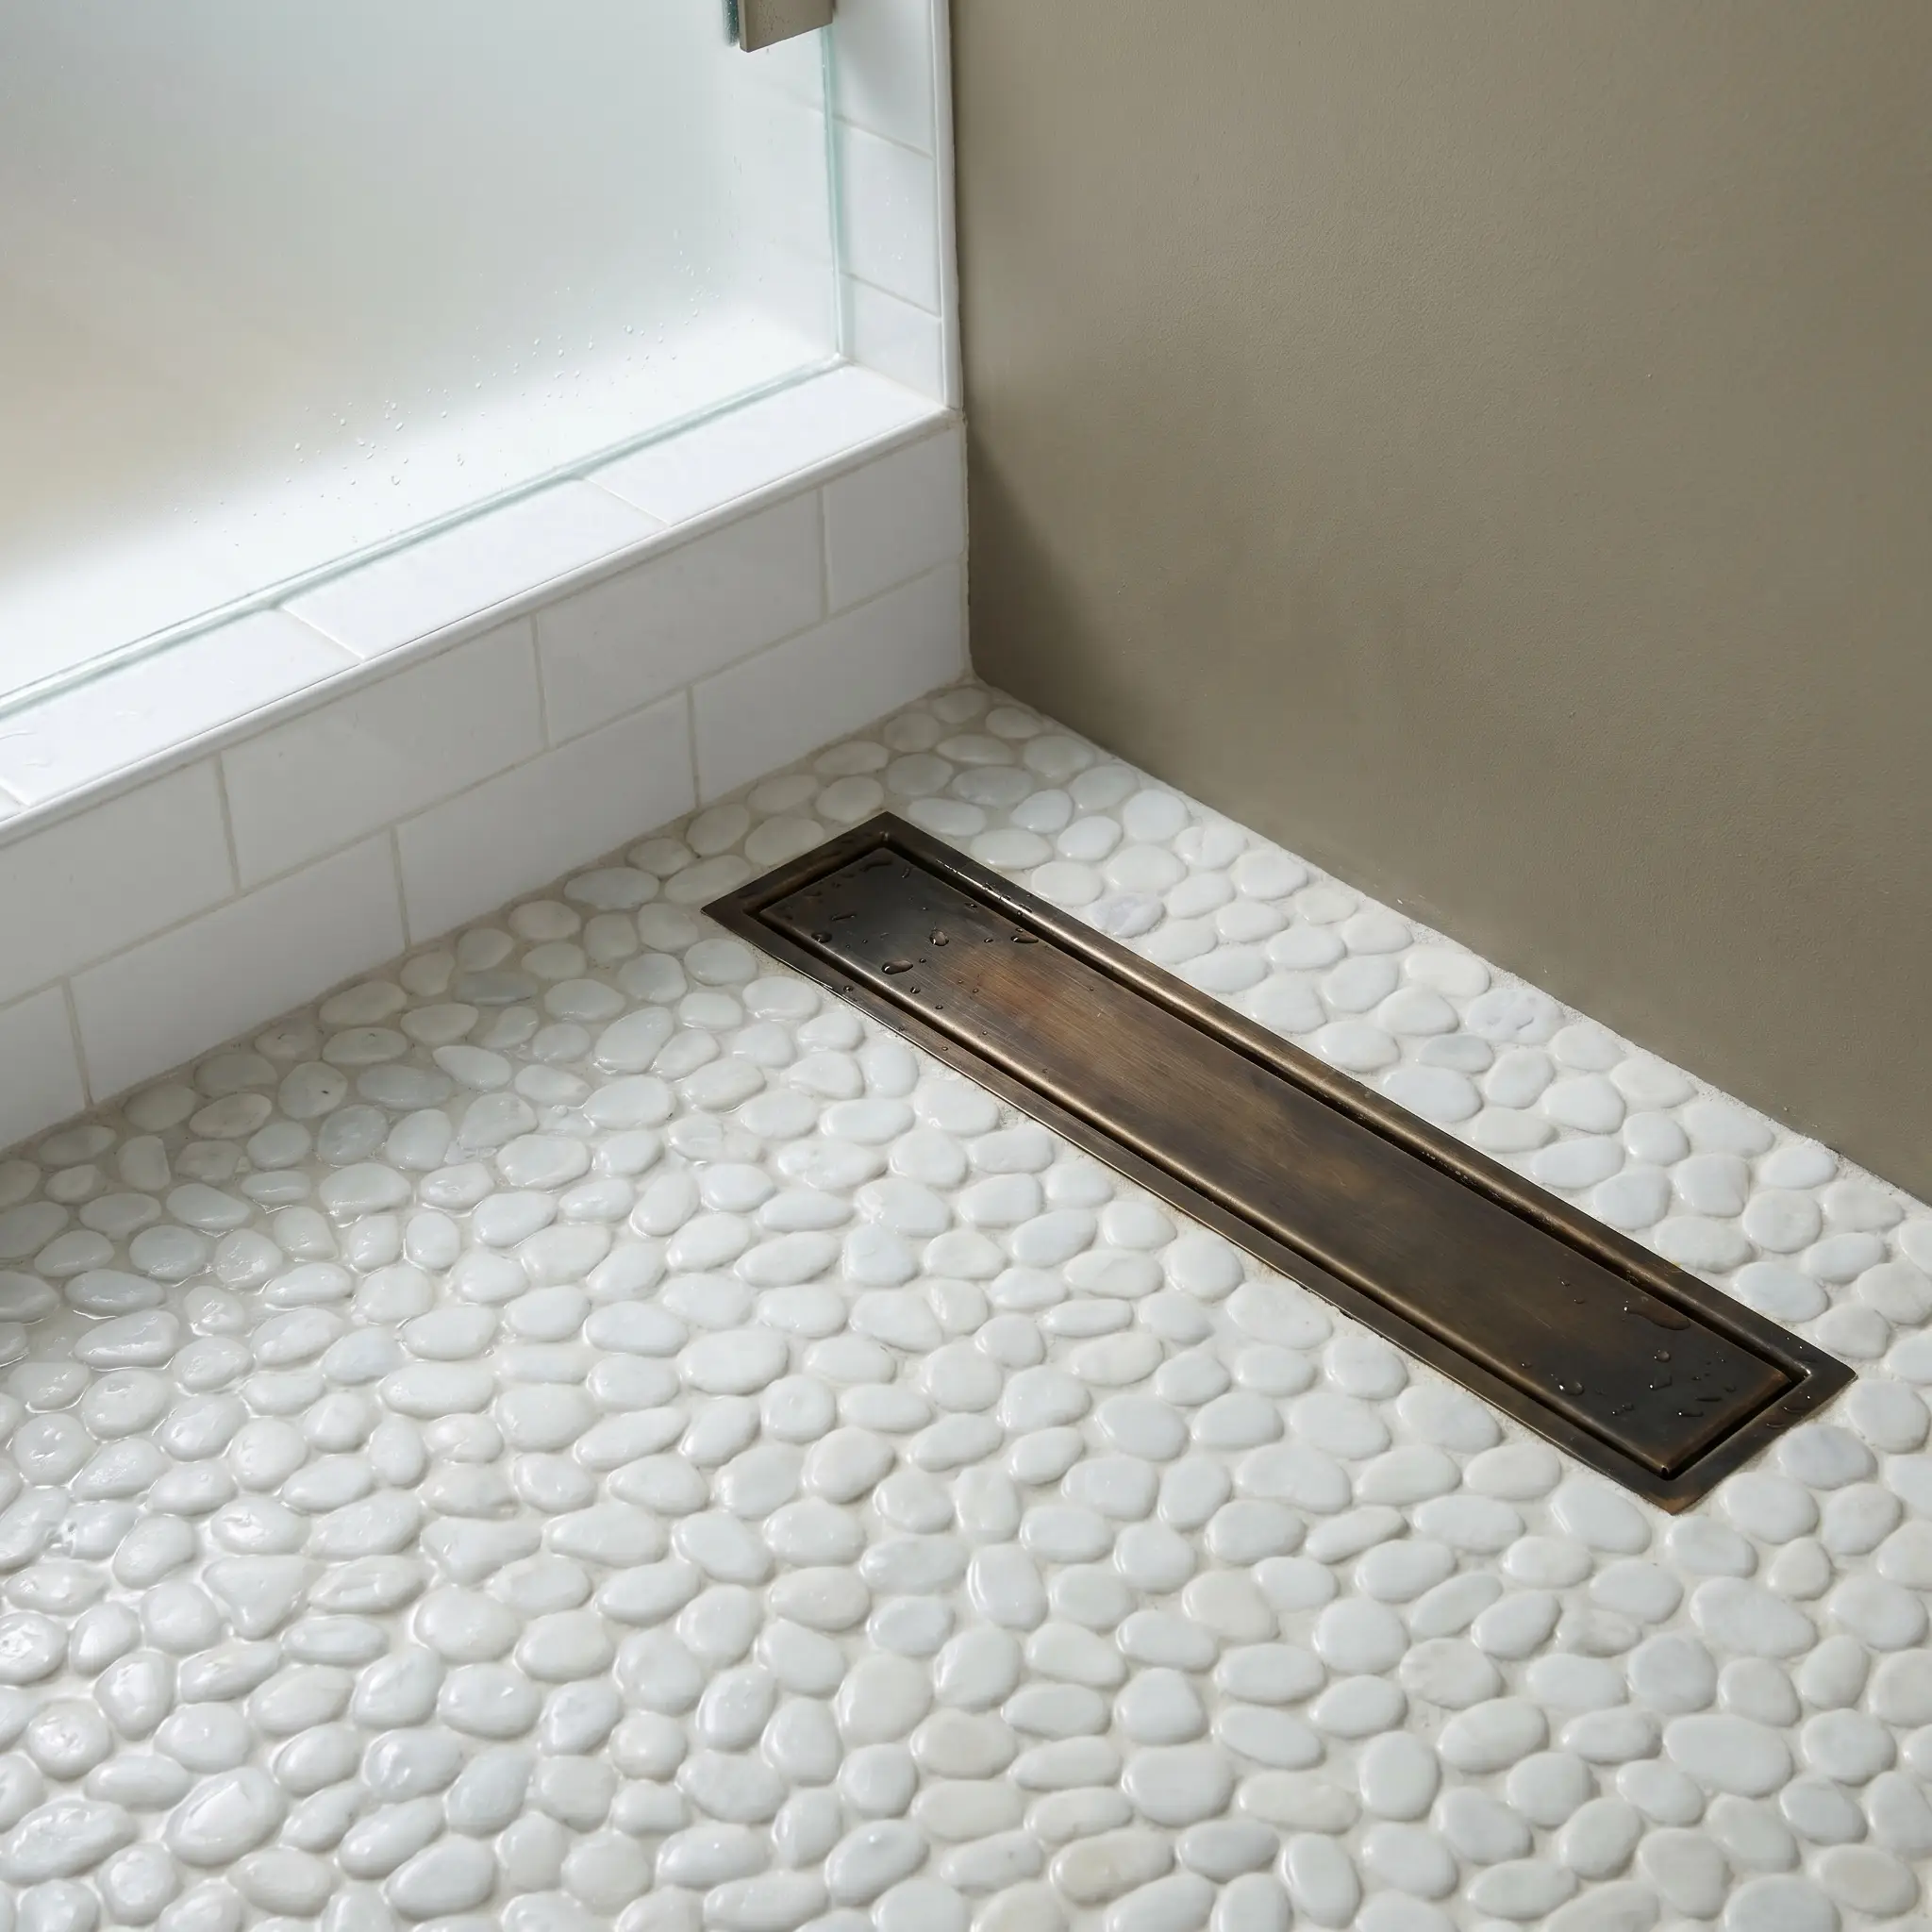
Rather than fighting the natural oxidation process in the wettest part of the room, lean into the beauty of material evolution. A living finish brass drain will slowly darken and spot, developing a rich patina that grounds the pristine white shower pan.
- Vibe: Organic Modern
- Key Materials: Unlacquered brass linear drain, white pebble mosaic floor
- Styling Pro-Tip: Never use harsh chemical cleaners on a living finish drain; clean strictly with mild dish soap and water.
Grounding the Palette with a Third Element
The most frequent architectural mistake in this aesthetic is designing a room exclusively with white and gold. Without a third grounding element to absorb the high contrast, the space will feel unmoored and visually blinding. Introducing a distinct third material anchors the palette, providing essential depth and psychological warmth.
22. Introduce Rift-Sawn White Oak to Warm the White and Gold
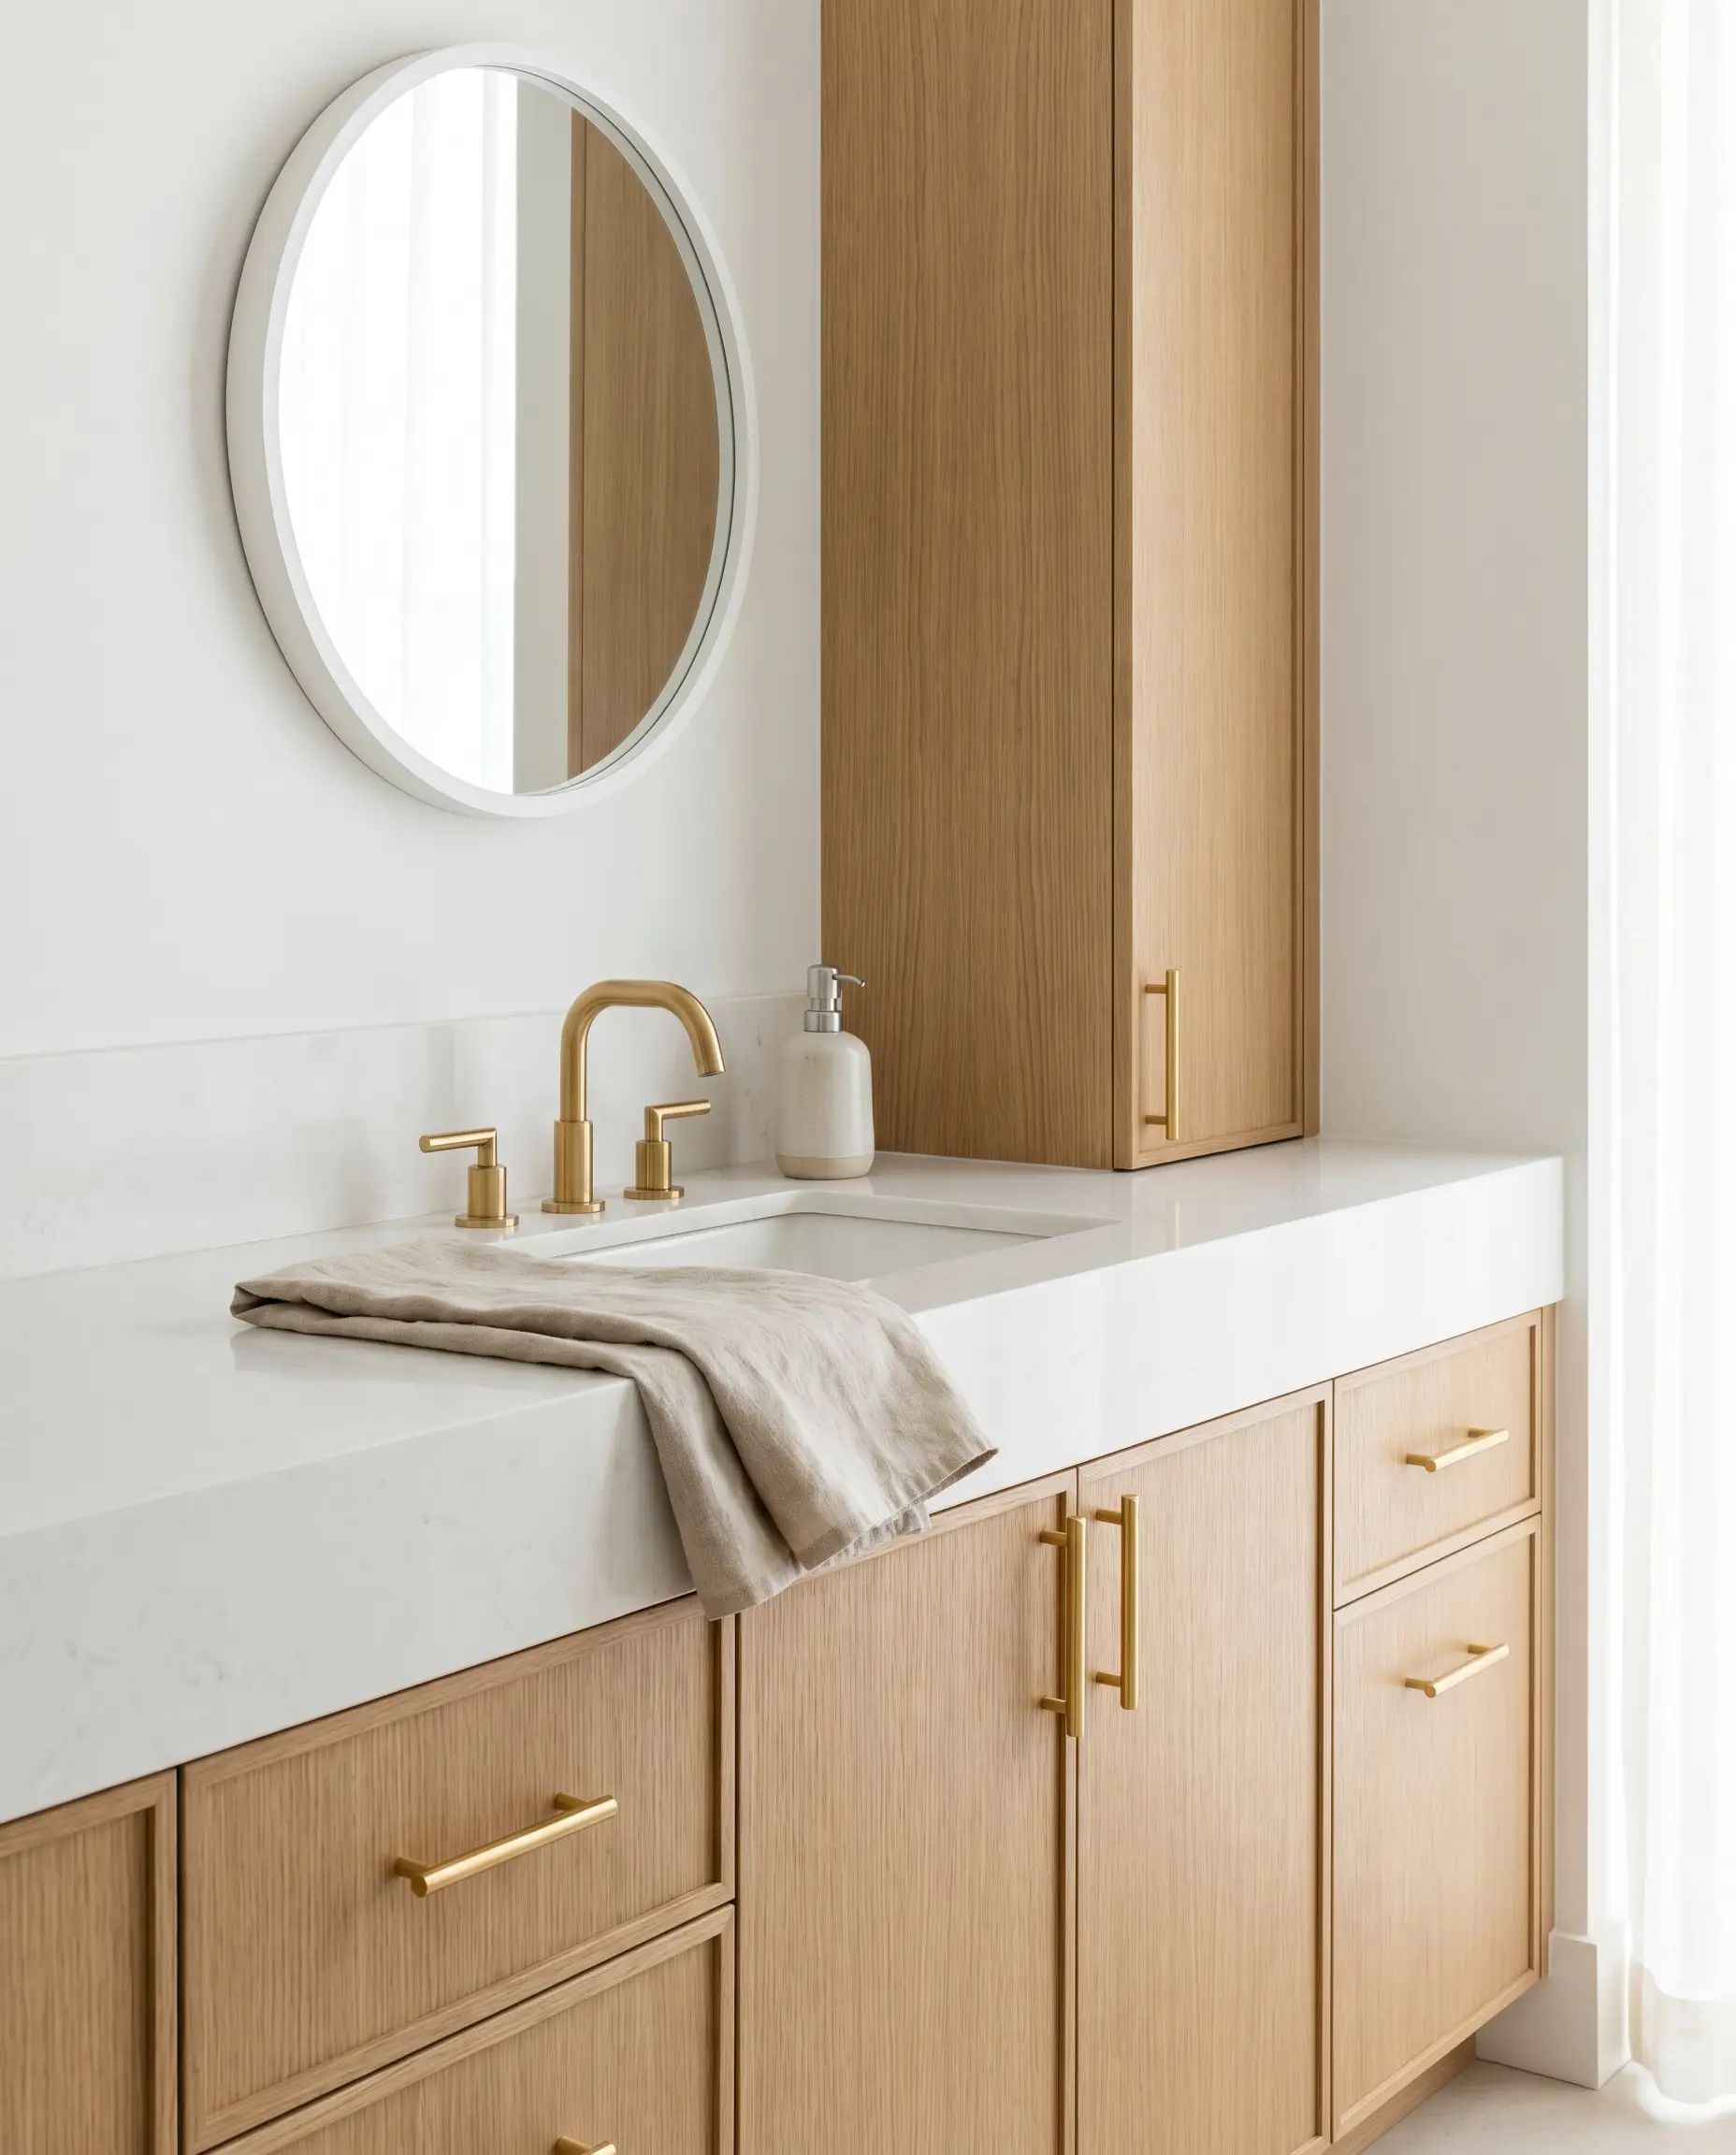
The linear, tight grain of rift-sawn white oak serves as a highly effective neutralizer for bright metals and stark stones. Integrating an oak vanity or floating shelves injects organic warmth, perfectly bridging the gap between a white wall and a brass fixture.
- Vibe: Organic Modern
- Key Materials: Custom rift-sawn white oak cabinetry, clear matte wood sealer
- Styling Pro-Tip: Keep the wood finish as natural and matte as possible to avoid clashing with the sheen of your metal hardware.
23. Anchor the Room with a Matte Black Hexagon Floor Tile
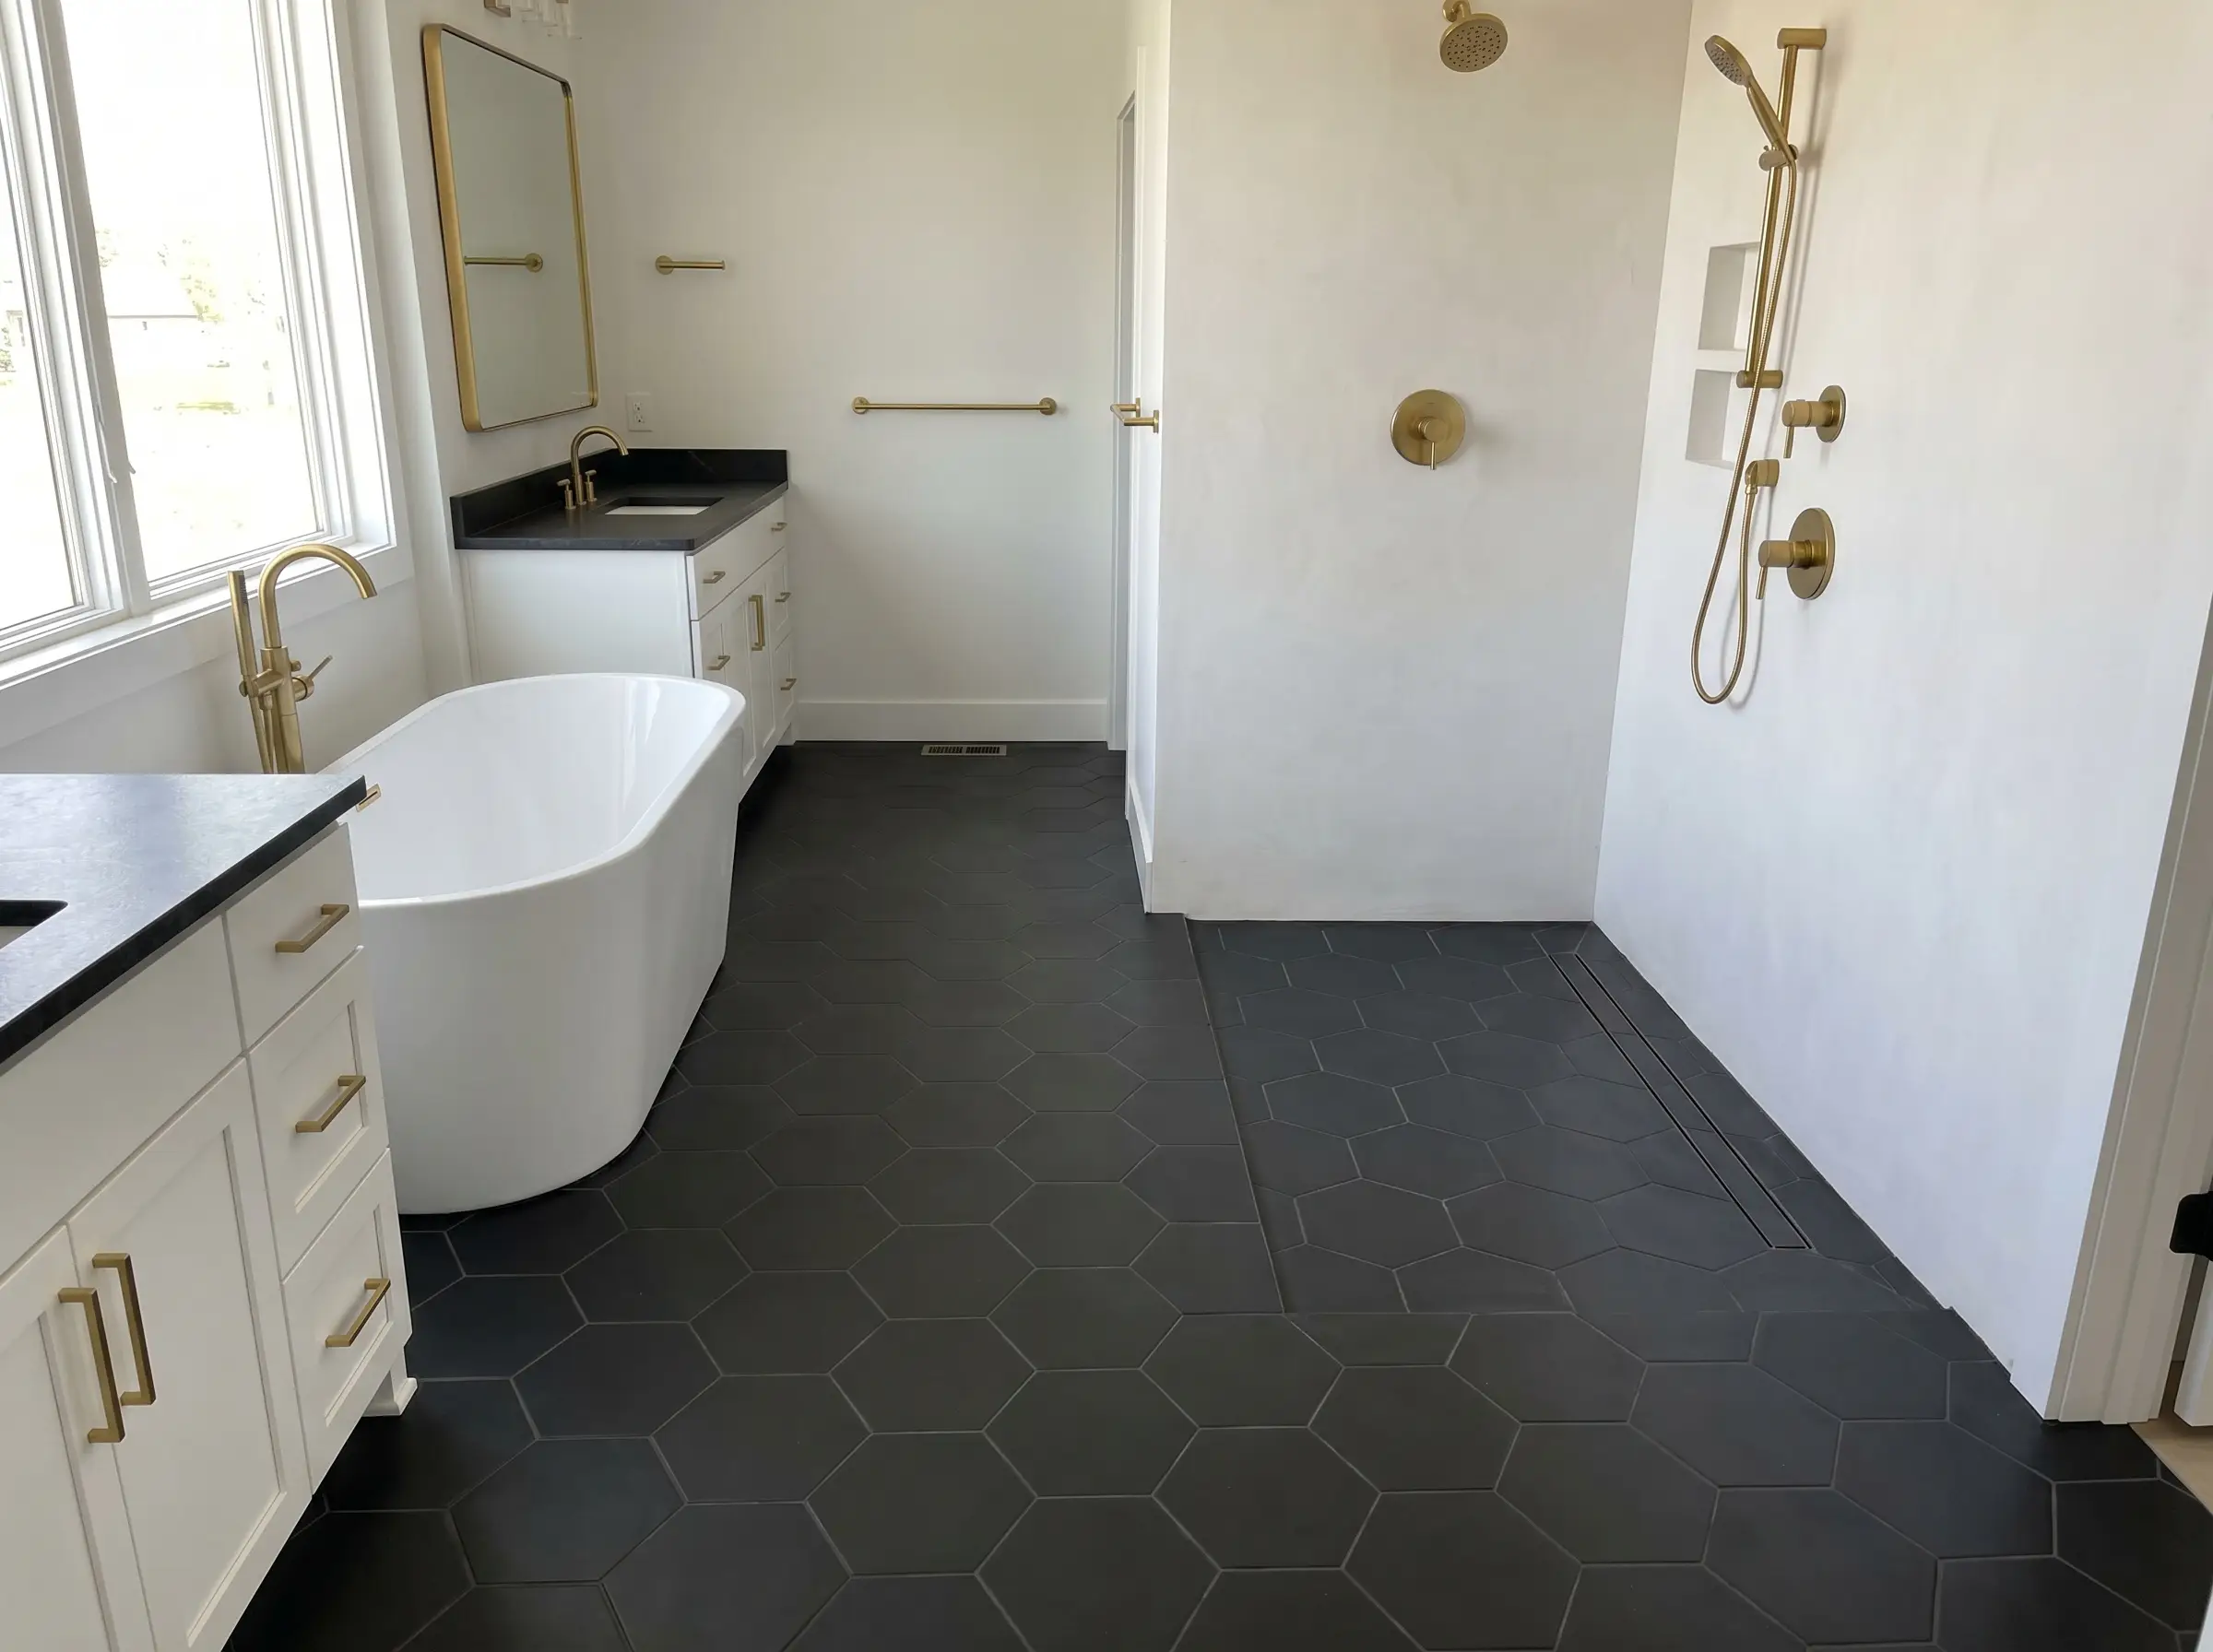
A white and gold palette can easily float away into visual weightlessness. Laying a heavy, matte black floor tile instantly grounds the room, allowing the white walls to recede and the gold hardware to pop with sharp, graphic intensity.
- Vibe: High-Contrast Modern
- Key Materials: 8-inch matte black porcelain hexagon tile, charcoal grout
- Styling Pro-Tip: Run the black tile straight into the curbless shower pan to maximize the perceived footprint of the floor.
24. Layer Olive Green or Terracotta Vintage Rugs Over White Tile
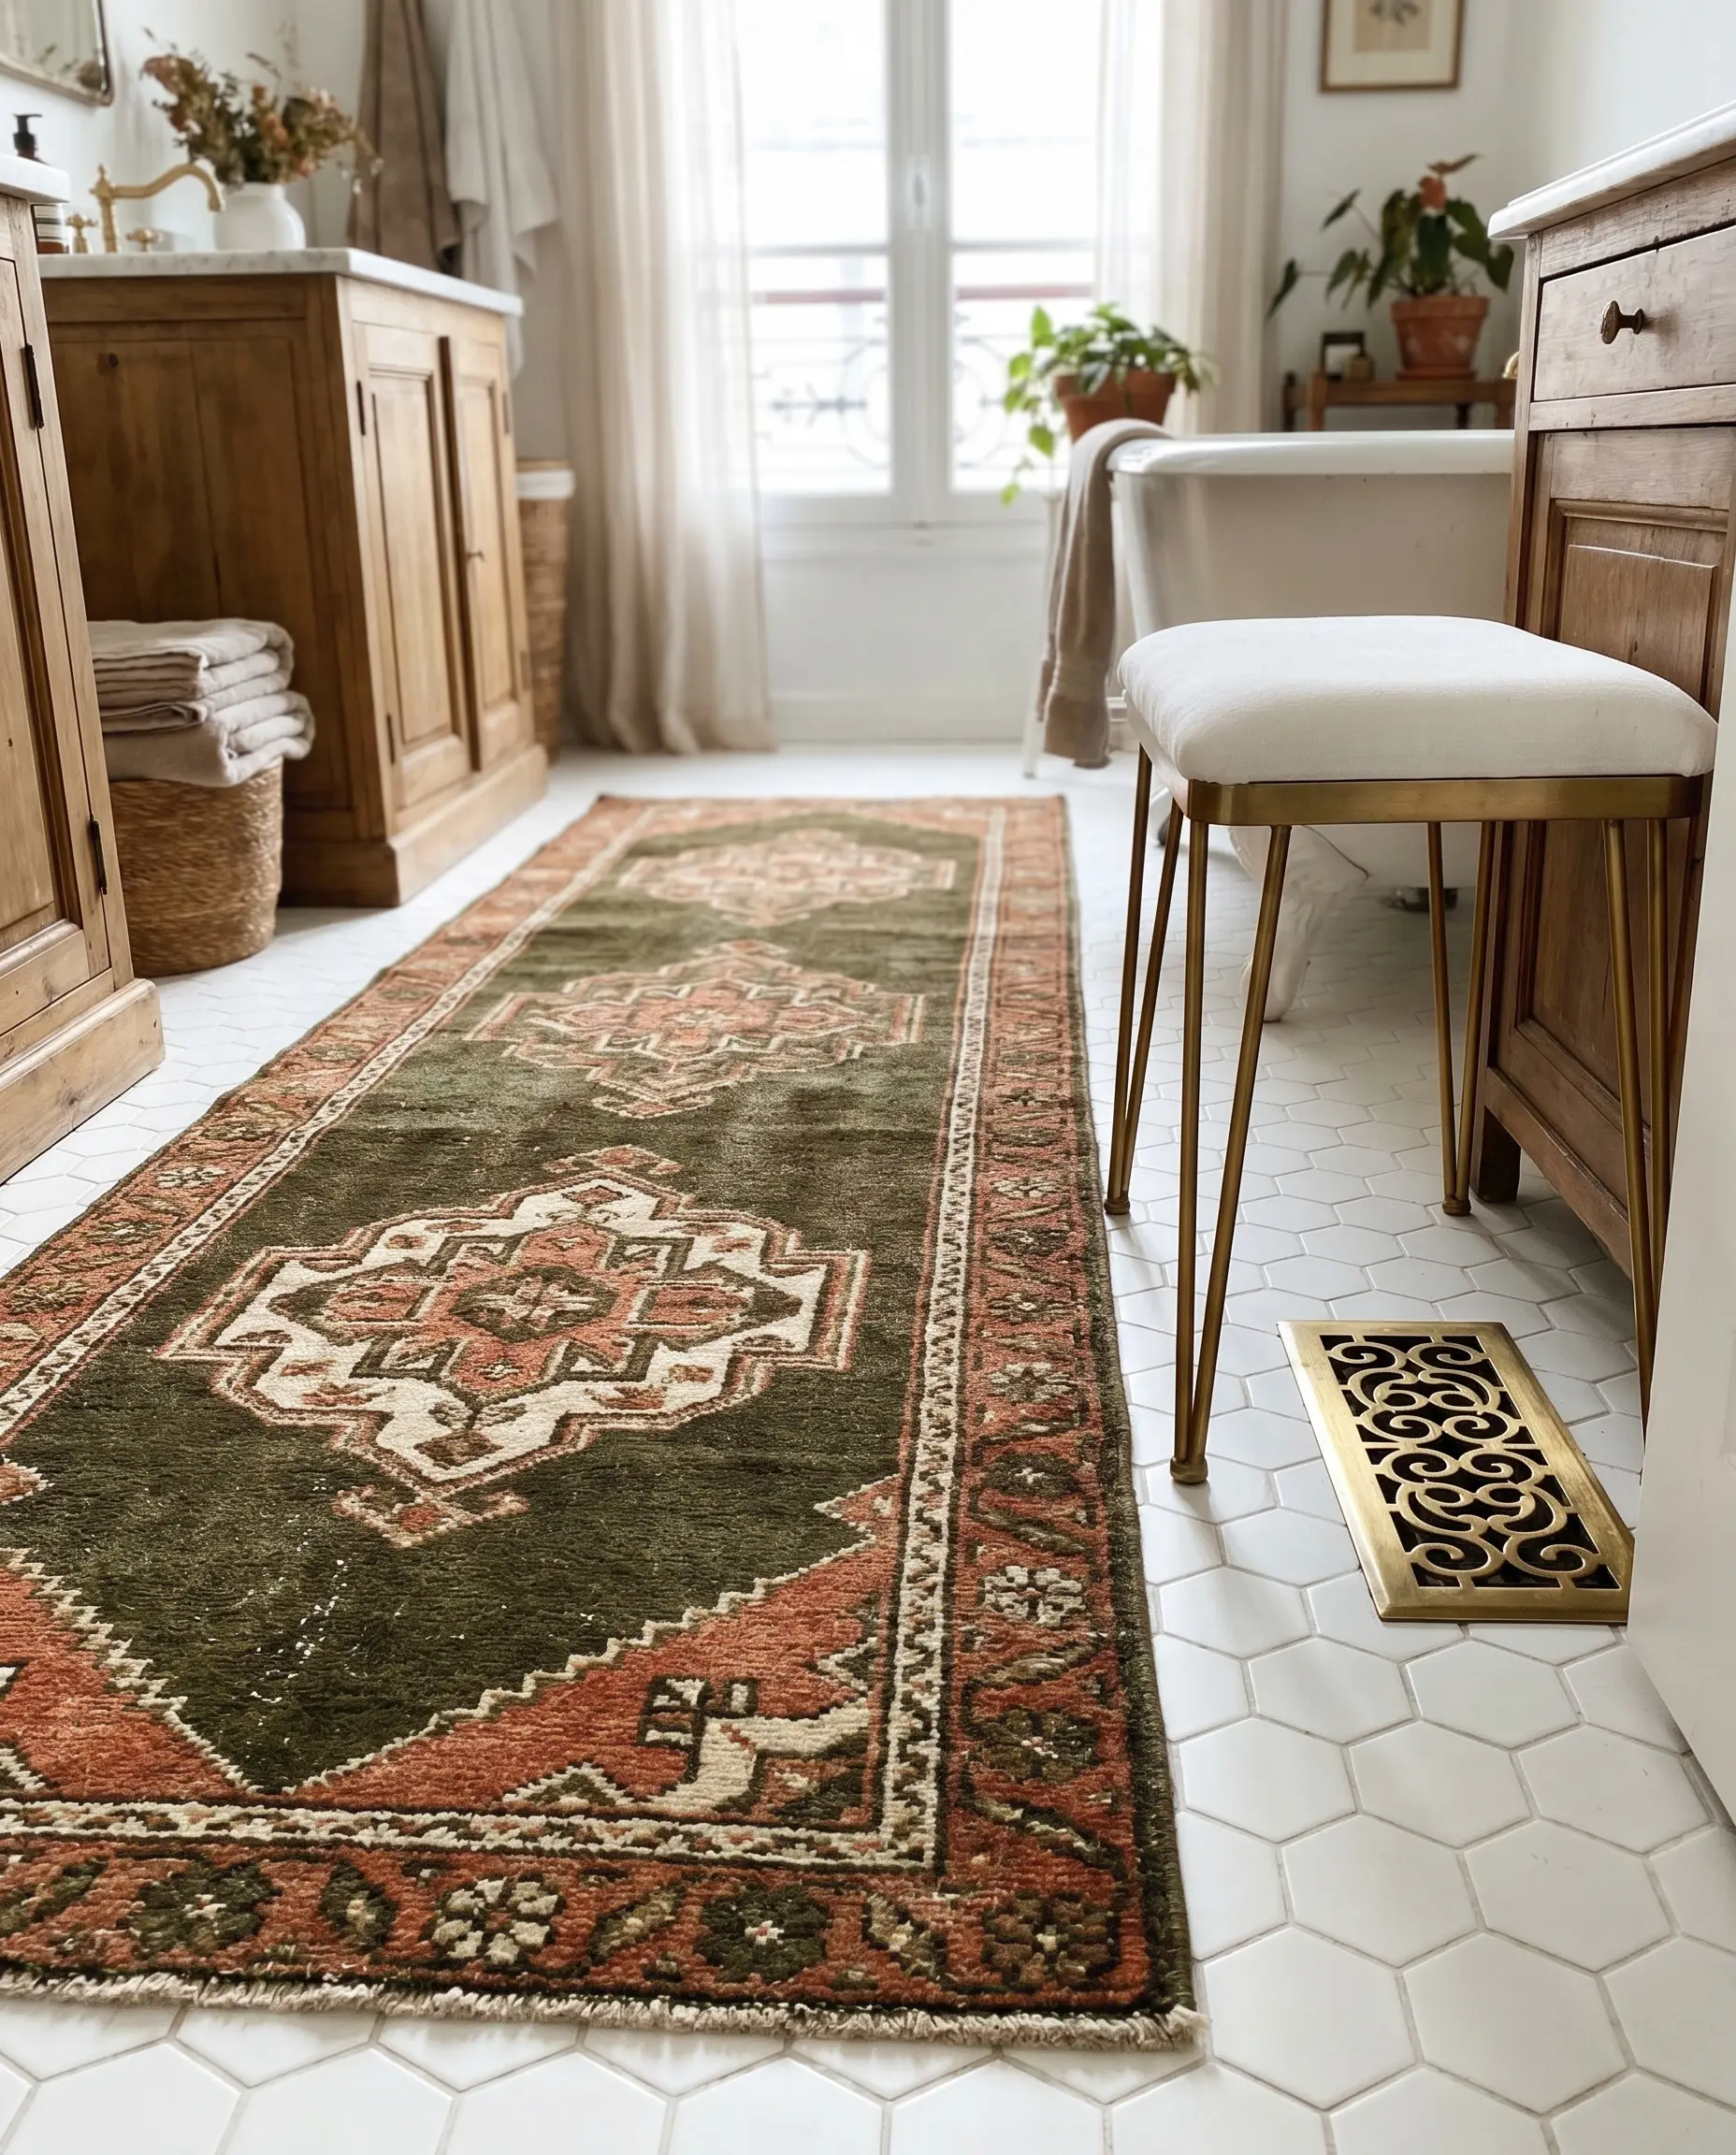
Introducing textiles is a highly effective way to ground a sterile room without committing to permanent architectural changes. A vintage runner featuring deep olive green or terracotta threads absorbs the harshness of a white tiled floor while complementing the warmth of brass accents.
- Vibe: Parisian Chic
- Key Materials: Hand-knotted wool runner, white hex floor tile
- Styling Pro-Tip: Use a high-quality, waterproof rug pad to protect the textile from residual bathroom moisture.
25. Contrast Bright Gold Hardware with Deep Walnut Wood Tones
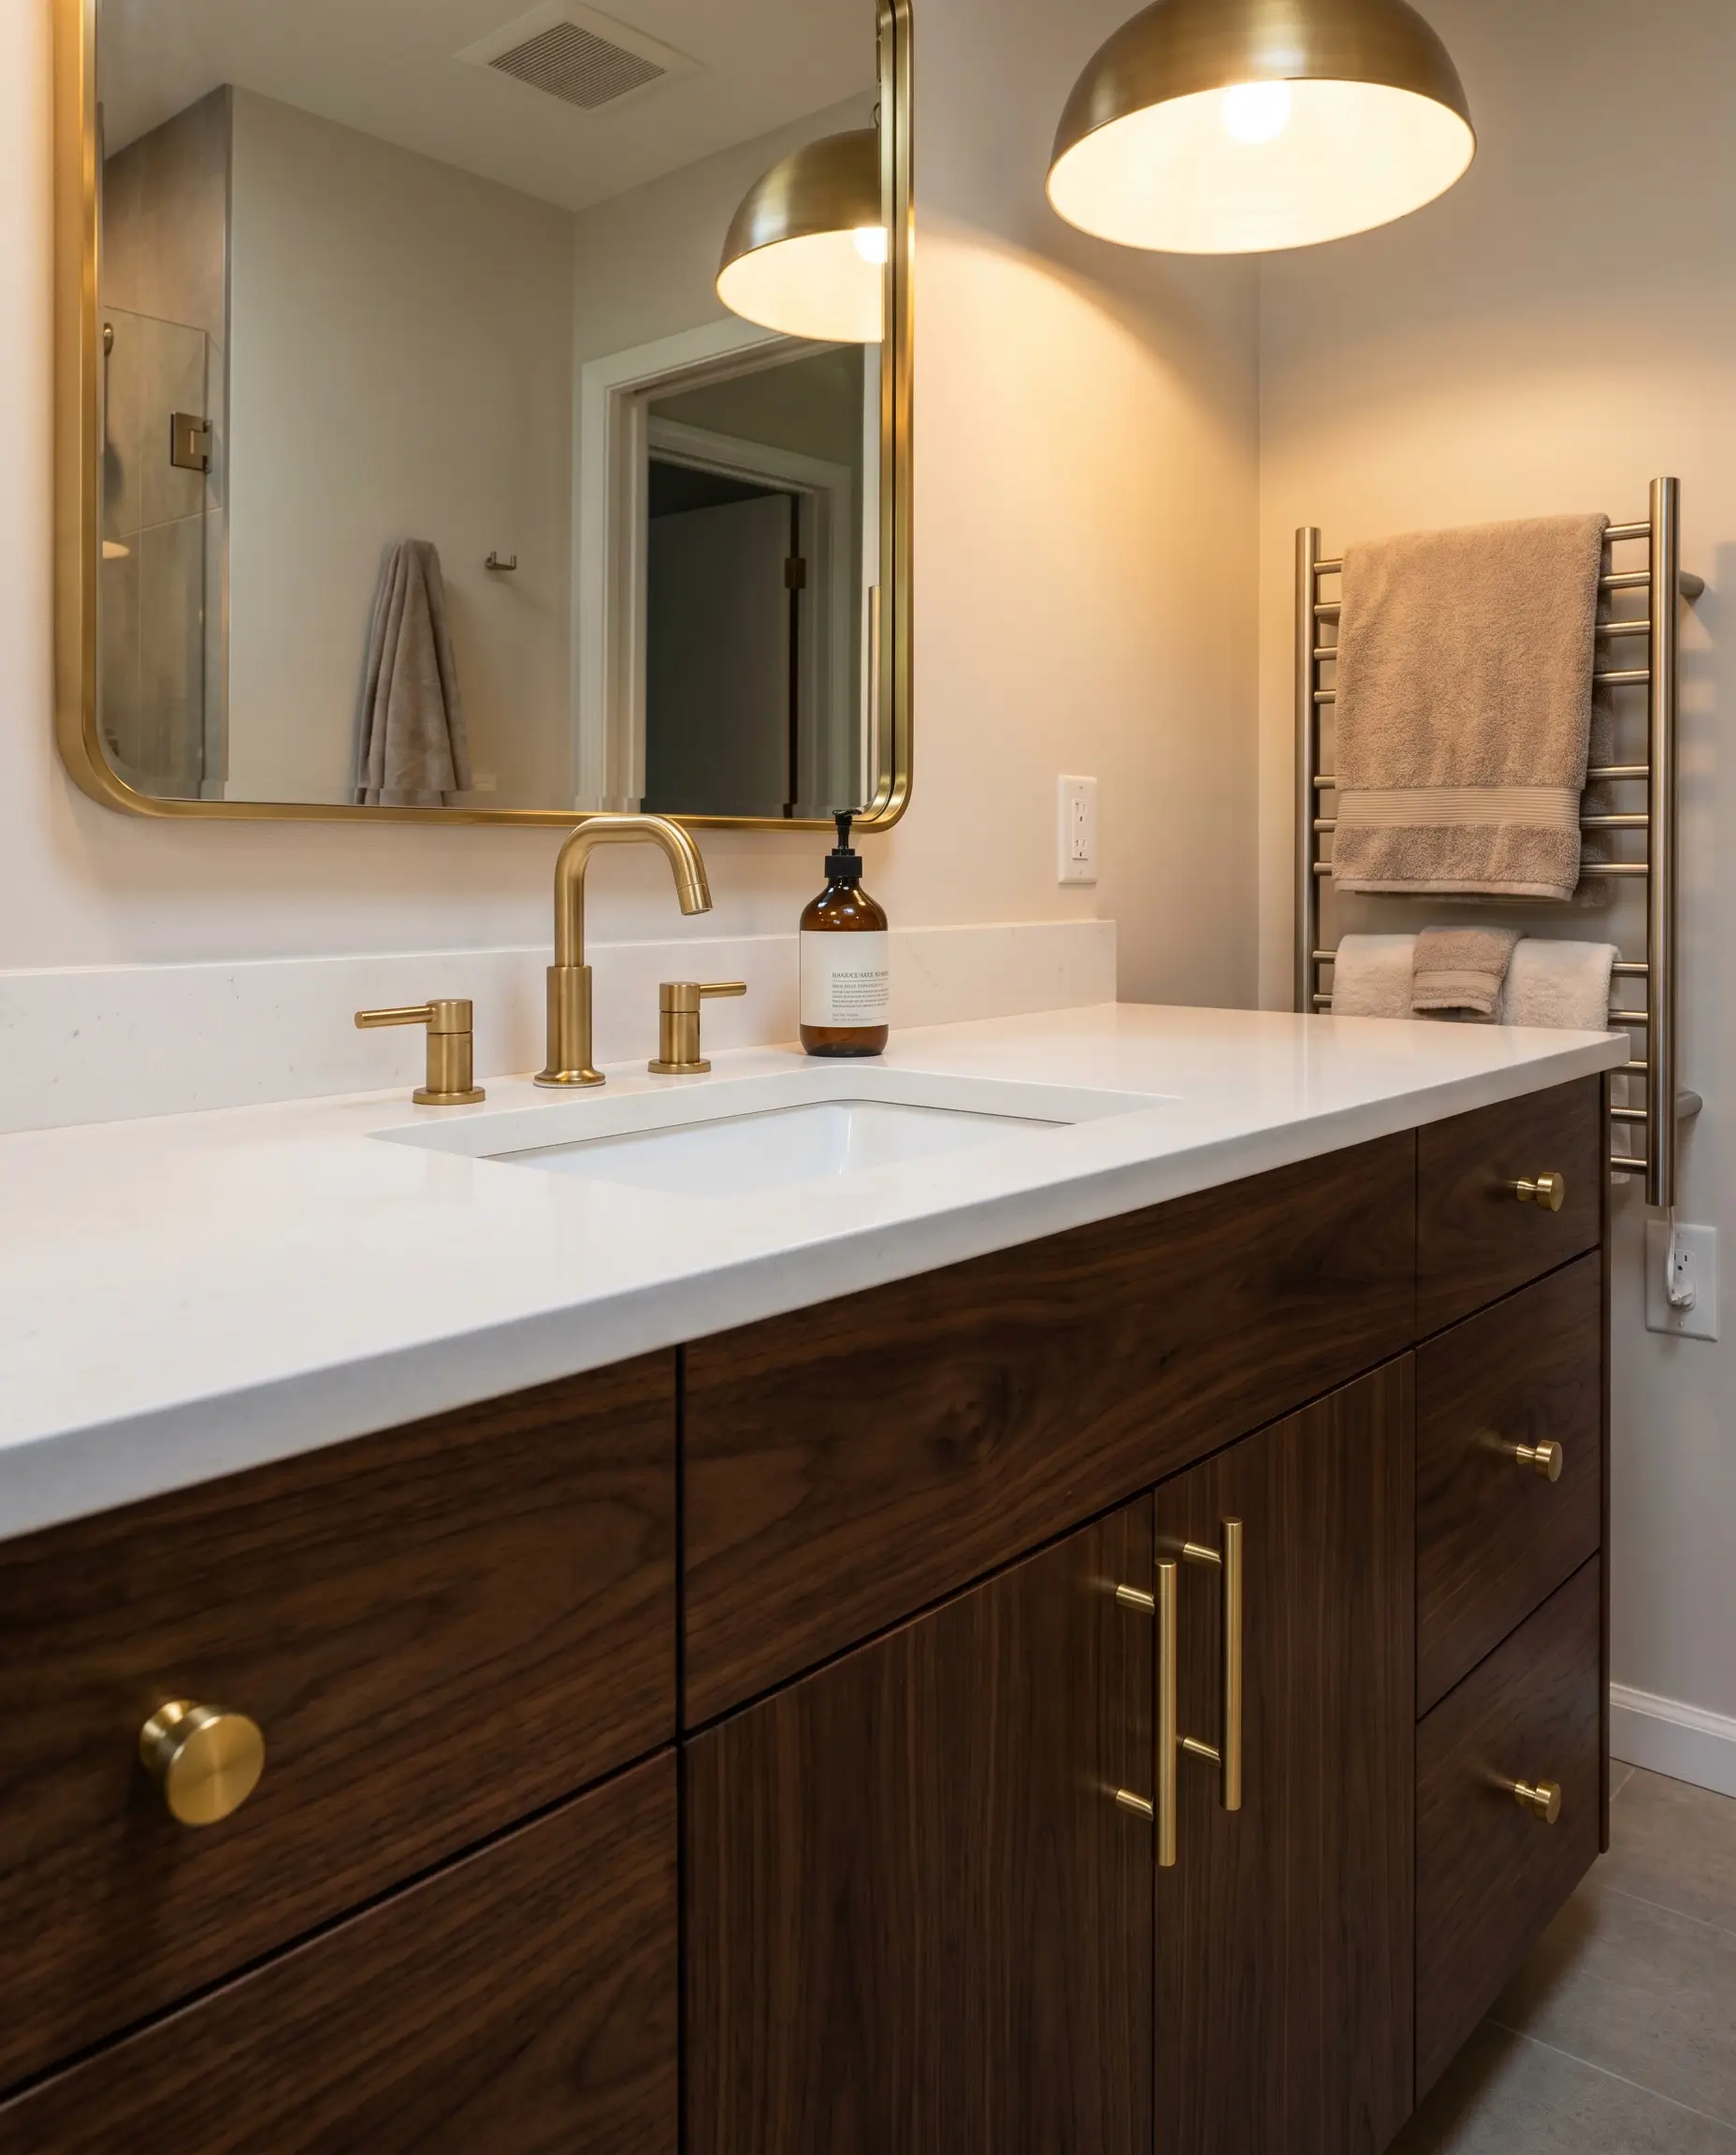
For a more historically rooted aesthetic, the heavy, dark grain of natural walnut provides a sophisticated backdrop that makes polished or brushed gold hardware sing. The dark wood absorbs the light, ensuring the bright metal remains the undisputed focal point.
- Vibe: Mid-Century / Traditional
- Key Materials: Flat-panel walnut vanity, brushed gold cylinder knobs
- Styling Pro-Tip: Ensure the walnut is sealed with a marine-grade polyurethane to withstand the fluctuating humidity of the bathroom.
Mastering the Timeless Bath
The ultimate success of a white and gold bathroom does not rely on buying the most expensive fixtures on the market; it relies entirely on the tension between your chosen materials. The inherent coldness of a white, tactile surface against the aggressive warmth of a carefully selected metal finish creates a dynamic, enduring space. By prioritizing material integrity—whether through the chalky depth of Roman clay or the evolving patina of unlacquered brass—you ensure the room feels architecturally significant rather than superficial.
If you are hesitant to execute a complete plumbing overhaul, begin by swapping out your vanity’s cabinet pulls or updating your sconces to establish a baseline of warmth. The transition from a sterile washroom to a bespoke sanctuary happens in these deliberate, micro-adjustments of scale and finish. As you plan your material palette, which direction will you take your metal finishes: the static, predictable luxury of champagne bronze, or the raw, living patina of unlacquered brass?

The Hackrea Style Desk treats interior decoration as an exact visual science. Rather than focusing on demolition or floor plans, this desk masters the art of color theory, undertone matching, material pairings, and spatial proportion. From balancing the visual weight of mixed metals to finding the perfect bridging tone between disparate wood species, this desk provides the rigorous aesthetic rules needed to achieve high-end, editorial-quality harmony in any space.