The builder-grade overlapping T-molding is the enemy of good design. The seam between two distinct materials is a deliberate architectural opportunity, not a hardware store afterthought.
A flawless floor transition demands precision, starting with the invisible hero of all high-end builds: meticulous subfloor preparation.
To achieve a perfectly flush finish, you must account for the physical requirement of an expansion gap while carefully calculating material tolerances. We are leaving clunky, tripping hazards behind and executing professional-grade thresholds, ranging from flush brass inlays to organic tile bleeds.
The Mechanics of a Flush Transition (Wood to Tile)
A perfectly flush seam requires the finished surfaces to align with mathematical precision. This means calculating the exact thickness of your thinset, Ditra matting, and tile against the thickness of your engineered or solid wood planks. If the subfloor is uneven, achieving this architectural line is impossible without intervention. Professional installers rely on self-leveling underlayment to create a dead-flat canvas before a single board is laid.
Pre-Installation Checklist:
- Subfloor Leveling: Grind down high spots and pour self-leveling compound over low spots to achieve a perfectly planar surface.
- Material Thickness Calculation: Measure the exact millimeter thickness of the flooring material, plus the required adhesive or mortar bed.
- Underlayment Selection: Specify the correct thickness of uncoupling membranes (like Schluter-DITRA) or plywood underlayment to bridge any height discrepancies before installation.
The Flexible Cork Expansion Joint
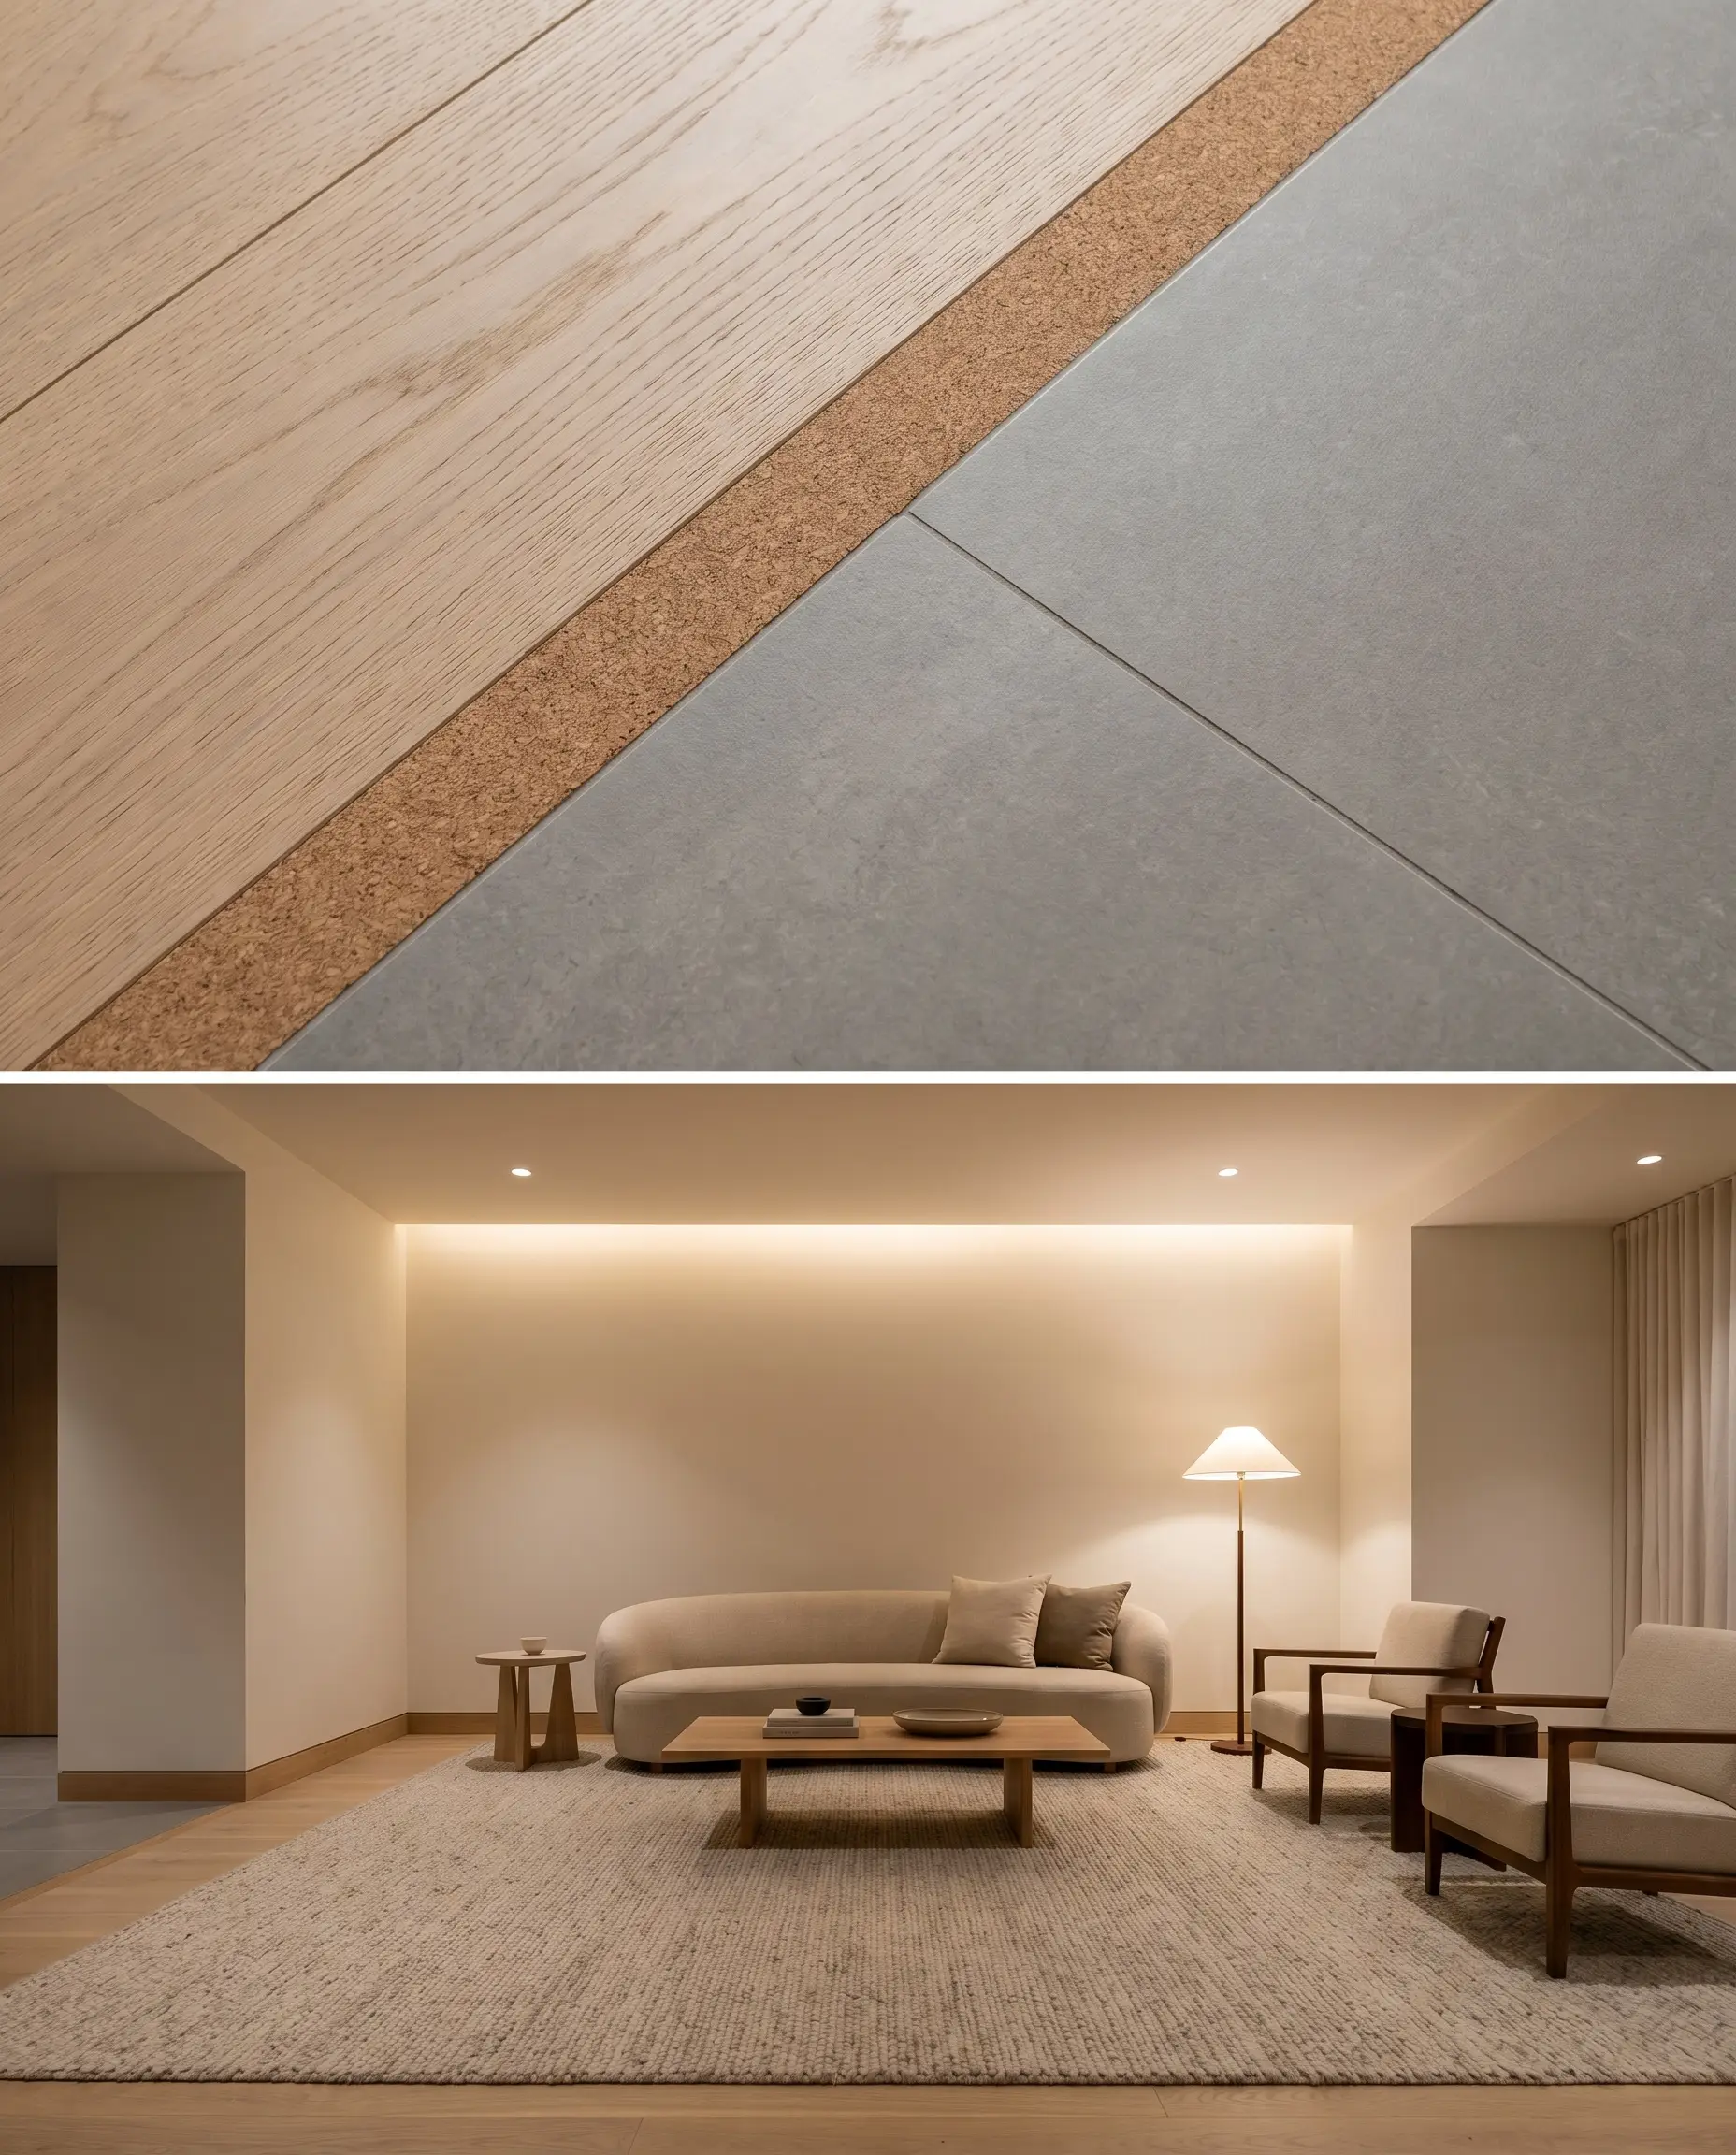
Seal the raw cork strip with a high-grade clear polyurethane immediately after installation to protect against moisture and structural degradation.
Architectural Standard
A 1/4-inch strip of natural, flexible cork placed directly between hardwood and tile compresses to absorb the natural expansion of wood while maintaining a visually quiet boundary. This minimalist approach offers a seamless, flush threshold that honors the organic nature of the materials without relying on metal or wood overlaps.
- Vibe: Minimalist, Organic Modern
- Material Pairing: Ideal for 3/4″ engineered white oak meeting matte porcelain tile.
- Key Materials: 1/4-inch natural cork expansion strips, clear polyurethane sealant.
- Tolerance Profile: Requires a perfectly flush subfloor and exact height alignment between wood and tile.
Perpendicular Wood Picture Framing
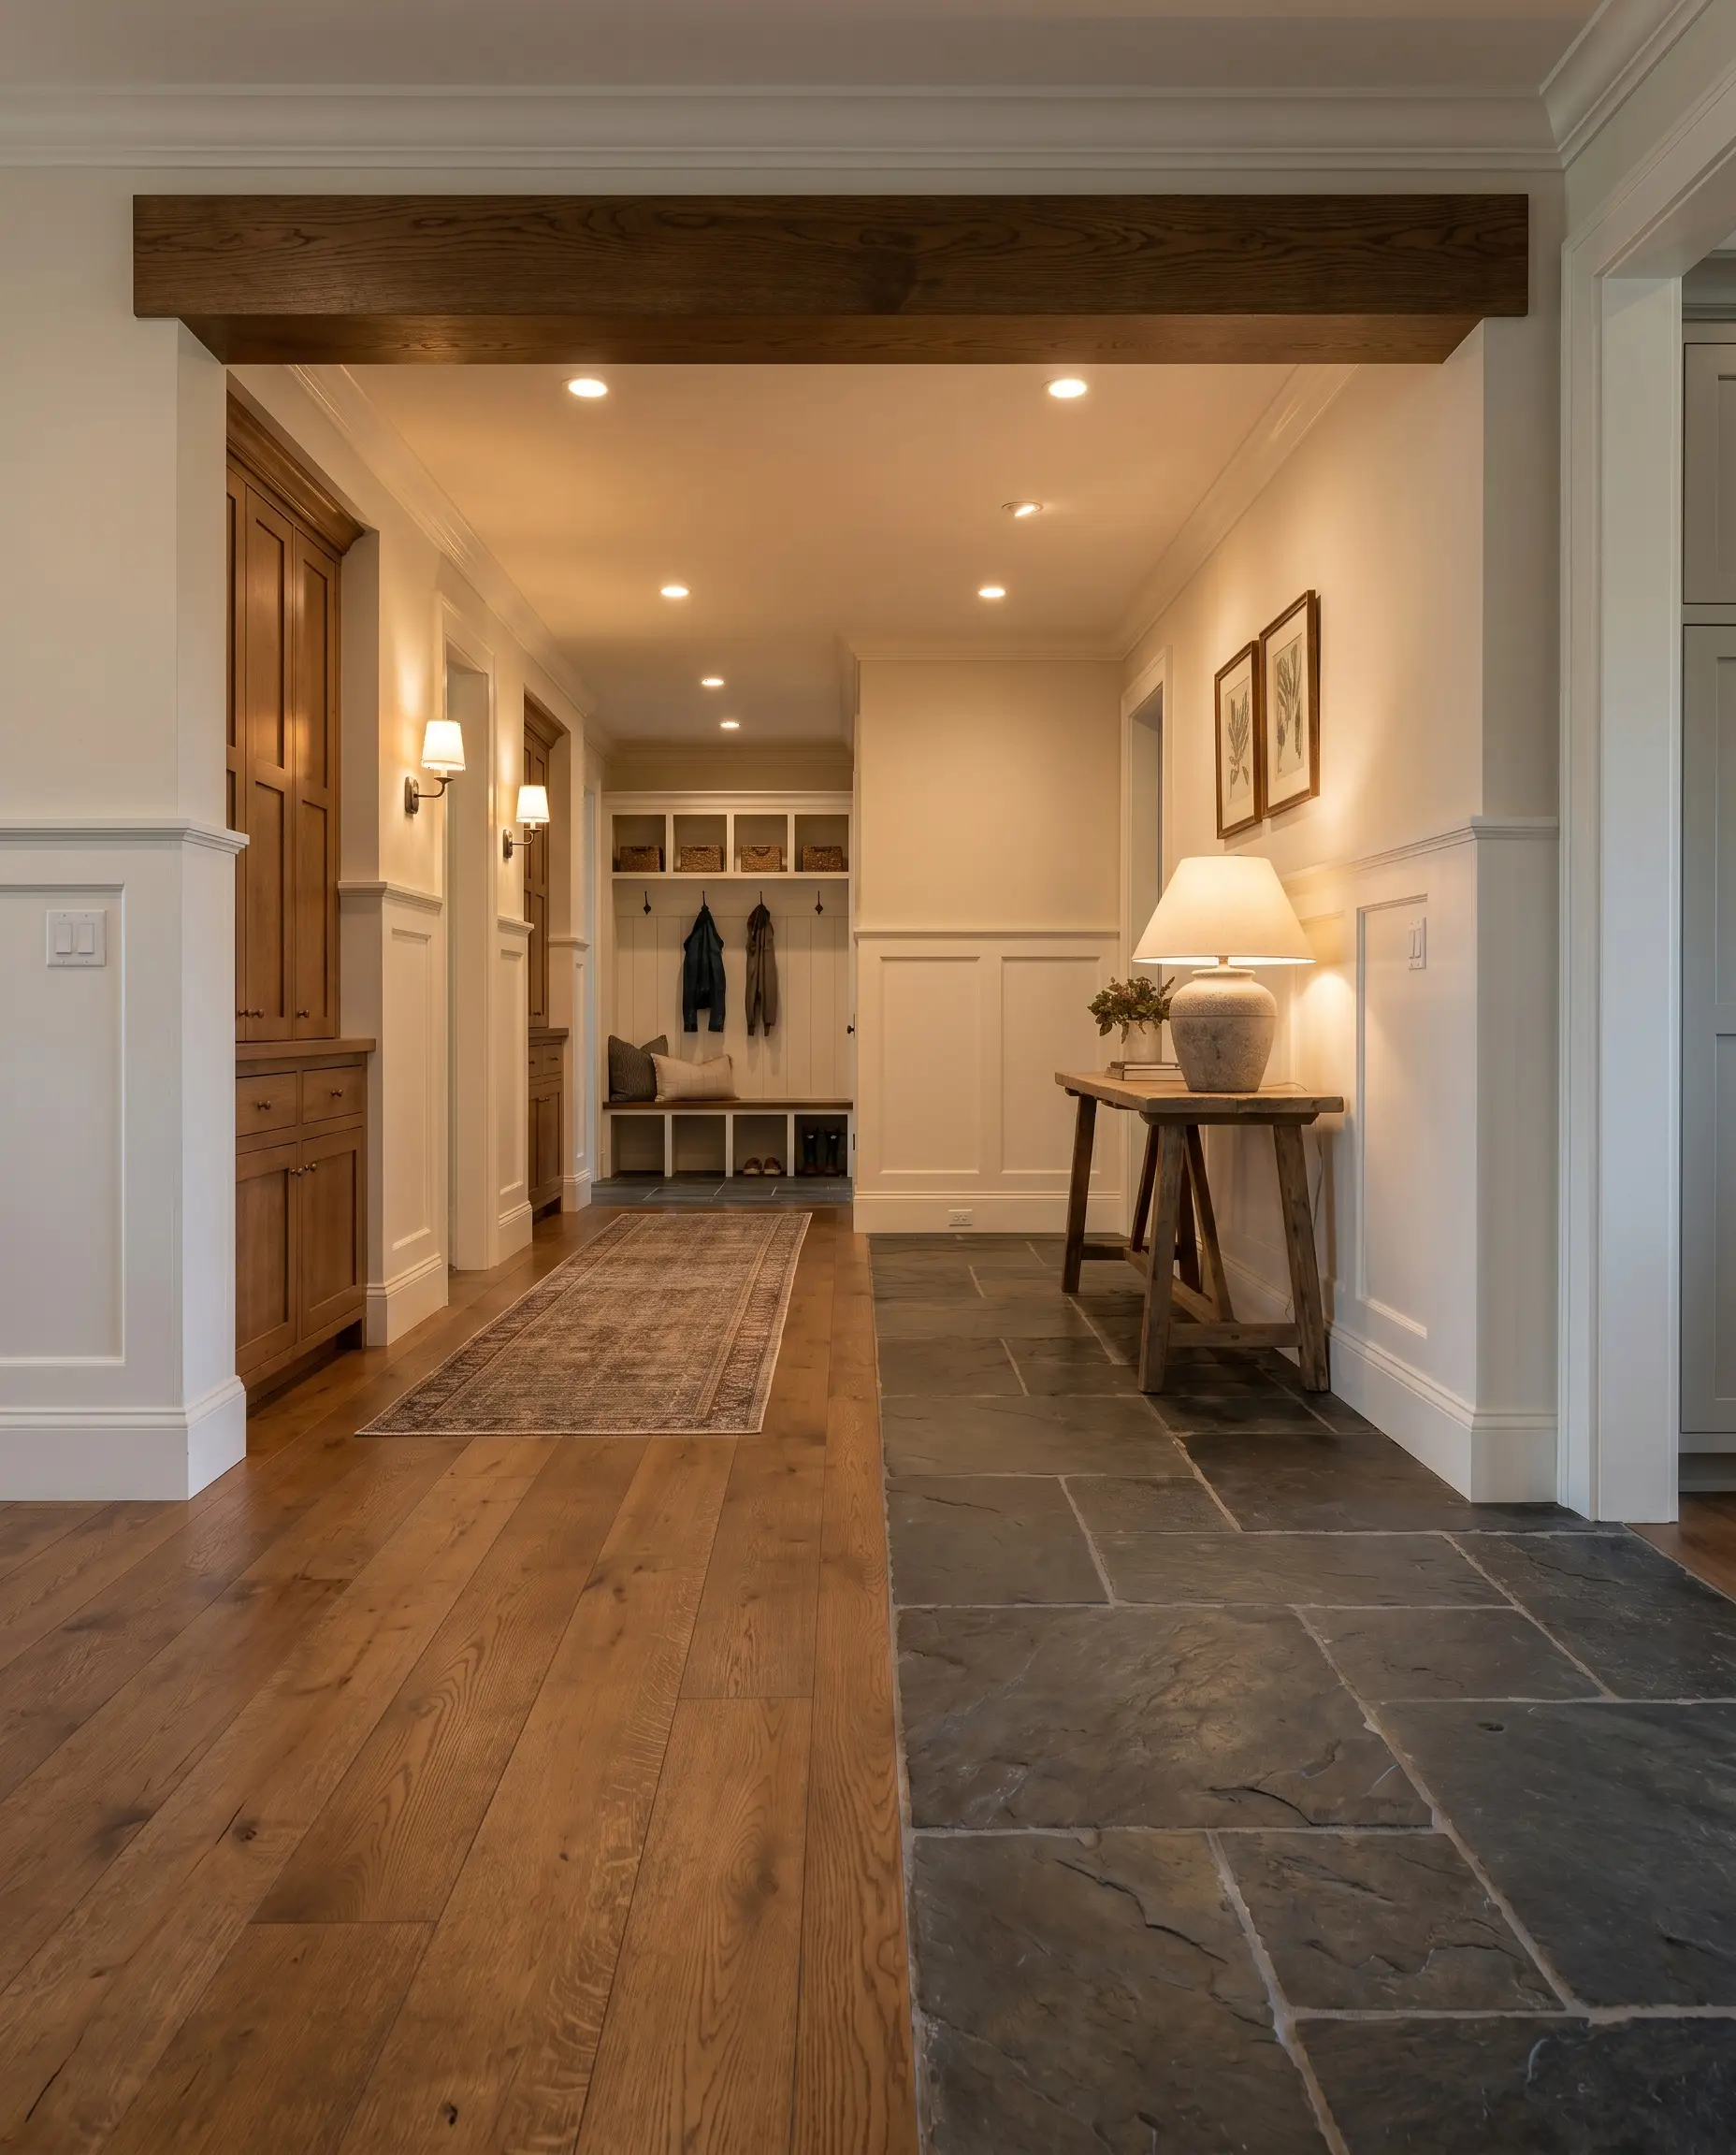
Instead of running horizontal planks directly into a raw tile edge, install a single perpendicular header along the threshold to act as a picture frame. This traditional method cleanly caps the raw edges of the wood floor, providing a sharp, intentional visual boundary that honors high-end craftsmanship.
- Vibe: Transitional, Classic Custom
- Material Pairing: Solid 3/4″ rift-sawn oak abutting natural slate or limestone.
- Fabrication Detail: Requires meticulous milling of the header board to ensure the groove perfectly accepts the tongues of the field flooring.
- Structural Benefit: Hides the end-grain of the wood planks, which is highly susceptible to absorbing moisture from adjacent tile mopping.
Grout-Matched Caulk Lines
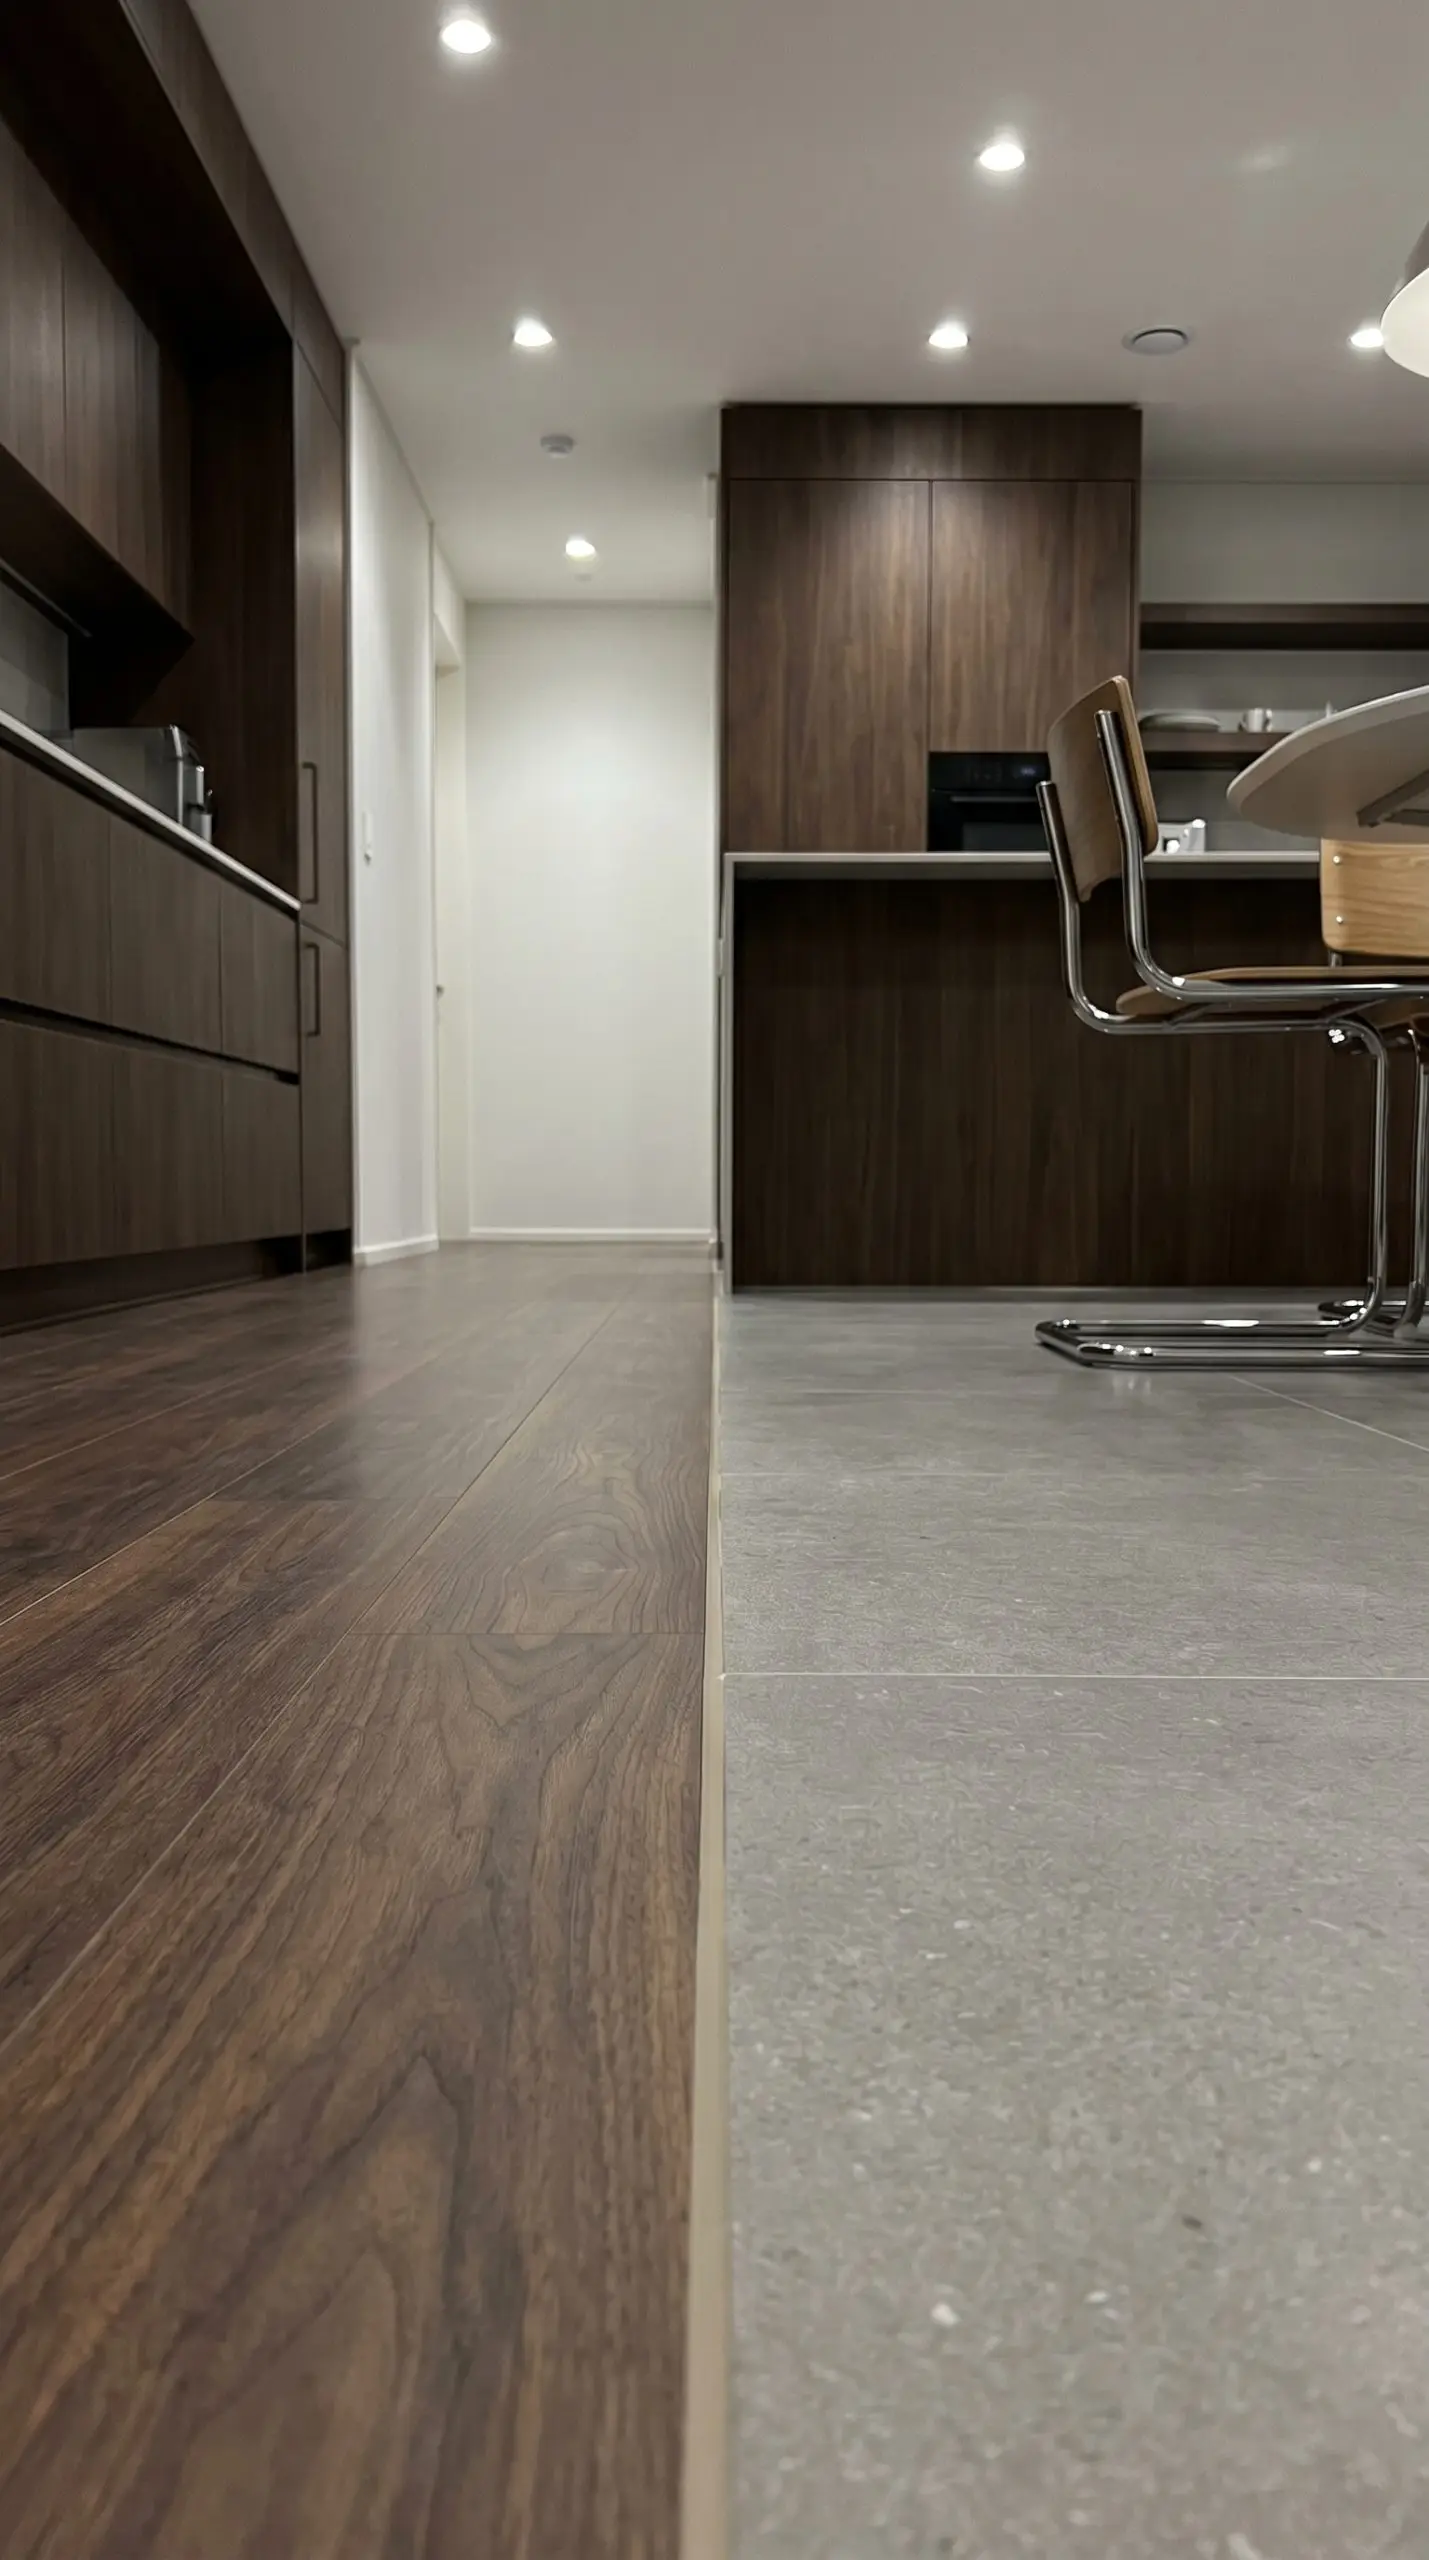
Never use standard cementitious grout against wood or LVP; the rigid material will inevitably fracture as the floor naturally expands and contracts.
Hackrea Pro Tip
For materials with minimal movement, a highly controlled 1/8-inch gap filled with sanded, color-matched caulk creates an almost invisible transition. Flexible sanded caulk mimics the texture of the adjacent tile grout while absorbing the micro-movements of the flooring, making it a mandatory specification for a seamless finish.
- Vibe: Monolithic, Invisible
- Material Pairing: High-end LVP or highly stable engineered wood meeting large-format porcelain.
- Key Materials: Sanded acrylic caulk matched exactly to the tile grout manufacturer’s color wheel.
- Application Method: Mask off both the tile and wood edges with heavy-duty painter’s tape before caulking to ensure a razor-sharp architectural line.
Metal Profile Accents: Treating Thresholds Like Jewelry
We are transitioning from hiding the seam to highlighting it. Metal transition profiles, particularly Schluter systems, protect the fragile, exposed edges of porcelain or ceramic tiles while introducing a high-contrast architectural line. When treated as deliberate design accents, these metal inlays serve as jewelry for the floor, perfectly suited for heavy architectural spaces or high-end contemporary layouts.
Unlacquered Brass Schluter Strips
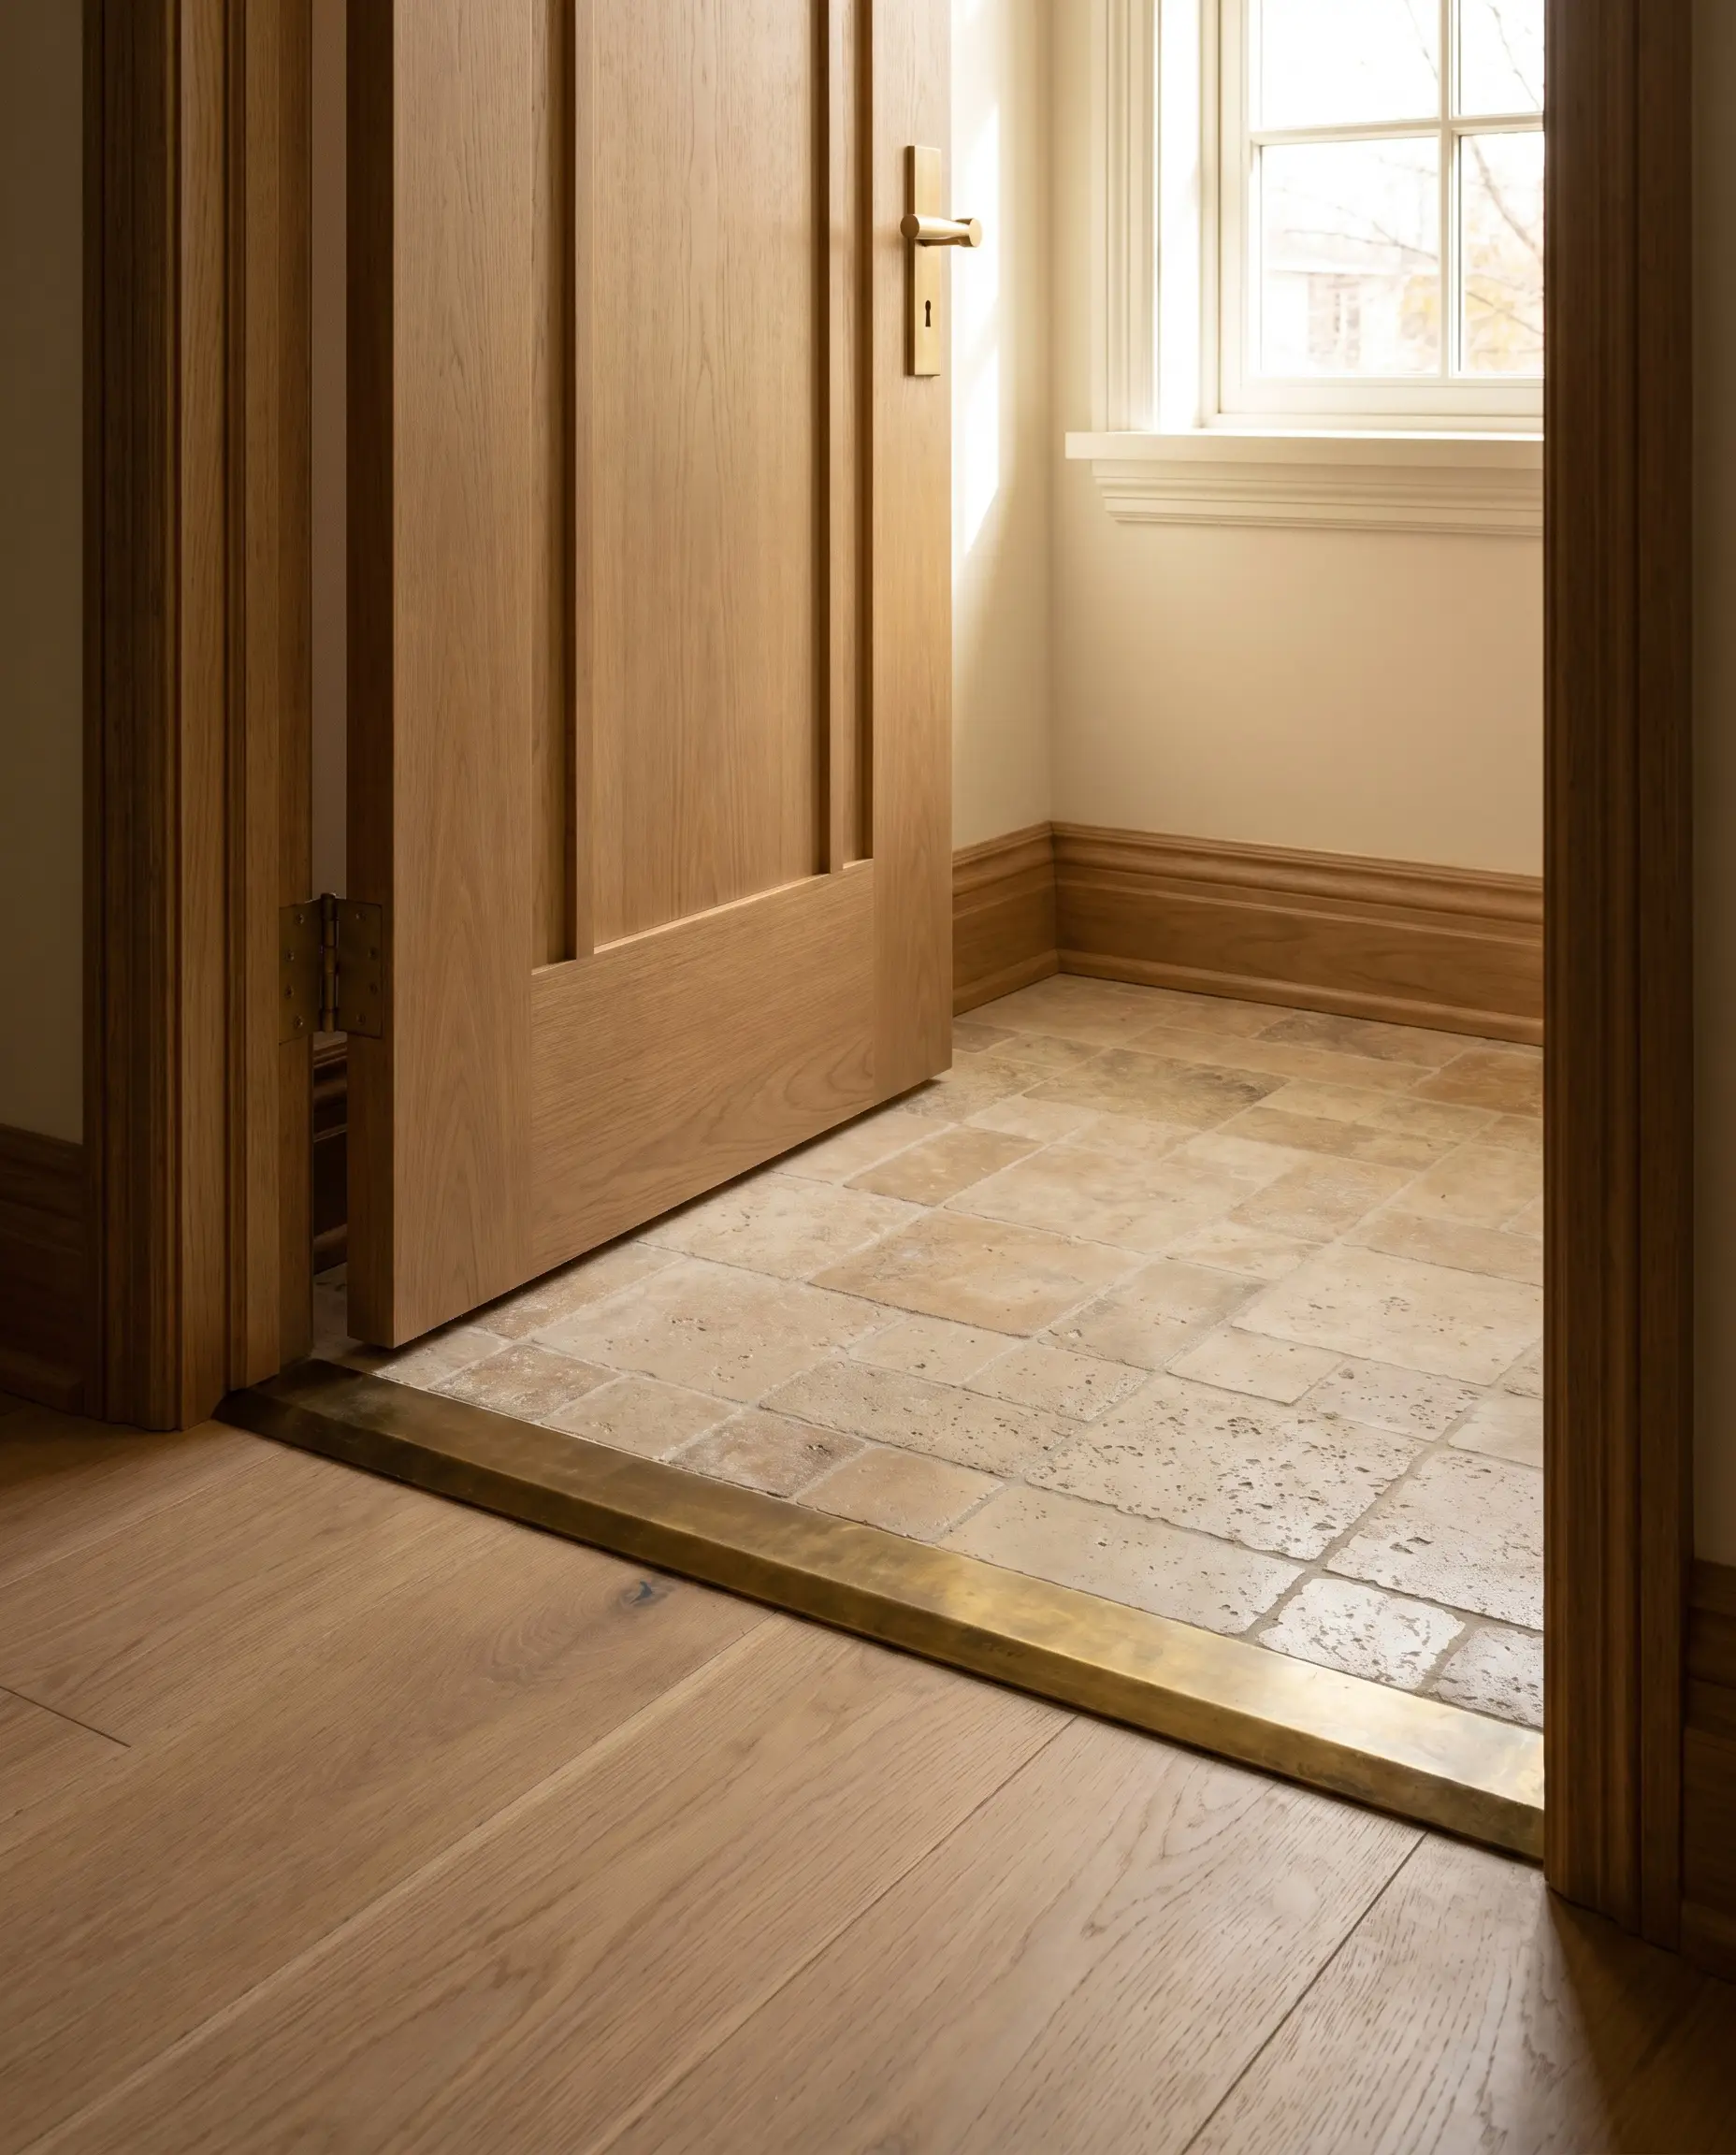
Specifying an unlacquered brass profile introduces a living finish that will naturally patina and darken over time. This heavy, warm metallic line pairs beautifully with natural materials, drawing the eye and establishing a bespoke boundary between rooms.
- Vibe: Art Deco, Heritage Custom
- Material Pairing: Wide-plank white oak meeting natural zellige or tumbled travertine tiles.
- Key Materials: Schluter-SCHIENE in solid unlacquered brass.
- Hardware Match: Unlacquered brass door hardware and cabinet hinges.
Ultra-Thin Matte Black Aluminum Profiles
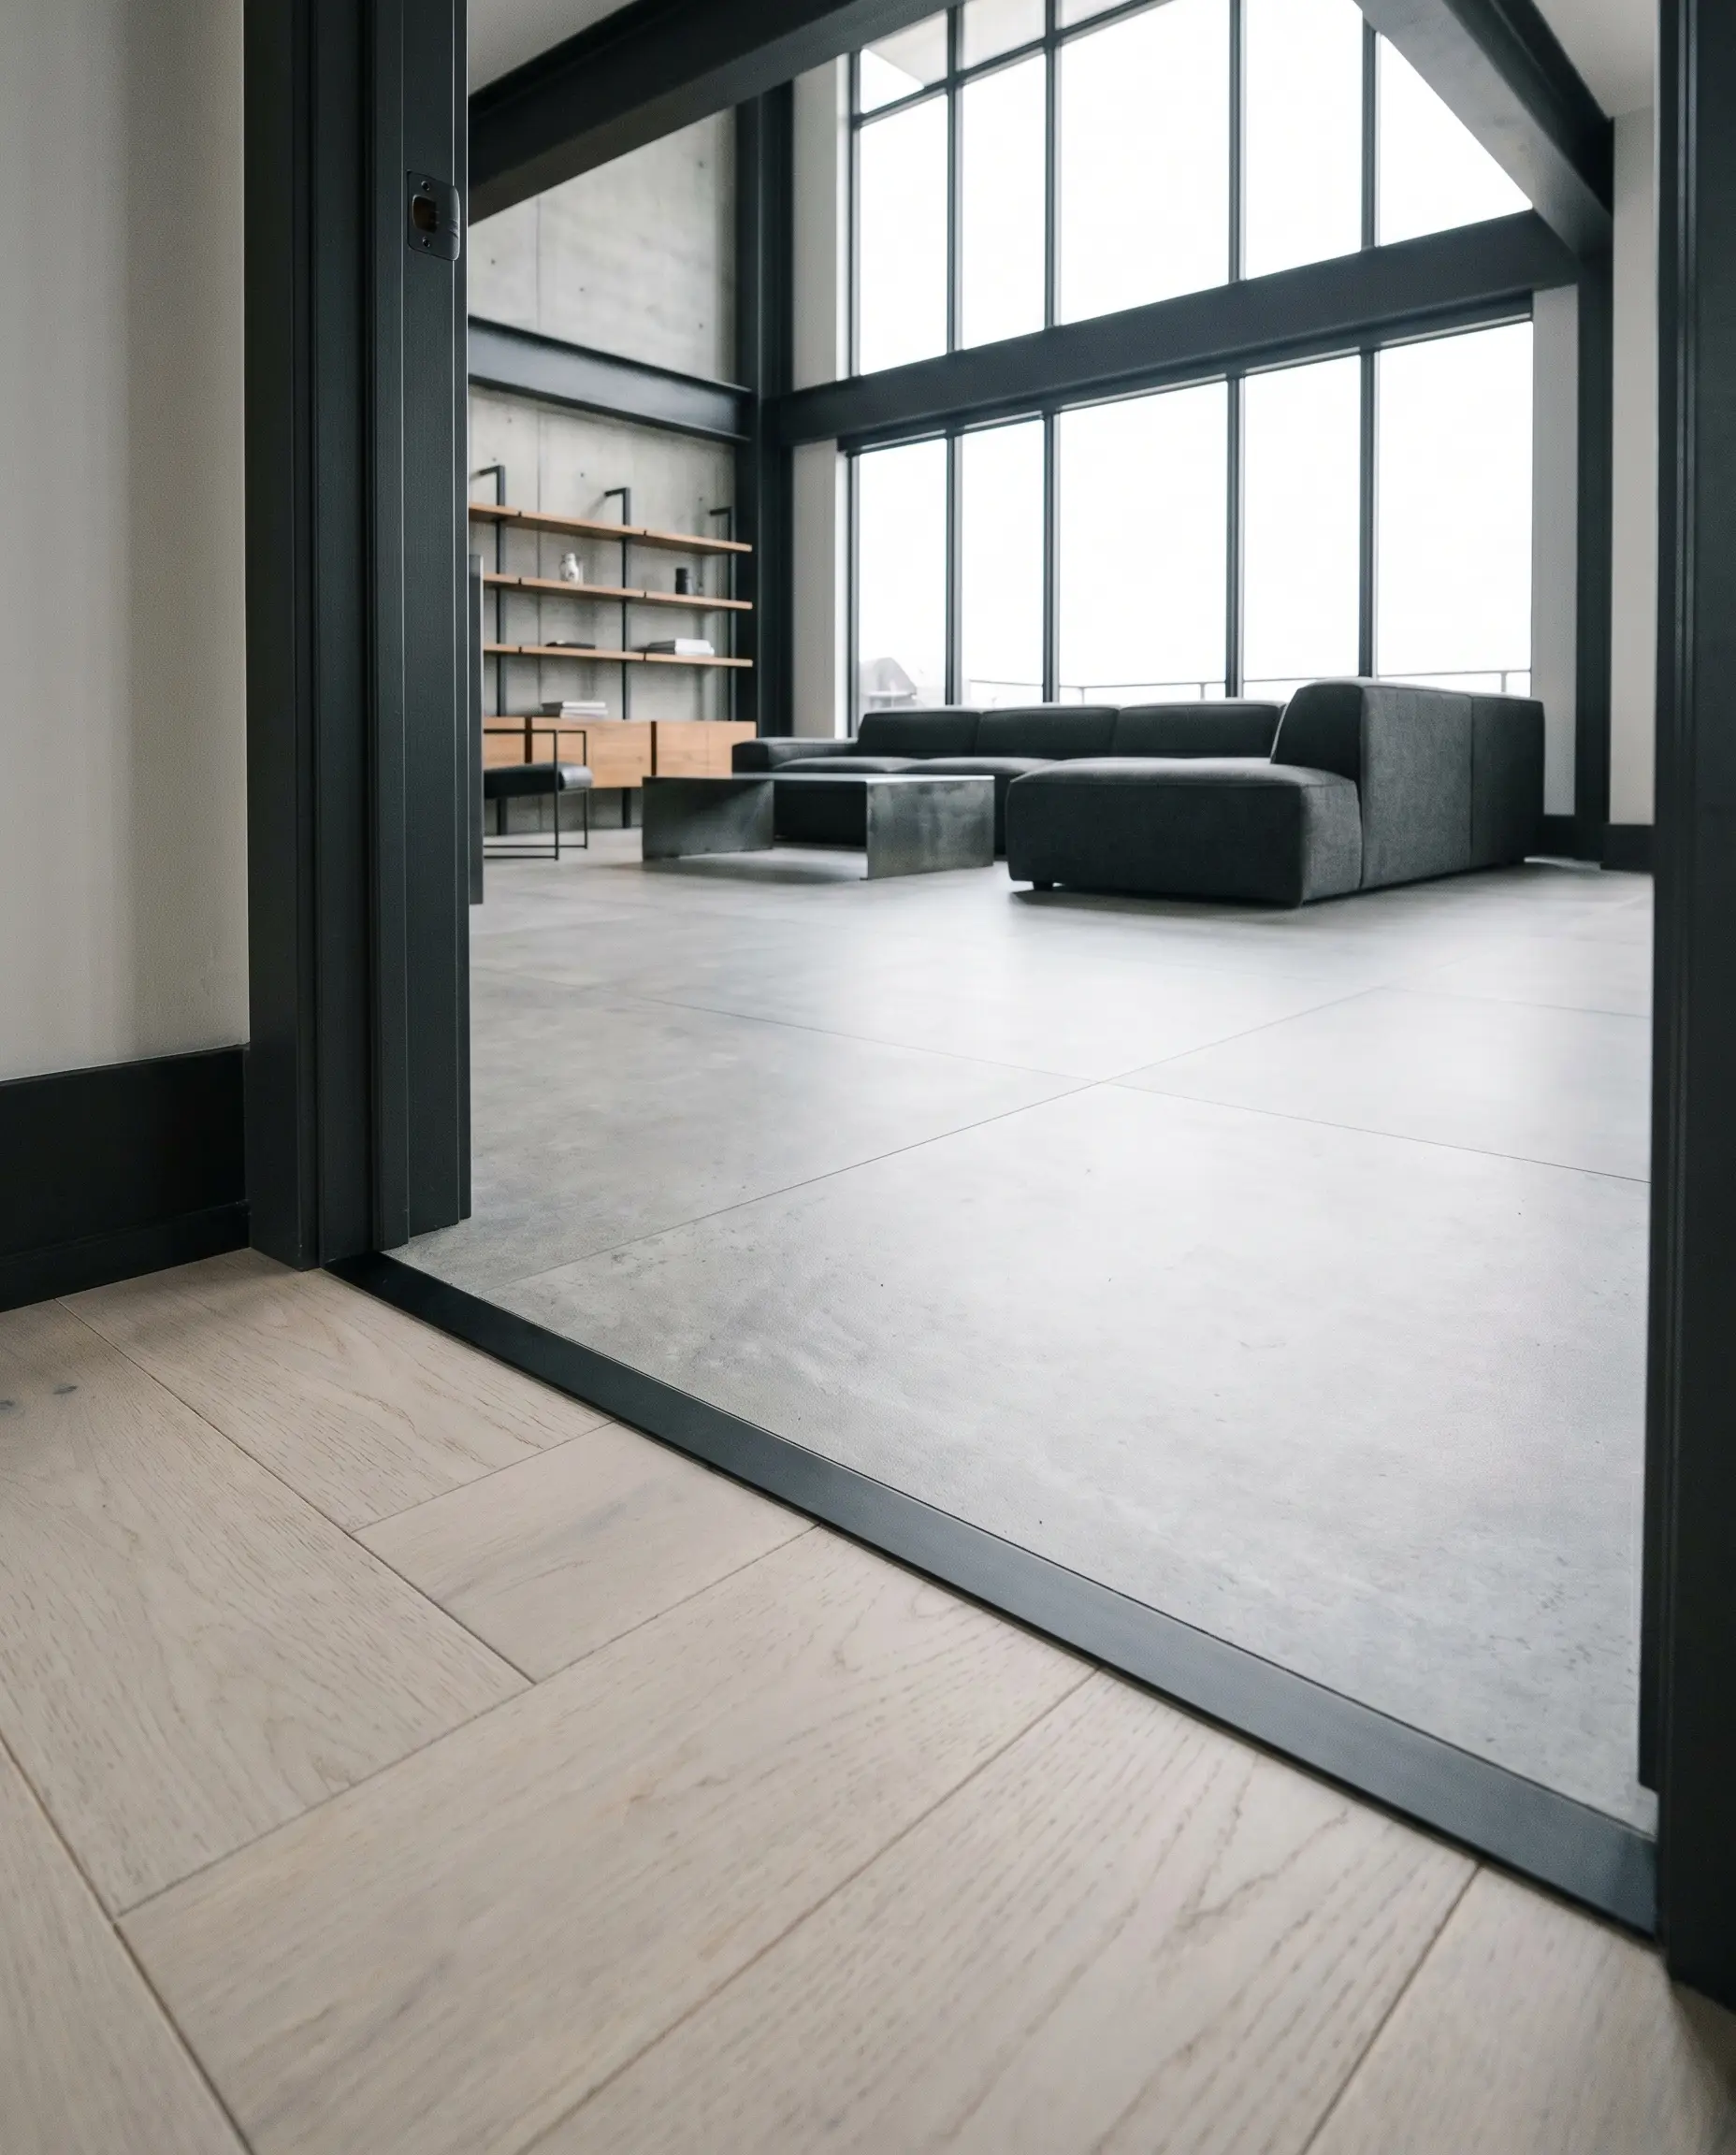
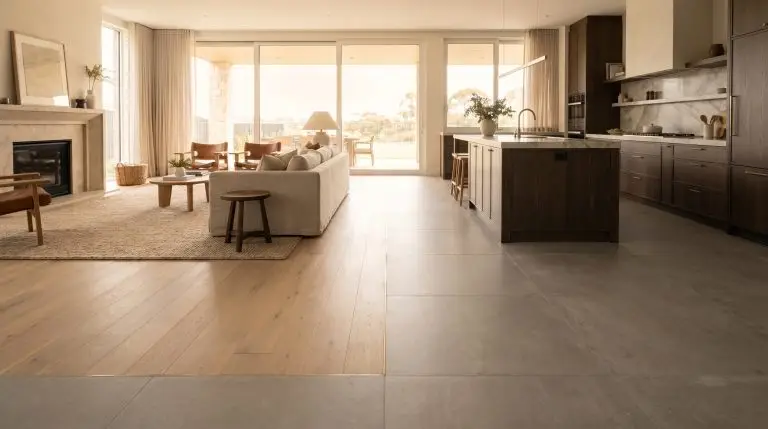
A 1/8-inch matte black anodized profile creates a sharp, graphic visual stop between concrete-look tiles and pale hardwood. This deliberate, high-contrast line anchors minimalist designs and requires precise subfloor leveling to ensure the narrow metal edge sits perfectly flush with both surfaces.
- Vibe: Industrial Minimalism, Ultra-Modern
- Material Pairing: Pale ash or maple engineered hardwood meeting large-format concrete-look porcelain.
- Paint Match: Sherwin-Williams Tricorn Black (for matching nearby baseboards, window mullions, or door casings).
- Key Materials: Matte black anodized aluminum L-angle profiles.
The Z-Bar for Carpet to Hardwood
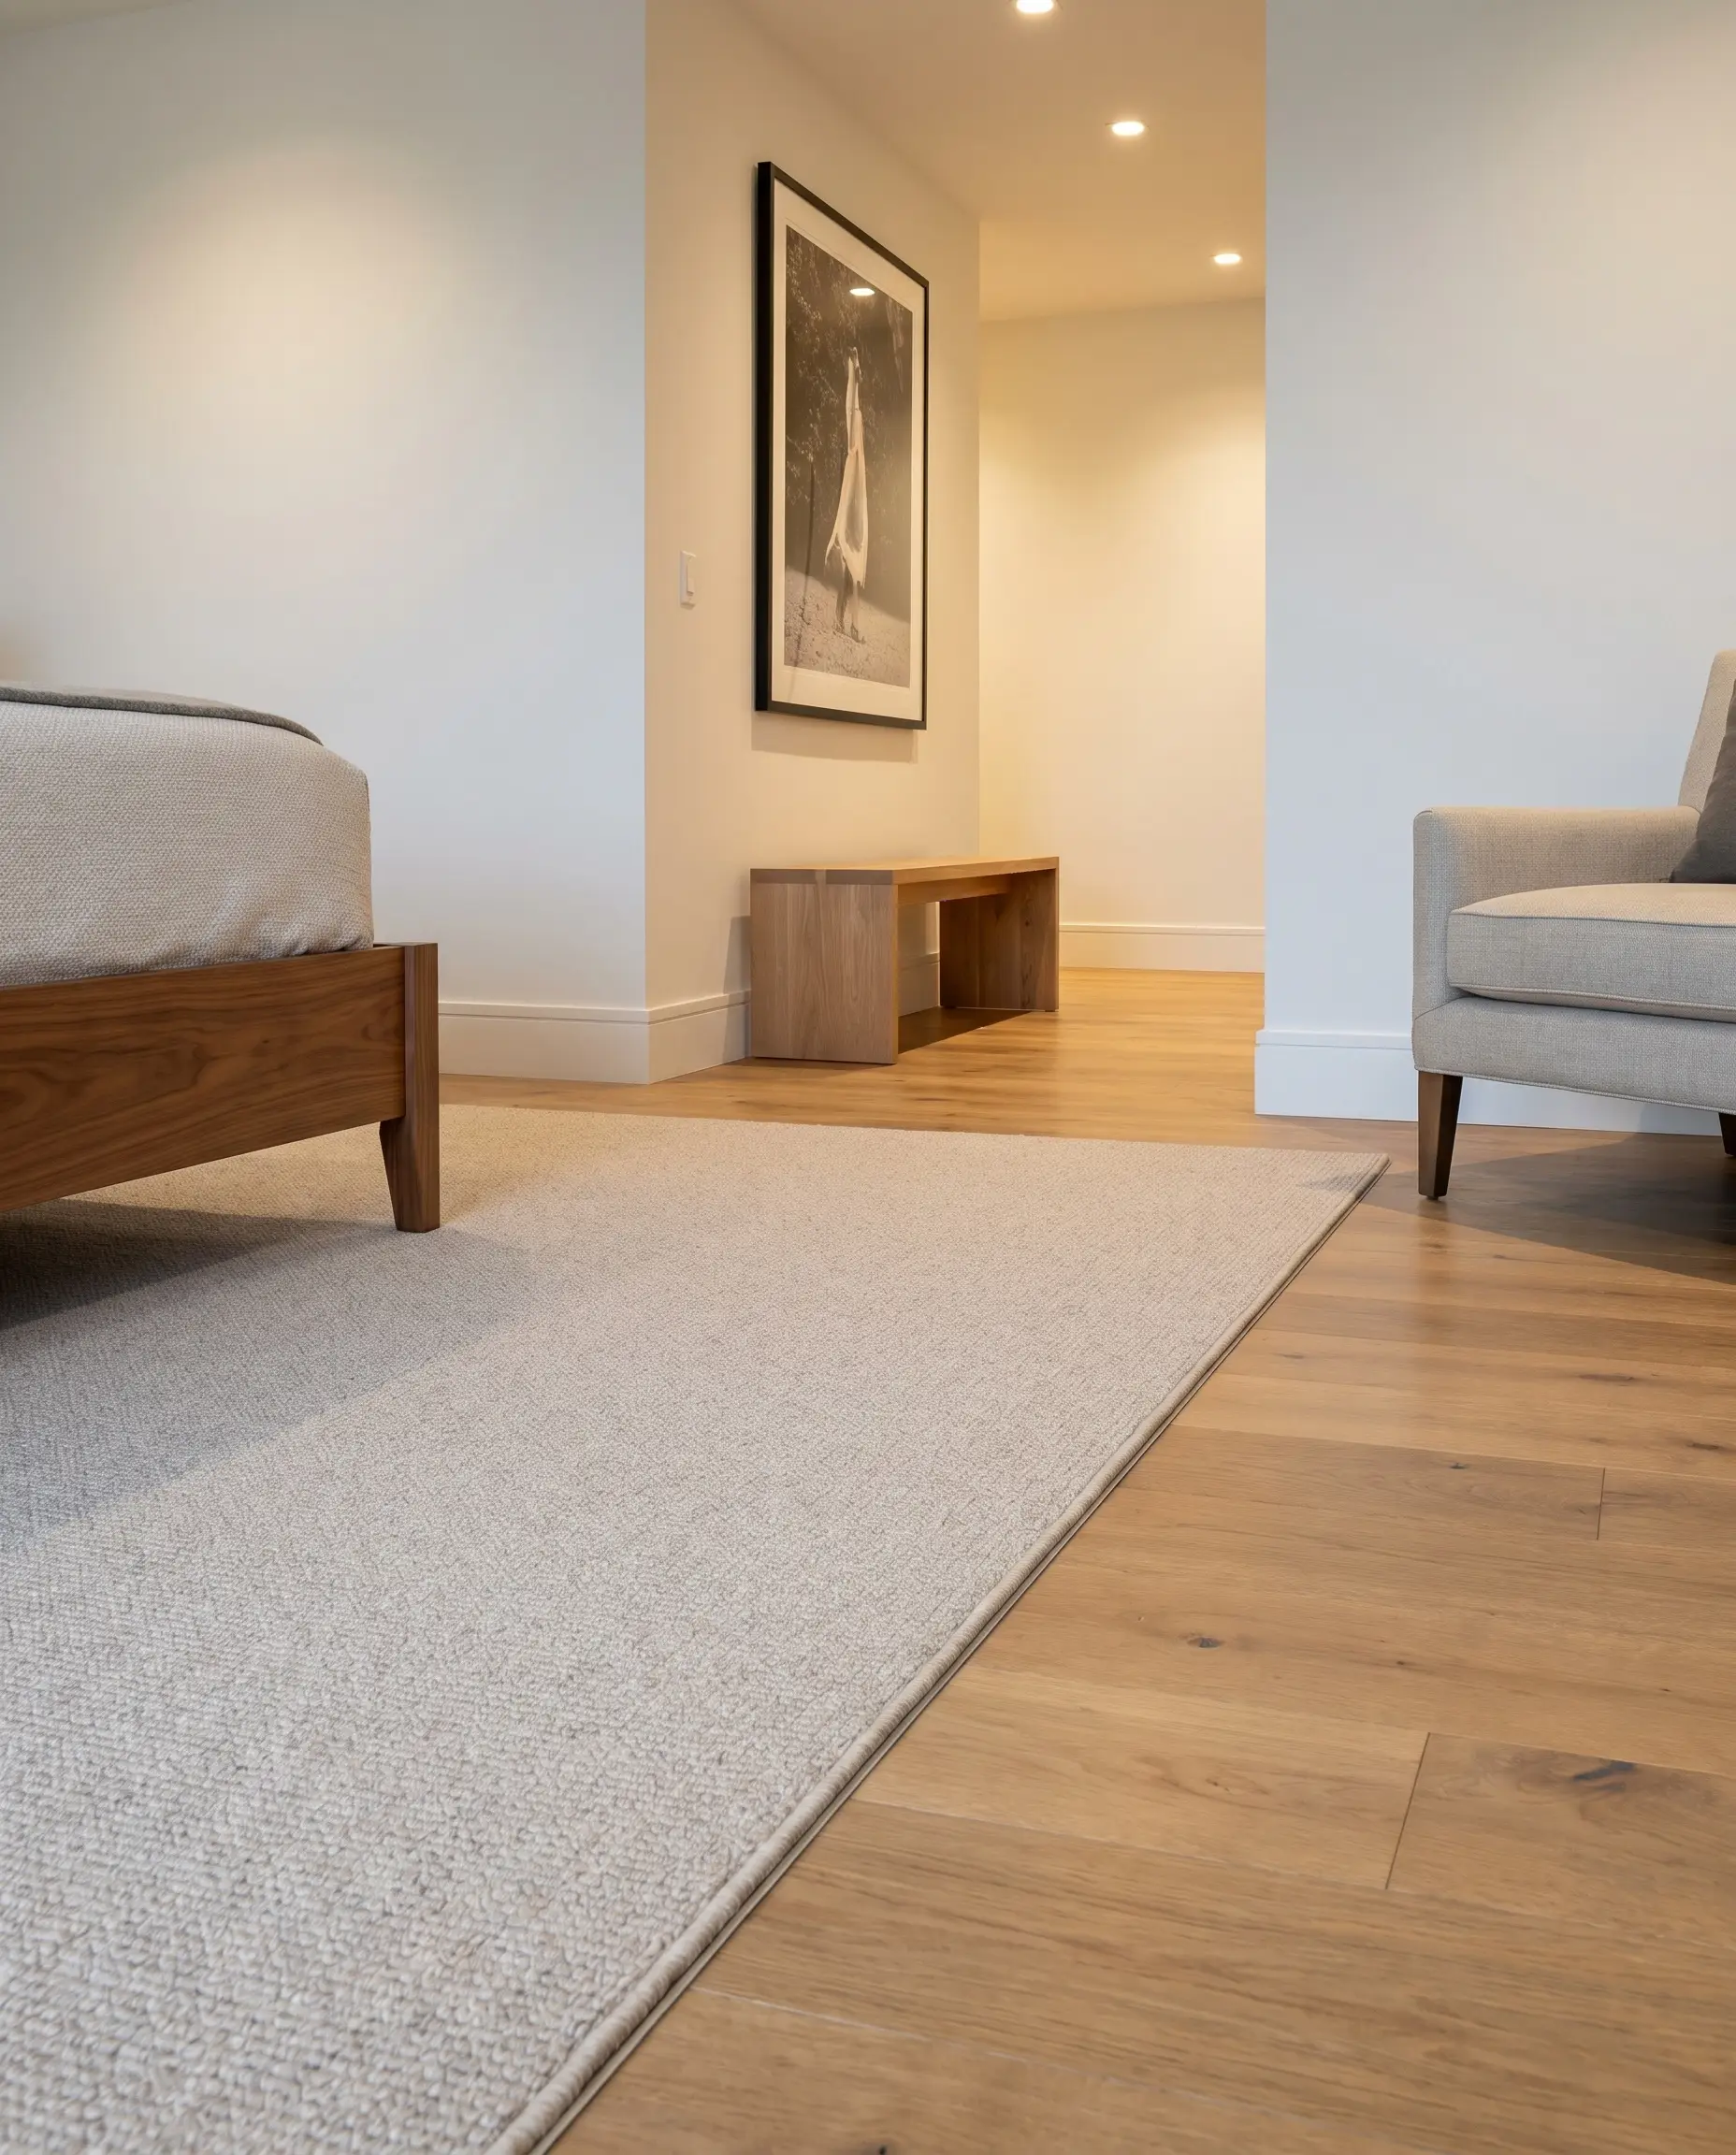
The notoriously difficult carpet-to-hard surface transition is elegantly solved using a hidden Z-bar (or Z-gripper) transition profile. This concealed metal track allows the carpet to be tightly stretched and tucked under a metal lip, rolling smoothly down to the hardwood without exposing unsightly staples or raw, fraying edges.
- Vibe: Clean, Tailored
- Material Pairing: Low-pile wool carpet meeting solid hardwood.
- Mechanics: The Z-bar is nailed to the subfloor, the carpet is stretched over the integrated tack strip, and the leading edge is tucked under the bar’s hammered lip.
- Visual Result: A clean fold of carpet that meets the hardwood directly, with zero visible hardware.
Managing Uneven Floor Elevations
Perfectly flush seams are not always structurally possible without undertaking the massive expense of tearing out and rebuilding subfloors. When bridging a 1/4-inch to 3/4-inch height discrepancy, the goal is to manage the elevation change elegantly without creating a tripping hazard. The right transition profile accommodates the tolerance gracefully, turning a structural headache into a deliberate architectural feature.
Height Difference:
| Height Gap | Transition Solution | Aesthetic Result |
| 1/4″ to 3/8″ | Sloped Metal Profile (Schluter-RENO) | Modern, ADA-compliant metallic ramp. |
| 1/2″ to 3/4″ | Custom-Milled Wood Reducer | Bespoke, flush-fit millwork extension. |
| 3/4″ + (Wet Rooms) | Angled Solid Stone Saddle | Heavy, traditional waterproof boundary. |
The Sloped Schluter-RENO
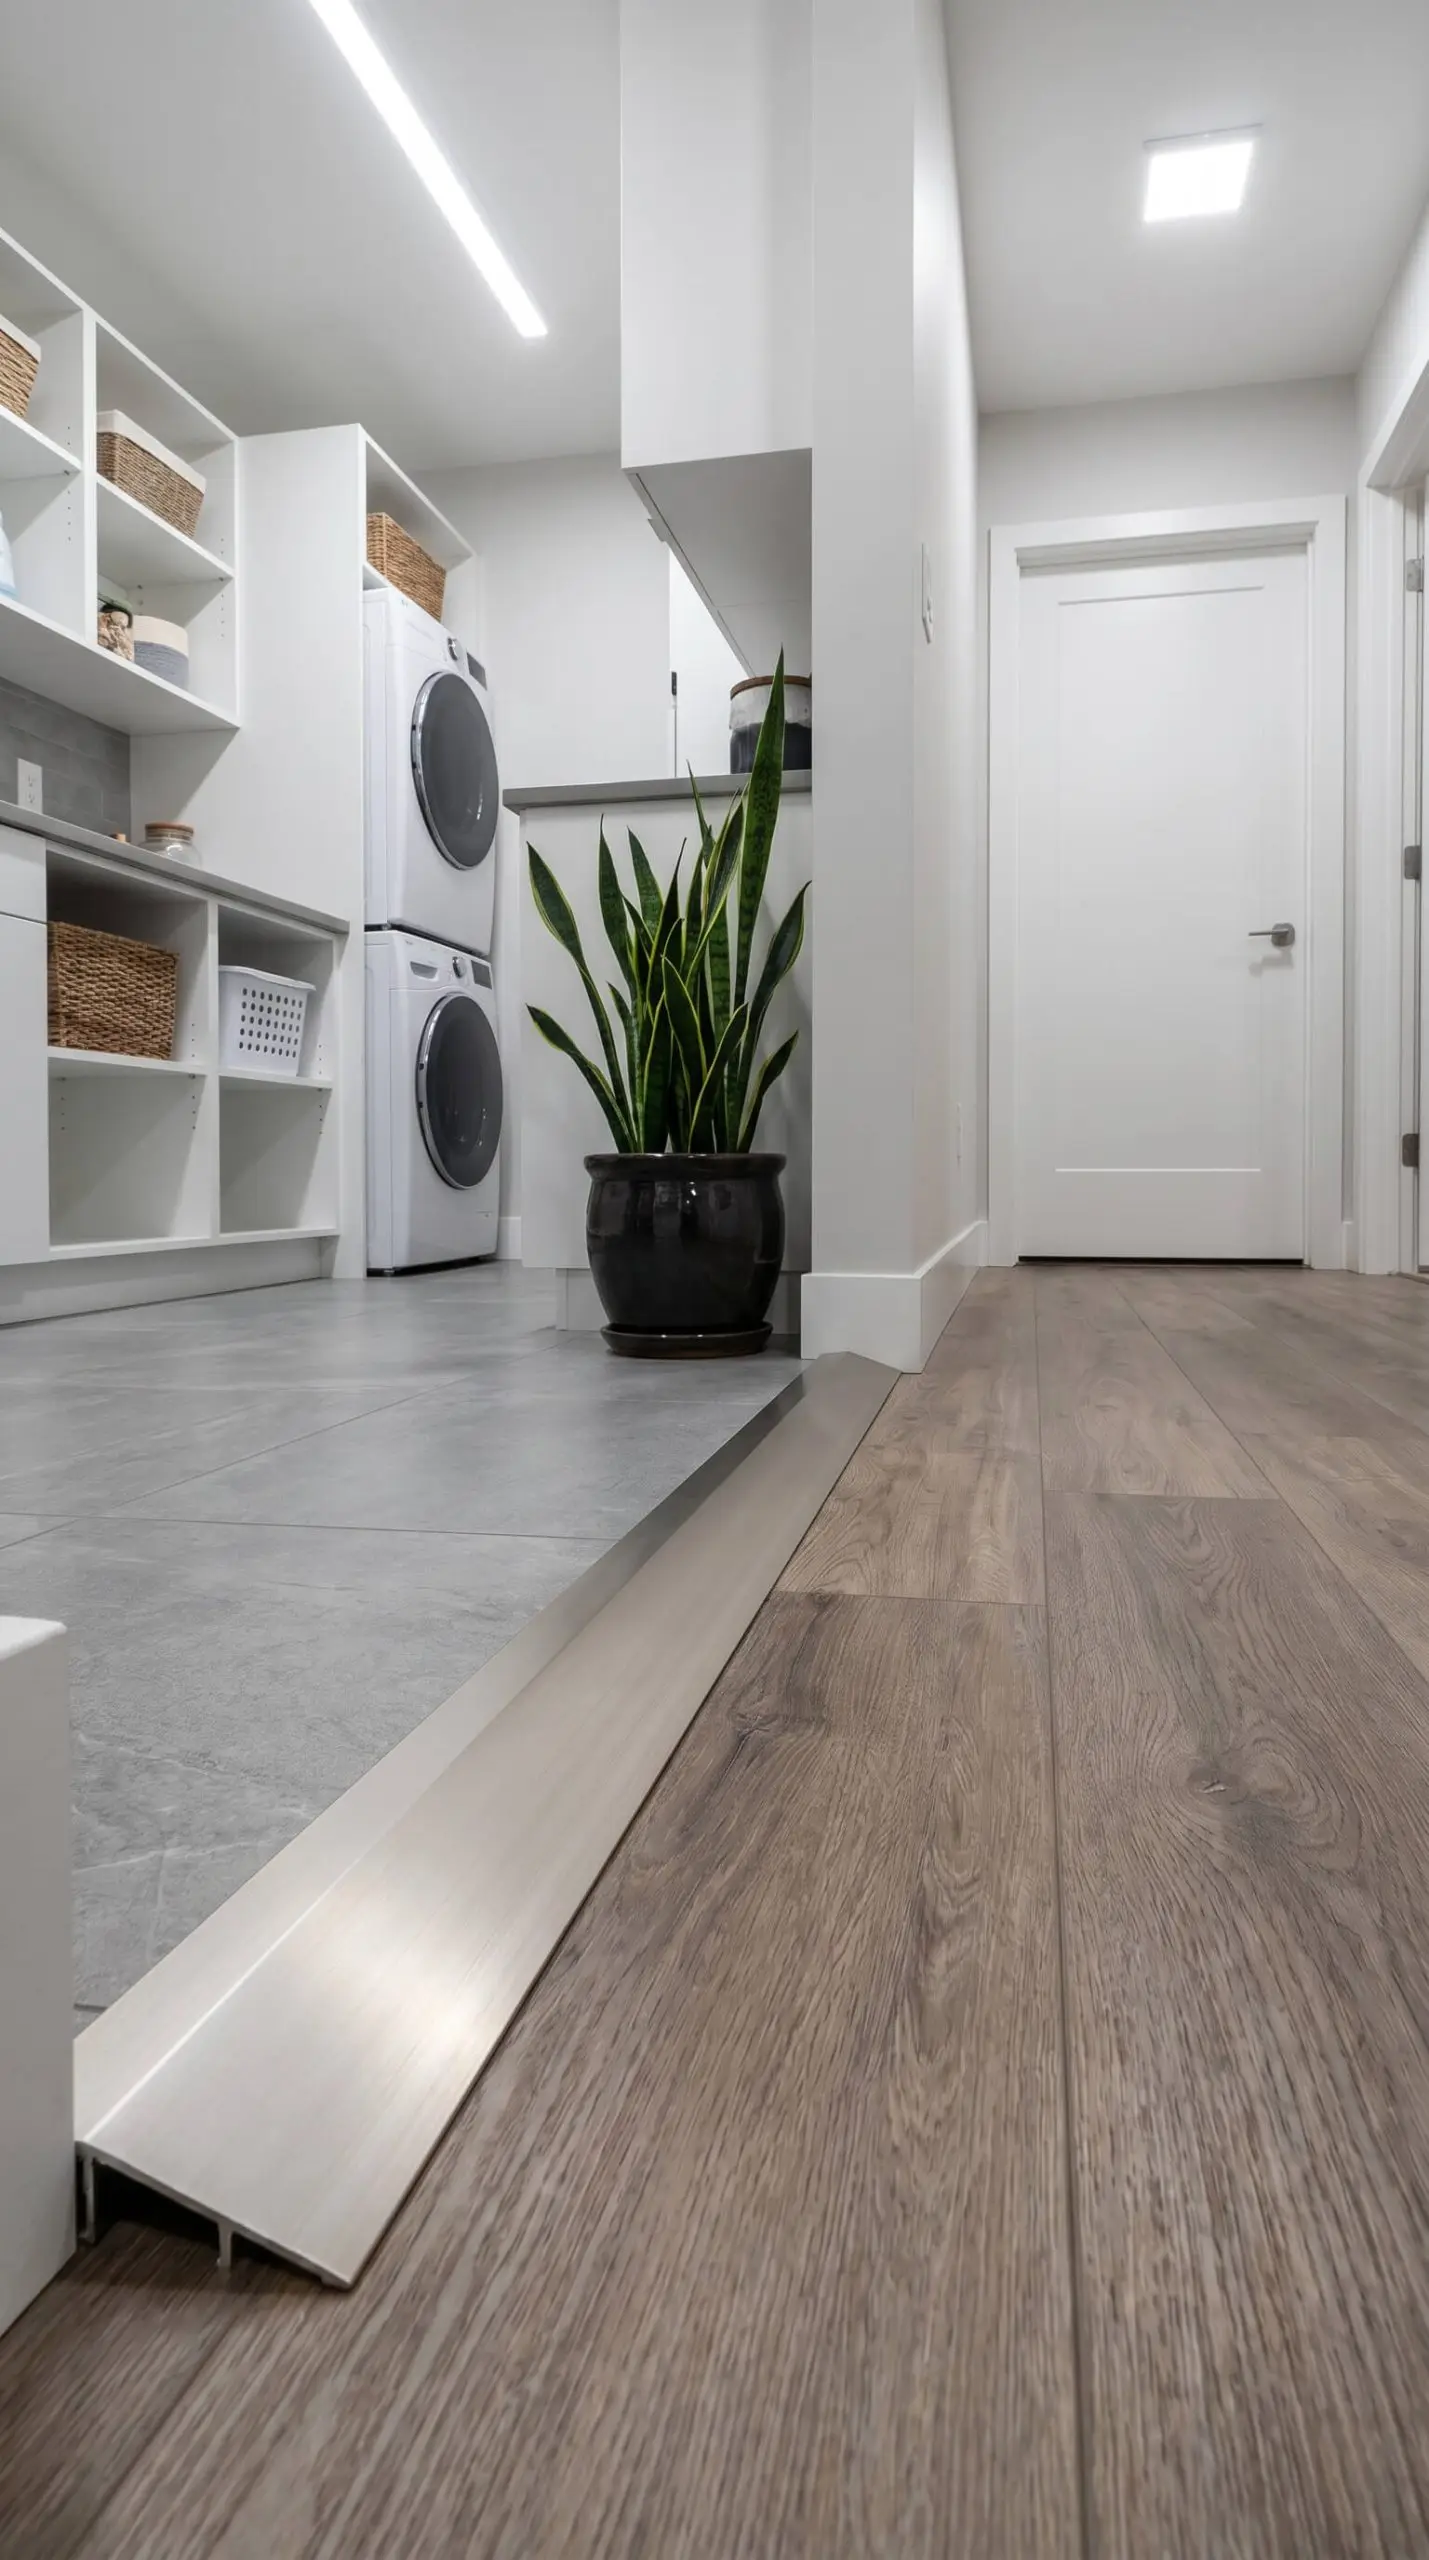
The Schluter-RENO profile features a gentle, ADA-compliant metallic slope that protects the higher tile edge while tapering seamlessly down to a lower wood or LVP floor. Originally designed for commercial-grade durability, this anodized aluminum or brass profile offers exceptional structural integrity for residential renovations.
- Vibe: Functional, Modern Utility
- Material Pairing: 1/2-inch porcelain tile sloping down to 1/4-inch LVP.
- Key Materials: Schluter-RENO-U or RENO-V profiles in satin anodized aluminum.
- Installation Detail: The anchoring leg is embedded in the tile’s thinset mortar coat, ensuring it will never shift or pull away from the seam.
Custom-Milled Wood Reducers
Always provide your millwork shop with physical offcuts of your actual flooring so they can precisely match the grain profile and stain formulation.
Hackrea Styling Tip
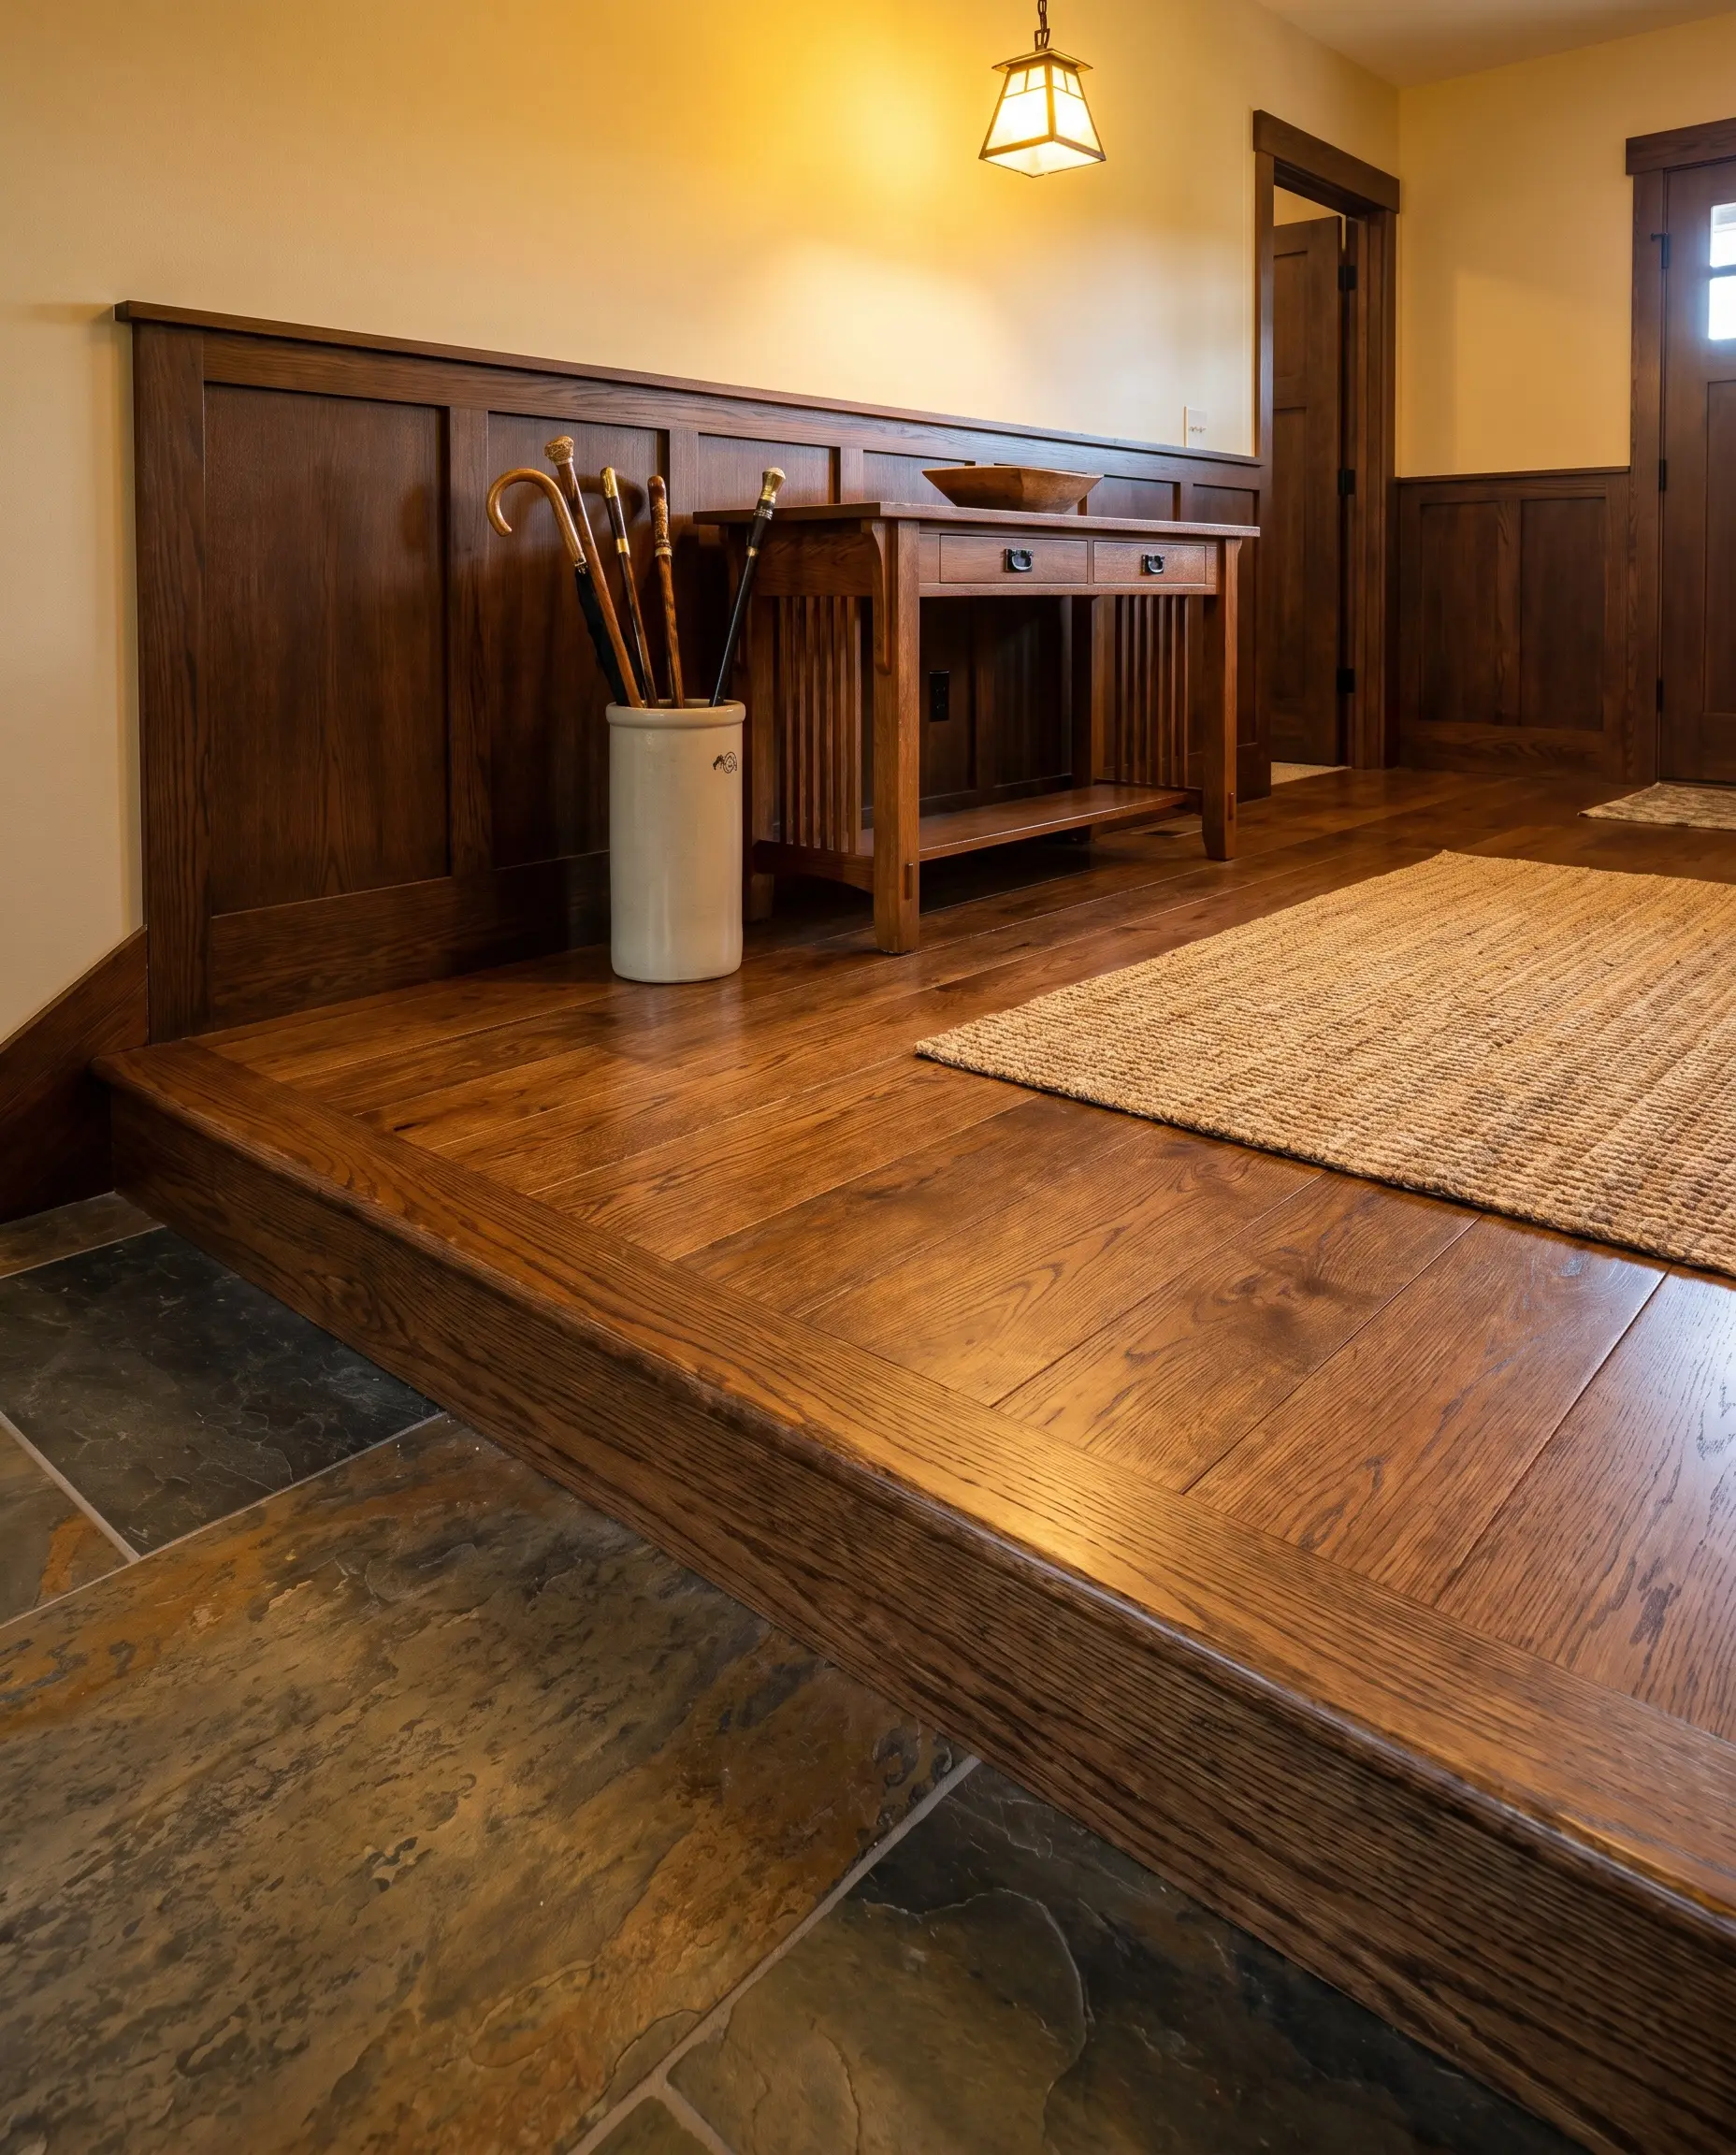
Abandon the generic hardware-store overlapping T-molding and commission a custom-milled wood reducer that physically sits flush against the higher tile edge and slopes down to the wood. This bespoke piece must be perfectly color-matched to the exact species and stain of your floor, ensuring the transition looks like a deliberate extension of the millwork rather than a lazy patch.
- Vibe: Traditional, Bespoke Craftsmanship
- Material Pairing: Higher natural stone tile dropping down to site-finished solid hardwood.
- Fabrication Detail: Requires custom routing to match the exact millimeter drop between the two specific flooring materials.
- Attachment Method: Glued and blind-nailed to the subfloor, completely avoiding top-nailing for a flawless surface.
The Angled Marble Threshold
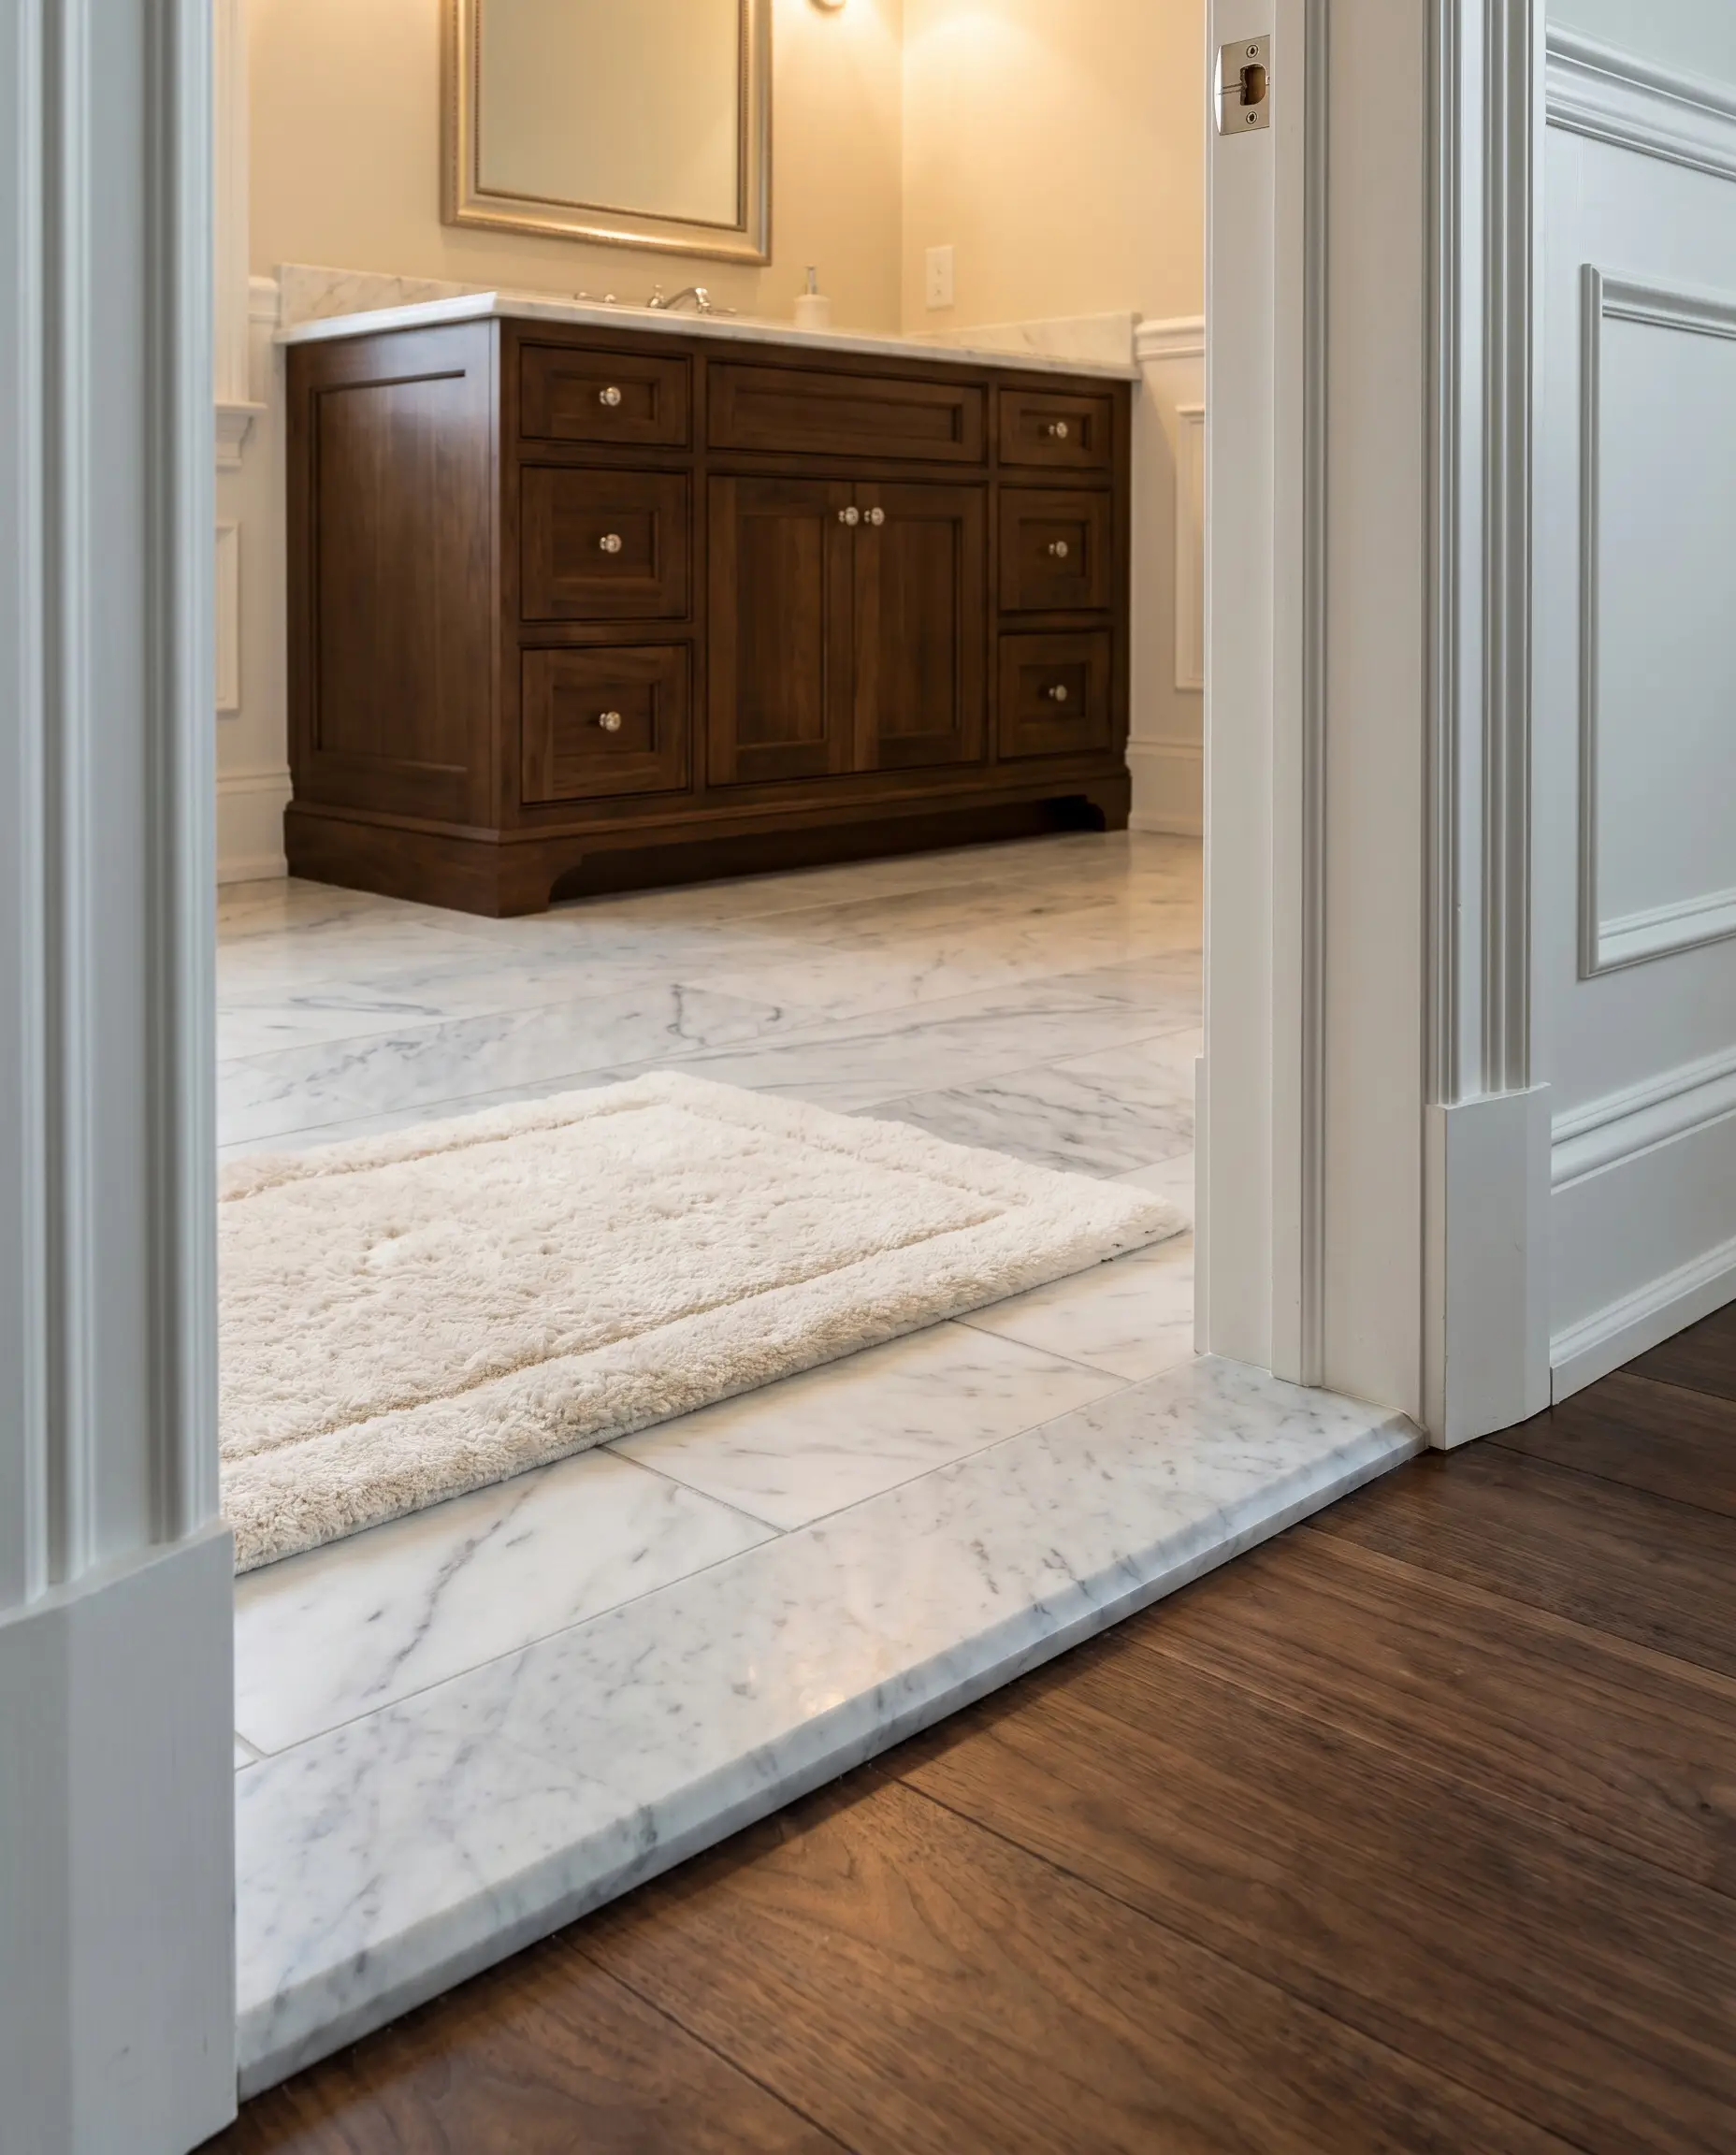
A solid piece of Carrara or Nero Marquina marble, custom-beveled on one side, acts as a luxurious, solid ramp for bathrooms meeting hallways. This heavy architectural detail creates a definitive, highly waterproof boundary for wet rooms while offering an opportunity for striking visual contrast.
- Vibe: High-End Luxury, Classic Hotel
- Material Pairing: Bright white marble threshold contrasting heavily against dark walnut flooring.
- Key Materials: 2-inch wide solid marble saddle with a custom 1/4-inch bevel on the egress side.
- Functional Benefit: Acts as a solid water dam, preventing bathroom moisture from wicking into the hallway hardwood.
Organic and Asymmetrical Boundaries
Breaking away from straight lines allows for complex, highly custom intersections that redefine open-concept flow. Executing an organic boundary, such as a kitchen bleeding naturally into a living room, requires meticulous planning and CNC-level precision for the wood cuts. This is the most advanced, bespoke design execution possible, turning the floor into a seamless, uninterrupted canvas.
The Hexagon Tile Bleed
You must use a highly flexible, color-matched sanded caulk around every individual tile in a hex bleed; rigid grout will instantly crack against the expanding wood points.
Expansion Joint Warning
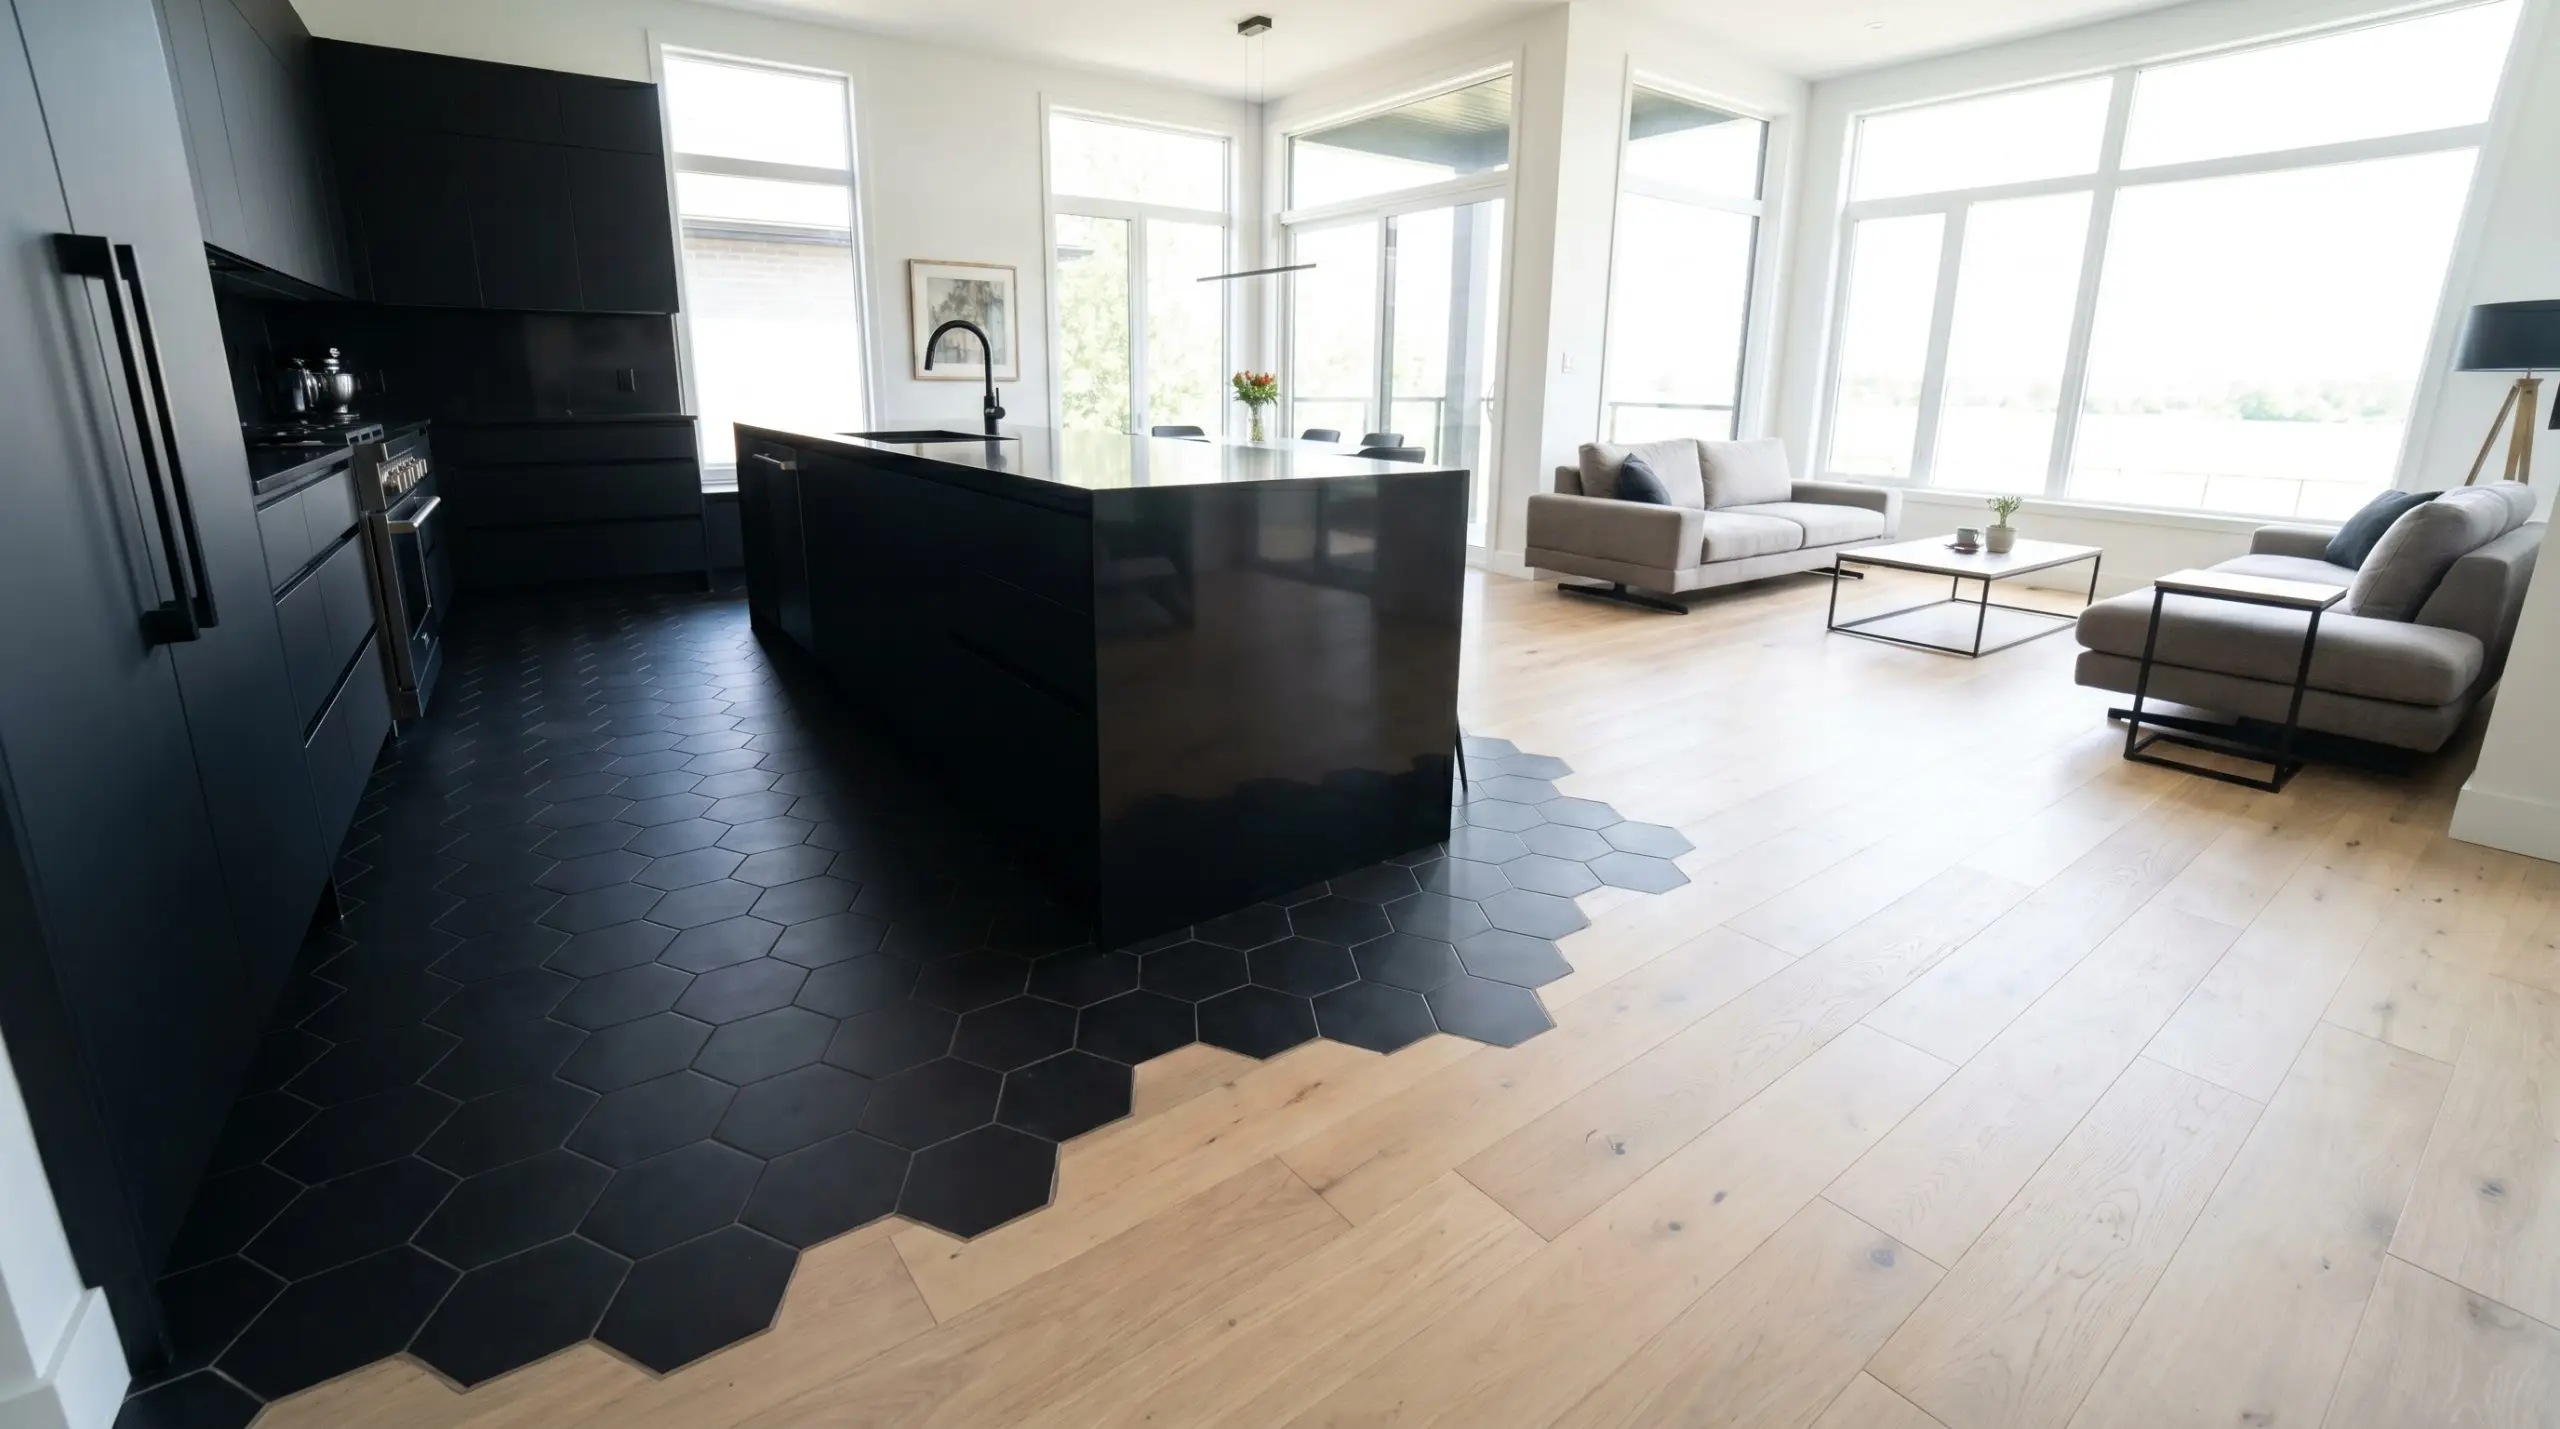
Transitioning from porcelain hex tiles in a kitchen into straight hardwood planks is achieved by meticulously cutting the wood to wrap around the individual hex shapes, creating an organic, dissolving boundary. Because these intricate cuts leave absolutely no room for standard expansion gaps, managing the seam tension with flexible adhesives is highly critical.
- Vibe: Organic Modern, Avant-Garde
- Material Pairing: Matte black porcelain hexagons dissolving into light engineered European oak.
- Execution Requirement: High-precision oscillating multi-tools or CNC routing for the wood planks.
- Subfloor Prep: Requires a highly uncoupling membrane beneath the tile to isolate the movement of the wood subfloor from the rigid porcelain.
Sweeping Curved Tile Cuts
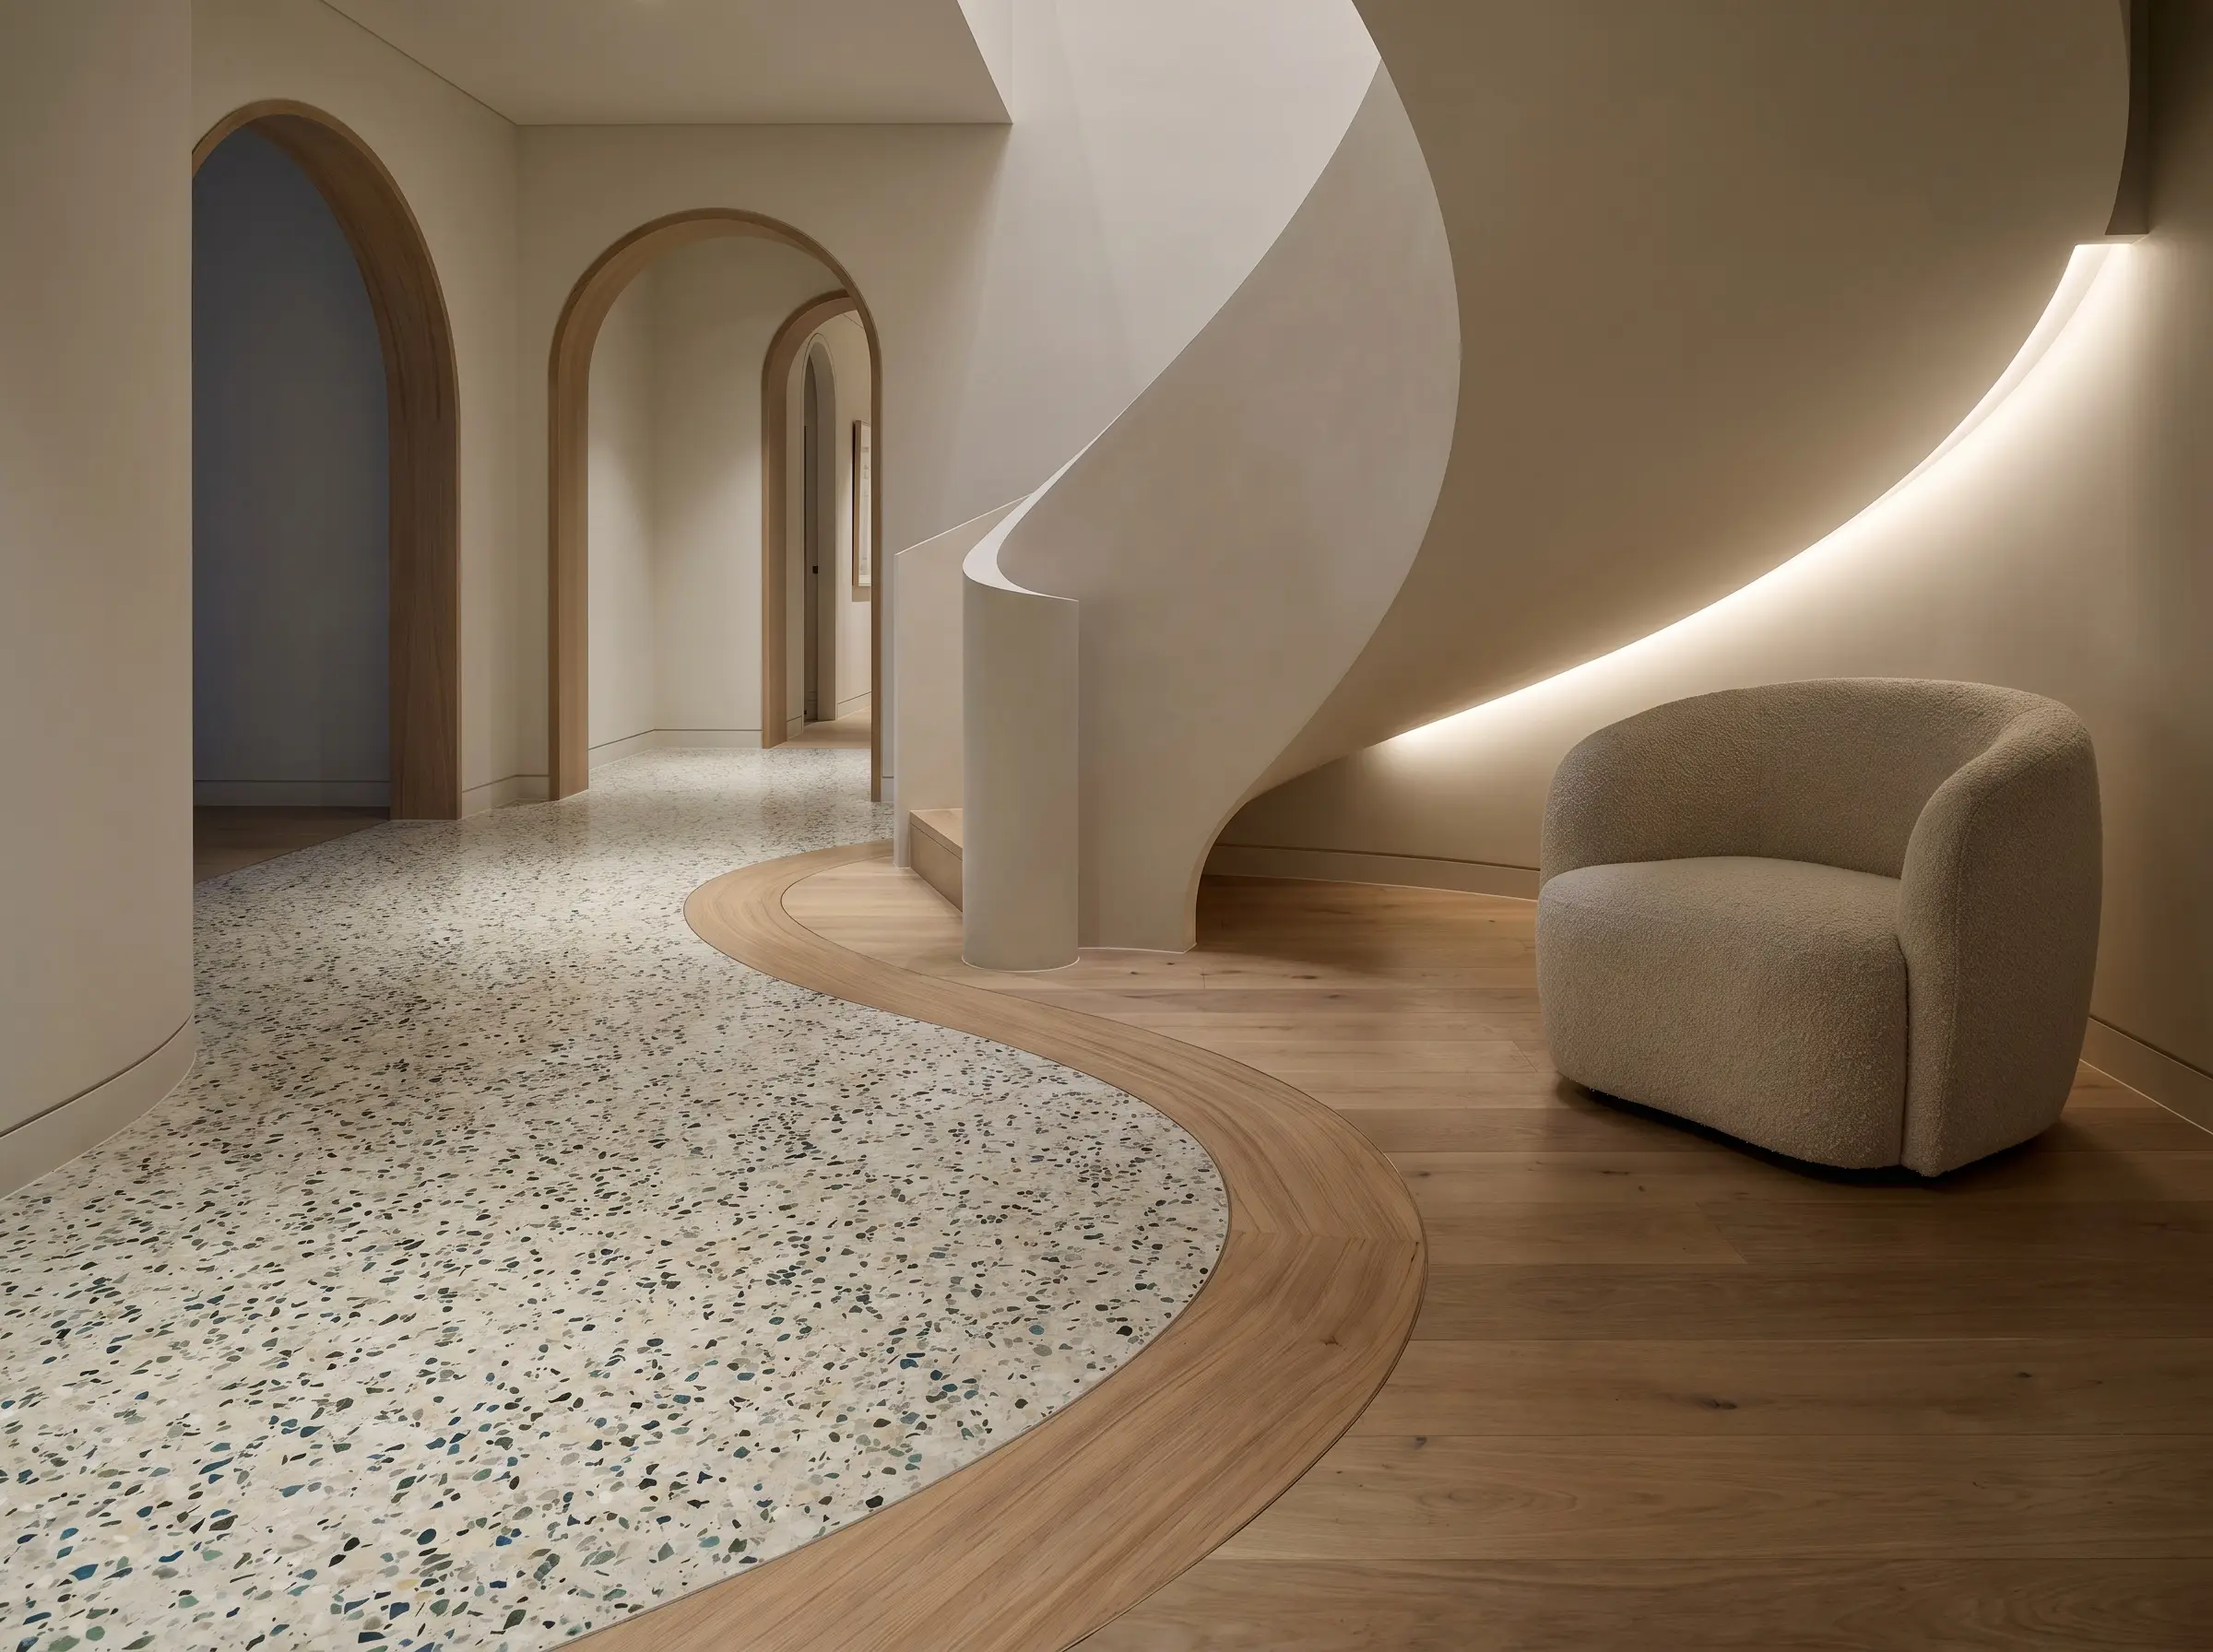
Utilizing a waterjet-cut curved boundary, such as a sweeping arc of penny tiles or terrazzo meeting hardwood, defines fluid architectural spaces. This elegant floor boundary is ideal for emphasizing curved entryways, wrapping around spiral staircases, or softening the rigid geometry of a modern room.
- Vibe: Post-Modern, Fluid Architectural
- Material Pairing: Poured terrazzo or penny rounds meeting flexible curved wood-bending ply borders.
- Execution Requirement: Custom waterjet cutting for the tile and specialized steam-bending for the wood header.
- Design Theory: Use the curve of the floor transition to echo the radius of arched doorways or curved kitchen islands above it.
Doorway and Structural Thresholds
Localized transitions that happen directly underneath doors require strict spatial discipline. The placement of the seam dictates how the flooring is perceived from adjacent rooms, making door swing mechanics the primary driver of your layout.
the seam must sit exactly underneath the center of the door when closed, ensuring the transition is completely invisible from both sides of the room.
Architectural Standard The golden rule of doorway transitions
The Concealed Pocket Door Seam
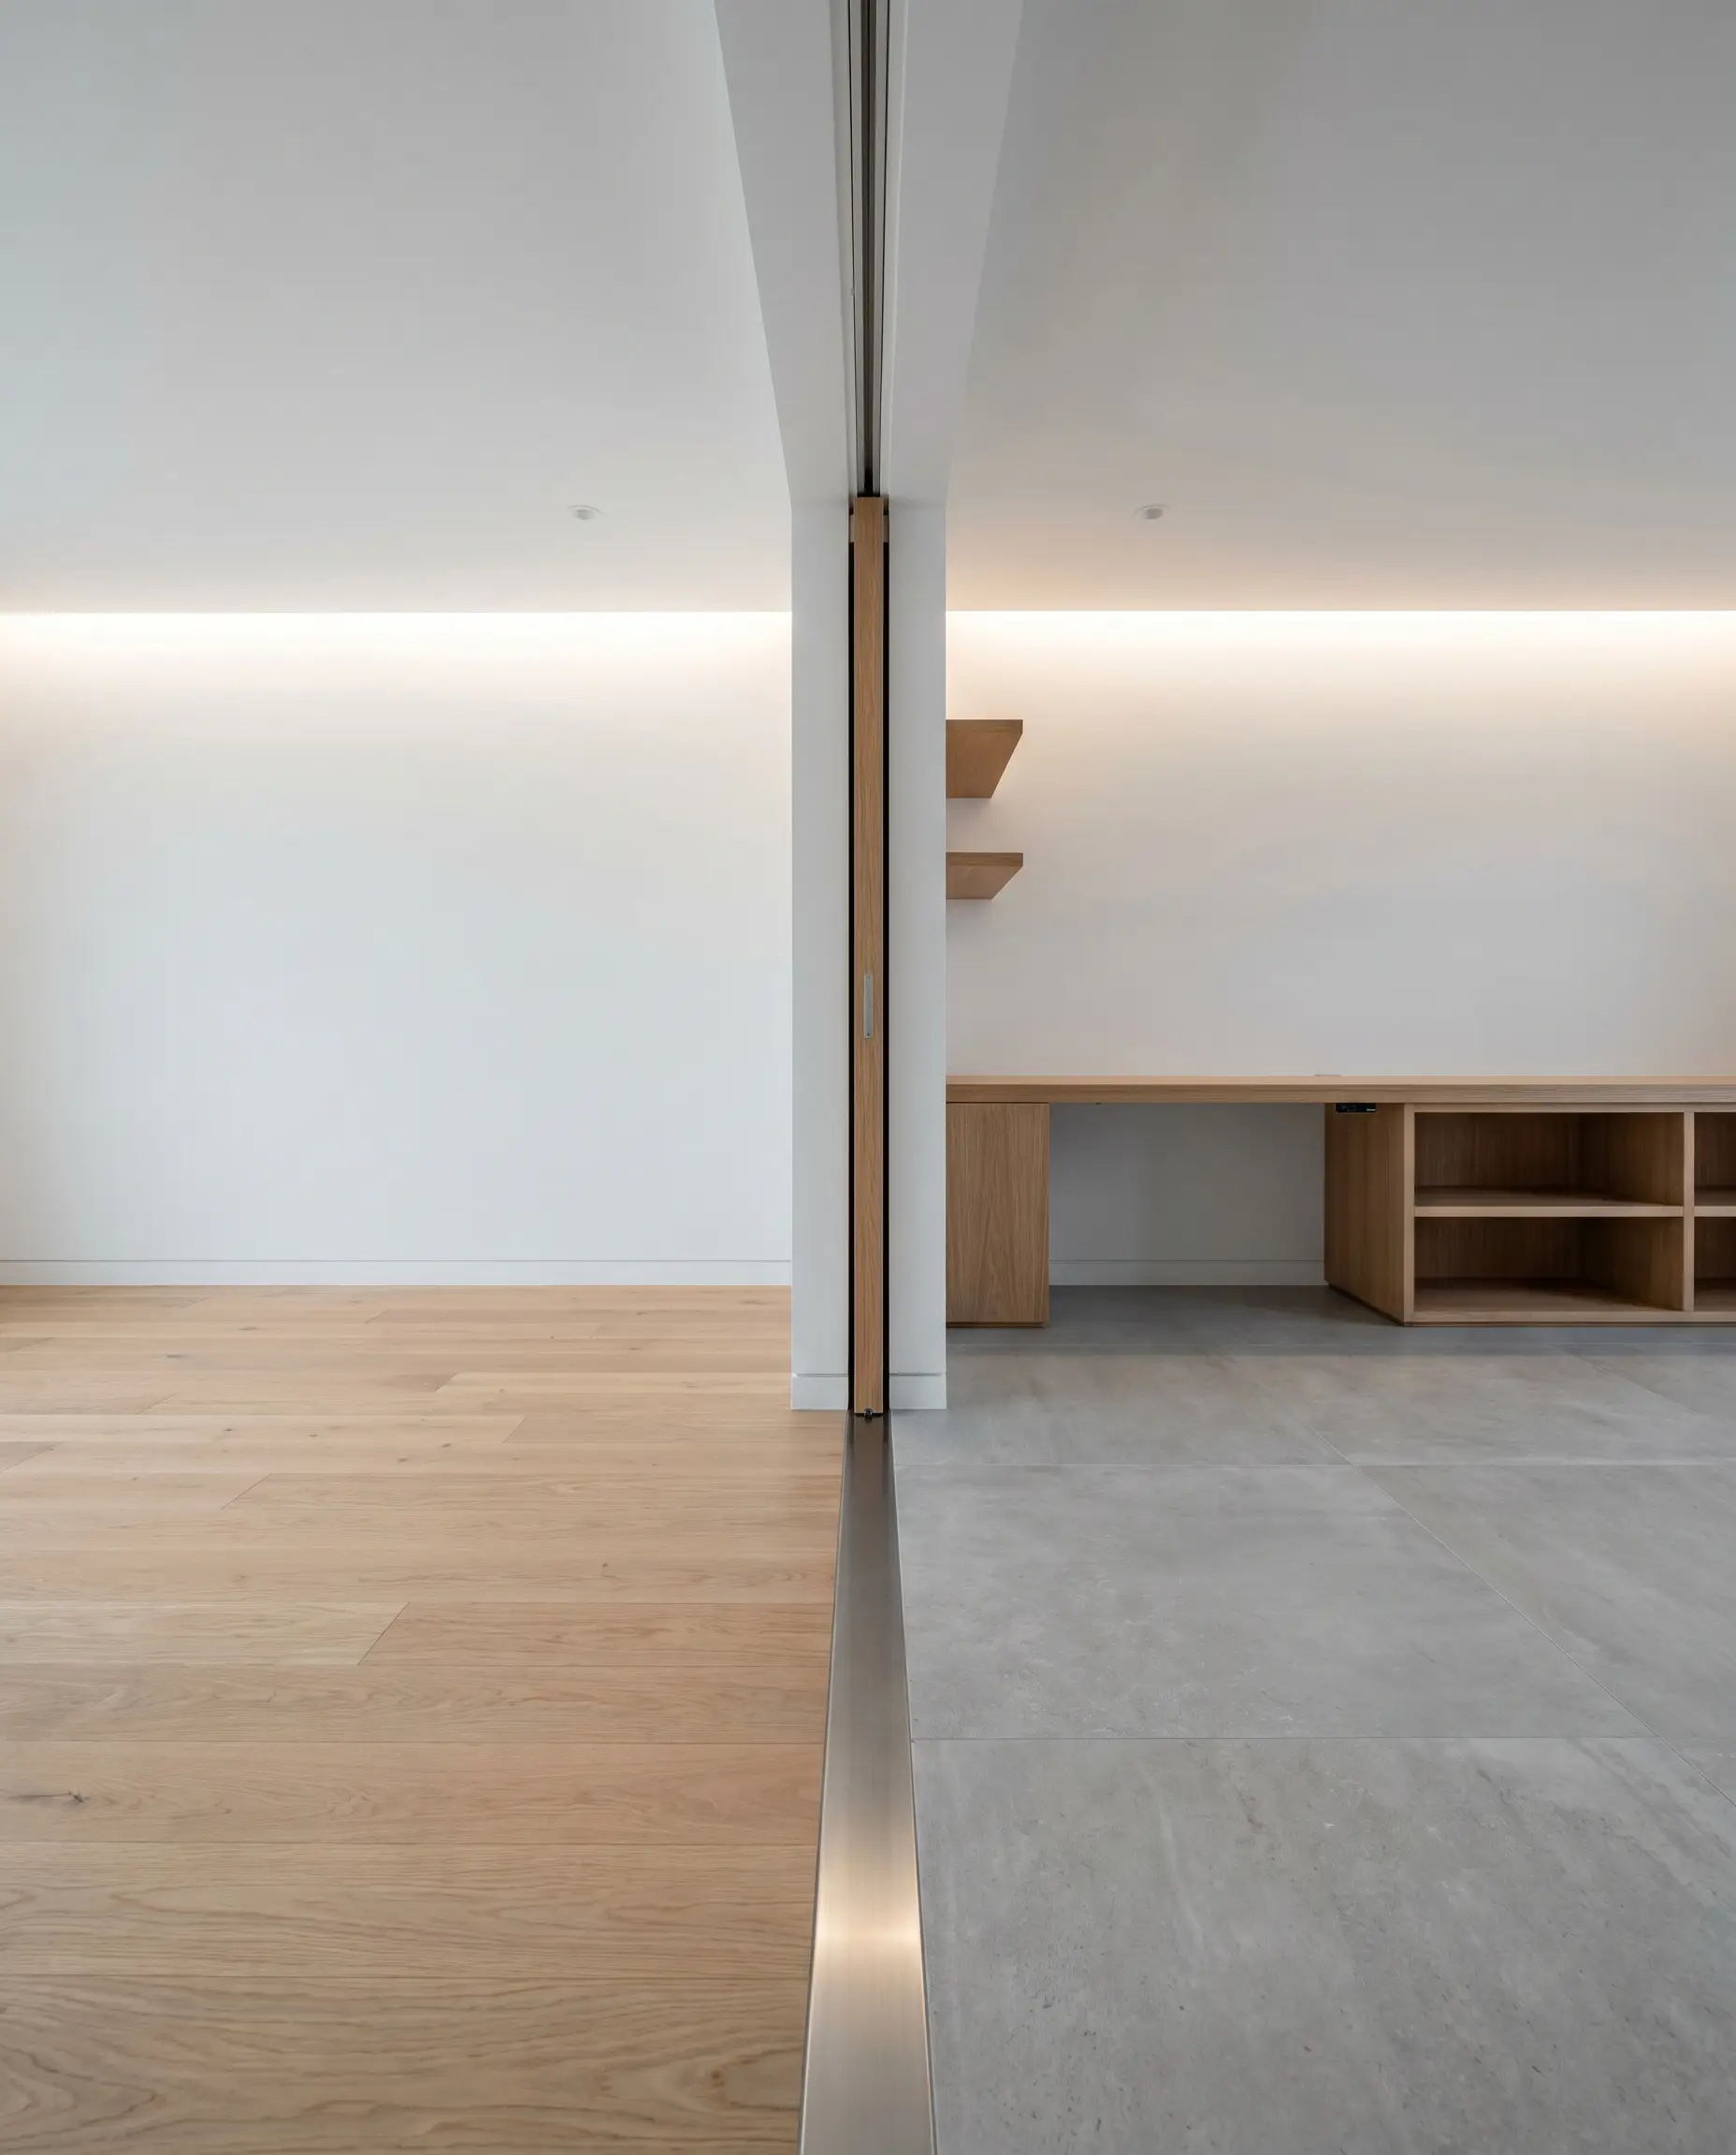
A floor transition beneath a pocket door must perfectly align with the overhead track. Because the door disappears into the wall when open, the threshold becomes highly visible, demanding a flawless flush metal inlay to cap the seam with absolute precision.
- Vibe: Ultra-Clean, Purpose-Built
- Material Pairing: Stainless steel or unlacquered brass T-profile sitting completely flush between wood and tile.
- Alignment Detail: Plumb-bob the exact center of the pocket door track down to the subfloor before setting the transition profile.
- Clearance Tolerance: Ensure the metal profile sits absolutely flush so it does not scrape the bottom of the sliding door panel.
The Contrasting Stone Saddle
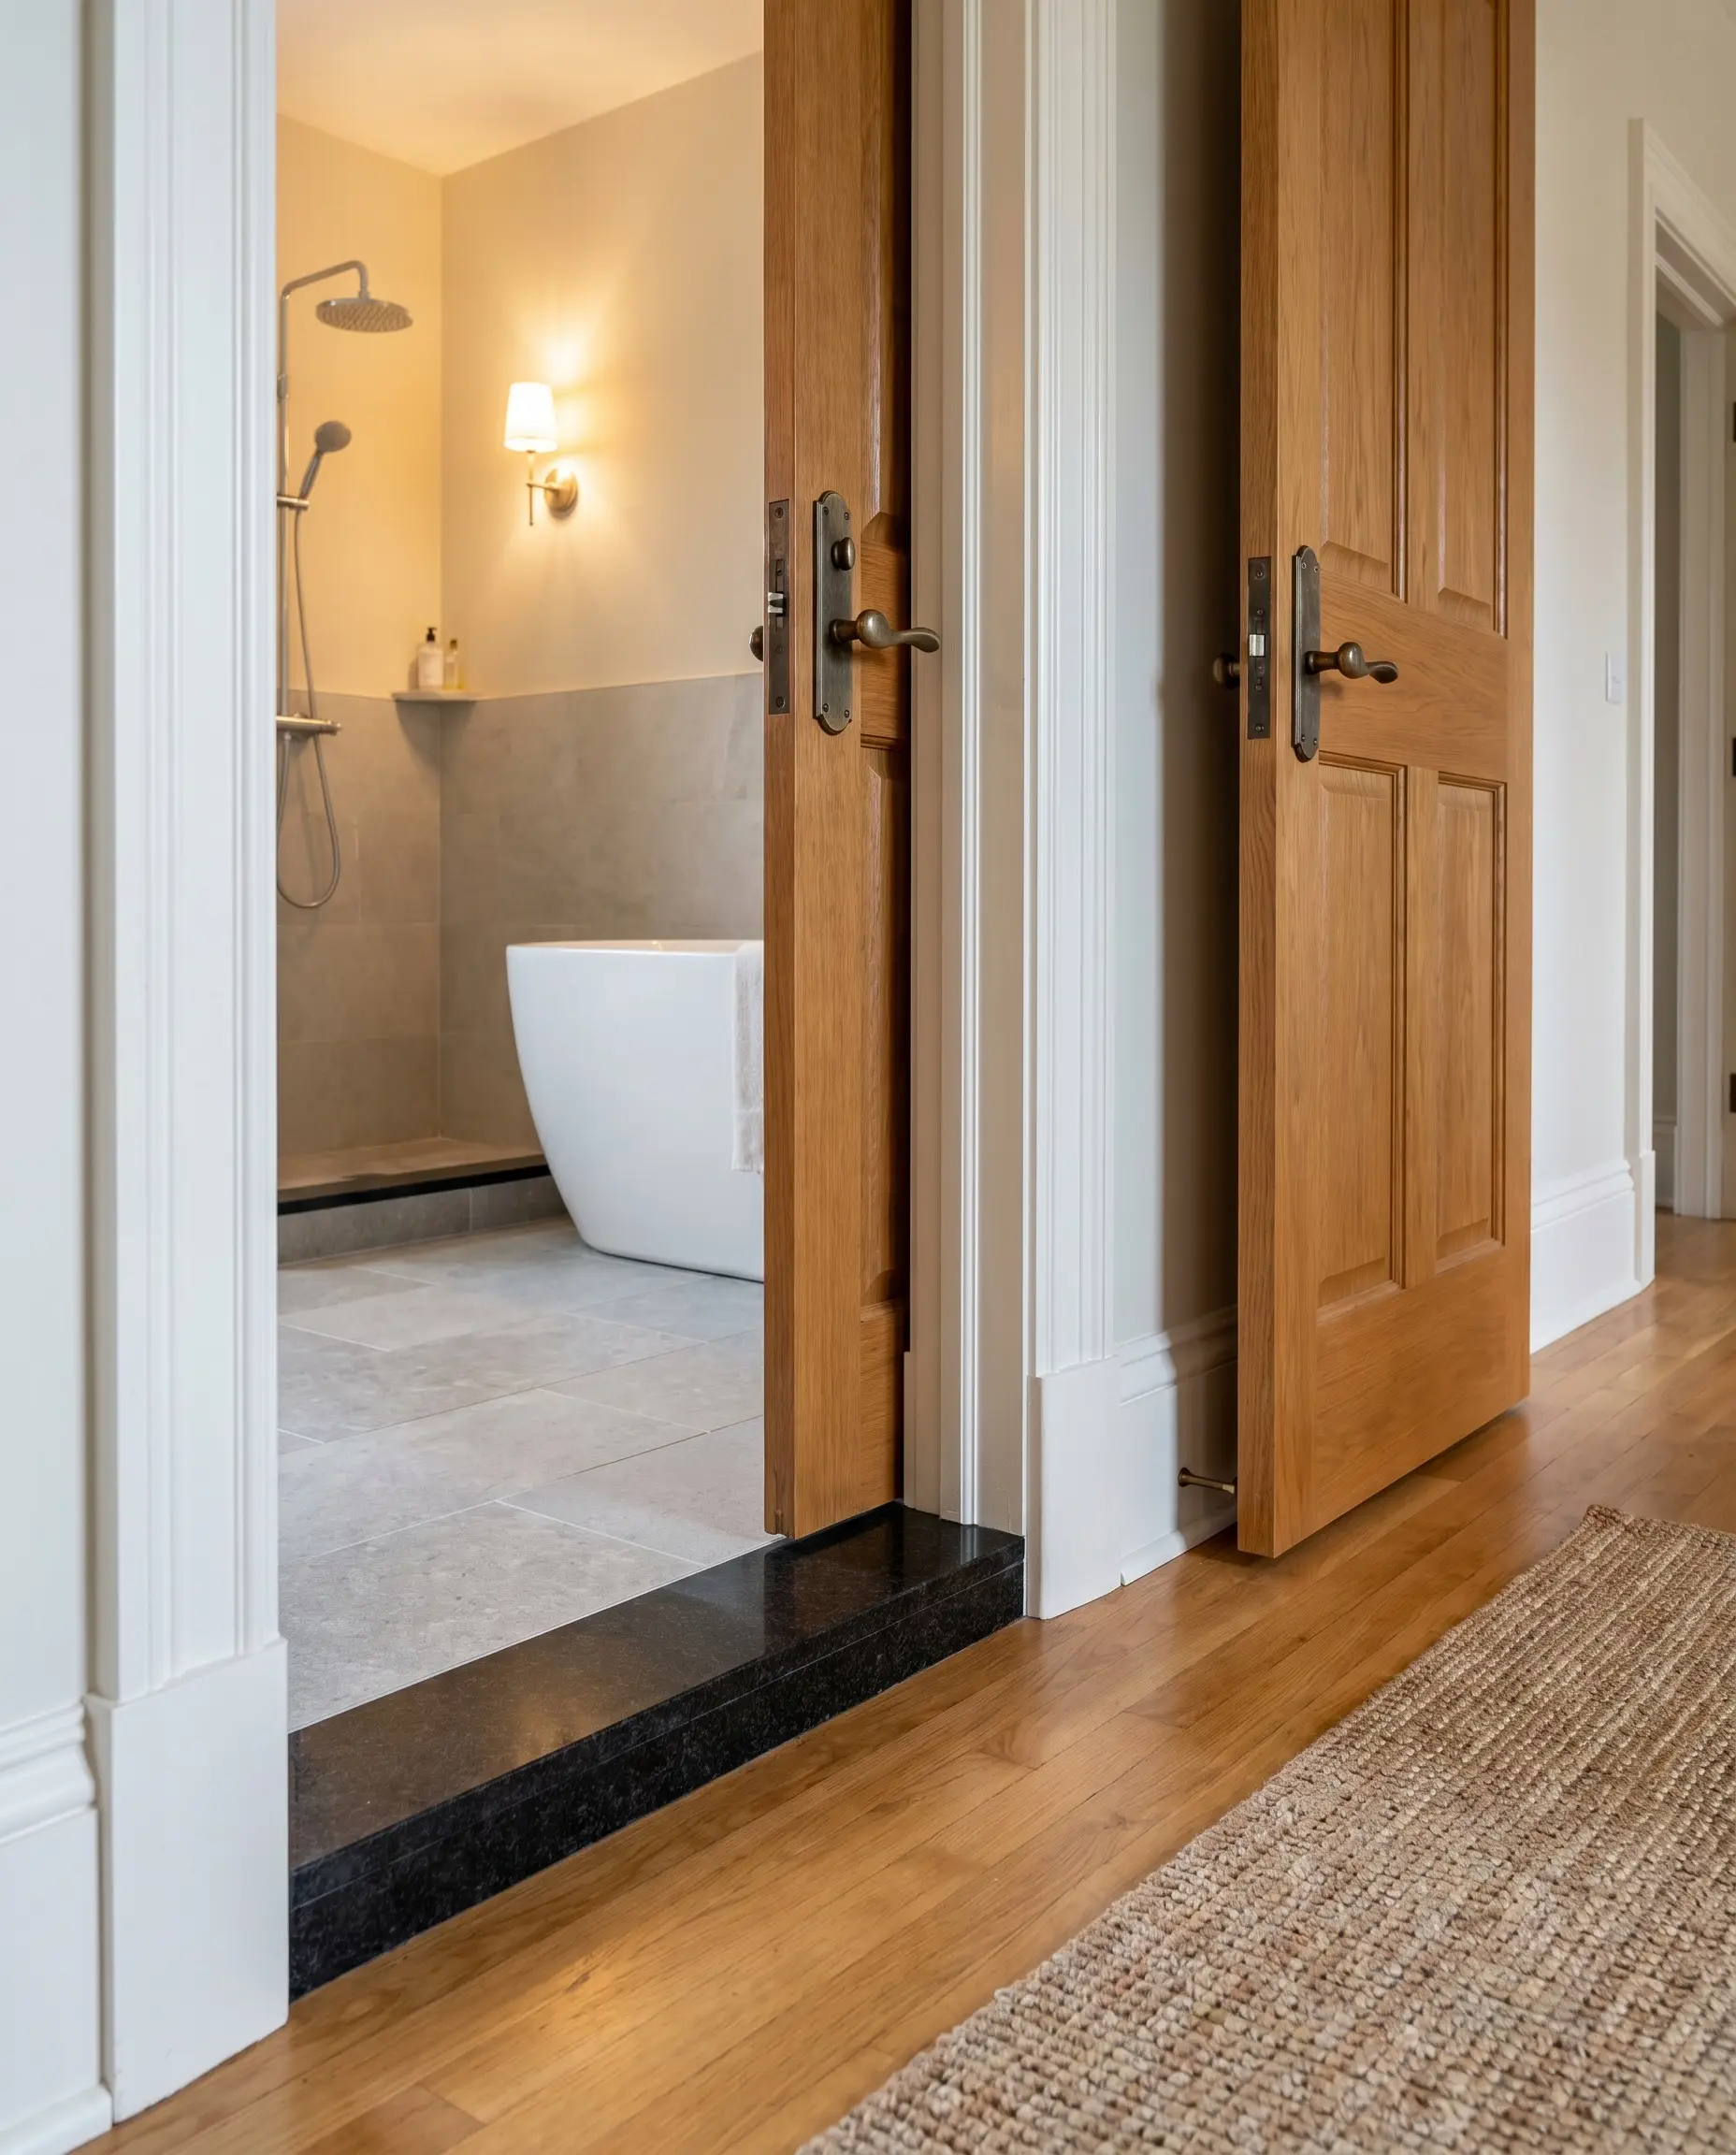
Using a thick, raised stone saddle to definitively separate a high-moisture bathroom from a dry bedroom acts as both a visual break and a functional water dam. This heavy architectural detail honors traditional building practices while actively protecting the hardwood from potential water egress.
- Vibe: Traditional, Stately
- Material Pairing: 2-inch wide Absolute Black Granite saddle separating a tiled wet-room from an oak hallway.
- Functional Benefit: The raised profile acts as a physical barrier against catastrophic bathroom flooding.
- Installation Note: Must be set on a full mortar bed to support the weight and prevent cracking under heavy foot traffic.
Securing the Perfect Seam (Final Takeaways)
Floor transitions are a defining hallmark of good interior architecture. Achieving these bespoke, flush looks is entirely dependent on planning the subfloor and calculating material thicknesses before a single box of flooring is opened. Mastering the expansion joint and ditching the overlapping builder-grade strips will fundamentally upgrade the structural integrity and visual flow of your space. For a deeper analysis of selecting the foundational materials that make these transitions execute perfectly, review Hackrea’s comprehensive guide on home renovation prep and flooring materials.
Ask the Expert:
A: Yes, if the gap is standard. You can carefully pry up the existing T-molding and replace it with a custom-milled flush T-profile or a flexible cork strip, provided the depth of the expansion gap allows for it and the two subfloors are relatively level.
A: Industry standards dictate a minimum of a 1/4-inch to 1/2-inch expansion gap at all vertical obstructions and transitions, depending on the specific wood species, plank width, and the humidity fluctuations of your climate.

The Hackrea Style Desk treats interior decoration as an exact visual science. Rather than focusing on demolition or floor plans, this desk masters the art of color theory, undertone matching, material pairings, and spatial proportion. From balancing the visual weight of mixed metals to finding the perfect bridging tone between disparate wood species, this desk provides the rigorous aesthetic rules needed to achieve high-end, editorial-quality harmony in any space.