How to Decorate a Narrow Hallway: Spatial Tricks & Wall Styling
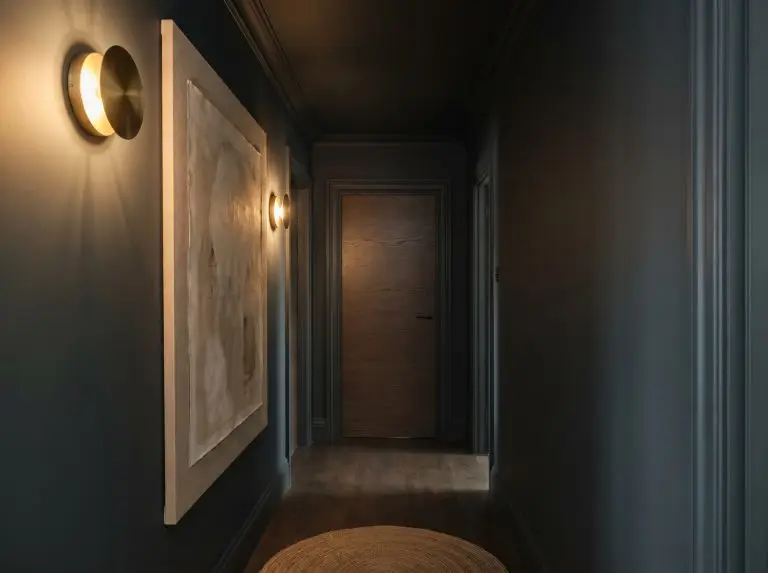
Walking down a standard 36-inch builder-grade corridor shouldn’t feel like navigating a dark tunnel. Yet, most of us are stuck with these windowless spaces that frustrate our design ambitions and bruise our shoulders. When you only have three feet of clearance, standard gallery frames and bulky lighting fixtures quickly become physical hazards, transforming a functional transit space into a claustrophobic obstacle course.
To fix this, we need to rethink our approach to narrow hallway wall decor. Instead of merely hanging pictures, we must practice strict clearance control—treating the vertical planes as architectural tools to manipulate scale and Light Reflectance Value (LRV). By drawing the eye upward and forward rather than trapping it on cluttered side walls, we can entirely rewrite the spatial footprint.
Decorating a narrow hallway isn’t just an aesthetic exercise; it is the strategic application of optical expansion.
Architectural Treatments & Textural Wall Coverings
When physical clearance is entirely non-existent, texture and color must do the heavy lifting. These zero-depth architectural treatments manipulate the perception of width and height without stealing a single millimeter of your walkway space.
Blur Physical Boundaries with Color Drenching
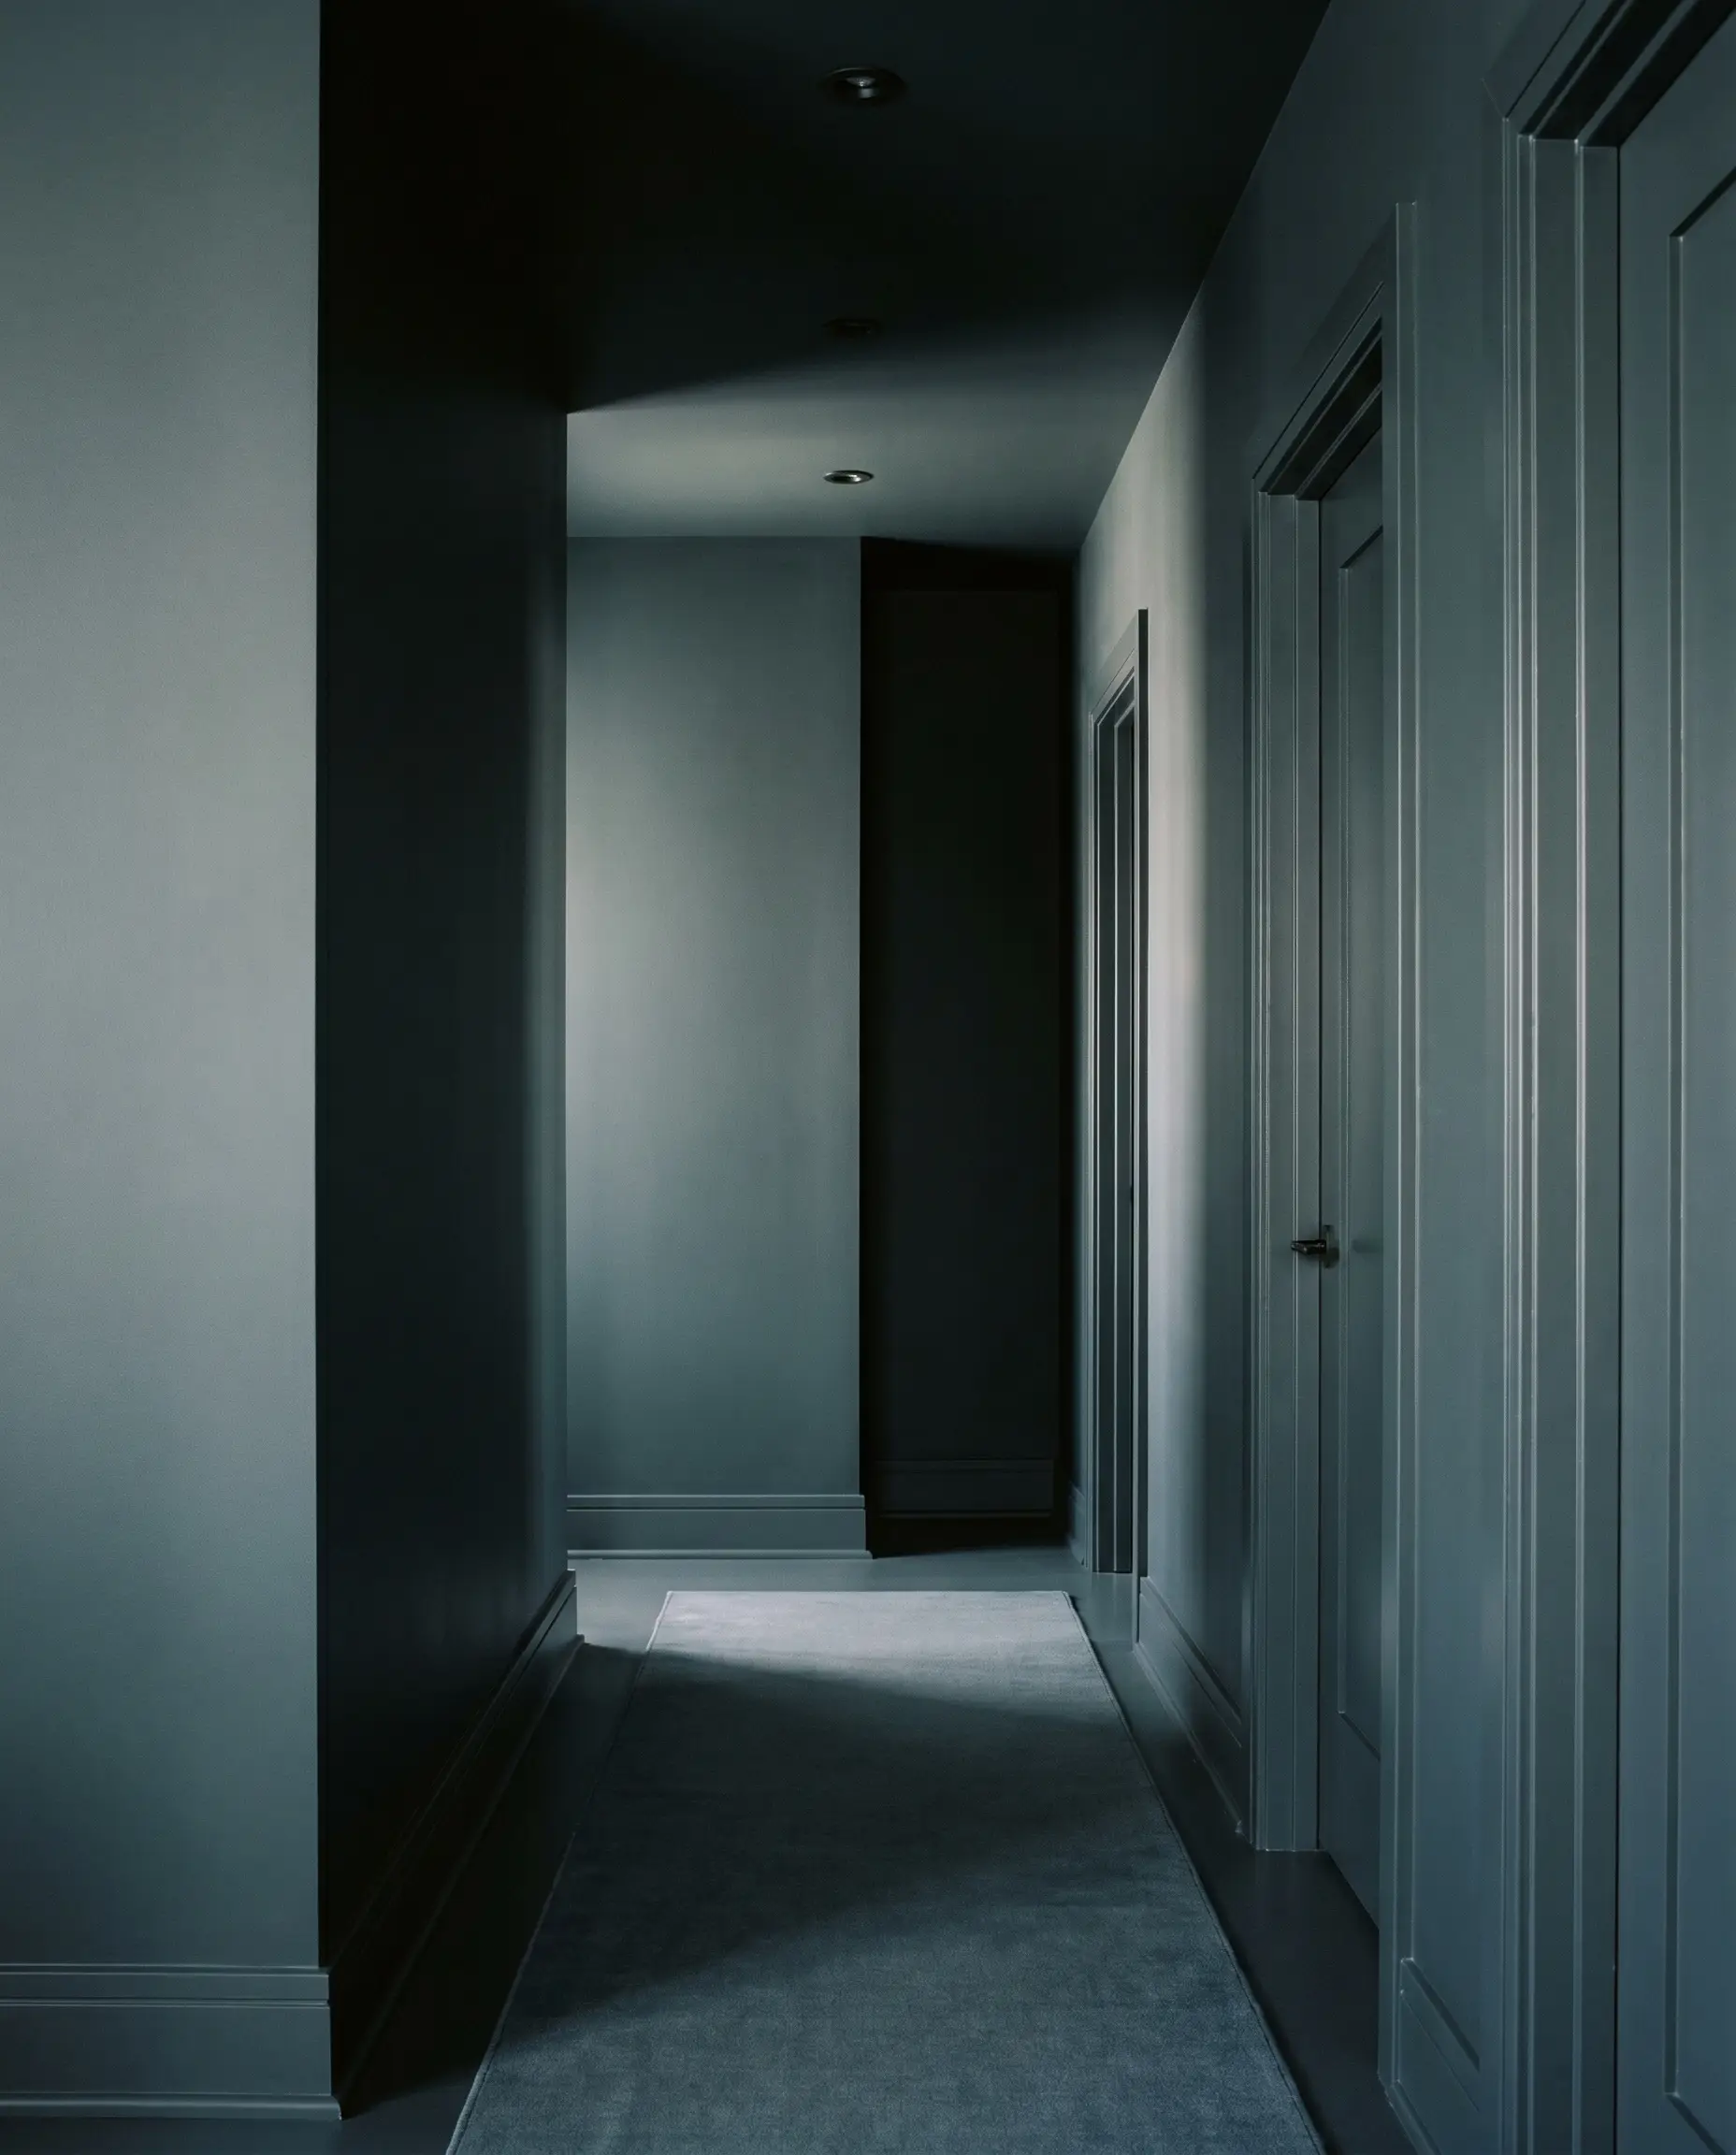
Painting the baseboards, walls, doors, and ceiling the exact same medium-to-dark tone effectively erases the hard visual lines that tell the brain exactly how narrow the space is. By enveloping the corridor in a single, continuous shade, the sharp corners disappear into shadow, creating a moody, expansive atmosphere.
- Vibe: Monolithic Modernism.
- Paint Recommendation: Benjamin Moore Regent Green (a deep, muted pine).
- Styling Pro-Tip: Use a matte finish on the walls and a satin finish on the trim in the exact same color to add subtle architectural definition without breaking the visual plane.
Your eye registers the continuous, unbroken color and assumes the room is significantly wider than the physical drywall permits, effectively blurring the boundaries of the corridor.
The Optical Effect
Apply Limewash or Roman Clay for Zero-Depth Texture
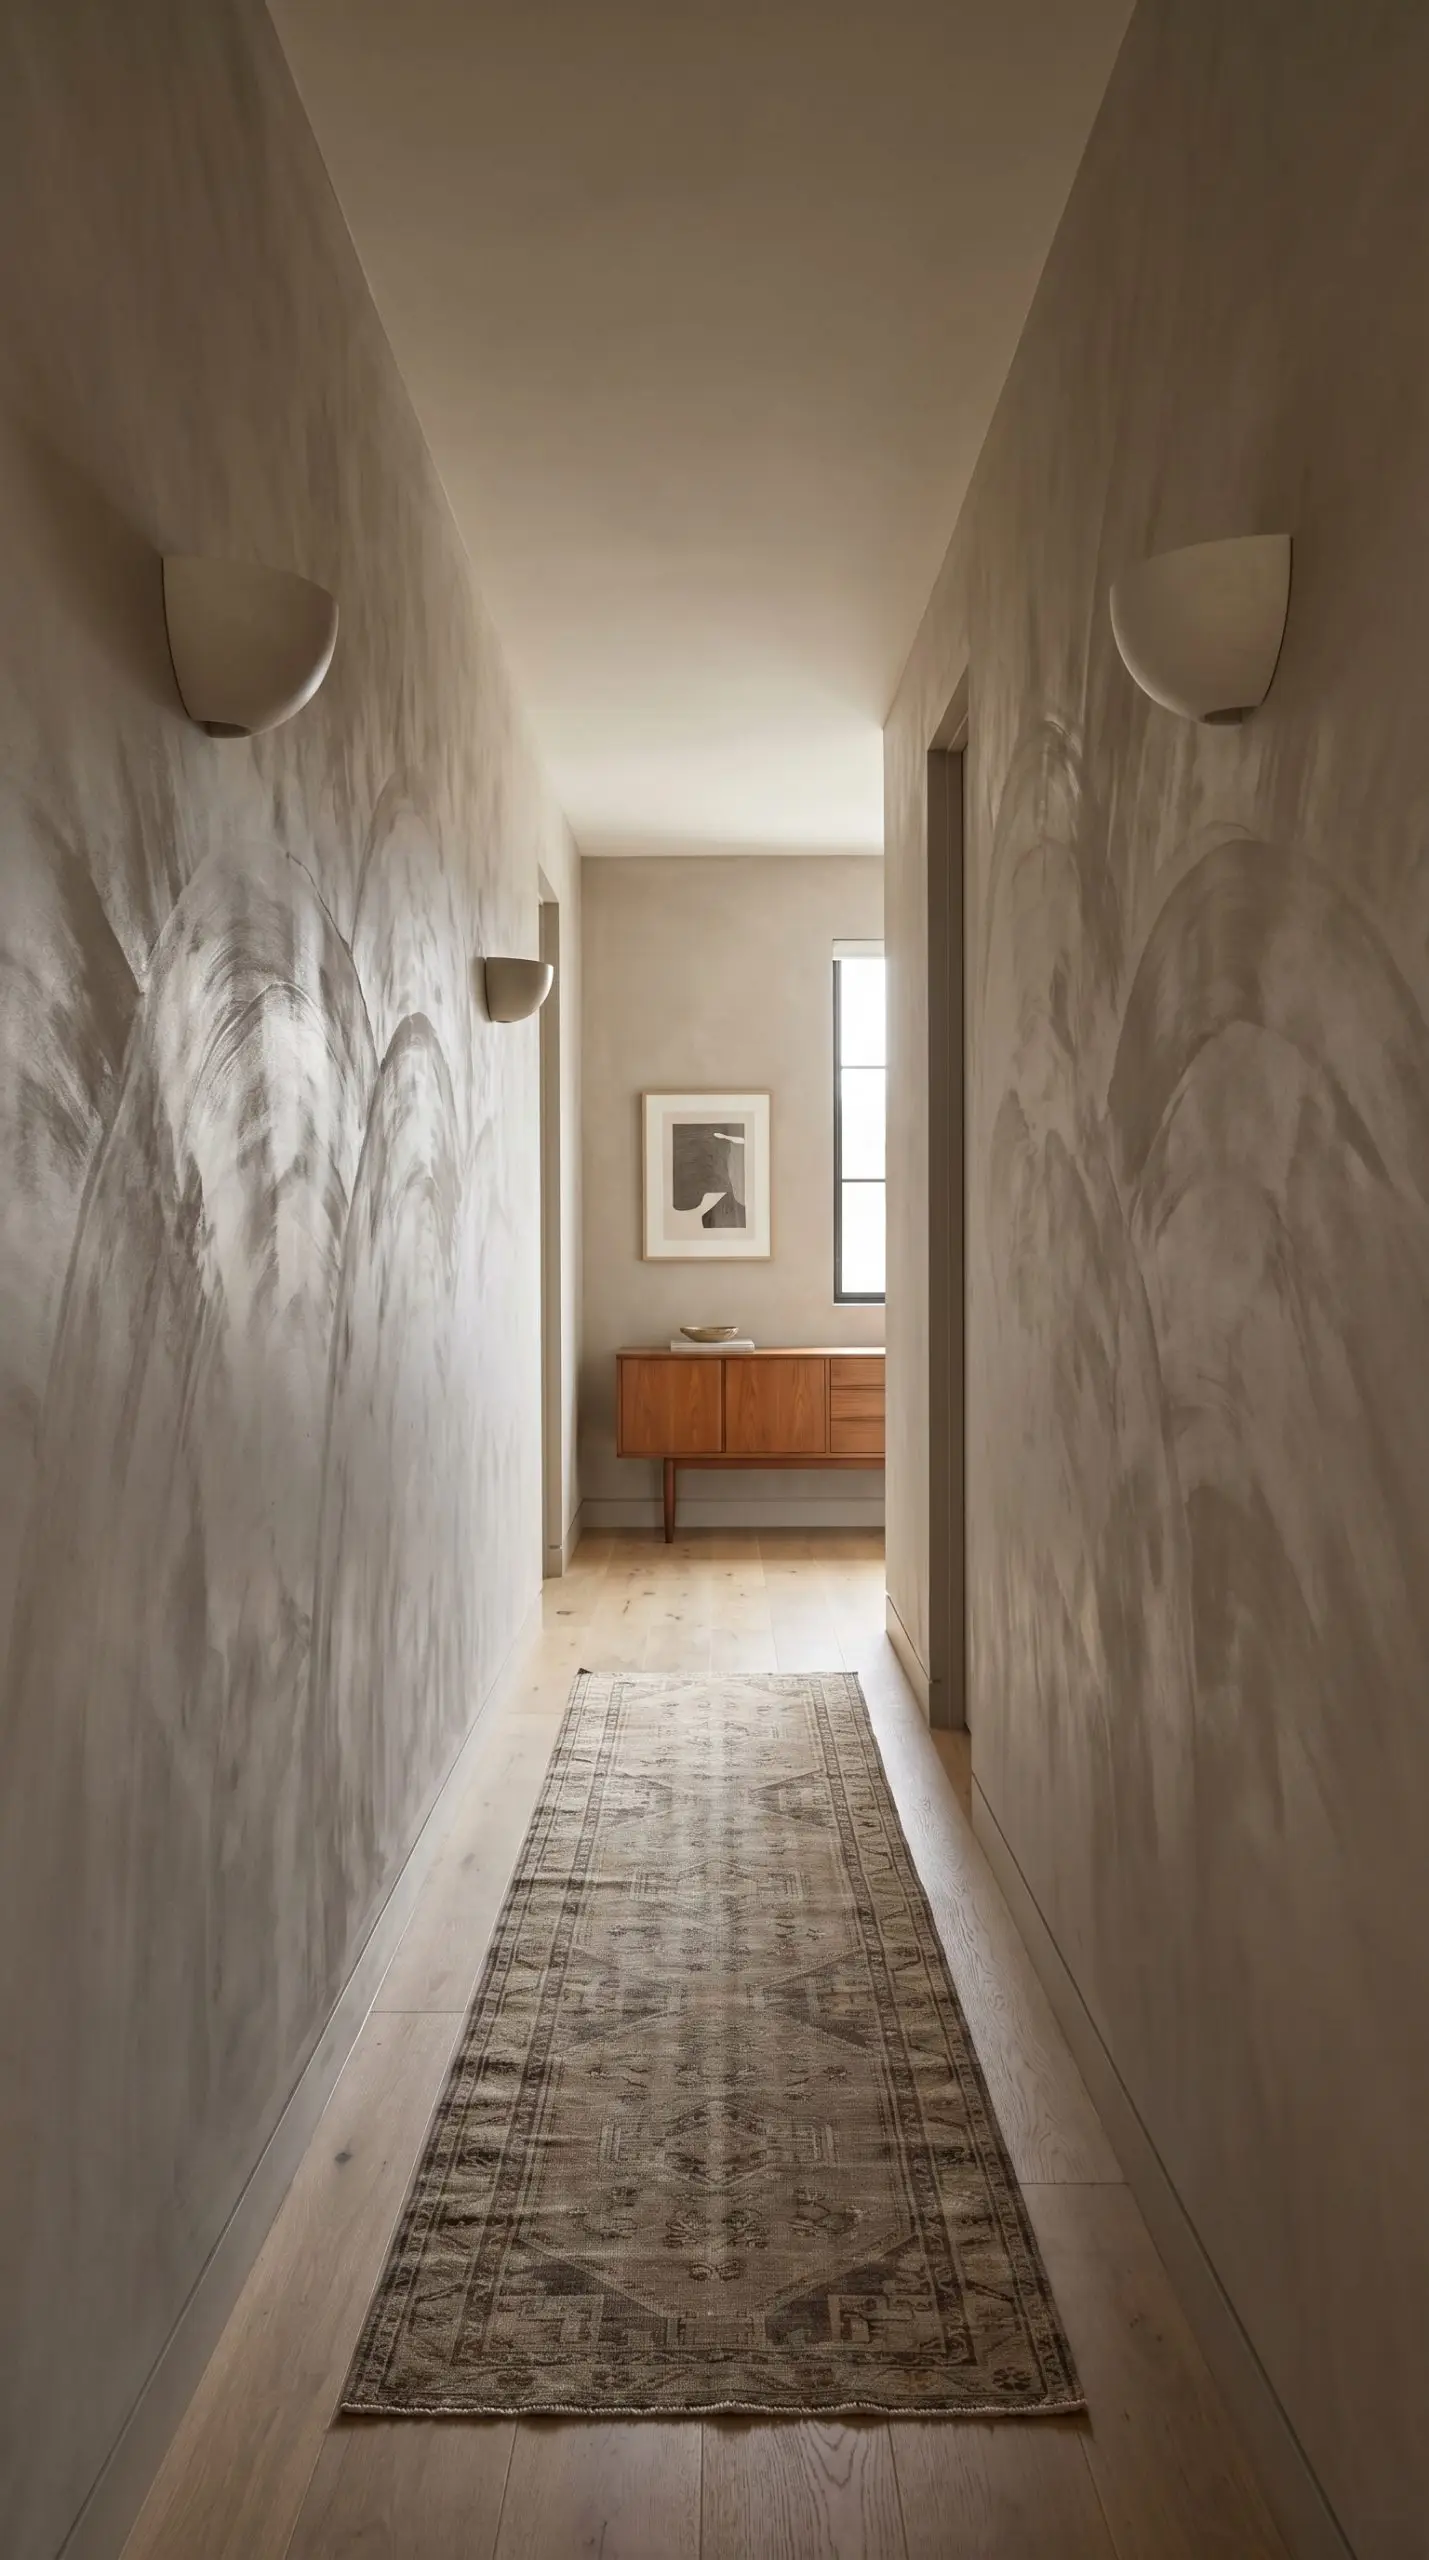
Organic Modern plaster finishes provide massive visual movement and shadow play on completely flat walls, eliminating the need for bulky artwork. The chalky, matte texture catches whatever ambient light is available, turning the wall itself into a tactile feature.
- Vibe: Earthy Organic Modern.
- Key Materials: Portola Paints Roman Clay.
- Color Match: Portola Paints Charleston (a warm, stony greige).
- Application Pro-Tip: Apply the clay with a flexible putty knife in broad, sweeping arcs to maximize the textural variance and light diffusion.
Install Two-Thirds Height Picture Molding
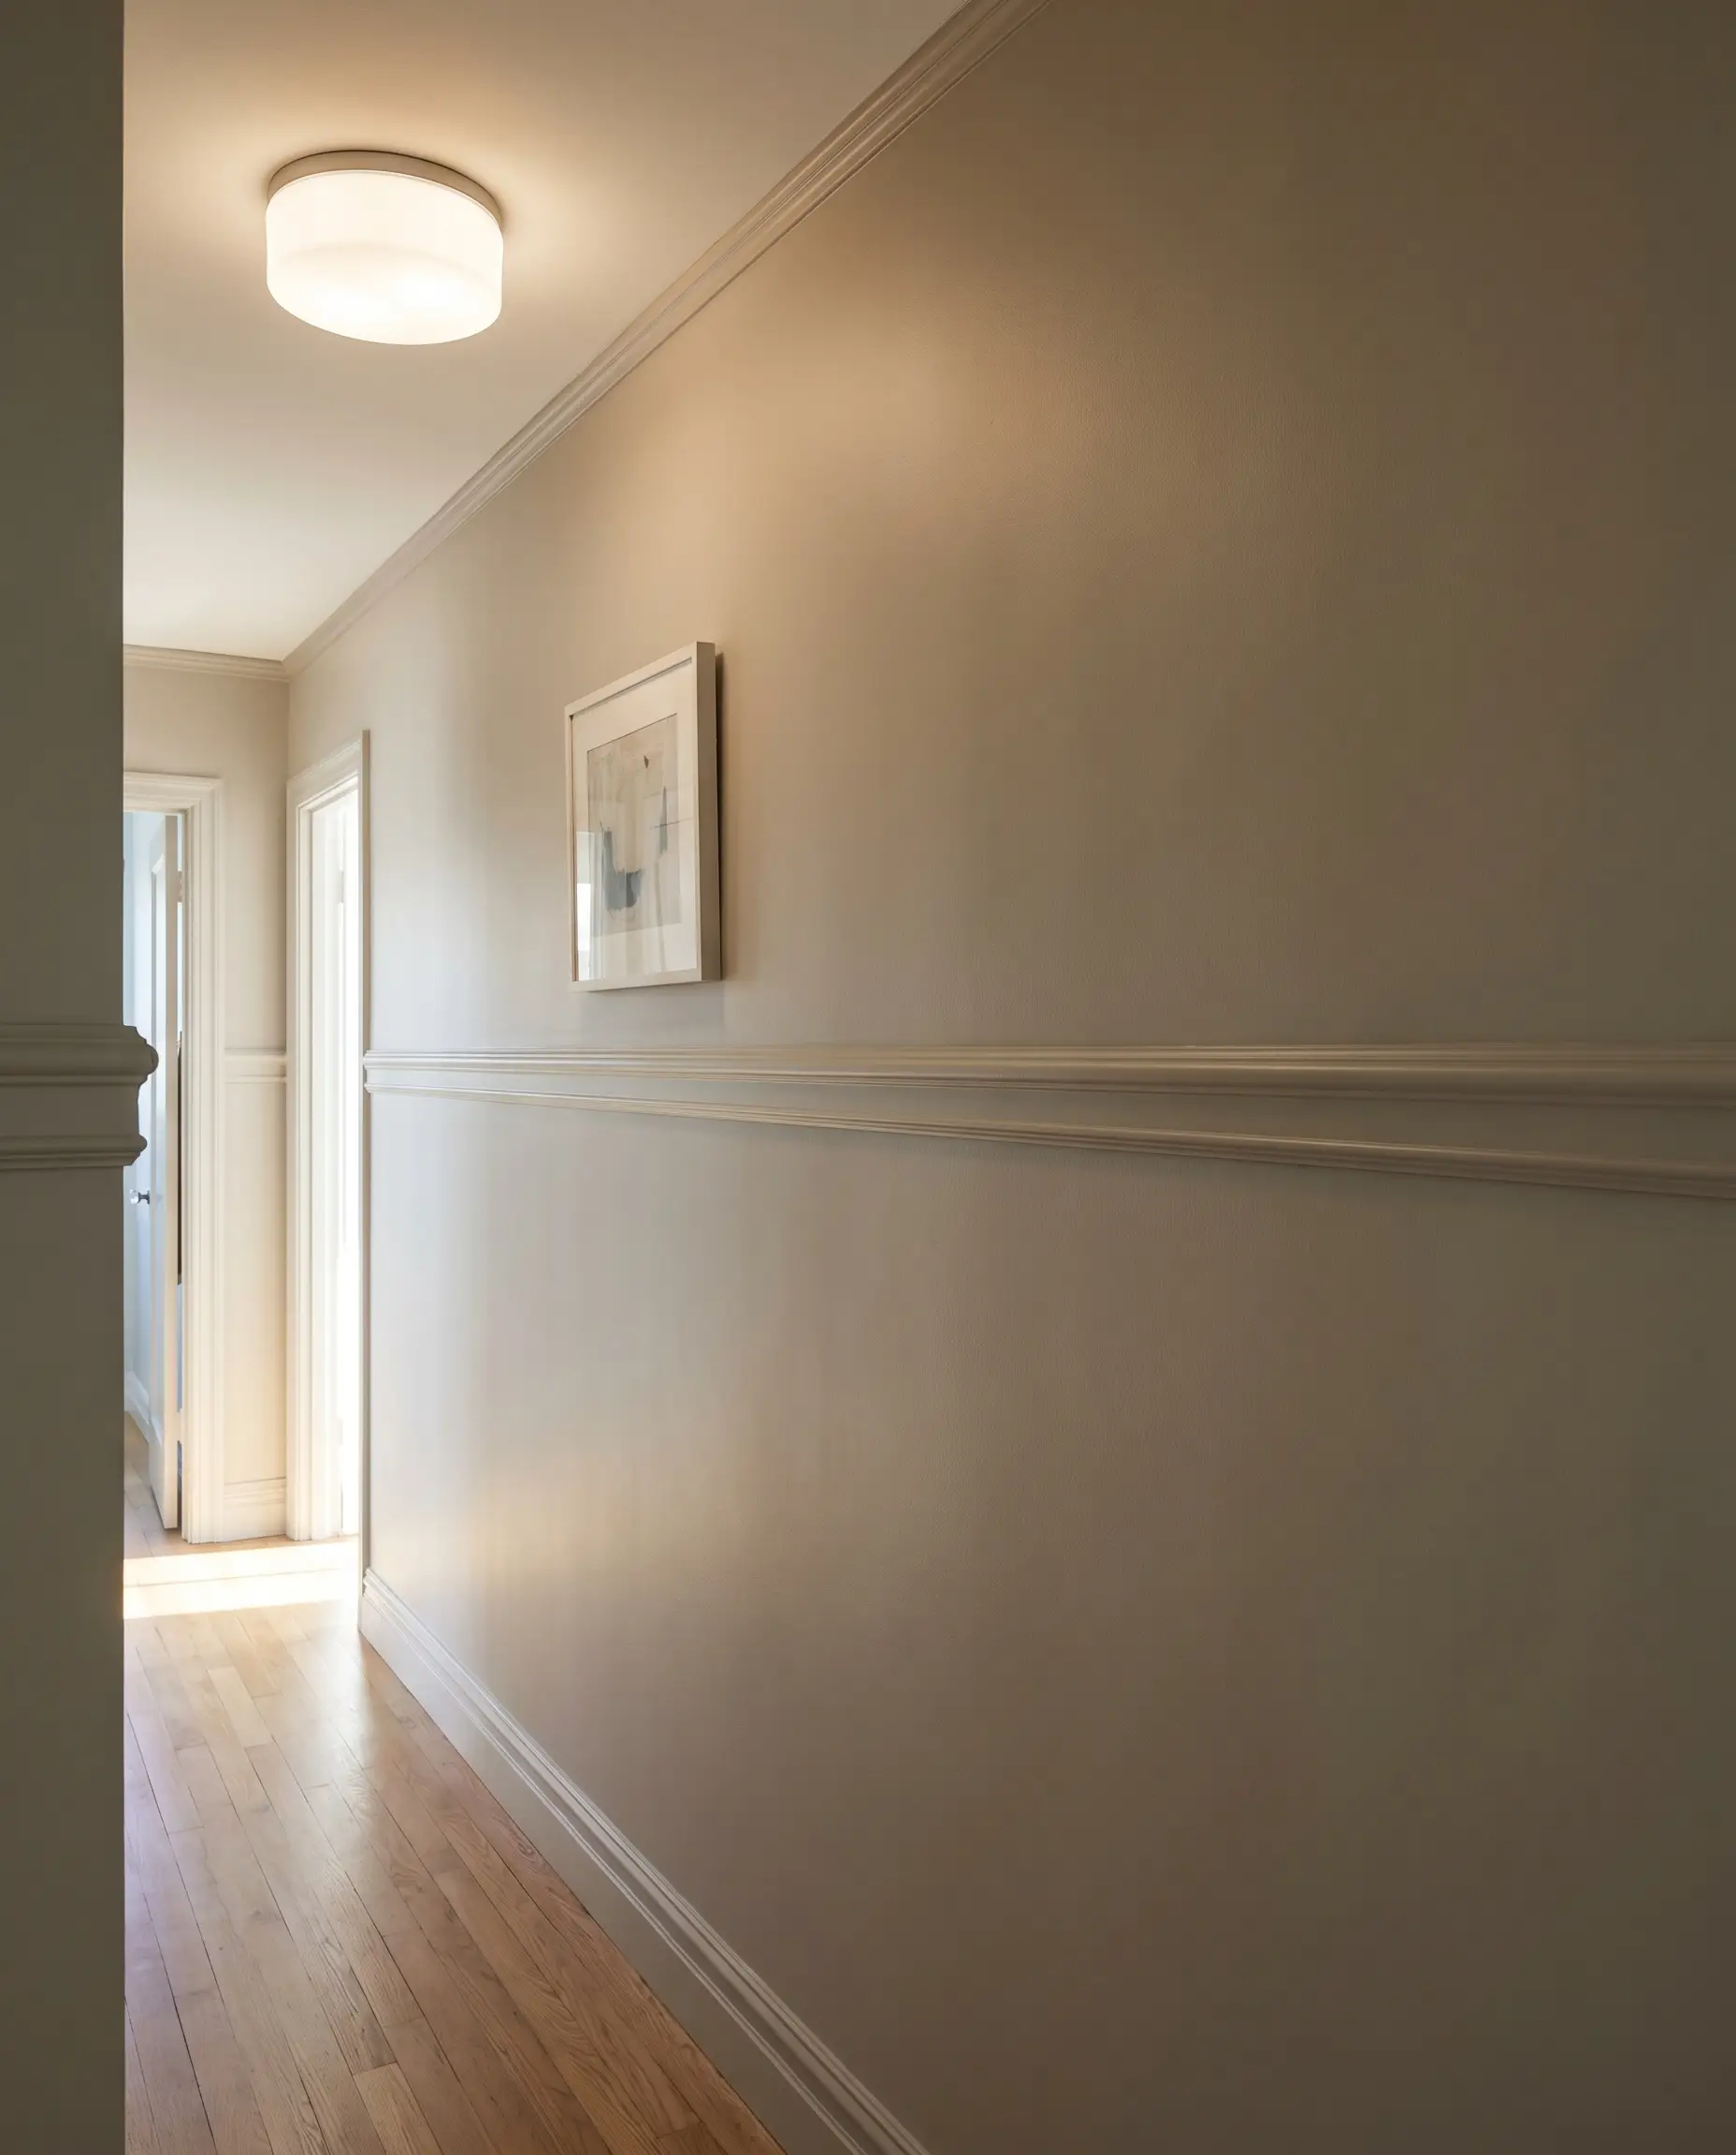
Installing traditional wainscoting or picture molding at a two-thirds ratio—rather than standard chair-rail height—forces the eye upward. This specific proportional shift makes the ceiling feel exponentially taller, instantly countering the compressed feeling of a tight corridor.
- Vibe: Tailored Transitional.
- Key Materials: Primed polyurethane panel molding.
- Styling Pro-Tip: Paint the molding and the wall behind it the identical color to maintain a sleek, modern profile.
Proportions:
- Standard 8-Foot Ceiling: Place the top rail exactly at 60 to 64 inches from the floor.
- Standard 9-Foot Ceiling: Place the top rail exactly at 72 inches from the floor.
Use Trompe L’oeil or Scenic Mural Wallpaper
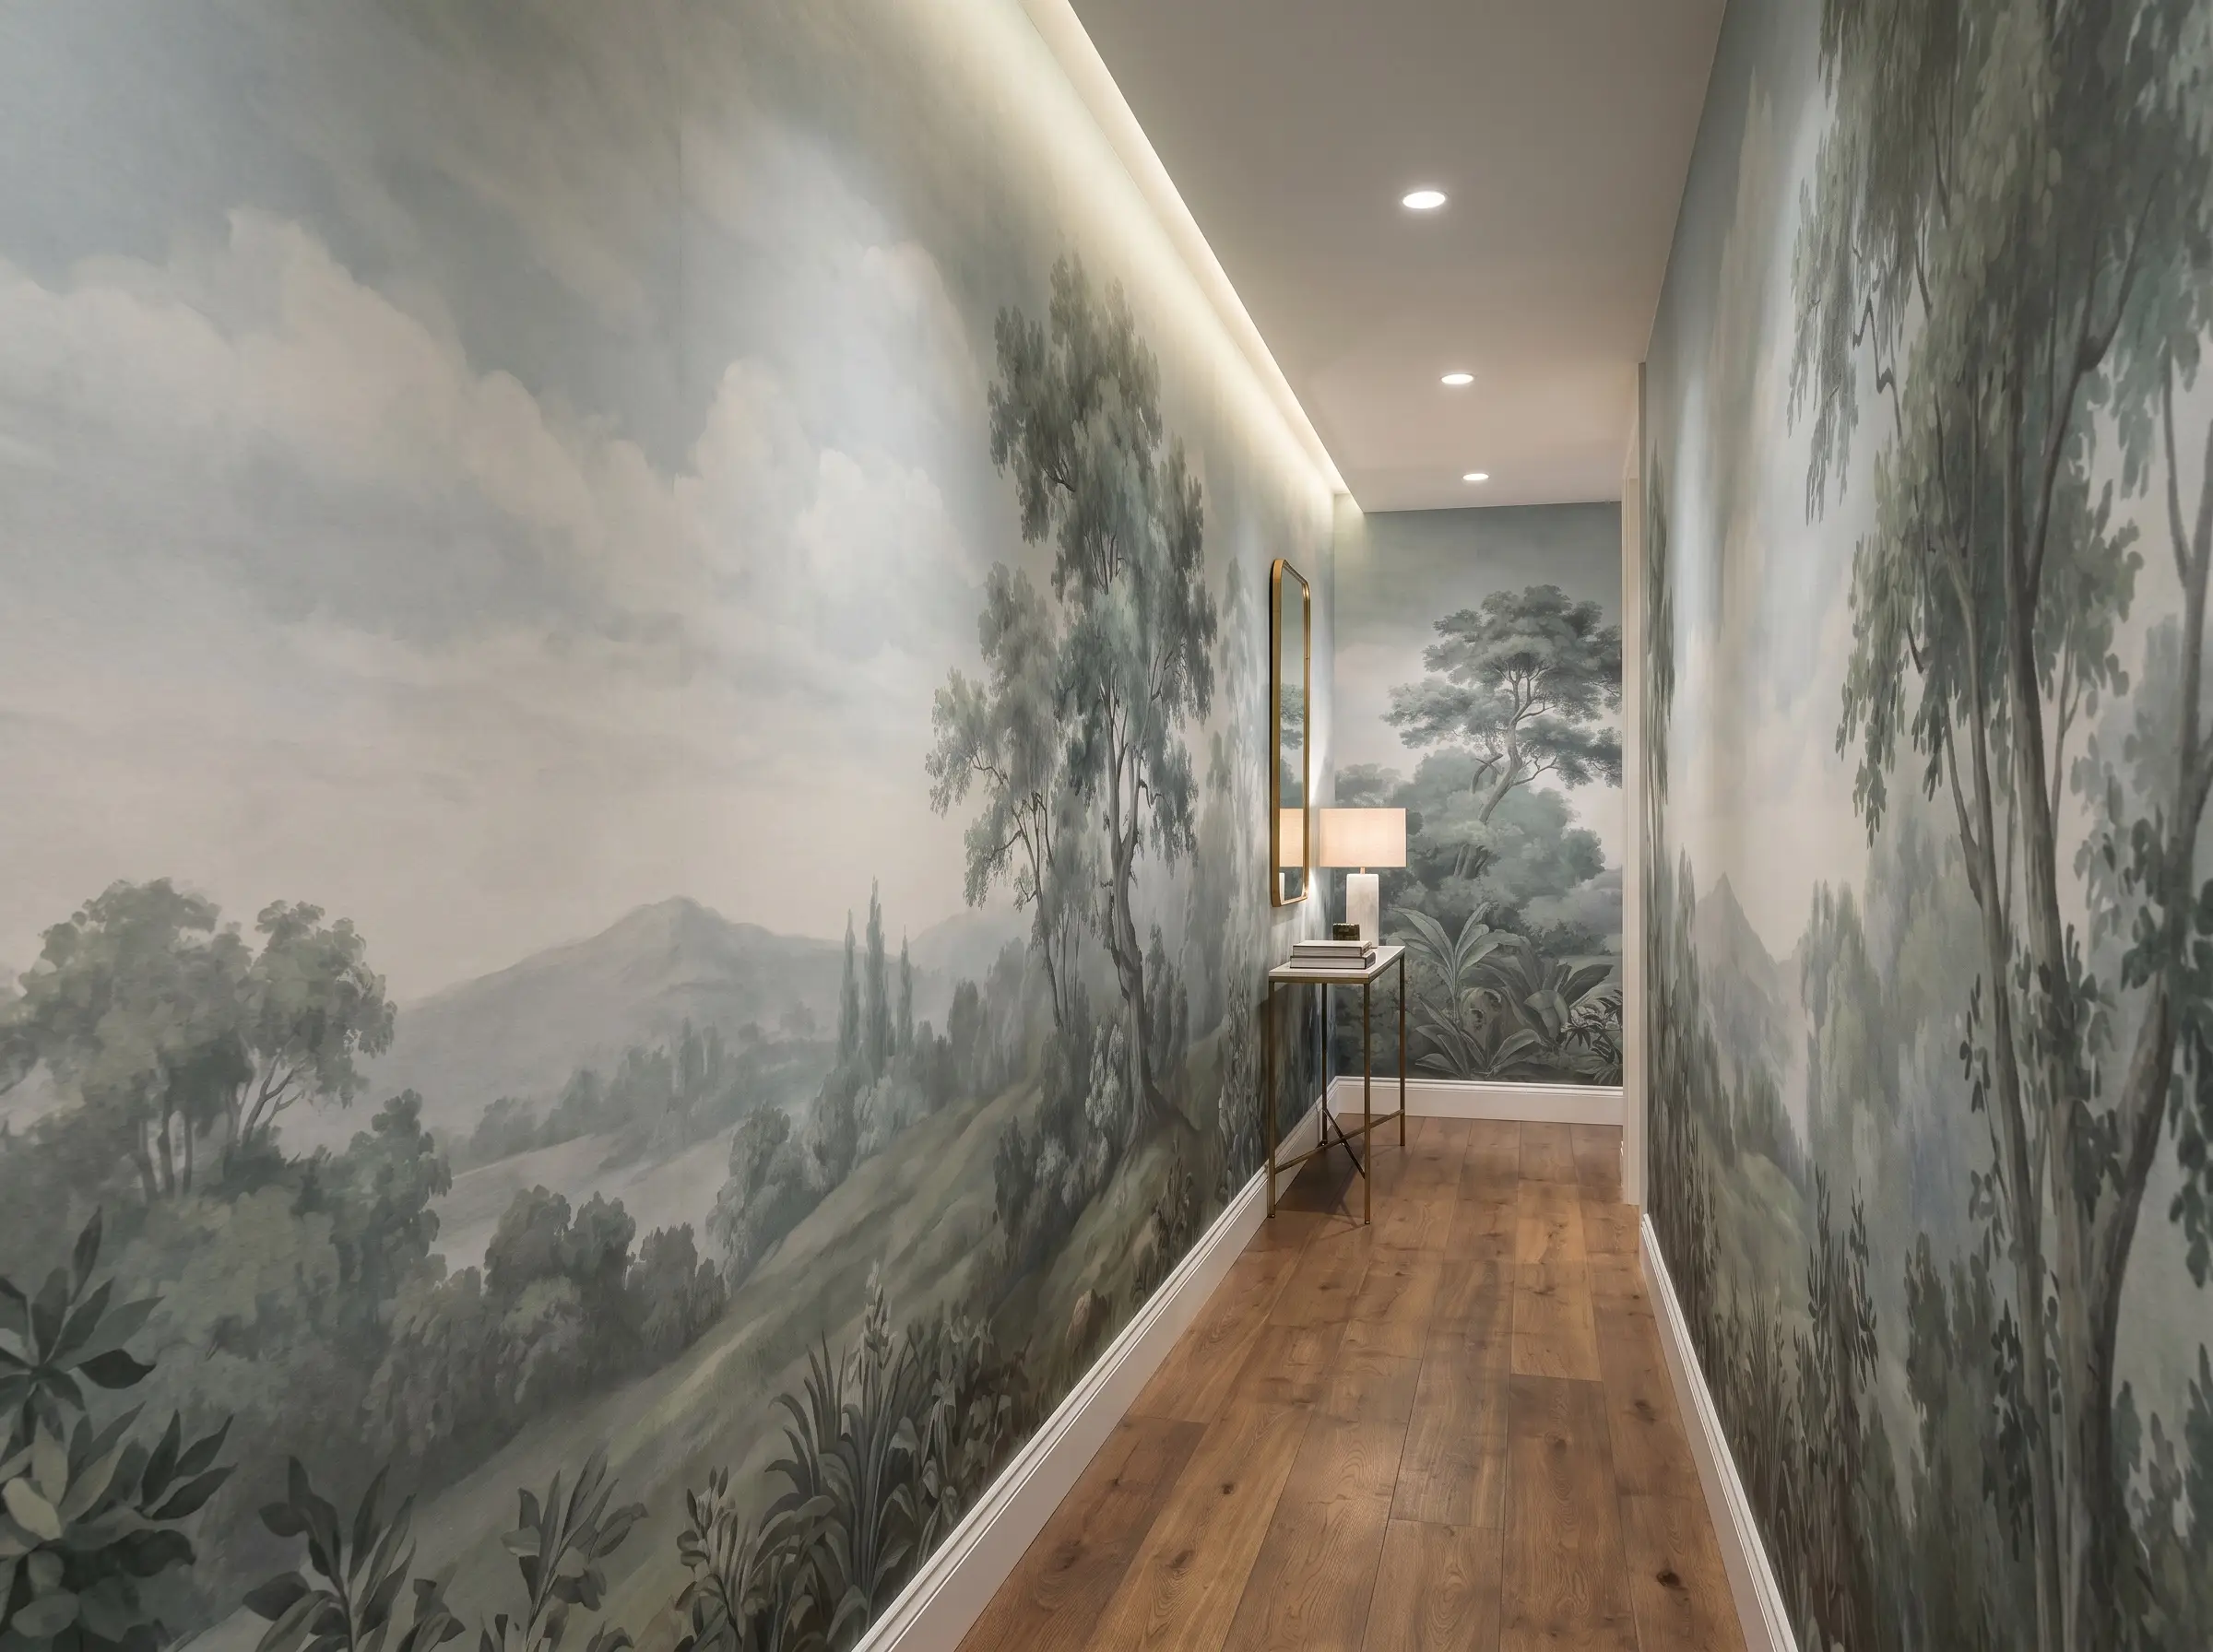
Wrapping a narrow hallway in a panoramic, scenic wallpaper—like a misty landscape or sweeping botanical mural—brings built-in perspective that tricks the eye into seeing depth beyond the drywall. Unlike busy, repetitive geometric prints which can induce claustrophobia, a continuous mural creates a false horizon line.
- Vibe: Sophisticated Escapism.
- Key Materials: Non-woven scenic mural panels.
- Styling Pro-Tip: Ensure the lightest part of the mural’s “sky” sits at eye level to maximize the illusion of open space.
Optical Illusions with Mirrors and Lighting
Bouncing light and manipulating sightlines are the most effective technical tools for widening a tight footprint. By understanding the physics of light reflectance in windowless corridors, you can double your perceived square footage.
Anchor the Terminus Wall with an Oversized Mirror
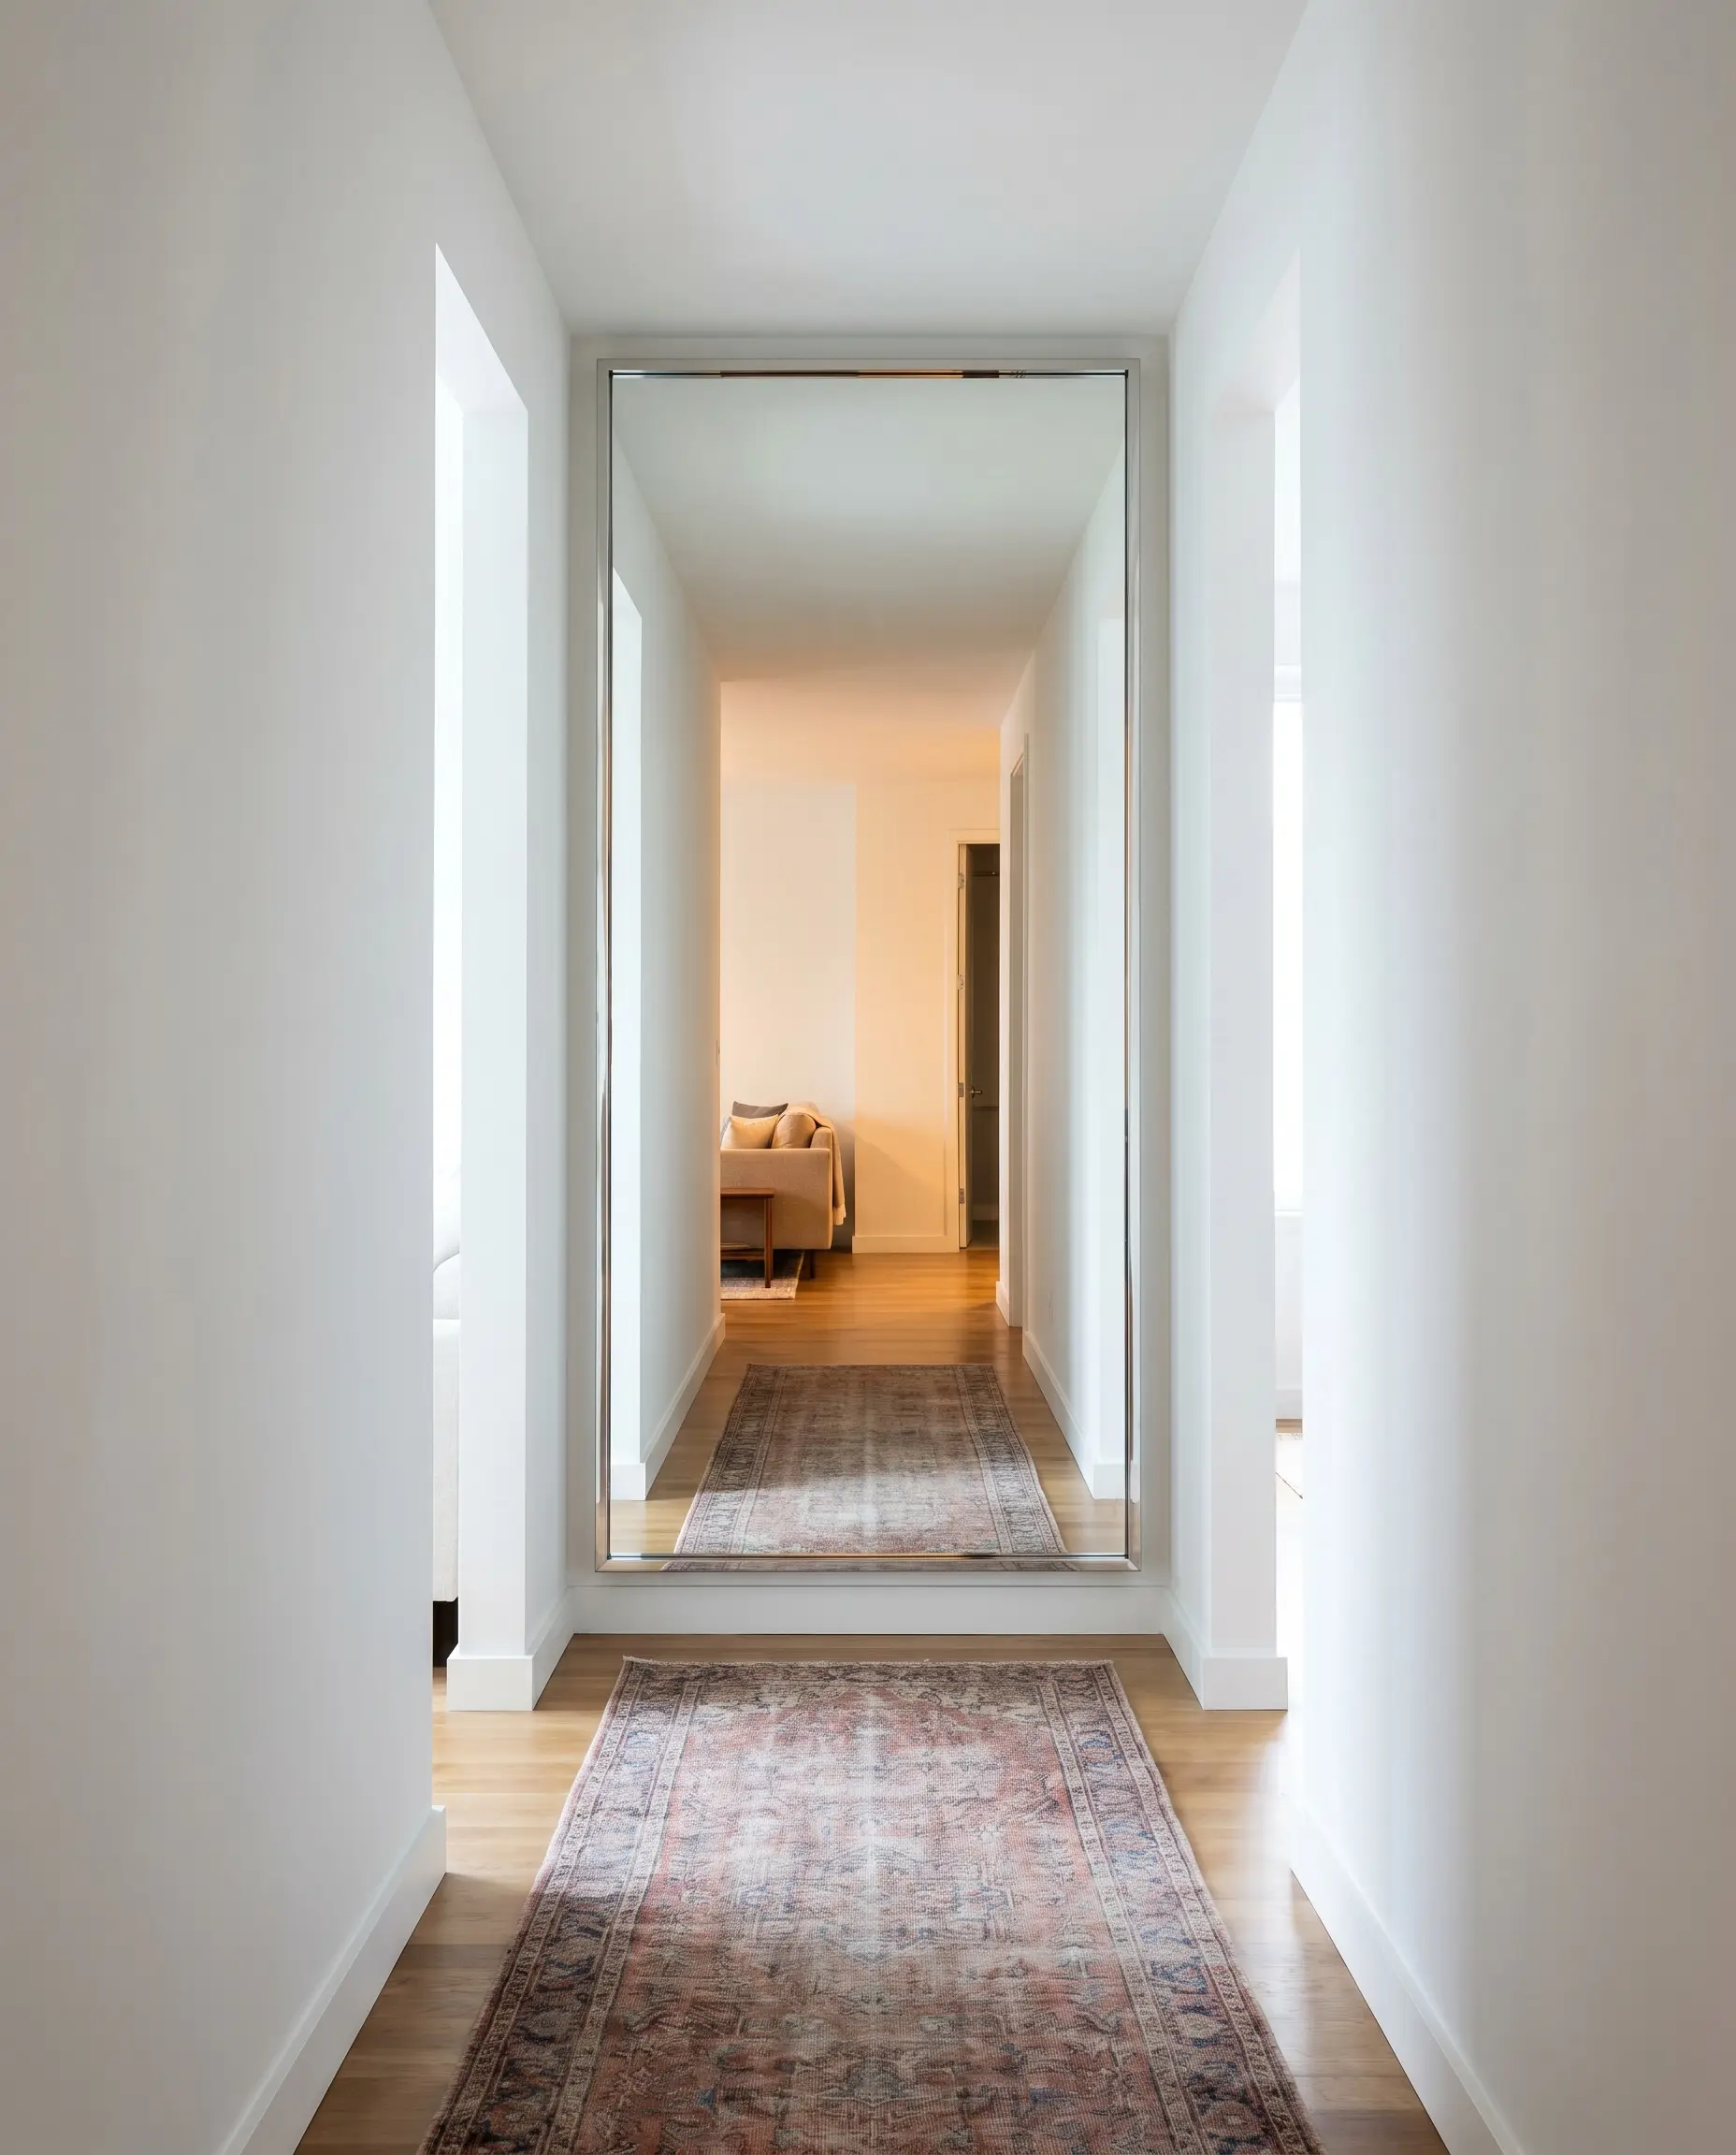
The “terminus”—the dead-end wall of a long hallway—is the most critical focal point for fixing the bowling alley effect. Placing a massive, floor-to-ceiling mirror strictly at the end of the hall captures light from adjacent rooms and doubles the perceived length of the corridor.
- Vibe: Expansive Contemporary.
- Key Materials: Unframed, polished-edge floor mirror.
- Styling Pro-Tip: Avoid placing mirrors on the side walls of a 36-inch hallway; they will only reflect the blank drywall three feet across from them, reinforcing the narrowness.
Install ADA-Compliant Low-Profile Sconces
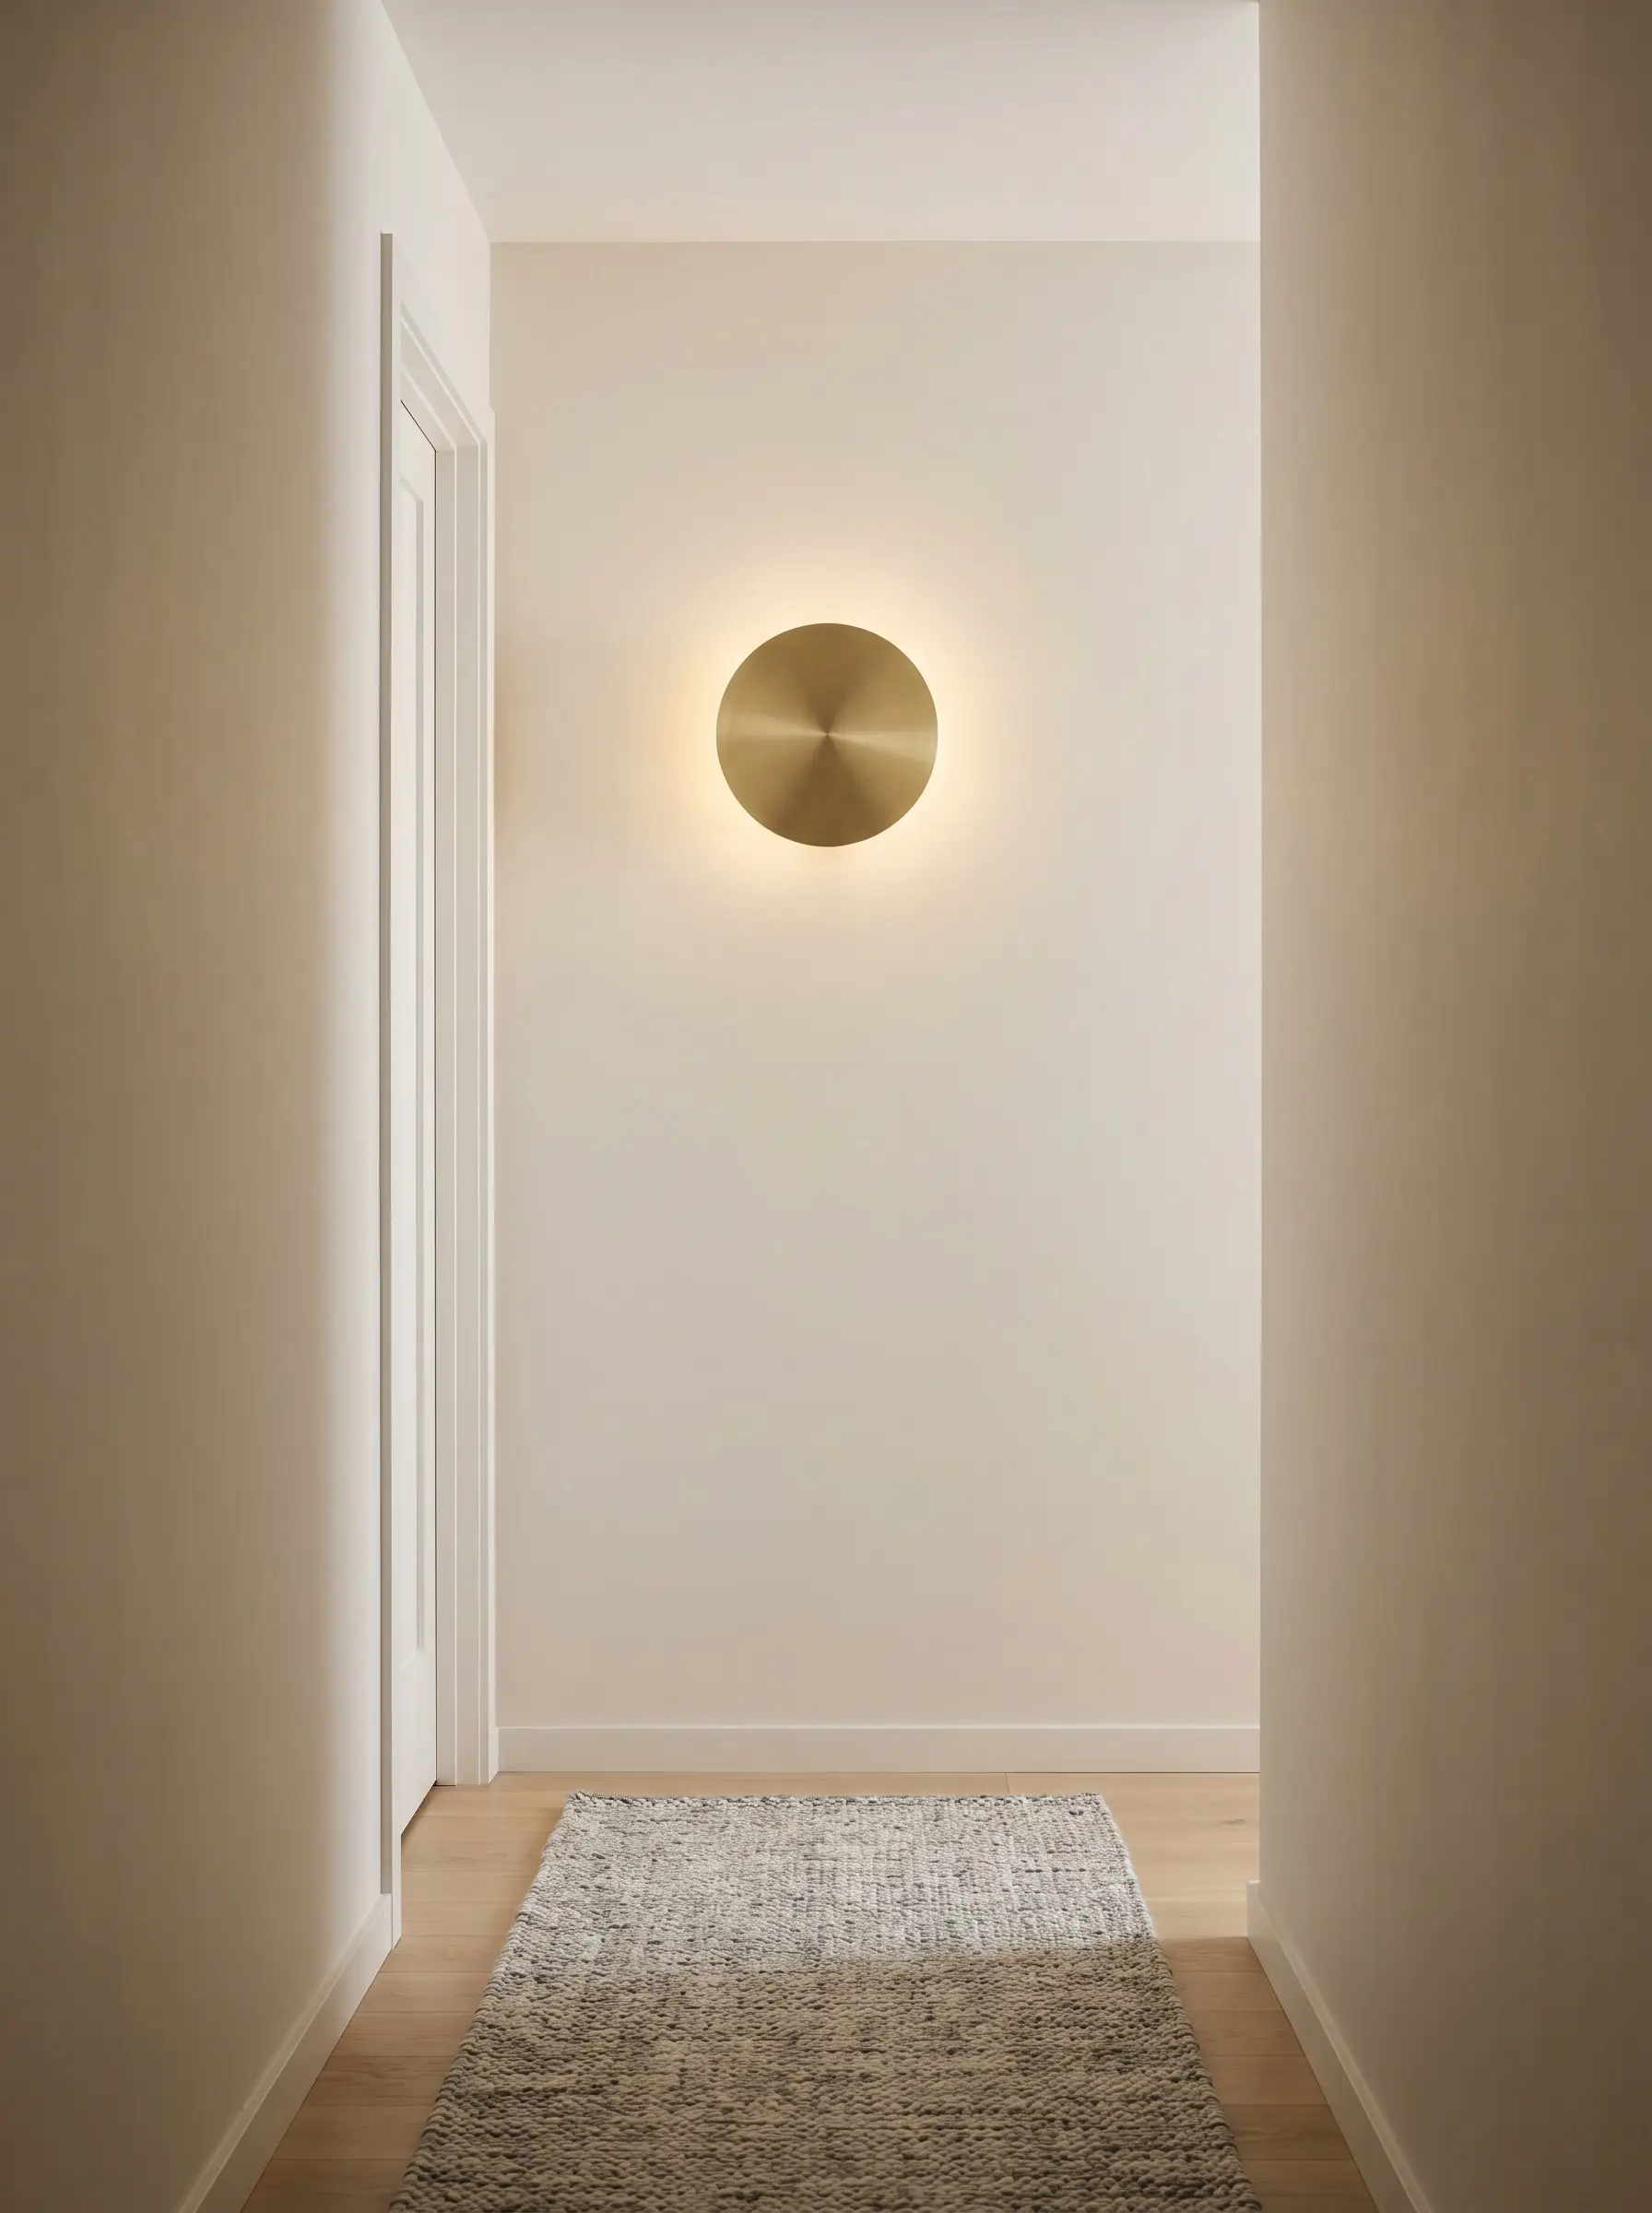
Standard sconces jut out six to eight inches, creating immediate physical hazards in a tight corridor. Upgrading to ADA-compliant sconces ensures your lighting stays impossibly sleek while providing critical ambient glow.
- Clearance Check: Strict maximum of 4 inches depth.
- Vibe: Minimalist Luxury.
- Key Materials: Plaster up-lights or flat brass disc sconces.
- Styling Pro-Tip: Wire these low-profile fixtures to a dimmer switch to control the light output and mood.
Utilize Ceiling-to-Wall Wash Lighting
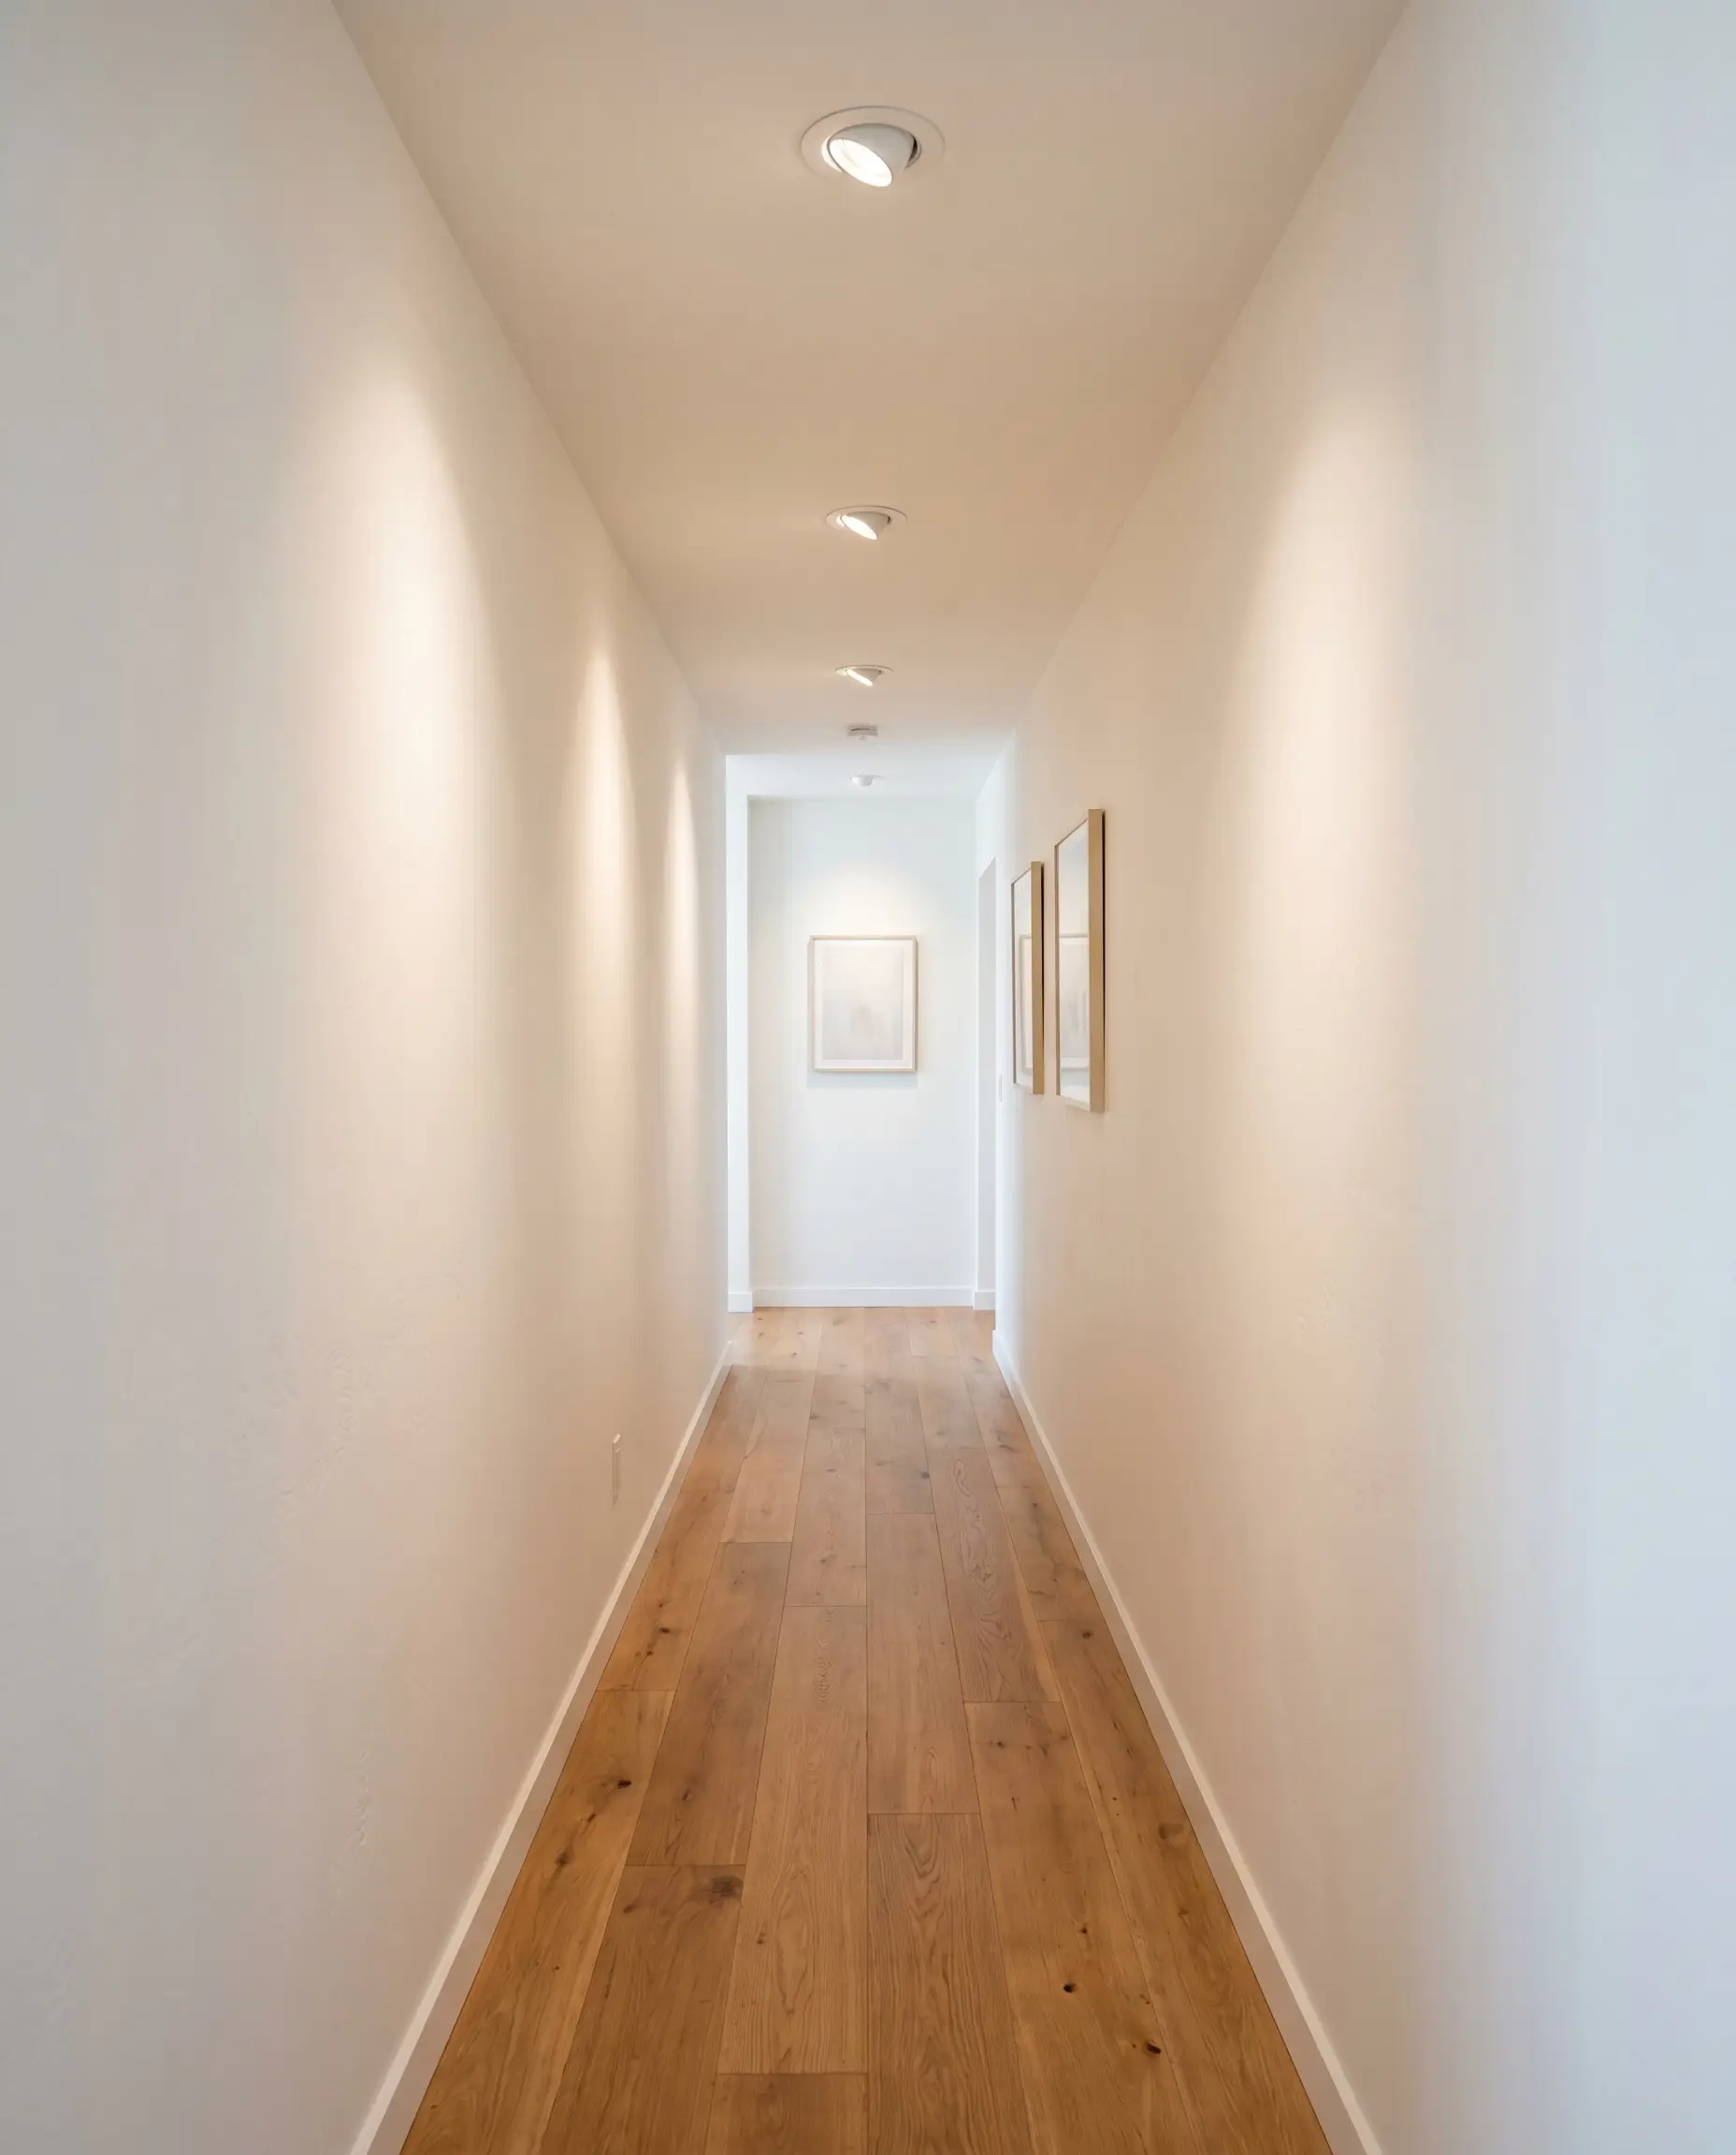
If adding hardwired wall fixtures isn’t structurally possible, use directional recessed ceiling lights equipped with gimbal trims to “wash” the side walls with light. When walls are brightly illuminated from above, they automatically feel further away.
- Vibe: Gallery-Grade Illumination.
- Key Materials: 3-inch LED recessed gimbals.
- Styling Pro-Tip: Angle the gimbal trims approximately 30 degrees toward the wall to create a smooth, grazing effect that highlights paint texture.
Mount Narrow, Vertical Antiqued Mirrors
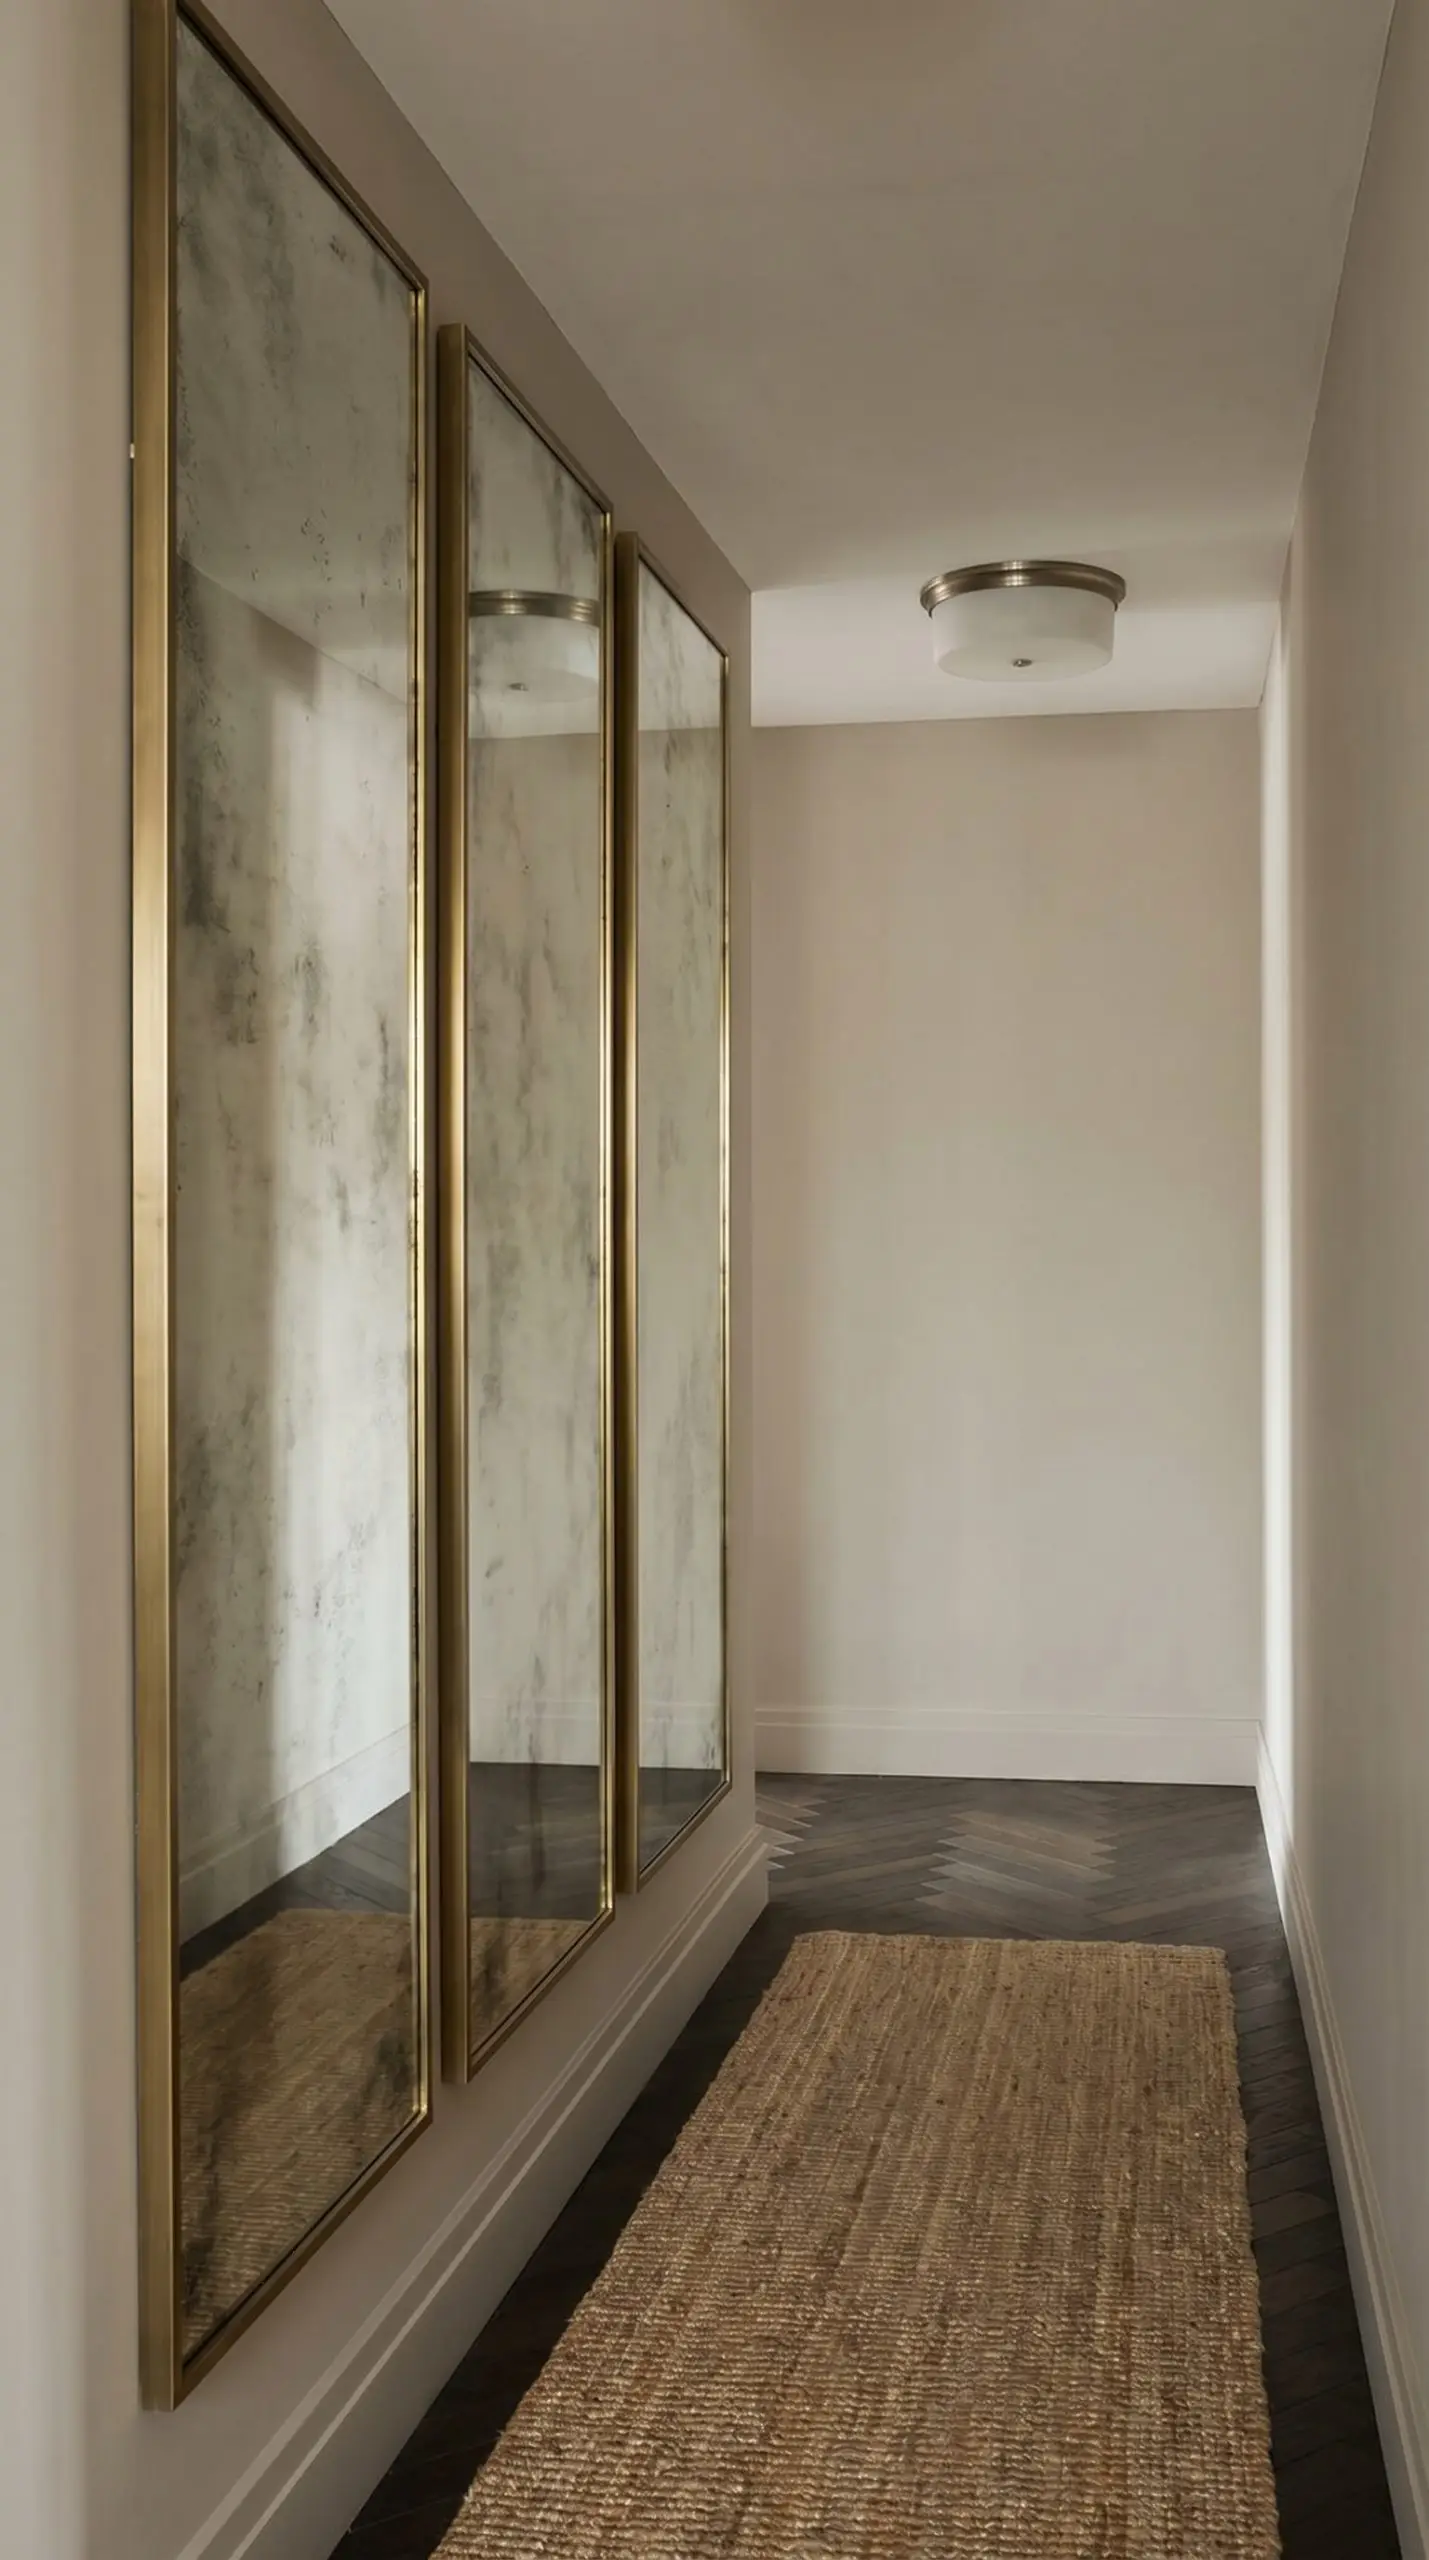
If mirrors absolutely must be placed on the side walls, utilize tall, aggressively narrow panels of antiqued or smoked glass. The verticality pulls the eye upward, while the clouded antiquing softens the reflection so you avoid a disorienting funhouse effect.
- Vibe: Parisian Chic.
- Key Materials: Foxed or antiqued mirror glass.
- Styling Pro-Tip: Install a grid of three identical, ultra-narrow panels spaced exactly three inches apart for rhythmic visual interest.
Paint High-Gloss Lacquer on the Ceiling
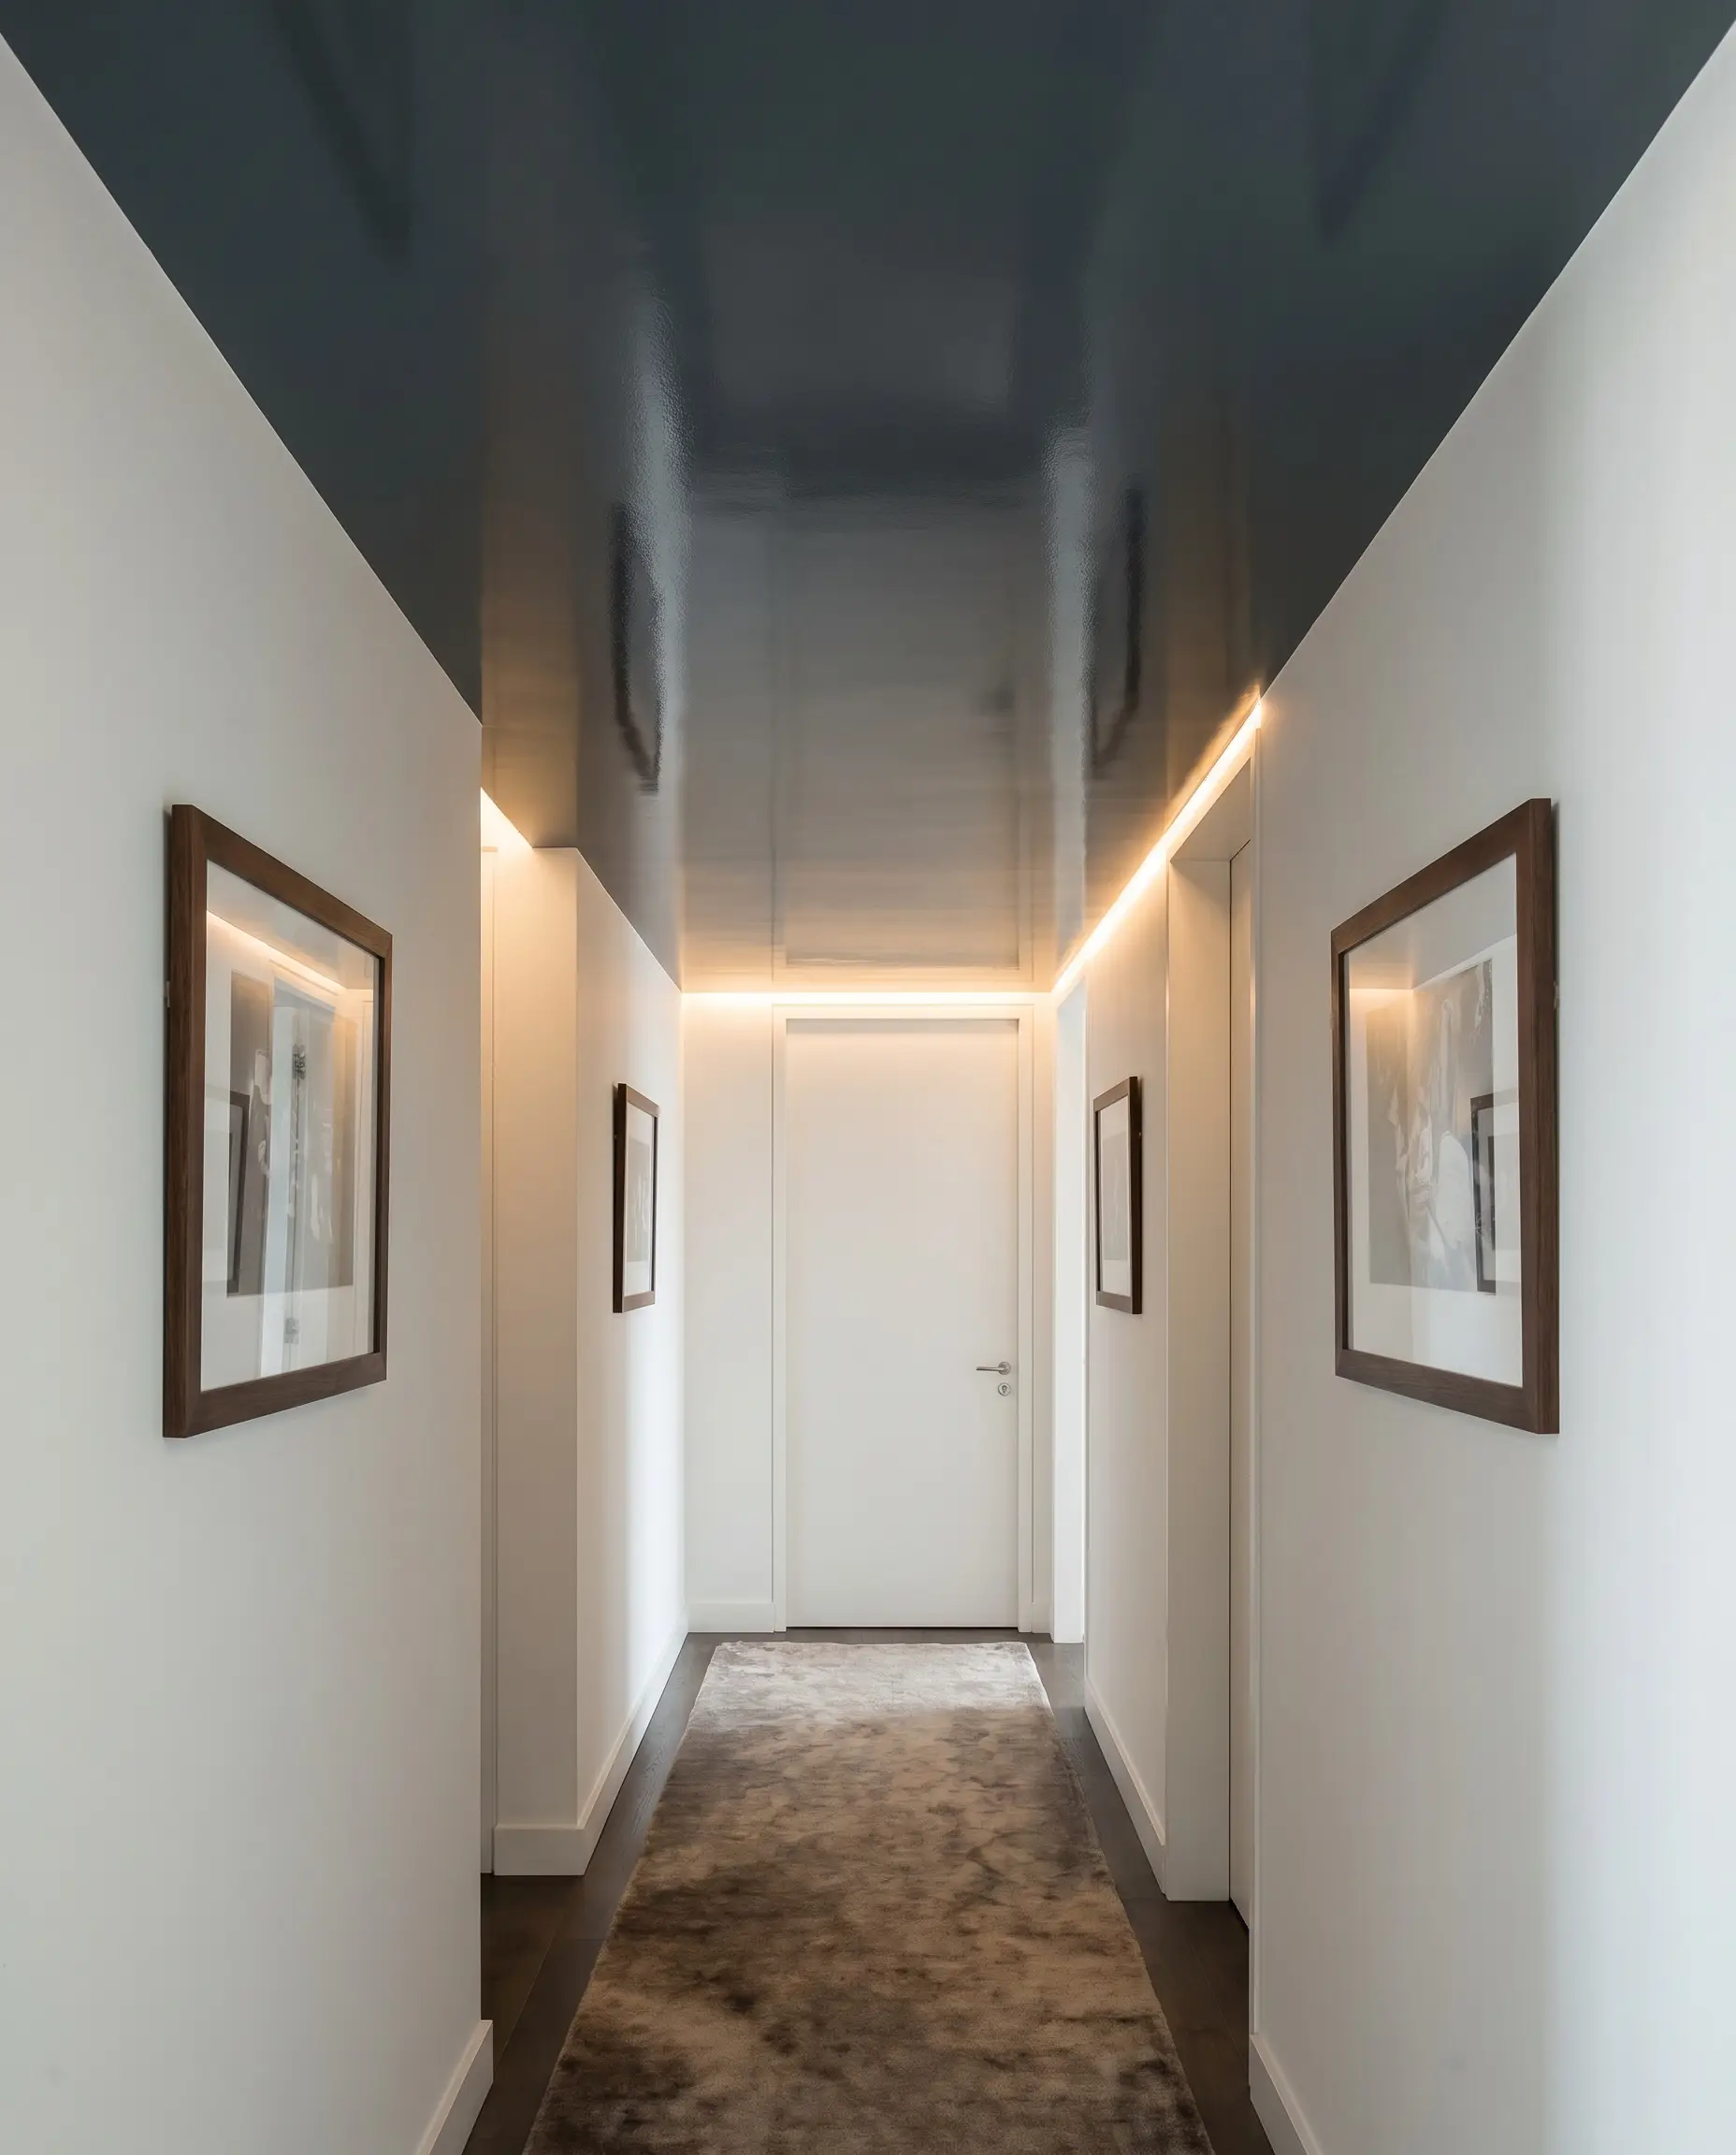
Applying a high-gloss or lacquered paint strictly to the ceiling acts as a subtle overhead mirror, bouncing ambient light downward and making the hallway feel endlessly tall. This high-end finish draws attention away from the restrictive width of the walls.
- Vibe: High-End Bespoke.
- Paint Recommendation: Farrow & Ball Hague Blue in Full Gloss.
- Styling Pro-Tip: The ceiling drywall must be perfectly skim-coated to a Level 5 finish before applying lacquer, or every single structural flaw will be magnified.
Art Displays for Tight Clearances
Transitioning from spatial architecture to personal styling requires a ruthless commitment to flush profiles. If an object fails the “Bump Test”—meaning you can easily knock it off the wall with a laundry basket—it simply does not belong in your narrow hall.
Source Flush-Mount Canvas or Panel Art
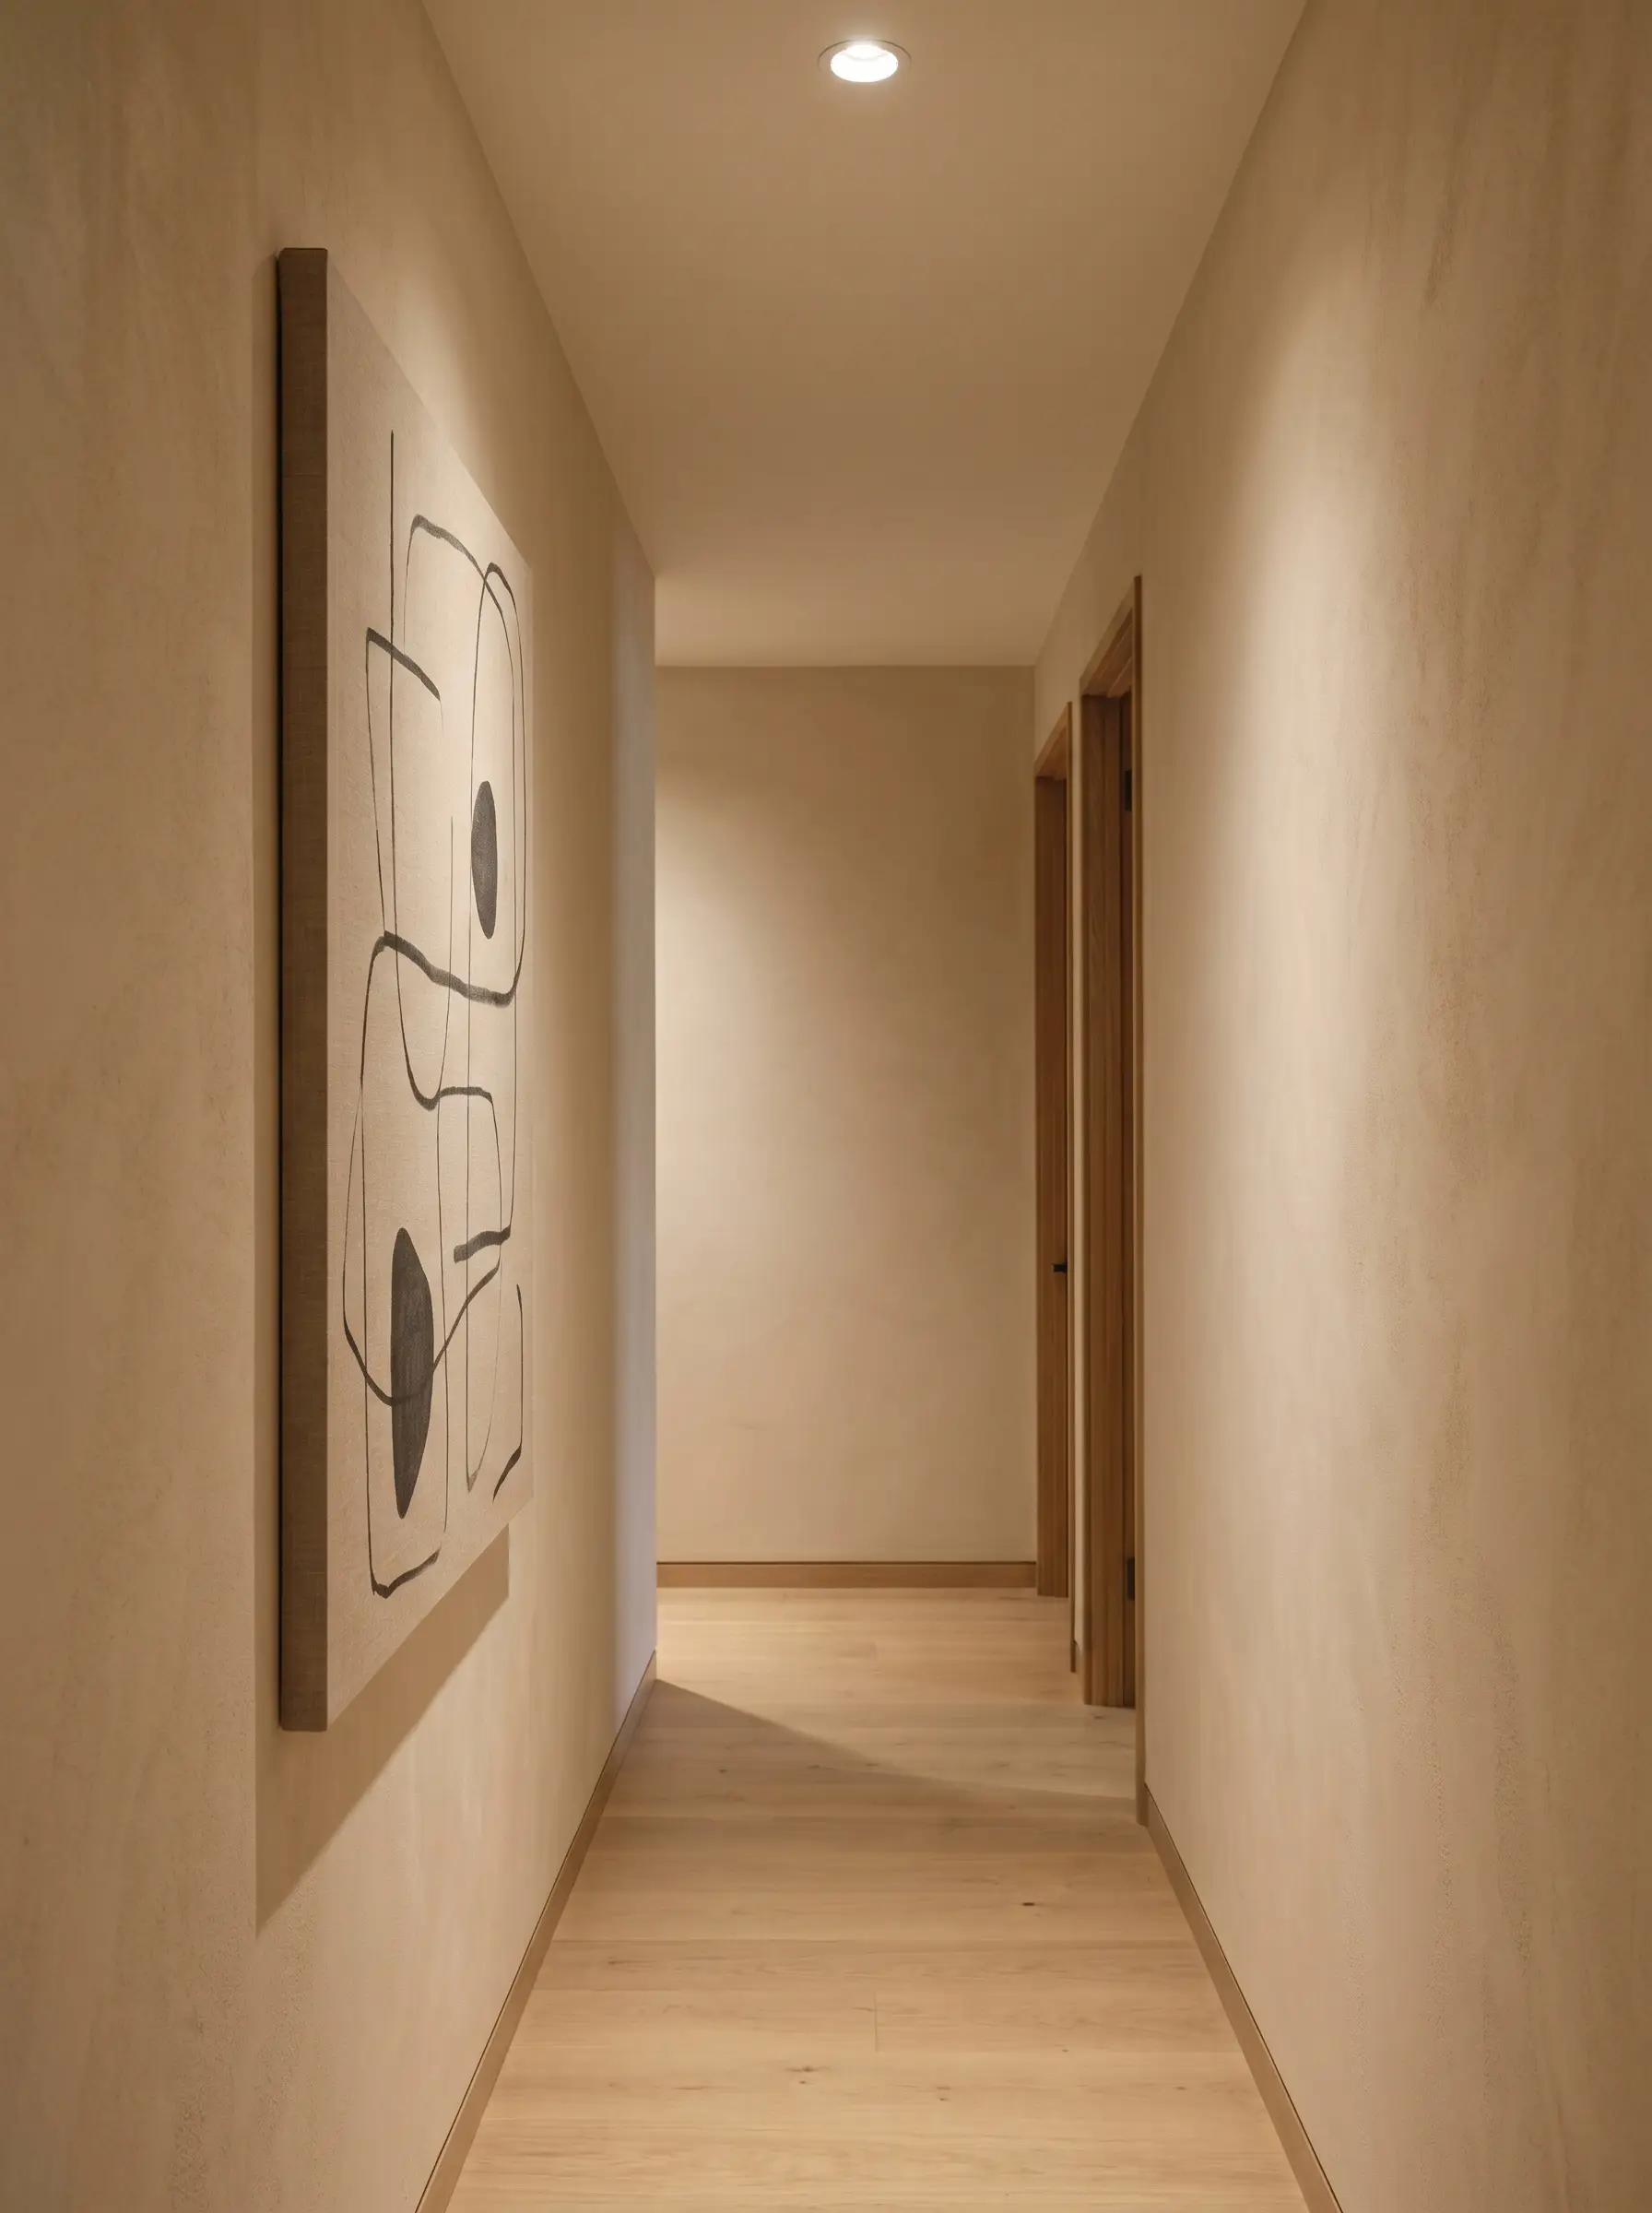
Ditch the thick, ornate wooden frames that aggressively eat into your walkway. Opt instead for raw canvas stretched over ultra-thin bars or wood panel art that sits completely flush against the drywall, preserving your physical clearance.
- Clearance Check: Maximum depth of 1 to 1.5 inches.
- Vibe: Modern Studio.
- Key Materials: Raw linen canvas or flat birch panels.
- Styling Pro-Tip: Use flush-mount security hardware (like French cleats) instead of traditional wire to keep the top of the canvas from leaning outward into the space.
Use Acrylic or Lucite Floating Frames
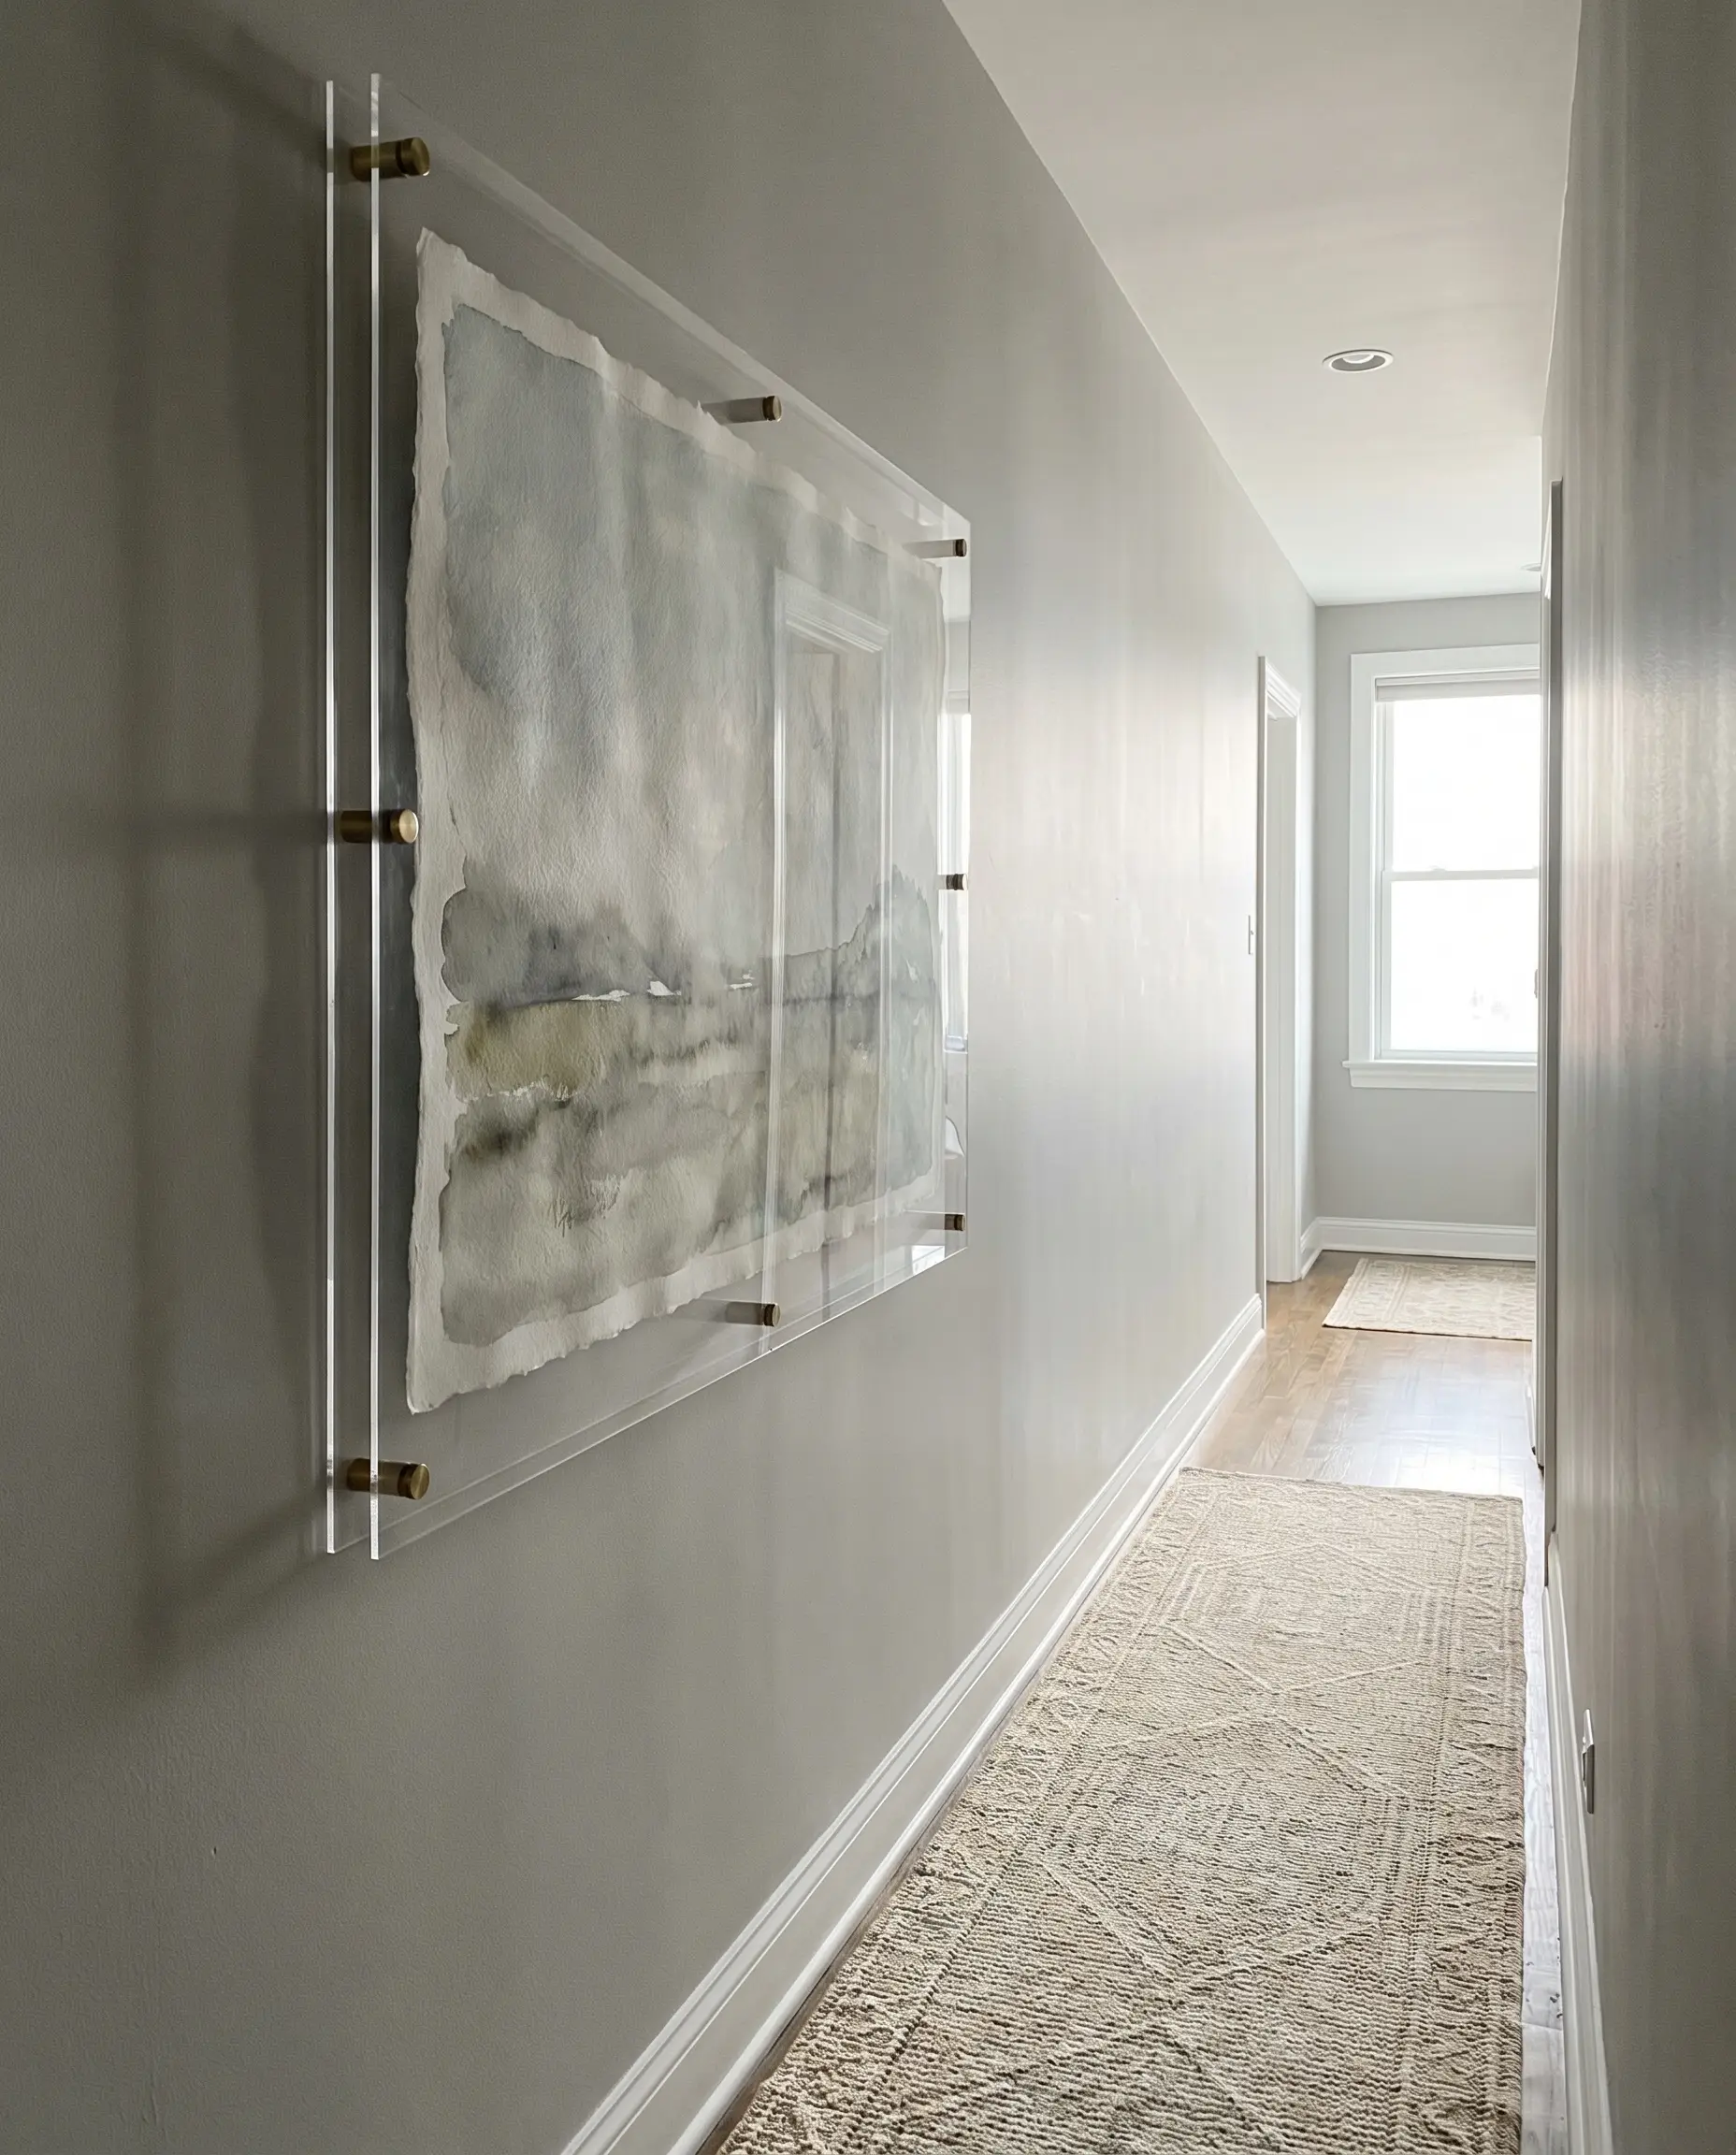
Floating artwork between two pieces of clear acrylic glazing held by metallic standoffs reduces the visual weight of the frame to almost zero. The transparent edges allow the wall color to show through, making the art feel airy and entirely non-intrusive.
- Vibe: Crisp Minimalist.
- Key Materials: UV-filtering acrylic panels, unlacquered brass standoffs.
- Styling Pro-Tip: Float a deckled-edge watercolor print inside the acrylic to contrast the sharp, modern lines of the frame.
Execute a Floor-to-Ceiling Salon Hang
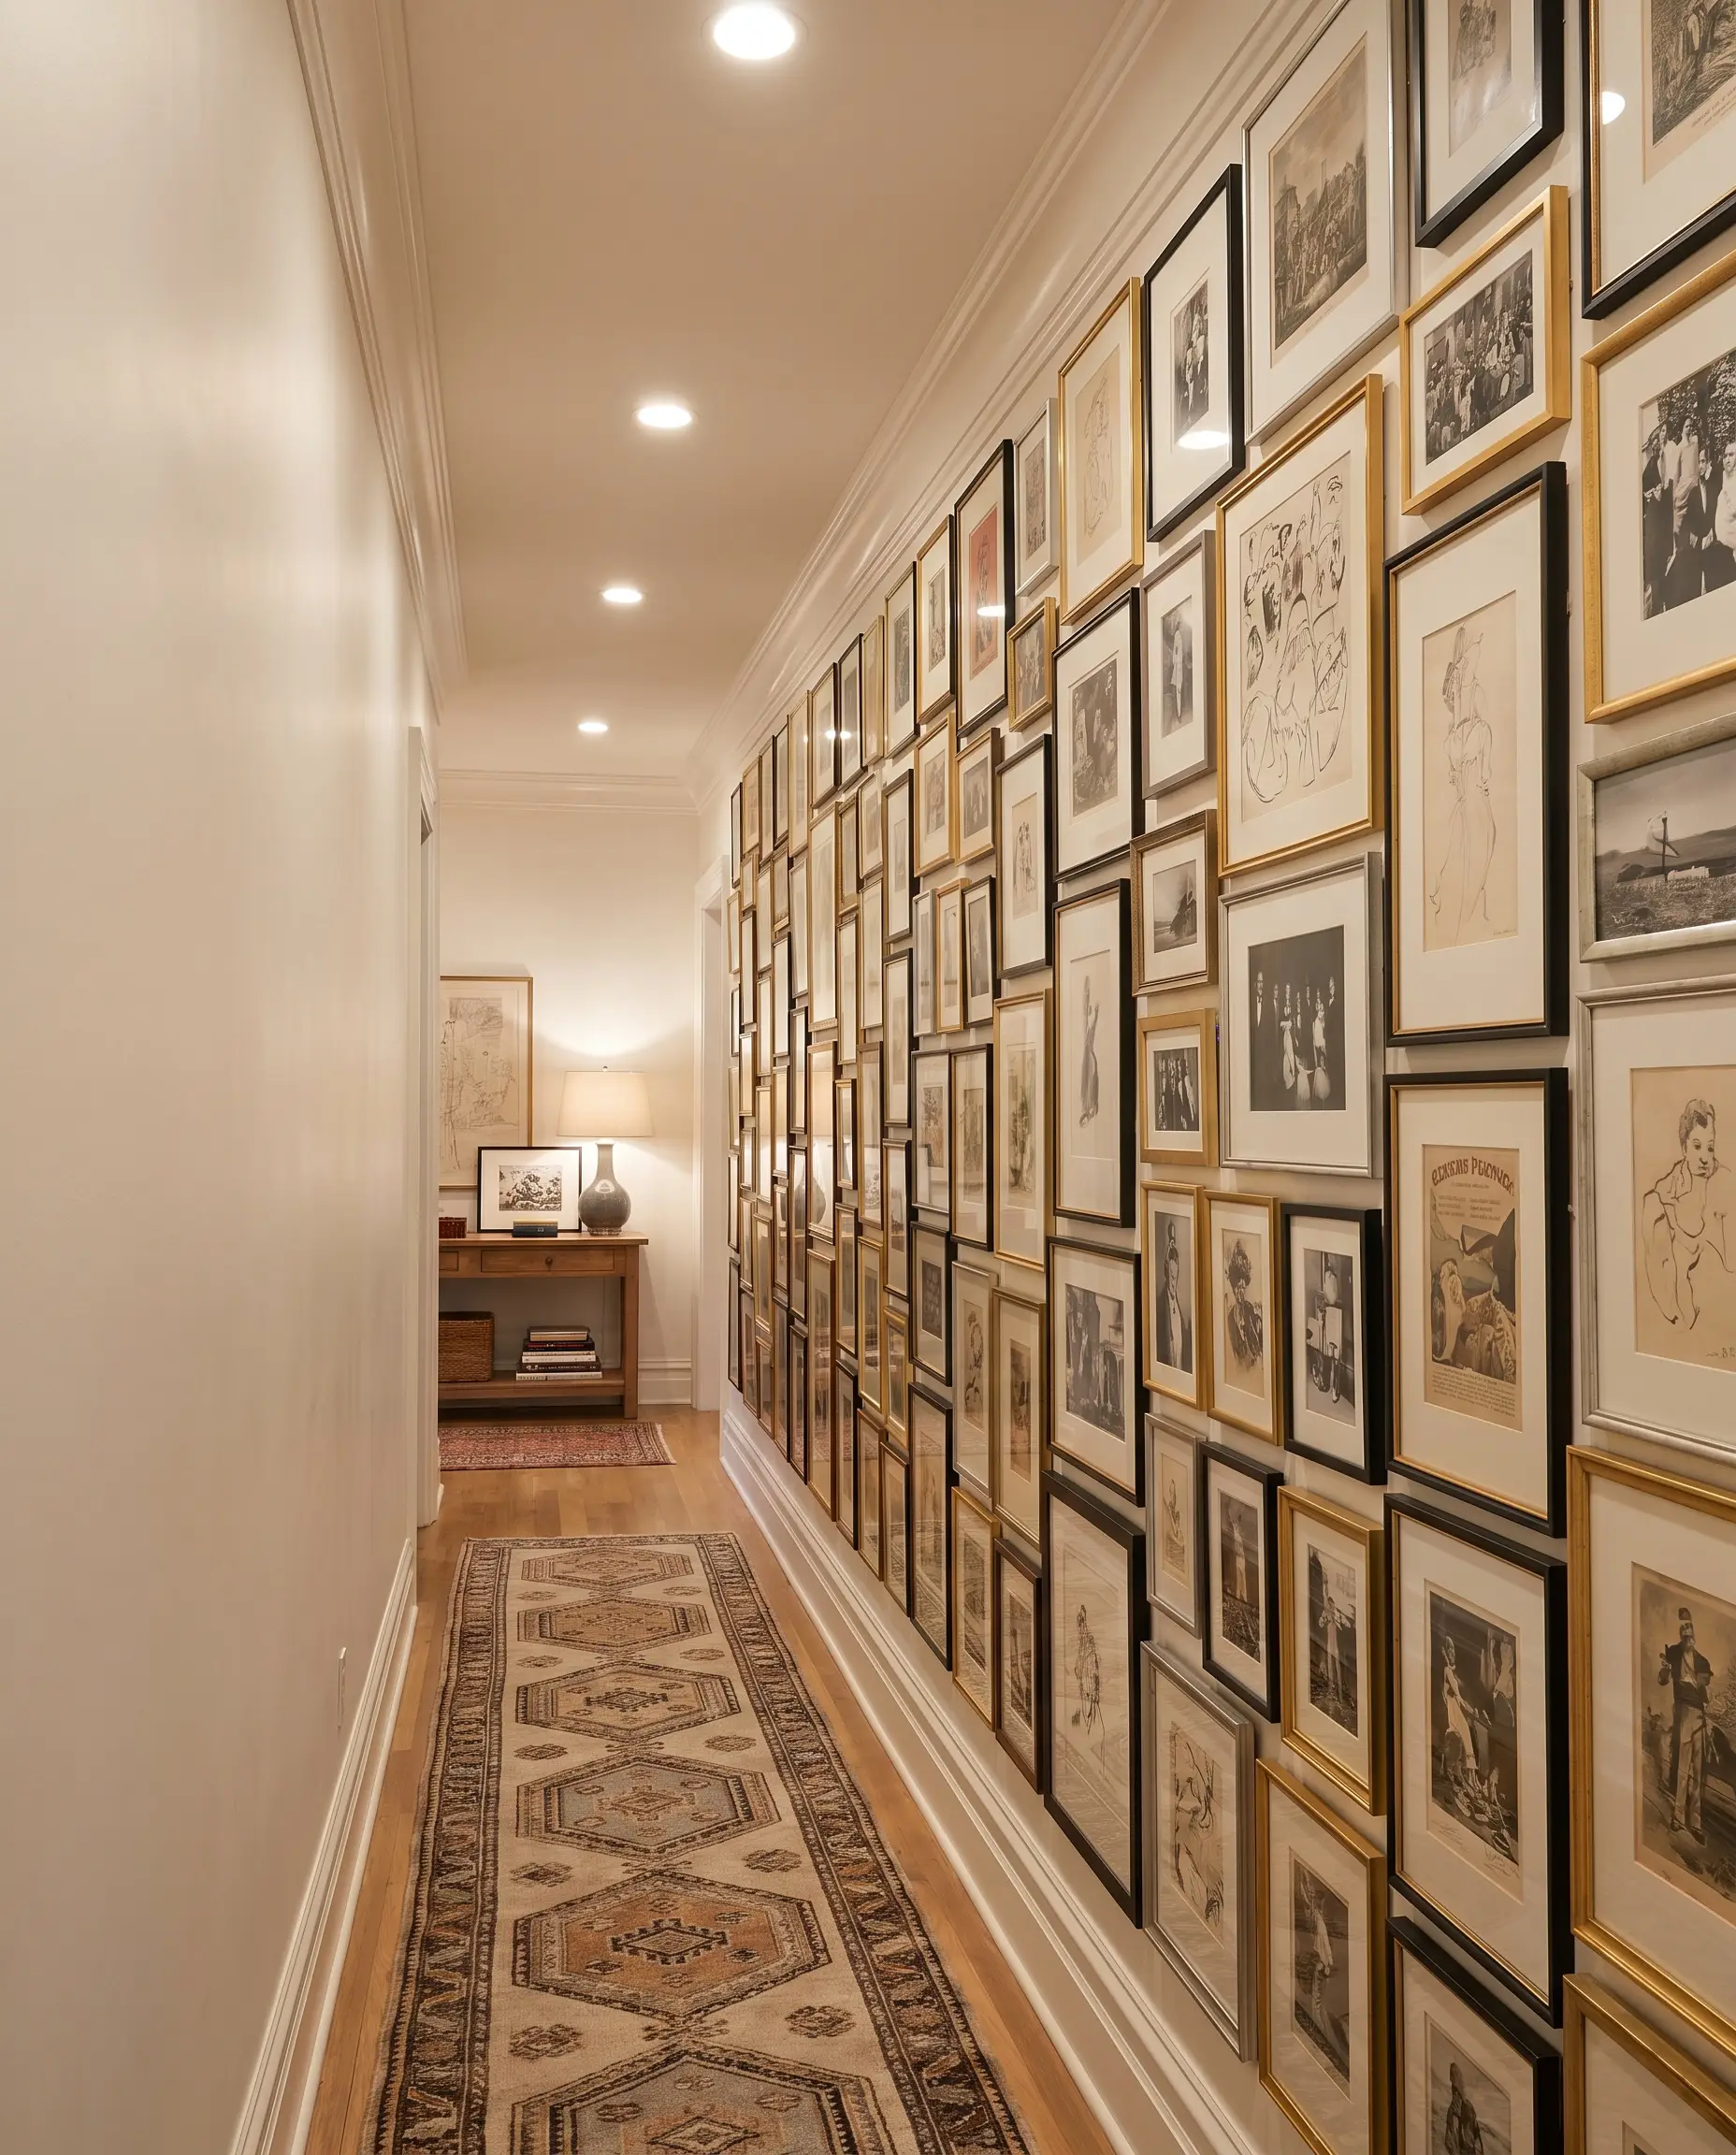
While counter-intuitive, covering one entire wall from baseboard to crown molding with a dense gallery wall turns the vertical plane into a single, cohesive architectural feature. This prevents the harsh horizontal line of a standard single-row gallery, which only extends the bowling alley effect.
- Vibe: Curated Eclectic.
- Key Materials: Assorted thin-profile metal frames.
- Styling Pro-Tip: You must leave the opposite wall completely blank to prevent overwhelming visual chaos and physical crowding.
Paint the Terminus Wall an Advancing Color
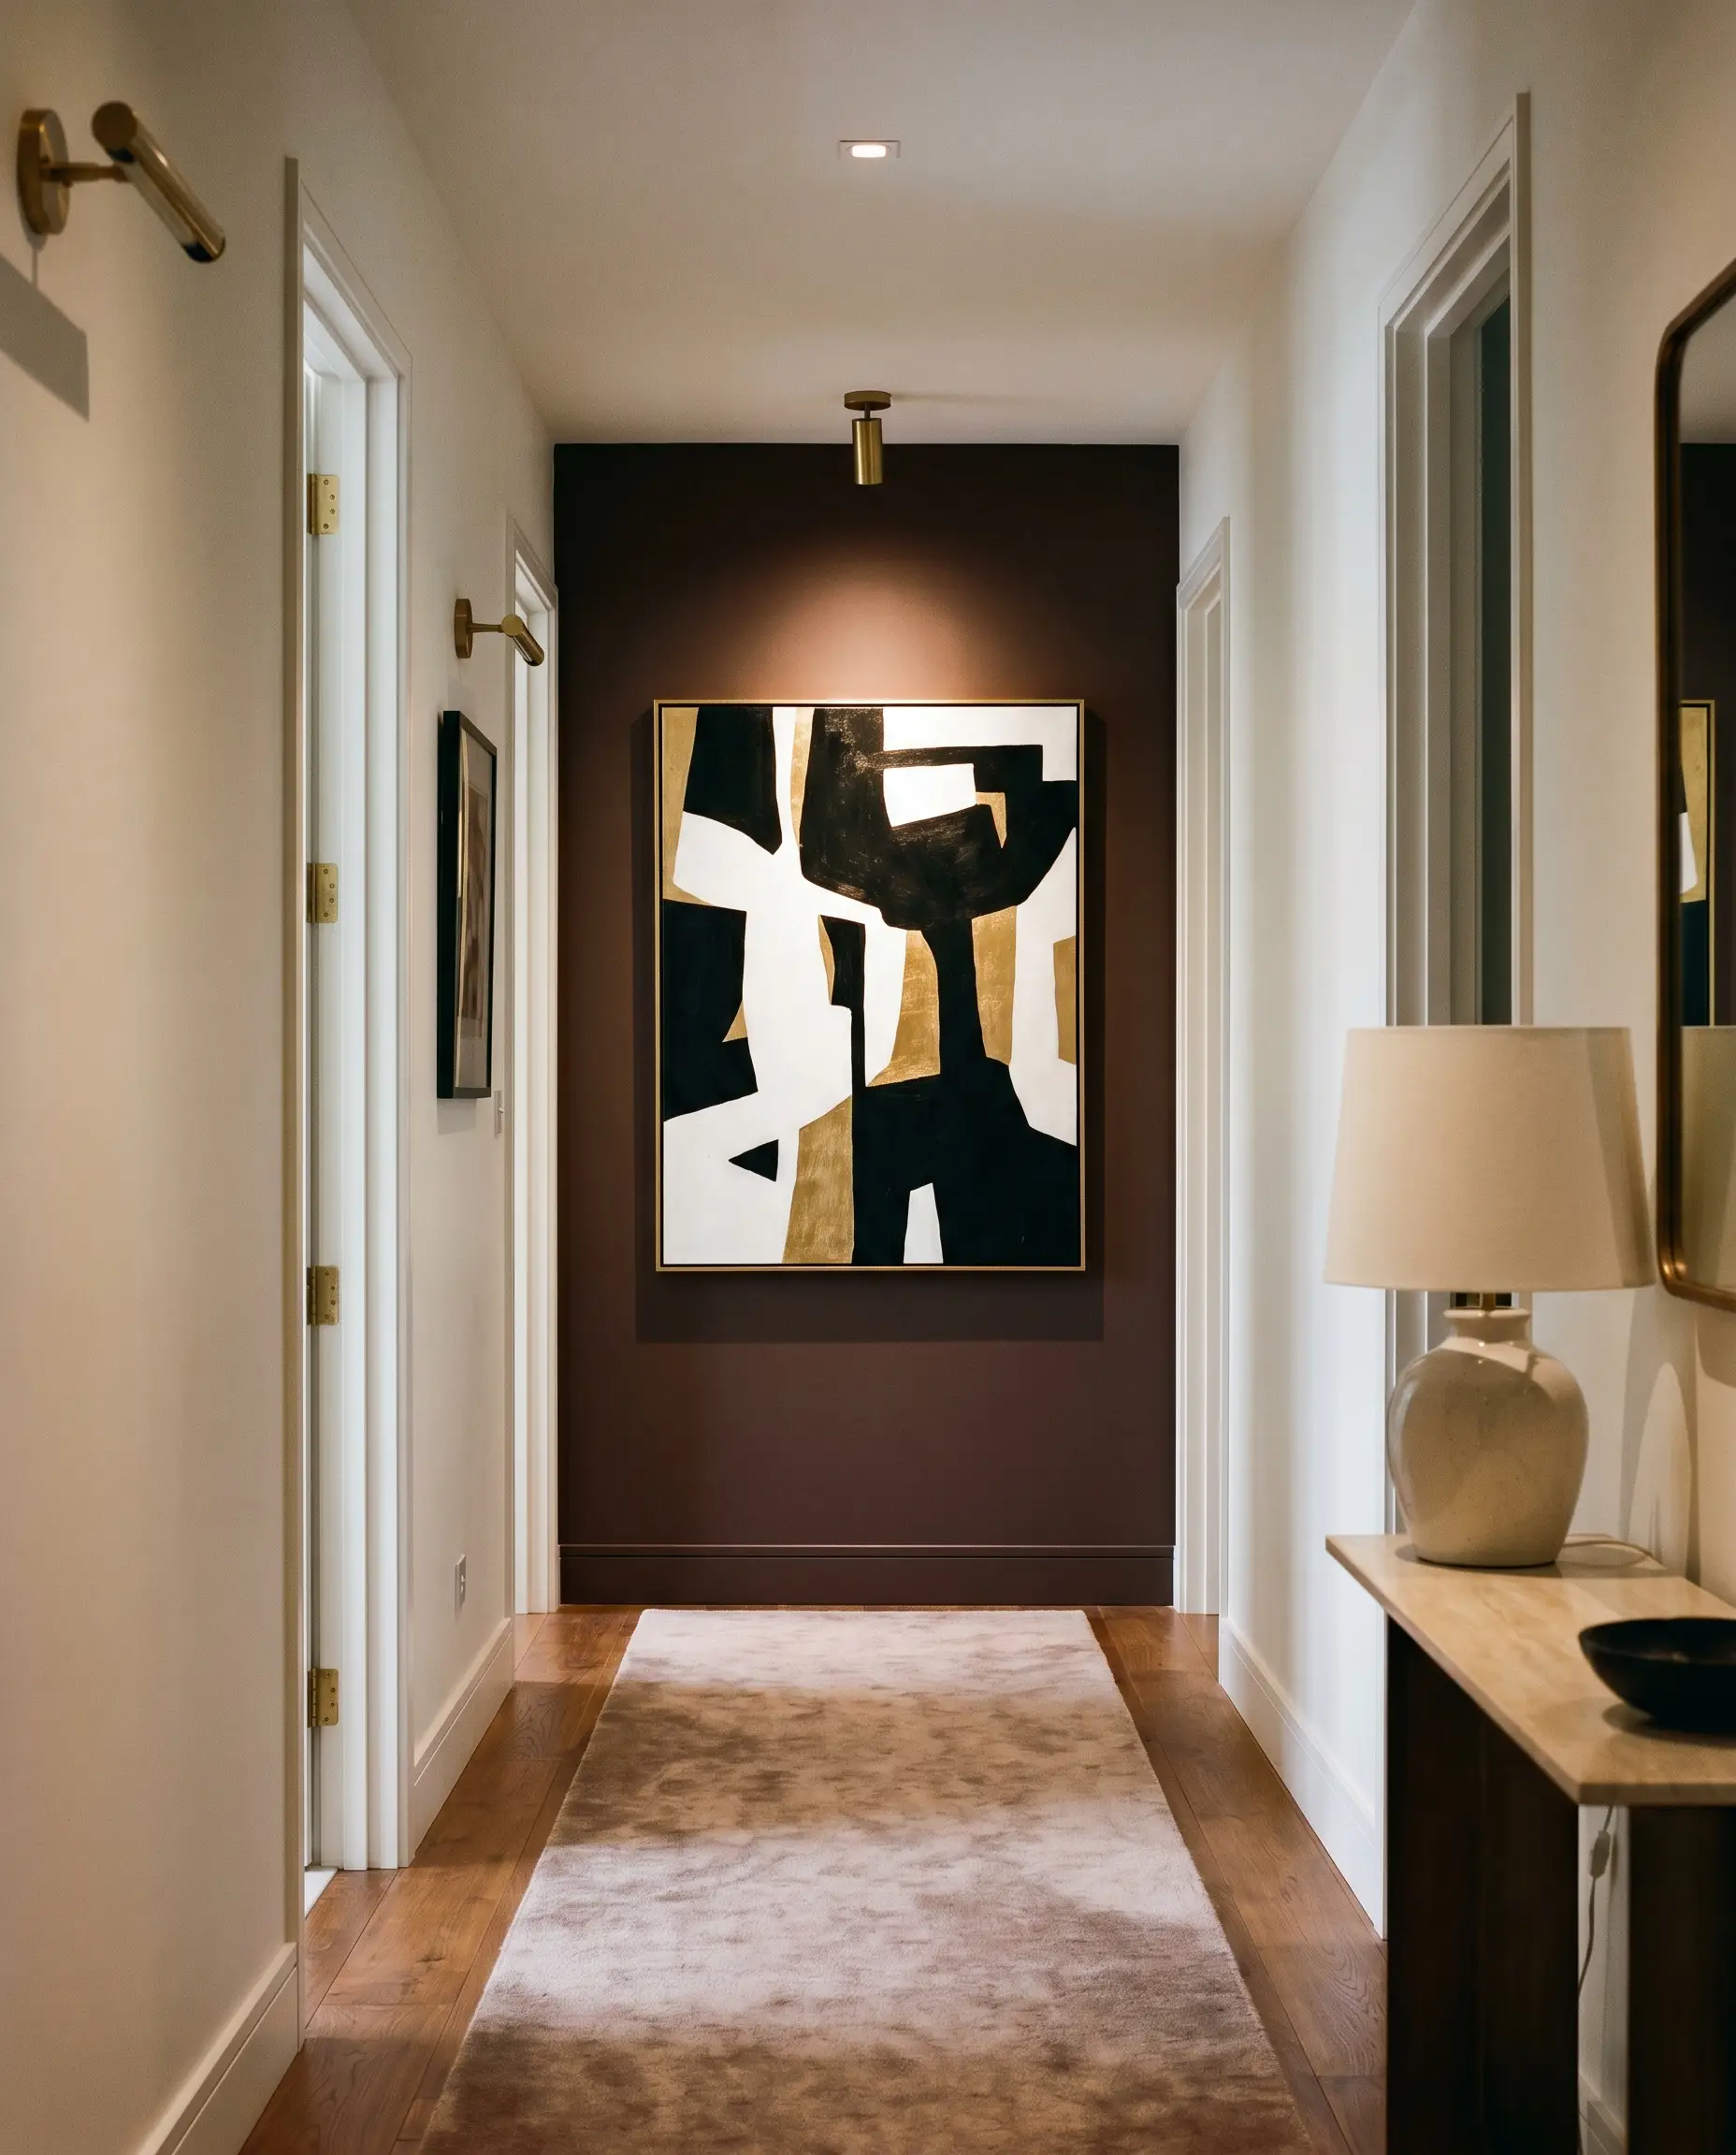
To shorten an oppressively long corridor, paint the terminus wall a dark, warm color and hang a single, high-contrast piece of art squarely in the center. Warm, dark tones visually advance toward the viewer, effectively making the hallway feel shorter and wider.
- Vibe: Dramatic Focal Point.
- Paint Recommendation: Sherwin-Williams Carnelian (a deep, warm plum).
- Styling Pro-Tip: Illuminate the terminus art piece with a dedicated ceiling directional light to firmly anchor the sightline.
By applying an advancing warm color to the far wall, the brain perceives the end of the hallway as physically closer than it is, instantly correcting the elongated, tunnel-like proportions.
The Optical Effect
Recess Art Between the Drywall Studs
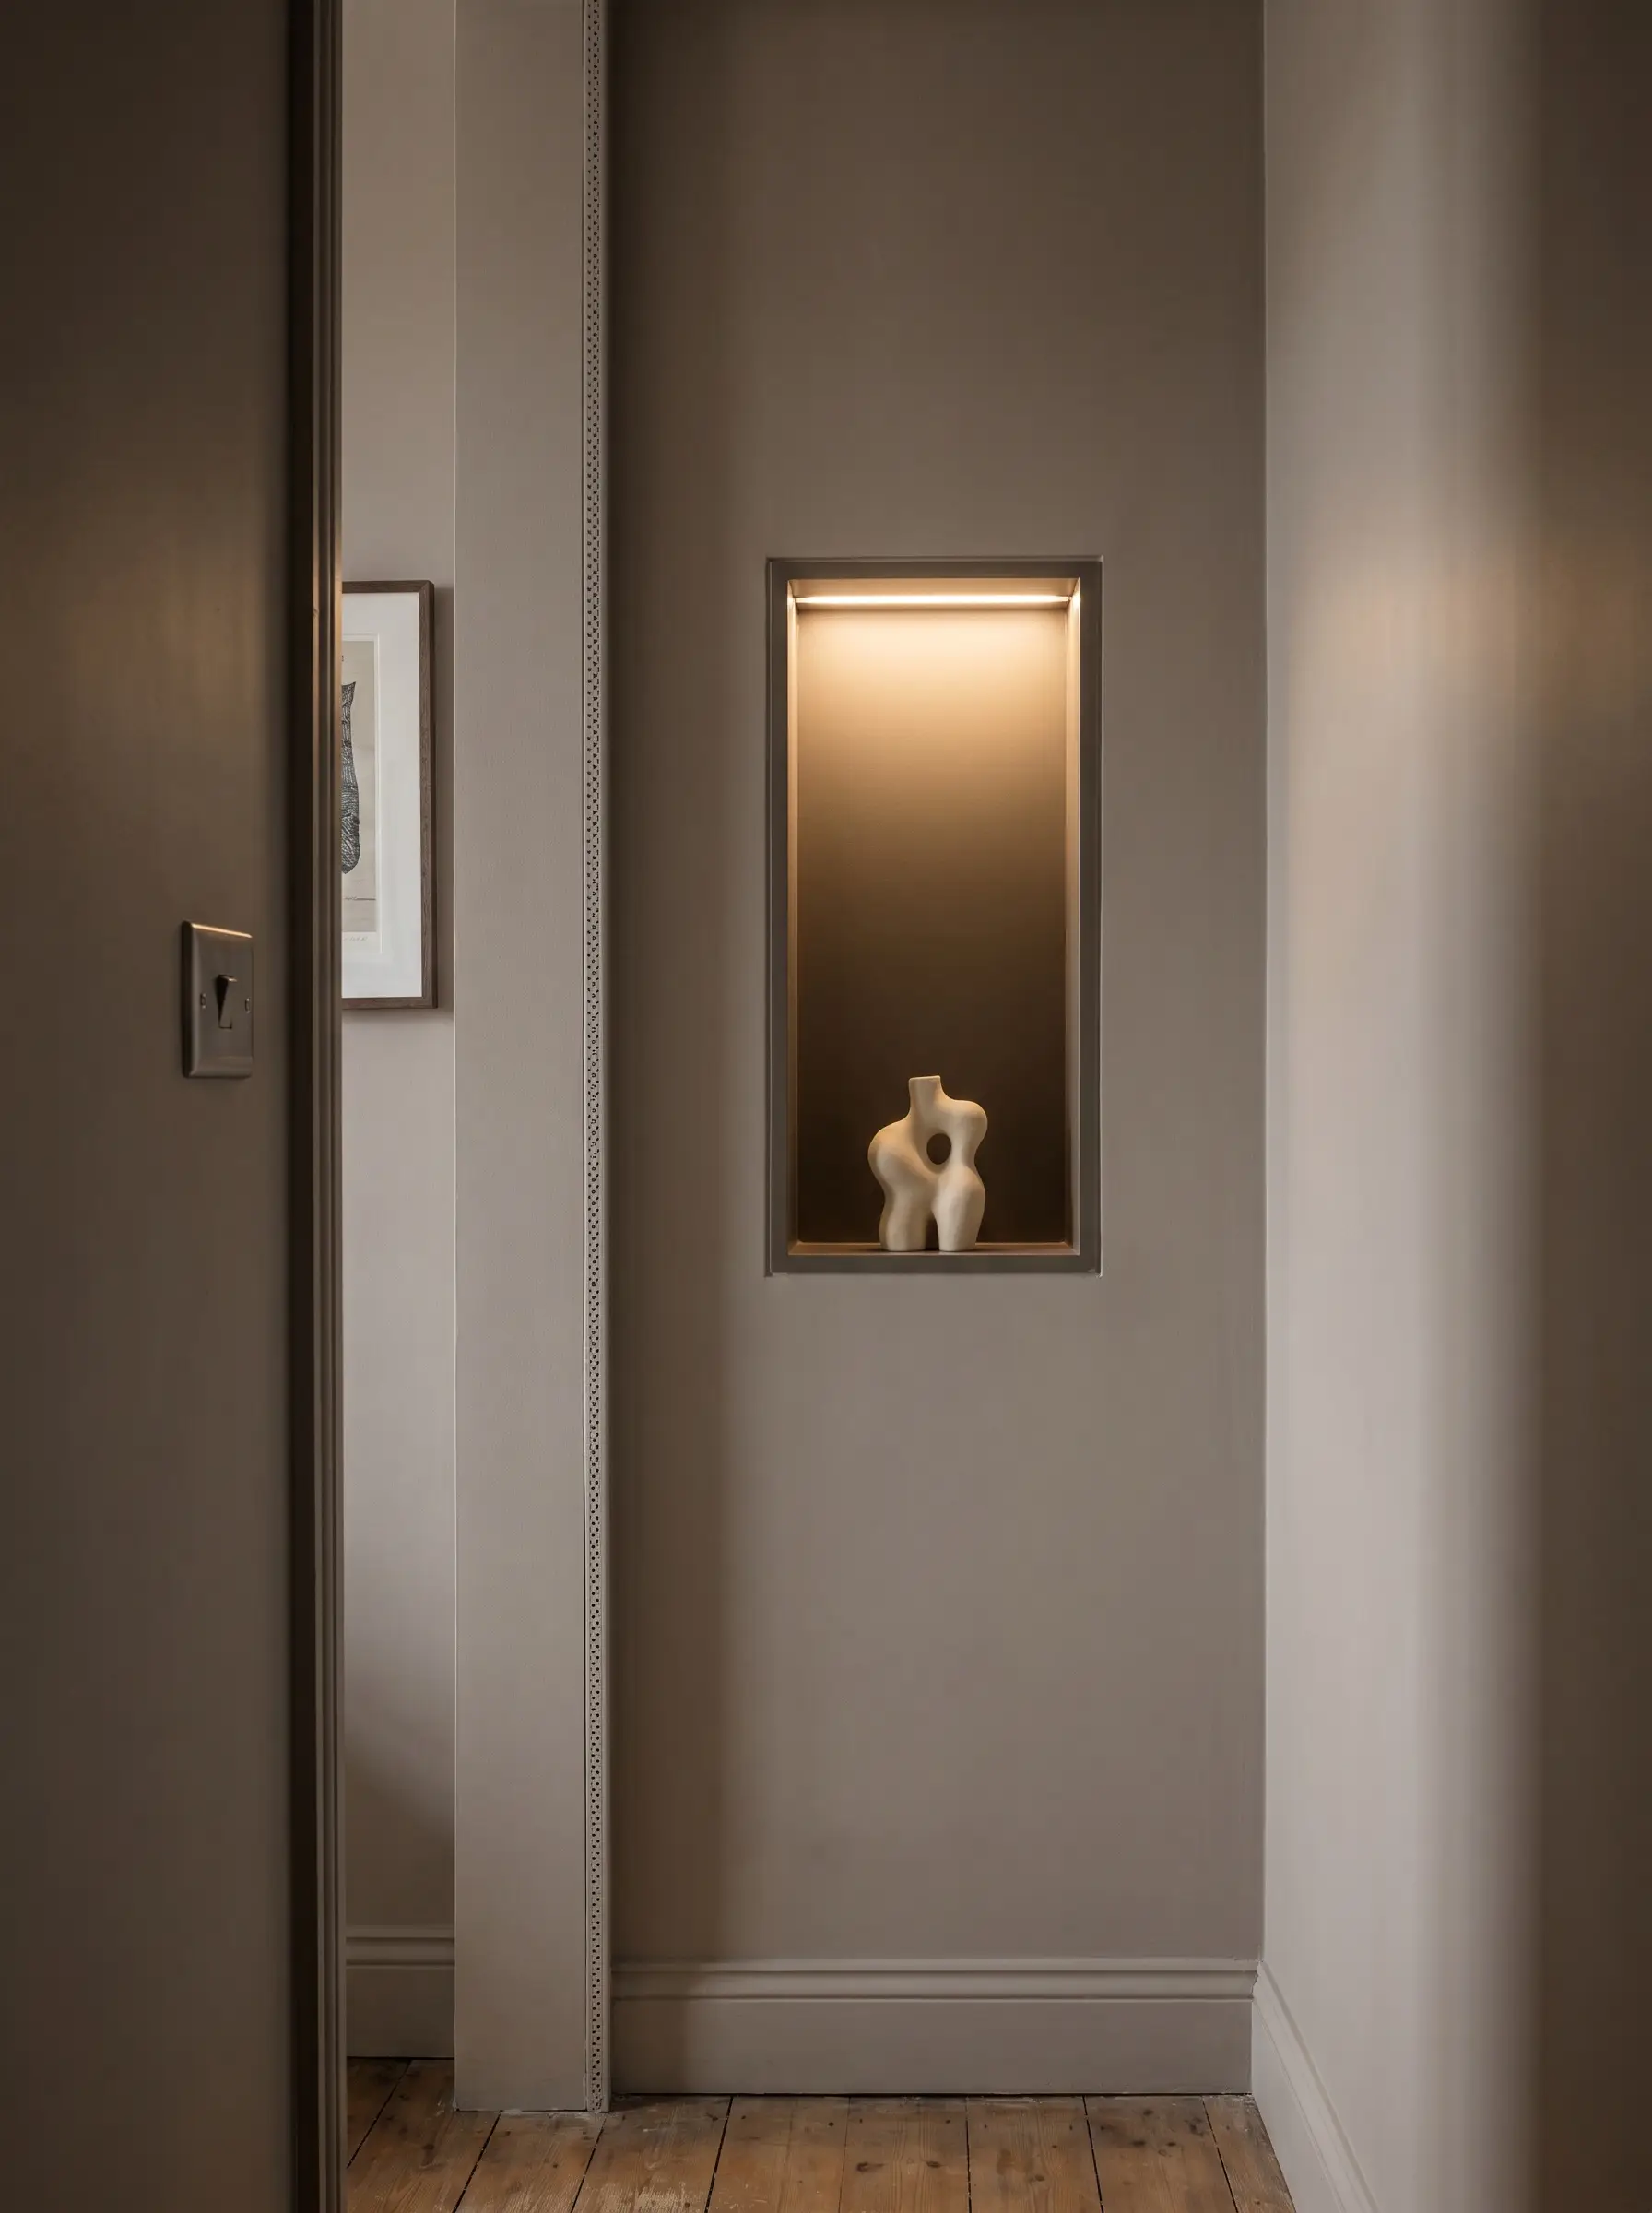
For a bespoke architectural solution, cut into the drywall between the studs to create shallow, illuminated niches for sculptures or framed art. This brilliant framing strategy reclaims 3.5 inches of depth from inside the wall itself.
- Vibe: Bespoke Gallery.
- Key Materials: Drywall corner bead, micro-LED puck lights.
- Styling Pro-Tip: Paint the interior of the niche a shade darker than the hallway walls to enhance the illusion of depth.
| Feature | Visual Impact | Installation Complexity |
|---|---|---|
| Recessed Niches | High (Bespoke, architectural feel) | High (Requires cutting drywall, framing, and drywall finishing) |
| Surface Mount Art | Moderate (Depends on framing) | Low (Simple hardware placement) |
Hang Tapestries or Unframed Textiles
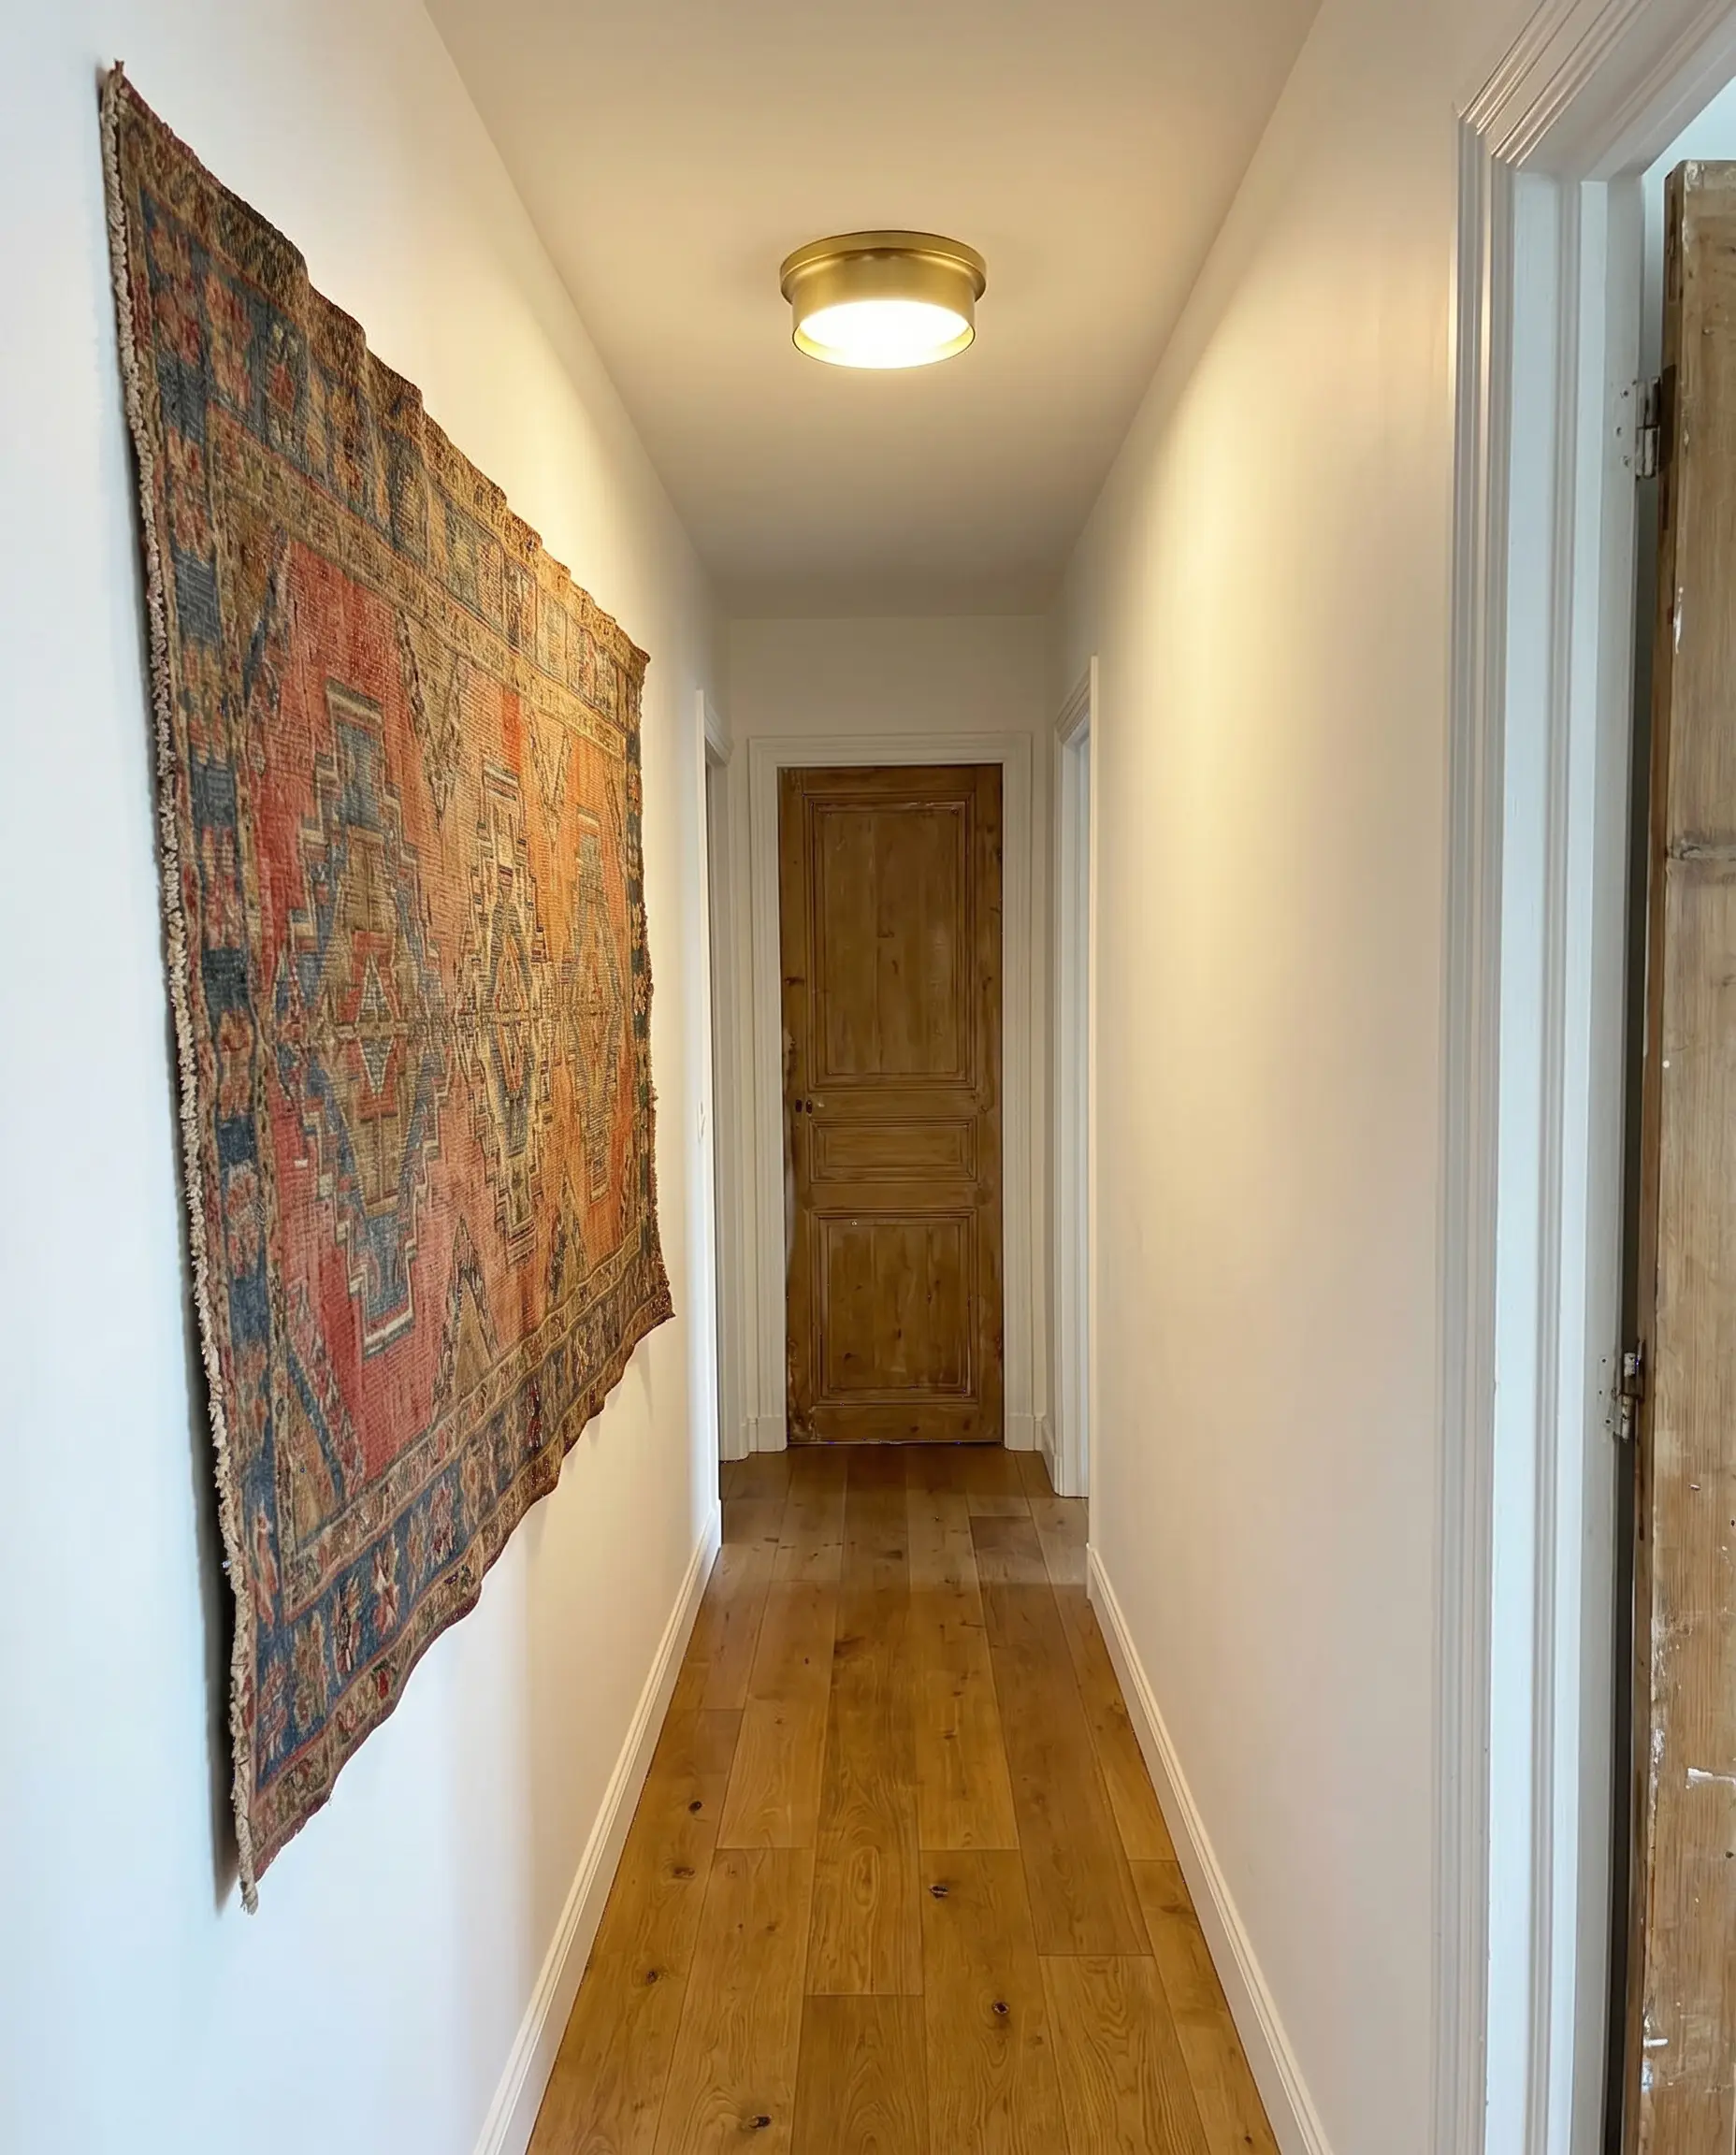
Swapping framed art for woven tapestries, vintage rugs, or mounted textiles provides zero threat of shattered glass if bumped in passing. They sit perfectly flat against the wall and excel at absorbing echoes in hard-surfaced hallways.
- Vibe: Tactile Bohemian.
- Key Materials: Vintage kilim fragments, linen tapestries.
- Styling Pro-Tip: This is an ideal, stress-free solution for households with energetic kids or large, clumsy pets.
Ultra-Shallow Functional Decor
If decor in a narrow hall must serve a functional purpose—like holding keys, mail, or coats—it must be rigorously engineered for shallowness. Standard entryway furniture is strictly forbidden here.
Install a 2-Inch Deep Picture Ledge
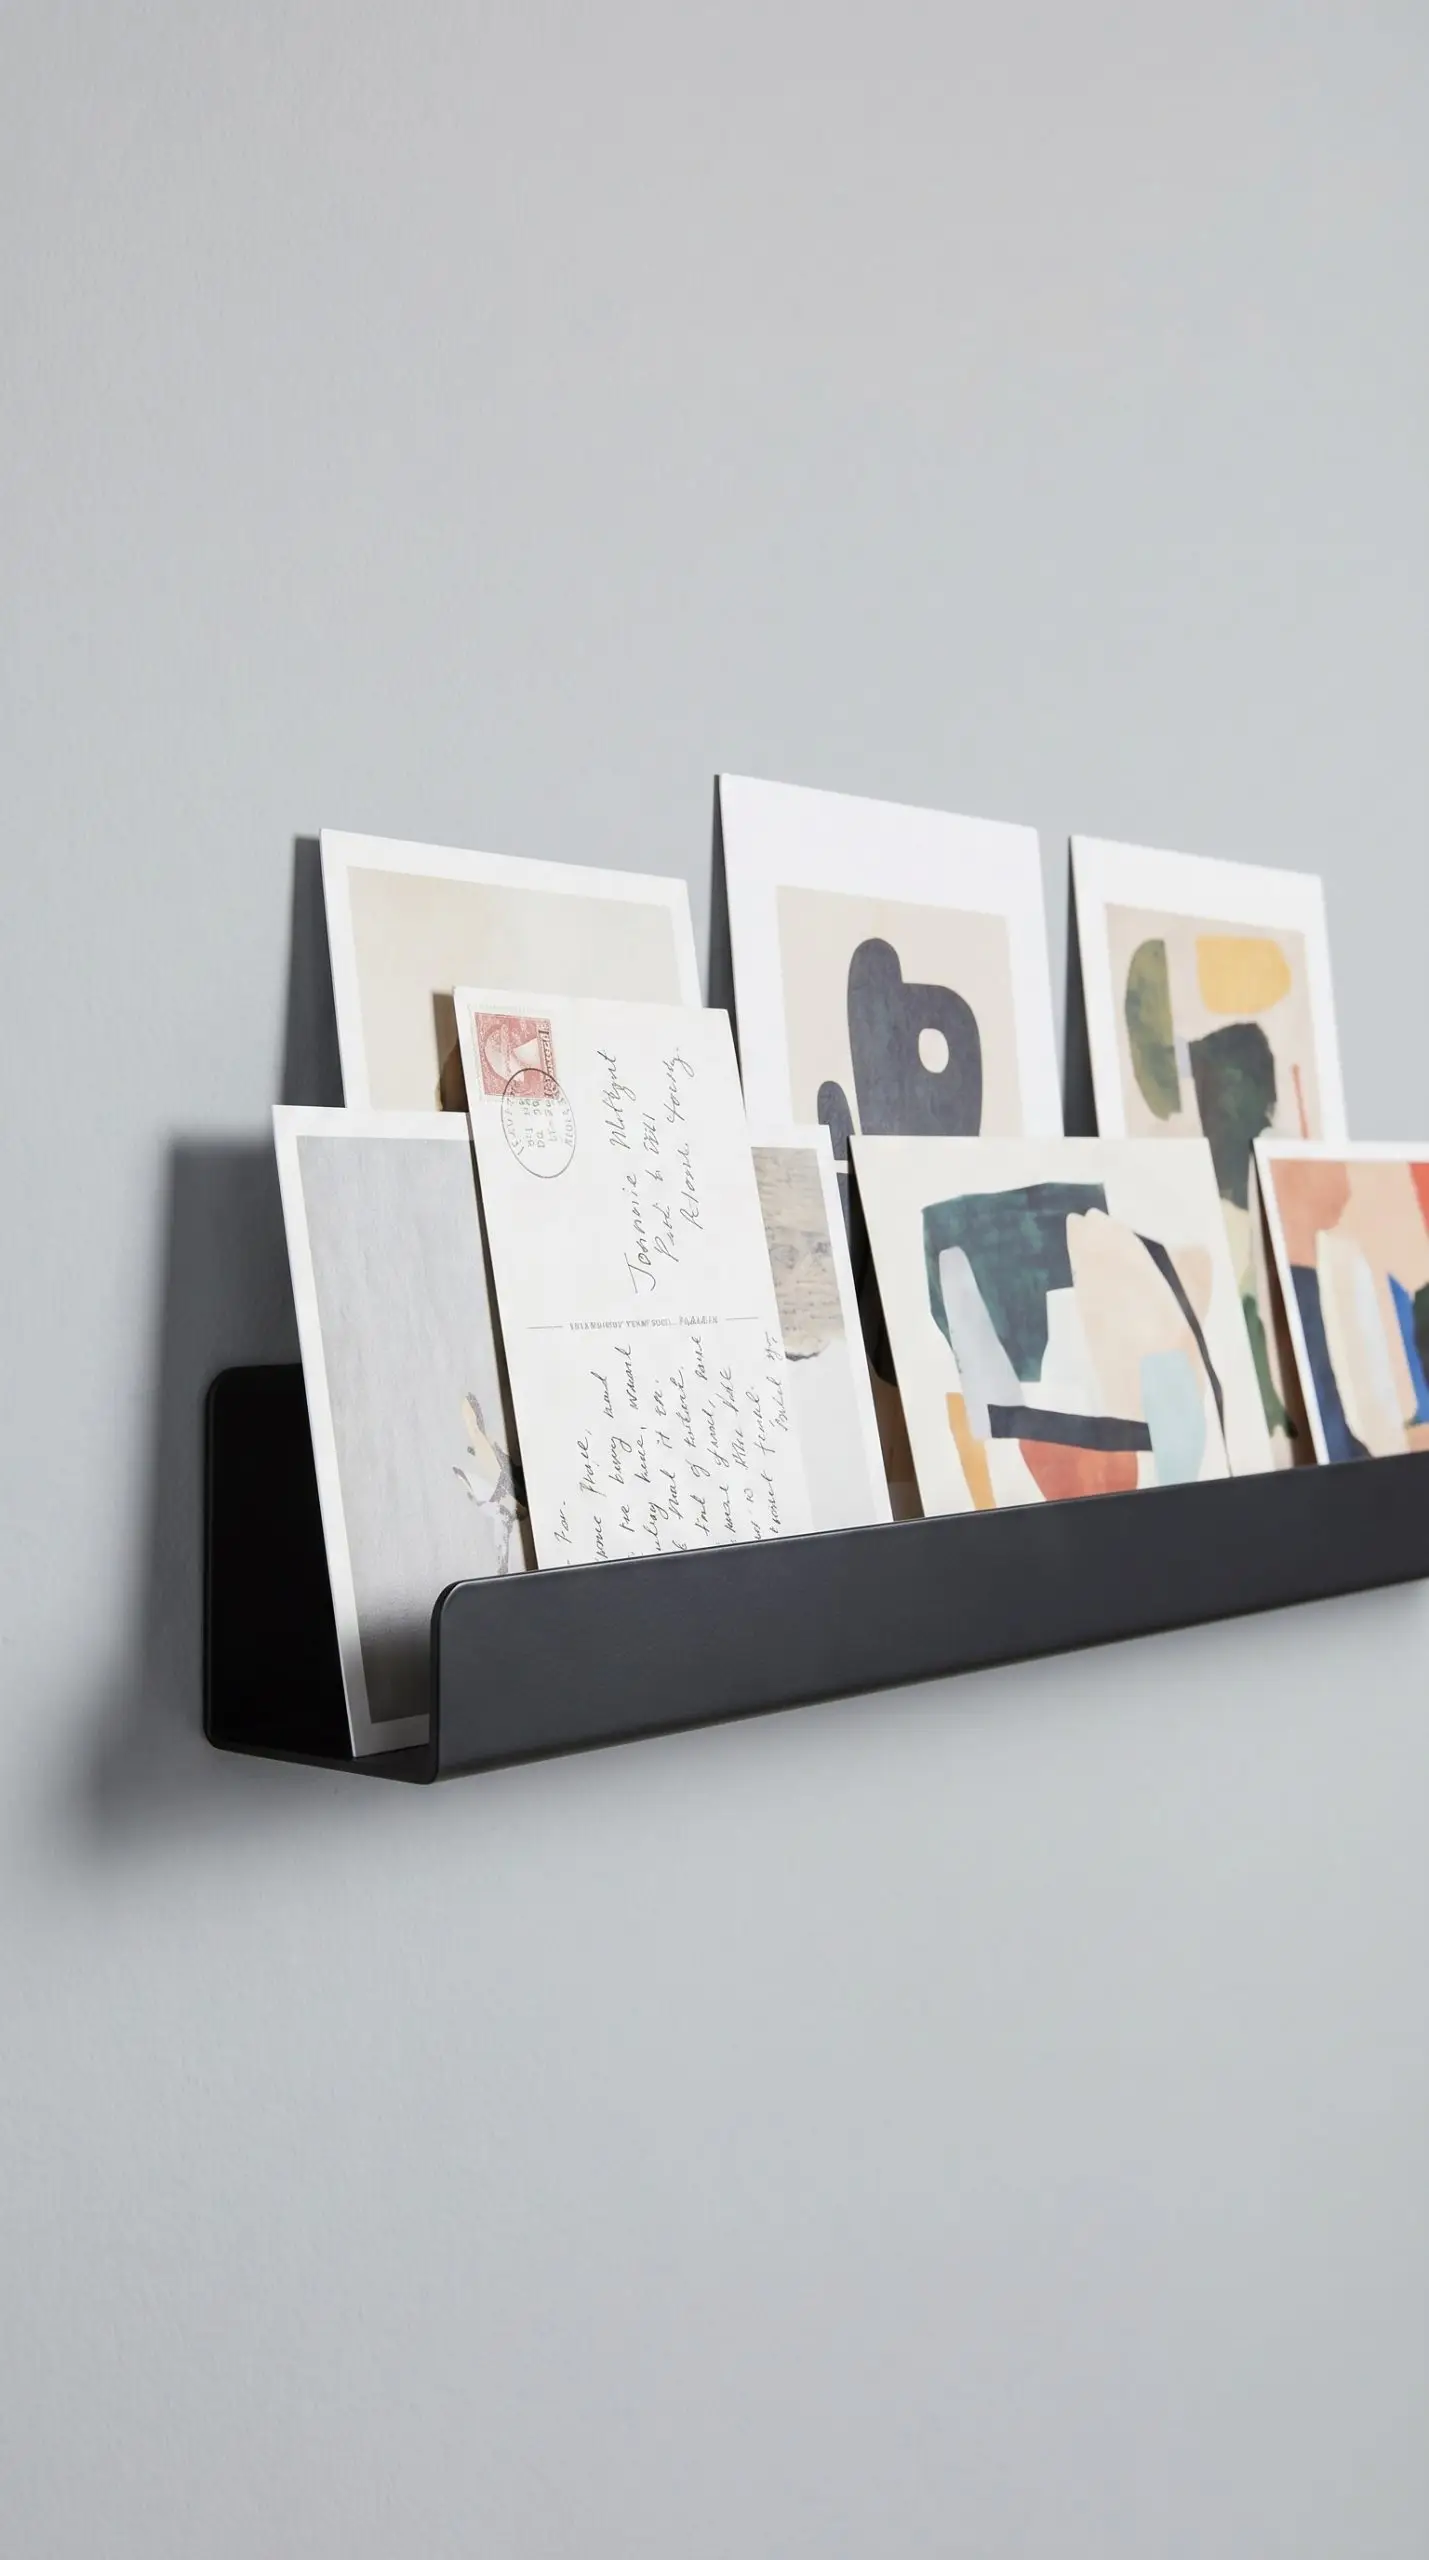
Traditional floating shelves, which typically jut out eight to twelve inches, are major hazards in a 36-inch hall. Instead, install an ultra-shallow two-inch acrylic or wood picture ledge to lean small, unframed prints, postcards, or thin mail.
- Clearance Check: Strict maximum of 2 inches depth.
- Vibe: Streamlined Utility.
- Key Materials: Powder-coated steel or clear acrylic ledge.
- Styling Pro-Tip: Overlap unframed prints of varying heights to create a casual, layered look without requiring bulky frames.
Mount Fold-Down or Retractable Hooks
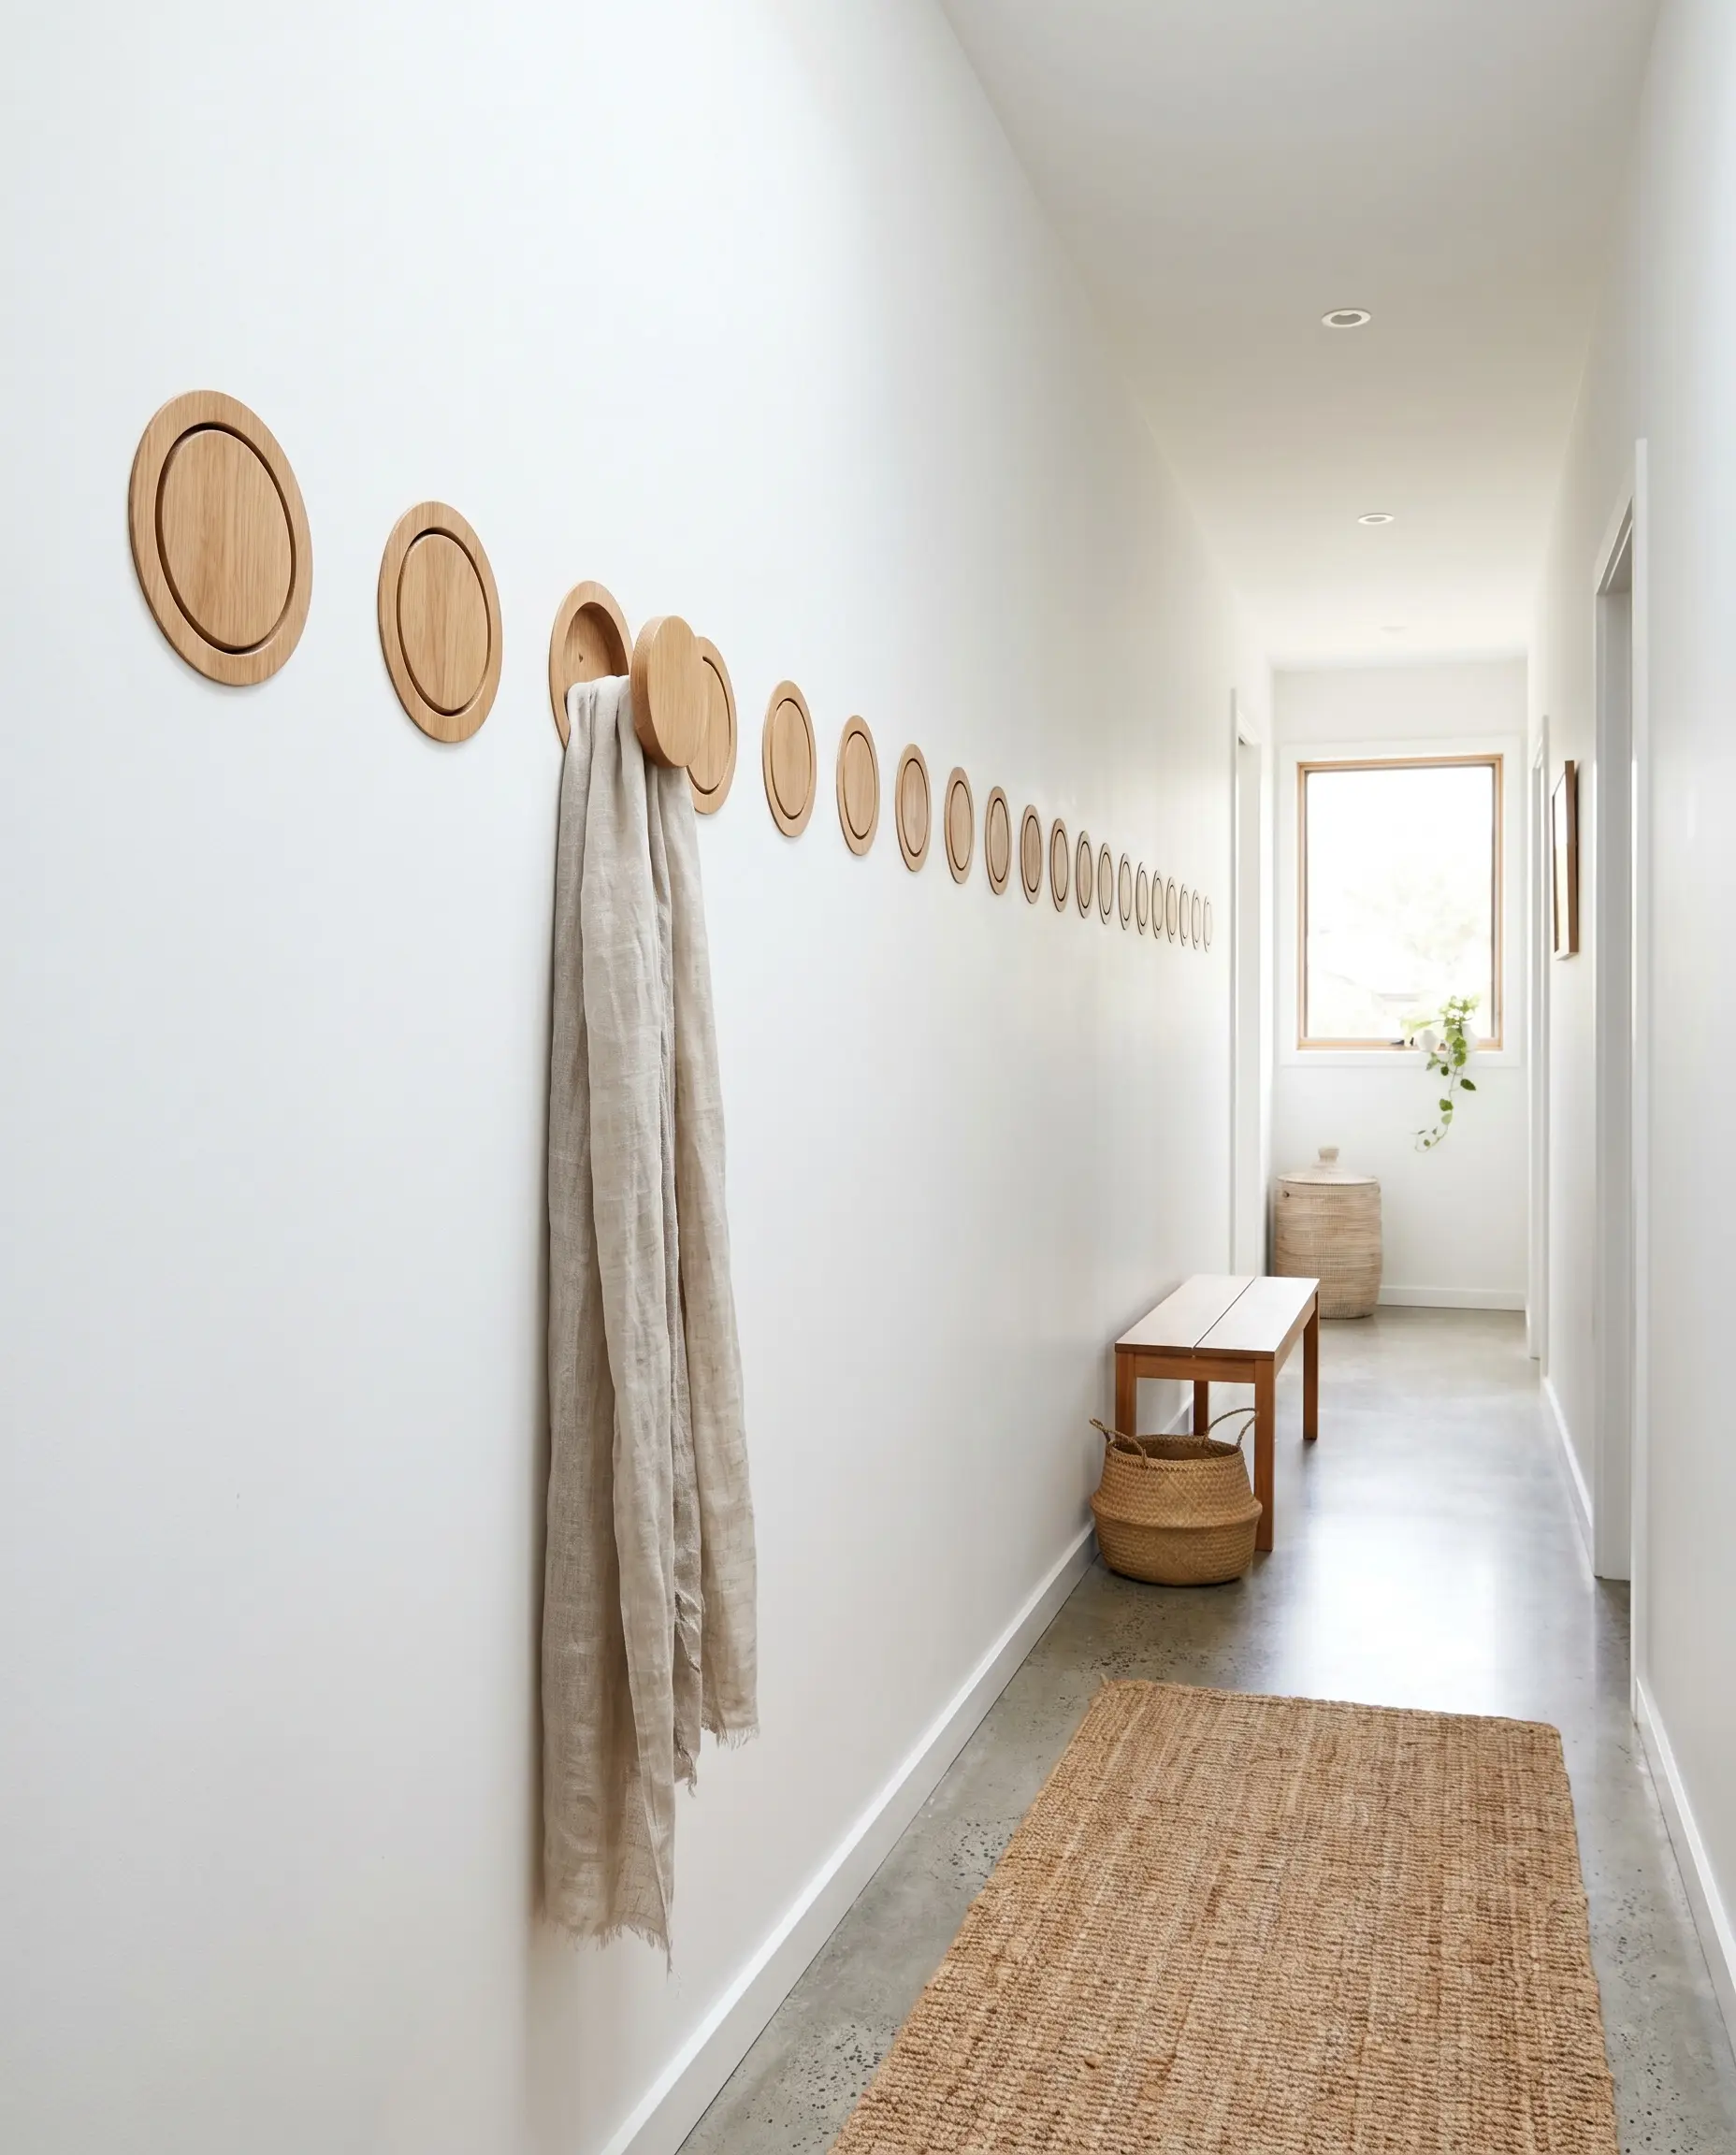
If your narrow hallway must double as an entryway, utilize piano hooks or retractable wooden pegs. These clever fixtures fold completely flat and flush into their casing when not in use, preserving your precious walkway.
- Vibe: Scandinavian Practicality.
- Key Materials: Solid oak or walnut retractable hook racks (e.g., Muuto Dots style).
- Styling Pro-Tip: Mount a continuous line of retractable hooks exactly 60 inches off the floor to create a horizontal architectural detail that also serves as storage.
Utilize Wall-Mounted Semicircle Consoles
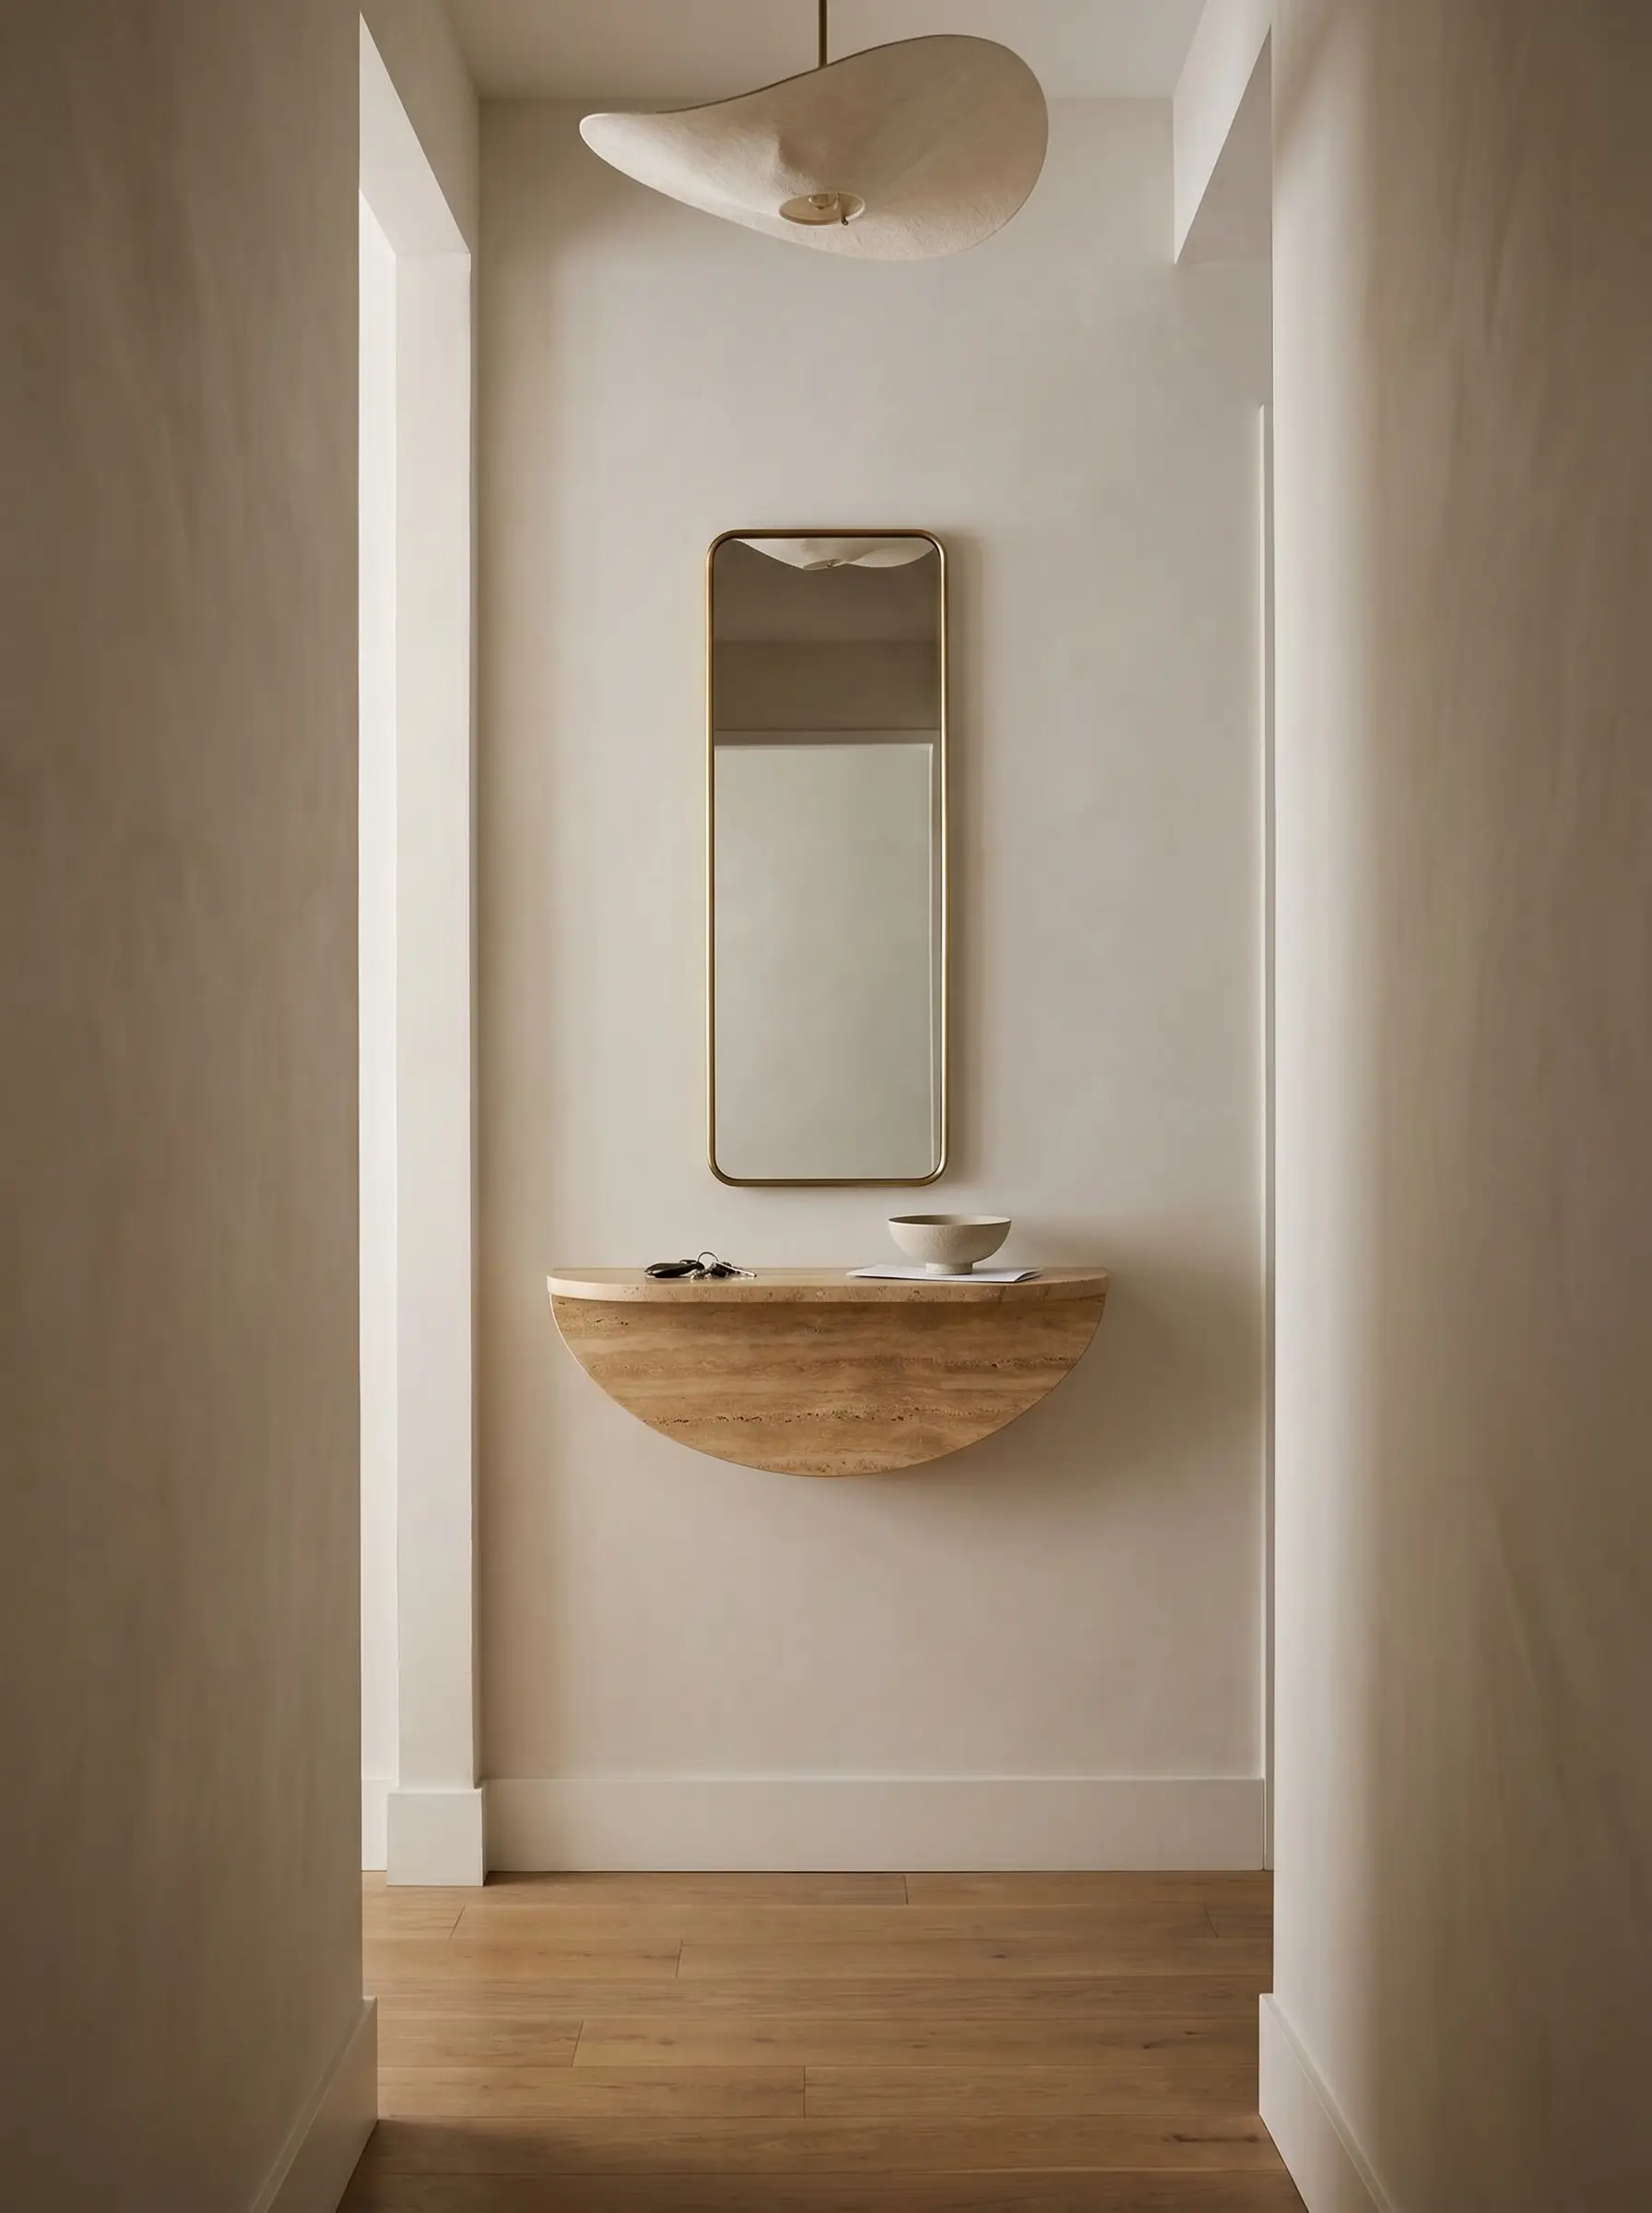
When a drop zone for keys is absolutely necessary, mount a floating semicircle (half-moon) shelf. The deliberate lack of sharp corners physically improves the flow of foot traffic and prevents painful hip-bruising.
- Clearance Check: Maximum depth of 6-8 inches at the center radius.
- Vibe: Softened Modernism.
- Key Materials: Travertine or bentwood half-circle floating shelf.
- Styling Pro-Tip: Mount a narrow vertical mirror directly above the console to establish an intentional “entryway” zone without eating up floor space.
Add Shallow Wall-Mounted Planters
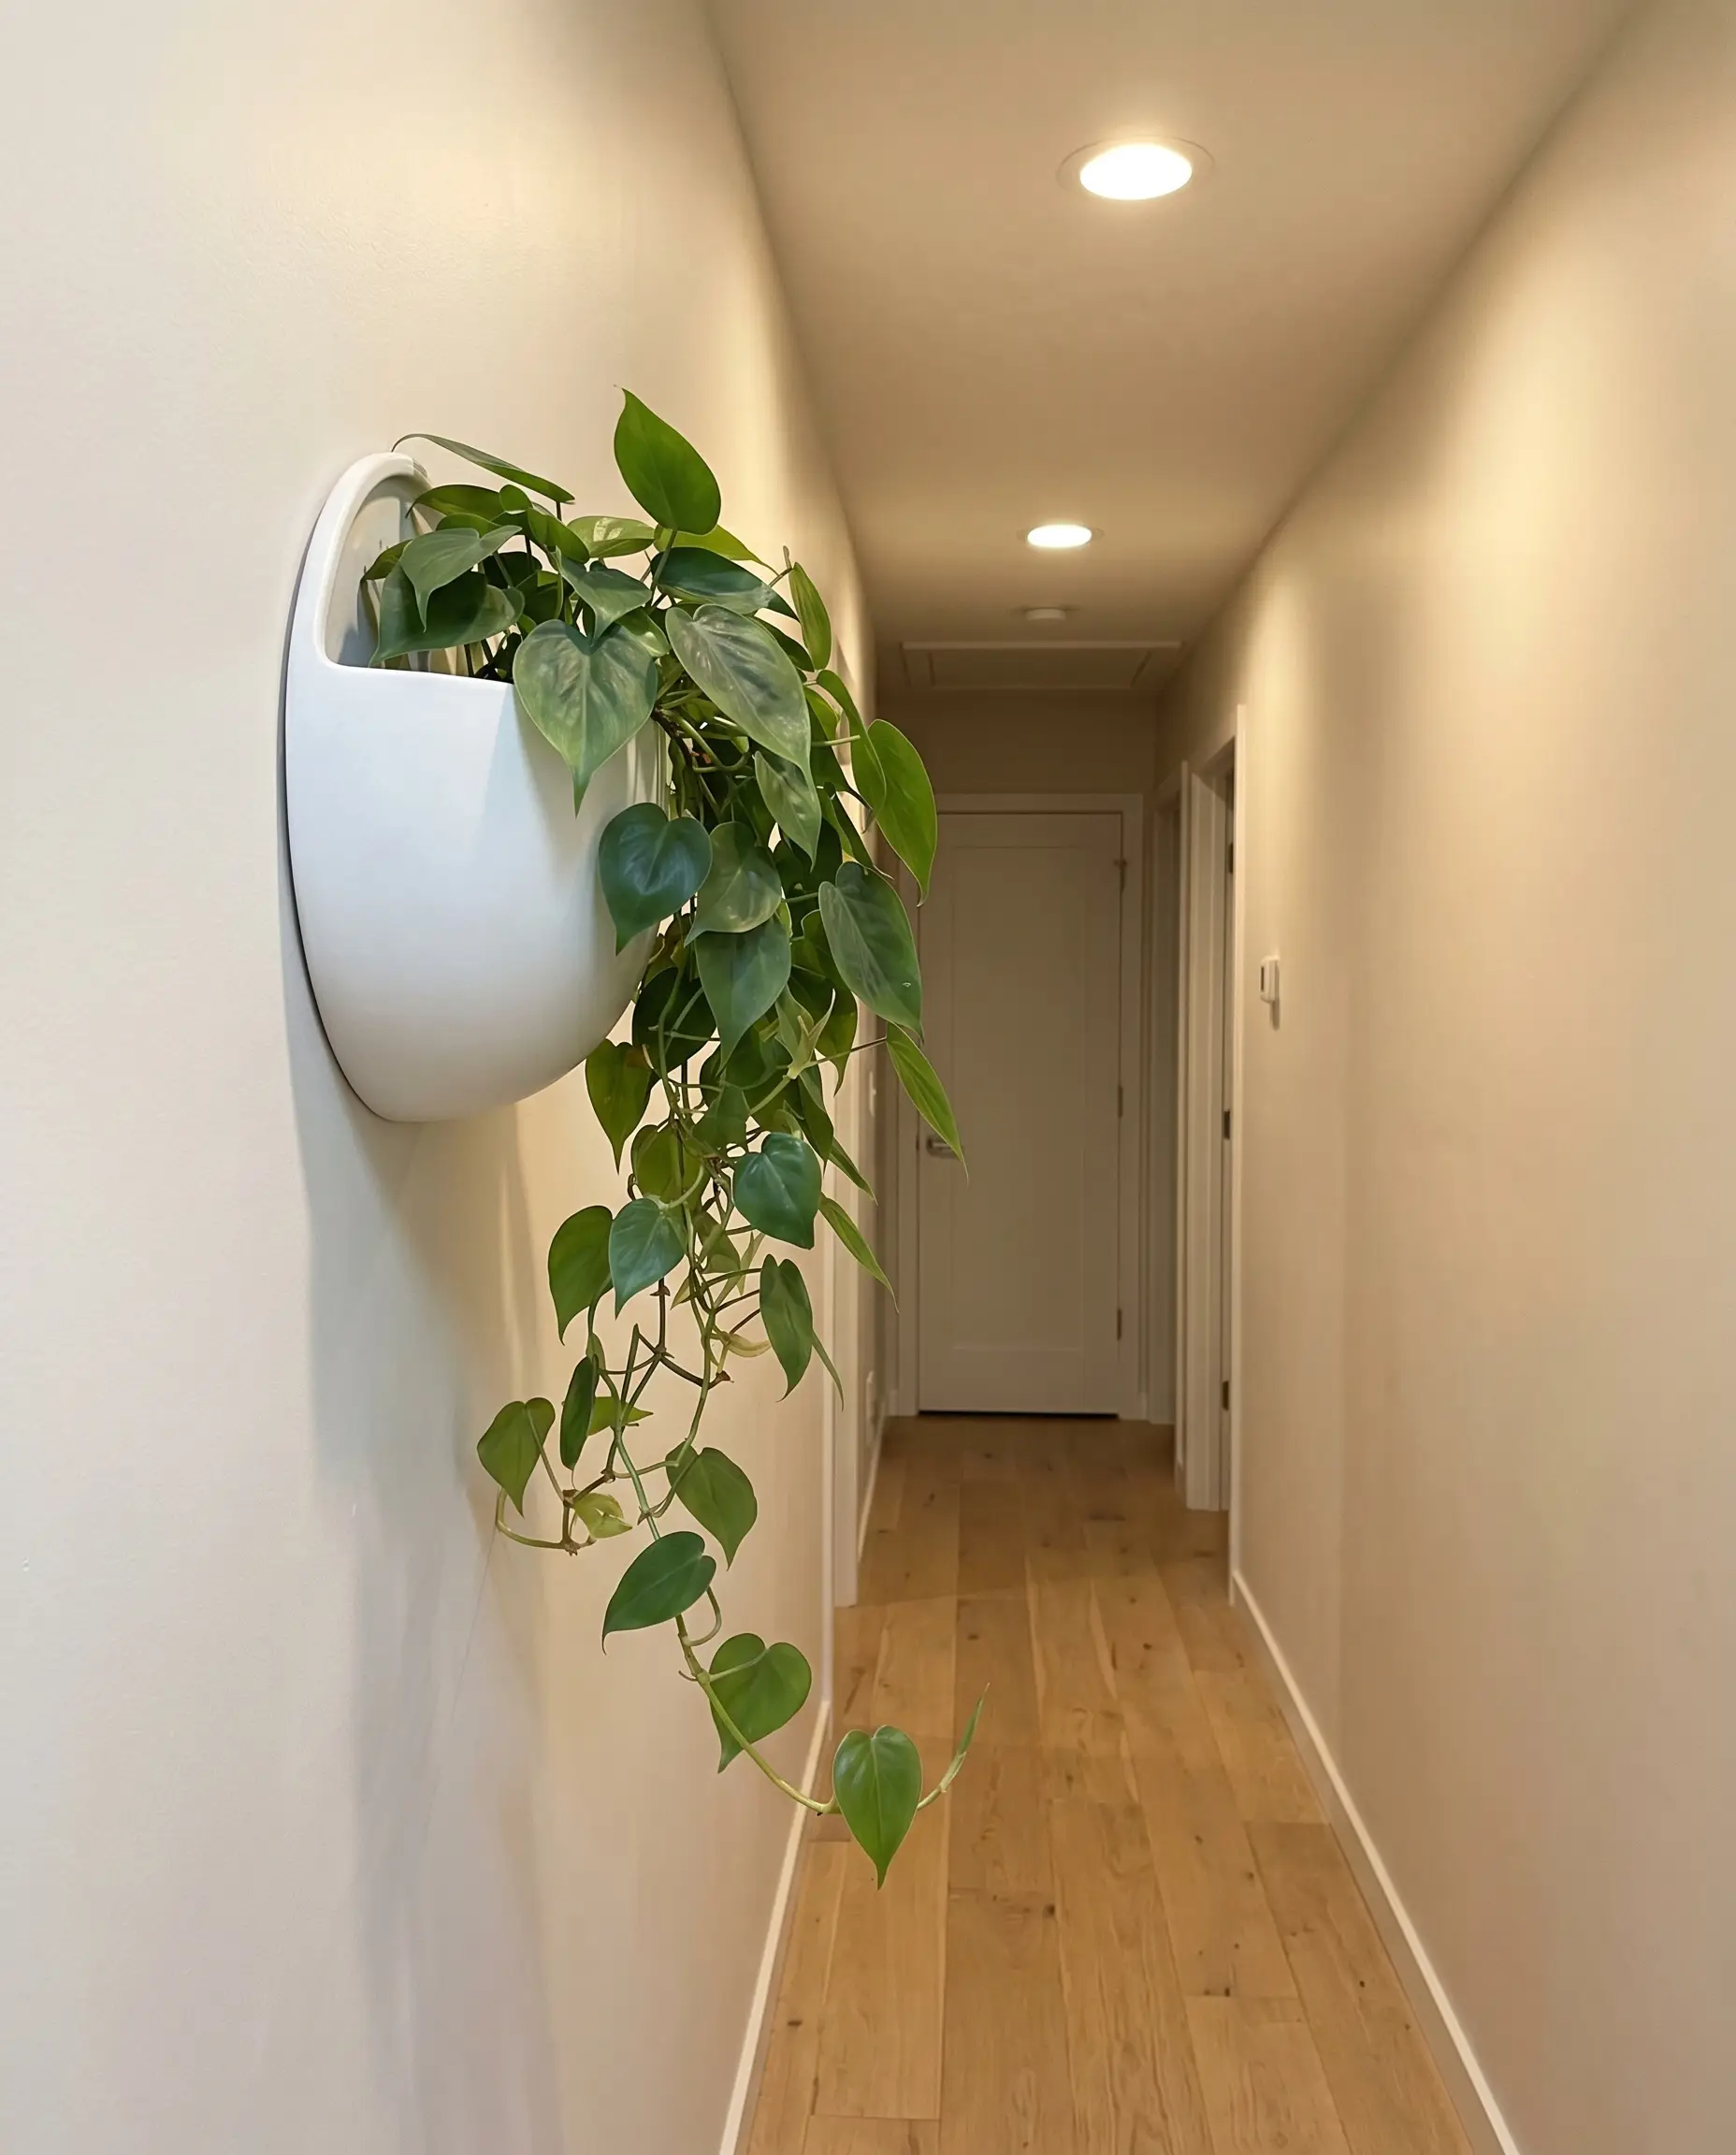
Bring life into a windowless hall by utilizing flat-backed, half-circle ceramic wall planters. These shallow vessels are perfect for low-light, trailing plants that add an organic, softening element to rigid drywall.
- Vibe: Biophilic Design.
- Key Materials: Matte ceramic flat-backed planters, Pothos or Philodendron.
- Styling Pro-Tip: Ensure the planters are fully sealed on the back or use an internal plastic drip tray to completely prevent water damage to the drywall.
The Final Walkthrough
A narrow hallway should never be treated as a design afterthought or an unavoidable nuisance. It is an opportunity to create a highly curated, jewel-box moment within your home. By applying rigorous clearance control and manipulating light reflectance, you can entirely rewrite the spatial experience of your corridors.
Grab a tape measure right now and check your hallway width. If you are working with a strict 36-inch span, evaluate whether your primary focus needs to be optical expansion—utilizing high-gloss paints and advancing colors—or flat styling through textiles and acrylics. Your transit spaces deserve just as much intentionality as your living room.

The Hackrea Style Desk treats interior decoration as an exact visual science. Rather than focusing on demolition or floor plans, this desk masters the art of color theory, undertone matching, material pairings, and spatial proportion. From balancing the visual weight of mixed metals to finding the perfect bridging tone between disparate wood species, this desk provides the rigorous aesthetic rules needed to achieve high-end, editorial-quality harmony in any space.