A full roof replacement typically spans two to six weeks from initial quote to final cleanup. The on-site installation itself usually takes one to three days for most homes. However, factors like material availability, weather conditions, permit approvals, and contractor scheduling can extend the overall timeline. Planning for these variables helps set realistic expectations and ensures a smoother experience from start to finish.
Imagine waking up to a leak after a heavy storm, or noticing shingles curling at the edges after years of Canadian winters. Your roof is more than just shingles and nails; it is your home’s first line of defence against the elements. When the time comes to replace it, knowing what to expect can ease the stress and help you plan with confidence.
In this guide, we break down each phase of the roof replacement journey. From the first consultation to the final inspection, you will learn what influences the schedule, how to prepare your property, and which questions to ask your contractor. Let us walk through the timeline together, so you can move forward with peace of mind.
Understanding the Full Roof Replacement Journey
Phase One: Initial Assessment and Quote
The process begins when you reach out to a roofing company for an evaluation. Qualified experts in Calgary Roof Replacement will examine your current roof, identify structural considerations, and discuss material choices suited to your home and climate. This stage typically requires one to three business days, depending on contractor availability and weather conditions. You will receive a comprehensive written estimate detailing scope, materials, labour, and projected timelines.
Phase Two: Planning, Permits, and Material Procurement
After approving the quote, the planning phase commences. Many municipalities require permits for roof replacement, with processing times ranging from a few days to two weeks. Materials are ordered concurrently; standard asphalt shingles are often readily available, while specialty options like metal or slate may need longer lead times. In regions with distinct seasonal patterns, such as those where Calgary roofing expertise is valuable, scheduling around weather windows becomes especially important.
Factors influencing this phase:
- Municipal permit processing speeds
- Material availability and shipping logistics
- Seasonal contractor demand
- Roof complexity and architectural details
Phase Three: Pre-Installation Preparation
Before installation begins, preparatory steps ensure efficiency and safety. Your contractor may deliver materials, set up protective barriers for landscaping, and establish secure access points. Homeowners can help by clearing the attic, securing loose items in garages or sheds, and moving vehicles away from the work area. This preparation typically occurs one to two days prior to the start of work.
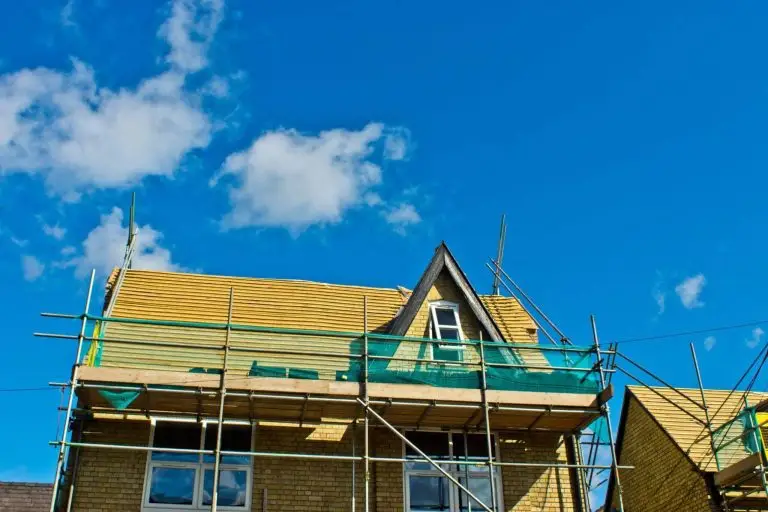
Phase Four: On-Site Installation
The physical installation is the most visible stage. For an average single-family home, skilled crews can complete the removal of old materials and installation of the new system in one to three days. Complex designs or larger properties may require additional time. Work progresses methodically: deck inspection, underlayment application, shingle installation, and fitting of flashings and vents.
Typical on-site installation schedule:
| Day | Key Activities |
| 1 | Remove existing materials, inspect the roof deck, and begin underlayment |
| 2 | Complete underlayment, install shingles on primary sections |
| 3 | Finalize shingle work, install flashings, and conduct initial cleanup |
Phase Five: Final Inspection and Project Closeout
Once installation concludes, a thorough walkthrough verifies quality and completeness. Your contractor will check nail placement, secure all flashings, and ensure the property is left clean. Many areas require a municipal final inspection to close the permit. After approval, you receive documentation including warranty details and maintenance guidance. This closing phase usually wraps within one business day.
A Note on Unforeseen Circumstances: While planned projects follow this structured timeline, unexpected events like severe weather damage may require emergency roof repair. In such situations, contractors prioritize immediate safety measures before transitioning to a full replacement schedule.
This overview reflects standard industry practices and is independent of any specific provider, including Elite Exteriors Pro.
You can apply wallpapers, paints, etc. on walls and see how they look in various interiors.

Preparing for a Smooth Roof Replacement Experience
Questions to Ask Before You Commit
Choosing the right partner for your project is crucial. Before signing any agreement, consider asking these essential questions to ensure clarity and confidence:
- What is your estimated start date, and how flexible is that timeline?
- How do you handle unexpected weather delays during the project?
- Can you provide references from recent projects in my area?
- What warranty coverage is included for both materials and workmanship?
- How will you protect my landscaping and property during the work?
These conversations help set clear expectations and build trust before work begins.
Material Selection for Canadian Climates
Your choice of roofing materials significantly impacts both longevity and project timing. In regions with harsh winters and variable weather, certain options perform better than others.
Popular roofing materials and typical lead times:
| Material Type | Average Lead Time | Climate Suitability |
| Asphalt shingles | 1 to 3 days | Excellent for most Canadian regions |
| Metal roofing | 1 to 3 weeks | Ideal for heavy snow and wind |
| Synthetic slate | 2 to 4 weeks | Durable with strong aesthetic appeal |
| Cedar shakes | 3 to 6 weeks | Natural look, requires maintenance |
Discussing these options with your contractor early helps avoid delays later in the process.
Practical Steps to Prepare Your Property
A little preparation goes a long way in ensuring efficiency and minimizing disruption. Consider these homeowner actions before installation day:
- Clear your attic of stored items to provide easy access for inspection
- Trim overhanging tree branches that could interfere with work
- Remove wall hangings or fragile items that could vibrate loose during demolition
- Plan for alternative parking if your driveway will be used for material storage
- Notify neighbours about the upcoming work as a courtesy
These small steps help the crew work safely and efficiently, keeping your project on schedule.
Post Installation Care and Maintenance
Once your new roof is complete, proper care extends its life and protects your investment. Schedule a brief walkthrough with your contractor to understand:
- How to spot early signs of wear or damage
- Recommended cleaning methods for your specific material
- Gutter maintenance frequency to prevent water backup
- When to schedule professional inspections: ideally, every two to three years
Many homeowners find that a simple annual visual check from the ground helps catch minor issues before they become major concerns. This proactive approach supports long-term performance and peace of mind.
Final Thoughts on Your Roof Replacement Timeline
Replacing your roof is a significant investment in your home’s protection and value. Understanding the full timeline from quote to completion helps you plan with confidence and avoid unnecessary stress. While the physical installation may only take a few days, the entire process benefits from thoughtful preparation, clear communication, and realistic scheduling.